I finished the back of the Diagonal Nine Patch Saturday morning before I drove to the BAM meeting. I found a piece of fabric that comprises the main part of the back (top left). The large print works well for a back and I am glad I didn’t cut it up for the front.
I used up a number of pieces of fabric that have been hanging around for awhile, which is always a good feeling.
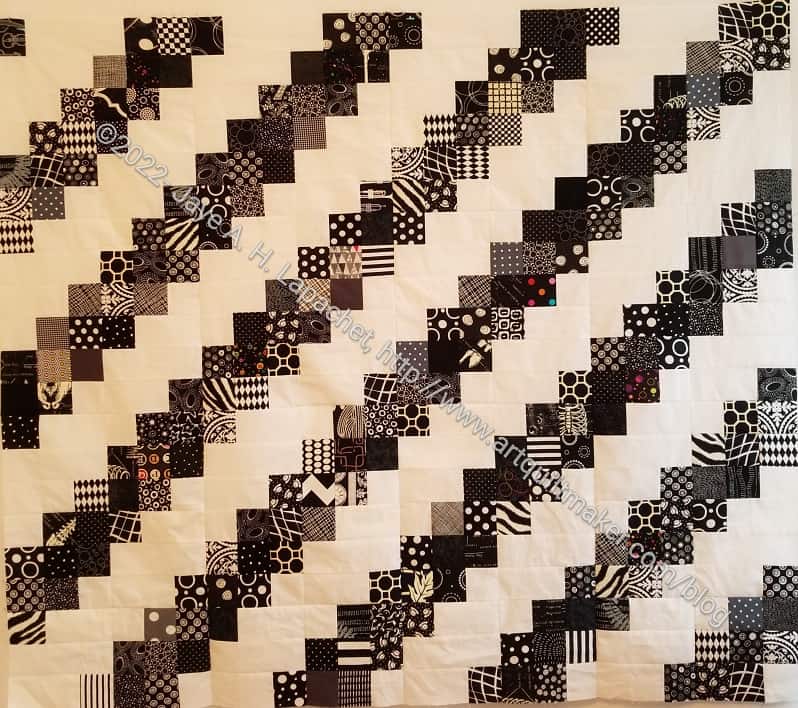
Diagonal 9 Patch top
I am pretty pleased not only that the whole package is ready to go to Colleen, but also that there were no tasks hanging around for after the meeting. It felt like a clean finish.
I chose a black and white stripe for the binding.
I worked on the back for 20 minutes or so on Friday after cleaning out the garage and that 20 minutes put everything in place for finishing on Saturday. Every minute counts!
This is a pretty easy quilt so as soon as I finished all the bits and pieces required to make Pies & Points ready for quilting, I turned my attention to the Diagonal Nine Patch. I talked about the size in my last post and, as you can see, I increased the size. I think this size will be fine, but am still reserving judgement.
With 7×7 blocks, the quilt top will be about 42 inches square and my hesitation is whether that is a large enough quilt. I think it is on the verge of being large enough, but I may want to add another column and row.
I have about 7 more blocks to go in this configuration. The issue is that I am eager to get this quilt done and move on to Orange You Glad. I also want to bring this quilt to Colleen.
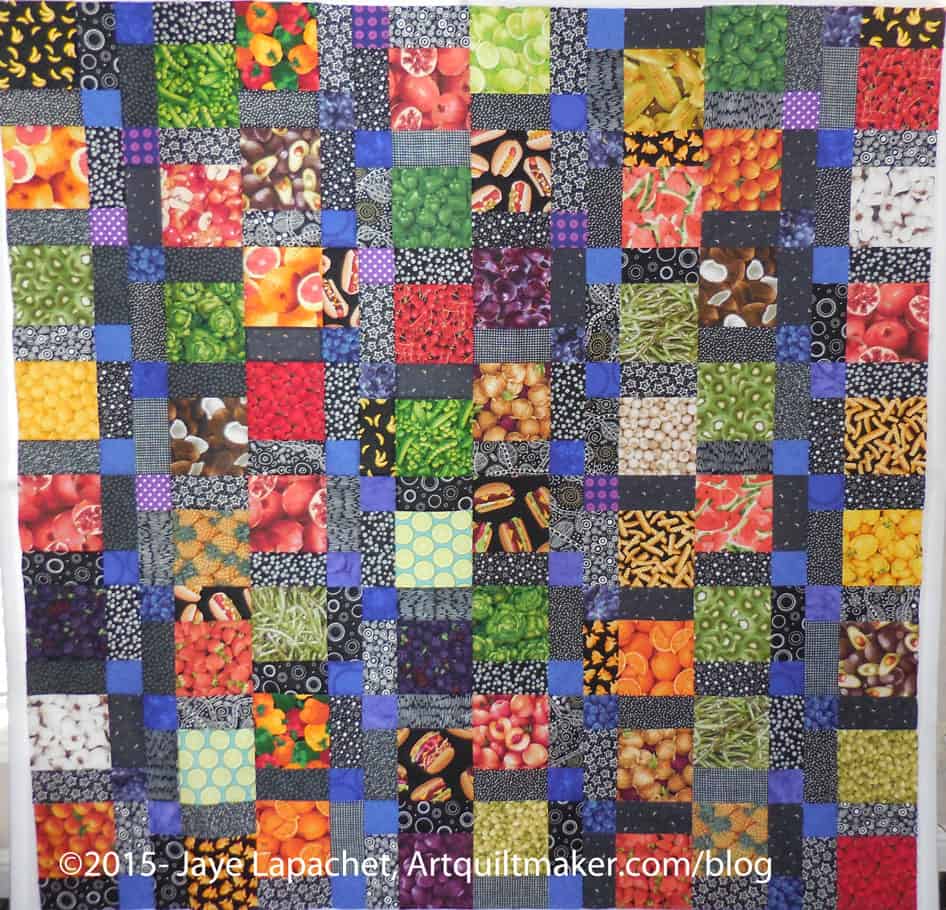
I spent the first part of the quilt retreat (will write about the retreat in general, but want to talk about the projects first!) working on the Food quilt that will go to a friend of the Young Man’s.
We are friends with the parents also, and they are very interested in my quilts. It seems reasonable to make a graduation gift for their son.
I bought plenty of fabric when I purchased for the Young Man’s Food Quilt, so I have plenty of fabric. The fabric is hard to find near where I live, but I bought most of it in Lancaster County when I was there with my SIL. Food themed quilts are good for boys as they are sort of neutral, but not too girly for boys. Quilts can easily be kind of girly, especially for someone like me who loves pink. 😉
I did the same pattern, a Disappearing Nine Patch, though I arranged the blocks in a different way.
I wasn’t able to finish the top, because I forgot the black I want to use as an inner border. I did make 4 piano key borders to add once I put the black border on the piece.
This project has been hanging over my head so I am glad I have made significant progress on it. Hooray for retreats!
Remember this quilt? I haven’t worked on it in a while, thought it has been on the list for awhile. Working on it what I did on the weekend when I wasn’t at the races (wearing a big hat like I was at Ascot or something), doing laundry or answering one of the 1000 questions I get asked when I am at home.
The project has been on my mind. I got a bug in my ear to quilt it myself and that was sitting in the back of my mind taunting me. I wasn’t sure how long it would take me. I wanted to get it done during these two weeks (last week and this week), because I was off work and I could devote some serious time to quilting.
Wonky 9 Patch – quilting
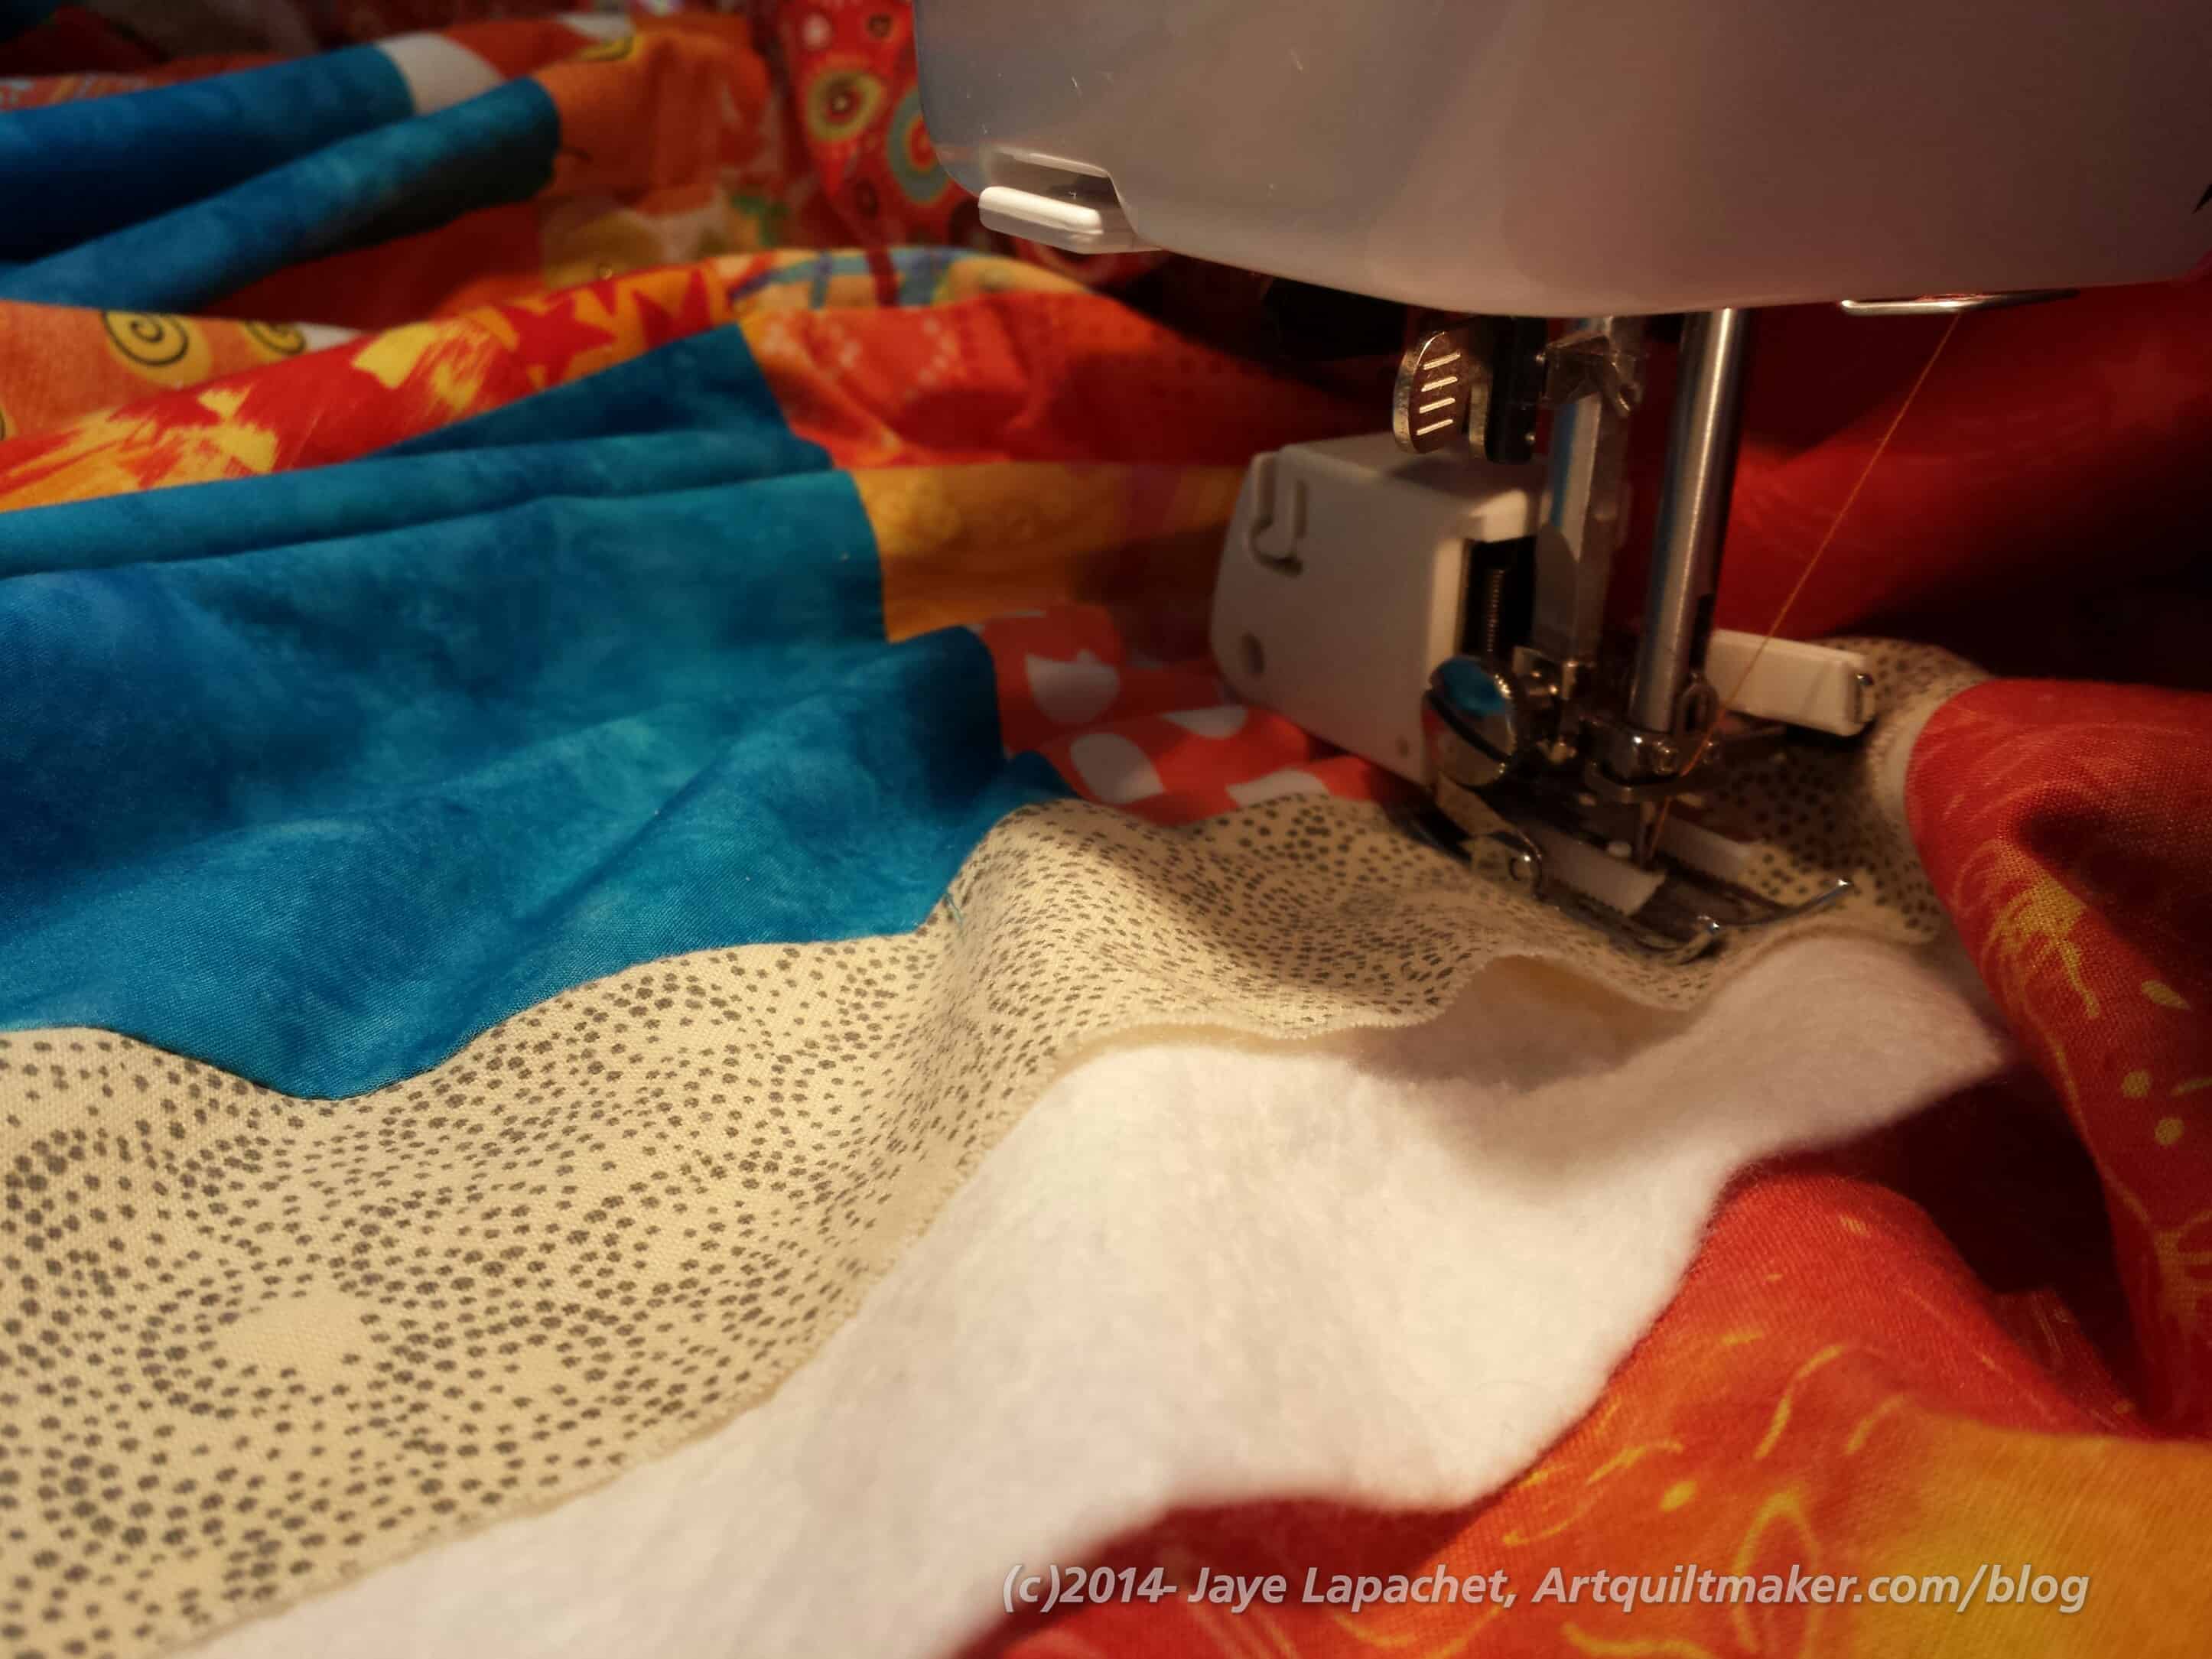
Because this quilt didn’t have a border and I didn’t think the design called for one, I put on what I call a ‘quilting border’. A quilting border gives me something to cut off when I am squaring up the quilt and don’t want to chop of points or parts of the design for a piece that didn’t end up quite square. I learned to do this after chopping off points and designs on the Punk Rock Quilt. the only tricky part is to make sure you cut off enough so that the edge will be completely covered by the binding.
Orange blocks quilted
First, I quilted straight-ish lines in all of the orange wonky 9 patches. I used Aurifil #2145 for the orange blocks. I didn’t intentionally follow any lines or do any in the ditch quilting, except when I was trying to get from one part of the block to another. I did try and keep the three lines in each block about the same distance away from each other. However, sometimes I veered off track a little to make sure that there was a relatively even amount of quilting in each area. I also wanted the quilt to drape so that was another reason not to quilt too densely. That went pretty well and I didn’t see any puckers on the back. I quilted all of the orange blocks in a few hours on one afternoon.
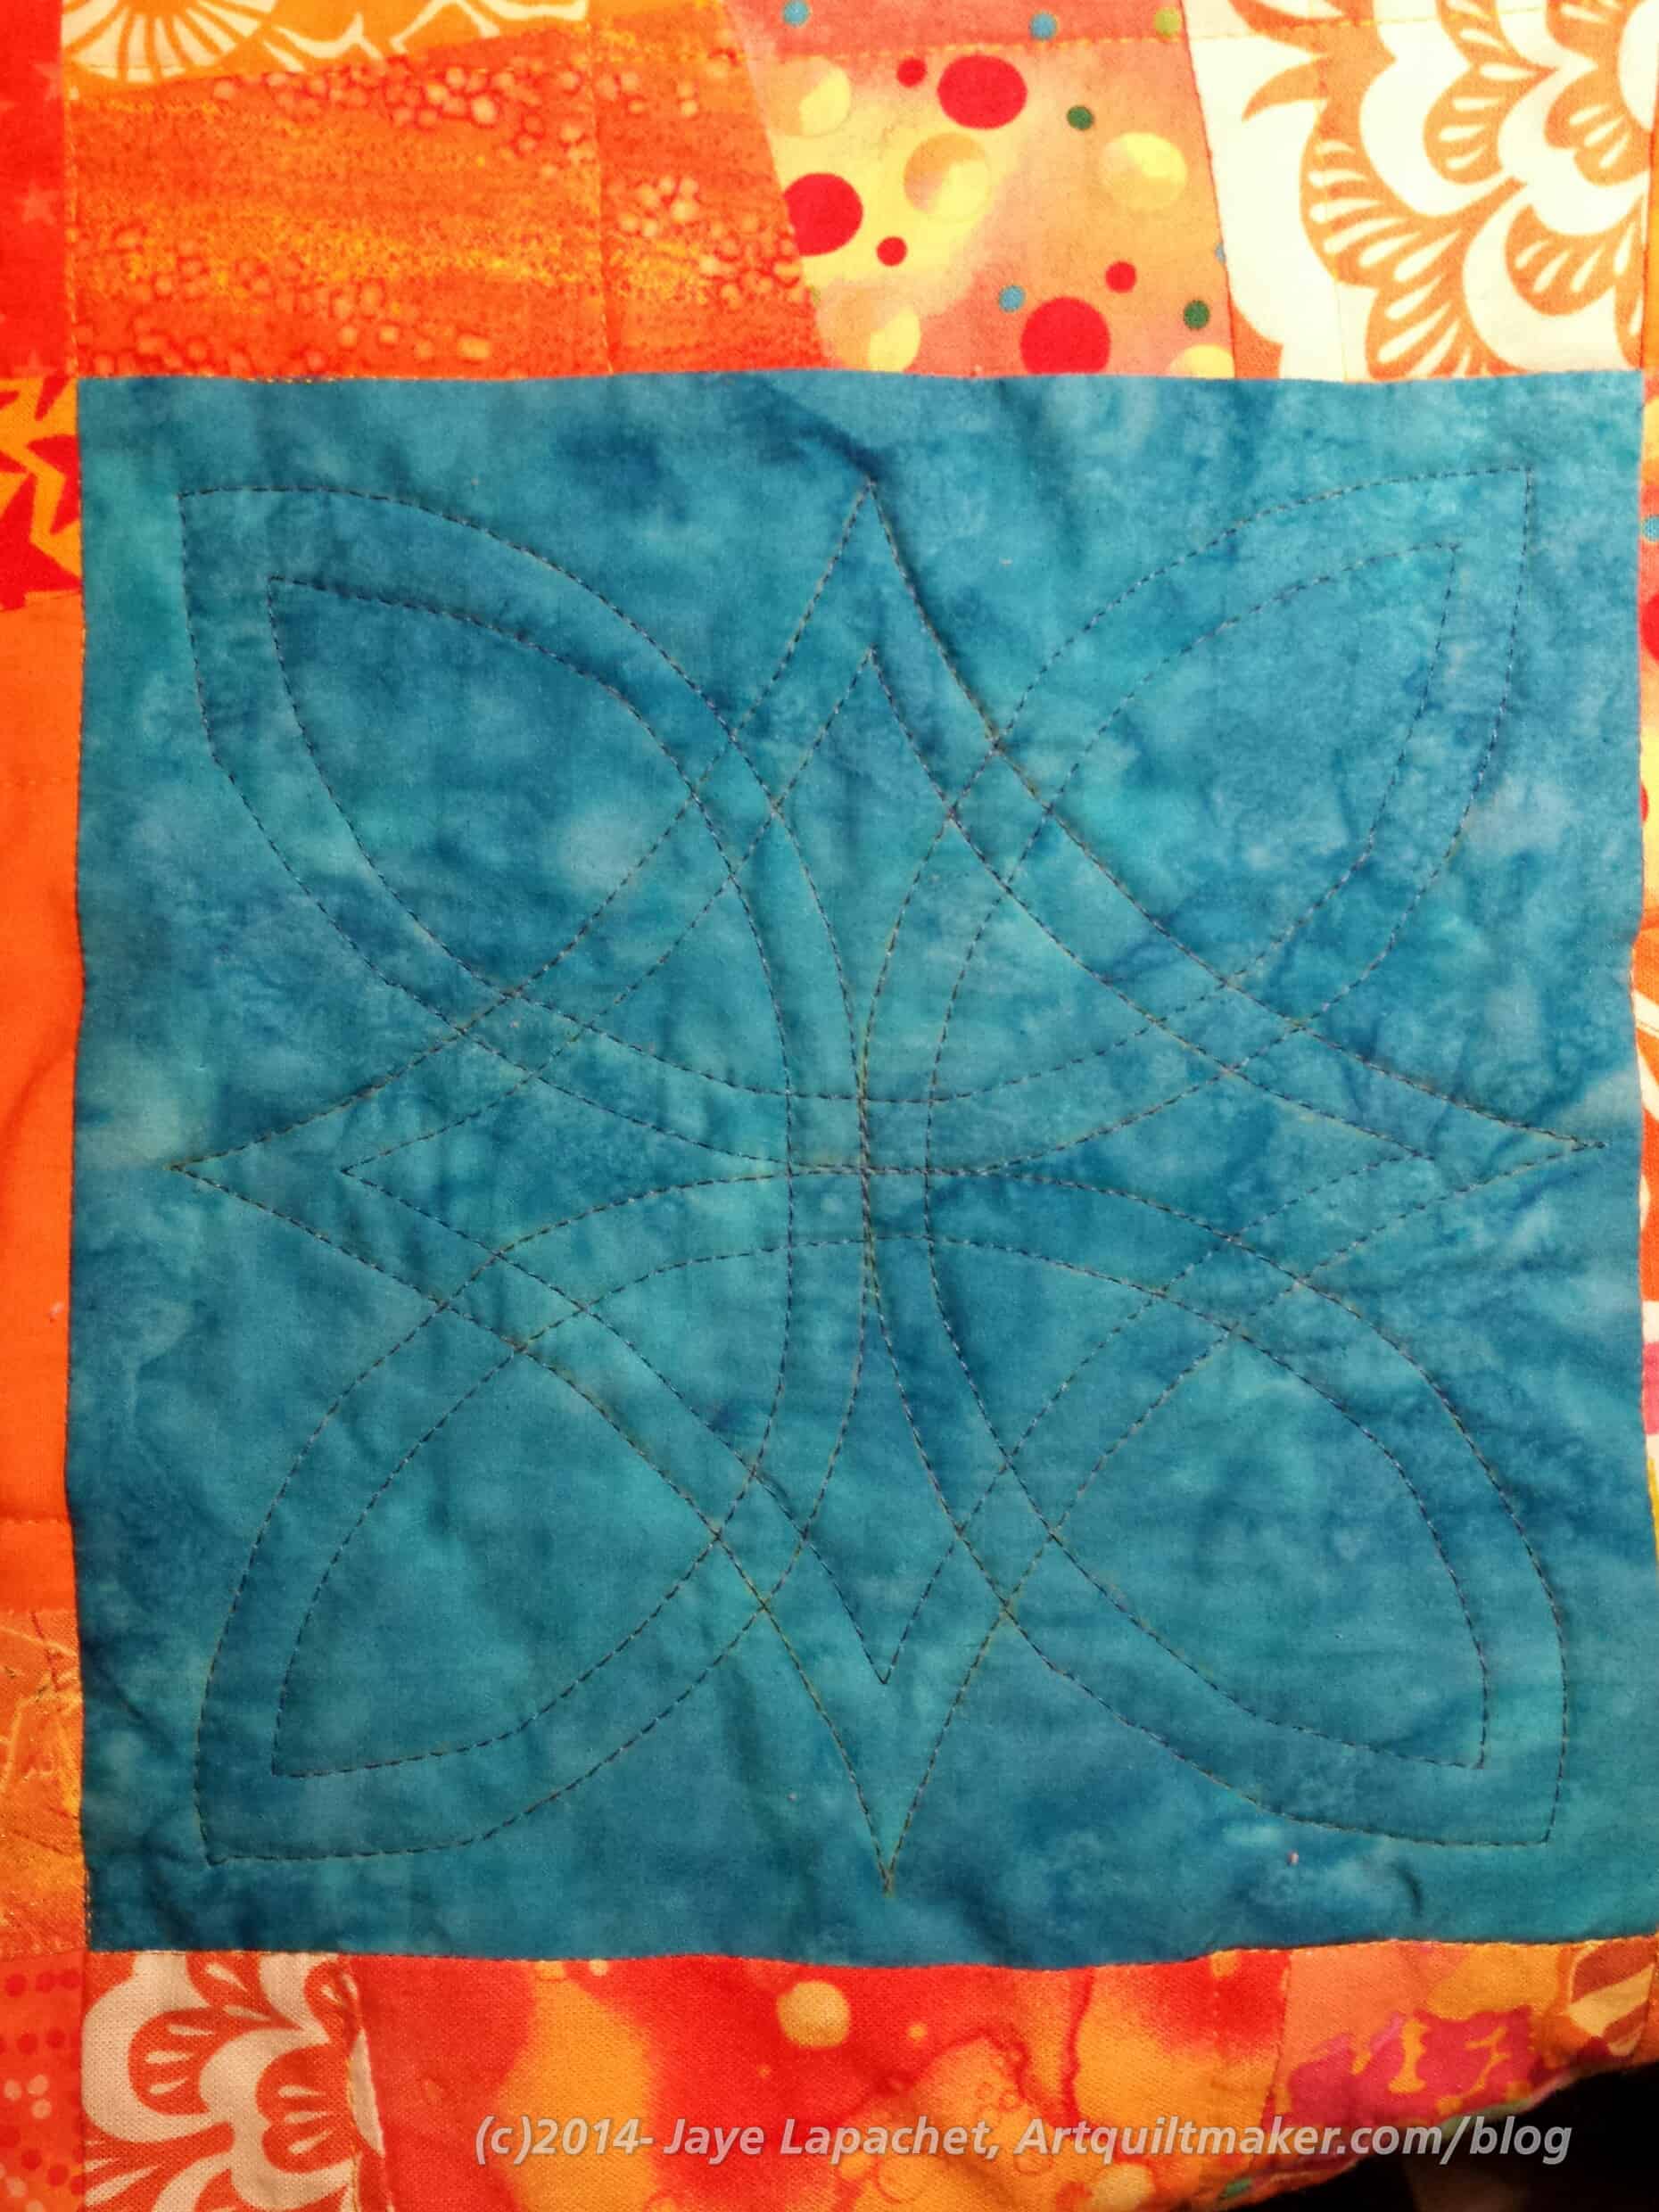
Plain block quilting
After the orange blocks, came the hard part. Shockingly, I had an idea for the plain block quilting as well. I found a vaguely Celtic design that would work for my idea. I wanted it to be round, but all of the round designs I found were too complicated. I used Paint to enlarge the design.
I also didn’t want the design to scream out at viewers, so I used a companion color to the blue fabric (FYI: Aurifil #2740). I also used a walking foot on all of the quilting. I don’t usually do that, but it worked pretty well in keeping the puckers down.
I used Saral paper and a Sewline pencil to transfer the design. I really use the Saral paper. I don’t think there is much of the yellow left. I used the Sewline to fill in when the Saral rubbed off and I wasn’t finished quilting.
I quilted a couple of the plain blocks and figured out how to stop and start only once, assuming all went well. Not all of the blocks are perfect but, as Frances says, the Muggles won’t know. I think the overall impact is pretty striking.
One thing I wish I had done was use orange in the bobbin on the plain blocks. As it stands the blue quilting really stands out on the back.
In a way, Saturday and Sunday, which fed off Thursday, were all about getting as much done in the sewing room as humanly possible. I didn’t kill myself, but I was clearly going for quantity. Remember the post I wrote about creating a relationship with your quilts? Not Saturday and Sunday. I had some projects I wanted to finish and I just put the pedal to the metal.
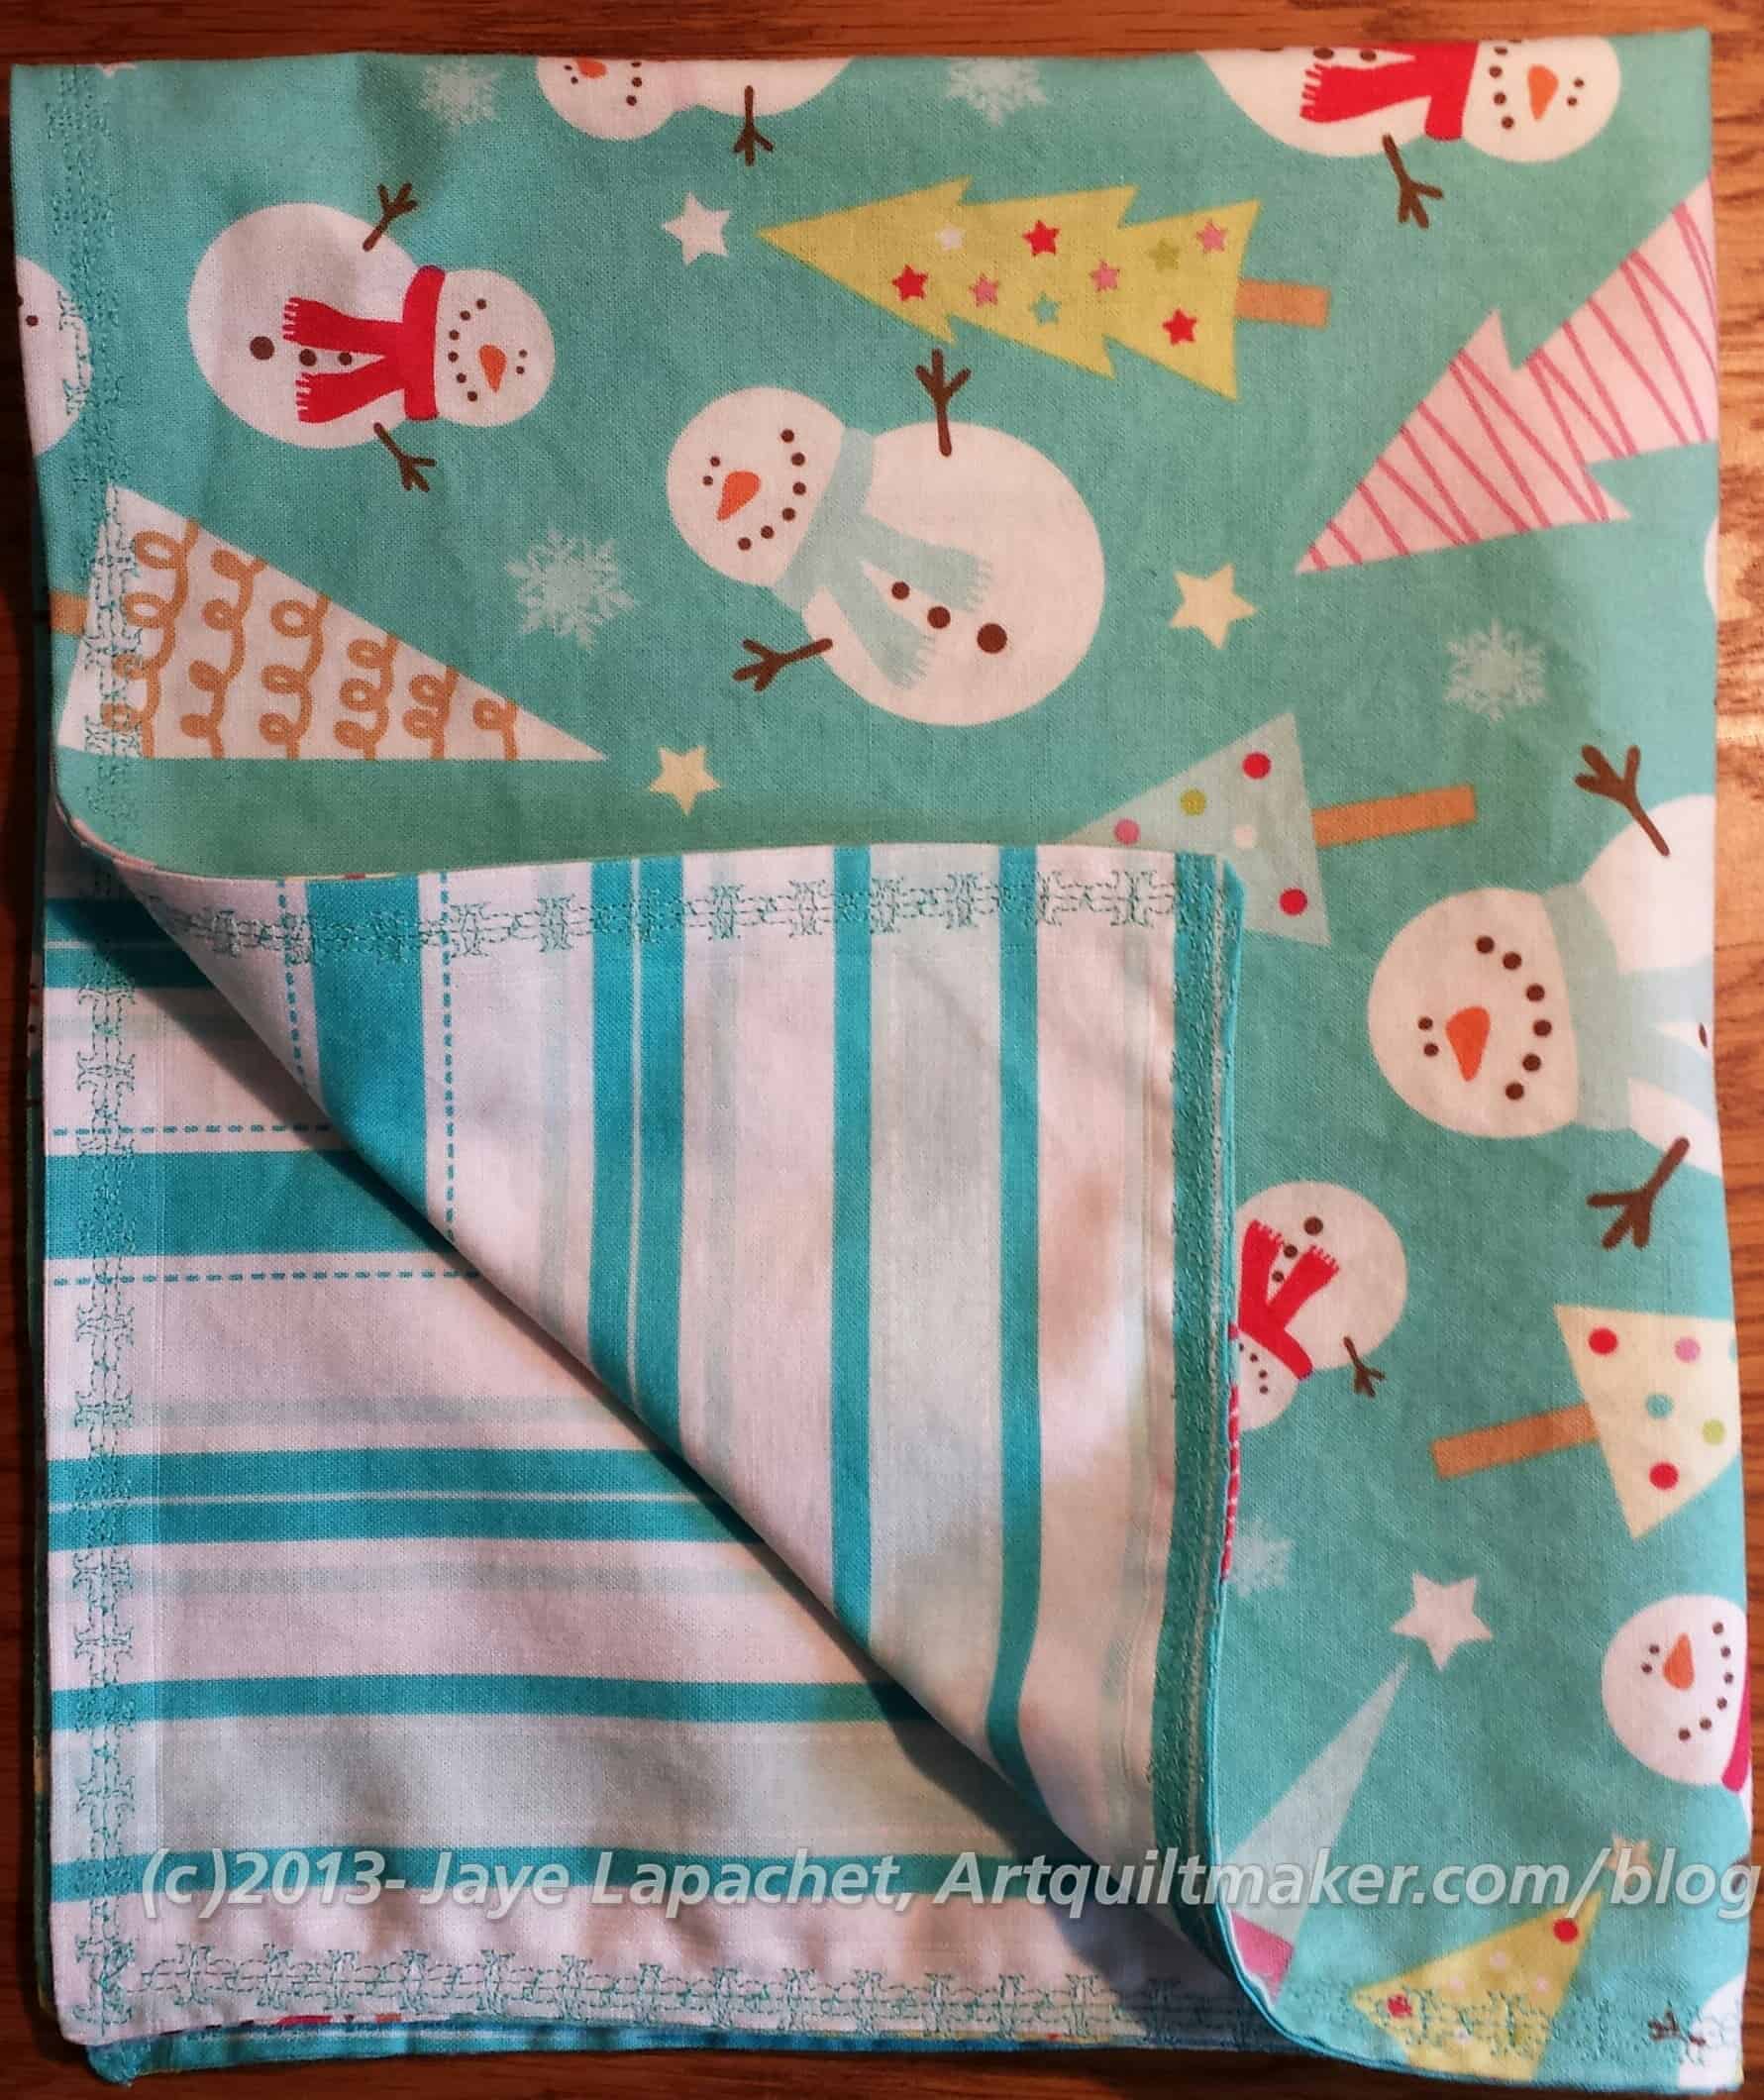
I had rummaged through my Christmas fabric drawer on Wednesday night, in preparation for Sew Day. I decided that instead of just making a bunch of gift bags, I would make a couple sets of napkins also. We use cloth napkins and I have always wanted 30 or so to use during the month of December. I picked two fun fabrics and cut them up ready for sewing. For 4 napkins I need 2 yards of fabric. I like big, fat, generous napkins, so I make them fat quarter sized. I also don’t like just folding the hem over and having the back show, so I make them 2 sided.
I forgot what a pain making napkins can be. I like them when they are done, ; not difficult, but they are a pain to make. Decorative stitches take forever.
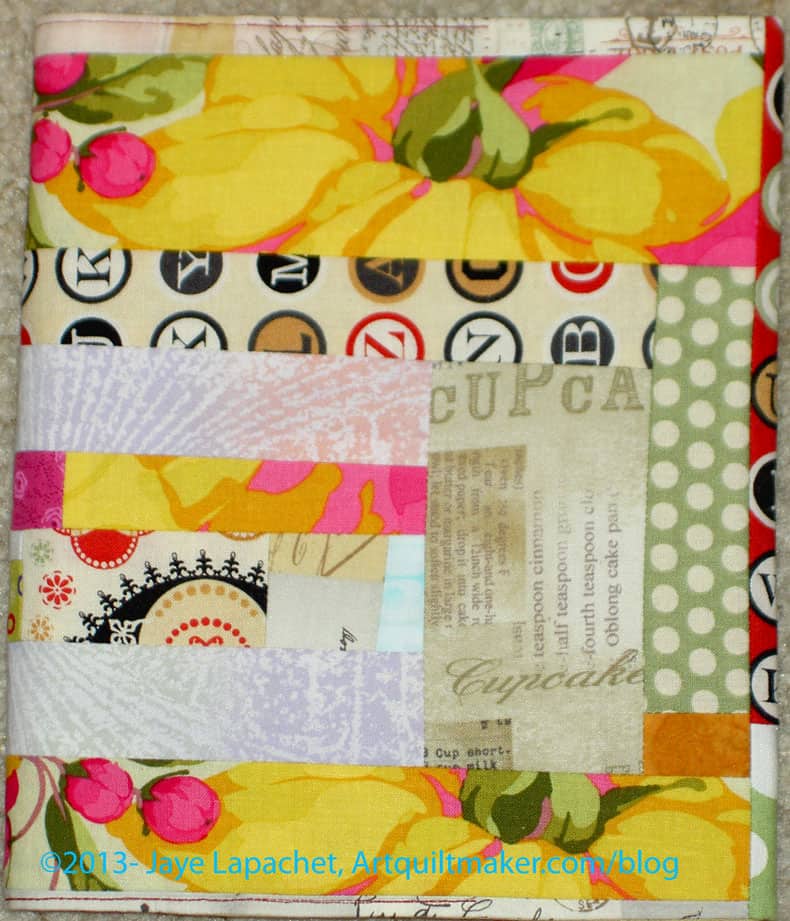
Journal CoverJournal cover inside
This is the journal cover that I worked on as leaders and enders. I mentioned it the other day when it was in progress. As you can see, it is a combination of the Philip Jacobs fabrics, the Circa 1934 fabrics and some random fabrics as filers. I think it looks more interesting than some of the other journal covers I made on Thursday. I’ll have to do a post just showing off the journal covers.
I think the problem in my mind is that the pieced journal covers are pretty time consuming when I really need a journal cover and am feeling a bit rushed. I think what I’ll have to do is use leaders and enders to work on piecing journal covers that I want to be interesting and when I am in a rush, I’ll use some lush fabric dying to remain, essentially, uncut.
The inside of the journal cover is what I was talking about when I mentioned the problem of the long strips. I had a long strip with the green bubble dot and the brownish dot sewn together. I didn’t want to just add a long strip, so I cut the strip in half, turned one of the pieces and sewed it back together. Then I sewed it to the end of the cover. I think the little bit of effort adds some interest. Even though it is on the inside, I will see it each time I open the journal.
Dot Monkey Cat Bed
I put together all four cat beds. This was the first one and I stuffed it part way with the leftovers from the T-shirt quilt.
Total count for the weekend is:
3 napkins
4 cat beds
2 journal covers
binding for t-shirt quilt
Modern Round Robin work
This doesn’t feel like a lot, but I know I worked all weekend when I wasn’t doing housework or chauffeuring. The work is good, too, so I guess I have to be happy with that.
WIPs
There are also some projects I didn’t quite finish, but will, hopefully, later this week.
3 napkins that still need decorative stitching
2 journal covers that still need finishing
I do not believe in the concept of Quilt in a Day. I love Eleanor Burns, I love various quick techniques and the rotary cutter, but I simply do not believe I can make a well designed quilt with great piecing and wonderful quilting in a day.It is not possible for me.
I do believe I can get a lot done in one day, though, and this quilt is proof.
Short story: the top is finished except for the quilting border; back is nearly finished. I do not want this project to linger. I want to finish the back and get it to the quilter. I want to be done with my part before the weekend. We will see. I don’t want it to become an albatross.
Kathleen’s Wonky 9 Patch
Inspiration is a funny thing. You never know when it will strike or what will spur it on. The combination of Kathleen’s quilt, the Pinterest photo and the oranges that I bought some weeks ago from the quilt shop From Here to Quilternity all coalesced into one big blob of inspiration and I sewed.
And inspiration breeds inspiration.
Susan, of the History Quilter podcast commented on Twitter (yes, I am there, too. You can follow me – @artquiltmaker) that the orange part of the quilt looked like mosaics. As you know, I love mosaics and tile and try to take inspiration from them where I can. Susan is absolutely right and her comment has been on my mind all day.
what would a quilt look like if I did the same idea, but made the blocks and, thus, the pieces smaller?
how would this design look with no plain blocks?
is this a great way to explore monochromatic color schemes?
etc.
My mind is whirling with possibilities. Simply whirling. If I had more time, I would explore all of these possibilities. Perhaps someday.
Long story: I really got a bug in my ear on Thursday night. I happened to look at a Pinterest photo (above, the door and the orange textiles) I had pinned some weeks ago and that photo, along with Kathleen‘s quilt made got me started.
Did I need another project? No.
Did I care? Obviously not. The muse must be satisfied.
Wonky 9 Patch – detail
I spent Friday late afternoon and evening cutting 9.5″ squares from the fat quarter group from the From Here to Quilternity quilt shop. I had to press and cut other pieces according to my ‘new fabric regime’, but it went well. The next day I began sewing.
Kathleen had done a demo for making these blocks and she reminded me that this is an Oh! Fransson pattern. I had forgotten.
When I looked at the pattern, I knew exactly what to do. I referred to it for sizes, but I also just went my own way. I have done this kind of piecing before with the Slash Stars. The thing that makes this quilt, IMO is the setting. Brilliant.
I also, like Kathleen, made the quilt a bit bigger. It has to be wrapped around a boy, so it needed to be bigger. If I had had more of the blue fabric, I would have added two more rows to the bottom, but I didn’t.
Fresh Squeezed FQ Pack
The only tiny quibble I have with the pattern (perhaps it is just a tutorial?) is the movement of the pieces. You can’t just move one piece each time. You need to move 2 at one point, three at another. I think this needs to be a bit clearer, BUT I should also read the directions all the way through before starting a project. 😉 I looked at my pieces and moved them according to what I thought was best, so it worked out.
I am pretty pleased with my blue plain squares. This sort of blue was my plan all along. I had planned to buy a solid, but didn’t have a Kona color card and wanted to make sure I had the right color. Blah. Blah. Blah.
On a whim, I delved into the fabric closet and came up with the blue fabric above, which is an old commercial hand dye. It is probably a Hoffman, but I don’t know for sure. I love it because it complements the orange perfectly. I like Kathleen’s grey background (the photo above does not do it justice); I am not so fond of the white (I know, Modern quilt blasphemy) in EH’s version. Then again, I am a color girl, someone in love with color, so I didn’t expect anything less.
Now I am in love with orange and blue. Stay tuned for the ramifications. 😉
The title of this post has to do with how Athena was born. Zeus got a massive headache and then Athena sprang, fully formed, from his forehead. Can’t imagine the scar. 😉 That is how I feel about this quilt. I didn’t do much of the work – EH designed the quilt, Kathleen made it and showed it at a guild meeting; I took up the baton and ran with the idea.
Fabric – I use either a half yard, a yard or a fat quarter. If you use a yard you can make 4 smallish bags, two medium bags or one large bag. You can make bags with any size piece of fabric and you can make a specially sized bag for a special gift.
thread
ribbon
Sewing machine
basic sewing kit
For this tutorial, we will use a fat quarter of fabric
1. If your fat quarter does not have a selvedge, create a hem using two folds so there are no raw edges. If your fat quarter has a selvedge, use the selvedge for the top. It won’t unravel.
2. Press hem in place.
3. Sew hem with a decorative stitch, if you have it, a zigzag or straight stitch work fine as well.
Optional: If you have stitch letters on your sewing machine, stitch your name and the year so you know when you made the bag.
4. Fold hemmed bag in half RIGHT SIDES TOGETHER so that half of the hem is underneath itself towards the top and the fold is on the left. You will be making a French seam.
5. Fold a piece of ribbon about 1.5 feet long in half. You can adjust the size of ribbon you use depending on how much ribbon you need to tie.
6. Place the folded ribbon in the open side of the bag about 4″ from the top edge/hem.
7. Pin ribbon in place.
8. Pin rest of the right side and bottom closed.
Use an 1/8″ seam allowance or as small as you can.
9. Starting from the top, sew down the right side, backstitching at the beginning and over the ribbon 2-3 times. You want to backstitch at stress points to keep the bag from ripping apart.
10. Turn at the corner and continue across the bottom, backstitching at the end.
11. Turn the bag inside out, so the right sides are together and the ribbon is out of the way of the seam (It will be inside the bag, but I put mine as straight as possible towards the opposite side of the bag.
12. Press seams, taking care to push them as far out as possible so there is no extra fabric near the seams.
Use a 1/2″ or 5/8″ seam allowance.
13. Starting at the top, sew down the side and across the bottom again to finish the seam.
14. Open bag to make sure the raw edge is hidden inside the seam.
15. Turn bag inside out and press.
Voila! Your bag is really to use!
Please come back and check this tutorial out as I may update it.
A woman at work is expecting a new baby. She is so pleasant to work with and so helpful. I have been wanting to make her some receiving blankets. As I have said many times, receiving blankets are so useful as playmats, swaddling cloths, capes, etc. She is about to go out on leave, so I finally made them last weekend and gave them to her on Monday.
Gift Wrapping
I was particularly proud of the wrapping. As many of you know, I am a very poor gift wrapper, so I was thrilled that this came out so well. I didn’t even plan it!
I am on the last section of my current journal and know I will be needing a new journal soon. I have gotten used to using journal covers and thought it was time to make a new one. I have been using the Innocent Crush cover since I made it. Even though I have made others, none of them have felt the way the Innocent Crush journal cover feels.
Finished Fall Journal
Still, I enjoy using journal covers and I want to perfect the process, so I made a new one.
I am pleased with the fabrics I used – all scraps and bits from other projects, though the letters and numbers were a perk from Bear Patch Quilting in Minnesota.
I am glad I was able to use the Belle Fleur fabric, but I am a little annoyed that the piecing all ended up the back. I might switch the cover around so that the piecing is on the front even though that will mean that the letters are upside down. I might not care, but we will see.
Yes, I knew while I was working on this that I should be working on the Stars for San Bruno #3 quilt. I haven’t been in a really great mood, so I haven’t wanted to work on it, since I don’t want to infuse it with bad energy. I may have to eat more chocolate.
Finished Journal
I decided to photograph this end up from above so you could all see the front and back.
I have heard mention of ‘lifestyle’ photographs that seem to be popular on blogs right now. I don’t have a photograph studio, so this was the best option I could think of at the time.
Bear Patch Quilting gave out small pieces of fabric (about 10″x10″), which is where I got the letters and numbers and fabrics. Apparently, they give them out to everyone who purchases something in the store. I think they were called Bear Paws. I was allowed to choose the fabric I wanted from a box they kept under the counter. I asked what kind of fabrics they used and the owner said that they cut from current fabrics.
Using Wonder Clips
One thing that worked out really well was the Wonder Clips. Again, I bought these in Minnesota. I had been wanting to try them for binding. I was tempted to buy the large size package, but decided to try the small one first. Good thing, because they worked fine for binding but not for my process. I already poke myself plenty with the needle and the clips stuck out too much for comfortable stitching.
I had a brain wave, however to use them to sew the journal cover together and that worked great! Using straight pins works ok, but it hard to insert them into the fabric when the cover is on the journal, but not sewn. I need to have the cover around the journal so that I get the fit right. The clips worked really well, because they didn’t interfere with the journal. I loved them for this purpose!
There is a link to the journal cover directions from the tutorials page on the toolbar (just under the AQ banner) above. You will see the submenus if you put your mouse over AQ Info. I welcome your suggestions on making this tutorial better.
At the September BAMQG meeting, Claudia mentioned the Jelly Roll Race as an activity for the meeting. I liked the idea, but wasn’t that enthusiastic about doing it for an activity at a meeting. I like to sew slowly and my machine has been behaving badly lately, which sounded like a recipe for disaster. I am not one for Disasters with an Audience. Still, as I said, I liked the idea.
I know I said I was done with precuts, but, apparently, I can’t help myself. I bought a Terrain Jelly Roll and began the process on my own. Later, I saw an explanation of how the process should work and I was interested to see that the writer suggests mitering the strips together.
For a person who doesn’t like really long seams, this project was kind of a nightmare of long seams.
I finally finished the center of the quilt and kind of liked it. it is large enough to be the center of a large throw. I also like that I can see how much fabric a Jelly Roll really is. I want to put some borders on it, but am not sure what yet.
As I mentioned in a previous post, back in July, this quilt is all about the fabric. I got down to it over Labor Day weekend and made the top. I still need to add borders, but the top is basically done.
You can see that the Disappearing 9 patch block means that there is an automatic border on two sides of the quilt. I don’t want a border on two sides of the quilt. I want the border (a border in this case) to be symmetrical, so I added a row of rectangles and squares.
Giant Food 9 PatchGiant Food 9 Patch #2
These blocks actually are quite large. Each square in the block is 6.5″. Once you cut them into quarters they become a manageable size.
I was consistent about placement of red and black, so that the red would end up as cornerstones and the black would be the sashing. I fiddled around with the arrangement quite a bit, as I am wont to do. I wanted to vary the food prints that were next to each other as well as the location of the blacks.
Arranging
This is what you get once you cut a 9 patch block into quarters and rearrange them. In fairness and honesty, the above are quarters from 4 different 9 patches. You would see the same red, if they were from the same 9 patch, but you get the point. Even if this was from the same 9 patch, there would be variety, because of the different blacks and the different focus fabrics.
Chunkin' It
Per TFQ’s instructions, I did chunk this quilt together. That method of putting together quilts works so much better for me than sewing blocks together in rows. I also find it easier to keep my blocks placed where I want them placed.
I finally finished Grama’s 2d Grab Bag. She lost the first one, perhaps I mentioned it? I am really sad she lost the first one, because I really liked that one. Oh well.
I wrote (sewed??) her name with my stitch letters in the handle, so perhaps the next finder will return it to her. Perhaps I should start the next one? 😉
I used Aurifil thread and two different light fabrics for the inside so she could see what was in there. The leaf fabric is one I have had, but since I hadn’t used it, I thought it would be fine to use for this project.
Some of you may know that I have a friend in New Zealand. She was not affected by the recent earthquake – she lives about 7 hours away. Today she sent me this notice and I thought I would pass it along. I will be sending some hearts off in the next couple of weeks. Perhaps you would like to do so as well?
I am gathering hearts for Christchurch. Not heart blocks in the quilting sense but ‘hanging’ hearts.
Two heart shapes sewn together, stuffed or not, embellished, embroidered, CQ’d, quilted, plain or fancy, felt or fabric or anything goes. Add a loop at the top.
I didn’t do any massive gift making, but it turns out that I did make a fair number of gifts. I wanted to test the journal cover tutorial and use the fabulous bas relief fabric I talked about a few weeks ago for someone who would enjoy and appreciate it. My pile of gifts for Friend Julie looked a bit pathetic, so I rushed out and bought a journal and made her the journal cover with this fabric.
I had a fat quarter of the fabric and I wanted a journal that would show off as much of it as possible. Flax had a huge pile of black sketchbooks on sale, so I rummaged through them and finally came up with a 10×10″ size. I thought it would be a useful size and show off the fabric nicely.
Bas Relief Journal Cover Open
It turned out to be a bit too big for the fabric, because, of course, of the requirement that book has to open. As a result the pockets for the covers are a bit small – only about 2.5″, but I hope they will stay on when she is drawing.
I had some trouble with the measurements. This is a different journal than the Miquelrius journal and I needed different measurements, so I adjusted the instructions in the tutorial and have, hopefully, made it more clear for future.
Bas Relief Journal Cover Closed
I think I centered the fabric nicely and it is shown off well. I thought of a lot of different ways of wrapping it and ended up with just a ribbon. I salvaged the ribbon from somewhere, but pressed it and it is of nice quality, so it looked nice.
Hopefully, the gift will spur on a plethora of creativity at Julie’s house.
Lil Sissy nagged me to go with her to A Work of Heart on Tuesday night. She started last week and kept asking. We had some pending, but tentative plans that fell through, so I was able to go. It was one of the worst weather nights of the year – lost power, water on the road, rain for hours – and the drive was a bit arduous. Still, I am really glad I went. The piece above is the piece I made.
Not a quilt, or fabric related piece, so stop reading now if you are not interested in mixed media.
Andrea, the AWOH goddess, was inspired to make her original piece after reading Taking Flight by Kelly Rae Roberts. This type of mixed media isn’t really my thing mostly because it is so messy and I just don’t have a space to be supremely messy. I really went to the class to hang with my sister and mom and because I want A Work of Heart to be successful. Also, I need to learn to be more spontaneous.
I love this piece. I didn’t think I would, but I love the end result. I needed a bit more time for the class, but I got done. I just felt a bit rushed. I love the messiness of it. I love the spontaneity of the piece. I love the mix of turquoise and ‘titan buff’ over the ripped paper. I think I would like to do one of these with copies of some of my great grandmother’s letters. She had beautiful handwriting and it would have so much meaning to me.
Dream detail
I feel like this is really a successful piece.
Dream detail 2
I didn’t plan to rip the paper, but I saw my sister doing it and copied her. When Andrea mentioned ‘titan buff’ (the beige I rolled over the background with the turquoise) I heard “tight and buff” and we had a good laugh about the implications of such a name.