While at my SIL’s I looked through some quilt magazines I brought with me for her. We looked through the magazines and discussed the various projects. I had looked through the magazines before, but looking through them with my SIL made me see them differently.
I actually like looking through magazines with almost any other quiltmakers. I get a different perspective on the project as I talk with another person.
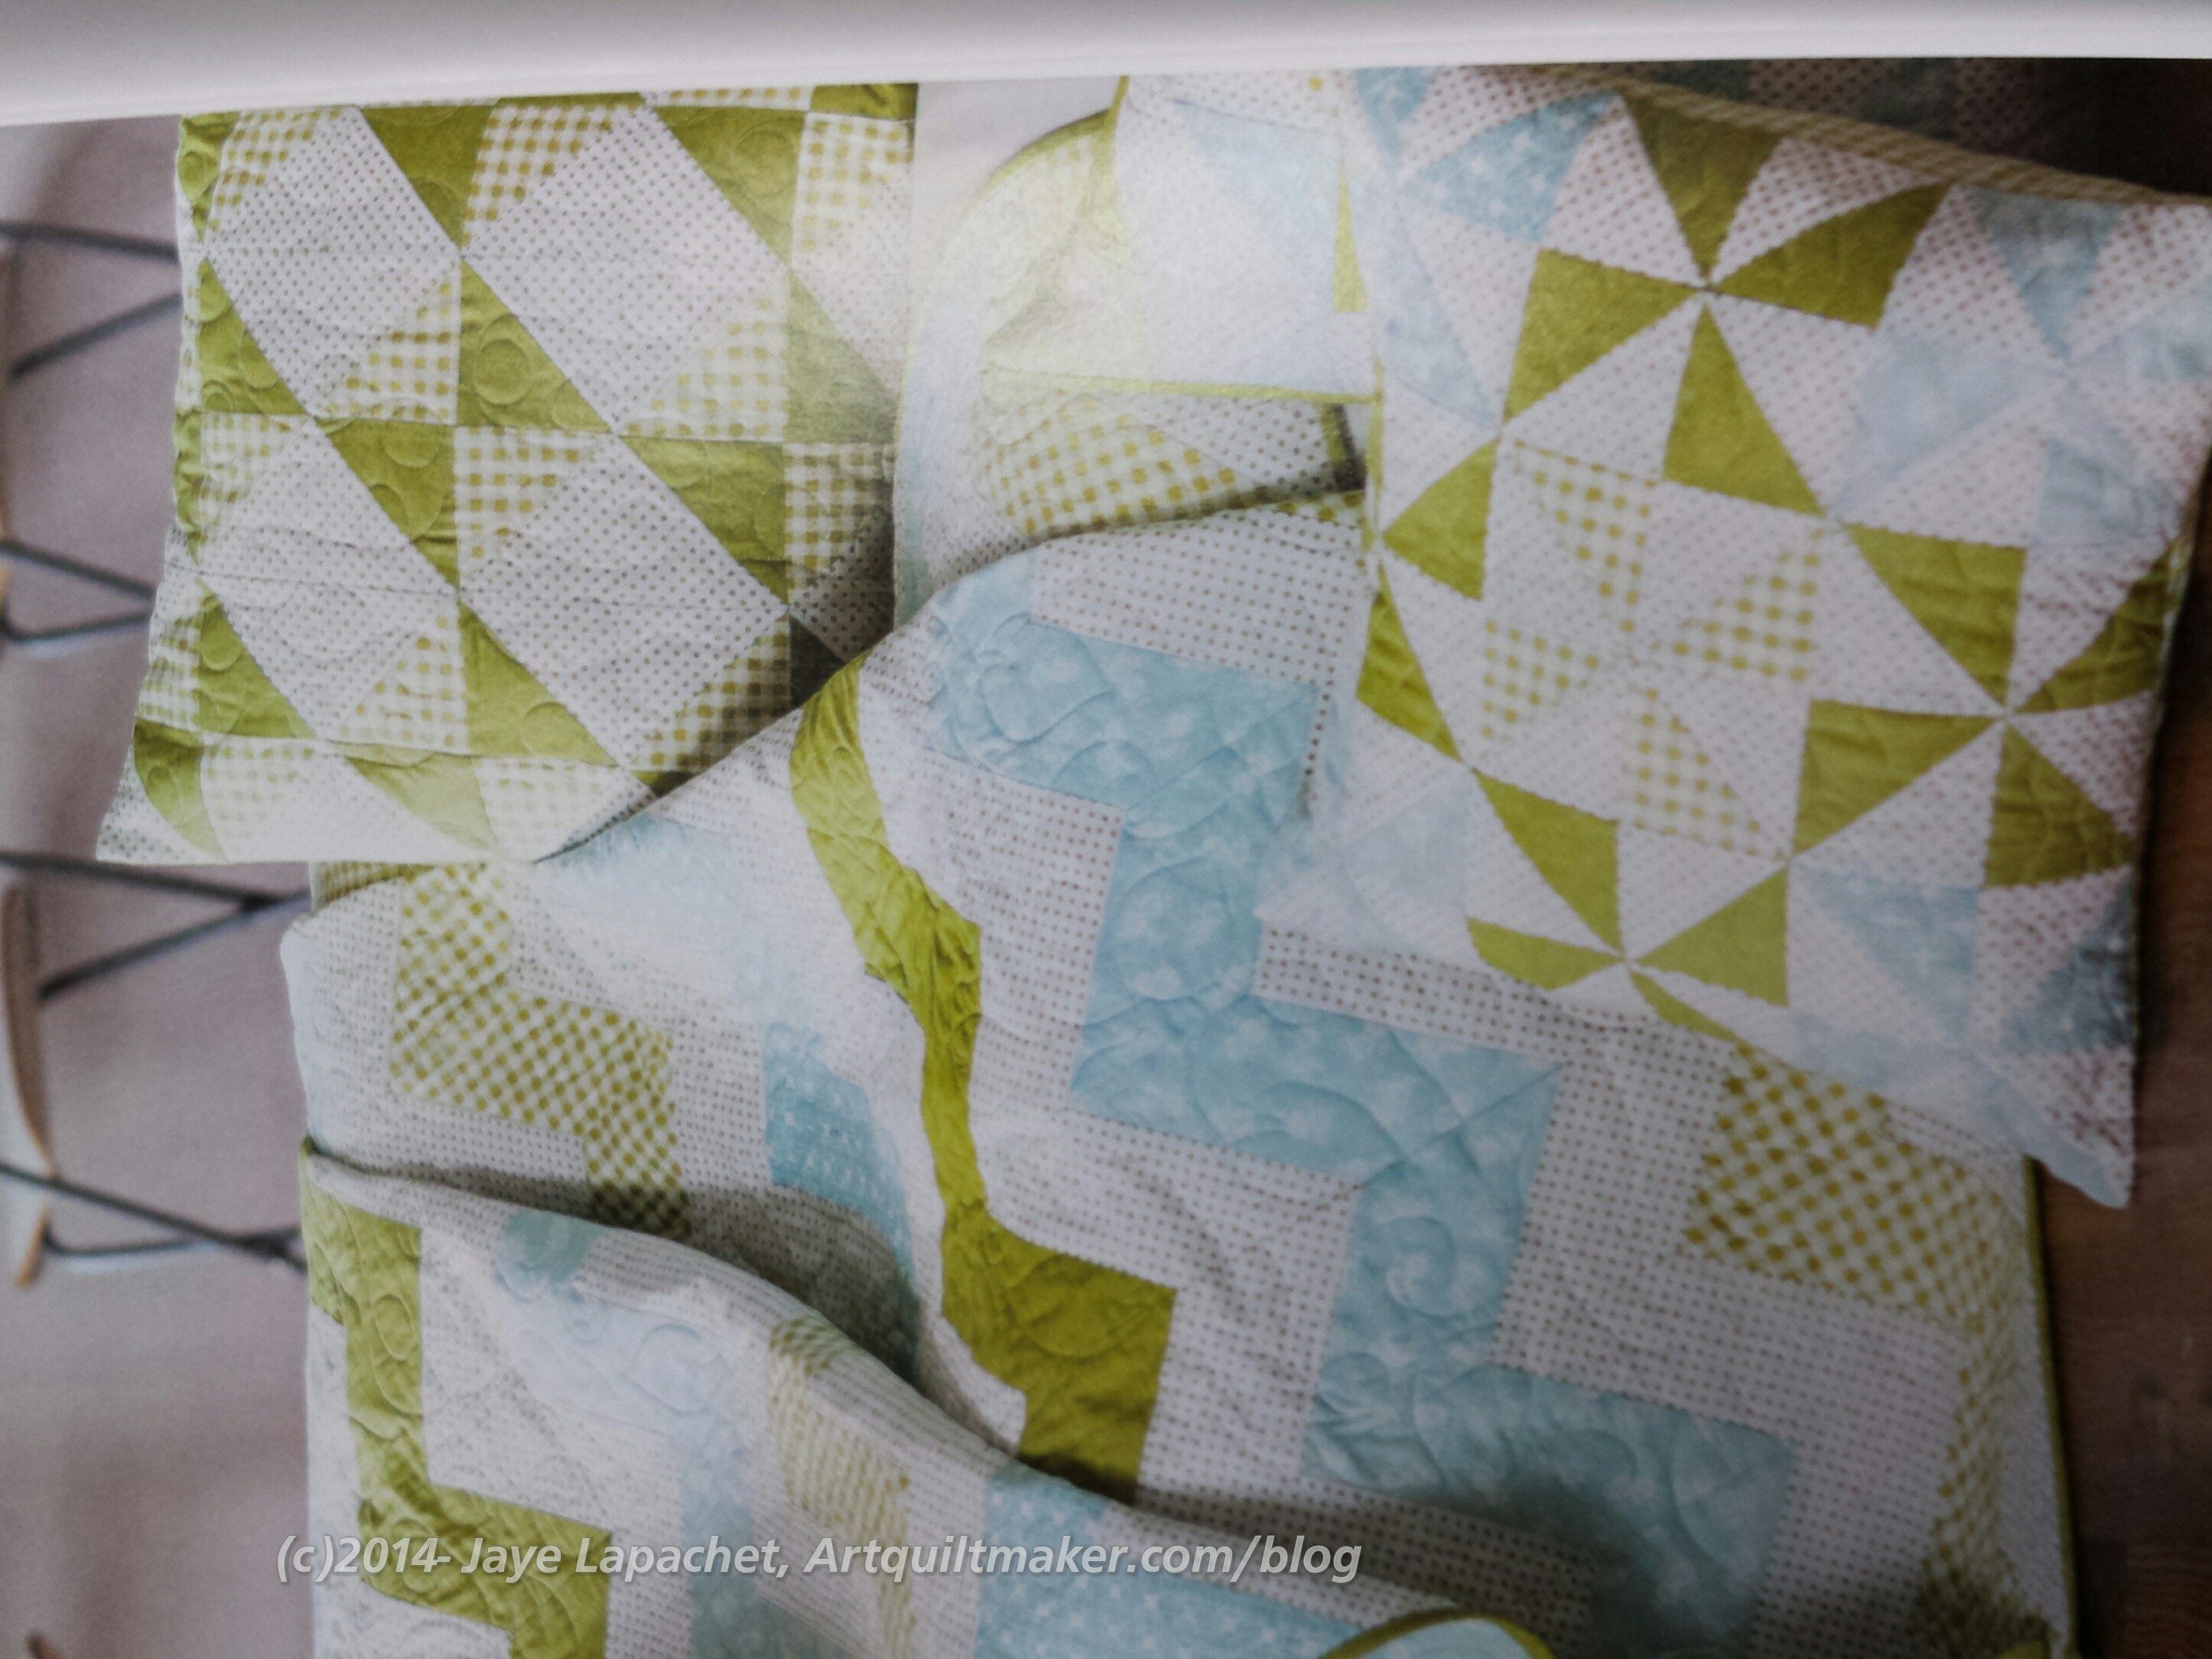
Pillows from Magazine
In the magazine, I caught a glimpse of some pillows. These were projects made from leftover HSTs. One had a very interesting pinwheel pillow.
The thing I like about that design is that it is simple, but interesting. The maker used at least four fabrics. It is hard to see the light blue in the corners so there could be more. The more fabrics keep the design simple, but make it interesting and not boring.
Brush Creek Foundation for the Arts offers artist residency programs on a 13000-acre Wyoming ranch.
eyebrow brush
Definition: “A brush is a tool with bristles, wire or other filaments, used for cleaning, groominghair, make up, painting, surface finishing and for many other purpose. It is one of the most basic and versatile tools known to mankind, and the average household may contain several dozen varieties. It generally consists of a handle or block to which filaments are affixed either parallel- or perpendicular-wise, depending on the way the brush is to be gripped during use. The material of both the block and bristles or filaments is chosen to withstand hazards of its application, such as corrosive chemicals, heat or abrasion.” (Wikipedia)
wire brush
brush with terror
toilet brush
brush your teeth
brush plant
Photoshop tool
watercolor brushes
brush it under the rug
blending brush
decorators’ brushes
brush with death
brush generators
shaving brushes
chip brush
Brush collection is provided to all City residential solid waste ratepayers.
brush pen
brush it aside
Selfie brush
Charles F. Brush High School
bottle brush plant
brush fonts
Brush News Tribune
Purdy Brush
paint brush cover
Post the direct URL (link) where your drawing, doodle, artwork is posted (e.g. your blog, Flickr) in the comments area of this post. I would really like to keep all the artwork together and provide a way for others to see your work and/or your blog.
We are also talking about this on Twitter. Use the hashtag #CPP
The Creative Prompt Project, also, has a Flickr group, which you can join to post your responses. I created this spot so those of you without blogs and websites would have a place to post your responses.
Brush varieties by function
For removal of material (cleaning & polishing)
The action of these brushes is mainly in the tip of each flexible bristle which dislodges particles of matter.
The action of these brushes is more akin to combing than brushing, that is they are used to straighten and untangle filaments. Certain varieties of hairbrush are however designed to brush the scalp itself free of material such as dead skin (dandruff) and to invigorate the skin of the scalp.
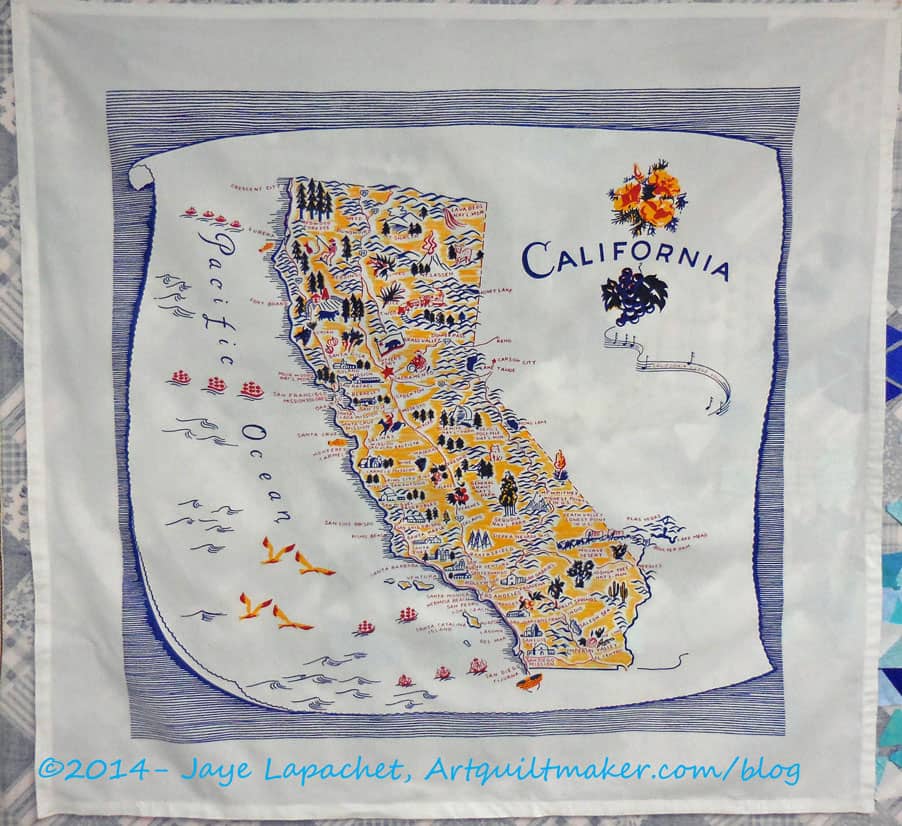
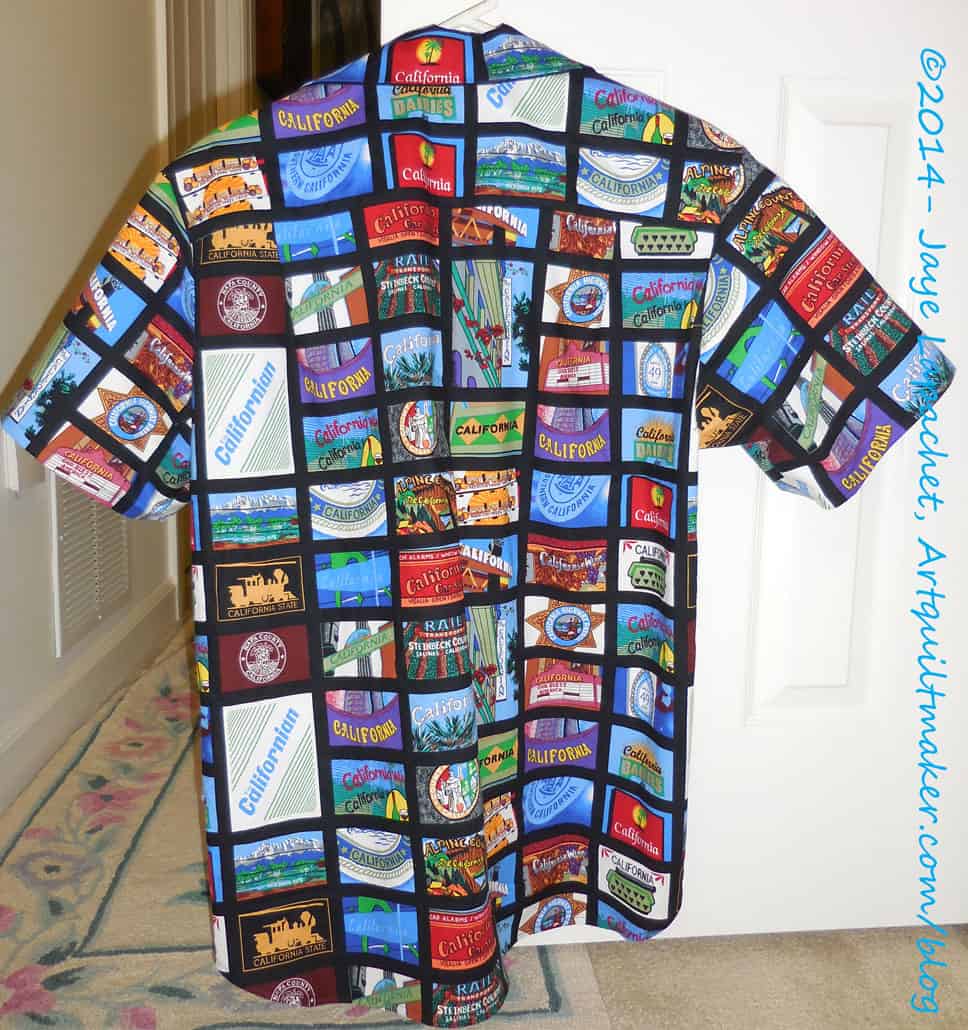
As I mentioned in the previous post, we made shirts for DH and BIL#3 (I have to give designations now since there are multiple BILs involved). As you have heard both are involved in the Native Sons of the Golden West. Over the course of a few months, I found two different types of California themed fabric and bought it. I knew I was heading to Maryland and SIL#2 is almost always game for the crazy ideas I have.
My idea was to make two shirts out of each fabric. We started with the tablecloths. They were available on eQuilter. Mrs. K saw them and emailed me about them. I bought the last three. As I said in the previous post from Sunday, we had to fussy cut in order to get the most out of the motifs on the fabric and to have enough fabric to make two shirts.
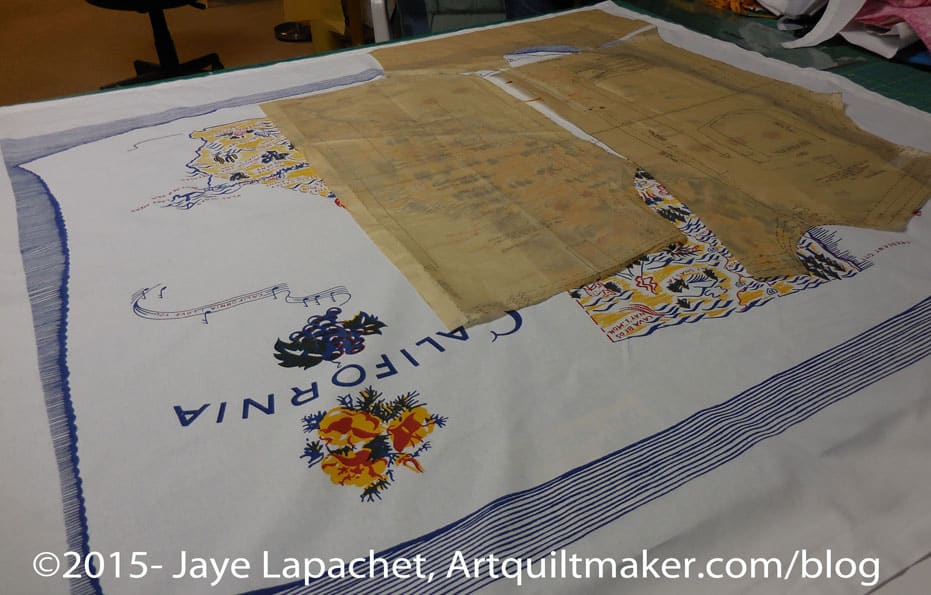
Pattern Layout
The first order of business was to lay out the pattern pieces on the tablecloths (yes, we washed them) and cut out the pieces. We tried to get the most pieces out of tablecloth #1 to ensure we had as much of the motifs on each shirt as we could and as we were nervous we wouldn’t have enough fabric.
While we were laying out the pattern pieces, a story appeared. Not a story with a murder and a romance, but a story about California. One of the shirts we decided tended towards water and boats and the other land. We couldn’t use all the motifs for each shirt. It was kind of a shame we couldn’t fit the California motif into both shirts. It just wouldn’t work. I kind of wish I had bought four tablecloths, but I know there were only three left.
Tablecloth in process
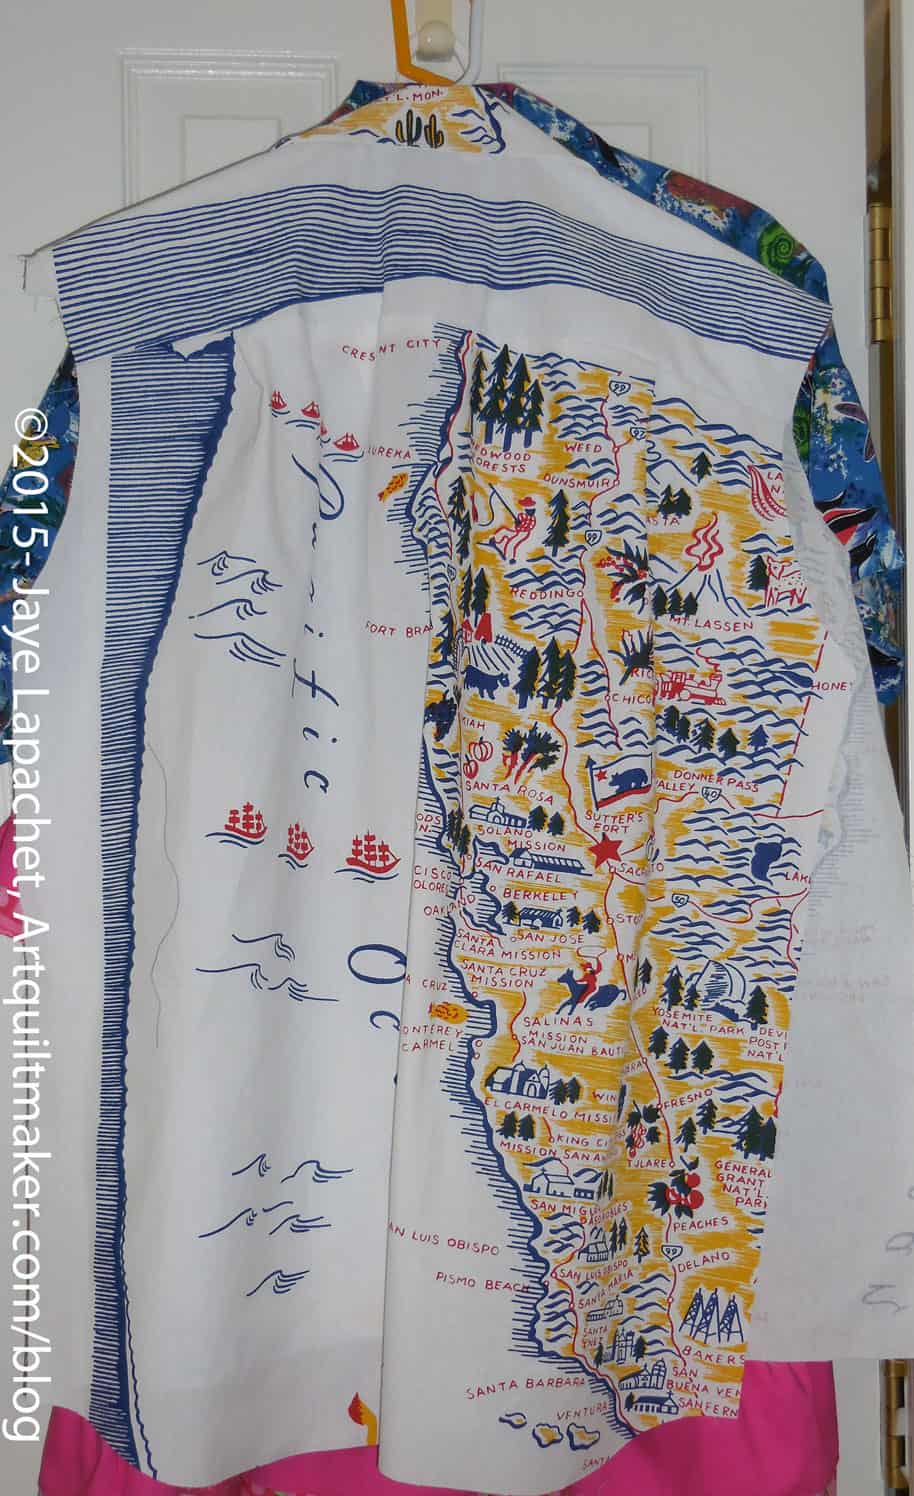
We decided not to do all of the shirts at the same time and we focused on the tablecloth shirts. We sewed and pressed and marked. By the time I went to my work conference, we had two shirts done in including the buttons.
We were pretty thrilled with the way the tablecloth shirts came out. Would we have wanted them to have more of the California map on them? Yes. Would we have preferred it if the lines around the border could have been made symmetrical? Yes. It wasn’t possible yet we are very happy with how they came out.
There were a lot of design challenges with these shirts, but I think that the design challenges made this project fun and the shirts unique.
Black NSGW Shirt for Paul
SIL got me on the garment sewing bandwagon by making me sew the entire third shirt myself. She was there to guide and be my marking slave, but I did all the cutting and sewing.
We were able to finish that except for the buttons.
I came back on Saturday and we blew through the last shirt. I cut out the pattern (only one piece wrong this time) and then SIL took the lead and I took slave position again. We got it done, though we are both skeptical that it is a three hour shirt as the pattern advertises.
I have made a few garments before, but the patterns seem very complicated and I am not a confident garment maker. Working on Shirt #3 and alongside SIL on the others really helped boost my confidence. I won’t be making ballgowns anytime soon, but I might try an easy dress from a pattern I bought. Or remember that skirt?
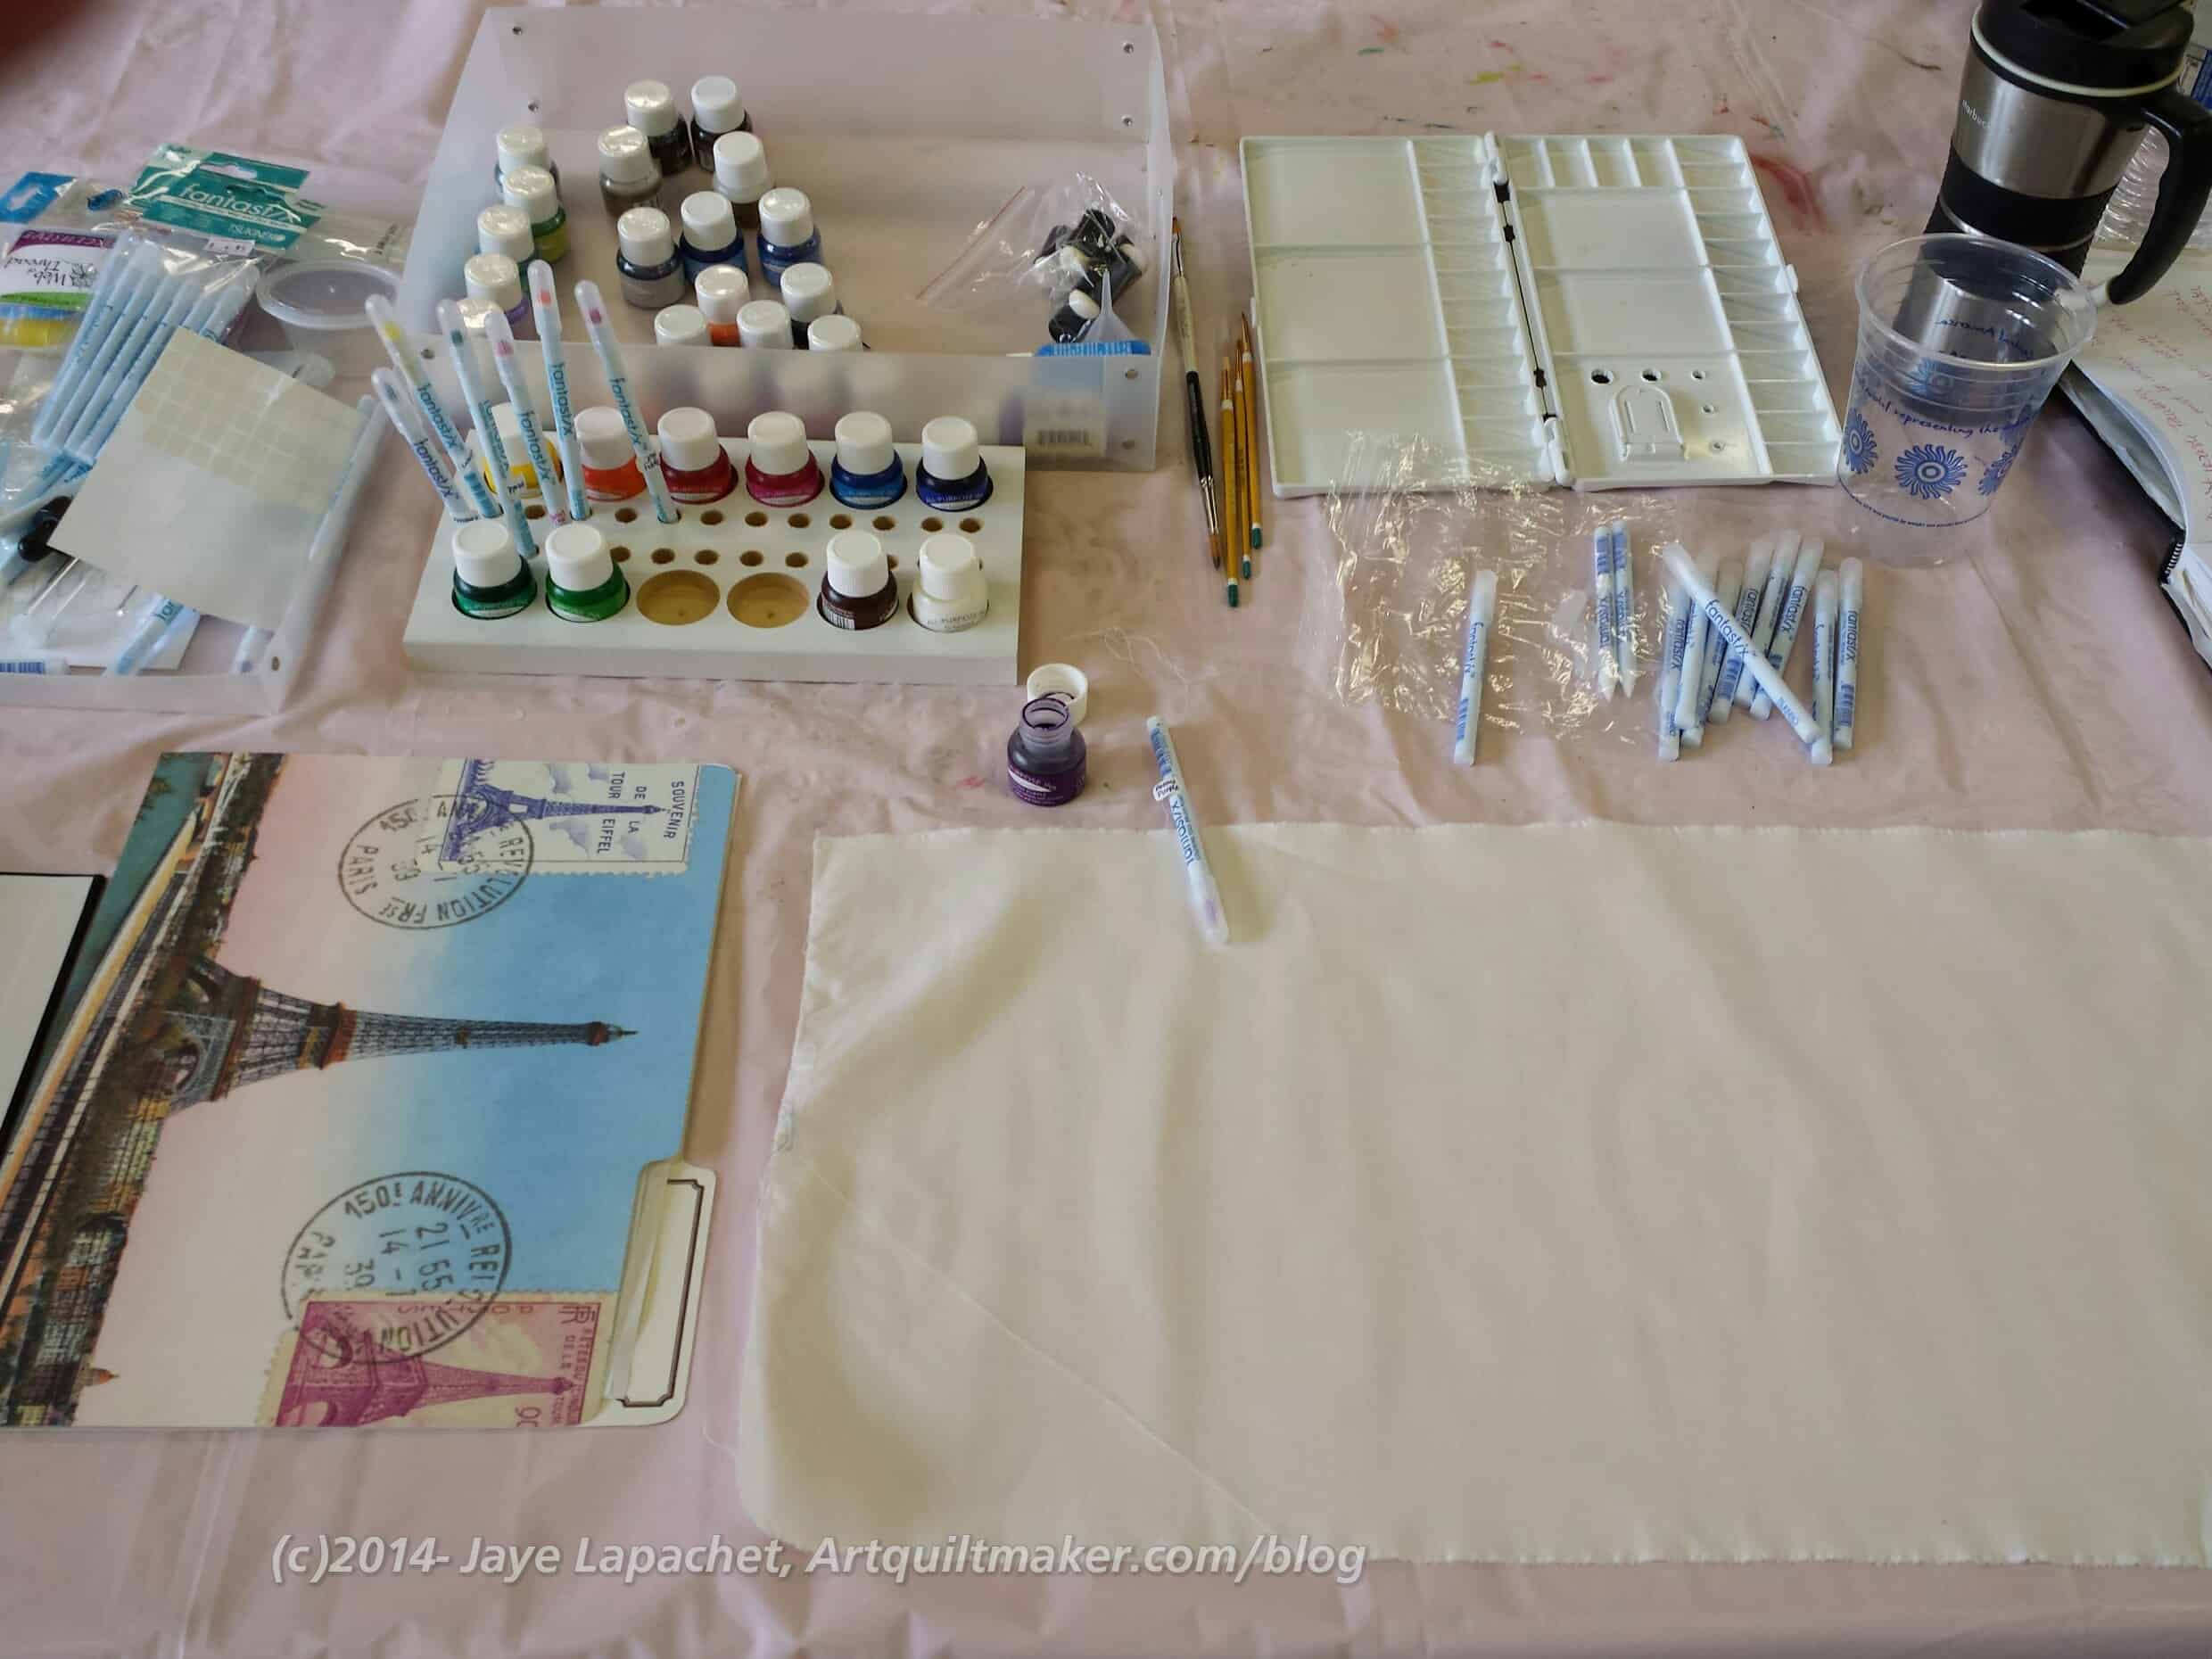
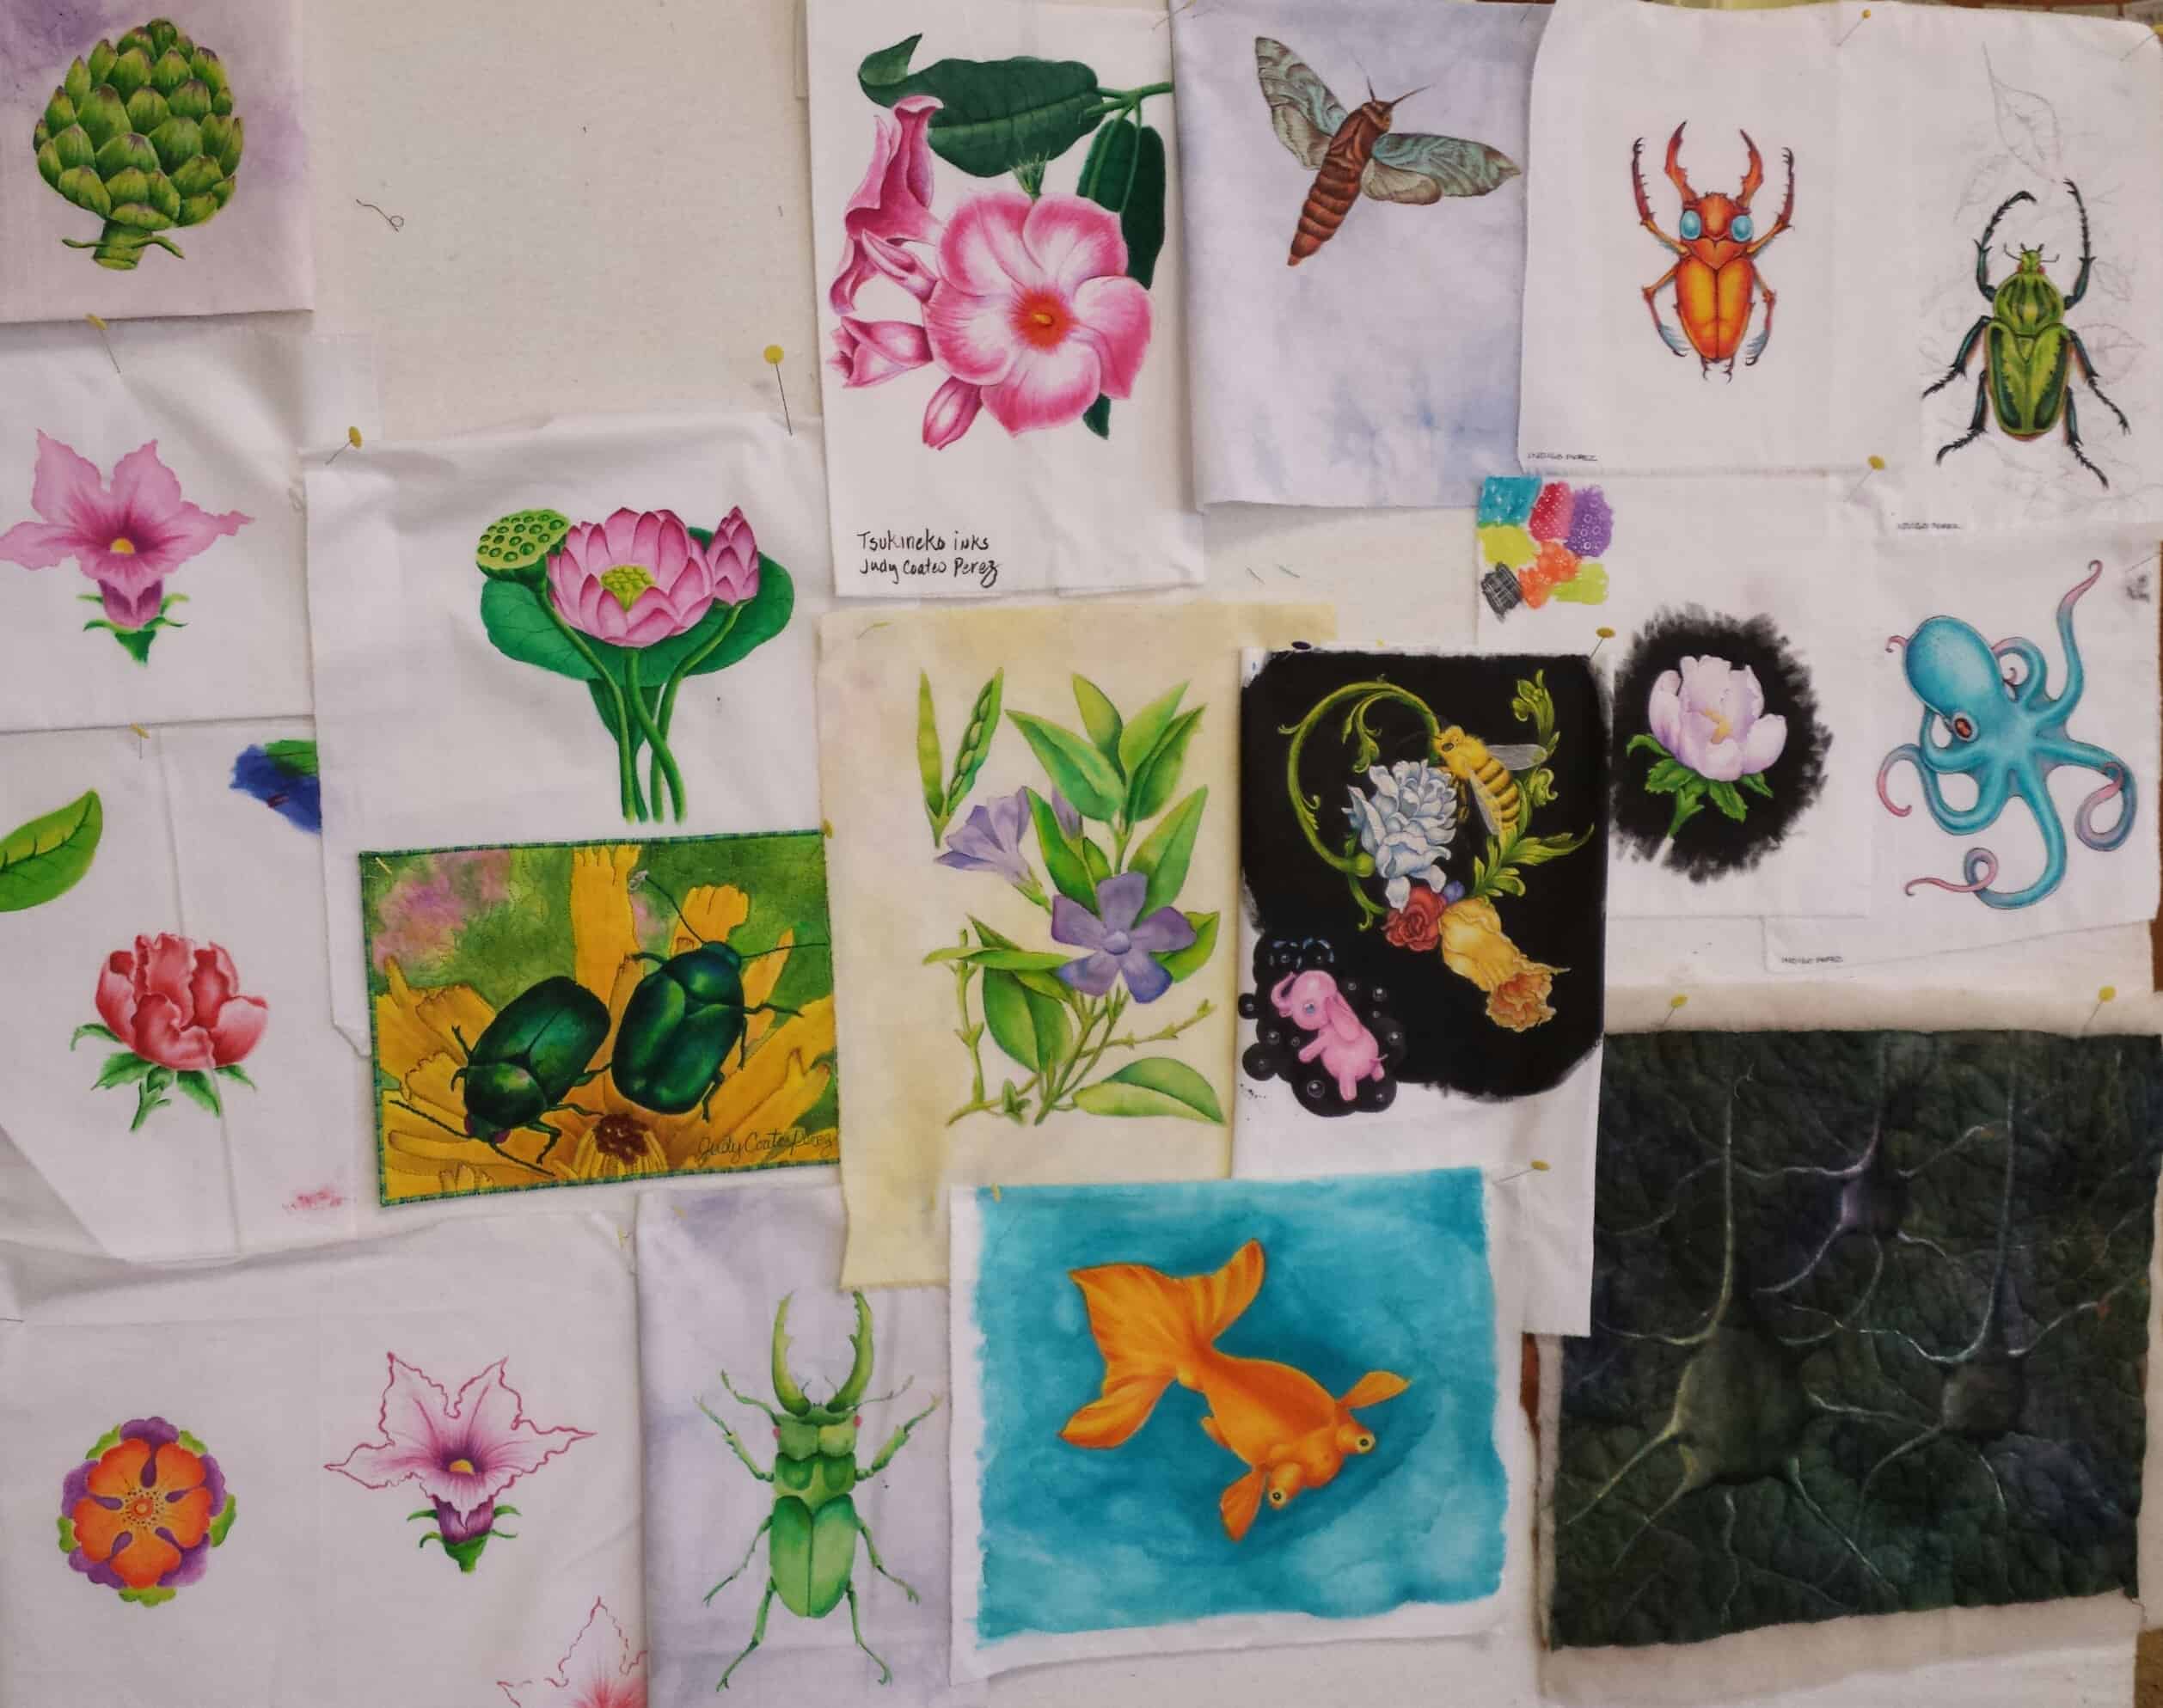
I have a lot of Tsukineko Inks. I love the idea of them. They don’t change the hand of the fabric. They purport to be permanent (have not Googled that nor do I have personal experience). They are not too messy and have fabulous colors.
Sadly, I have never had a lot of time to learn to use them or practice with them. Awhile ago, Nancy and I got together one time to try them out. I had fun and was inspired, but I haven’t really had a chance to work with them since. I love them so they have been on my mind.
It turns out that my class was with Judy Coates Perez. She is awesome and then I read my blog and found out that the first time I wrote about Tsukineko Inks had to do with Judy Coates Perez!
So, this was an EBHQ workshop and I signed up a few months ago knowing I would be on the East Coast around the same time. I signed up and made plans to be sure and be home by the time the class started.
Then I found out I was on the waiting list.
I was #8.
I had no chance of getting in. I was disappointed. Supremely disappointed.
What else could I do? I moved on. The inks stayed on the shelf.
Then I went on my trip. Practically as soon as I settled into the East Coast I got an email from the workshop coordinator saying I had gotten into the class and needed to confirm ASAP. I couldn’t believe that I, #8, had gotten into the class. That is practically a 50% dropout rate. I found out later that the dropout number was the most people who had ever dropped out of a workshop in recent memory and the most people on the waitlist who had ever gotten into a class.
I was really happy! I RSVPed ASAP and then panicked. Did I have the right colors? How could I know? I wasn’t at home to check. I panicked about it on and off until I got home. Finally, when I checked, I was completely astounded to find that I had all but one of the colors. I must have bought a ‘basics’ kit at some point. It didn’t even matter than I didn’t have that color once I was in the class.
Judy Coates Perez is an awesome teacher and I would take a class from her again in an instant. She is caring, giving and very easy going. She has a lot of extra colors (yes, I bought a few more) and supplies. Since I didn’t really have a chance to buy anything on the supply list, I scrounged a water cup from Peet’s when I got an extra cup of morning tea and bought the rest from her: brushes, etc. Fortunately, the supply list was short and sweet.
Blending
The first thing we did was work on getting used to the ink and blending. I wrote the colors down next to my practice pieces so I would know what I had done in the future.
It takes practice.
The technique requires a light touch. Having a light touch, I found is not my strength. I also found that, since I was determined to succeed, that I made an effort to calm down, slow down, be patient and realize that this technique was a commitment and not a sprint.
I really like the slow and careful way one has to apply the inks. It is soothing in a lot of ways.
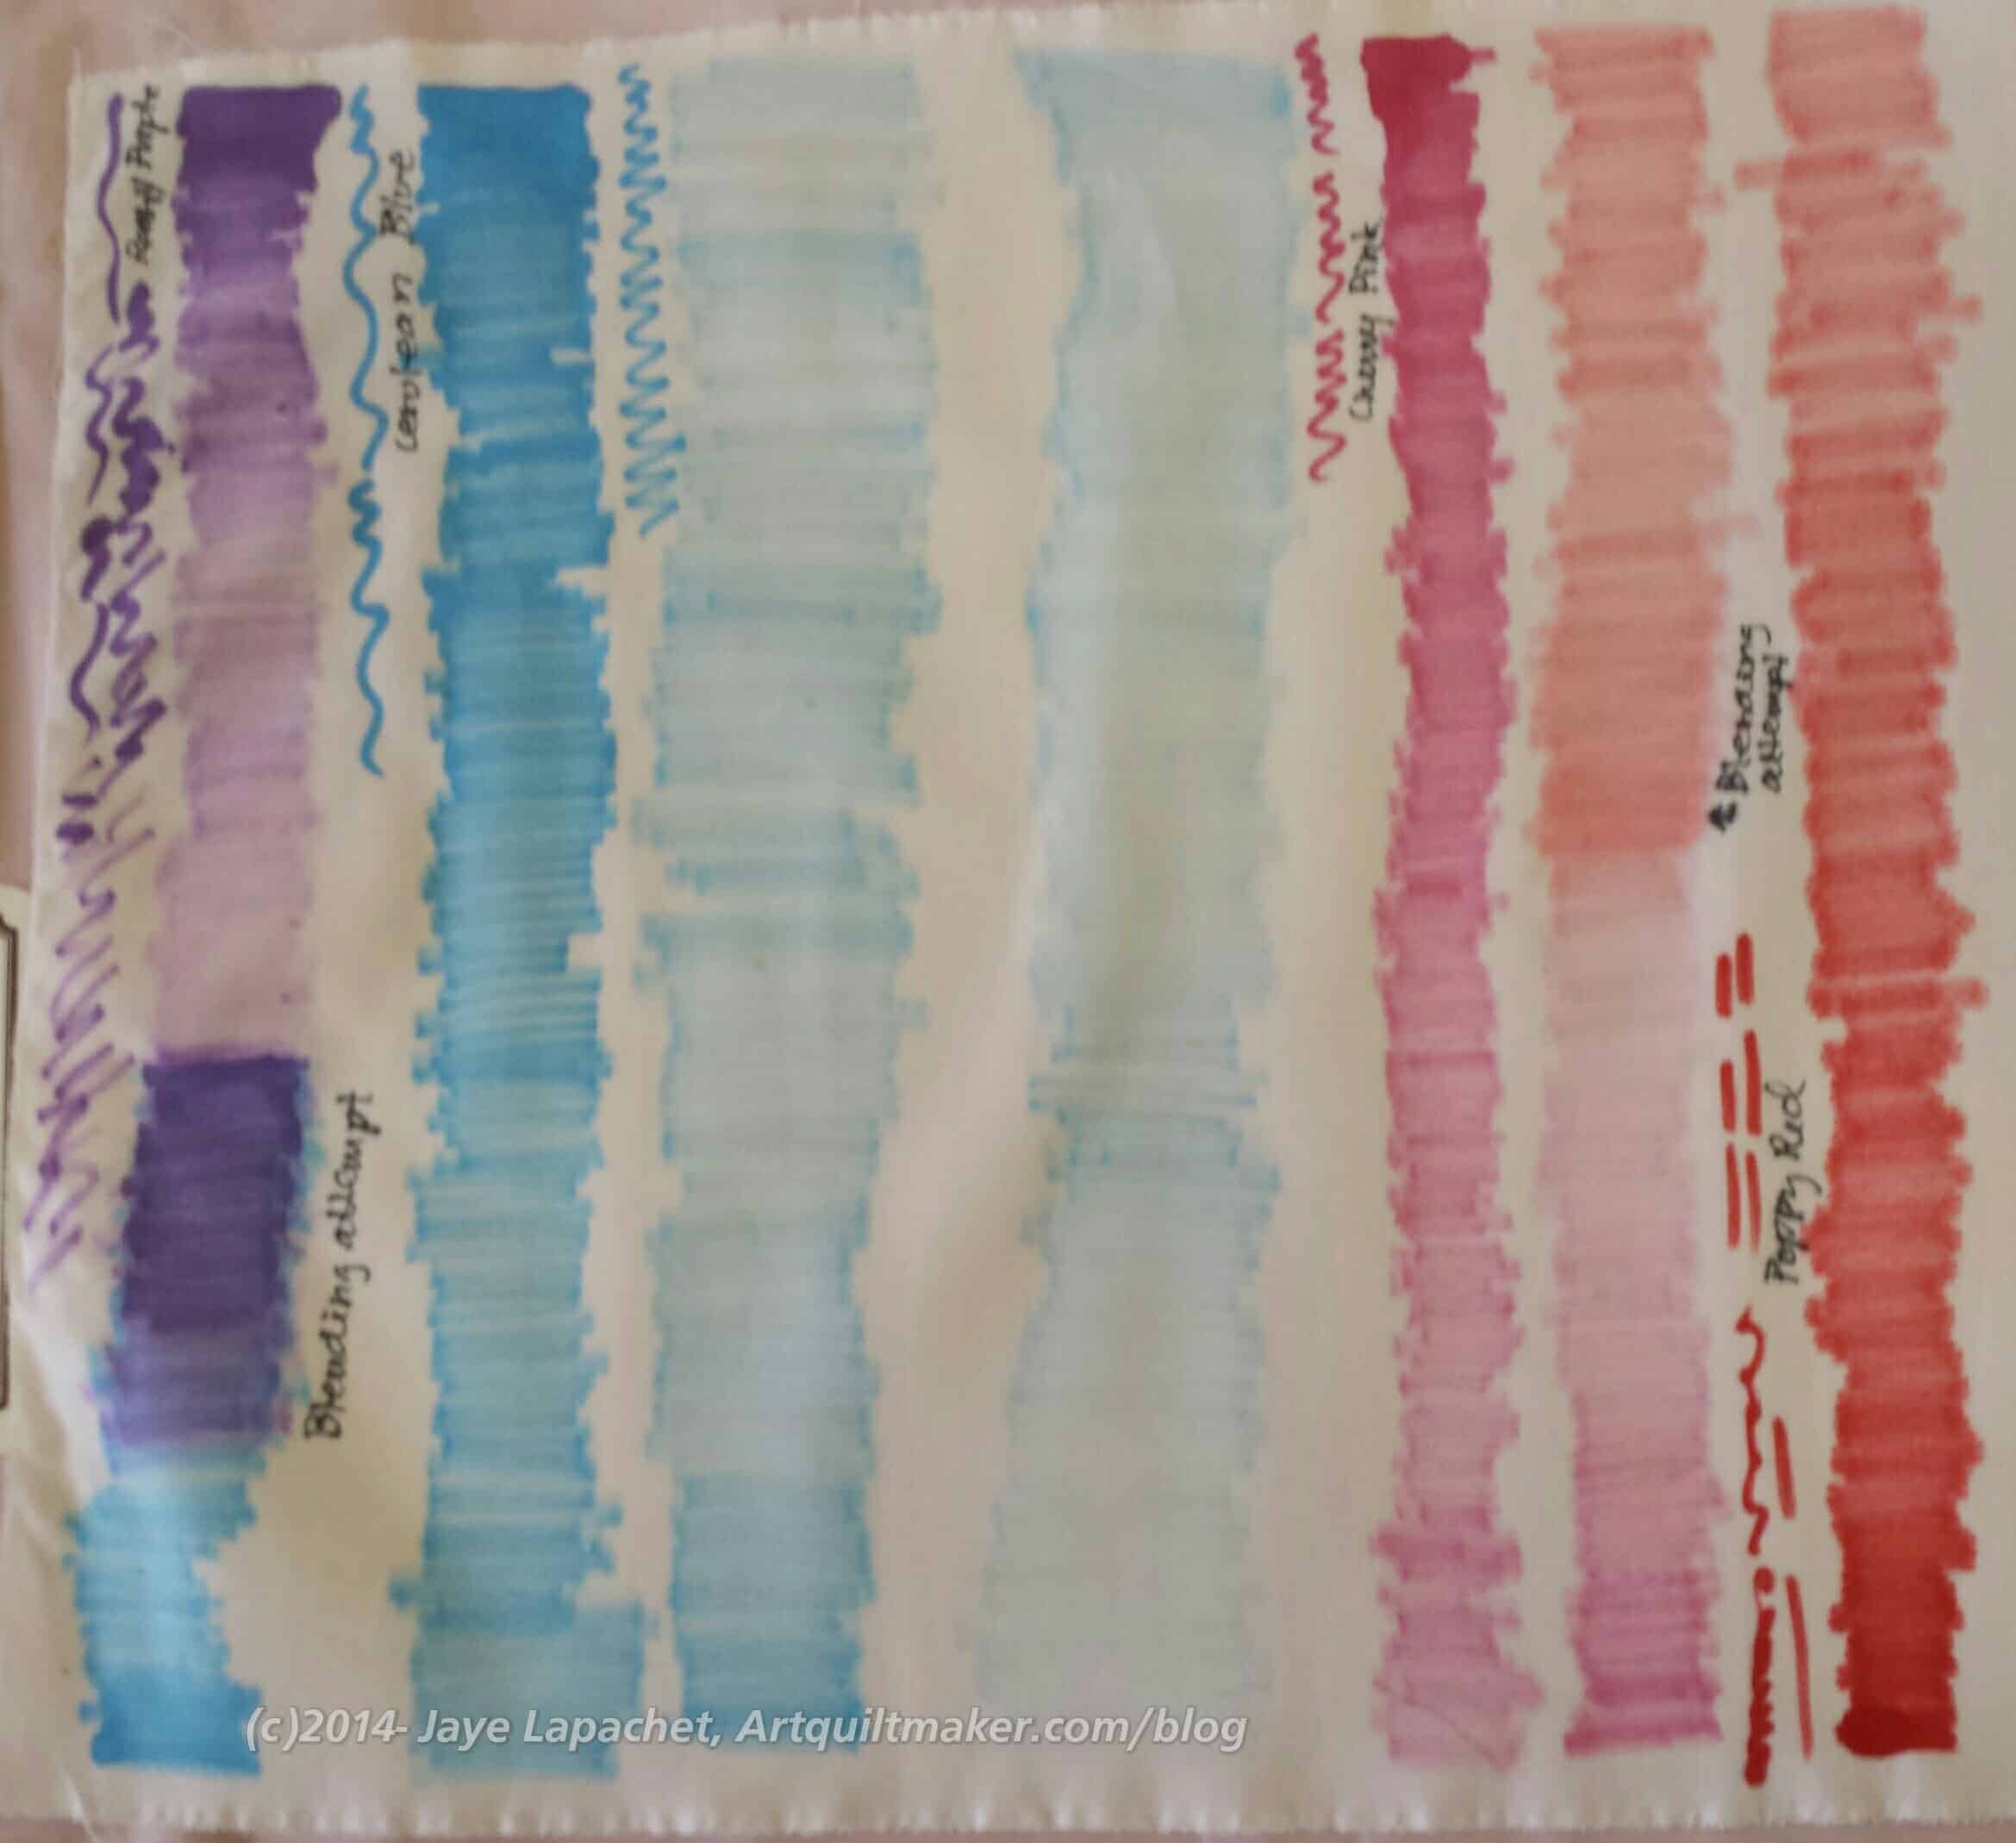
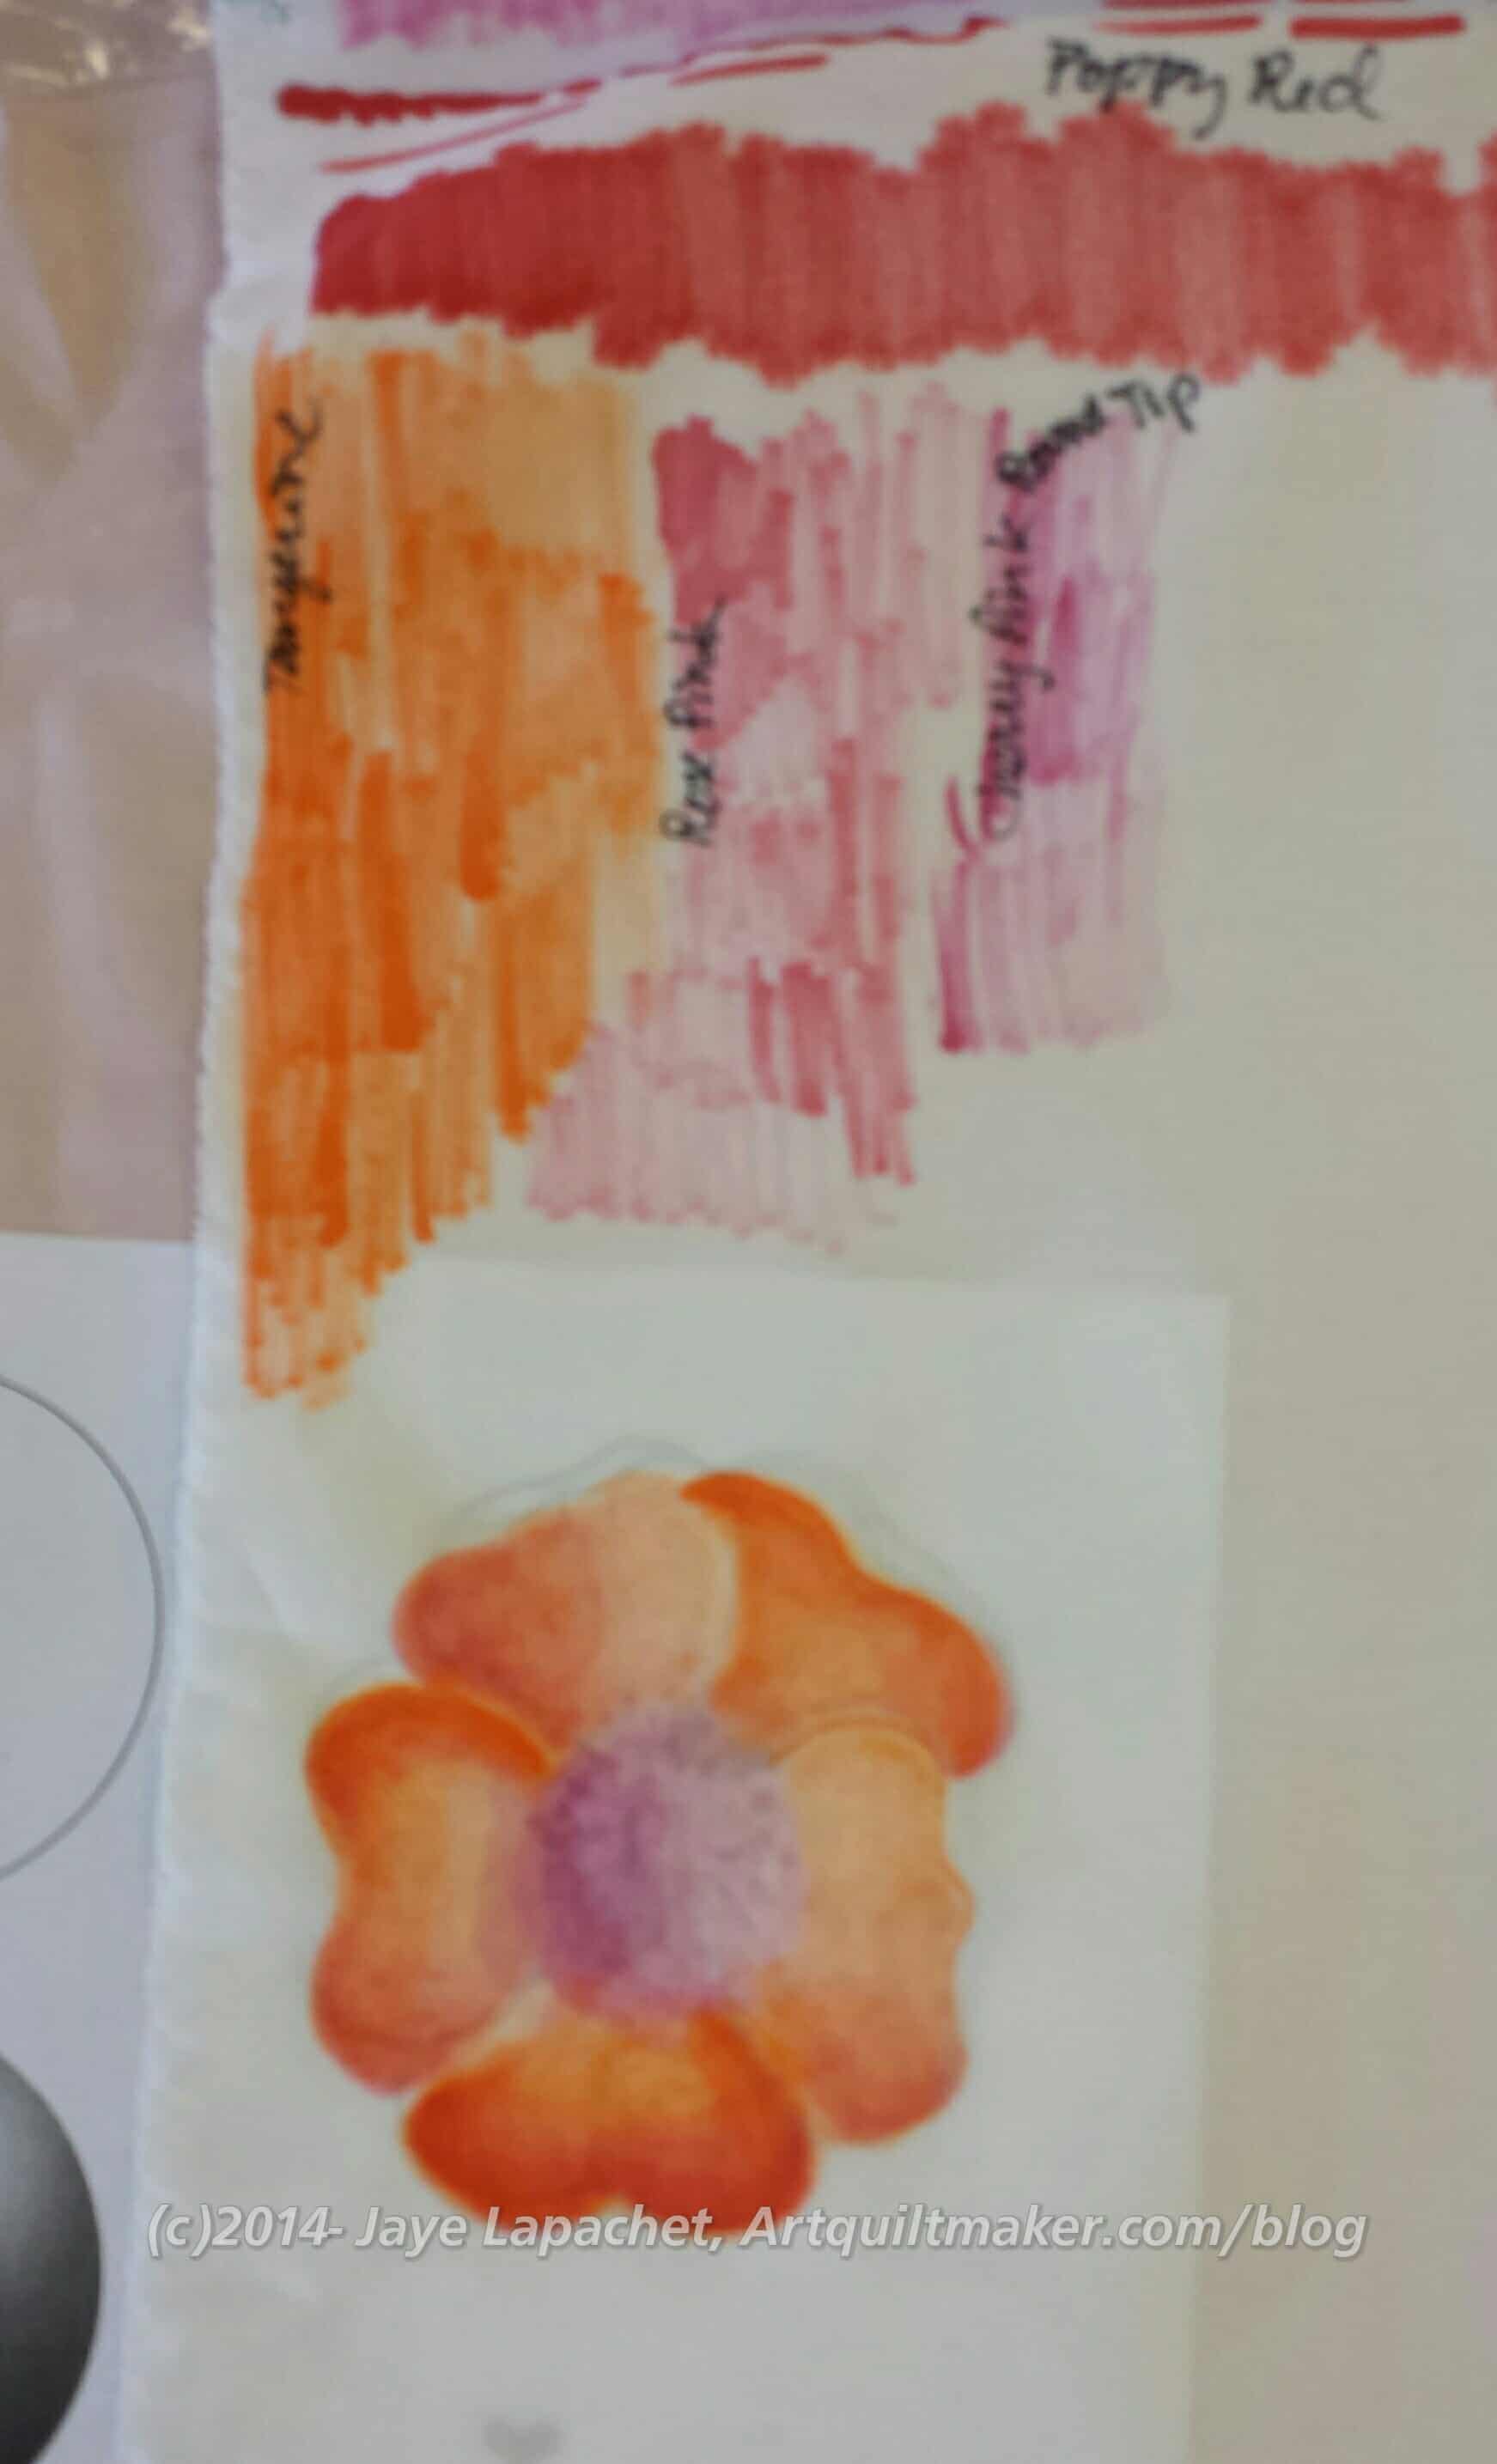
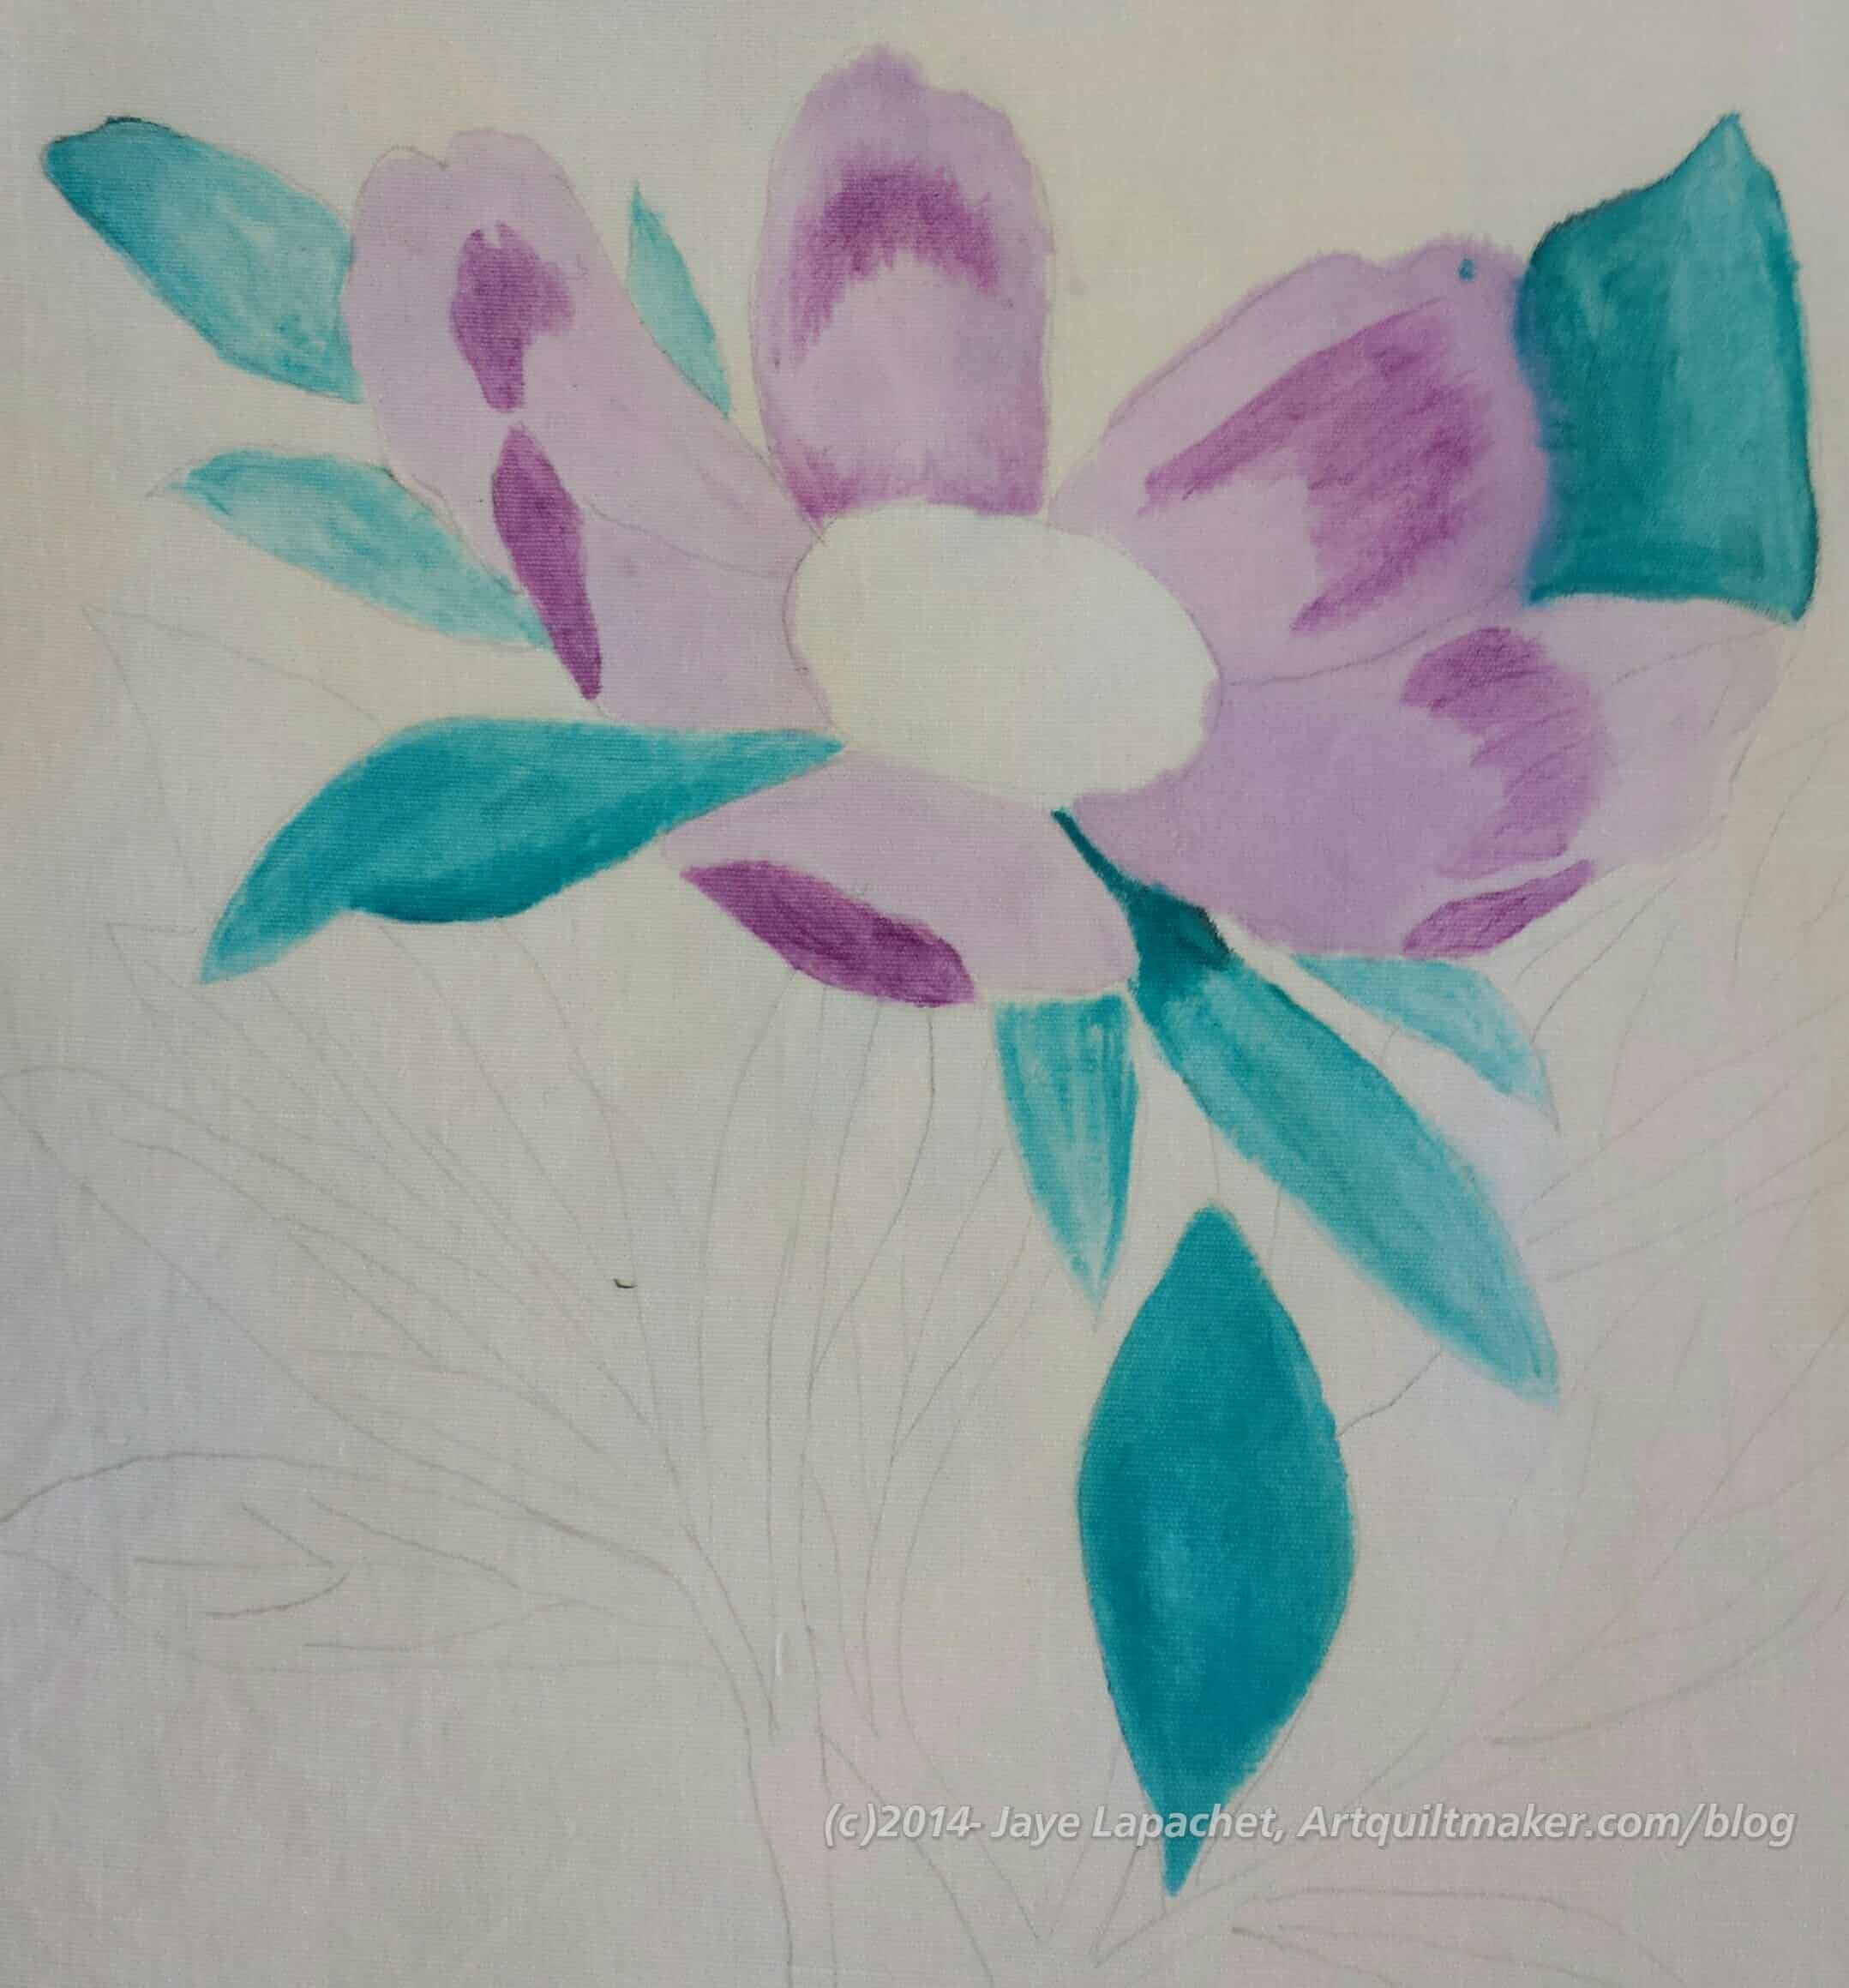
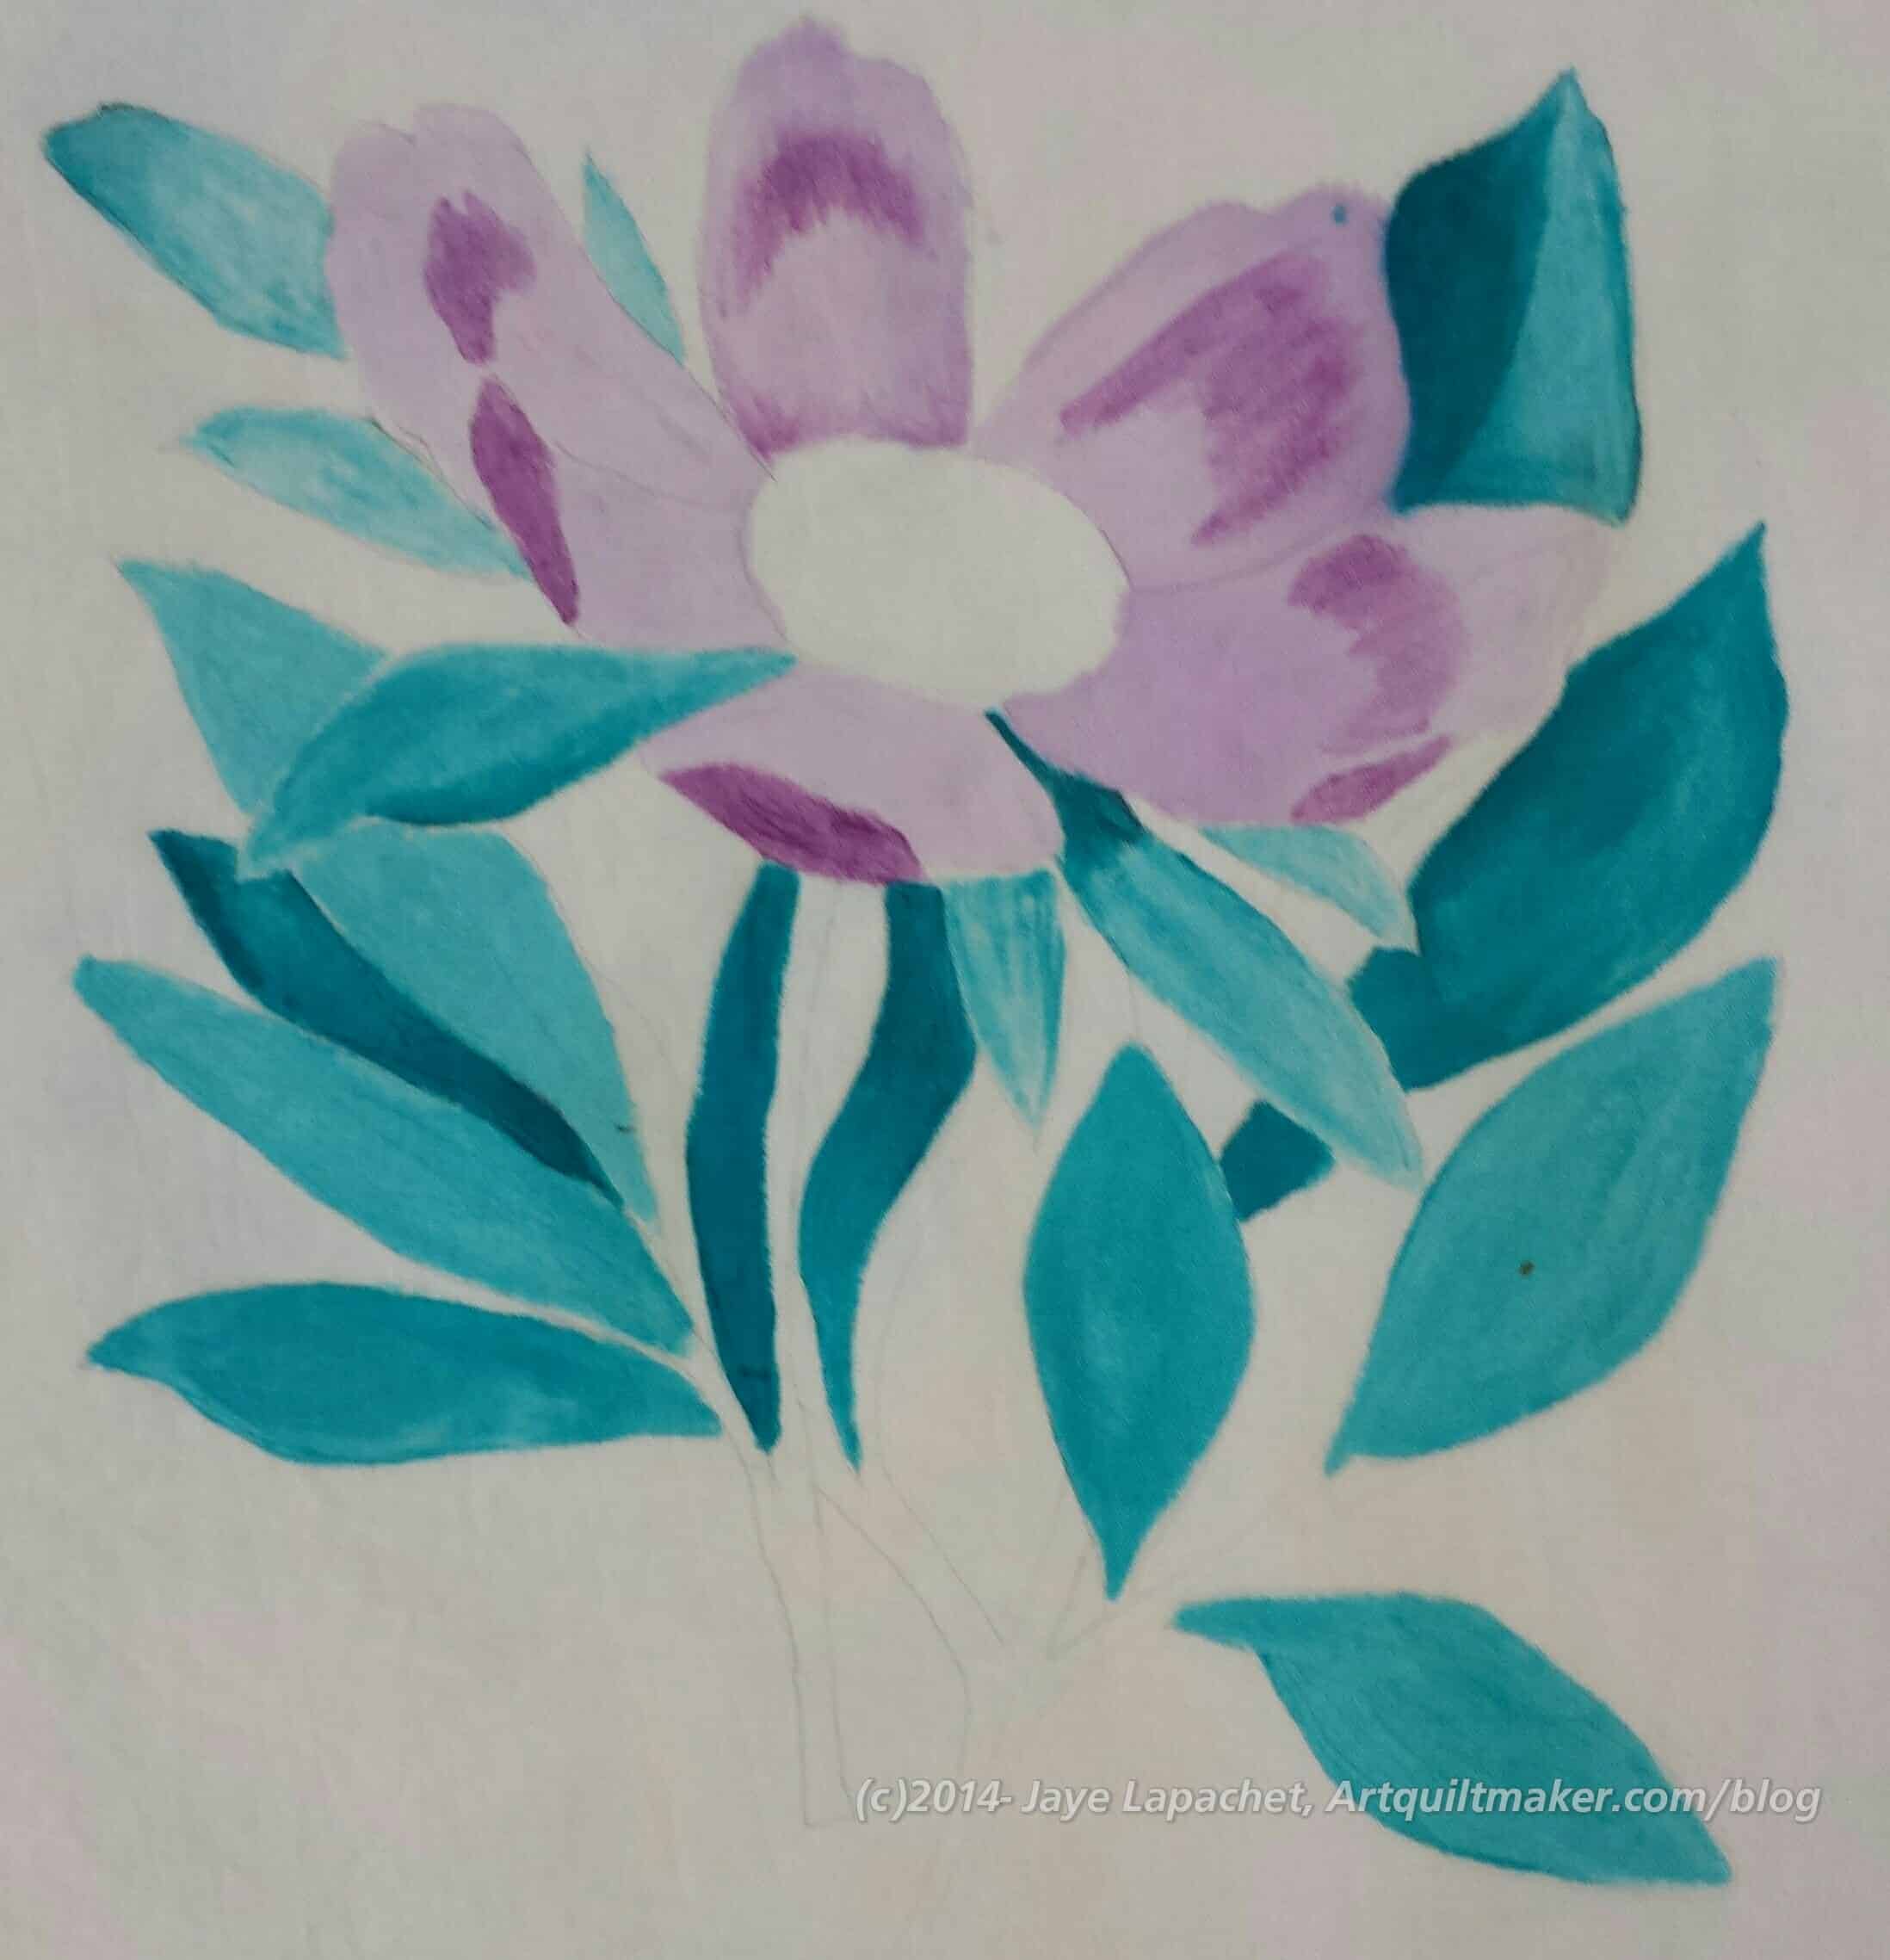
Leaf and Flower
Once we started in on leaves and flowers, my rhythm was in full force and, though, my first leaf was a little heavy handed, but the practice helped and I got better. I needed to slow down and apply the ink more lightly. I tried to do that with the second leaf. It isn’t perfect, but it is much better.
The squiggly lines are me trying to get a smaller amount of ink of the applicator.
Tsukineko ink Flower, January 2015
I made a really nice flower. It isn’t as good as Judy’s, of course. For having only worked with Tsukineko inks for a few hours, I was pretty happy with my work. I can see shading and some shadows. I can also see how the blending changed the original tangerine I used for the first coat.
In the afternoon we switched to using paintbrushes. It is completely different and you make the inks more transparent and lighter in color using aloe vera gel (no additives).
I had to get used to a whole new technique, but I tried to take my patience with me into this new technique. The key with the paintbrushes is to have synthetic brushes (boar bristle for oils are too stiff and sable used for watercolors absorb too much liquid) and work in small spaces at a time.
Tsukineko inks, Peony in progress
Judy had copies of botanical line drawings and I picked a peony. I didn’t want to get the snail! My neighbor did, however, and she did a really great job with it. Snails, though, YUCK!
While trying to make the ink looks smooth and even, I was also practicing managing the amount of ink I was using. I got better as I went along.
I could tell other people were getting frustrated with the technique and the inks as the noise level grew as people stood up and started to chat. I just sat and worked away at my little spaces on my Peony.
Tsukineko inks, Peony in progress 2
I used Orchid Odyssey for the petals, Thistle for the shadows on the petals and Tropical Lagoon for the leaves. I wanted to something a little different in terms of color and to try out some of my other inks.
Way too early they chivvied us along and got us to pay our bills and clean up our areas. I didn’t finish, but I am pleased with my progress.
The inks get heat set and are permanent when they dry. I learned in this particular exercise to heat set areas once I am happy with them.
I am trying to think of a way to use these inks in my work. I can’t think of anything at the moment, but will keep thinking as I want to use them.
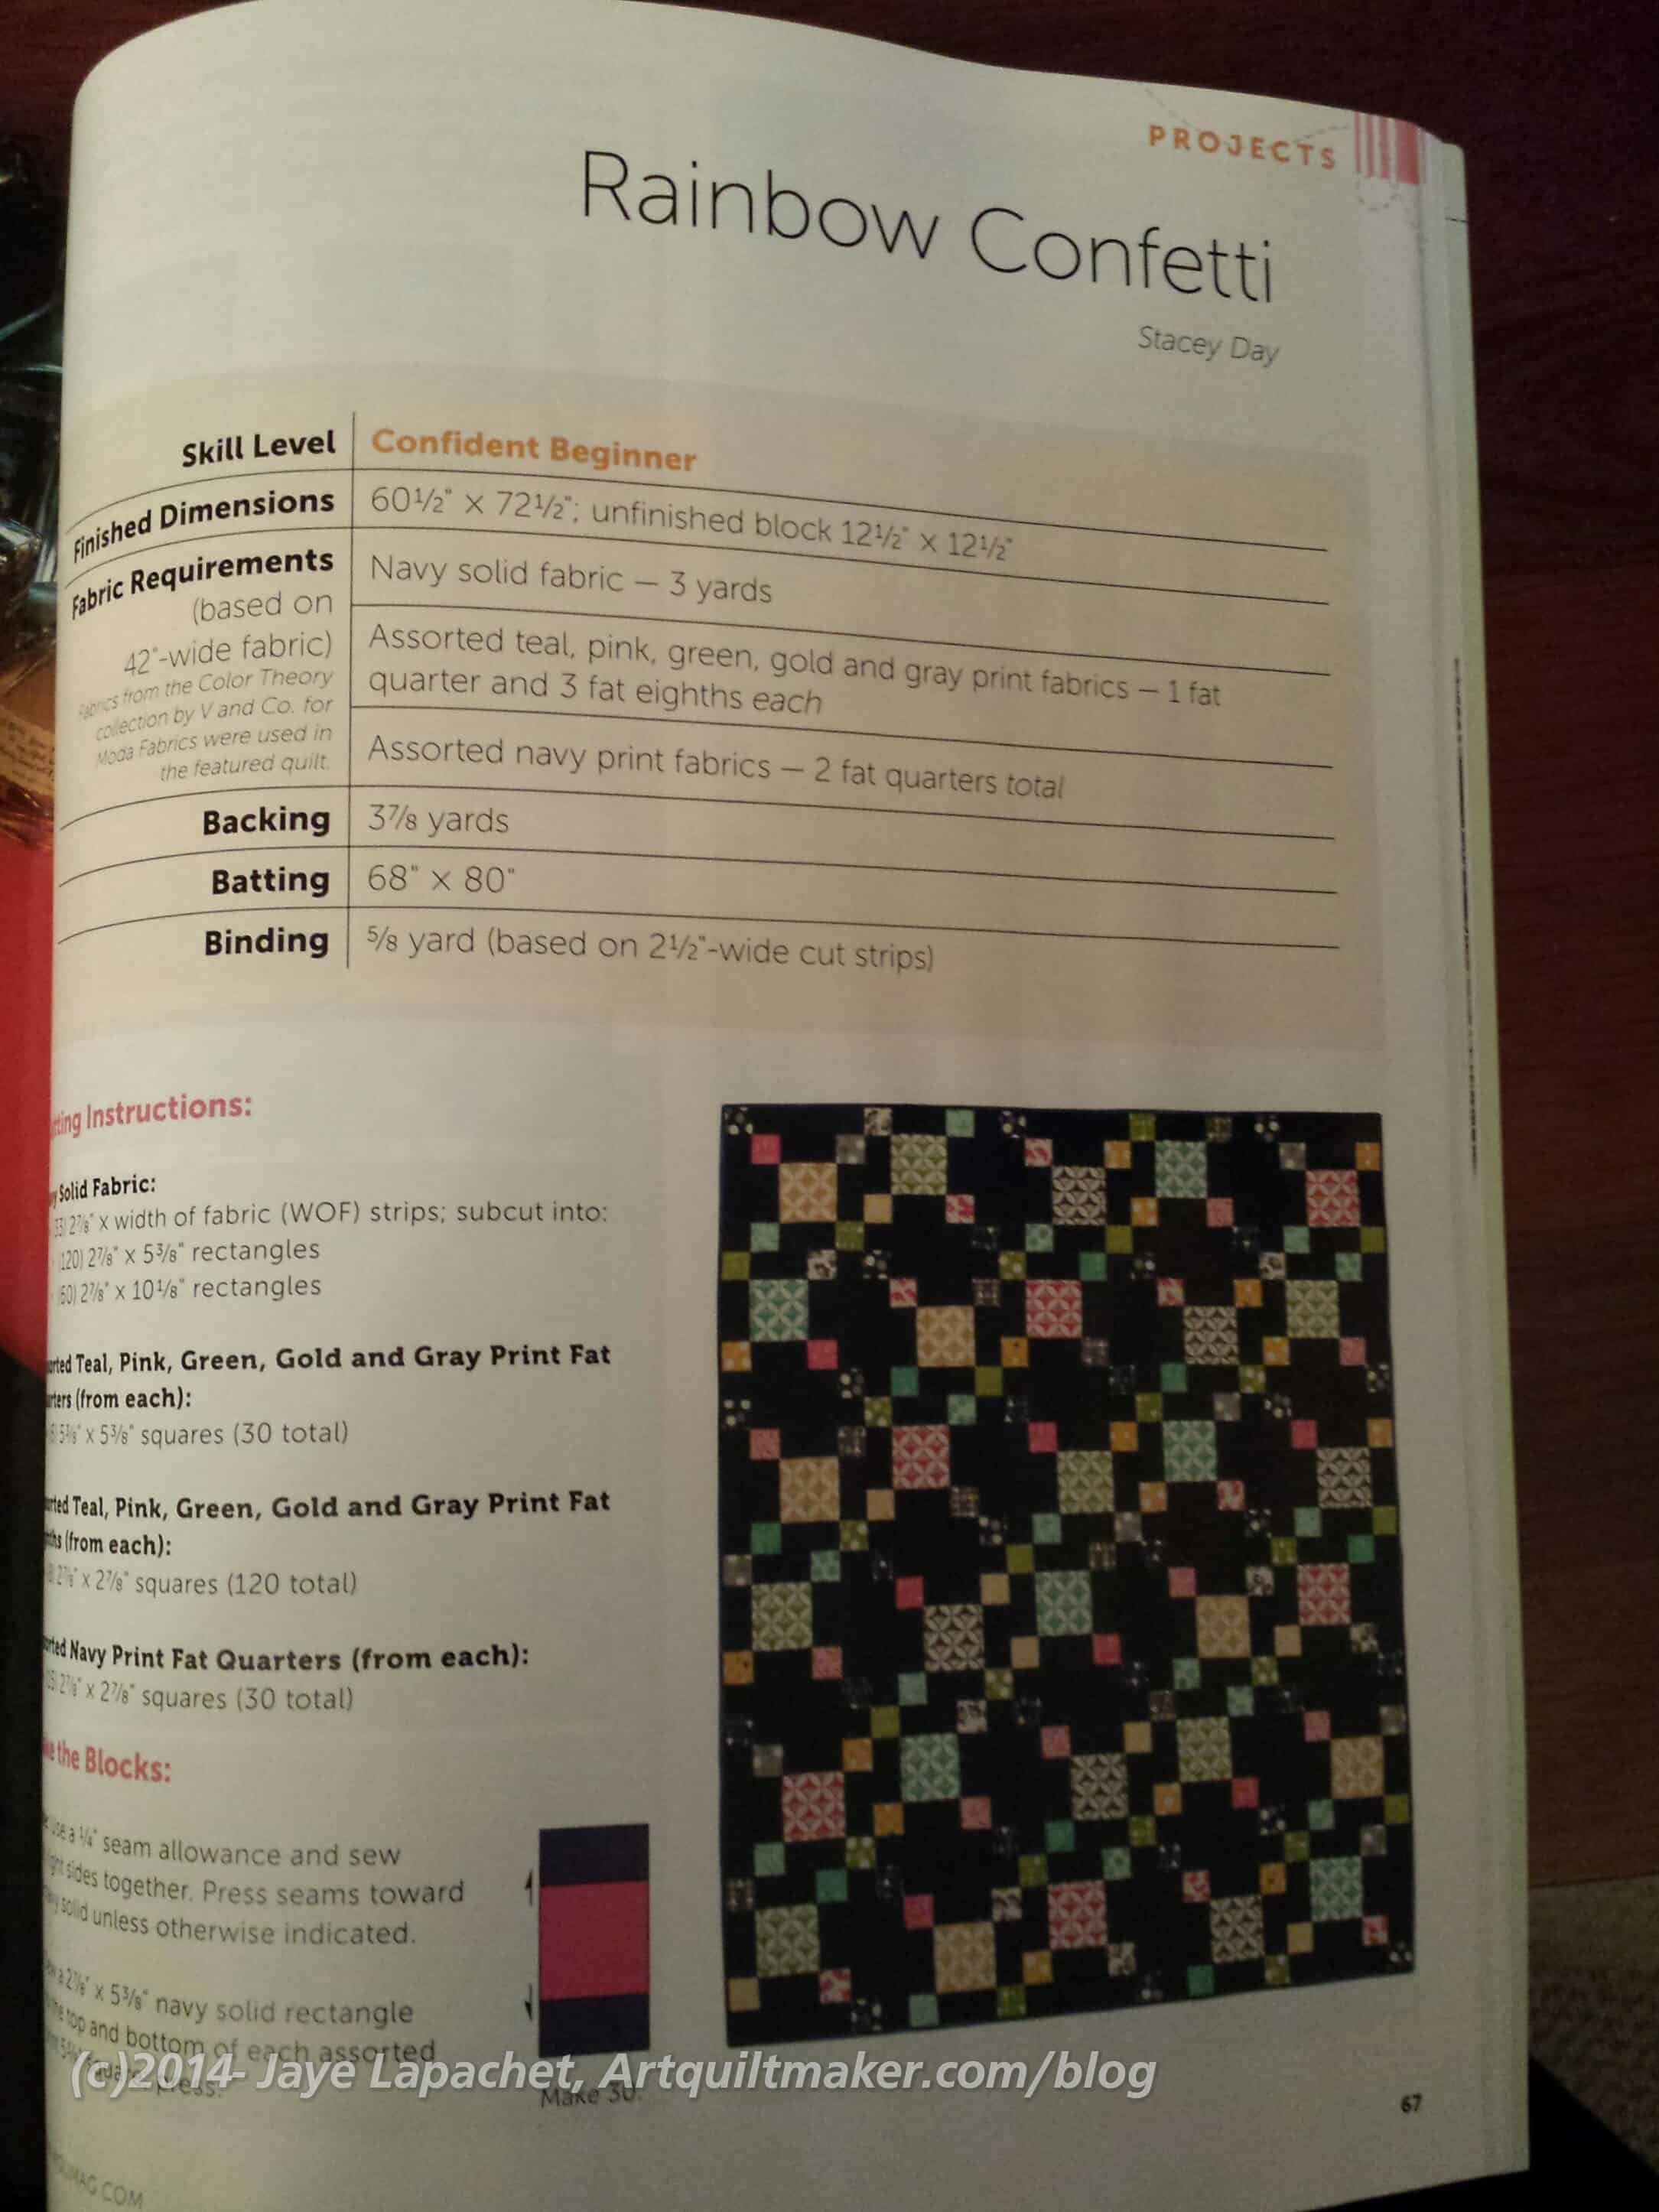
During my recent trip to the East Coast, I stayed in a hotel while attending a work meeting. I saw the carpet and thought it would make a great quilt, recolored, of course.
I like the simple design.
There is interest even though the design includes just squares, using different sized squares and subtle changes in “color.”**
I can see this design with a solid background and a variety of bright colored something fabrics for the squares. Prints or solids would both work. I was thinking about it, designing this in my head and then I saw….
Modern Quilts, Winter 2015
almost the exact same design in Modern Quilts, the Winter 2015 issue. I couldn’t believe it.
Back to the drawing board.
**Nota bene: color in this instance is generous as I consider color to be something I can actually see. 😉
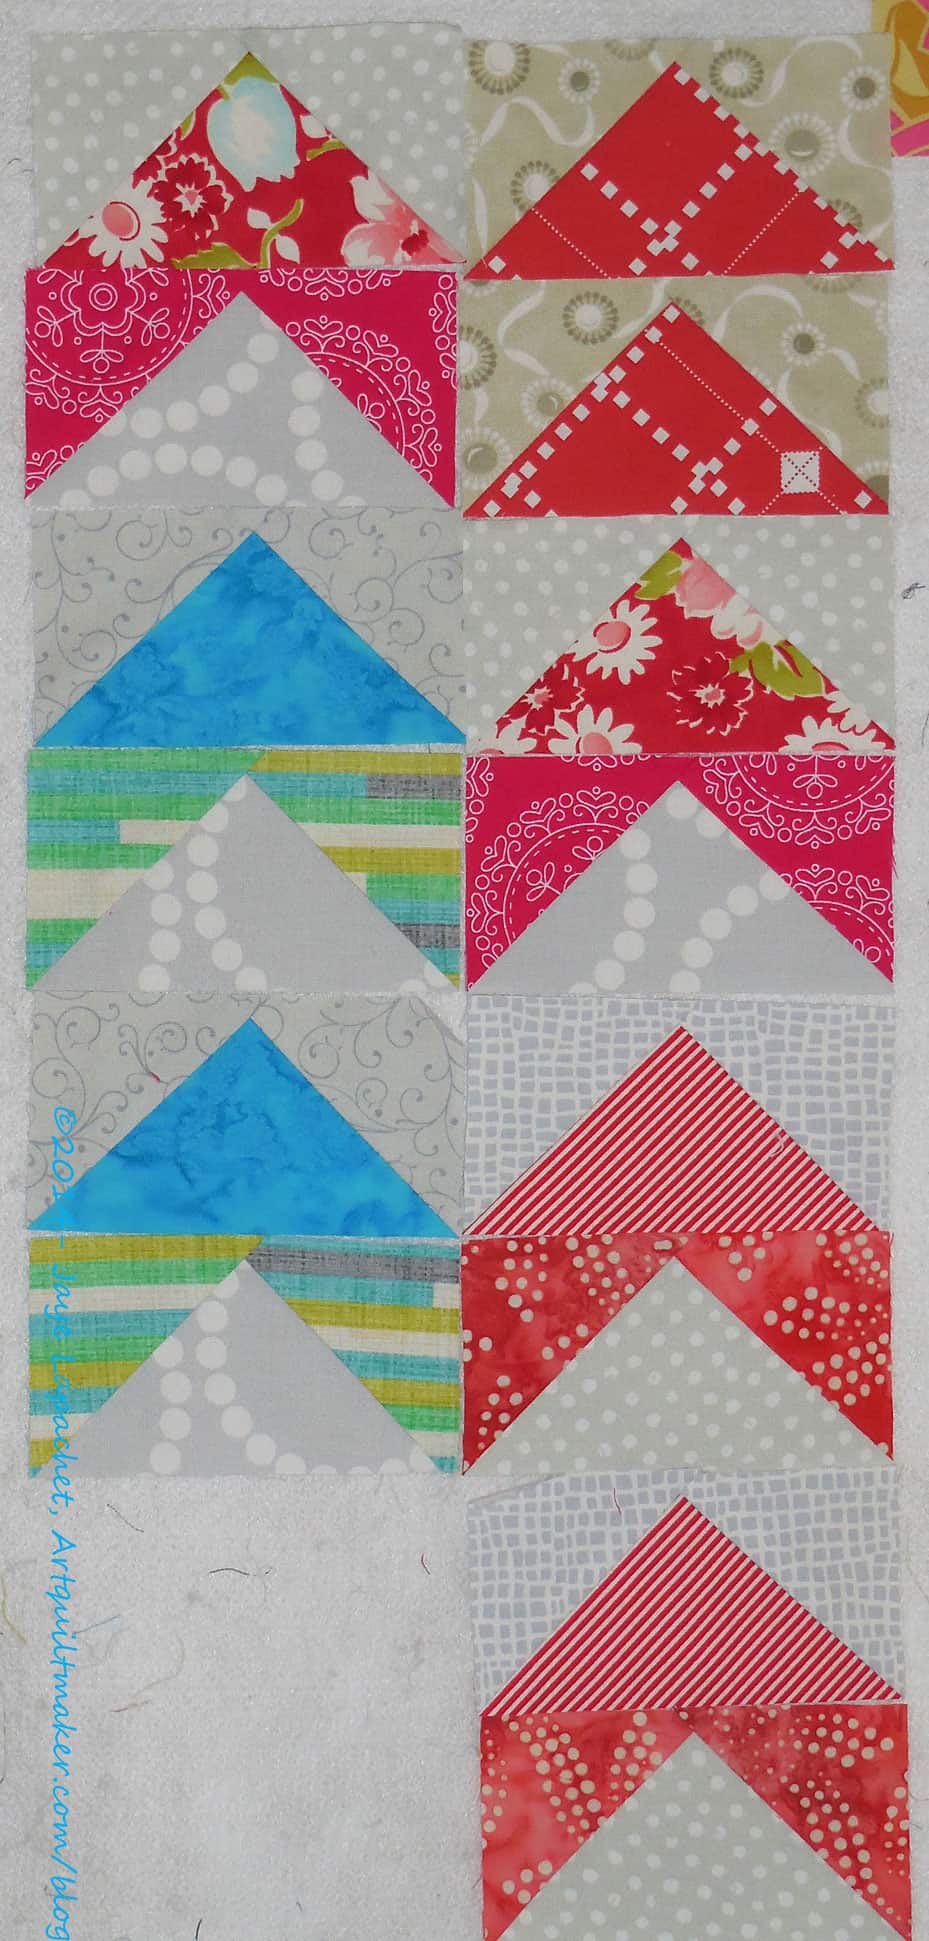
TFQ already talked about our Flying Geese exchange on her blog. Still, I am going to talk about it here. Over the course of the year, probably ad nauseum. Still, it is my blog.
I like doing projects with TFQ. The last one we did together was the Star Sampler. She is waiting to finish hers, but mine is done.
As you might remember, we started off, after PIQF, exchanging the PIQF Cross blocks. TFQ admitted to sincerely disliking those blocks before I did, but I really did not like them very much. When we finally got on the same page, TFQ suggested Flying Geese patches and I thought that was a good idea.
We decided to use the same color selections: light, bright grey, which was good. I already had a selection out to use. I have since picked out a few others.
First off: I started off making the Flying Geese wrong. That is why you see some of the geese have been made into chevrons. I just have them on my design wall arranged like that for kicks. I can’t see making more of the Flying Geese the wrong way. I don’t suppose you ever really know.
That meant that I had to start over, recutting, readjusting my brain and sewing more to catch up.
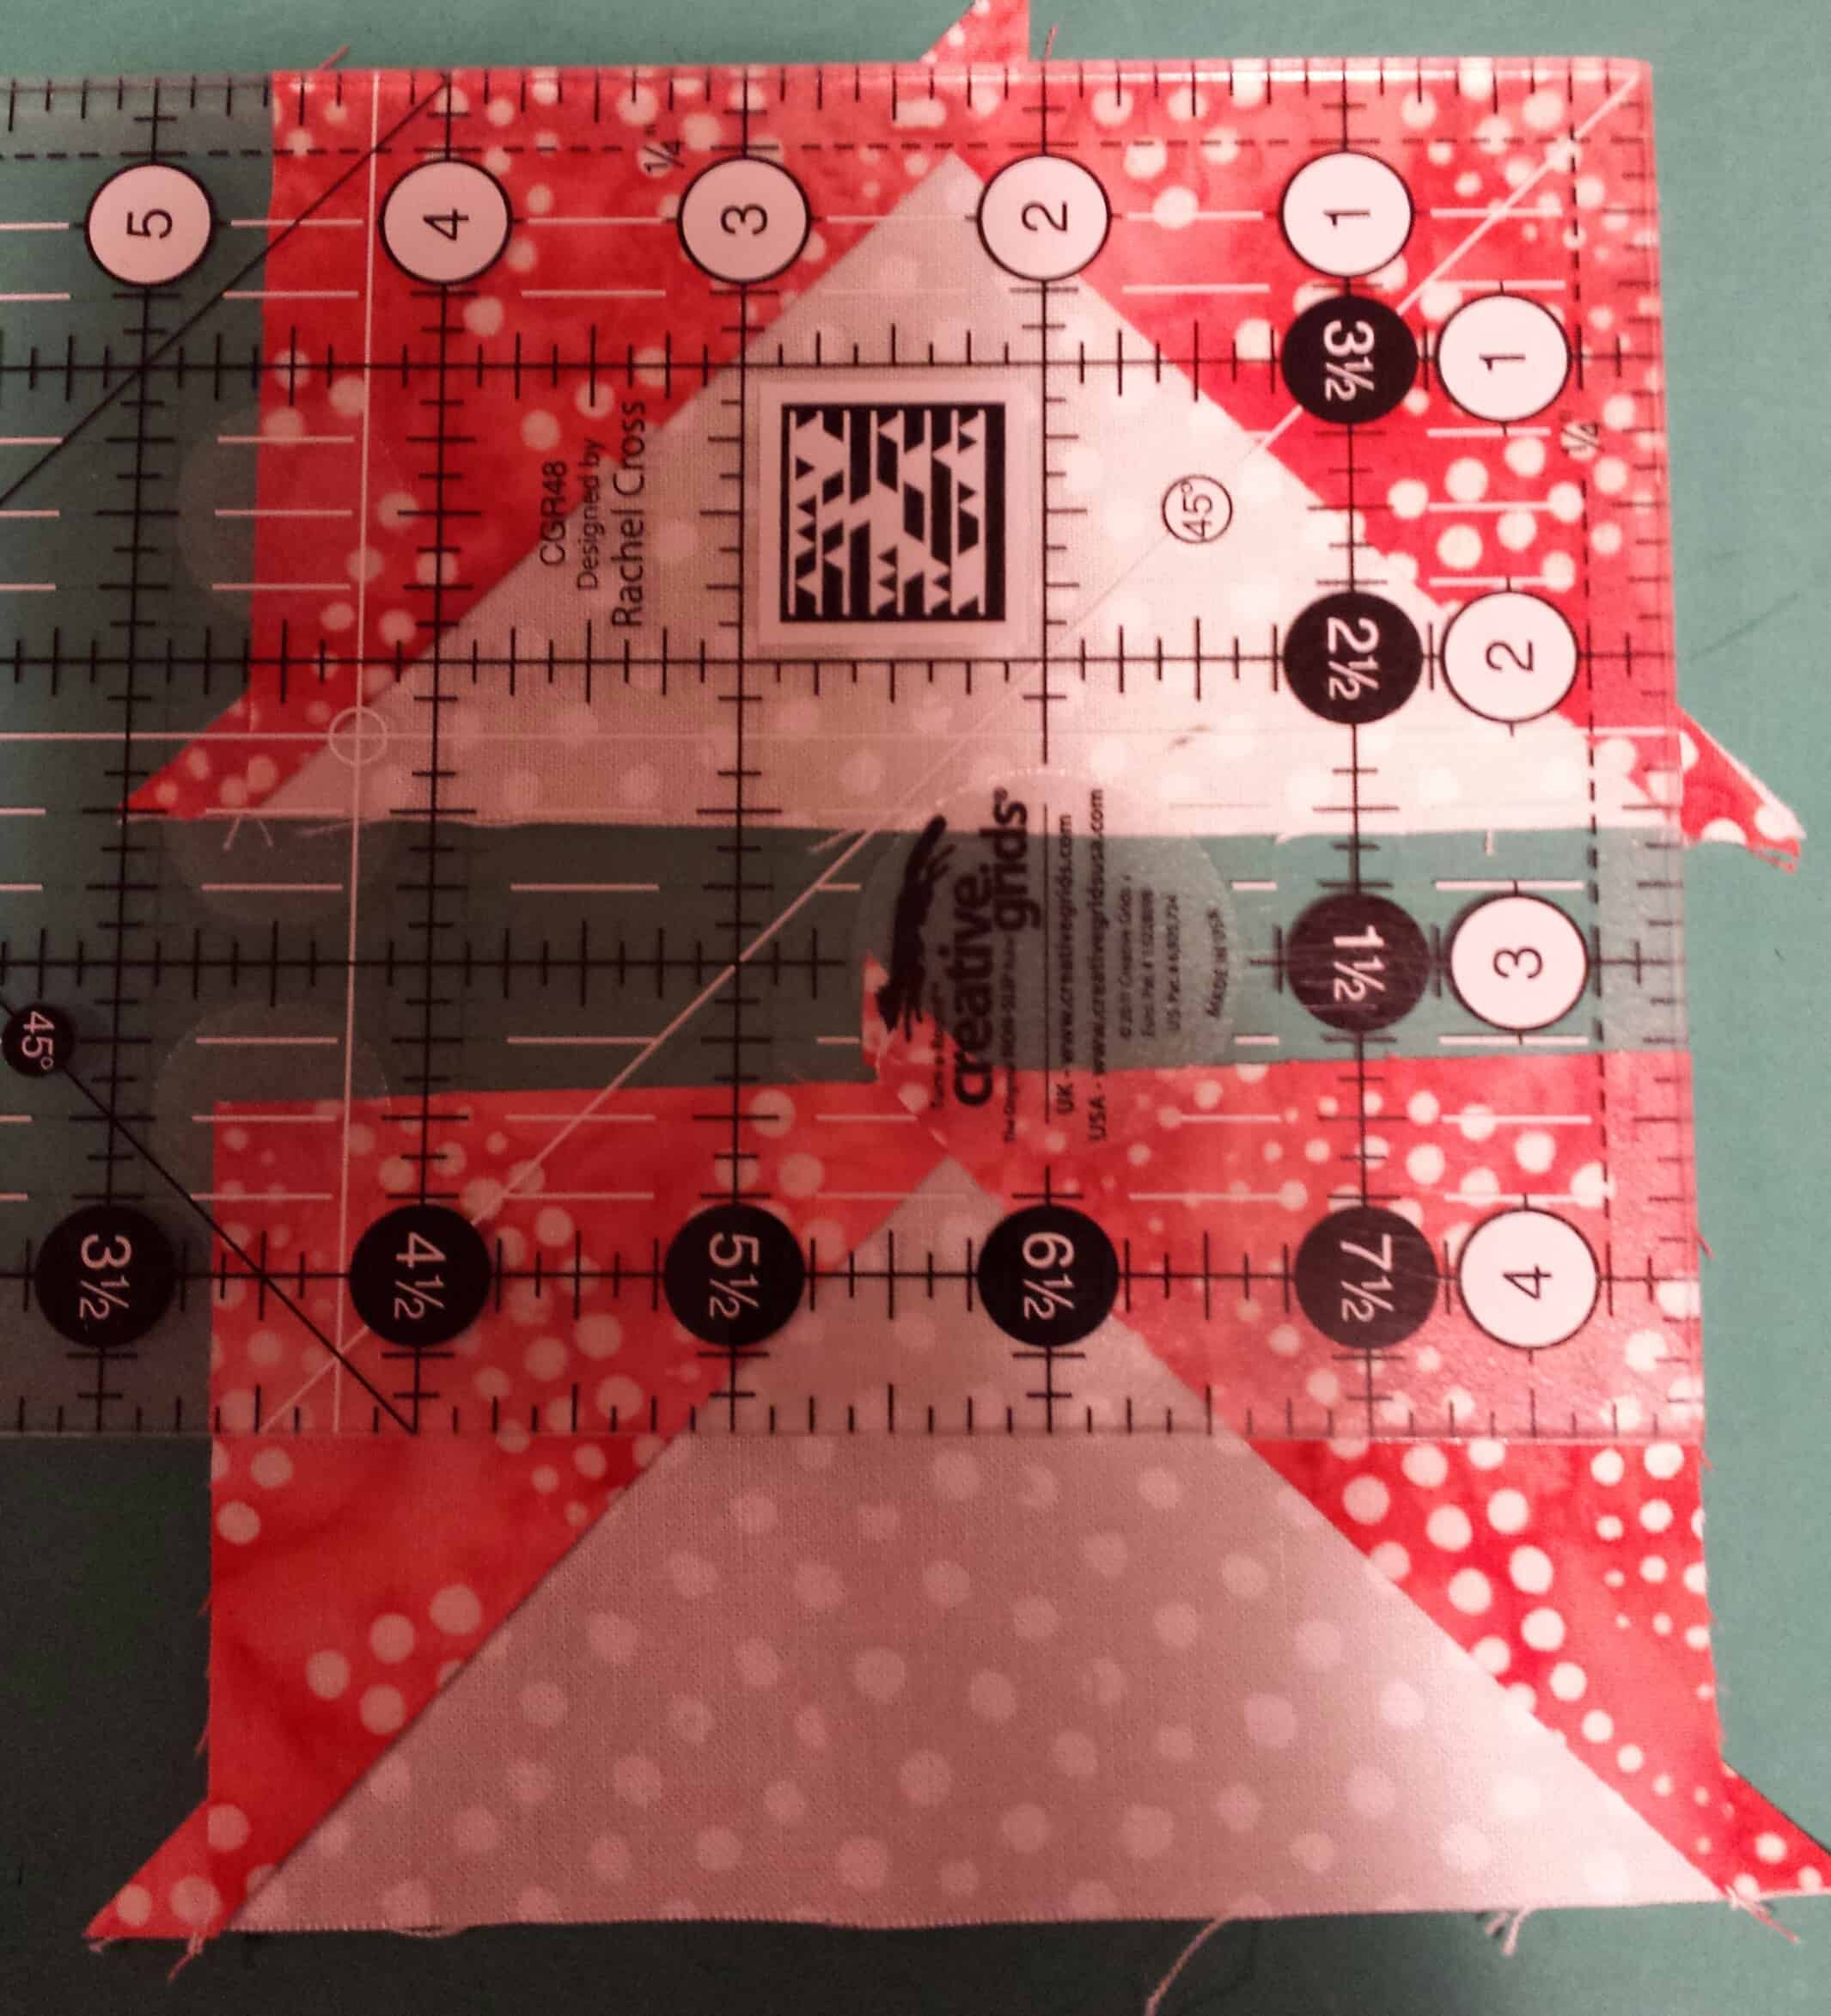
Measuring
Next, I got reacquainted with the Deb Tucker Flying Geese ruler. I have also used other rulers such as the Creative Grids Flying Geese ruler. This time I am using the Deb Tucker Flying Geese ruler. Once I figured out what size to cut each square, then I churned out several geese. The Deb Tucker Flying Geese ruler makes 4 at a time, which is one reason I like it.
Aside from actually mailing off the patches, which I keep forgetting, I am doing pretty well making them. This is a much better project. I am already thinking about what I will do the mounds of Flying Geese I am going to have. I do have ideas, especially for these, which are gorgeous!
As you read this I will probably be on an airplane heading home. I spent 10 days or so in Maryland visiting my SIL and BIL and, oh yeah, attending a conference for work.
I arrived on Friday evening and was treated to a delicious dinner when I arrived at my SIL’s. She picked me up on her way home from work and BIL (now retired) had dinner ready when I got there. He is a great cook and very attentive to my dietary challenges. I always enjoy eating with them.
Vintage Looking Tablecloth
We spent a lot of Saturday getting ready to sew the shirts I had planned for DH and his brother. The prep mostly involved cutting. The shirts were made from vintage-looking tablecloths, which I had sent ahead. Since it wasn’t normal fabric yardage, there was a lot of fussy cutting.
We did take some time out to go visit Patches, a shop in Mt. Airy (great name, huh?), Maryland. I have been there before and really liked it. This time, I didn’t find as much that I had to have, but I enjoyed the outing.
They had the Yazzi bag that Jinny Beyer recommends. I had intended to buy it, but wanted to see it in person, so I took a good look and decided not to buy it. It is a great bag, but a lot of the space is taken up by the padding. I don’t travel with m y handwork enough to make it worthwhile. The handwork bag I have is fine.
The countryside is so different here. I see a lot of quilts that are winter scenes with leafless trees and this is the first time I have actually seen such a scene in real life. They,of course, have evergreens here, but there are vast spaces filled with leafless trees. It is interesting.
We also baked a cake. I brought a gluten free (also egg and soy free for SIL) mix with me and we baked it. I used SIL’s confectioner’s sugar to make the frosting and she frosted it. Team effort. Then back to sewing.
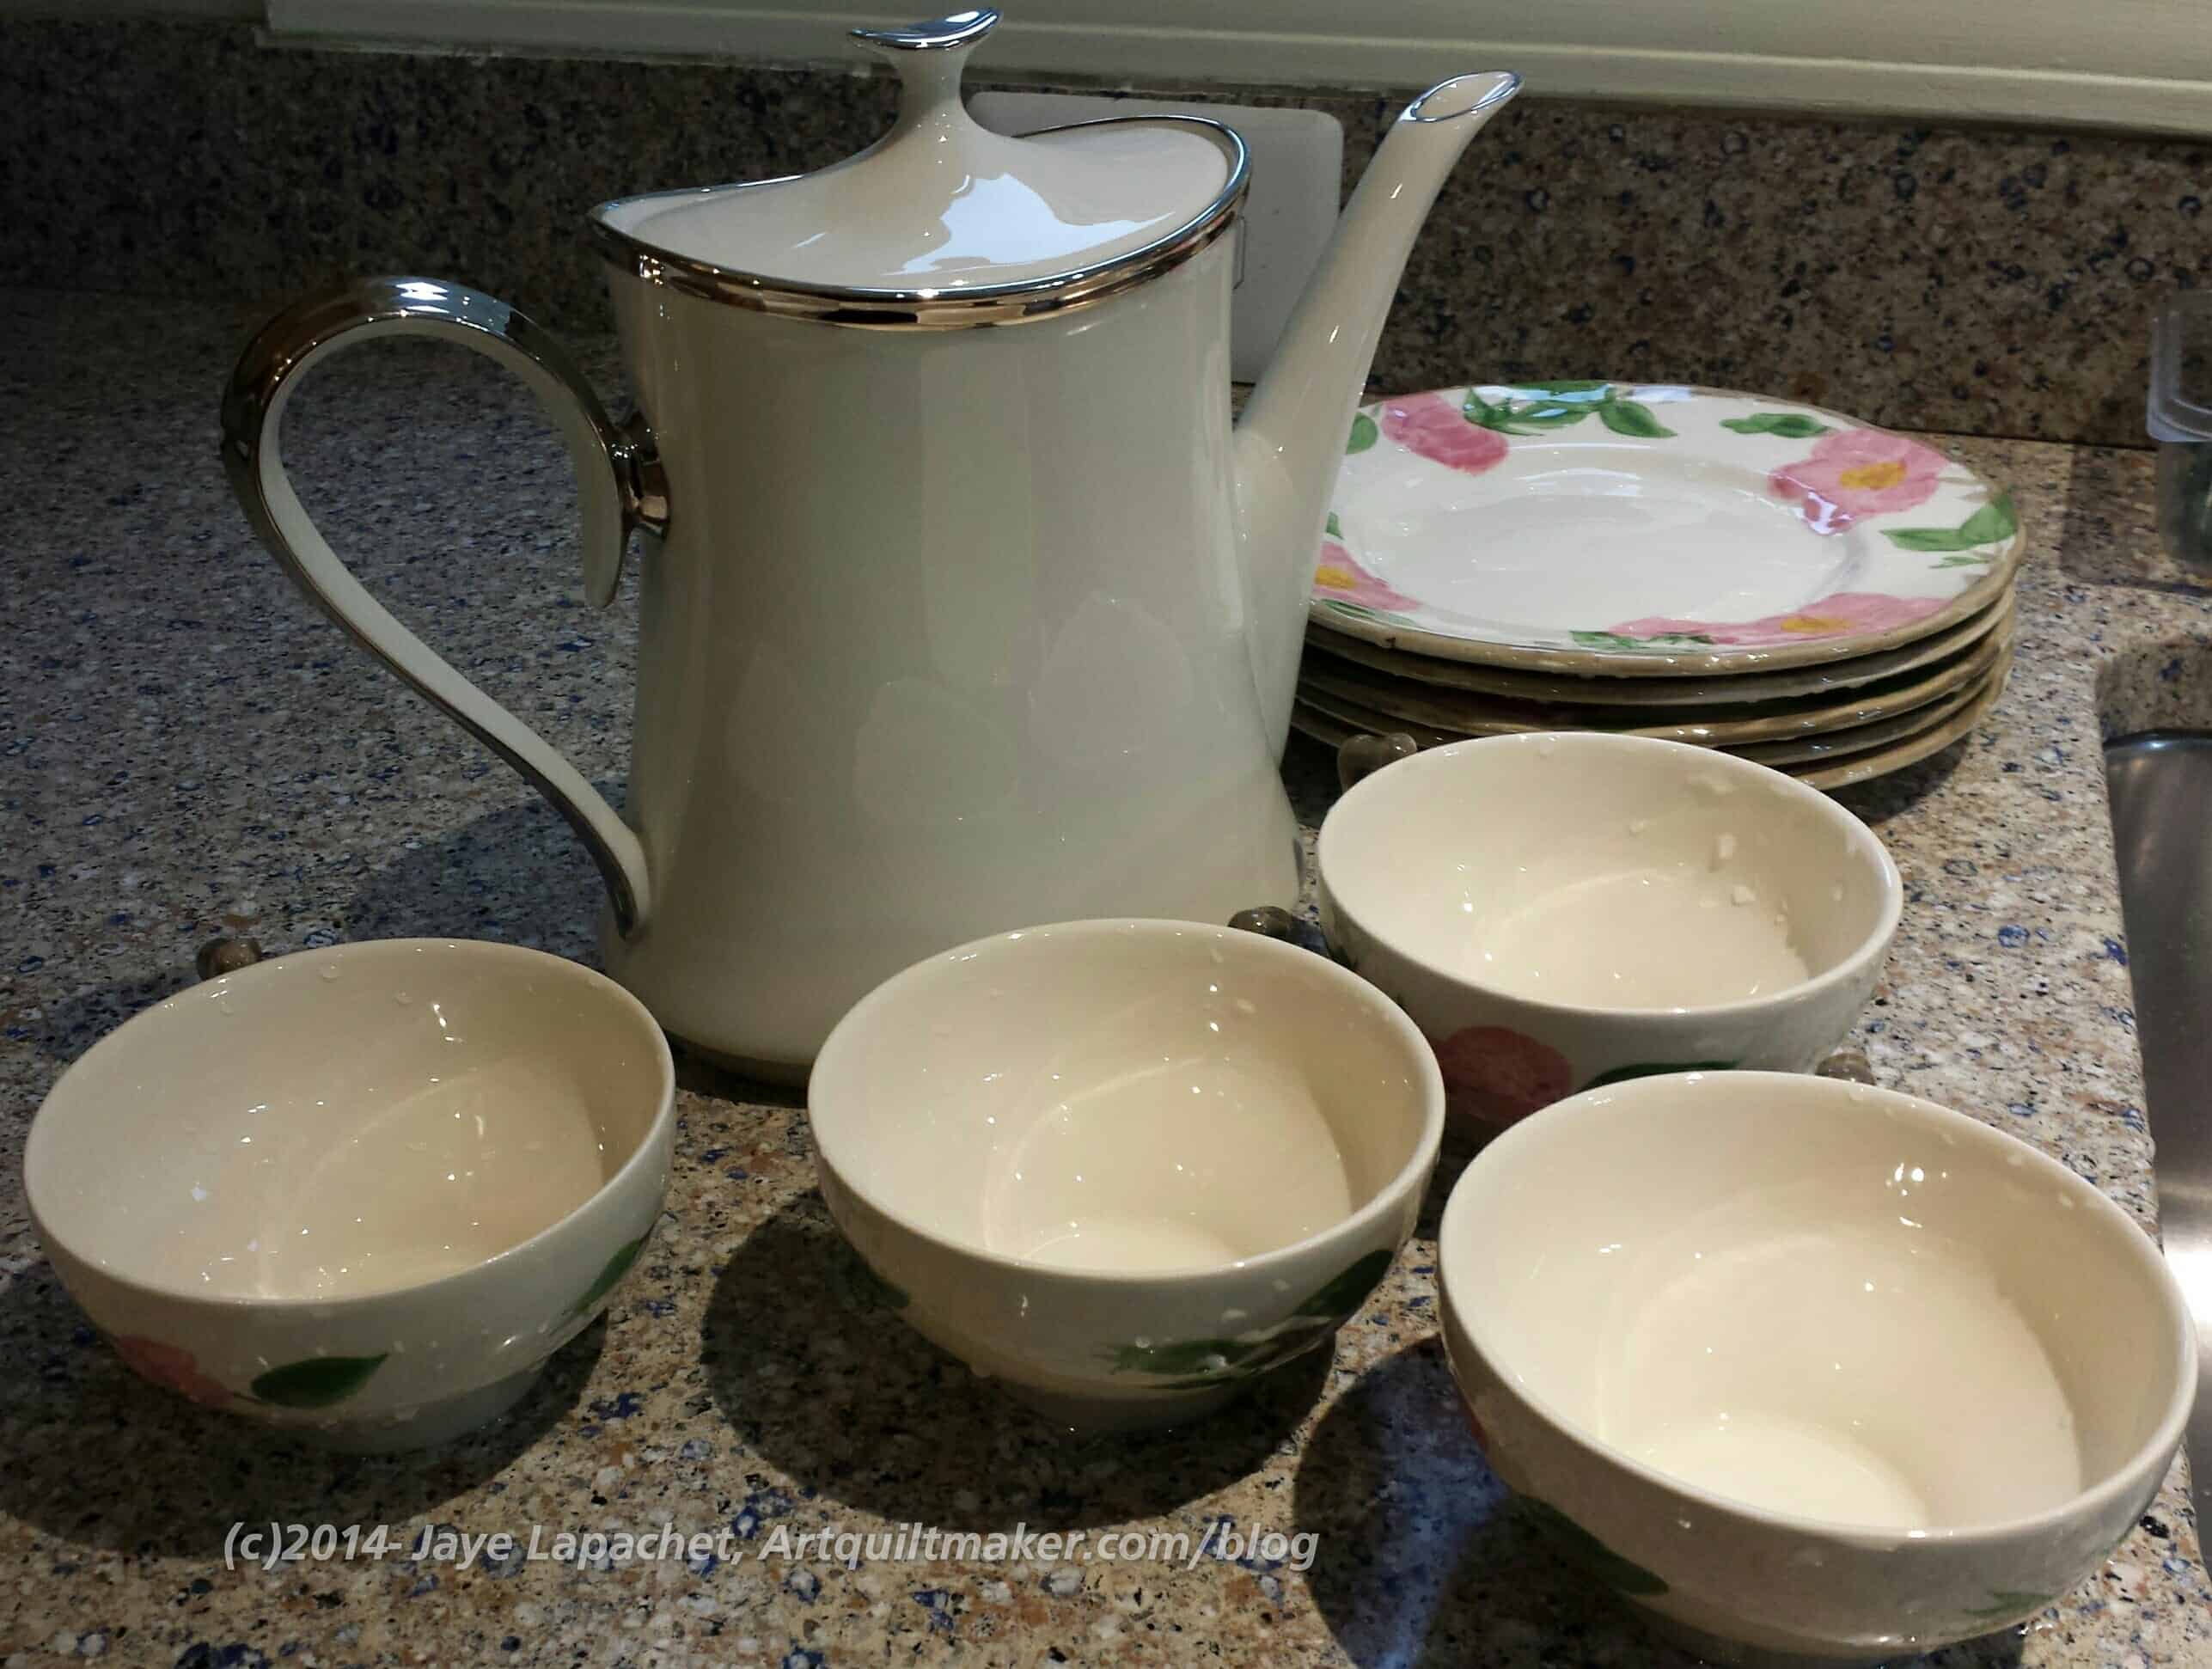
Desert Rose & Lenox Olympia Platinum
Sunday we worked on the shirts. I think by then we had cut most of the pieces out. SIL had not used the pattern in awhile so there was some fumbling around while she reacquainted herself with how the shirts would be made. I had helped her before, but am so inexperienced making garments that I was of little to no use in that department.
We also got ready for a party. We used her Desert Rose china, and pretty flatware, so we washed and dried the pretties before we set the table. We used her Lenox Olympia coffeepot for a different kind of tea. I hadn’t ever had the chance to really look at SIL’s china pattern. It has really clean lines and a simple design. I am still trying to figure out how to fit it all into my suitcase without breaking any for the trip home. 😉 It is always fun to use use nice things for a party.
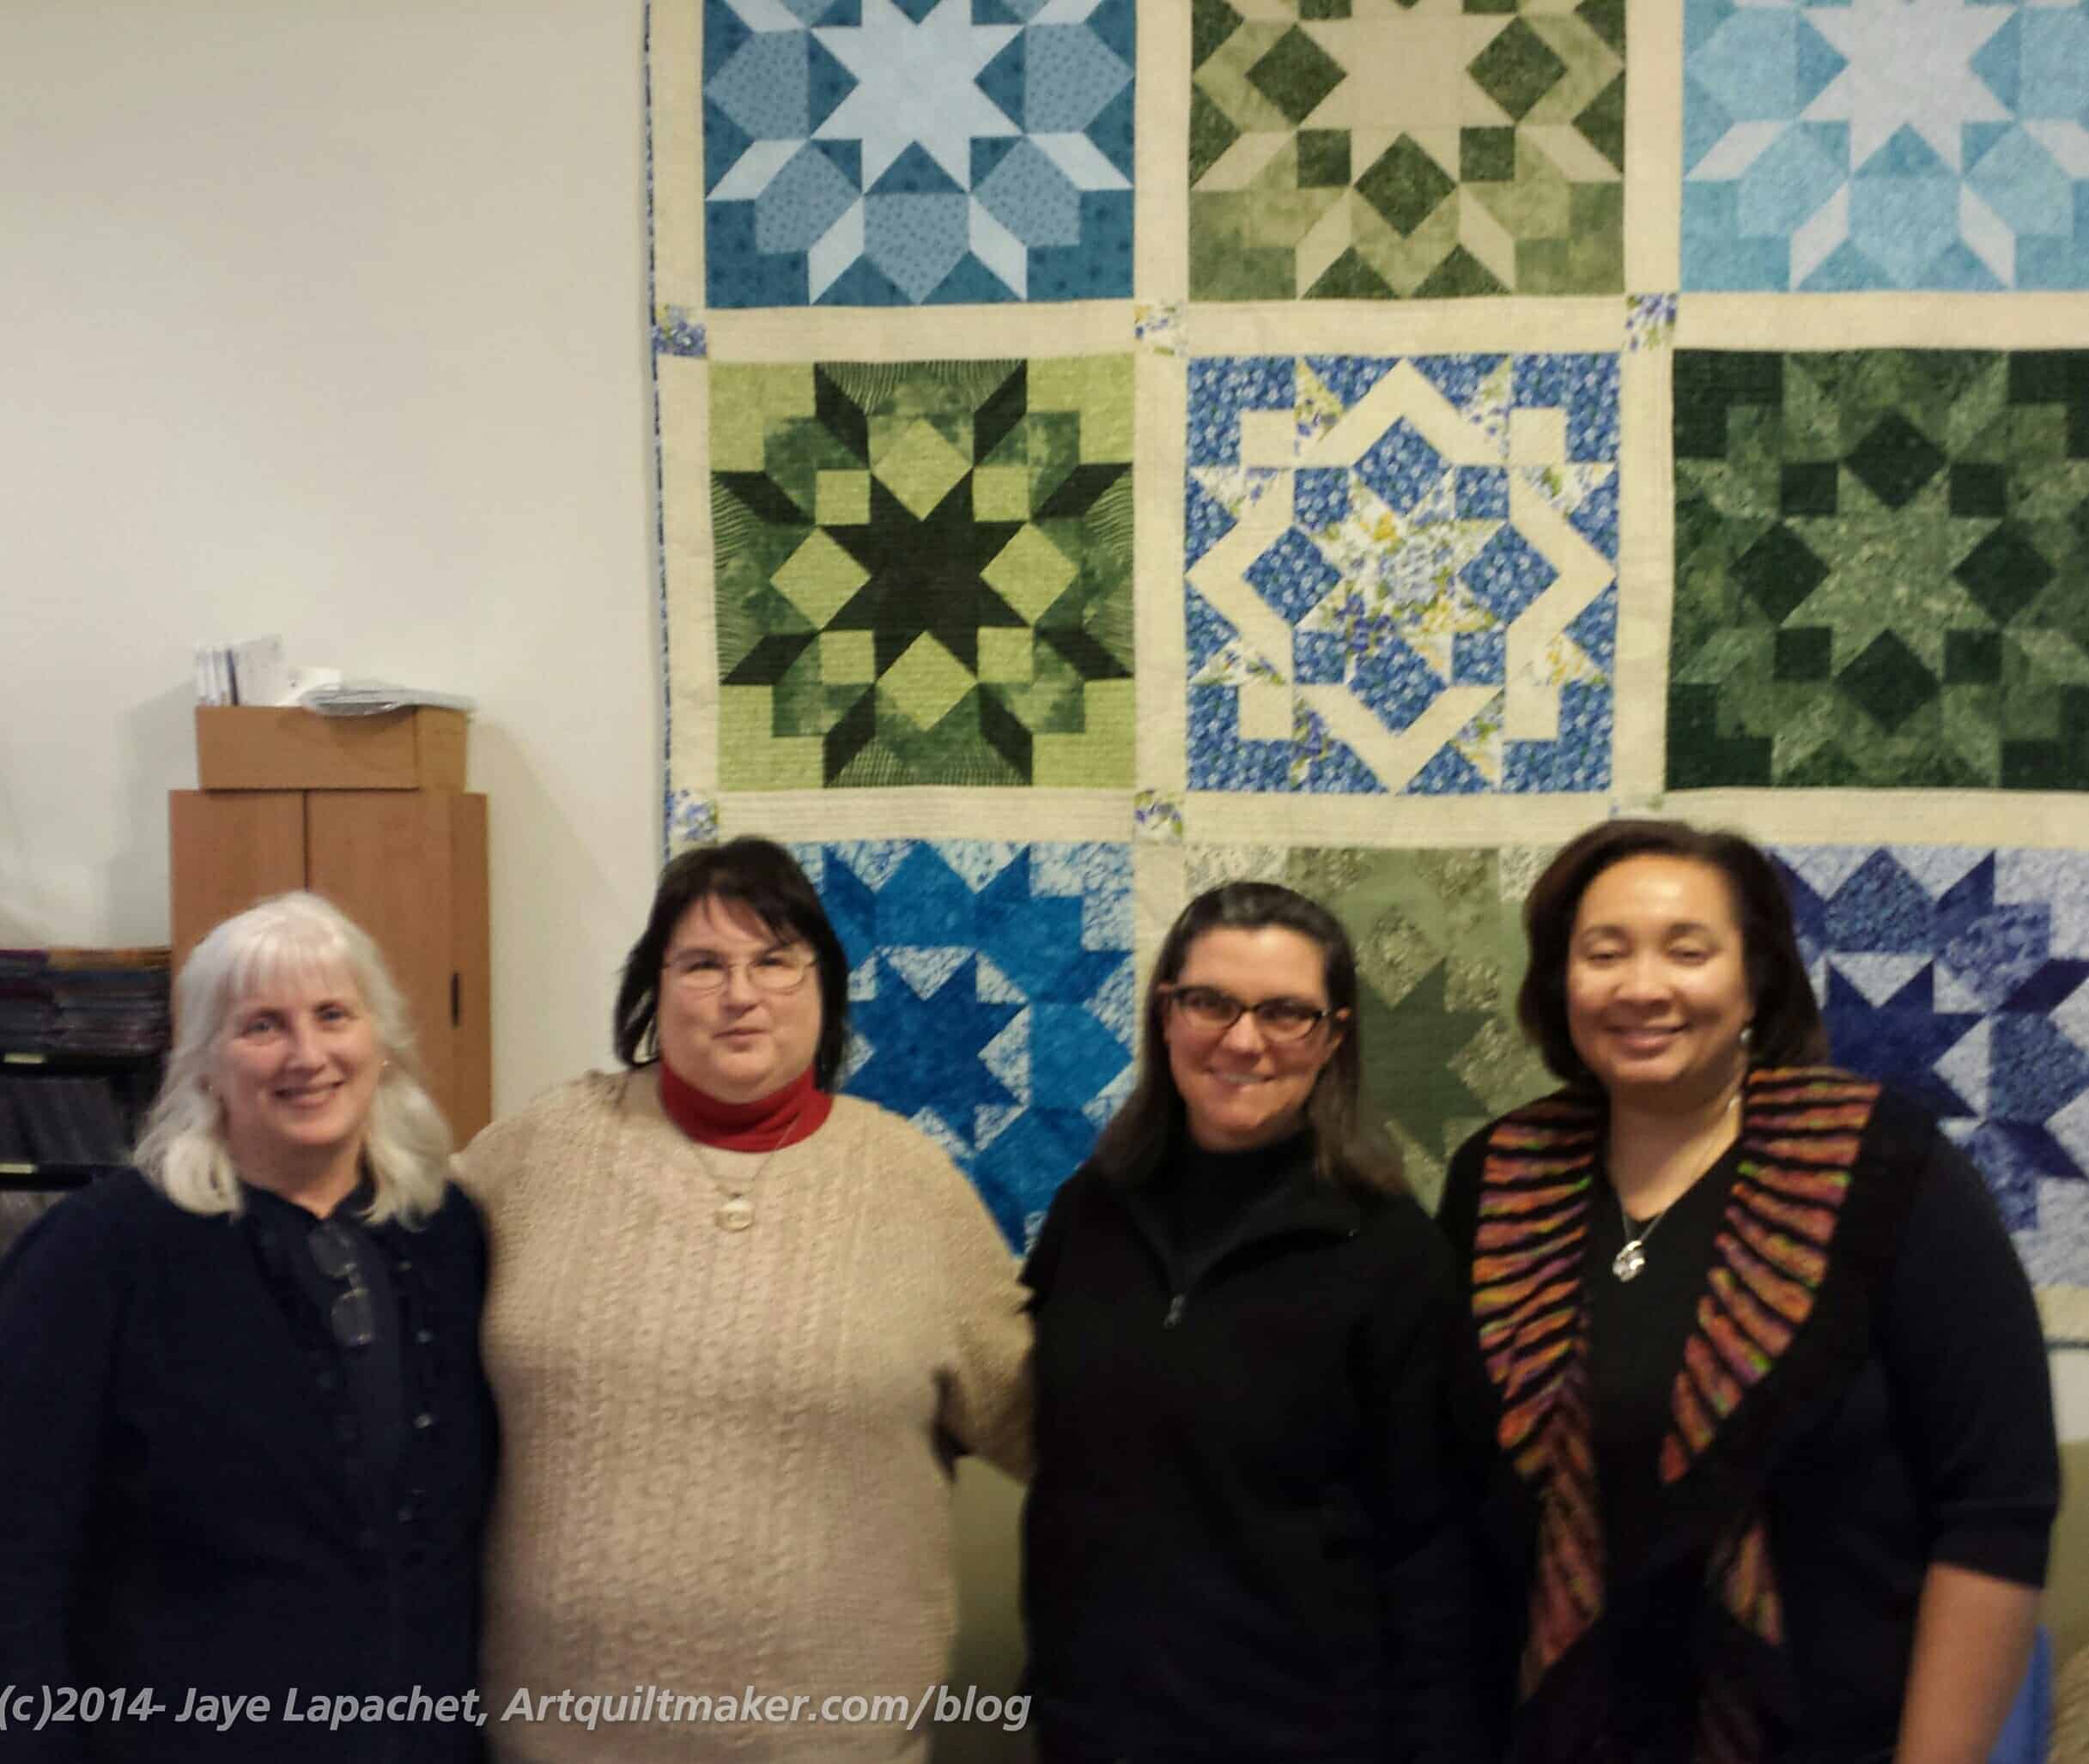
Twilters in MD
Since I was on the East Coast and that doesn’t happen every day, I invited several people over. It was a good opportunity to meet up with friends I don’t get a chance to see very often. Sadly, in the middle of winter, travel still isn’t that easy and only two people were able to make it. Tanesha and Torie came with bells on. Boy did they bring some show and tell! Tanesha made a slideshow for your viewing pleasure. I will post some more pictures about the show and tell later.
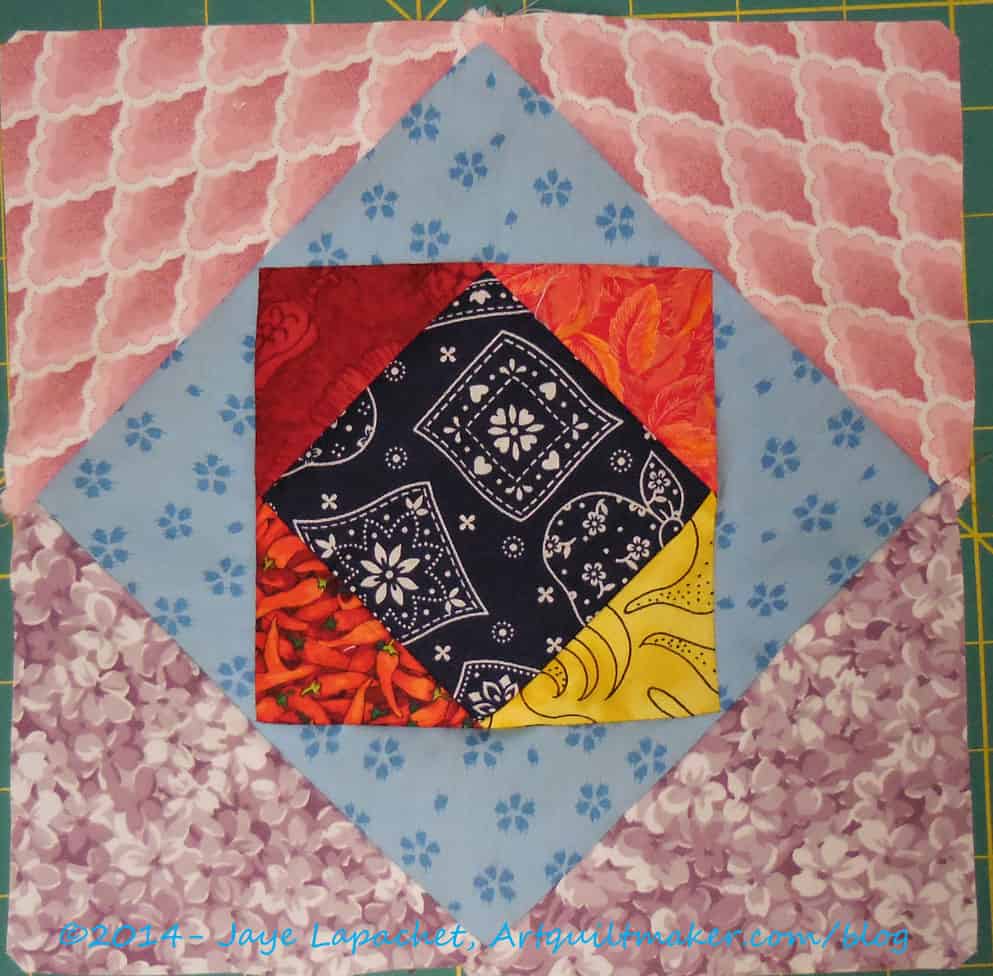
Snailtrail test
SIL wants to make a Snailtrail quilt. She and I both have the Accuquilt cutting system. She wants to cut out the quilt using her Accuquilt. One question that came up was whether there was a list of blocks with their sizes and the dies required to use them. I looked on the site and couldn’t find one. I also looked on Ebony Love’s site and couldn’t find one there either. There is a Snailtrail complete die, but it is for the electric Accuquilt* and neither of us plan to buy one. I suppose if they told that information, it would sell fewer dies, because people wouldn’t have to buy the specialty dies. Also, how could a person use this new die with a variety of different fabric?
I got out the bags of pieces SIL has cut already with her Accuquilt. They are waiting to be used in a quilt. I played around to see if I could figure out how to make her pieces work. The only pieces that are not exactly perfect, but work are the light blue triangles. They are QSTs, so the bunny ears are chopped off the wrong way and the bias is in an odd place. Still, SIL would only have to cut one more set of triangles for the outside of the block to make it bigger. The above block was made entirely from Accuquilt dies. They are:
3.5″ Square – die #55006
3″ QST – die #55396
3″ HST – die #55009
4.5″ square – die #55018 (value die)
Black NSGW Shirt for Paul
I made a third shirt as well. SIL had me do most of it myself, though she approved all of the steps. We hoped to do the last shirt as well, but time was short.
SIL also got me to watch Outlander (she can be very persuasive), the Starz series. I had sort of been avoiding the books for years. I even avoided them in the recent flurry of excitement over the series. Not sure why. I think I had a different idea of what they were about. SIL had it and put it on while we were sewing. Yes, I am going to borrow the book(s) and see what all the hype is about. Also, I need to figure out a way to watch the next part of the series when it comes out again. I don’t have Starz and don’t plan on buying it.
It was a great trip. BIL is a great cook, so I ate well every night. I also got rides everywhere which was fantastic. I felt like a princess: I didn’t have to do anything!
I’ll probably do a part two, and/or three, so stay tuned.
*It is really dumb for Accuquilt to make a die that only fits one of their cutting systems. Perhap sthe electric system has special sizes or something, but making a die for that machine only means that many customers cannot buy it without buying the new machine. I doubt many people will do it and it seems like bad marketing to me.
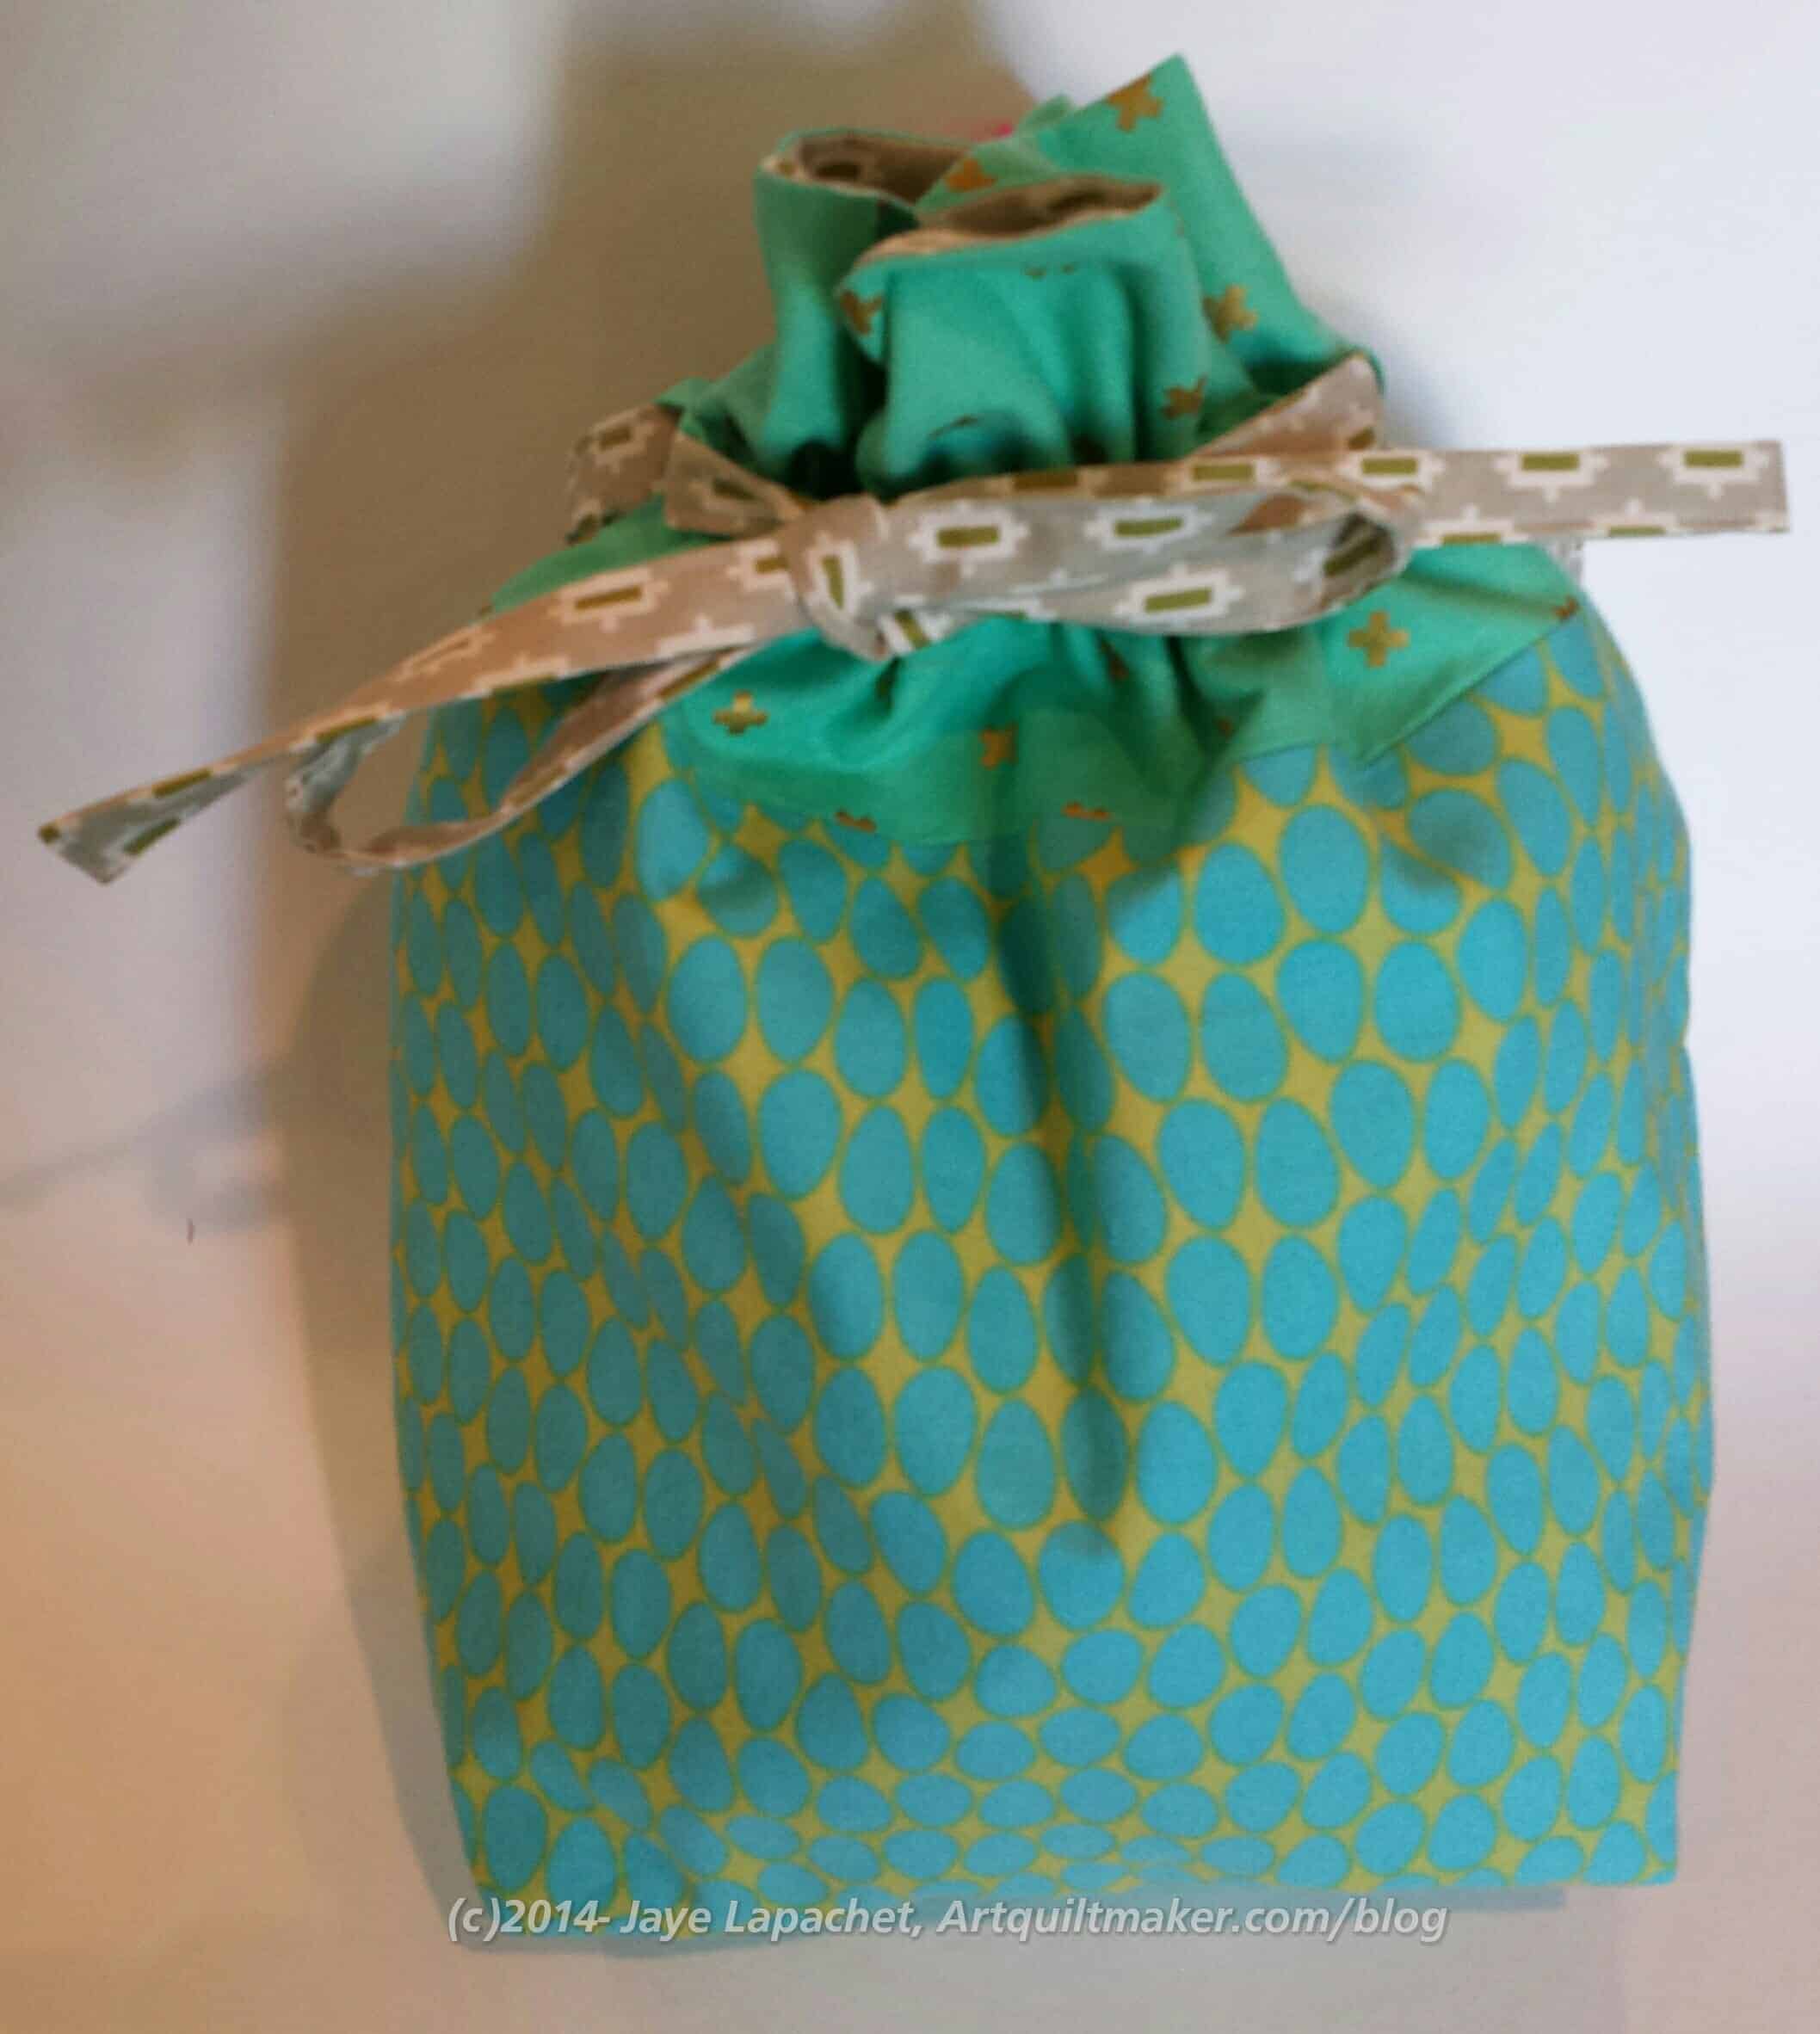
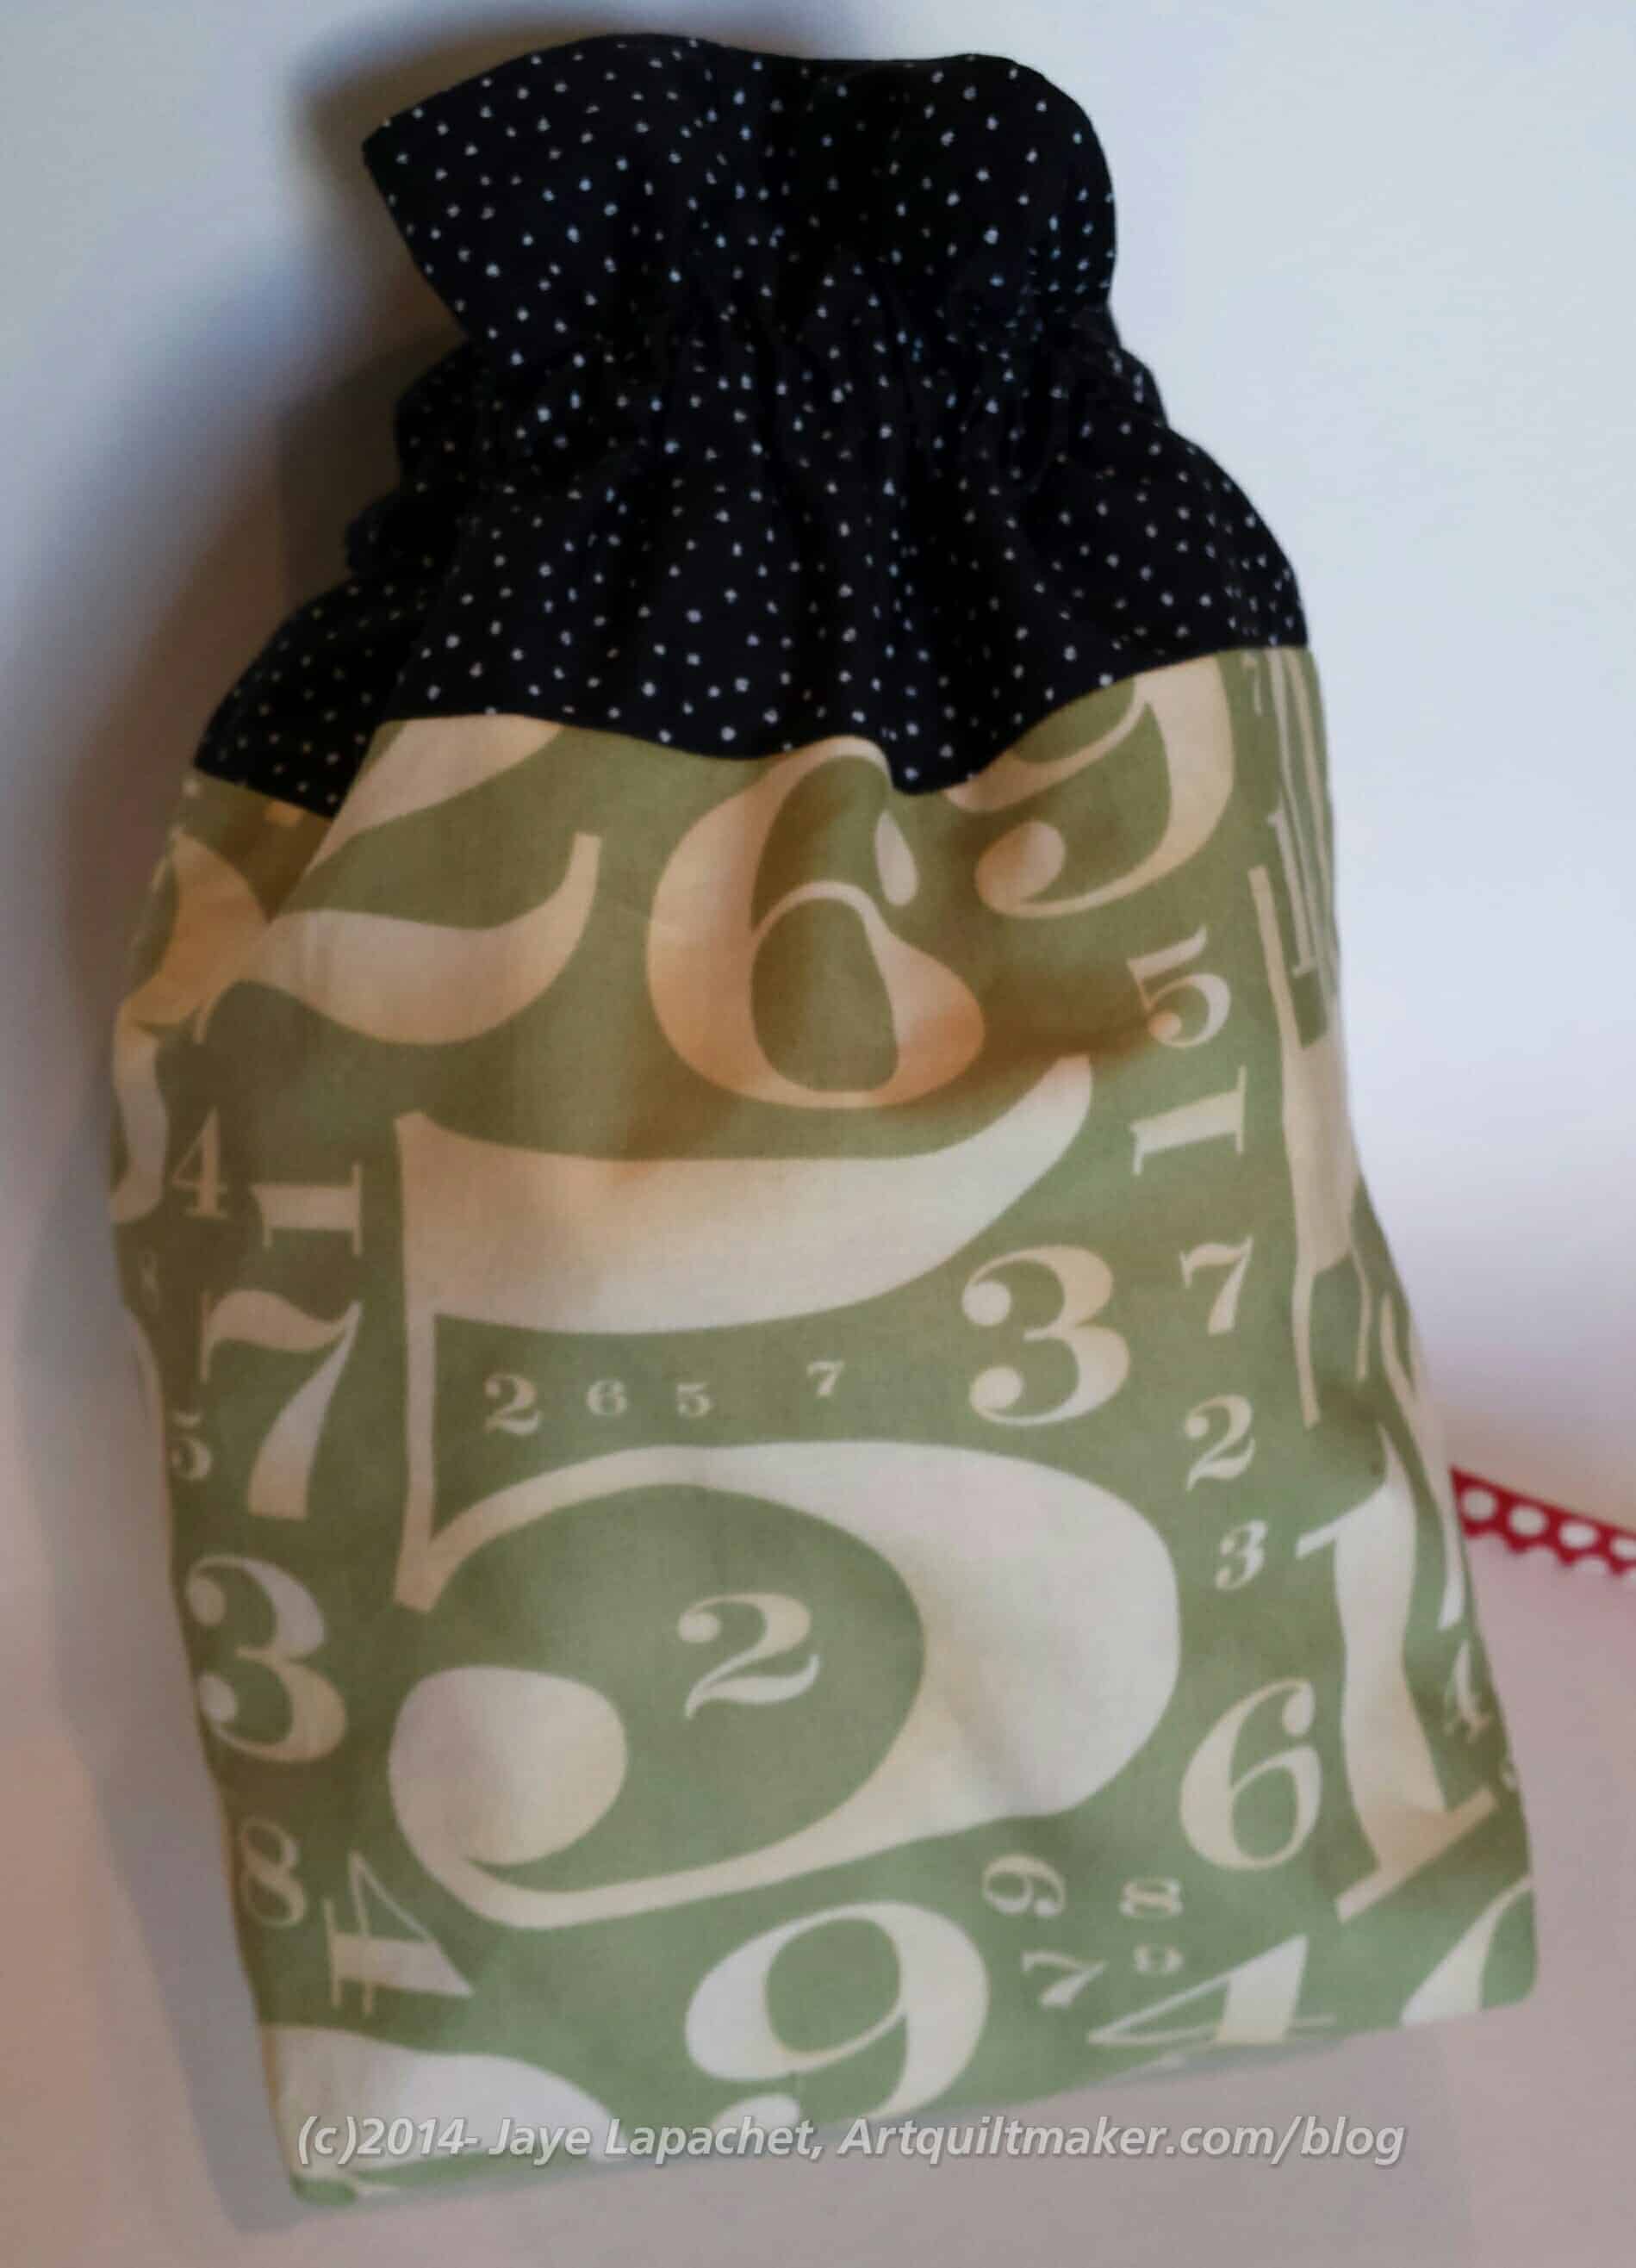
The other week when I made some gift bags I lost one. It turns out that I must have clipped a thread and been distracted while the bag and some other pieces slipped down behind my sewing table.
I, subsequently, dropped something else and felt like it was my birthday! I found all the things I had been wondering about.
Definition: “A bracelet is a loop of material, such as a strap or chain, that is intended to be worn around the wrist or forearm, without being attached to clothing. Sometimes, it is a combination of joined or interlocking loops. Frequently, it is made in a decorative style, and is worn as jewellery. It may have a supportive function, such as holding a wristwatch or other items of jewellery such as religious symbols or charms. Medical and identity information is marked on some bracelets, such as allergy bracelets, hospital patient-identification tags, and bracelet tags for newborn babies. If a bracelet is a single, inflexible loop, it is often called a bangle. When it is worn around the ankle it is called an ankle bracelet or anklet. A boot bracelet is used to decorate boots. Colloquially, handcuffs are sometimes called bracelets. Bracelets can be manufactured from metal, leather, cloth, plastic or other materials and sometimes contain jewels, rocks, wood, shells, crystals, metal or plastic hoops, pearls and many more materials.” (Wikipedia)
handcuffs
POW-Missing Persons bracelets
Smart bracelet lets you know how drunk you are
Charm bracelet –A charm bracelet is an item of jewelry worn around the wrist. It carries personal charms: decorative pendants or trinkets which are signifiers of important things in the wearer’s life. In recent history, Italian charm bracelets have become trendy. While traditional charms dangle, Italian charms feature individual pieces soldered flat onto the surface of the link.
Bangles –Main article: Bangle – Rigid bracelets, usually from metal, wood, or plastic, are referred to as bangles or bangle bracelets. They can be smooth, textured or set with stones. In India, glass bangles are common. Made from ordinary glass that is about 1/4 – 1/8 inch in width, they are worn in groups so that arm movement causes them to make a gracious sound rather like the clinking of wind chimes. In India, it is also common that young children will wear thin gold bangles on their hands and ankles.[2]
A spring closing type of bangle is used as both an adornment and a handy clip to hang things from. Marketed as a handbag hanger.
Slap bracelets –In the late 1980s and early 1990s, “slap bracelets” – flat, felt-covered metal strips that curved around one’s wrist when gently hit against it—were a popular fad. Often adorned with neon colors and vivid graphics, these bracelets could be found at inexpensive retailers. A rumor emerged that “slap bracelets” caused bleeding and puncture wounds and thus fell out of style.
Beaded bracelet –Usually made from loose beads with a center hole and connected by a piece of string or elastic band through the holes.
Link bracelets –Bracelets made from connecting or linking various or similar components or jewelry findings. Link bracelets can be made of a variety of materials included metals and gemstones.
Alternative health bracelets –Alternative health bracelets, such as ionized bracelets, karma bracelets, magnetic bracelets, Power Balancehologram bracelets, etc., are a separate group not distinguished by their design but by the beneficial function claimed for them by their manufacturers and distributors. Karma bracelets are made from wood beads and may contain various charms. Associated with bringing good luck and good karma to those who choose to wear it.[citation needed] No claims of effectiveness made by manufacturers have ever been substantiated by independent sources.[3]
Sports bracelets –Main article: Gel bracelet -The use of colored silicone rubber as a material for producing sports bracelets was popularized by Nike and Lance Armstrong through the Yellow Livestrong wristband starting in May 2003.[4] Their success has led to the silicone bracelet becoming a high cost tool for various awareness, information, and charity campaigns. This can be likened to the use of awareness ribbons for similar purposes. These bracelets are also known as “baller id bands”, “wristbands” or “balling bands”[citation needed].
Post the direct URL (link) where your drawing, doodle, artwork is posted (e.g. your blog, Flickr) in the comments area of this post. I would really like to keep all the artwork together and provide a way for others to see your work and/or your blog.
We are also talking about this on Twitter. Use the hashtag #CPP
The Creative Prompt Project, also, has a Flickr group, which you can join to post your responses. I created this spot so those of you without blogs and websites would have a place to post your responses.
jewelry worn on the wrist
The Nymi itself is a bracelet, virtually indistinguishable from the Fitbit Flex or the Jawbone Up.
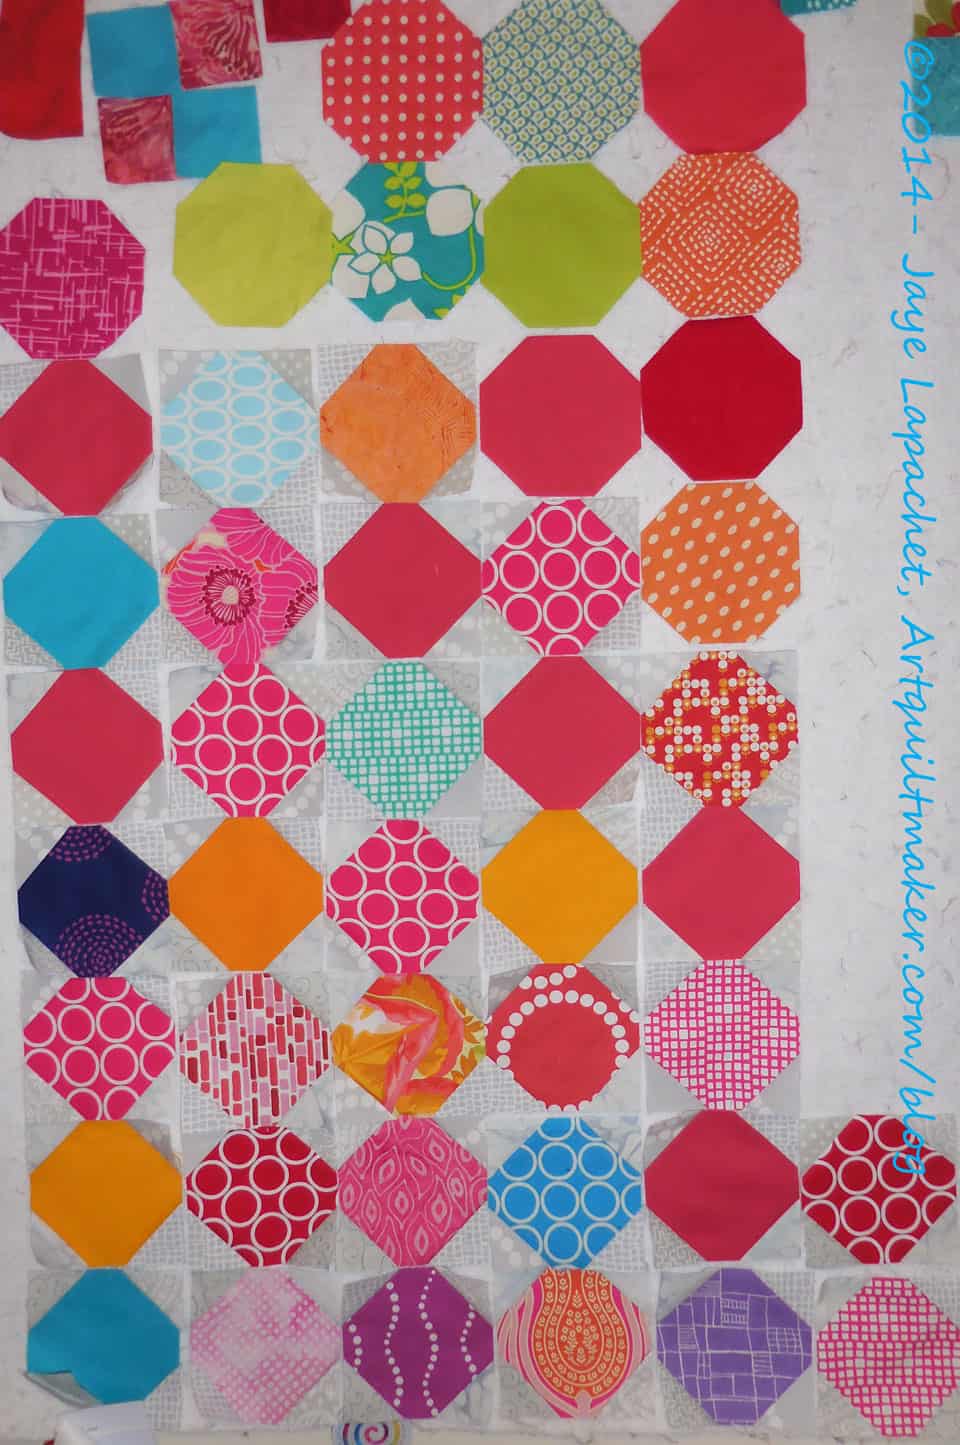
Progress is being made, but I have still only worked on the snowball blocks since the last post.
There is certainly a lot of pink! And, secondarily, a lot of warm colors. I used most of the cool colors on the Russian Rubix and want to use what I have.
The good news is that I have to make the 9 Patches, so I can use more cool colors there if the design warrants it.
I am adding the corner pieces using the leaders and enders method. Adding the triangles to the corners makes the octagons look really different from the octagons in the Russian Rubix quilt. I am glad, because it keeps the piece from being boring.
As I said the other day, it is the practice of the group to make bags as thank yous for the BAMQG officers. I made all, but one of the bags for the main officers.
I really enjoyed last year at BAMQG. I thought Kelly started off strong and had some good challenges. Remember the Kelly Bag? I want to do that practice again and her technique of making a bag out of the practice really makes me want to do it. There is nothing like having a bunch of ugly muslin 12″ squares laying around to put the best of us off FMQ practice.
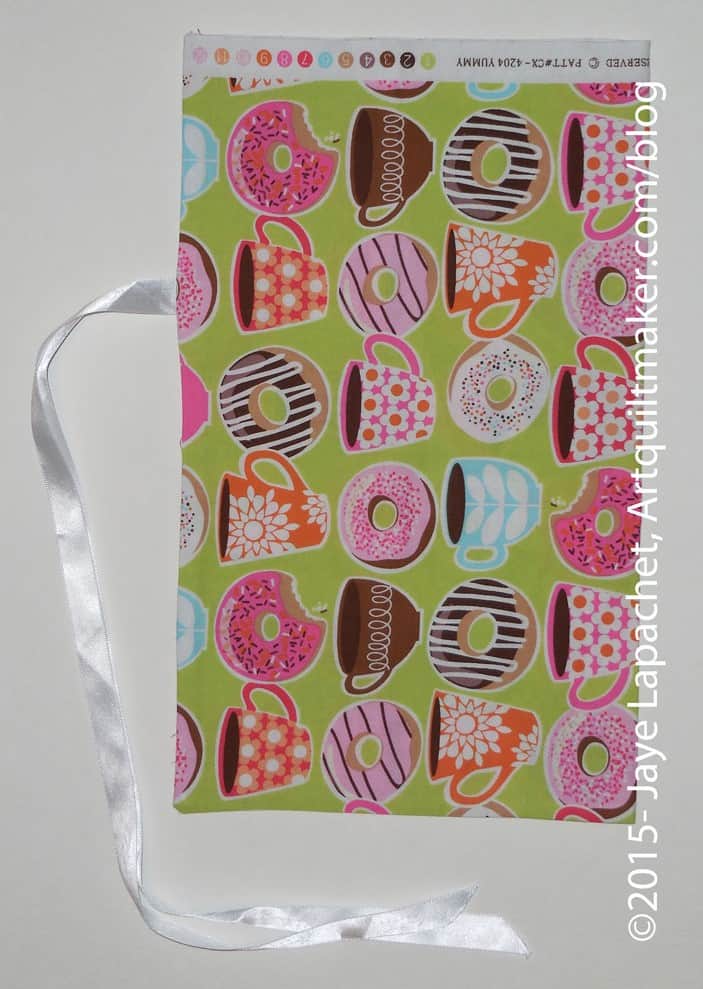
I got some Cotton + Steel and thought I would use some of it for her back along with the egg fabric I don’t remember the name of and some Bonnie and Camille on the inside and for the tie.
Claire’s Bag
Claire’s bag is much more lively. She is such a little dynamo that I wanted some cheerful fabric. Making her bag coincided with me rummaging through my multicolor fabric bin.
I really should do a review of the pattern. I made these from the Jeni Baker Drawstring Bag pattern, which is so popular now. They are relatively fast to make. We’ll see if I do a review.
This is a good project for other guilds as thank yous, because if you can get people to make the bags everyone else only had to bring a few small gifts. I never liked the idea of getting blocks as a thank you. Yes, you get a little of each person, but you have to deal with another UFO and their foibles in sewing. JMO YMMV, of course.
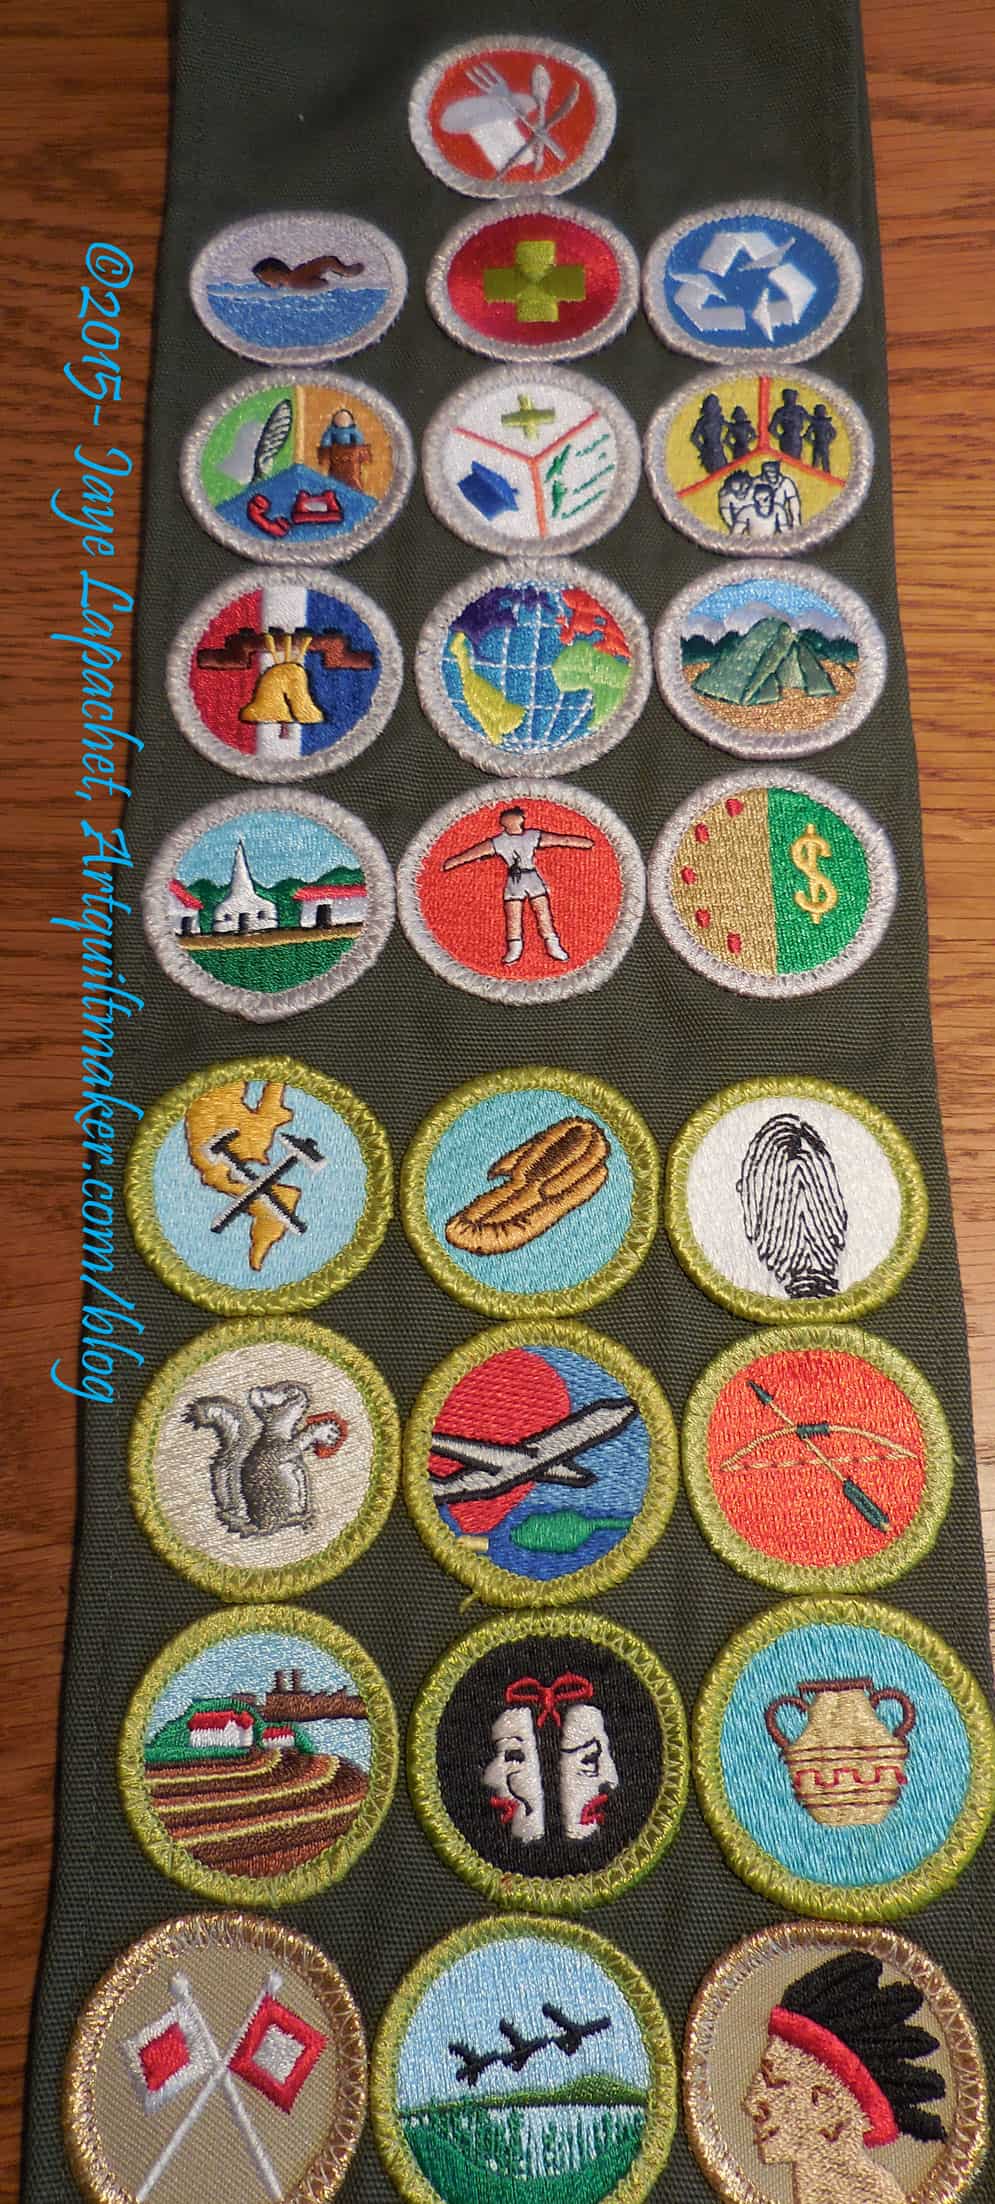
Last time I had to sew on merit badges, I thought it would be the end. However, the Young Man came home with a few more than he needed sewn before the Eagle Scout Board of Review. I don’t even think this will be the last time, because if (and I am pretty sure he will, but I don’t want to tempt fate) he gets his Eagle rank I’ll have to sew all the accoutrements of that onto his sash and shirt.
My mom commented, when she ironed his uniform for the Eagle Scout Board of Review, that the shirt was really cheap. I wonder if I should get one that is more substantial. More likely, I think, is making a shadow case picture with the shirt and the sash, etc in it for him to hang on his wall.
The Eagle Scout Board of Review was last Tuesday (a week ago) and he is now a candidate for the rank of Eagle Scout. He has been approved by the local district. His application will be sent to the National Organization for approval. Cross your fingers!
It was cold here*. I wore extra clothes and two jackets when I went on my walk. Nights were hell, because even though I sleep in flannel pajamas, I was cold at night.
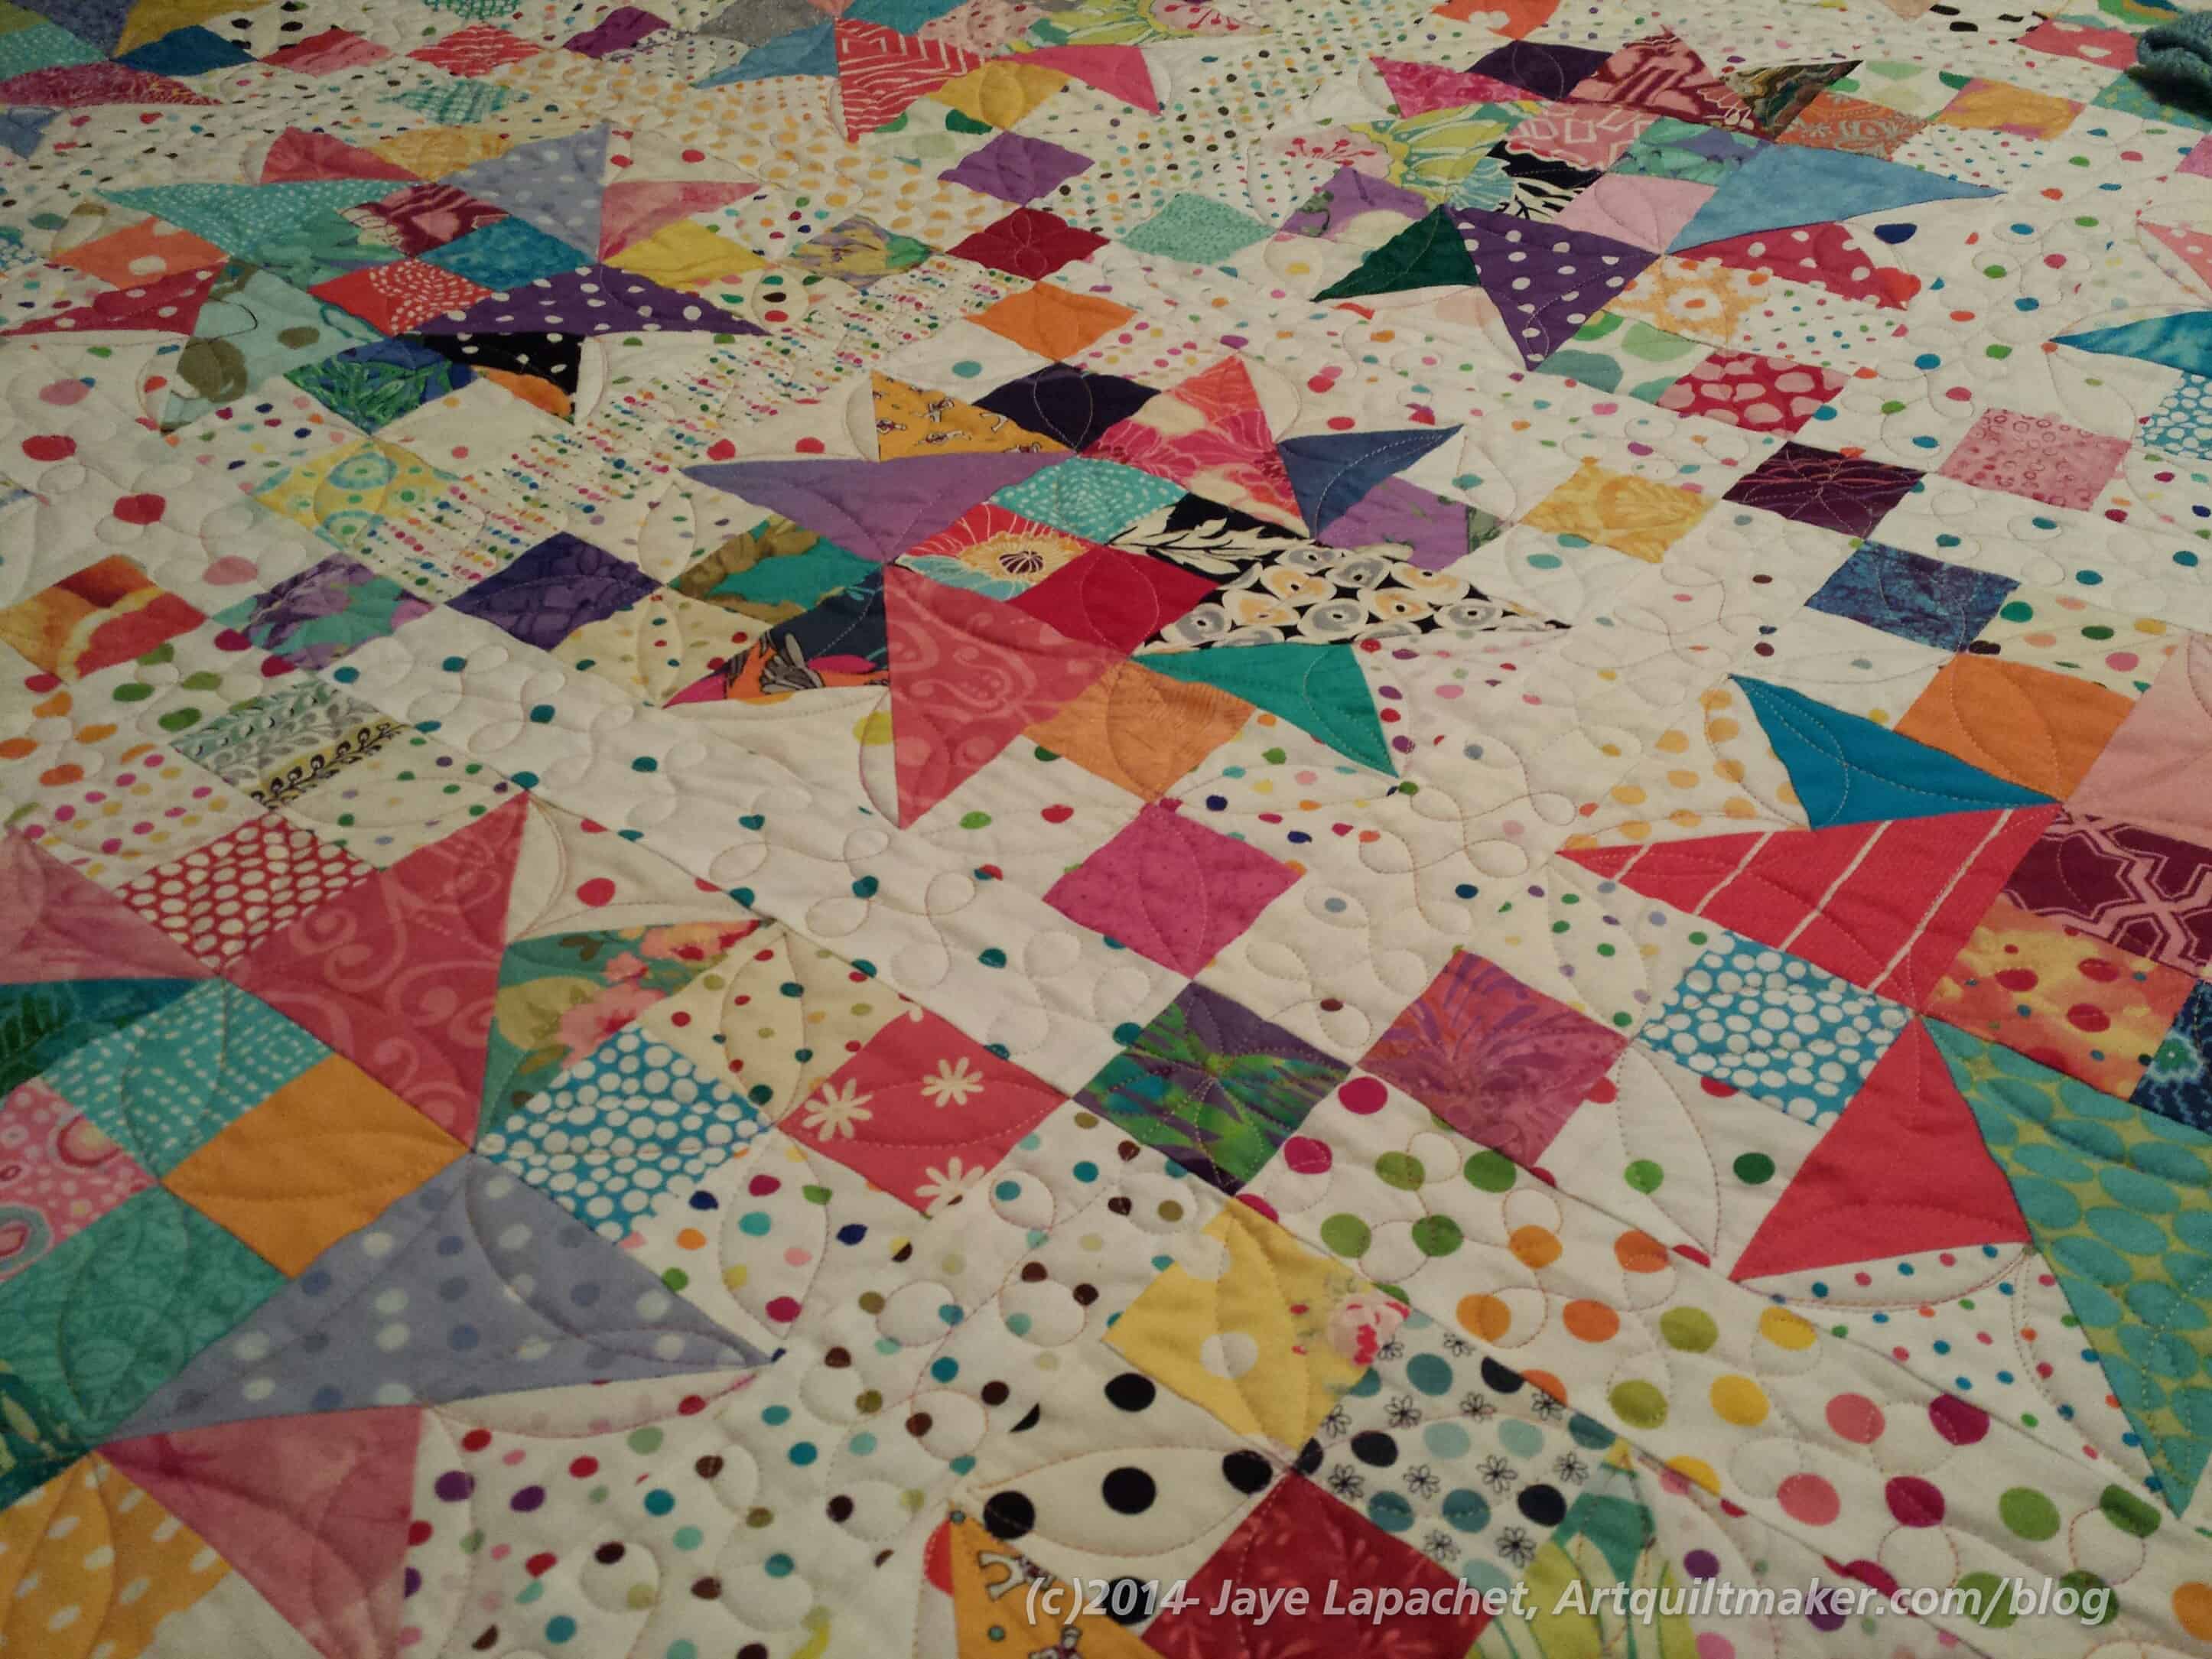
I have a lot quilts laying around, so I threw Scrapitude on the bed on top of Thoughts on Dots, the Sampler and Water Kaleidoscope and down duvet. I don’t know if it helped, but it certainly gave the new room (sadly in need of new decor) a temporary new look. Having Scrapitude on the bed also made me look at it more frequently.
Scrapitude Carnivale on the bed
As you might recall, I did kind of a controlled scrappy palette for that quilt. I didn’t want to throw everything in and hope for the best. I wanted to secure a good outcome, as much as I could, in advance, thus the dotty background on white. Still, as I walk around and look at the quilt, I think about the fabrics I used and consider which I would use again and which I would toss out.
In the recent episode by Jinny Beyer for the 2015 Craftsy BOM, Jinny said that you need dark-darks as well as light lights. I think that is true for certain projects. I have to admit that I would toss most of the darks, especially the blacks and dark greens, I included if I were making the exact same quilt again. They look like holes in the quilt.
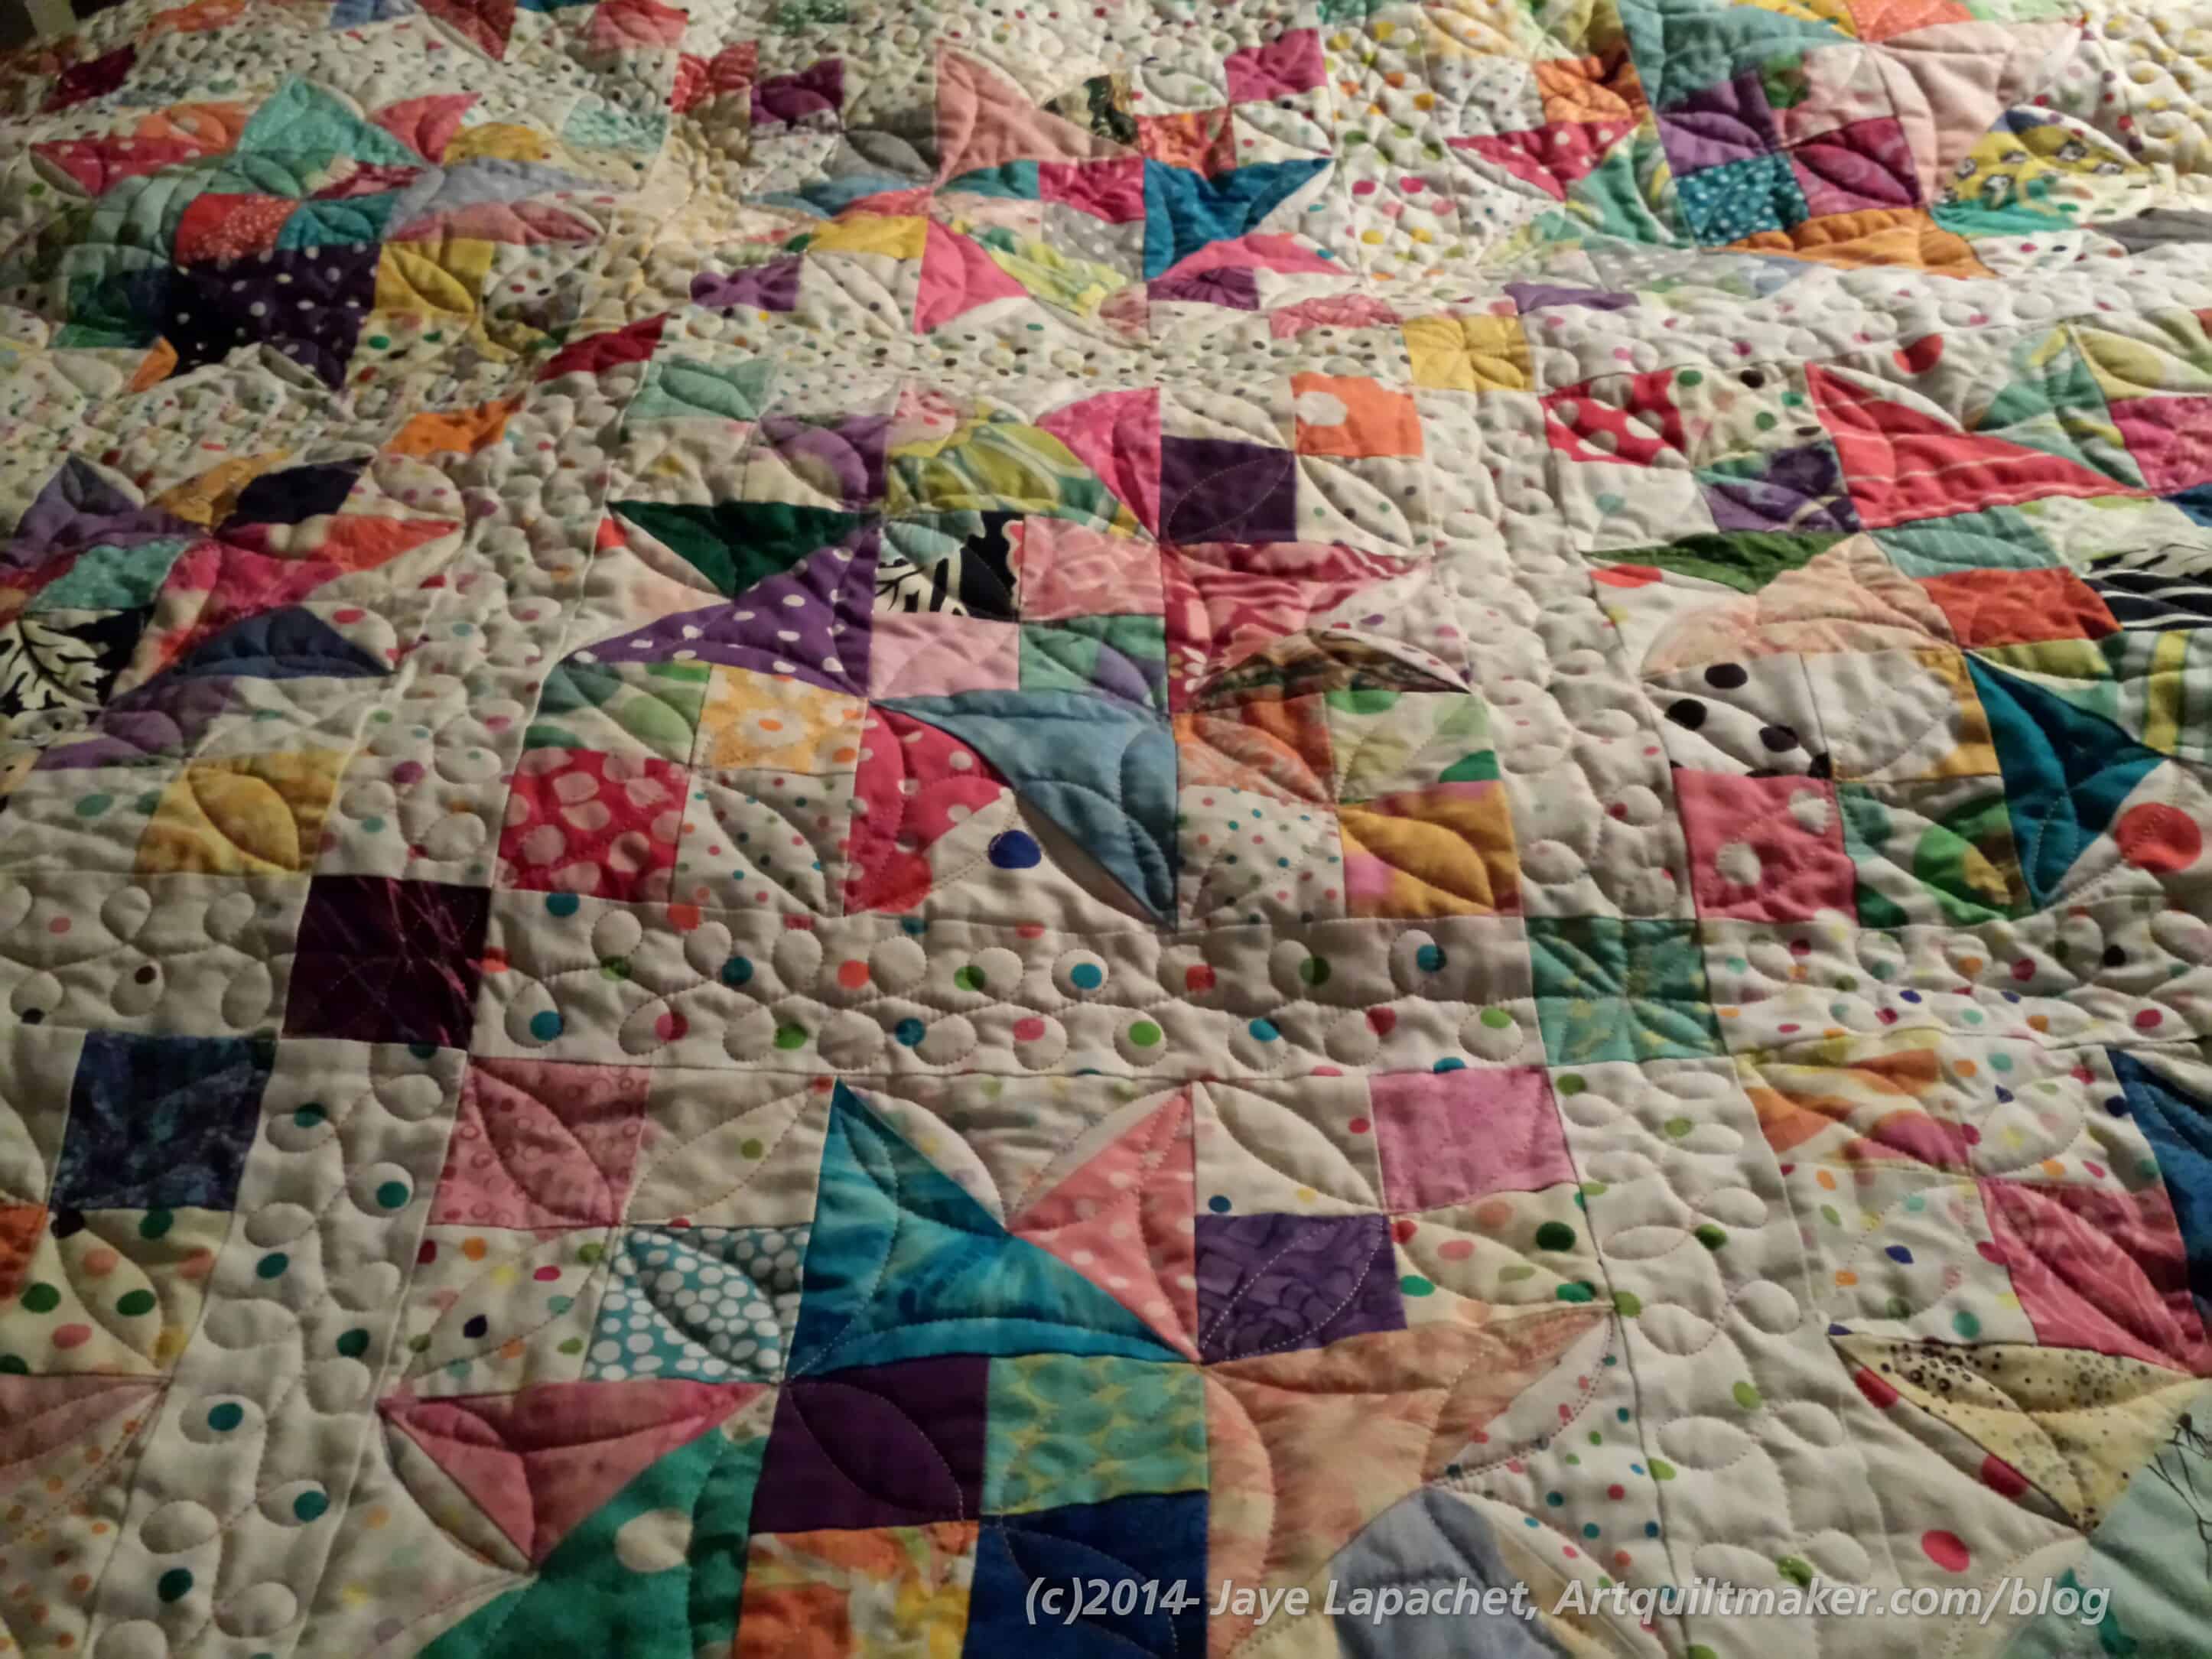
Scrapitude at Night on the bed
There are also some lights that I would get rid of because they make parts invisible and areas of the quilt look completely different from other areas. There is one block that looks like a Friendship Star with some four patches around it rather than the complex star, with the interesting triangle legs, that it is supposed to be.
I have to say, though that I enjoy looking at the pieces I used. It makes me think that scrap quilts are much more interesting and you can look at them longer than other quilts. I certainly have not yet gotten tired of look at this quilt.
Do you see your quilts differently once you put it on the bed?
Nota bene: I live in California – on the coast and it doesn’t snow here. I have thin California blood not robust snow blood. ‘Cold’ is relative.
As you may remember, it is the practice of the BAMQG members to make bags for the officers. This year I made two bags for two of the officers and two for the Charity Girls. The Charity Girls are not on the list, but Michelle and Peggy did such a fantastic job this year that I couldn’t resist.
“Fantastic Job” does not even begin to describe how inspired I have been to make donation quilts. I have been contemplating how I felt in 2014 about making donation quilts, which you can read all about if you want to go back through the year, but I can’t really wrap my head around it. Yes, it was an opportunity to sew. Yes, it was an opportunity to work with others either like Gerre and I did or by handing in a quilt top and having someone else quilt it. Those descriptions sound so selfish. Clearly making these quilts was not about me. It was about making something for someone who needed a bit of comfort. Sadly, I think, if I am honest, the why goes back to me. I enjoy making the donation quilts. I enjoy working with others. I enjoy handing off tops for someone else to quilt. I I I.
2015 Bag for Michelle
Regardless of my selfishness in doing good, I thought the Charity Girls did an awesome job and I wanted them to feel the love, thus the bags.
We had a discussion at the CQFA social on Saturday about Workshop projects and how they are not always the kind of projects one wants to finish. There are a lot of variables going into the workshop -the right fabric and supplies, working in an unfamiliar environment, etc. – that conspire to make you learn something, but not always like the end result.
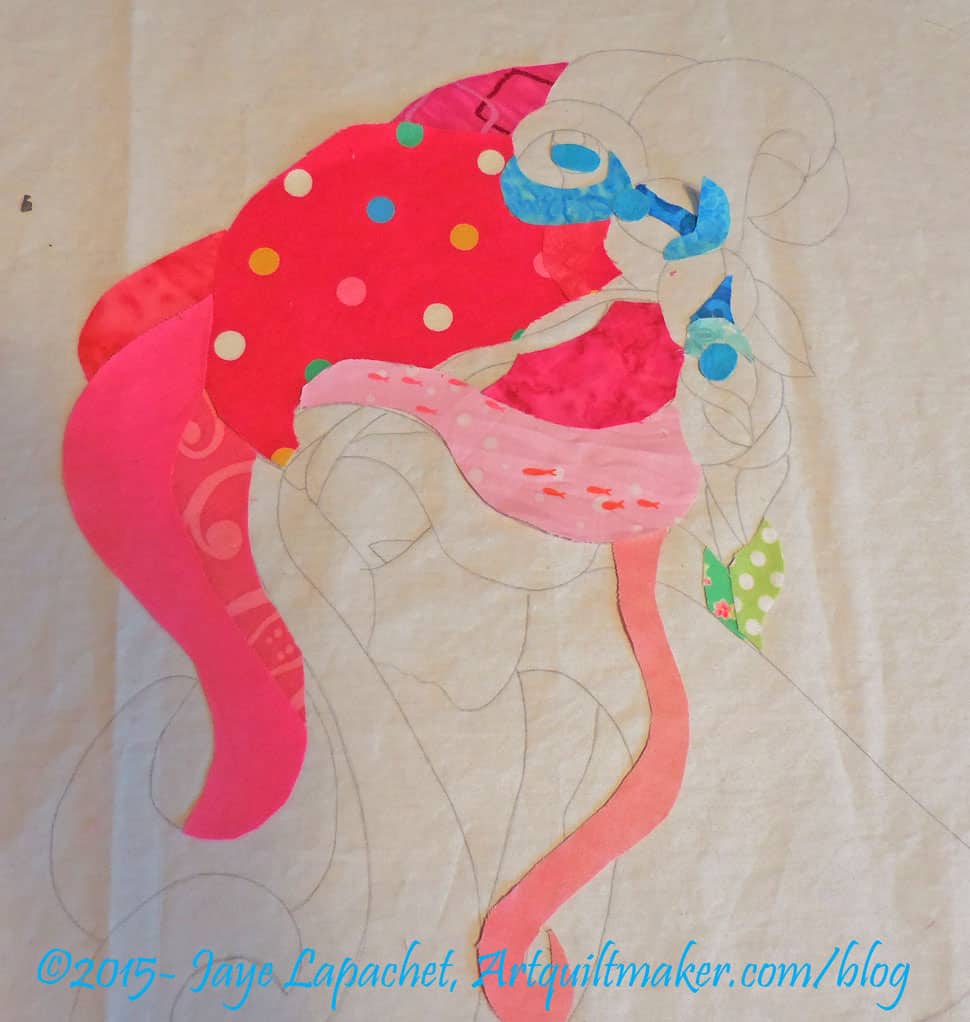
Serendipity Lady – Beginning Work
That is not the case with Serendipity Lady. I have wanted to do this design ever since I made stained and leaded glass panels back in the dark ages. Caroline’s workshop at CQFA last spring (?) gave me the means in fabric and the inspiration to make this dream a reality.
The problem was that my piece had so many small pieces that cutting out the pieces straight from the fabric became an issue. I went back and tried a few times and failed – or didn’t succeed as thoroughly as I would have liked. I didn’t want to simplify the pattern and I didn’t want to blow it up larger either. Struggling with the mechanics of making a piece does not make it fun. Finally, I put it aside to mull over.
This was disappointing, because I came home so jazzed about this project after the workshop. Creating is a struggle, but for this one, I just wanted it to work. Sadly, that is not the way ‘making’ works.
In the mulling process, I came up with the idea of making templates for each piece. I was about to embark on that line of thought using the kind of cardstock (tagboard??) I used to use for cutting the templates for stained and leaded glass panels when I had lunch with Maureen and Dolores.
I mentioned my problem to them and how I wanted to use templates and asked their advice. They both immediately went to freezer paper and patiently explained how to use freezer paper to make the templates. I couldn’t really envision the process in my head. It became clearer when they kind of walked me through the process, reminding me to trace the design backwards.
What Process Looks Like
Again, I was really excited so I came home, taped the design to my sliding glass door and retraced the pattern backwards. Then I traced the backwards pattern on to freezer paper and sat in front of the TV and cut it out.
Again, those tiny little pieces were not my friend. At the moment I have them all paperclipped together, but that is only because I keep forgetting to get an envelope each time I go downstairs.
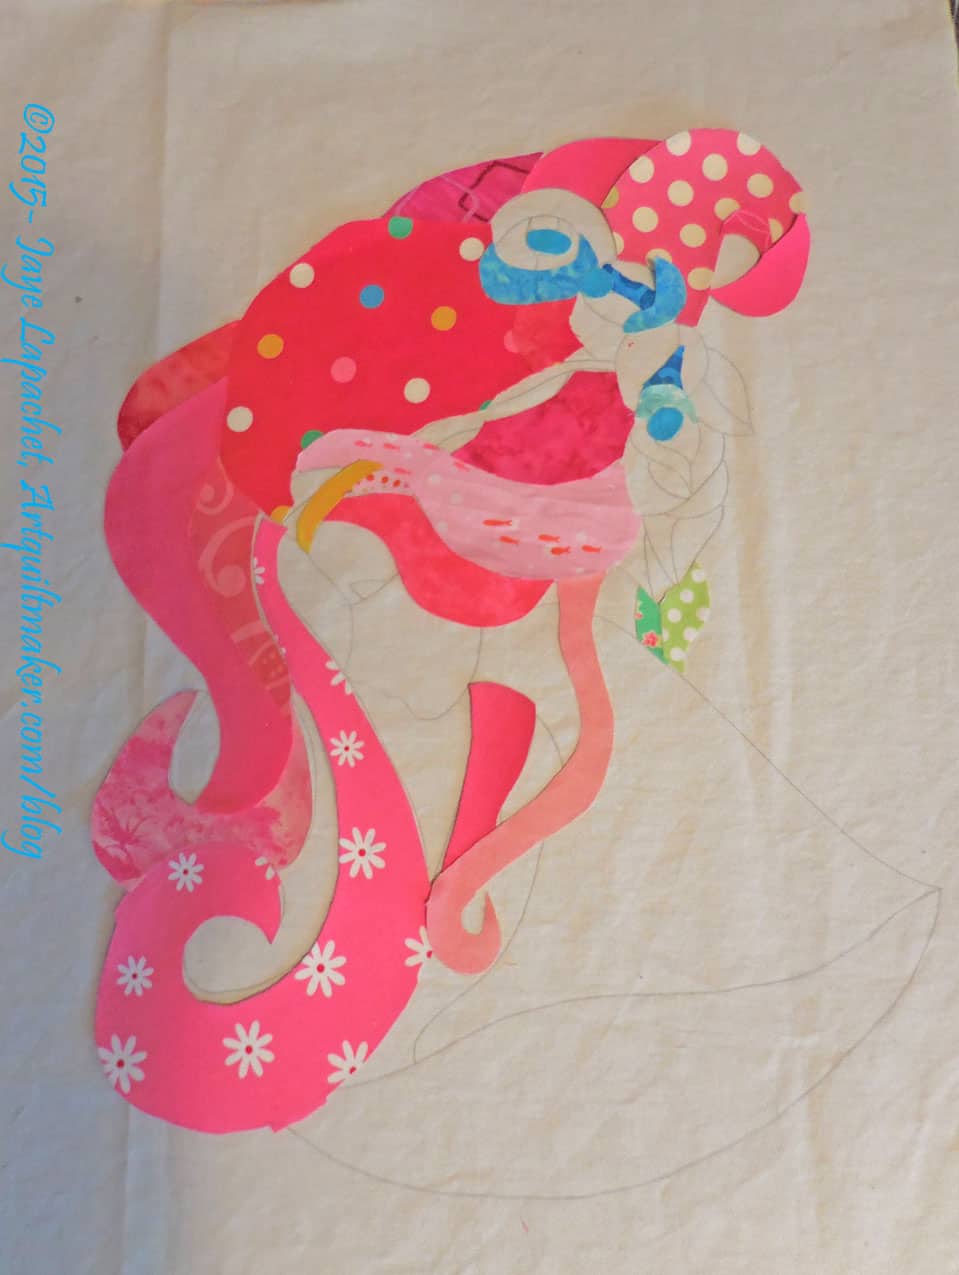
Serendipity Lady – Weekend Work
Next I started applying freezer paper to fabric. Then the real fun began. I threw out some fabrics after putting them near other fabrics and the picture really started to take shape. I am not done and I haven’t glued down the pieces yet, but I really had a lot of fun making some serious progress.
My mind is whirling with the possibilities of adding a few beads, embroidering the eyelash, etc. Fun!