Berry Linux is a bootable CD Linux with automatic hardware detection and support for many graphics cards, sound cards, SCSI and USB, etc.
Wendell Berry – The backdrop for many of Wendell Berry’s short stories and a number of his novels, Port William is a fictitious town located in Kentucky
Kansas City Chiefs’ Eric Berry
Blueberry cobbler
Definition: “The botanical definition of a berry is a fleshy fruit produced from a single flower and containing one ovary. Grapes and avocados are two common examples. The berry is the most common type of fleshy fruit in which the entire ovary wall ripens into an edible pericarp. They may have one or more carpels. The seeds are usually embedded in the fleshy interior of the ovary, but there are some non-fleshy exceptions, such as peppers, that have air rather than pulp around their seeds.
A plant that bears berries is said to be bacciferous or baccate (a fruit that resembles a berry, whether it actually is a berry or not, can also be called “baccate”).
In everyday English, “berry” is a term for any small edible fruit. These “berries” are usually juicy, round, brightly coloured, sweet or sour, and do not have a stone or pit, although many seeds may be present.
Many berries, such as the tomato, are edible, but others in the same family, such as the fruits of the deadly nightshade (Atropa belladonna) are poisonous to humans. (Wikipedia)
Post the direct URL (link) where your drawing, doodle, artwork is posted (e.g. your blog, Flickr) in the comments area of this post. I would really like to keep all the artwork together and provide a way for others to see your work and/or your blog.
We are also talking about this on Twitter. Use the hashtag #CPP
The Creative Prompt Project, also, has a Flickr group, which you can join to post your responses. I created this spot so those of you without blogs and websites would have a place to post your responses.
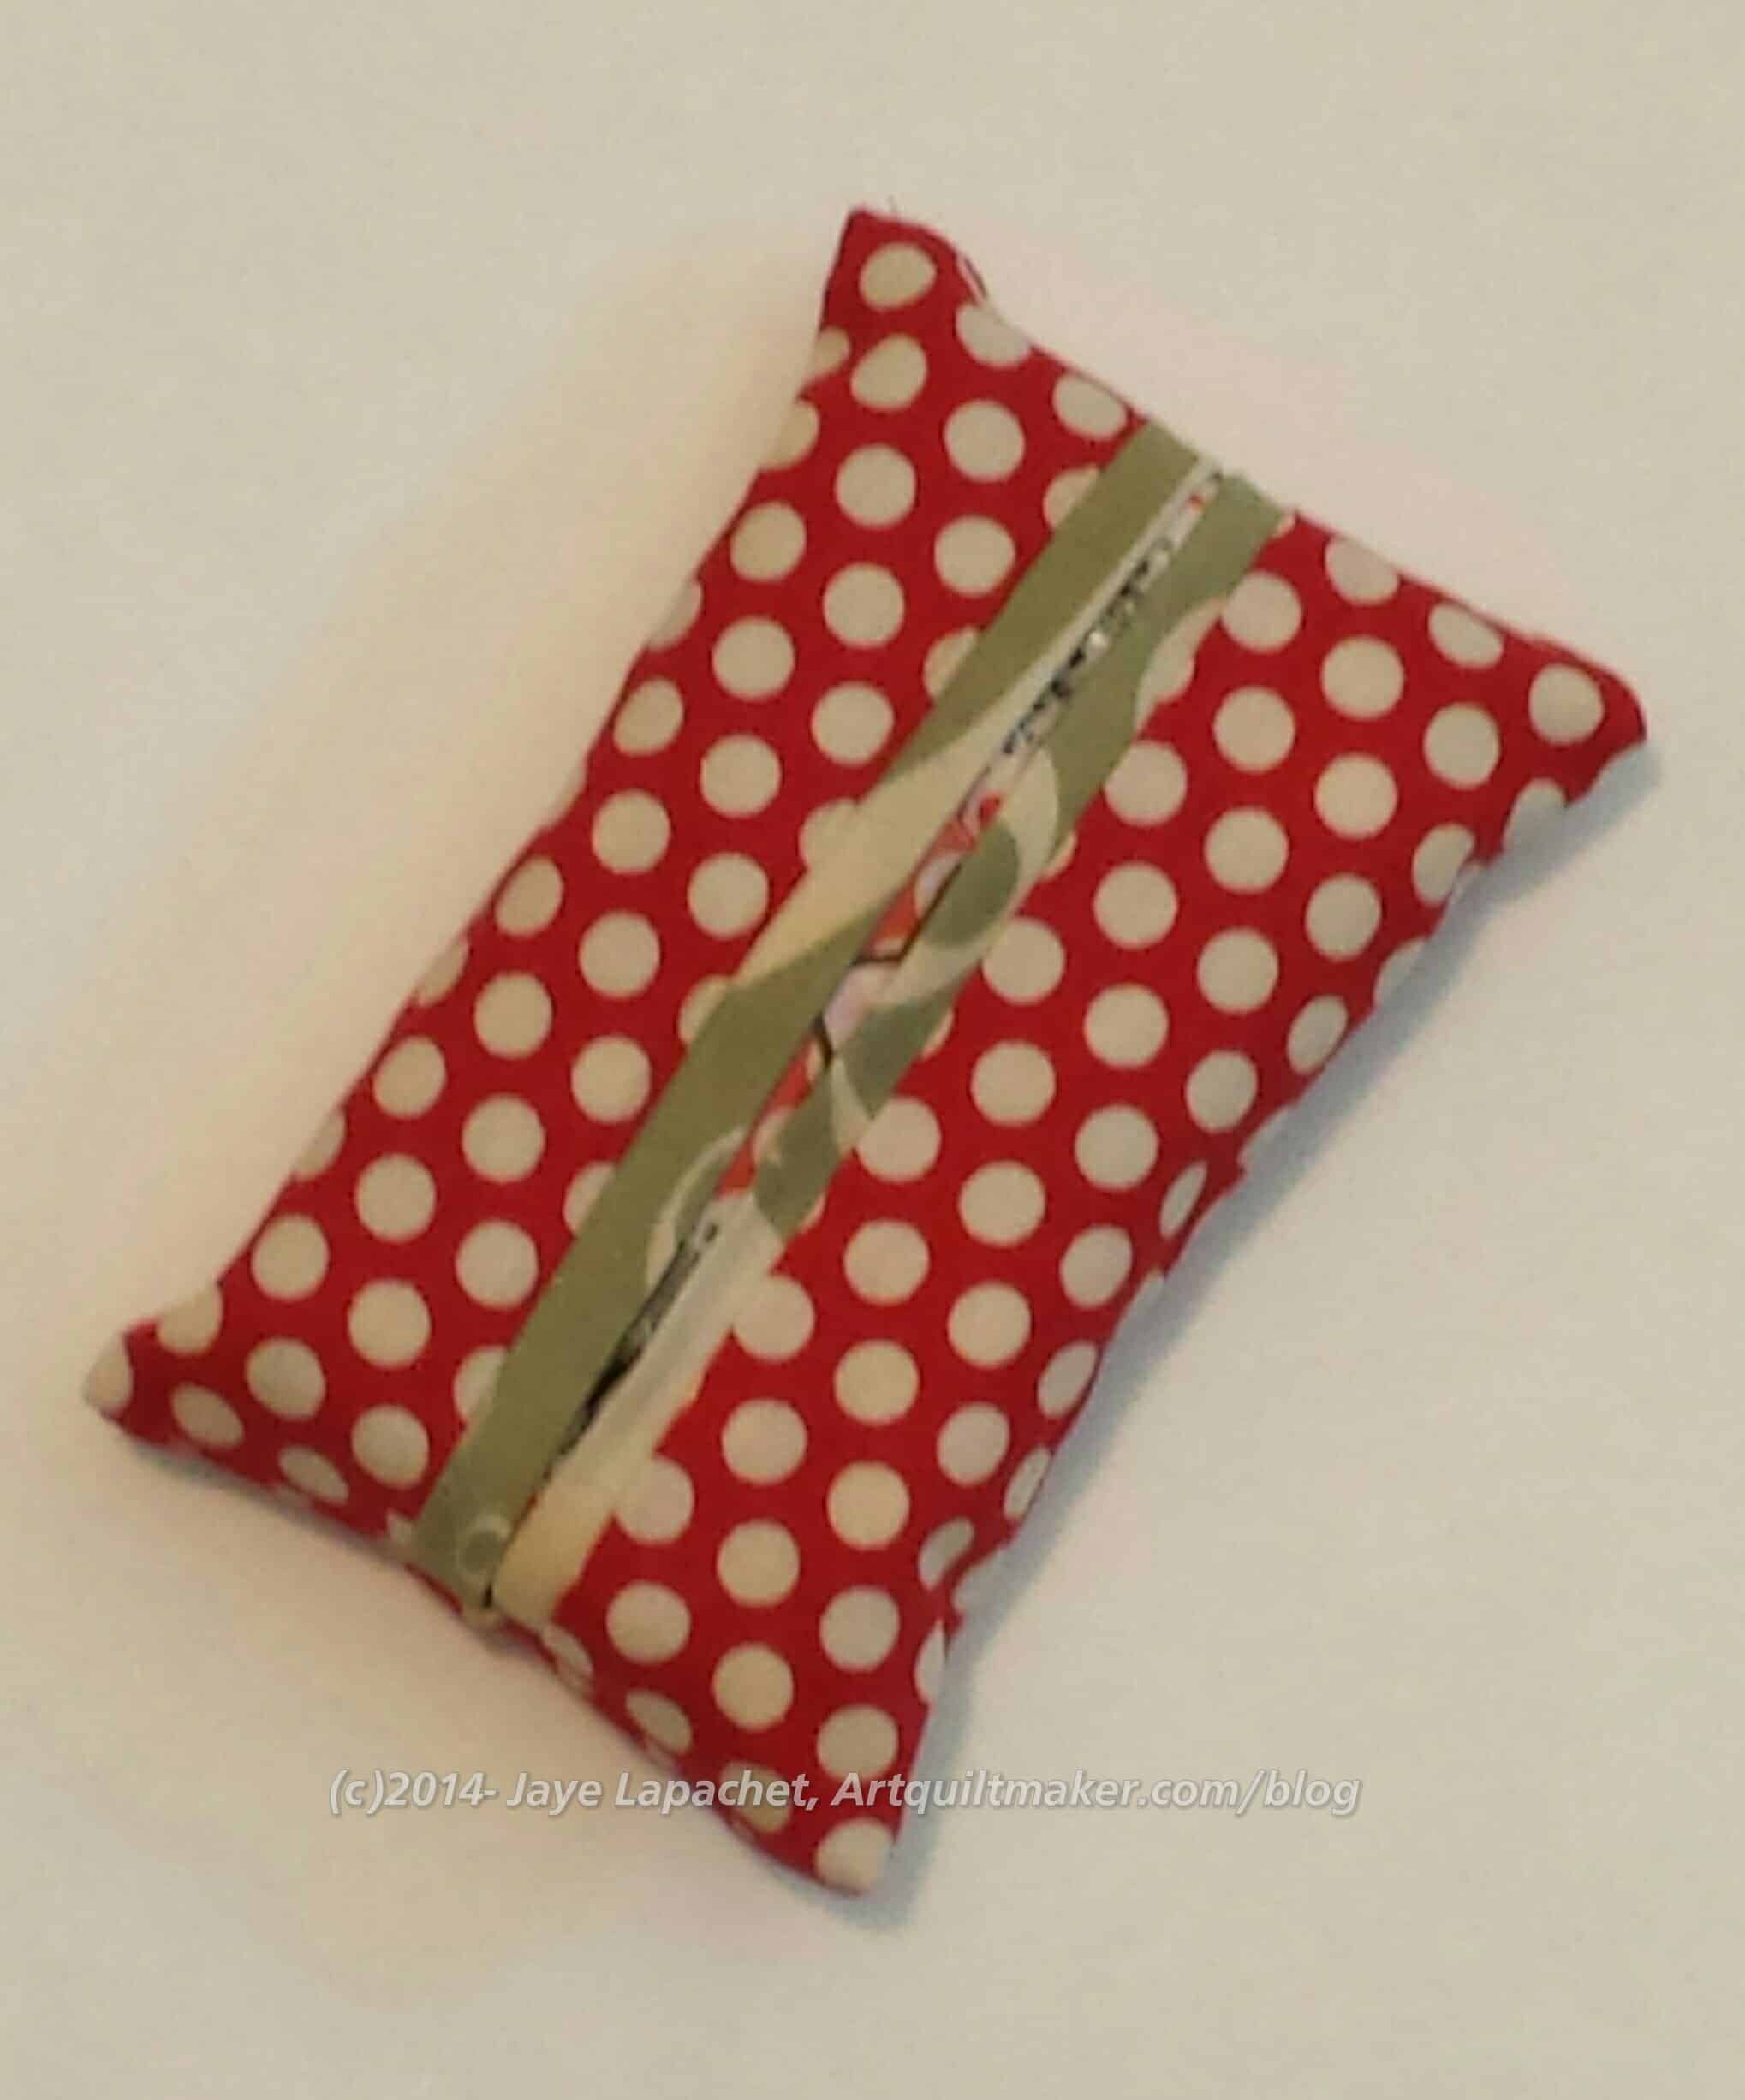
Valerie over at Evening in the Garden blog made some packs of gifts that included tissue holders. I decided to try making one. I have some of those small packs of tissues and thought they would make nice small gifts. I ended up making only a couple, but they are on my list for this year for gifts on hand. Valerie used a YouTube video tutorial to make them and they are unbelievably fast. If you have a serger, they are even faster.
If you are following along with the Grand Illusion 2014 Mystery Quilt by Bonnie Hunter, she revealed her finished quilt on New Year’s Day. I like the block, but am kind of glad I didn’t do the project as the finished piece looks really busy. I would not have wanted to pick out fabrics for the piece. I think it would have been more frustrating than challenging doing so without knowing what the quilt would look like.
Nonnie tweeted about a free BOM from Craftsy designed by Jinny Beyer. Yes, FREE! the basic design is a basket sampler. I didn’t buy the kit (have plenty of fabric, thanks!), but there is a kit that goes with the BOM, which you can buy. Even if you have no interest in making the blocks, you might want to ‘enroll’ in the class and listen to Jinny’s color theories. While there are many, many color theories out there, hers is interesting and well thought out. I am not sure I agree with all of her points – the jury is still out – but I like hearing what she has to say. Her theory interests me, especially the part about shading, in terms of my FOTY quilts.
I really liked Polka Dot Finale, a tree made from wool with polka dot leaves.
Articles & Information
There is so much out there on why crafting/making is good for you. Here is another article from CNN. I like this quote “Crafting can help those who suffer from anxiety, depression or chronic pain, experts say. It may also ease stress, increase happiness and protect the brain from damage caused by aging.” The article also mentions flow, which I knew, but had a hard time describing beyond ‘ getting into the zone’ until I read a quote in the article from Psychologist Mihaly Csikszentmihalyi, who first described this phenomenon as flow: a few moments in time when you are so completely absorbed by an activity that nothing else seems to matter. Flow, Csikszentmihalyi says, is the secret to happiness — a statement he supports with decades of research.” I like that. Flow. There is also some discussion about “a nonpharmaceutical way to regulate strong emotions such as anger or prevent irrational thoughts. “Flow could potentially help patients to dampen internal chaos”. “
The article includes a video about making electronic gadgets, which was interesting, because it provided an option for those who may not want to glue or sew or stitch.
I can’t help but be a fan of having a hobby and making. This article is really well done, supported by some research as well as anecdotes. I really like it.
Fabric, Tools & Supplies
For those of you who listen to the Hip to be a Square podcast, you know that Pam, the hostess, tracks her fabric usage. She recently posted her year end review and made a few comments on her usage over the three years she has been tracking. Pam has shared a copy of the blank spreadsheet she uses to track her usage, so you can track as well.
Marsha McCloskey is the Feathered Star Queen (I made that up). It is a block that I have always wanted to make and really think it is doable now that I have figured out the Triangle Technique. She talks also about Bernina no longer producing her favorite presser foot for piecing, the #13. I do not have a Bernina and have not tried this foot, but if you want one, now is the time to scrounge around and see if there are any left waiting to be sold. McCloskey also talks about the ultra fine 70/10 Schmetz Microtex (Sharp) Needles. If you use them on your sewing machine, the needle threader may not work. She was told by a nice lady at Paramount Sewing & Vacuum that a 75/11 is as small as you can go for most automatic needle threaders. Haven’t tested this, but will put it on my to do list.
If you have not perused Marsha’s site, now is the time as there are a lot of specials going on. Until January 30, she’s offering newsletter (click to get to the newsletter on Yahoogroups) readers 10% off on all orders over $25 placed at the website. To receive the discount, just type BLUE2 in the space for Coupon Code when you place the order at: http://www.marshamccloskey.com/ Her newsletter is interesting. You can also join by searching for Marsha McCloskey on Yahoogroups.
Sandy found the Inspira Studio by ClosetMaid. Would this studio work for you as your ultimate-the only-studio-you-get-in-your-lifetime studio?
Organization
There are different types of organization, but mostly they fall into two categories: mental and physical. I find that I need to get into the mental frame of mind before I can start to tackle the physical. GoGoKim has made it past the mental and is on to the physical with some good techniques and tips for organizing her workroom.
NoScrapTooSmall is also back on the blogging bandwagon, talking about her Year of Making. She has some interesting links to others doing their Years of Making as well. I am interested in the words that people pick for their year, but have never been able to make it work for myself. I think that something like NoScrapTooSmall’s Year of Making would be a better method for me. I have been swamped so I haven’t been able to follow all the links, but that is high on my priority list.
Nadine Ruggles talks about her Word of the Year and discusses a little of how I feel about words of the year.
Quilt World News
There is a project going on to underwrite the funding needed to update the IQSC space into a special gallery. Linda Pumphrey is launching this campaign to raise funding to pay for the lighting and hanging system in the new ground floor gallery at the International Quilt Study Center & Museum in Lincoln, NE. The gallery will be used to showcase work from contemporary quilt makers, regional quilt groups and special selections from the IQSC&M collection.
Classes
The class registration for Sisters, Oregon show is open.
EQ‘s first online class sessions begin January 9th! Learn EQ on your own time, from esteemed EQ teachers. They have one or a few free classes as well.
Yes, it is 2015 and I am still gathering fabrics. In fairness, most of these were from the end of 2014. In any case, it is my project and I am still gathering fabrics. 😉
I can’t arrange this piece until the Black & Grey Teenaged Boy Quilt is off the design wall and that project is going nowhere at the moment.
There are a couple of things going on. First, there are certain fabrics I want to include in this entry in the series.
Next, I am doing quite a bit of scrap reduction and when I have a large enough piece that I can use a goodly chunk of it, I cut a piece for the FOTY 2014.
Finally, I am annoyed that I didn’t decide on shapes like I did for 2012, which were rectangles and squares. I’ll probably go with that arrangement for the 2015 version. That is still some time off, so we’ll have to see.
One of the things I made, as I mentioned were tissue covers. I took some of the Cosmo Cricket Circa 1934 fabric I had leftover from the first Stepping Stones quilt and made some small things out of it. I just got a bug in my ear to use that fabric again. Not sure why.
I have a few more packs of tissues to fill some covers, so I may make a few more. We’ll see.
Is it still early January or have we moved into mid January already? I don’t know. I seem to be back in the saddle after a really good mini-session with Maureen and Dolores. More on that later, but in the meantime, I have been making a sort of effort to sew.
That effort has result in the pieces and parts for many, many Stepping Stones blocks, a bunch of cut pieces for the FOTY 2014 and one Stepping Stones block completed.
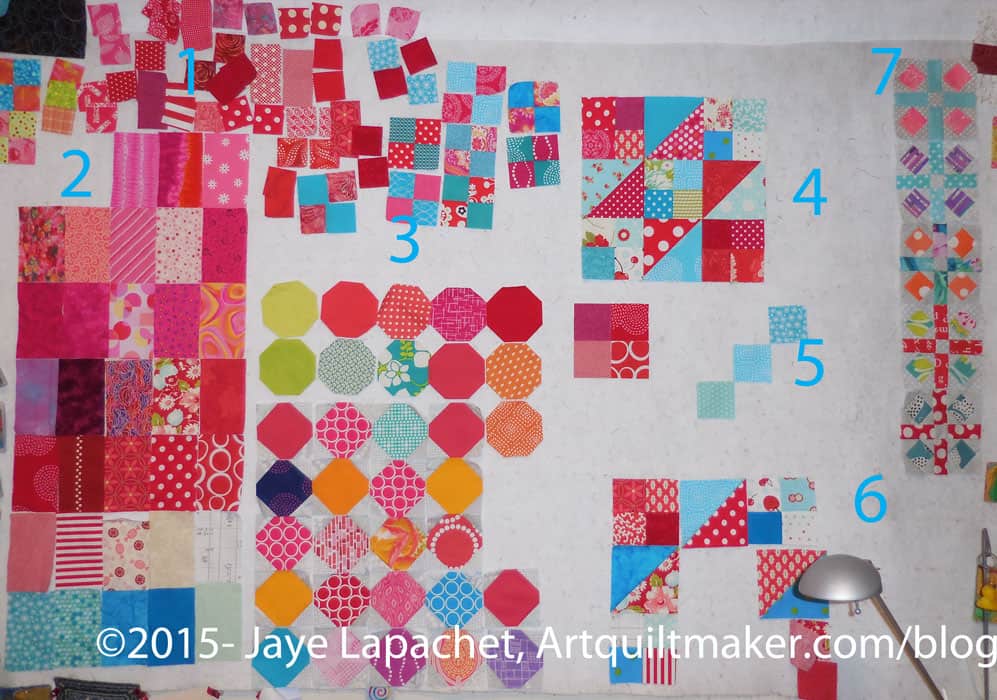
Design Wall Jan 12, 2015
Parts for turquoise and red four patches. I really need to cut some more blues.
Octagons and snowball blocks for the Octagon 9 patch. I am making progress, but mostly I am sewing triangles to the corners of the octagons to make the snowball blocks.
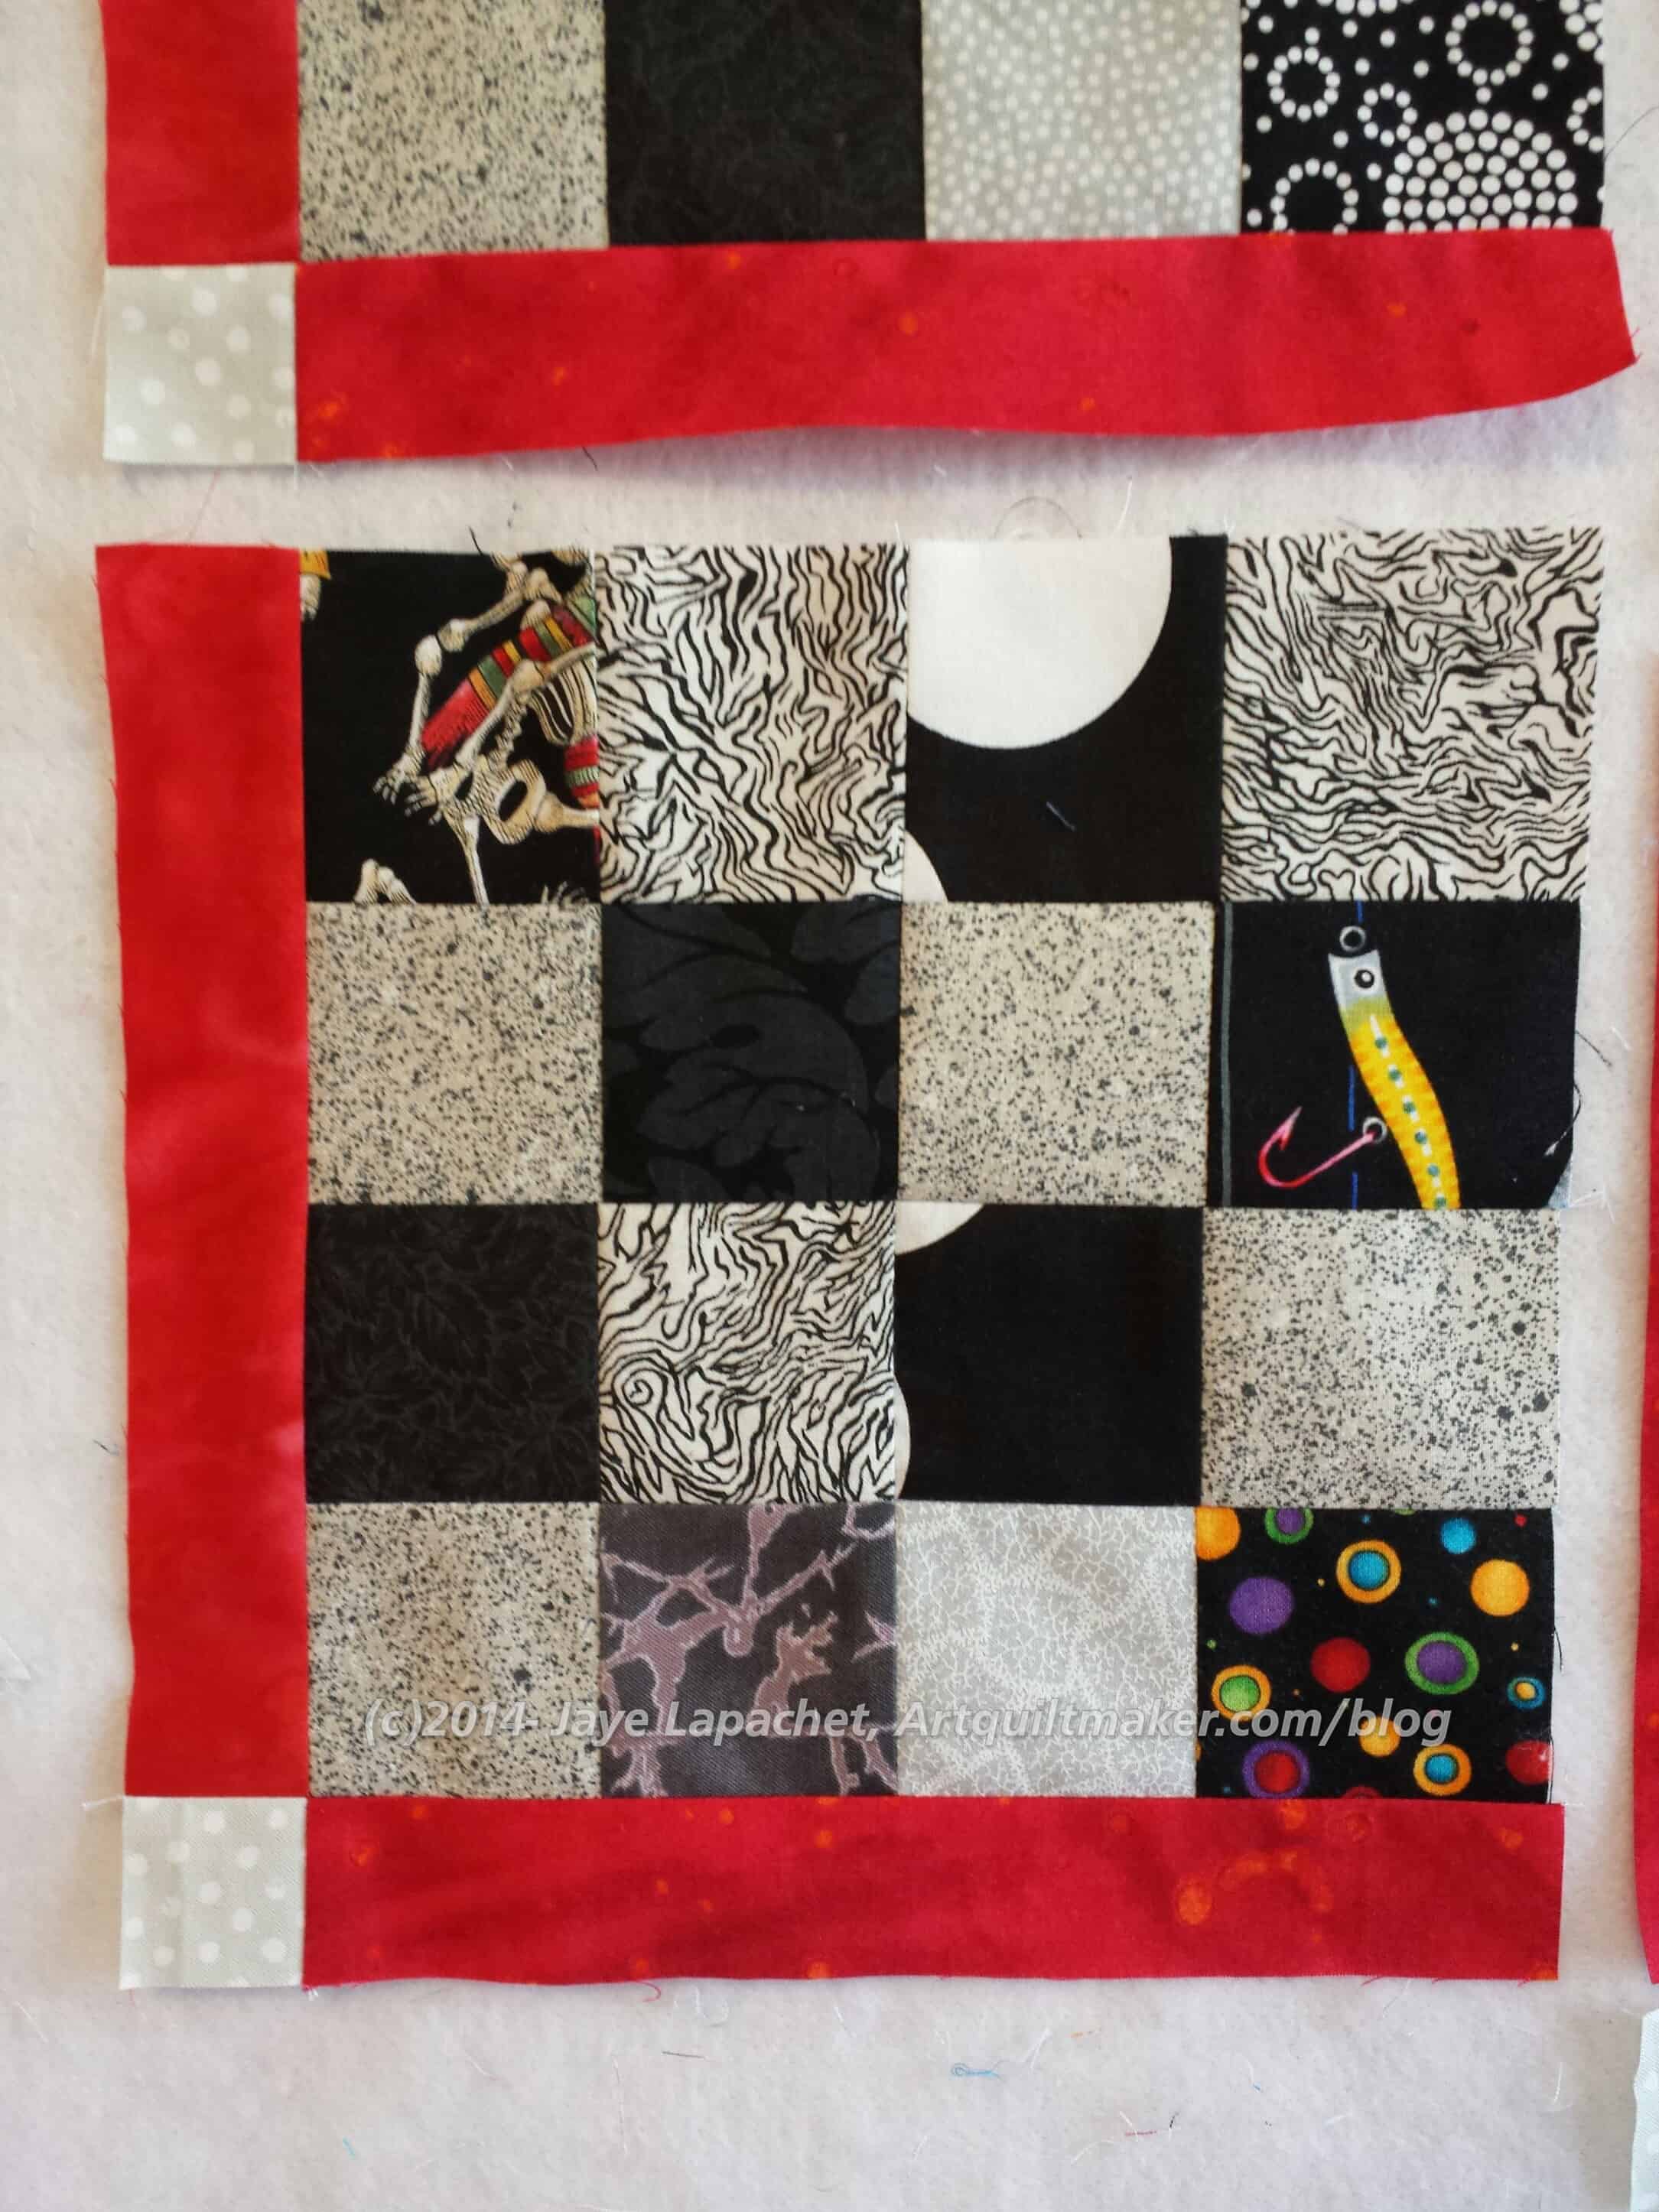
One completed Stepping Stones block. I am having fun selecting fabrics for the patches. I am glad I added some fabrics to the Bonnie & Camille fabrics. It is good to use them and I think they add a lot to the look of the blocks.
Third Stepping Stones block in process. You can see how I keep track of the pieces I choose. There are still a lot of pieces to cut.
Second Stepping Stones block in process. I am sewing patches together.
I haven’t gotten rid of these PIQF Cross blocks yet, so they are still on the design wall.
Take a look at my last design wall post and see the difference, though some quilt things never change. 😉
I am linking up with Judy Laquidera at the Patchwork Times.
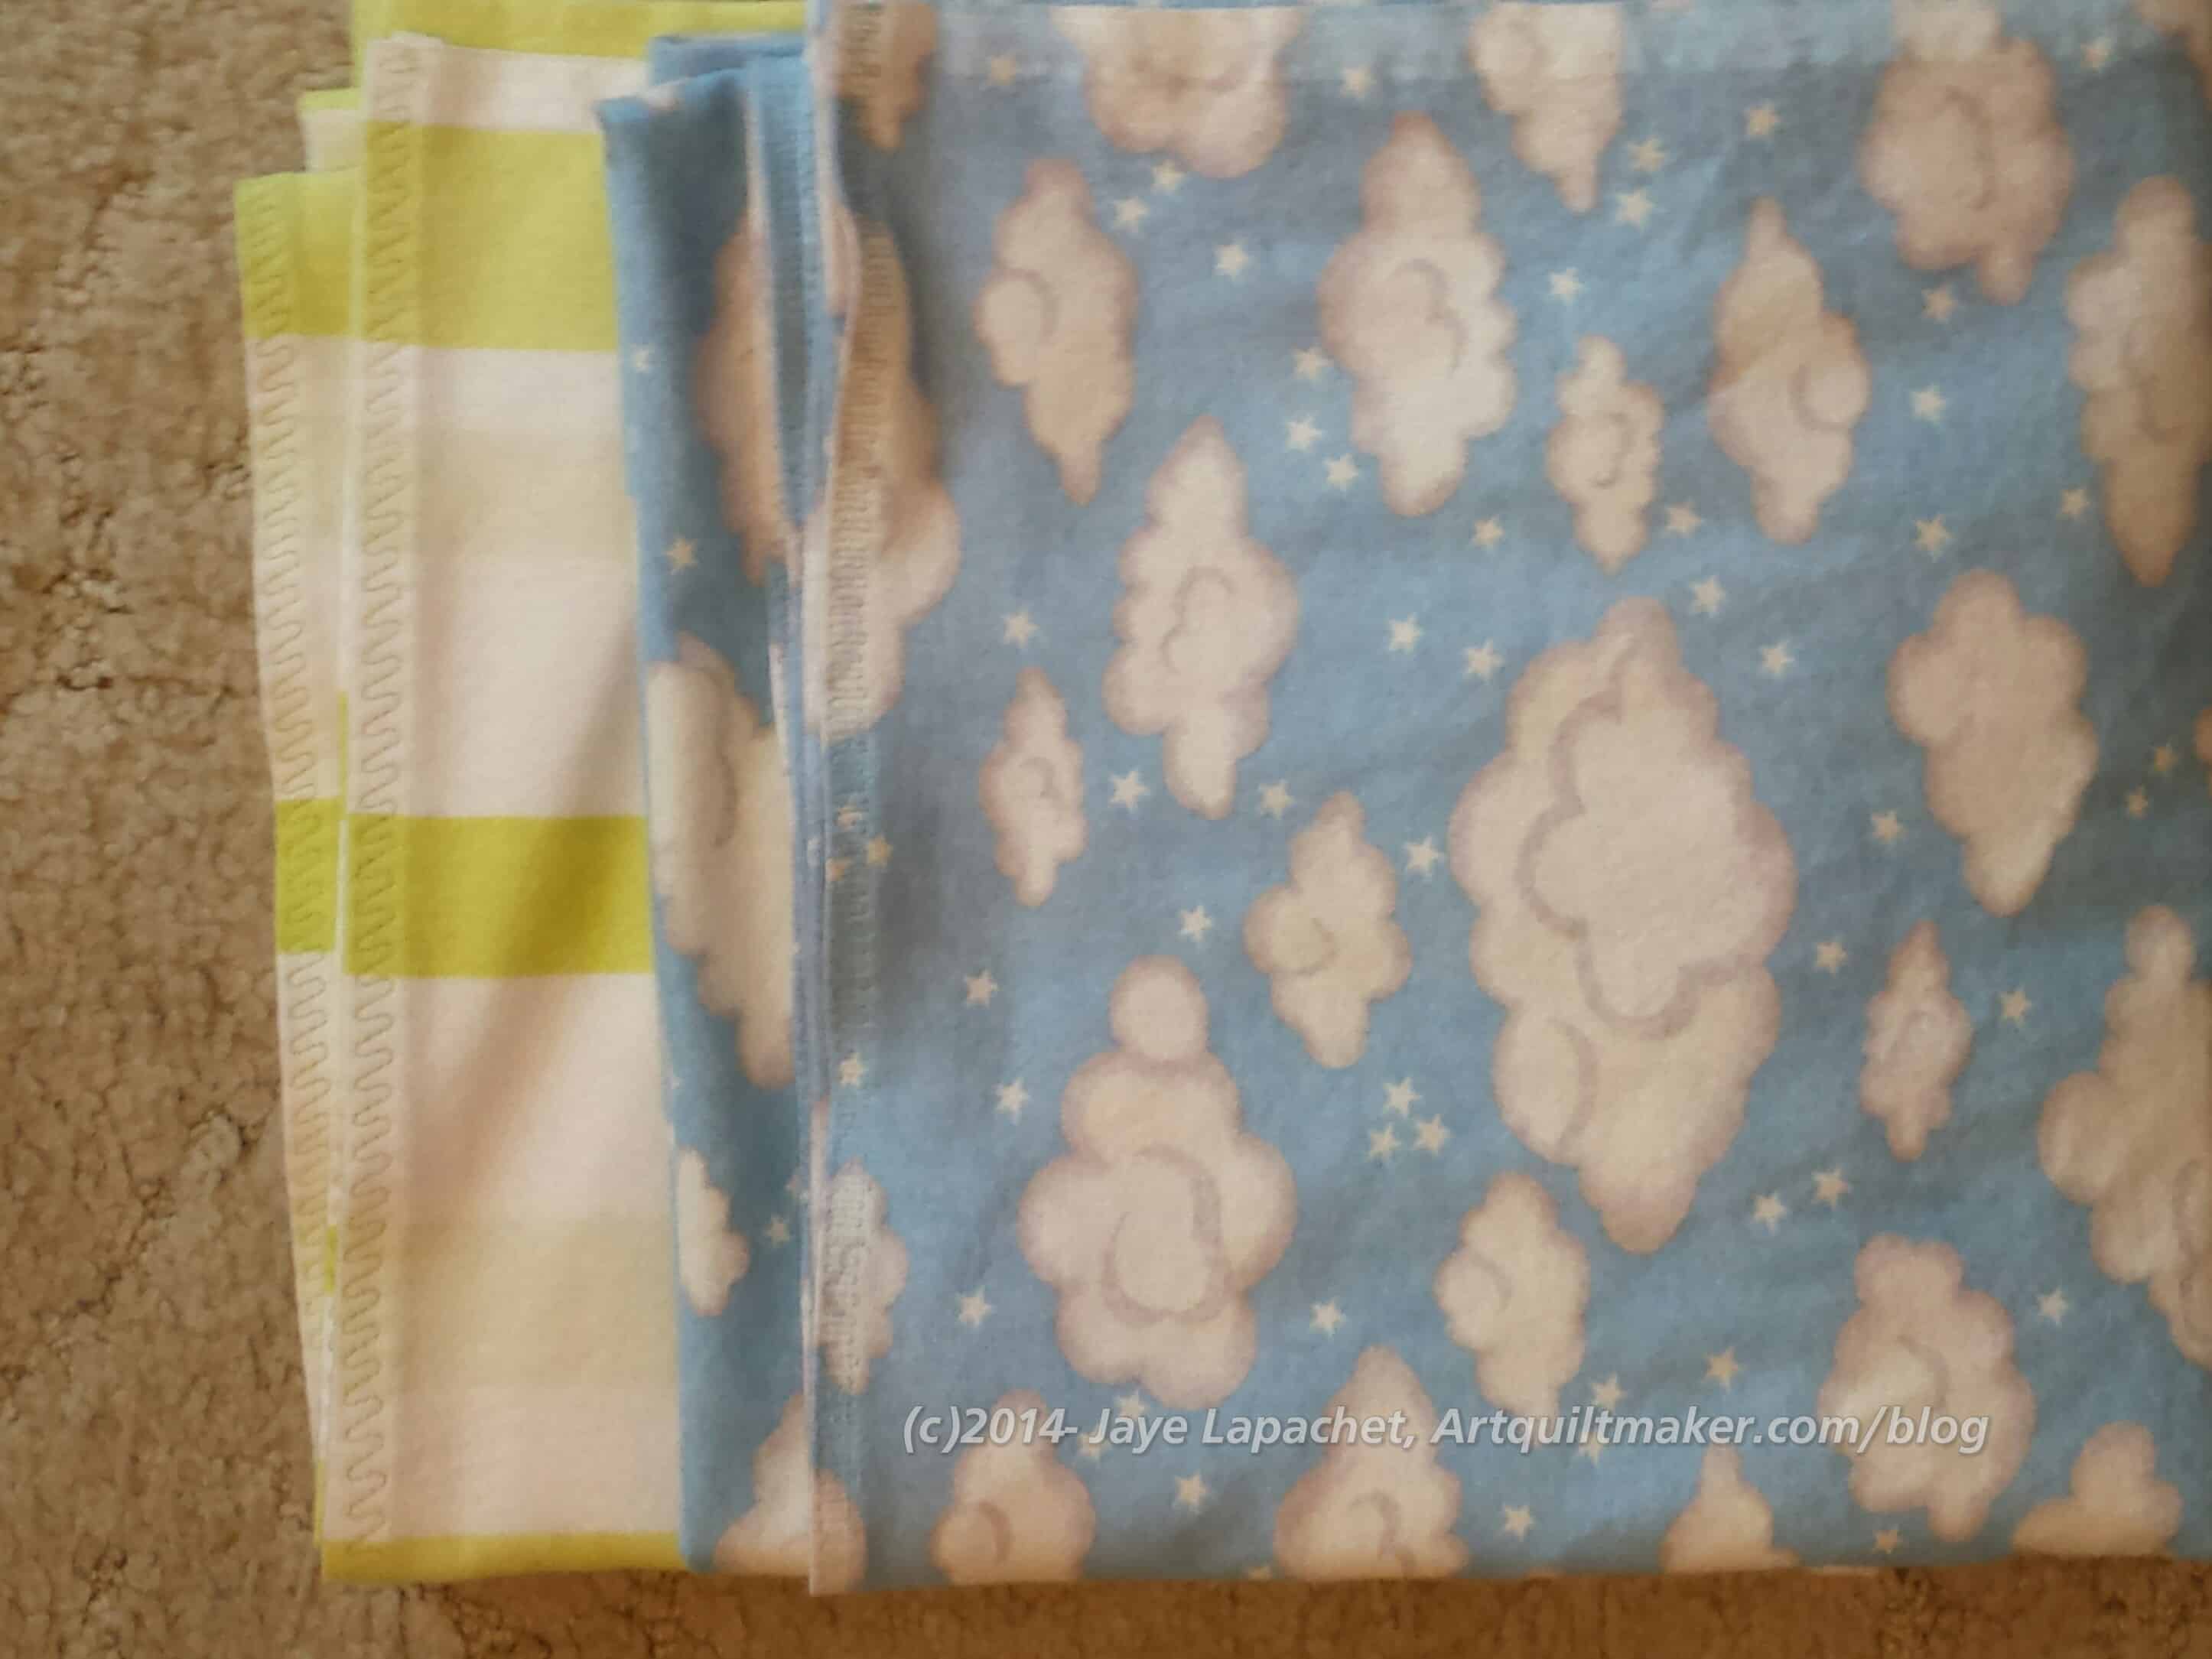
As an added bonus I found a piece of batting that I thought would be big enough, but it wasn’t so I spent some time last night, after the meeting and dragging the Young Man a Band performance, using the batting tape to make a piece of batting large enough. Gerre is willing to work with frankenbatting, so now the piece is ready to be sent to her.
I really cannot help spreading the usefulness that these receiving blankets bring with them. Also, I feel a bit for Ruth and her family. Her baby was born a month early, The Y.M. was born 3.5 weeks early with jaundice and little under weight, so I understand a bit of what she is going through. Of course, every mother’s experience is different and every child is an individual.
I like giving these as gifts, as I may have said as they are extremely useful as:
playmats
layering for warmth
sunshade
Superman cape
Sheik headress
sarong/skirt
I just did a decorative stitch; I didn’t do any stitch lettering this time. By the time you read this I will have already sent them off.
Do you remember the copper colored crayon in the box of 96 (or was it 100? You know the really big box with the sharpener on the back)? I loved the way it went onto the paper really smoothly. I also liked the metallic sheen it had.
Definition: “Copper is a chemical element with symbol Cu (from Latin: cuprum) and atomic number 29. It is a ductile metal with very high thermal and electrical conductivity. Pure copper is soft and malleable; a freshly exposed surface has a reddish-orange color. It is used as a conductor of heat and electricity, a building material, and a constituent of various metal alloys.
The metal and its alloys have been used for thousands of years. In the Roman era, copper was principally mined on Cyprus, hence the origin of the name of the metal as ?yprium (metal of Cyprus), later shortened to ?uprum. Its compounds are commonly encountered as copper(II) salts, which often impart blue or green colors to minerals such as azurite and turquoise and have been widely used historically as pigments. Architectural structures built with copper corrode to give green verdigris (or patina). Decorative art prominently features copper, both by itself and as part of pigments.
Copper is essential to all living organisms as a trace dietary mineral because it is a key constituent of the respiratory enzyme complex cytochrome c oxidase. In molluscs and crustacea copper is a constituent of the blood pigment hemocyanin, which is replaced by the iron-complexed hemoglobin in fish and other vertebrates. The main areas where copper is found in humans are liver, muscle and bone.[2] Copper compounds are used as bacteriostatic substances, fungicides, and wood preservatives.” (Wikipedia)
Copper is an essential cofactor for oxidation–reduction reactions involving copper-containing oxidases. Copper enzymes regulate various physiologic pathways, such as energy production, ironmetabolism, connective tissue maturation, and neurotransmission. (More information)
Copper deficiency can result from malnutrition, malabsorption, or excessive zinc intake and can be acquired or inherited. Symptoms include deficiencies in blood cells, bone and connective tissue abnormalities, and neurologic disorders. (More information)
Marginal copper imbalance has been linked to impaired immune function, bone demineralization, and increased risk of cardiovascular and neurodegenerative diseases. However, the use of more precise indicators of nutritional copper status needs to be considered for future research. (More information)
Organ meats, shellfish, nuts, seeds, wheat-bran cereals, and whole-grain products are good sources of copper. (More information)
Copper toxicity is rare and often associated with genetic defects of copper metabolism. (More information)
Post the direct URL (link) where your drawing, doodle, artwork is posted (e.g. your blog, Flickr) in the comments area of this post. I would really like to keep all the artwork together and provide a way for others to see your work and/or your blog.
We are also talking about this on Twitter. Use the hashtag #CPP
The Creative Prompt Project, also, has a Flickr group, which you can join to post your responses. I created this spot so those of you without blogs and websites would have a place to post your responses.
As I said in the last post, projects I have wanted to do for awhile, as well as brand new ones, keep springing into my head. I have added at least four more projects to this list in the last little while.
Art Institute of Chicago Fusible Quilt
Pattern: Original
Fabric: Turquoise and red, mainly, but other colors for the leaves and flowers
Steps: need to fuse a bunch of turquoise to some piece of fabric in the ‘ticker tape’ style. I am thinking of making it similar to the Whole Cloth Quilt and using red, again, for the background.
Thoughts: I really liked Daisy‘s version of Easy Street, which she calls Cherry Bomb (she thinks of the best names for quilts) in terms of color and feel. I don’t want to copy her, but if I do this quilt, I’d like to have the same pinky-red feel to it. One challenge about a mostly monochromatic quilt is getting enough contrast. I look forward to that challenge.
Food quilt #2 (Hunting and Gathering)
Pattern: Disappearing 9 patch
Fabric: RJR Food prints. Will use a different color for the non-food print section than I did for the Young Man’s version.
Thoughts: Gift for son of good friends for graduation. I have started cutting for this in a serious way. I just need to figure out alternate colors.
Food quilt #3 (Hunting and Gathering)
Pattern: Disappearing something, probably 4 patch or 9 patch
Fabric: RJR Food prints. Will use a different color for the non-food print section than I did for the Young Man’s version.
Fabric: Half Moon Modern Fabrics. I have half yard cuts, I think, plus some odds and ends and I’d like to use them together with some additional fabrics, or, at least a background.
Thoughts: I do think it is difficult to start with fabrics rather than a pattern.
Interlocking Triangles Quilt(s)
Pattern: This is an idea that I designed myself. I made two quilts and have variations on the pattern to make more.
Fabric: I have a few different collections of fabric I want to use. Most are rainbow colored
Thoughts: This is a quilt from which i get a lot of bang for my buck. The visual impact is tremendous. The easiest way to do the spiky triangles is with paper piecing. I am not that big of a fan of paper piecing (read my laments about the Spiderweb‘s paper piecing). I made Spiky Stars using templates and that was meditative and won a prize, so it is doable.
Jack’s Chain Quilt
Pattern: Jack’s Chain, a continuous pattern
Fabric: bright scrappy, consistent centers
Thoughts: This is one of the first quilts I saw hanging in a quilt store and thought of making, after I had learned to quilt. Making the nine patches would be a good leaders and enders endeavor.
Medium Mondo Bag
Pattern: From QuiltSmart. Saw Katie’s and really liked it. I also thought it would be a good use of those mini-charms, or give me an excuse to buy them.
Fabric: I have a number of groups of mini-charm packs I have been collecting to use for this project. I will probably go with a combination of Bonnie & Camille fabrics to start.
Thoughts: There is something about the stabilizer that I cannot wrap my head around, which is one of the reasons I have not started this pattern.
Music Quilt
pattern: Don’t know
Fabric: music prints and tone-on-tones
Thoughts: The Young Man has requested this quilt as his graduation quilt
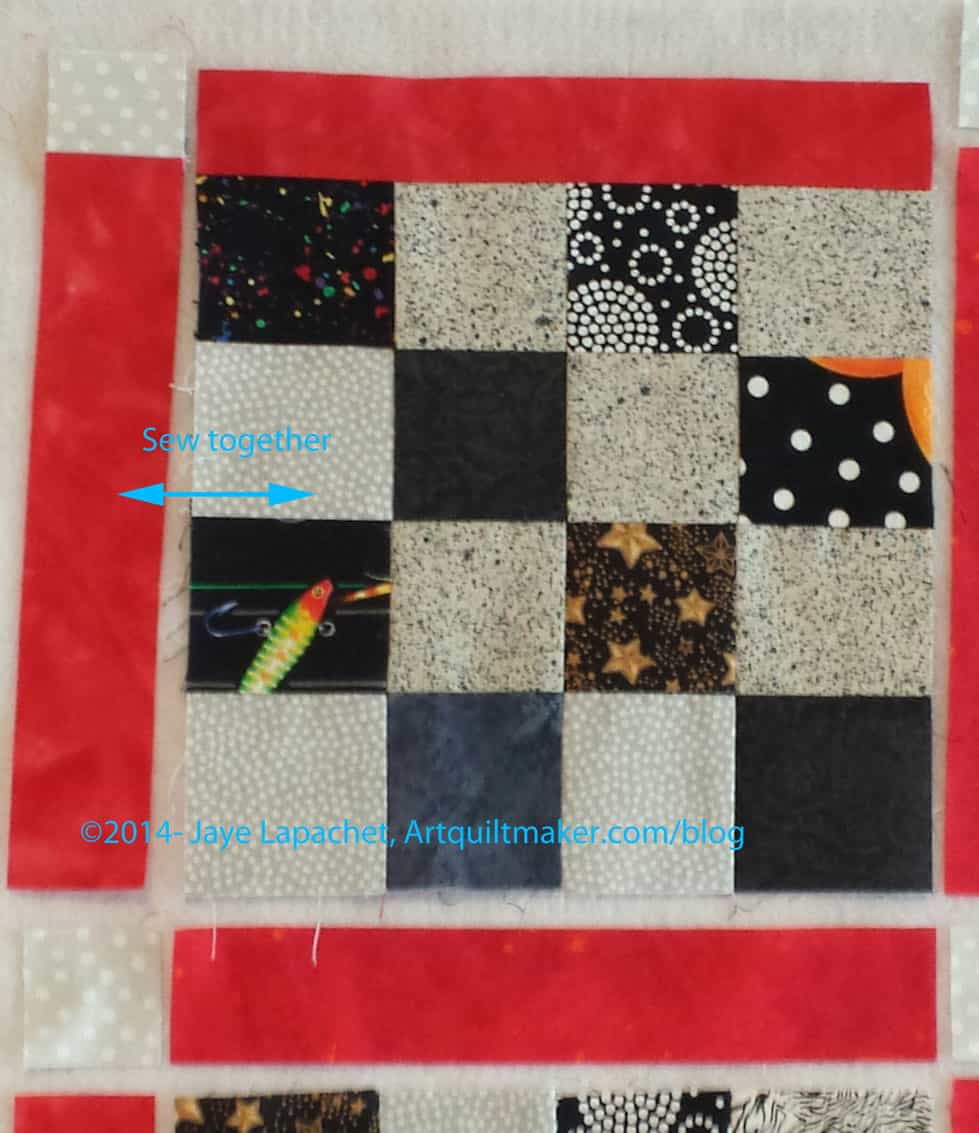
Neutrals and Red/Scarlet Quilt
Pattern: Sew two ~3?x3? squares together, slice each separate fabric and insert a red strip, resew and sew the two squares to another set of squares.
Fabric: neutrals+white, black and whites. I have some of these. I bought them not know what to do with them.
Thoughts: gift
Pineapple (Hunting and Gathering)
Fabric: dots. Have most of the strips cut. Will be much more selective about which strips I use.
Pattern: Pineapple log cabin
Thoughts: I haven’t given up on a Pineapple quilt despite my frustration with the previous attempt. I bought a different ruler: a Creative Grids Pineapple ruler in hopes that it will work better for me.
Fabric: scrappy again, but with NO browns or blacks or super darks that look like holes; also more blues and perhaps a different background, though I do like the dots on bright white. I would make sure to skip the dots with a cream background.
Thoughts: I have made a couple of, what I call, Colorblock quilts over the years. One was the Kona Challenge in 2011, another was my 1990 Colorblocks 2 and the first one, Colorblocks, also made in about 1990. I bought the fabrics at the Marin Needlearts show about a zillion years ago and they have languished waiting for me to learn to back them so I can use them.
Fabric: Scrappy. I will use a grey for the background, because if I use more of the cut fabric patches, the pattern will be lost. The pieces are too oddly shaped and I don’t want to lose the pattern in a mass of scraps.
Pattern: Come Quilt with Me Rotary templates
This is clearly only an irregular feature, but and thinking of all the projects above, I am kind of scared to add more in order to make it a regular feature.
Out of the Dream State:
Stepping Stones #2– I started to make blocks for this, so it is out of the dream projects stage.
Fabric: Bonnie & Camille fabrics Bliss, Ruby, Vintage Modern. I wanted the contrast to be good, so I added additional fabrics to beef up the Bonnie & Camille fabrics.
I didn’t make a lot of gifts this year despite my best intentions, but I did make a few things for Friend Julie. I bought some purple chair fabric and just started making a set of things for her. I didn’t really plan to, it just happened. it was fun to try and figure out how place the fabric on the projects so the chairs stood out.
First, I made the tissue holder. Actually, I made two others as tests before I made this one, but it was the first gift that I made for her. I took a look at the tutorial that Valerie uses and tried it myself. Easy peasy! Bonus: I had some tissue packs with which to fill it.
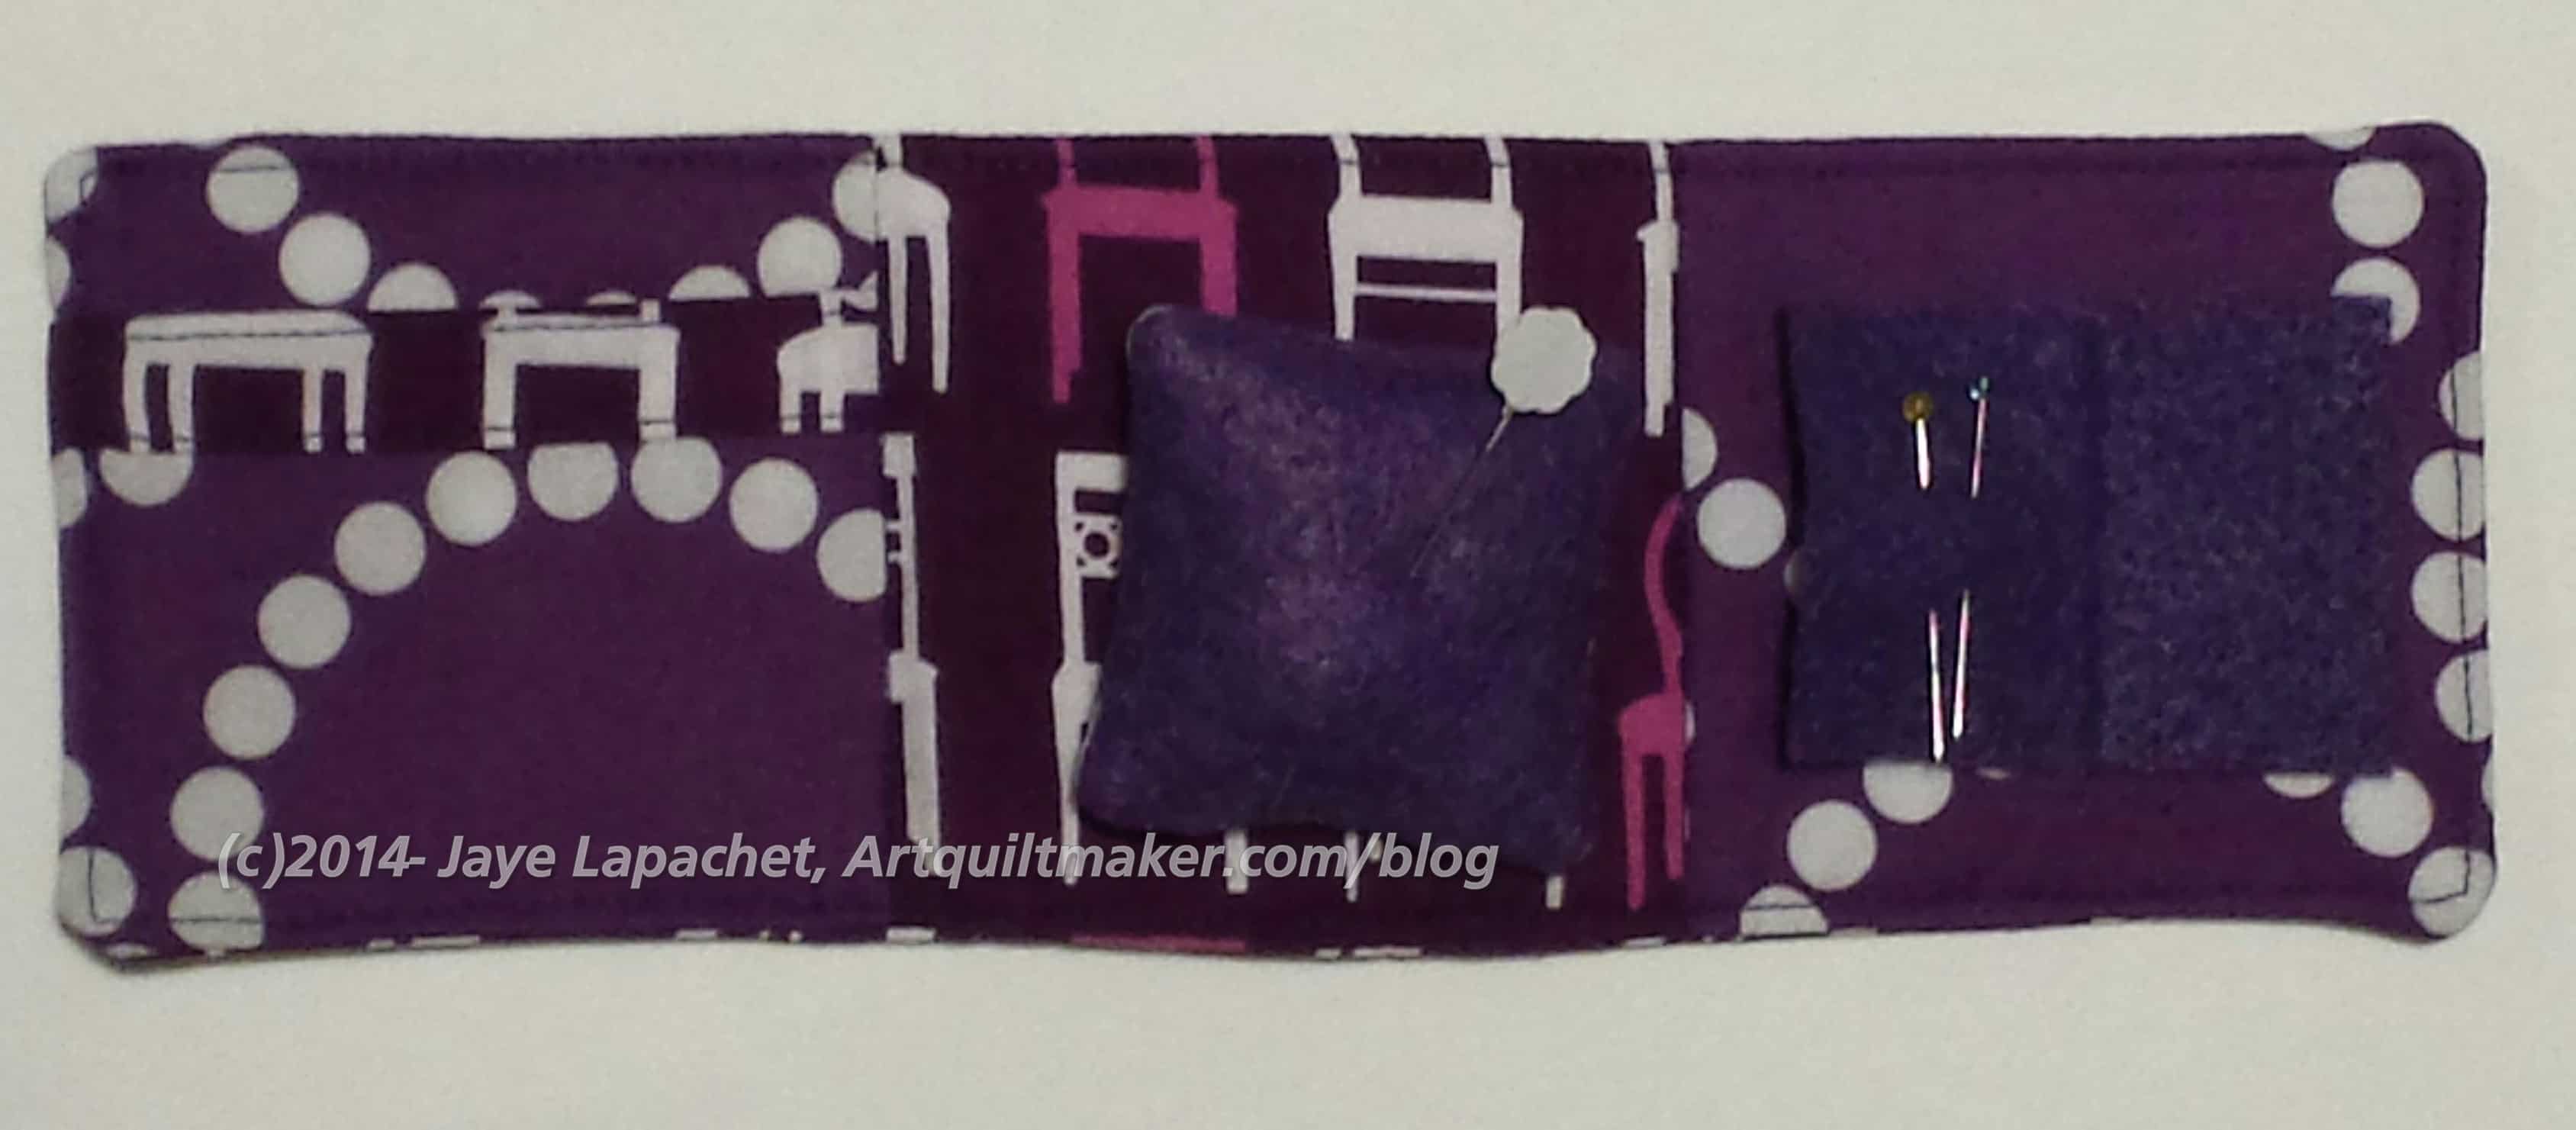
Purple Chair Needlecase
Next was a needle case. I *think* Julie does some hand work, but I don’t really know, I am embarrassed to say. Now she is encouraged to do so because she has a needle case. 😉 If she is not a handworker, then perhaps I should start a campaign of buying Perl Cotton for her? 😉 With my luck, she will couch it to something on the machine.
Before she opened it, she didn’t know what it was. I think she was confused because I re-used some Recchiuti ribbon. I was pleased with the way the case looks tied up with the ribbon.
I made some changes to the pattern. Are you surprised? Instead of sewing two pieces of quilting cotton together to make the needle portion of the needlecase, I cut and sewed one square of felt to hold the needles.
Purple Chair Needlecase – open
I also used felt for one side of the baby pincushion. I can’t quite seem to get the pincushion to finish straight, but I’ll keep working on that.
Awhile ago I bought the Jeni Baker drawstring bag pattern that has been so popular among the modern quilters. On her blog, In Color Order (I wish I had thought of that name!!!), is a tutorial for one size of the bag. Anyway, I made several over the holidays and I decided at the very last minute, e.g. two hours before we were meeting (sigh!), to make her one to hold all of the goodies. When I say last minute, I mean last minute. DH had to lace the string into the holes while we drove. I didn’t even have a chance to take a phone, but Julie was kind enough to send me a couple.
Purple Chair Bag – closedPurple Chair Bag – open
The inside is grey.
I have a few other ideas for purple chair (and purple Pearl bracelets) fabrics accessories.
TFQ taught me this method of putting quilts together. I have adopted it as my own and use it for block-based quilts. Very occasionally I’ll put a long border on after the center of the quilt is complete, but otherwise I try to avoid the long seams required to put quilts together in rows.
Using this method, usually I have only one really long seam to sew at the very end and 1-2 mid sized seams.
This technique improves accuracy when you have sashing and cornerstones, but also improves accuracy with just sashing. If you have no sashing, then the pieces are much easier to handle.
Occasionally you will have a quilt where chunking is not appropriate for one reason or another, thus it is good to know many techniques, so you can choose the one that is most appropriate for the creative vision you have.
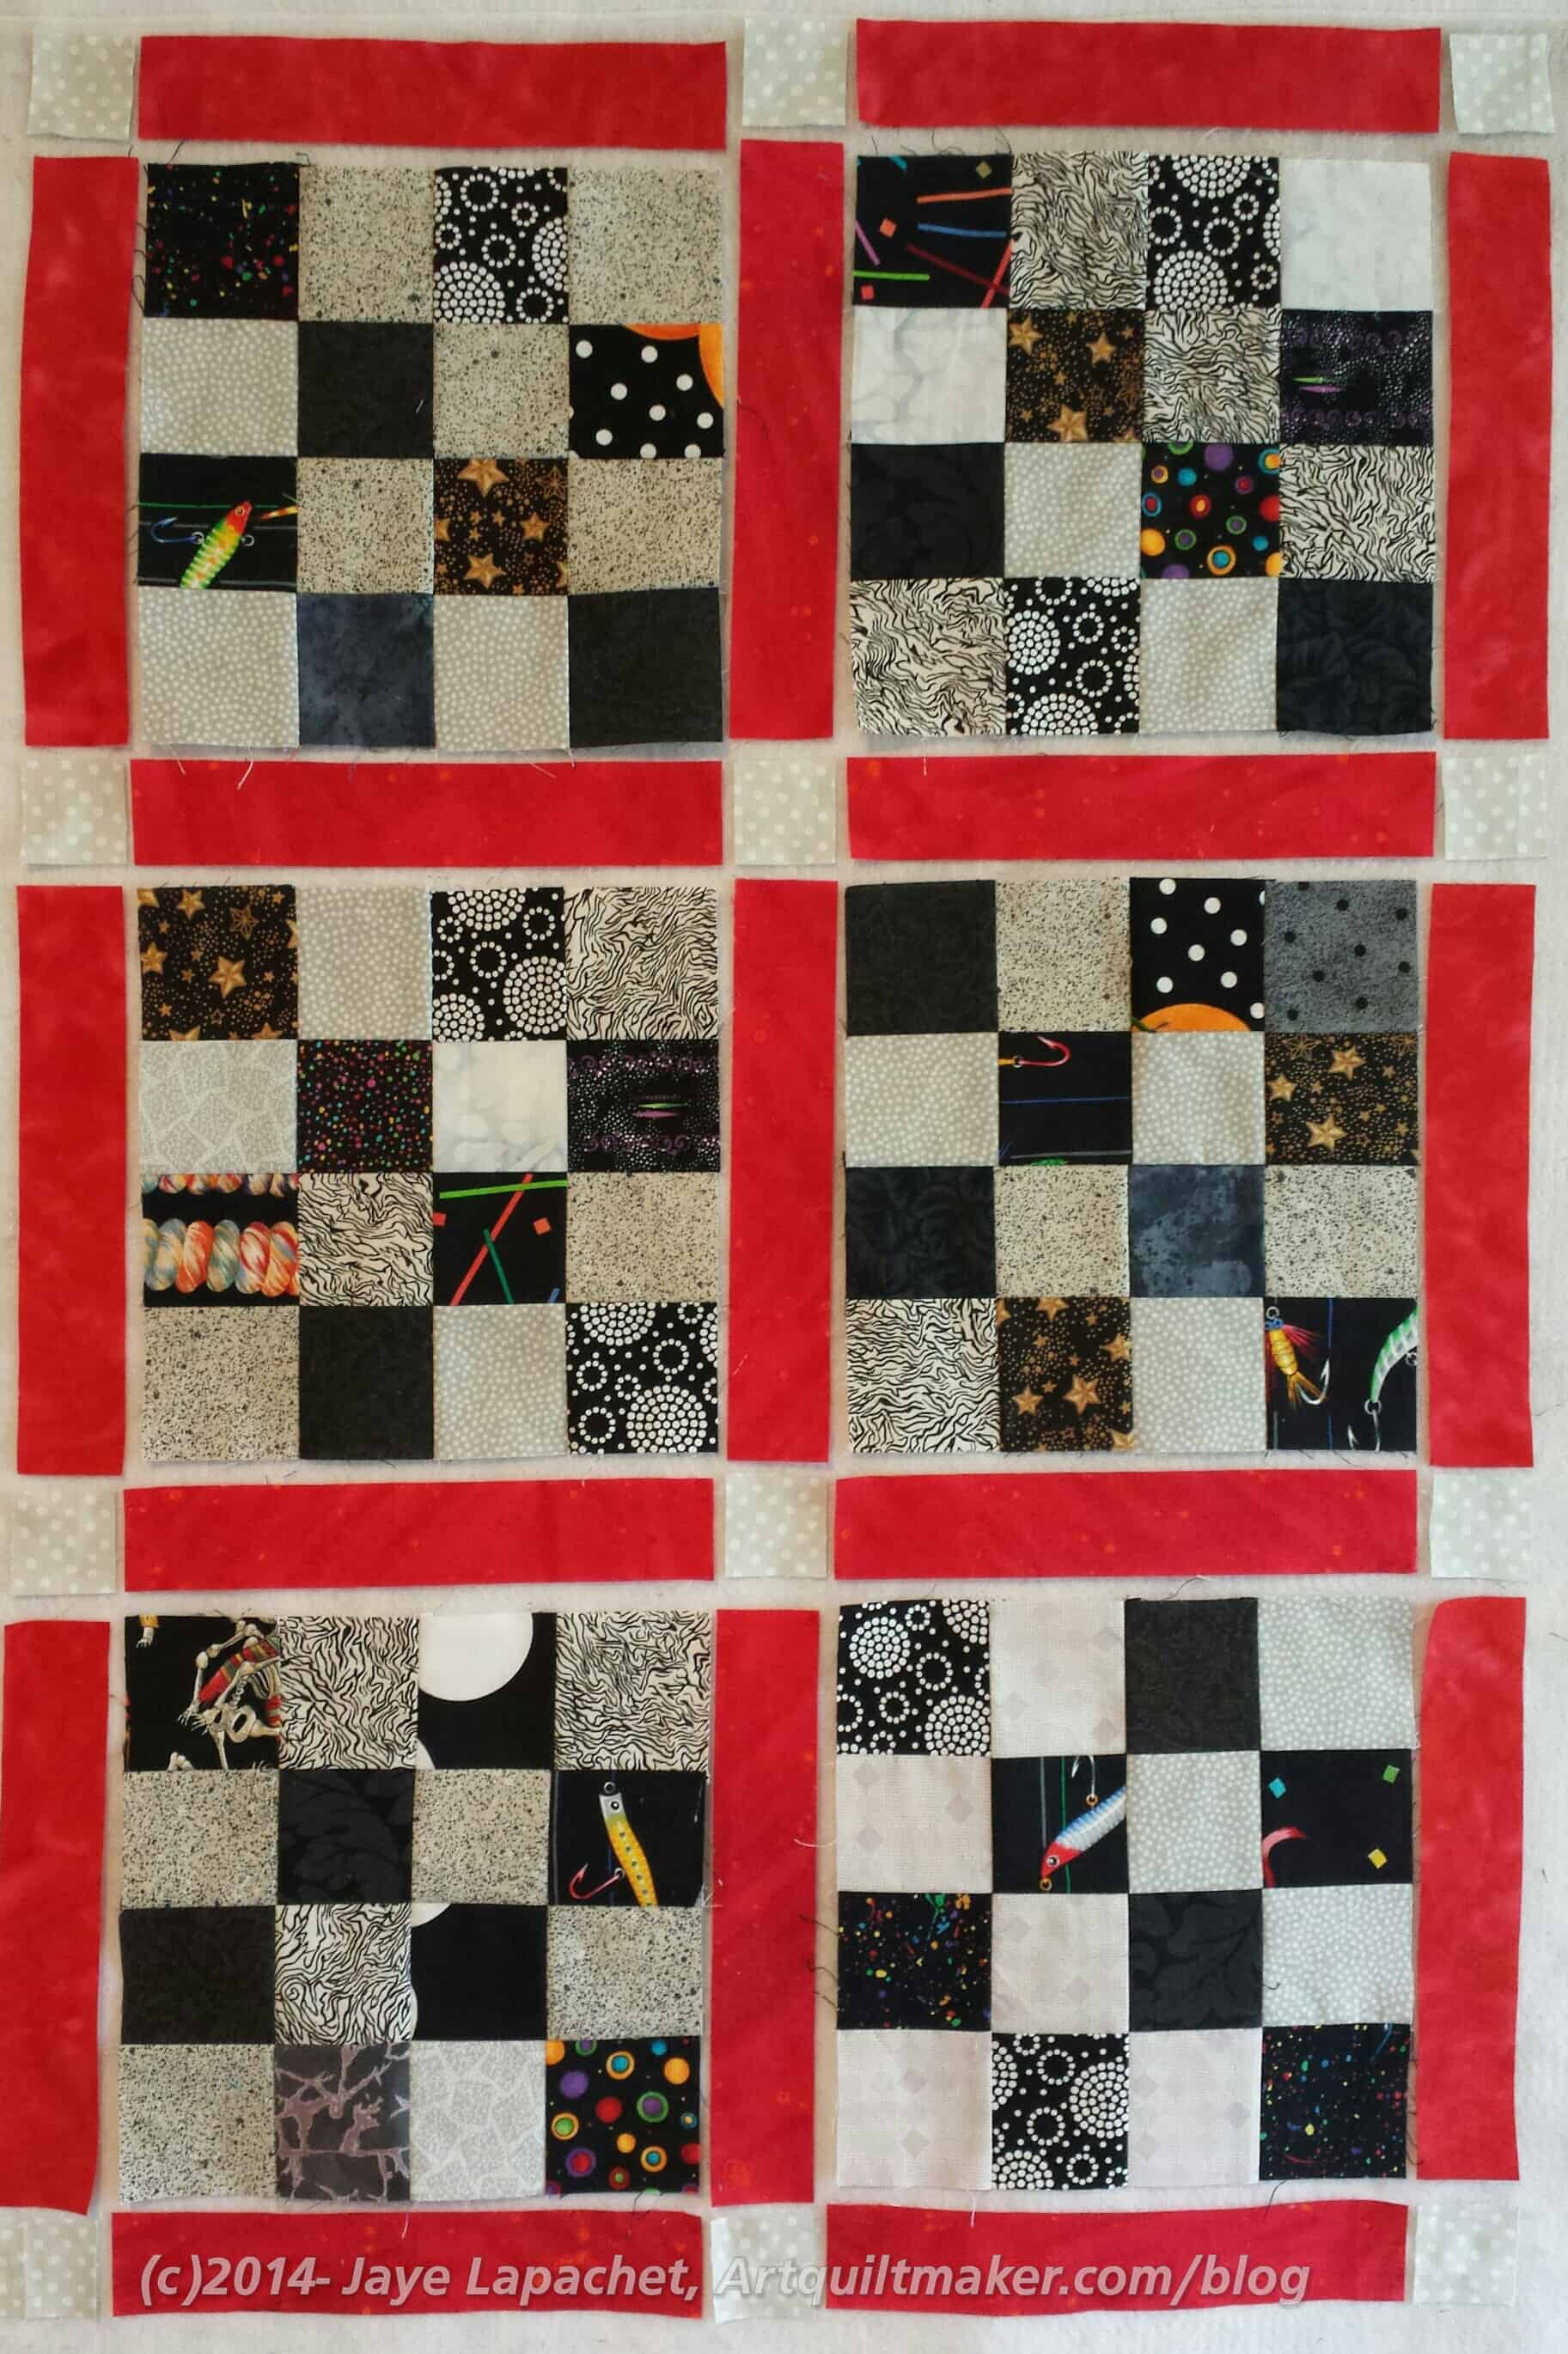
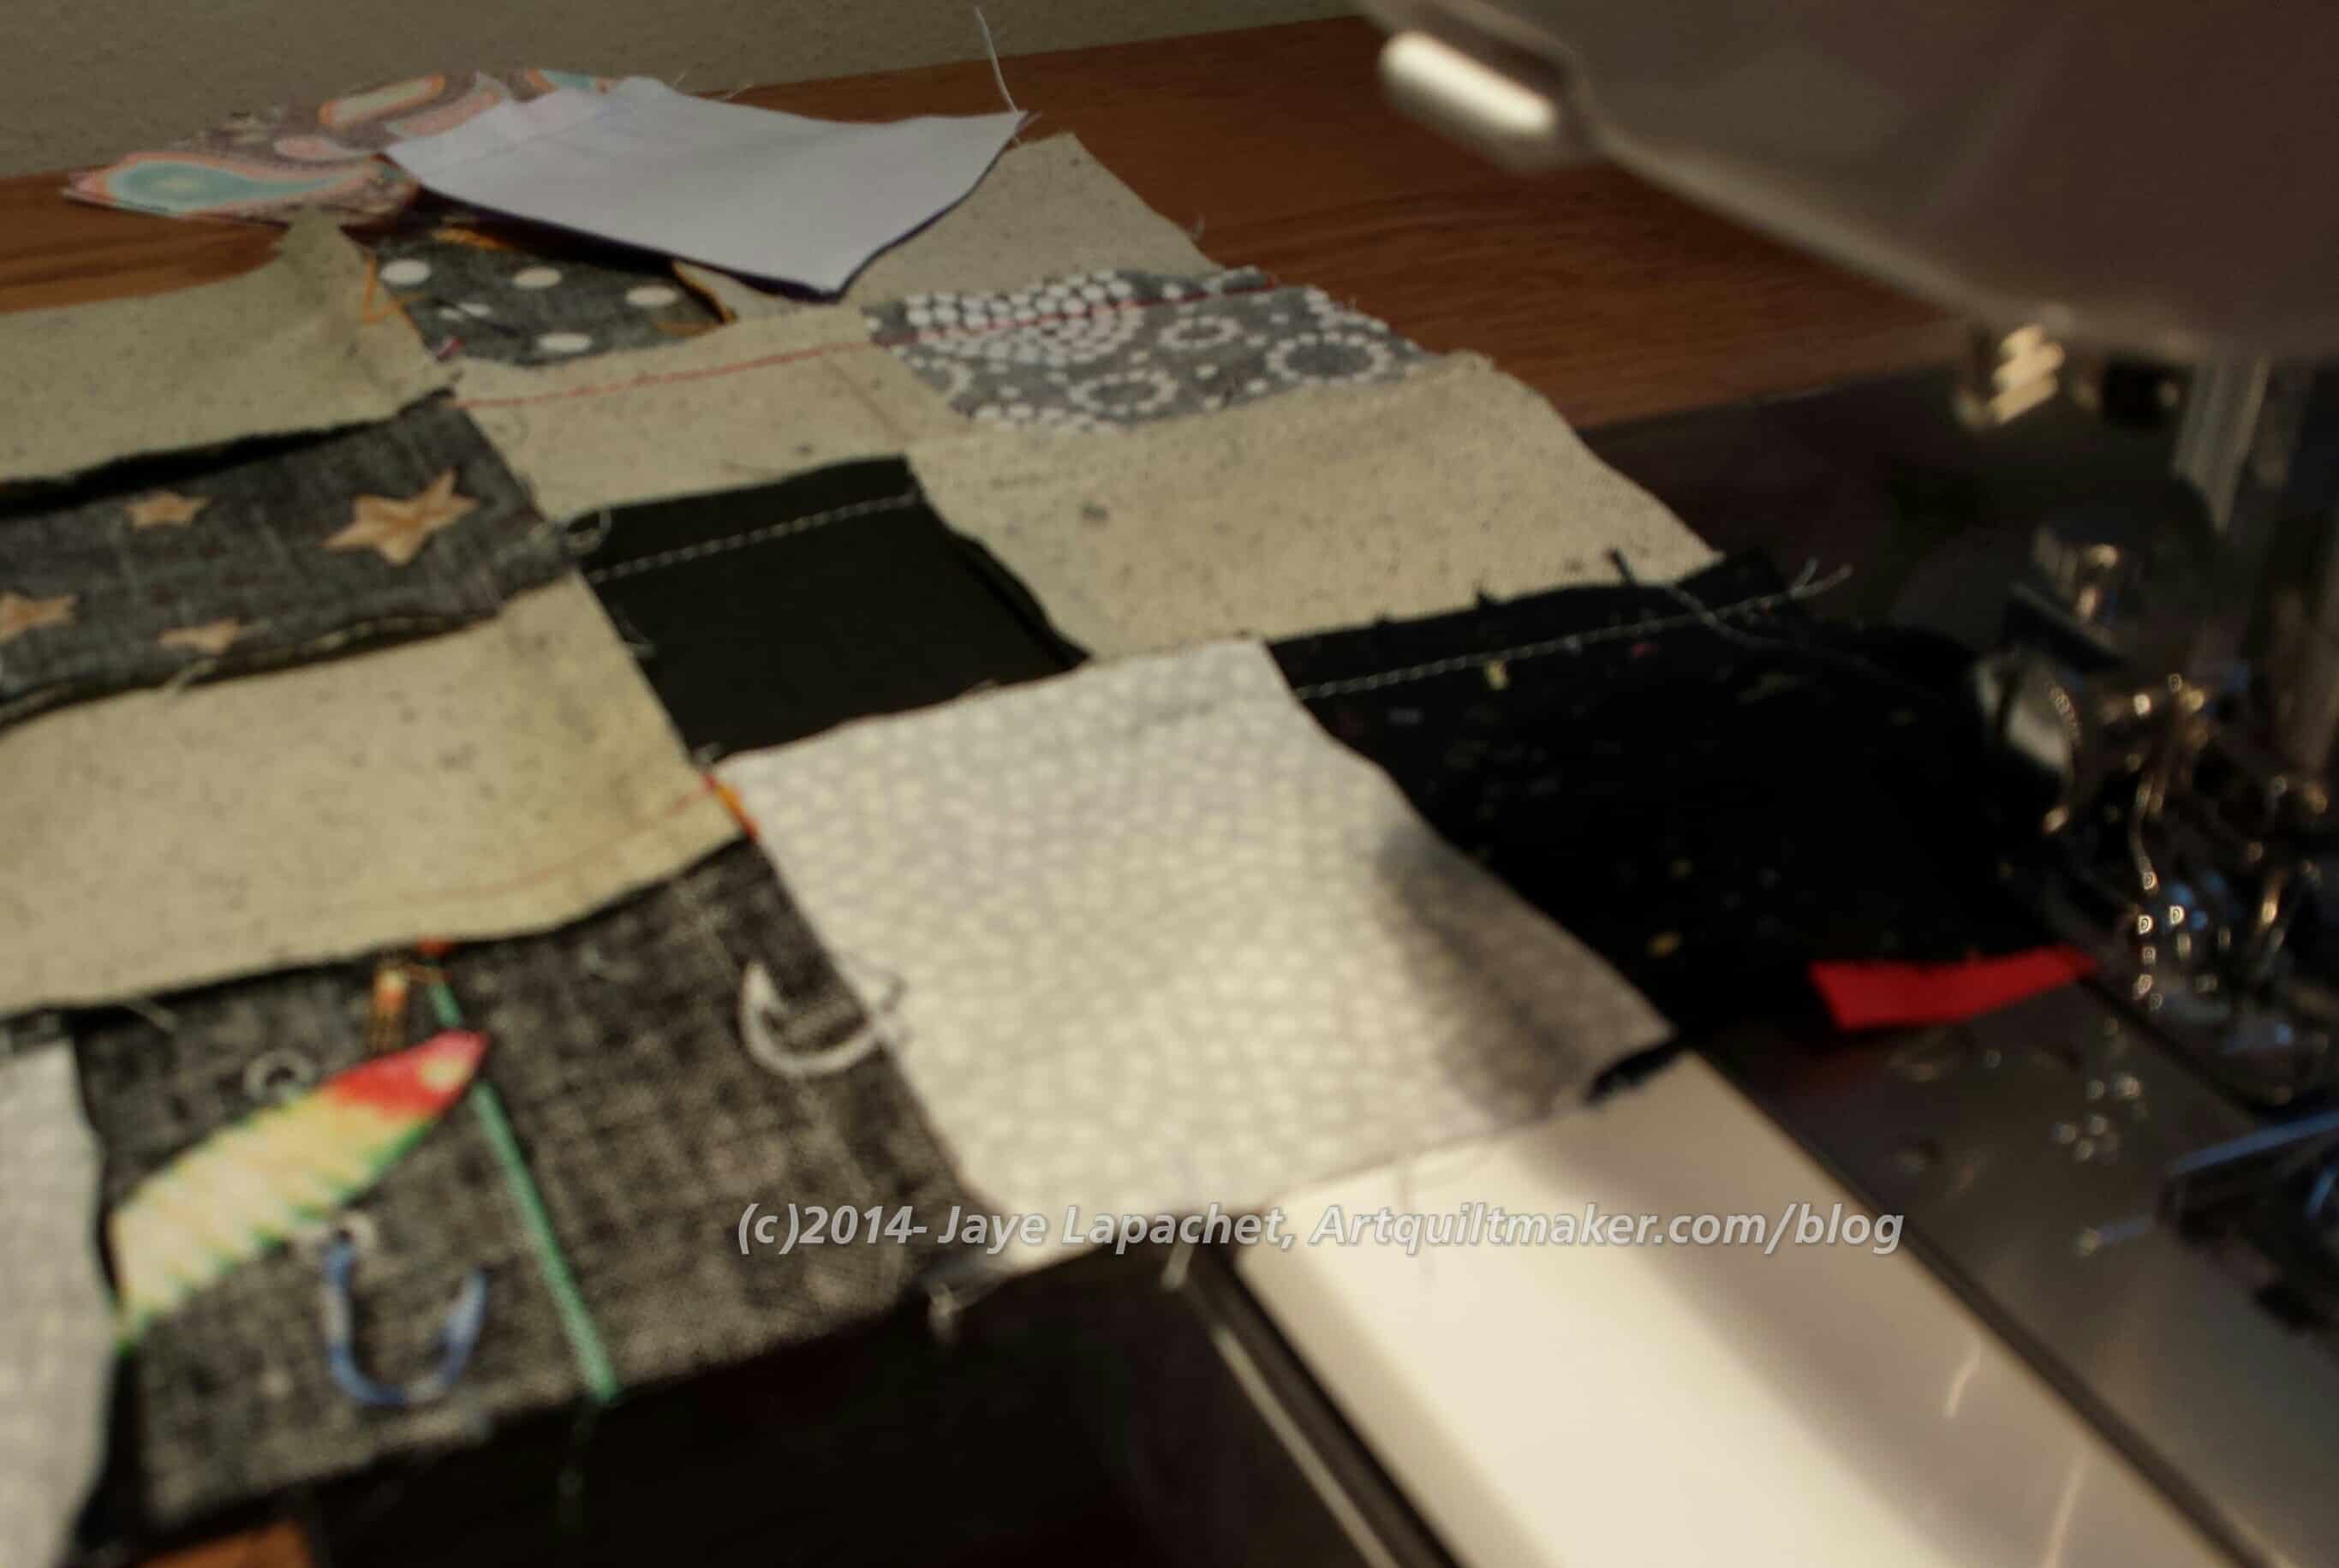
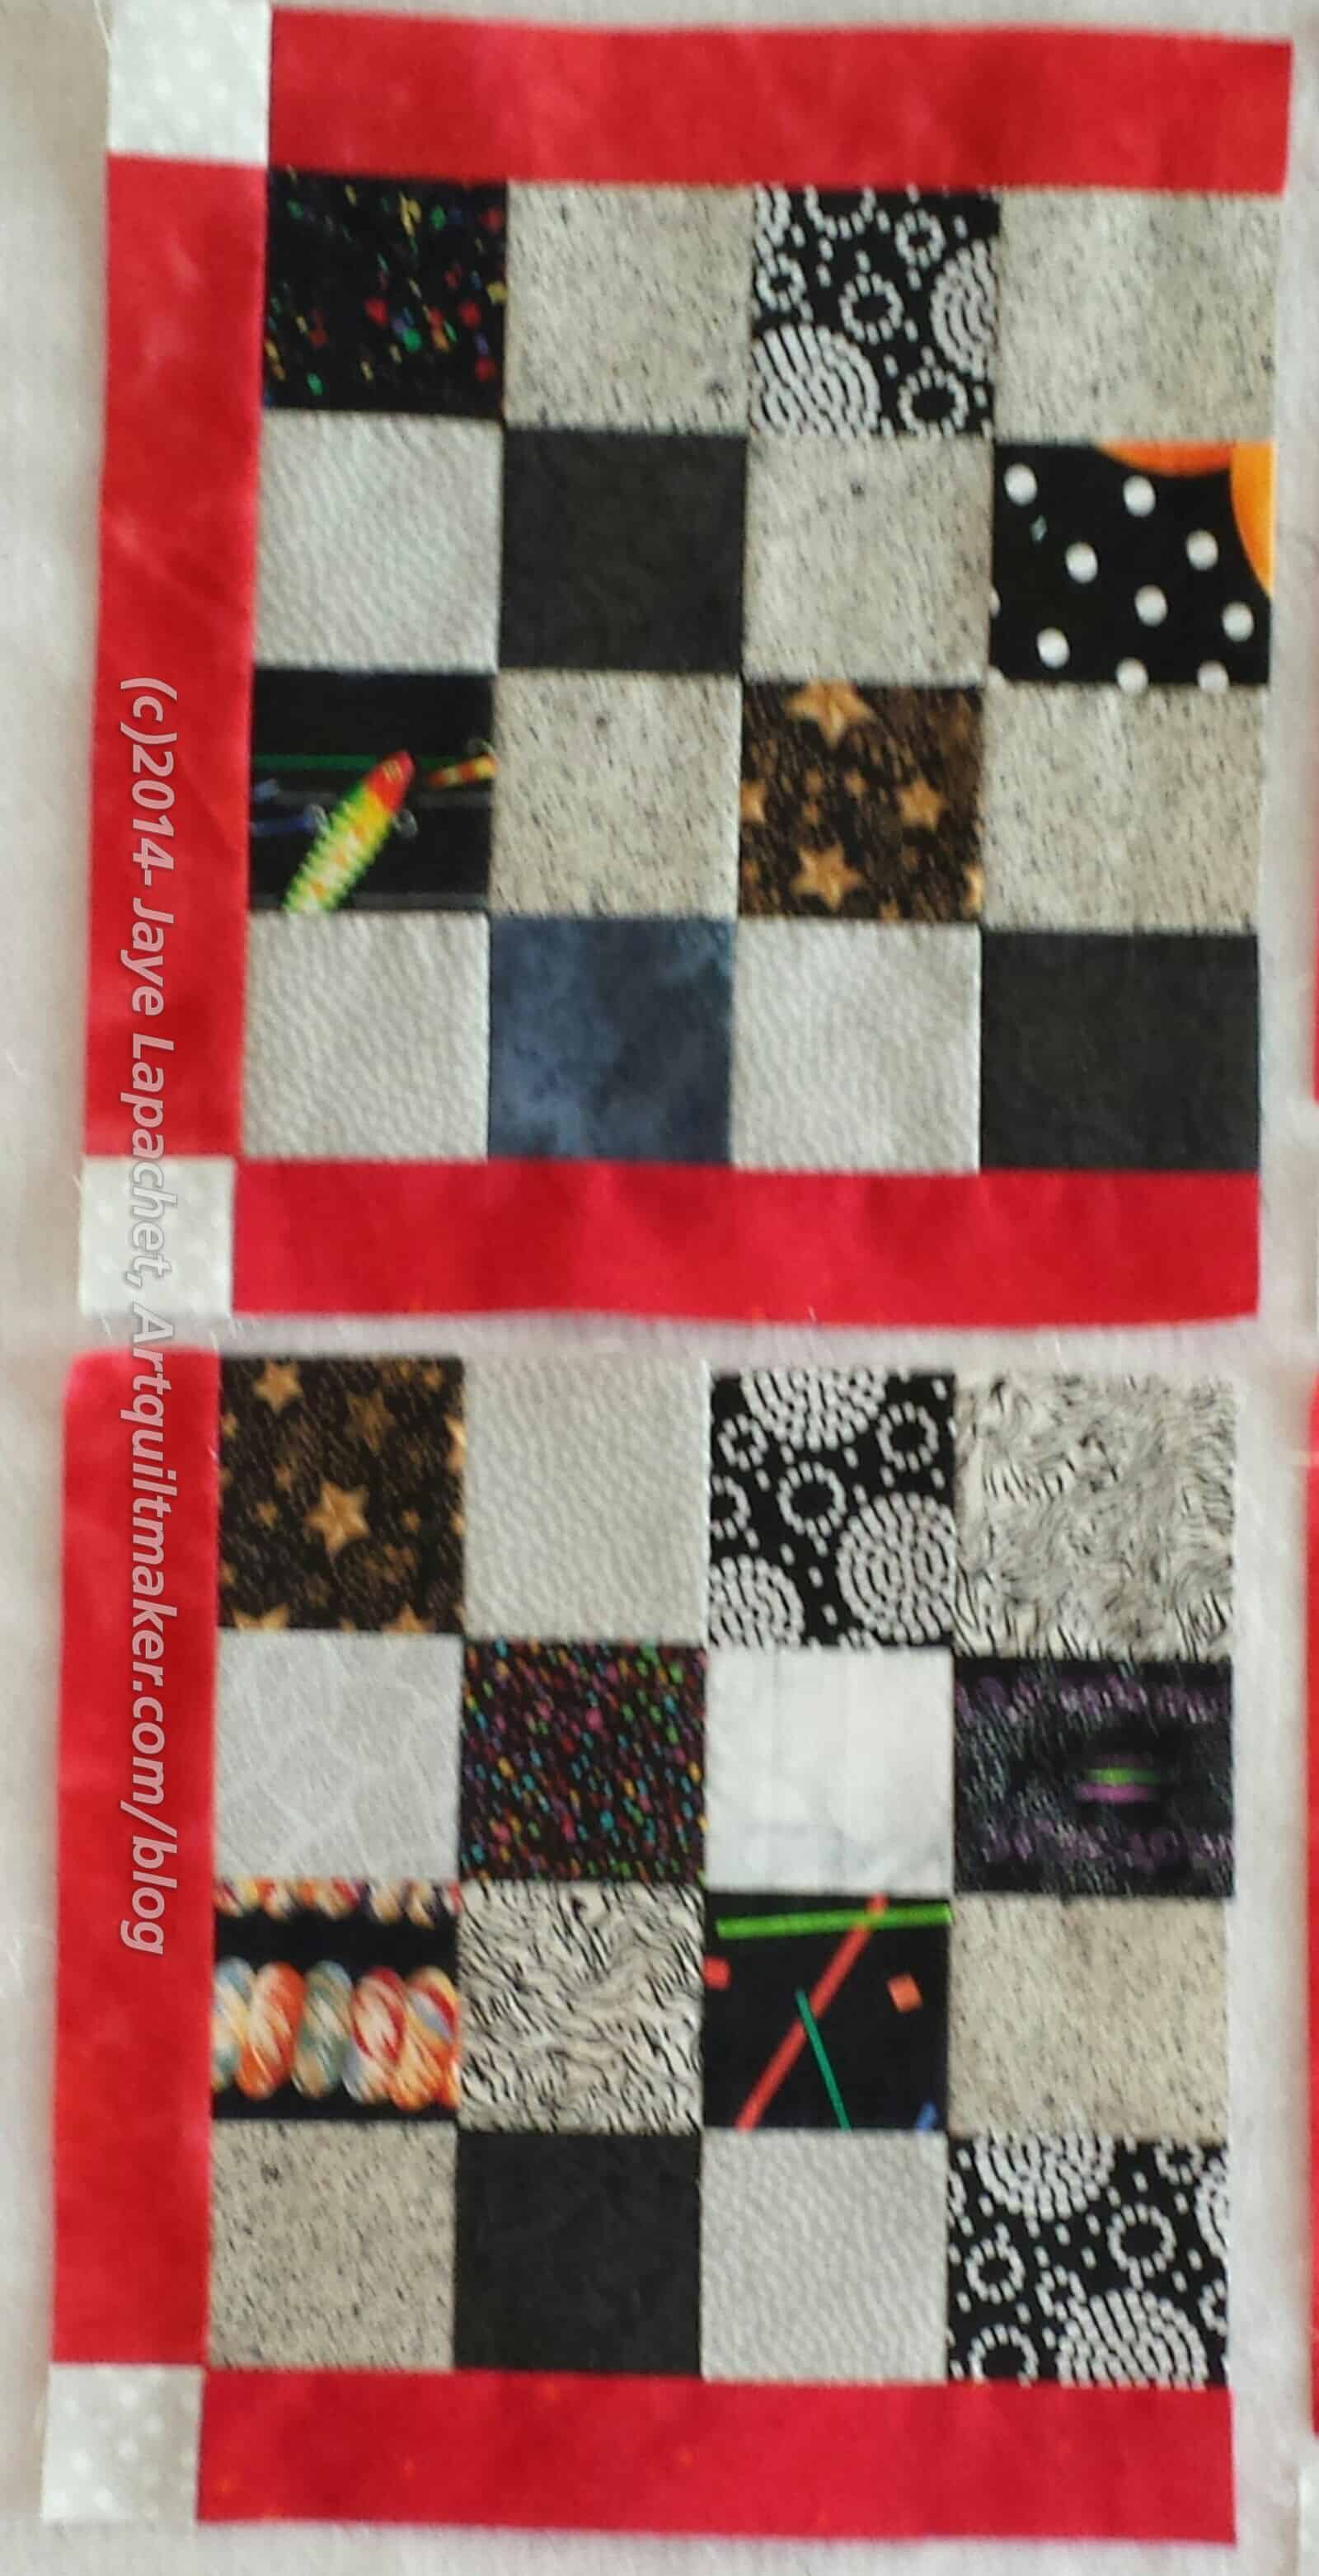
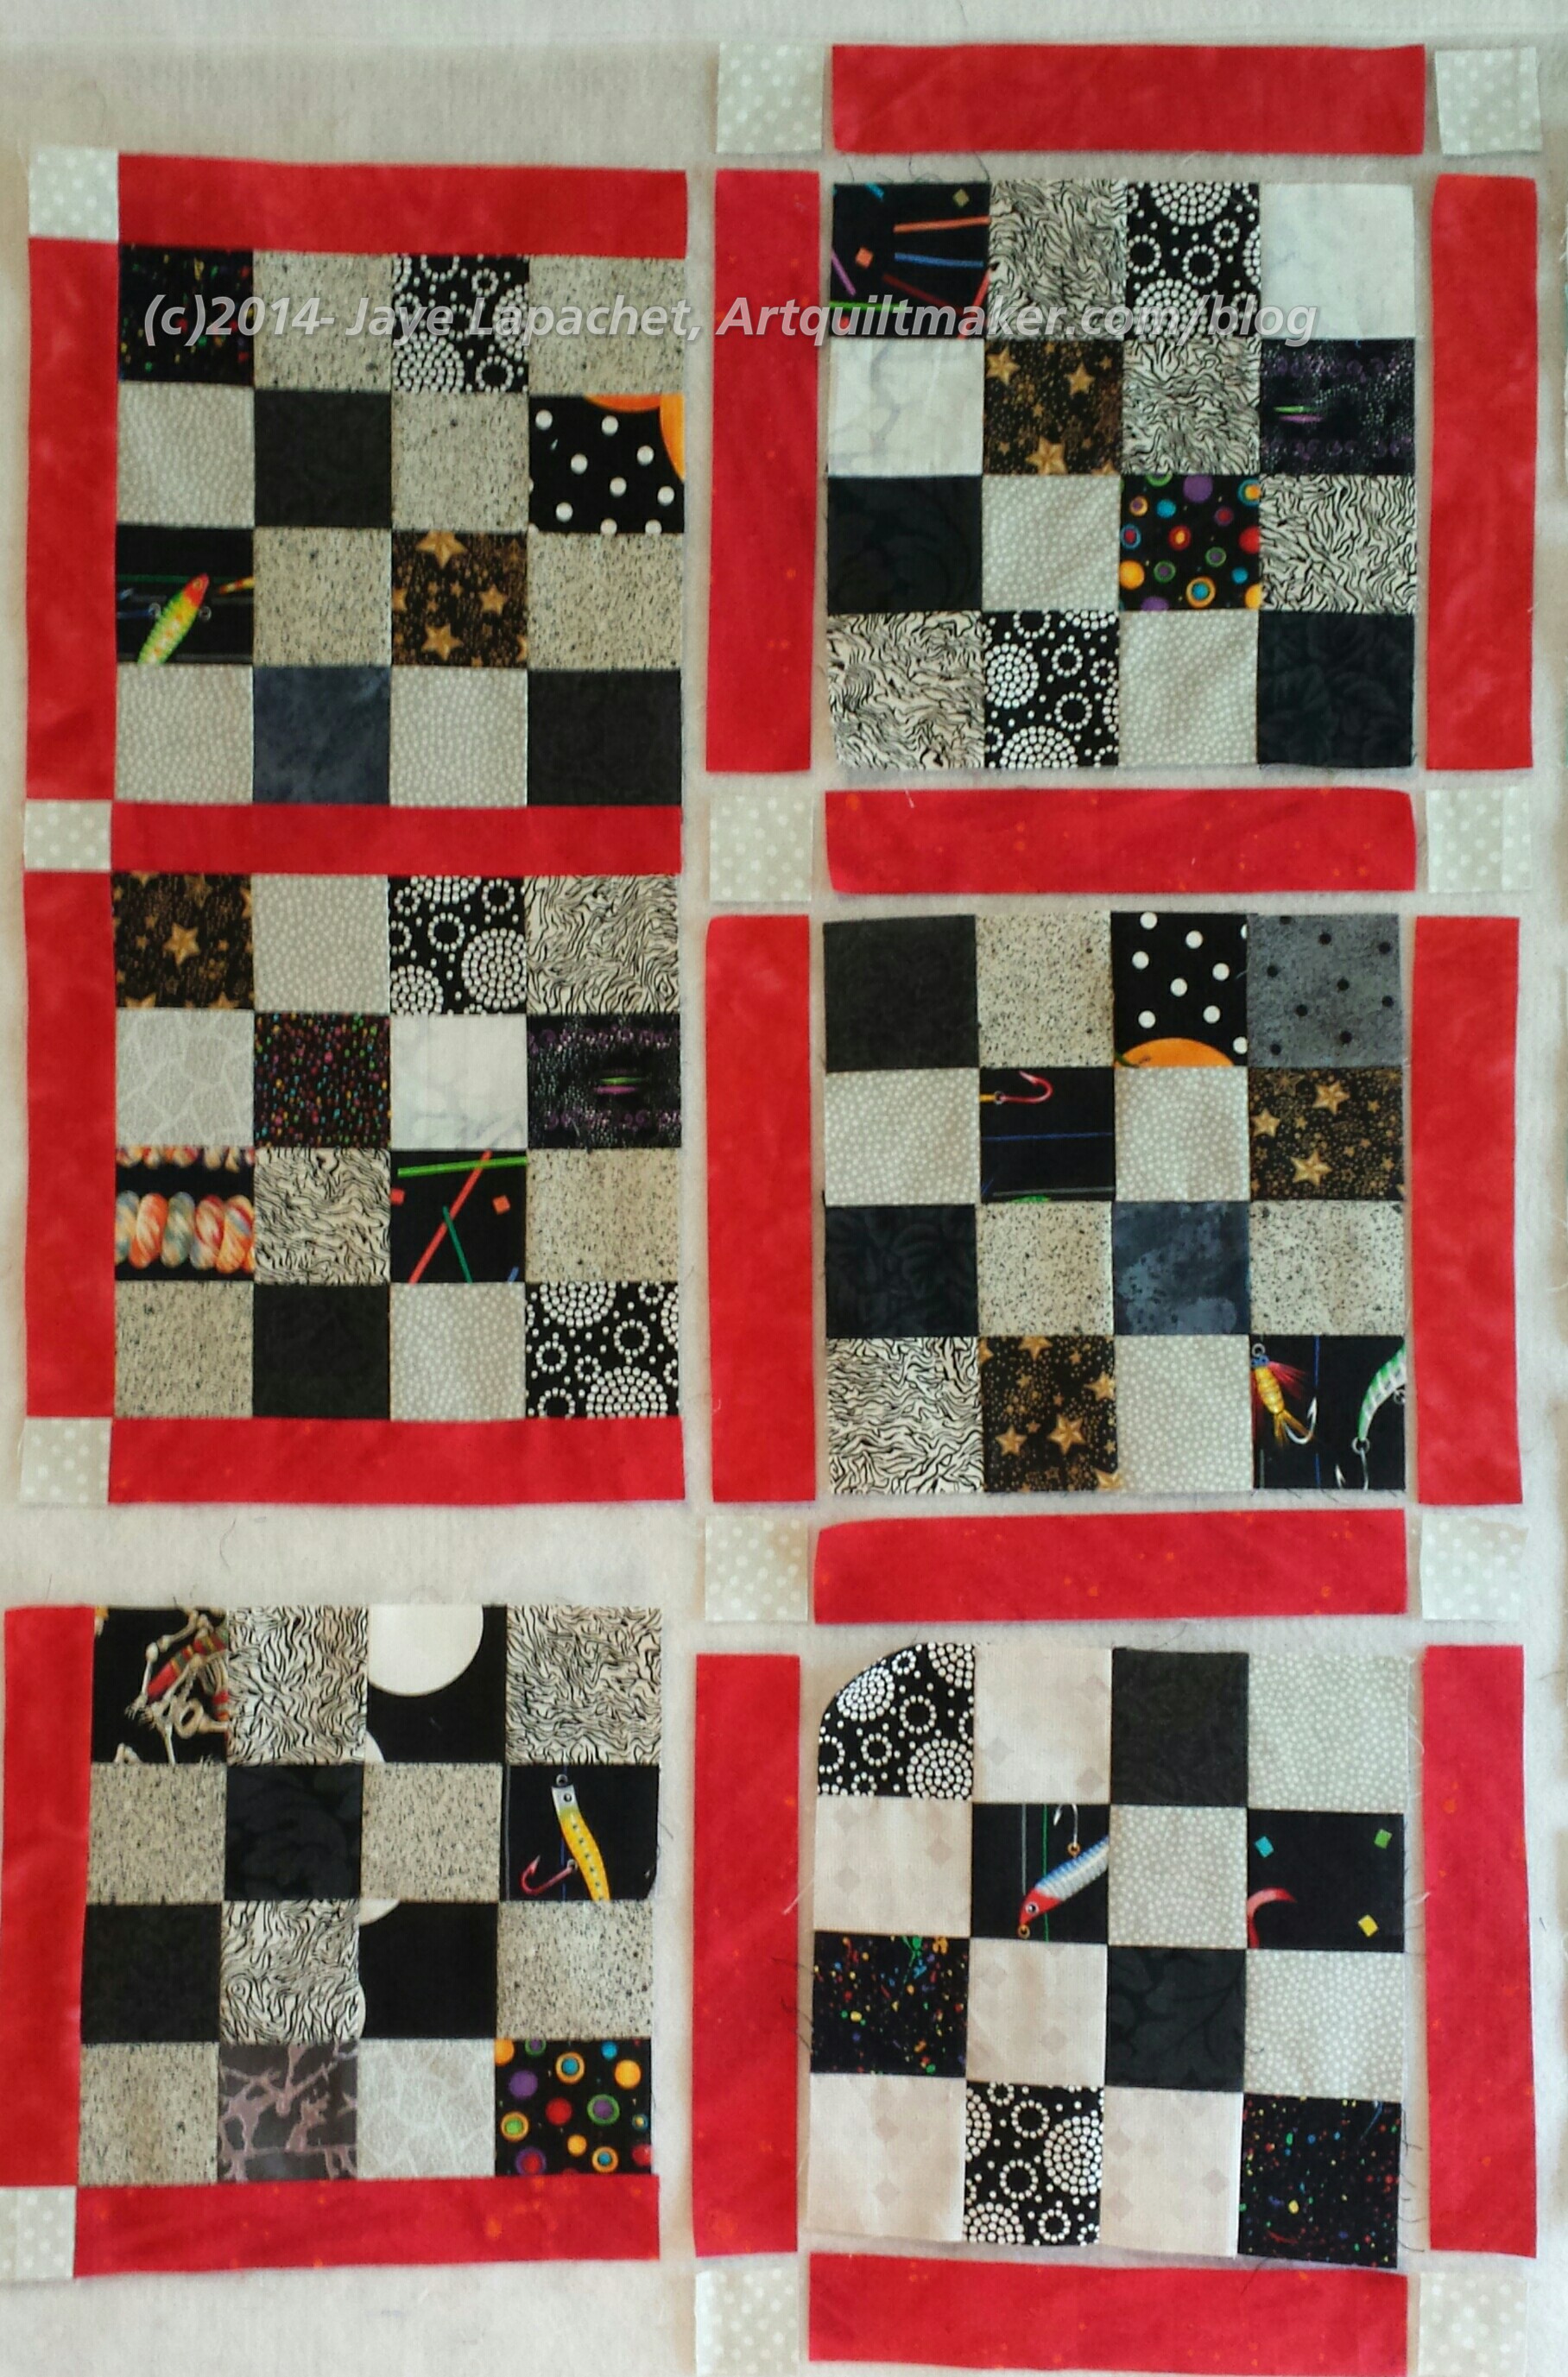
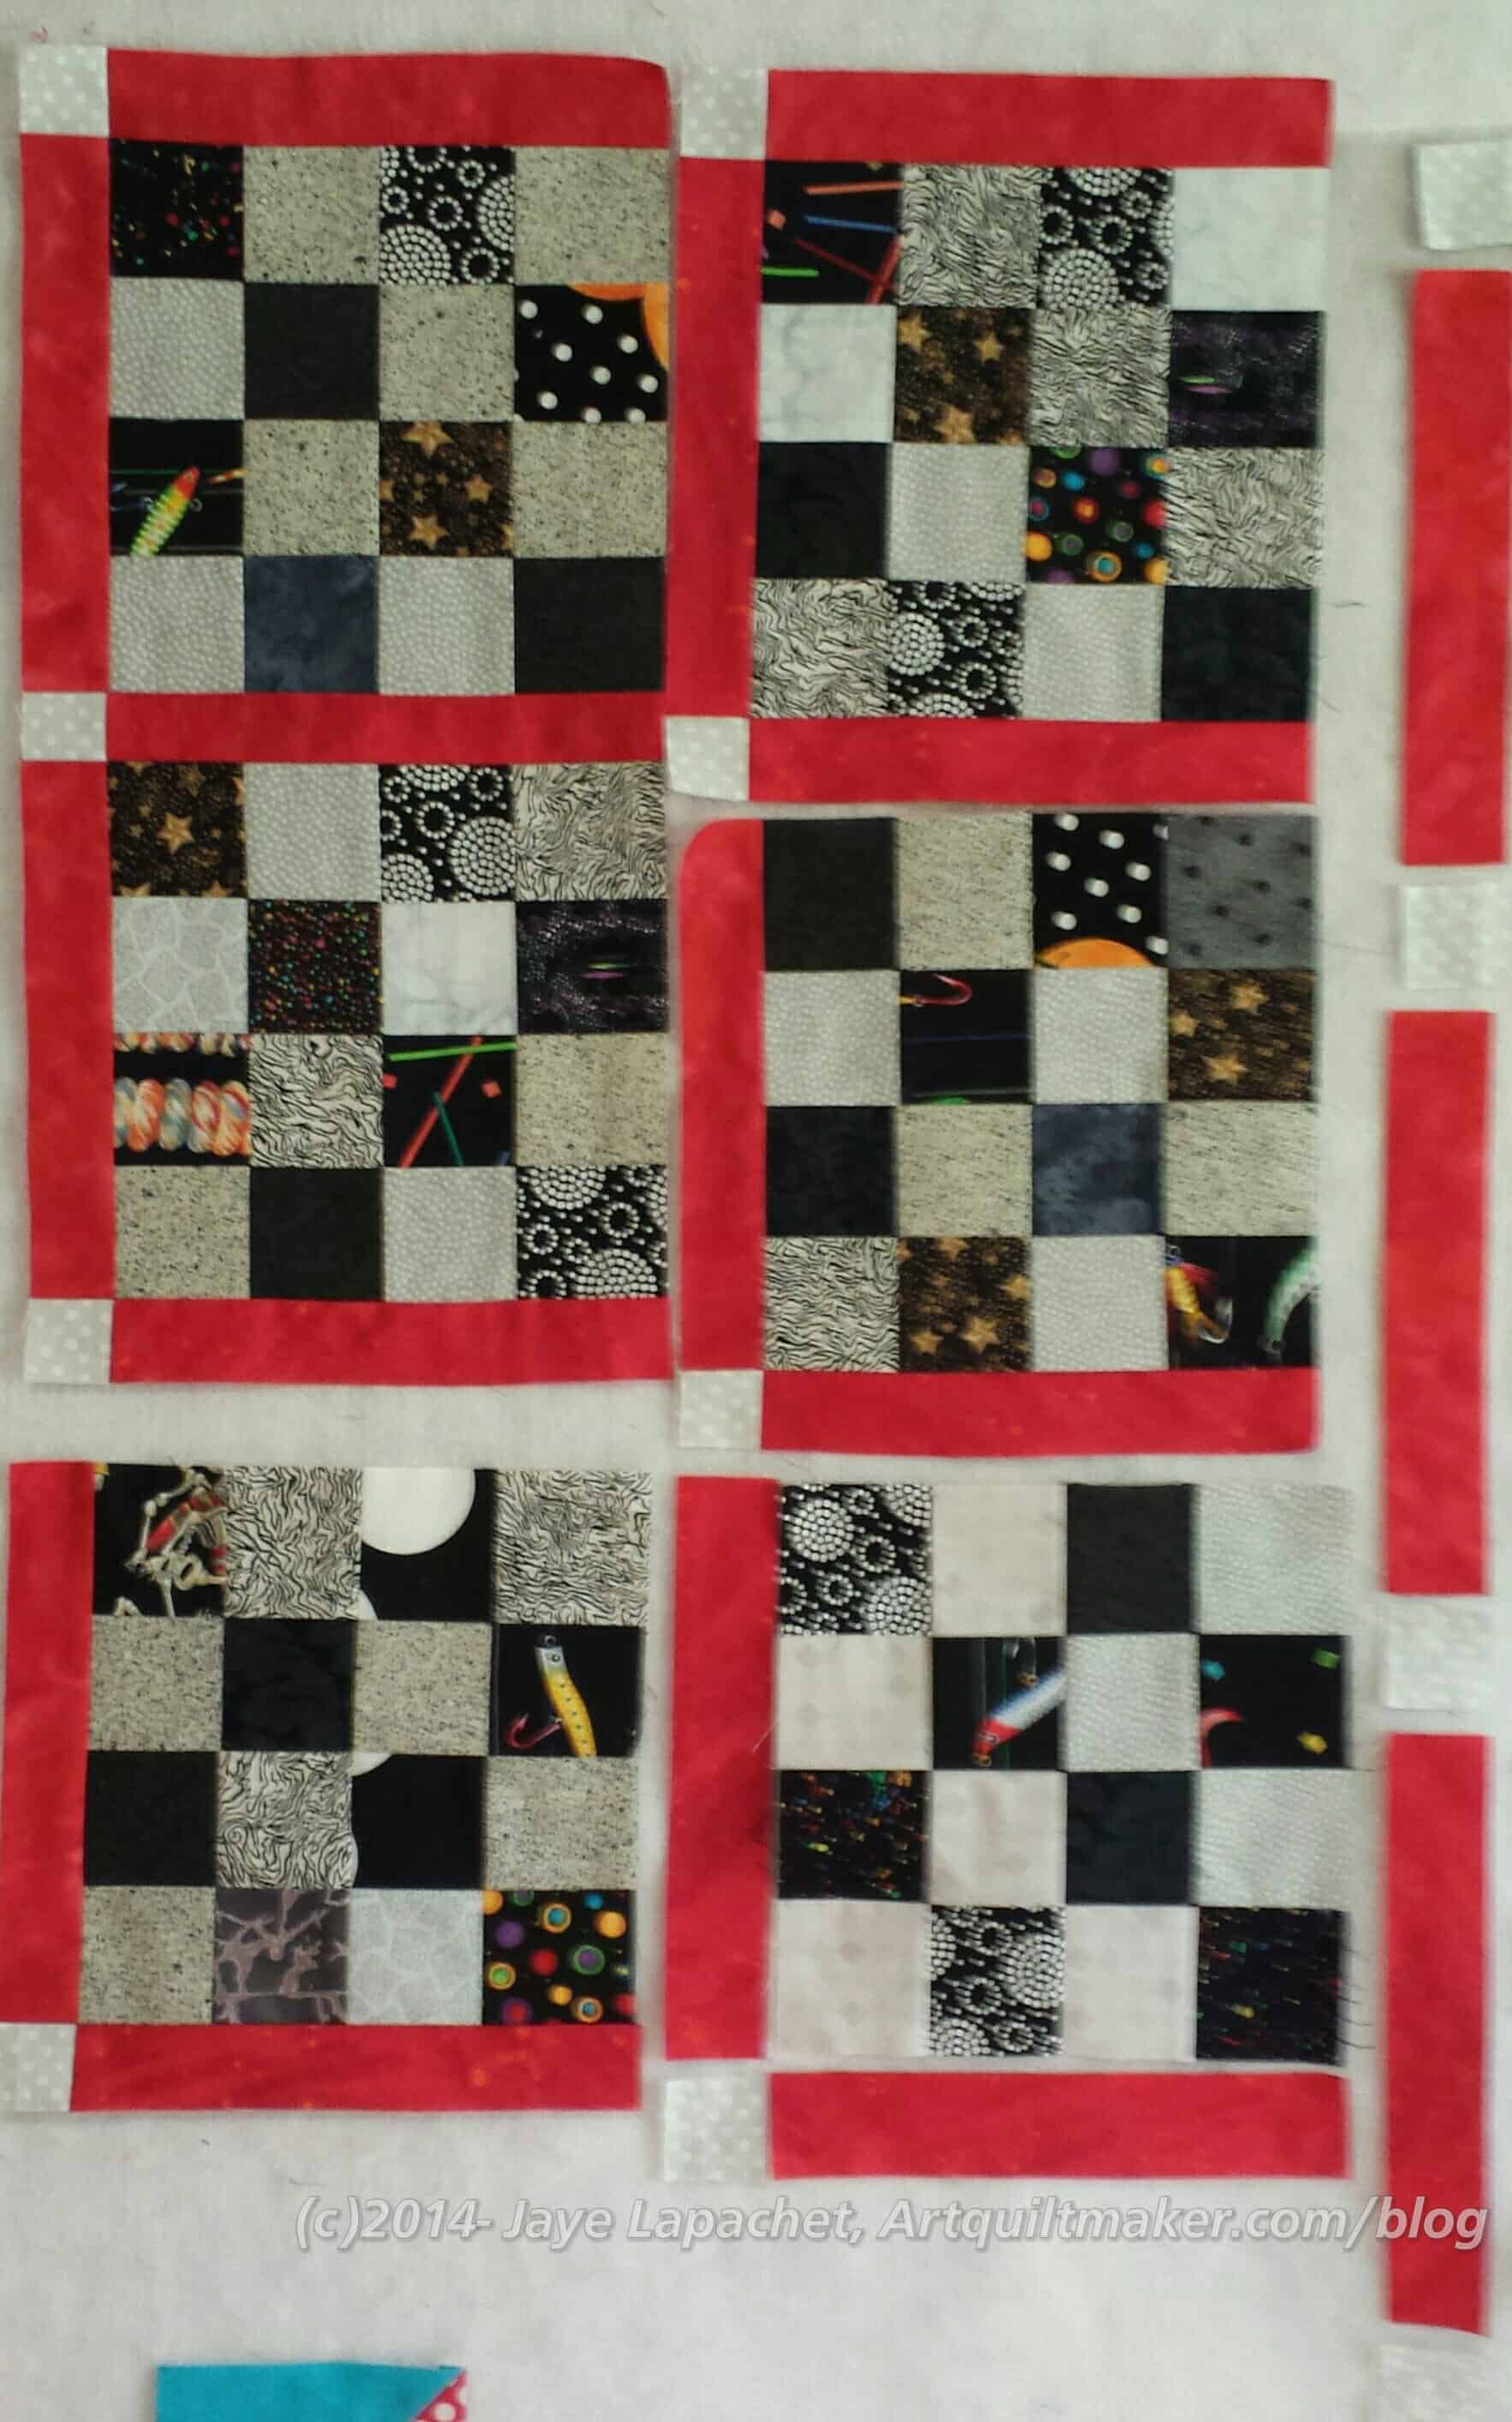
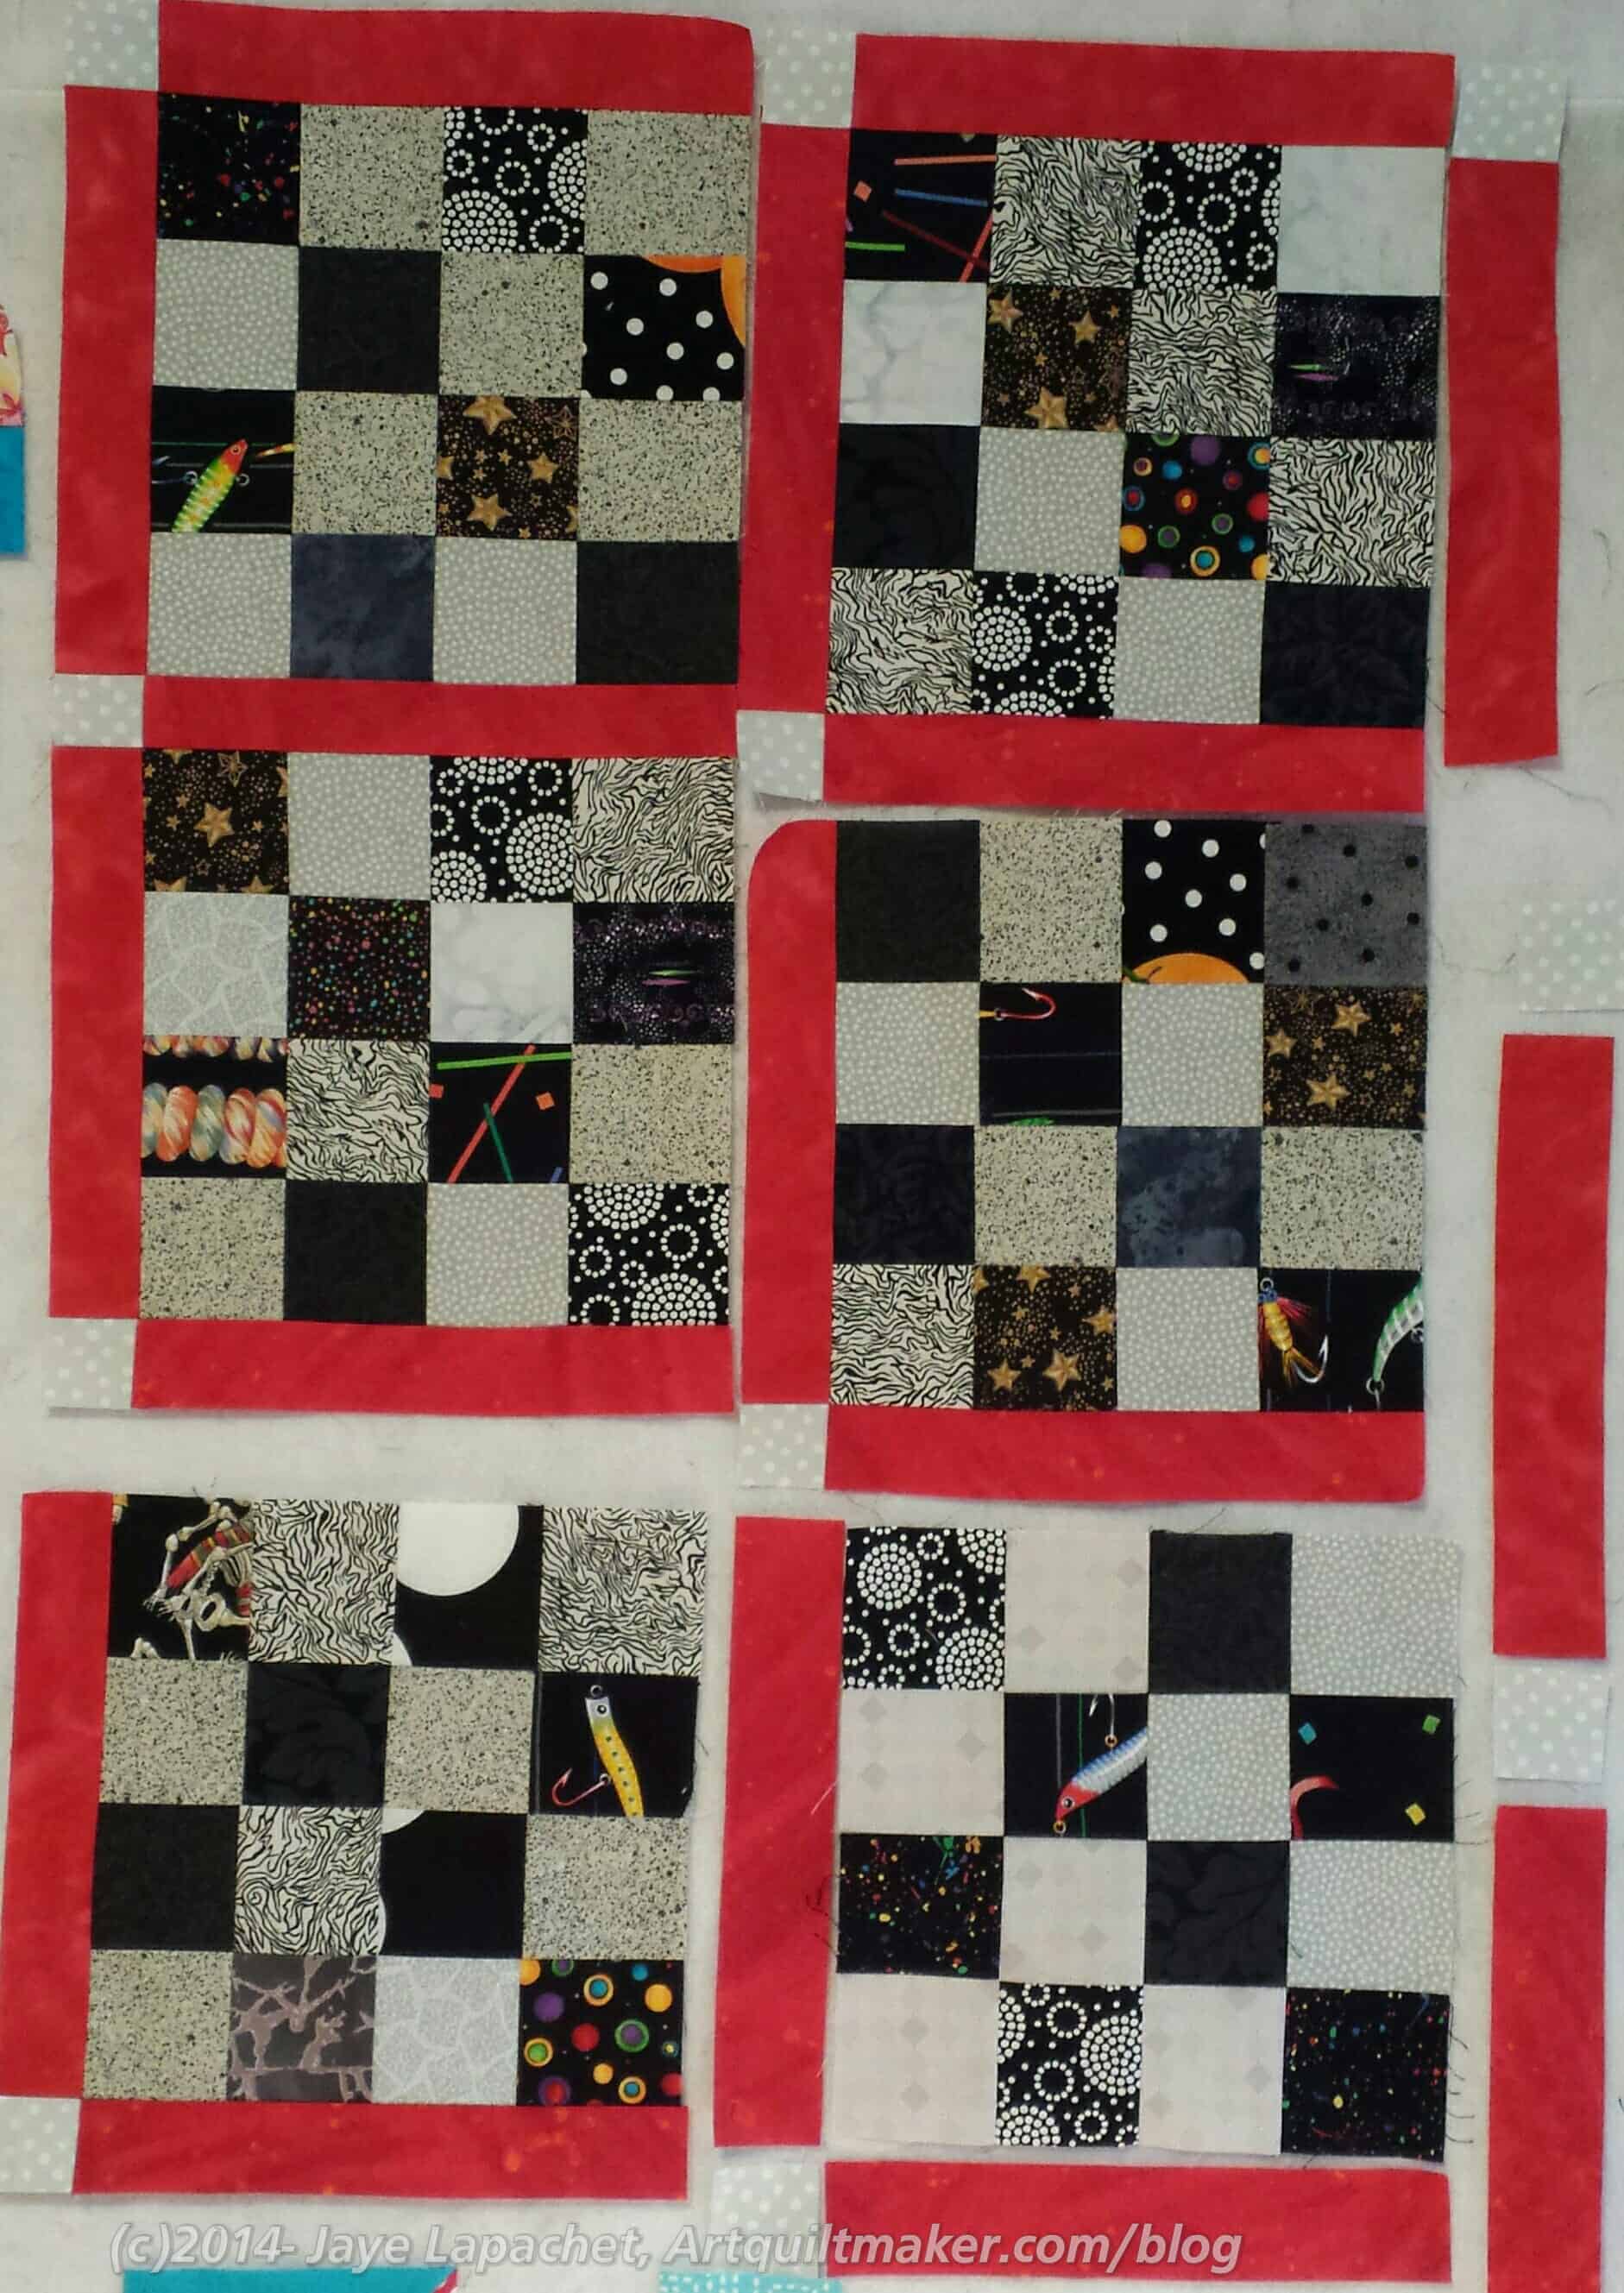
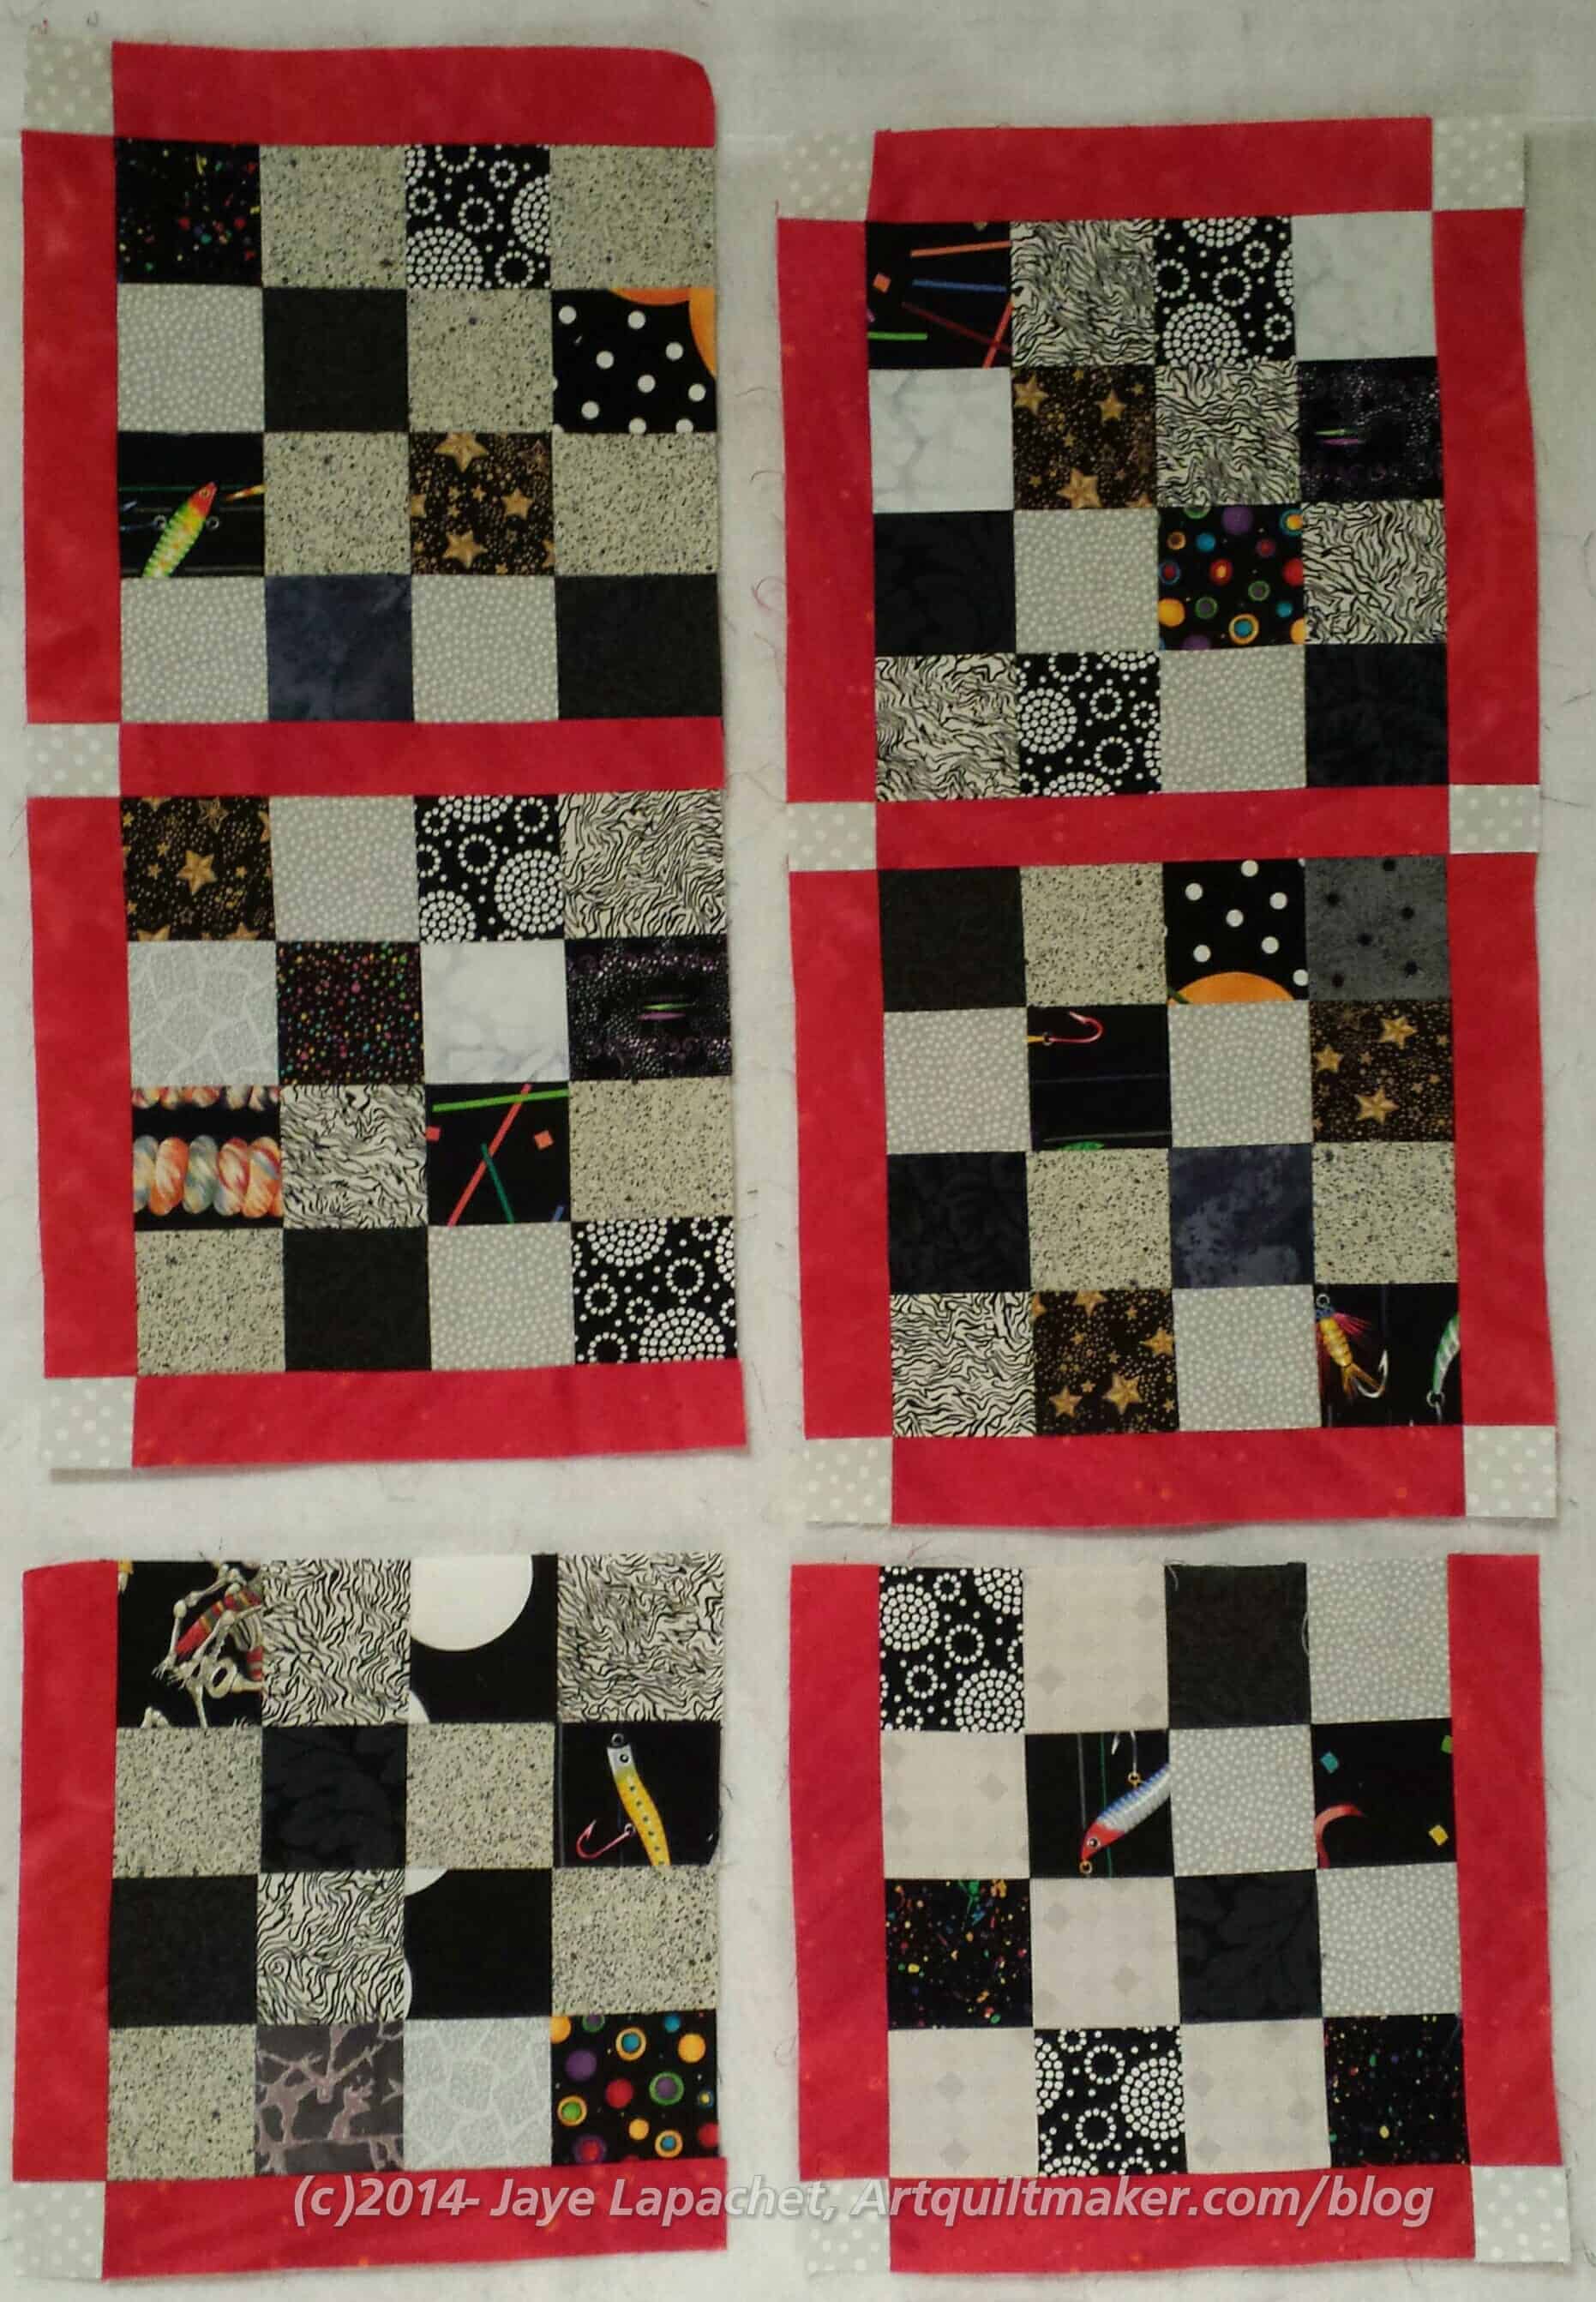
Blocks Laid Out Waiting to be Put Together
The quilt starts out as a bunch of pieces waiting to be put together. In the example above:
Blocks: grey and black Sashing: red Cornerstones: grey
The basic idea is to put the quilt together as you would a block: sew smaller patches together to make larger sections. I avoid sewing the quilt together in rows as I think the quilt is more square and there are fewer out of line intersections than when the quilt is sewn together in rows.
In the example above, the border can be incorporated into the construction of the quilt. You won’t need to put it on after, which will also help line up the cornerstones with the sashing.
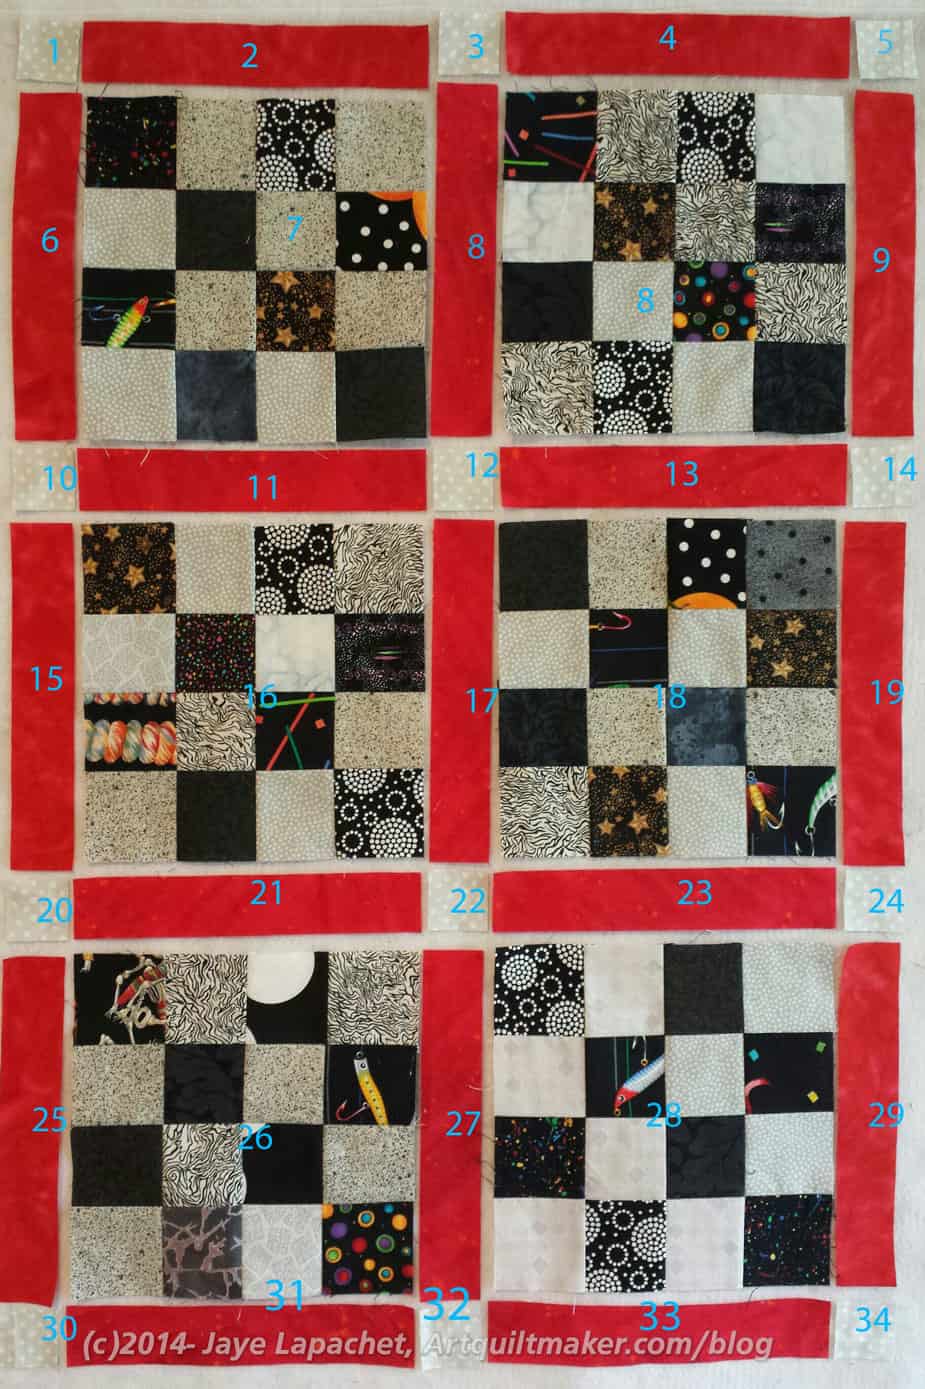
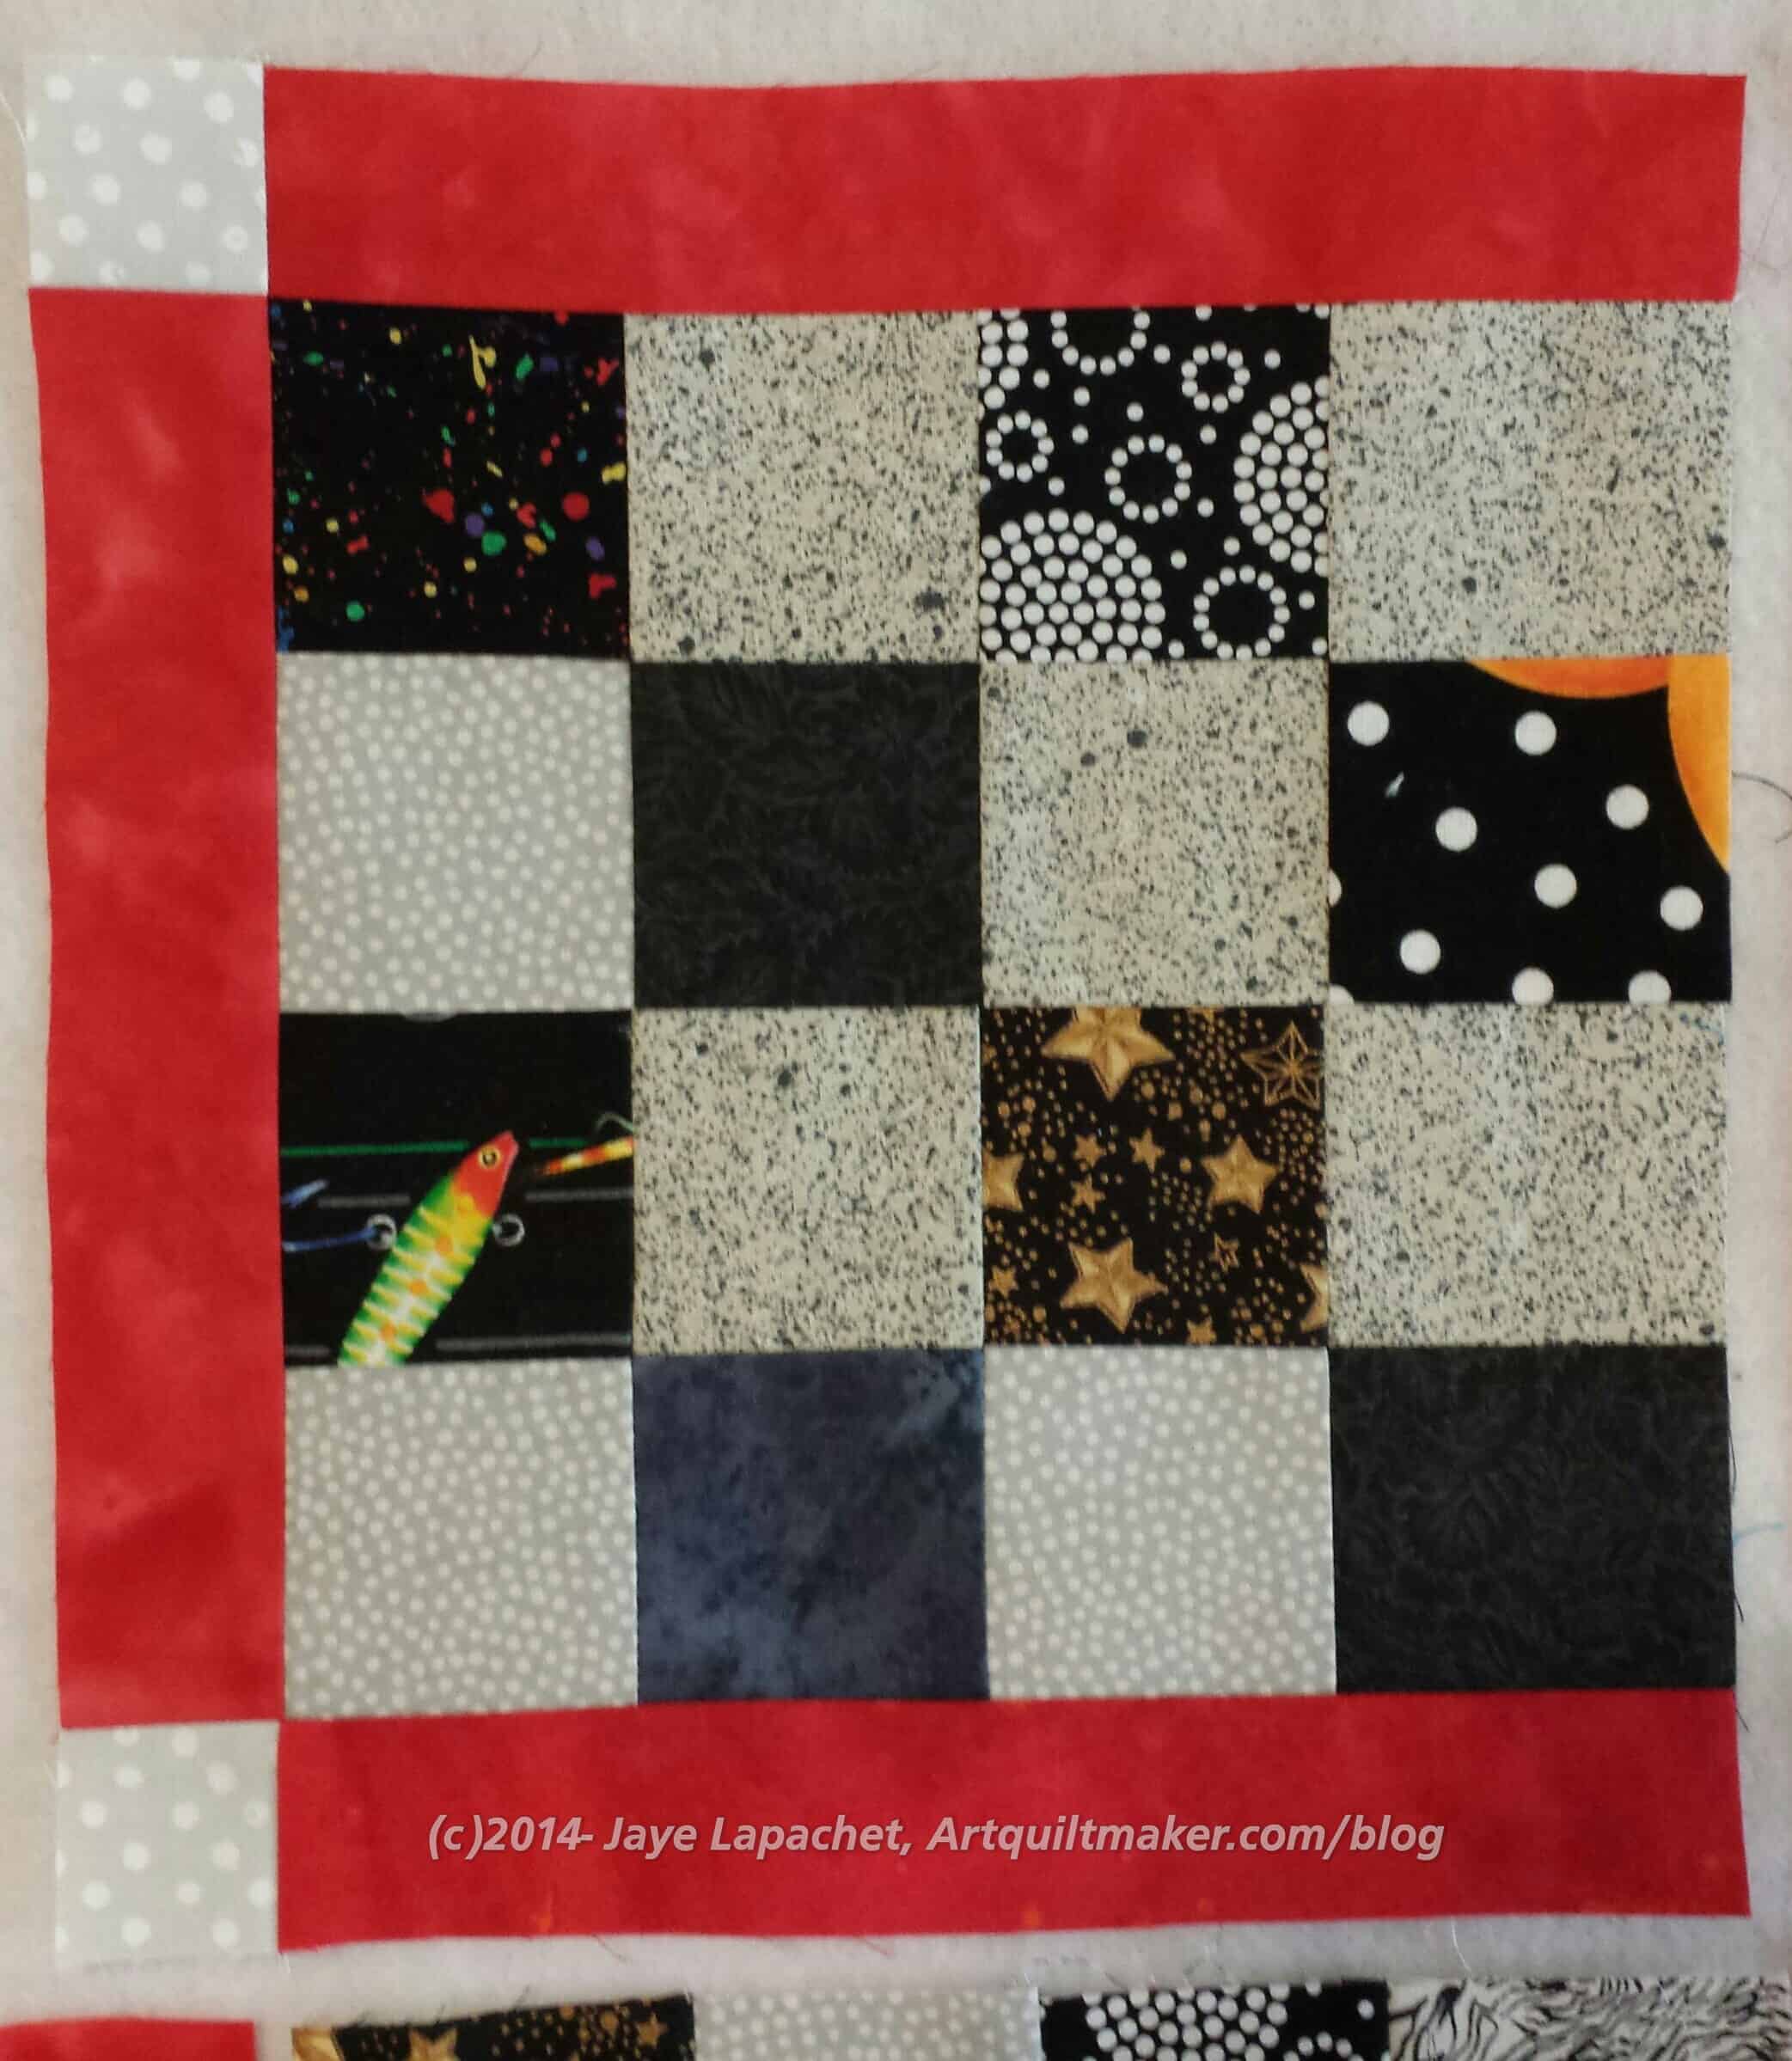
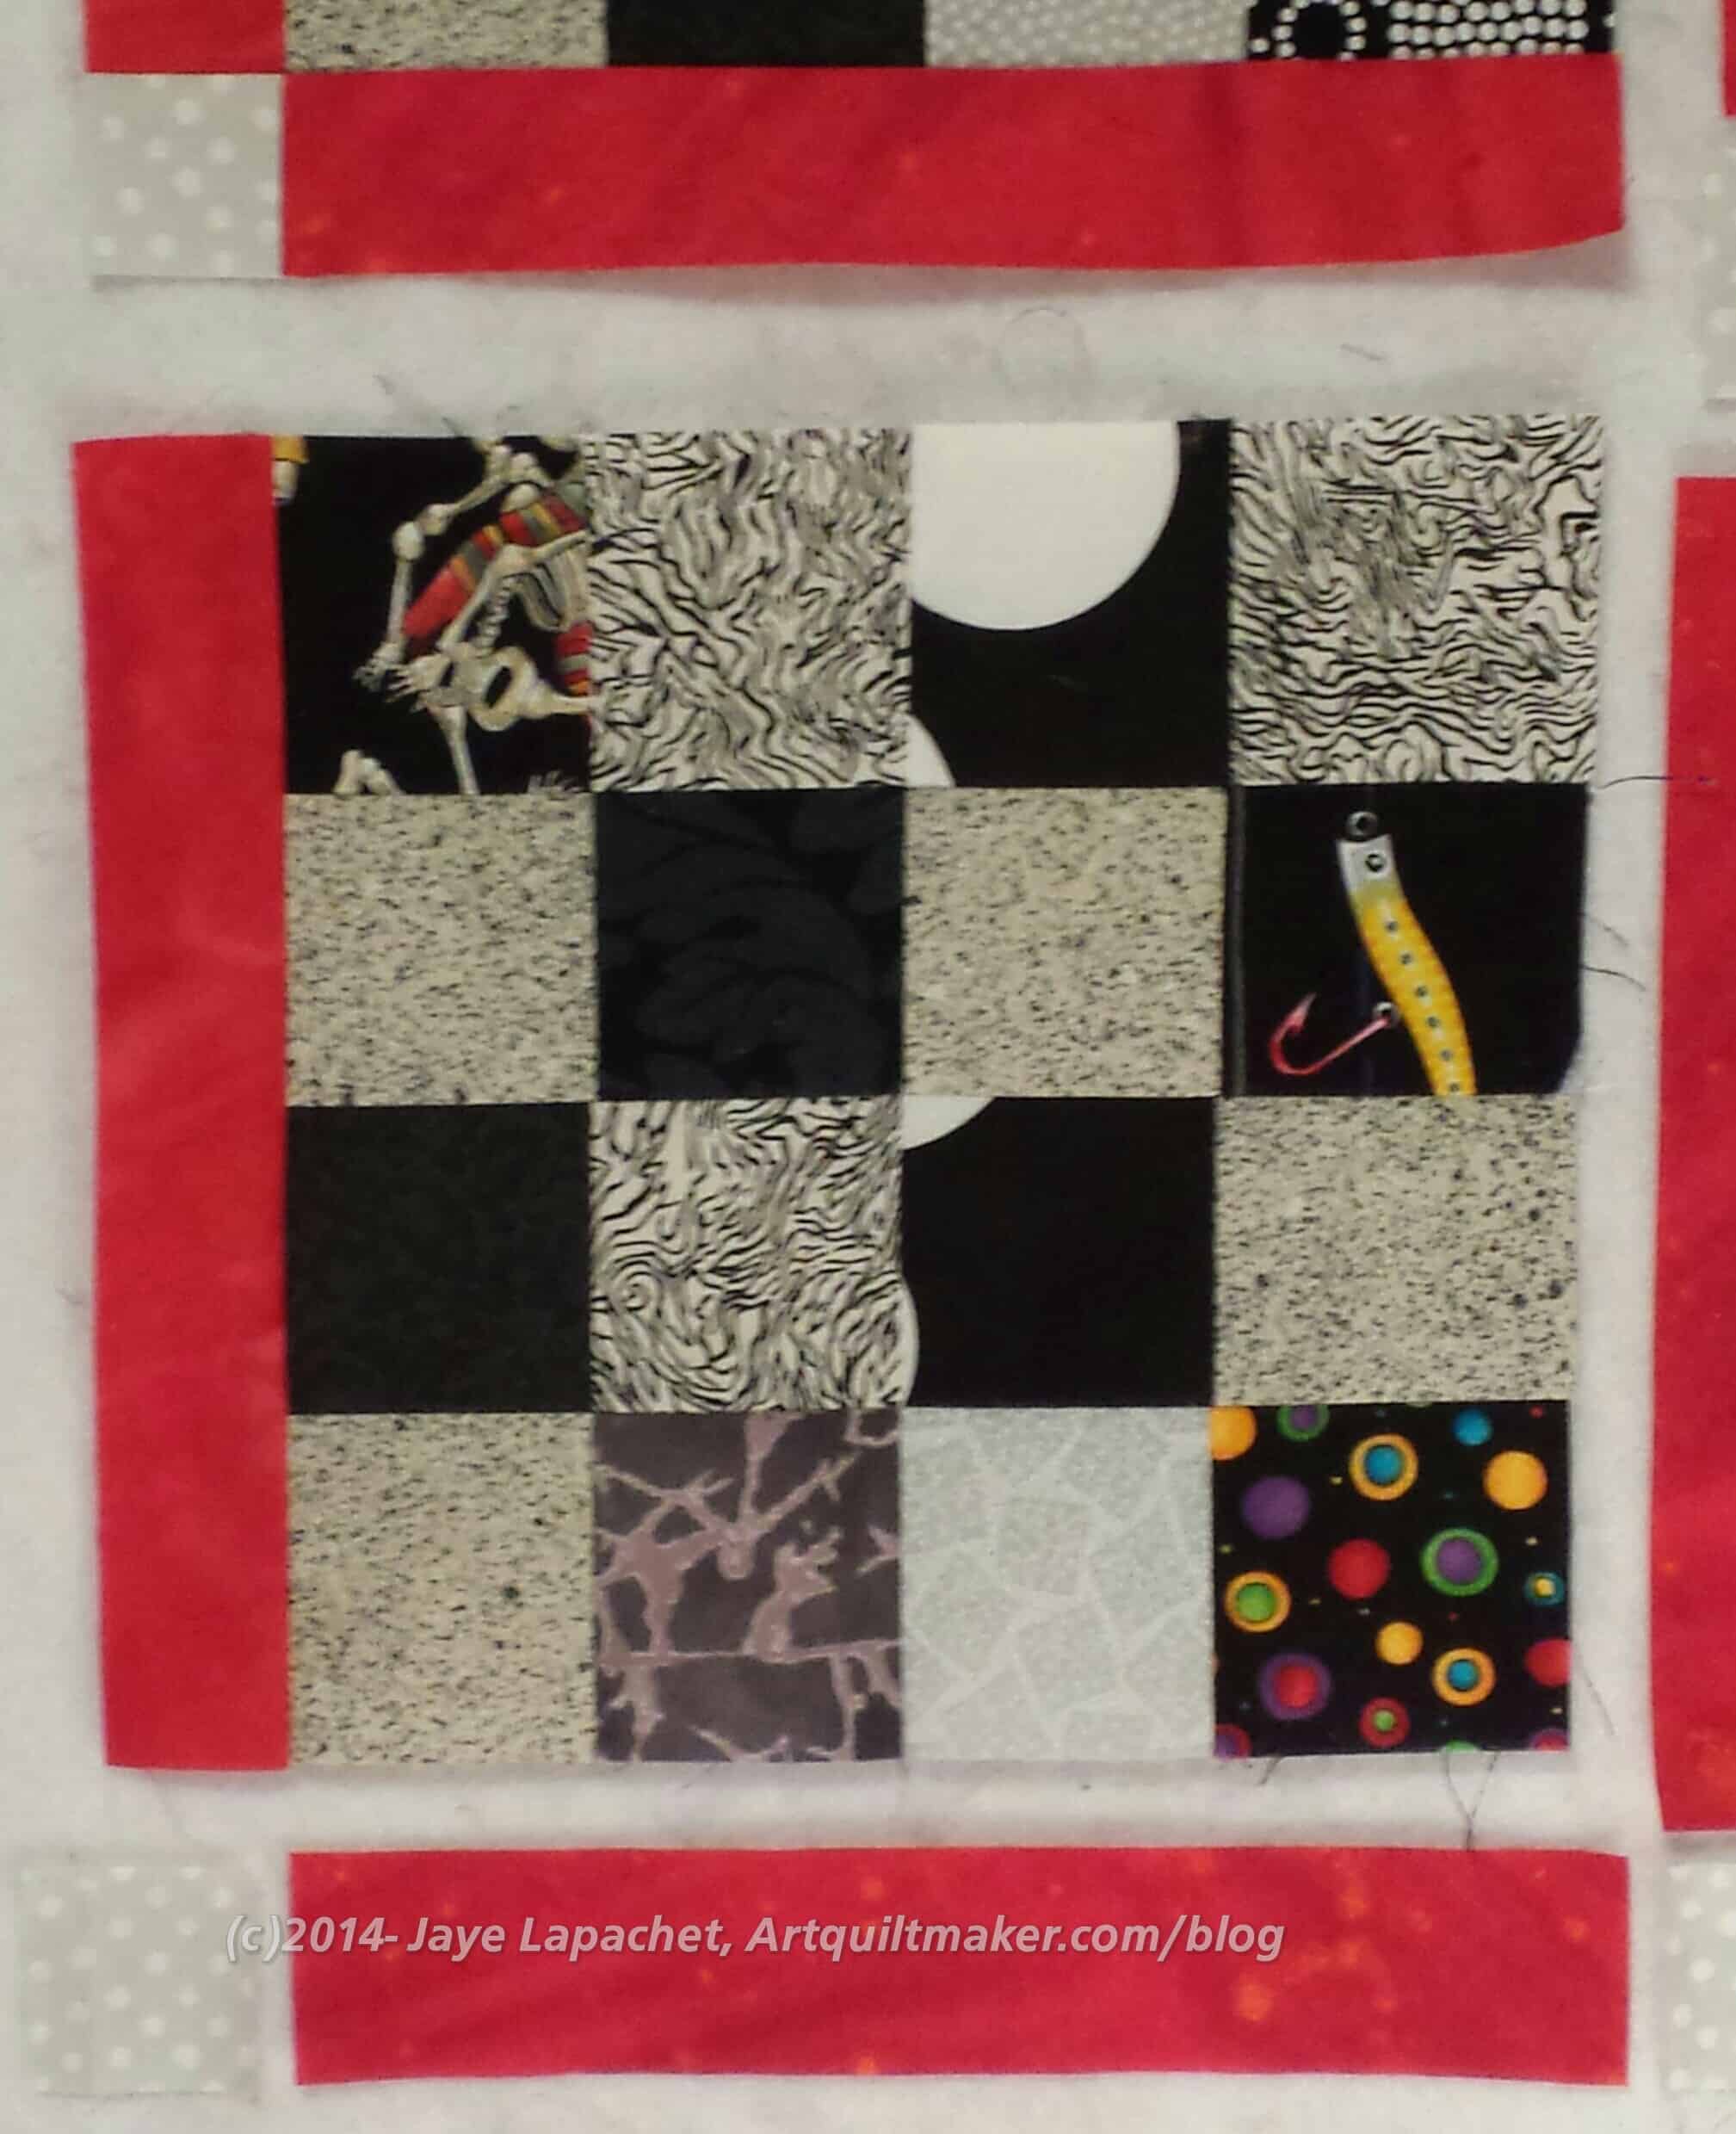
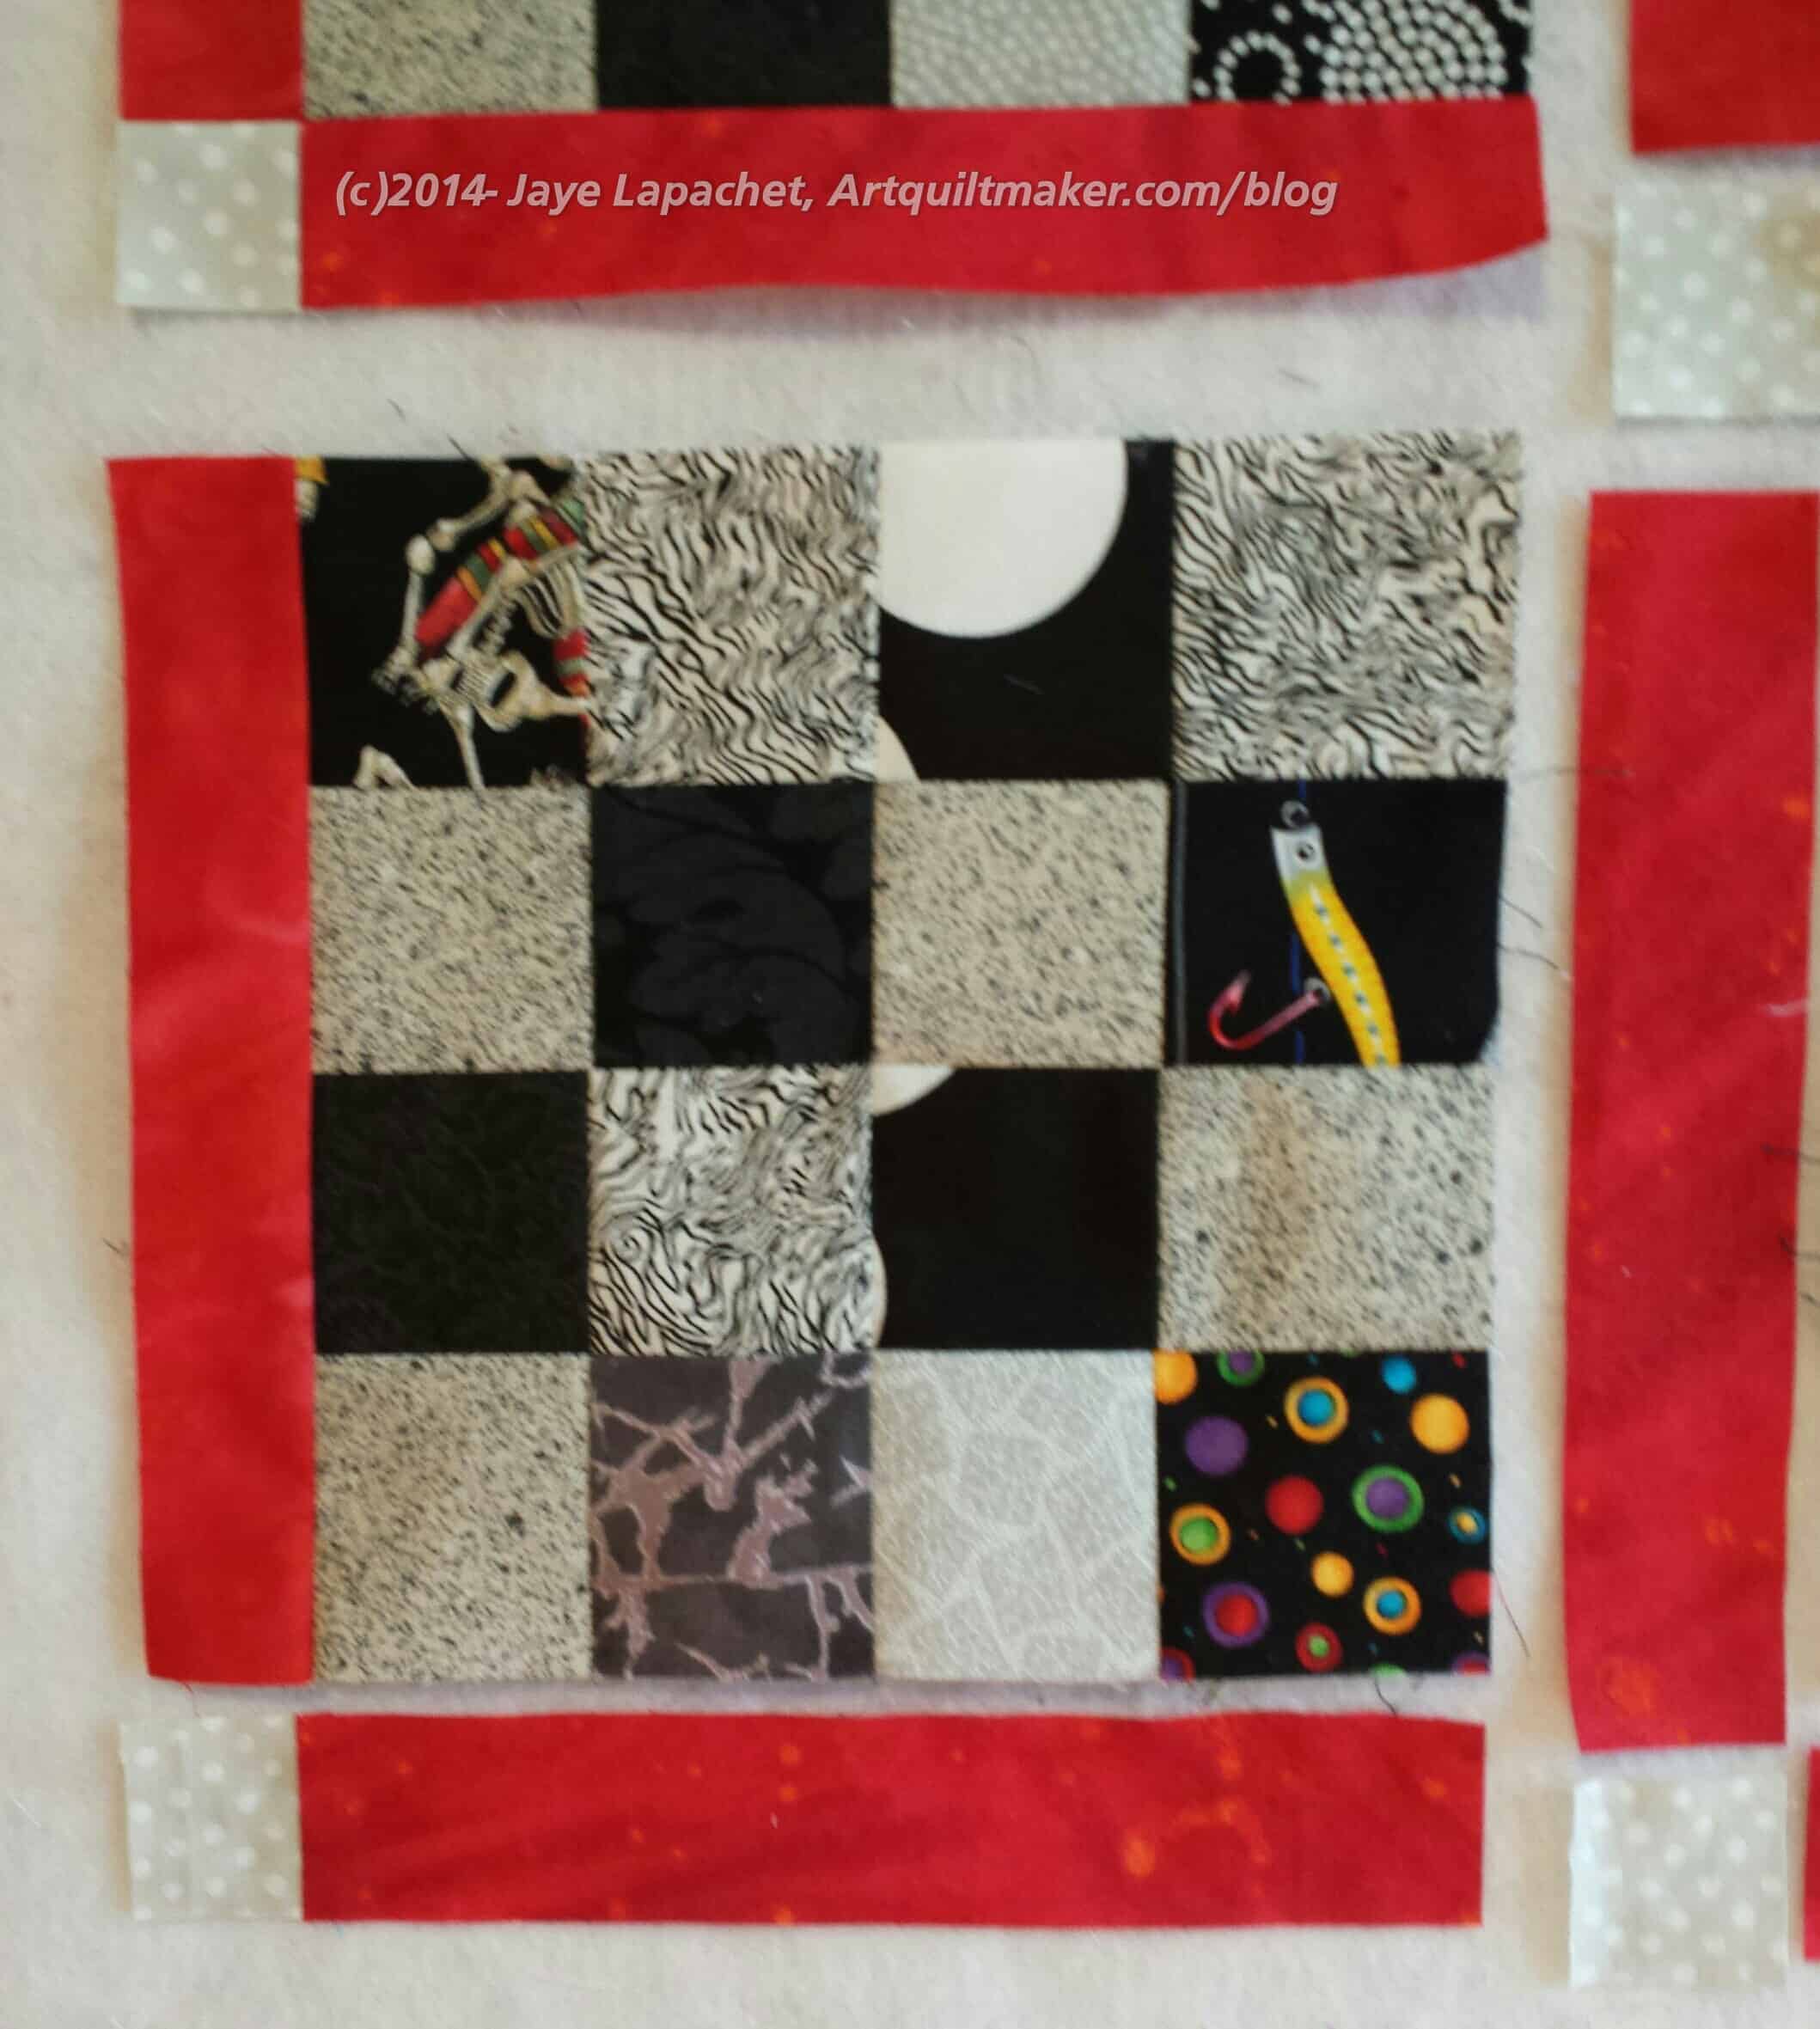
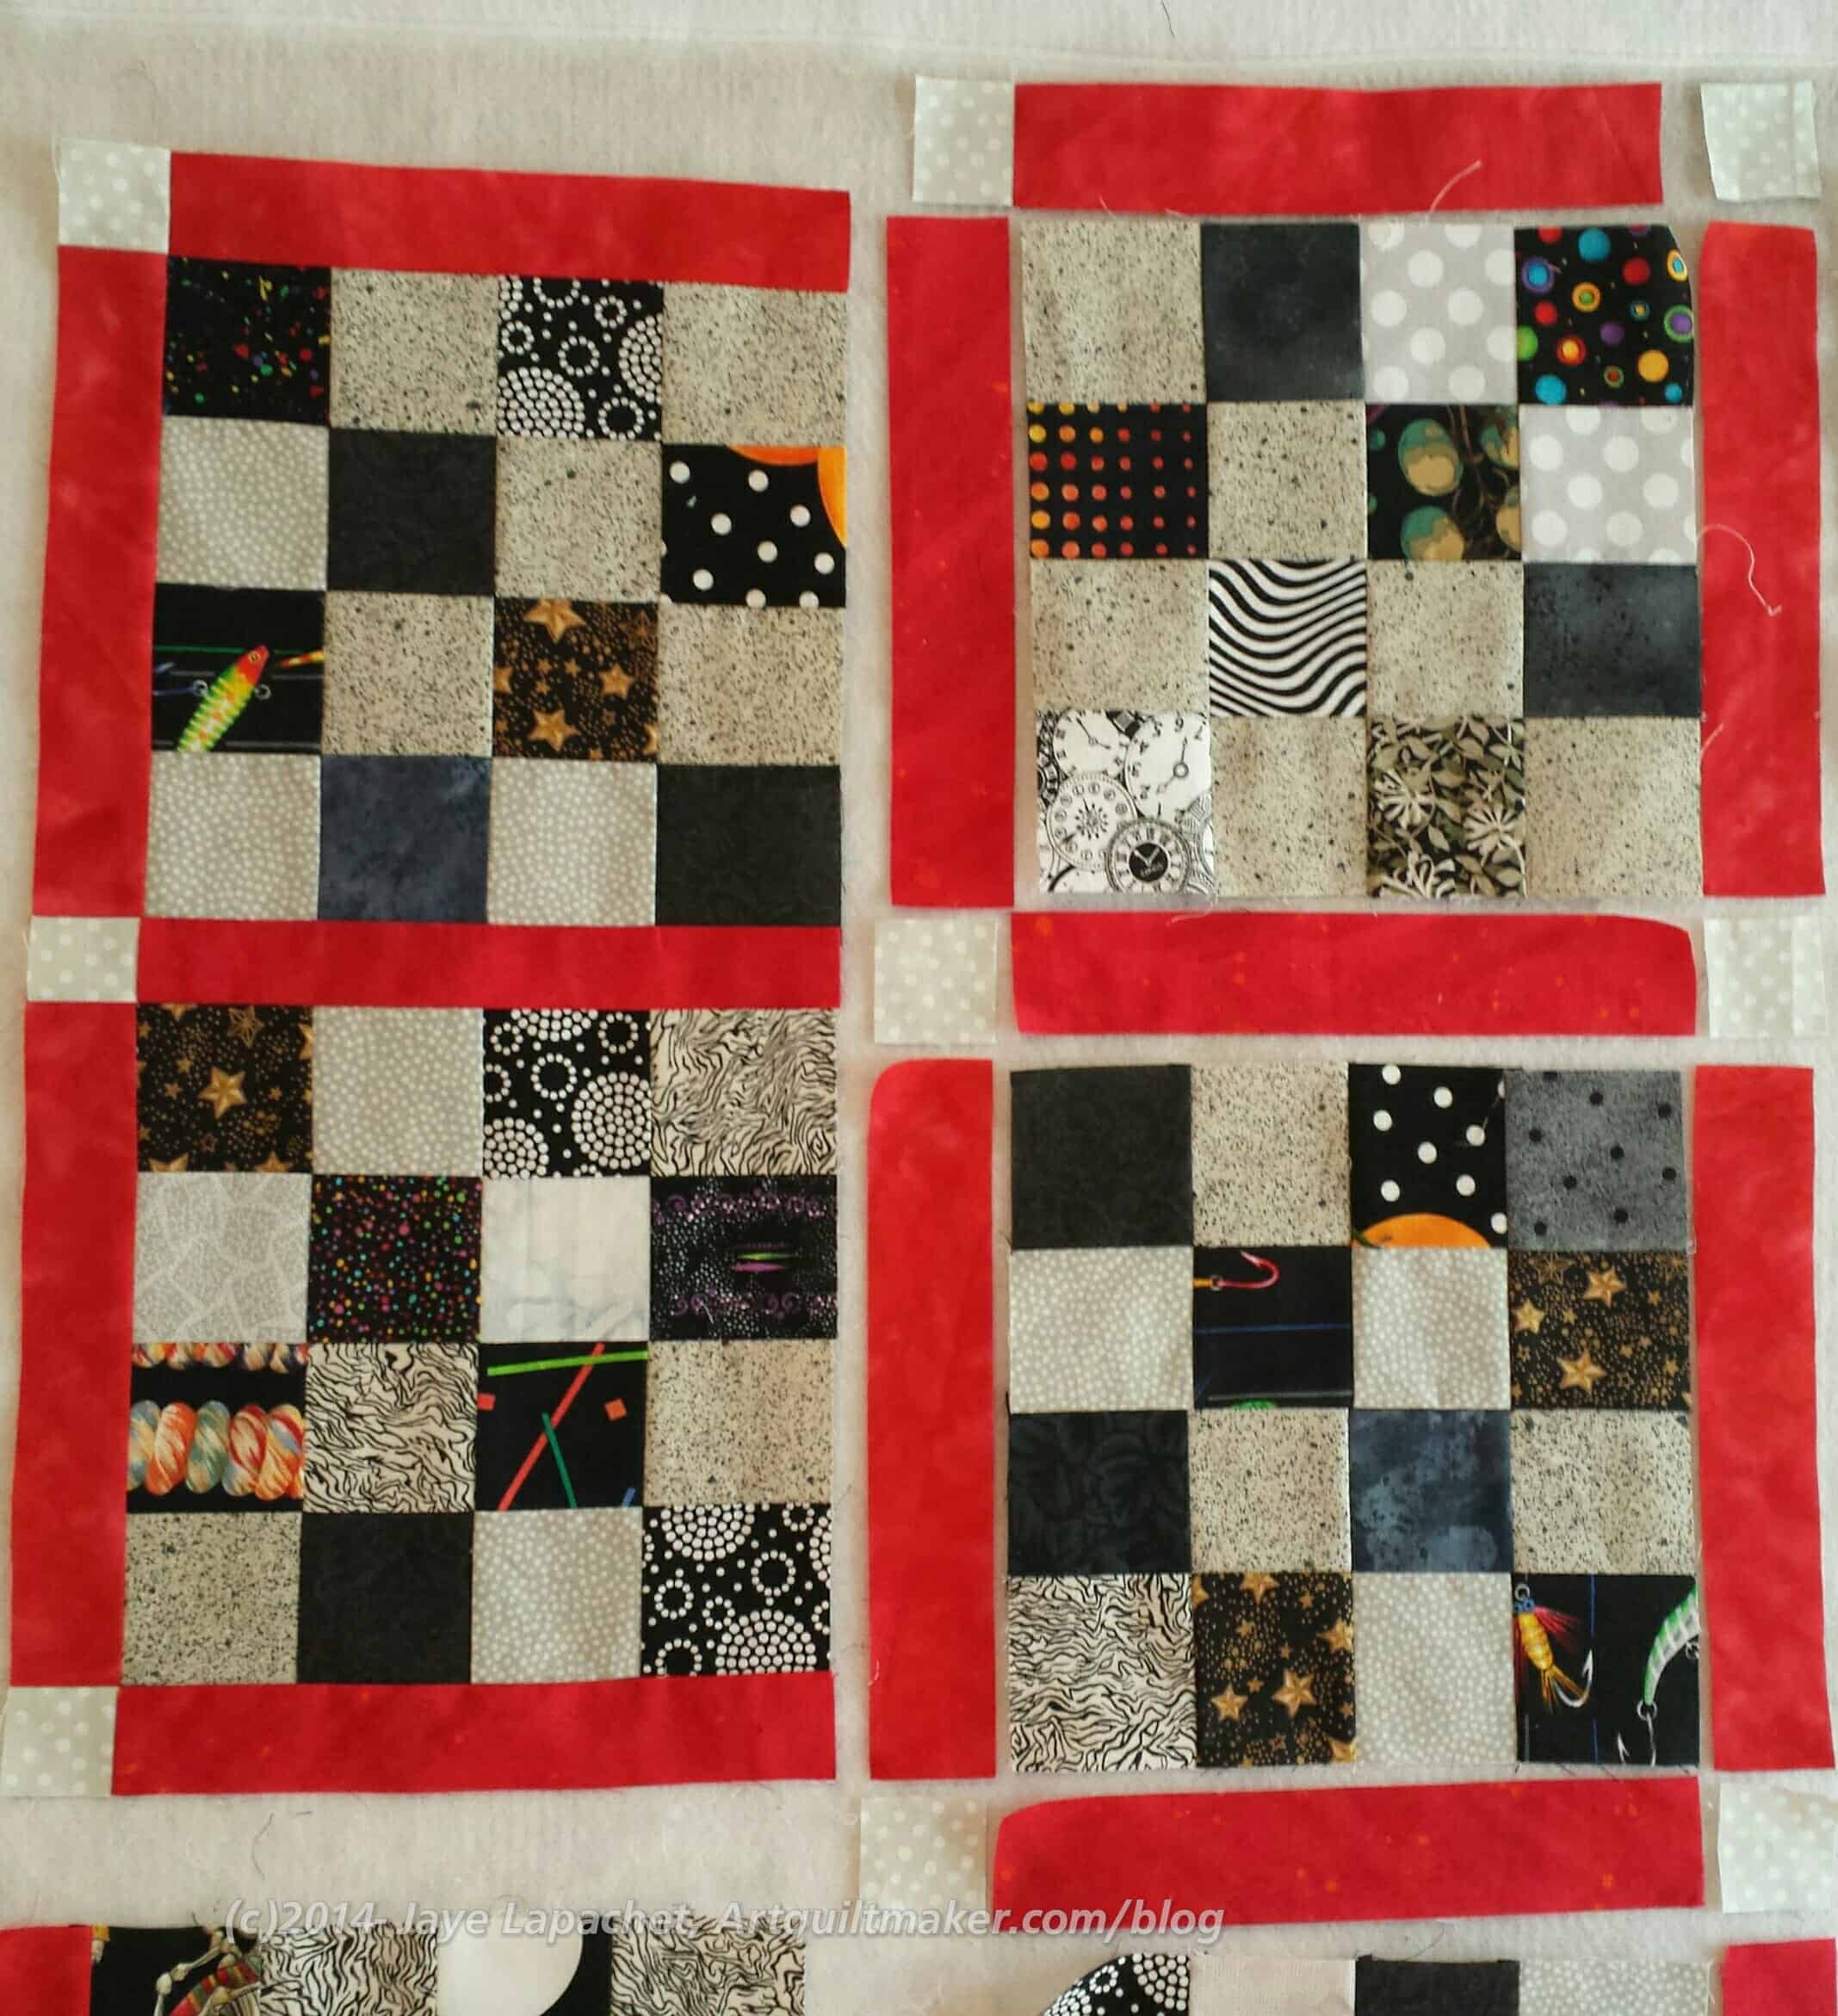
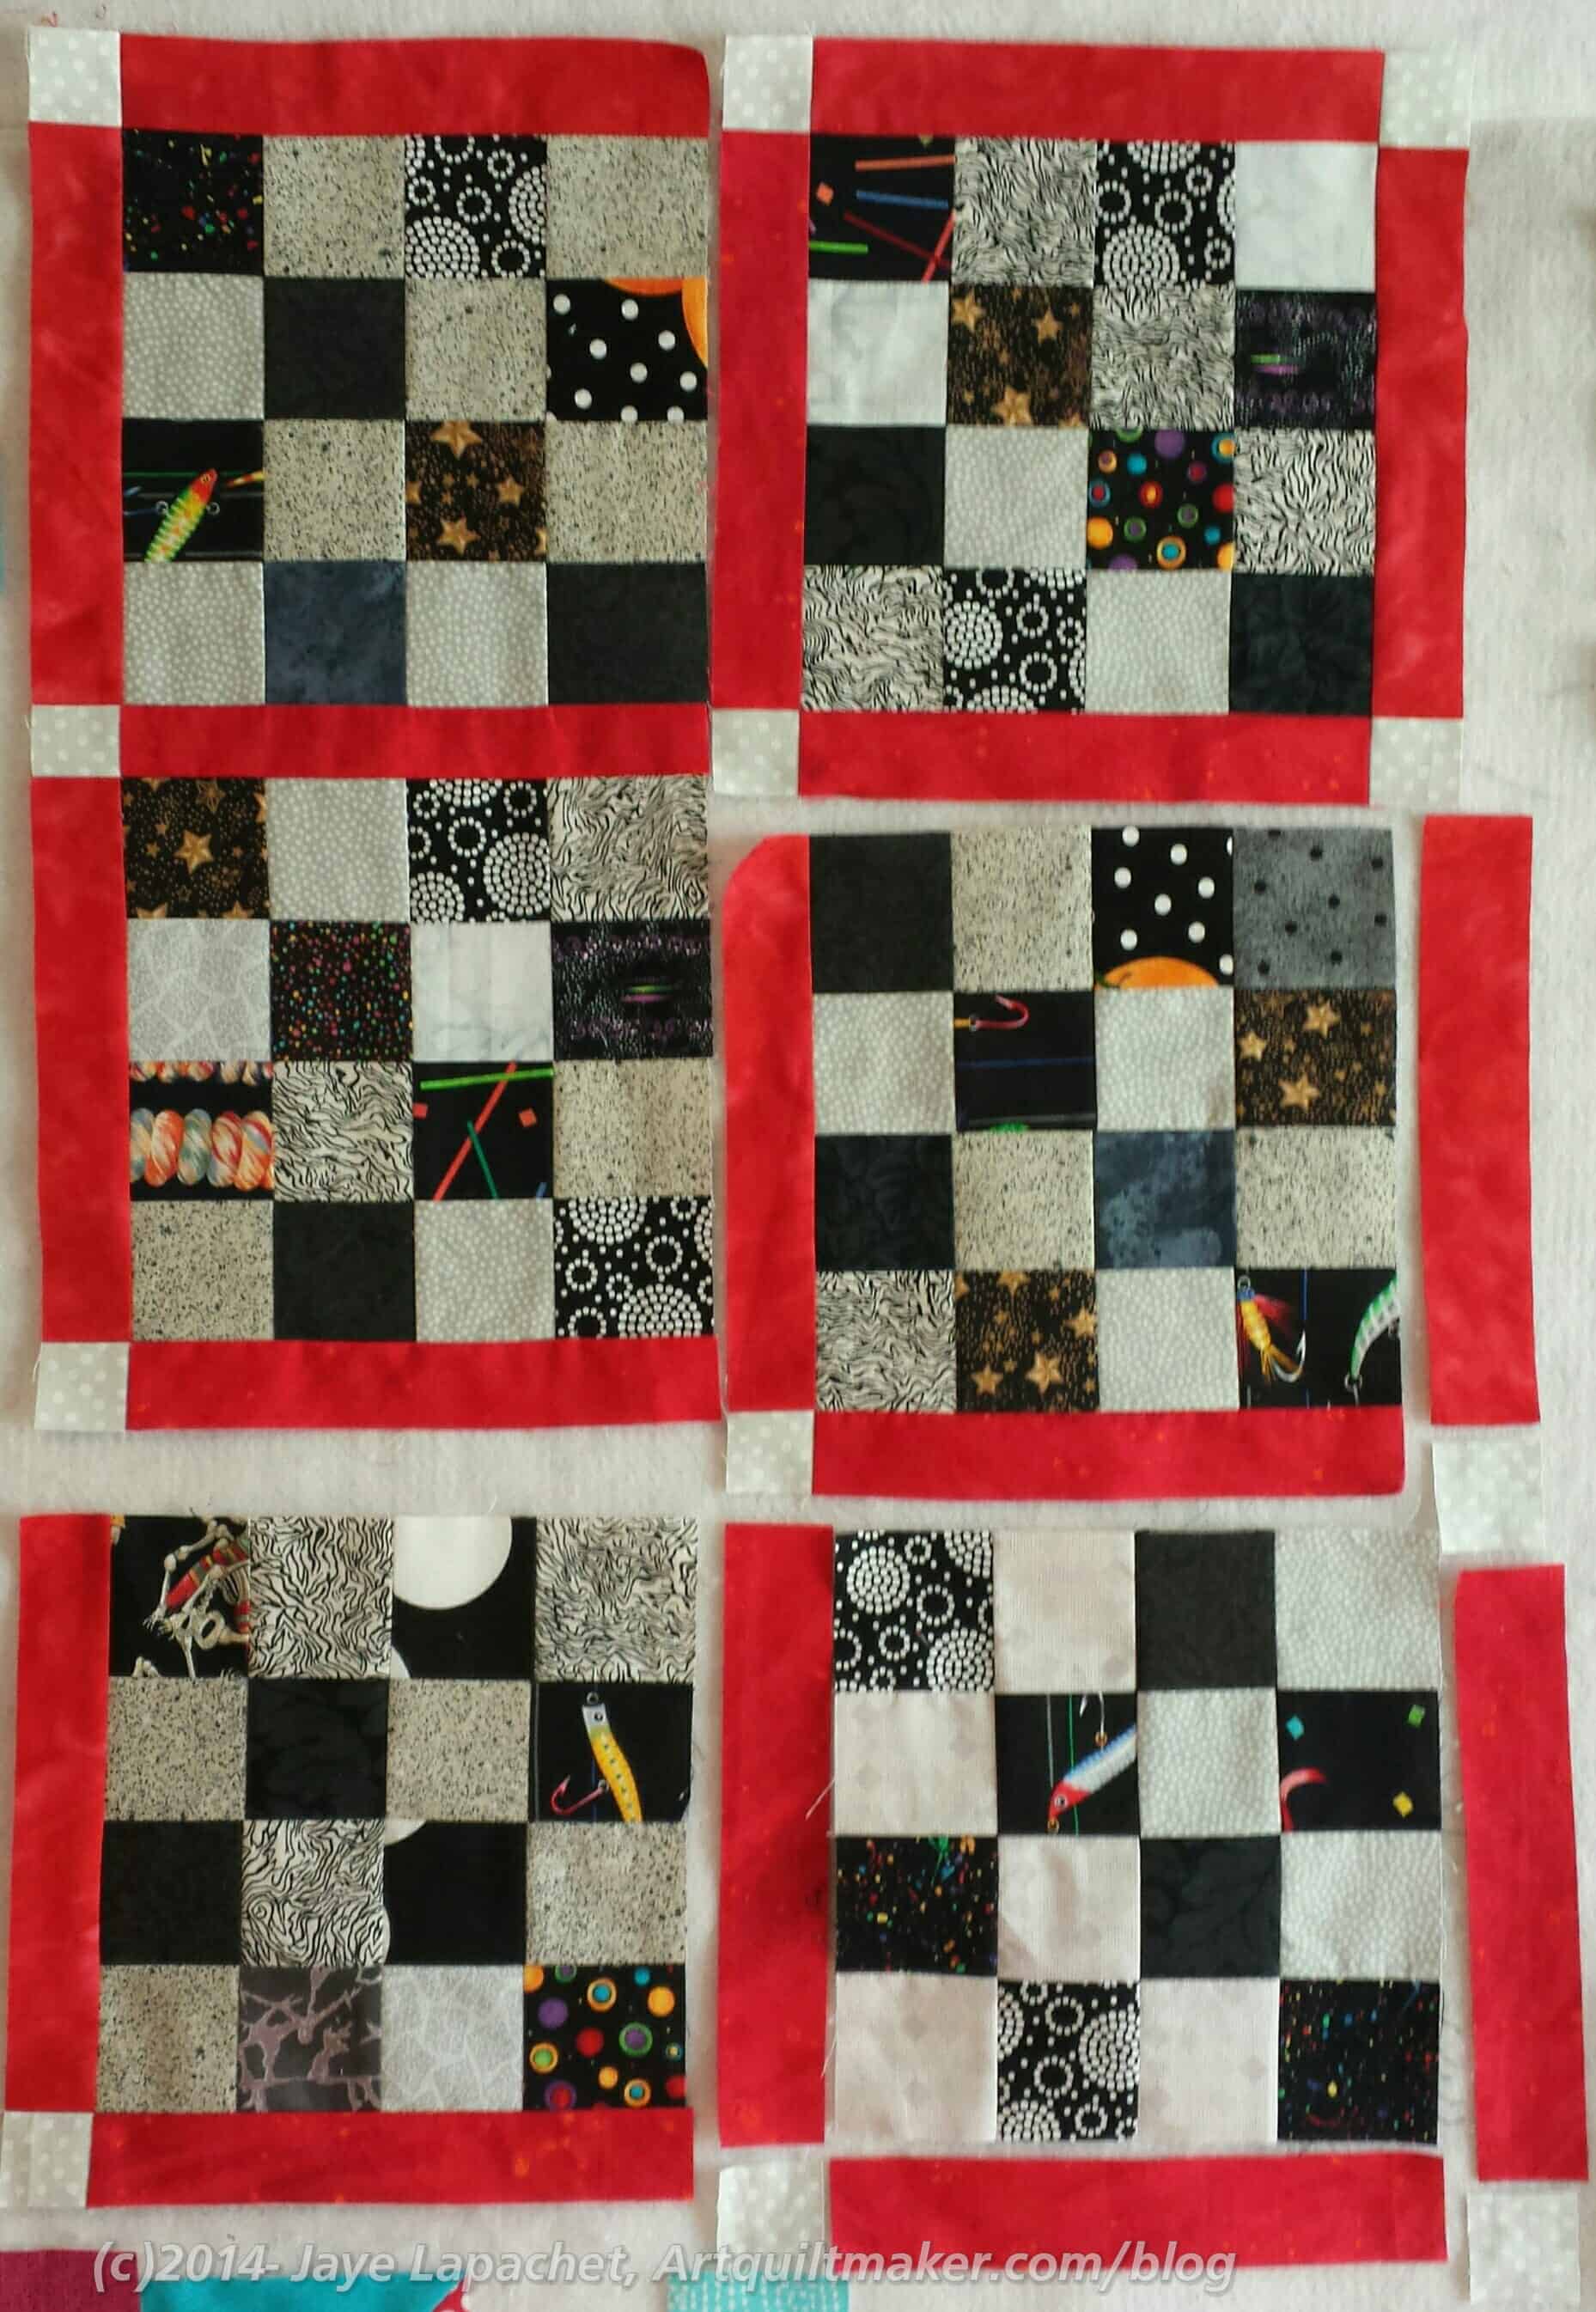
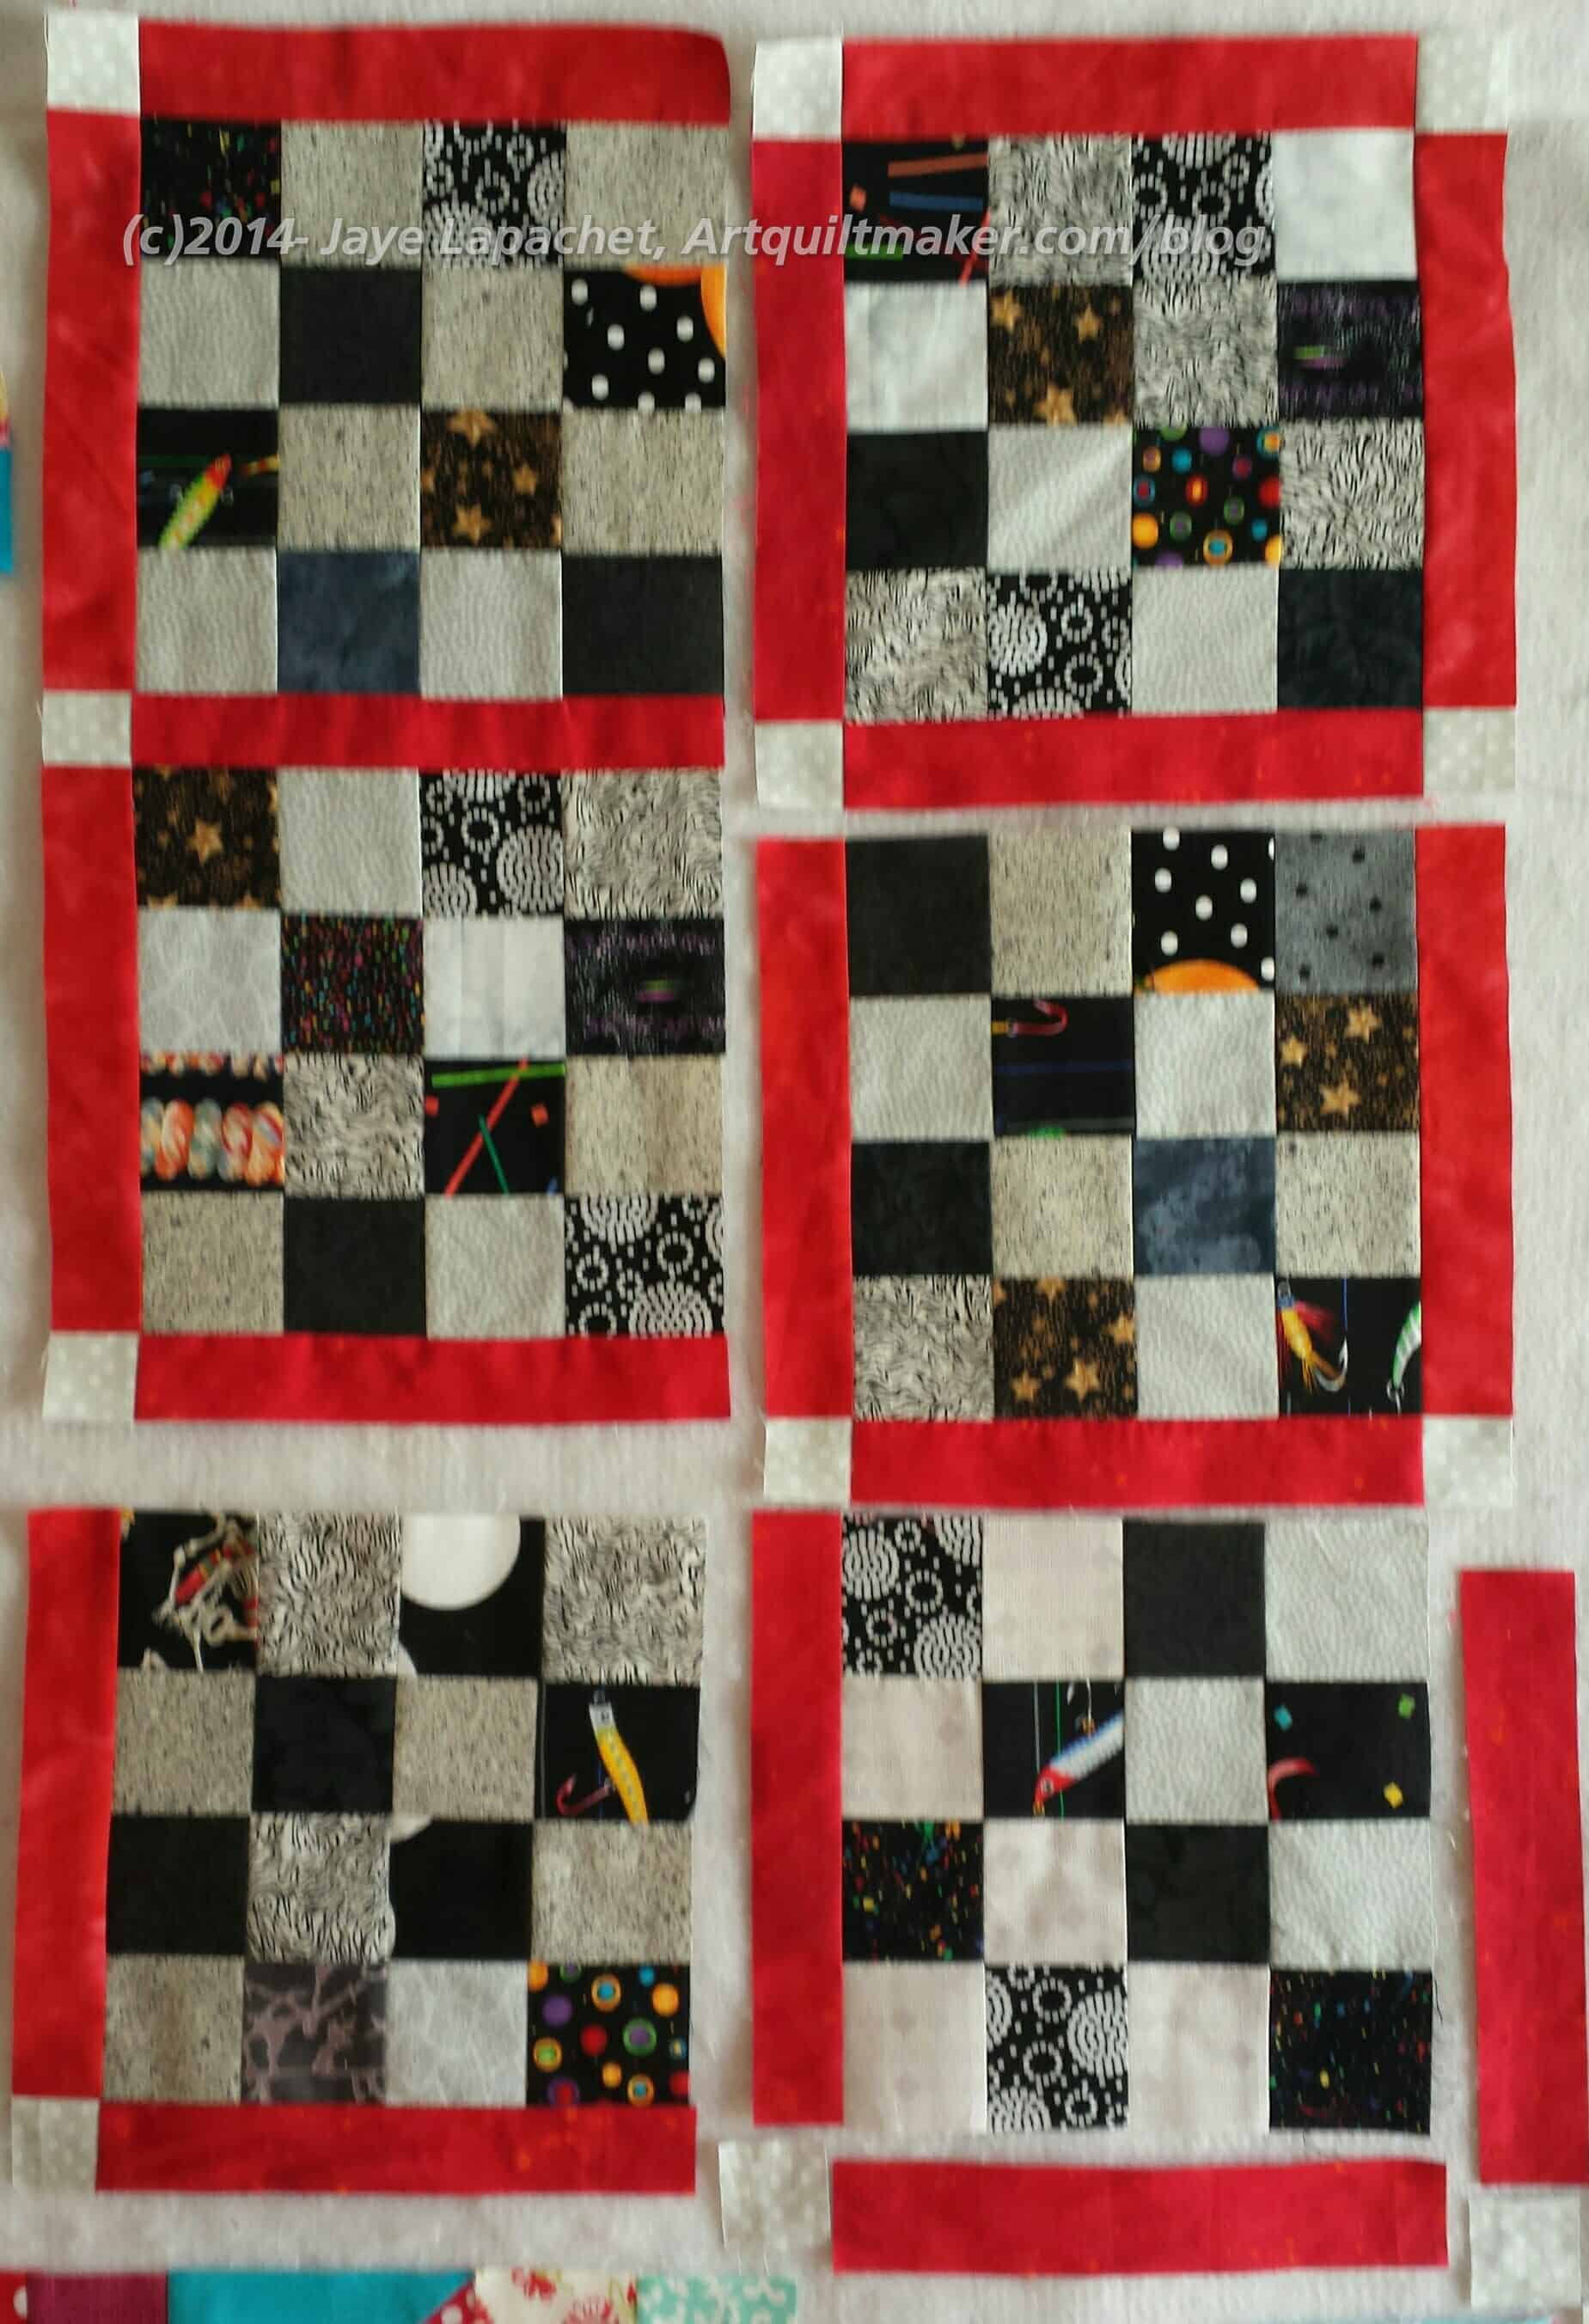
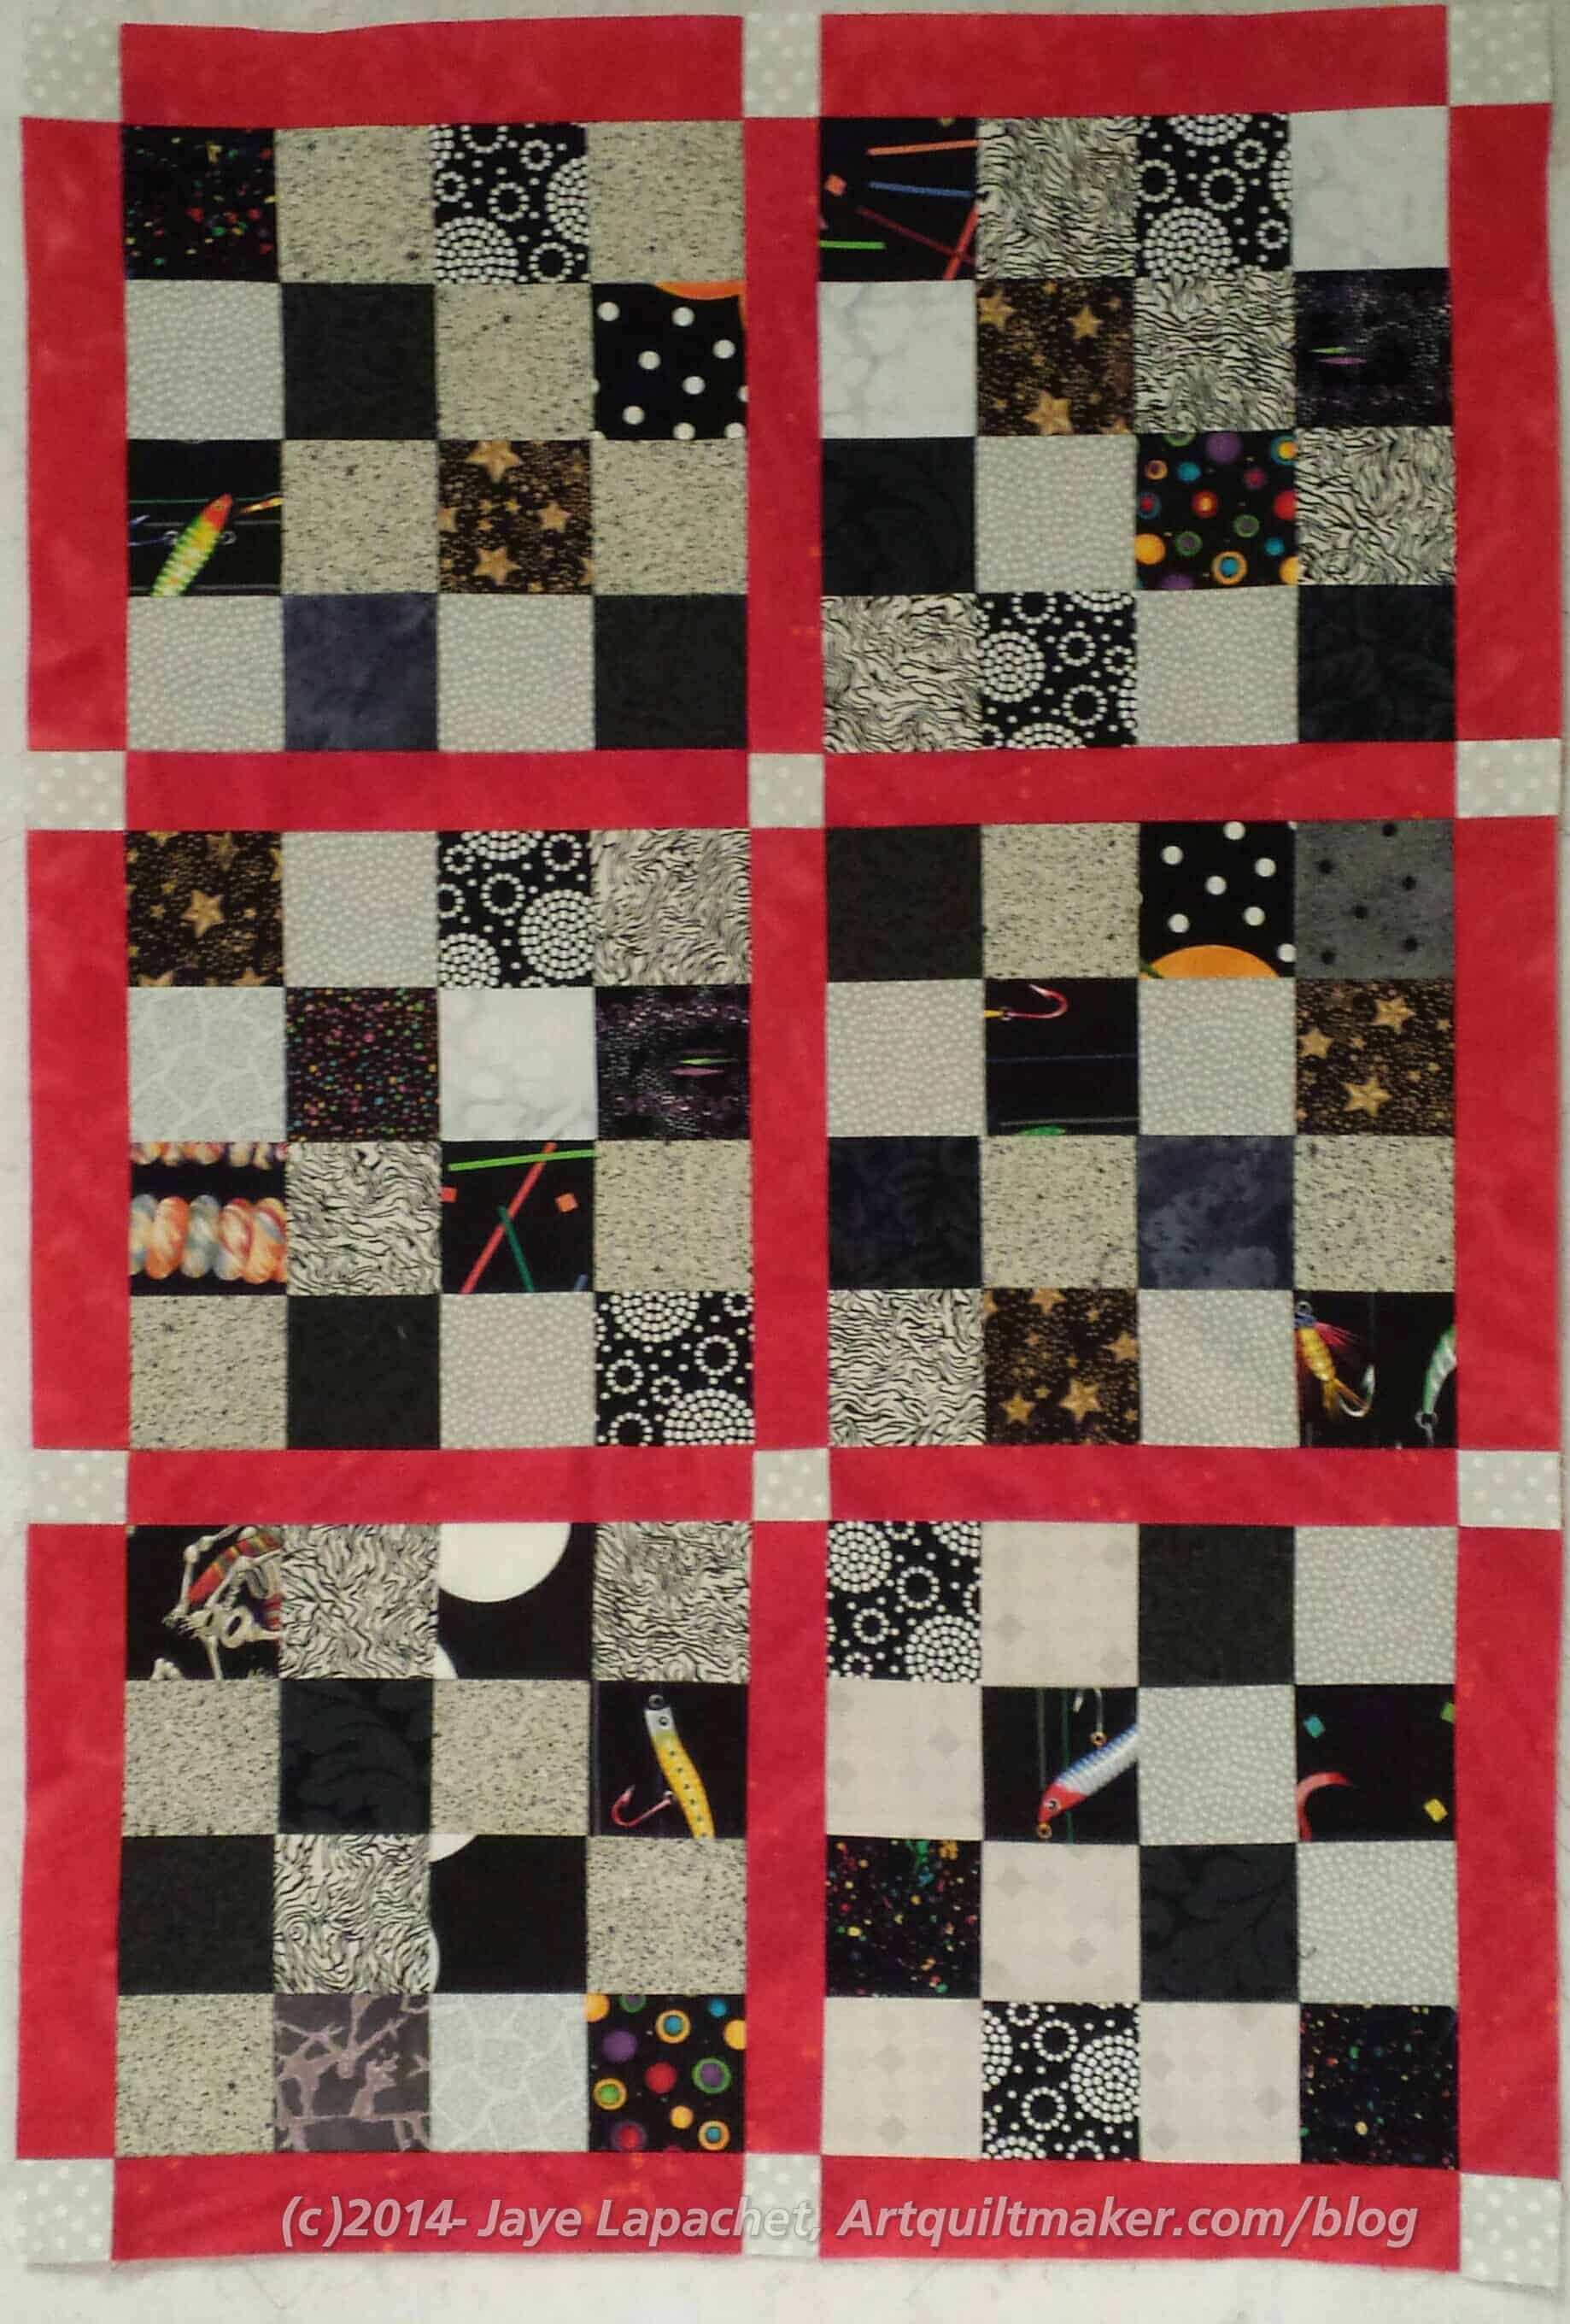
Nota bene: The picture below is numbered, so it will be easier for you to follow the tutorial.
Numbered PhotoSew patch 2 to 7
First, sew #2 to #7, the top piece of sashing to the first left hand block. Press to the red piece of sashing. I press to the red, because there are fewer seams to get in the way.
Sew patch 1 to 6
Next, sew #1 to #6, the first grey cornerstone (upper left hand corner) to the first side piece of red sashing.
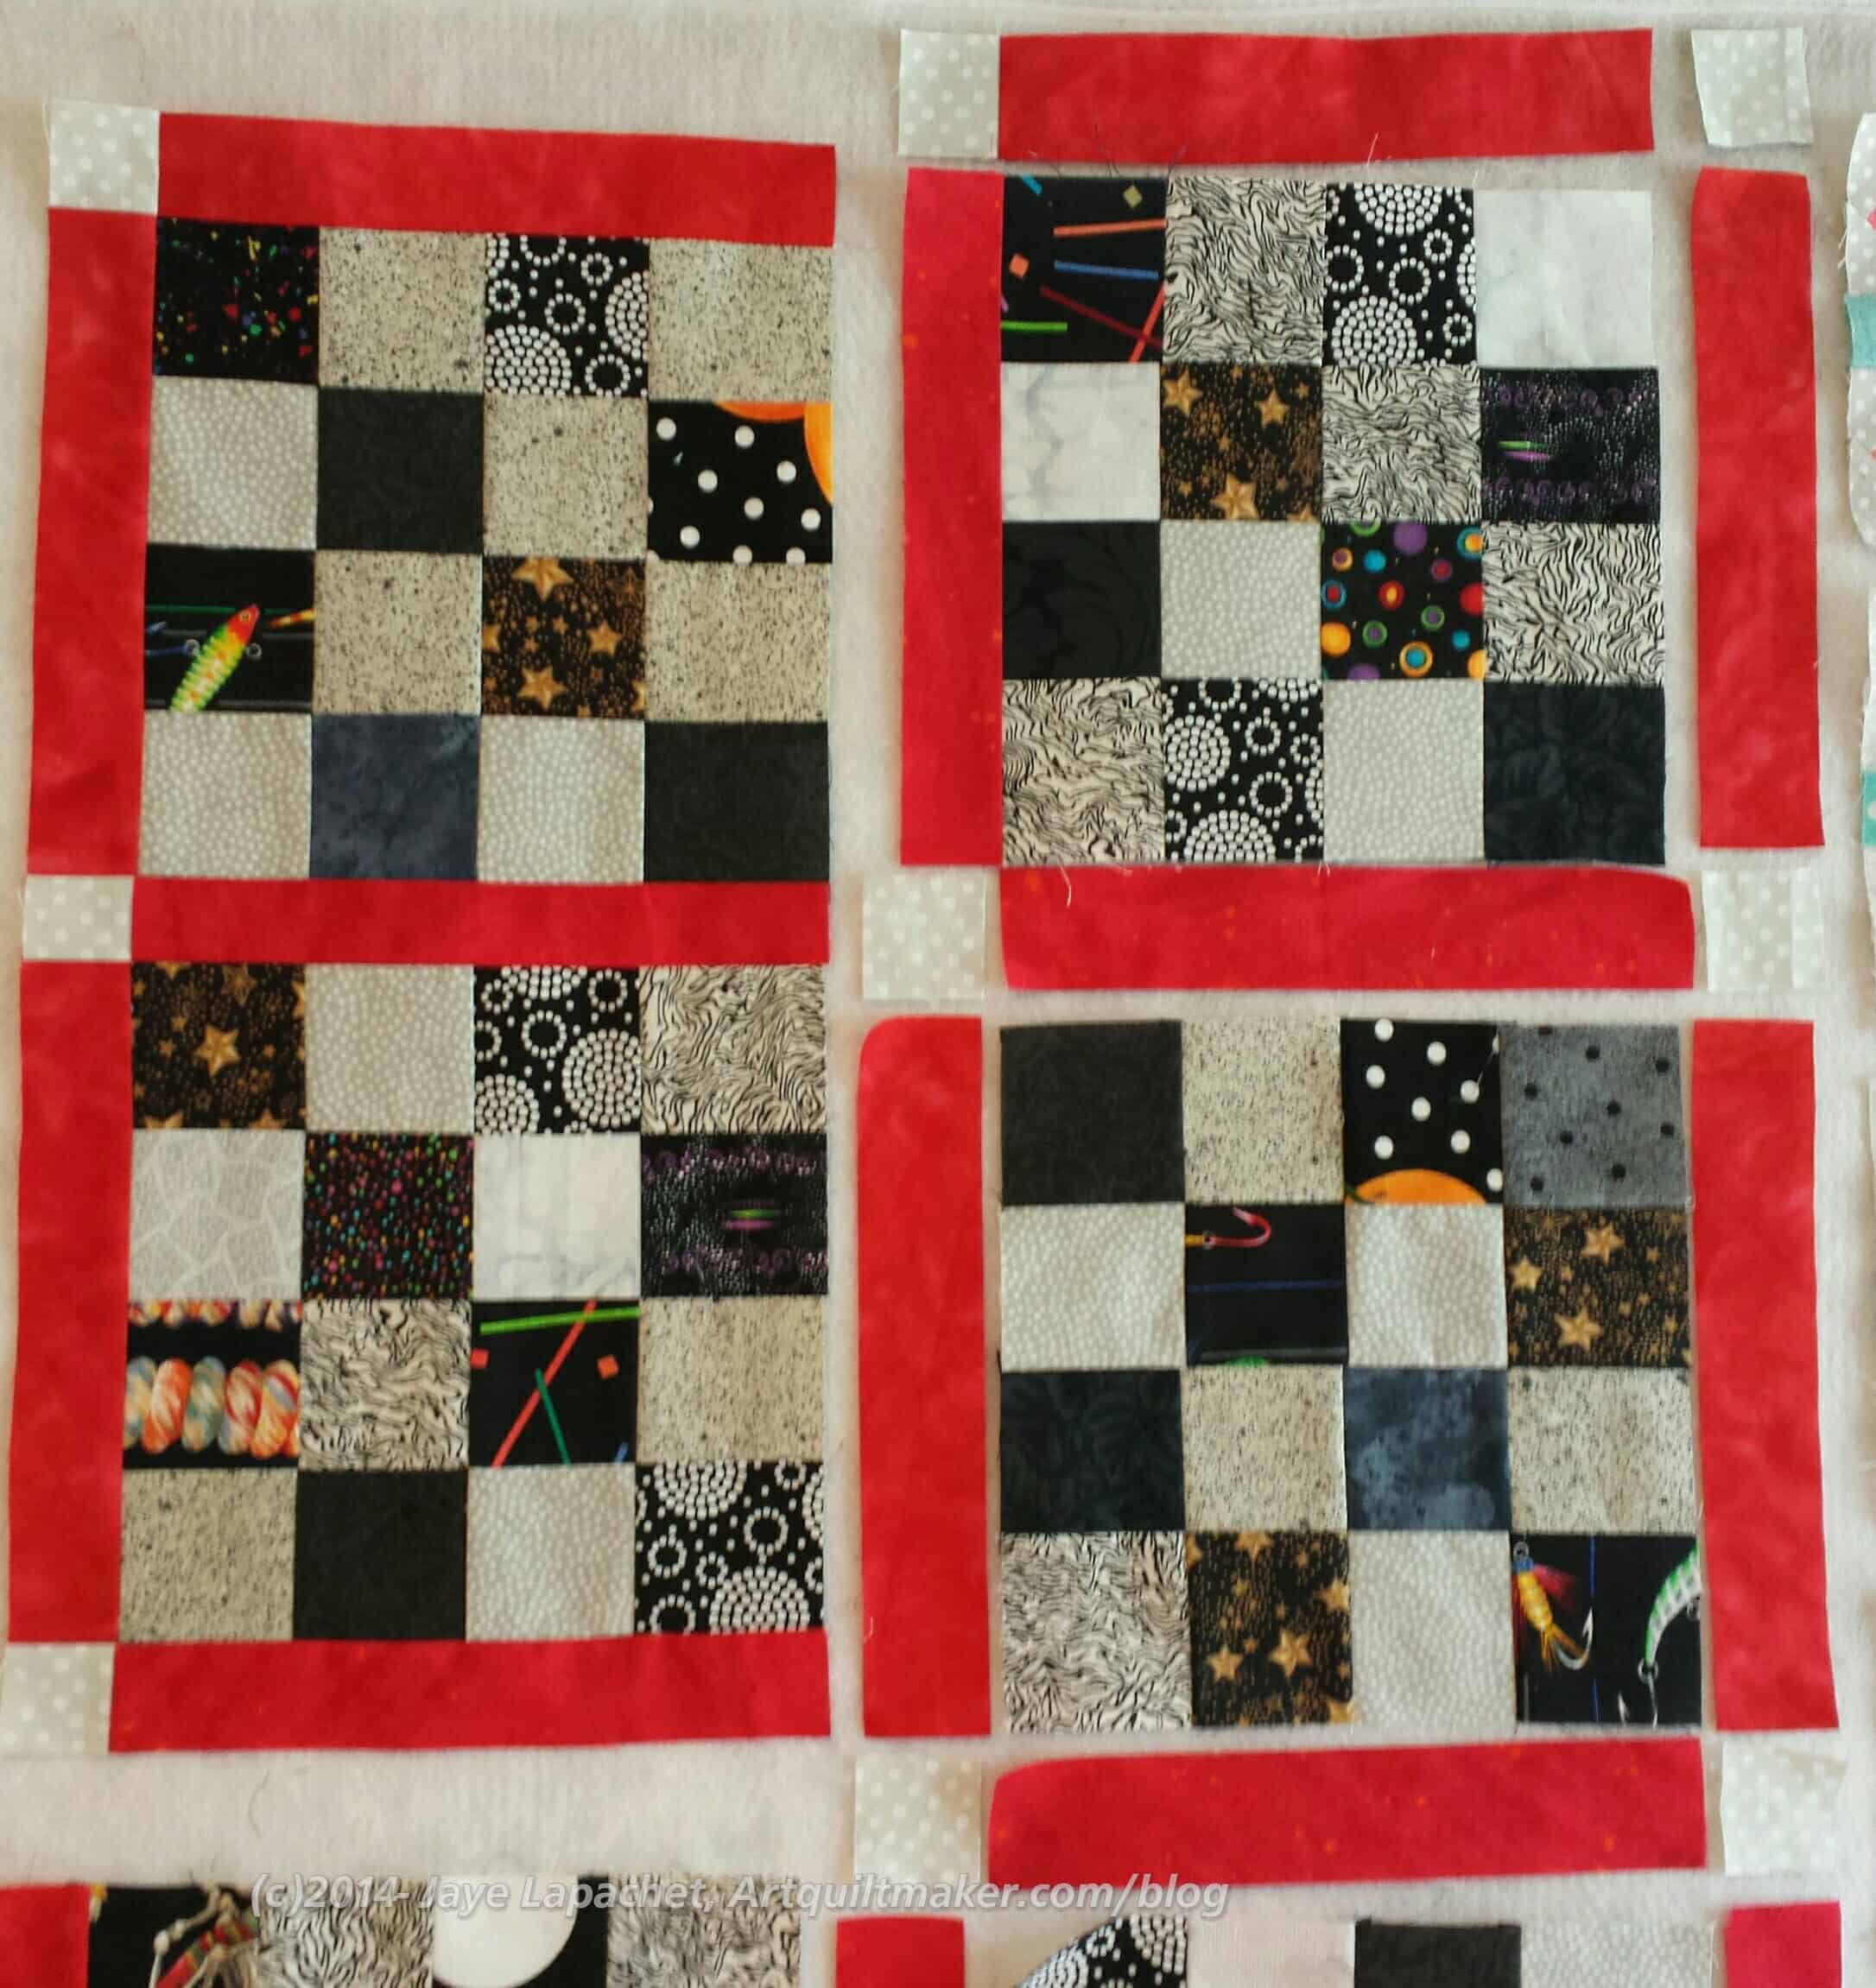
Sew first 2 sections together
Now you have two sections which you should now sew together. This is how you sew the border on. If you had a second border, you could also incorporate that into the piece, but this technique works best when the border is broken up into pieces (e.g. sashing and cornerstone). You can always put additional long borders on later.
First two sections sewn together
You now have your first ‘chunk’! Hooray!
Sew bottom cornerstone and sashing to block chunk
Now sew patch #10 to #11, the bottom cornerstone to the bottom piece of sashing. Then sew that 10-11 cornerstone-sashing bottom pieces combination to the first chunk.
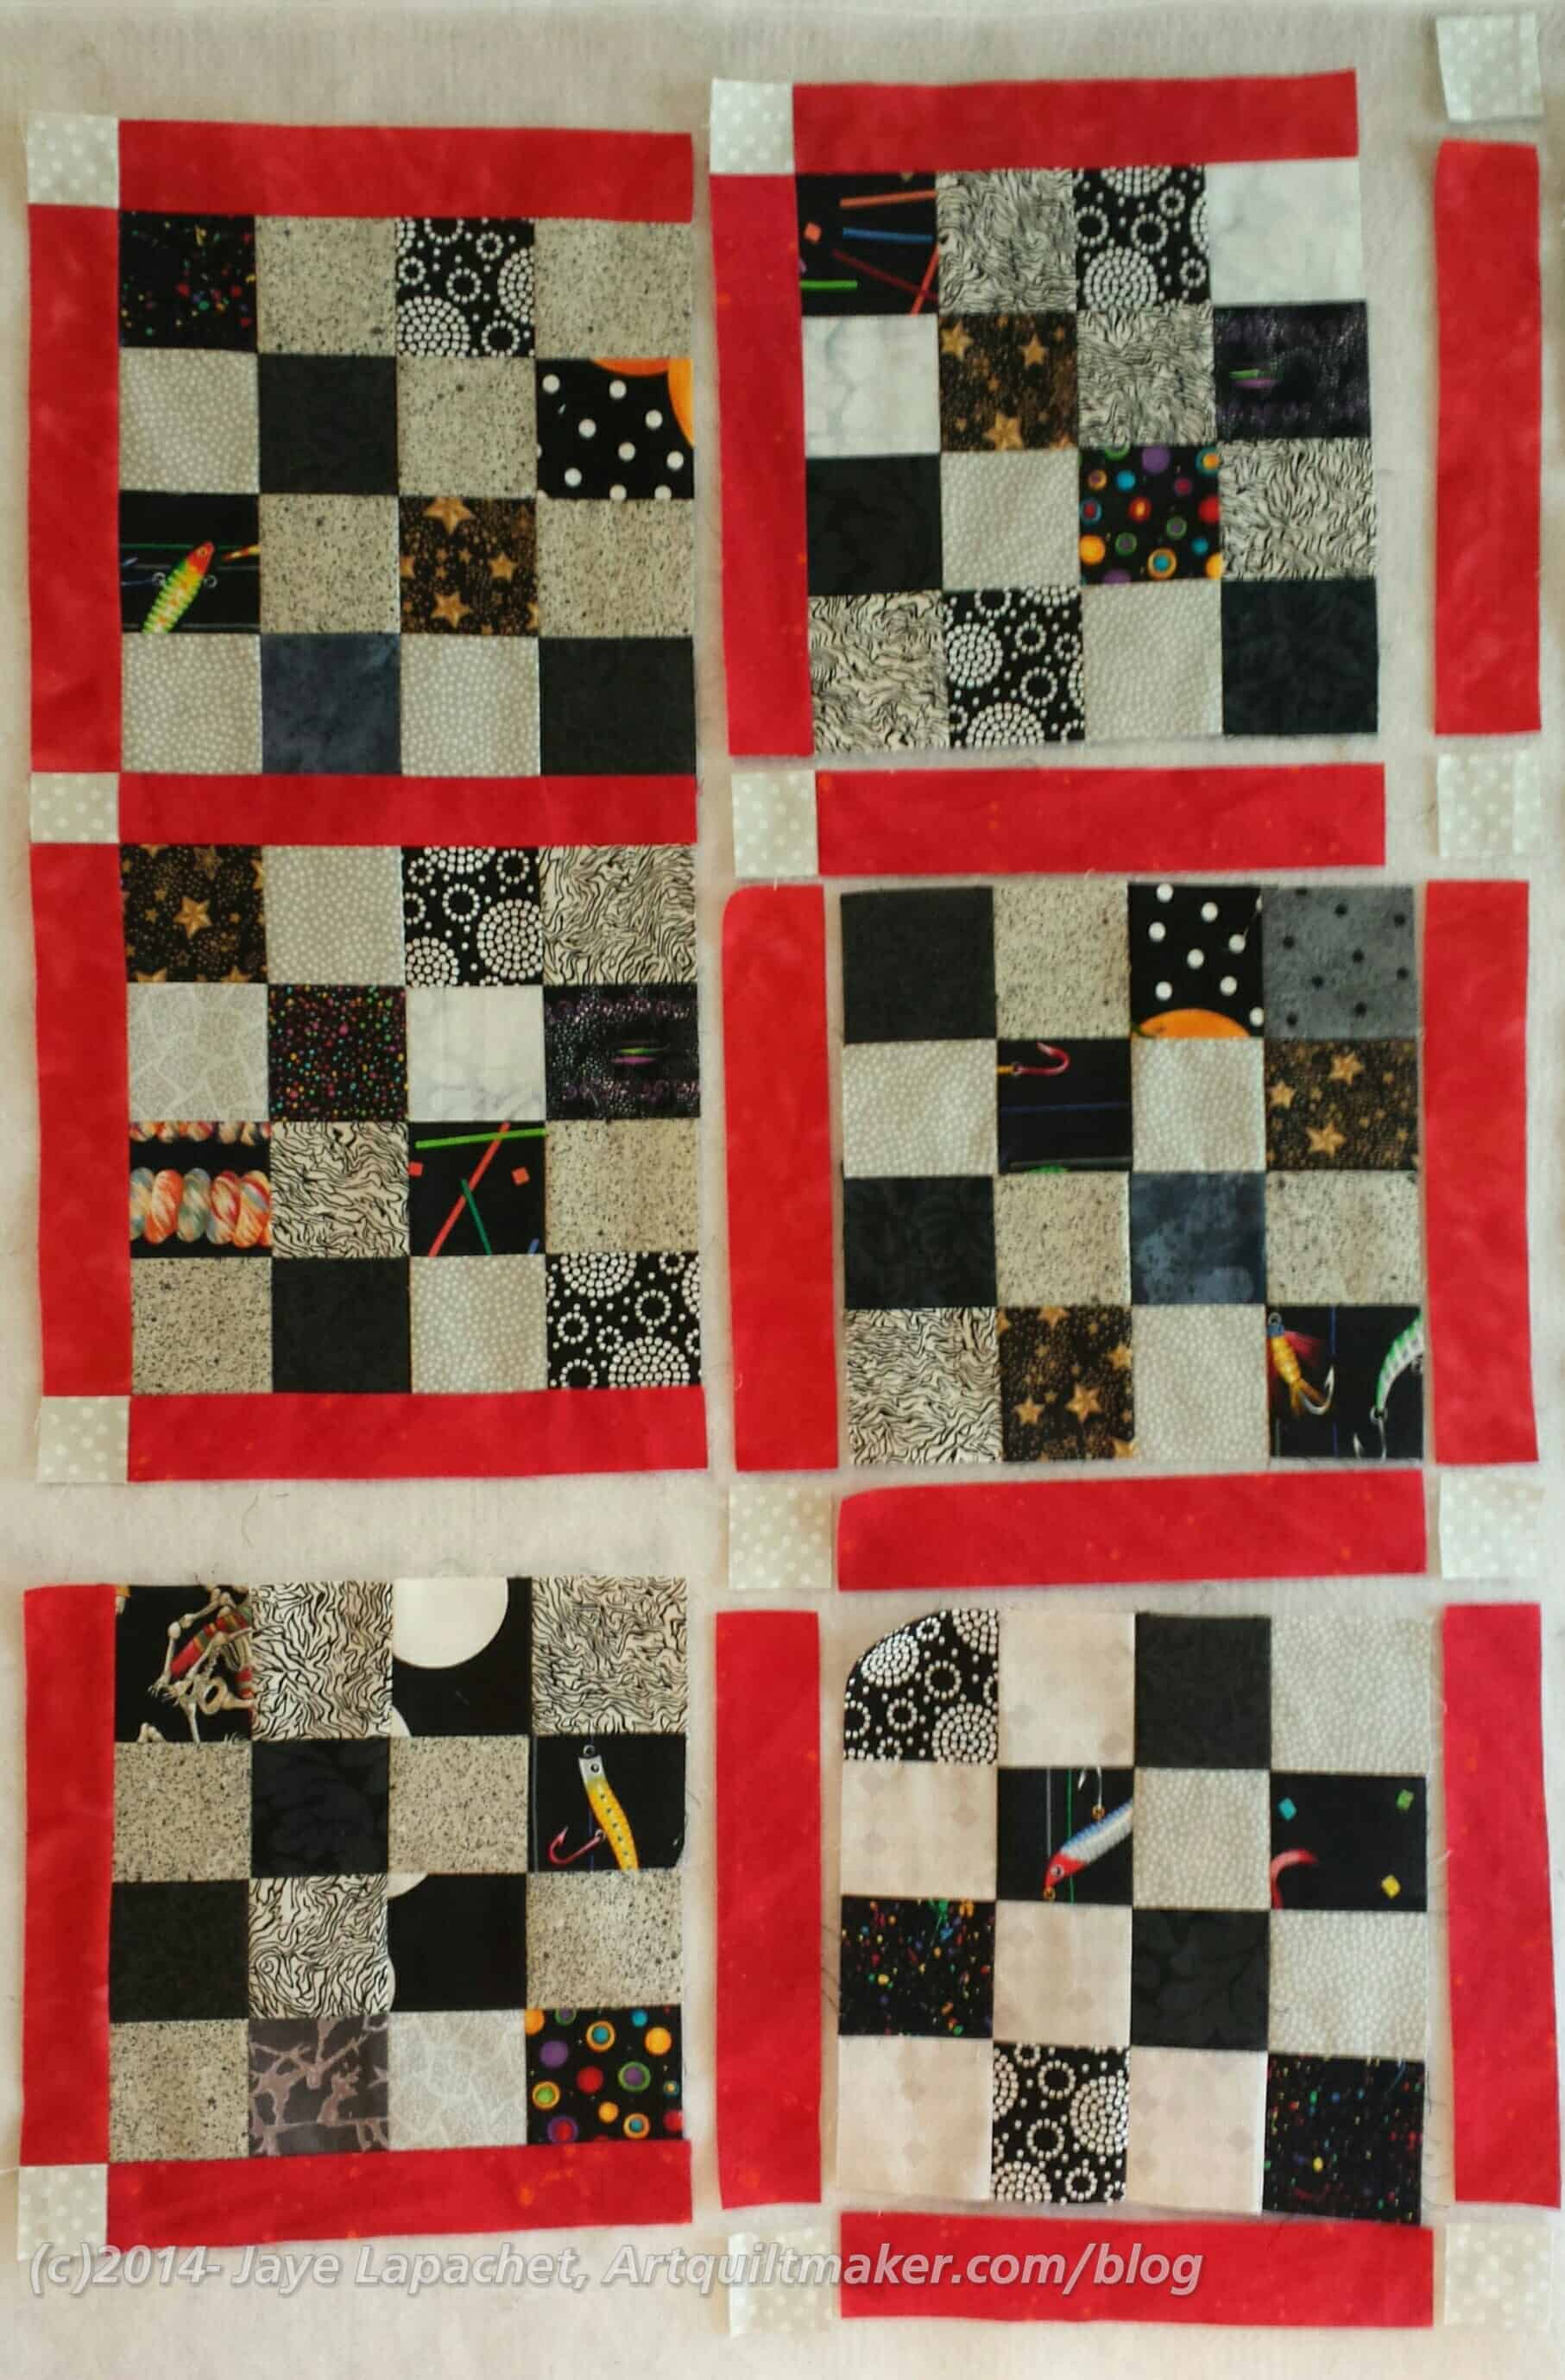
Almost fully bordered block
Voila! You have a chunk fully sashed!
Pin sashing piece #15 to block #16. Now sew the sashing to the block.
Side sashing sewn to 2d chunk
Generally, there will be a piece of sashing that needs to be sewn to a block alone before you can sew a sashing-cornerstone combo to a chunk. You make the ‘chunk’ by sewing a piece of sashing alone to the block.
Sew bottom cornerstone and sashing to 2d block chunk2d chunk
The center ‘chunks’ are just comprised of one cornerstone, 2 pieces of sashing, and a block. Sew the side sashing to the block. Sew the cornerstone to the bottom sashing, then sew the bottom cornerstone-sashing combo to the sashing-block combo for another chunk.
<Insert photo of 2 chunks sewn together> At this point, you can sew your two chunks together.
Now that you have two chunks sewn into a larger chunk, the next step is to prepare your next chunk. You do it the same way you prepared the two chunks above.
Pin sashing piece #25 to block #26
Pin sashing piece #25 to block #26. Now sew the sashing to the block.
Patch #30 sewn to #31
Now sew patch #30 to #31, the bottom cornerstone to the bottom piece of sashing. Then sew that 10-11 cornerstone-sashing bottom pieces combination to the first chunk.
Third chunkTwo chunks
With two pieces of sashing and a cornerstone sewed to block #26, you have your third chunk. You could sew the #25-#26-#30-#31 combo to the chunk you sewed together before, but I suggest you wait until you have more pieces sewed together.
Sew piece #3 to piece #4
Refer to the drawing of your pieces in Step 1. Now we move up to the top of the section again and sew #3 to #4.
Sew sashing #8 to block #8
Sew piece #8 to block #8**. This puts a piece of red sashing on your block #8.
Next, sew cornerstone/sashing #3-4 to sashing/block #8.
Next, sew cornerstone/sashing #3-4 to sashing/block #8.
Sew cornerstone #12 to sashing #13 and then to the block
Sew cornerstone #12 to sashing #13 and then to the block. I don’t have a picture of the two pieces sewn together before I attached them to the block, but you do have to sew them together before you sew them on the block. Now, sew that combination to the block.
Follow the same steps for block #18.
Follow the same steps for block #18 as you did for block #8. Sew sashing #17 to block #18. Press. Next, Sew cornerstone #22 to sashing #23 and then to the block.
You will have two new chunks, one with sashing on three sides and another chunk with sashing along two sides.
Sew cornerstone #5 to sashing #9
Sew cornerstone #5 to sashing #9 (upper right).
Sew cornerstone #14 to cornerstone/sashing piece #5-9
Sew cornerstone #14 to cornerstone/sashing piece #5-9. You will have a piece made from three patches.
When you press, press the cornerstone seams in the opposite direction as you have pressed the other sashing already applied to block #8. This will allow you to piece your seams more precisely.
Sew the long thin piece made up of three patches to block #8
Sew the long thin piece made up of three patches (2 cornerstones and a piece of sashing) to block #8, which already has sashing on three sides.
Sew sashing/cornerstone piece #19-24 to block #18
Sew cornerstone #24 to sashing #19. I don’t have a picture of the two pieces sewn together before I attached them to the block, but you do have to sew them together before you sew them on the block. Now, sew sashing/cornerstone piece #19-24 to block #18 (middle right).
Sew sashing #27 to block #28
Sew sashing #27 to block #28.
Sew cornerstone #32 to sashing #33. Now sew combined piece #32-33 to block #28.
Sew cornerstone #32 to sashing #33. Now sew combined piece #32-33 to block #28. This will give you a chunk that is sashed on two sides (left and bottom).
Sew sashing #29 to cornerstone #34, then sew that combined strip to block #28. Pay attention to seams so you can line them up.
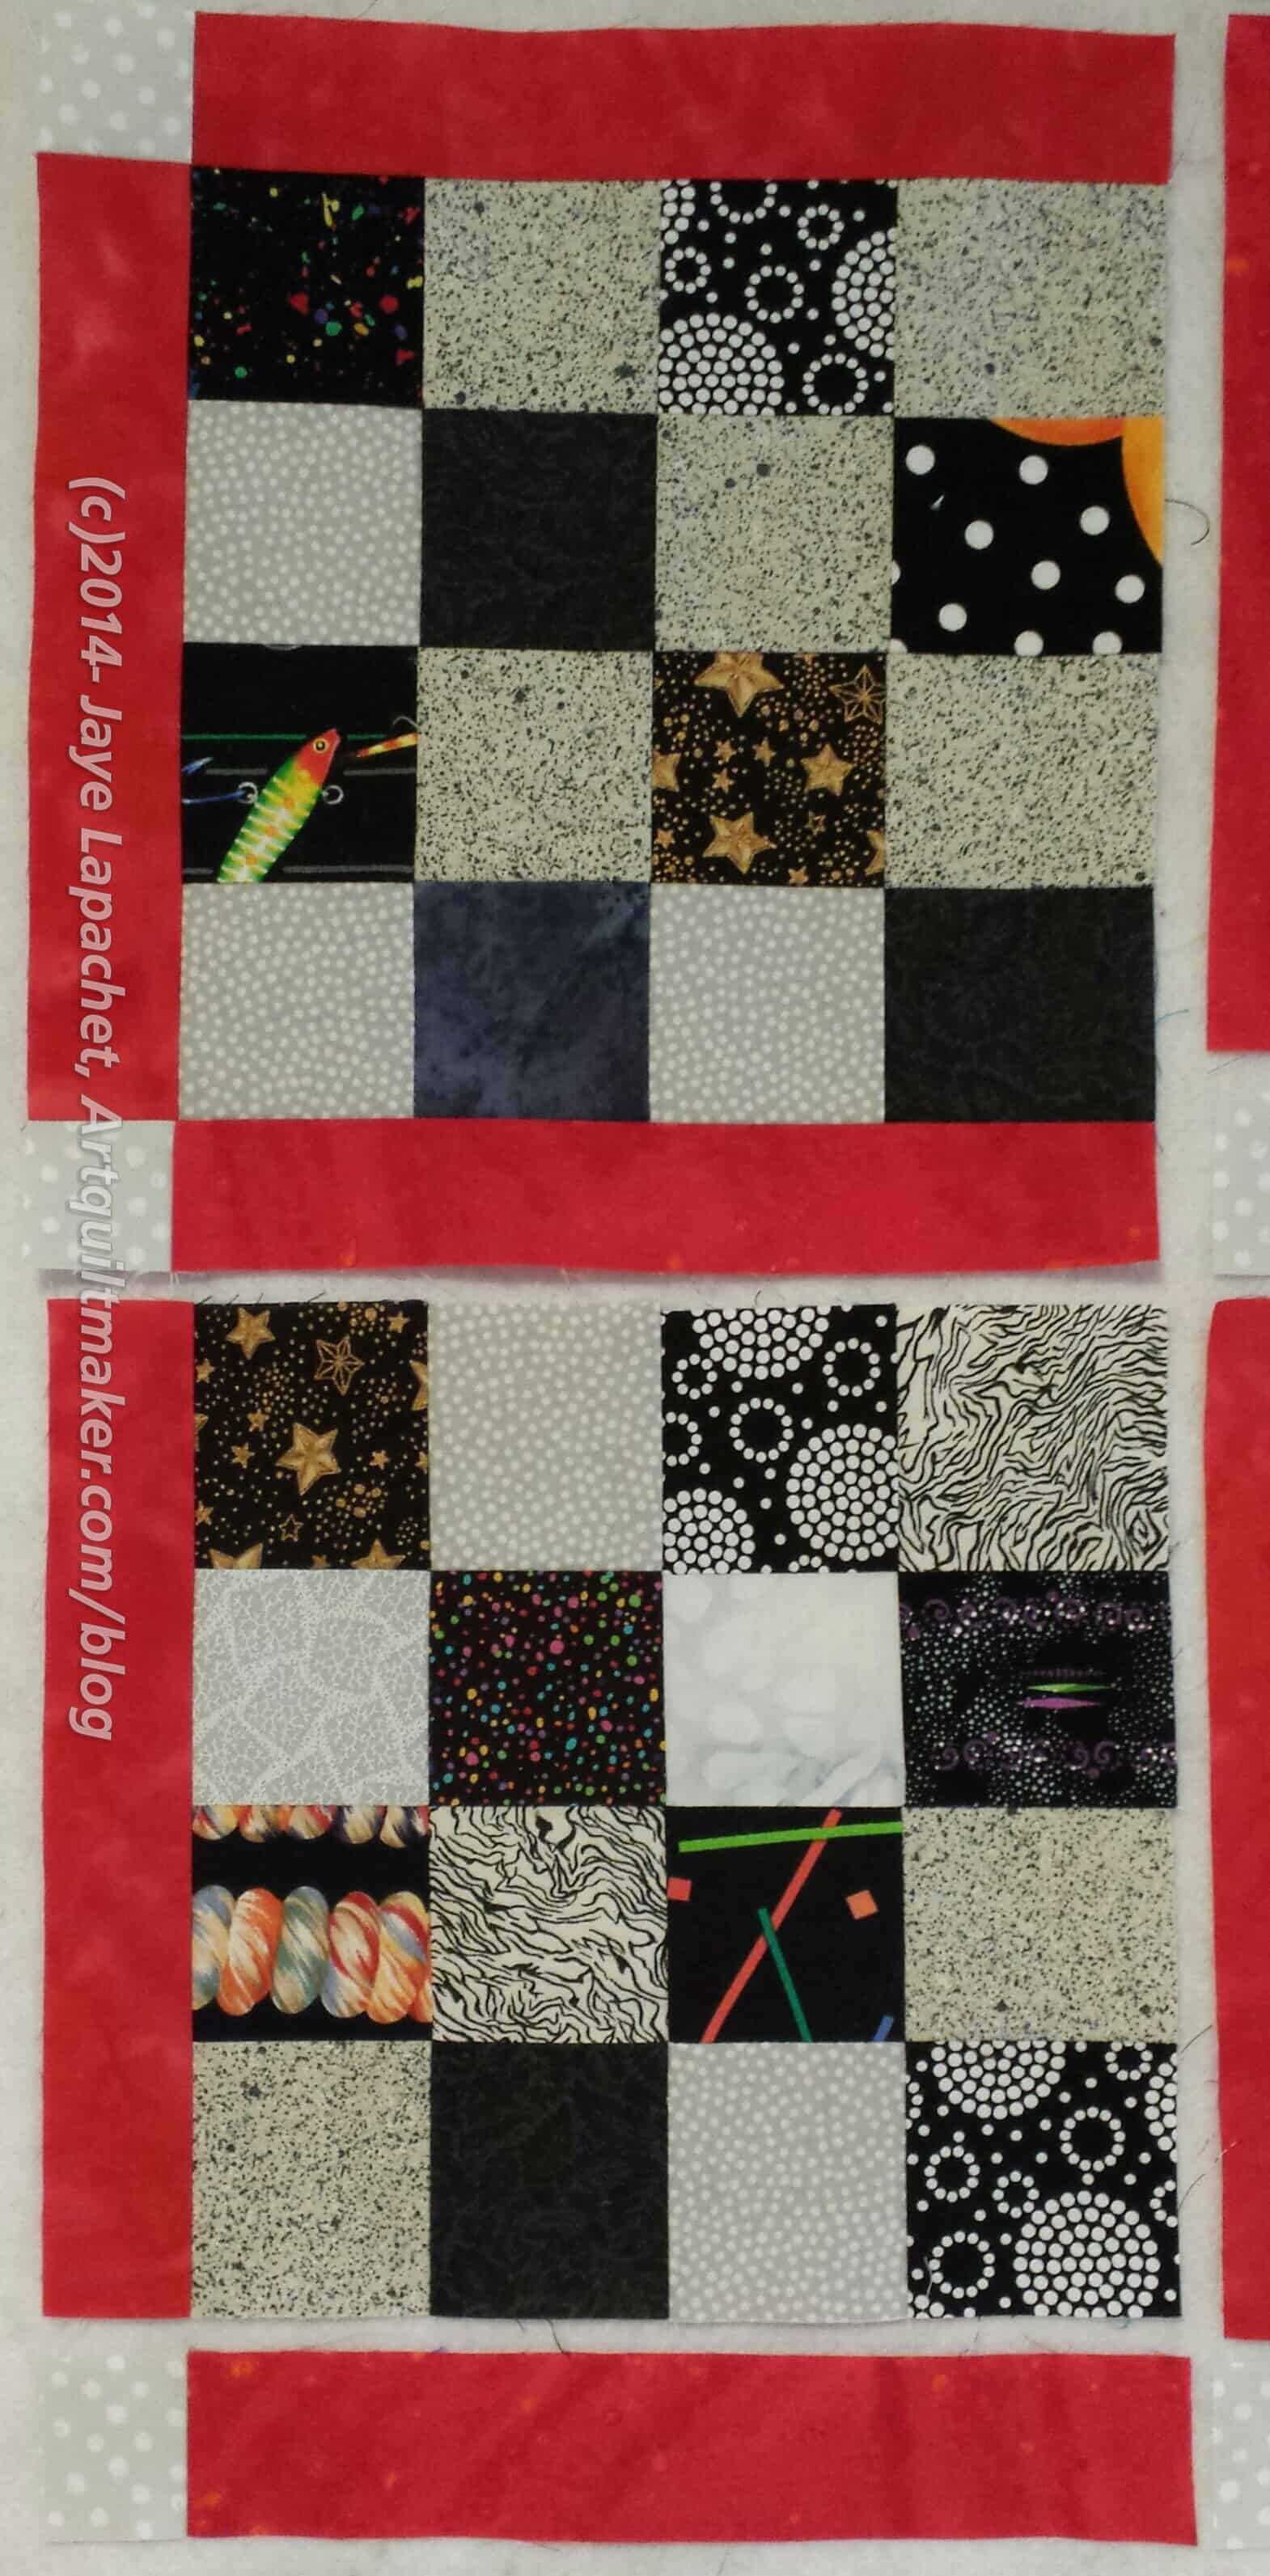
You now have five chunks and are ready to sew them together.
Sew the two blocks on the upper right side together.
Sew the two blocks on the upper right side together.
Sew the two bottom blocks together.
Sew the two bottom blocks together. Now you have three chunks.
Sew the top two chunks together
Sew the top two chunks together, which is four blocks.
Sew the bottom chunk, made up of two blocks to the top chunk
Sew the bottom chunk, made up of two blocks to the top chunk, which is made up of four blocks.
I have used a small piece as an example, but the same principles apply to a larger piece. I start in the upper left hand corner and work my way to the lower right hand corner, making chunks and eventually sewing them together into larger chunks until the quilt is finished.
Let me know if you have questions.
You will have easy access to this tutorial via the link on the navigation bar to tutorials.
**Nota bene: I accidentally labeled two pieces of fabric with the number 8 in Step 1. Note that one is a piece of red sashing and the other is a block. Please look at the photos to assist you with the correct sequence of piecing.
All small items, prior to those completed in December 2014, have been completed since November 4, 2013. I am going to make a new list for 2015 so this list will no longer be updated. I want to see more select progress in 2015 and try and get an idea of how much I am doing.
Well, 2015 has barely started and I can already say that I had a hand in making a donation top.
Ooops! I have forgotten what the politically correct term is for donation quilt. I guess I didn’t listen to Pam’s podcast episode well enough.
Anyway.
BAMQG Sew Day was yesterday. I planned to go and had all of my cutting projects planned out to take when I thought of emailing Gerre to see if she would be there. Gerre and I made the Green T quilt together in the Great Charity Race last fall. We make a good team and Gerre makes me happy to be around.
Shockingly, she said no! It turns out that she was injured before Christmas had had been stuck at home since then and she didn’t feel like it. I cajoled and encouraged and bribed her with the prospect of working on another charity project with me. My thought was that she wouldn’t have to think about a project. She could just show up with her sewing machine.
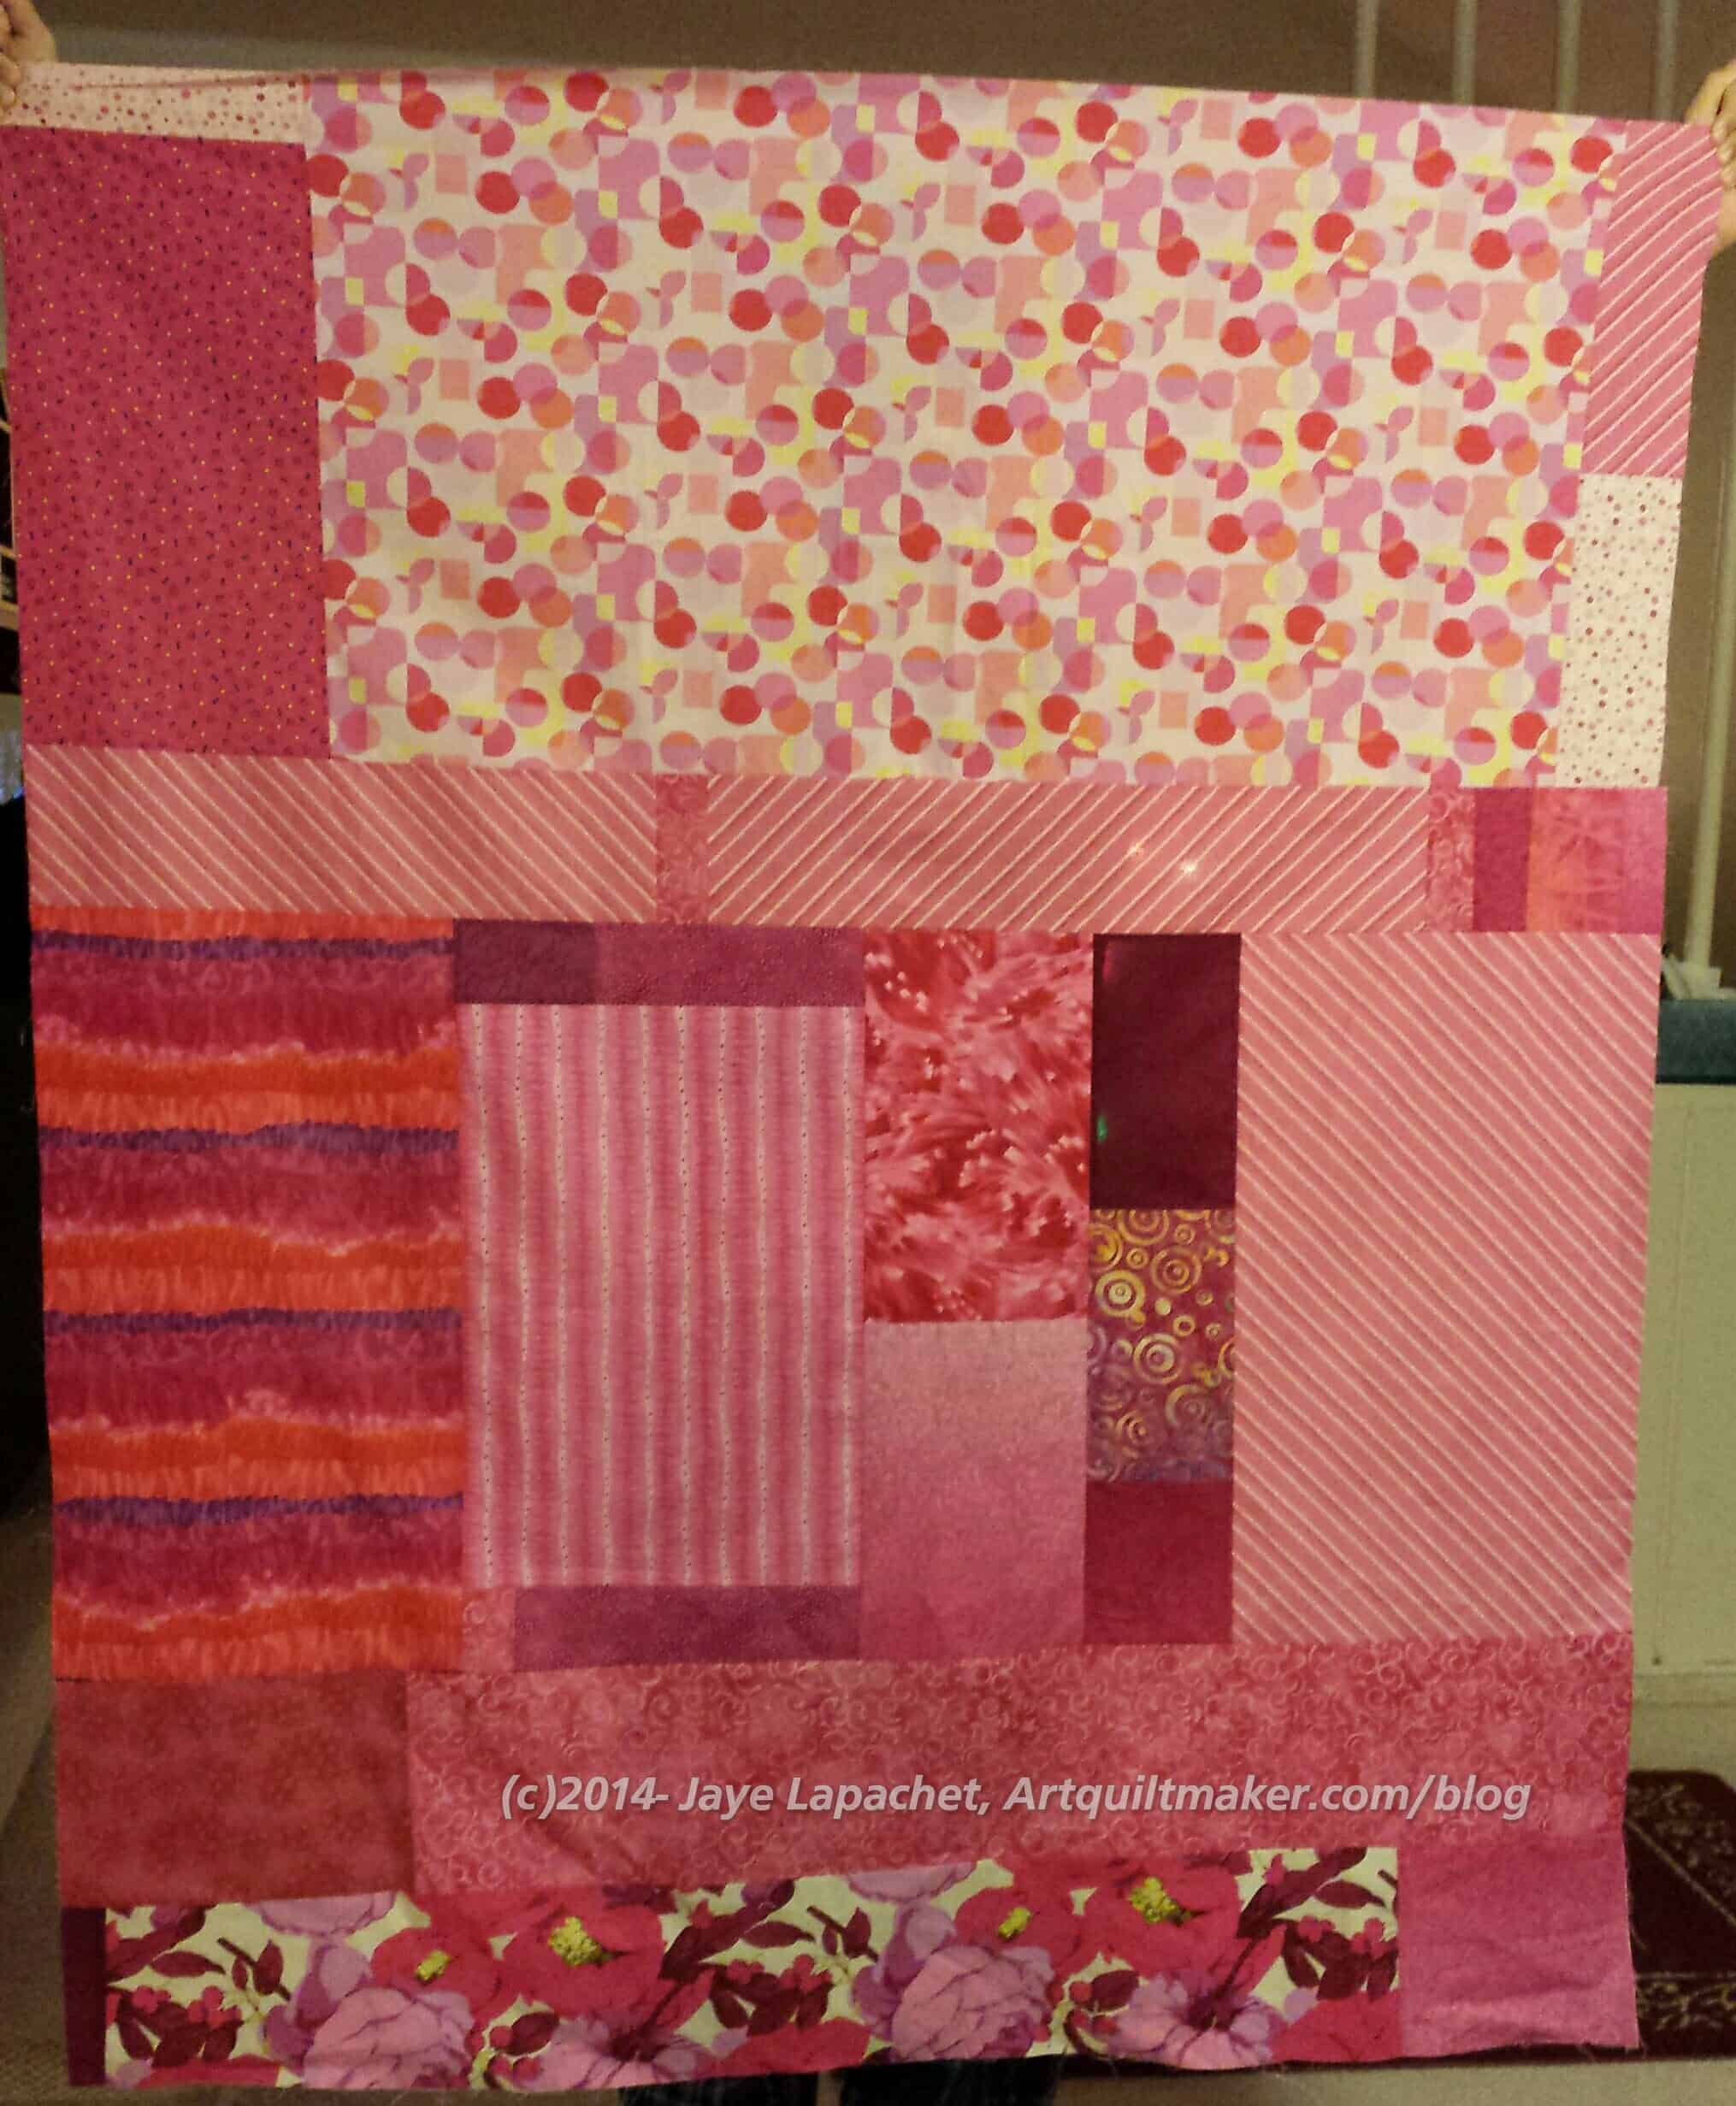
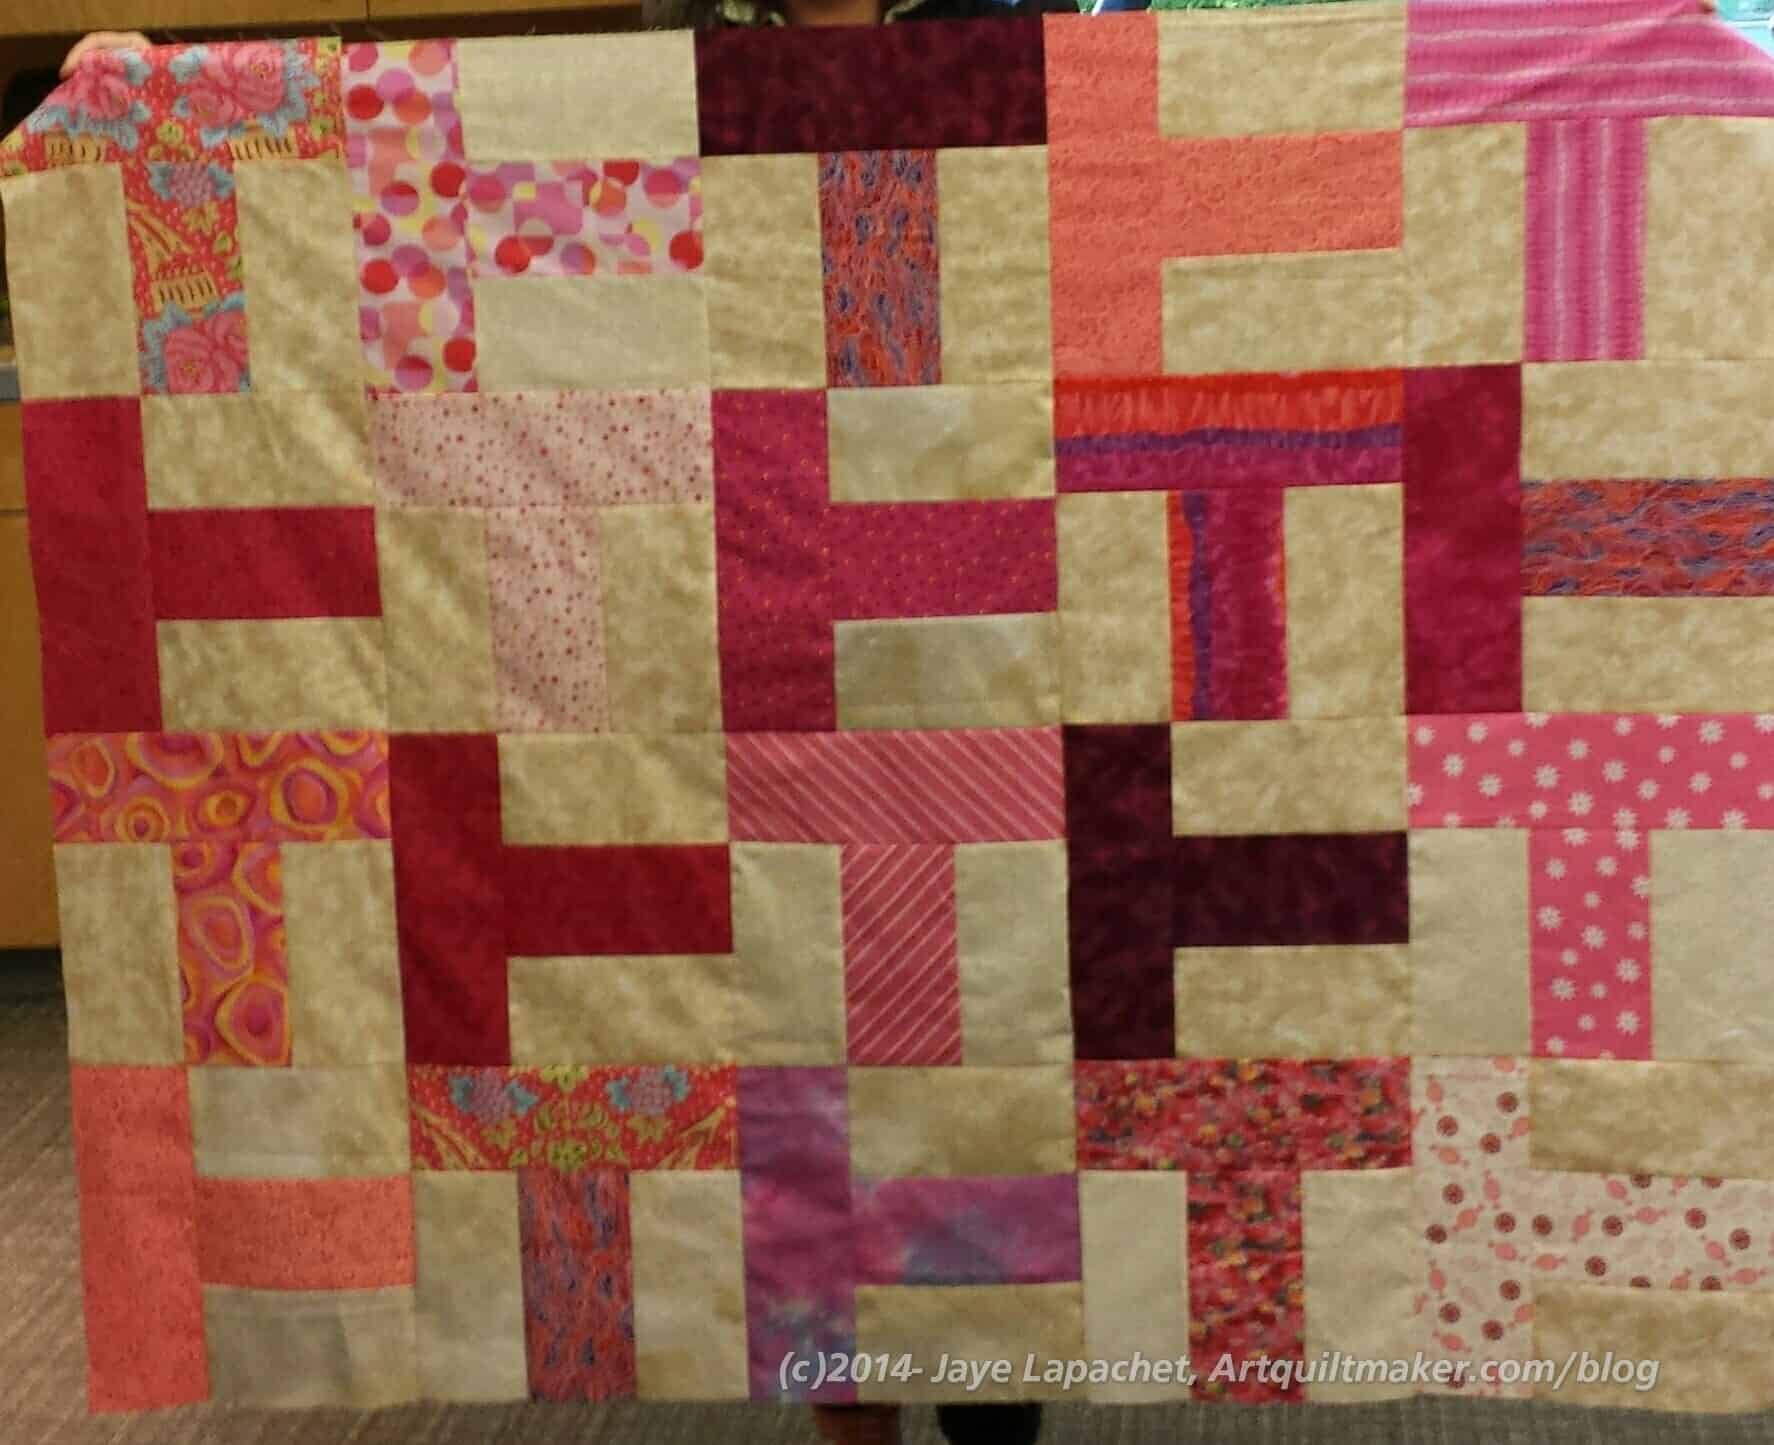
It worked! Gerre decided to come and my job was to get fabric for another ‘T’ quilt together. We agreed that something cheerful was in order. I pulled out some pinks. I also pulled some beiges for the background that I wanted to use up anyway.
I arrived a little later than I intended (those PJs were nice and comfy). I started pressing and Gerre started cutting. The T quilts we made during the Great Charity Race were cut out. We found out how daunting the cutting can be. Once we passed that hurdle, I sewed the first seam and then pressed and Gerre sewed the rest as I pressed and handed her pieces.
Pink T Donation Quilt
The result is a cheerful quilt that we hope some lovely girl will enjoy. I don’t even think the beiges are very terrible.
Gerre has the piece, which is about 55″x45″. I will make the back and send it to her, she will quilt it, then I will bind it.
Gerre left much more cheerful and I got in over 5K steps running around, so it was a good day on many different levels.
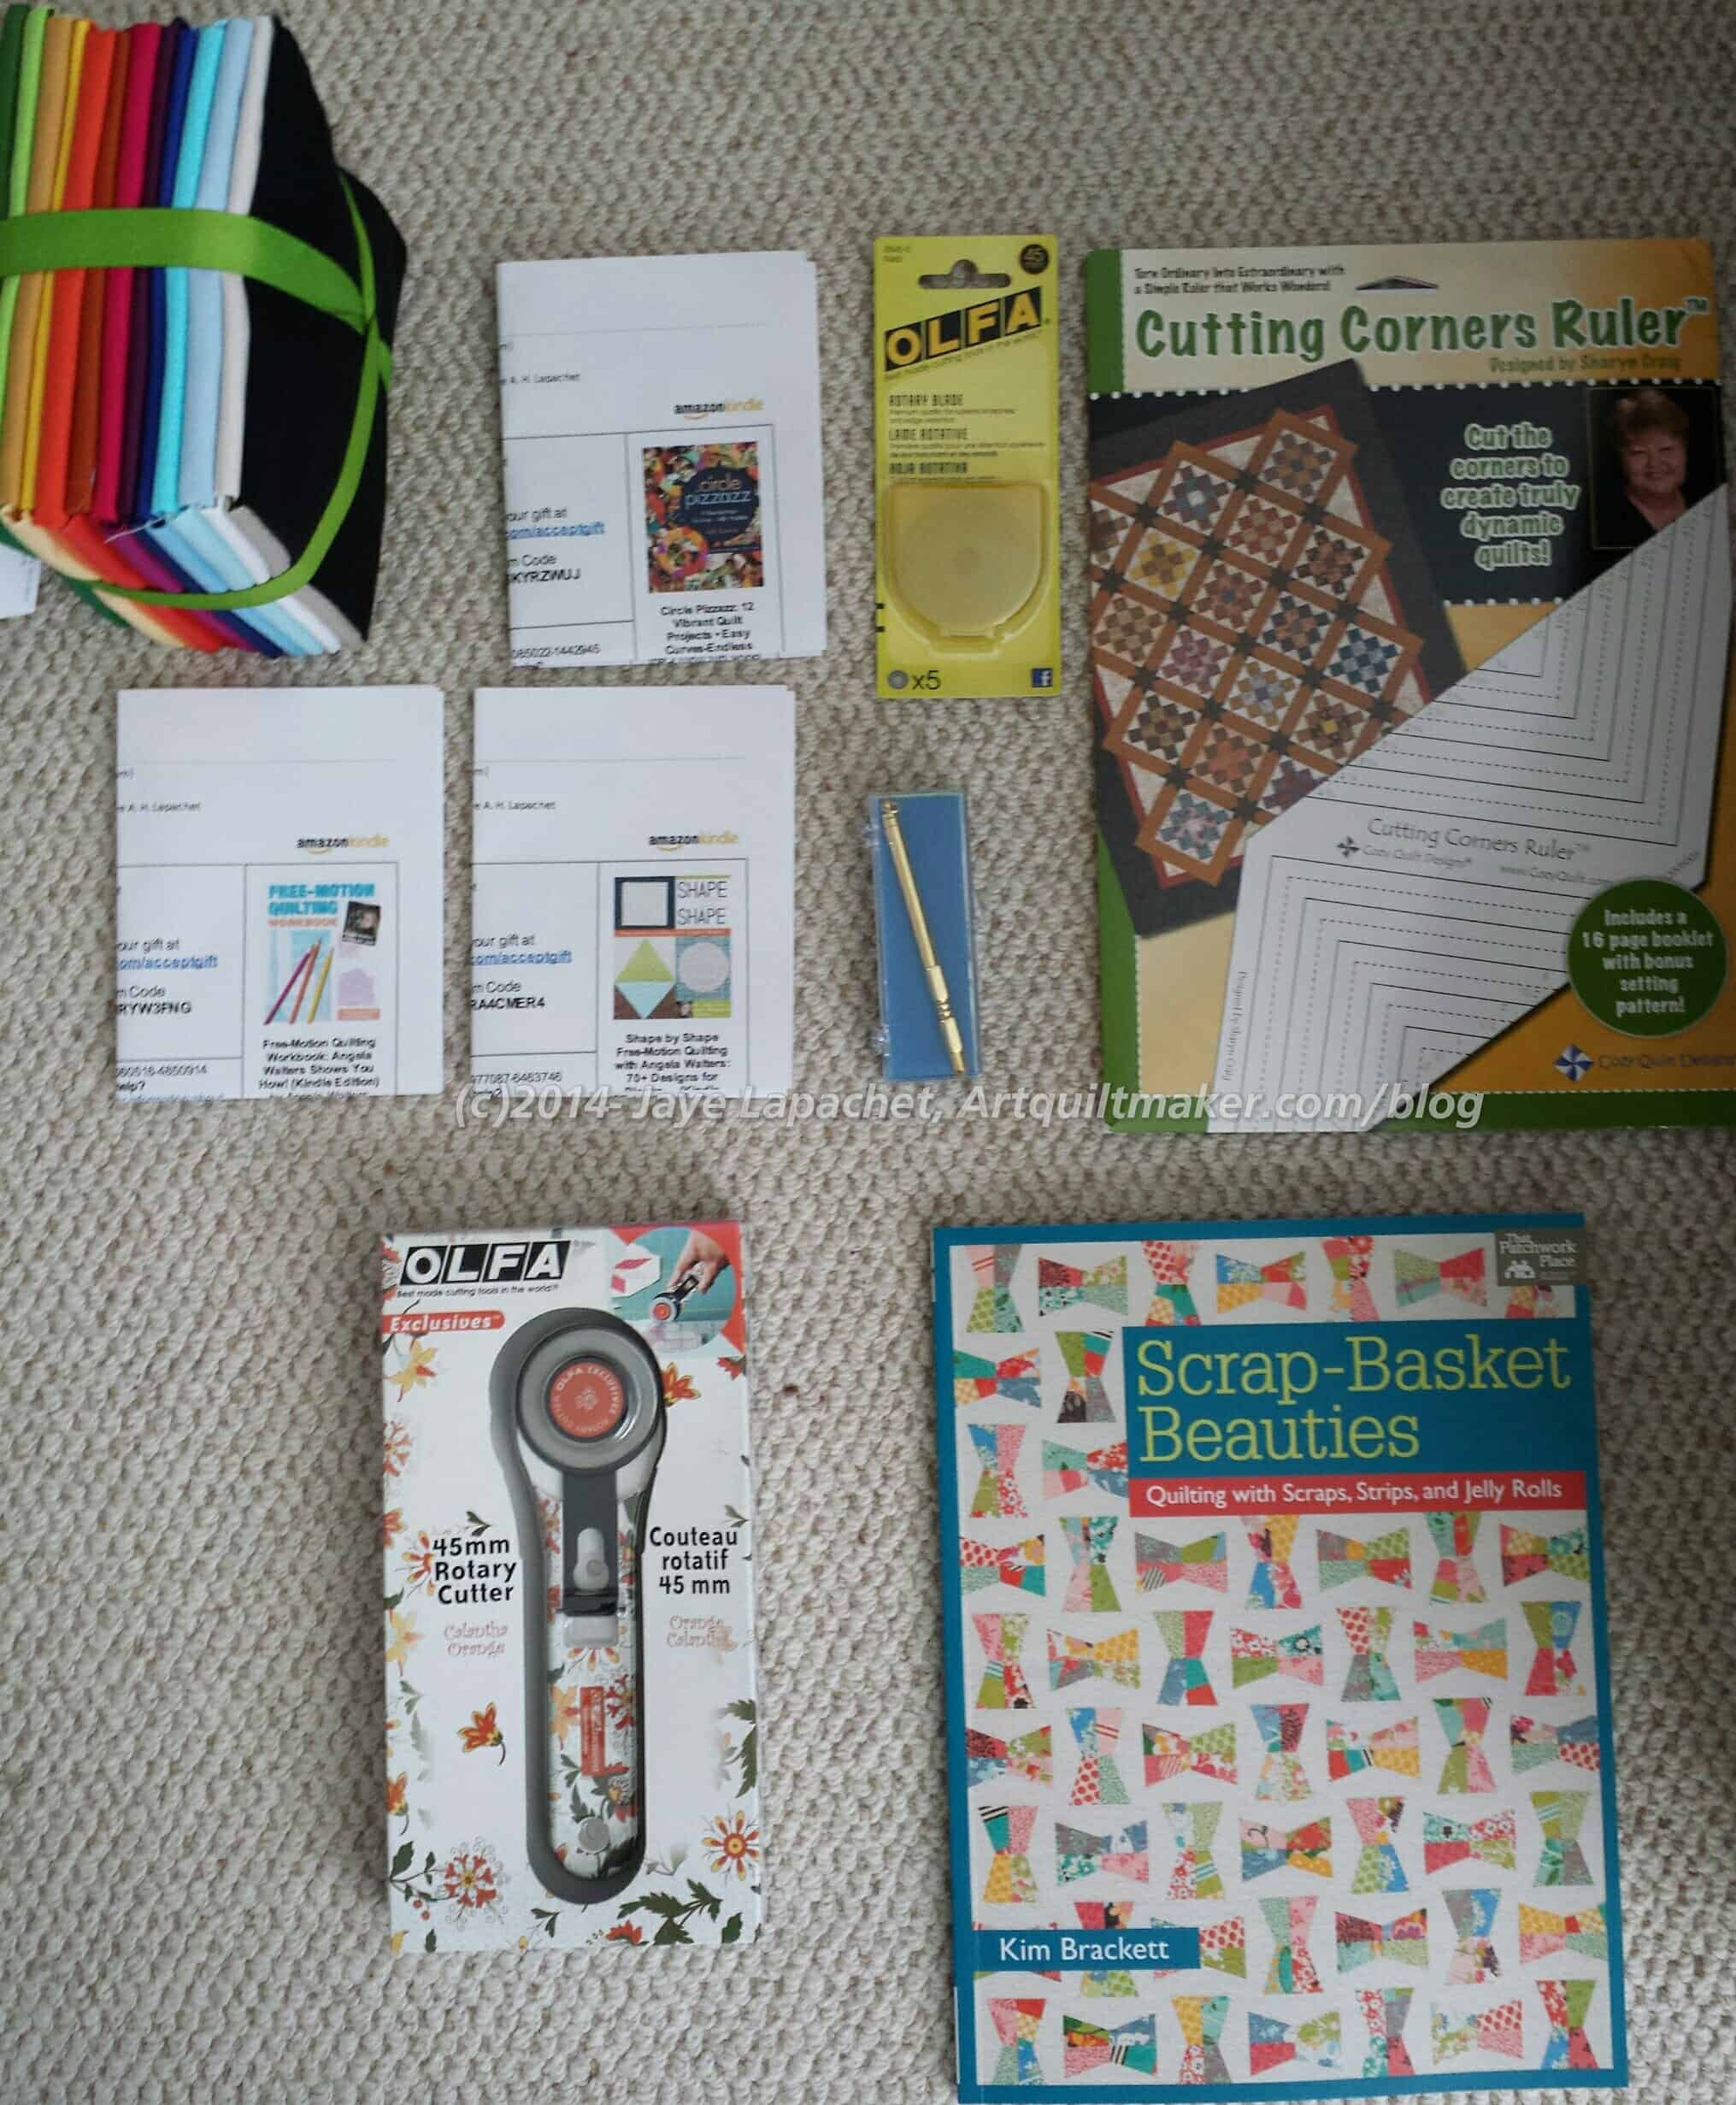
I got a nice group of quilt/sewing related gifts for Christmas this year. It was also the right amount of stuff.
I really wanted that Scrap Basket Beauties book after seeing one of the quilts made up during a visit to Back Porch Fabrics in Pacific Grove with Friend Julie. The Young Man came through for me. I want to make the quilt I saw, perhaps in turquoise and red? Perhaps 2015 will be year of the turquoise and red? It isn’t as though I have a shortage of those colors of fabrics. 😉
The fabric in the upper left hand corner is some solids from American Made Brands. My mom found those and I am really pleased to have a few pieces with which to play.
DH got me some Kindle books from the Angela Walters machine quilting series. I will never be a serious machine quilter, but I got a glimpse of those books and think they will be really useful in my endeavors. I took over the Young Man’s iPad 2 (upgrade from my iPad 1 after he got an iPad Air for his birthday) and have been slowly reinstalling my apps including the Kindle app.
DH thought the rotary cutter was cool and thought to get some refill blades (always useful!) as well. The nice stiletto was in my stocking and I have been using it instead of my seam ripper, which I always used to push patches through my machine when corners were flipping the wrong way.
Mrs. K had good and interesting results with the Cutting Corners ruler, so I thought I would try it as well. I’ll let you know how that goes.
Is responding to creative prompts on your list of resolutions? I hope so. we have only 74 prompts left until the end of the project. WOW! I wonder what I will do on Fridays after that?
I picked ‘blush’ because I wanted a word that would evoke the newness of the year and after several years, I have used up many of the words that mean new. Onward
a kind of makeup (cream or powder)
Blush wine bar (San Francisco)
Definition (blushing): “Blushing is the involuntary reddening of a person’s face due to emotional stress. Examples of emotional responses that may trigger blushing include embarrassment, anger, or romantic stimulation. Severe blushing is common in people who suffer social anxiety in which the person experiences extreme and persistent anxiety in social and performance situations.” (Wikipedia)
Blush dresses
Blush band
Blush prom
blush lingerie
a color
a type of rose
Studio blush
Blush Raw Bar Lounge… a welcome-as-you-are, relaxed and contemporary atmosphere.
blusher
Blush is an online life coaching company for girls.
Blush Botanicals is one of Southern California’s premier floral design companies, serving the San Diego area and beyond.
Post the direct URL (link) where your drawing, doodle, artwork is posted (e.g. your blog, Flickr) in the comments area of this post. I would really like to keep all the artwork together and provide a way for others to see your work and/or your blog.
We are also talking about this on Twitter. Use the hashtag #CPP
The Creative Prompt Project, also, has a Flickr group, which you can join to post your responses. I created this spot so those of you without blogs and websites would have a place to post your responses.
Blush may refer to:
Blushing, the physiological occurrence of temporary redness of the face as an emotional response