I didn’t know what to sew over the weekend. It isn’t like I don’t have plenty of projects on which to work. Also, I am making good progress on the Who Am I? piece, but I wanted to make progress. I have another block to make for the Aqua-Red Sampler and decided to try something new.
I found some directions for a machine pieced (machine sewn?) Cathedral Window block and it was bugging me, so I decided it would be the last block in my Aqua-Red Sampler. It wouldn’t be the same as all the other sampler quilts and I would get to finish something today while progressing on something else.
I started with the Fons & Porter directions I found in one of their magazines. 🙁 These directions did not tell me what size blocks I was making or what size to cut the patches. The directions were not that helpful either. I am not sure what the company that owns Fons & Porter is doing, but they aren’t doing themselves any favors by hiding this crucial information.
I went to the web and found two tutorials. I used them in conjunction with each other, because neither had all the information. Sometimes Crafter had the right size, so I could tell what sizes to cut and Lovely Little Handmades had excellent directions though used different sizes patches.
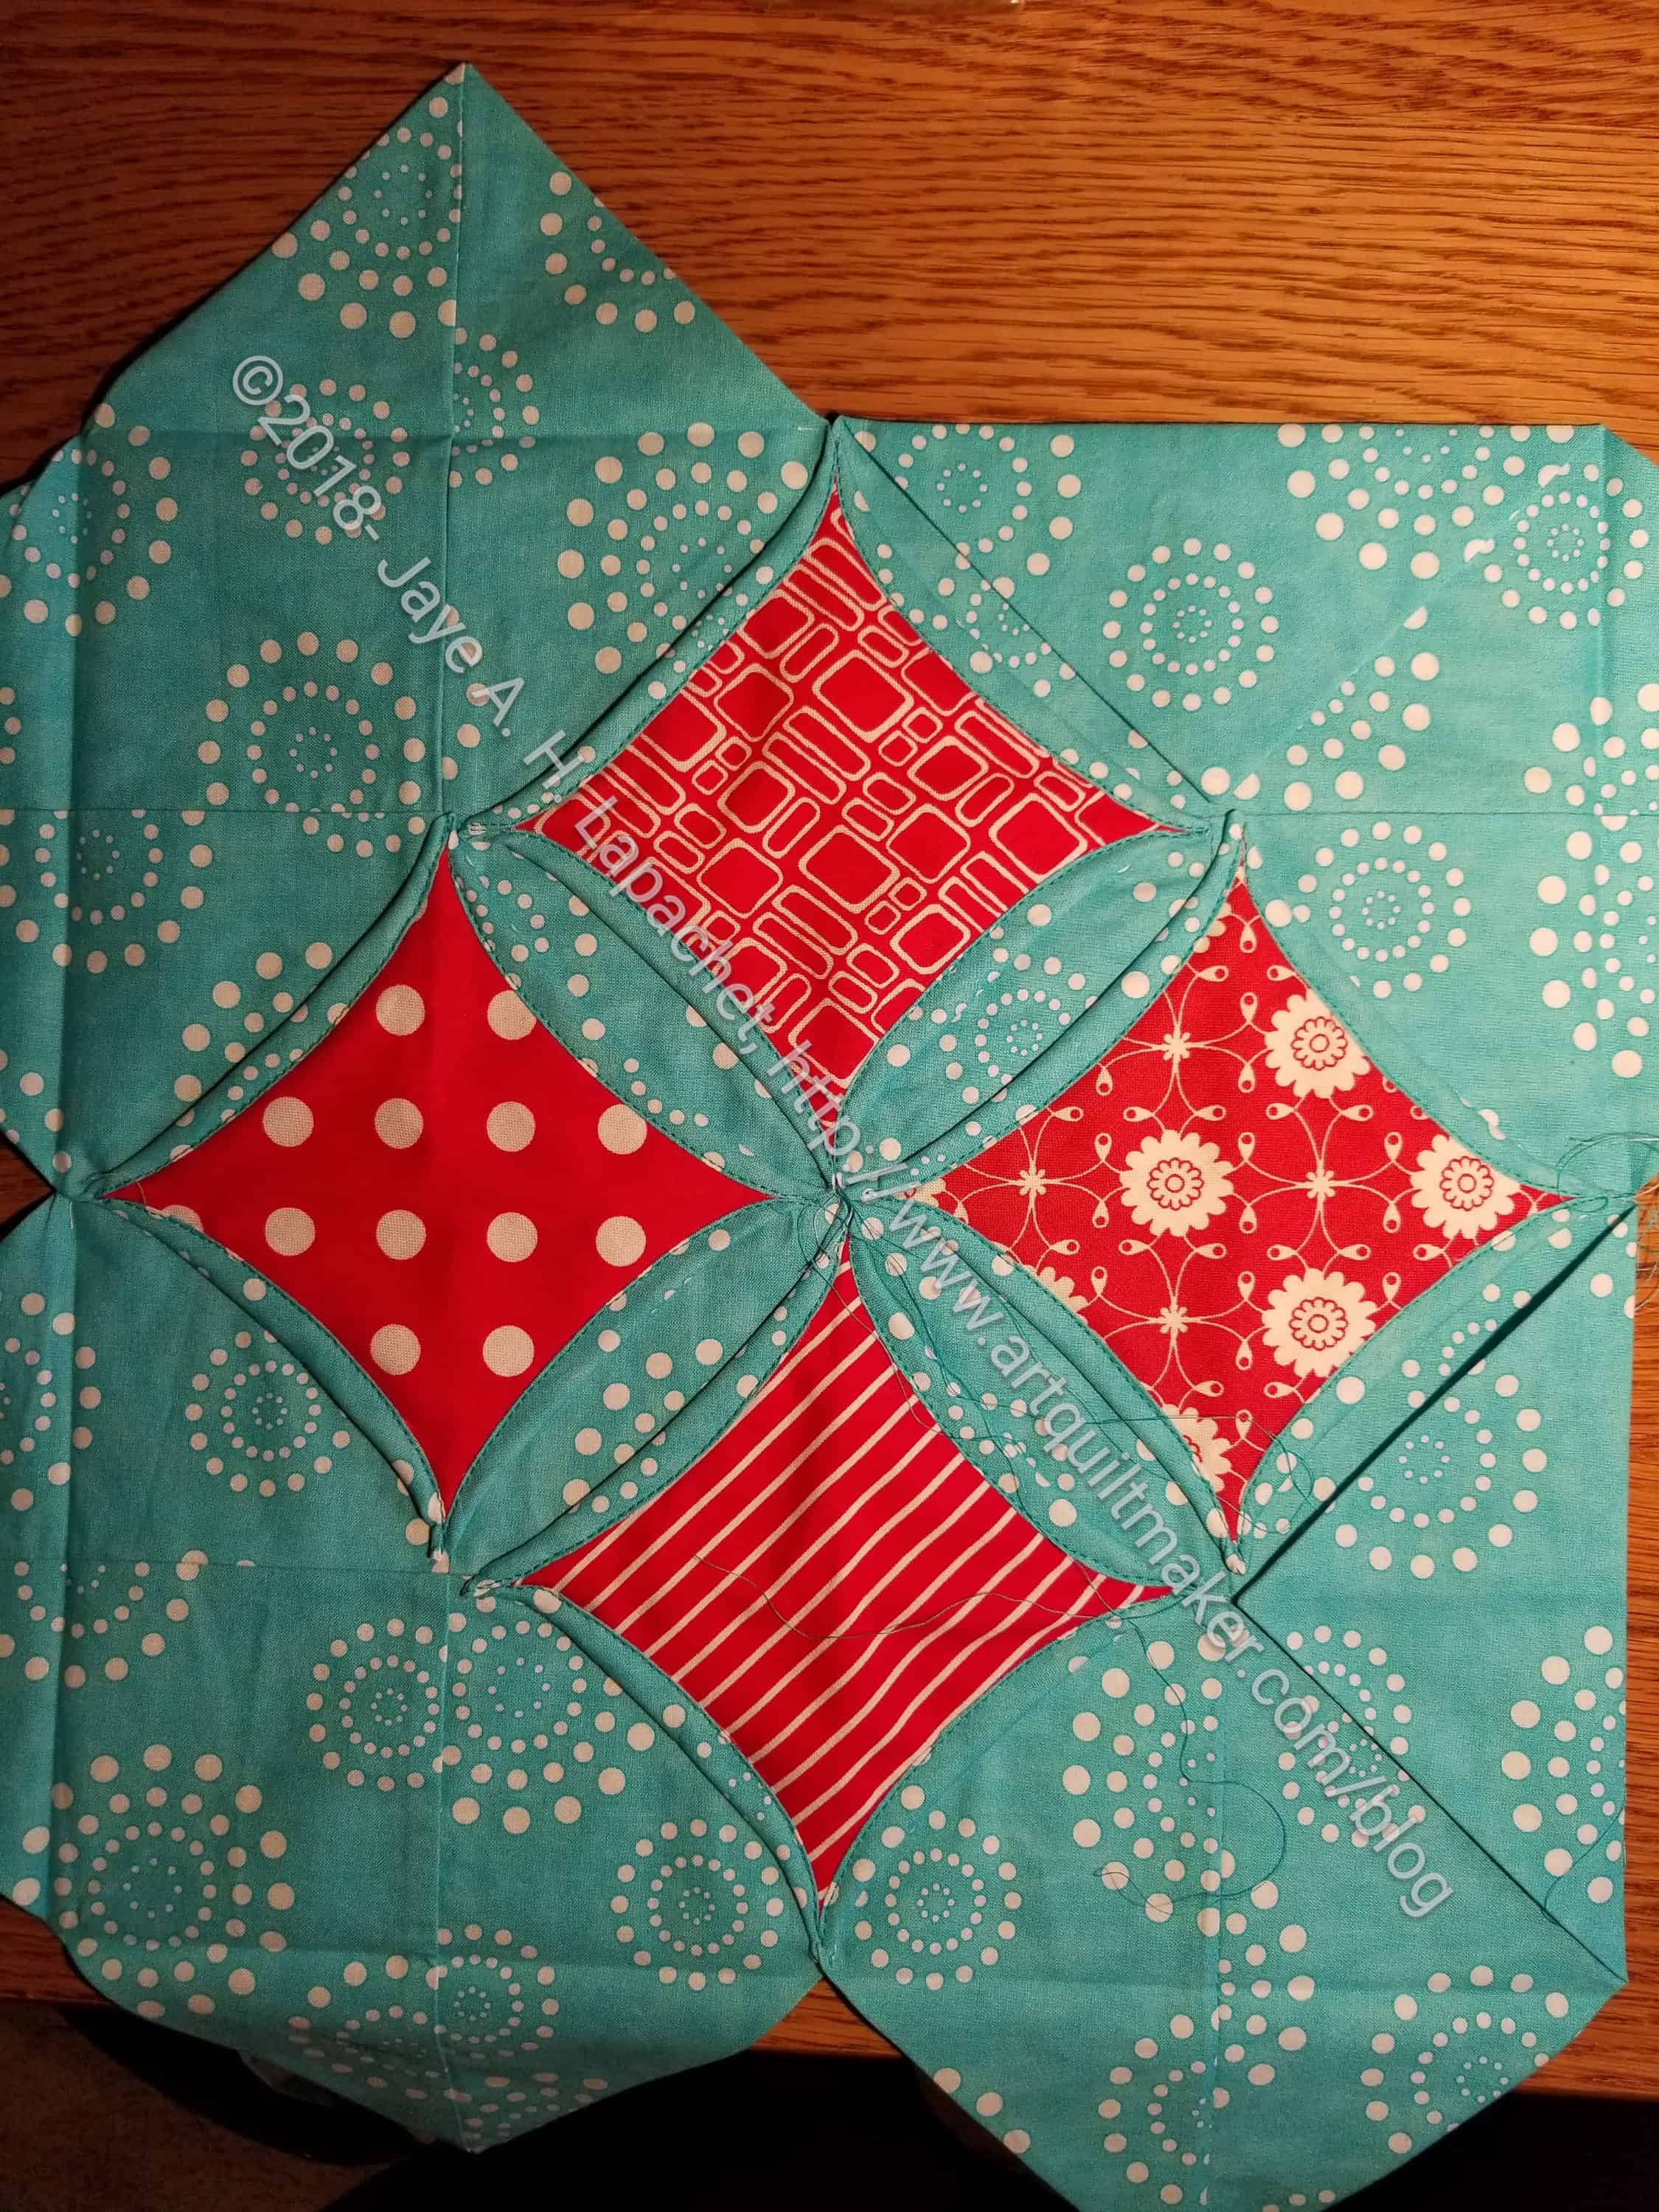
Cathedral Window Block in process
My block is still in process, but it is coming along very well.
I have some hand sewing to do, which neither tutorial recommends, but I don’t care. It is the way I want to finish my block.
I decided to create a tutorial. I think the quilt world needs a more complete Cathedral Windows block tutorial in the 12.5 inch (unfinished) size, so look for that soon.
When I finish this block, another decision will be made and I will be able to put the Aqua-Red Sampler together.
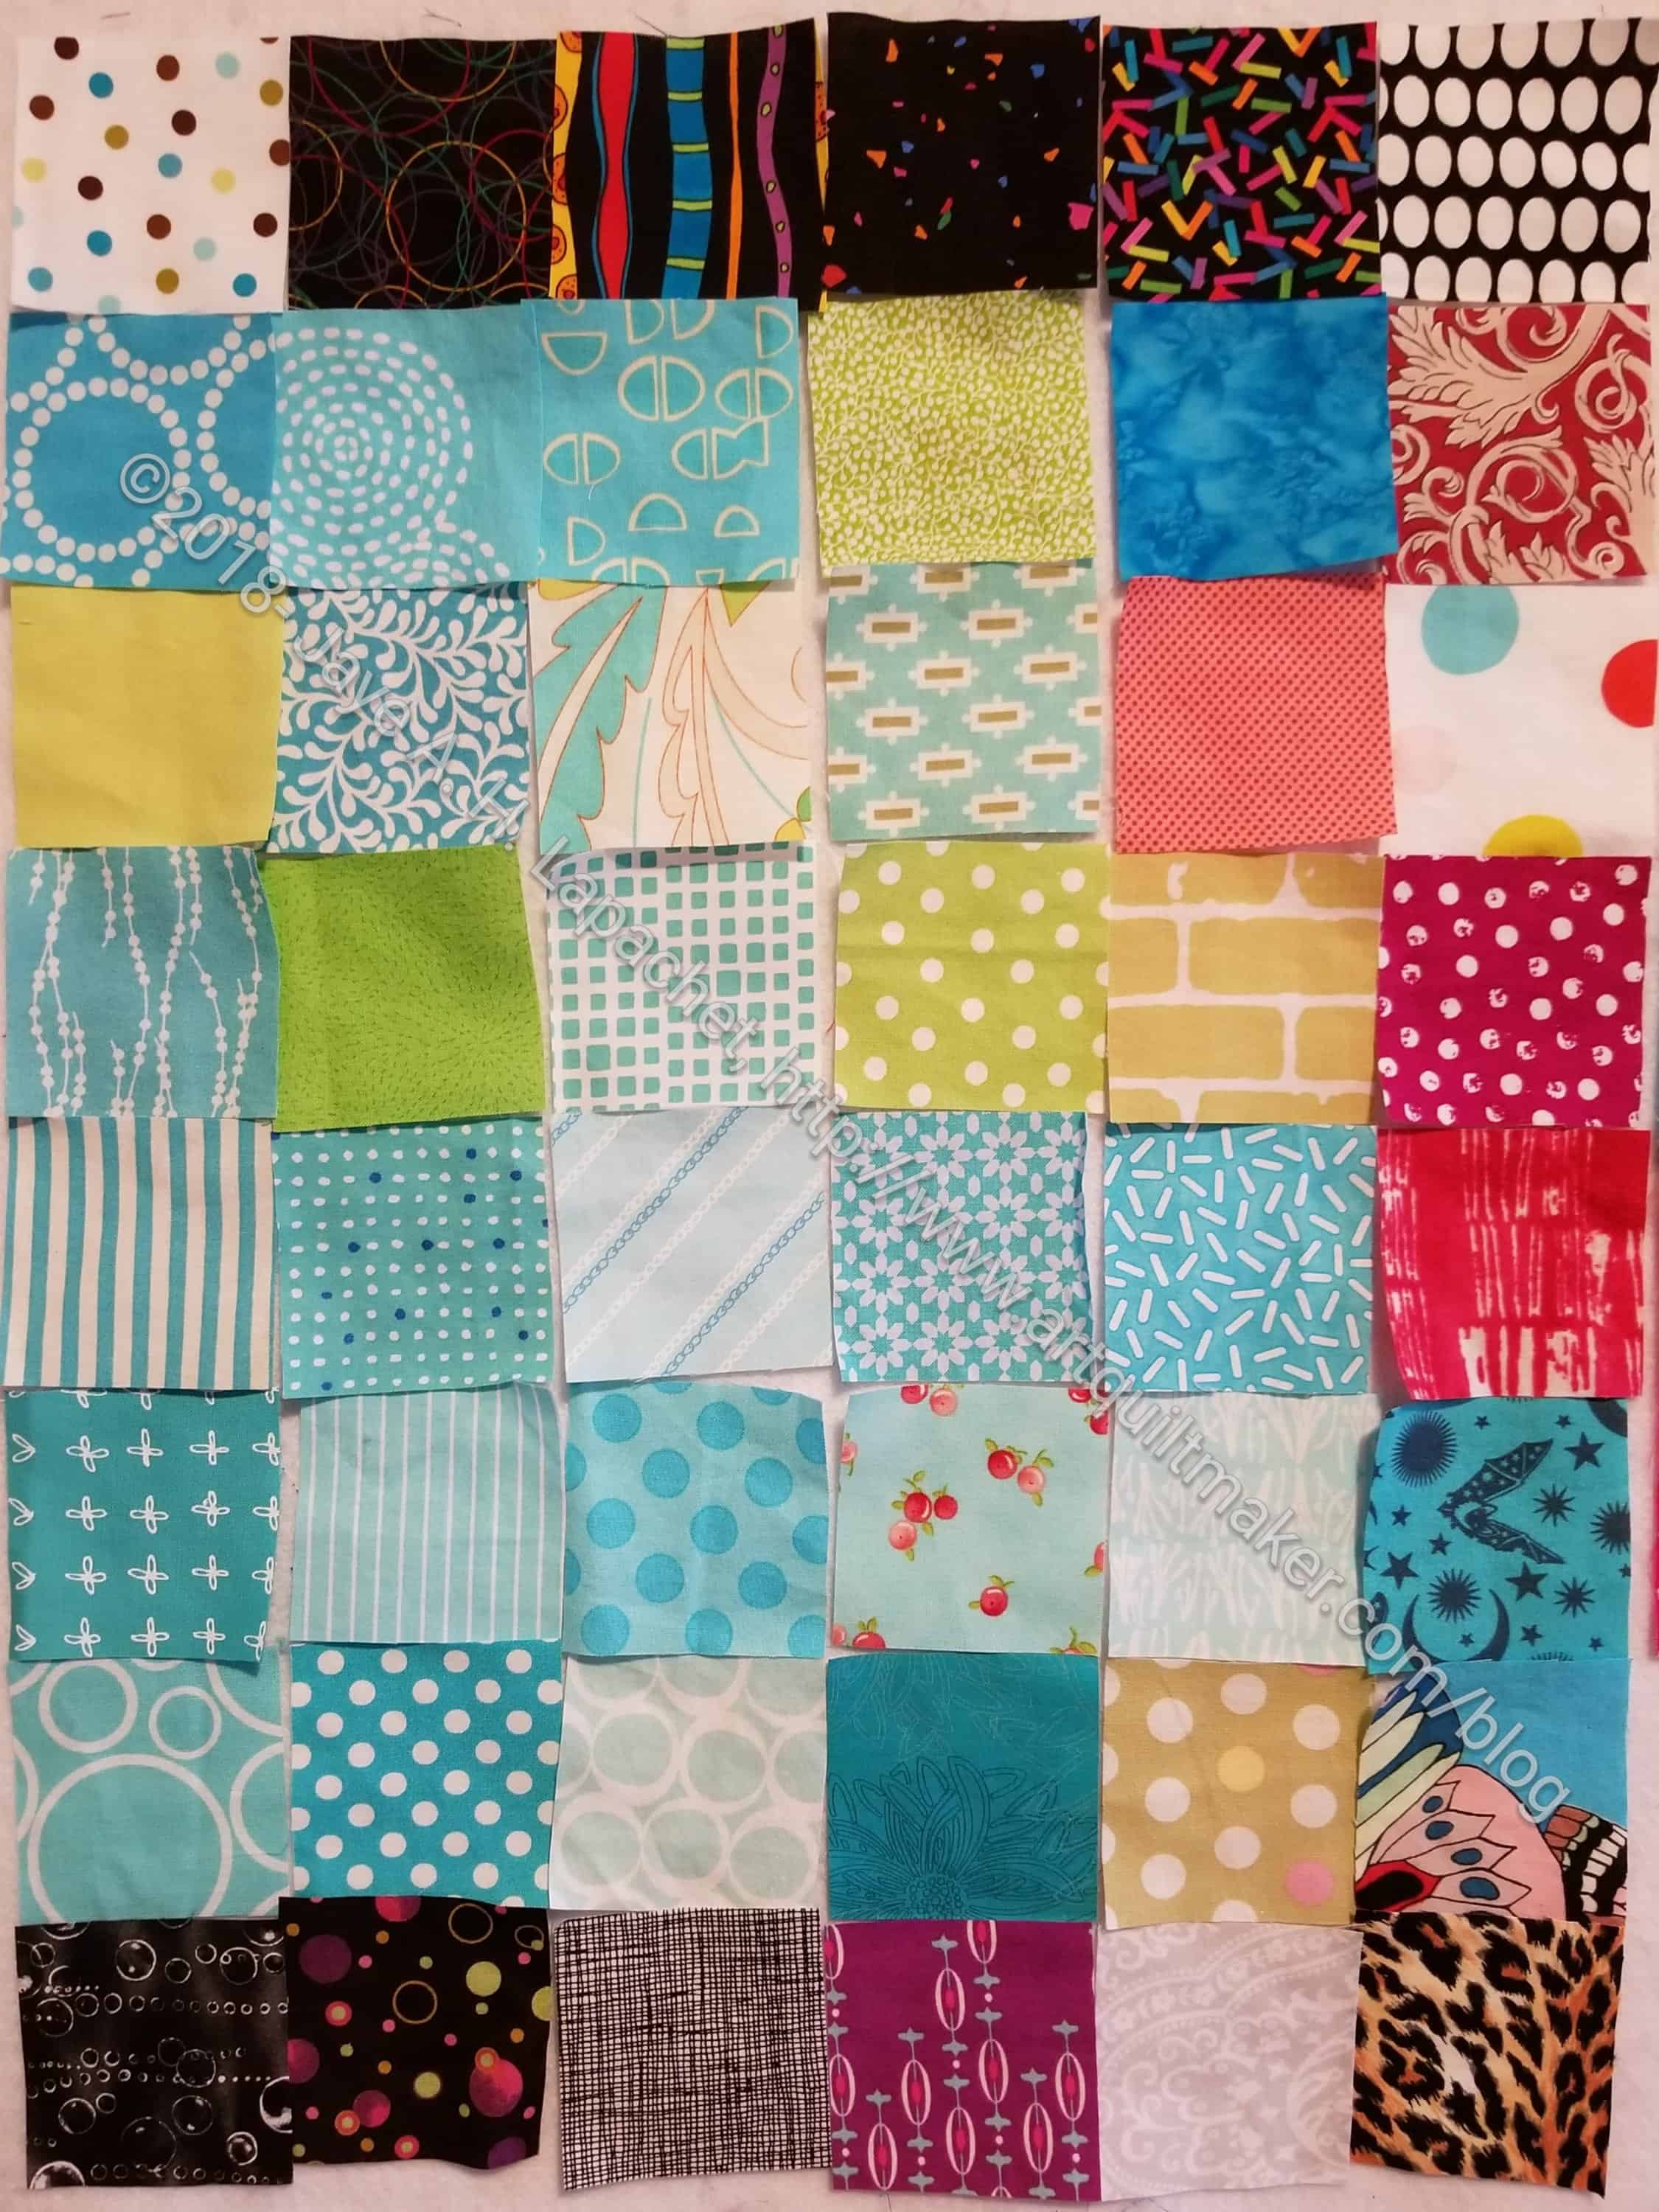
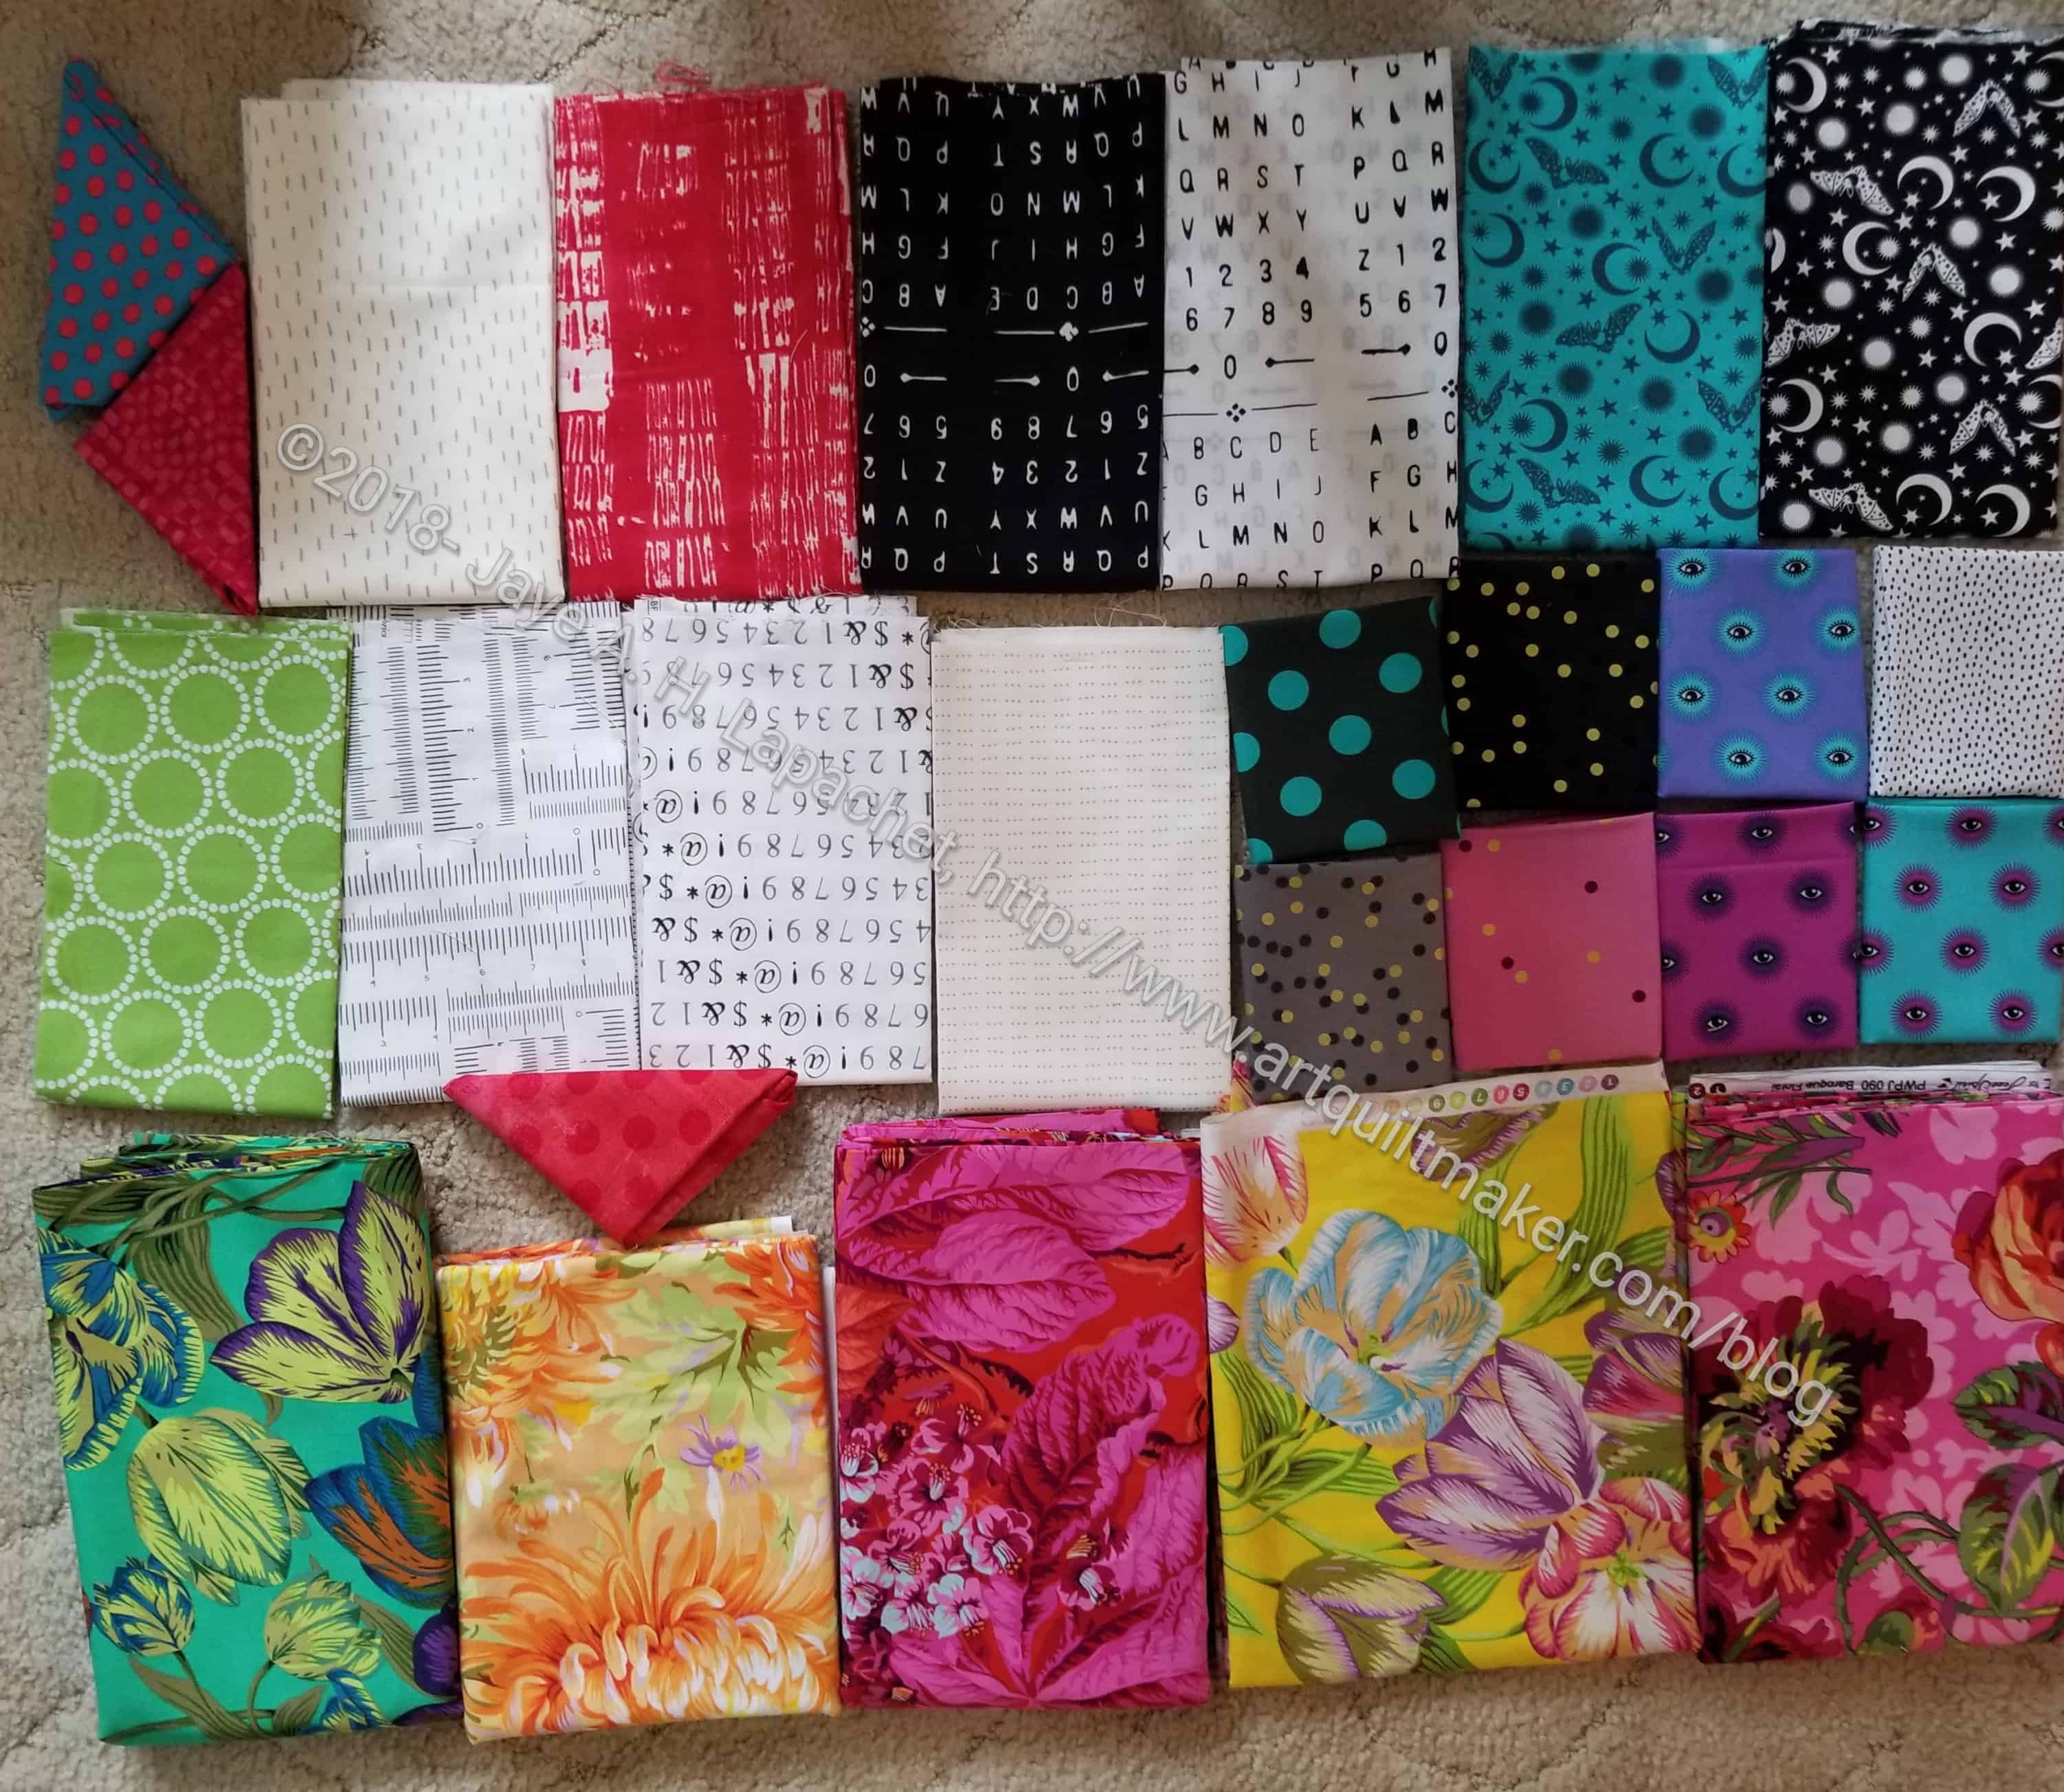
It took me awhile to cut enough squares to make a good post. I did it and am still making progress.You can see that many of the fabrics are from the Stepping Stones n.2 piece. There are a few from Ends n.5 and also some from the Tool Tote. It is fun to see the fabrics I used in projects in this quilt.
There are also some new fabrics, which makes me feel happy, because I am getting fabrics cut and organized for future projects.
This is making me think of putting together FOTY 2017. I really need to get to that. Should I finish the Aqua-Red Sampler first or put that project back on the back burner and move to FOTY 2017?
I have so many projects!!! I need more time to sew.
I couldn’t go to Sisters without visiting local quilt shops. It’s what I do.
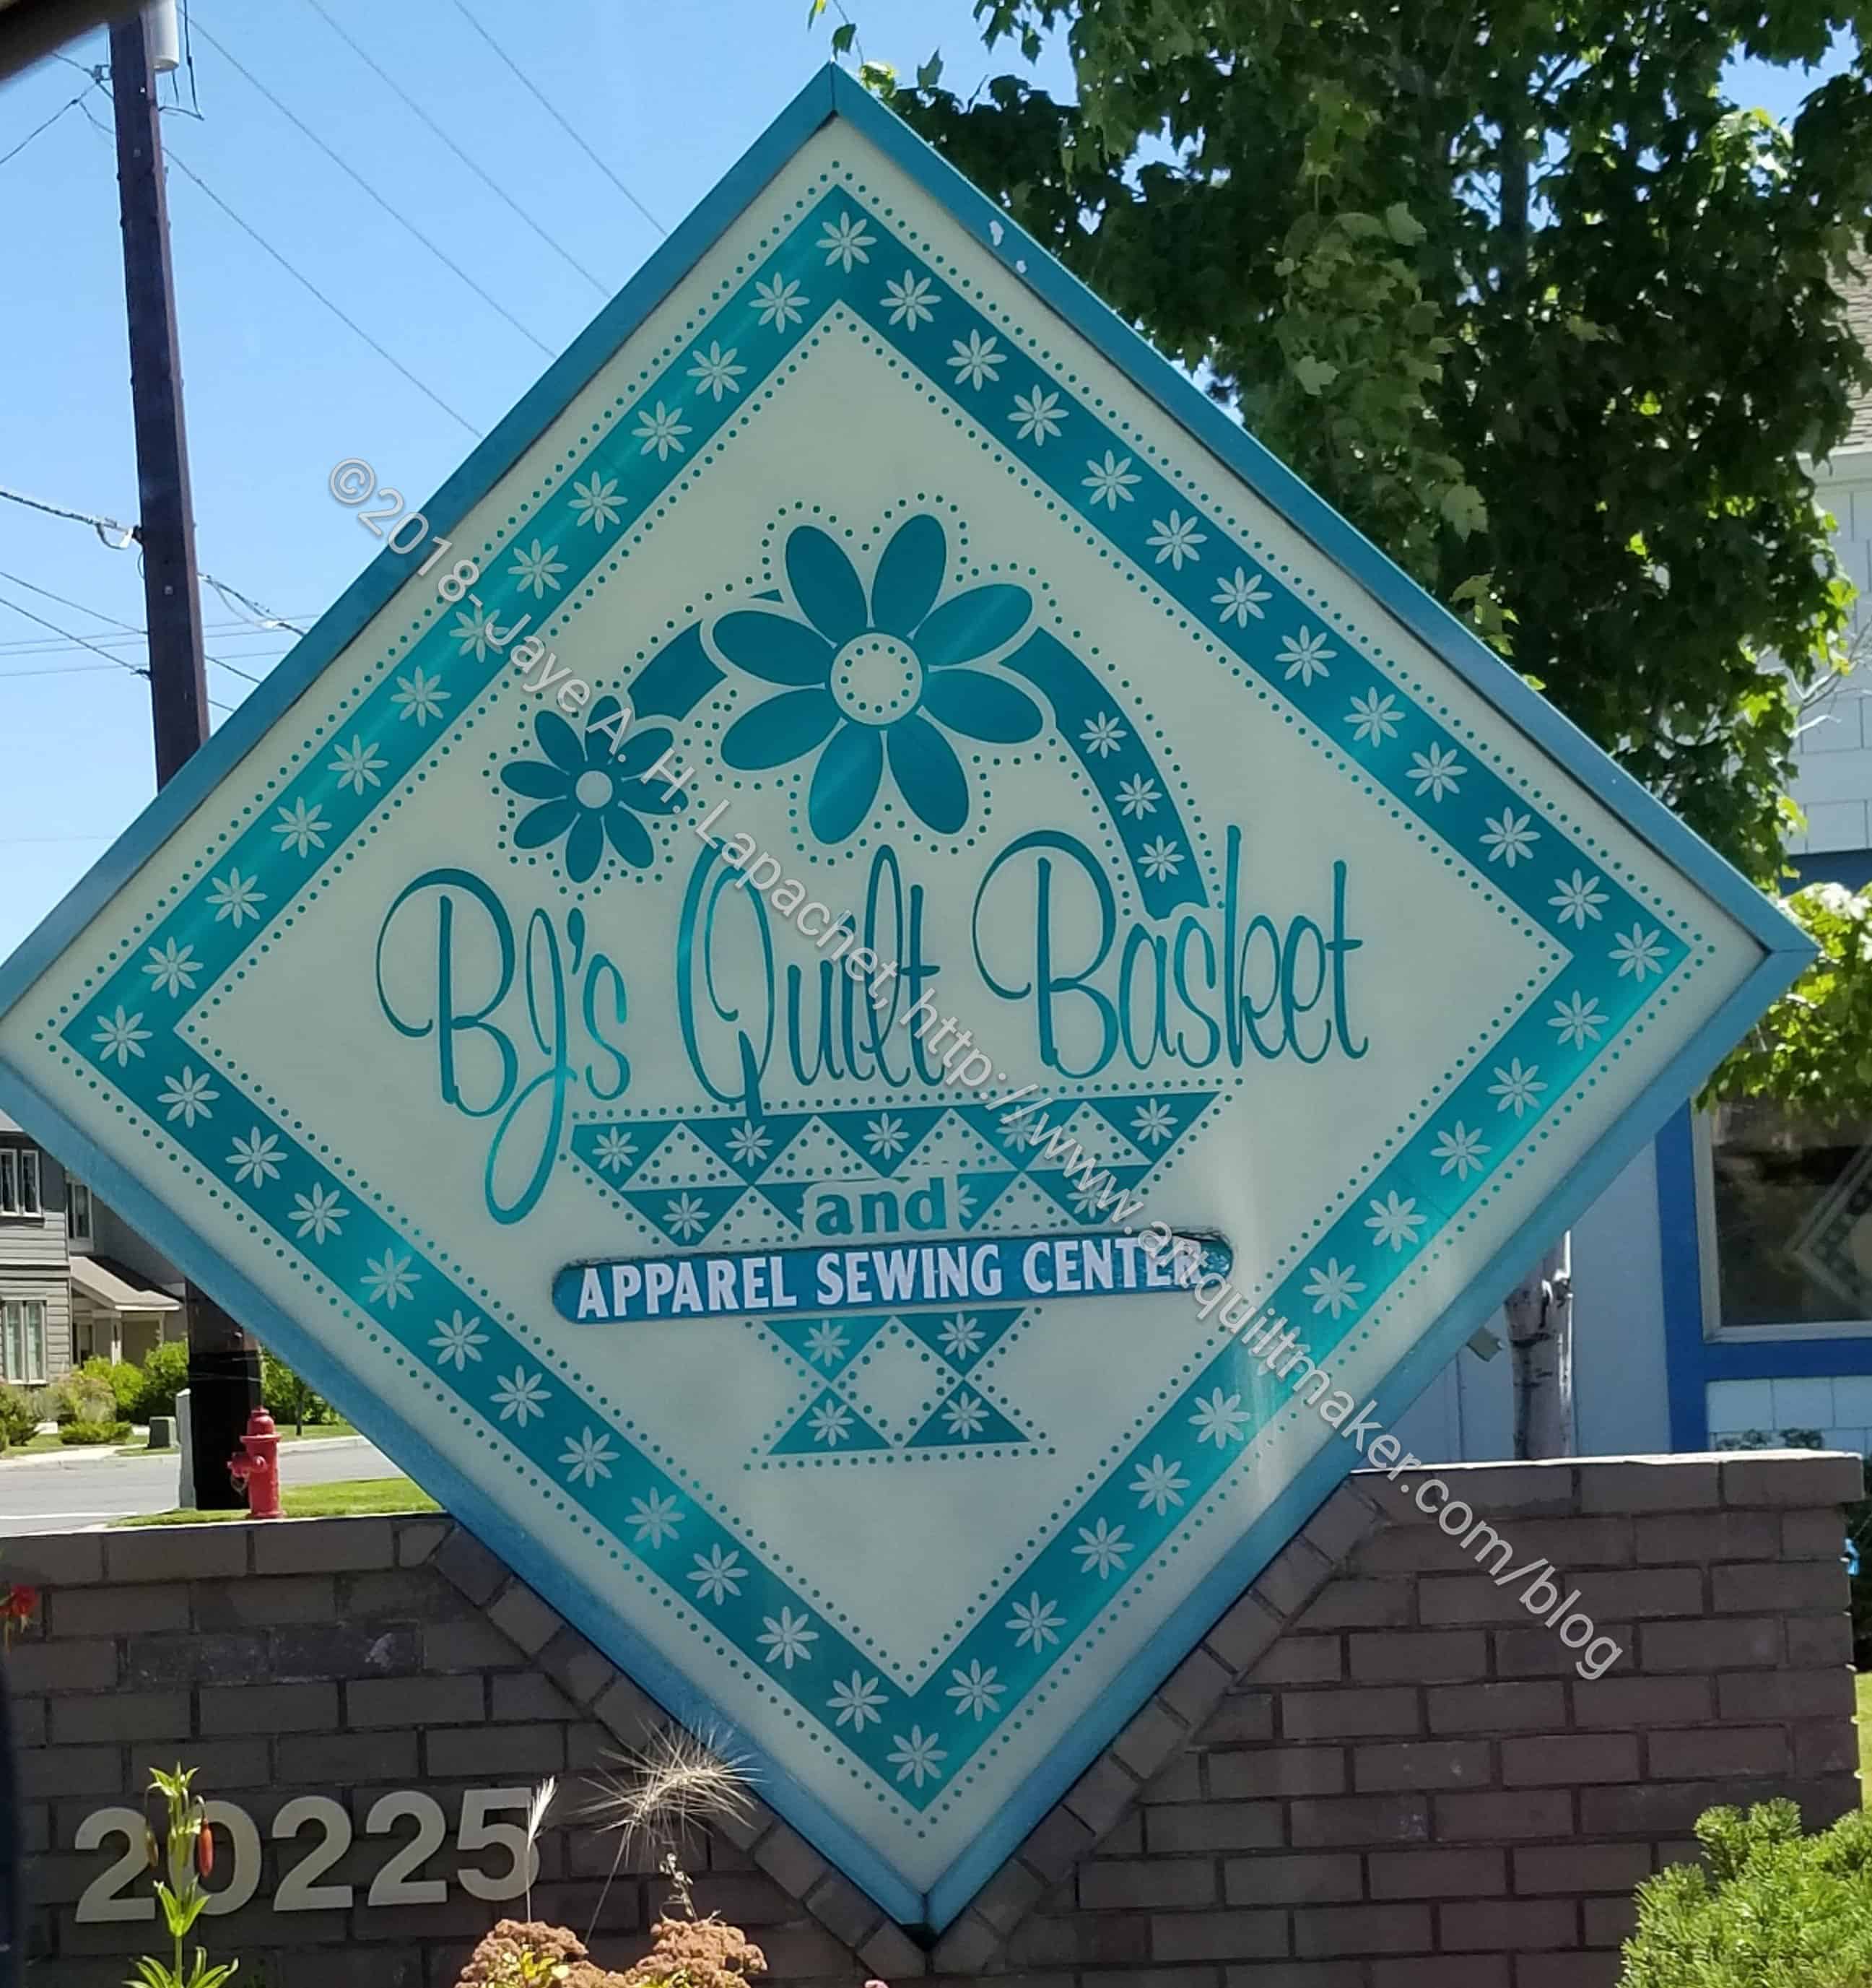
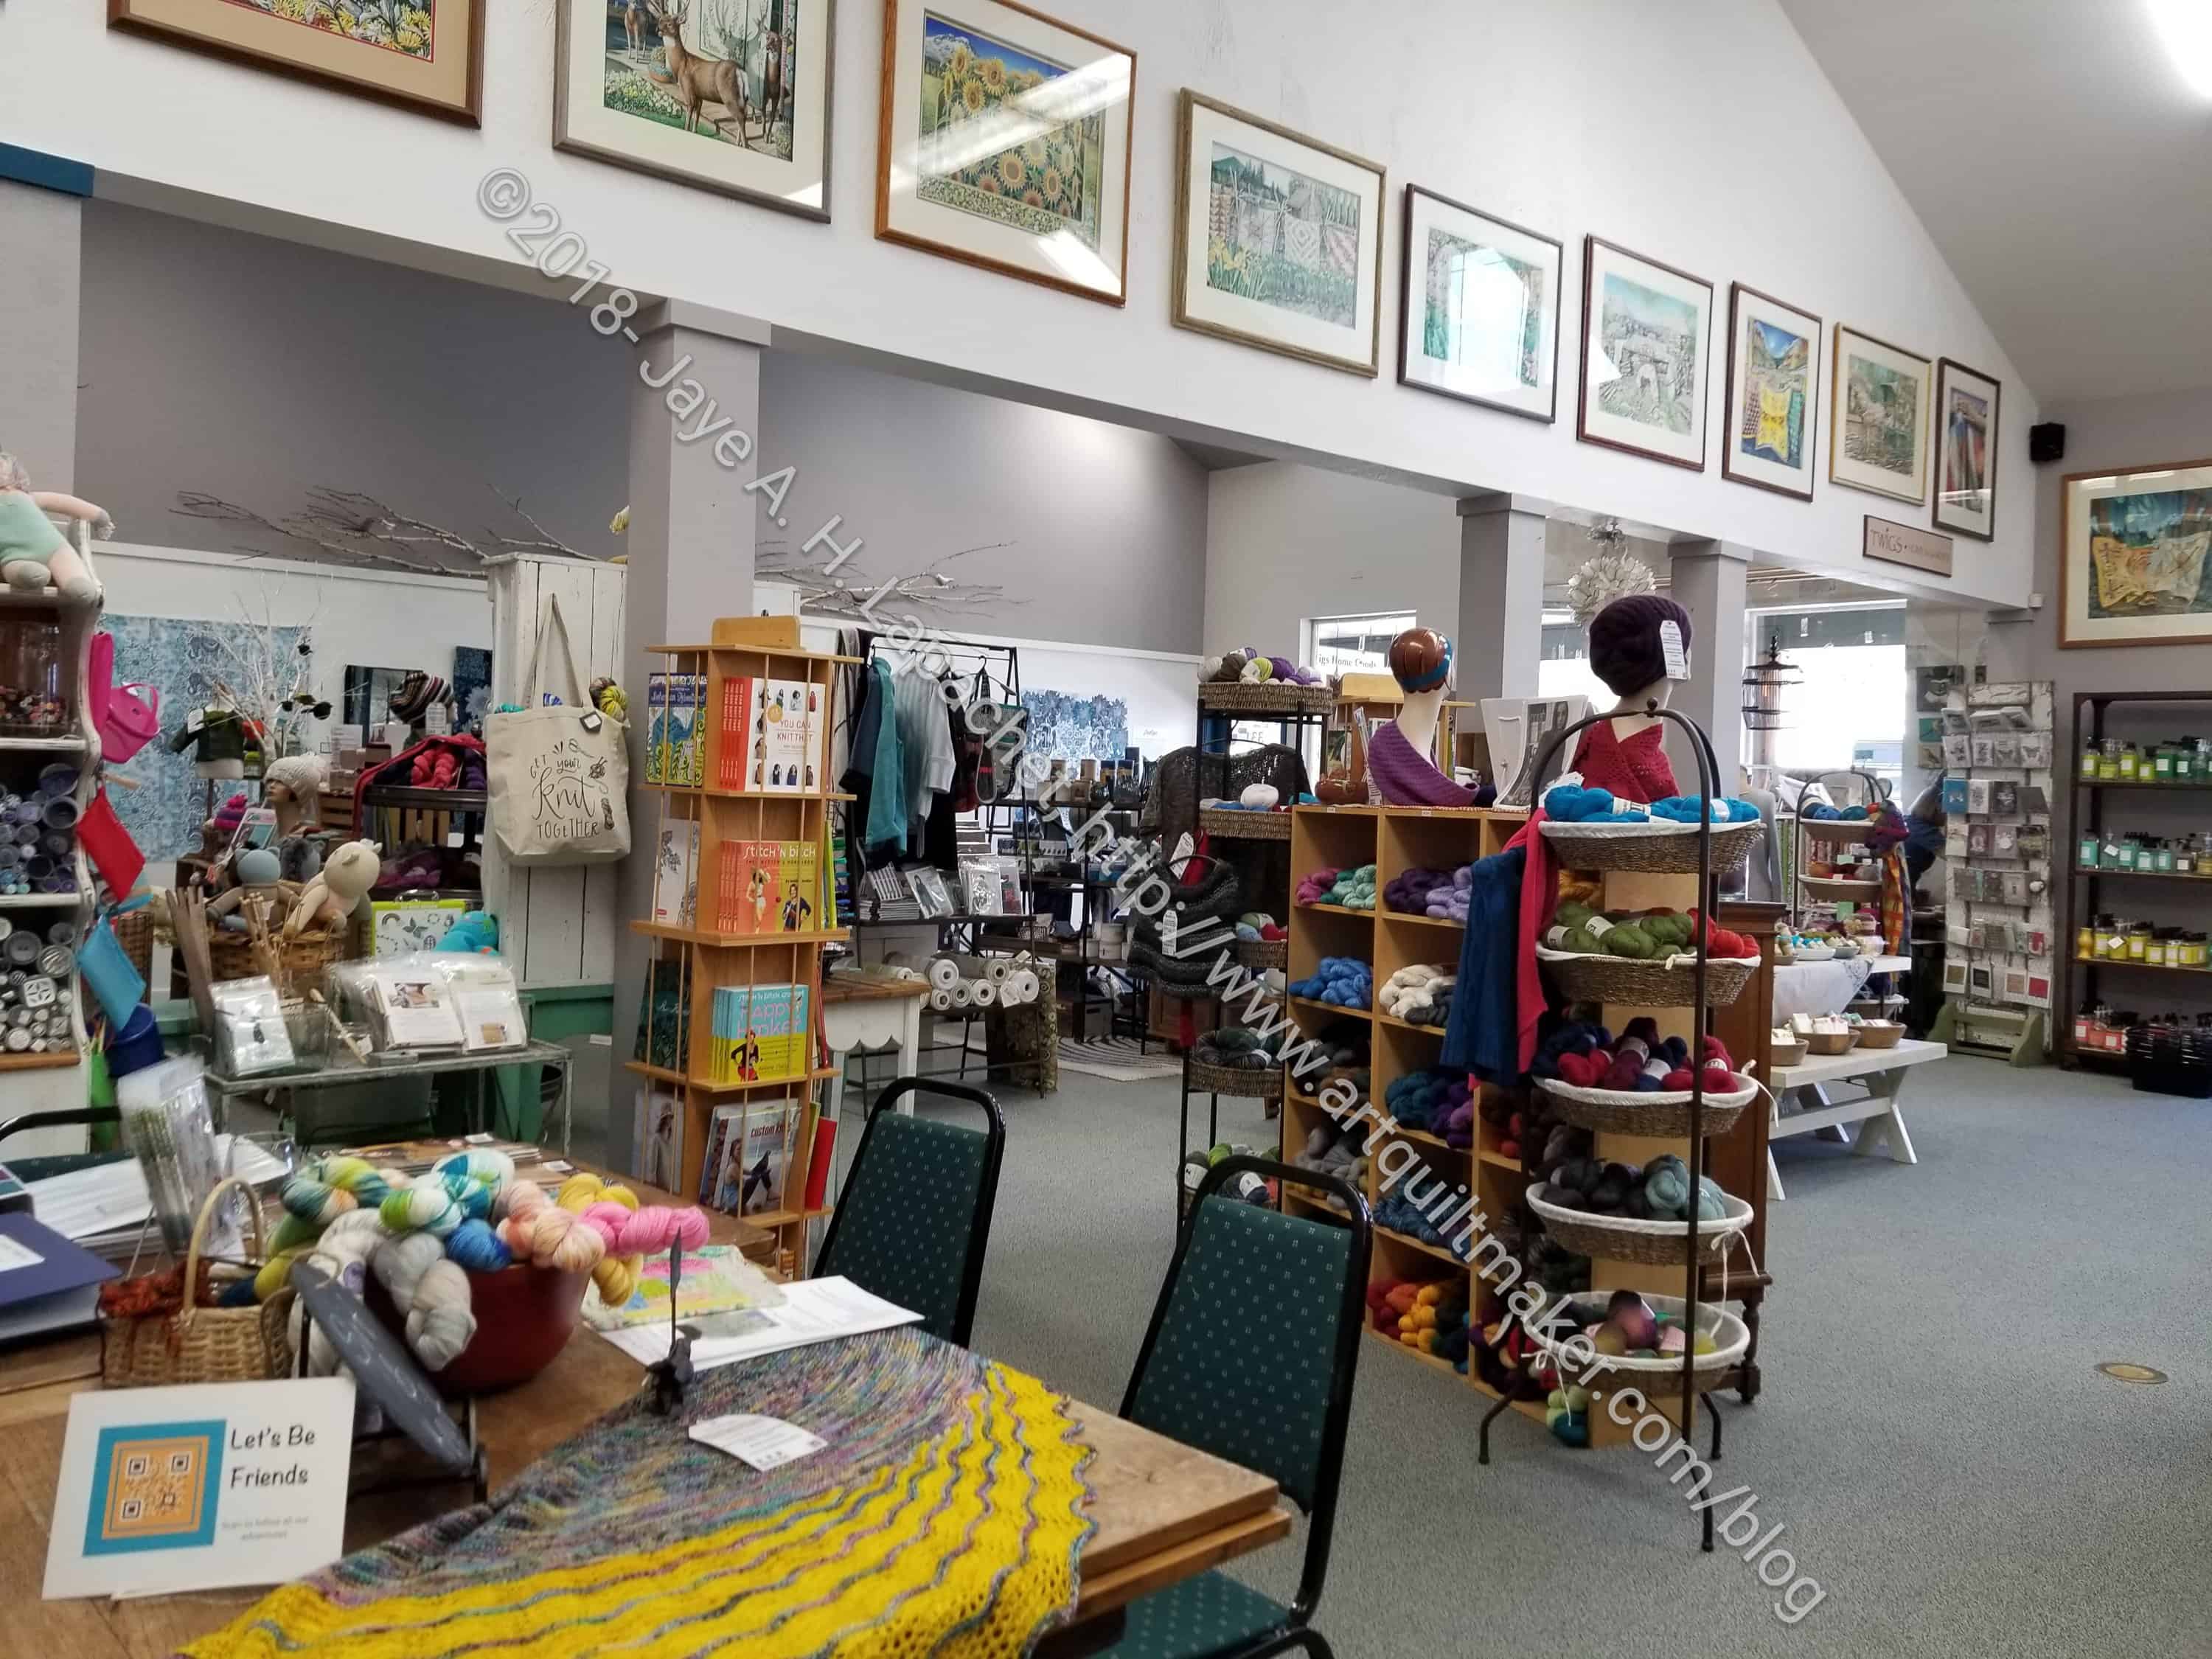
BJ’s Quilt Basket
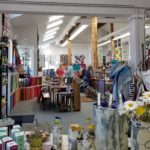
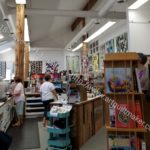
The second one we visited was BJ’s Quilt Basket in Bend. Don’t worry, I’ll get to the Stitchin’ Post.
BJ’s Quilt Basket Interior 1
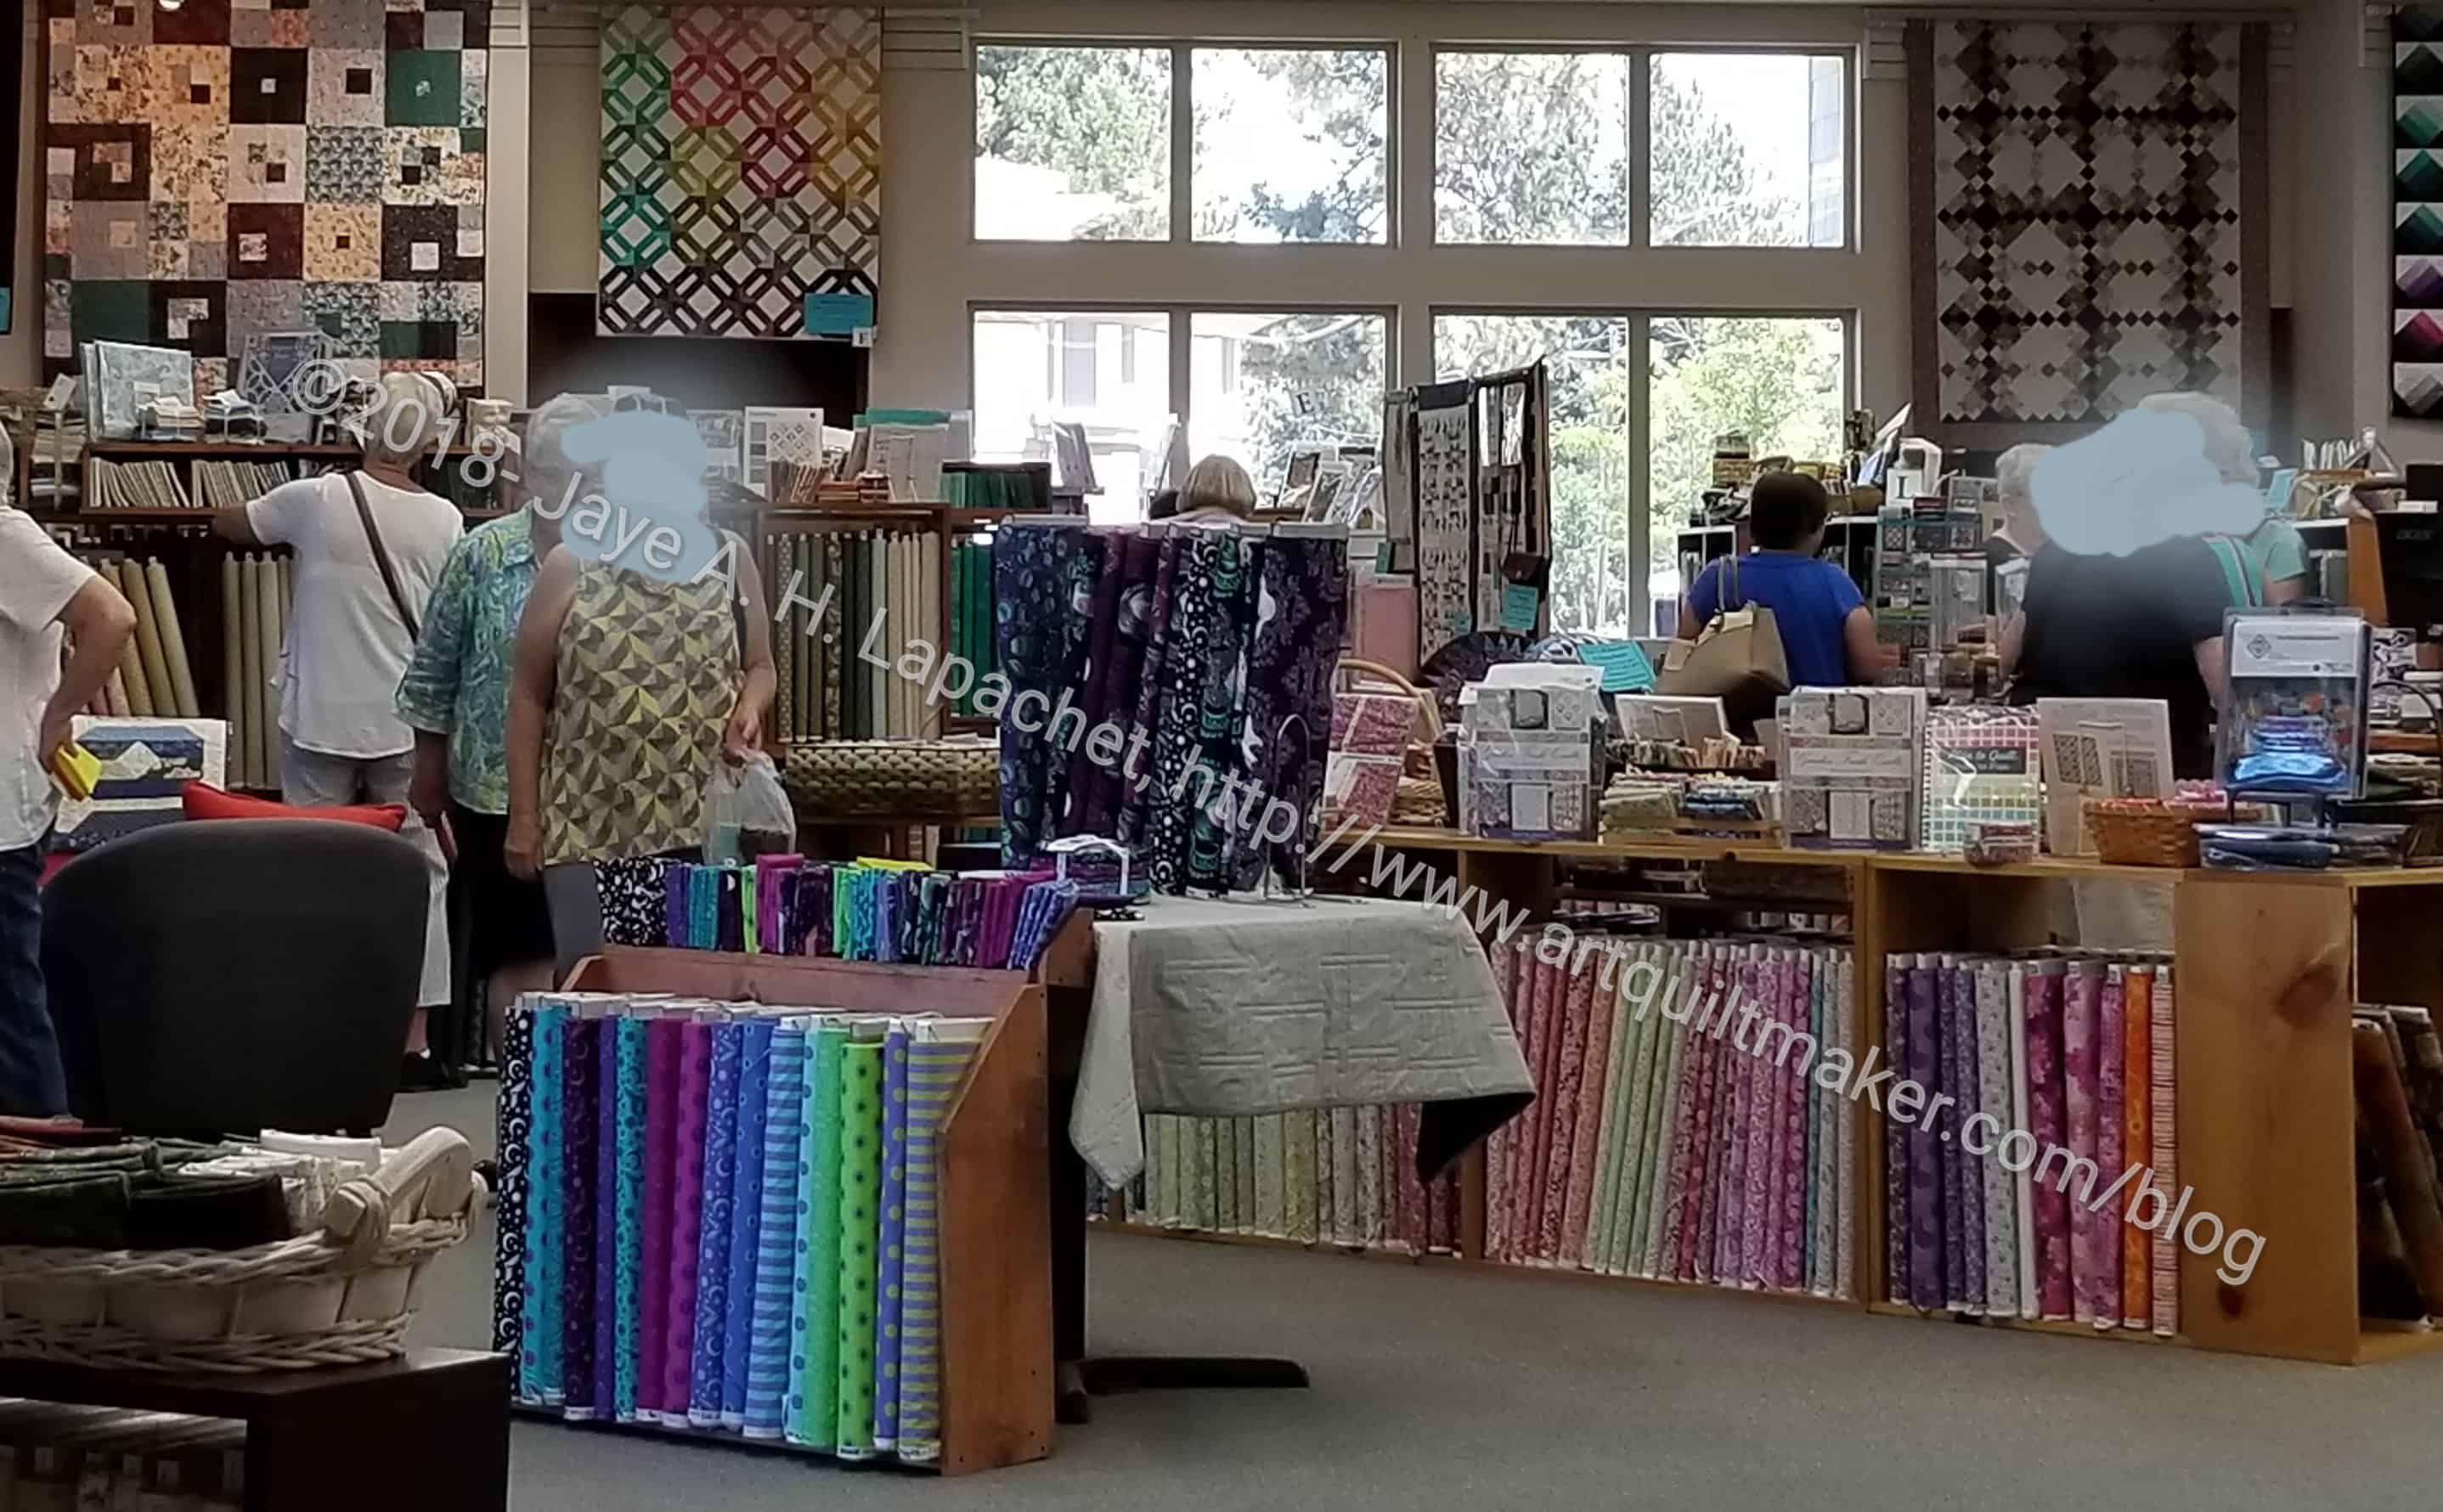
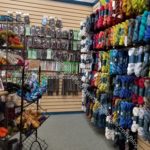
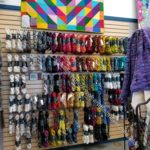
The shops in the area are LARGE and have a lot of fabric. BJ’s was no exception. The shops in the area were benefiting from the Sisters Outdoor Quilt Show and all the related events, so they had extra staff and specials going on. They also had a cooler out front full of free water, which was nice. It was fairly warm, so it was a nice gesture.
BJ’s Quilt Basket Interior 2
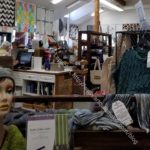
I am not used to such large shops, so it felt a bit overwhelming. BJ’s had a section of repro fabrics, a section of 1930s prints, a few aisles of batiks, blenders (tone-on-tone) plus a lot of new stuff right up front. It was kind of shocking to see so much fabric in one place. Delightful also.
BJ’s Quilt Basket Interior 3
I was pleased to see a lot of batiks in the area. Near me, people eschew batiks even though they are lovely. BJ’s was no exception. The shop had tons.
I saw the Tula Pink dots and stripes at The Stitchin’ Post, but I didn’t buy them. I couldn’t resist a few bits at BJ’s.
They also had lots of Kaffe prints. I bought a few at each of the shops at which we stopped.
Julie and I did not have classes on Thursday. I highly recommend taking a day off from the intensity of learning when you are at an event like Sisters/Quilter’s Affair.
We got up at our normal 6:30 because of that crazy window, but had a leisurely breakfast, sat around a bit and then got ready before we left at 10:30 to go to some quilt shops.
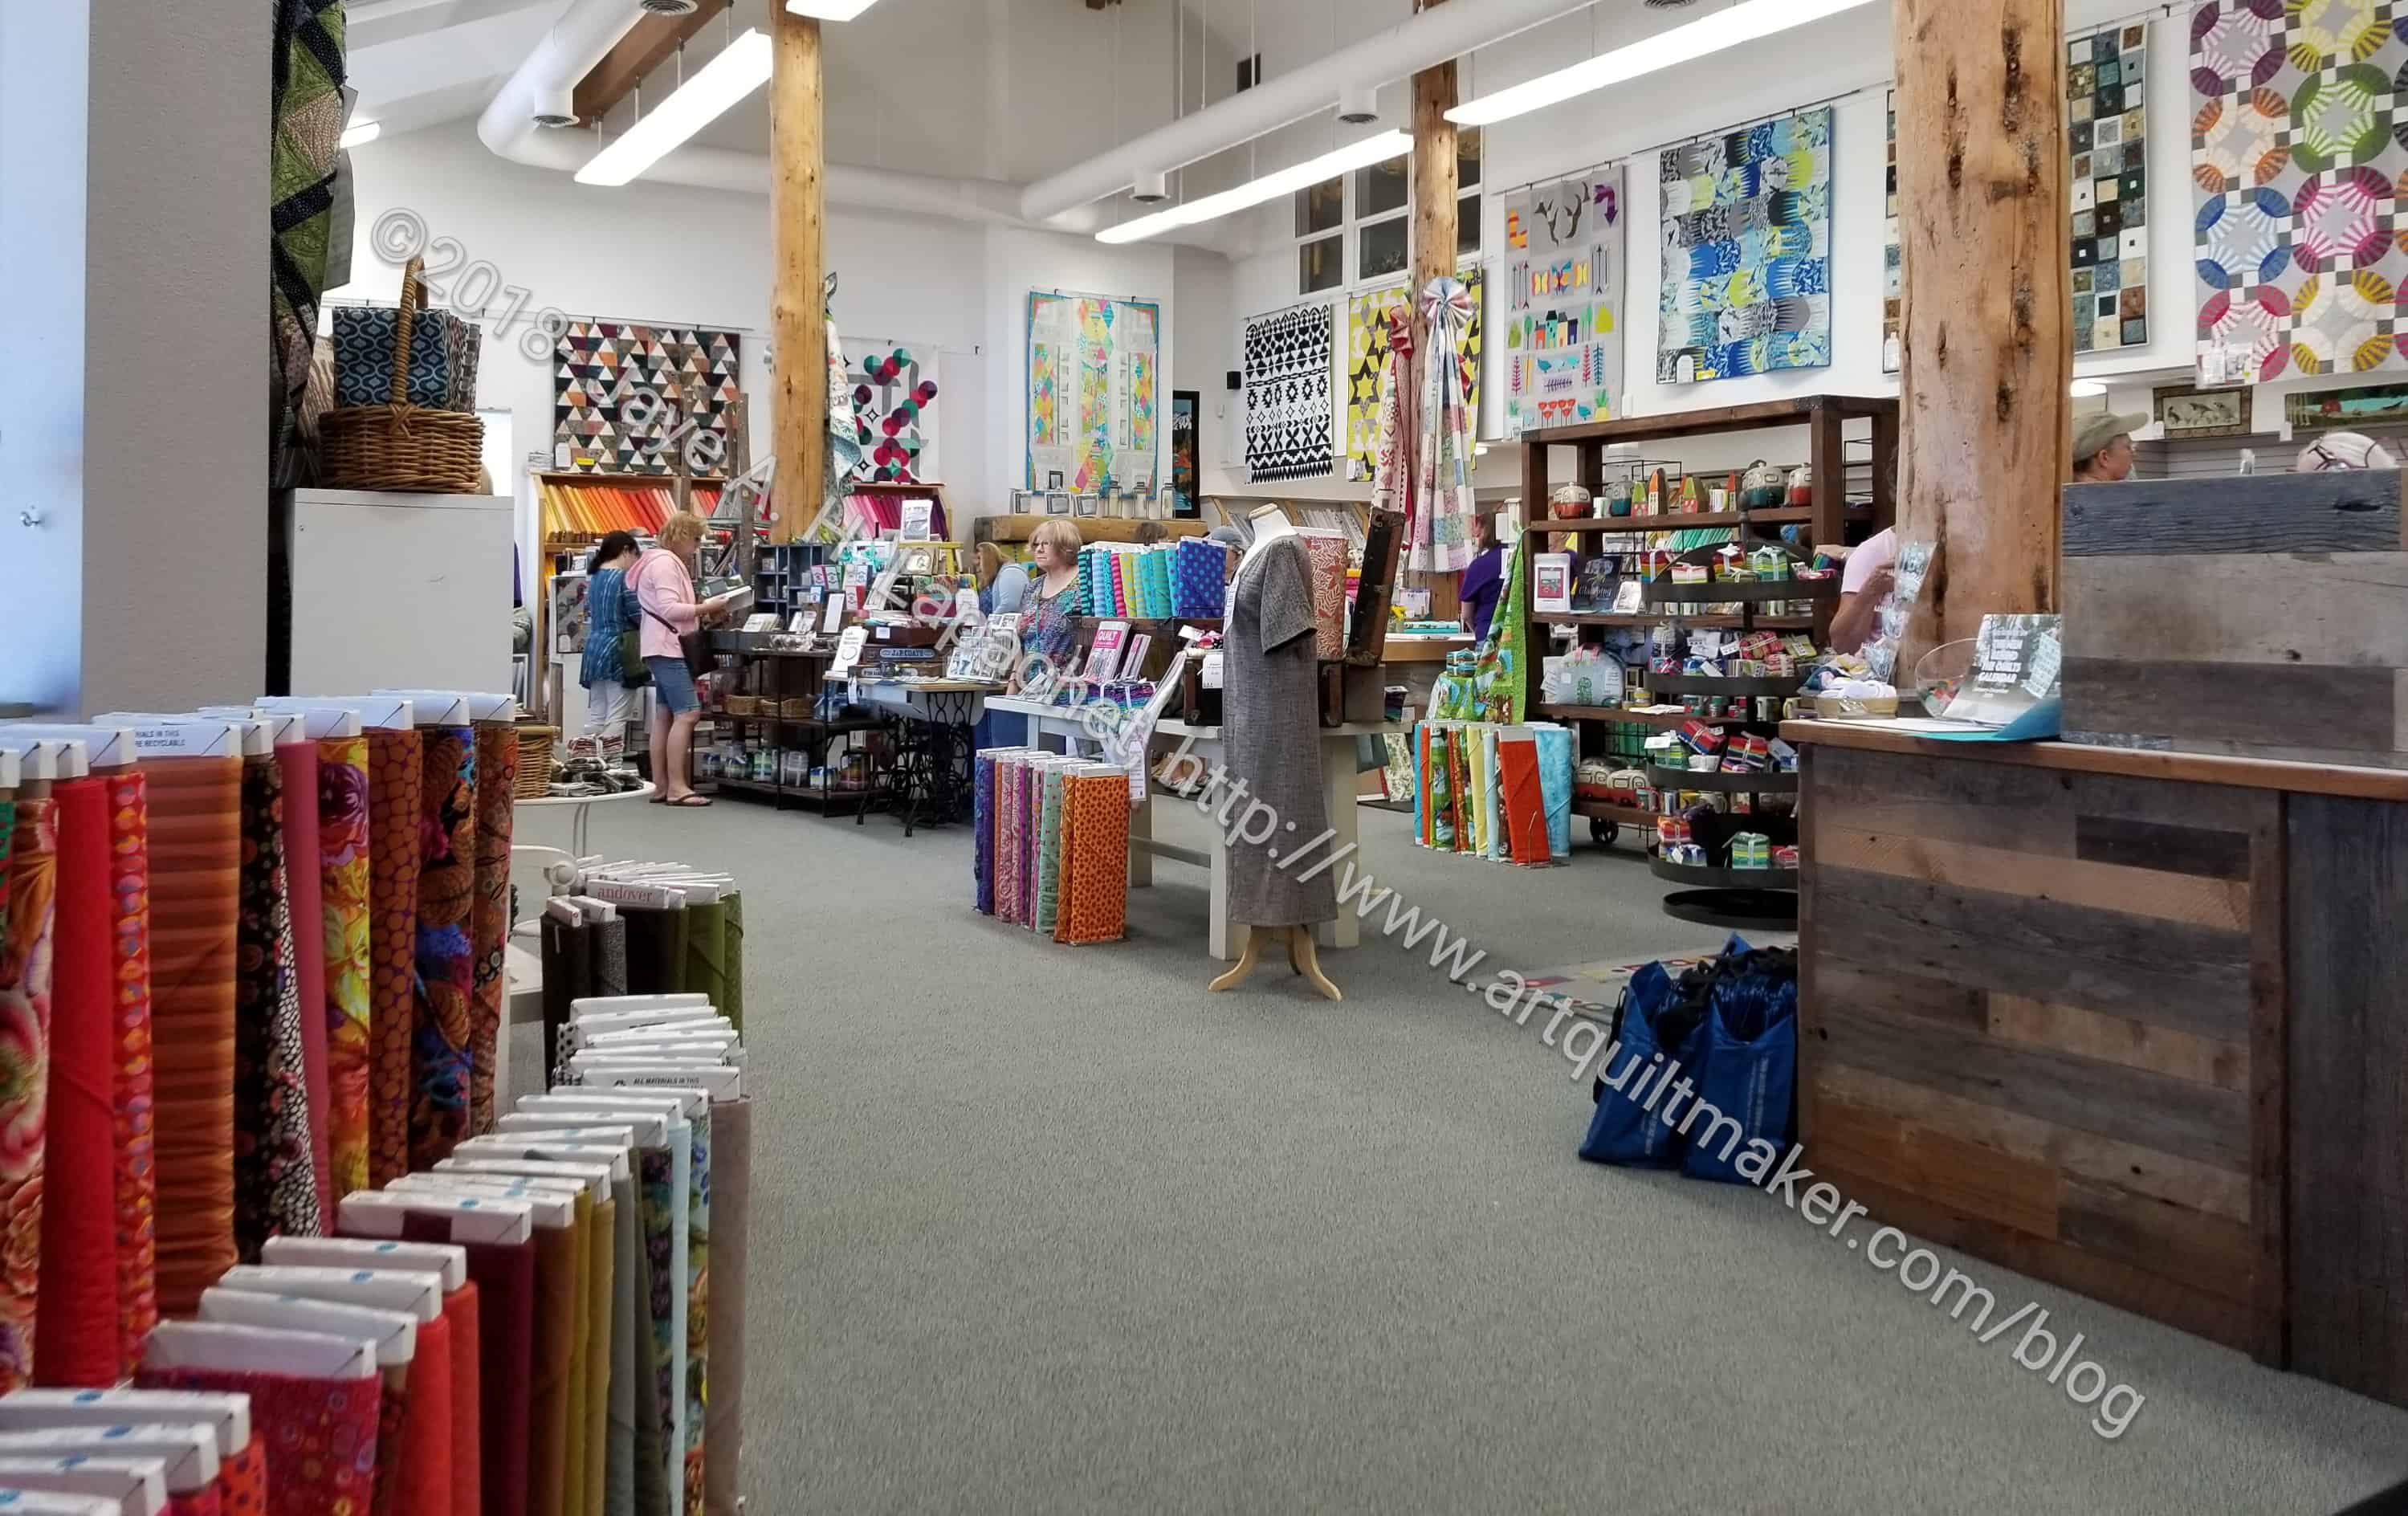
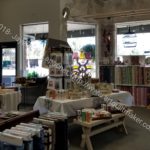
The Stitchin’ Post
First stop was the Stitchin’ Post. It is a 7-8 minute drive from where we were staying. I would be thrilled if I had a quilt shop that close to my house. I’d be in trouble, but thrilled nonetheless.
Okay, the Stitchin’ Post is actually in Sisters, not in Bend, but I am calling this series of posts the Bend Shop Hop regardless. Bend “Area” is too long (take a look at that URL already!).
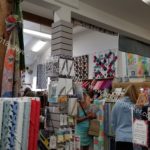
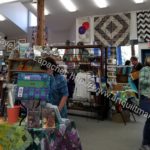
Stitchin’ Post Interior 8
We went into the Stitchin’ Post at least twice, but the Thursday visit was the day we planned to look around at everything. I think we might have been there closer to 4 times, but who’s counting?
Stitchin’ Post Interior 1
It is a gorgeous shop. Huge! High ceilings, bright paint, plenty of staff, lots of great fabric and samples. Prices were ‘normal’ – $12-13/yard. The stock was depleted early in the week and by Thursday, our shop hop day, it was hard to find things. Not horrific. It wasn’t like the shop was empty, but a lot of notions were sold out and their fat quarters were a bit thin on the ground. Still, I found plenty to buy.
Stitchin’ Post: Kaffe prints
The Stitchin’ Post had a gorgeous Kaffe corner. I bought a lot of Kaffe on the trip, though not as much as I could have. I will use one of the pieces to make a nightshirt.
Stitchin’ Post Interior 4
This was the first shop at which I saw the Tula Pink Dots and Stripes. They are gorgeous. Nice sized dots and stripes and interesting colors. I really wanted all of them, but the lines for cutting were daunting at times when there was enough to cut 24 half yards. You can see them in the photo above behind the dress.
Stitchin’ Post Interior 2
Stitchin’ Post Interior 3
Stitchin’ Post Interior 5
There was so much to look at in that shop! they had a lot of different fabrics, some of which I hadn’t seen before. I saw lots of batiks, which we don’t see here anymore very much.
There was a small section of household gifts – soaps, tea, mugs and some interesting pincushions. I wanted to get one for Julie, but I couldn’t while she was there and when I came back to get it, someone else had beaten me to it.
Stitchin’ Post Interior 10
Stitchin’ Post Interior 11
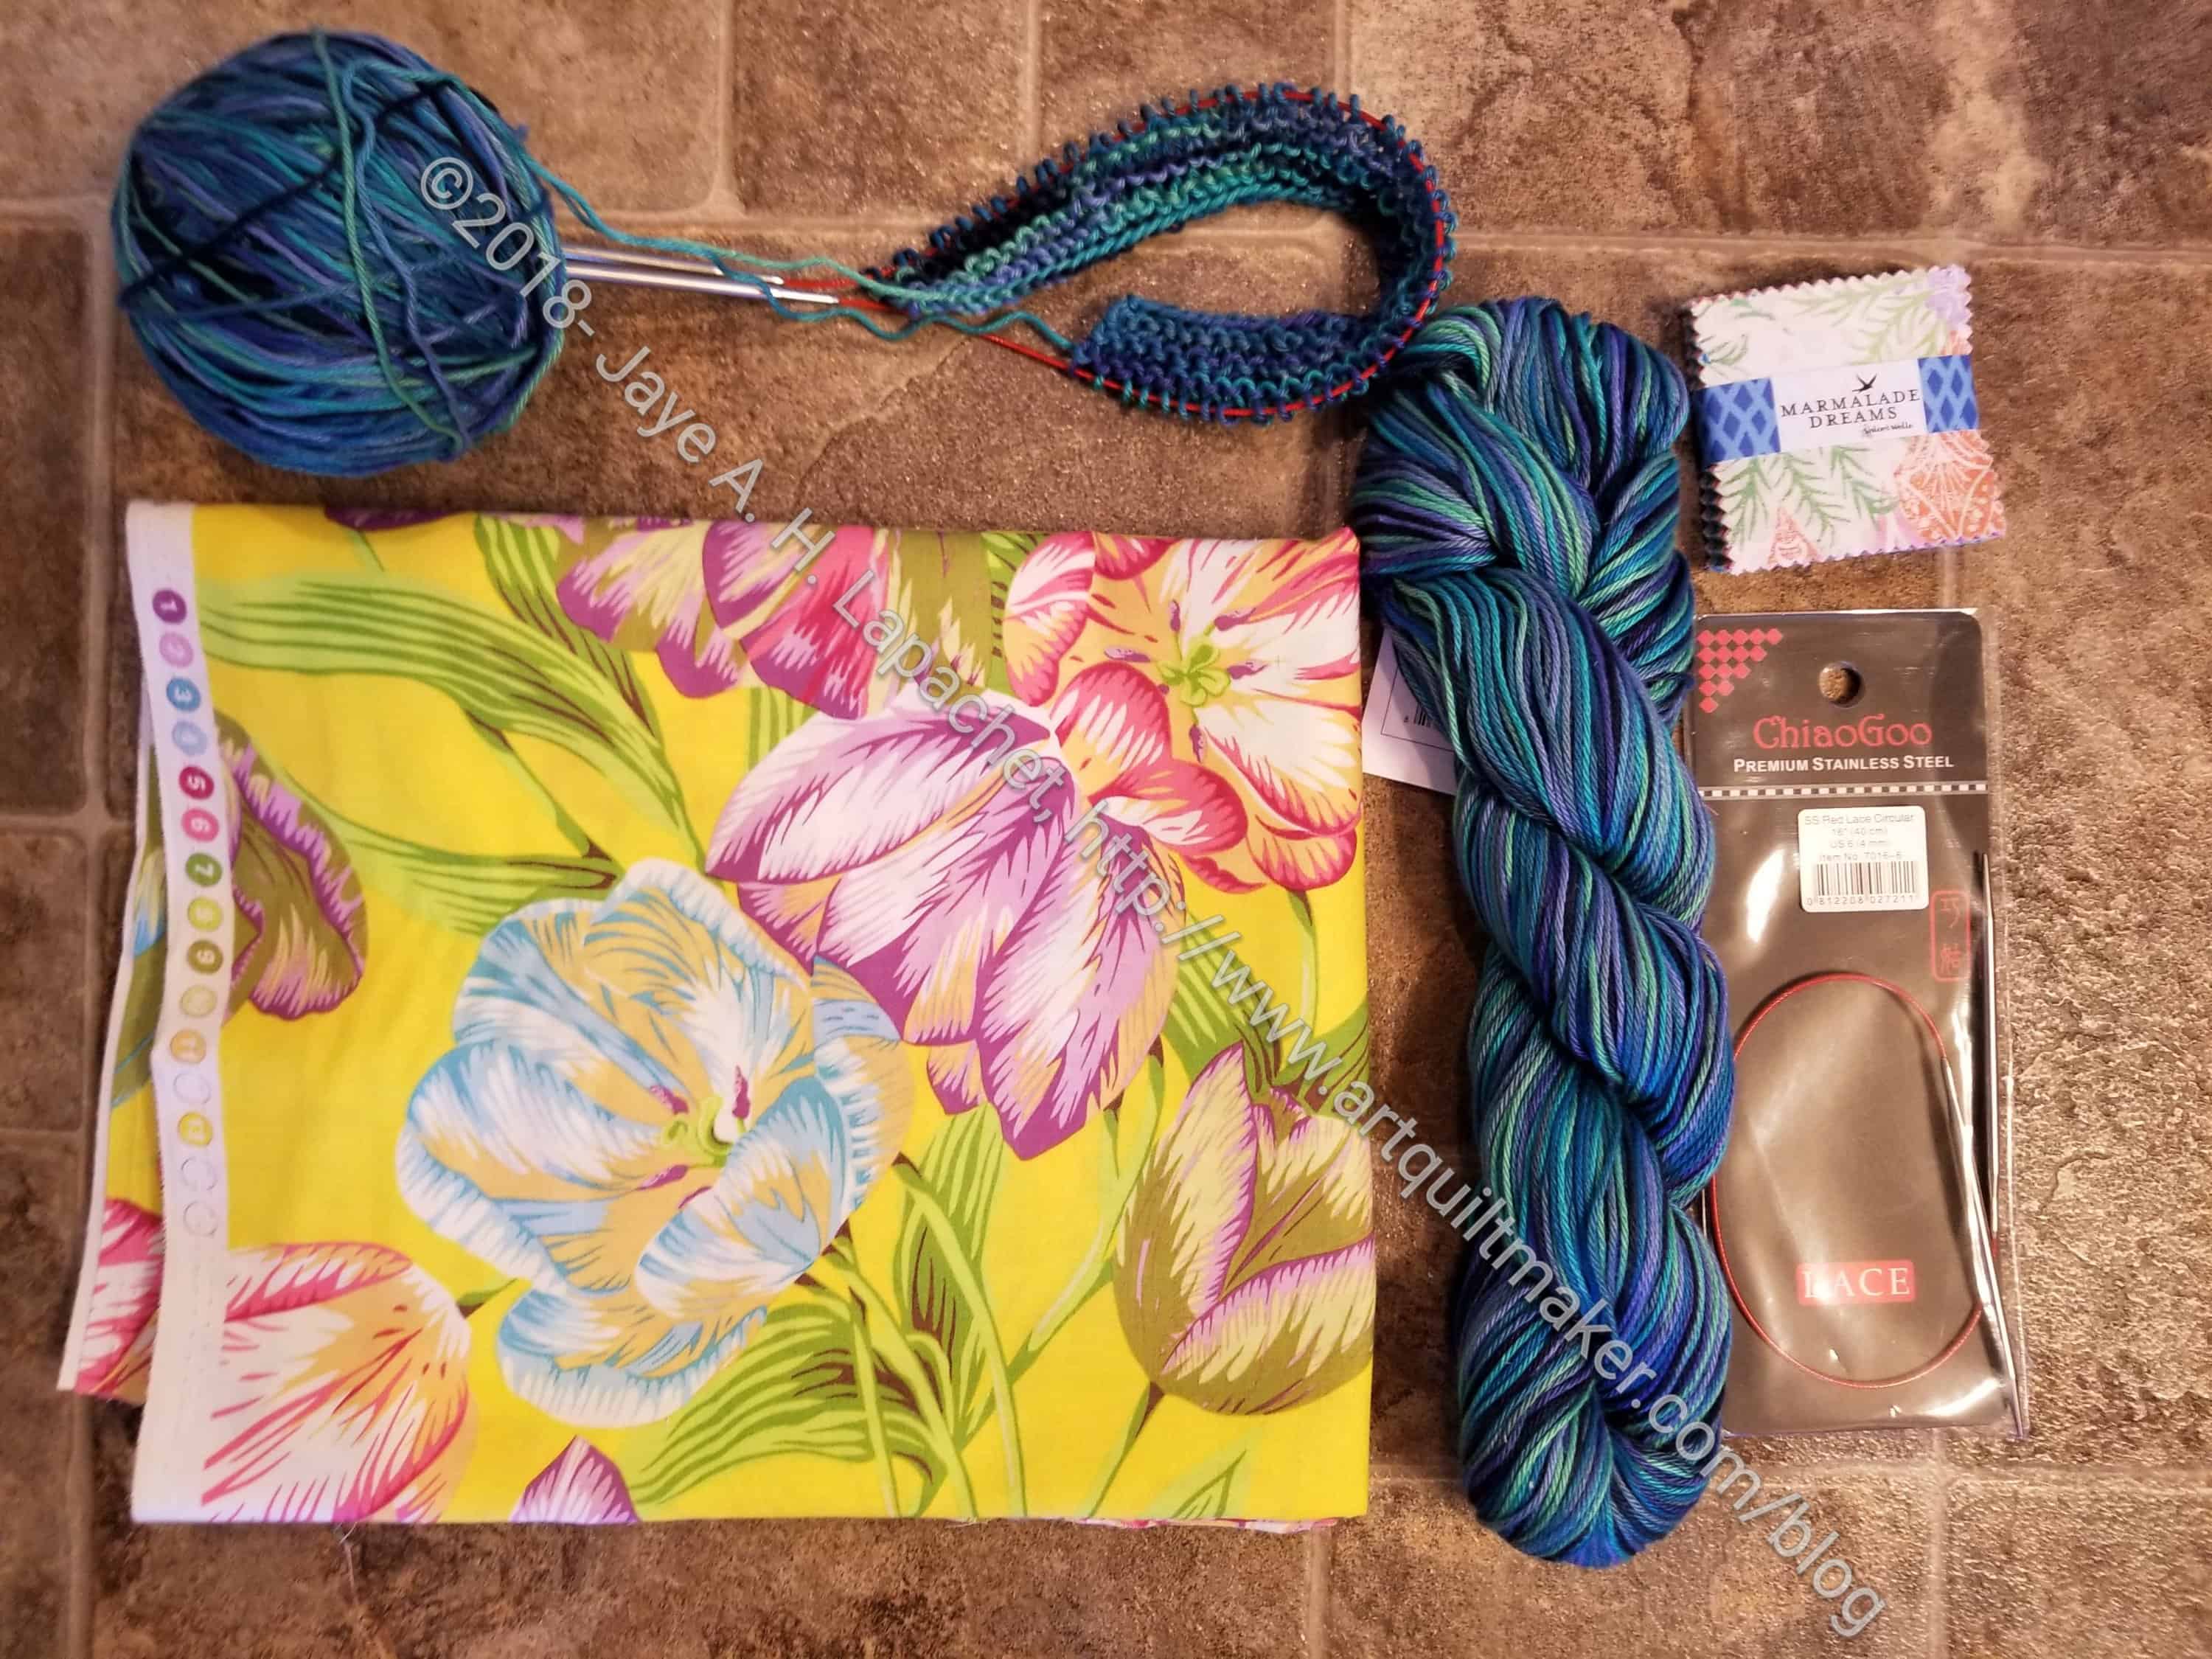
I looked at the yarn a lot on Sunday and, as mentioned, bought a couple of skeins to make another scarf. Since I didn’t bring needles with me, I had to buy needles as well.
Stitchin’ Post Interior 6
Stitchin’ Post Interior 7
Stitchin’ Post Interior 9
First Stitchin’ Post purchase
This shop is absolutely worth a visit. I had a great time. If you are in the area, head to Sisters and visit The Stitchin’ Post.
Stitchin’ Post purchases
The Stitchin’ Post is located at:
311 W. Cascade St. (Hwy 20/126)
in Sisters, Oregon
Mailing address:
P.O. Box 280, Sisters OR 97759 Phone: (541) 549-6061 eMail:stitchin@stitchinpost.com Store Hours:
Monday – Saturday 9-5 (9 – 6 in the summer)
Sunday 10-4
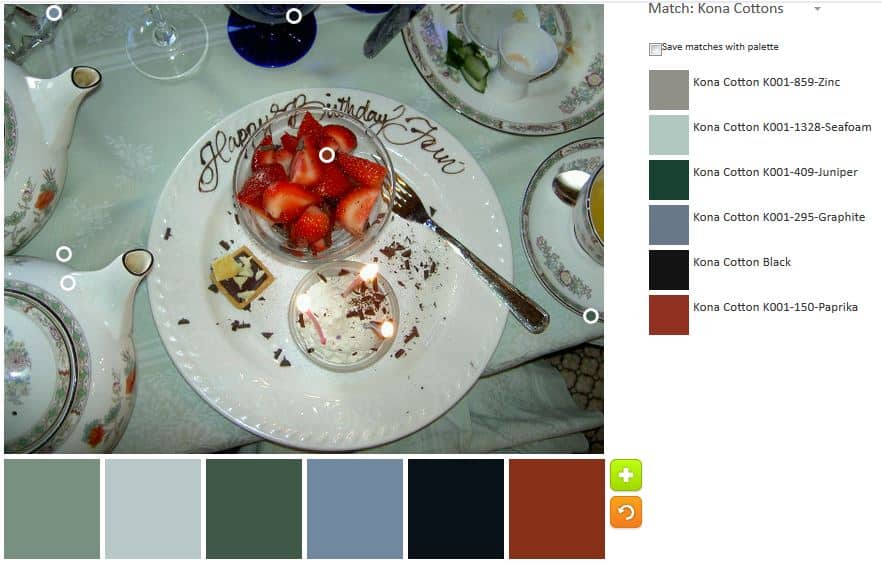
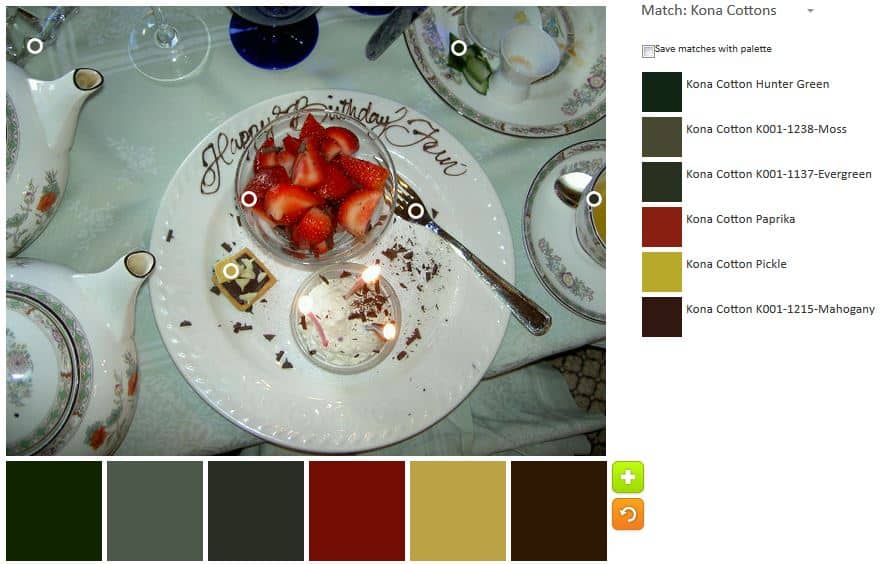
I came across this photo as I was perusing possible ColorPlay photos. In 2004 I went to afternoon tea at the Ritz with my mom, grandmother and mother-in-law. It was nominally for my grandmother’s birthday and one of the first times she had come to see me.
This was not a great photo choice as the colors aren’t the tropical paradise I like.
ColorPlay: Afternoon Tea- default
The default is more colorful than I expected. There are lots of dull colors, but that reddish-brown, Paprika, isn’t terrible.
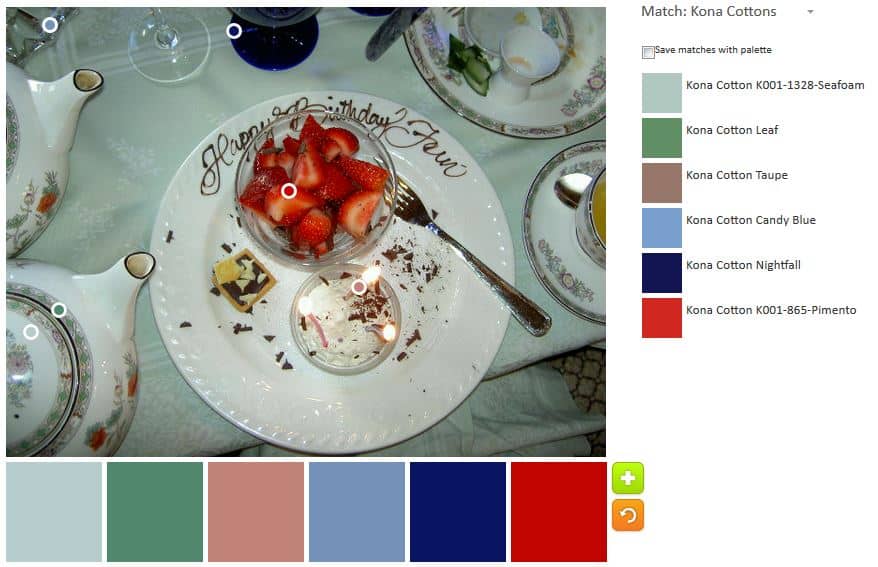
ColorPlay: Afternoon Tea- 1
I moved the bubbles around slightly and came up with a slightly brighter palette. I don’t think the colors go together that well, but the Pimento and Nightfall look pretty nice.
ColorPlay: Afternoon Tea- 2
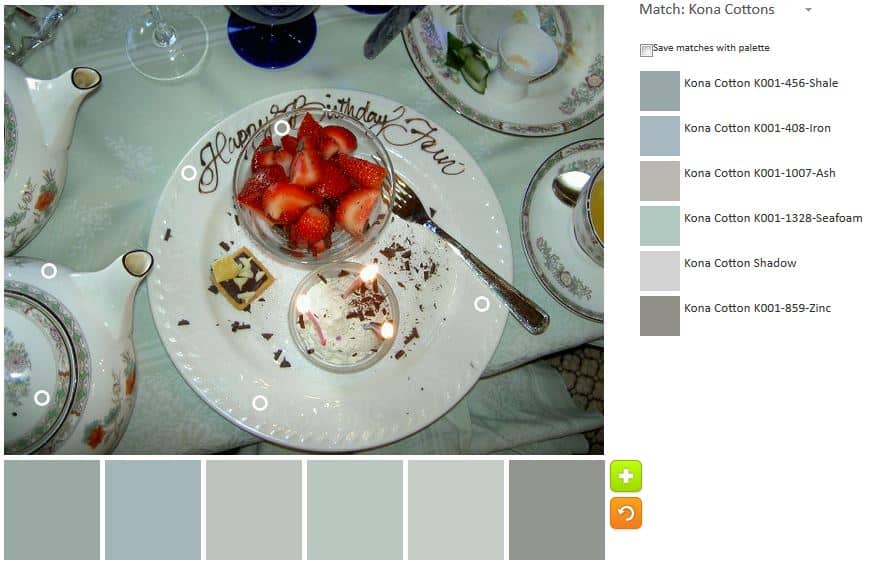
Palette number 2 is where I gave in to neutrals. I didn’t want to do a monochromatic neutral palette out of the gate, but I admitted that most of the colors in the photo would be some kind of neutral.
ColorPlay: Afternoon Tea- 3
Palette number 3 is a slight variation of palette number 2. More and darker neutrals.
ColorPlay: Afternoon Tea- 4
The grey palette is my monochromatic attempt.
ColorPlay: Afternoon Tea- 5
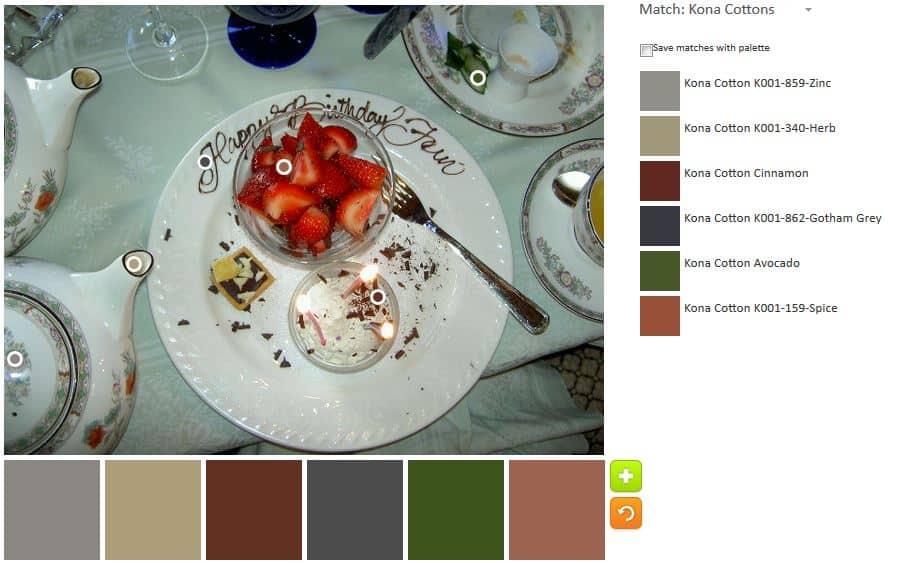
I thought I would finish up with palette n.4, but then I saw a bit of yellow and wanted to use that in a palette. The first attempt at adding the yellow resulted in Kona Moss. For whatever weird technological issue, I couldn’t get close enough to the edge to capture the yellow. I tried again and Pickle based on the little pastry on the plate. I was going for scarlett from the strawberries, but ended up with Paprika again.
Let me know what you think of these palettes and if you make anything.
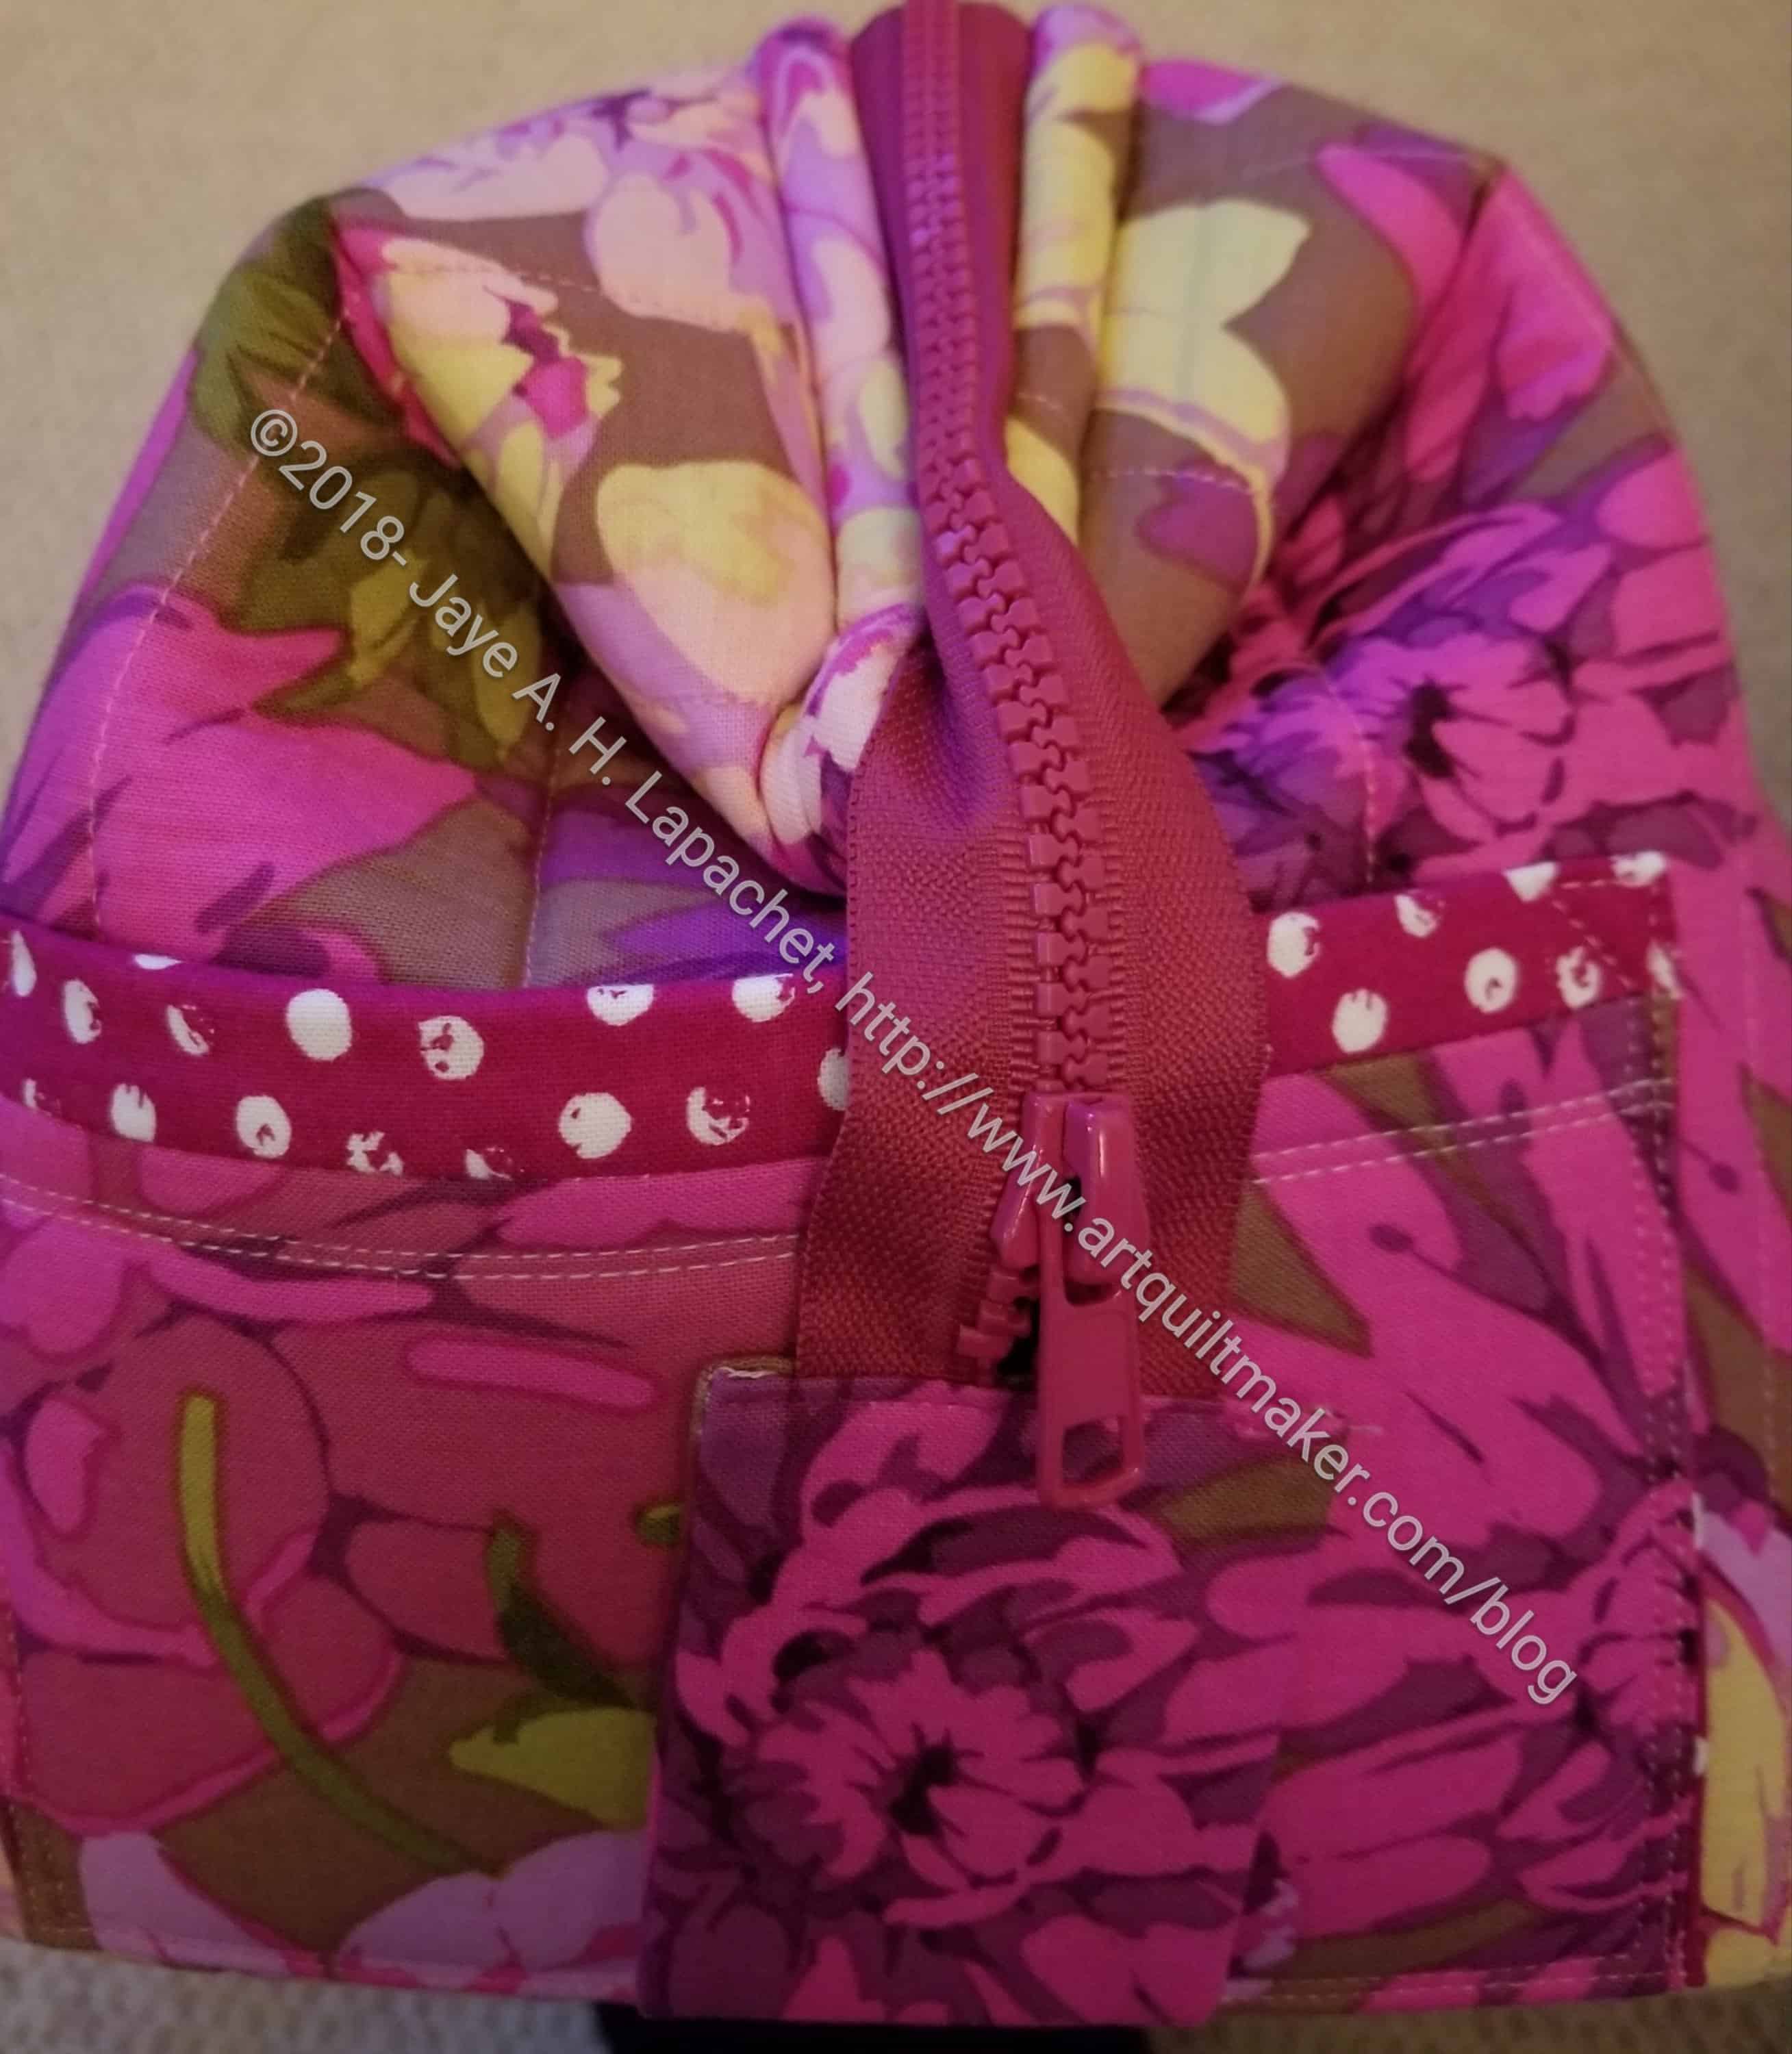
I finally finished the Tool Tote. Now I can just stare at it wondering, a little, what I was thinking.
Looking at in this photo, it looks great, but I am not sure about actually using it. The Tupperware box I have used forever works fine for tools and is hard. How would I fit this thing into my travel system? On the other hand, it has handles and handles are always a good thing.
Tool Tote: Zipper Tab with Soft & Stable
I was almost finished the other day, but I put the zipper tabs on and they just looked terrible. Using Soft & Stable in a zipper tab is a dumb idea. I wouldn’t have known it was a dumb idea unless I had done it, though.
The photo of the zipper tab makes the thing look fine. It isn’t fine, though; it didn’t stay together and on the back the top hem was popping out and looking awful. I also went around the whole thing 3-4 times and couldn’t quite match up the stitching as the whole bag was attached to the zipper tab. The whole thing was a mess.
Tool Tote with new zipper tabs
I ripped off the Soft & Stable zipper tabs and made some new ones with ShapeFlex instead. It worked like a charm and the zipper tabs look a lot better. I changed the fabric used and that helped make the tabs look better as well.
If you make this bag, definitely make it with fabric for the zipper tabs matching the outside pocket.
Tool Tote: big mouth opening
I had big plans to make a bunch of these, because of the Big Mouth design. I really like the way it opens up all the way, so you can see all of your stuff. It was a hassle to make and I didn’t think the directions were great. They were very chatty and friendly, but not very useful. I think I might be ruined by the Crafty Gemini style of learning. I do know that if I make more I will get better at making them.
As I said, I am not sure what to do with it. I could get another set of tools and fill the thing and keep it with my guild stuff. Not sure if really need that.
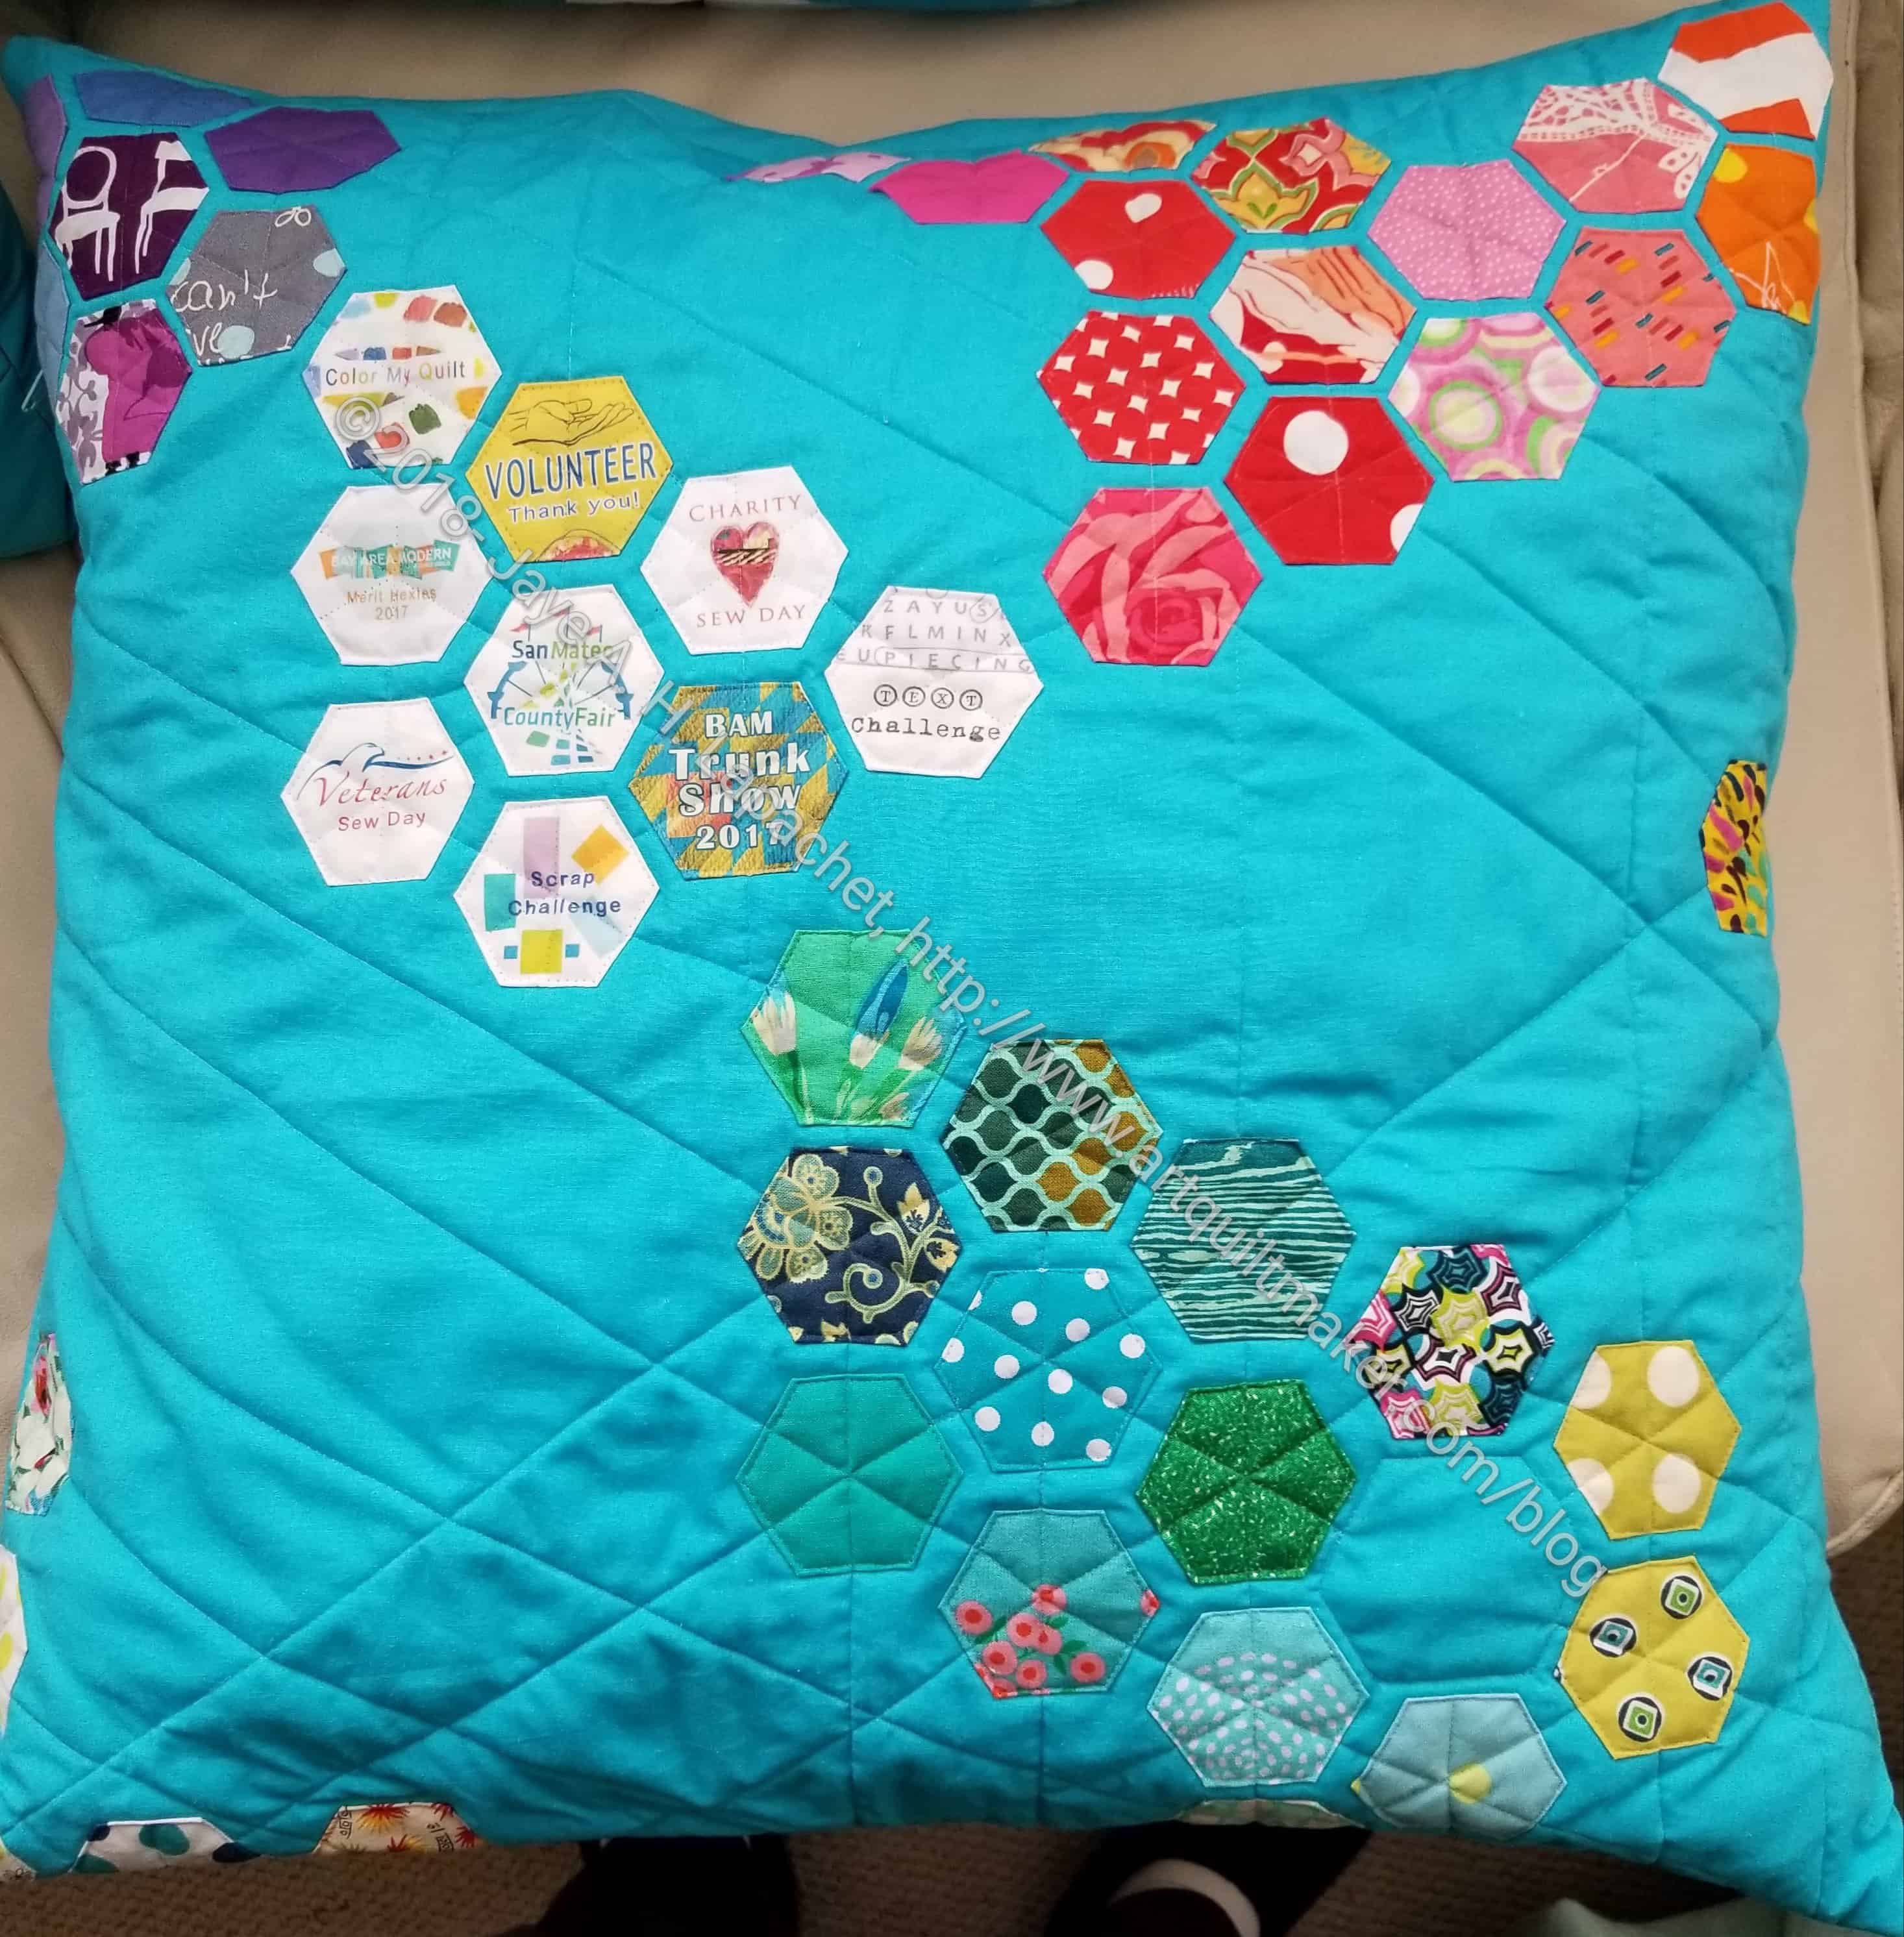
I totally forgot to post the finished version of my merit hexie pillow. The last time I posted about this was on April 4!
I don’t know exactly when I finished it, but it was not long after April 4.
I had to take all the papers out before appli-quilting them on to the background.
I also forgot to show it at the guild meeting. I’ll bring it with the Walking Foot WOW pillow (another thing I forgot to bring to show and tell) to the next meeting.
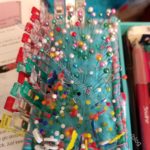
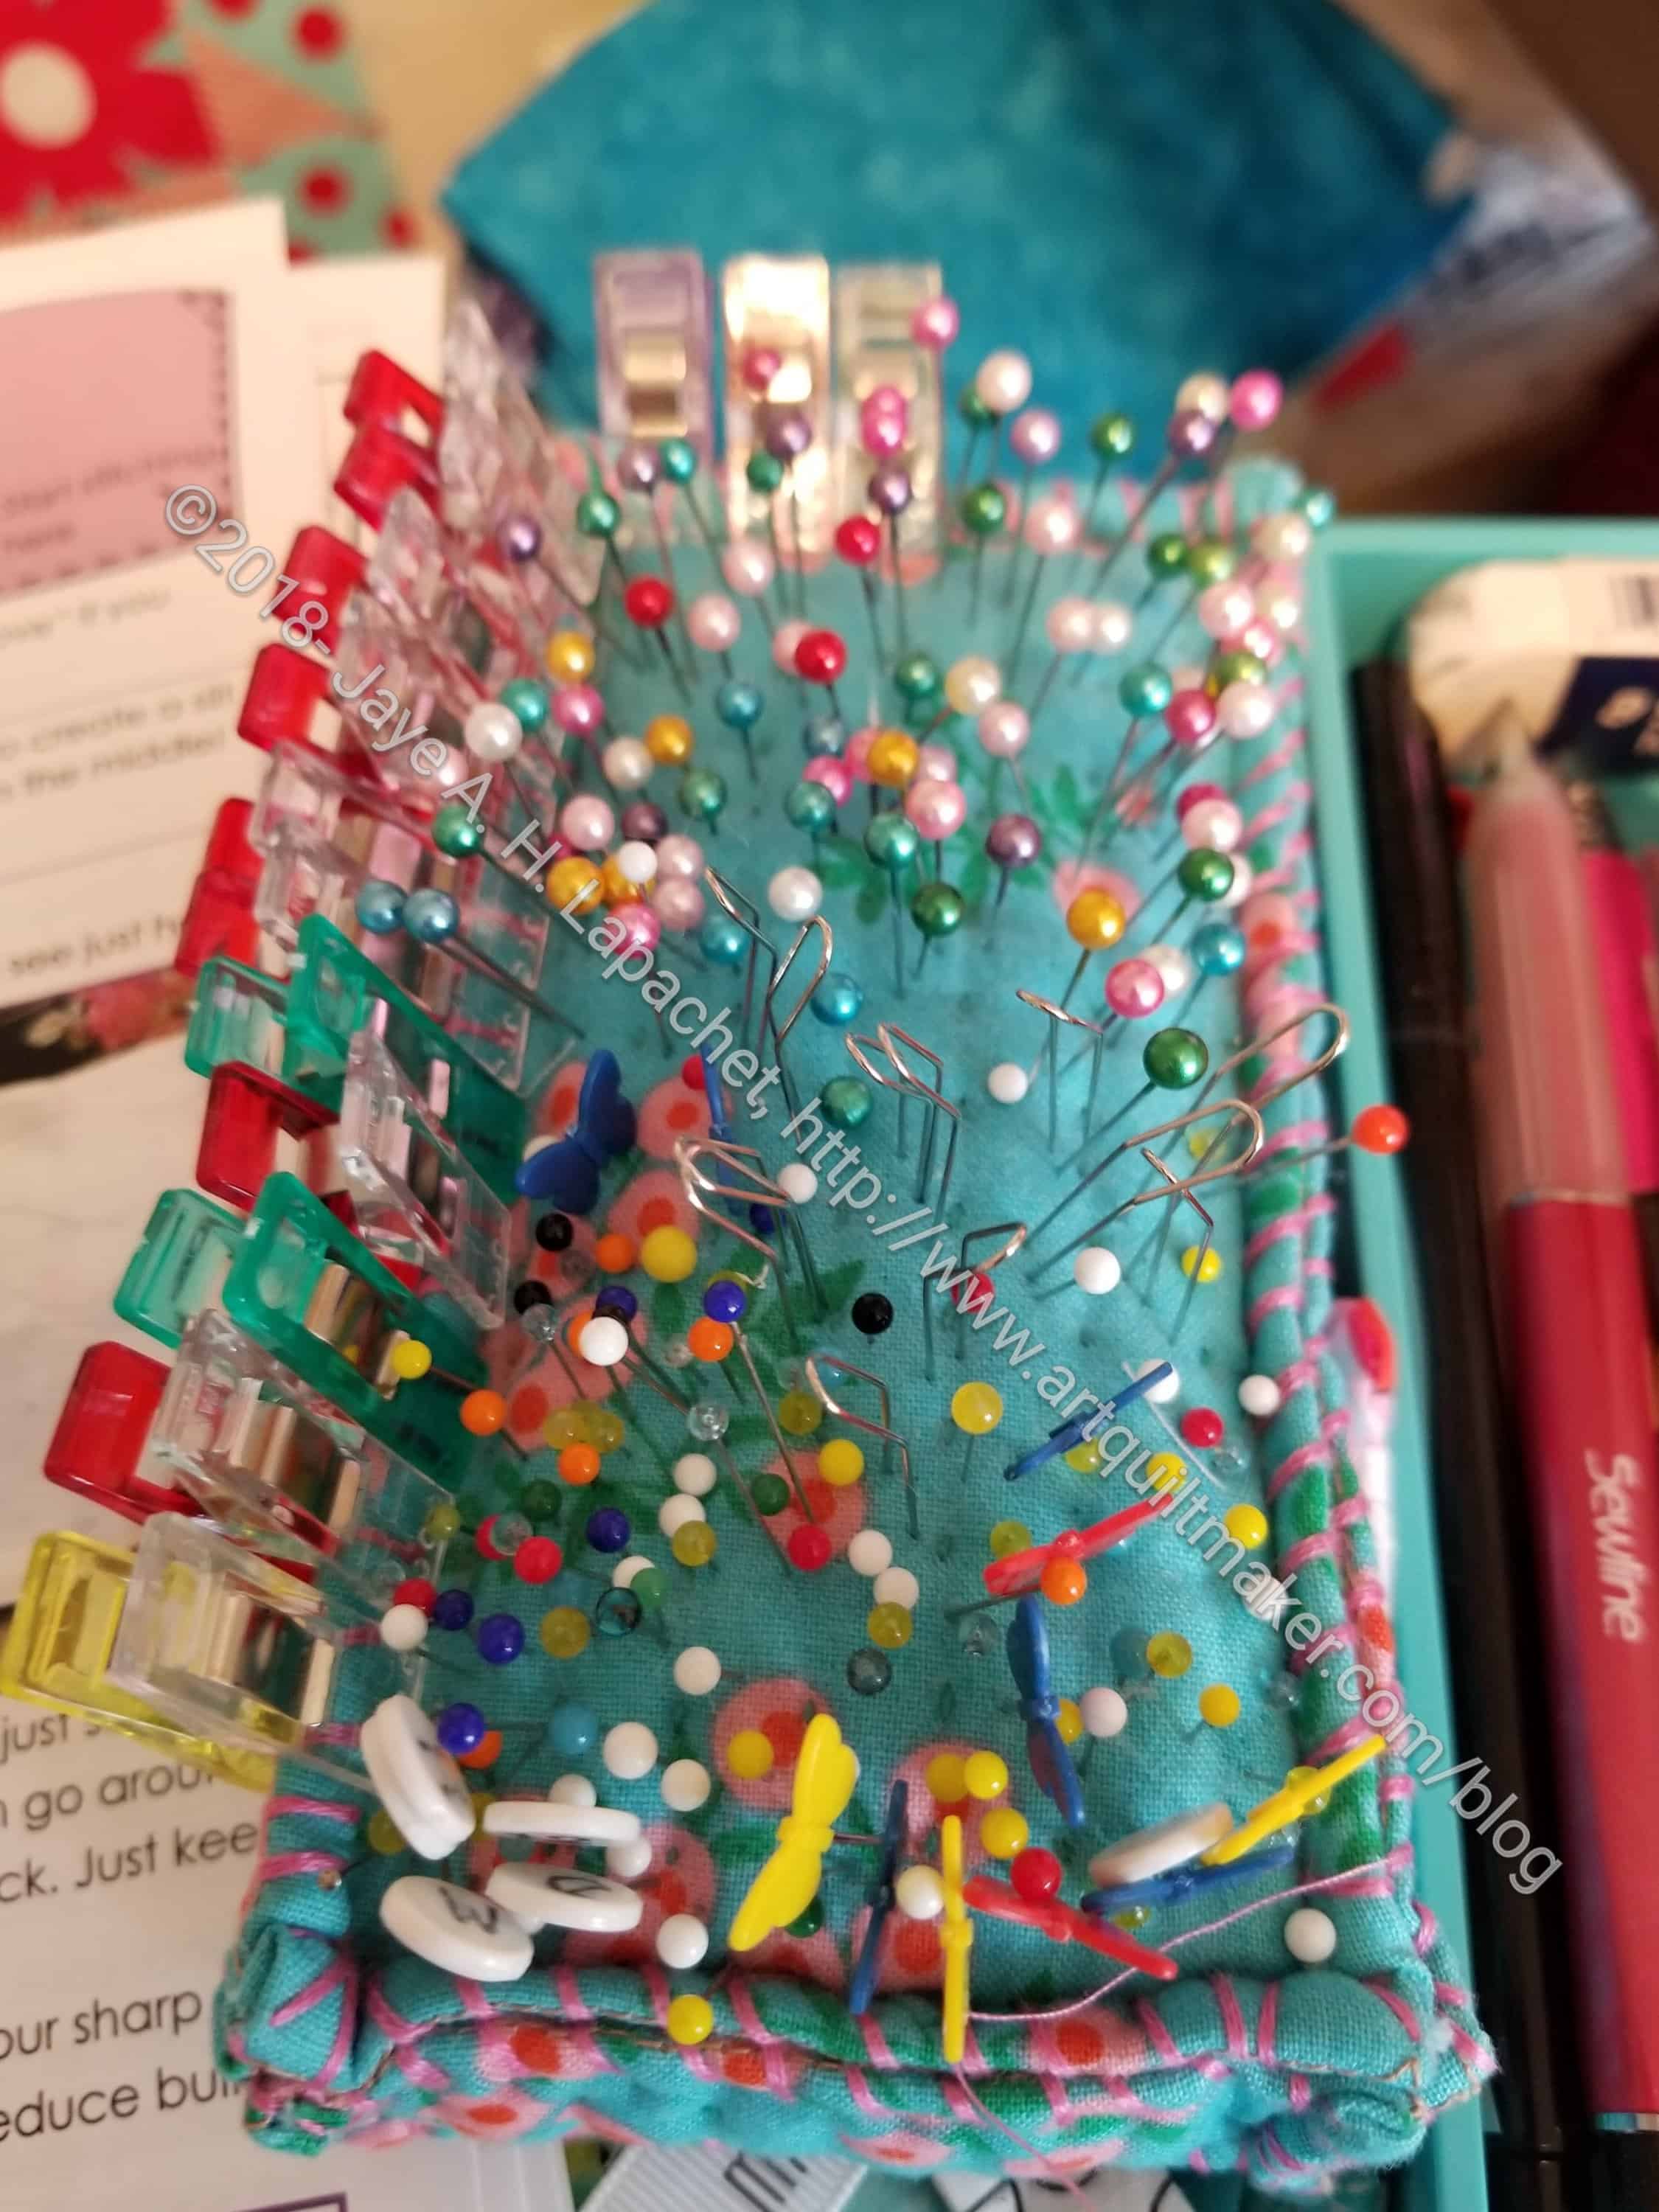
The other day I wrote about the pincushions I use when I am working.
Pinchushion – wool felt (gift from A
Gerre’s special rectangular pincushion
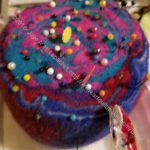
Design Wall Pincushion
Ironing Board Pincushion
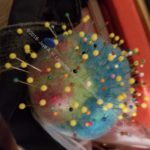
Travel Pincushion
I didn’t exactly lie, but I was mistaken. I actually have 5 (yes, FIVE) pincushions and I use them all, though the two I discussed the other day get the most use.
My workroom isn’t that large and it is full of books and fabric and desks, so there isn’t really much floor space. I could walk around carrying a pincushion, but I don’t. Apparently.
In addition to the two that move between my sewing machine and cutting table, I have one on the bookshelf above my ironing board, one next to my design wall and one that travels with me.
These three extras are where they are because they were given to me as gifts. I used to have a hand me down tomato pincushion, but people kept giving me cushions so now I am up to 5. I am not sure what I’ll do if I get any others. The sad part is that pincushions are so great. There are so many fun shapes and great patterns for them.
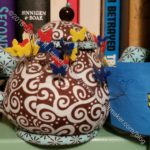
Ironing Board Pincushion
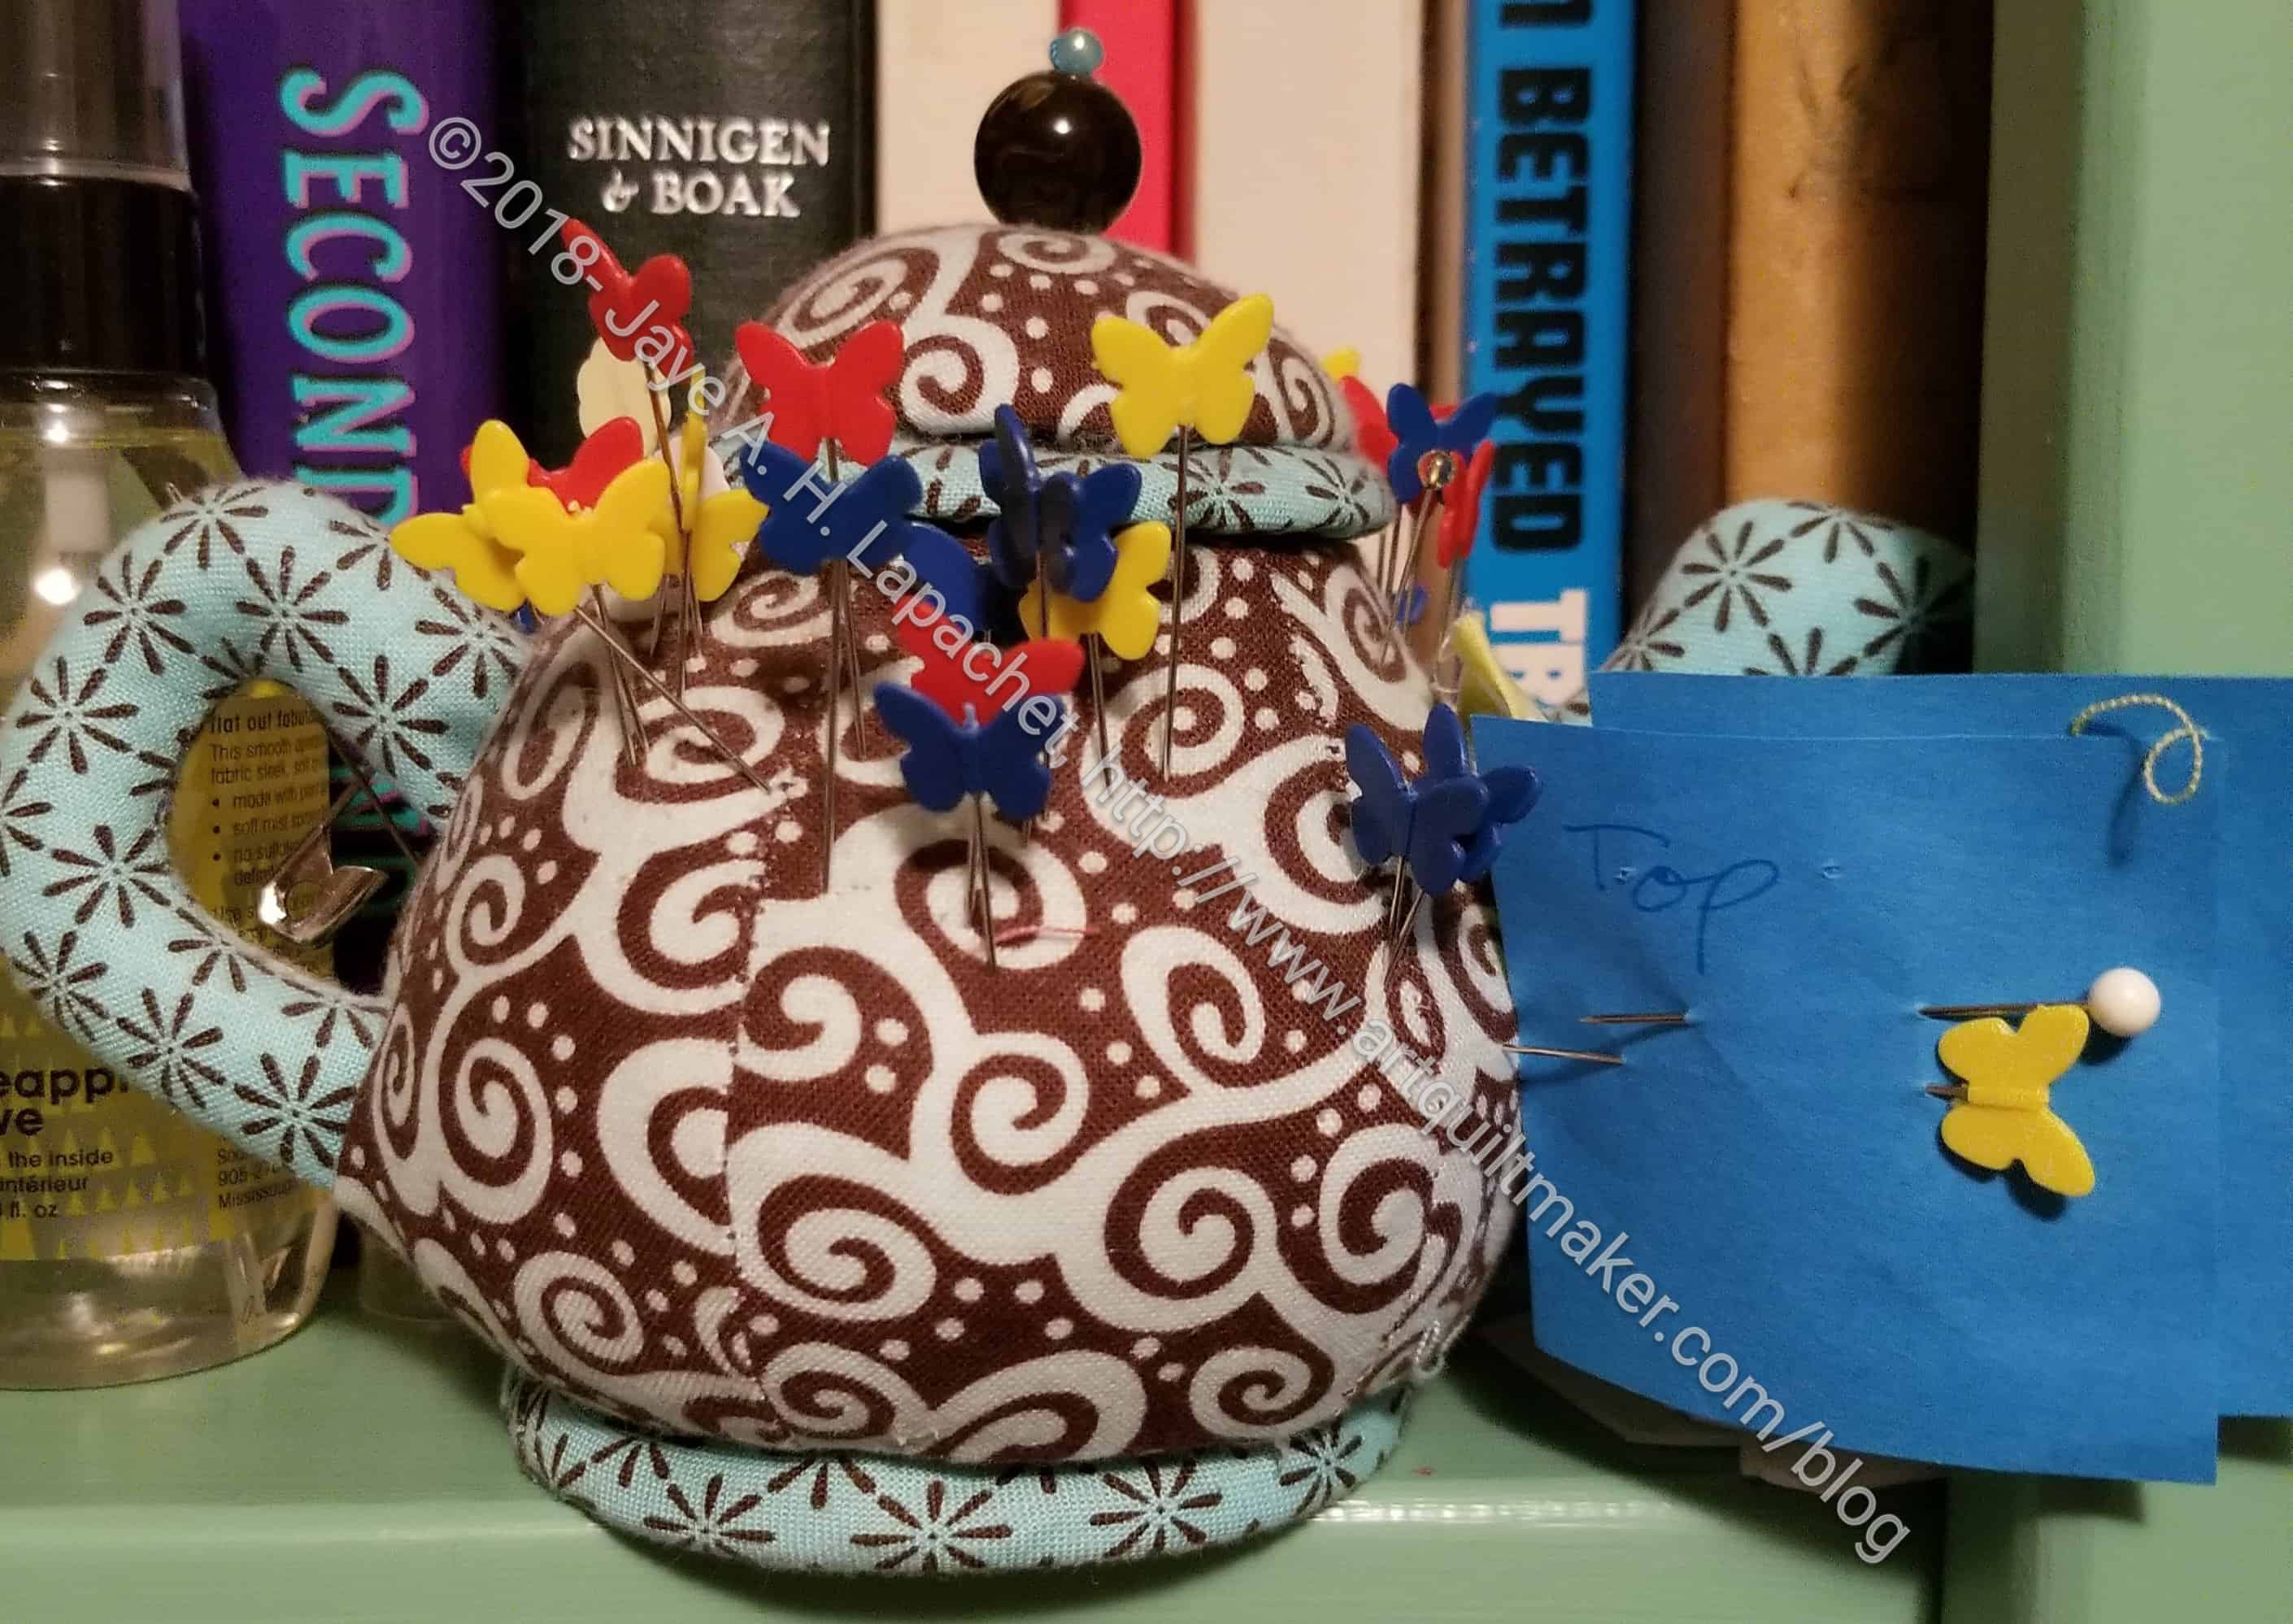
Anyway, the teapot pincushion is one that I keep on the bookshelf above my ironing board. It is a fun shape and those pins are my least favorite. Oh, the butterfly heads are fun, but somehow I just don’t like those pins. They don’t get much use as I only use them when ironing and I usually have to be desperate.
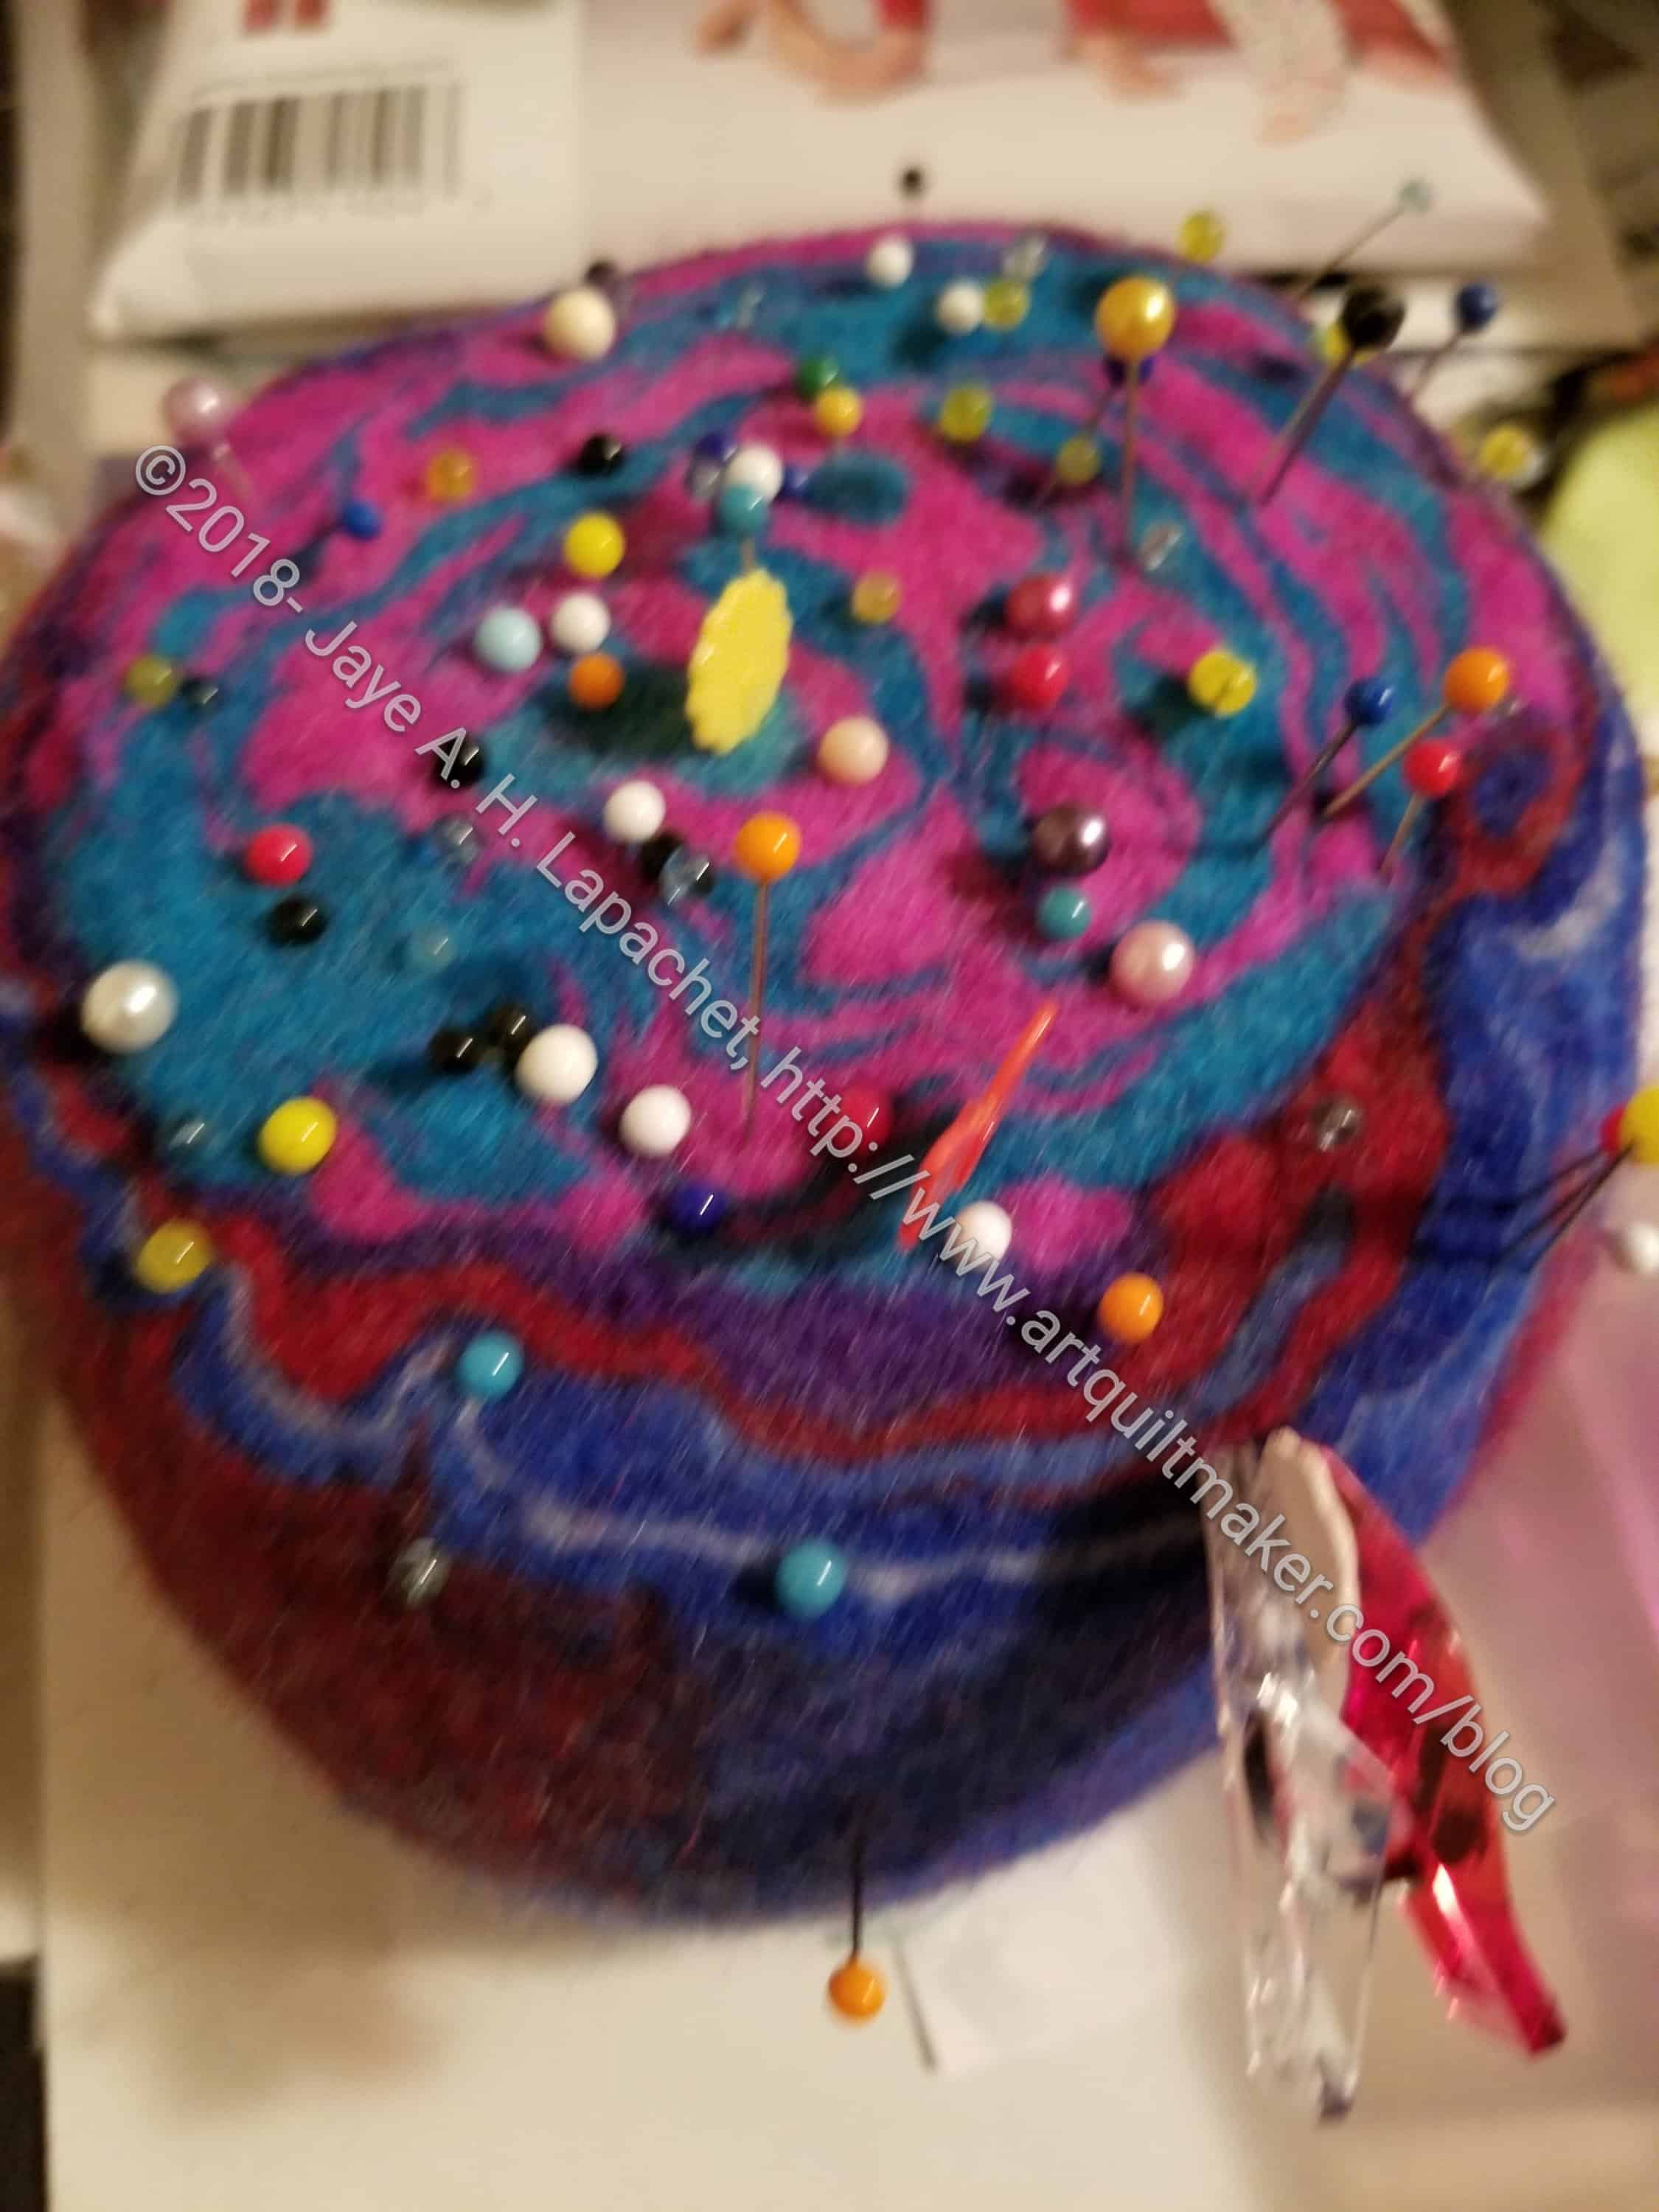
Design Wall Pincushion
The design wall pincushion is another wool felt pincushion. It is a great color and very swirly and fun. I put in near the design wall, usually so I can pin quilt tops to it when they get too heavy for the flannel. I used it, and the pins quite a bit for the Stepping Stones n.2. The pins come in very handy when I am desperately trying to keep a top on the wall. It is annoying that the design wall fabric won’t hold a whole top.
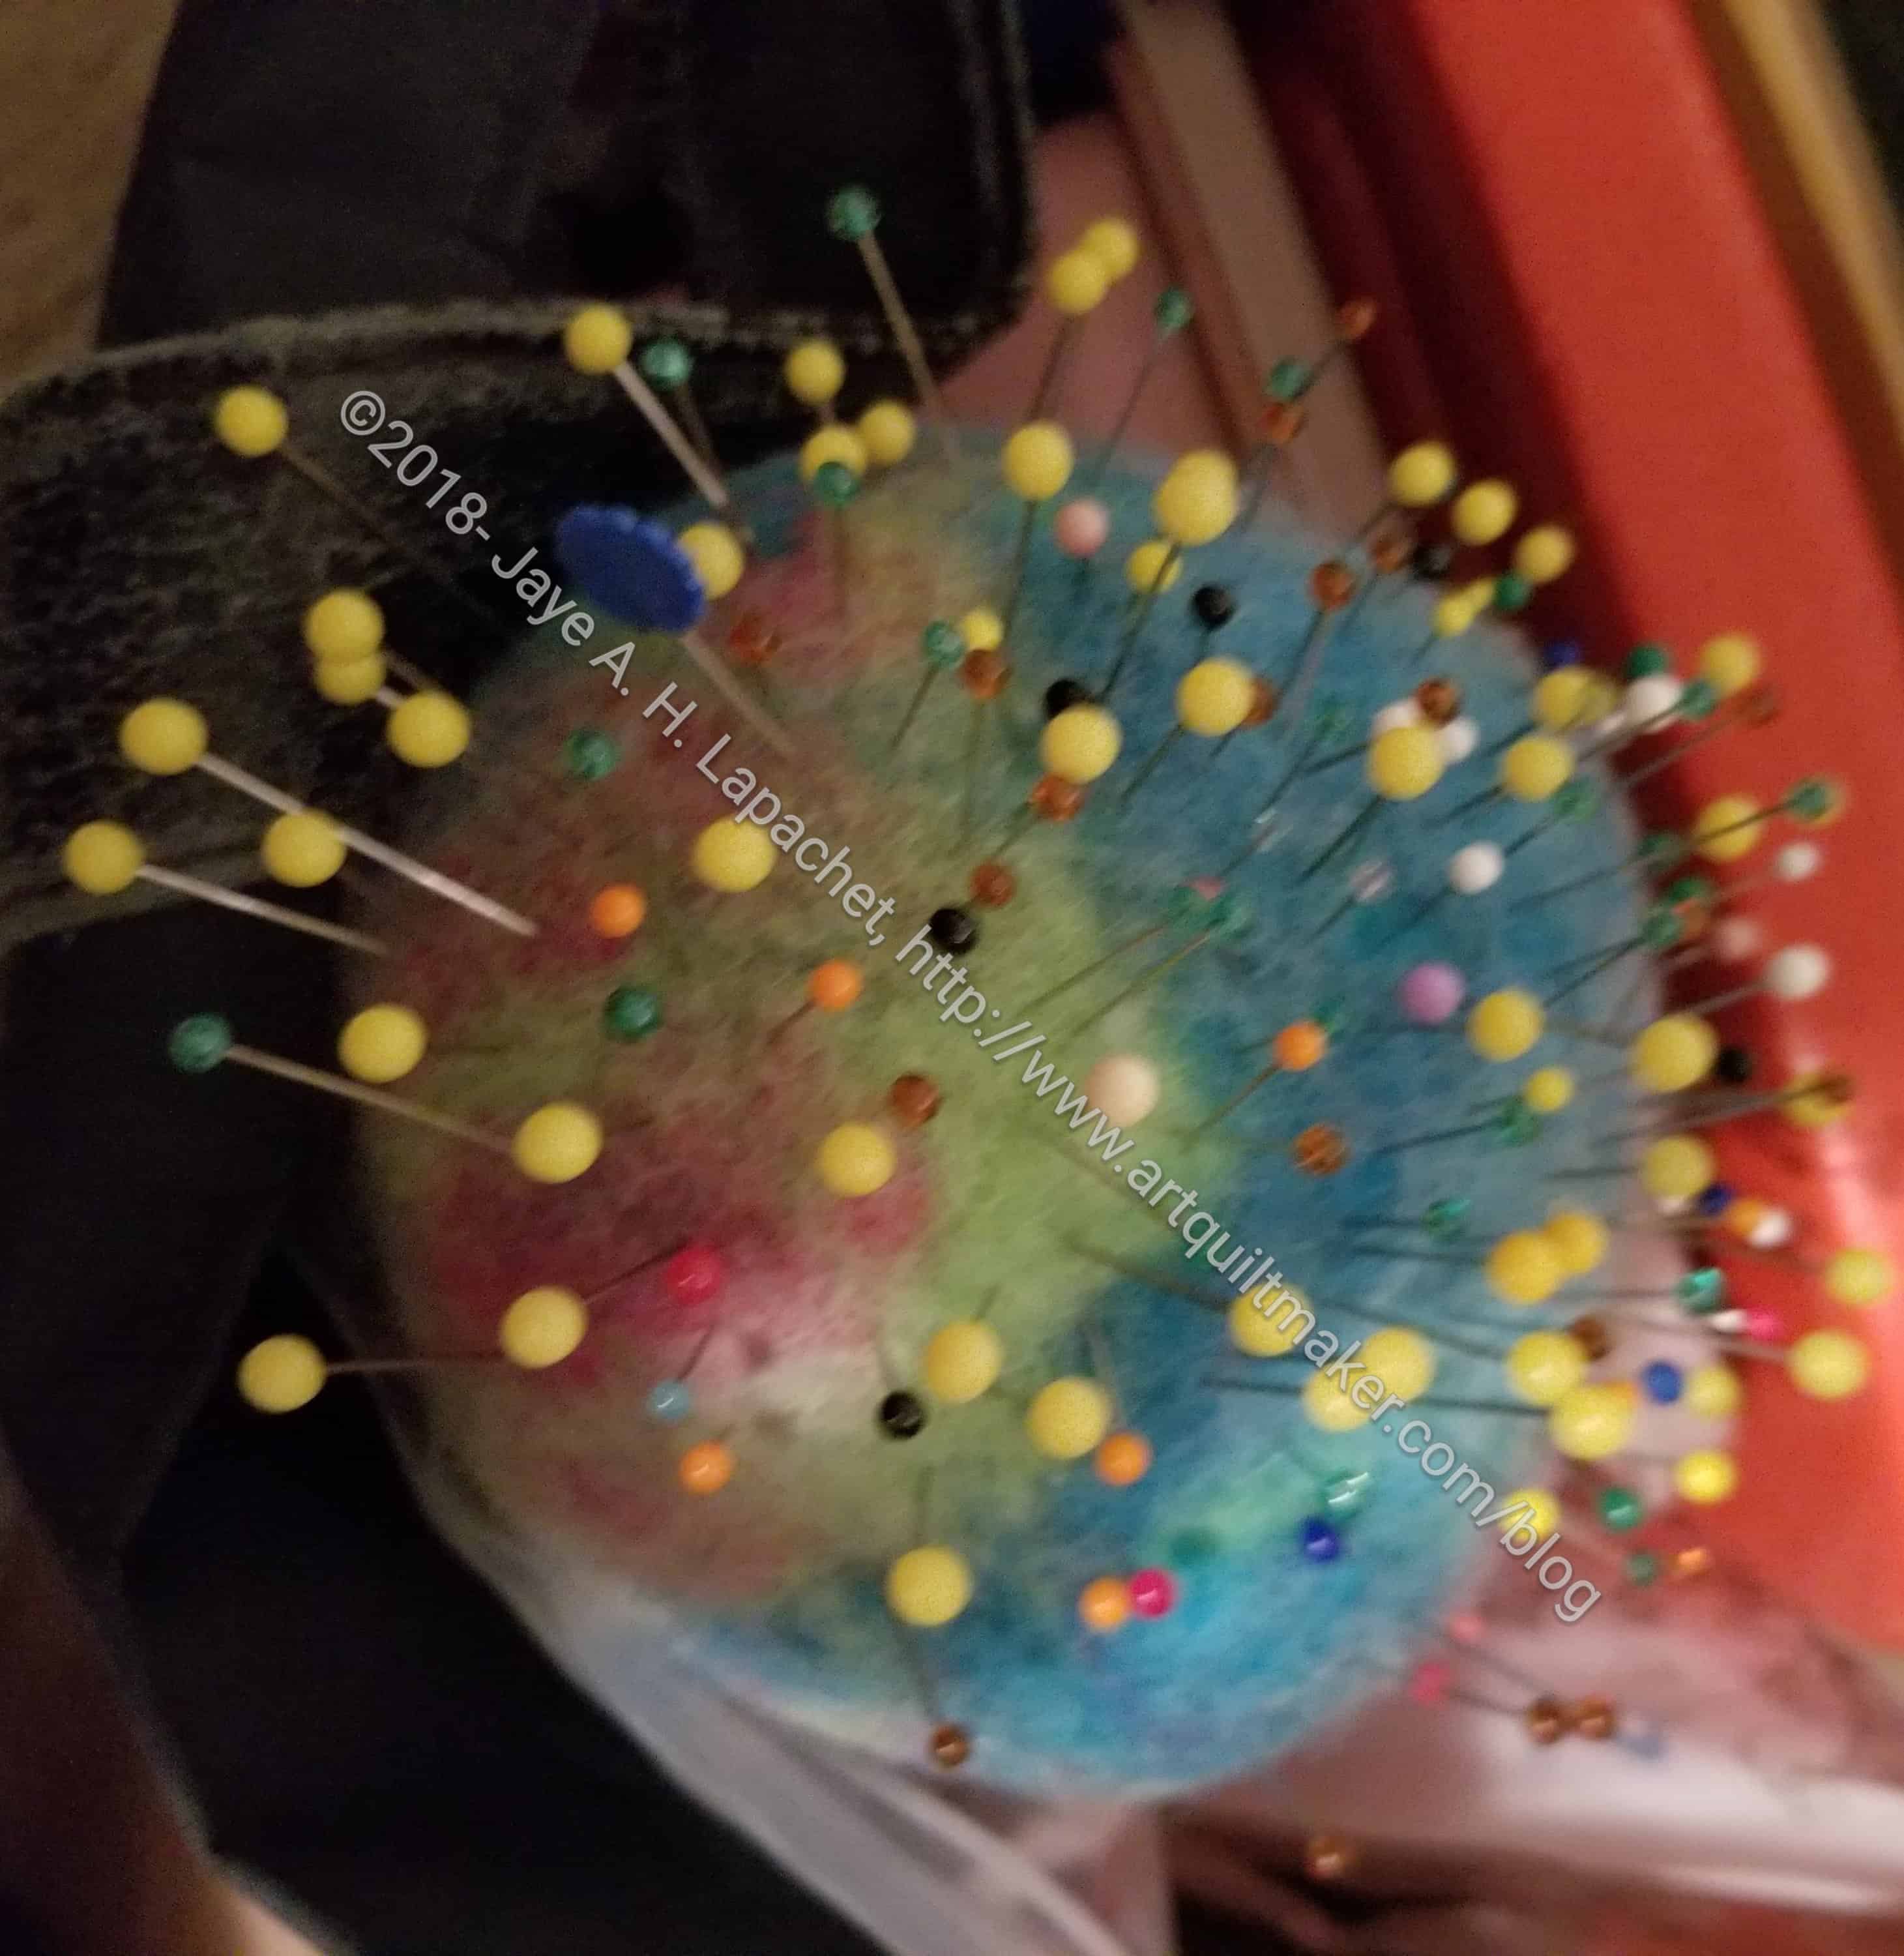
Travel Pincushion
The travel pincushion is essential. I have doubles of everything all packed and ready to go at a moment’s notice and the pincushion is no exception.
I completely used up all the pins in my travel pincushion between Sew Day on Saturday and the Rosalie Dace class. It was crazy to see this pincushion empty. A lot of my pins are taken up with the City Sampler blocks, but the others were just engaged with different projects. I was able to reclaim some so the pincushion does not look so desolate.
As you can see from the variety of pins, I have a lot of different kinds of pins. My favorites are Dritz Pearlized Pins. Of course, I love the colors, but there is something about them that works for me. They are not the thinnest or the longest, but they do work well for me.
I carved out about 6 hours yesterday where I just sewed. I finished a donation block and started another. I started and finished a Color My Quilt shard. The biggest deal was that I worked on the Rosalie Dace piece I started in Sisters. I haven’t really worked on it since the trip, but my mind has been working on it. I finally cleared off the big design wall enough to get it up there.
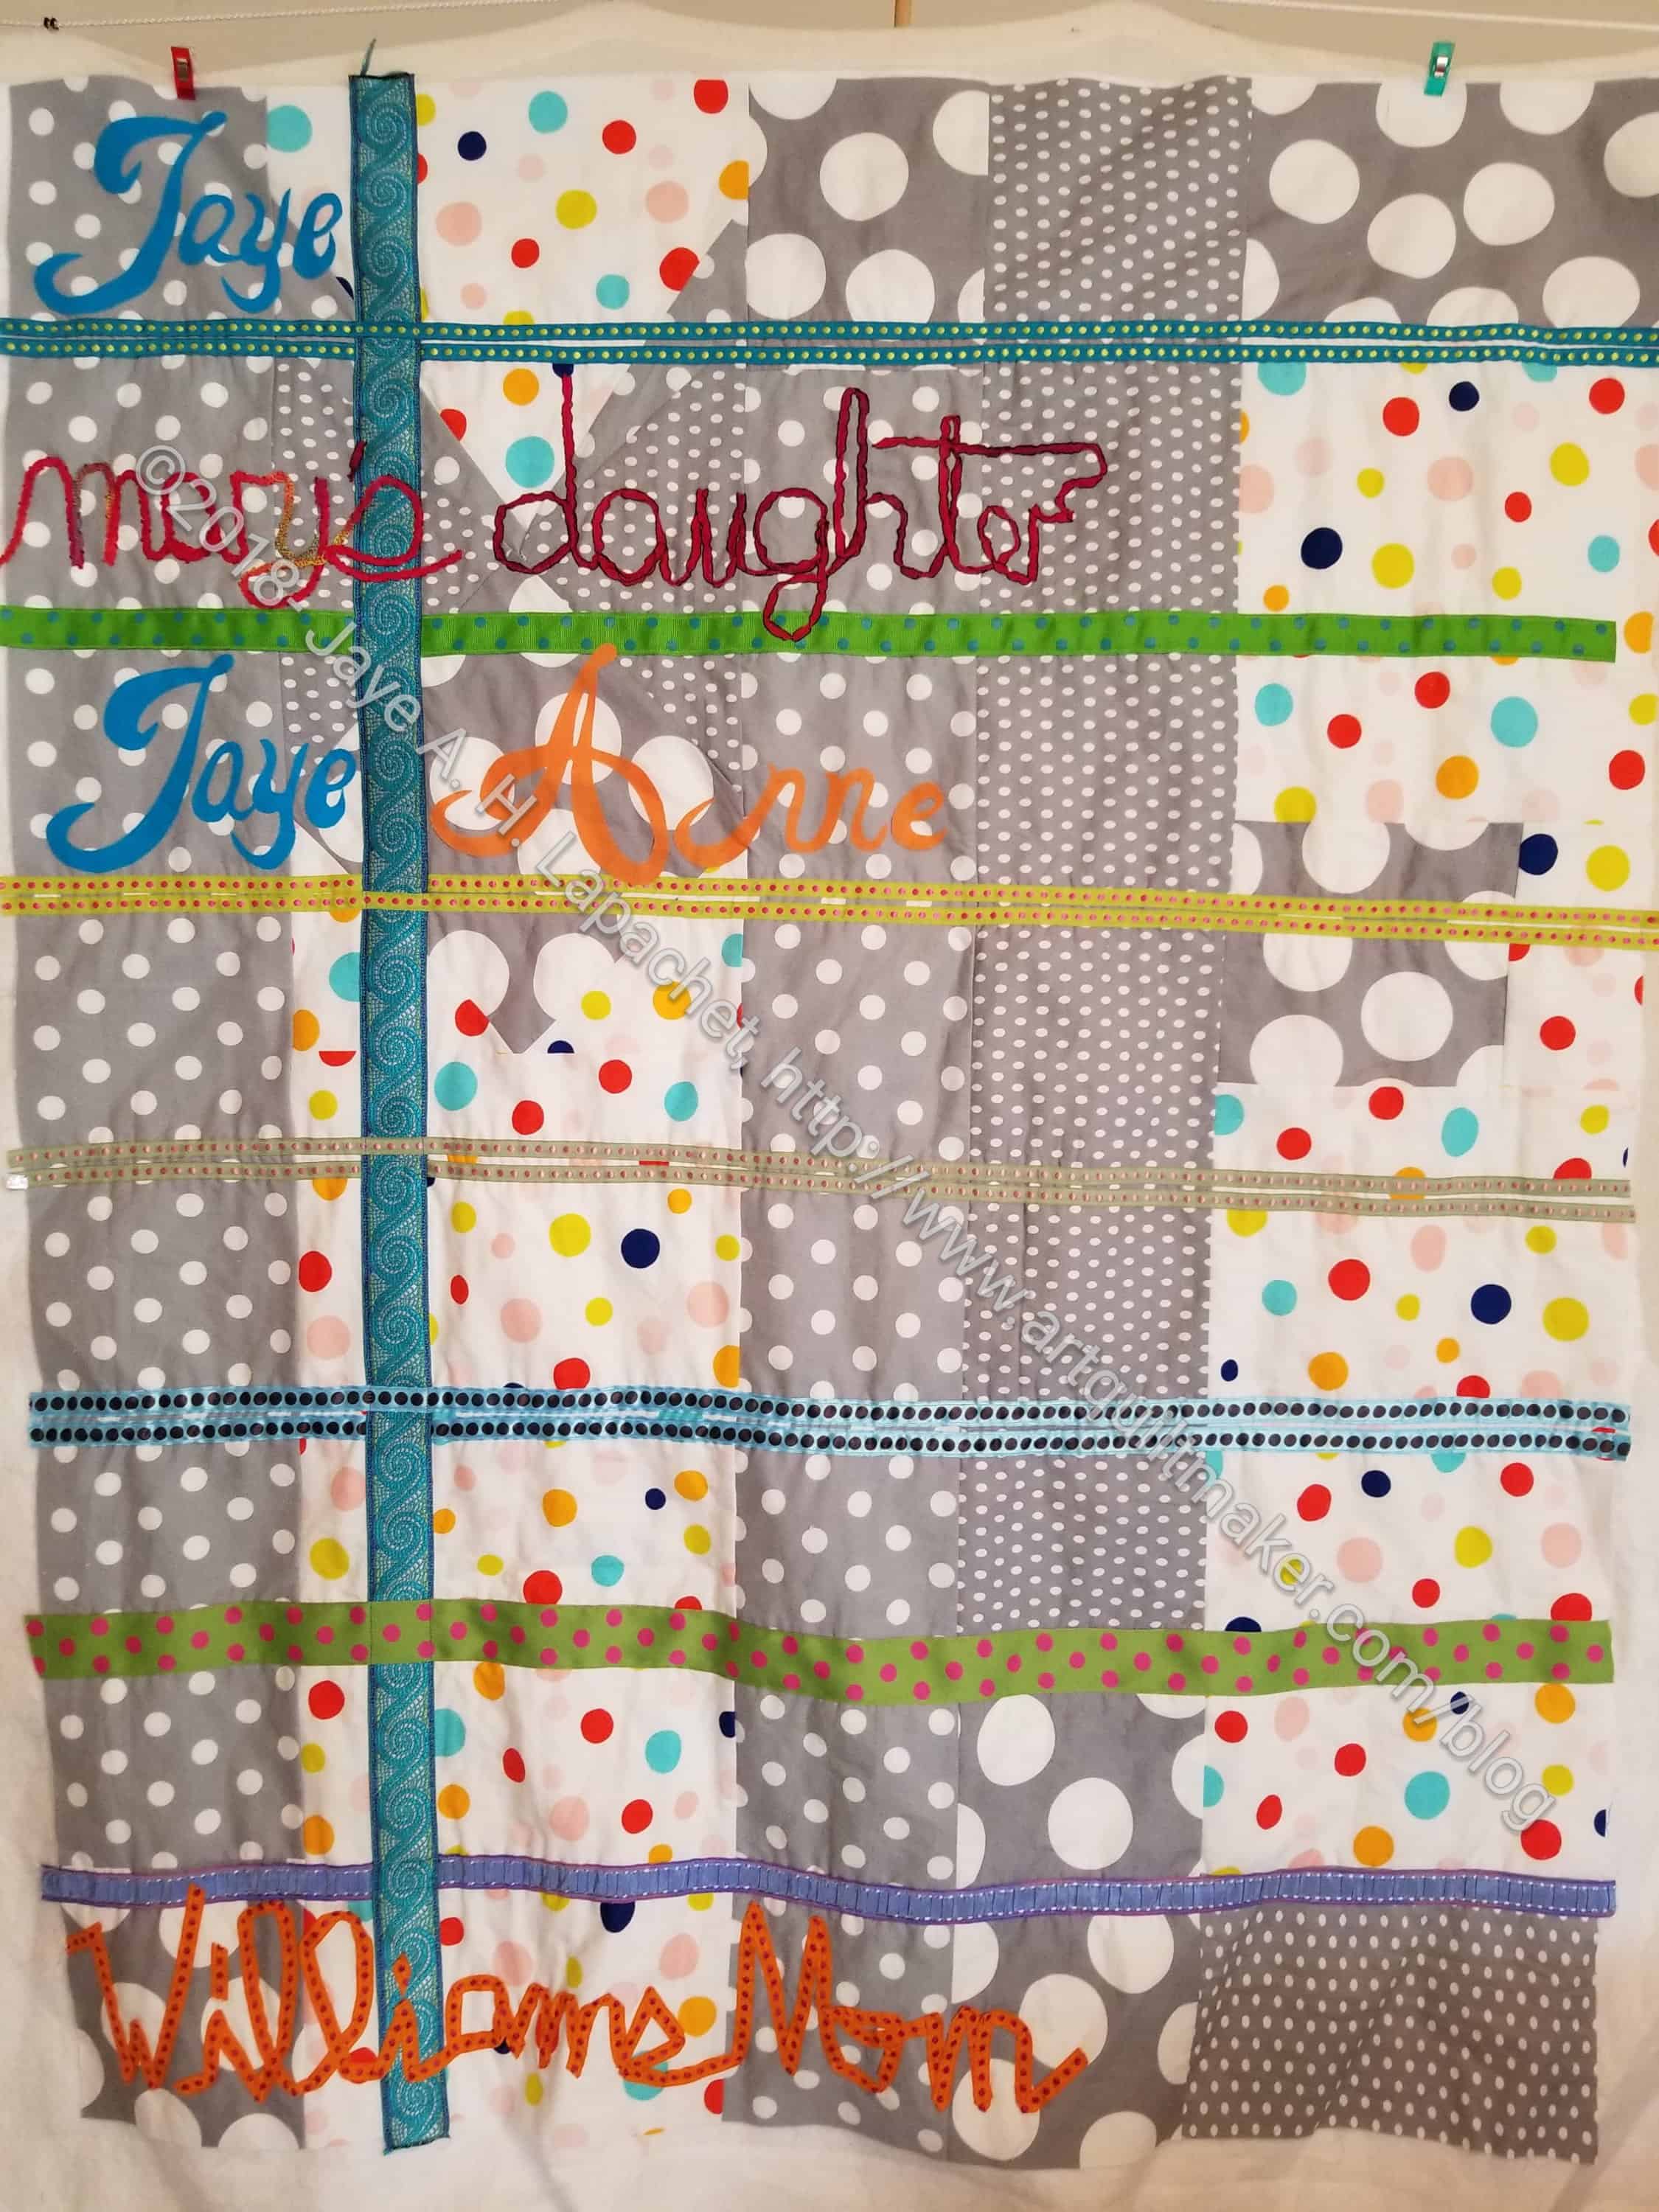
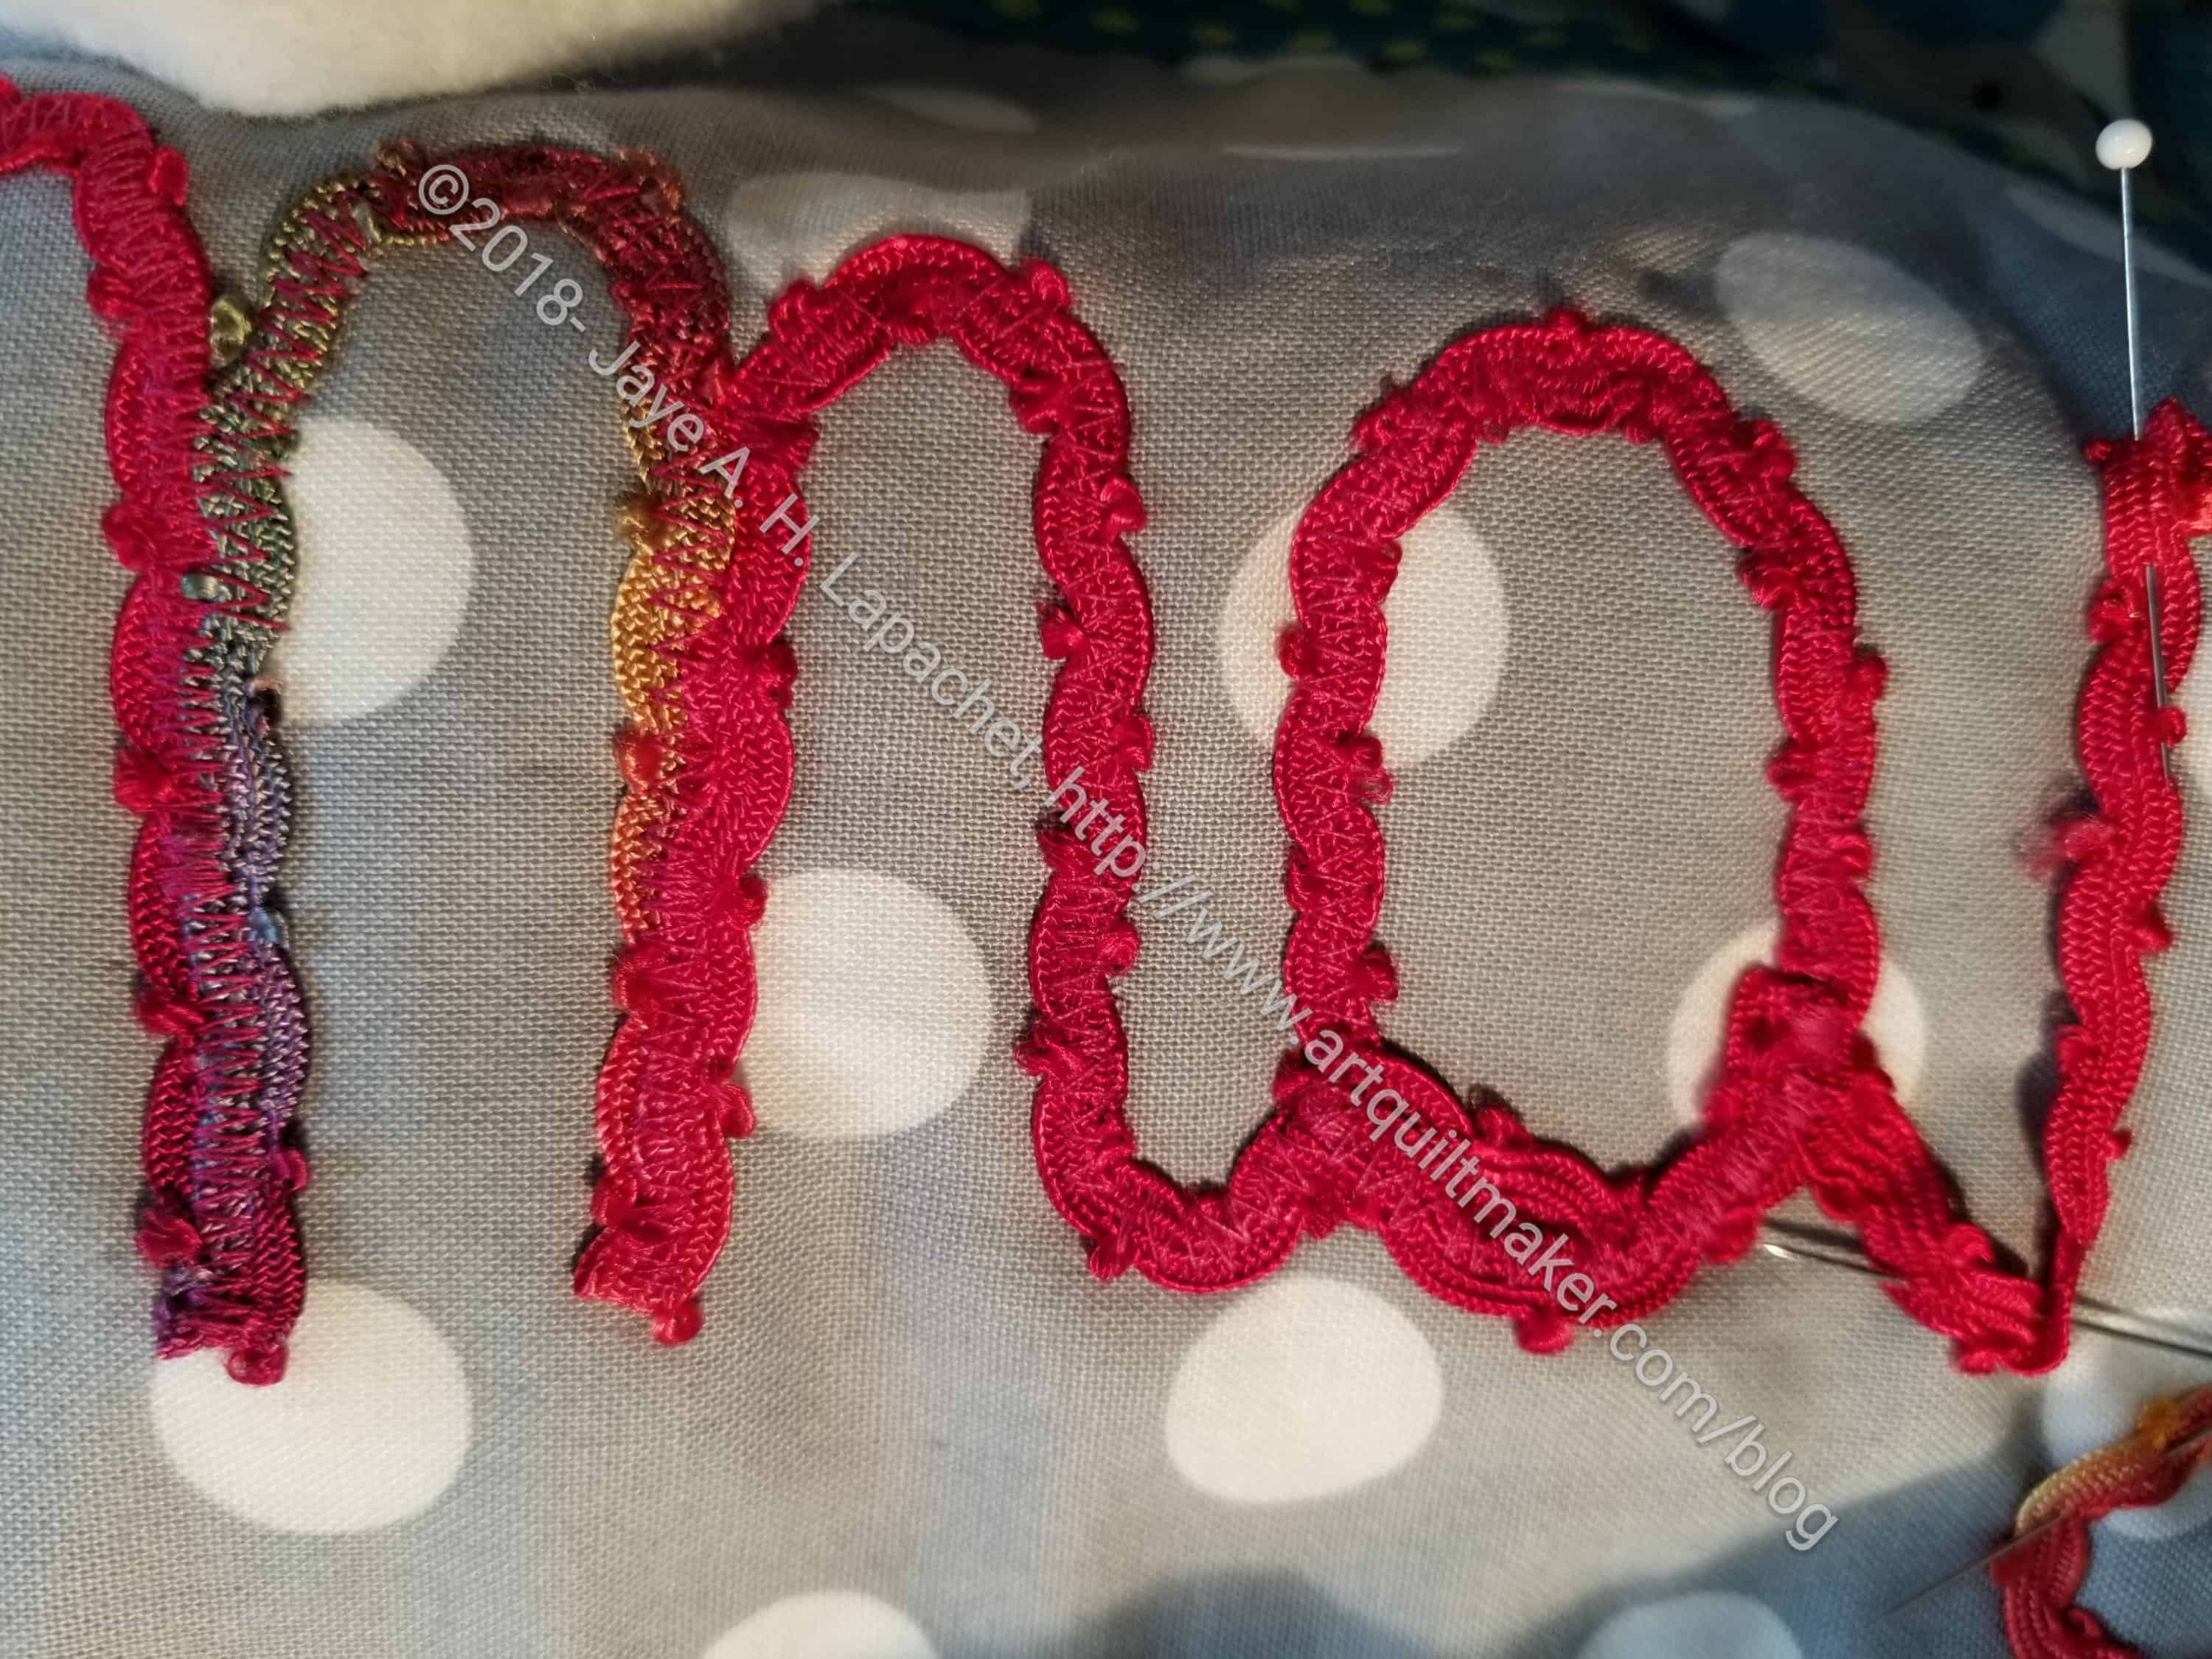
Who Am I? – early August 2018
I thought I would keep adding letters, but the number of pins in the piece (a problem at Sew Day I can talk about later) and unfused bits flailing around demanded a different course. The quilt really wanted me to sew down and fuse down letters so I did.
The two sets of ribbon/trim letters are sewn down using a zig zag stitch in varying widths. It really took forever because I sewed very slowly, but I am pretty pleased with the way it came out.
Mary’s Daughter – early August 2018
For the ‘mary’s daughter’ piece, I used an Aurifil violet-ish color on the top and the bottom.
For ‘William’s Mom’, I used clear Auriful in the top and an an orange 50 wt in the bobbin. I started out with orange in the top, too, but it obscured the circles that are part of the design of the ribbon.
I feel good about the work. I am so pleased to be making progress.
I take walks at lunch and there is a lot of construction going on around my office, which means I can’t walk the same way every day. I also don’t know the neighborhood very well and I walk on different streets every day, so I see different things every day.
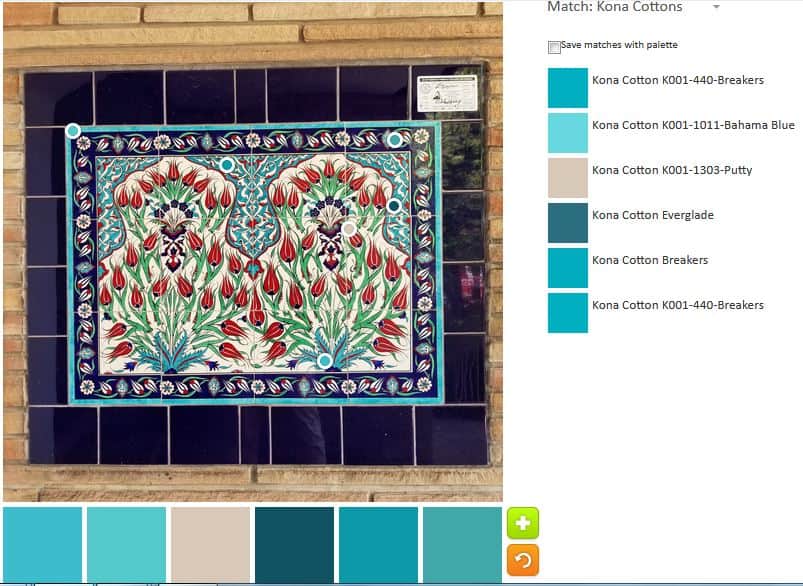
ColorPlay: Tile-default
I thought about cropping out that beige brick, but, frankly, I was too lazy. It is interesting how it came out in the default palette. The default goes for neutrals again. Two of the colors in the default palette are neutrals! That is crazy!
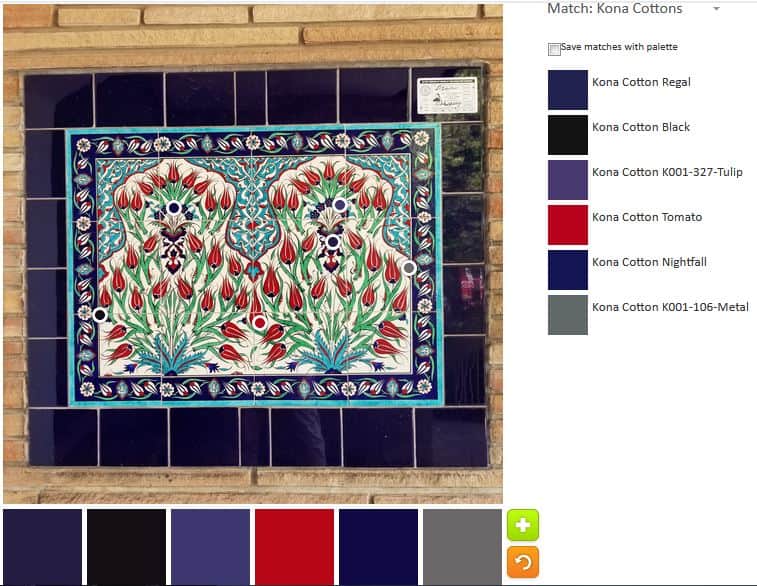
ColorPlay: Time -n.1
I went sort of random for the first palette. I am not sure that red works really well.
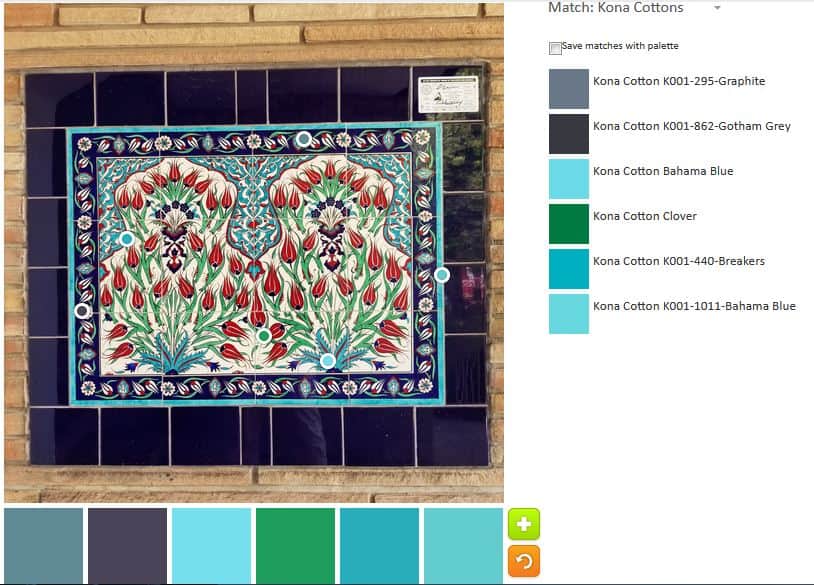
ColorPlay: Tile -n.2
This is my monochromatic palette. I like the variety of turquoises in this palette.
ColorPlay: Tile -n.3
I did another monochromatic palette – this time in green. I think combining palette two and three might be interesting.
ColorPlay: Tile-n.4
The fourth palette is completely random. I tried to make one that was completely different and used different colors than showed up in some of the other palettes.
ColorPlay: Tile -n.5
I had to do one more mostly turquoise palette. i wanted to make it different than n.2, but there are some similarities.
This tote has been moving around my workroom half made. Over the weekend, after finishing the Ends n.5 donation top and back, I got back to the Tool Tote. I am nearly done.
The inside and the outside were both made, but I had to put them together and install the zipper.
I just kind of got to it and began. It is hard to pick up after three weeks, but I just did it.
Weird Zipper Ending – Tool Tote
Fortunately, I have done a lot of zippers this year already with two SewTogether Bags, the BAM Pillow Swap, the Zip Away Organizer, the Roadtrip Bag, the Walking Foot Wow Pillow cover, my Sew Together Bag (for embroidery), and the Merit Hexie pillow, so I have plenty of zipper experience. It turned out that this zipper was no problem. I had no trouble with this zipper. I barely even registered that it was zipper installation. I didn’t really like the way the endings looked. I didn’t understand the ending – there wasn’t enough explanation for me. It worked, but I thought for sure I would have to rip.
Tool Tote – zipper in
It looked pretty good once I did the sewing. I think I didn’t think about it too much and that worked for this project.
I kept testing the zipper all the time and it kept working. It doesn’t look like the picture, but it works. We’ll see if it works when it has stuff in it.
The directions on this project aren’t as good as I would like. I thought that this pattern would be a good one for gifts, but the directions are a challenge. I can’t decide if I want to make other ones or if it is just too much hassle.
Noodlehead has a pouch pattern called the Petal Pouch. It has such a lovely shape.
ByAnnie has a new pouch pattern called Clam Up. It should come as no surprise to anyone that it looks like a clam. There is a video about it as well. The pouches come in multiple sizes.
HollyAnne has a tutorial up about making string blocks. The tutorial is a part of her stash busting project
Brimfield Awakening
Brimfield Awakening is a pattern company that creates EPP patterns. I saw one, Brimfield Meadows, on Instagram that other day that I really liked. I bought another one of their blocks at QuiltCon (possible for Aqua-Red Sampler???). I like the one that they posted today on Instagram (left). It is fun and cheerful and interesting.
Northcott sends me a newsletter periodically and this month new fabrics for Halloween are coming out. One free pattern is called Elegantly Frightful Oven Mitts. This would be a great swap gift or hostess gift. Other free patterns by Northcott and their designers are found on the patterns page.
HollyAnne gives some ideas on her blog about how to make any quilt pattern scrappy. I have a different idea of making quilts scrappy, which you can read about, also.
You know what a huge fan I am of fabric gift bags, right? I got an AllPeoplequilt newsletter and they have a pattern for a fabric gift bag that has some nice features. I didn’t look at the pattern, but feel free. I want to cover the world in fabric gift bags and don’t care whose pattern you use.
Other Artists
Ricky Tim’s lost his home in a fire burning through the Colorado area where he lived.
Erica Arndt partnered with RomaQuilts to create a free video Jelly Roll Rug tutorial. You have to buy the pattern as this video doesn’t replace the pattern
I love the “linked 8 pointed star” on the Em’s Scrapbag site. I found this when I clicked on a few links after uploading my Design Wall Monday link last week. I wonder if it was originally a Kansas City Star, Laura Wheeler, etc pattern? I’ll have to look into it (in my copious amounts of spare time).
Exhibits
Mel Beach talks about her process for creating her Prince entry in the Cherrywood Challenge. Cross your fingers that Mel’s piece will be accepted.
Fabric, Tools & Supplies
I found a new source for bag hardware. They have some nice options! Have you ever heard of butterfly connector hooks? No? Me neither, but I want to use one for something!
Paintbrush Studios has an interesting pattern. The squares overlap and have different sized sides. This pattern features the Ring Ring line, another line with vintage telephone motifs.
There is a new learning site called Bluprint. It seems to be like Craftsy or Creativebug. They have free trials and a special for $100 for the first year or $9.99 per month. It seems like the per class model is going by the wayside. Angela Walters is one of the teachers. I haven’t tried it.
Update 8/1/2018: AQ Reader Lucy writes that BluPrint is a rebranding of Craftsy Unlimited. She points other readers to the Craft Industry Alliance article
I saw a history of Crayons. I have either a 72 or 96 box, but I understand the new standard (??really) is 120! WOW! That is a lot of colors. They updated the chart in the post and it is interactive and fabulous. You know you love crayons. 🙂
Japanese Class 15 is a blog about vintage sewing machines. My mom has an Emdeko and I happened to find a post about that machine. It is a good reference.
Thanks to Sarah Ann Smith for pointing out a blog post on trouble shooting skipped stitches.
I happened cross this shop, Modern Quilting, and thought some of their fabrics were quite beautiful. I like “Dear Mum.”
Copyright & Legal Stuff
A court opinion came out recently that will have everyone who posts photos on the Internet up in arms. The ruling is very narrow, as explained in a recent article. The use has to be non-commercial, even if posted on a commercial site and previously published. In the case mentioned, the phot also did not have any indication that it was copyrighted. This is an odd aspect as everything we create is supposed to be copyrighted whether we put a notice on it or not. If you put a notice on the work, you gain additional protections and rights, but an artist isn’t supposed to HAVE to put a notice on the work. I suppose that will be a reason to appeal. Also the judge said the artist was not financially harmed. As it pertains to this site, all of my photos are copyrighted. If you can’t see the copyright notice, trust me it is there. I am happy to work with people who want to publish my photos. Contact me.