Various & Sundry 2013 #8

Reading

I know I haven’t been good about telling you what I am reading. I have just finished Midnight Riot by Ben Aronovitch. Carolyn of BBQ suggested the series. I am listening to the second in the series, Moon Over Soho, on audio. I am also reading A Single Thread by Marie Bostwick. I read Marie’s new book and wanted to revisit the characters.

Projects
Camping Merit Badges

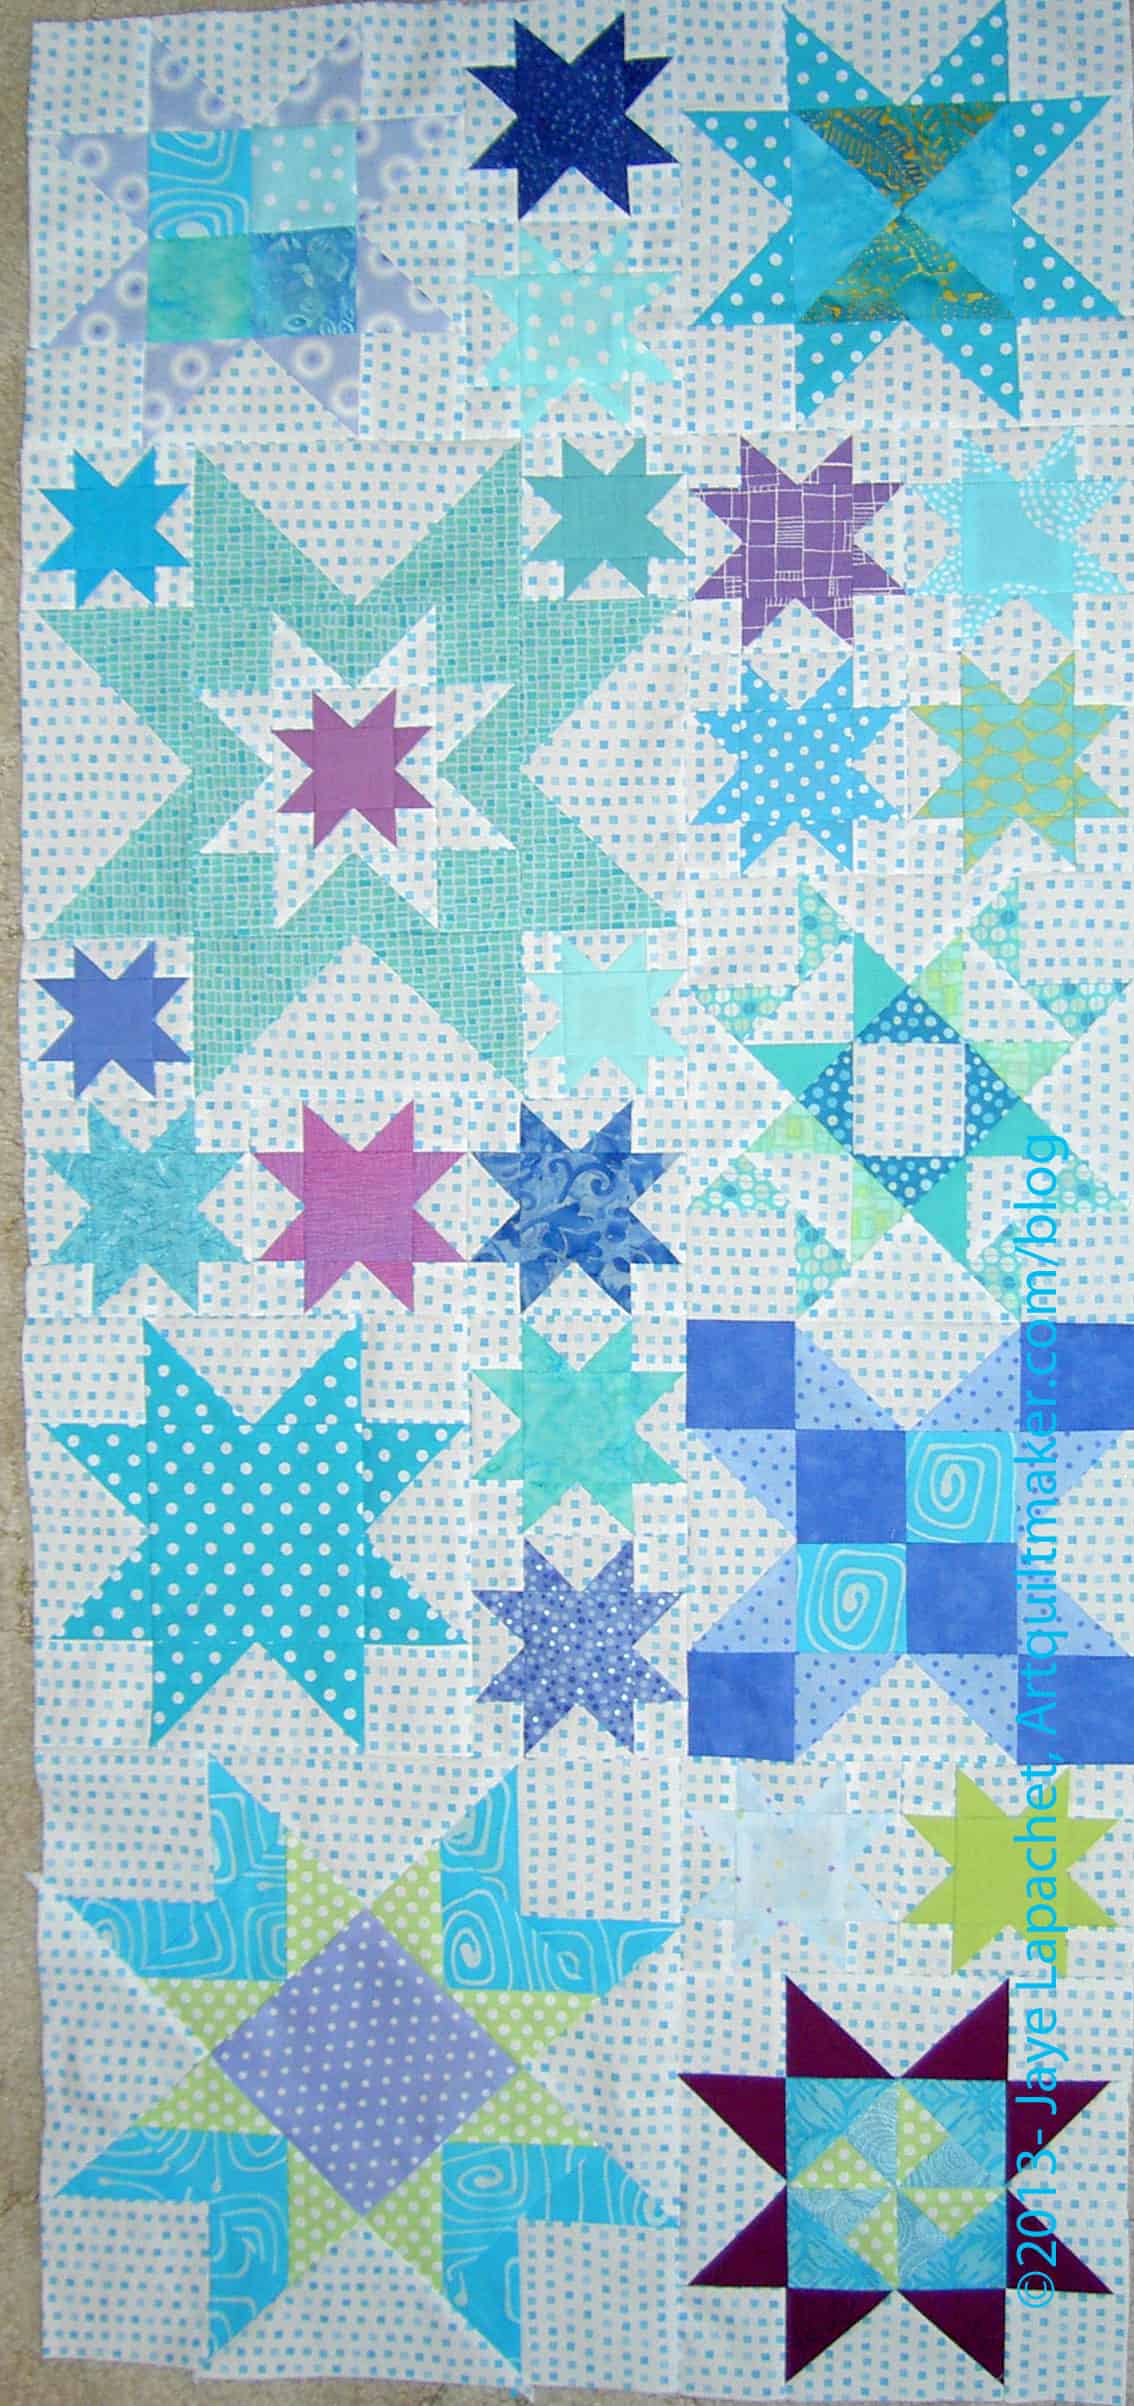
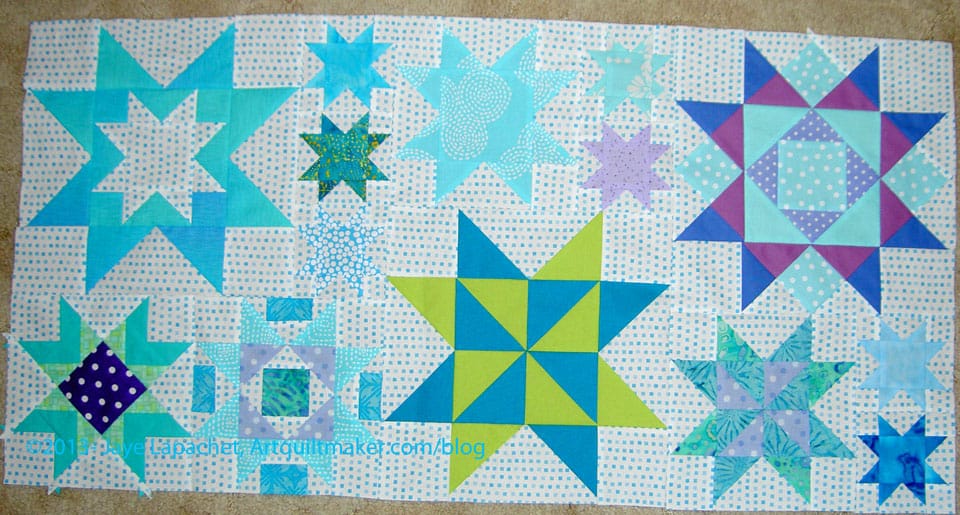
As I work on finishing the Star Sampler, I am beginning to think of my next project. I have a zillion projects on my list, a number of UFOs begging for my attention and The Young Man reminding me that his t-shirt quilt has an open spot on his bed. What I really want to make is another Petrillo bag. Reading glowing missives about Sara‘s fabulous-ness is not dissuading me even with the screams of those UFOs echoing in my ears.

I cut some 2.5″ background squares to make another donation quilt, but haven’t done anything about the foreground yet.

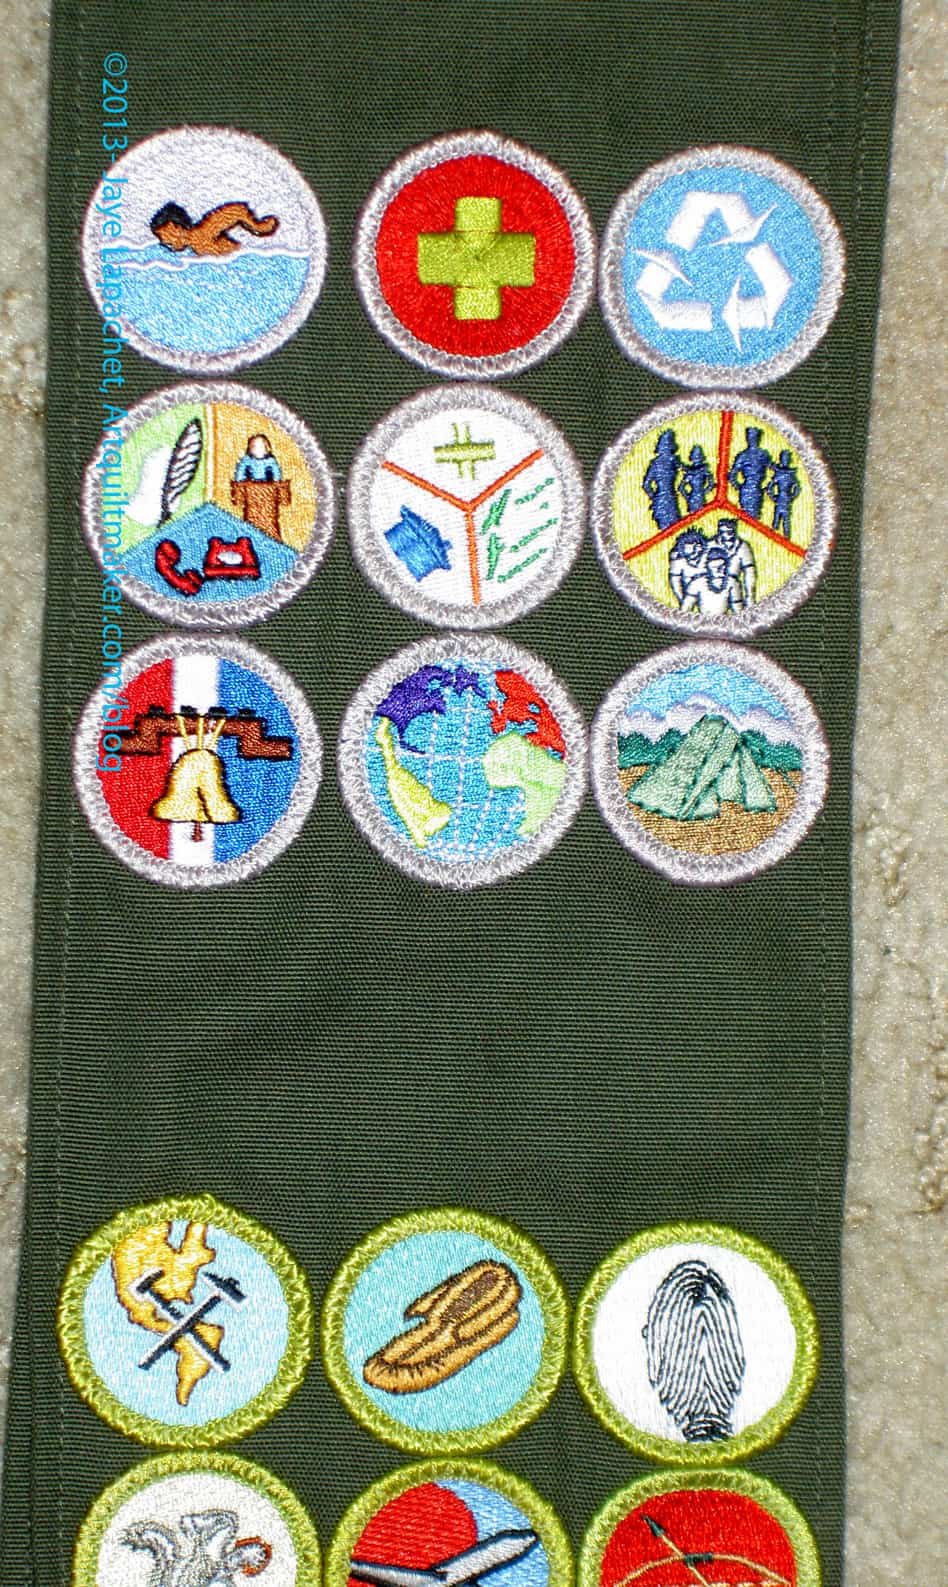
I also sewed on one of the Young Man’s newest merit badges, Camping. It is Eagle required.

Other Artists

If you haven’t seen Julie’s relatively new quilt, take a look at Contained Observation. There is a lot to look at and fun surprises. She also did some fabulous ATCs, which I missed out on for some reason. 🙁

Mom hasn’t been writing much, but take a look at her blog. She has written some good, heartfelt posts recently.

I was wandering around Blogland a few few Fridays ago when i was just too exhausted to even move to the couch. I stopped by the Fresh Lemons blog only to see this great mini-hex project. I know they are half hexies, but I am ignoring that. The layout reminds me of my Eye Spy quilt, but I love the idea of doing a scrappy version in the diamond layout. HOWEVER! I am not allowed to do any hexie projects until I finish, or make serious progress on the Flower Sugar Hexagon quilt. I really should work on it. It would be so great in my country manor…

Weeks Ringle and Bill Kerr will be doing a West Coast Road Trip. Check out the locations and dates on their blog. I will be in the San Mateo class (I have already signed up!). They are really good lecturers, so the experience is worth the price of admission.

Media

Sandi at Piecemeal Quilts wrote a great post recently about blogging platforms. If you don’t know the difference between WordPress and Blogger or aren’t sure what a No Reply Blogger is, go over and check out her post. And remember: she does the great Skillbuilder Series.

Gretchen did a short review of Judy Martin’s The Creative Pattern Book.

The image that Danny Gregory posted on his blog is partial, but what is there is fabulous. It reminds me so much of how I want to take to take notes and illustrate my life. It reminds me to stop and look. If you don’t read Danny Gregory’s blog, it is full of inspiration. Yes, he draws. That is his thing, but he is a creative person and we can gain inspiration and tips from other creatives.

Check out this colorful article on Kaffe Fassett. It is so beautifully illustrated.

Techniques and Tutorials

Here is a tutorial for the Ribbon Star. I wish I had seen this before I made mine!

Here is another quilt block library. Some of the blocks in the library are ones that I have been seeing around the web lately. The Ribbon Star is in this group as well. Odd since it seems like it is an old block. It is, at least, similar to an old block. I looked it up in Jinny Beyer’s The Quilter’s Album of Patchwork Patterns and found three blocks (pg.139) that are similar, Capital T (Louisville Farm Journal, 1883), Tea for Four (Nancy Page, 1937), and Rippling Star (new design, which first appeared in Jinny Beyer’s previous book, The Quilter’s Album of Blocks and Borders book in 1980).

Gen X Quilters has a tutorial on Contrary Wife.  It is part of the Sisters’ Ten Modern BOM. I have no idea what that means. I just like these types of blocks – the ones with that strong diagonal line.

Robin has a tip on seam ripping.

New Pieces has some info about thread.

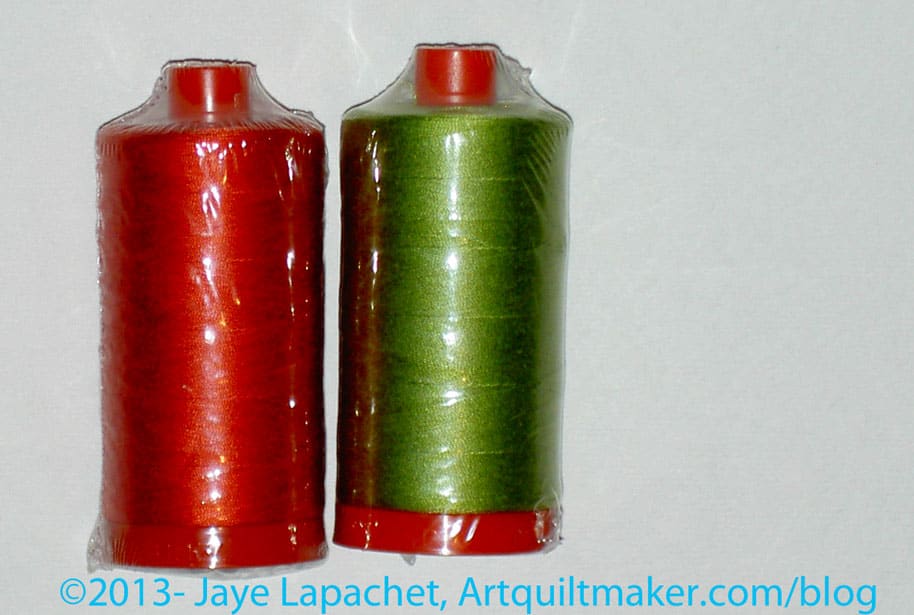
Below is my Quilt Bear June Thread offerings.
June Quilt Bear Thread

Creative Prompt #212: Ribbon

This prompt is a bit of self indulgence. I won 4 ribbons at the County Fair, which is held this past week in our county. I was amazed and awed that I had won the first one I saw, then my eyes must have been bugging out of my head as I visited each of the pieces I had entered and saw ribbons on all. So, ribbon is the word for the week. I can’t wait to see your responses.

American Ribbon Manufacturer

raffia ribbon

Bluetooth Streamer

gift wrap, ribbon & bows

font

grosgrain

spool of ribbon

hair ribbons

First place ribbon

Definition (computing) – “In computing, a ribbon is a set of toolbars placed on several tabs. For example, Microsoft and Autodesk software released since 2007 have popularized a form of modular ribbon as their main interface, where large tabbed toolbars, filled with graphical buttons and other controls, are grouped by functionality. Such ribbons use tabs to expose different sets of controls, eliminating the need for many parallel toolbars. Contextual tabs are tabs that appear only when the user needs them. For instance, in a word processor, an image-related tab may appear when the user selects an image in a document, allowing the user to interact with that image.

The usage of the term ribbon dates from the 1980s and was originally used as a synonym for what is now more commonly known as a (non-tabbed) toolbar. However, in 2007, Microsoft Office 2007 used the term to refer its own implementation of tabbed toolbars bearing heterogeneous controls, known as “The Fluent UI”. Thus, Microsoft popularized the term with a new meaning, although similar tabbed layouts of controls had existed in previous software from other vendors. The considerable redesign of the Office user interface caused a backlash and a rejection from some users of previous versions of Microsoft products, as well as from developers because of concerns about copyright and patents.”

toolbar

Pabst Blue Ribbon beer

There are a variety of campaigns to help raise money for research of various diseases, conditions and cancers using ribbons

Colored cloth placed on a uniform to signify rank or status

Ribbon Seal

Personalized timemap

Ribbon Music

Definition – “a: a flat or tubular narrow closely woven fabric (as of silk or rayon) used for trimmings or knitting. b : a narrow fabric used for tying packages.”

typewriter ribbon

Post the direct URL (link) where your drawing, doodle, artwork is posted (e.g. your blog, Flickr) in the comments area of this post. I would really like to keep all the artwork together and provide a way for others to see your work and/or your blog.

We are also talking about this on Twitter. Use the hashtag #CPP

The Creative Prompt Project, also, has a Flickr group, which you can join to  post your responses. I created this spot so those of you without blogs and websites would have a place to post your responses.

My Next Big Idea

I spent a happy hour last week in my workroom after dinner trying to get a handle on the un-ironed fabric that is causing havoc in my workroom. I feel like I have been ironing fabric forever. I know that is why many of you don’t pre-wash your fabric. Trust me, if it weren’t for the smell of burning chemicals when I press, I’d be right there with you. Still, I found a couple of pillowcase bodies that I had cut who knows when. I cut a couple of pieces of Lizzy House Pearl Bracelets dark green for the cuffs and pinned together a couple of pieces of fabric that will be pillowcases soon.

Pearl Bracelets
Pearl Bracelets

Yes, I am using up some precious Lizzy House Pearl Bracelets. Frankly, I have enough fabric and my fabric is currently overwhelming me, so it is a good use. Also, that green went really well with the taco and burrito fabric I had previously cut for the body of the pillowcase.

The above two paragraphs are a precursor to my post-Star Sampler idea. I don’t know if it will work, but I am going to try to work through some small projects and patterns for bags, etc. Of course, there are quilts on the 26 Projects list that I want/need to finish, so I will work on those. Also, I have bought a number of pieces of fabric for specific small craft items such as pillowcases. I want to get those sewn and out the door. I also have patterns and some fabric for other projects such as bags. I want to make another Petrillo bag. I need more journal covers. I am thinking that I am going to take some time and work on these types of projects. I am going to try, at least.

I may sneak some leaders and enders for charity quilts in, but that is my idea.

Vintage Tuesday #4

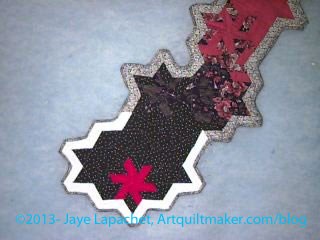
Pink Spider Looking at the Stars

Pink Spider Looking at the Stars is the first quilt I ever finished.* Note the word “finished.” I started my Sampler quilt and got to the quilting point and then stopped. Hand quilting was the order of the day and hand quilting takes a long time.  I was a UFO girl from day one.

Pink Spider Looking at the Stars was the result of a challenge in the small quilt group I belonged to at the time. We were given pieces of all (or most, maybe) of the fabrics and had to make something. These quilts were displayed at an EBHQ show in the early 1990s, or, perhaps 1989. Again, I don’t remember.

Pink Spider Looking at the Stars - detail
Pink Spider Looking at the Stars – detail

I don’t have any good photos of the quilt, but the quilt is around here somewhere, so I could take some if I were motivated to do so.

One thing you might notice is that the design is insane. I made this piece with templates. I didn’t have a rotary kit at the time, though I think I may have bought one shortly thereafter.

You might also notice all of those mitered corners on the binding. The binding was a pain, I have to admit. Most of the time now I keep my quilts square so as to avoid mitered corners. I subscribe to the notion that if you don’t know you can’t do something, then you can do it. Nota bene: hanging out in space without a space suit is the exception.

From an early quilt age, I could do Y-seams, which is why I know you can do them. Although these are 6 rather than 8-pointed stars, there are a lot of Y-seams. I had done an 8-pointed star in my sampler class and figured 6 would be similar or easier.

Seeing this quilt might give you a clue as to why my hackles raise a bit when I see Half Square Triangles classified as “intermediate”. HA!


*Vintage is a little bit of an exaggeration, but I am using it to denote old stuff in this series of posts

Modern Quilt Studio Homework #12

This is the last one. Did you do the homework? Did you do one of the homework assignments? C’mon, people, pick one and do it. You’ll like it 😉

QuiltCon Homework #12

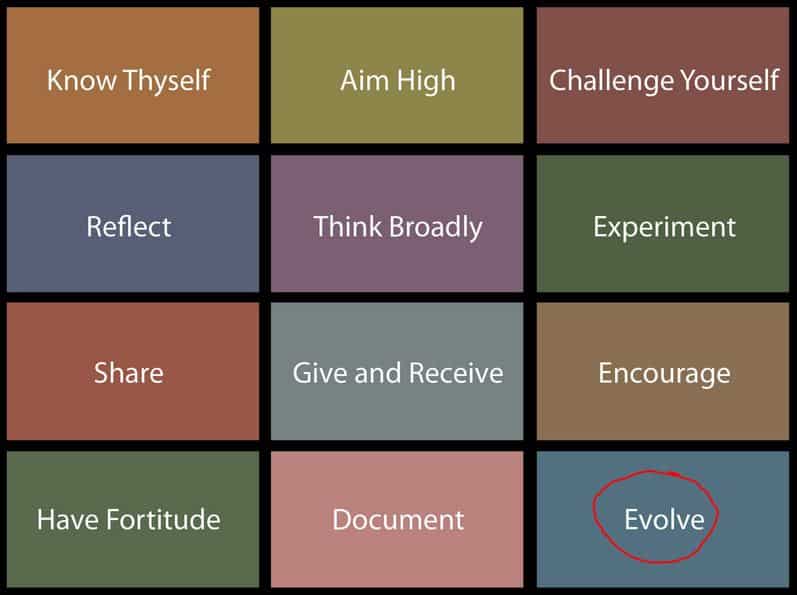
Weeks writes “Evolve. Lastly, look at your work over time. What makes your best quilts the “best”? How have you evolved? How will you continue to evolve?”

I find it useful to do this. sometimes self reflection is valuable (though if I can’t stand what I am seeing, I know it is a time for a change).

One of the things I am doing with my Vintage Tuesday posts is to look at my old work, as well as the work of others (I am not that vintage, after all!). It is interesting to revisit the work I have done in the past.

One thing that really jumped out at me is the change in colors that I use. I have always thought of myself as using brights, but in looking back at my old pieces, such as the Spiderweb, Starry, Starry Night and the Women’s Work pieces, there is a lot of black. It makes me wonder what that was about?

Black is a relatively easy background. It goes with everything. It is easy to grab for a class or group project and two of these projects fell into those categories.

Still, I have always thought of myself as using brights. And, there are brights in these quilts, though fewer in Starry, Starry Night. I find that the brights have to be very bright to not be overshadowed by the black. OR I should have been more careful about the ratio of black to color in these pieces.

Despite the brights, the pieces mentioned above are not Sparkle Pink, which is an explosion of bright happiness. If anything, I have been working with color. The work might be subtle, but I find myself saying, mostly to myself, “what if I combine this color with this?” or “will this transition be smoother, if I move this blue next to this turquoise?”

I also think that trying new techniques and taking new classes is a great way for me to evolve. I took a lot of dyeing classes at one point and despite my best efforts, found that it wasn’t for me. I also couldn’t really get on board with the whole trumpeting of “I dyed this fabric” messages that went along with the dyeing. It is fabric, I use it in a quilt (or bag or apron or….). Mostly, it was just too messy and there was no convenient wet studio to rent. Finally, despite my painstaking detailed recipes, I ended up with more than my share of chartreuse hand dyed fabric.

My recent formal classes were hand applique‘ (also not my thing, but good to check periodically) and inset circles. I love that technique.

Craftsy really makes this easy as you don’t have to pack up the machine and travel, and you can do the work at your own pace. Oh how things have changed!

Mostly, though, I sit at home and try to make really hard blocks- or sort of hard blocks. or I try new patterns for bags that have the kind of construction that makes your brain do flips, but ends up really cool.

I want to learn new stuff; I want make quilts that are hard sometimes, quilts that have souls. I don’t want to stay where I am in my quiltmaking process. I want to move on.

See my last installment of this homework, which was posted last week.

Images courtesy of the Modern Quilt Studio.

Section 7

PICT3489sm

I know I am drawing out the ending of this a bit, but the truth is that I haven’t gotten the back done and I need to get the back done before I can show you the entire project.

I’ll get there. I am just not there yet.

No section came out perfectly. I am not talking about precise sewing, though that is true as well, but also in color placement. I tried hard to disperse the fabrics sort of evenly and among the different sections in hopes that this strategy would act as a way of moving your eye around the piece.

Section 7
Section 7

This, Section 7, was a bear of a section. I really had to sew carefully and fix little bits and bobs here and there. The fact of the matter is that the Ribbon Star isn’t on the same grid as the Sawtooth Star and that came back to haunt me a little bit when when putting this section together.

Still, I got the monster together and am pleased.

Mosaic No.19 Redux

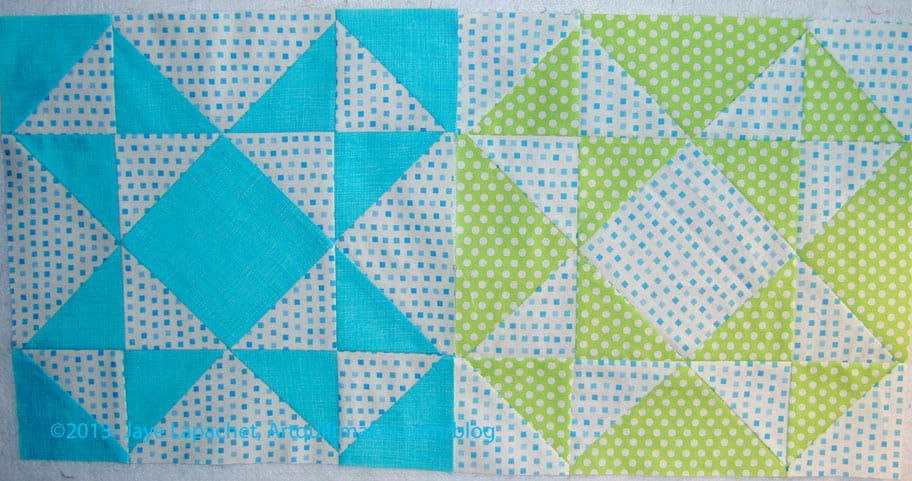
Remember that I went on a bit about the Mosaic Number 19 and how it wasn’t quite up to par? Still, it was the first block I made for this project and I had some fondness for it.

Well, I remade it.

Mosaic No.19
Mosaic No.19

So much for fondness. It just didn’t fit and I decided that while I was remaking blocks that weren’t working for other reasons, I might as well remake this one.

One thing I wanted to do was make sure that the background was the background. In the green version, there are large triangles of green in the middle center where background should be. Essentially the Sawtooth Star shape is reversed in terms of fabric. I thought the green where the background should be would ruin the flow of the background of the quilt. Yes, this new configuration meant that the corners would be non-background fabric, but other blocks have that quality as well, so it will be ok.

I have to say that I do like the frame around the center block int he green version. It really focuses attention on that center tilted/on point square. I suppose I could have found something to fussy cut and kept that look in the new version, but I didn’t think of it.

That blue that I used is a really nice blue. I think it shows up really well in the photo.

See more about this quilt using the Star Sampler tag. I wrote a whole post about the genesis of this project, which you might want to look at.

Creative Prompt #211: Map

Google Maps

topographical map

Rand McNally

Mapquest

campus map

Yahoo Maps

Home World Map Shower Curtain

subway map

GPS Navigator

satellite map

Subdivision Map Act

time zone map

flickr.com/map

Harry Potter’s Maurauder’s Map

map tacks

bird migration maps

Wilkinson Microwave Anisotropy Probe (WMAP)

map out your argument

David Rumsey Historical Map Collection | The Collection

Map of Life

Atlas

Internet map

The MAP Fund

Definition: “A map is a visual representation of an area – a symbolic depiction highlighting relationships between elements of that space such as objects, regions, and themes.

Many maps are static two-dimensional, geometrically accurate (or approximately accurate) representations of three-dimensional space, while others are dynamic or interactive, even three-dimensional. Although most commonly used to depict geography, maps may represent any space, real or imagined, without regard to context or scale; e.g. brain mapping, DNA mapping and extraterrestrial mapping.”

Personal Geographies: explorations in mixed-media map making by Jill Berry (book)

how to find your way

Automobile club maps

map maker

cartographer

Map (Java platform)

Map Library


Post the direct URL (link) where your drawing, doodle, artwork is posted (e.g. your blog, Flickr) in the comments area of this post. I would really like to keep all the artwork together and provide a way for others to see your work and/or your blog.

We are also talking about this on Twitter. Use the hashtag #CPP

The Creative Prompt Project, also, has a Flickr group, which you can join to  post your responses. I created this spot so those of you without blogs and websites would have a place to post your responses.

Ribbon Star Redux

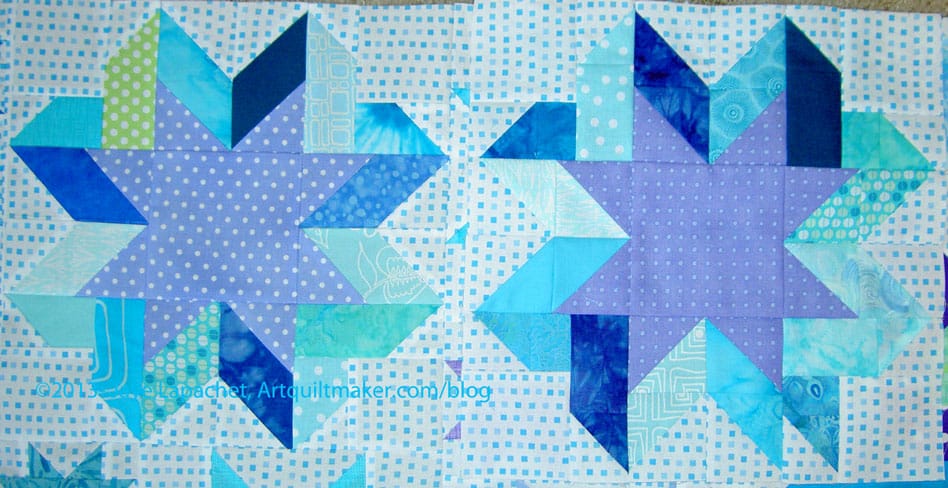
Ribbon Star Old (L), New (R)

You might remember the drama of the first Ribbon Star. You also might remember that I made the star over using half square triangles rather than parallelograms.

I have to admit that I never really liked the new version, which you can see on the right of the above picture. I used it, because I had no choice, but I didn’t really like that particular lavender fabric.

Finally, I decided that I would remake the first block. The first block had a lot of problems, not the least of which was that the parts were a variety of different sizes. I unsewed all the squares, rearranged some of the colors and resewed them so that the block, basically, fit together. Many of the seam allowances are so far short of 1/4″ that I really worry about their integrity.

Still I am really happy that I get to use the original version of the block.

FOTY 2013 Early June

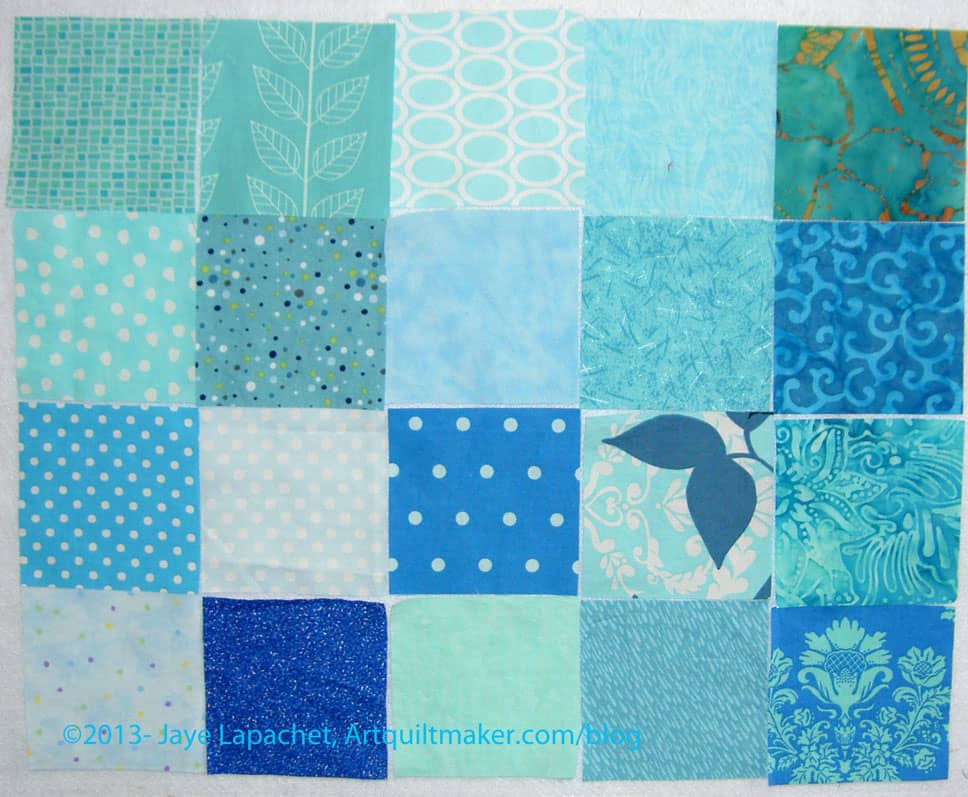
FOTY Patches Early June 2013

There is something I like about this 2013 Fabric of the Year project. I like having a piece of each fabric. Once the quilts are finished, I love walking by them and thinking “that fabric would be perfect for this project” or “OH! I remember that fabric. It was such great fabric.” It is like looking at a scrapbook.

I am afraid I am getting tired of it, though. Perhaps I am just tired. I know I am tired, but having the feeling seep over into fabric is scary.

These are blues from the end of the Star Sampler project. Mostly, I made the 4″ Sawtooth Stars from these fabrics. Yes, I did arrange them purposefully to be only a blue batch. I have a whole additional group that I’ll photograph later that is all different colors.

Modern Quilt Studio Homework #11

QuiltCon Homework #11

Weeks writes “Document your ideas. Use a notebook, a sketchbook or a box to collect even the most simple sketches or ideas for future quilts. Photograph everything you make and keep those images together. Print them and put them in an album so you can see them all at once.”

She is correct. Stop surfing after you finish reading this post and go document. No excuses, just do it. Trust me you will be happy later.

I rip pages out of catalogs that might be inspiring. I keep colors and brochures. All of these go into a [overstuffed, very full] box. Periodically, I look through this box and toss things that don’t work, but once something gets through or groups of bits look cohesive I make a file. Looking through this box is a good source of inspiration.

I make a folder for each quilt I make. I also make a folder for each project about which I am thinking. I am selective about the projects that reach the point where I am actually collecting stuff to include or use in a project, but once I have even a few pieces of paper, I make a file.

I make a file, because I like everything to be together. I am a librarian after all. 😉 I like to open the file, see my drawings, measurements, color palettes, notes to self, etc. all in one place. When bits and bobs are all over, I get crazy.

I also use my sketchbook and journal to jot down quick ideas. If any of these come to something then I photocopy the page from my journal to put in my file.

I also label all of my quilts. My quilt labels are getting more and more elaborate in terms of the information I include. A couple of weeks ago, I dropped quilts off at the County Fair. I made a mistake in categorizing the quilts for the Fair, so they had to be re-measured. I am now including the size of the quilt on the label, because it is easier to look up than measuring the quilt again. I had a quilt stolen, so I am somewhat manic about labeling my quilts. I do have one quilt that is unlabeled. If I can figure out when I finished it, I will make a label.

I want to create a scrapbook that includes each of my quilts. I have a file for this project, but have never gotten to it beyond creating a gallery on this blog.

Obviously, you have to do the type of documenting that is right for you and fits into your life and schedule. What works for one won’t work for everyone. Just do something.

See my last installment of this homework, which was posted last week.

Images courtesy of the Modern Quilt Studio.

A Week Away and Some Quilting pt.3

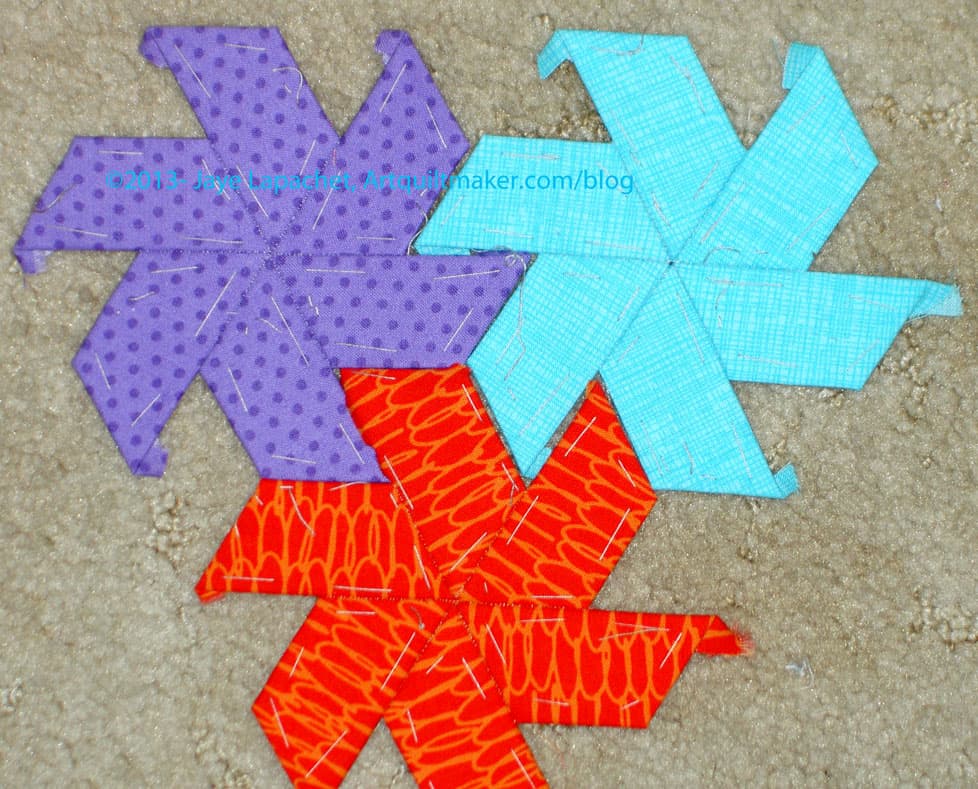
English Paper Pieced Stars

I guess I am on kind of a star kick. I am showing you MORE stars, after all.

Aren’t the colors pretty? I think they go together well.

This is the miniscule amount of English Paper Piecing I was able to do while we were out with the Natives. I was only able to piece in the car and it was just a 4 hour drive each way.

I thought I would have scads of time sitting by the pool to work on this project, but nope. I was too busy smiling, shaking hands with DH’s constituents to bring this project out. I think I will have a goal of getting it done by the time he ends his term as Grand President in 2017. It will be my political project. Perhaps I’ll have enough for a table runner?

Book Review: Simply Retro

Simply Retro with Camille Roskelley: Fresh Quilts from Classic BlocksSimply Retro with Camille Roskelley: Fresh Quilts from Classic Blocks by Camille Roskelley

I pre-ordered this book because I really enjoy Ms. Roskelley’s blog and color palette. I also think she does a good job of subtle marketing. She includes her life along with her patterns and fabric. She is part of the community. I like to encourage and support that type of attitude.

Right away, I was inspired. I love her dedication. Dedications are often really sappy and short, but the in Simply Retro is a bit longer and seems so heartfelt.

The introduction is relatively short, but brings up her pioneer ancestors’ quiltmaking. When the reader turns the page, part of the introduction is illustrated with quilts made from, for the most part, Camille’s wonderful fabrics. The introduction mentions simplifying blocks. She writes “…Instead of Y-seams and foundation piecing, I’ll show you how to use simple half-square triangles (HSTs), Flying Geese units, and chain piecing…” there is absolutely nothing wrong with simplifying, but don’t be scared off by her words. Y-seams take a bit longer, but are not scary. You can see a tutorial I wrote for my sampler class. If you sew slowly, you can do Y-seams with no problem. Don’t let that one line scare you away from the addition of Y-seams and foundation piecing to your quiltmaking toolkit.

Ms. Roskelley says in the introduction, which I think is true is “The piecing, combined with clever placement of light and dark fabrics, creates interesting secondary designs in many of these quilts.” I think that line describes what makes blocks interesting and filled with infinite possibilities. Additionally, the author mentions enlarging the original inspiration, so that it turns into a piece like the very large Swoon blocks. I am really glad that she pointed out that this is another way to add interest to traditional blocks.

This book is FQ, charm pack, and pre-cut (she calls them cut-goods) friendly. Camille says she uses yardage as well. In the second section, Ms. Roskelley talks specifically about pre-cuts. I agree and disagree. Make your quilt your own. Use a charm pack, Jelly Roll or turnover, but remove some of the fabrics and replace them with different fabrics, from other lines, from other years, of your own choice. Throw some of your own personality into the quilt. Don’t get hung up on having the exact fabric Ms. Roskelley used and making an exact replica of her quilts. She does not mention this at all, but I think it can be an issue when using pre-cuts.

There are 11 projects in this book, but a few have multiple sizes and/or variations. You can see some of the quilts in her blog post about Quilt Market. Swell, the first project (pg.17) is a great scrap project. Retro (pg.23) reminds me of my Stepping Stones quilt. I love the squares and triangles set on the diagonal look. The bonus of this pattern is that it is simply made from a bunch of 4 patches and half square triangles. Easy as well as leaders & enders friendly! Dapper Canon‘s (pg.45) attraction is the “cut off corners” of the blocks which make them look octagonal or slightly round. You can do this with many, many blocks by using the background for part of the blocks. Dwell (pg.59) is a nice twist on the house or schoolhouse quilts. I love the idea of putting another block inside the basic house structure. There is, as the main character in [book:Anne of Green Gables|8127] would say, a lot of scope for imagination in this piece. Sweet Life (pg.75) uses large prints very well and is not boring, a some quilts with this goal can be. The little 9 patches used as cornerstones are a nice touch.

I have to say I like the names she has chosen for her quilts. I don’t know if I would use them, but I think they work well for a book. The names also fit the quilts.

One FABULOUS thing about this book? She includes the finished size of the block in the pattern! Hooray! While you may be thinking “who cares?” It can be a really helpful piece of information if you want to resize the quilt, mix in other blocks or use one block to make a pillow cover. Thanks, Camille!

I would have liked to see alternate colorways of the patterns in this book. I realize that deadlines are tight, especially for working moms, but it would have been nice to see some of the patterns in batiks or solids as well as Camille’s fabulous palette.

The book has the requisite Quiltmaking Basics section (pg. 96-). As I have said before, I wish someone would just write another, more up to date, big book of quiltmaking basics and allow everyone else to refer to it. I suppose that would mean that people would have to buy two books. Fortunately, there are some gems in this section, which makes it more than the same-old, same-old. She pins (pg.98-hooray!) and talks about she does it. Camille explains chain piecing (pg.100), including a reminder to snip the threads in between. Ms. Roskelley has good instructions on adding borders.

No index, but the book is definitely worth a look anyway.

View all my reviews

Star Sampler Sections

AKA

A Hot Mess as Pam or Tanesha would say. We don’t use that phrase here, but it seems appropriate.

Section 3
Section 3

It is certainly true that projects look worse before they look better. This Star Sampler and my workroom are both in the Worse stage right now.

All the parts, which I have sewn together, look great, but the parts are all over the place. Discards are in a pile. Fabric is in another pile. I don’t know how I work under these circumstances. Really.

Making all of those blocks in advance, though, makes it really easy to put together. I have all the parts, so I just need to grab them and sew. Nota bene: If you make this project, I would recommend making all the blocks first. I know I don’t always do that, but in this case, it works.

As I thought, I love the layout. I love it that it is difficult to see how the blocks were set together. I love it that there are 3 different sized blocks used in the quilt. I guess I just like my secrets. 😉

Section 1
Section 1

It is fun deciding which blocks will go with which other blocks. We are getting some of our summer weather so the photos have the foggy look to them. I had all the lights on and used the flash, but still…the foggy look.

I think the blocks with the strong (non-background) corners look ok. The one in Section 1 (lower right) doesn’t stand out like a sore thumb, which is a relief.

I thought the Basic Stars might look like big un-pieced blobs in the middle of the sections, but I think I chose fabrics wisely and placement wisely. I think the Basic Stars may provide a slight resting spot for the viewer’s eyes amidst all the pieced blocks.

Section 2
Section 2

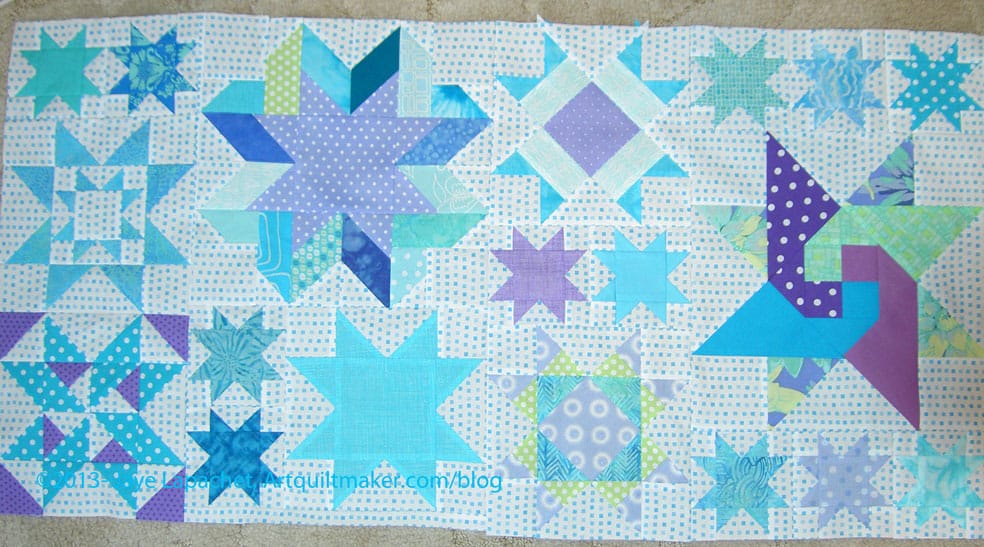
The 12″ blocks are working well, too. 12″ blocks are so….big. I thought they would dominate the quilt, but the 8″ and 4″ stars soften them up a bit. I do like that Rising Star in the upper left hand corner. That might be my favorite block.

Do click on the photos to see them larger. They look better larger.

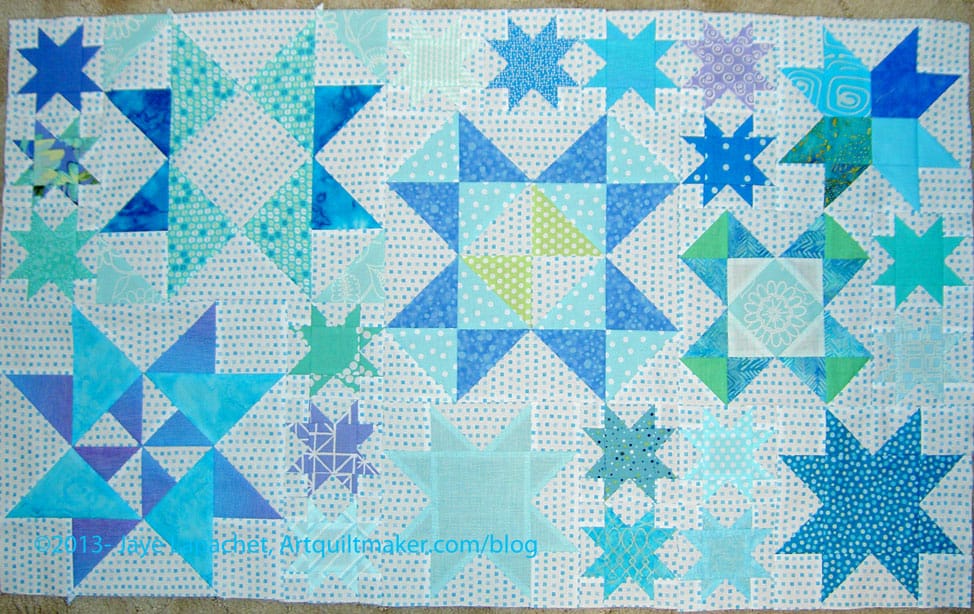
Star Sampler - 1/2 of the top
Star Sampler – 1/2 of the top

Believe it or not I had to tidy the whole house including my workroom, which meant tidying that mess I talked about earlier in the post. All of the pieces and parts had to get off the floor.

I put everything up on the design wall. It promptly fell off. All that piecing is heavy and even my super sticky design wall fabric was no match for this baby. I had to resort to pins.

The above photo is half of the piece. HALF! Half does not completely fit width-wise. The blocks on the bottom are still blocks. They had to go somewhere and I did not want them sucked into the vacuum!

I am thinking it looks a bit chaotic. Please tell me I did not go through all this work to end up with chaos.

Remember: if you want to know more about this quilt, the pattern and the project, check out the Star Sampler Background post.

Creative Prompt #210: Treasure

treasure chest

you are a treasure

treasure hunt

Treasure Island Music Festival (San Francisco)

sunken treasure

Book: “A Treasure’s Trove: A Fairy Tale About Real Treasure For Parents And Children Of All Ages is an illustrated children’s book written by Michael Stadther and published in 2004 by Treasure Trove Inc, which he incorporated to do so.[1][2] The “real treasure” was found by deciphering clues in the book that led to fourteen tokens that could be turned in for unique jewels, each representing an insect or character from the book, or a cash prize representing one third of the jewel’s value.[3] Initially, it was reported that there were twelve jewels,[3] however, it subsequently emerged that there were fourteen prizes. In 2005 it was reported that film rights for A Treasure’s Trove had been acquired by Cruise-Wagner Productions,[4] however, apart from a reported trailer being in development in the New York Times,[5] there has been no further news.”

pirate’s treasure

Treasure Island (book)

Definition: [general] “treasure (from Greek ???????? – th?sauros, meaning “treasure store”,[2] romanized as thesaurus) is a concentration of riches, often one which is considered lost or forgotten until being rediscovered. Some jurisdictions legally define what constitutes treasure, such as in the British Treasure Act 1996.

The phrase “blood and treasure” or “lives and treasure” has been used to refer to the human and monetary costs associated with massive endeavours such as war that expend both.”

Japanese video game developer

one person’s trash is another person’s treasure

women’s yoga treasure thong sandal

Timeless Treasures fabric

buried treasure

National Treasure

Treasures of Led Zeppelin

treasure finder

lost treasure

Treasure Island Flea Market (San Francisco)

Google Maps Treasure Mode

treasure map

hidden treasure

Treasure by Bruno Mars

Dritz Printed Treasures Inkjet printable fabric

Tiki Treasure game (kids)

Royal treasure

Treasury

Treasure Detectives (TV)

treasure yarn

Osmosis (also known as Treasure Trove) is a solitaire game played with a deck of 52 playing cards where the object, like many solitaire games, is to put the cards into foundations, although not in numerical order.

Definition: [legal] “Treasure trove is a term that may be broadly defined as an amount of money or coin, gold, silver, plate, or bullion found hidden underground or in places such as cellars or attics, where the treasure seems old enough for it to be presumed that the true owner is dead and the heirs undiscoverable. However, both the legal definition of what constitutes treasure trove and its treatment under law vary considerably from country to country, and from era to era.

The term is also often used metaphorically. Collections of articles published as a book are often titled Treasure Trove, as in A Treasure Trove of Science. This was especially fashionable for titles of children’s books in the early- and mid-20th century.”

“You are His special possession… His precious Treasure” Malachi 3:16-17

Post the direct URL (link) where your drawing, doodle, artwork is posted (e.g. your blog, Flickr) in the comments area of this post. I would really like to keep all the artwork together and provide a way for others to see your work and/or your blog.

We are also talking about this on Twitter. Use the hashtag #CPP

The Creative Prompt Project, also, has a Flickr group, which you can join to  post your responses. I created this spot so those of you without blogs and websites would have a place to post your responses.