I was scrolling IG the other evening and found yet another Color of the Year announced.
Pantone Color of the Year 2025: Mocha Mousse
Kona Color of the Year 2025
We have Mocha Mousse from Pantone and Nocturne from Kona, both of which I talked about the other week. Could these two colors be more different?
KitchenAid Color of the Year 2025 – Butter
Now, we have KitchenAid’s Color of the Year, Butter, joining the party.
If you are thinking, enough is enough, wait there are more! Better Homes and Gardens has a whole article about Colors of the Year as does House Beautiful. A lot of these companies are paint companies. Sherwin-Williams was not satisfied with one color, but chose nine, yes NINE, in their “first ever color capsules of the year.” Most of the colors are brown and purple tones.
N.B. Kona and KitchenAid were not included in the article, which was written in December.
Separately, Diamond Vogel, a paint company I have never heard of, announced their color of the year: Rediscover 0408. It could be just 0408. It is a green color.
I think a lot of these colors are depressing and dark. Perhaps it reflects the times?
Young House Love provides a recap of all the paint colors of the year for 2025. This is a nice post, even without Kona and KitchenAid, as it provides the new CotY next to the previous several years for each company. You could use these for quilt color palettes assuming you like darker colors.
What is your color of the year? I am struggling to choose between turquoise and pink.
These are the notes for one of the modules in my quilt and design classes. They are posted on the blog so my students have easy access. You will get something out of them, but you would get more by taking one of my classes. Check the link for more information.
Size and Scale are an element of design
Size and Scale are related terms
Definitions:
-> N.B. Definitions overlap. I have tried to organize them, so keep an open mind.
Size
“Size and scale are words used to describe the physical size that a shape or form has in comparison other shapes or lines within the design field.” (A Fiber Artist’s Guide, pg.98)
“Proportion relates to how shapes interact with each other within a design.” (Adventures in Design, pg. 74)
“Proportion refers to relative size, size measure against other elements or against some mental norm or standard.” (Pentak & Lauer, pg.60)
the comparative relation between things or magnitudes; a proper or significant relation between things or parts; relative size or extent (Random House College Dictionary).
Proportion (Random House College Dictionary): the comparative relation between things or magnitudes; a proper or significant relation between things or parts; relative size or extent
Example: “Proportion refers to relative size, size measure against other elements or against some mental norm or standard.” (Pentak & Lauer, pg.60)
Scale
“‘Scale and ‘proportion’ are related terms that both basically refer to size. Scale is essentially another word for size.” (Pentak & Lauer, pg.60)
“Big is meaningless unless we have some standard of reference. A big dog means nothing if we do not know the size of most dogs. This is what separates the two terms,” size and scale. (Pentak & Lauer, pg.60)
“…the scale of the pattern, that is, its size in relationship to the size of the pieces that are cut, will determine the impact of the pattern on the overall design of the quilt.” (Quilter’s Book of Design, 2d, pg. 80)”‘Large scale’ is a way of saying big and ‘small scale’ means small.” (Pentak & Lauer, pg.60)
a succession or progression of steps or degrees; a graduated series; an arrangement of things in order of importance (Random House College Dictionary).
Scale (Random House College Dictionary): a succession or progression of steps or degrees; a graduated series; an arrangement of things in order of importance
Ratio
the relation between two similar magnitudes in respect to the number of times the first contains the second (Random House College Dictionary).
Ratio (Random House College Dictionary): the relation between two similar magnitudes in respect to the number of times the first contains the second
Example: “…the scale of the pattern, that is, its size in relationship to the size of the pieces that are cut, will determine the impact of the pattern on the overall design of the quilt.” (Quilter’s Book of Design, 2d, pg. 80)
Using these Tools:
Using Size:
“The principle of scale in a work of art is all about the volume of the message you wish to send to your viewer.” (Art+Quilt, pg.64)
“The scale of a work of art in relation to the viewer, its human scale, is often” one of the first considerations an artist makes.” (Art+Quilt, pg.64)
where will it be displayed? the atrium of a large office building or the foyer of a private home? (Art+Quilt, pg.64)
Elements in a design that are larger seem close. (Pentak & Lauer, pg.176)
Elements of a design that are smaller seem farther away. (Pentak & Lauer, pg.176)
Elements of a design that are larger seem more important, conversely elements of a design that are smaller seem less important. (Pentak & Lauer, pg.176)
I don’t want you to get the idea that small is unimportant. A small amount of yellow in a purple quilt can make all the difference to the overall design.
“Scale and proportion are closely tied to emphasis and focal point. Large scale, especially large scale in proportion to other elements makes for an obvious visual emphasis.” (Pentak & Lauer, pg.60)
“Unusual or unexpected scale is arresting and attention getting. Sheer size does impress us.” (Pentak & Lauer, pg.61) Magnifying something that is usually quite small can capture your attention through sheer surprise. A butterfly wing that fills the entire frame gains significance as you see extraordinary details seldom noticed in everyday life.” (Art+Quilt, pg.65)
Georgia O’Keefe is an example of an artist that uses this technique. (Art+Quilt, pg.65)
“An unnatural contrast of scale in your quilts can also be used to achieve interesting effects. Surrealists such as Salvador Dali used wildly confused internal proportions to intentionally create uneasiness in the viewer. One element that is purposefully out of scale with other elements within the quilt will attract the viewer’s attention and become a focal point.” (Art+Quilt, pg.65)
if you want to exaggerate a shape, “have some visual continuity between the shapes.”(Adventures in Design, pg. 75)
Think about the relative sizes of pieces in a quilt. It is important to vary sizes to add interest. (Fearless Design, pg. 32)
think about piecing the same blocks in different sizes in order to add interest to your quilt.
Using Ratio
Using ratios really has to do with proportion. The Fibonacci sequence has to do with ratios of objects to one another on the design field. “One powerful way to help your design evolve to its highest potential is to select the width and height dimensions that promote the natural movement of your design….select your dimensions based on a ratio that best suits your design. Observing your design’s directional flow and focus gives you a starting point to sort through your options.” (Adventures in Design, pg. 77)
“1:1 ratio is a perfect ratio for designs that radiate symmetrically from a center point….if your design is 24″ high in this ratio, it will also be 24″ wide.” (Adventures in Design, pg. 77)
“A 1:2 ratio provides added width to a horizontal design or it extends height to a vertical design. In this ratio, the longer dimension is twice as long as the shorter dimension. If you want one dimension to be 24″ wide, the other dimension would be double that – 48″ high.” An example of this ratio is Poulnabrone Dolmen (Adventures in Design, pg. 77)
The 1:3 ratio provides more lengthwise extension than 1:2 ratio. “In this ratio, one dimension is three times greater than the other dimension. This gives more room for the design to expand in one direction. Thus if you want one dimension of your design to be 24″, the other dimension would be 72″.” An example is a quilt called Acid Rain by Gloria Loughman. This ratio has allowed a “dynamic sky to evolve in her quilt.” (Adventures in Design, pg. 77)
“A 1:4 ratio greatly exaggerates the length of a design. One dimension is four times greater than the other dimension. If you want your 24″ high design to have an extreme horizontal extension, the 1:4 ratio would give you a width of 96″.” An example is Rhododendrons over Water by Amanda Richardson of Cornwall England (Adventures in Design, pg. 77)
” The 3:4 ratio is best used when a design has only slightly more movement in one direction than the other. In a 3:4 ratio, a design that is 24″ in one direction would be 32″ high in the other direction”…. Joen Wolfrom says that “the 3:4 ratio should be saved for such occasions when your design does not need much expansion in one direction or the other.” Example is Ticondrroga Star by Larisa Key, Willimatic, CT. (Adventures in Design, pg. 77) I use this ratio quite a bit, especially for block quilts, because I think it adds interest to the layout.
“A 2:3 ratio allows for more extended directional movement than a 3:4 ratio does. It doesn’t exaggerate the length as much as the 1:2, 1:3, and 1:4 ratios do. ” (Adventures in Design, pg. 77) If you have 24″ high quilt, your quilt’s width would be 36″. (Adventures in Design, pg. 78) Example is Fishermen’s Widows by Anna Faustino
The Golden Mean or 8:13 ratio is considered to be “the most beautiful, pleasing dimension for art and architecture…It provides beautifully balanced dimensions”, because of the subtle dimensional change. “The Golden Mean is a component of the Fibonacci sequence.” (Adventures in Design, pg. 81) If you have 24″ high quilt, your quilt’s width using the 8:13 ratio would be 39″. (Adventures in Design, pg. 78) You can find a calculator for Golden Mean ratios at: http://goldenratiocalculator.com/ and there is a chart in Adventures in Design pg.81. An example of a quilt using the Golden Mean Ratio is Pamela Mostek’s Five Apples.
Notes:
A designer can use relative sizes to give a feeling of space or depth. Artists have taken this basic idea and exaggerated it by increasing the size differences. It is very common to many periods and styles of art to use different scales. (Pentak & Lauer, pg.176)
“In past centuries visual scale was often related to thematic importance. The size of the figures was based on their symbolic importance in the subject being presented… This is called hieratic scaling.” (Pentak & Lauer, pg.60)
“Private spaces are perfect for small, intricately stitched works and allow for a more intimate experience with the art.” (Art+Quilt, pg.64)
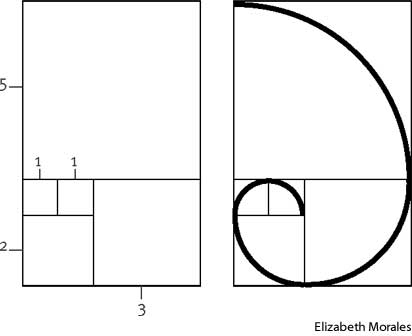
“The most renowned proportional number sequence is the Fibonacci sequence“…”The Fibonacci sequence begins as 0, 1, 1, 2, 3, 5, 8, 13, 21, 34, 55, 89, 144, and so on. Each successive number in this sequence is the sum of the previous two numbers. You can use small or large sections of this sequence to determine the dimensions of elements within a design.”… “The Fibonacci sequence highlights the strong relationship between mathematics, nature and art. (Adventures in Design, pg. 76)
The images denoting the Fibonacci sequence are fairly common. I imagine you will say “oh, of course! I have seen this!” when you see the spiral. Nautilus shells are also used as examples of the Fibonacci sequence. As we mentioned in the podcast, nature uses the Fibonacci sequence in its design field frequently. By doing a search on the term and looking at images, you will be amazed at the trees, flowers and other natural phenomena that include the Fibonacci sequence.
Resources:
Art + Quilt: Design Principles and Creativity Exercises by Lyric Kinard**.
Design Basics**, 5th, c.1999, David A. Lauer, Stephen Pentak
Painting by Numbers: the Fibonacci sequence in art by Curtis Belmonte and Conor Pappas
**N. B. : Obviously, you should shop at local quilt shops and small businesses. However, if you are too busy or can’t find what you need there, I use Amazon affiliate links and may be paid for your purchase of an item when you click on an item’s link in my post. There is no additional cost to you for clicking or purchasing items I recommend. I appreciate your clicks and purchases as it helps support this blog.
In this case, some of the books I use are out of print, so visit your local independent used book store for copies.
I decided to revisit other gifts I have made. This time it is Friend Julie’s turn.
Julie’s Birthday Gifts
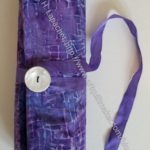
Julie’s Journal Cover – front
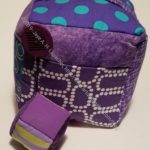
Julie’s Purple Pincushion Gift
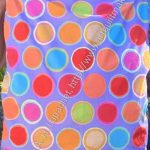
Kaffe Pillowcase Gift for Julie
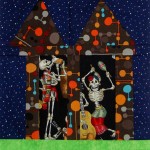
Halloween House #3
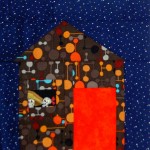
Halloween House #2
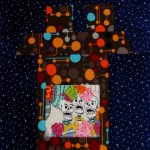
Halloween House #1
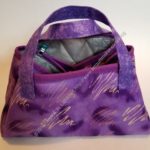
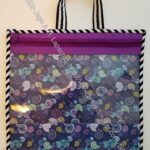
Walker Bag
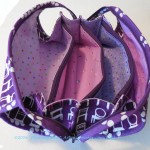
Purple Chair Sew Together Bag for Julie – open
Scissor Cozy for Julie
Julie’s Iron Caddy
Julie’s Pencil Roll
Mega- Pinnie for Julie
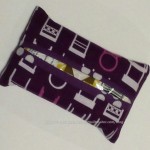
Tissue Holder
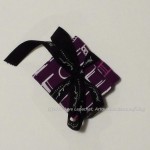
Purple Chair Needlecase
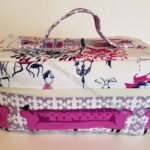
Purple Chair Bag – closed
Julie’s Mini Maker Case
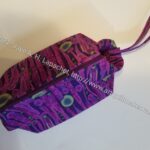
Large Retreat pouch -aerial view
Julie’s Project Bag
Julie’s Take a Stand Bag
Julie’s UCAB
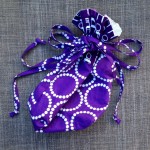
Lined Drawstring Bag for Julie
Lavender Dot Bluestem – top
I am pleased to see these bags and accessories show up when Julie and I meet to sew. I am still so glad that she is using them. She liked the Bluestem pouch I gave her for Christmas.
I am not sure what patterns are on my to make list for this year’s gifts. I’ll have to see!
I finally dug in last weekend and finished Ends n.21. Honestly, I needed the design wall space! LOL! Still, it is finished and ready to go to the meeting on Saturday.
This design is super easy, so there wasn’t really a lot to do. I just had to sit down and sew. Saturday was kind of a finishing up day as I didn’t have tons of time to sew, so I finished up projects that were already started and didn’t require a lot of thinking. I think this quilt looks fun. It is about 39 inches x 40 inches. Not huge, but a nice playmat size.
Ends n.21 back finished
I also grabbed a piece of fabric out of my backing fabric supply and made a quick back.
As a librarian, I am completely against censorship. Even as a special librarian and knowledge manager rather than a public librarian, I think people should make their own decisions about what they read. Of course, parents have a responsibility to guide their own children’s reading habits. My mom told me not to read Wifey** by Judy Blume when it came out. Since I loved Judy Blume’s novels, her frank way of talking about topics nobody discussed with me and I had a library card, I read it anyway. Later, my mom told me she was concerned I wouldn’t understand the sex parts. I didn’t, but I also just skipped over them. I do that now when the sex scenes are too graphic. Talking to me about the sex parts didn’t seem to be an option.
As an artist, I also am against censorship. Even though I make a lot of pillowcases and non-controversial items, I do consider myself to be an artist. I have made my fair share of art quilts. In that group is a subgroup of political quilts. When a quilt is pulled from a show, as my quilt Blood & Oil was, it is painful and confusing.
I also don’t really like people telling me, unsolicited, what to do.
I censor myself quite well. I do not watch horror films or anything remotely scary. When the YM is visiting and wants to watch a scary movie with DH, I go sew something with the door shut, or they watch it when I am gone. I don’t need any help with censorship, no matter how good your intentions.
There are three points here.
First, mind your own business. If you can’t mind your own business then compromise. Fighting doesn’t accomplish anything and calmly stating your point of view AND listening to your opponent’s point of view might create some change.
Second, if you don’t want your kid to read something, or look at some art, explain why. Don’t just say ‘it’s filth’. That may be true, but it is a non-answer. Let your emotions simmer down and explain your thoughts in a reasonable way. When the YM was in high school, the Archbishop of San Francisco wanted teachers to sign a morality code. This morality code was a huge problem for my son. We live in an area where all different kinds of lifestyles are tolerated. We talked about each of the points on the way to school each morning. Did I want to talk to my son about sex? No. Not a comfortable topic to talk about with a boy. As a parent, I felt it was my duty to tell him what I thought, explain to him what I thought the Archbishop was trying to achieve, and give him a chance to voice his views.
You’ll get better results from your kids, and compliance, if you explain your views clearly and are not hysterical while you are explaining. Is this easy? No. Communication is difficult. It takes practice and provokes a feeling of fear. Parenting isn’t easy, so don’t have a kid if you don’t want to do the hard things. Kids are not accessories.
Third, keep your thoughts and feelings to yourself when they might adversely impact others. I am not saying don’t discuss controversial issues, I am saying, if you don’t want to read a book, don’t read it, but let others decide for themselves. You are perfectly entitled to think the way you do. However, you are not entitled to tell others what to do. Let other people raise their children and manage their viewing or reading habits in a way that works for them.
This is not the first time AQS has acted in this manner. I remember them refusing to hang Amigos Muertos by Jonathan Shannon. Amigos Muertos was not good enough to be hung the year after Jonathan won Best of Show for another quilt at AQS the year before.
I thought then that it wasn’t possible that in the modern US, an organization would think that AIDs and death too awful of a subject for grownups to contemplate. An article in the Seattle Times at the time describes the various points of view.” In Jonathan’s case, Meredith Schroeder, AQS president, to one of Shannon’s backers dismissed charges of censorship [in a letter] and stressed that his was one of the 587 quilts that weren’t good enough for the 400 piece-quilt show. “Jonathan’s credibility is in question, he has misrepresented the truth to his friends to get them to act on his behalf to pressure AQS to reconsider his quilt and accept it into the show,” Schroeder wrote to the East Bay Heritage Quilters.” I remember the quilt hanging at the EBHQ show that year and signing the petition to get AQS to reconsider.
Hollis Chatelain’s quilt Burkinabe Mother was censored from the AQS magazine in 2005. It shows a woman feeding her child.
More recently, in 2016, Kathy Nida’s quilts were censored. The quilt that was excluded was “ ‘I Was Not Wearing a Life Jacket,’ a piece Nida made to help process a recurring nightmare in which she was losing things in a stream and nobody was coming to her aid.” Kathy wrote about it on her blog. One of part of her post says “So some person objected to my quilt and couldn’t just walk by, moving on to the next quilt (which is what I do when another Sunbonnet Sue shows its ugly head…I don’t call Fox News…I don’t pitch a fit and refuse to ever come back to another show.)…they had to demand it get pulled from the show.”
That is my point exactly. If you don’t like a piece of art, move along and look at something else.
Abby Glassenberg describes two AQS censorship incidents in her Craft Alliance article from 2016. This article also discusses how differently the Mancusos handled a complaint about content, including what they did when Fox News showed up to do a story about one of the quilts. I am sure she will write about this recent incident soon.
There is a lot of noise around this issue.
Kathy Nida is still blogging: YAY! and she writes about the most recent bout of censorship. See the quilts (I don’t have permission to post them) and hear her point of view on a recent post.
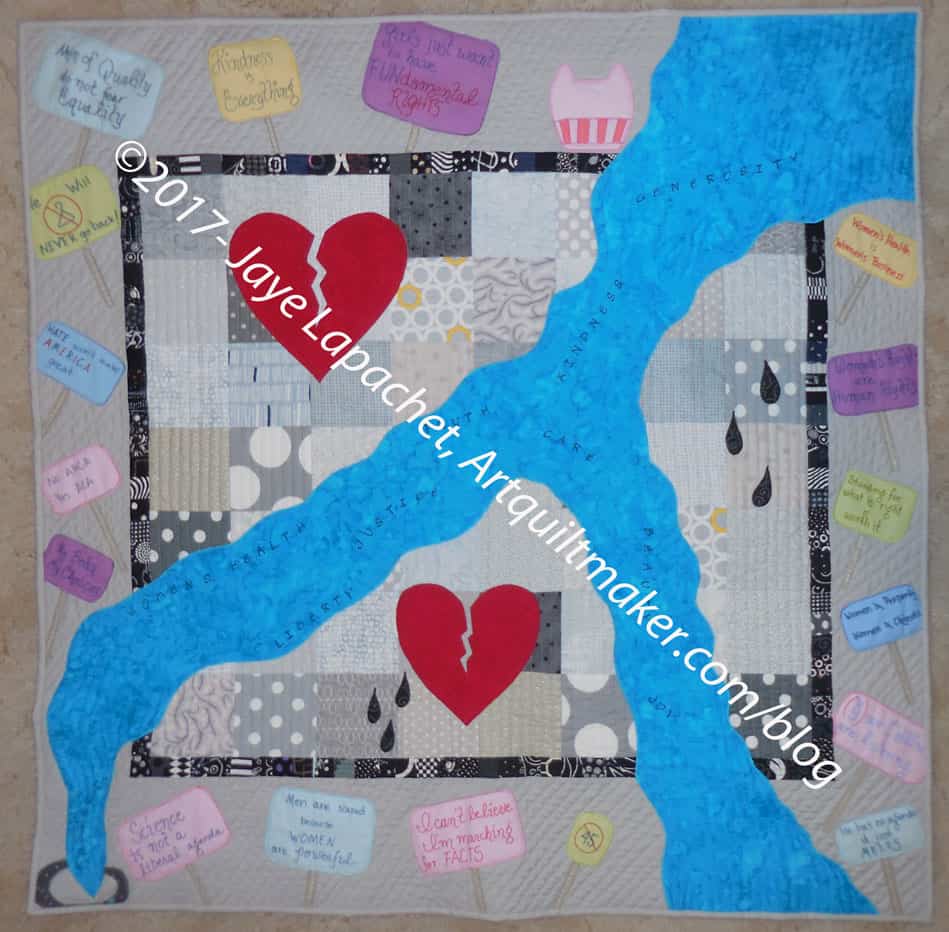
Bisa Butler and Faith Ringgold have certainly been drawn into controversy, but using quilts as a protest media has a long history. Temperance Union. Gee’s Bend. Quilts to raise money for both sides of the Civil War. Red Cross quilts. The NAMES project. How about my own political quilts, the most outrageous and vocal of them is Down the Drain? What would AQS say about my quilt? Io the Alien writes more about AQS censorship on her blog.
SAQA pulled the whole show, which I am sure was a difficult decision. In my opinion it was the right thing to do. People will not get to see any of the quilts in the show, which is really sad, but censorship is also not right. If you are able to see these quilts, tell any AQS people you see that you are glad you were able to see the show.
Keep in mind that AQS is a private organization. In its history section, you can see that the Schroeders underwrote the entire enterprise. The US Congress gave it National Quilt Museum designation in 2008, but that museum is private. It is not a 501c3, at least I was not able to find a record for it in Guidestar. If it is not a 501c3, that means it is for profit. They are making money off of the quilts and shows and books and patterns.
Art is meant to provoke thoughts and feelings. You may not have liked the Andres Serrano piece that swept up a bunch of artists including Robert Maplethorpe in a controversy about NEA funding. I do know that when you saw it, or heard about it, it provoked a response. The article describes the feelings of various Corcoran Gallery workers and their reactions. The pieces AQS censored didn’t look offensive to me. I was intrigued by the structure of the 3D piece by Yvonne Iten-Scott and wanted to see how it was made. I was also interested in how much piecing went into the second piece by Laura Shaw Feit. I love lots of piecing, so the second piece looked right up my alley.
These quilts vaguely gave me the impression that they might be about “women’s issues.” So? More than half the population of the world has to deal with “women’s issues,” including birth, breast feeding, menstruation, caregiving, hysterectomies, terminations, miscarriages and many other naturally occuring issues. As a woman, I think some of these normal bodily functions are gross and I don’t want to think about them much less discuss them. That doesn’t mean I don’t think of them or want to see artwork discussing or depicting them. Because topics like this are censored they have become important issues being discussed in public.
Because some people can’t mind their own business, nobody will get to see any of the quilts at a very large show where they might have changed someone’s life.
AQS Mission Statement
In light of this controversy, I find the AQS mission statement to be quite funny, in a “liar liar pants on fire” kind of way.
If you want to do something, here is a letter you can write to AQS sponsors. The letter encourages sponsors to think about the organizations to whom they give money. Pulling sponsorship has more of an impact than not renewing your AQS membership.
I am a grownup and can make my own decisions, especially about what I look at and read. I don’t need AQS to decide I am too delicate to handle looking a quilt. I don’t need others to protect me from art.
Digital ID: (intermediary roll film) fsa 8b14065 http://hdl.loc.gov/loc.pnp/fsa.8b14065 Reproduction Number: LC-USF34-008655-D (b&w film neg.) Repository: Library of Congress Prints and Photographs Division Washington, D.C. 20540 USA http://hdl.loc.gov/loc.pnp/pp.print
Get over the image of quiltmaking as a bunch of prim older ladies sitting around a quilt frame. An Observer article describes “And so we’re going to have to change that image of quilting we have in our heads, the one where matronly figures with prim buns bend over fabric scraps. “
Do what the article says. Get over it. I am not a prim older lady sitting at a quilt frame.
Quilts are art. Discuss.
UPDATE:
Hyperallergic published an article about this topic. I didn’t find it until after this post was published.
**N. B. : Obviously, you should shop at local quilt shops and small businesses. However, if you are too busy or can’t find what you need there, I use Amazon affiliate links and may be paid for your purchase of an item when you click on an item’s link in my post. There is no additional cost to you for clicking or purchasing items I recommend. I appreciate your clicks and purchases as it helps support this blog.
Project bags are great for keeping all the pieces, parts and supplies for projects together. I have another jumbo project bag on the list of things I want to make for myself.
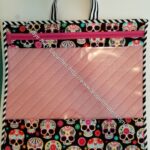
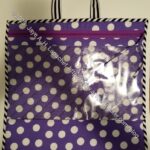
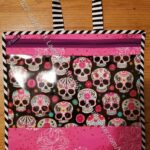
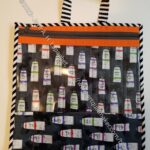
In the course of thinking about this bag I realized I have made a lot of project bags. I was initially thinking of the ByAnnie project bags**. I have made quite a few of them despite the need to quilt them. I noticed, as I looked through my photos, how many different types of project bags I have made. I decided to put them all in one post so I could see them in one place. It also gives you an idea of the different types of project bags there are. Keep in mind that this is a small number of the various patterns out there.
Tim’s Project Bag
Hildegarde in the Project Bag
My Jumbo Project Bag
Gerre’s Project Bag #2
Gerre’s project bag #1
Purple Dot Project Bag
Gerre’s Project Bag
Mom’s Project Bag
Julie’s Project Bag
Two project bags for Mom
Ultimate Project Bag in use
Ka-Bloom Amethyst Project Bag
The photos above are mostly the ByAnnie project bags**. I added in the Ultimate Project Bag from Crafty Gemini, because it is more like the ByAnnie project bag than not. Also, I have a project in it, so it is a different kind of project bag.
Ka-Bloom Amethyst Project Bag
I have also made the Amethyst project bag from Sew Sweetness and the Sunset Project Bag from Crafty Gemini. These are quite different from the ByAnnie bags.
The Amethyst Bag is not flat. It is a box, essentially and is large enough to store blocks. I gave this away soon after I made it so I haven’t used it, but I can see it being a good bag for a large project. The ByAnnie bags are flat, so have limited space.
I like the project bags that have some vinyl so I can see what I have in the bags.
Sunset Project Bag: front panel
The Sunset Project Bag is more for small yarn projects, like crochet or knitting, in my opinion.
Project bags, regardless of design are useful and I will probably make more.
Drawstring Bag – Project size
The Lined Drawstring Bag pattern also has a project size. A lot of people use this for knitting projects. I like to give these as gifts and use them as gift bags. They are useful for knitting, but I have one that I use when I have a knitting project and probably won’t make others. The bags made from this pattern also hold collections of things. I made one as a carry-all for a juggling balls set.
I also adjust the sizes and use this pattern to make bags for quilts. The design is useful for quilt storage bags that double as gift wrap.
Of course, I use my fair share of zipper bags and other ‘free’ type of bags. I find they tend to slide off shelves, if I stack too many of them. Using a bag with fabric provides some grip when stacking.
Still, making more and more project bags is not my goal. I want to be able to reuse them not just provide a place to store pieces from UFOs.
Do you use project bags? What is your favorite pattern? What patterns have you tried?
**N. B. : Obviously, you should shop at local quilt shops and small businesses. However, if you are too busy or can’t find what you need there, I use Amazon affiliate links and may be paid for your purchase of an item when you click on an item’s link in my post. There is no additional cost to you for clicking or purchasing items I recommend. I appreciate your clicks and purchases as it helps support this blog.
I finished Orangeade and turned it in at Sew Day. I was glad I had something to to turn in since I didn’t plan on working on the Community quilt project.
This was not a difficult quilt to make. I did play around a lot with the placement of the squares so that the eye roved around a little bit at least.
I am happy with the way it turned out and, as usual, am thinking of making more.
Orangeade back finished
I always want to make the backs as it means more fabric used. The pieces I have available to use are not as big as I have used most of the large pieces that didn’t have a purpose. I ended up piecing this one. I think that will become more the norm. I do have some backing fabrics, but they are a lot of large flower prints and I mostly don’t want to use them for donation quilts. We’ll see. More fabric out means I can buy new fabric.
I only had enough fabric from my trip for ~6 months’ worth of pillowcases for my nephew who isn’t going to college right now. Recently, I ponied up and bought more fabric. After a week or so, I found cuff fabrics and started in on making the pillowcases.
Train ticket pillowcase
Route 66 states pillowcase
Route 66 road trip pillowcase
Sharks teeth pillowcase
Beige map pillowcase
Passport Pillowcase
I have 6 finished and two more in process. I might be able to finish them by the weekend. Mom helped by trimming some of the threads that sometimes stick out after sewing a French Seam, especially on fabric that frays easily.
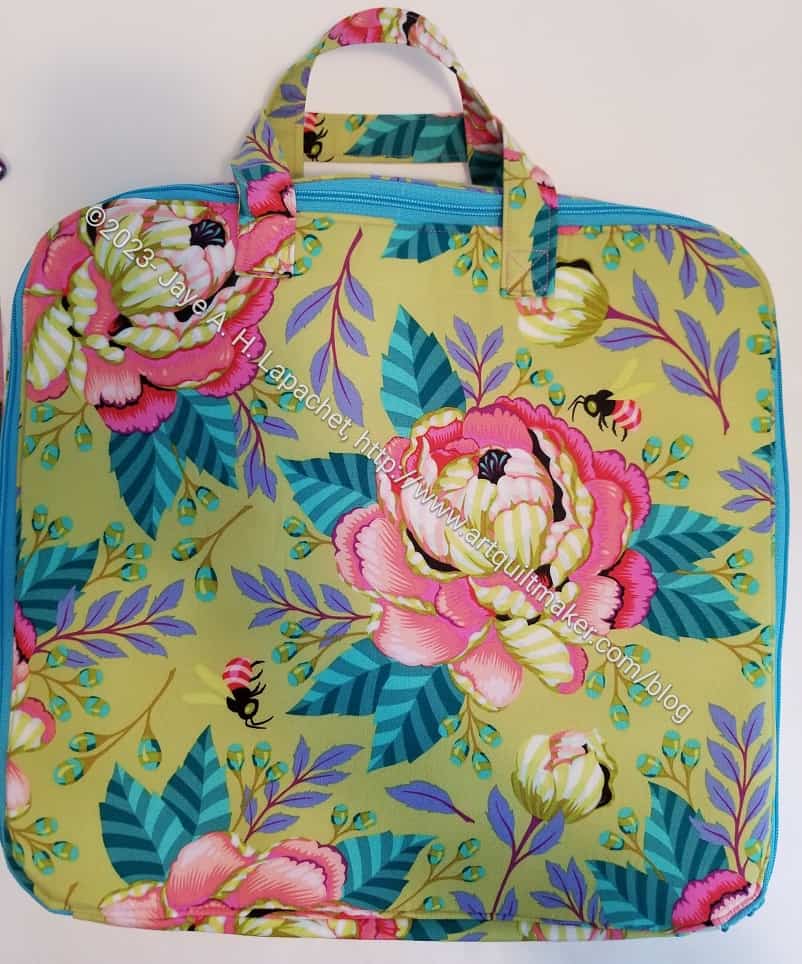
After years of whining about the Hindsight Superbloom, it is finally done. Apparently, thinking up someone to whom I could give this bag was the key.
I carefully fussy cut the panels, so those pink flowers were featured. I wasn’t sure how it would look, but it looks good to me.
Hindsight Superbloom – back
I also remembered to machine sew on my label! Yay!
I like the way the handles look. That print is fun. The handles aren’t that comfortable, though. They seem to be made from some kind of polyester. I was trying to avoid sewing strips together to make the handles and that worked. I don’t think the recipient will be able to carry a lot of heavy items in the bag comfortably.
Hindsight Superbloom – interior
Hindsight Superbloom – interior zip pocket
Hindsight Superbloom – top
I used some dot fabric as the lining and it looks really fun. It also achieves my goal of being light colored, so easy to see the items in the bag.
The last photo (above, right) shows the bag closed. It has a recessed zipper. In that photo, the bag has all the small gifts I got for the family who are caring for my stepdad.
I think I might add a slip pocket or two to the next one I make.
Hindsight Superbloom – side pocket
One thing I love about this bag are the sides pockets. They are super cute. I don’t know if they are useful, but I think they would be.
I am really pleased with the way this came out. It went together really well.
I have started another donation top, this one part of the Ends series. Can you believe this is the 21st?
This is made from a random piece of background fabric and the edges of the Hugs & a Kiss quilt. The sparkles in the dots are fun.
I accidentally started this series in 2017 with the first one, made from what I called ‘dreg ends’. I have a box with the cut off edges of finished quilts. I still have it, though there are many fewer edges. I am trying to keep up with using the edges as they come back from being quilted, but that box still has old edges in it.
It is rainy and dark here, which wreaks havoc with a lot of my schedule and tasks. Still, I had a goal of spending some time on Old Town over the weekend. Despite nursing duties and regular household chores, I was able to make good progress.
Late in the afternoon, after working on the 8-at-a-time technique for the HSTs pieces, I cut a few up and was able to put one of the Old Town blocks almost together. The photo is a little dark, because of the weather.
I still have a bunch of pink Flying Geese to make (I substituted pink for the red Bonnie suggested), but I wanted to see a whole block, so I took some of the pieces I had been cutting and made a set of Flying Geese.
Old Town block in process
While I have to pay attention to the lights and darks, I like the way the changes to the colors work together. The pink I used for the Flying Geese is one of the fabrics that Free Spirit sent me.
If you haven’t done the center of the Sawtooth Star yet, you could do different things in the center – a different block, fussy cut fabulous fabrics, a piece of fabric to match the arms of the Sawtooth Star.
I am pleased with how the block looks. There are a few changes I want to make before I sew it together.
I finally started the Hindsight Superbloom. This is a project that has been on my list for a long time. I was excited to make this version at the time I made the first Superbloom. Somehow I lost momentum, but recently I was inspired to pull out the fabric and the pattern and get busy.
Yes, I remembered to put my label on the bag before I started to assemble it! I am happy about that.
Hindsight Superbloom in process with handles
I had a little trouble with the handles as I was using webbing instead of making them from fabric. I eventually got them on the bag. UGH! I know why the process had to go the way it did, but I found it difficult.
I am always surprised at the size of this bag. It is quite roomy, but I always think it is bigger than it actually is.
So far, I am l loving the process. Those side pockets are awesome.
Another month, another Sew Day. I spent another Sew Day cutting up scraps, just like last time. I cut a big pile and made a dent, but I didn’t finish cutting up all of my scraps. I spent about 5 hours. My scraps are still not limited to the Desktop Cube I made for the purpose, which is disappointing. They need to be contained since my cutting table is small enough without it being overrun by scraps.
Mom and Jaye
My mom came with me. Yay! She was well enough to spend the whole day out! I kept her supplied with pain medications and food. She said it went well. I kept her quiet and at home the next two days and she is doing ok. I was so relieved that she didn’t have a complete relapse. It sound ridiculous, but I can’t help but worry about her.
Tim’s Jittery Wings quilt
Tim just got back from a retreat with Mitzi of Jittery Wings. He came over the other day to use my design wall and continued that work at Sew Day. His quilt is a whole bunch of HSTs and Flying Geese. Sounds like Old Town, right? LOL!
One thing I love about HSTs is how many different designs quiltmakers can sew using only HSTs. Of course, as I said, Tim’s quilt has whole bunch of HSTs and Flying Geese.
Mary’s Crisp Blue quilt
Mary was working on a quilt for a friend going into the hospital and it looks so crisp.
This is a simple Rail Fence design. She used a couple of jelly rolls she had and it looks so great! I also like how complex it looks. I just love block quilts. 😉
The guild was having a Community Sew Day. People worked on a variety of different designs. I cut up my scraps, as noted above, and didn’t participate there. I couldn’t bring Mom and my machine. I just wasn’t up for it. I did, however, bring Orangeade and several donation blocks. I definitely want to contribute but I don’t need to do it at Sew Day.
One of the quilt tops they worked on was similar to the Infinity Quilt I made for one of my nephews.
Community 9 Patch quilt
Claire is a great one for rescuing usable fabric. She had a group of men’s shirts and people were working on 9 patches out of that beautiful fabric. The fabric was very soft and had a nice weave. I don’t know what the ultimate design will be, but it will work very well for a boy or man once it is finished.
Mom was sitting across from Lynette who was working on these blocks. I wanted her to sit at the other table so she had some new people with whom to talk. I am sure it is boring just talking to me all day.
Community quilt design
The other design was similar to Mary’s Rail Fence. I couldn’t figure out why this was a such a weird shape. I think the rectangles were actually made in two parts, but I really don’t know.
Anyway the Community quilt team did a great job prepping for the event. There were a lot of people at Sew Day, which was nice. Mostly, I was pleased that Mom had a good time and was able to get out and see the world.
Well, I did. Mom said she wouldn’t be using the walker long enough to warrant me making a bag for it. I waited about 2 weeks before making it, but finally made one the other night. She loves it and finds it very useful. I have to keep reminding her not to fill it up too much. She is limited to carrying 5lbs per hand.
I remember thinking the directions were confusing at the time. I made the same mistake this time that I made before: I sewed the Velcro inside the pocket. DUH! I hope the photos I added will help with that.
This time, I took the time to make some edits and add in some photos for next time. I hope I won’t have to use those directions again, but I am planning for the worst and hoping for the best.
I finished Clue 5, the block centers of Old Town. I think I only have some HSTs to make before I can start assembling blocks. Yay!
I spent almost the whole weekend working on it, but finished and worked on some bags I need to finish once these were done.
Scrappy Old Town Square-in-a-Square
I read the clue wrong and started out making the outside triangles scrappy, but pivoted and made them all match, which is what it looked like others were doing.
Some of the lavenders are leaning towards purple. I hope that they are not too dark. I really tried to keep them light.
Old Town Clue 5 detail
I know I could have done my own thing, but I thought a little control would be better. I am already substituting lavender for the coral called for in the design. I think the lavender looks good so far. We’ll see when I put the blocks together.