Almost two days through the holiday weekend and I have done no sewing. Partly, I can’t decide what to work on and partly, I feel distracted.
We went to a small BBQ yesterday (the BBQ was normal sized, but the party was small), so I didn’t do much sewing. When we got home, we spent time watching Castle, yes, one of our favorite shows. I didn’t even do any handwork (I really could use a couple of bindings right now). I don’t know what to think.
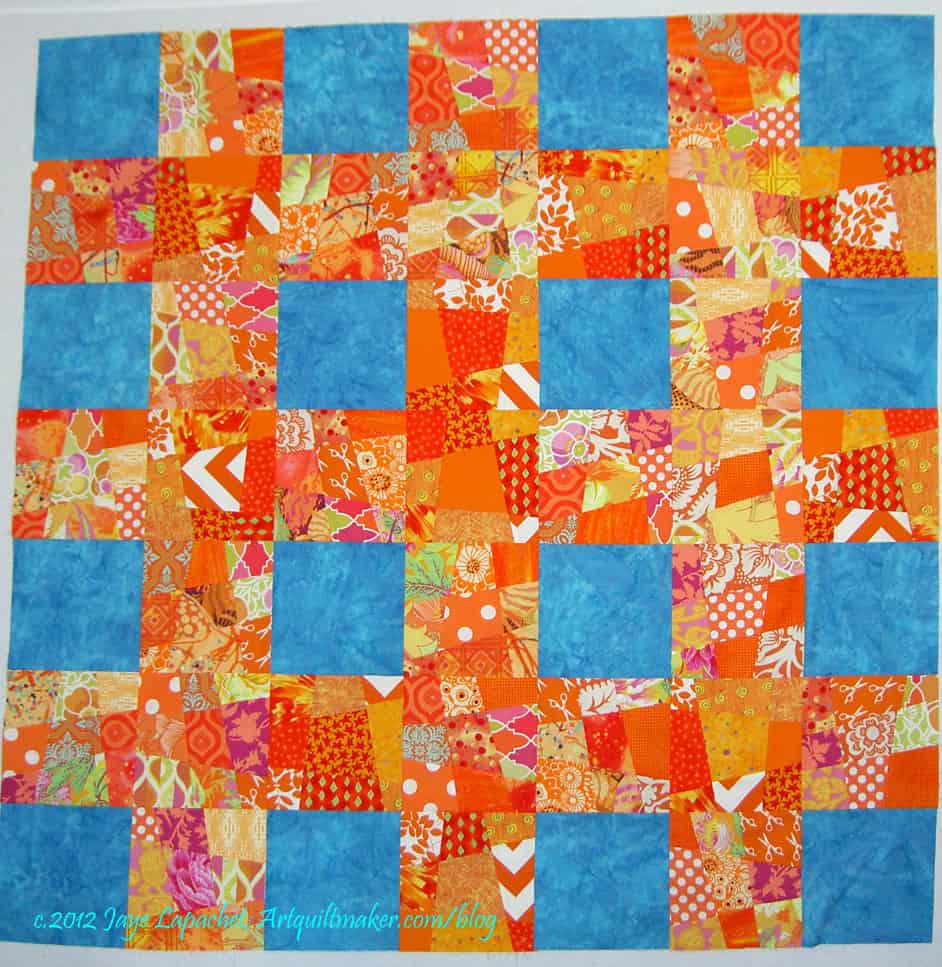
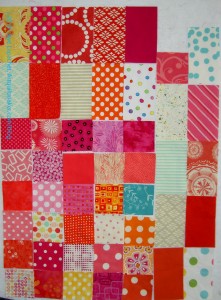
Orange Donation Quilt
The obvious choice to work on is the t-shirt quilt. It should be a no-brainer since I am nearly finished, but somehow it isn’t calling my name and I don’t have the mental strength, at the moment, to power through. I feel terrible that it isn’t calling my name, too, because the Young Man is so excited about it. He is excited even though the piece has a lot of steps to completion before we can put it on his bed. I am hoping he just wants to check something off his list.
I also have a donation quilt in progress that I have been working on as leaders and enders. Tfun orange scrappy pieces at the top are just there to add some fun to the photo. They are not part of the quilt. They might become a journal cover some day, but right now they are just leaders and enders.
The problem with the donation quilt is that I am just short of some orange, so I have to cut some more orange squares. Not only do I have to cut more squares, but I am out of appropriately sized scraps, so I have to go find some orange for which I don’t have a plan. I am just not up for crawling around my fabric closet even though I’d like to be able to send this with Kelly to the August meeting.
Wonky 9 Patch Sewn
I also thought of working on the Wonky Nine Patch. That means quilting. The thing is already basted and I have an idea of how I am going to quilt it. If I had started today, I probably could have finished it by Sunday. I didn’t start it, though and I am not sure I want to start it now.
I guess I have to admit that the biggest problem is my computer. My old (3 year old, which doesn’t seem that old to me) died. It sort of died. The hard drive was acting up, which turned out not to be the problem. Then the motherboard was the potential problem and I just ended up buying a new laptop. It is a nice laptop and I can mostly get it to do what I want, but the set up and passwords, etc, not to mention I wasn’t planning on spending this money today, is all making me a little anxiety ridden.
I guess I should really title this post Quilt Angst, because I really do feel, as we say in German, aengstlich about sewing this weekend. What’s up with that? Perhaps I’ll lay on the couch and read and hope that tomorrow provides more inspiration.
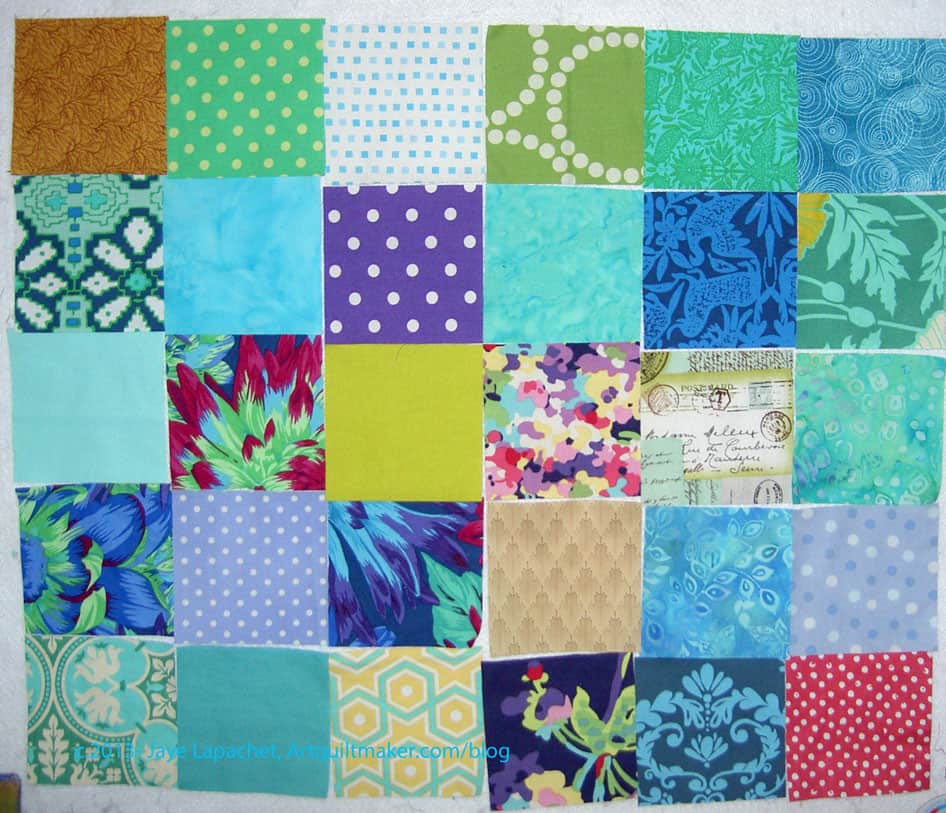
I have cut more pieces for the Fabric of the Year 2013 quilt. Many of the fabrics in this group turned out to be more greyed… or not as bright perhaps as I thought. That is the problem with buying fabric online. The colors just don’t reproduce as well our eyes see them.
Still I am pleased with Texture Basics pieces (dots, stripes, diamonds & houndstooth). They are not ugly and the red and teal are particularly nice.
I am already cutting them up for a project, which is great as well.
This year’s shape is a 3.5″ square and I have an idea to do a kind of waterfall effect. Stay tuned to see what actually happens!
I had two fabri-lanches in the past few days, so I finally started pressing fabrics and cutting the squares for Fabric of the Year 2013.
There are fabrics for projects in process and also fabrics that just came up on the ‘to press’ pile. I might need to take a day off work that I dedicate to pressing fabric.
Weeks writes “Aim high and ignore what other people are doing. Following the crowd will not teach you as much as figuring out how to combine you interests with your skill set. Where do you want your quilting to take you?”
One of the best things about quiltmaking is figuring out how to get something done. once I had to figure out how to put beads on a quilt — a lot of beads. I also had to figure out the best way *for me* to attach French ribbon to the quilt. I didn’t know of a class; I didn’t think to look on the Internet (though I think I started that quilt before blogs were prevalent. Not sure about that) and I was confident I could figure it out.
I want to make a kind of curved Pickle Dish, Double Wedding Ring looking quilt. I saw a picture of a little part of a quilt in a magazine. I cut it out and will try and make it someday. I won’t buy the the kit because I want to use my own fabric choices. I like making hard blocks and hard quilts. I don’t necessarily want to do it all the time, but I want to make things that others think are impossible.
Image Courtesy of The Modern Quilt Studio, Bill Kerr and Weeks Ringle; *No copyright claimed to Modern Quilt Studio’s chart of points.
Weeks Ringle issued some homework in her lecture at QuiltCon and then posted it to her blog for the rest of us. In a recent Various & Sundry post, I briefly mentioned the QuiltCon homework. I glanced at it first and thought I would pass it on, which I did in that post.
Then I went back and looked at it further and thought it would be a good exercise. I thought I would print and paste the homework into my journal and maybe write something about each section and make myself a better quiltmaker.
I decided that I would do it here for all of you to read. Won’t you join me?
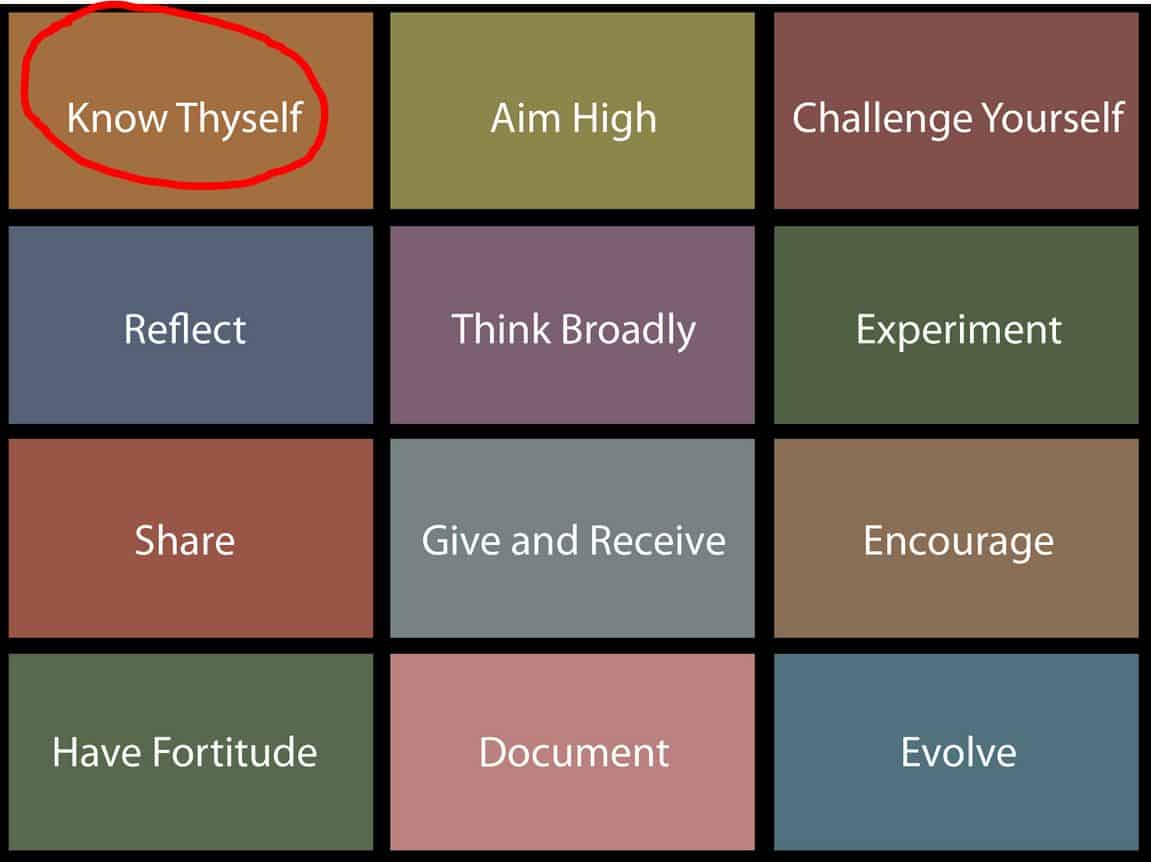
Weeks Ringle’s Quilt Con Homework #1
#1 is Know Thyself
Do you know yourself as a quiltmaker?
Weeks writes “Know thyself. Make a list of what you’re good at – use your strengths to develop your own techniques and your own pattern. Now make a list of things that you don’t know how to do – then figure out how to whittle away at this list to expand your skill set”
In order for me to make a list of what I am good at I first need to make a list of what I like and what is important to me about quiltmaking and relate it to myself.
I like bright colors, so I work in bright colors. It might be good for me to try out some beiges, but I don’t like beiges. I have bought some chocolate browns lately, so I am considering that to be expanding my horizons into the realm of depressing colors because there is no way I am making beige quilts.
I want to make cheerful quilts. I want to make quilts that make people sing in happiness. I want to make quilts that make people smile when they look at them. So what if they aren’t dignified?
I don’t believe in the adage “buy ugly fabric, because it makes your pretty fabric look prettier.” To me, ugly fabric is just ugly. I have been down that road and refuse to do it again. Fabric is getting to be too expensive to buy what I don’t like.
I like good technique, because *I* think bad technique can take away from the look of the piece. If that means making my half square triangles 1/8″ larger and trimming, so be it.
I like to make well made pieces, because I don’t want my pieces to fall apart. I take my time in finishing and I rip out seams a lot.
I don’t want to be categorized as making a certain kind of quilt. This is such a hard thing to explain. I want to make the quilts that I want to make in the style and fabrics I want to use. I don’t want to be a traditional quiltmaker, I don’t want to be labeled a modern quiltmaker or an art quiltmaker (ironic, huh?). I want to make the quilts the my mood dictates.
I like to work on projects that I like. This is my hobby/passion/vocation, but I don’t get money from it, so I want to make what I want to make.
I like to reshape ideas into my own. This might mean that I take a block from the 1930s and make it over in Martha Negley and Philip Jacobs prints.
I think knowing quilt history is important. Kind of like that old saying “knowing history prevents us from repeating the past.” I like to remind myself that women came before me and have done all this before. I appreciate different ways of doing things and different tools to get the job done, but I have no illusions that I am doing anything brand spanking new that nobody has done before. I have block books, so I can try and figure out who did it before and where I might find more information on how they did whatever the task is. To recognize those quiltmakers who came before me makes me feel like I am part of something.
I think it is important to step up. People before me shared tips and tricks. I have some knowledge and I might as well share it. The blog makes it easier. That is why I work with Sandy on her podcast, post tutorials, etc.
It is important to support the community. I don’t mind sharing my tutorials. I want everyone to make quilts, buy fabric. Perhaps some of that karma will come back to me someday.
I don’t like it when people steal from my blog. It hurts when I have spent a long time working on a project and taking the time to post.
I find it important to use part of my quiltmaking time for charity. If I can’t make a quilt, I’ll make a quilt top. If I can’t make a top, I’ll make some pillowcases. There is always someone who needs to know that someone else cares. I think charity/donation quilts should be pretty. While I am making them, I can learn something new or try out a new pattern I normally wouldn’t work on.
As a result of the above, here is my to do list. These are not resolutions; these are things I will work on over the next 50 years.
To Do:
Be more patient
Practice curves
Don’t let my fabric sit around.
Get back to that Pineapple quilt.
I am sure I will think of more, but this is a start.
*No copyright claimed to Weeks Ringle’s chart of points.
Most quiltmakers are taught to press to the dark or in such a way as to enable nesting of seams. Generally this works pretty well for most projects.
Ruth McDowell talks a lot about the direction of the pressed seams. She uses the added bulk of the seam allowance to highlight sections of her quilts.
This technique came to mind when I was making a Drunkard’s Path block for the Sampler Class. I used to use the Drunkard’s Path as the block to learn curved piecing. It is a hard block, though and I want my students to be successful, so I chose the Dove this time. It went together so easily that I was glad I had chosen it.
Still, I may offer the Drunkard’s Path as an additional block in the Sampler Class, so I decided to make one in the colors of the Aqua-Red Sampler. This is where the pressing came to mind. I tried to press to the outside piece (the concave piece), so that I could next the seams, but the curved pie shape really wants to stand out, so I ended up pressing to the inside curve. We will see if it makes a difference in the way this piece stands out in the end.
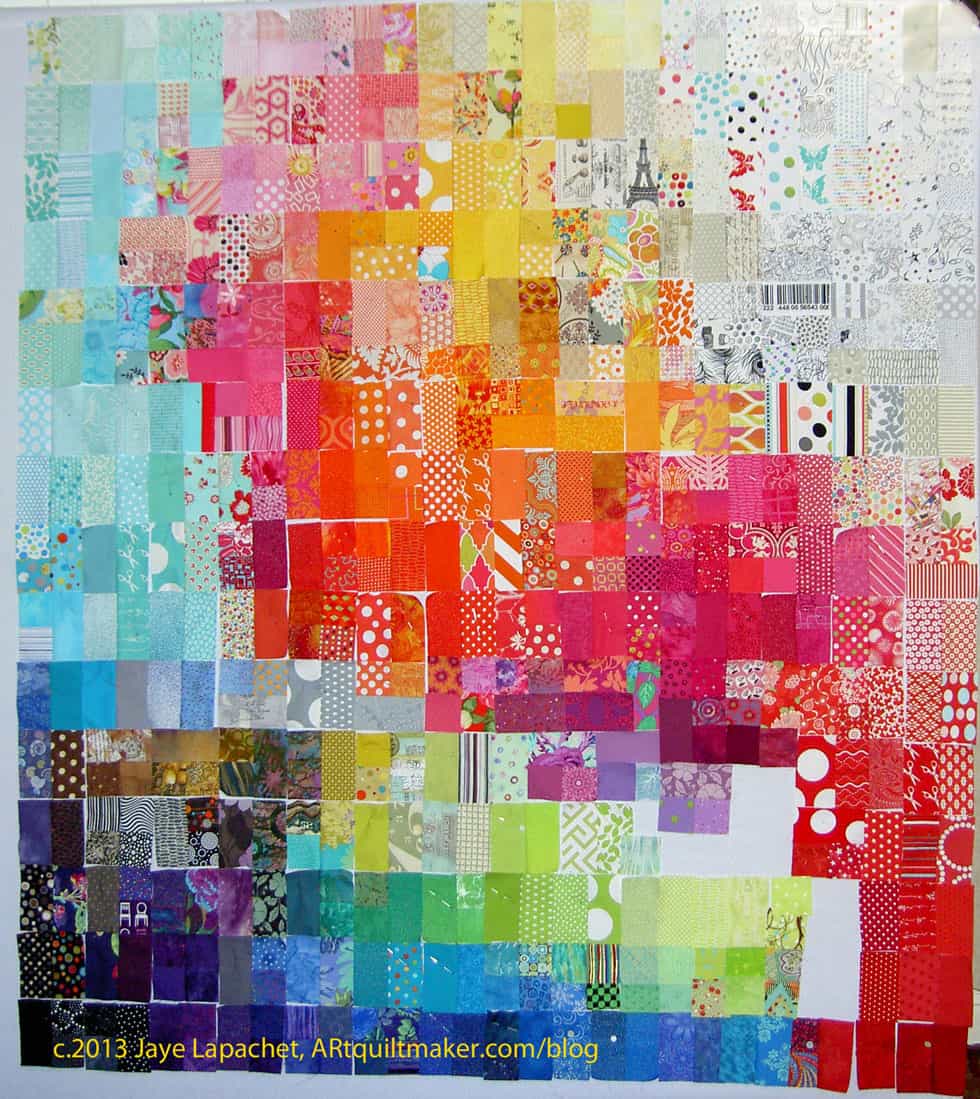
Early last week I posted the final patches I was planning on using for FOTY 2012. The CQFA retreat was this past weekend and I worked on the quilt top all weekend. This is the final layout, or nearly the final layout, of Fabric of the Year 2012. I think of this as a butterfly emerging from a cocoon, in some ways. Perhaps I will call this piece Chrysallis?
In this picture, all the pieces are sewn into groups of 2. By the time I left the retreat center, I had started to sew larger chunks together and the upper right hand corner was nearly all sewn.
As usual, I went through my process of hand wringing and chest beating on Friday followed by sewing and intense rearranging on Saturday.
One of the things I really like about working on this at the retreat (remember last year’s retreat?) is that everyone helps. They don’t help by rearranging, though that goes on a bit, but they come by and give me an opinion, there is always someone around to help with tricky placement and they appreciate my process. By appreciate, I meant they let me engage in my process, which, for this project, involves a fair bit of angst. It was all worth it. I am pleased with the way this is coming out.
I think that I may be over the colorwash technique for these pieces. I like the idea of cutting a piece of fabric from each fabric I use or buy during the year, but I think I have done enough of the colorwash exercise for the time being. I am trying to think of something else for 2013. I have some fragments of ideas, but they haven’t coalesced yet.
A few weeks ago, I wrote about my strategies for getting out of the Creative Desert. Getting out of the Creative Desert is different from seeking inspiration. Just because you are piecing a bunch of squares together doesn’t mean you are inspired. Piecing a bunch of squares together is good because you are working, but you are only at the first step back to your creative potential.
I find that if I need inspiration, it doesn’t work for me to go out and look for it at that moment. I can’t rush outside and look around and expect to be inspired JUST LIKE THAT. The world might be boring that day or I might not be able to see, really see. I have to be prepared. I have to be in the habit of looking for it every day as I go about my business. I have to accumulate possibilities so it is available when I need it.
Teaching yourself to see requires training. Fortunately, the training does not require you to spend time in the gym every night. It requires you to clear out your head for 5 minutes and look. Christi Friesen, a polymer clay artist, described what I am talking about really well in a recent Notes from the VooDoo Lounge podcast episode. She said your mind has to go into “screensaver mode” to get your best ideas. (a creative example of this can be found on writer Deanna Raybourn’s blog in a post from last week) That explains why I get my best ideas in the shower or right before I drop off to sleep. Thoughts about lunches for tomorrow, who has to be picked up from where and what’s for dinner are not on my mind and there is space to be inspired, to put together the bits and pieces of inspiration you have encountered into a logical whole. Listen to this episode, if it is not on your regular playlist. Exercise: go out at lunch, walk around the block with a clear mind. Don’t think about your next meeting or the assistant who won’t do your bidding. Look at the world around you.
1st: Identify: I know what I like: mosaics, leaves, color, architectural details are a few. You have to look at a lot of stuff to know what you like. It doesn’t matter what other people like, because if you don’t like something, you won’t be inspired.
2d: See. Walk around with your head up. Stop looking at your shoes; they are fine. Really. They are fine. Get out of your head and SEE what is around you. See what is really in front of you NOT what you EXPECT to be in front of you. Seeing is different than looking. We look at the things around us so we can avoid the slimeball from the sales department, not get hit by a car, and find the right coffee shop. Seeing is the next step after looking. Something deeper sparks your interest and you pay attention to the thing. The thing gets in your head and your mind starts playing with it, turning it over and translating it into a quilt design or a machine quilting pattern.
If you can’t go out or you live in an industrial wasteland, look at sites that provide you with inspiration that you don’t see in your every day life. Flickr and Pinterest can be black holes of creative doom, but they can also provide excellent inspiration. People share photos of their trips to exotic lands and interesting tidbits they see in their daily travels. Put some random words into the search box and see what you get. I found the above photo by putting “Thailand blue” into the Flickr search box. Gorgeous birds, aren’t they? Look at the color combinations! Check out the beaks. I love the feathered tail of the bird flying. Amazing!
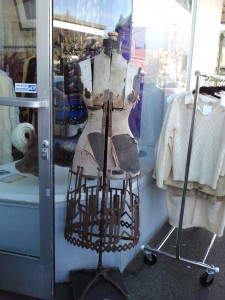
Piedmont Ave Mannequin
3rd: Document. Having a camera in my phone is the best thing ever. I take photos of the strangest things because of some little detail that sparked some interest. I have photos of half decayed leaves on the street because of the color. I have a corner of a magazine page, because of a star pattern that might be good in a quilt some day. I have a photo of a rack of vintage sweaters, because of the shape. I am focused on quiltmaking, so when I see a pattern or design that I like, I document it for a later quilt or machine quilting design. You may not see what I see, which is why you need to collect your own inspiration.
If you carry your camera around or have a smartphone, remember that your photos don’t have to be professional. The photo of the mannequin above has that commercial door in it, which looks stupid, but I want to photograph the whole mannequin without completely blocking the oh-so-narrow sidewalk traffic.
You don’t need a camera in your phone. If you don’t want to haul your camera around with you, bring a sketchbook. You don’t have to be Degas or Seurat. You aren’t drawing on the street or on the bus to win awards; you are drawing to remember something, for your own use. You don’t have to share. Commit to whipping out that sketchbook to record a line or design. This is your inspiration. What it looks like in your sketchbook will never look like the end result.
4th: Manipulate. Put your photo or sketch (after you scan) through Photoshop, Photoshop Elements or one of the free programs available online. Add filters. Change the pixels to a sketch or a different color. See what happens. Save your creation as a new file and compare to what else you have done.
5th: Use. The inspiration you are collecting will quickly become crap if you don’t use it. Look through your folders or boxes periodically. Don’t review your bits and pieces only when you are in need of inspiration. Look through folders regularly just because. If you can’t remember why you saved a shard, then it is time to toss it.
Sea by Cuba Gallery
6th: Organize. For every project, I keep all of my notes, swatches, and details in a file folder. Once you have decided to work on a project, put the shards of inspiration into that file folder with your calculations and fabric swatches. Have you ever seen the movie “Working Girl”? She uses her organizational system at the end to prove the deal was her own idea. You can tell where you are and how to move forward if all the pieces are in one place. Also, if they fall out of the folder, the way they land might provide further inspiration. If you let a project simmer for awhile, having your inspirational shards all together will help you get back on track quickly.
I may cut a few more, but these are probably the last patches for FOTY 2012 you will see until I sew. I made an effort to press and cut some more pieces. With TFQ’s help I made a little progress.
I sorted all of the patches I cut into color groups, so I am pseudo ready to place the patches and then sew. I may not get to sewing this weekend, though I do hope to do enough placement to make some progress sewing.
Creativity is a funny thing. It requires focus, time, dedication, energy and an extreme amount of nurturing. I find there is a delicate balance and if I slip too far one way, I find myself in the Creative Desert. If I had a friend with these requirements, I would probably tell her to put on her big girl pants and stop whining.
I want to get along with Creativity, though, so I find that some of the causes finding myself in the Creative Desert are:
loss of momentum
interruptions
distractions
Interruptions, for me, often lead to loss of momentum.
The Internet’s vast wealth of blogs, images (Pinterest, I am looking at you!),words, fabulousity that I could never have imagined, etc. Family obligations, which can be managed somewhat, but not completely are a problem as well.
I have found some things that help to jolt me back into the game:
open a charm pack, put it on your design wall and start rearranging. I spent a lot of time, after being in the Creative Desert for awhile, staring at those charm squares. In the past I have forced myself to either stare at them or rearrange them for an hour.
cutting some interesting shape (check out Come Quilt with Me rotary cutting templates) from groups of fabric and just keep cutting them until you have enough to make a quilt.
make napkins or tote bags
try out blocks you have always wanted to try, though I find that something rote is better when I am in the Creative Desert
make journal covers or notebook covers
donation blocks
take like colors from your scraps and just start sewing them together crazy quilt style. Just sew, don’t think. Trim as needed until you have a new piece of fabric.
Yes, I have sewed those charms square arrangements together. I have a few of them around and they will probably never become quilts I plan to use. They served their purpose. Perhaps I should put borders on them and give them to the BAMQG Charity Girls?!
Thoughts on Dots was the outcome of some of those charm square rearranging sessions. It has a similar look and feel and required the same kind of working style. It created momentum.
Now I try and stay out of the Creative Desert using the following strategies:
always knowing what my next step on something is. If I am stuck on one project, I usually have another project on which I know where I am going.
having projects in the hunting and gathering stage
doing all the steps of the project, even the ones I don’t like. This prevents one small thing from keeping me from moving forward.
don’t let projects languish. The longer I don’t work on a project, the less interesting that project becomes.
Handwork helps keep the momentum when I have to be away from the machine. If I get out of the habit of sewing, I am more easily distracted by other things (oooooh, shiny!) such as Pinterest, blogs, Flickr, etc.
The FOTY project helps me keep my momentum up as well. I can iron one piece of new fabric and cut all the pieces I need in about 5 minutes
Have a garment that signals it is time for creativity. Perhaps it is a bathrobe or a well worn soft inside jacket (polarfleece or sweatshirt material come to mind), an apron or smock, slippers or soft socks. Only wear this garment when you are in your workroom. Don’t do other things in it. It needs to be a signal to work creatively.
I hope these strategies help you stay out of the Creative Desert.
Sunday, I worked on the A-B-C Challenge back. I finished the top on Saturday and got busy with the back on Sunday. It took forever. Well, it seemed like it took forever.
I think I was just tired. I took last week, mostly, off, but with one thing and another, I did a lot.
Another thought is that I have really high expectations of what I can accomplish in a given number of hours. I don’t usually count requests for my chauffeur service, laundry duties, lunch, etc.
For once, I was very careful about pressing the seams open, though Colleen never says anything about that. I am proud of myself.
I am also pleased that I could use another giant piece of Martha Negley fabric. I love her prints, just like I love Philip Jacobs prints. Putting the large flower on the back of the Flowering Snowball was such a great experience that I wanted to repeat it. This particular print has some odd colors, but they go well with the Empire gold that Pat Bravo loves and includes with her collections. Also the green goes well with that border fabric.
I am trying to use larger pieces and make simpler backs. They take less time. Can you tell how simple this back is compared to the Stepping Stones back? I wonder what I was thinking!
You will be pleased to know that the sashing drama is over. The quilt top is double sashed.
“Double sashed” means that I have sashed each block and then added sashing between the blocks.
A-B-C Sashing Complete
I did not chunk this quilt and I am partially sorry I didn’t.
One of the benefits of chunking is that all of your sashing lines line up. When you put a quilt together in rows, it is possible that your sashing lines will be off from row to row.
I did not sash, because I didn’t want to have the checkerboard problem I had earlier this year with the inside border for FOTY 2011, which was that the white looked weird because it didn’t line up problem. I wanted to have really long pieces of sashing so that there would be as unbroken a line as possible.
At this point I am not sure it would have mattered. I am pleased with the red and white dot fabric I used. I think it is inspiring me to have a Year of the Dot in 2013. We’ll have to see if I can figure out what that means.
A-B-C Sashing in process
Next step is to figure out what else I need to do for the borders. I worked on different things last weekend, but didn’t come up with anything that excited me. If I had more of the Sevenberry red dot, I would put a thin line of the grey around the edge and then a fatter strip for the border. I don’t want to go hunting for more fabric. I’ll find something I have to make it work.
The time is really flying by. I was thinking about ordering my turkey next week (maybe the week after). I bought some pumpkin for Thanksgiving and Christmas pies last week in my attempt to get ahead of the major shopping in the next few weeks. I am behind. Behind in blogging, my house feels like a wreck, behind in cutting new and used fabric. Everything.
Case in point: it has been almost two months since I last posted FOTY fabrics. The last blog post was in late August! Gracious!
Still I was able to get some new fabrics cut up. I was also able to scrounge some squares from fabrics I have been using. Are you able to see the projects I was working on in this group?
I see some blocks I made, a journal cover I made and a few fabrics slated for journal covers I will make. One reason I love this project is that it is like a memory book in fabric.
As you might remember there were good comments on the next to the last post I wrote about the border of this quilt. Rhonda was right, not that I doubted her, of course. This quilt looks a lot better with a red border on it.
I did a trial run of the border in another post and, then, sewed it on last weekend. Do you ever have times in your quilt work where you have a lot of little things to do – make a binding, sew on a border, fix a hole, print foundation templates – that all seem to stack up before you can move on with projects? I had a weekend like that last weekend. I never feel like I get a lot done when I have those lists of things to do, but the weeks that follow are full of amazing productivity.
I really am so much happier with this quilt now that it has a red border. One thing I completely forgot about was the binding. I had made a white binding, which was no longer appropriate for this quilt, so I also made a red binding for the quilt.
As I have mentioned, I may quilt this myself. My quilter has so many of my quilts and they are languishing a bit. My machine is so much easier to use and no longer frustrating since it was serviced and I have a spool of thread that would work. I think I could quilt this quilt – simply and get it out of the house.
Quilting a quilt does take up space on my machine and does hamper my piecing productivity. I guess I have to become OK with the entire quiltmaking process. I have been avoiding quilting for the last couple of years. Perhaps it is time to get back in the saddle.
The first picture in this recent post by Camille Roskelley (I just can’t stay away from her blog! If she posted 10 times a day I would be reading all the time and not going to work, cooking for my family or washing my hair) made my eyes pop out of my head. I know you have gone to look at the photo and are thinking “well, yeah, it is a polka dot, you love polka dots, Jaye, big whoop.” Why my eyes popped out of my head when I saw Camille’s work is because of sashing.
Huh? you think.
Yes, dear readers, sashing. Remember that I was puzzling over sashing options for the A-B-C Challenge earlier this week? The whole time I have been making these blocks I have been lamenting that Pat Bravo did not include a really good red in the line. I gnashed my teeth further because the Zoe Pearns dot has a wonderful red in it. I have lots of red and white dots. My idea may not work (make visual decisions visually!!!), but right at the moment I feel brilliant.
Big Dots
I love this big dot, but I don’t think it works with the A-B-C Challenge blocks.
The color is ok, though. It is hard to say, though, because the large dots interfere with the blocks. I think it might be from the Half Moon Street collection, but am not sure.
Small dots
I think the smaller dots are better. This fabric is from the Sevenberry (?) collection. I am not sure, though. Not quite right. Why? I don’t know. I do have a large enough piece, though, so perhaps I will go with it just because of that. Bad reason to choose a sashing, though, I know.
Small dot #2
Still, I liked the smaller dots, so I looked for another. A mini fabric avalanche (fabri-lanche?) gave me another idea.
I thought, perhaps, the problem was that I was trying out the fabrics with a straight set, so i got out a different red and tried the blocks on point. Some of the blocks, like the baskets, look ok, but most of the blocks just look weird. It is probably just that I have been looking at them in a straight set, but I don’t like the on point set.
Small dot #2 straight set
Here is the same fabric, but in a straight set. I like it, but the red is very strong.
A lot of what I like is the idea of the red. I like using a strong color for sashing and background. I also like the idea of bringing out that little red in the Zoe Pearns dots I mentioned above. It might be a dumb idea, because you can even tell. I can’t tell even when I standing with my nose next to the design wall.
Small dot #2 straight set – detail
More quilt drama. I am glad I am working on this now, because if I had 5 minutes one weekend to sew these blocks together and I was trying to do this, I know I would make a bad choice and have to live with it.
I thought you might like to see a close up of this fabric with the blocks on it. Of course, there are a lot of other factors that will affect the final outcome of this quilt: width of sashing, width of binding, arrangement of blocks (beyond straight or on point set), etc.
Grey squares
As much as I hate to say it, after all of the drama and hand wringing over red above, I think this grey is the winner. The blocks look really good. The grey is not too brown. The blocks stand out and do not blend into the background. All the colors look good. The grey is not as stark as a white.
The problem is that I have to get more. I found some on Quiltshops.com and PayPal wouldn’t let me pay. Even if I decide to go with the red, I can use this grey for something else.