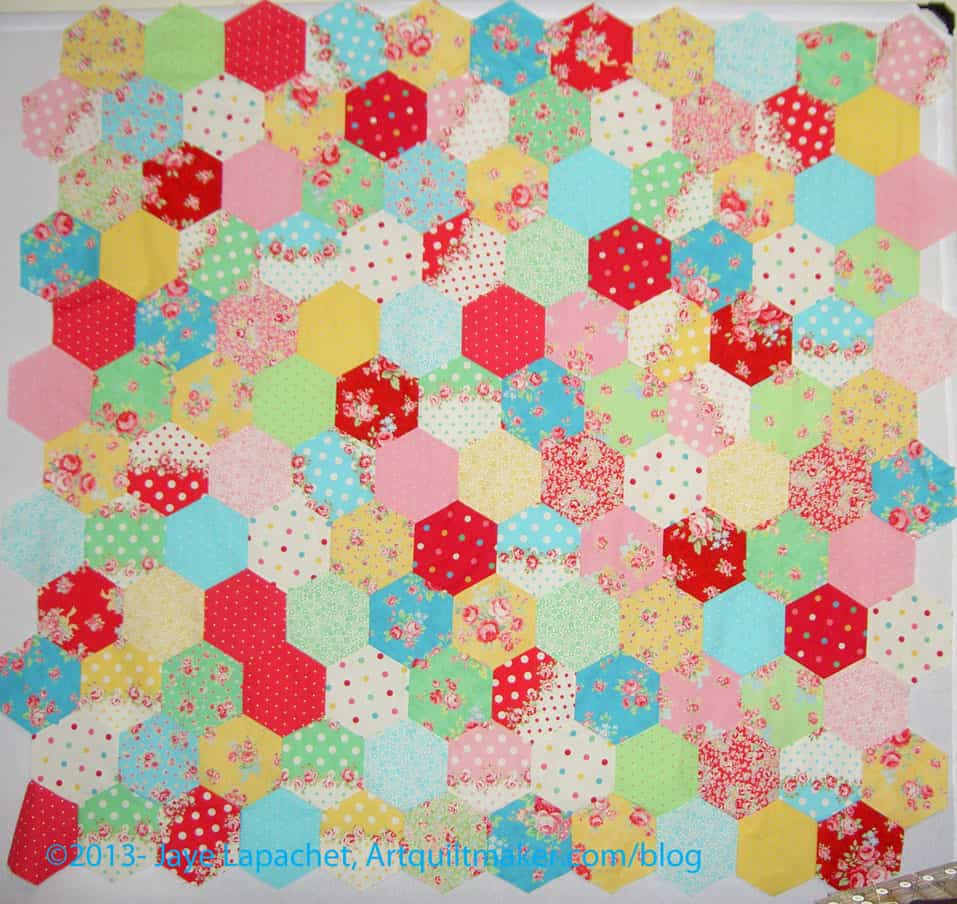
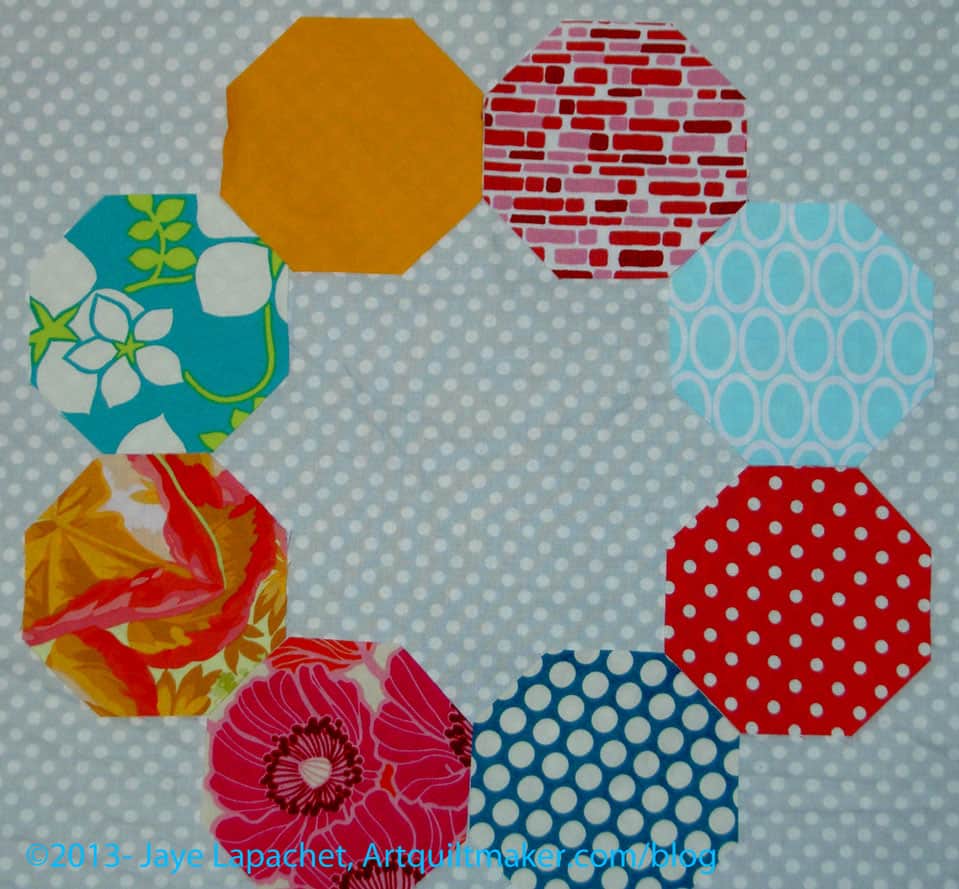
As I mentioned, all of a sudden, I am working fast and furiously on the Attack of the Hexies (Flower Sugar Hexagon). I spent all weekend trying, in vain, as it turned out, to finish the top, back and binding of Attack of the Hexies.
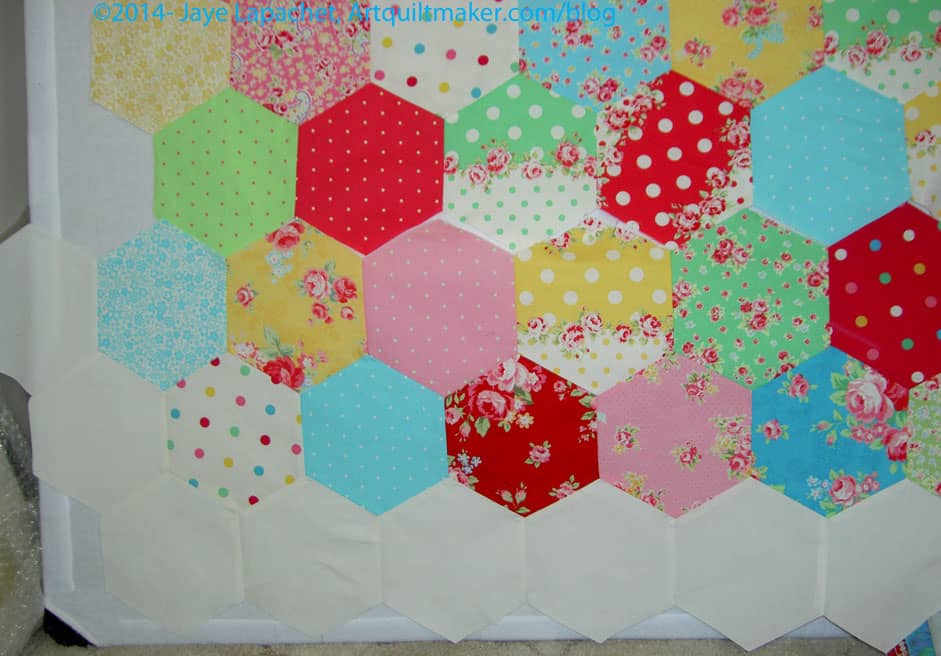
Attack of the Hexies border – in process
As I have said, Y seams are not hard, but they do take time. I decided to put a border on the piece and I needed to do it using hexagons. I don’t know another way to piece fabric into a hexagon piece without using hexagons. I could have cut off the hexagons on the edge, but I have always disliked that look for my own quilts and didn’t want to do that for this piece.
I also didn’t want to buy new fabric. Fortunately, I had enough of the Art Gallery solid Linen to use for the border. I didn’t even use all that I had, though my stock is significantly diminished.
The border is on the piece. I intend to trim it so the edges are square and still need to do that. I am all for wonky borders (Case in point: the Zig Zaggy Quilt), but not in this piece. I want the border to be square and subtle so that the center looks like it is floating on the border.
I am partway through the back as well. I lounged around for a long time on Sunday and didn’t have enough time to finish it. I had big pieces left over, so I didn’t have to piece a lot of small pieces together.
For months I didn’t work on the Hexies project, then on the first I just dove in and added rows. I am not sure why except that it didn’t require cutting. The hexagons were there, the piece was there and I needed something to sew.
I got my head around the Y seams and did it. I didn’t want to sew one hexagon on at a time and I had a row started, so I finished the row and worked on sewing the whole row on at a time. It was a lot of stopping and starting, but I just did it. I developed a system and kept at it.
Things I have to figure out:
How big to make it. It seems small now, but I know that if I fill my design wall it makes a pretty big quilt.
Whether to unsew a section where I sewed two of the same fabrics together.
How to finish the border – to square it off or leave it jaggedy. I am not sure I can face all those mitered binding corners
I plan to just work on it until I am done with the top.
I had 25 items on my list last time. I have removed the ones I completed (you can see them in the December 2013 To Do List post) and have crossed off the ones I completed since December 4. This list is in no particular order.
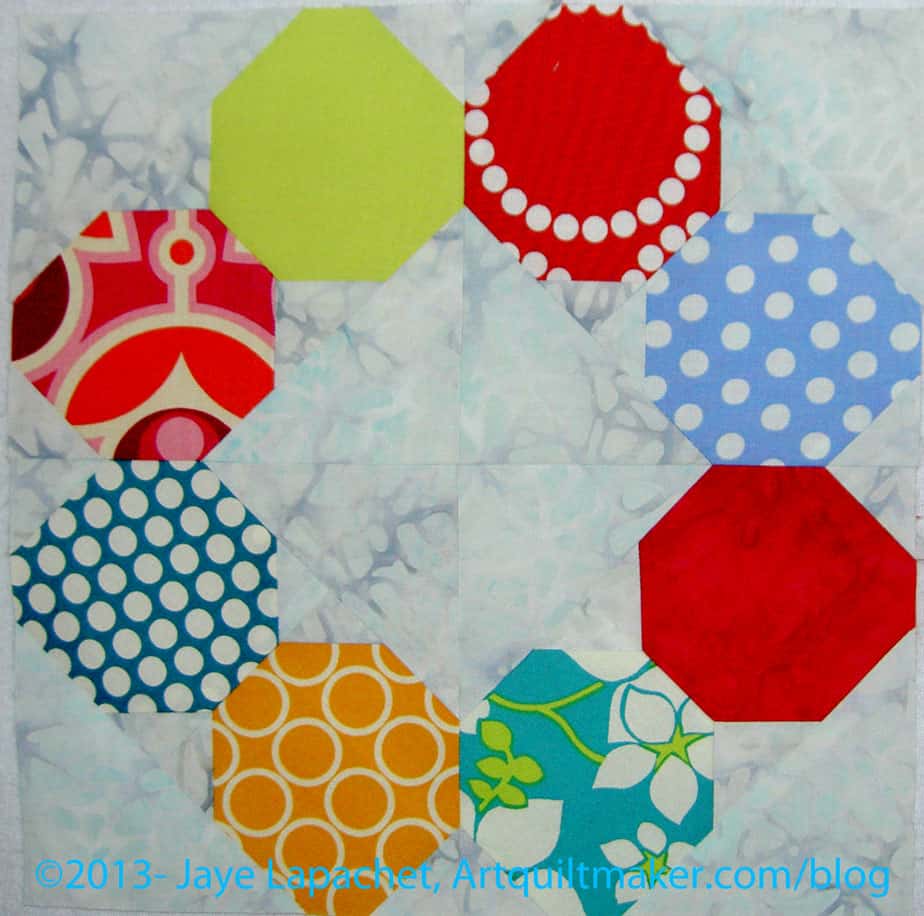
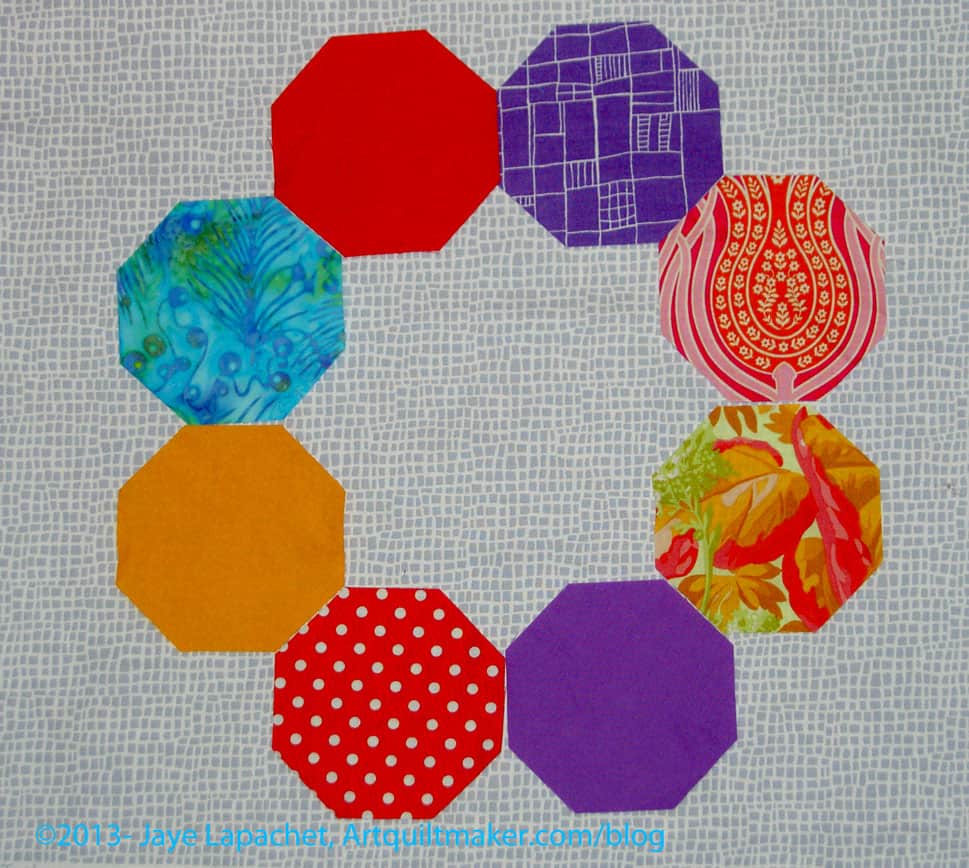
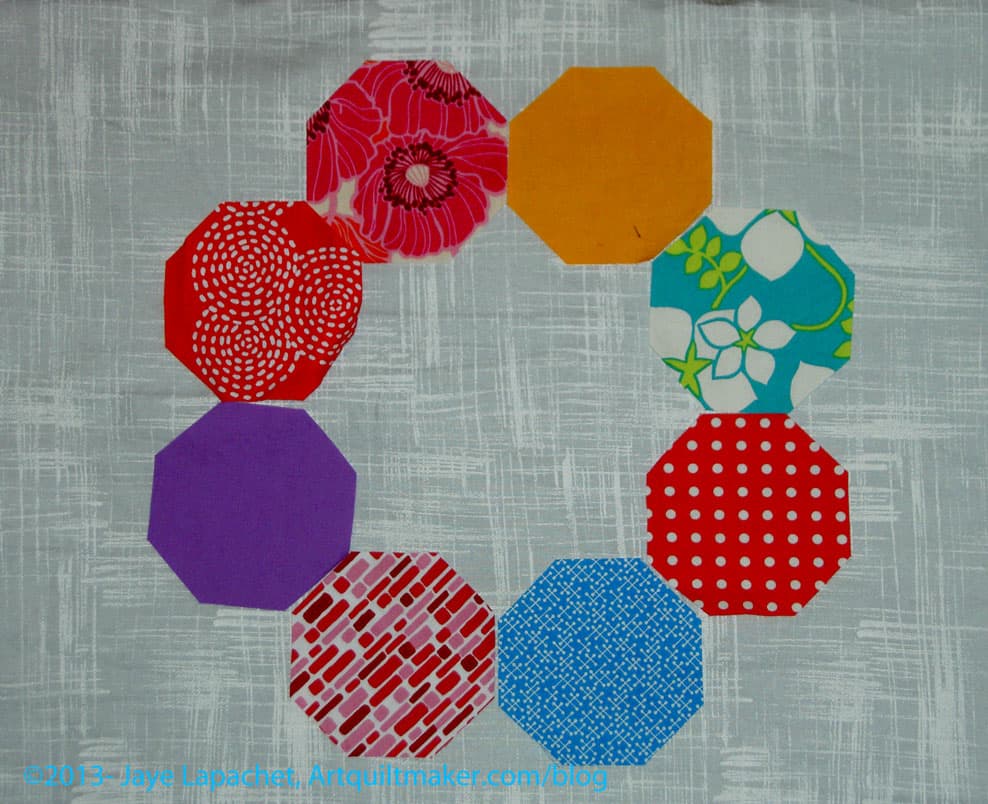
The center of the Russian Rubix blocks has been bothering me.
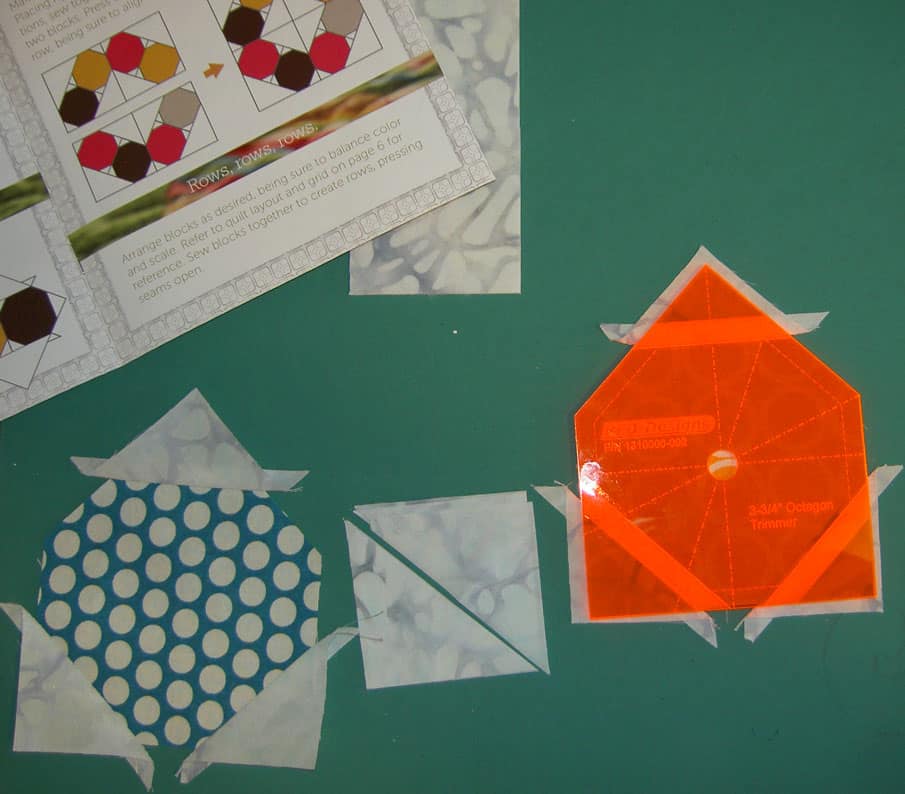
The block is put together like a four patch. to build the 4 patch, you add large and small triangles to the octagons. This makes the block really easy to put together (you should still buy the pattern).
The problem is that this type of construction means that there are four seams that meet in the center creating a very distinct seam line. I have had this block up on the design wall trying to decide if I can live with the seam lines or if I need to piece the block in a different way. Sometimes I can’t see the seam lines and sometimes they scream like a neon sign.
Russian Rubix block with solid center
As I might have mentioned, I decided to cut a square and try piecing the block with a solid square.
As you, can see from the photo (bottom right), the center looks great – seam free and pristine. The bad news is those weird angles with which I need to sew the other parts of the block.
Sigh.
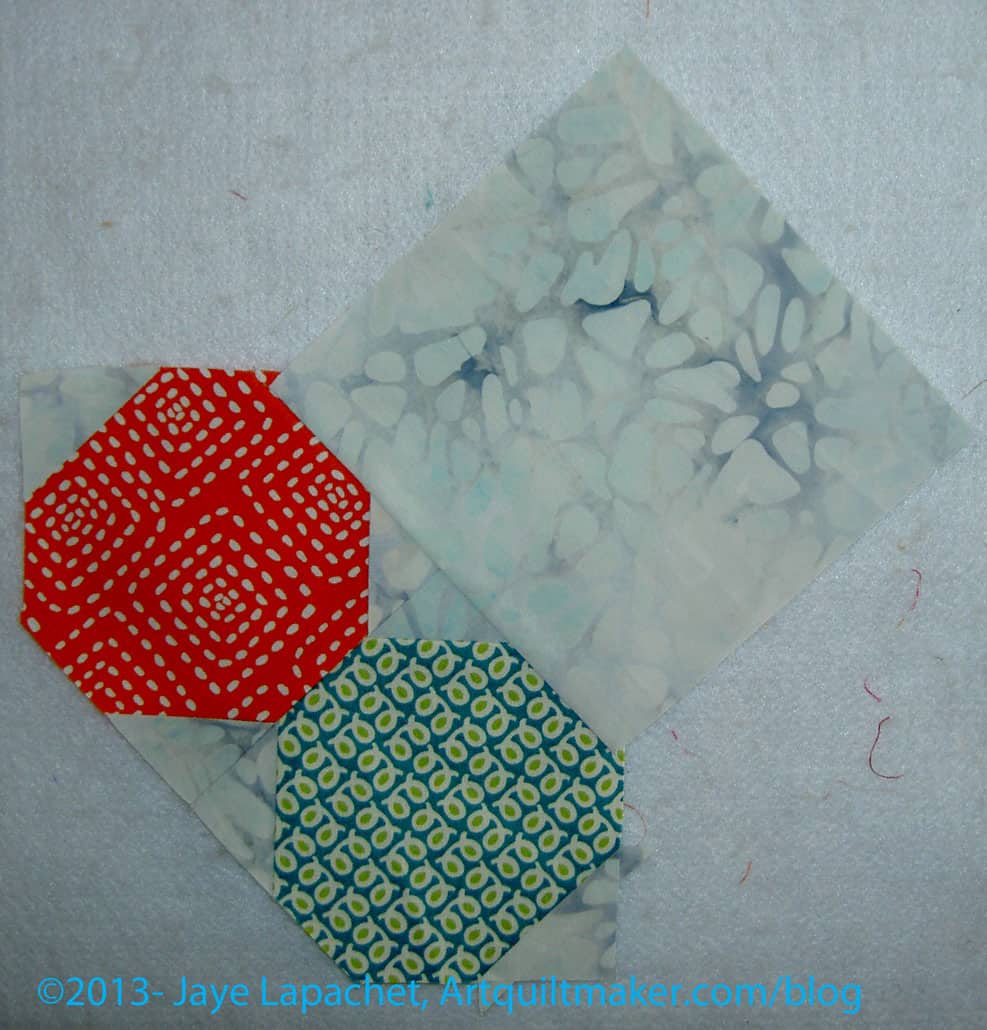
Some observations:
Print fabric with a large or distinct pattern would not work for the background. The messed up fabric design (from cutting up a large print or, for example, dot fabric) would scream at the viewer
Low intensity or solid fabric would work best.
Piecing the block with a solid center will end up with some weird angles to sew.
I don’t know where I will go from here. I will probably try to sew more parts of this block together to see if the piecing is as bad as I think it will be.
Periodically, I look at my design and think “there is enough here for a post”, so here is that post. The last post I wrote about what was on my design wall was earlier this year. You can find it on the April 1, 2013 post.
Design Wall 12/1/2013
My cup runneth over. Well, my design wall runneth over. Seriously, there is barely any space for one more piece of fabric.
I often think that my design wall mimics my mind and my mind is in quilt chaos at the moment. My mind is better now that I made a bit of progress during the Black Friday Sew-in and the weekend.
Mostly, the design wall is covered with octagons for the Russian Rubix. I don’t know why I feel the need to look at them spread out like that, but I, apparently, do. That feeling may be passing. The group on the very bottom is helping me to see all the unique colors. I have placed the octagons on the top randomly. I might be getting over this desire to see them all. Or I may just be getting annoyed at not having one spare inch of design wall space.
On the very bottom left are ATCs. These are bits of art from my art quilt friends.
Above the FOTY (mid/top left) is a Russian Rubix block. I am looking at it to see how bad that seam running through the middle looks. It looks bad, but not all the time and mostly if I look at it closely.
Top left are 2″ squares in red and turquoise. I cut the fabric whenever I wash and press either of those colors and then send them to a friend when I write her a letter. I don’t know how many I have sent her. I have and buy a lot of red and turquoise.
My Stars in Stripes are still waiting for background fabrics (upper right).
A lot of my Scrapitude pieces are on my sewing table along with a few Russian Rubix blocks.
What’s on your design wall (you can upload photos to Flickr, if you don’t have a blog and want to show me)?
Yes, I am a listmaker. Soon you will see that I will get overwhelmed by the lists I am posting and I will abandon some of them.
As I mentioned last month, this list was a way to get me back in the saddle after, what felt like, a non-sewing October. This is separate from the 26 Projects list, and I decided that I would post it again as showing progress is always a morale booster. I might still add it as a separate category to the 26 Projects list, but it might also be good to continue it as a separate post.
When I know I will have a block of time to sew, I like to be prepared. I have a block of time on Friday and am not really prepared.
I am always a little prepared, because I keep stuff around to sew to get me in the mood, get me out of a slump, get me going. With a block of time, however, I want to maximize the time available and get the most done.
Many people will be starting the latest Bonnie Hunter Mystery Quilt, Celtic Solstice. I am not planning on doing that one as I still have plans to make Easy Street from last year. I also have a lot of other things to do and think one mystery quilt is enough for now.
The To Do List has helped me to stay focused and know what to work on next. The 26 Projects List has helped keep me on track for getting old UFOs off my shelves. It is kind of a macro view of my quilt life while the To Do list focuses on the smaller projects and achievable goals.
I hope to have some time later today to figure out where I am with Scrapitude and make myself a list of what comes next. I know I have some more triangle units (different ones) to sew, but I have to figure out if I have cut the pieces I need to use to sew them together.
I can work on the Russian Rubix. I also still need to find some more cool colors, I think, for the Jaye-Roll. I haven’t thought about either project for a month or so.
I also want to make a sleeve for the Original Bullseye and a bag to wrap the T-shirt quilt in. Those may be first on my list as they should be quick finishes.
I guess I do have a kind of plan and only need a bit of
I feel so discombobulated. Not only is the machine still gone, but I was also out of town unexpectedly for a week. I am, now, not sure I know what I need to do or how to do it. I am definitely out of my element and out of my habit of sewing.
I thought a good way to get back in the saddle was to make a to do list. This is separate from the 26 Projects list, because it is more about immediate things. I might add it as a separate category to the 26 Projects list, but it might be a good post on its own.
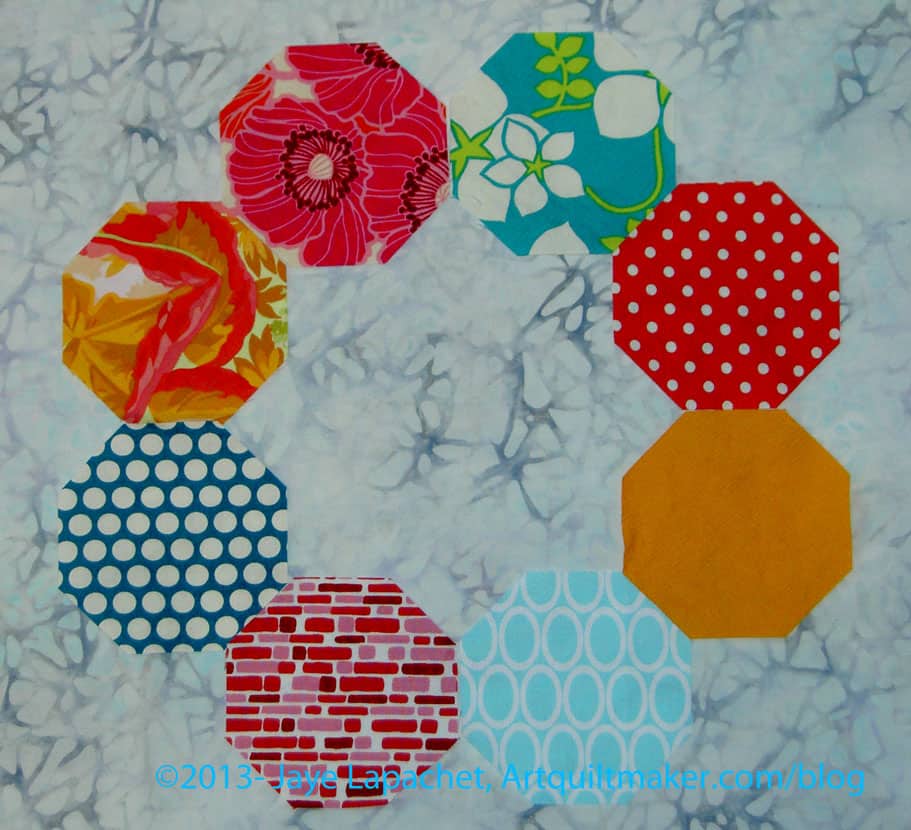
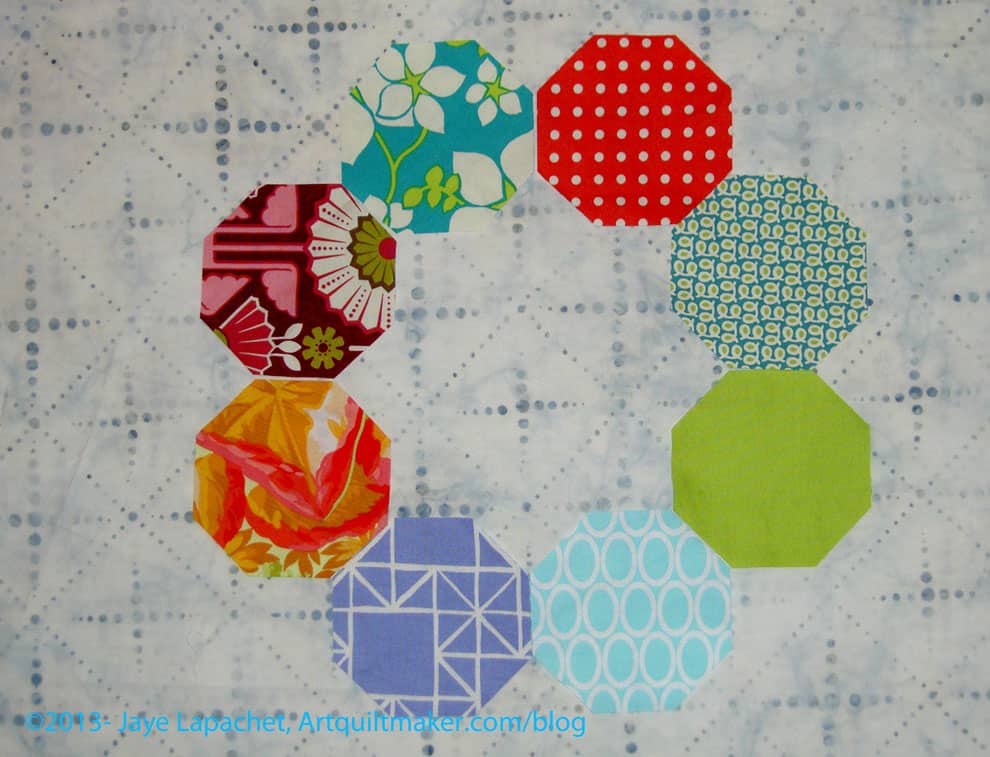
I had a feeling about the background drama and decided to make a couple of test blocks using my top two background fabrics.
Russian Rubix; Test Blocks
I am glad I did. A couple of observations:
the Russian Rubix blocks have a lot of seams
the seams seem to be in weird places, even though they make sense based on the design of the block
the fabrics I chose as potential background fabrics make the seams look very prominent.
In the photos, the backgrounds look like either would be fine. In real life the dots look better. The movement in the batik isn’t as good as I thought it would be.
These blocks are not difficult even though they look complex. The pattern is written so there is a lot of trimming. If you join in, definitely get the templates from Richard. It makes the cutting and trimming easy and painless.
I thought I would have been able to choose a background from the previous post, but it wasn’t to be. It occurred to me to think about what I wanted. I do want the background to be a player. I don’t want it to just fade into the background, so to speak. I also don’t want it to overshadow the foreground fabrics.
So, I spent some time on Sunday pressing greys and trying different greys with my octagons. It meant that I didn’t sew, but it also meant that I was carefully and deliberately engaging in the process.
Grey Batik
Above is a batik that I bought at The Granary. It has a bit of blue in it. I thought it wouldn’t work, but I do like it. It gives movement to the background. The dark grey bits remind me of swirling fog.
Grey Batik
It isn’t directional, which is a bonus. The blue doesn’t show up very well in the photos.
New Wave
This background goes with the blue flower in the upper left of the photo above. It is from the same line. I may even have bought it at the same time. It is a true background, in the sense of it doesn’t add anything.
New Wave
Again, has a directionality, but I wouldn’t say it is directional — or the directionality wouldn’t look weird if the pieces were cut different ways.
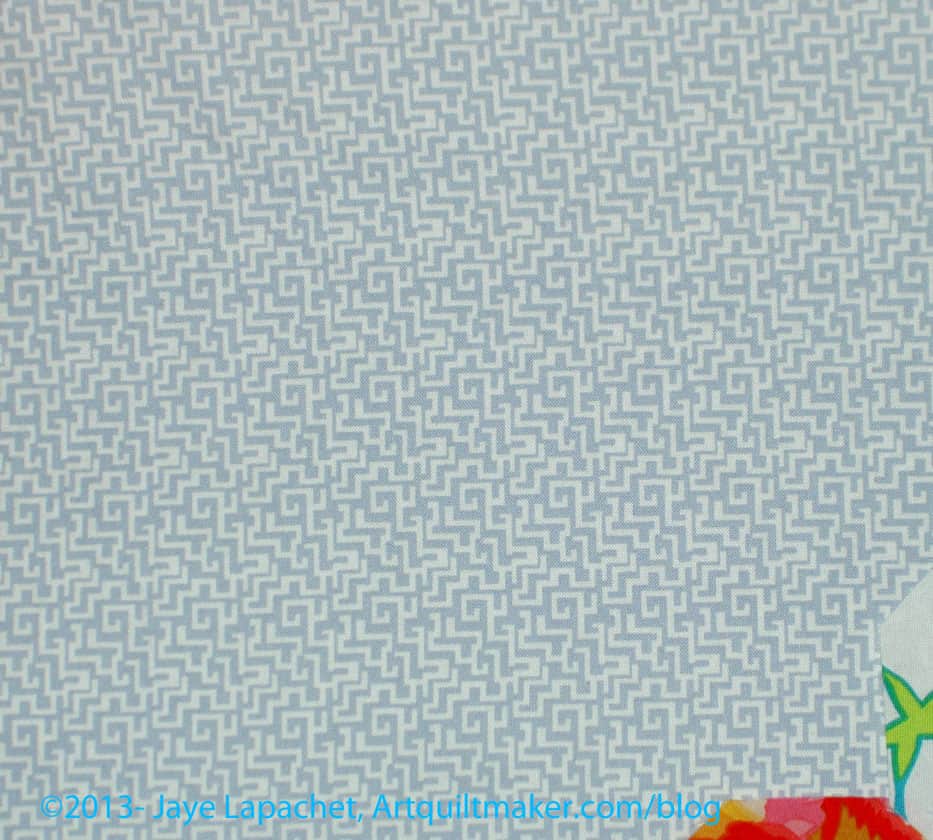
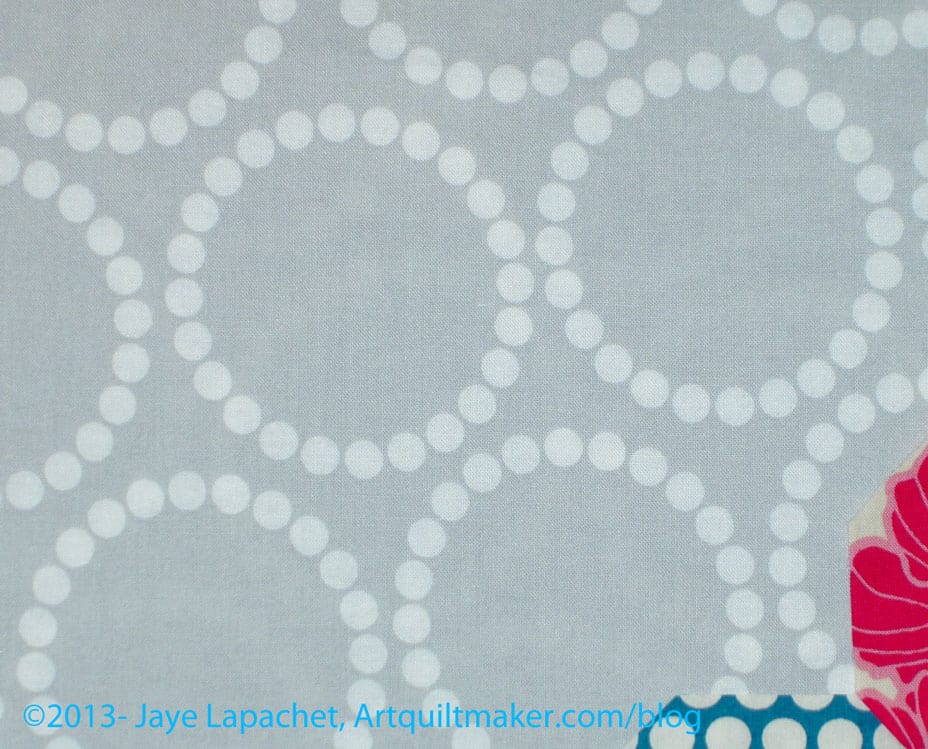
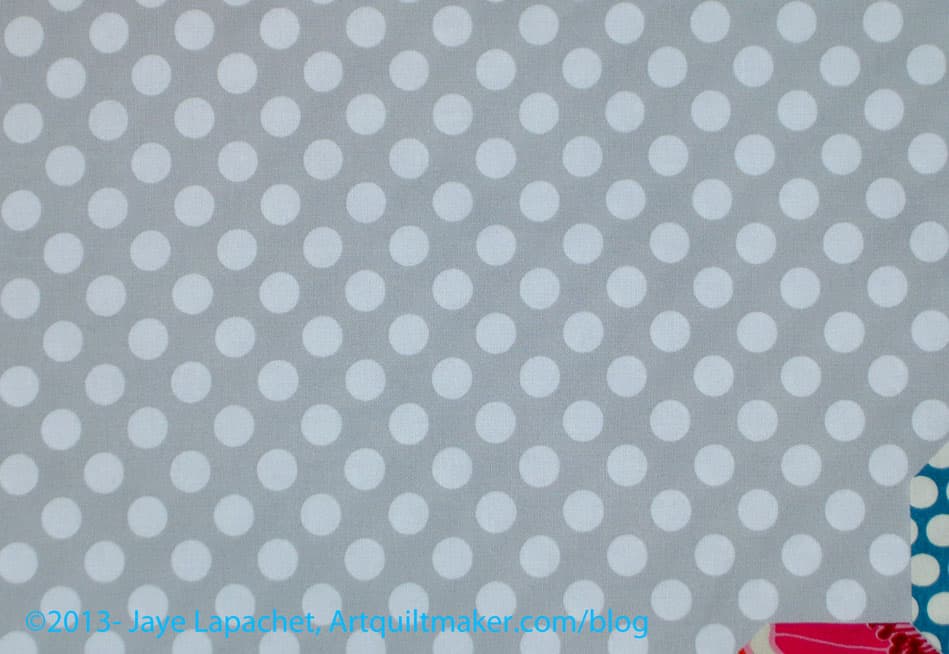
Grey Dot
Dots are always a safe bet. This dot is the right size not to interfere with the other dots, even the red ones.
Grey Dot detail
Not directional.
Angela Walter fabrics
I am not sure why I bought the amount (2-3 yards) of this. I think I was expecting the color to be a little different. Since I was pressing greys anyway, I decided to press this, but I don’t think it is appropriate for the project.
Angela Walter fabrics
Very directional. I don’t want to worry about the way I cut so that the lines of dots lined up. I am not sure I would want to worry about that.
Pearl Bracelets Grey
Lots of movement. If the pearl bracelets don’t interfere with the foreground, then the fabric adds a lot of movement. I would err on the side of this being too busy for the piece, which is a little busy anyway.
Pearl Bracelets Grey detail
Not really directional. I only have a yard of this and would have to buy more.
Ta Dot Grey
I have a boatload of this fabric, because it is a good background and I had the foresight to buy plenty.
Ta Dot Grey detail
Not directional.
Between the the choices above and the previous choices, I think my favorites are below:
Grey BatikGrey DotP&B Happy Go Lucky Grey
Of the three above, I think the batik is the most likely. I don’t have enough of the Happy Go Lucky, and can’t get anymore so that doesn’t seem to be a real option.
The grey dot is perfectly fine, but doesn’t really add anything to the piece. If I decide I don’t want to add the movement I discussed above, then that fabric would be a good option.
That leaves the batik.
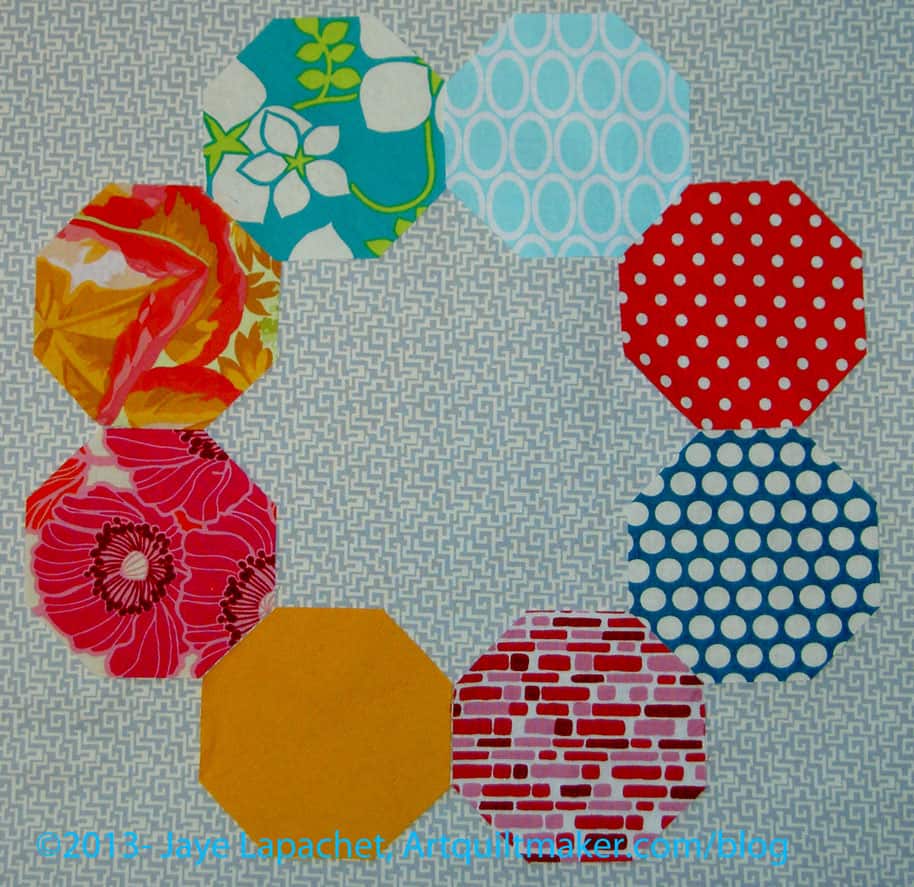
My SIL commented that I only showed the light blue on one of the backgrounds. This time, I used the same octagons for all the different backgrounds. I did rearrange them, however.
Once again, I am working on the background for the Russian Rubix. I know this seems like more drama than it is worth, but there are a couple of reasons, I am being picky:
White seems like an easy choice
Solid grey seems too boring and I don’t want to be depressed making it
I have to sew octagons together. I don’t want to sincerely dislike the background of a quilt that is difficult to piece
I don’t want the white in the foreground fabrics to bleed in the background and distort the look of the wreaths made up by the octagons.
I finally washed some greys and here are the choices I am contemplating:
Grey on White Batik
In no particular order, I am posting examples of the backgrounds I am considering. I like the movement of the grey on white batik. It does interfere with the light blue (bottom, center right).
Grey on White Batik detail
Above is the detail of the Grey on White Batik with only a little bit of other fabric for reference.
Painter’s Canvas from Magnolia Lane Collection by Laura Gunn for Michael Miller
This is my second favorite. It adds interest. It doesn’t interfere with the foreground fabrics. It isn’t boring.
Painter’s Canvas detail
I wish it weren’t so directional, though I think the directionality wouldn’t interfere with the design of the piecing. I could be wrong.
P&B Happy Go Lucky Grey
This my favorite. I love this grey. I have gone on and on about this grey and I am kind of angry that I didn’t realize I loved it when I had the chance to buy 1,000 yards. It is nowhere. I may call P&B and see if they have a bolt they will sell me.
I am worried I am just on the grey bandwagon and will sincerely dislike all of these quilts made with grey in 2 years.
Why Should you Care: you should care because of process. My thought process in the making of a quilt will give you some ideas of what to think about when you are making your next quilt. Maybe.
Over the weekend, I really had only a couple of hours to sew. Since I was behind Susan a bit on the Russian Rubix project, I decided to cut octagons from the fabrics I had selected for the 2.5″ strip project.
I know you must be thinking “what is she thinking!?!” Well, I was thinking that I really only needed 1-2 (at the most) strips for the 2.5″ strip project and that I could test out the color combination by using the same fabrics for the Russian Rubix project.
I may be wrong and may may have just cut up a bunch of fabric that I will need for something else. I may have cut up a bunch of fabric that I will be sick of using for projects by the time I have made two projects with it. I may hate the fabrics together, and have just cut up a bunch of fabrics in weird shapes that I won’t be able to use.
I really just needed something on the design wall.
Perhaps, for now, I am testing.
I cut a 2.5″ strip for the Jaye-roll project and a 3.75″ inch strip for the Russian Rubix and proceeded to use the RR templates to cut the octagons. I got about half way through cutting strips and octagons from the stack of fabrics I had selected and am pleased with the variety, the cohesiveness and the cheerfulness of the group.
I also cut enough so I could see how different fabrics interact with each other and on that level, I think this group is working.
Right now my biggest problem is background. It will be easier to audition backgrounds with smaller pieces available. The pattern has a white or Kona Snow background. I don’t know if I want to go that route, though I do think it would showcase-provide a nice backdrop? – for the colors of the fabric. I have been thinking grey. I wish P&B still made the Happy Go Lucky (?) grey I used in the A-B-C Challenge. I have some, but I don’t know if I have enough.
All of the above is speculation in my head. I have to get fabric out and look at it before I can decide for certain. Yes, I need to make visual decisions visually (thanks, Lorraine Torrence).
I am a bit messy when I work. I kept needing to cut different pieces from the various pieces of fabric. When I started the cutting, I would fold thefabric up each time, but it became ridiculous to unfold and refold every 5 seconds, so I stopped and just threw the fabric on the floor between cuts.
Why didn’t I just cut all the pieces from one fabric at once?
My mind doesn’t work that way. When I make bags, I have a hard time keeping track of pieces. I like to cut all the pieces (interfacing, fabric, etc.) required for a part so I move on the next part. For example, if the Main panel requires main fabric, interfacing and Soft & Stable, then I like to cut all the pieces before I move on to the straps, etc.
Perhaps I should have called this post “Second Guessing Myself”.
Back in January I finished the Swoon top and a short time later I sent it to the quilter.
I got it back last week. As usual, she did a fantastic job. I am merrily sewing down the binding, generally enjoying my cheerful Swoon in all its pink and orange loveliness.
THEN.
Camille Roskelly, the designer of the Swoon quilt, posts a new Swoon she has just finished.
Sigh.
I love her work. I love her fabrics. I would probably love her if she were a friend. But this newest quilt makes me wonder if I should have made the background all the same so the Swoony motifs float. I thought I was being so clever making the blocks different. Now I don’t feel so clever. I feel like I did it wrong. 🙁
The post is making me wonder if I should make a Swoon out of the Joel Dewberry Notting Hill fabric. I do love that fabric. Perhaps this all isn’t so bad after all.
Earlier in the year, while working on the Star Sampler project, I wrote: “Still I didn’t want to work on any Sawtooth Stars at the moment, even the new patterns. I just left these on the design wall and pretended I wasn’t behind again. This is an interesting exercise in working on one project almost exclusively. It is difficult for me to dedicate so much time to one project, I am finding. This makes me think more about my process.”
I didn’t go back after the above musing and put pen to paper (or keyboard to blogsite as the case may be) about my thoughts on process. I do think that the Star Sampler has given me some insight into working on a semi-complex, long term project. Whether or not I have said it, I have been thinking about trying to mostly stick to one project at a time. And, whether or not I have realized it or planned it, the Star Sampler project was a test of that thought.
We were about two months into the Sawtooth Star project when I wrote the above. I found my eyes wandering. The Star Sampler turned out to be a special project, because it required so many blocks, and, in turn, so much dedication. The blocks weren’t all difficult and there were some similarities, such as dozens and dozens of Flying Geese, but there was figuring out and puzzling out to be done throughout the project. The small 4″ stars were especially challenging, but mostly because of the size and the quantities required. The quilt, and the exercise might not have been a good test, but it was a test.
I have spent time thinking about this and I found that, after a few months of no longer working on the Star Sampler, the project sticks in my head. I feel like I have a relationship with Sawtooth Stars and I think about how much work and time the project took.
I think I have learned something about process from this project. Working on a large project that requires dedication has value. Speeding through projects doesn’t allow them to lodge in my brain. The Star Sampler is in my brain. I keep thinking about it. I think I need to consider other projects with the difficulty and depth of projects in the future.
Do I want to work on all projects that take 4 months to piece? Probably not, but I also don’t want to churn through projects every weekend. I want to remember the projects that I have made. I feel really bad about Fresh Fruit. Fresh Fruit, as you know was a leaders and enders project. Because the pieces were so large, I had the major pieces for the quilt top done before I really realized it. It didn’t require much dedicated time on my part. I kind of slid it between whatever else I was working on. It is definitely not lodged in my brain.
I don’t think it is sheer time that makes a quilt top lodge in my brain. I think there has to be a little drama, like the green border for the T-Shirt quilt. Not a lot of drama, but a little. Perhaps drama isn’t the right word? Perhaps the right word is process. I have to work through the process in order to get the quilt to stick in my mind. If there is no process, no puzzling out piecing tricks, no quandries, then the quilt just doesn’t stick in my mind. It is kind of sad to make a quilt and then not even remember making it.