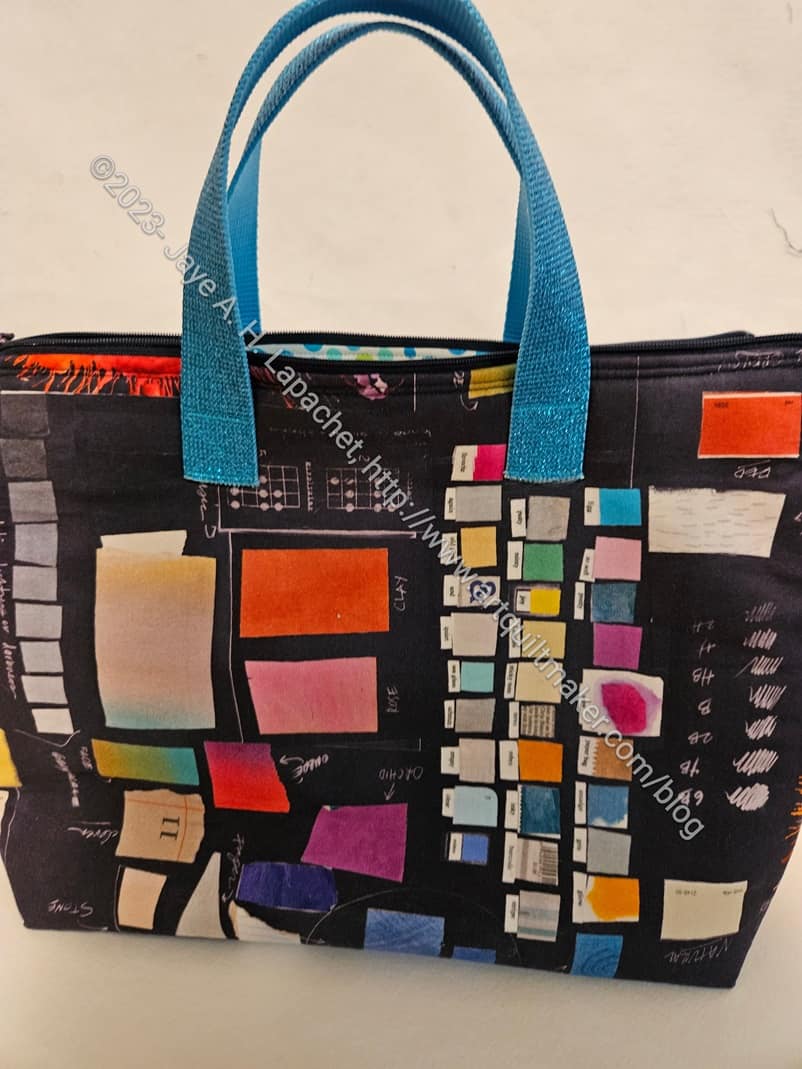
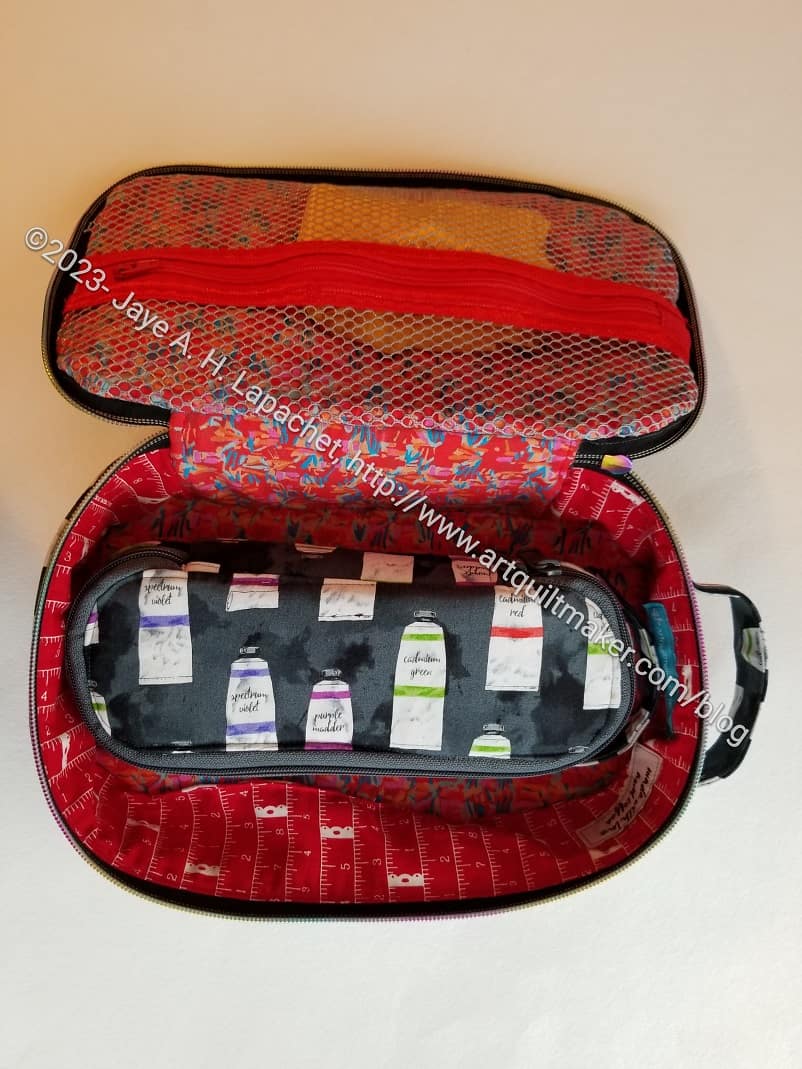
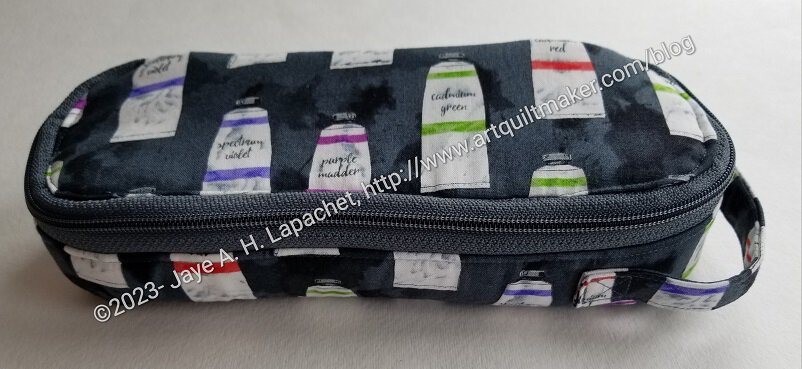
This the Kit Supply Tote I made for Carrie. It looks the same as the one for Sue, mostly because I used the same fabric for both of them. I highlighted the paint chips on this one and the color wheel on Sue’s.
We had a holiday lunch yesterday, which was super fun. I was hopping about the week before, because I could barely contain my excitement in giving these totes to them. I basically thrust the gift bags into their hands as soon as we sat down at the restaurant and made them open them. They seemed excited as well.
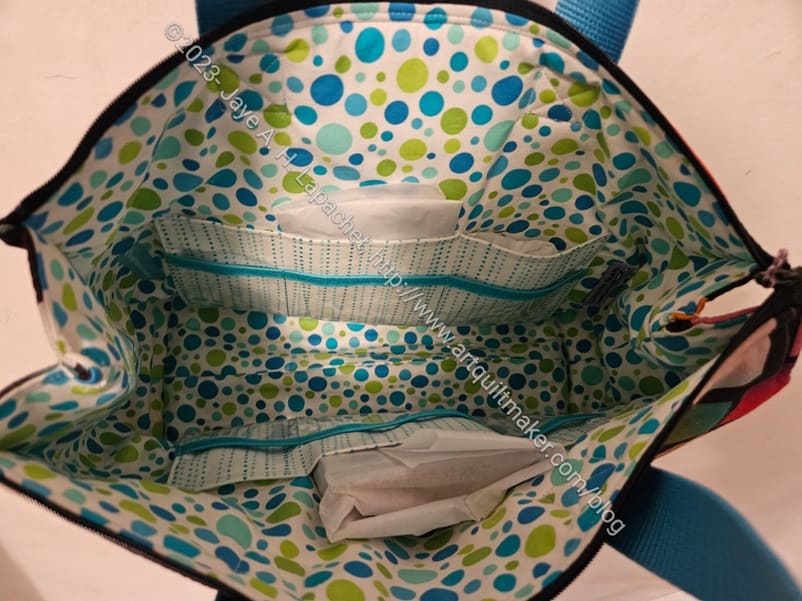
Kit Supply Tote: Carrie’s inside
I put a few small gifts in side just because I don’t like to give empty bags.
The insides are the same on both. I designed the pockets differently from the pattern as I wanted to put two layers of pockets for added storage. On Carrie’s tote, I separated the pockets more. Both have vinyl pockets on top of the fabric pocket. The vinyl pocket is edged with some turquoise doublefold elastic.
Carrie was super excited that this bag matched her Hackney bag. 😉
I am in the thick of the gift giving season. The YM’s birthday was on the 30th. Friend Julie’s birthday was on the 1st and Christmas is right around the corner. Yes, I am holding on to my hat!
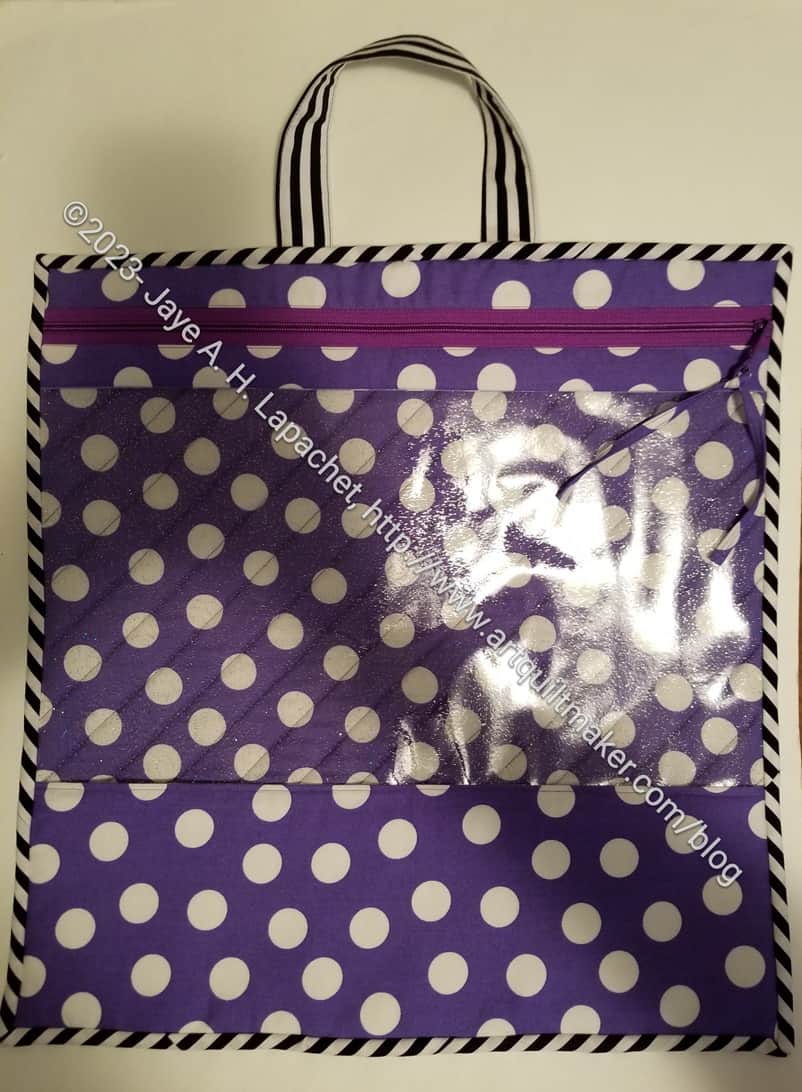
Purple Dot Project Bag
I finished the project bag for Julie back in November, but as with a lot of gifts, I couldn’t show it until now. I did put in a 26 Projects post, but didn’t make a big deal out of it.
I made Julie one of these before. This is a little different. It is the Jumbo size, which just looks large to me. It is, however, larger than the large.
The quilted construction of this is the same as the Ultimate project bag, so next time I’ll just quilt a certain size of fabric sandwich and move on. The directions for that part of the project were long and somewhat tedious. I know they have to plan for any type of bag maker and Annie thorough, for sure.
Julie received her package after some drama at the post office, which is a relief. I thought for awhile that she wouldn’t get it. She also wrote about it on her blog and said some very sweet things. I was very pleased hear how she is using the smaller version I made her last year (??).
I was pretty excited about this bag and my reward for hosting 27 people for Thanksgiving was working a project on which I really wanted to work. That is the Ultimate Project Bag.
I said in my previous post that there wasn’t much to cut out. That was true, but there is a lot of prep. I had to quilt it, but I took my lessons from when I visited Mary M and used the automatic cutting feature on my machine. OMG! even on my machine it makes a huge difference. I really don’t know why. Something about not having to pick up my snips, I guess.
The quilted piece is made up of lining, foam and exterior. Vanessa (Crafty Gemini) suggests quilting a big X over the whole piece. I didn’t want to do that, so I drew some random lines on the exterior.
Do I say that about all bags? The prep never gets easier. I know I said was Zen with it one time. I have to get that feeling back.
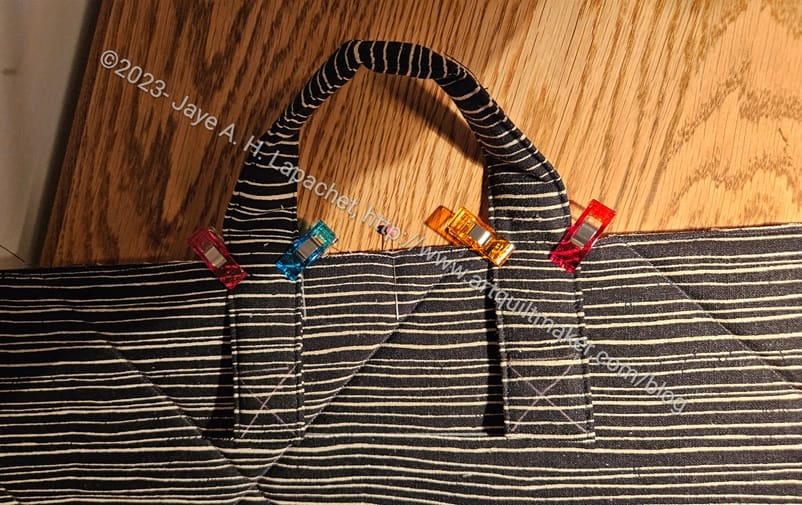
Exterior with handles ready to sew
I didn’t really like the way Vanessa told me to make the handles, so I made them the way I usually make them. I cut the fabric 15×5 and folded the pieces into quarters the long way. I did put a piece of foam, which she suggested, inside and that was a good idea. I usually forget to do it. Now, the handles are nice and comfy.
Zipper pockets in process
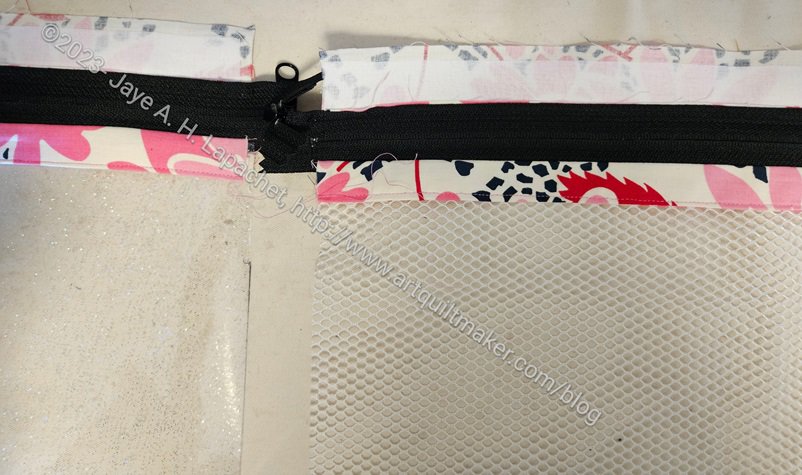
I also worked on the zipper plackets. I am not excited about how she says to make the zipper plackets. As I have said, I like my zipper tape covered. Only part of the zipper tape is covered. Granted, you can’t see the tape, because it will be too high up, but still.
Pockets on lining
The pockets go over the lining. They are sewn down at the bottom and then the excess is trimmed. Vanessa goes into a long explanation about why she adds extra to the end of the mesh and vinyl. She just trims them and leaves the edges raw. I was a little shocked by this, but I don’t really like raw edges. I think what I would do next time is sew down the pocket on the top, then mark the spot on the vinyl or mesh where the piece will be topstitched, then trim and put doublefold elastic over the edge. Finally, I would sew that edge down. I am not sure if it would work, but the edge would be bound. I guess I have to figure out if the stitching line for the bottom of the pockets has any wiggle room.
Vinyl pocket sewn down
I was able to get the mesh pocket sewn on. I worried the whole time I was working with mesh that everything I put in that pocket would get stuck in the mesh. If I make this project again, I can make two vinyl pockets.
As mentioned previously, this is one of the projects from the Crafty Gemini Organizer Club. I find that some things don’t age well with these videos. For example, many people use Sew Tites** now, especially when working with vinyl. There is no mention of them in the video. I think they must have been released after, though I thought maybe it was at a QuiltCon in 2015 or 2016. I don’t know. If you make this project, definitely get some Sew Tites**.
I made good progress and will be able to finish soon. This isn’t a difficult project. I am a little angry at myself for not getting to it sooner.
You can still buy the club (no affiliation). Check out the video showing all the projects.
**N. B. : Obviously, you should shop at local quilt shops and small businesses. However, if you are too busy or can’t find what you need there, I use Amazon affiliate links and may be paid for your purchase of an item when you click on an item’s link in my post. There is no additional cost to you for clicking or purchasing items I recommend. I appreciate your clicks and purchases as it helps support this blog.
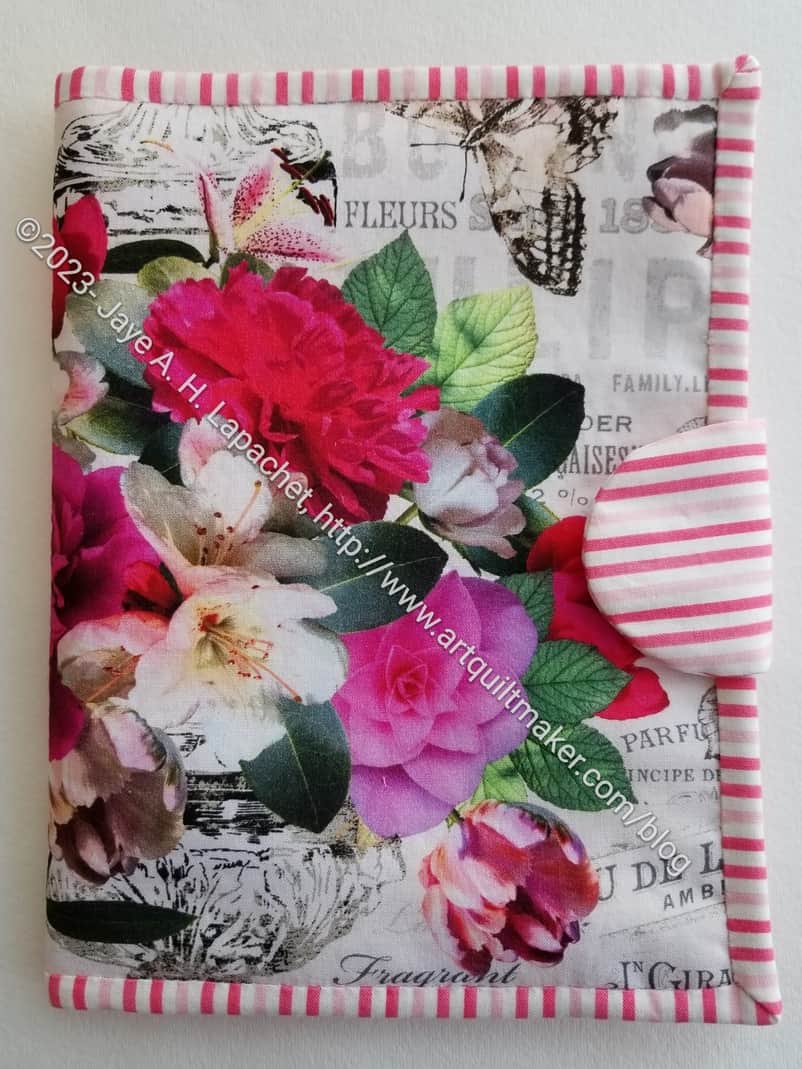
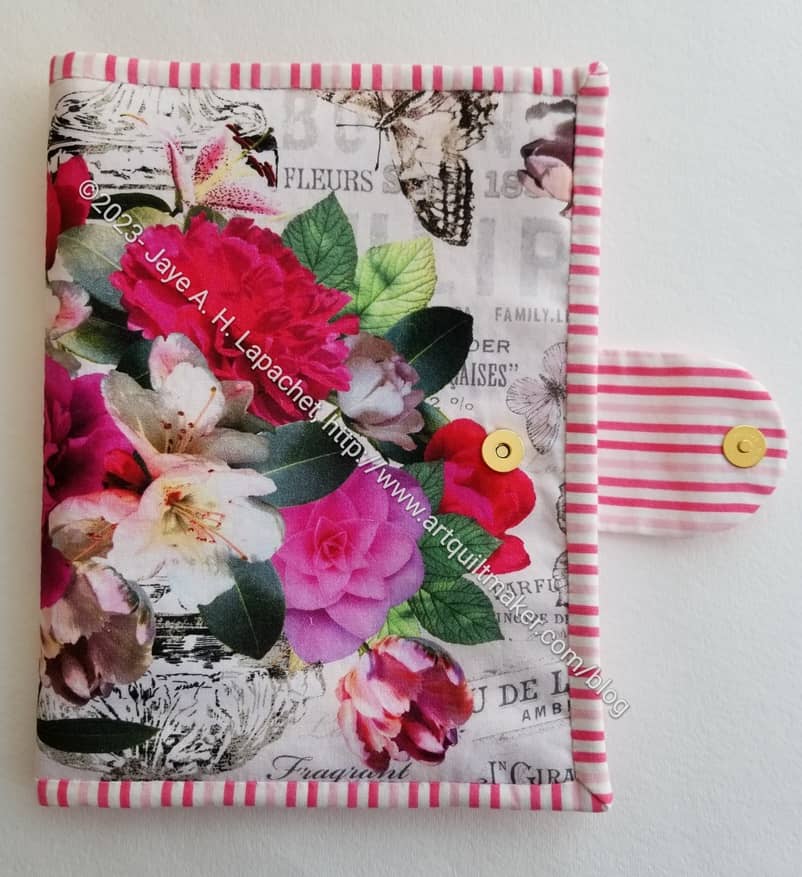
I am pleased with how it looks. I like the fussy cutting of the flower fabric (I bought that flower fabric at the Quilt Loft). It is sweet looking, though not modern at all.
I am a sucker for striped binding. I think it works. I think black and white would have been classic, but too much of a contrast with the flowers.
2-in-1 Case #4 exterior – open
The magnetic snap is gold. I am not sure why I had a gold one. I don’t usually buy gold, but the brand was one carried by Joann, so maybe I bought it there on ‘spec?
I was able to line up the stripes pretty well on the snap tab. Honestly, it was a happy accident. 😉
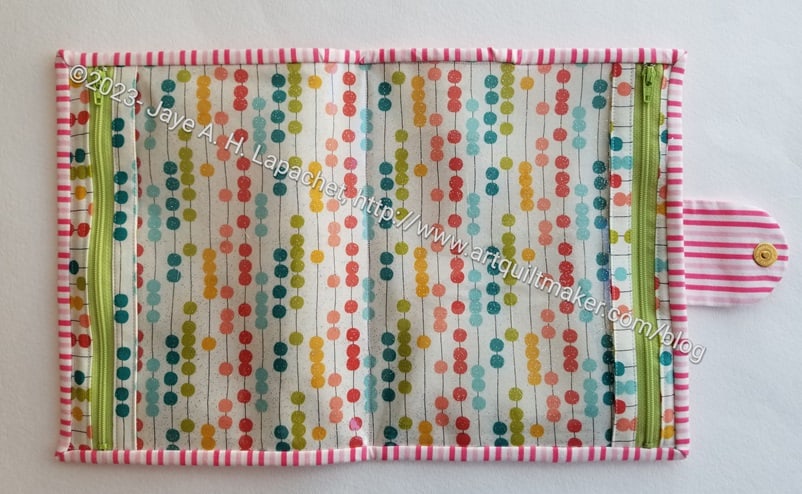
2-in-1 Case #4 interior
The inside looks pretty good as well, though the contrast between the outside (sweet and flowery) and the inside (modern) is very obvious. At least the user can’t see the flowers when the case is open.
I am looking forward to seeing the last two. The photo below shows the ones I have so far.
2-in-1 Cases – closed
Joelle made the red version. Cyndi contributed the blue example in the center and mine is on the right. They look so different!
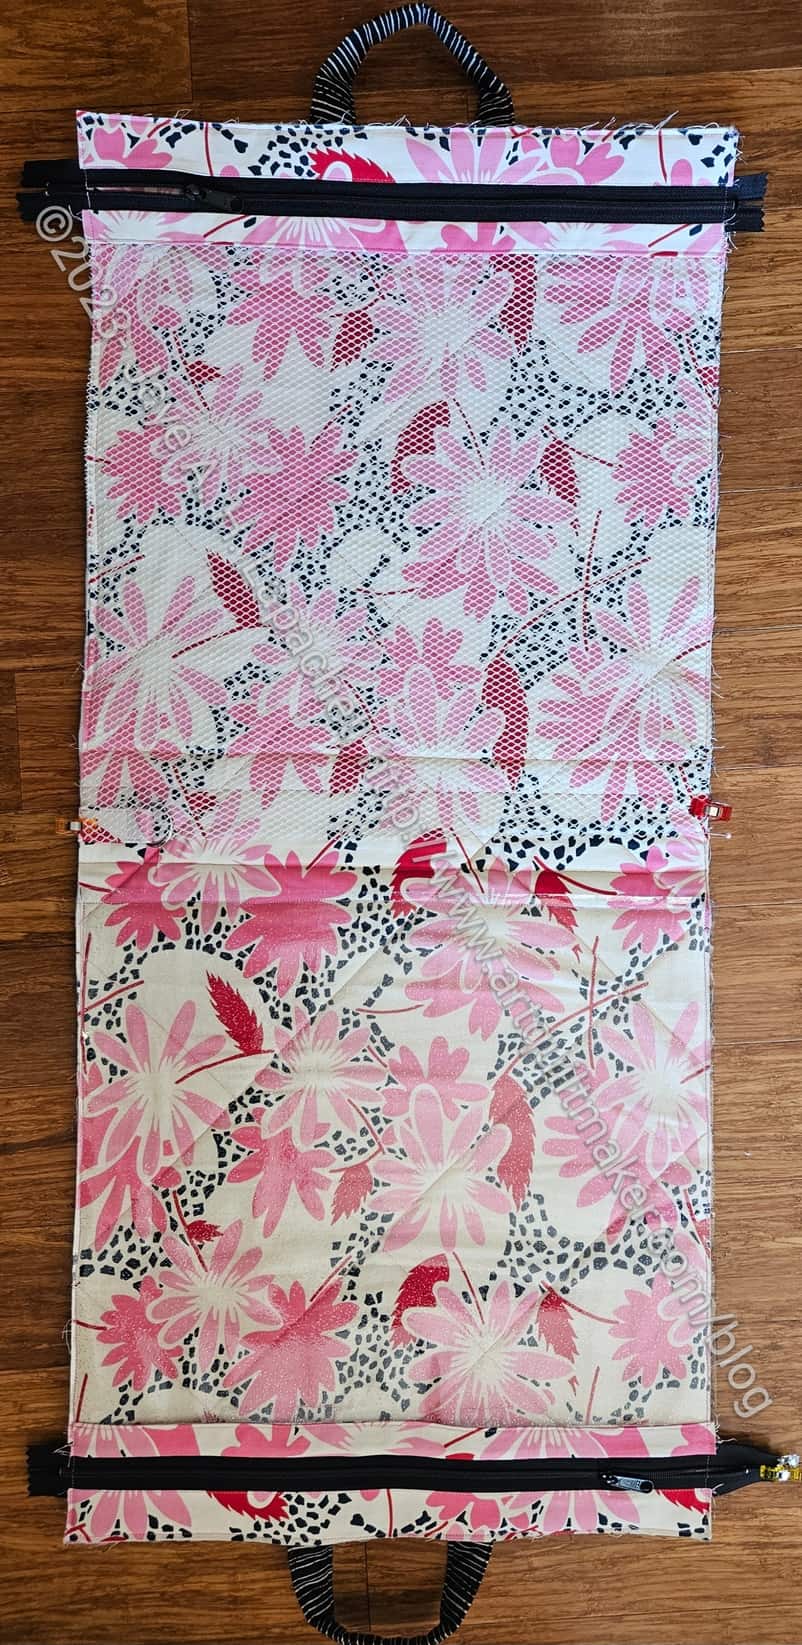
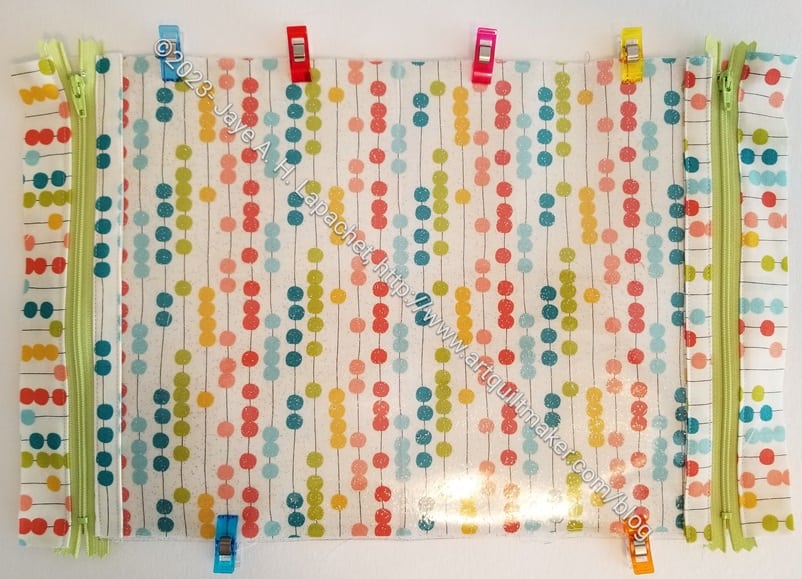
I continued to work on the 2-in-1 Case (#4) and have decided that making at least two of each bag is the best way to go. This one is so much easier than the others. Still, I am taking my time.
2-in-1 Case #4 – zipper stop
I forgot that I thought I should use a longer zipper than the one the pattern calls for and broke a needle.
The pattern calls for 8″ zippers. Inevitably one or other of the stops gets in the way and I break a needle. ERGH!! I wrote myself a note to use a 10″ zipper or continuous zipper tape. It doesn’t matter if the stops get cut off as the binding acts like a stop anyway.
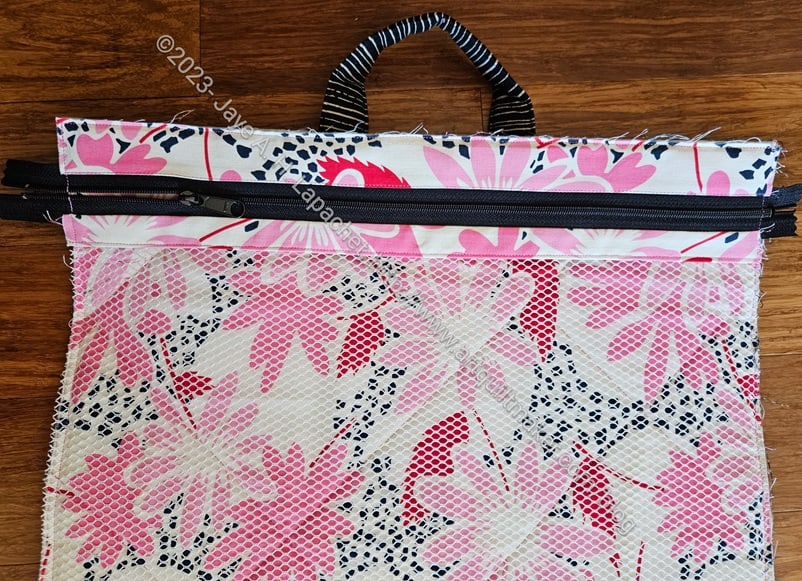
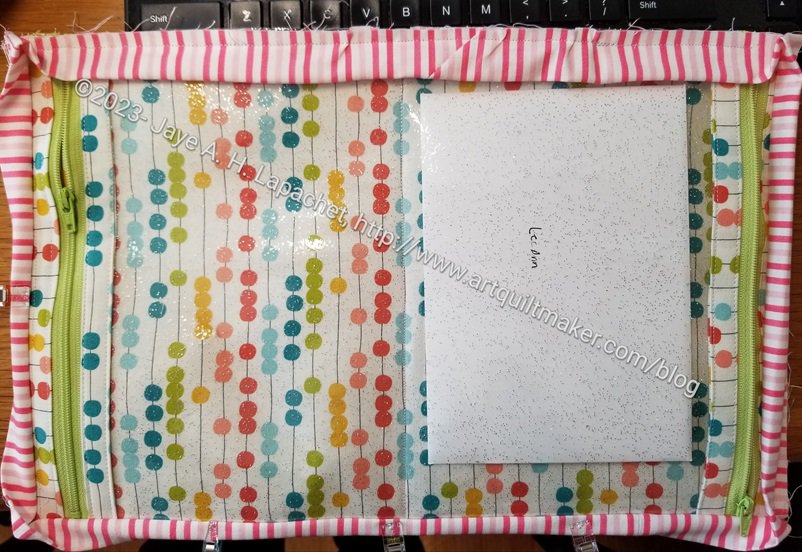
2-in-1 Case #4 interior
Besides breaking a needle, the case is coming together.
I changed zipper colors right before I sewed them to the vinyl. The ones I chose match the light green in the fabric pretty well. I was going to use a brighter green, but like these better.
I followed the seam allowance directions, but the section with the vinyl and the zippers was still too big. I could have ripped it out and done one part over, but decided just to center the section with the vinyl and cut off the extra. Maybe lame, but it will look fine.
2-in-1 Case #4 with binding
The binding is on and I will hand sew it to the back.
I was able to finish my Project Bag while I listened to a presentation at work the other day. You might think I was cheating on work, but I find that if I do some handwork, I can pay better attention to the presentation.
I was going to make Mom another one for Christmas, but decided on something else and made this one for myself with some of the fabric Colleen quilted for me. It is already in use for the EPPic bag pieces I cut out at Sew Day some time ago.
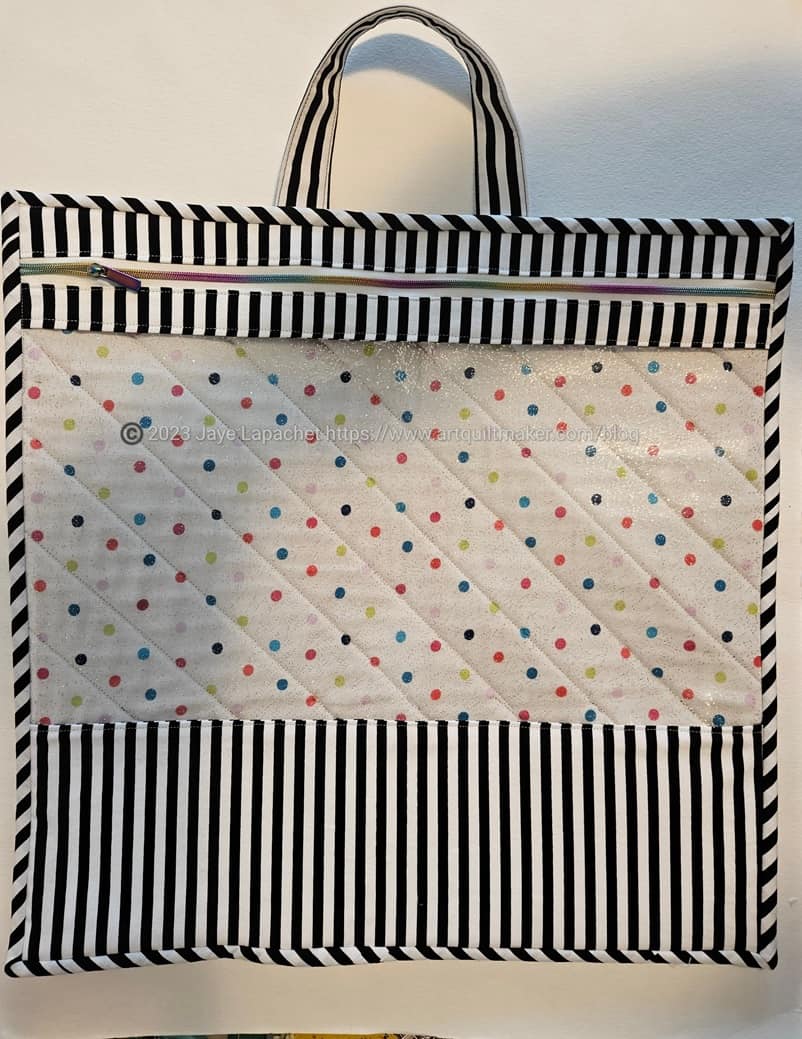
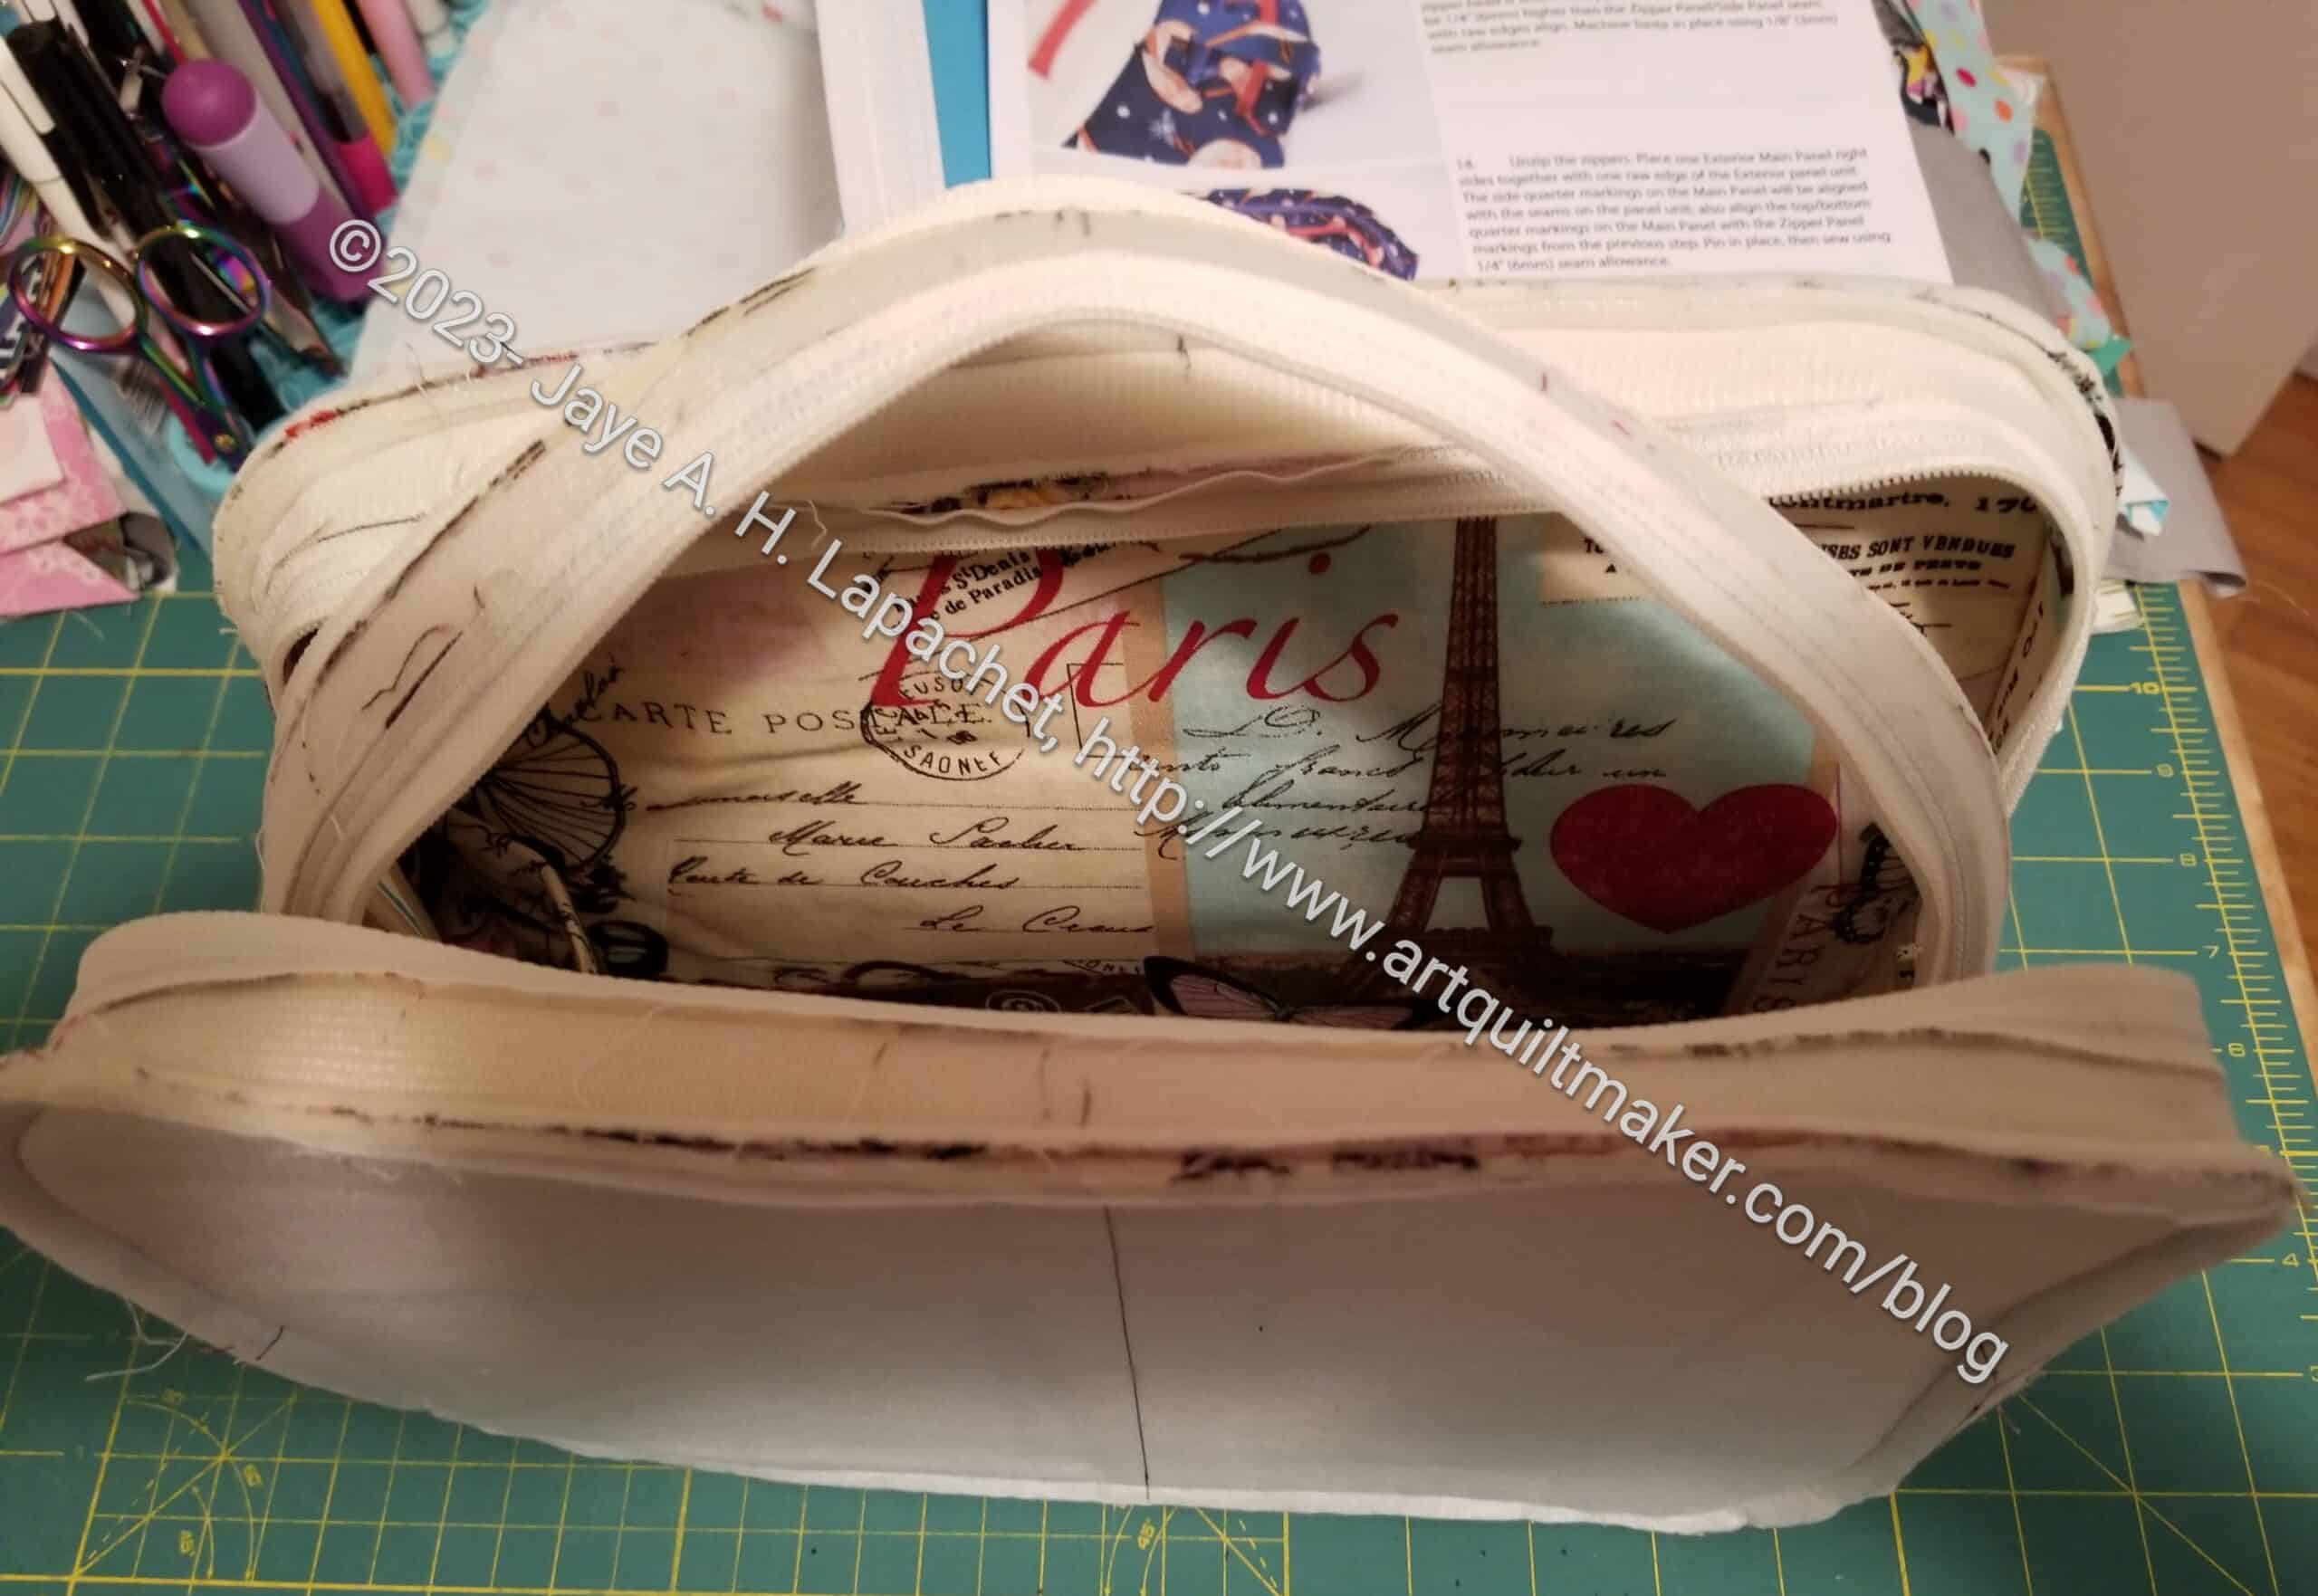
As mentioned, I am making another Kit Supply Tote. For some reason, I am thinking a lot about this bag. Sometimes, making the pattern a second time gives me new insights.
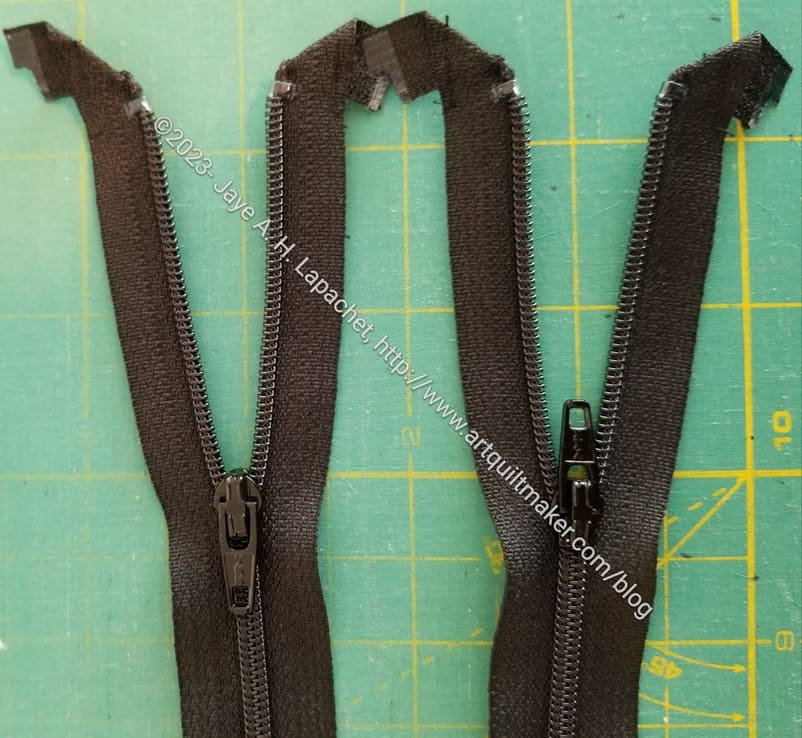
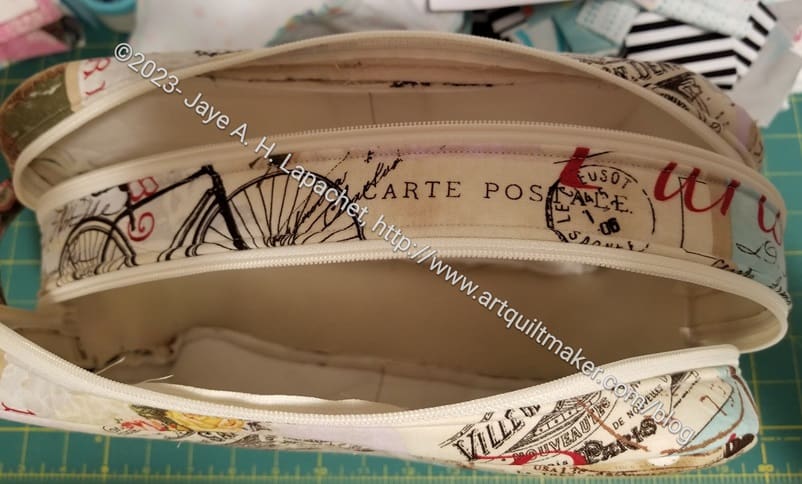
Over the weekend, I worked on the zippers in addition to the pockets.
The bag requires one separating zipper. I am getting more experience with them after the UCAB and my own Kit Supply Tote.
Zipper tape at 90 degrees
Some designers have makers fold back the zipper tape at a 90 degree angle. I have always found this problematic. Over the weekend, looking at the pattern, I realized that I didn’t have to totally secure the piece so it would never come out. I only had to secure it enough to keep it in place until I sewed the zipper in. I sewed a few stitches just where the open edge of the 90 degree folded piece. I had no problems with the zipper tape sticking under the presser foot and developing a thread blob.
I am working on another Kit Supply Tote. As an aside, having a model to look at as I make the pattern again makes the second one much easier.
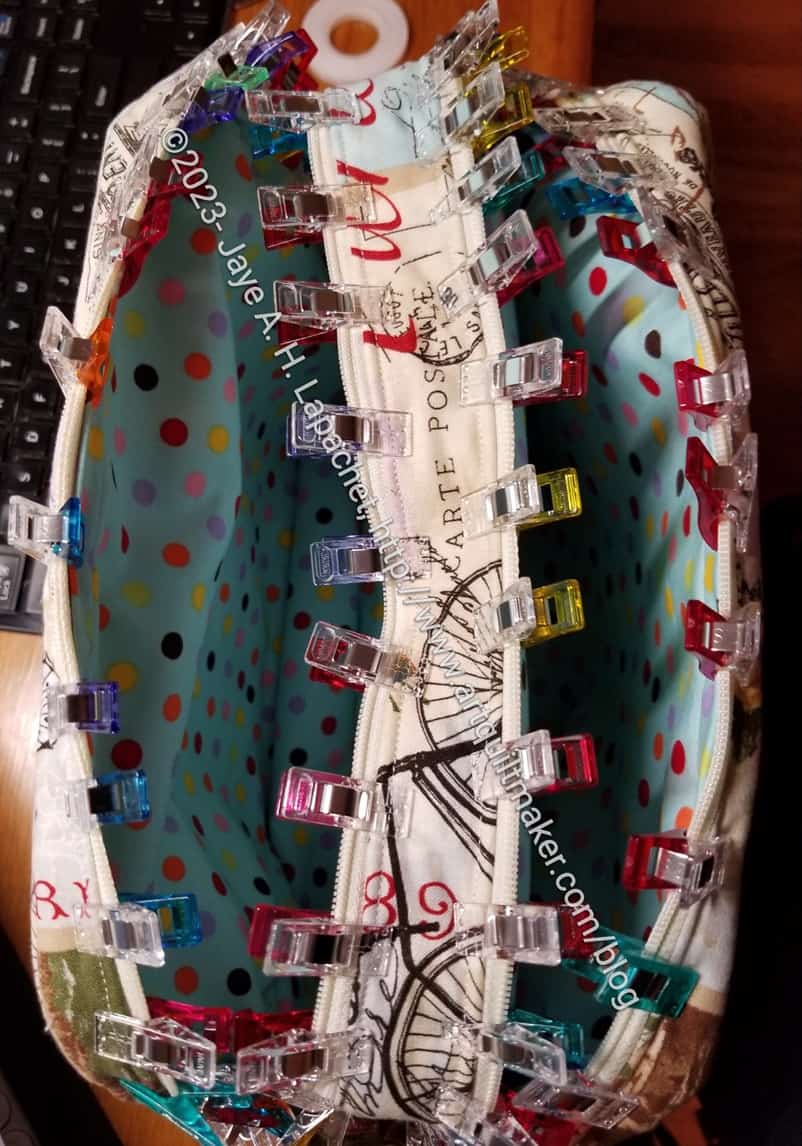
In this case, I worked on the pockets on Saturday night. I modified the pockets in the pattern, because I thought I could add more pockets. I prepared the modified pockets some time ago, but just started to sew them over the weekend.
Kit Supply Tote pocket modification
My pockets have the pockets from the pattern on the bottom (white fabric with blue lines of dots) and another vinyl pocket (top of vinyl has blue double fold elastic) layered on top. I thought this was a great idea until I started to sew it. I had to fold the vinyl under to make a seam, which makes the whole piece really thick. It worked, but it wasn’t ideal. I had to rip out one section at the bottom, because I didn’t quite catch the vinyl. After that I was very careful about catching the vinyl.
I could always add an internal zipper pocket, but I think these slip pockets are more useful. I think this idea has potential; I just have to work on it a little more.
N. B. In the photo, I am using Sew Tites**, pins** and WonderClips** to hold the pocket in place. The pins cannot be used on vinyl. I know I have mentioned this before, but it is always useful to hear it again. Vinyl doesn’t self heal, so WonderClips and Sew Tites are a must when you work with vinyl. That Sew Tite Magnum** was great! I use the pins linked above because they work better for me with bags. The super thin pins that some quiltmakers love bend when used with the layers required for bagmaking.
**N. B. : Obviously, you should shop at local quilt shops and small businesses. However, if you are too busy or can’t find what you need there, I use Amazon affiliate links and may be paid for your purchase of an item when you click on an item’s link in my post. There is no additional cost to you for clicking or purchasing items I recommend. I appreciate your clicks and purchases as it helps support this blog.
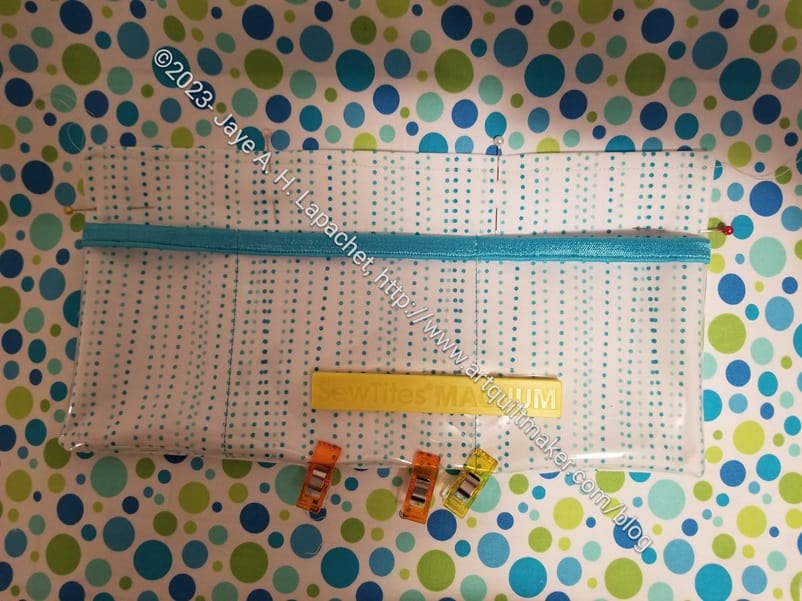
I made good progress on the disco Double Zip Pouch. This is an image of the pouch with the exterior completed.
Disco Double zip from top
The next step was to install the lining. I had to put the lining together. The instructions said to use washaway tape** to attach the lining to the inside of the exterior. I added the clips** to keep all the parts of the lining in place.
Now I have to sew it.
In general, I thought this was a pretty easy pouch to make. The drop-in lining is not a favorite, but I am determined to succeed.
**N. B. : Obviously, you should shop at local quilt shops and small businesses. However, if you are too busy or can’t find what you need there, I use Amazon affiliate links and may be paid for your purchase of an item when you click on an item’s link in my post. There is no additional cost to you for clicking or purchasing items I recommend. I appreciate your clicks and purchases as it helps support this blog.
The Disco Double Zip Pouch is from Minikins Season 2. Yes, hooray, I am working on it. Last time we talked, I had everything cut out. Then I went on vacation for a week and didn’t work on it. When I returned, I started sewing this project.
I think I decided to make the large size, because what I have is rather large. I have no idea what I chose. It is, at least larger than I expected. This pattern seems very similar to the Bello Pouch, though with double zips
Disco Double Zip inside out
It is kind of amazing. It went together very quickly. I thought it would be complicated, but the parts of the zipper that create the double zippers went together really easily. The center piece looks strange, kind of like a handle.
Disco Double Zip in process
There were some similarities to the Hackney. Specifically, making the gusset was similar to the Hackney. I am learning that making a dozen (??) Hackneys really upped my skills. I am not sure why that one pattern helped me so much.
Carrie is having fun making door prize collections.
BAM Picnic themed Door Prize
This one has a picnic theme, which I think is very clever. She is using some contributions from other team members, such as an interesting pouch that Tim made. The basket is from Amazon**, but there free patterns* for rope baskets, too. They are a good project for using up fabric scraps.
*N.B. I haven’t tried this pattern so your mileage may vary.
**N. B. : Obviously, you should shop at local quilt shops and small businesses. However, if you are too busy or can’t find what you need there, I use Amazon affiliate links and may be paid for your purchase of an item when you click on an item’s link in my post. There is no additional cost to you for clicking or purchasing items I recommend. I appreciate your clicks and purchases as it helps support this blog.
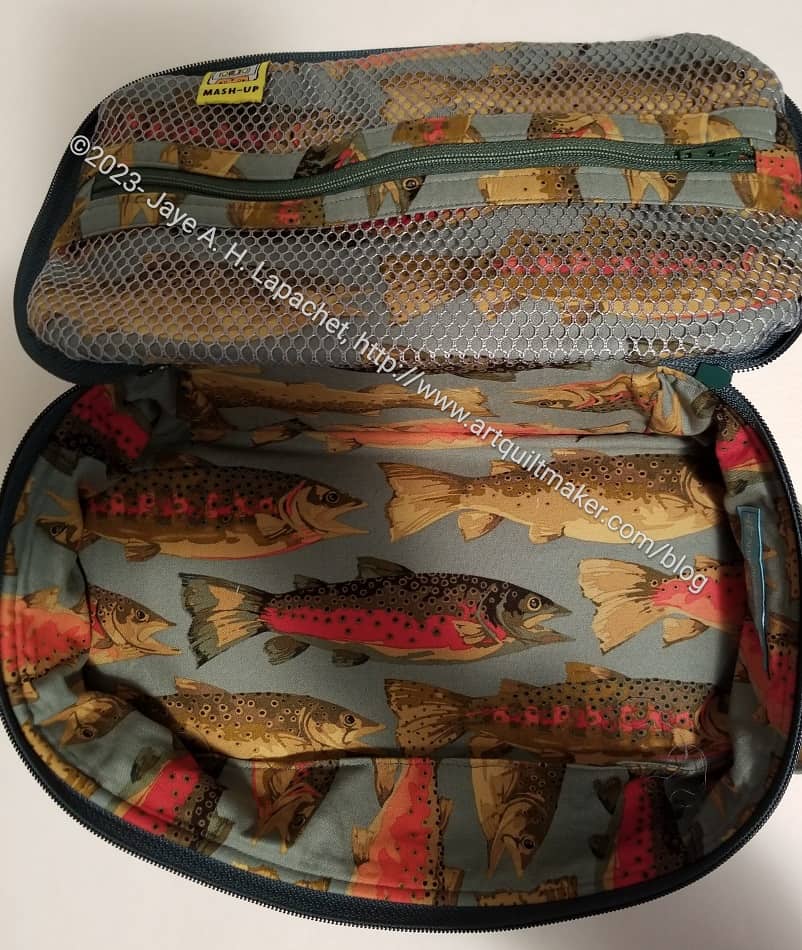
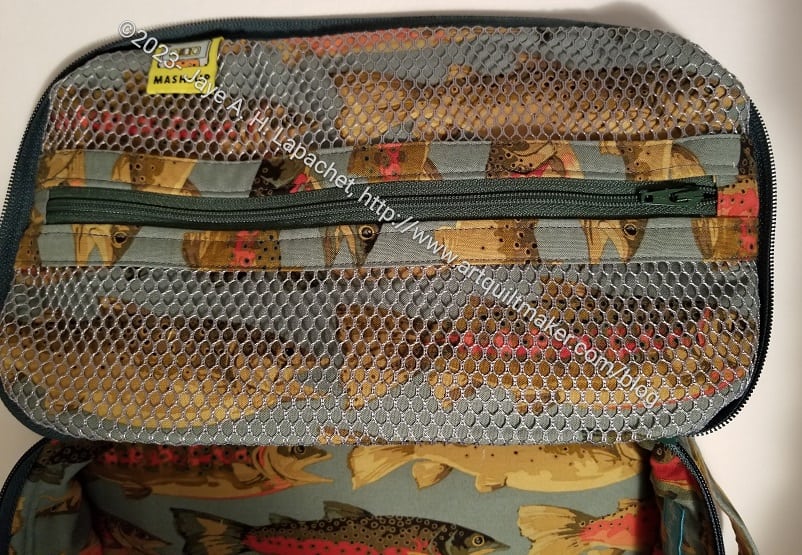
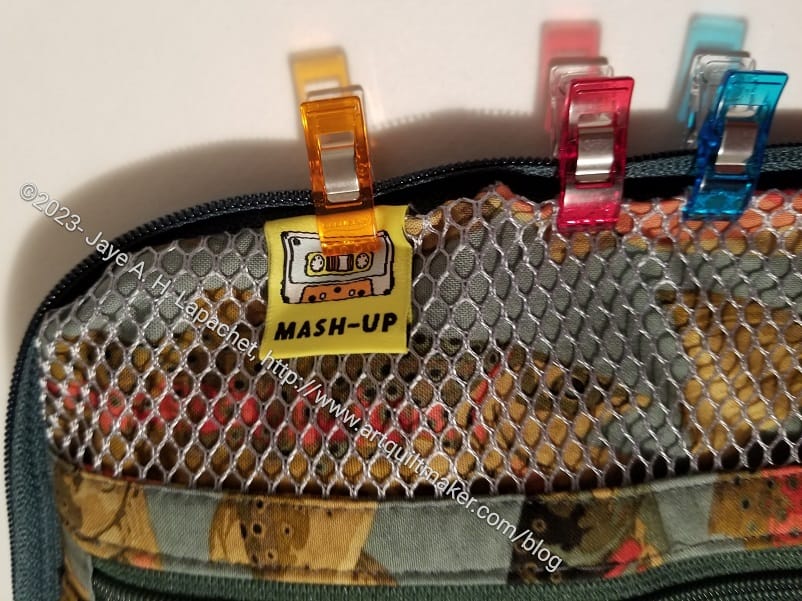
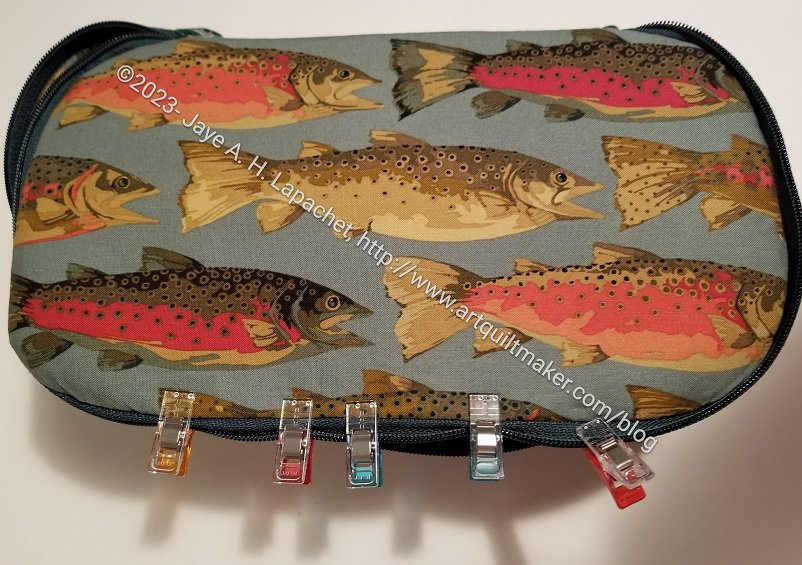
Hooray! The Fish Hackney is done. I am going to get a gift card and store it in my box of gifts. I can cross off one holiday gift requirement.
It looks pretty good. I am happy with it and hope my Dad will like it as well.
I think next time I will try a smaller vertical zipper for the mesh pocket. I think it might be useful and there is something about the zipper in the center of the pocket that bugs me a little bit. I’ll have to adjust the size of the zipper binding (called Mesh binding in the pattern) to accommodate a different sized zipper.
Fish Hackney – done – top
I was able to fix the label. I connected the bottom of the label to the mesh by sewing it carefully to bits of the mesh. I should have used yellow thread, but I didn’t.
I’ll have to think about where to put non-artquiltmaker labels in the future. Middle bottom of the top? It would mean they were upside down, but might be an option.
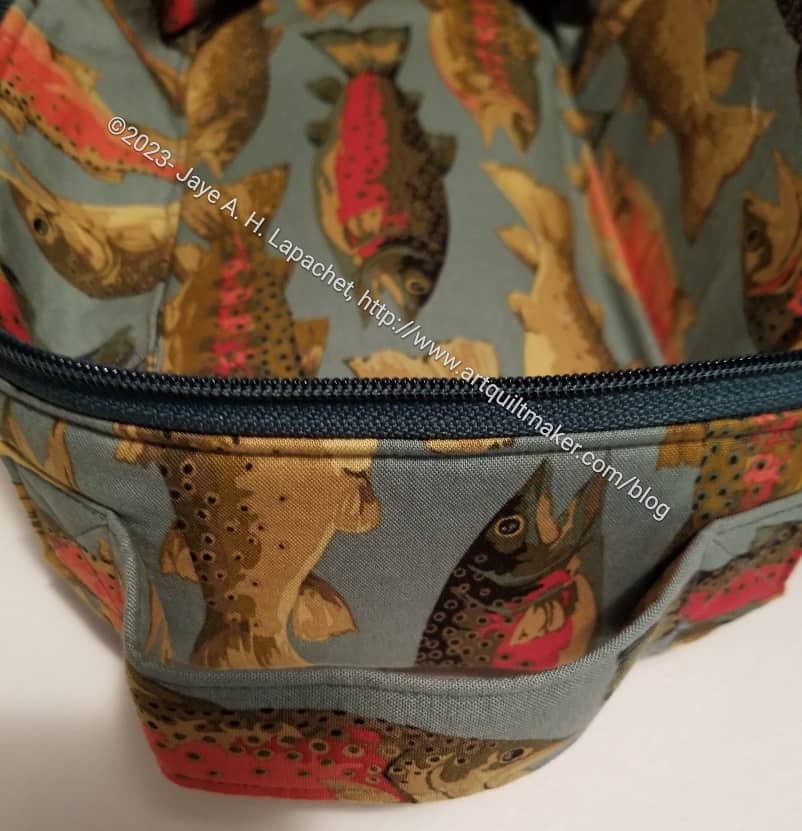
Fish Hackney – done – handle
The handle looks good. I think I need to position them a little higher up in the future.
I know I will make at least one more of these bags, maybe two.
I am finally nearing completion of the Fish Hackney! Hooray!
It isn’t that it is difficult. It is that I have been working on other projects and, also, as usual, haven’t had time. Good thing I started early.
I am pretty happy with the fussy cutting. I lined up some of the fish in the center of the top and bottom, which looks good. I made one mistake and put the back panel in upside down. Oh well. My dad loves fish so I think he will like it regardless.
Fish Hackney – inside top detail
I remembered to put on all the labels, but the label I put in the top inside is in a terrible location. It flaps up and gets caught in the zipper and I am going to have to do something about it. What was I thinking?
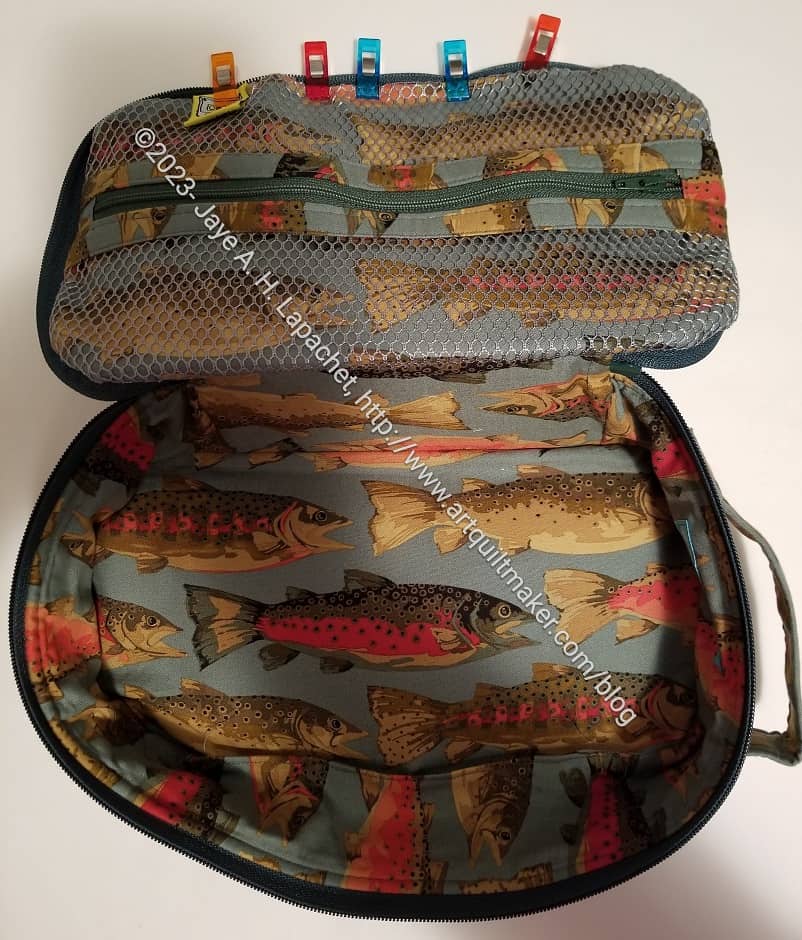
Fish Hackney – in process – closed
As you can see, I only have to close up the gaps. I’ll take a break from La Pass and get it done.
I know I showed these separately the other day, but I had to show you how they fit together. Aren’t they cute together?
As mentioned, I think the small one came out the wrong size, but I still think it is cute. I think it could be useful, too. It would fit very well into not a very large purse for … small items – makeup, sweets, toothbrush and toothpaste, etc.
Two Hackneys for Mom – interior
The small one also fits inside the large one. I am not sure why a person would use it that way. It is an observation, however.
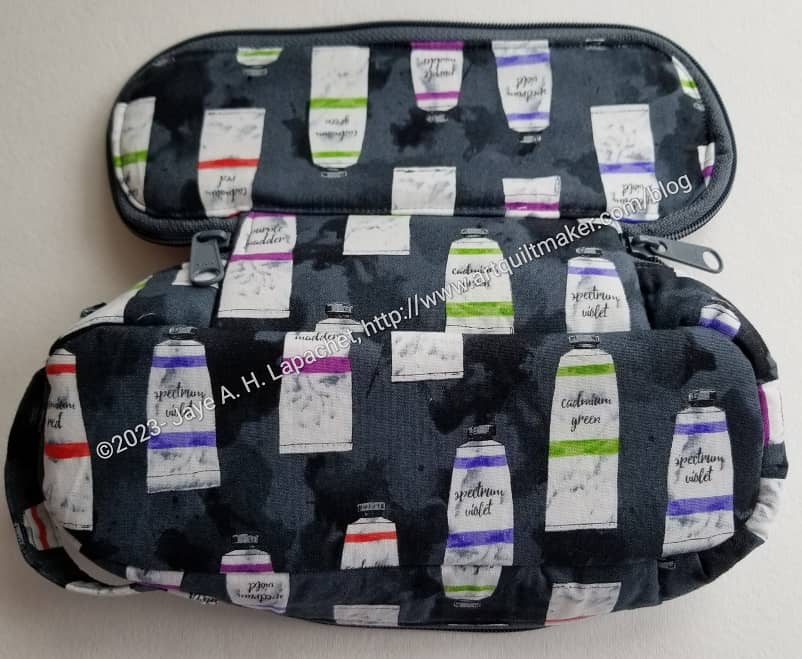
I finished this bag back in June. I couldn’t show it until today, because I intended it to be a birthday gift for Mom. She sometimes reads my blog, so I had to keep it a secret.
This was problematic as back in June, I was struggling to keep up with posting. Work was really busy and I was struggling to sew, which meant I didn’t have a lot to post. I should have finished another bag for someone who doesn’t read the blog, but wanted to try finishing one of the bags I cut out with the Cricut.
Paint Tube Hackney – open/exterior
Regardless, I finished this bag. I was concerned at first, because it was the small sized version of this bag and I thought it would be harder to sew. It was a little tight in places, but I was able to easily finish it.
I had to recalculate the handle size and position. I was a little off, but it will work.
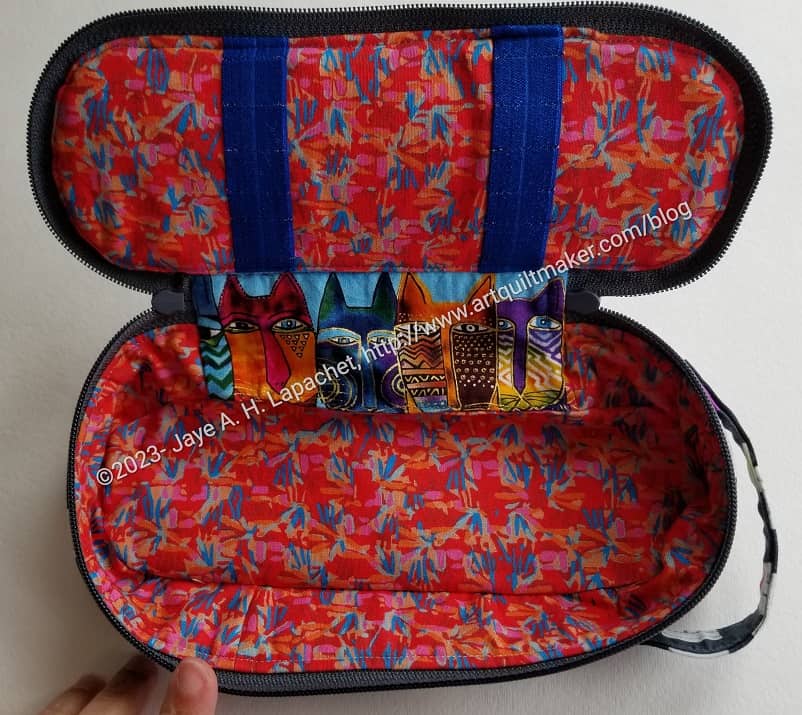
Paint Tube Hackney – open/interior
I think the back panel is a great opportunity for fussy cutting, so I took some of the Laurel Burch fabric I bought for mom and cut out some of the cats. I think it looks cute.
I also made a tool holder in the top instead of the mesh pocket. I didn’t want to fuss with that tiny space and I think the tool holder / elastic bands will be more useful for Mom.