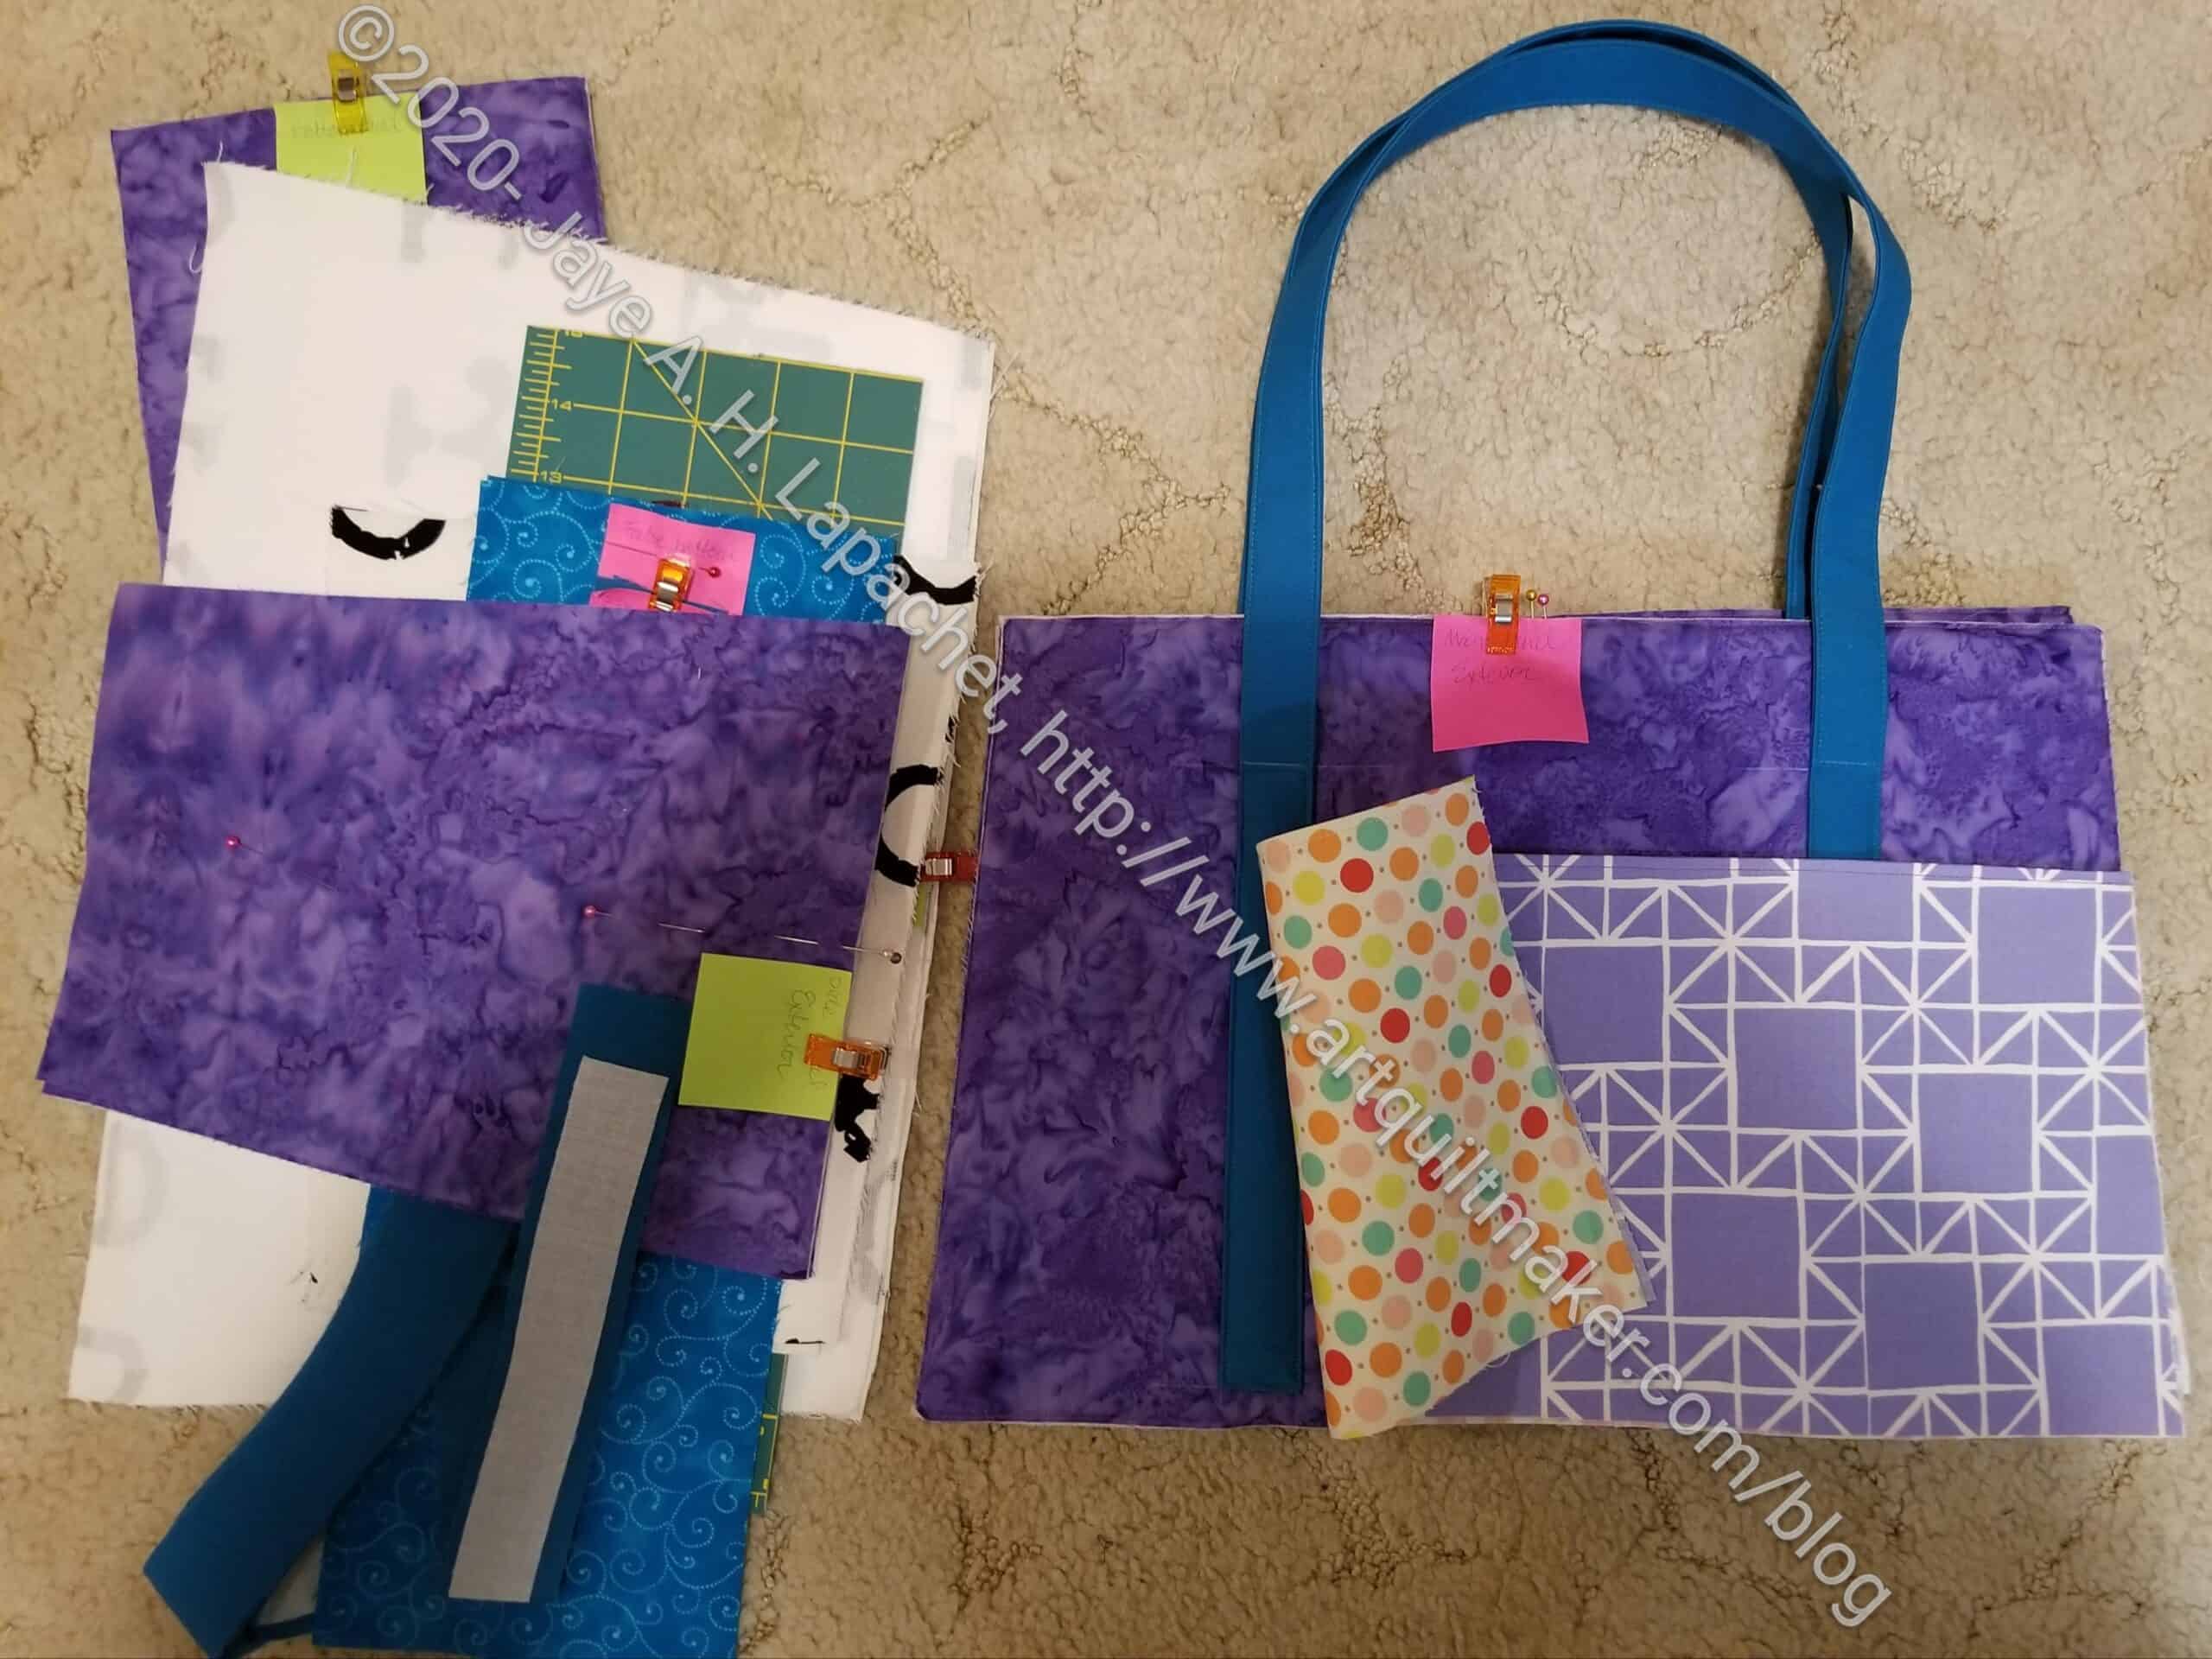
I started cutting out the Sheffield Tool Tote last week during Sew Happy Hour. I really got busy on it Friday, which is when I finished the cutting and, then, yesterday I started the sewing. Cutting out projects really makes me feel like I am getting nowhere so making pockets and the exterior made me feel like I was making progress.
This is a pretty structured bag by Sew Sweetness. It is similar to the Quilts Illustrated Tool Tote I made a few years ago (?). I bought it as part of the His, Hers and Furs bundle when that bundle was on sale (no affiliation). This is the first project I have made from that bundle.
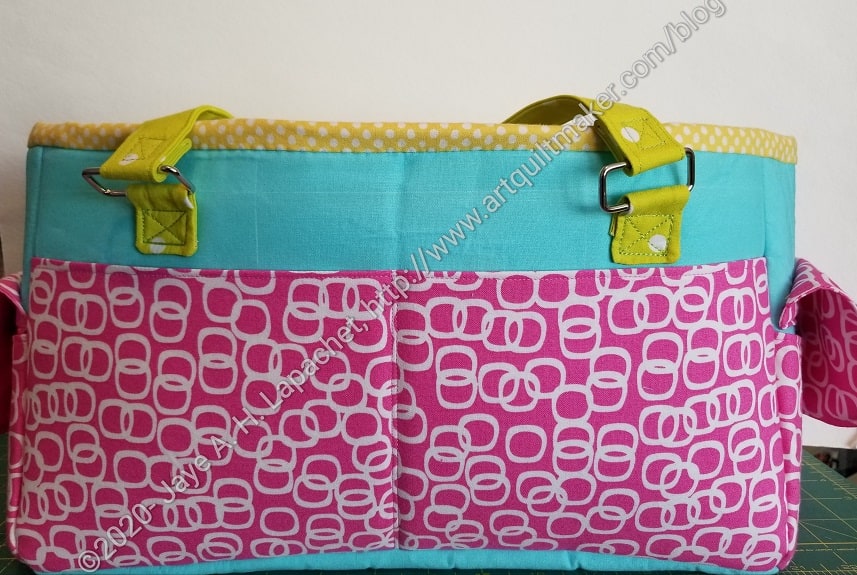
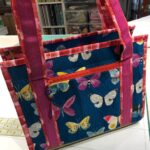
I joined the most recent guild swap and made an Oslo Craft Bag for Cyndi. She said she wanted any kind of tote bag. I was on the fence about this bag as it doesn’t strike me as a straight tote bag.
A few years ago I wrote about this bag and have been wanting to make one ever since. This was a great opportunity. I put a note in the bag that I would make her a real tote if this wasn’t what she was expecting. I thought about making her a Multi-tasker tote as well, but lost steam and didn’t get to it. I kind of want to make her a Superbloom tote as well.
Oslo Craft Bag Swap Gift
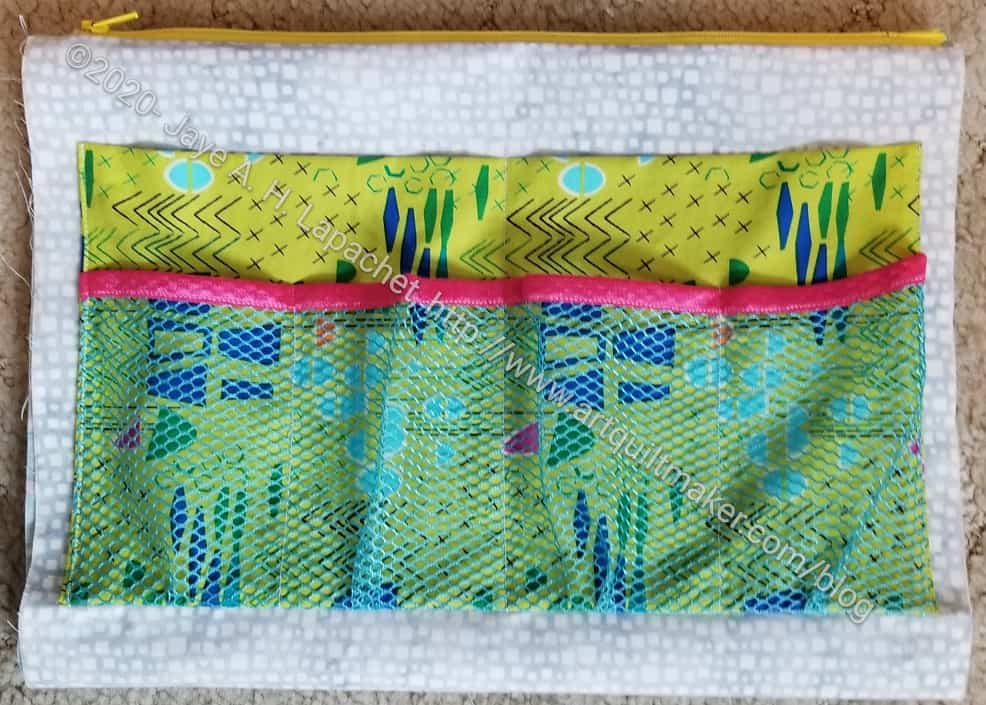
This bag went together with no problems. I thought the pockets with the yellow binding were a little too fussy. However, I like it that they have dimension. I don’t know if I would make them the same way again, but I like to make the pattern as is the first time, as you know.
I saw another version in the Facebook group (a good use of FB, IMO) where the maker put two pockets like the top photo shows, but put a second mesh pocket over the first. I am thinking about making another one and I might do that. I like mesh for some reason, though I am not sure what it is good for in terms of storing sewing items.
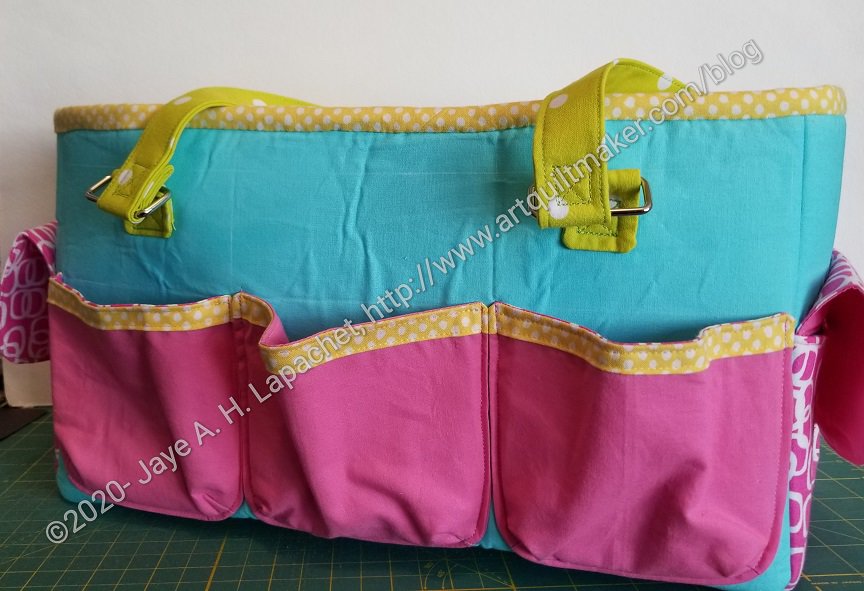
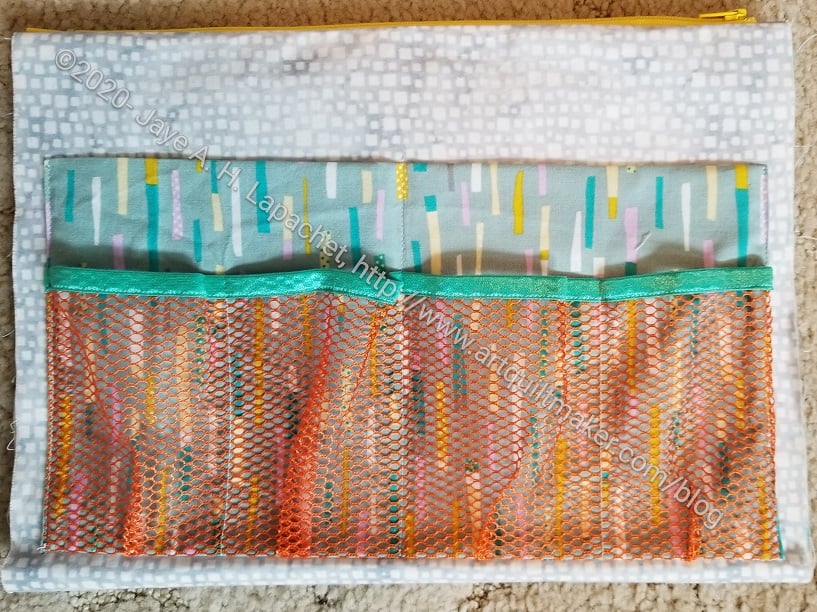
Oslo Craft Bag Swap Gift – interior
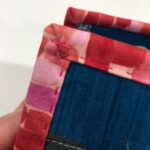
I was disappointed in the interior. Not the design, but the saggy-bagginess of it. The seam allowance was 1/2 inch, which I thought meant that Sara had included enough to take up some of the lining so it wouldn’t sag. No such luck. The exterior was sewn with a 1/2 inch seam allowance as well. I tried a few things to make the lining fit better. Short of taking the whole thing apart, none of my efforts worked.
It is a nice rectangular bag and I think it would be useful for various tasks including bringing things to Sew Day. We’ll see what Cyndi thinks.
I decided to make some Sew Together Bags as gifts. I know I have whined and complained about making them before, but I was reminded how useful they are when I was using my Embroidery Sew Together Bag for Craft Night. I have a couple of friends for whom I want to make something special and these will also be useful.
I know I should be working on the UCAB! I can’t seem to get myself to do it, but I really need to get it done.
Cutting for STB gifts – November 2020
I spent the day on Wednesday cutting the pieces. I didn’t get all the way through the fusible nor did I have time to quilt the outside, but I am much farther along than I was before I started.
I didn’t bring the binding fabric, so I have to cut that, but all the other fabric pieces are cut.
Even though it is fiddly, I do want to make a pincushion for each bag. I have added them to all of my Sew Together Bags and I think it is a very useful feature.
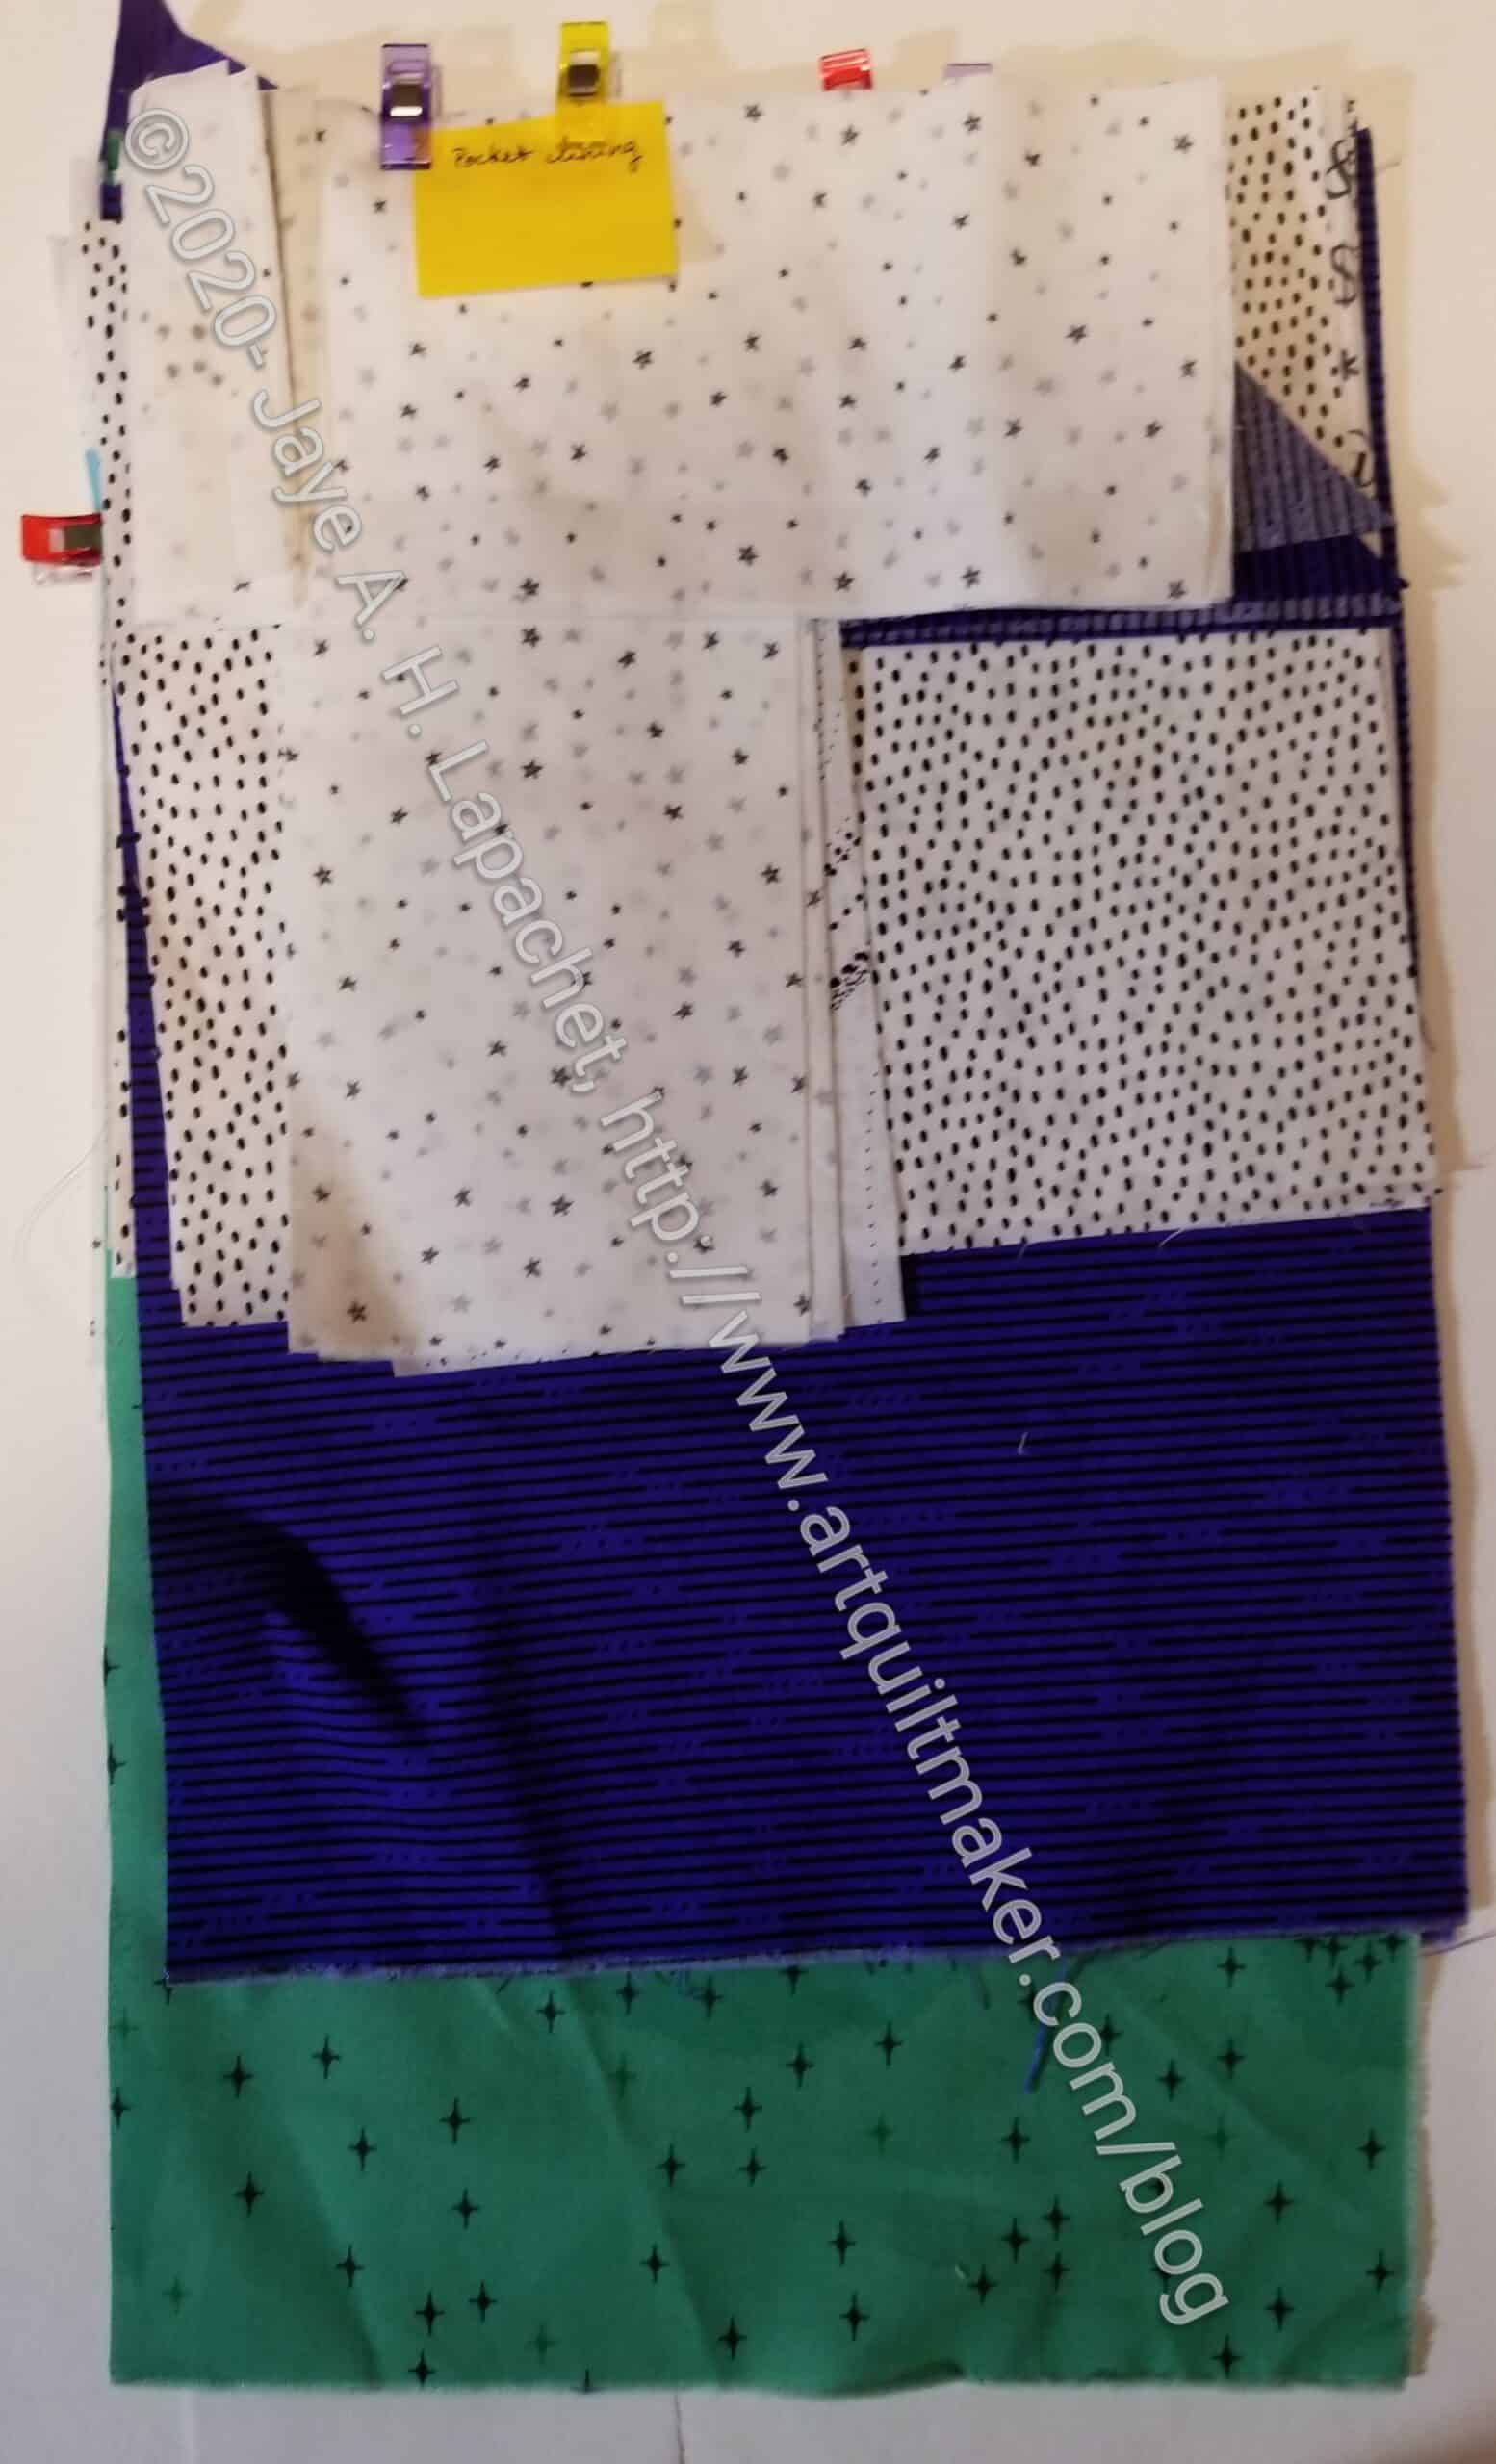
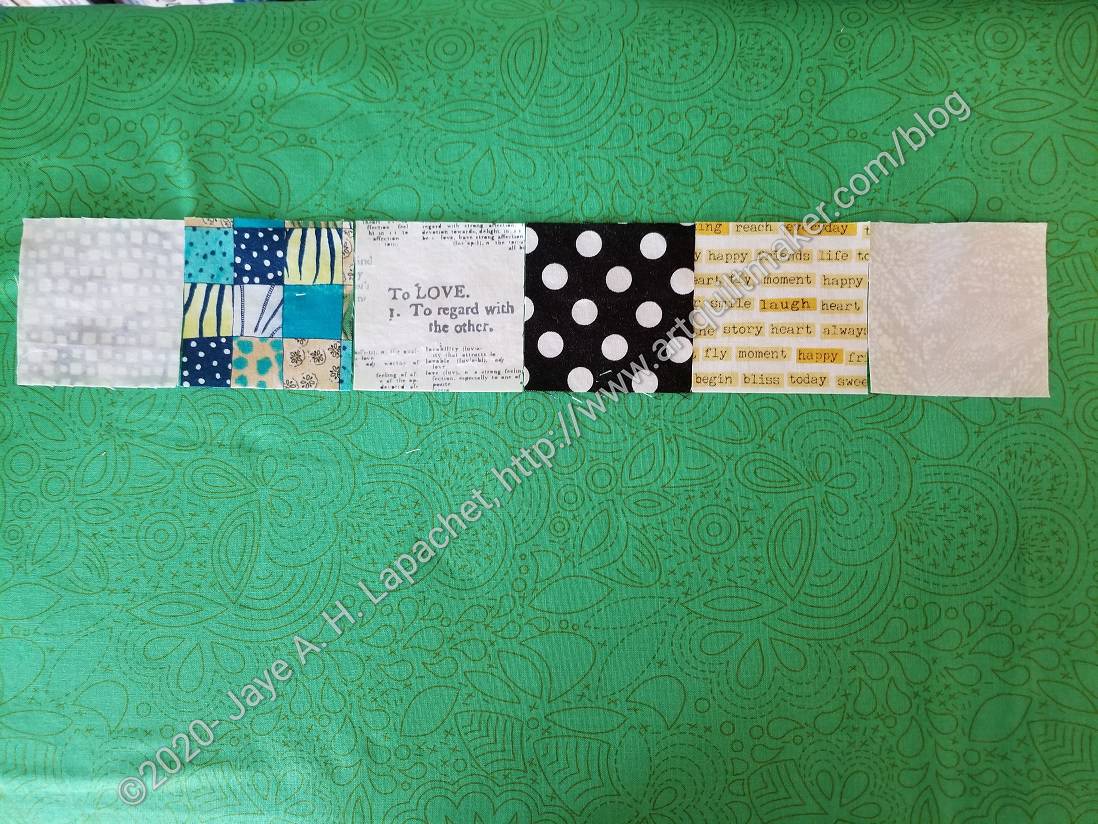
Piecing for Sew Together Bag Exterior
One thing I am going to do is to try and embellish the outside. I am going to add a little piecing to the exterior. The pattern, which I have said is basic at best, talks briefly about ’embellishing’ the outside, but doesn’t give specifics. Since I have two Sew Together Bags of my own, I measured the outside of one of them and have an idea of where to place the added piecing. It will look something like the above example.
I read some of my posts again and found that this is a hard project. I have some good advice for myself. I will try to take it. 😉 I know that I will be able to do them relatively quickly.
Mary and I were talking about something else when I remembered the Retreat Bag she and I decided to make. Neither of us have done it, but we both have all of the supplies, including the wire frame. This is a free pattern from Emmaline Bags. The pattern shows the frame you need and that is not free, sadly, but having a free pattern is helpful. And we have to support women owned small businesses.
Emmaline Bags Retreat Bag -free pattern
The bag really doesn’t have anything to do with Retreats – as in going away to sew – I think that is just the name.
I also noticed that Laura Coia of SewVeryEasy has a video on how to make the bag with the addition of an outside slip pocket and handles. This video is linked from the pattern page on the Emmaline site. I also saw a video from Birdcage and Thread that shows how to make this bag. The techniques in the two videos are a little different and one might work better for you. It’s good to have a choice.
I have two frames, so I can make two of these with the supplies I have on hand. I have been trying to think about what types of items/supplies I would store in this pouch and haven’t come up with anything yet. I could make one, or both, as a gift.
I am also thinking it might need a handle, leash or shoulder strap.
I seem to have a strong desire/need to finish things. I know I should be more enamored of the process. I have been trying for years to be more about the process, but I think I am sick of looking at things in my workroom and need to just make the projects and be done with them. OR fall in love with the process once I have tried it and go back for more.
I decided that I needed to get busy on the Ultimate Carry All Bag. The BAM Virtual Retreat is this weekend and that would be a good time to finish- or at least make progress- the bag.
Ultimate Carry All Bag Front Pocket
Ultimate Carry All large Pocket #2 back- examples
Ultimate Carry All large Pocket #2
Ultimate Carry All large Pocket #2 back
Ultimate Carry All large Pocket #1
Ultimate Carry All large Pocket #1 back
Ultimate Carry All Bag: Short Front Pocket
The last thing I worked on was the front pocket. I did it wrong and it is still in that state. That is the first thing I need to work on once I get going again. I also want to make one of these for myself, to replace my current Quilt To Go bag, and I am thinking of making the front pocket for that bag at the same time I finish this one. I know I would be skipping a bunch of steps, but at least one piece would be done.
Lynette said that she is working on a different way to add the binding. Since I am scared of that binding based on Cyndi’s and Mary’s experience, I am waiting for her to try it.
Mary’s Ultimate Carry All Bag
Mary’s Ultimate Carry All Bag-binding detail
Mary’s bag looks really good and she went around the binding by doing part of it by hand with some exceptional detailing. Her example is one I am considering. I have done a number of bag bindings by hand when the bag was too unwieldy for me to do it by machine. I also get better results by hand on awkward shapes. I am not scared to sew the binding by hand.
Writing about this project makes me want to work on it. Of course, I have to keep up with the Journey2Nebula as well.
This post should have really been the first one I wrote about the Catch All Caddy class. I should have posted it before the Baseball Catch All Caddy post. I realized that my mom, to whom I planned to gift it, reads my blog and I wanted it to be a surprise.
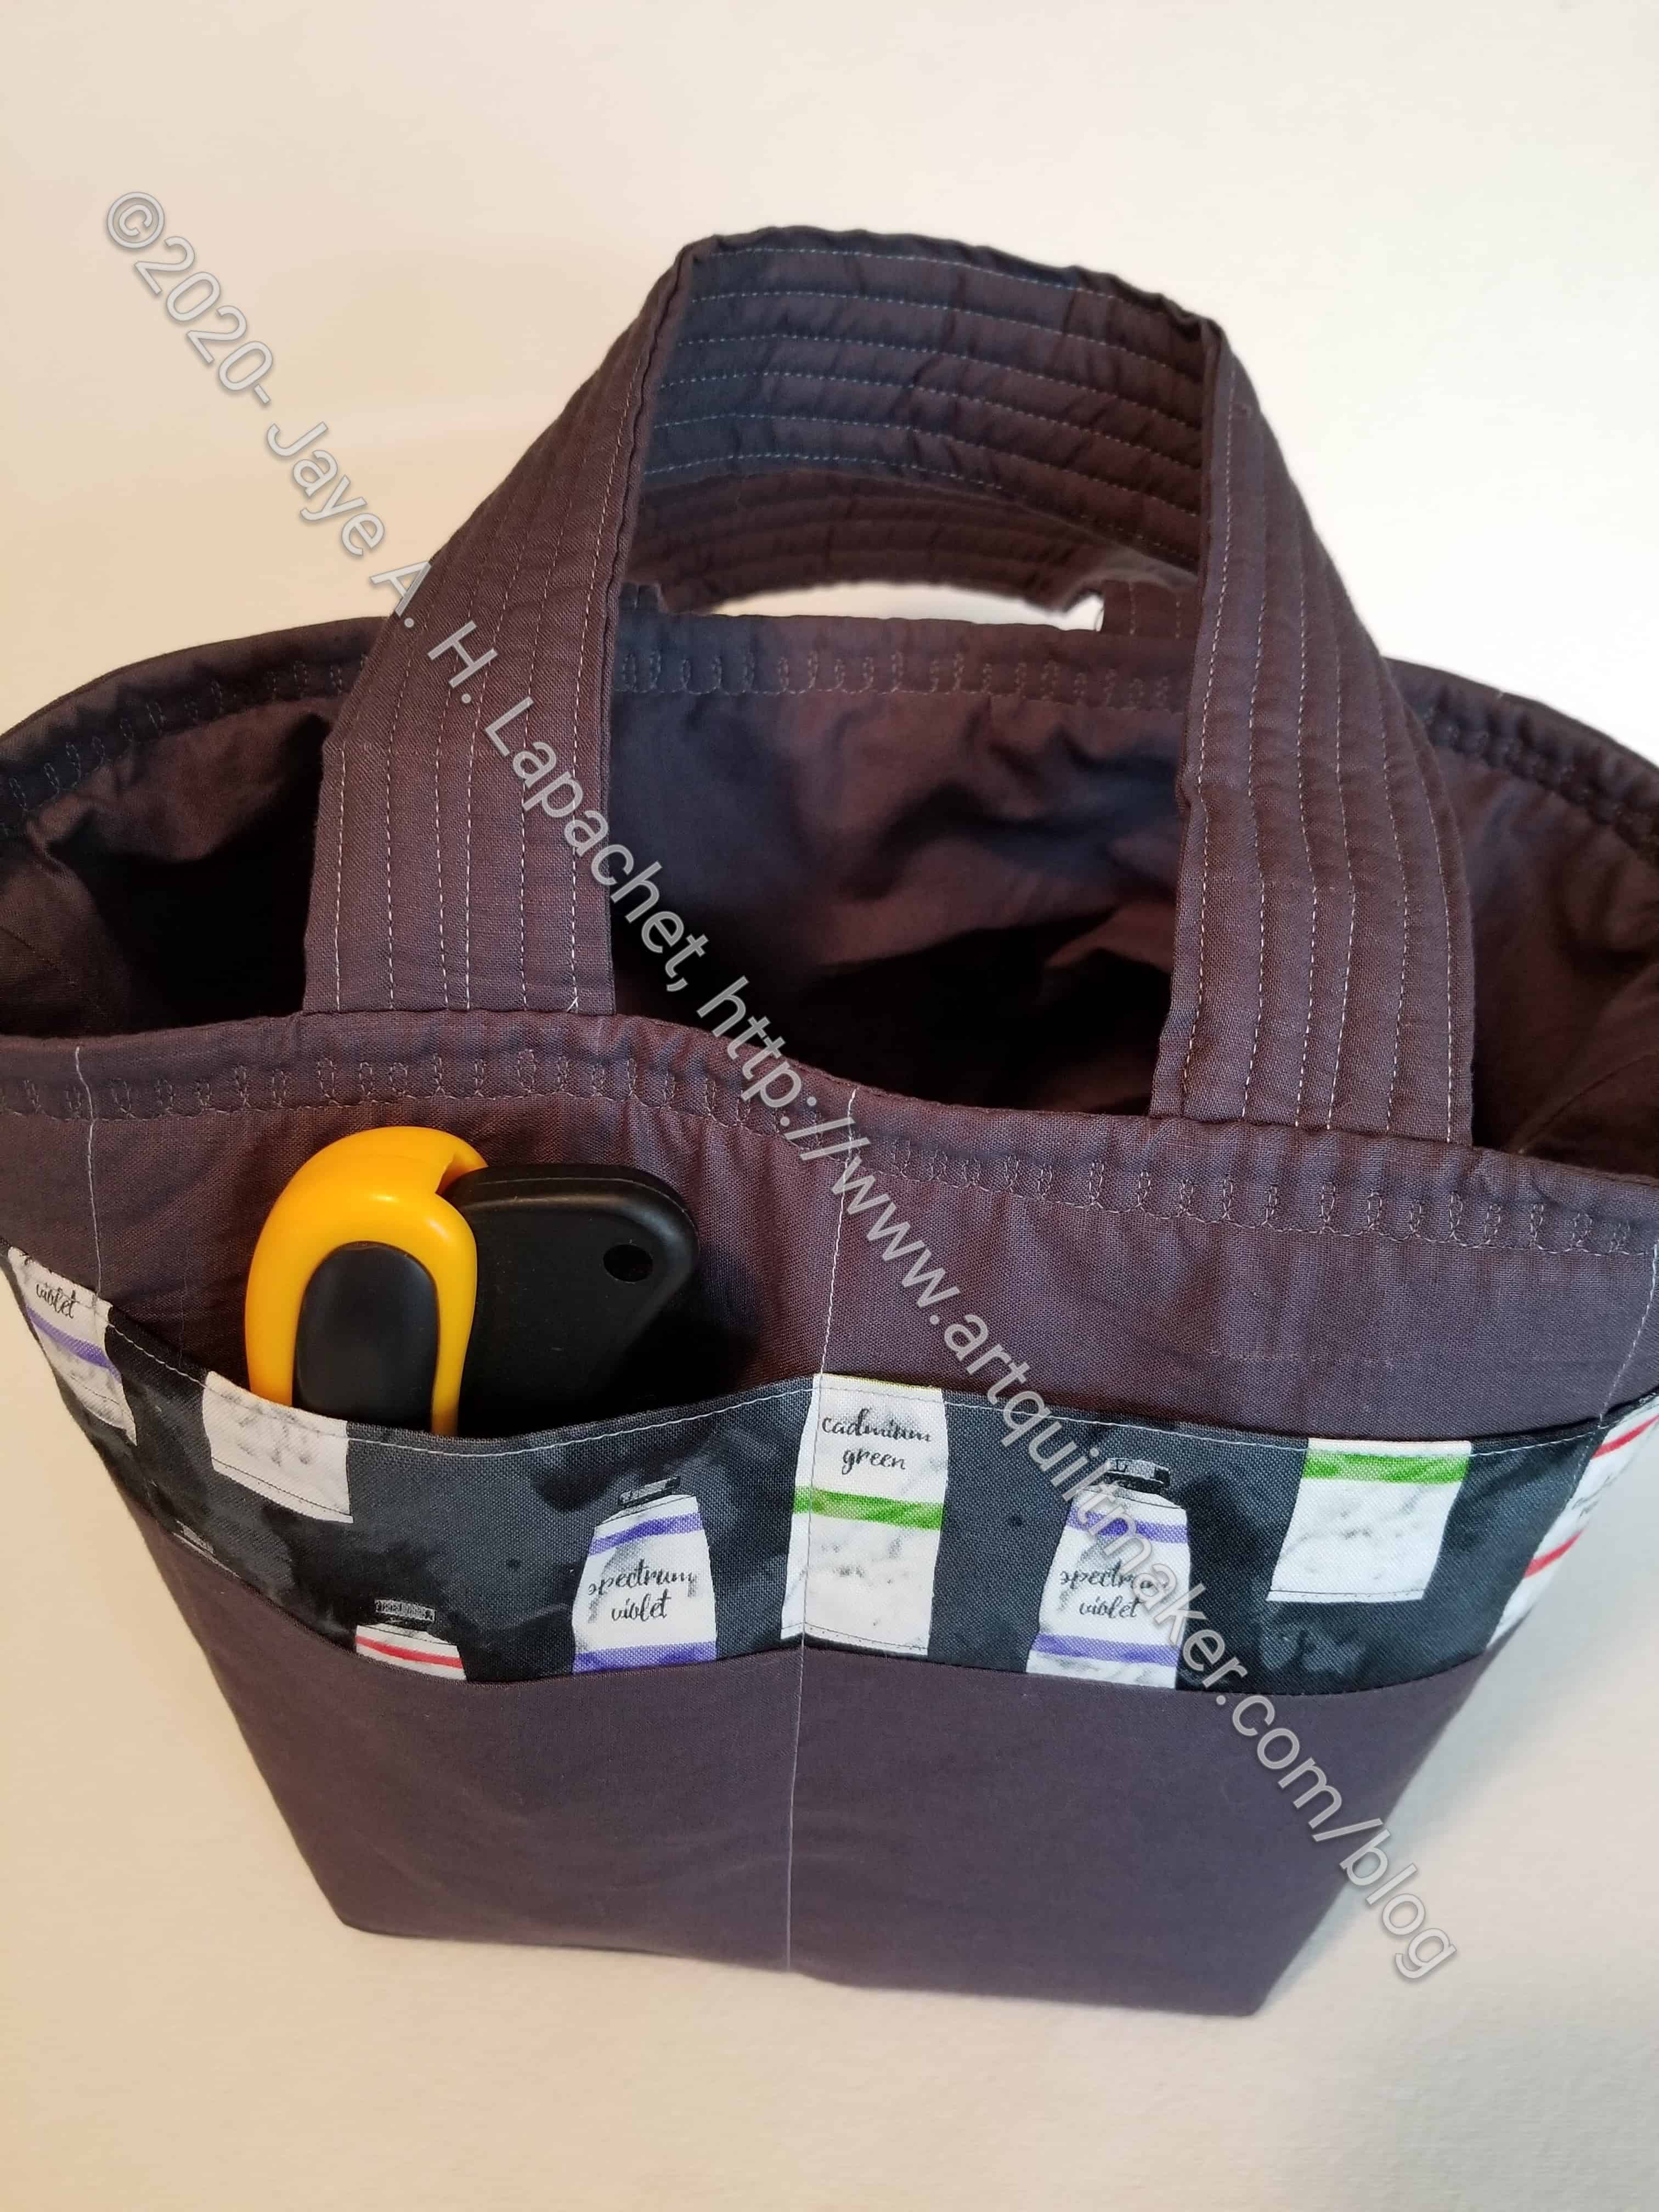
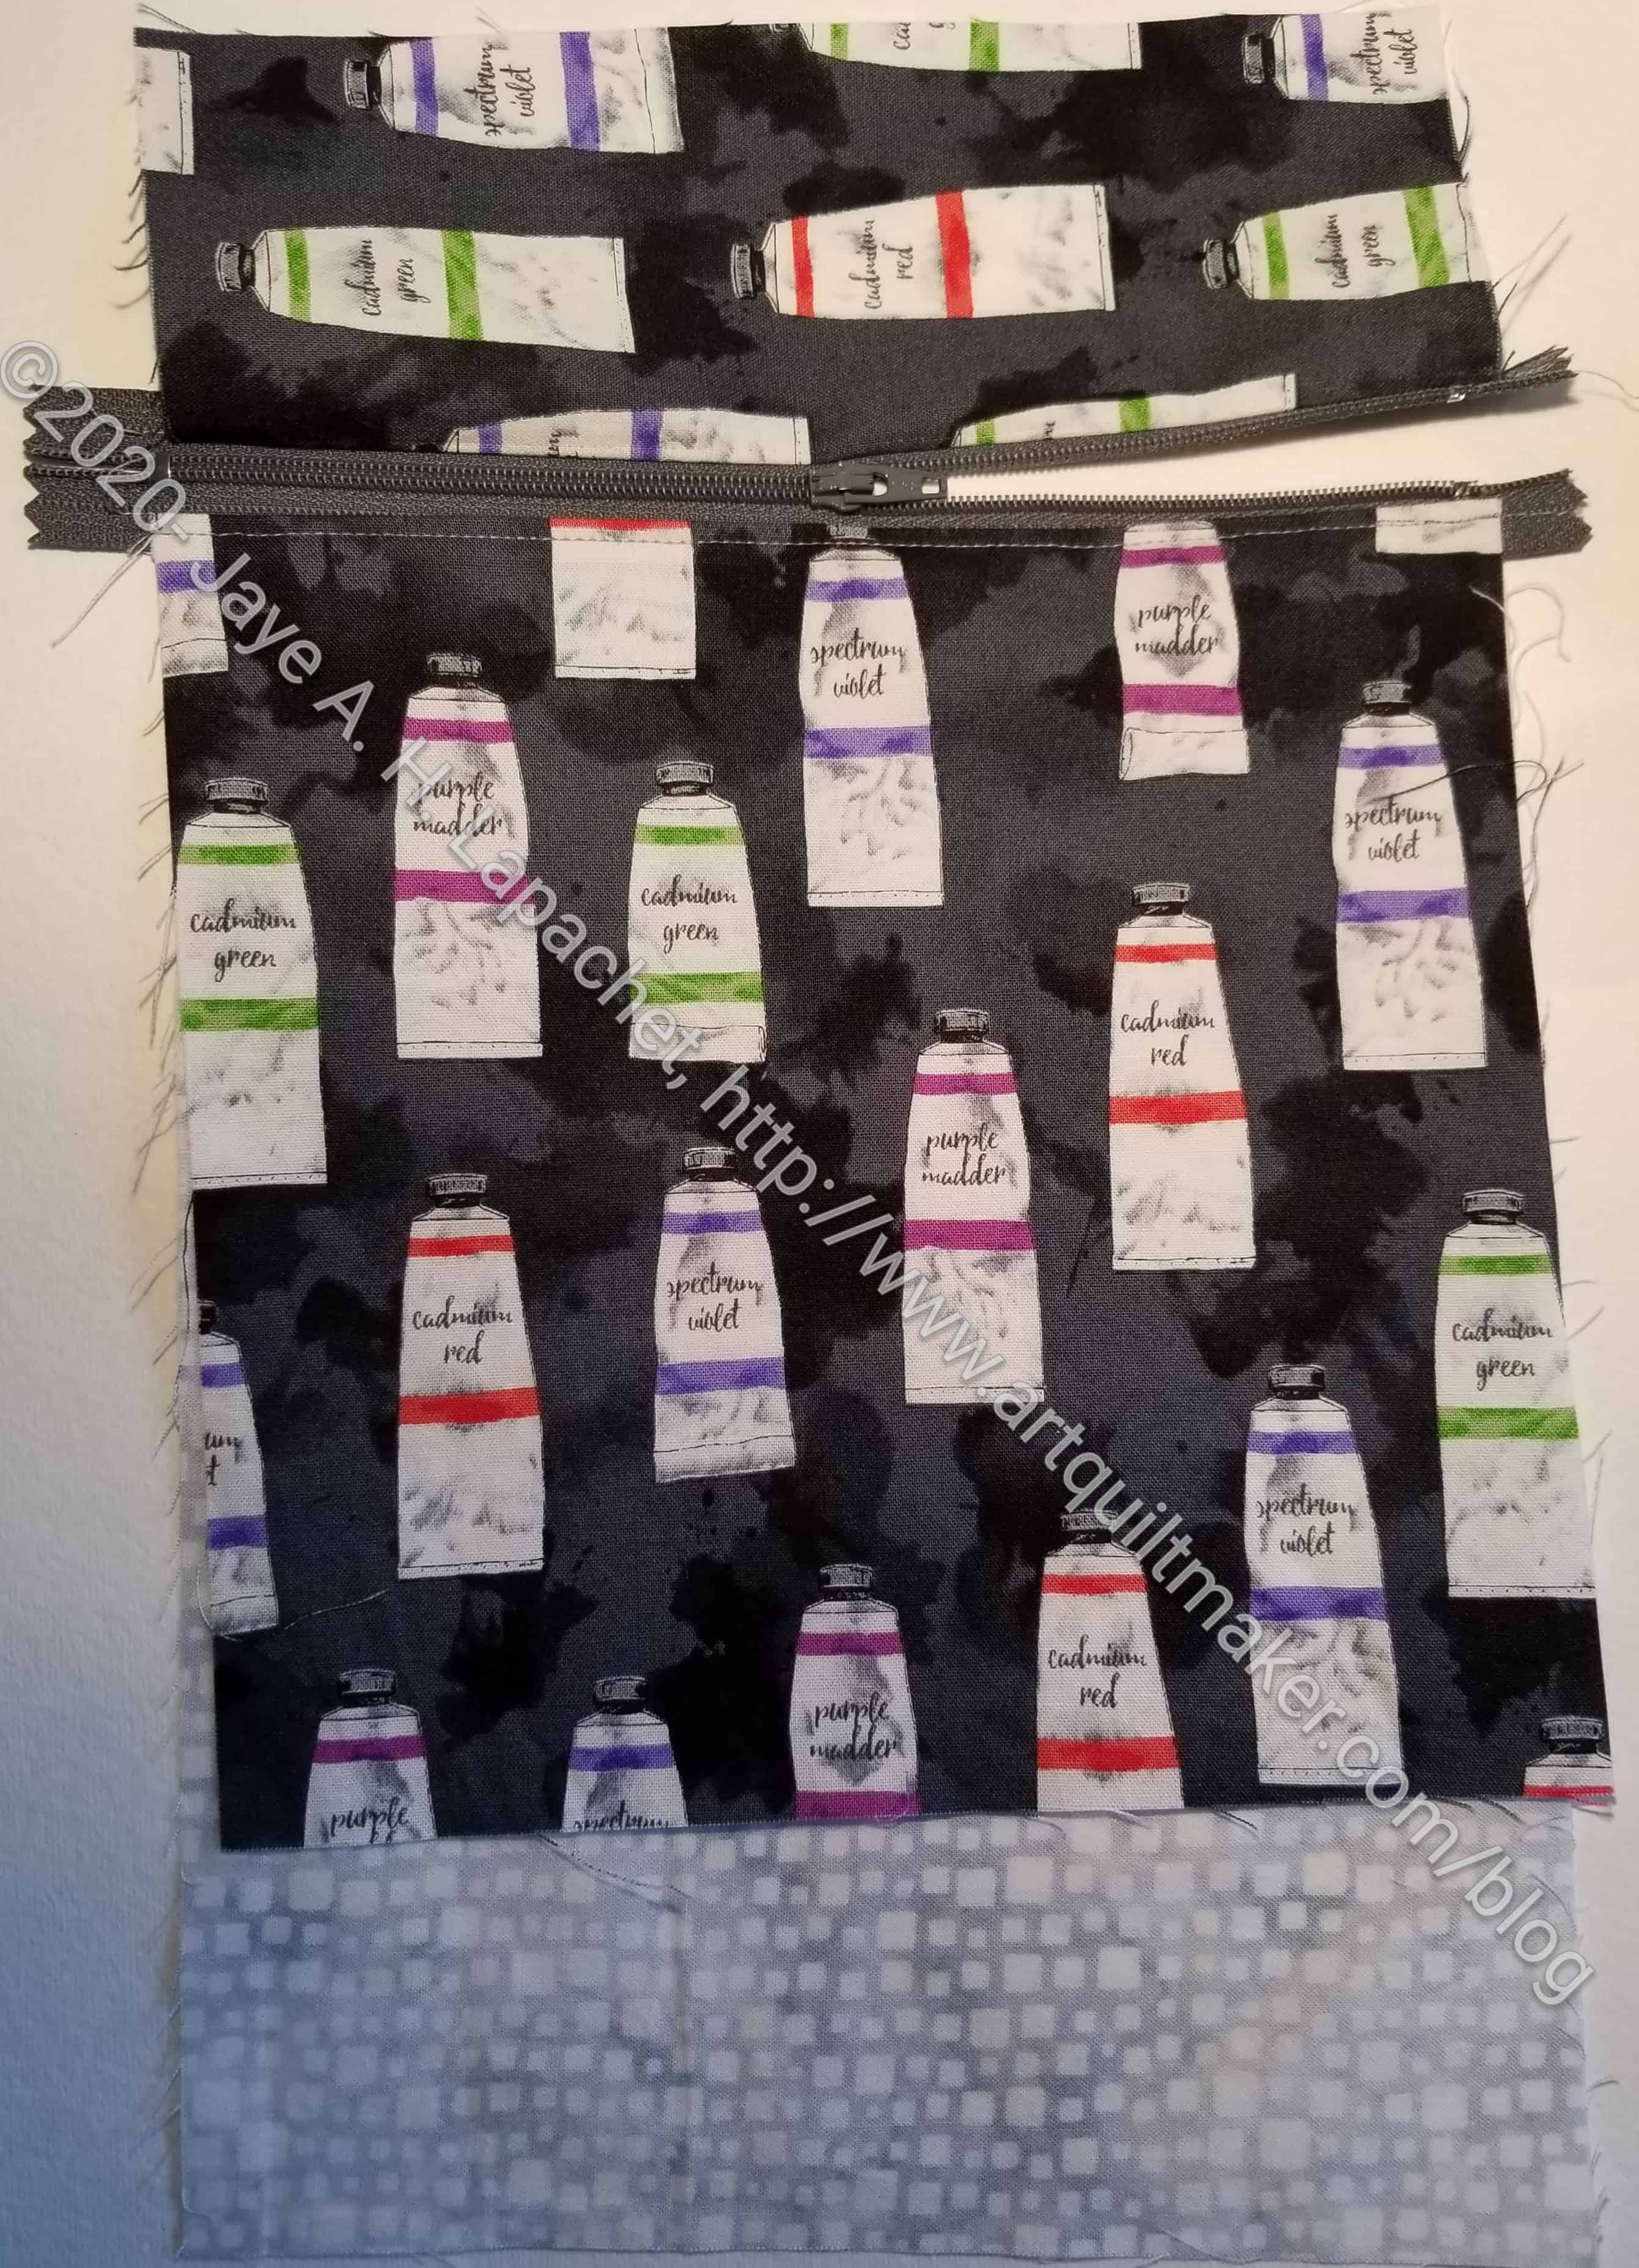
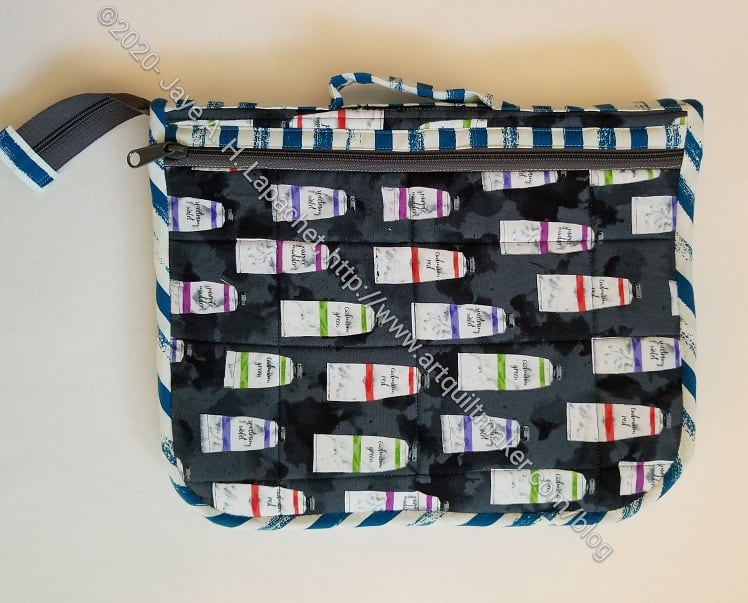
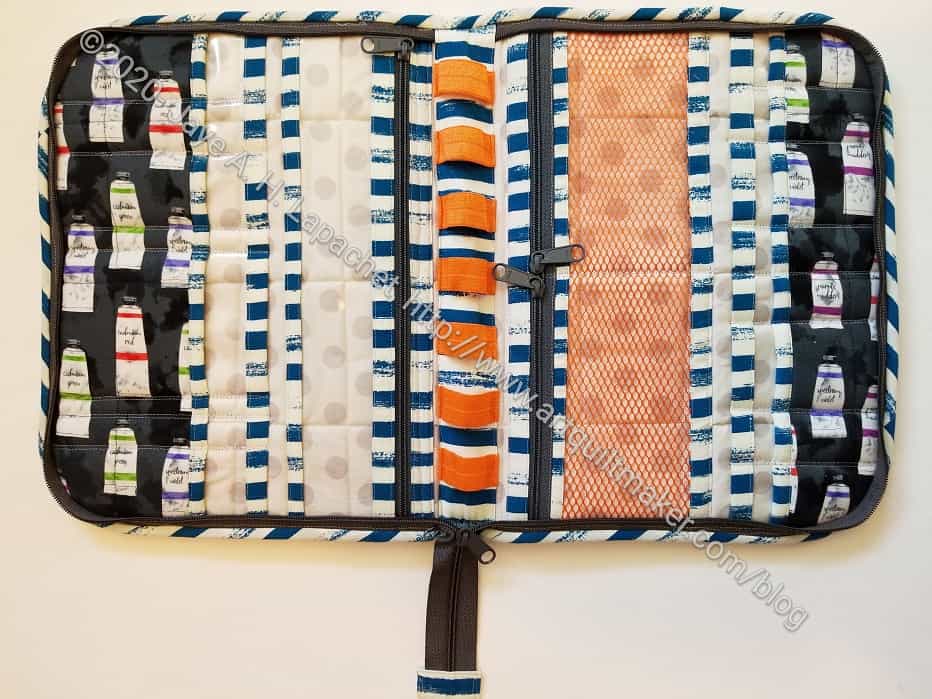
Paint Tube Catch All Caddy
As mentioned in the Baseball Catch All Caddy, this was the project from my first Zoom class and I really liked the pattern. Lynette taught the class and she did a great job. I was impressed with her overhead camera set up (she used her iPad on a tripod). I need to figure out that kind of setup for when I teach. Things take time.
I used the color scheme of the original, because I really like that slate grey. I used a Cotton Couture solid from Michael Miller. It was easy to work with, though I didn’t like the fact that the holes where the basting stitches had been showed even after I took them out.
Instead of making a scrappy border for the pocket, I used one piece of fabric. It is the paint tube fabric that goes with the set of bags and holders I am making for my mom. I was actually glad to add this one to the group, because I am running out of useful bags to make for her. She really liked t he bag and thought she might use it to carry a project between her recliner and her sewing room
Paint Tube Catch All Caddy
The bag went together pretty easily, which was why I could make two in one day, though I did cut the fabric for this one the day before the class.
I kind of like the simplicity of the bag and the opportunity to highlight favorite fabrics or scraps on the pocket border. I was thinking that I could use ribbon as well. I have some of that Renaissance Ribbon and this project would be a good way to highlight some of it.
I had some trouble with the lining, but was able to fix it when I closed the turning hole. I don’t think Mom will mind.
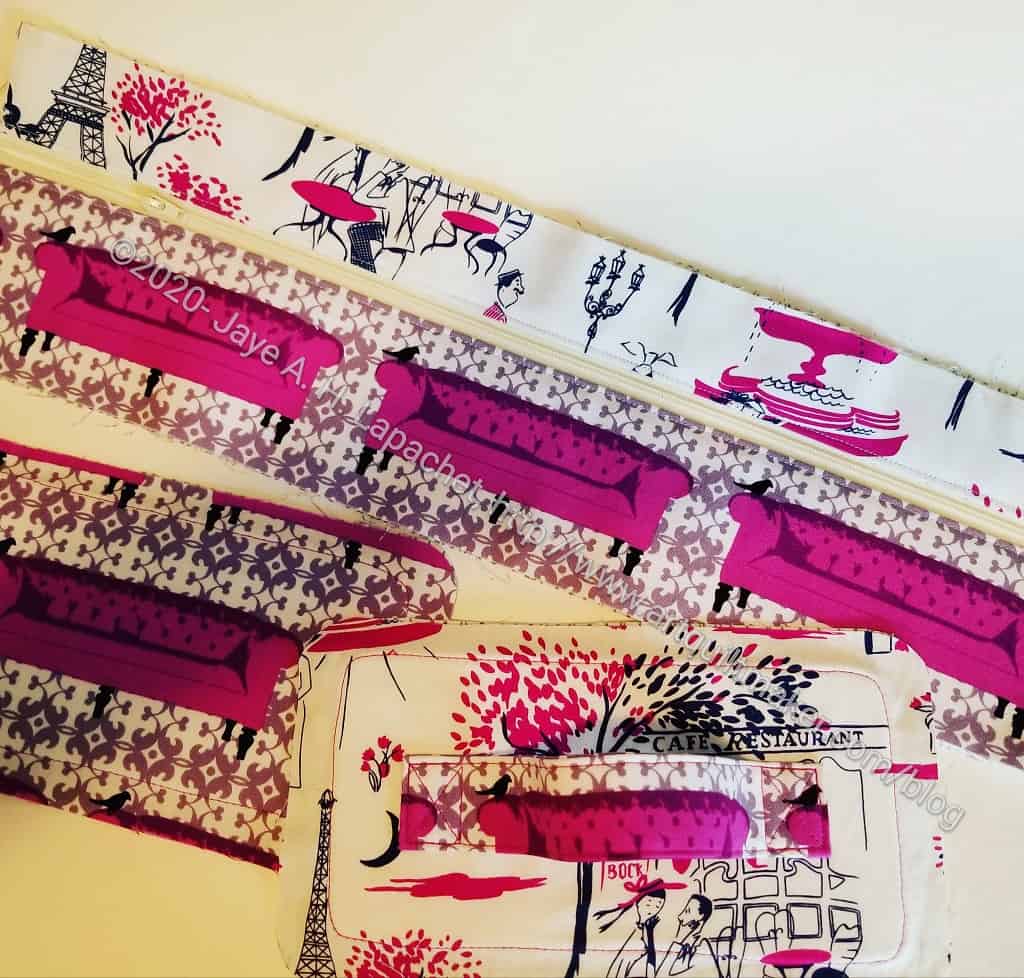
I spent some time over the weekend working on the Mini Maker Case Sew-a-Long with Lillyella. She sent out more instructions on Thursday and some corrections to the pattern. I was behind. I had work to do, and did some, but also wanted to think about some things, so I spent time on Friday catching up.
I normally don’t use a zipper foot, but decided to try it this time as Nicole, of Lillyella, had some good reasons for suggesting it. After breaking a needle and having the zipper foot go disastrously crooked, I ripped out the zipper and put it in again using my quarter inch foot** and a stiletto**. After sewing in the zipper and top stitching it down, I was super pleased with how it looks. It may be the best zipper I have put in EVER. Maybe.
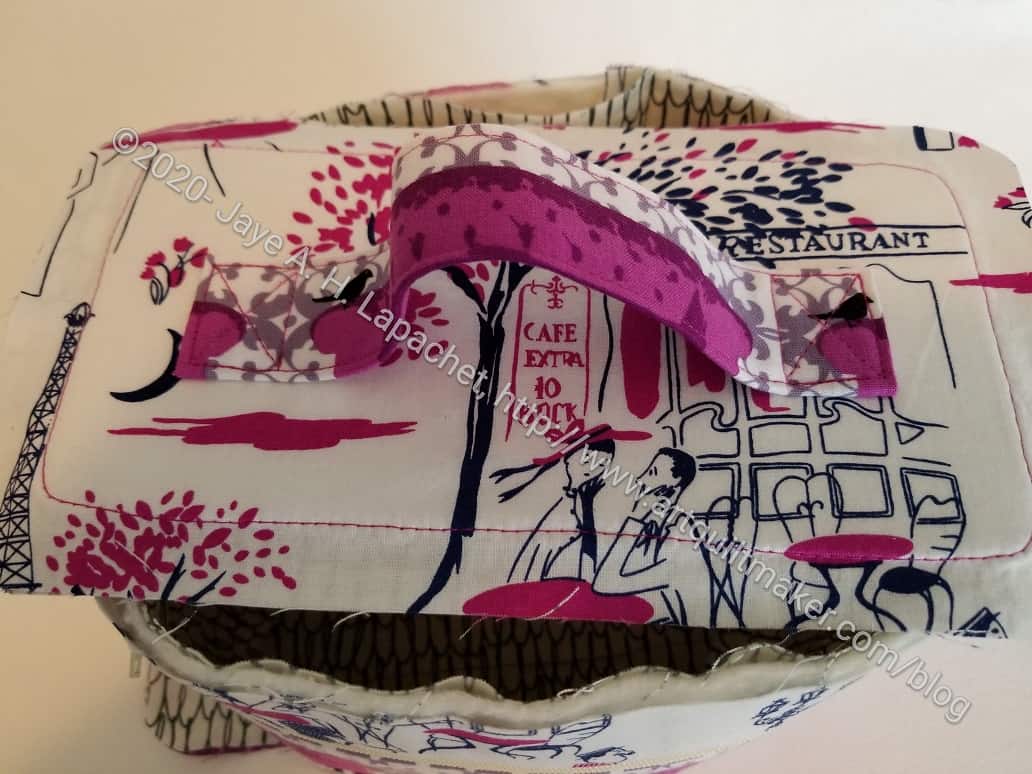
Mini Maker Case – handle detail
The handle was really interesting. I definitely like the look of it, but there were no instructions on holding it in place so it could be sewn. I tried one of the newer super strong Sew Tites**. That worked a little bit, but I had to hold on to it and check the placement until I could get it anchored in place.
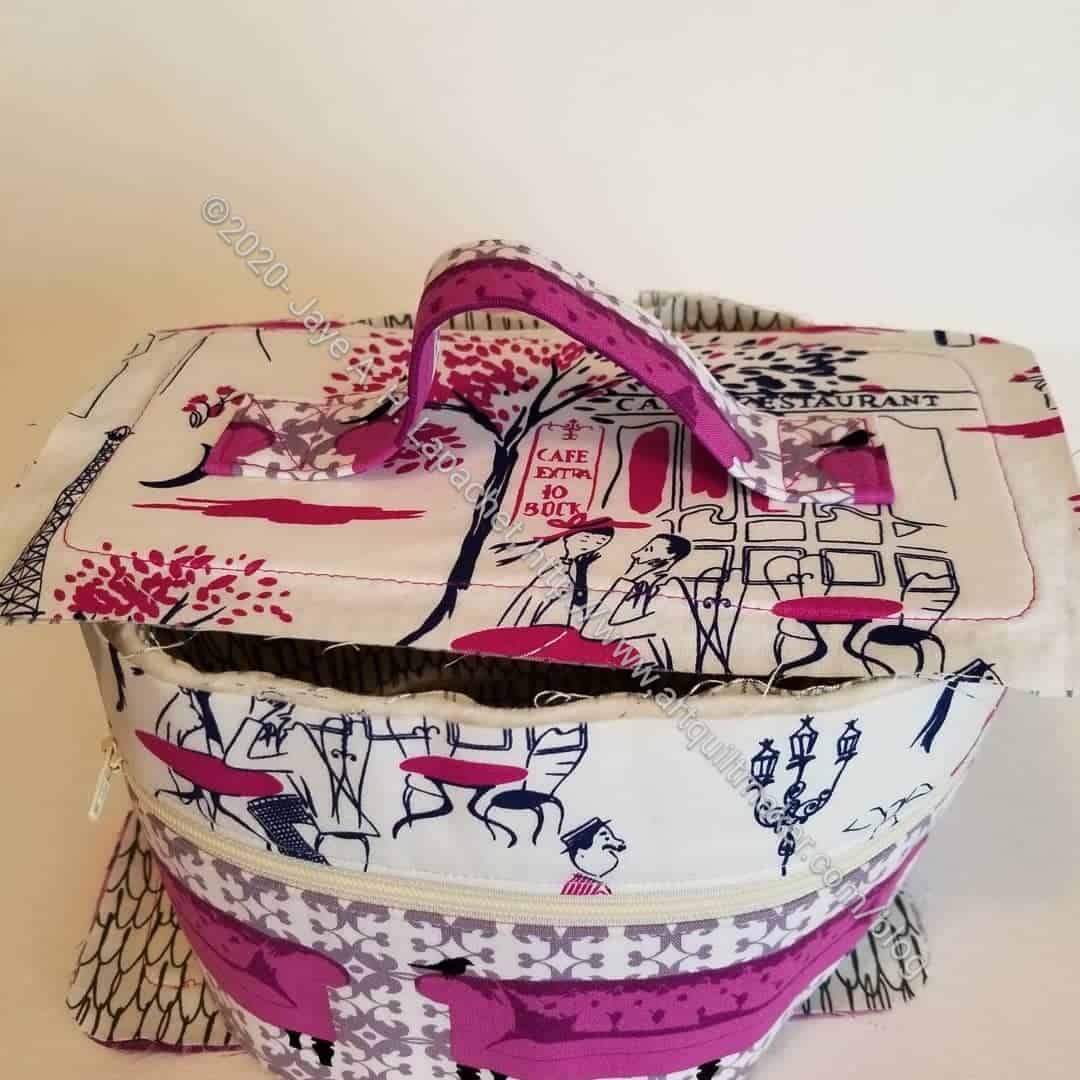
Mini Maker Case – Saturday Progress
On Saturday morning I went to work, having all the flat parts done. The assembly of the body was pretty confusing for me. You know how I am with pattern directions. Again, some ripping went on, but I eventually got the body together.
My next step is to assemble the entire thing. I know I should wait for the SAL, but I may want to keep the momentum going.
**I use affiliate links and may be paid for your purchase of an item when you click on an item link in my post. There is no additional cost to you for clicking or purchasing items I recommend. I appreciate your clicks and purchases as it helps support this blog.
Since it hard for me to access my design wall in the way I like, due to my foot, I decided that I would work on small projects this week. This included the lillyella Mini Maker Case Sew-a-Long. Yes, I am also still doing the Journey2Nebula. I really just want to win the prizes they are offering. Not really, though a little bit. I like the push to keep up and get these projects done.
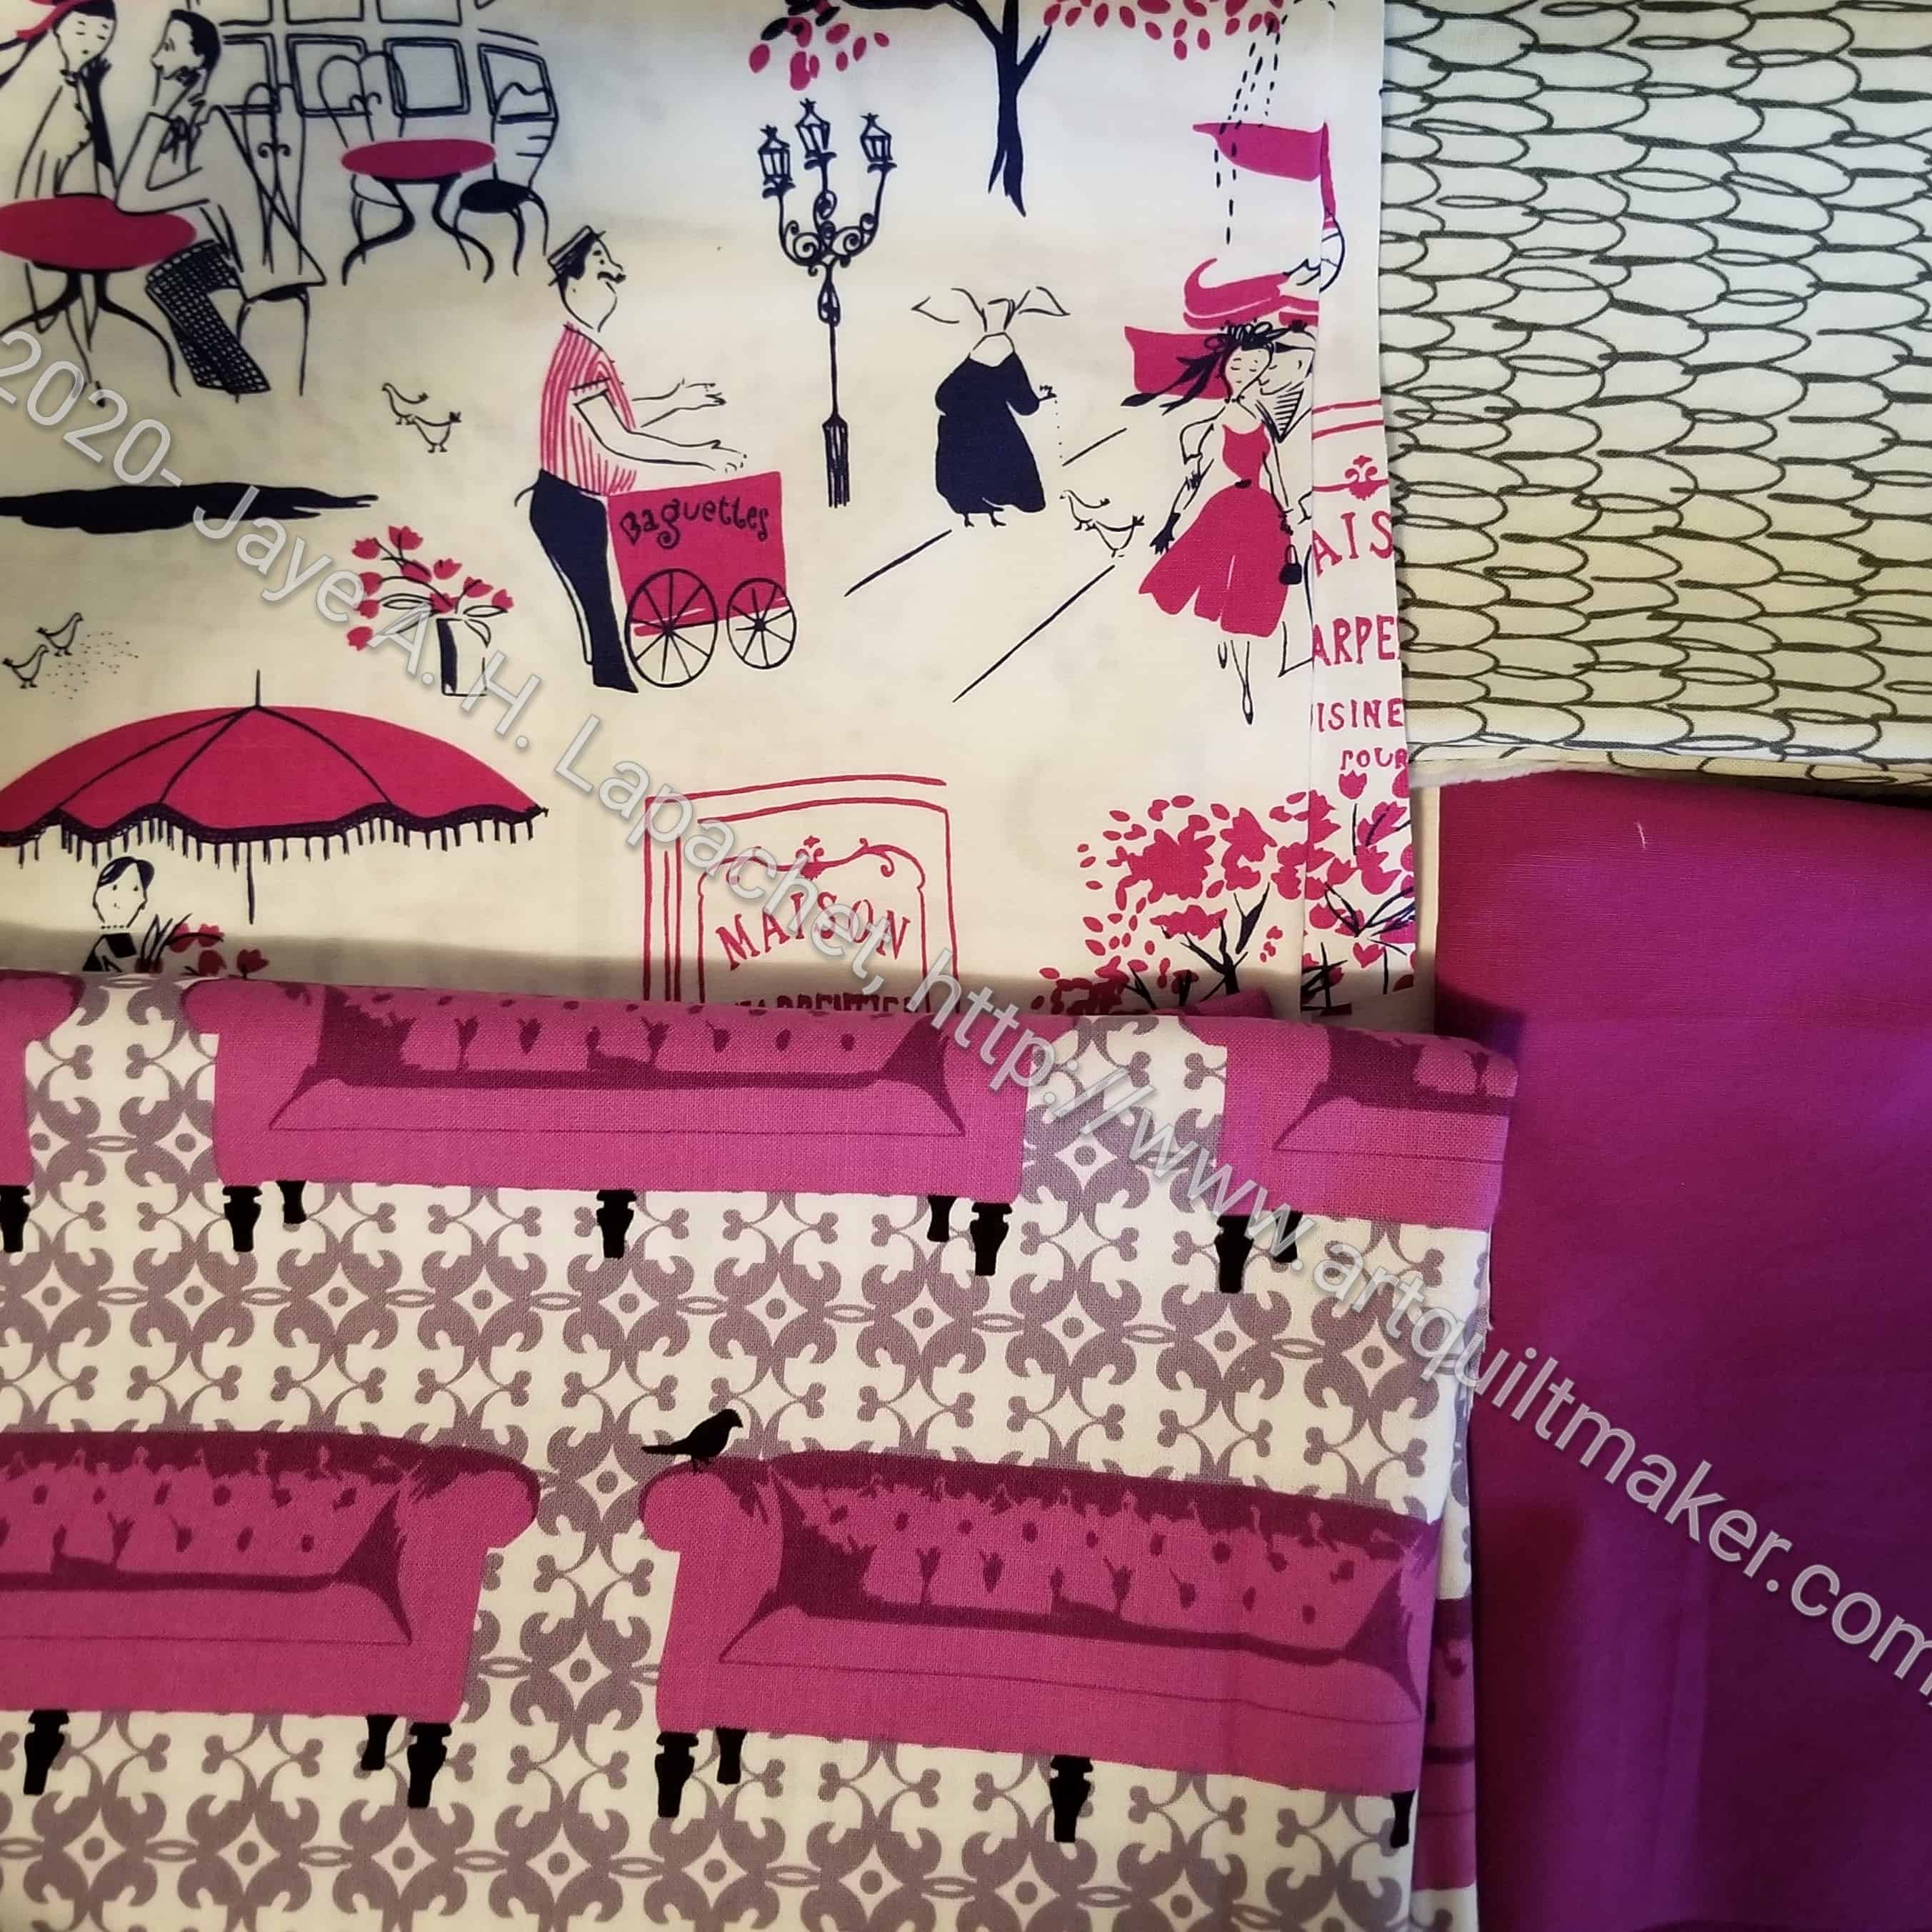
Mini Mkaer Case SAL fabric
This is a cute little train case looking tote. It is designed for the Oliso mini iron, but you can use it for other things as well. I chose the fabric for the project this week.
I started out with the couches fabric and wanted more purples, but the couches fabric is more red-violet, so I found other fabrics to match. I might also make one in the same fabrics as my All Rolled Up Tote.
BAM had its first Zoom workshop the other day and I took it despite some challenges. First, we had to do some prep work, which I did, but I think I went a little beyond, because I had a presentation and wouldn’t be able to join until late.
Catch All Caddy prep-complete
The Catch All Caddy was a bag that was given away at the 2013 retreat. I think it was one of the best bags given out when bags were still being made for retreats. Since then people who attended that retreat bring them to Sew Day and workshops, using them to organize tools and carrying their other stuff. Everyone else is envious, thus Lynette decided to teach the rest of us how to make the bag.
I felt good about my progress Friday night when I finished for the evening.
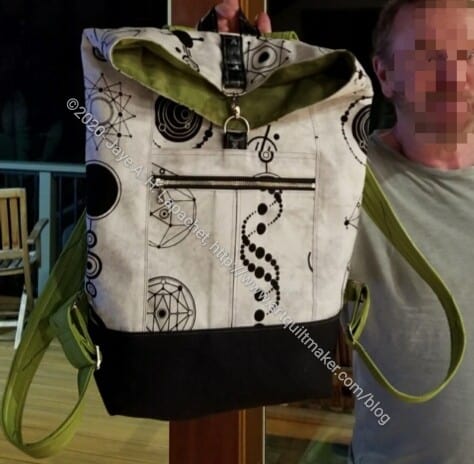
Tim has done great work again. He was inspired by Cyndi, another guildmate, so they are making Range Backpacks in tandem. Tim has made three so far and I am very impressed with his work.
The Range Backpack is a Noodlehead pattern. Tim likes it very much and says it is concisely and clearly written. He made some changes after making the first one such as using only SF101 as the interfacing and using a lobster clip instead of a buckle for the closure.
This is the pattern that spurred our discussion of the Hump Jumper.
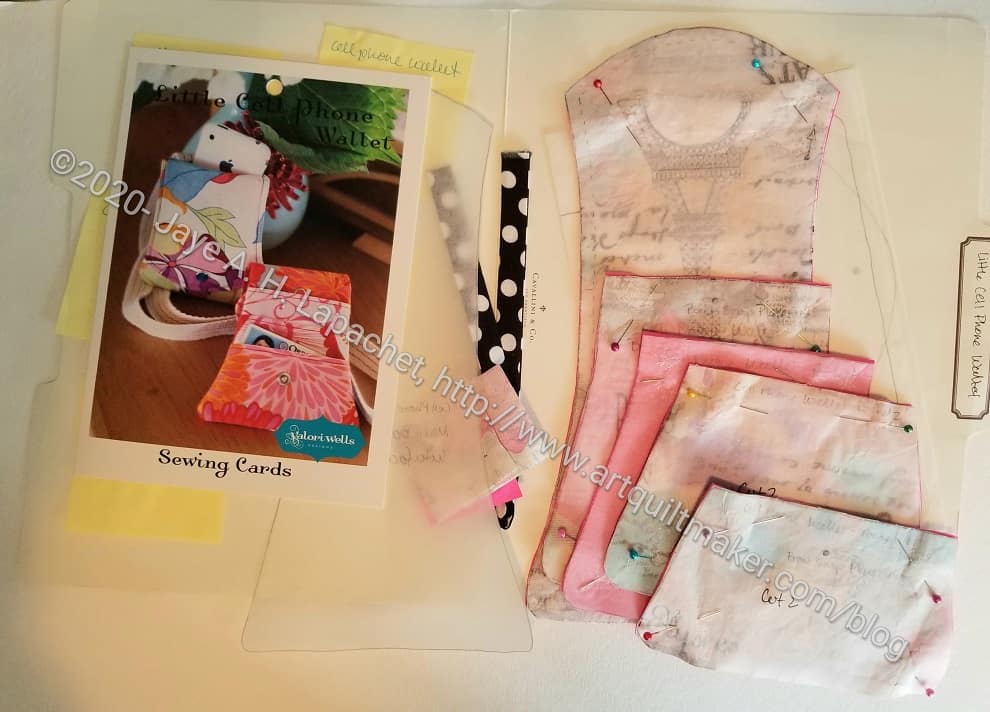
I have a favorite dress that was made for DH’s Grand President events. It is the one dress for which I forgot to make a matching cell phone wallet. I have used others, thinking they looked ok, but I like the matching ones.
I still wear these dresses when I go to certain types of events, so this project was sort of on my list. One problem was that I didn’t have anymore of the fabric and it was so old I couldn’t get anymore. At the January CQFA Mini-Retreat, I saw Marie with some of the fabric and asked her if she had more. She found a little more than a FQ and gave it to me. The fabric has been languishing since then. I was on the phone for an extended call and decided that was a good time to start cutting out the piece.
I didn’t have enough of the fabric for the whole thing so I used an AGF solid pink I really like. The outside will match the dress.
I worked on the UCAB again the other weekend. Last weekend? I don’t remember. It started off so well, then I got lost. I couldn’t figure out how to finish the front pocket.
I really tried hard to understand the pattern, but just didn’t get it, so I contacted the designer. I still couldn’t understand the explanation, so I asked Lynette.
Lynette sent me some info she had sent to another bag maker. It didn’t answer my question, but I woke up the next morning with an idea of how to make the pocket. It may not be the way the designer intended, but it will get the job done – as long as I do it!
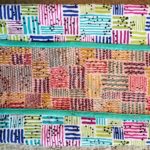
This version is an improvement on the previous version, but still not where I want it to be in terms of quality of sewing.
Arty Running with Scissors Tote-inside
The best part is that I think the binding looks great. I am also pretty pleased with the inside. I made an effort to make the stitching really even and consistent. I think I succeeded, but we’ll see what mom thinks.
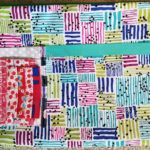
I have, actually, had this done since March. It was killing me not to talk about it every step of the way. However, my mom reads the blog and I wanted to surprise her. As soon as she saw the fabric, she would know it was for her, so I had to keep quiet.
Arty Running with Scissors Tote-inside
Arty Running with Scissors Tote-inside
I can’t wait to see what she puts in it and whether or not she uses the ironing pad.
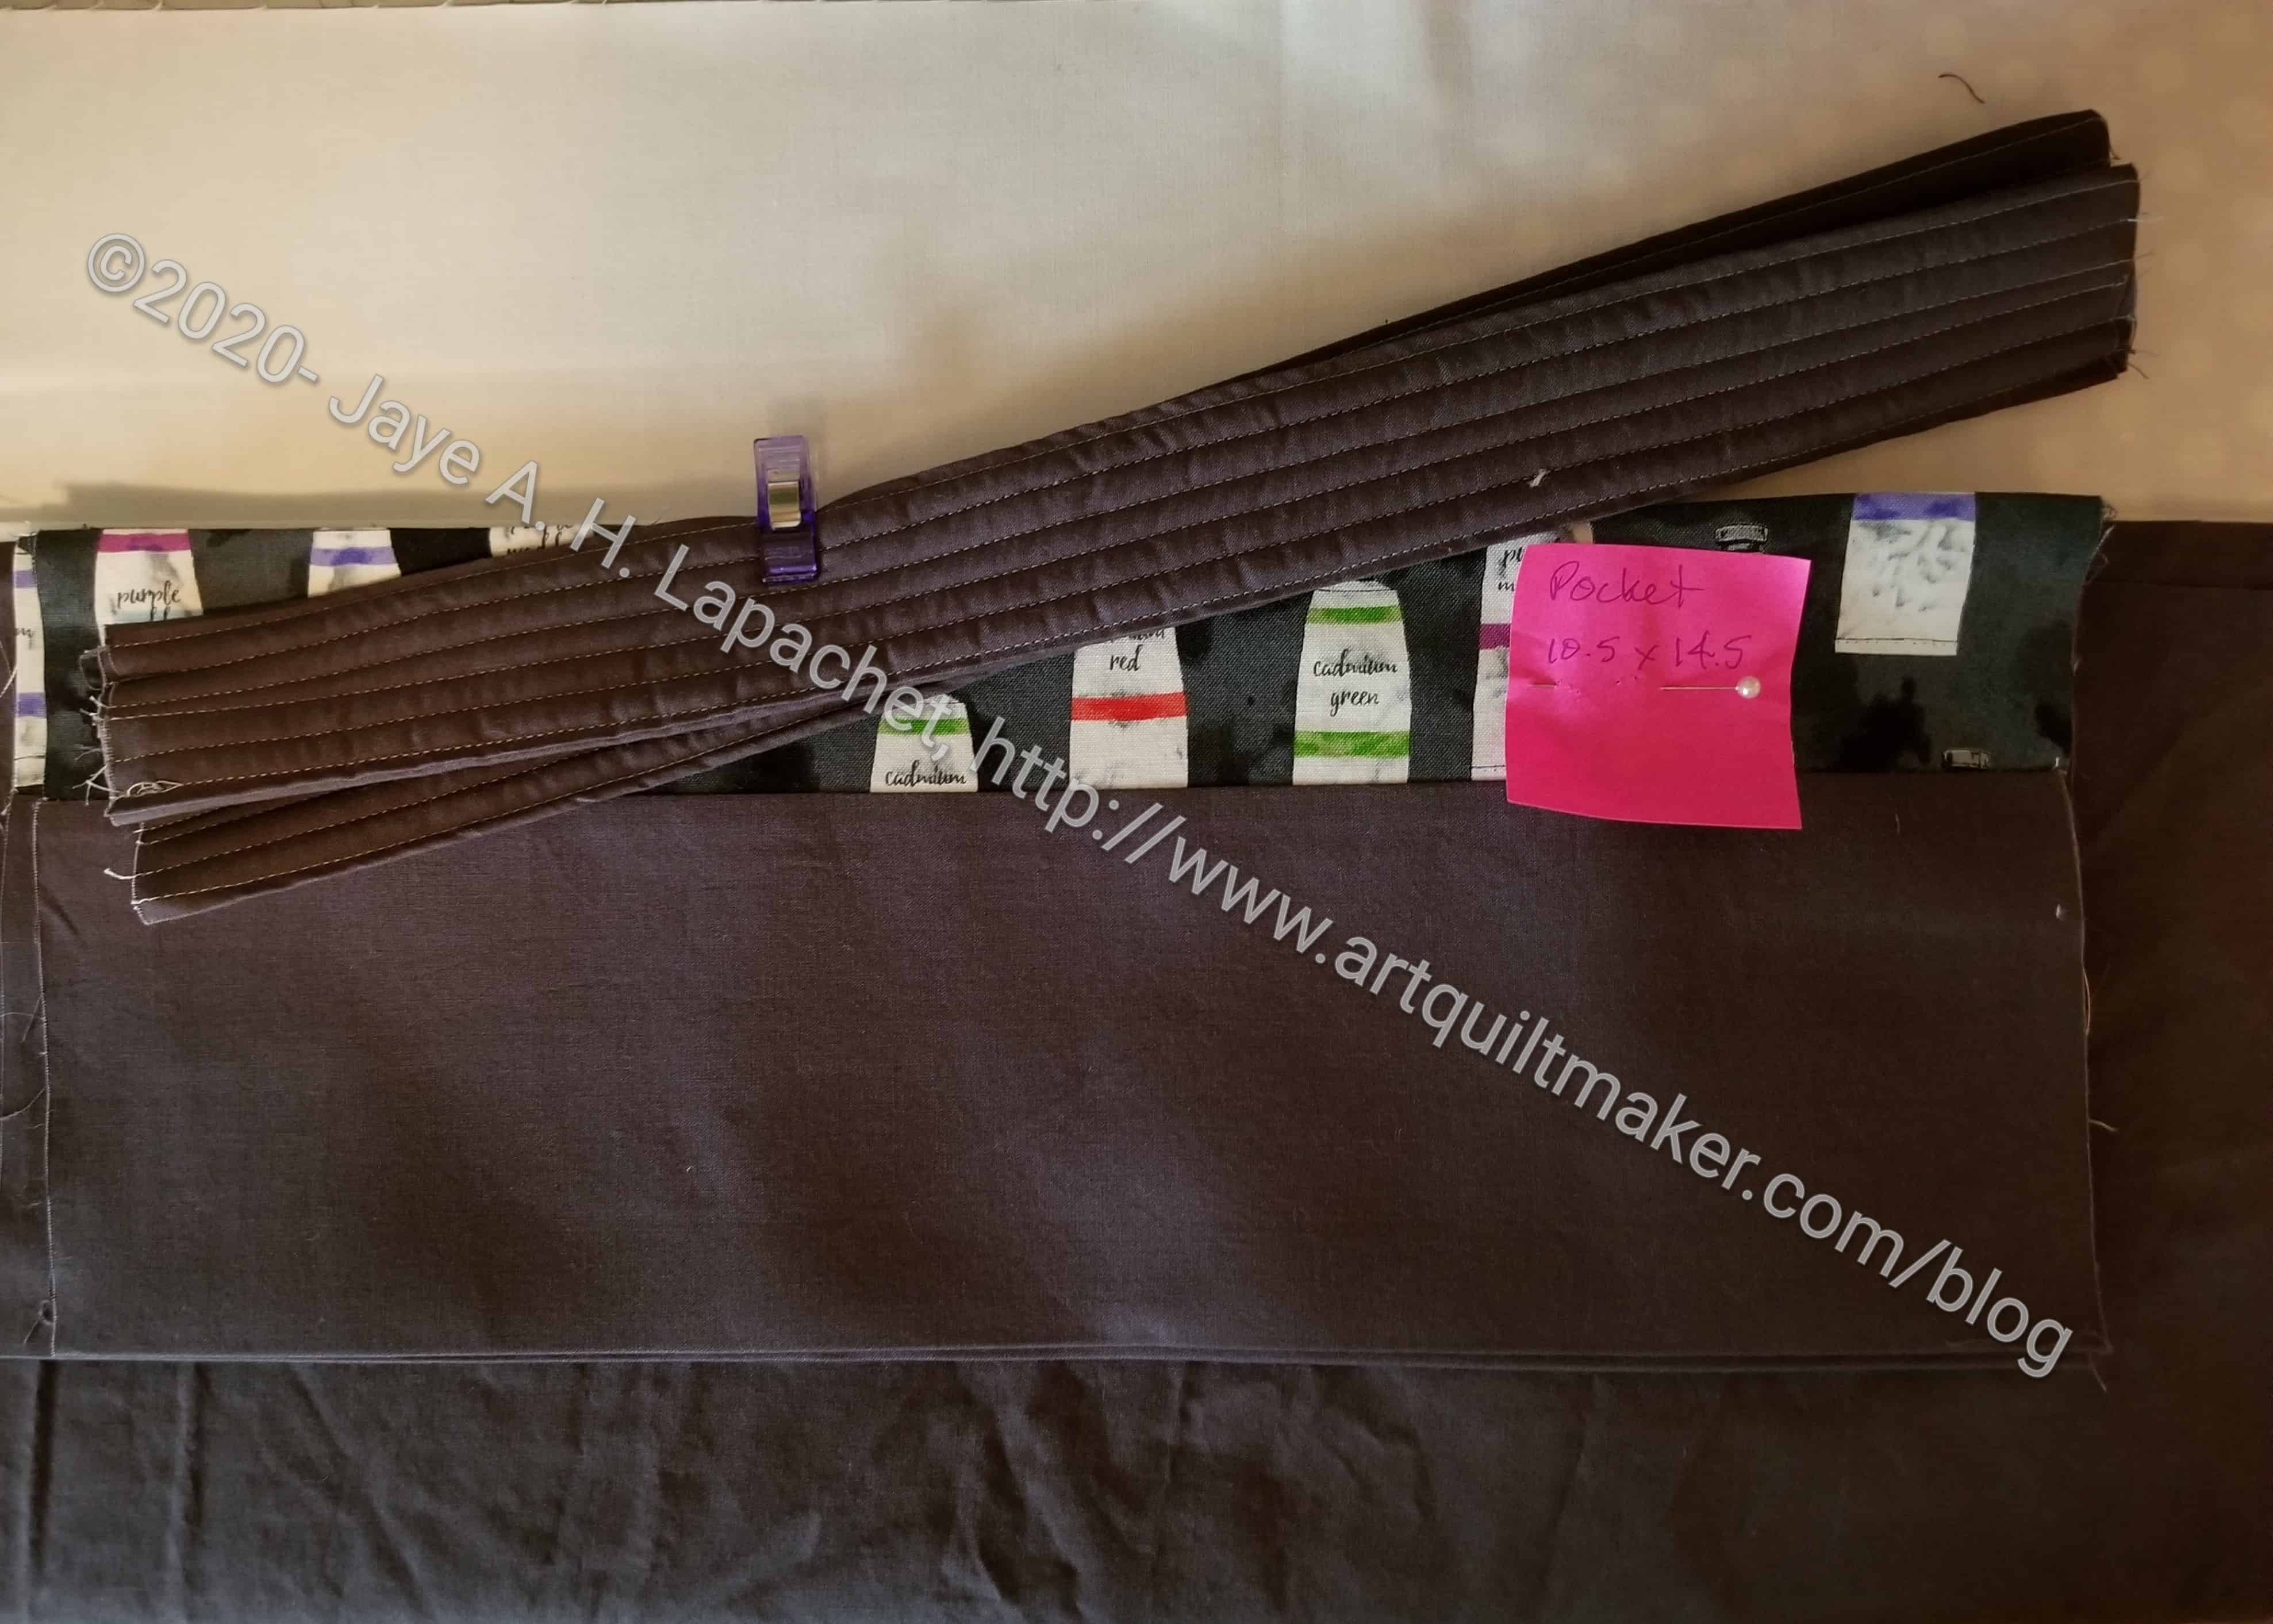
I spent the weekend working on my Ultimate Carry All Bag. I really needed to get on it since a few people have already finished it, like Cyndi. I am supposed to be one of the leaders, after all!
I already made the small front pocket, which is actually the third sewing step. As I think I mentioned, I don’t recommend skipping steps, but I needed to create the tutorial. Needs must.
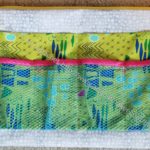
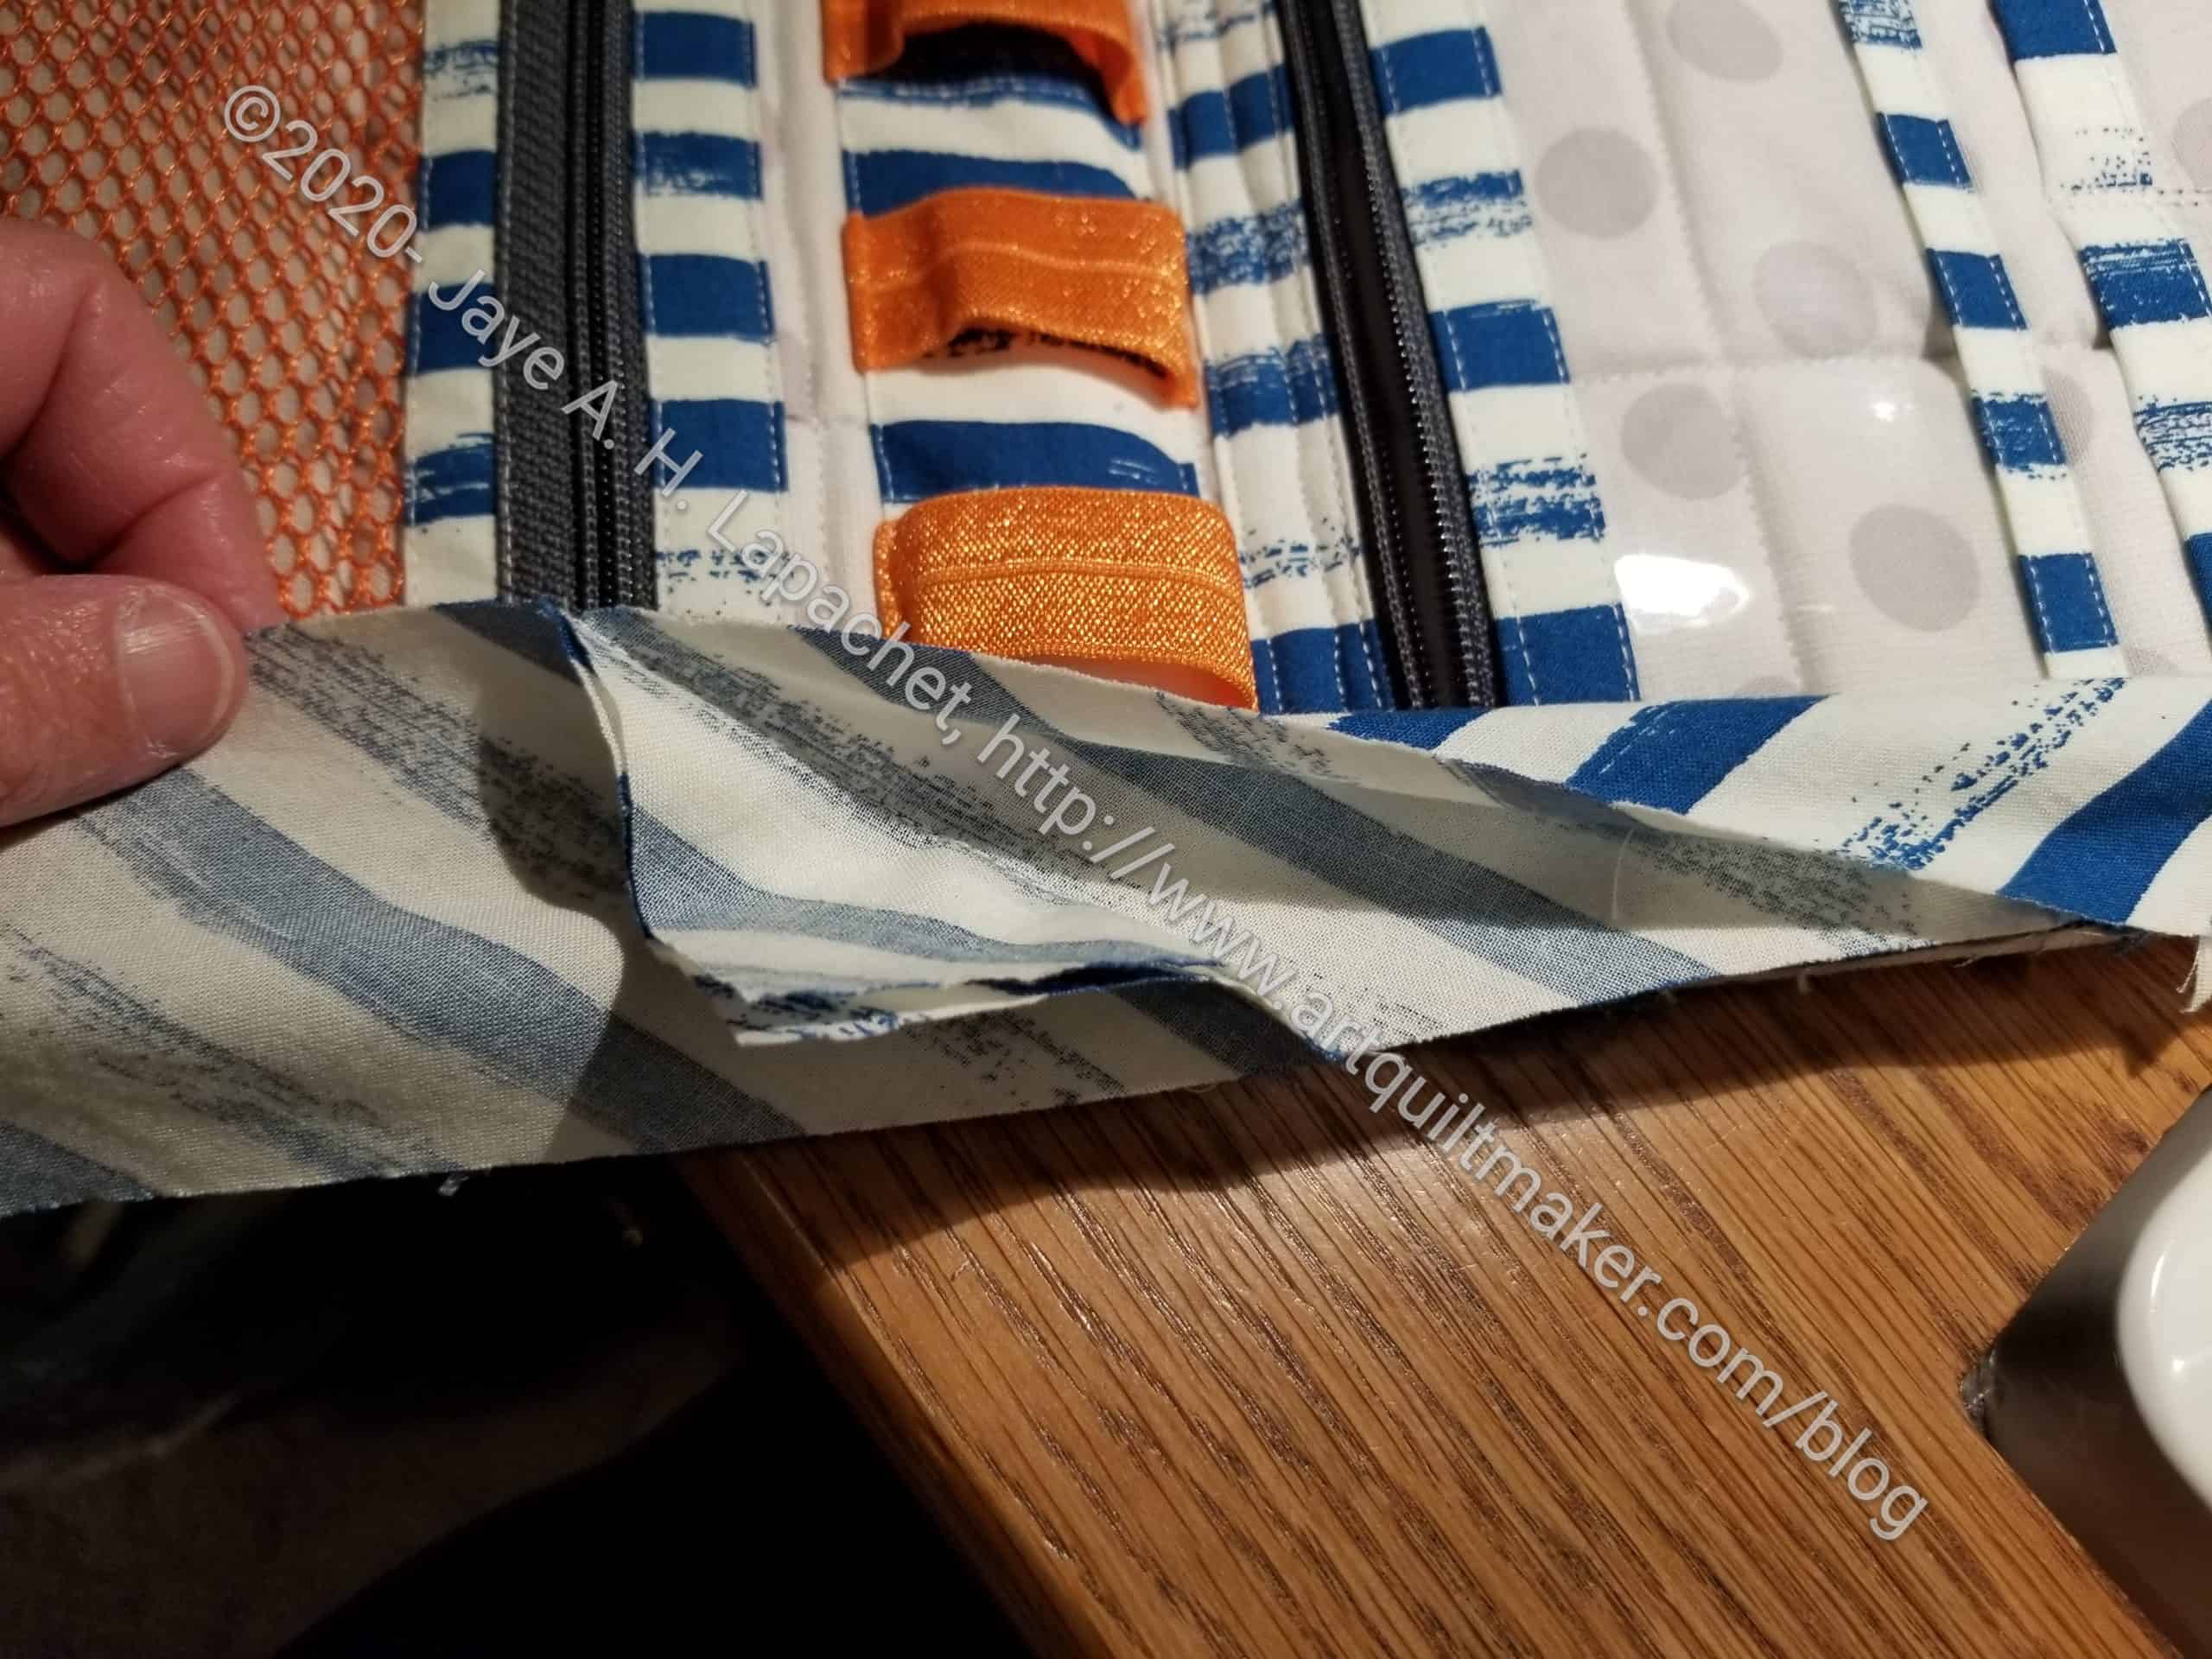
Ultimate Carry All large Pocket #1 back
With the small front pocket done, I only needed to create the two larger pockets. The one shown above is pocket #1 and is almost finished. I haven’t sewn up the sides or made the pleat in the bottom.
The green pocket with the pink binding on the mesh is the back of pocket #1. This is a hack I added. There was nothing on the back of this pocket. I know I might put stuff in it and forget about it. Still, why not have more pockets? More pockets are better IMO.
Ultimate Carry All large Pocket #2
Ultimate Carry All large Pocket #2 back
Ultimate Carry All large Pocket #2 back- examples
Pocket #2 has the pen holder. I don’t like white elastic, so I used more of the ByAnnie double fold elastic. I like the variety of colors and the elasticity. I wasn’t sure I would put the pen holder elastic on, but I did. Actually, I shortened it and added another Clippy pocket I thought it would be useful.
I made a ton of t mistakes and a lot of ripping went on over the weekend. These pockets are not difficult, but the instructions are unique. Also, I am experiencing a low level of anxiety generally and that is making it hard for me to focus on something as complex as bagmaking. Working on the HRTs is satisfying and not too difficult.
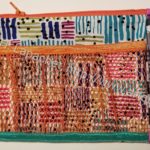
I am working on another Running with Scissors tote. Yes, I am a glutton for punishment.I am trying to get my head around the process.
I was able to get the stripes in order this time, which was great.
Running with Scissors tote binding
I also did the binding really well. I am pretty pleased with how it looks.
This time I did better , thought I still don’t have a handle on the process. It is as foreign to me this time as it was last time. I think this might mean I have to make another one. 🙂