I know these tutorials are taking forever, but they also take a long time to write. Doing them in smaller chunks fits my schedule better. Hopefully, the smaller chunks makes the bag more doable as well.
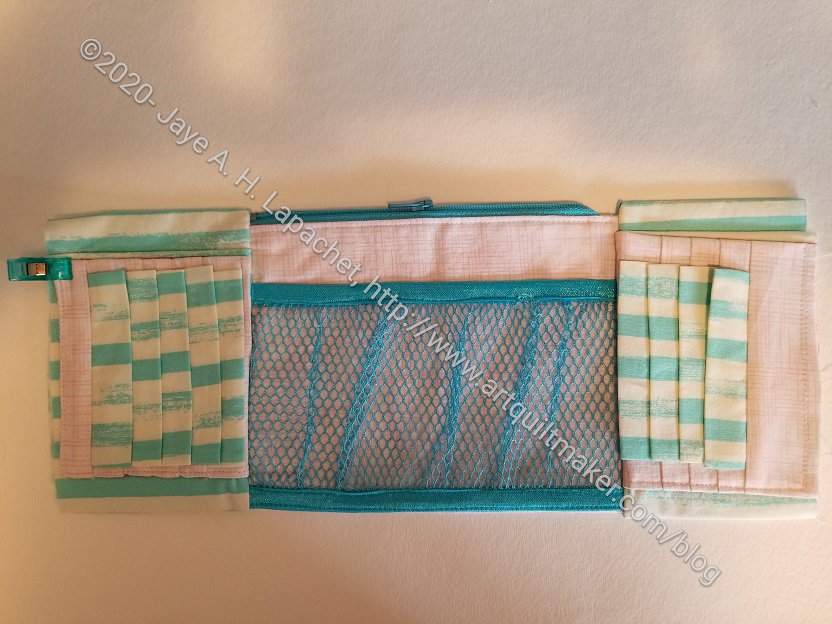
Today we are going to make the Clippy Pockets (type 1) used on the sides of the small, interior pocket instead of using the badge holders. The other day, we made the center zipper section. These Clippy Pockets will be placed on either side of the center zipper section. The pleats hold your WonderClips. The Clippy Pocket is not part of Quiltessa Natalie’s original pattern.
You can find the original pincushion instructions, from which this tutorial evolved, in Love of Patchwork & Quilting, issue 39. It is available digitally in the Apple and Google Play stores. The same pincushion pattern is available in the book 50 Little Gifts** from Lucky Spool.
Additional Supplies:
- Clover Chalkoliner**
- Corner poker (wooden knitting needle, skewer, etc)
- Creative Grids 4.5″ x 8.5″ ruler**
- Double-fold elastic (or twill tape)
- Hump Jumper (helps deal with thick layers)
- Sewline pencil**
- Large WonderClips**
- SF101 – add this to whatever section you think needs it. I added it to P4 to add some stability to the Clippy Pocket
- Post-it Notes** (really, you can use any post-it notes. I just like the shape and color of these. Another good product is Semikolon’s Sticky Tab Markers in a Booklet-no affiliation)
- WonderClips**
Notes:
- Use a quarter inch seam allowance
- Pay attention to the flaps and pin them back if necessary so you don’t sew them down
Tutorial:
The front pockets needs two of these side pockets. They will go on each side of the center zipper/mesh pocket.
You can make four and put more Clippy Pockets on the back, if you want. We won’t do this in this tutorial, but it is an option.
You will need P4 and all the pieces for the Clippy Pocket, v.2.
The Clippy Pocket section is inserted on the bottom of pattern pg.13. I made the Clippy Pocket instead of vinyl badge holders.
Yes, I am using different fabrics. I am sure you can manage.
Directions:
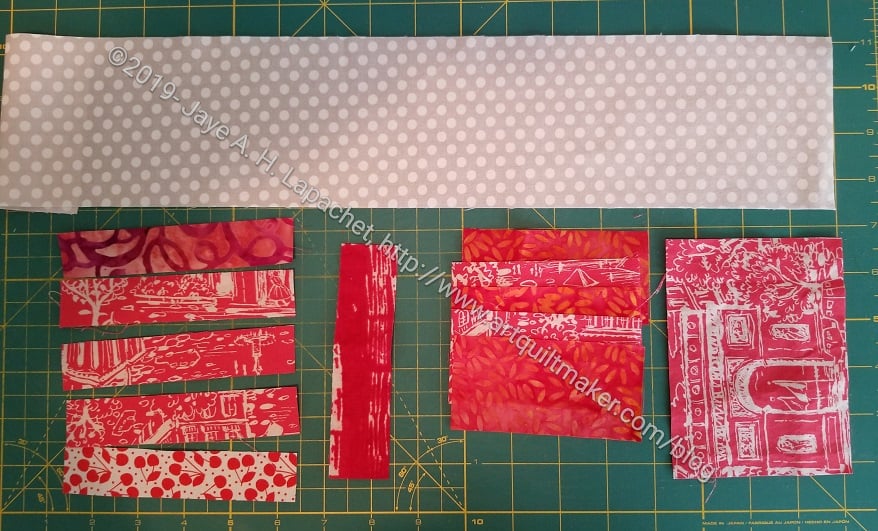
1. Cut the following:
A – cut 1 -1 1/4”x5” for edge
B- cut 5 – 2”x4” for Clippy tabs/flaps
C – cut 5 – 1”x5” for between the flaps
D – cut 1 – 3 ¾”x5 for back
Shapeflex – cut 1 piece 19 ¾” x 3 ½”
- Sew flaps: fold B pieces RST and sew short sides. One long side will remain open
- Turn sewn B pieces right sides out
- Press B pieces. Fold will have a crisp seam. B pieces are now flaps
- Lay A piece right side up

Layer and center a sewn B piece (flap) on top of the A piece
-
Layer and center a sewn B piece (flap) on top of the A piece

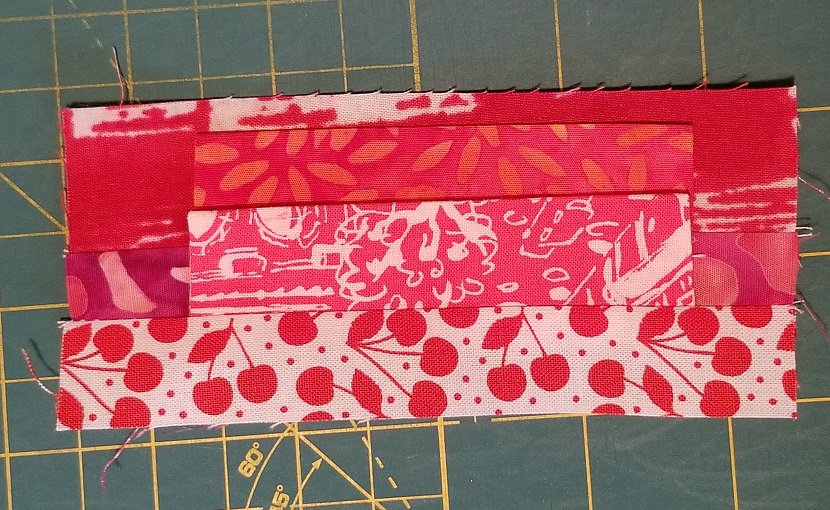
Layer a C piece on top of the A and B pieces WS up
Sew 3 pieces together along the long side where the raw edge of the flap will be sewn shut
-

Press Piece Press C piece away from the other two pieces
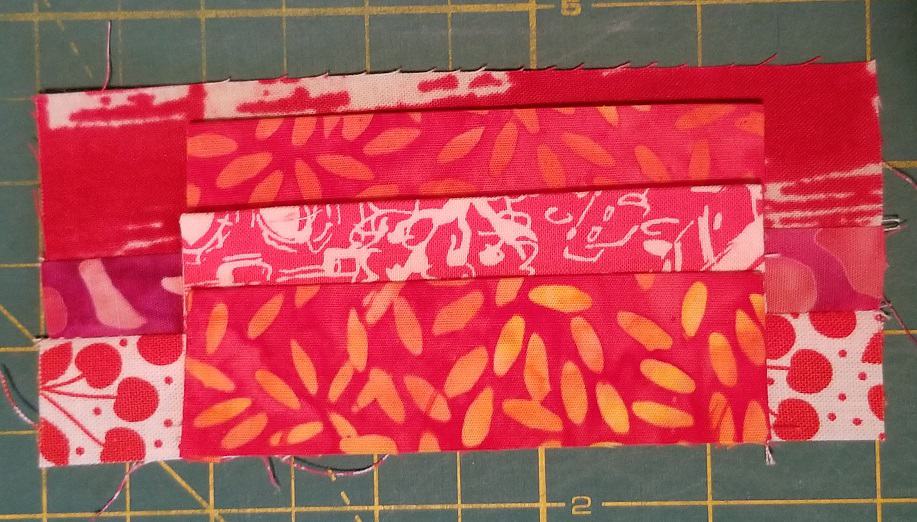
Layer another flap (B piece) on top of your sewn pieces
- Follow steps until you are out of flaps (B pieces) and C pieces

You will end up with a piece comprised of strips and flaps that is approximately 3 ¾” x 5”. This piece looks like a ‘flap ladder’. The sides of this ‘flap ladder’ should reach the sides of your P4 strip
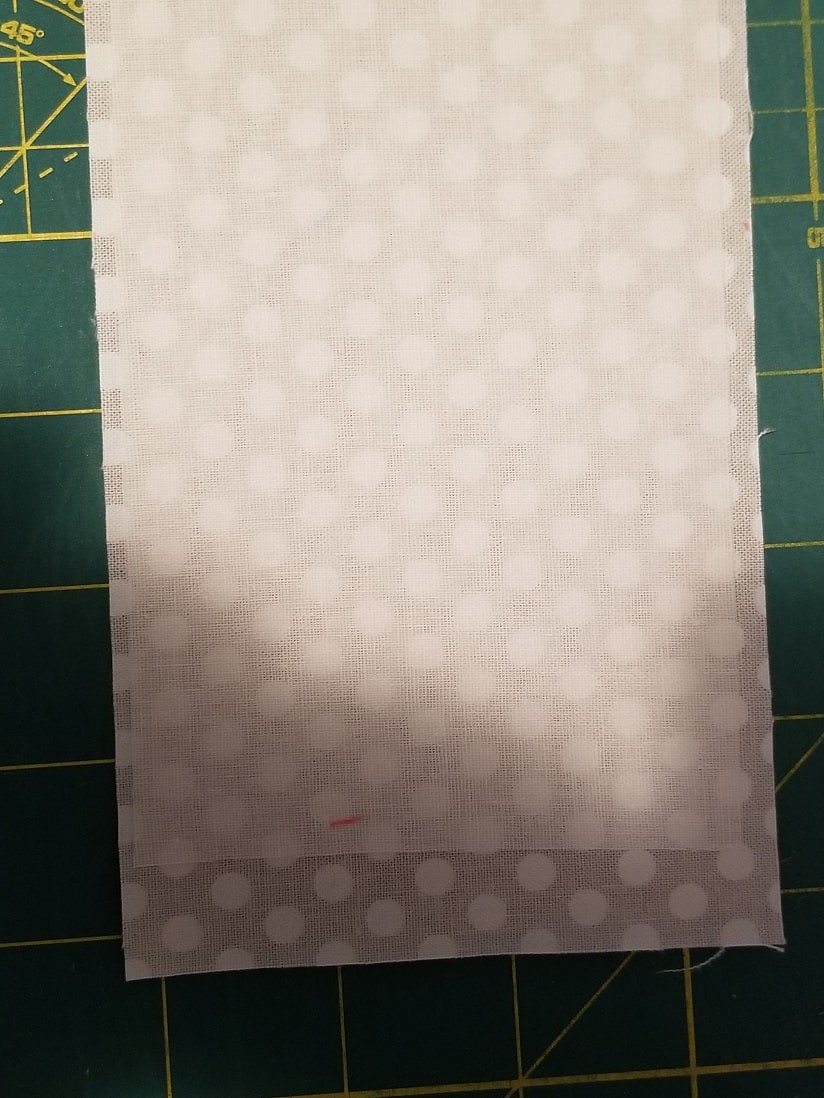
Press Shapflex on to your P4 piece
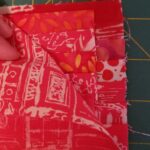

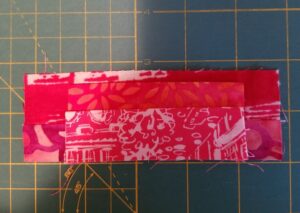
Layer your ‘flap ladder’ RST with piece D and sew along the short sides
- Carefully press seams open without creasing piece D or the ‘Flap ladder’
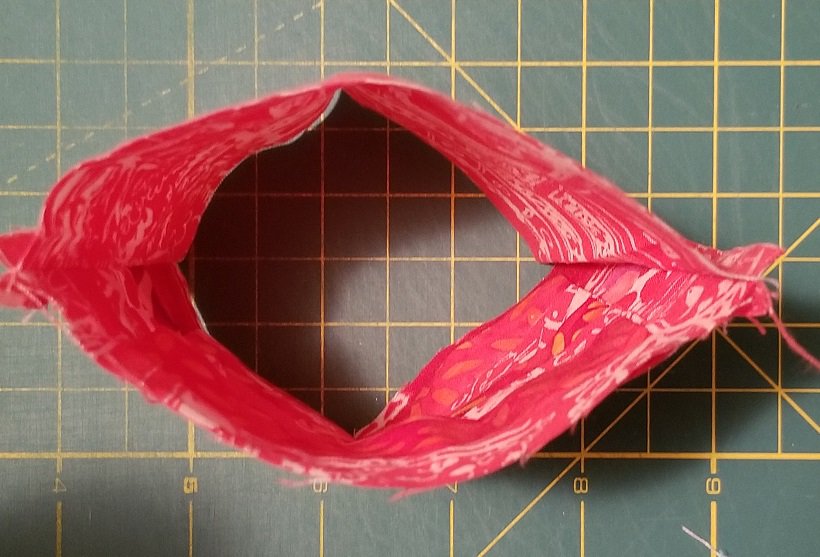
Now you have a loop.
Turn your loop right sides out
Press flat
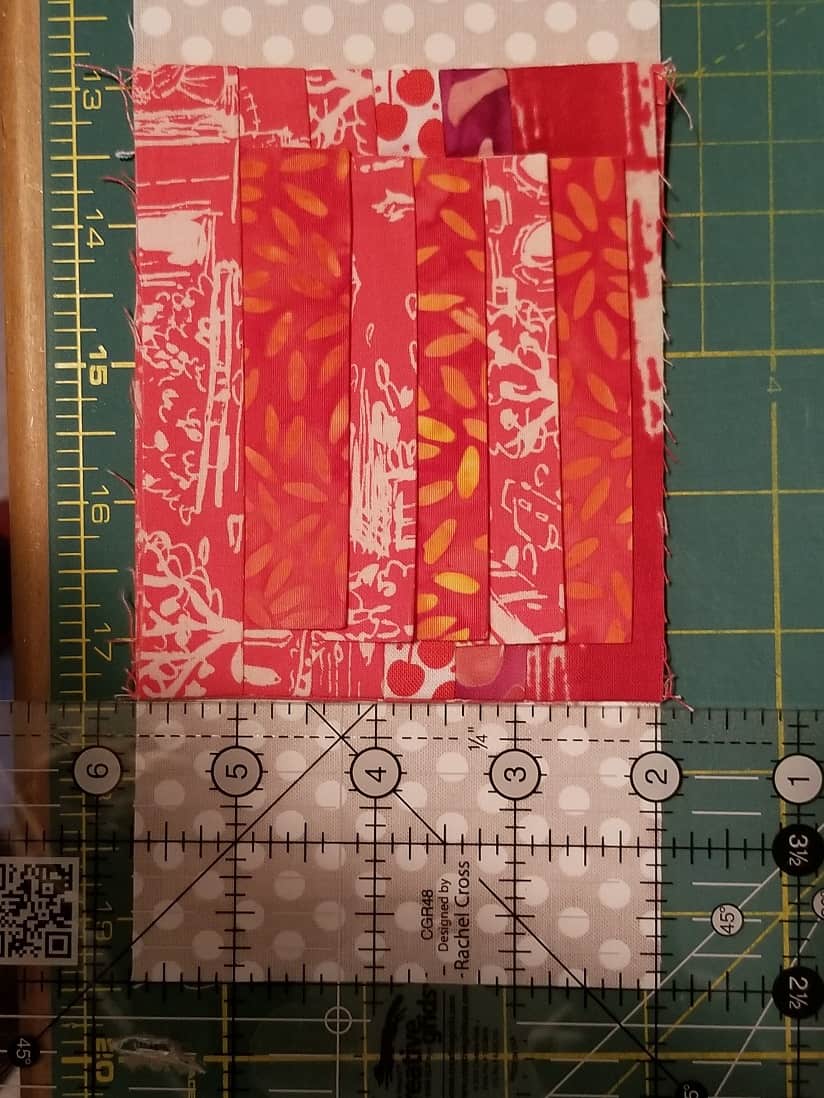
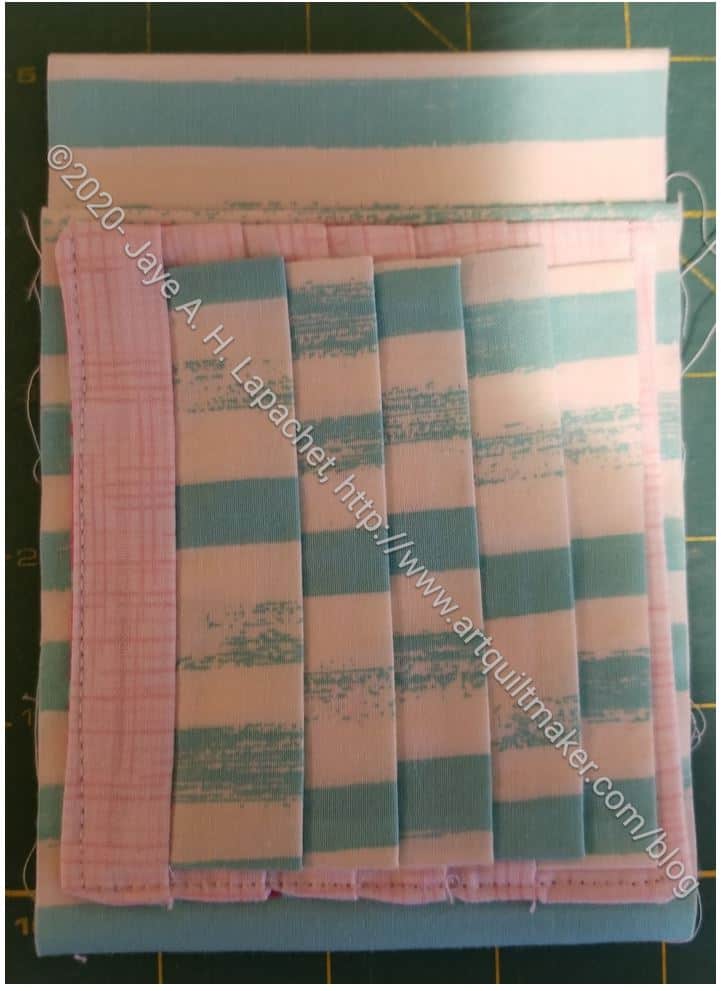
Place your sewn piece 2” from the bottom of your P4 strip.
- Pin in place with the raw edges at the side
- Fit your machine with your matching or top stitching thread
- Pin and sew across the bottom using matching or top stitching thread
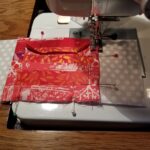
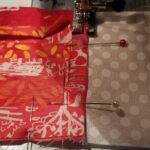
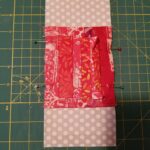
Sew across the bottom. N.B. : I used a contrasting thread so you could see it. For my final bag, I will use a matching thread.

- Continue with the directions on the Ultimate Carry All Bag pattern, pg.14, starting with “then fold the pocket fabric in half…”
Next time we will work on the Exterior front pocket
Previous Tutorials:
- Large Pocket #1 pt.1 tutorial
- Large Pocket #1 pt.2 tutorial
- Large Pocket #2 Clippy Pocket tutorial (type 2)
- Large Pocket #2 tutorial pt.2
- Front Pocket information
- Pocket information
- Clippy Pocket Hack (type 1) – prelude to a tutorial
- Clippy Pocket Hack (type 1) pt.1
- More on Clippy Pocket Hack (type 1)
**I use affiliate links and may be paid for your purchase of an item when you click on an item link in my post. There is no additional cost to you for clicking or purchasing items I recommend. I appreciate your clicks and purchases as it helps support this blog.