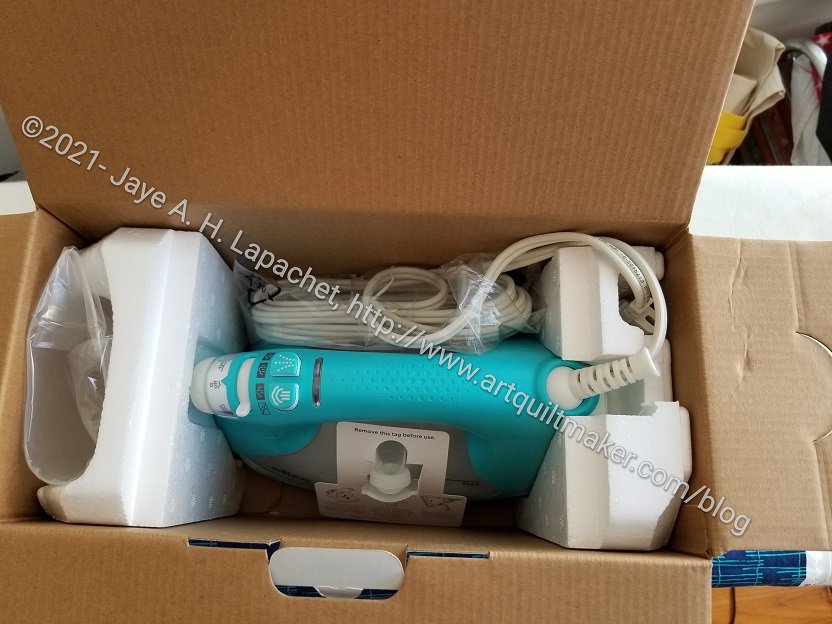
When Oliso came out withe a turquoise model right at the time I needed to replace my old Oliso, I hopped on the bandwagon.
Turquoise Oliso
The supply chain problems have affected me in various ways. I mentioned the bookcases for my workroom refresh. The iron has been delayed for months, but finally arrived last week.
Oliso actually air freighted some of the irons because of the delays and mine was one.
I can’t tell you how happy I am to have the consistent steam, the up and down feature and the longer ‘on’ time. Of course not having to set it upright is great, too. Not knocking the iron off my ironing board is a bonus. I really like these irons.
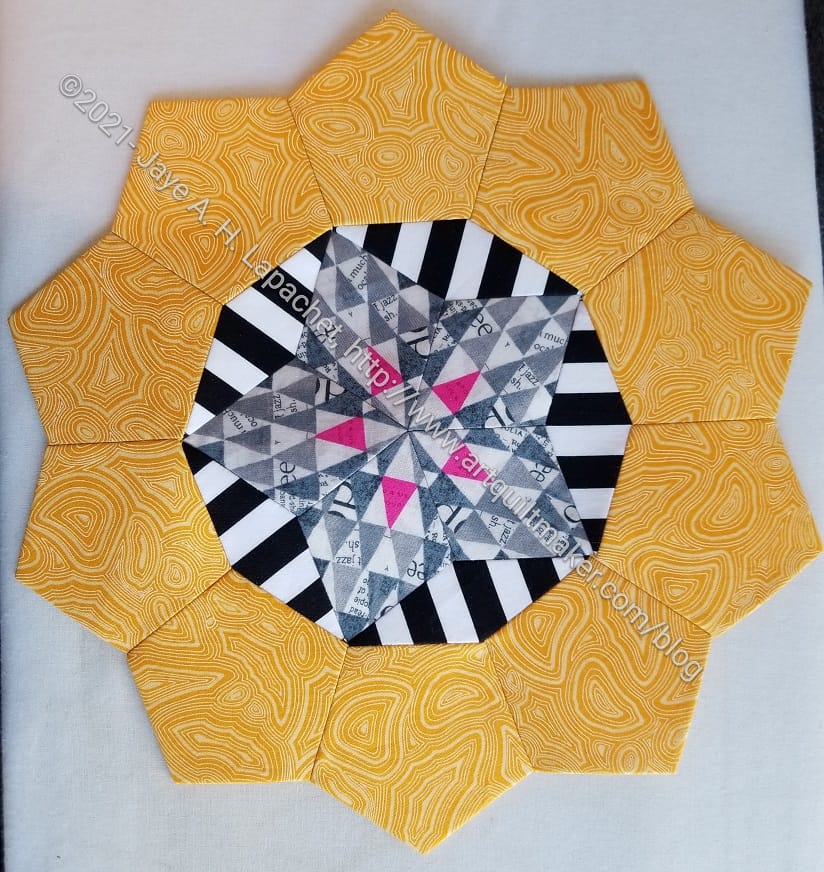
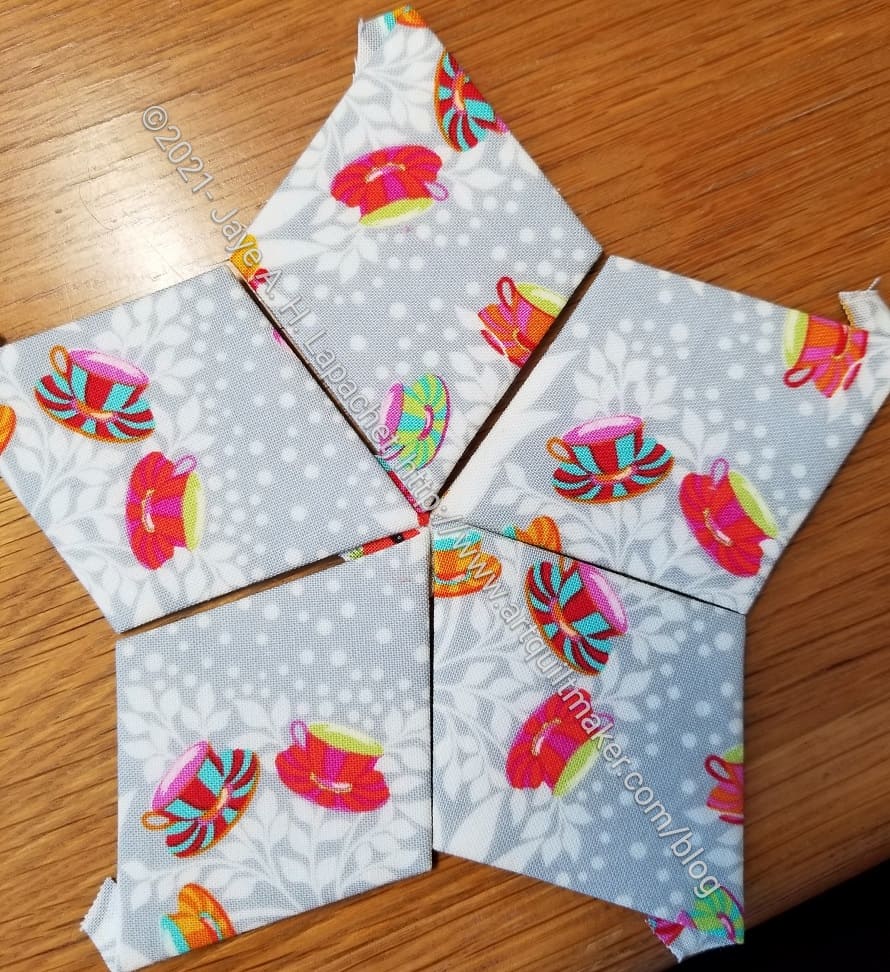
As you saw from the other post, I was able to get this rosette together, but I did really struggle. I couldn’t get the points of the various sections to line up. I am not sure what the problem was.
Yes, I know if someone can’t see it from a galloping horse, I shouldn’t worry about it and, ultimately, I accepted my fate and just did the best I could.
The whole point of EPP, however, is that it is possible to line up complicated designs because all the fabric is stabilized and there is no bias stretch to worry about.
Sections of M5 Yellow/Grey Rosette
The papers are die cut. I am using quilt shop quality fabric and I wash and press all of the fabric. Still, when I put the first section of the yellow and grey rosette together, the points were off.
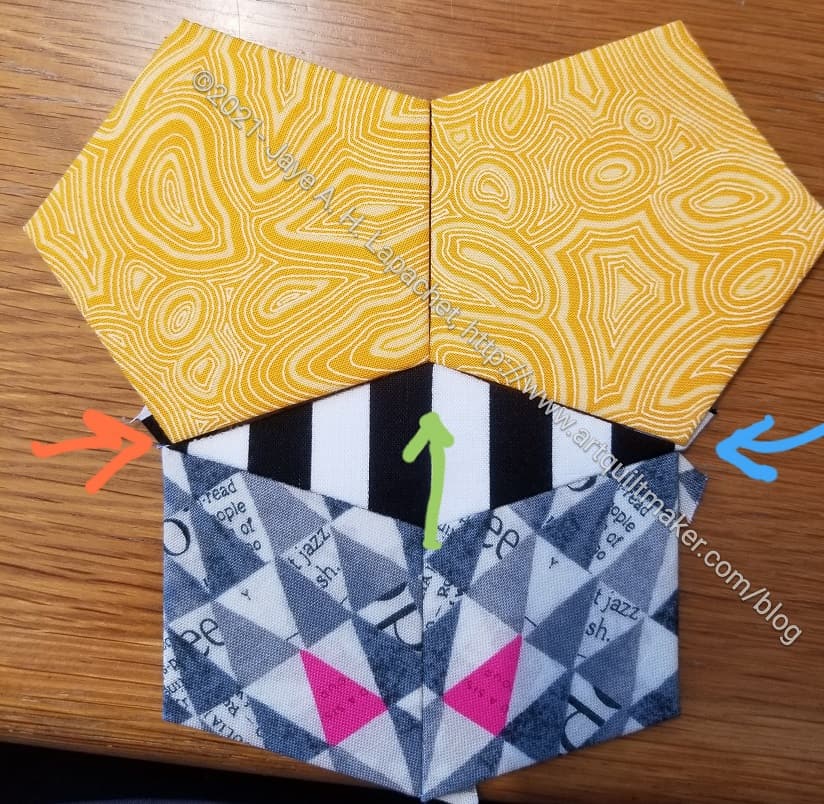
I wasn’t as worried about the center point (yellow meets stripes) as I was about the edges (see orange and blue arrows). If there are gaps there, there will be a gap between yellow pentagons.
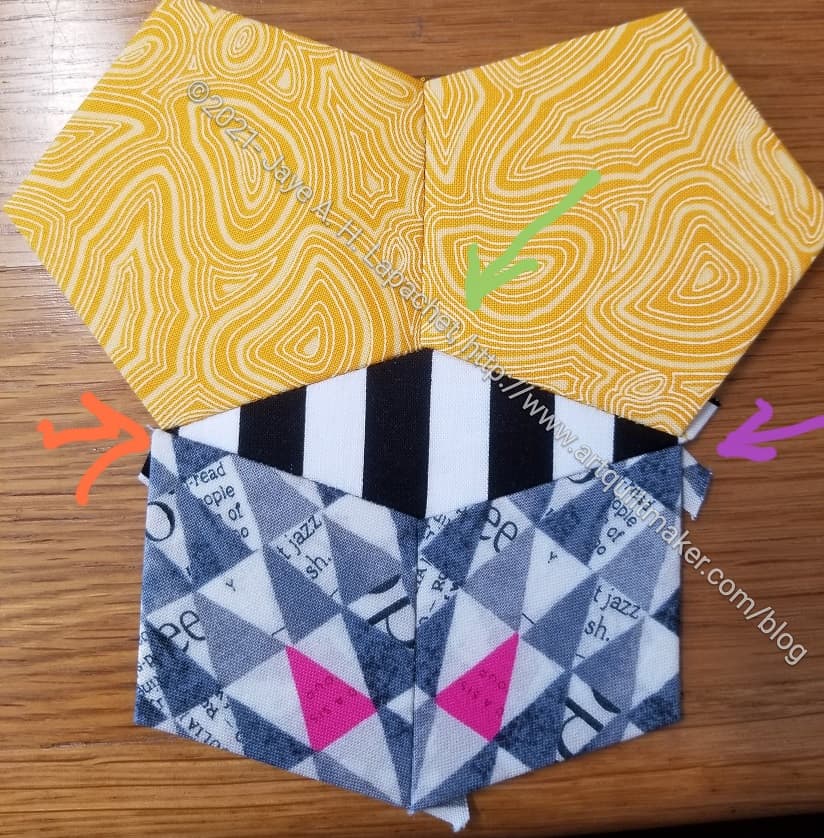
Sections of M5 Yellow/Grey Rosette round 2
In order to try to get the pieces in better alignment, I unpicked what I had sewn and tried again.
I was able to re-center them a little bit so the future gap on the side would be more evenly distributed, but I wasn’t able to get them lined up as perfectly as I would have liked.
Still, I think the Rosette looks good and adding other pieces doesn’t seem to be a problem.
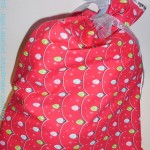
Even during the holidays, when it is busy, I make gift bags. The other day I went hunting in a ‘gift bag fabric drawer’ I have and pulled out some fabric I have saved for gift bags. There was a lot of birthday gift bag fabric in the drawer, but also a couple of pieces of Christmas fabric I could use.
I keep my gift bag fabric separate because I don’t wash it. The sizing helps keep the gift bags looking crisp and reminds me to wear a mask when I iron them during the construction process
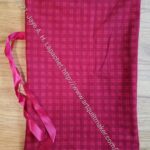
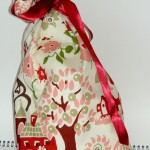
This candy cane heart fabric has been around for a long time. It is cute so I don’t know why I didn’t use it sooner. I had a yard, so I made two bags.
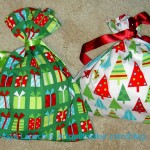
Debbie Mumm Plaid gift bag
Debbie Mumm Toaster gift bag
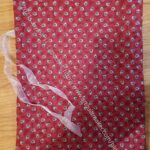
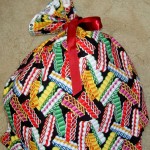
I had some old Debbie Mumm fabric. The fact that I have this fabric at all is a testament to 1) how long I have had it and 2) how little fabric there used to be to buy. Since it is unlikely I will use this for anything else, the fabric has become more gift bags.
In between sewing other projects, I have been making gift bags.
Now that the giant puzzle is put away, I have moved my EPP work back to the living room for after dinner stitching. I am making much more progress. Of course, the living room looks a little messy, but not as bad as it did.
EPP Workspace – Thanksgiving edition
I have all of my pieces laid out on the coffee table so I can just start stitching as soon as I sit down.
I haven’t quite put away Thanksgiving, so you can see the Thanksgiving tablemat I made a few years ago underneath everything.
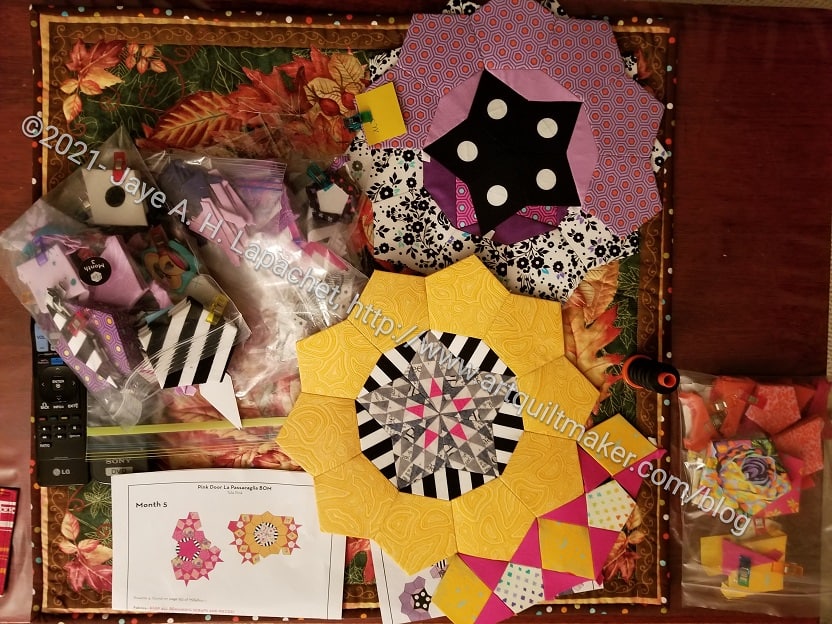
In this picture, there is a jumble. I am still working on M3 intermittently between finishing other months. Since I am able to spend more time working more on the project, I expect I will be able to finish it in a couple of months. I think I will have a little time work on it once I finish M5, which you can see on top with the yellow ring.
I have gifts on the mind. Time is short for some winter holidays so gifts that have not been started have to be quick. I don’t like to give handmade gifts that are only quick. I like to give things that people will use.
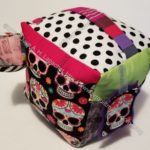
Here are the Mega Pinnies I have made.
BAM 2020 Retreat Mega Pinnie – finished
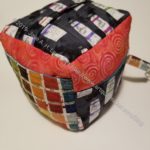
Gerre’s Mega Pinnie Gift
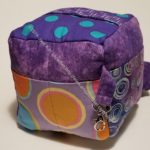
Mom’s Mega Pinnie
Julie’s Mega-Pinnie with lobster clip
Cheri’s Mega-Pinnie in use
Angel Mega Pinnie
I have an idea to make another one. Maybe for the Door prizes for next year?
Resources:
A Note to Follow Sew example – has some nice applique’ with hexies.
Once again, I am posting a gift bag tutorial to encourage you to forego paper wrapping and wrap your gifts in reusable gift bags. As a reminder, if you do not celebrate Christmas or another gift giving winter holiday, you can still make gift bags for birthdays, graduations, weddings and for giving quilts to people. You can make them using the tutorial below. You can make them using your own tutorial. You can use the In Color Order drawstring bag pattern or you can buy reusable fabric gift bags.
Supplies:
Fabric – I use either a half yard, a yard or a fat quarter. If you use a yard you can make 4 smallish bags, two medium bags or one large bag. You can make bags with any size piece of fabric and you can use the directions to make a specially sized bag for a special gift. Also, check out FabMo, if you are local, and get some super special fabric that makes up gorgeous gift bags.
thread
ribbon or cord or use your imagination (braided yarn?)
Sewing machine
basic sewing kit
For this tutorial, we will use a fat quarter of fabric
1. If your fat quarter does not have a selvedge, create a hem using two folds so there are no raw edges. If your fat quarter has a selvedge, use the selvedge for the top. It won’t unravel. If you are using the selvedge and not making a hem, skip to step 4.
2. (If you need a hem) Press hem in place.
3. Sew hem with a decorative stitch, if you have it, a zigzag or straight stitch work fine as well.
Optional: If you have stitch letters on your sewing machine, stitch your name and the year so you know when you made the bag.
4. Fold hemmed bag in half WRONG SIDES TOGETHER so that half of the hem is underneath itself towards the top and the fold is on the left. You will be making a French seam.
Sew first seam on gift bag
5. Fold a piece of ribbon about 1.5 feet long in half. You can adjust the size of ribbon you use depending on how much ribbon you need to tie.
6. Place the folded ribbon in the open side of the bag about 4 inches from the top edge/hem.
7. Pin ribbon in place.
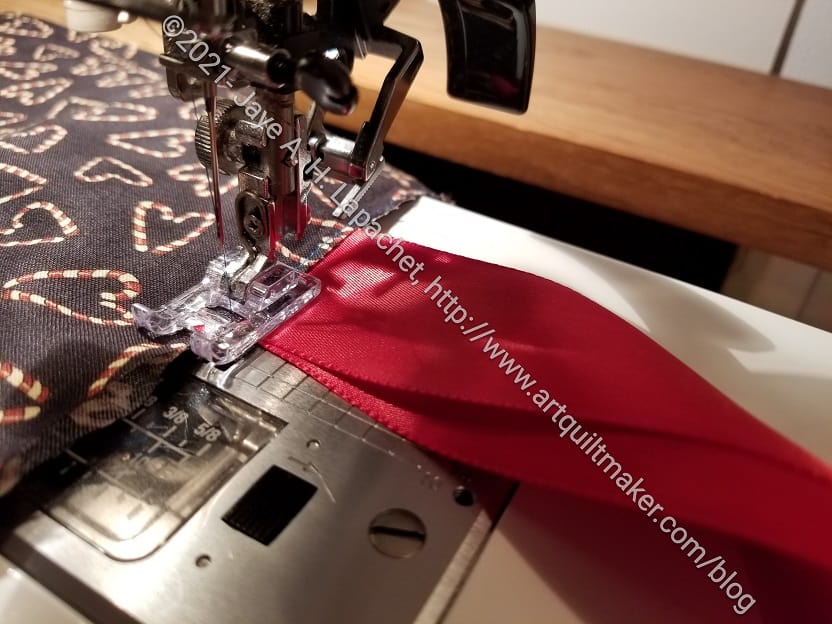
8. Pin rest of the right side and bottom closed. NOTE: If you are folding your fabric in half, you will be sewing two sides rather than the side and bottom. Basically, sew the sides or bottom closed depending on where your open edges are.
Use an 1/8 inch seam allowance or as small as you can.
9. Starting from the top, sew down the right side, backstitching at the beginning and over the ribbon 2-3 times. Backstitch at all stress points to keep the bag from ripping apart.
10. Turn at the corner and continue across the bottom, backstitching at the end.
11. Turn the bag inside out, so the right sides are together and the ribbon is out of the way of the seam (It will be inside the bag, but I put mine as straight as possible towards the opposite side of the bag).
12. Press seams, taking care to push them as far out as possible so there is no extra fabric near the seams.
NOTE: If you ribbon is synthetic or delicate, keep it out of the way of the iron.
Use a 1/2 inch or 5/8 inch seam allowance.
Finish French Seam
13. You are now sewing on the wrong side. Starting at the top, sew down the side and across the bottom again to finish the seam.
The raw edges will now be hidden inside the seams.
14. Open bag to make sure the raw edge is hidden inside the seam.
15. Turn bag inside out and press.
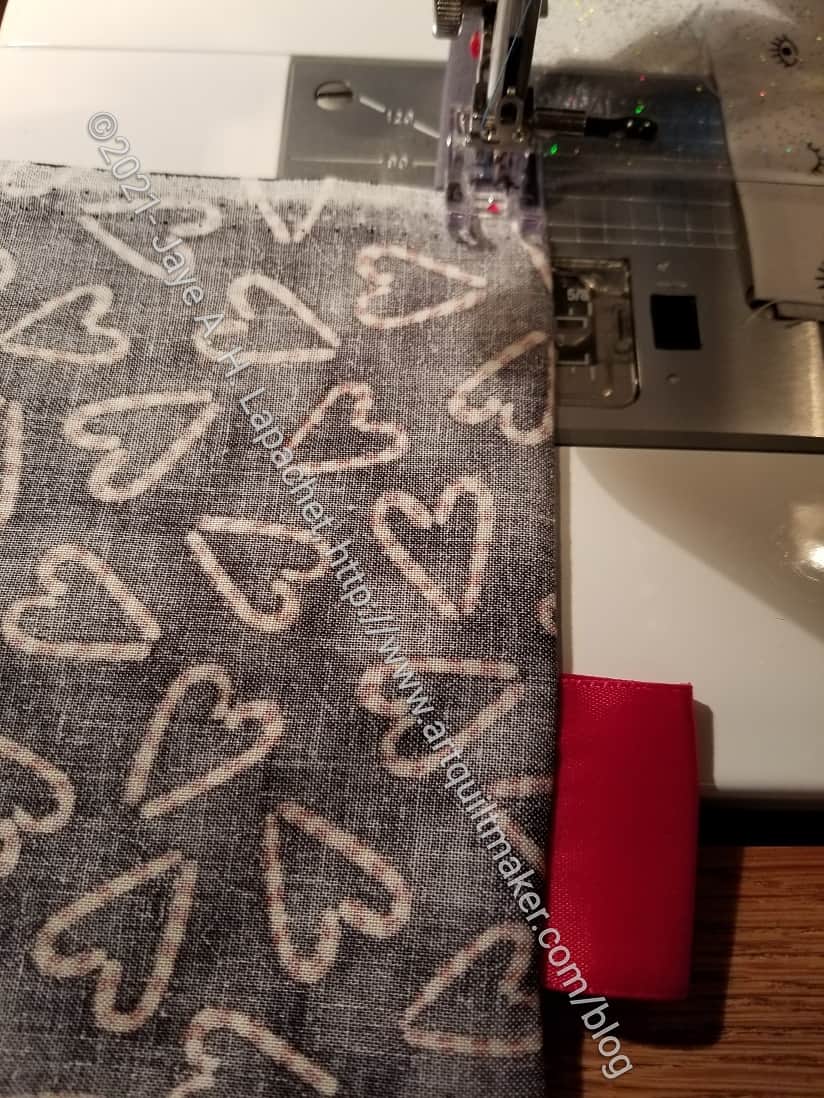
Candy cane heart gift bag
Voila! Your bag is really to use!
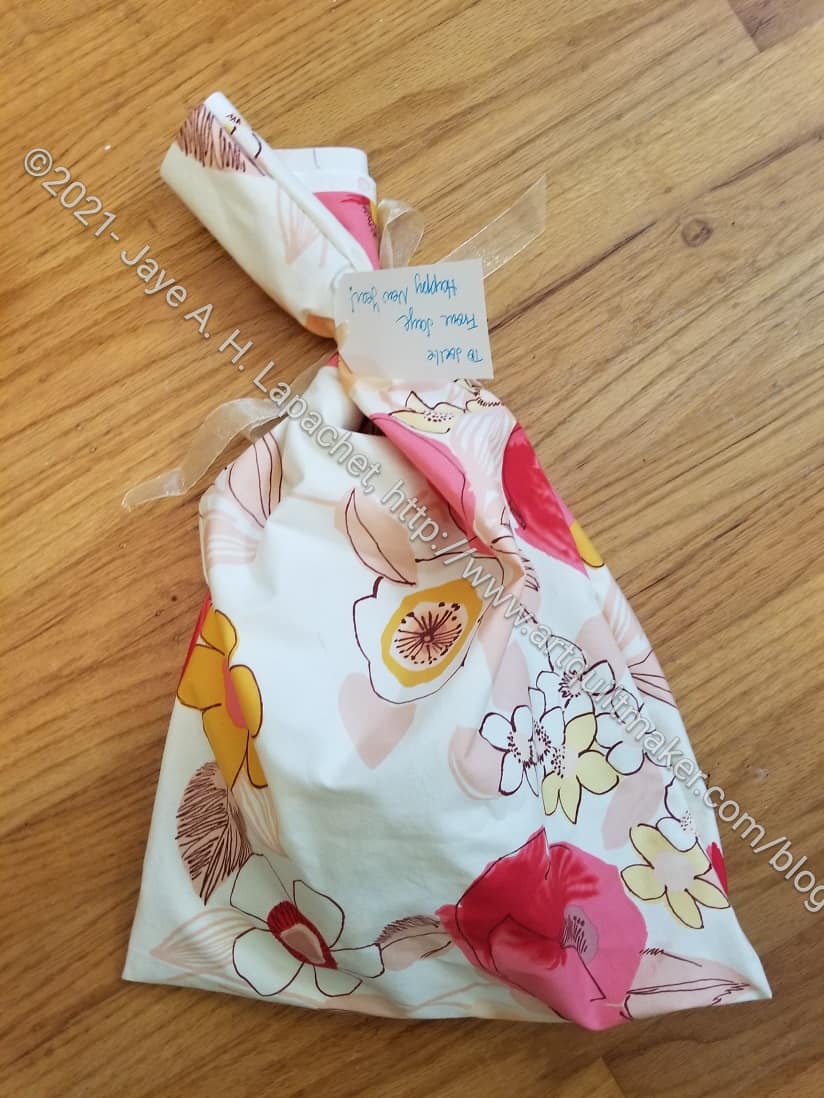
Pink Flower gift bag
Benefits:
reusable
good way to use fabric you might not use for quilts
Novelty fabrics
fabric you don’t love anymore
Use fabric you already own
orphan blocks
vintage sheets
opportunity to buy holiday fabric without committing to making a holiday (or birthday) quilt
quick way to wrap
no need to rush out to buy gift wrap
no tape or scissors needed
small children can help wrap, or wrap their own gifts
Fabric costs can be amortized over the years of the gift bag use
bags are made quickly
good opportunity to try out decorative stitches
Can quickly make a gift bag for an oddly shaped gift. I once wrapped a weed whacker in a gift bag!
Odd sized bags can be cut up later and used for different sized gifts
I reuse ribbon I get from other places for the ties
Easy to open and close the gift bag up again if the gift tag falls off
Embellishment possibilities are endless, if you want to take the time. Gift bags are a great way to try out different techniques, stitches, embroidery and embellishments
Blue Flower gift bag
Drawbacks:
takes time to develop a stockpile
reusable gift bags have to be stored
fabric costs are not insignificant
You don’t get beautiful mounds of boxed gifts under your tree
Any gift bags you make will add to your stockpile. You can use leaders and enders to make them, which means that your regular sewing isn’t interrupted much .
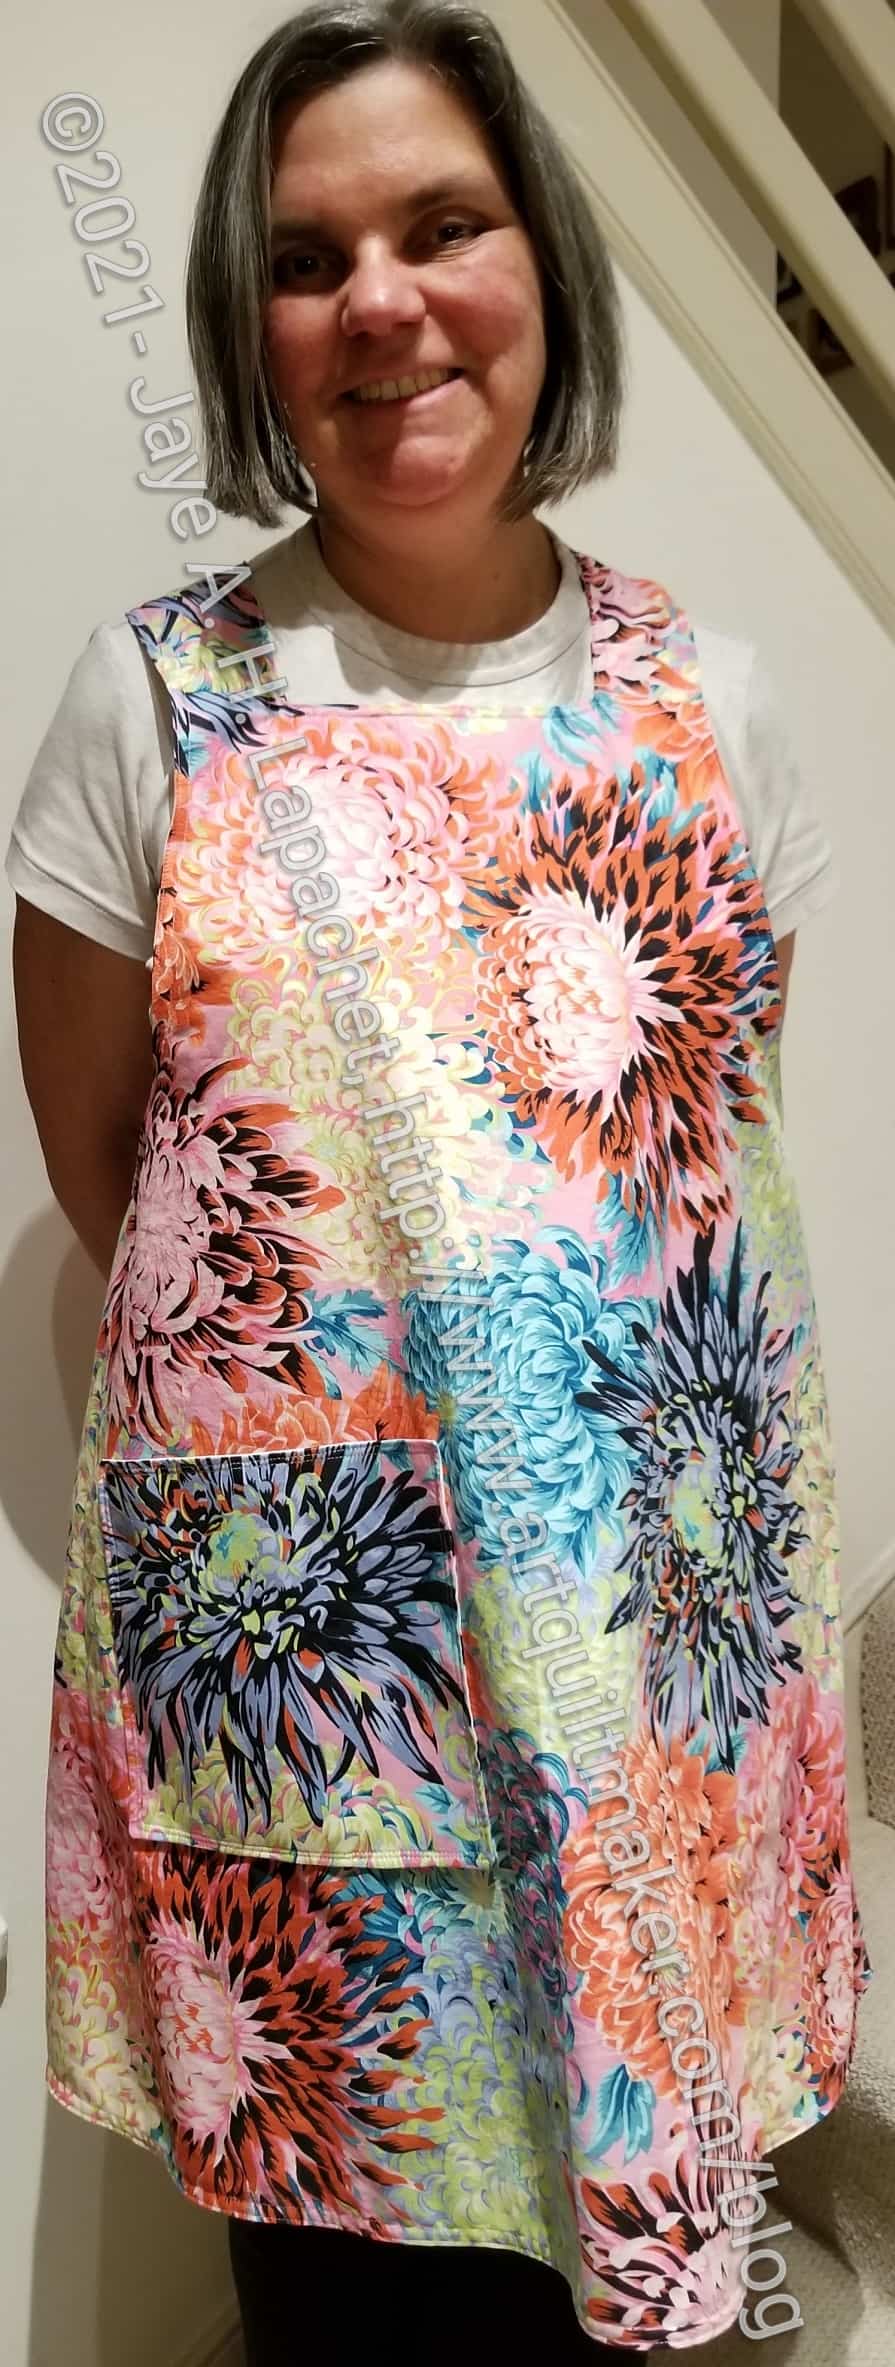
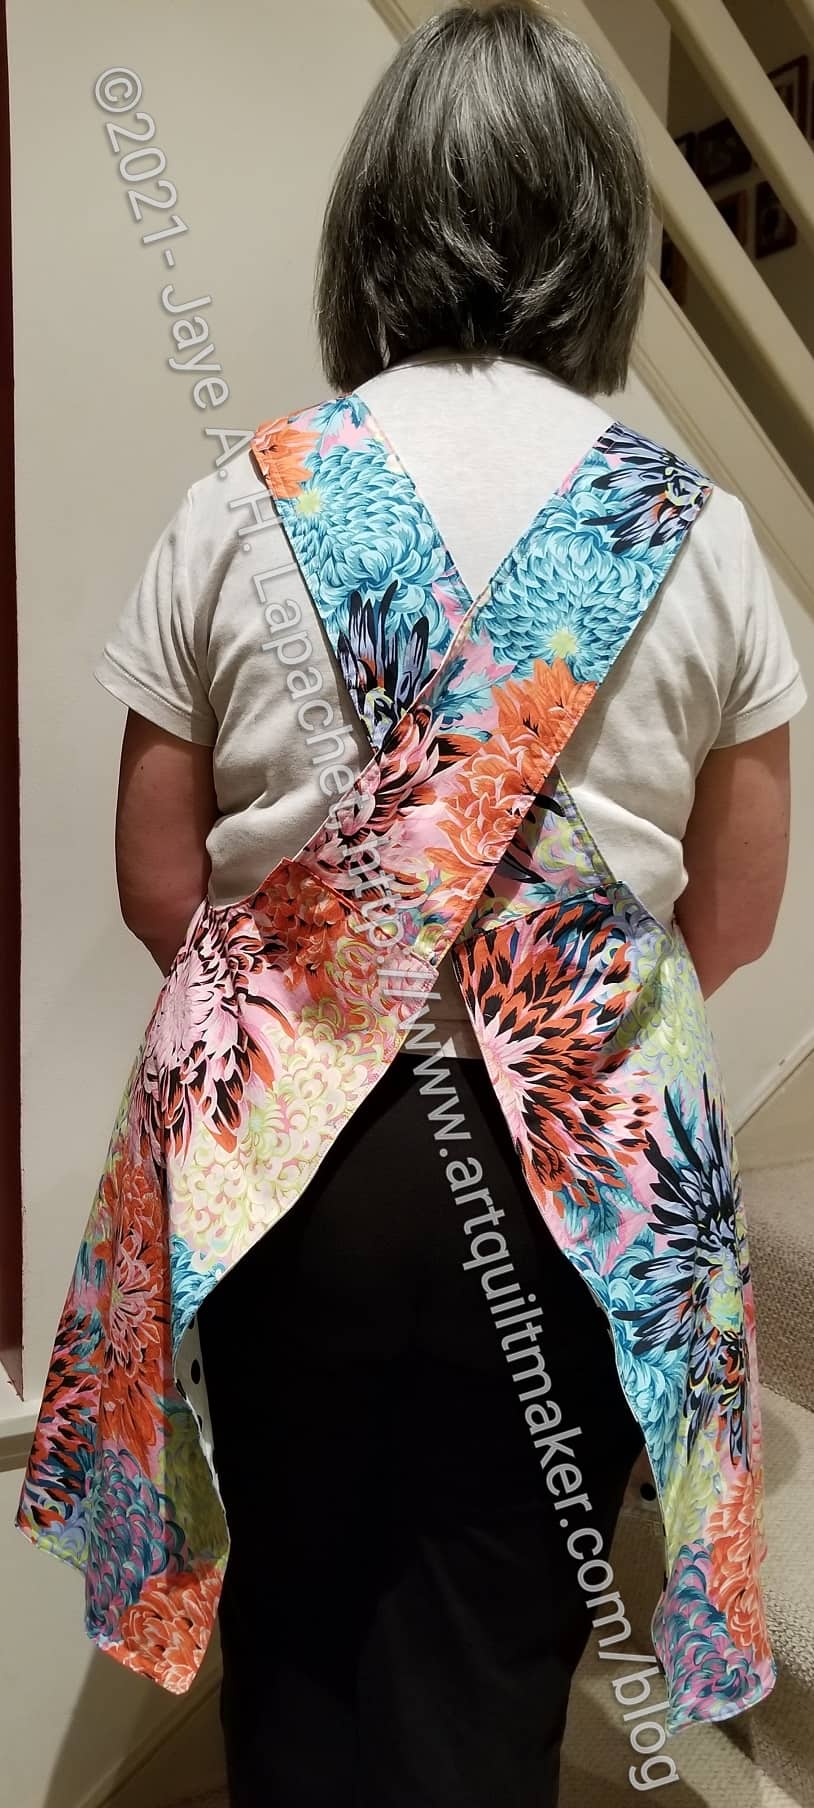
I started this apron in March when Maria set a challenge of everyone in the guild making an apron. She got everyone interested in Japanese apron.
I chose the Tessuti pattern, which is free. The pattern is designed so that the apron is single sided and uses linen or heavier fabrics.
I like my aprons to be reversible. I don’t really ever reverse the aprons, but I don’t like folding over and ironing hems. Also, I can use more fabric if I make them reversible. I have a lot of quilting cotton, so that is what I used.
Finished: Tessuti Apron – back
My problem was that I couldn’t imagine how I would put the apron together and the pattern didn’t help, because I was doing something completely different. One of the good things about being in a guild is that there are a lot of people with a lot of different experiences. We are fortunate to have Mary C for a lot of reasons. She has an encyclopedic knowledge of garment sewing. I brought my pieces and talked to her about the project. She could immediately conceive of how to put the apron together. She talked me through it, so I was able to finish it at home the next day.
I haven’t used one of these types of aprons as an apron. I wear aprons while cooking and baking all the time. Mostly I wear the Flapper apron I made a few years ago. The big difference is Japanese aprons don’t have ties. My new headphones don’t fit very well through my Flapper apron opening, so the new Japanese apron will help me slip the apron on and off as I move between my cooking chores and other tasks.
For the moment I am not using it. I want to show it at the guild meeting in its pristine condition before I start wiping flour on it.
I decided I should use the hat fabric that came with the month 5 shapes and designs. I cut the fabric, I basted the fabric to the papers and kept telling myself that it would be ok.
We all know that means trouble and this set of diamonds just didn’t make my heart sing. Also, it made me feel like I was missing an opportunity for fussy cutting.
La Pass triangle fabric
I was looking for some other fabric and came across some Carrie Bloomston triangles, which had the right grey plus a spark of pink. It is much better.
I thought about putting the pink at the tip, but then decided it would look great centered a little more. A happy accident is that the pink triangles created a star in the center! I am a lot happier with this fabric.
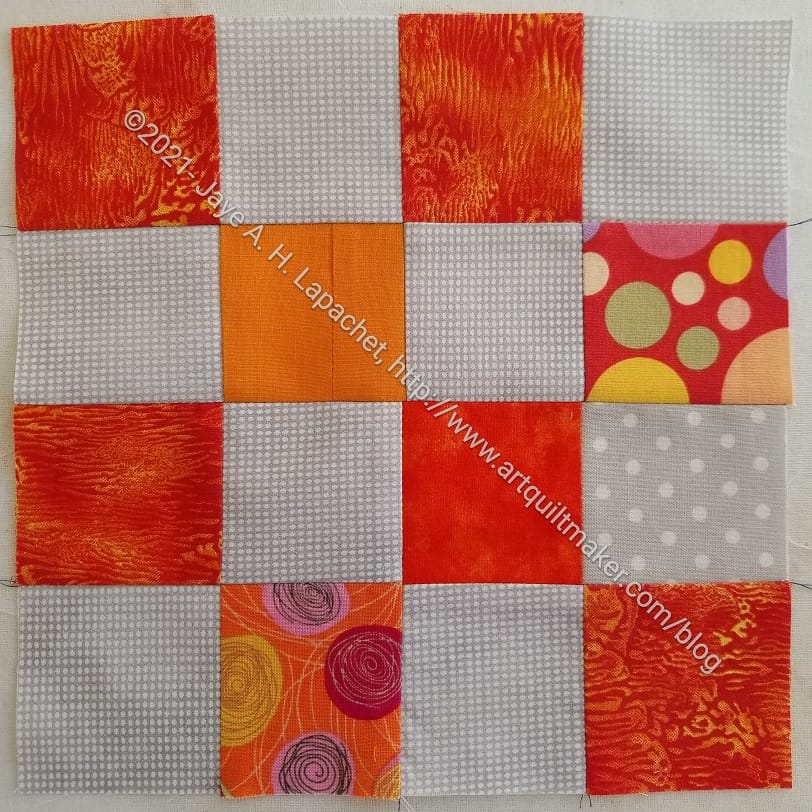
I haven’t been spending time on donation blocks lately, but I have made a couple lately. Mostly, I haven’t been piecing, which means I haven’t been making blocks.
I found my box of squares destined to be donation blocks, which had been buried. When I have needed a leader and ender lately, I have been able to grab a couple of them. Suddenly I have two blocks. It’s not a lot, but every little bit helps.
Philip Jacobs Donation block
I forgot how much I enjoy seeing different fabrics put together. Aren’t the blue and pink Philip Jacobs flowers a great combo?
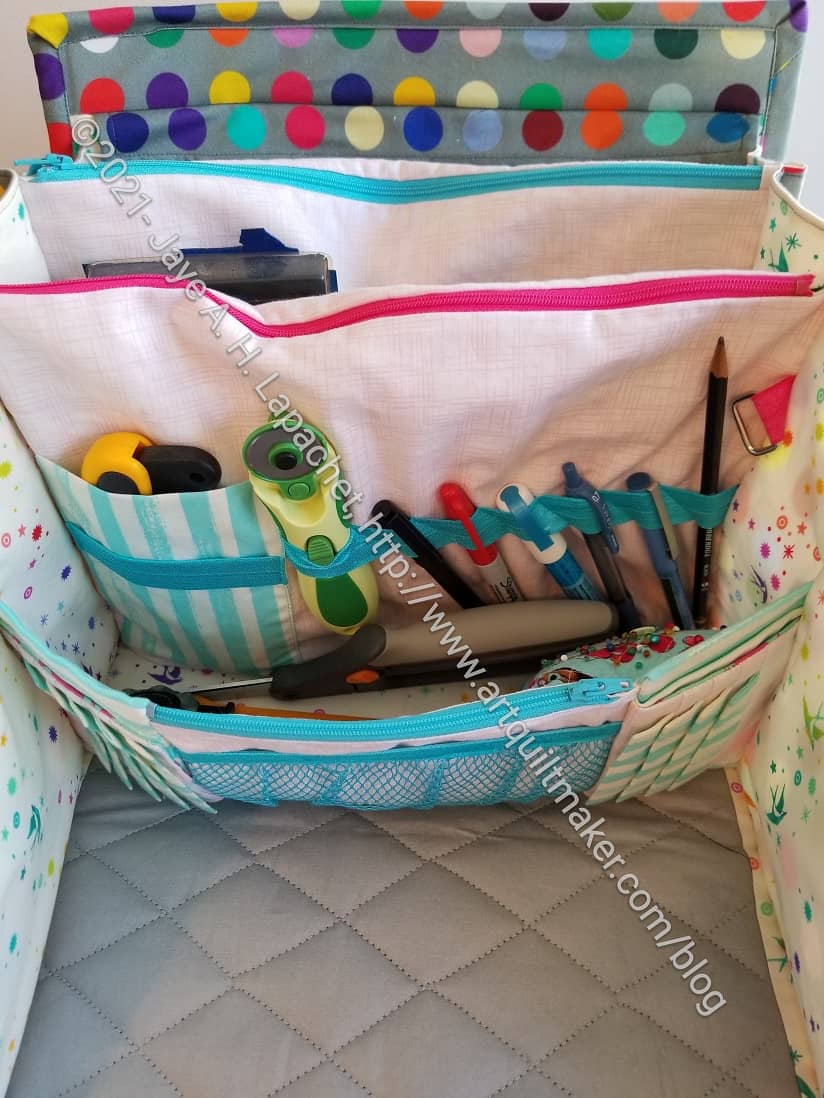
I mentioned some time ago that I needed a travel bag change. In making the UCAB for myself, the goal was that it would work as the new bag. After the fiasco at Sew Day, I knew I needed to get my travel supplies in order. I removed everything I had put in my sewing machine travel bag and replaced it in the UCAB.
Sadly, this isn’t a great bag for what I need. It is a good bag for a lot of stuff, but not for my travel needs. Sigh.
What I need: the bag to be taller so my scissors and HST rulers can stand up. I should have paid more attention to the slots in the elastic in the front, because my rotary cutters don’t fit in them. Also, I am afraid that if I lay my rotary cutters in the bag, they will cut the fabric of the bag. I think more mesh pockets would have been better, because I can see what I have in them. Also, my pink Tupperware supply box, which I have decided I can’t get rid of, doesn’t fit in this bag.
I can make bags for the scissors and rotary cutters, then clip them to the d-rings, but I don’t think that will solve all of my travel problems. I saw a video Tula posted the other day about what she uses for her travel/ sewing elsewhere bags. She uses some ByAnnie patterns. I am sure I have some Sew Sweetness patterns that would work the same way. I do have the Running with Scissors pattern and could make it again.
I don’t know what to think, but I am disappointed. Not that I made the UCAB, but that it isn’t a 1:1 replacement.
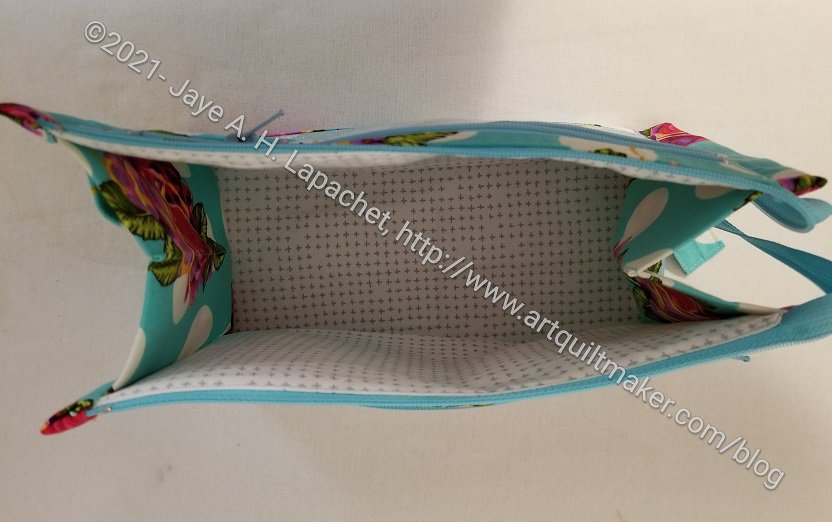
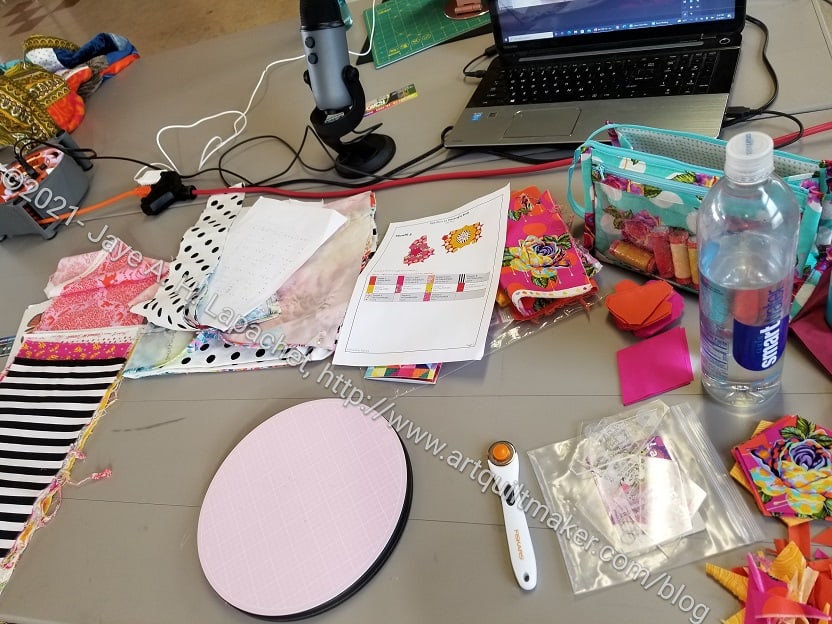
I am using it for various La Pass pieces and boy-oh-boy was I glad I had it! I forgot my La Pass Sew Together Bag when I went to Sew Day the other day and I couldn’t sew. I had nothing except my M5 fabric, my Sue Daly turntable cutting mat and this bag. I borrowed a rotary cutter from Amy, and was able to cut out M5 pieces (and not just sit around) because I had this bag, which had my templates. WHEW!
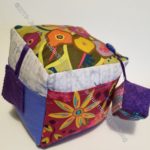
Dripping Roses Inside Outside Pouch open
This bag replaces the thread boxes I got when I ordered the Curiouser line of thread. The thread boxes were cute and well designed, but I can’t keep that kind of stuff around. This is more useful, because I can put other things in it like my templates.
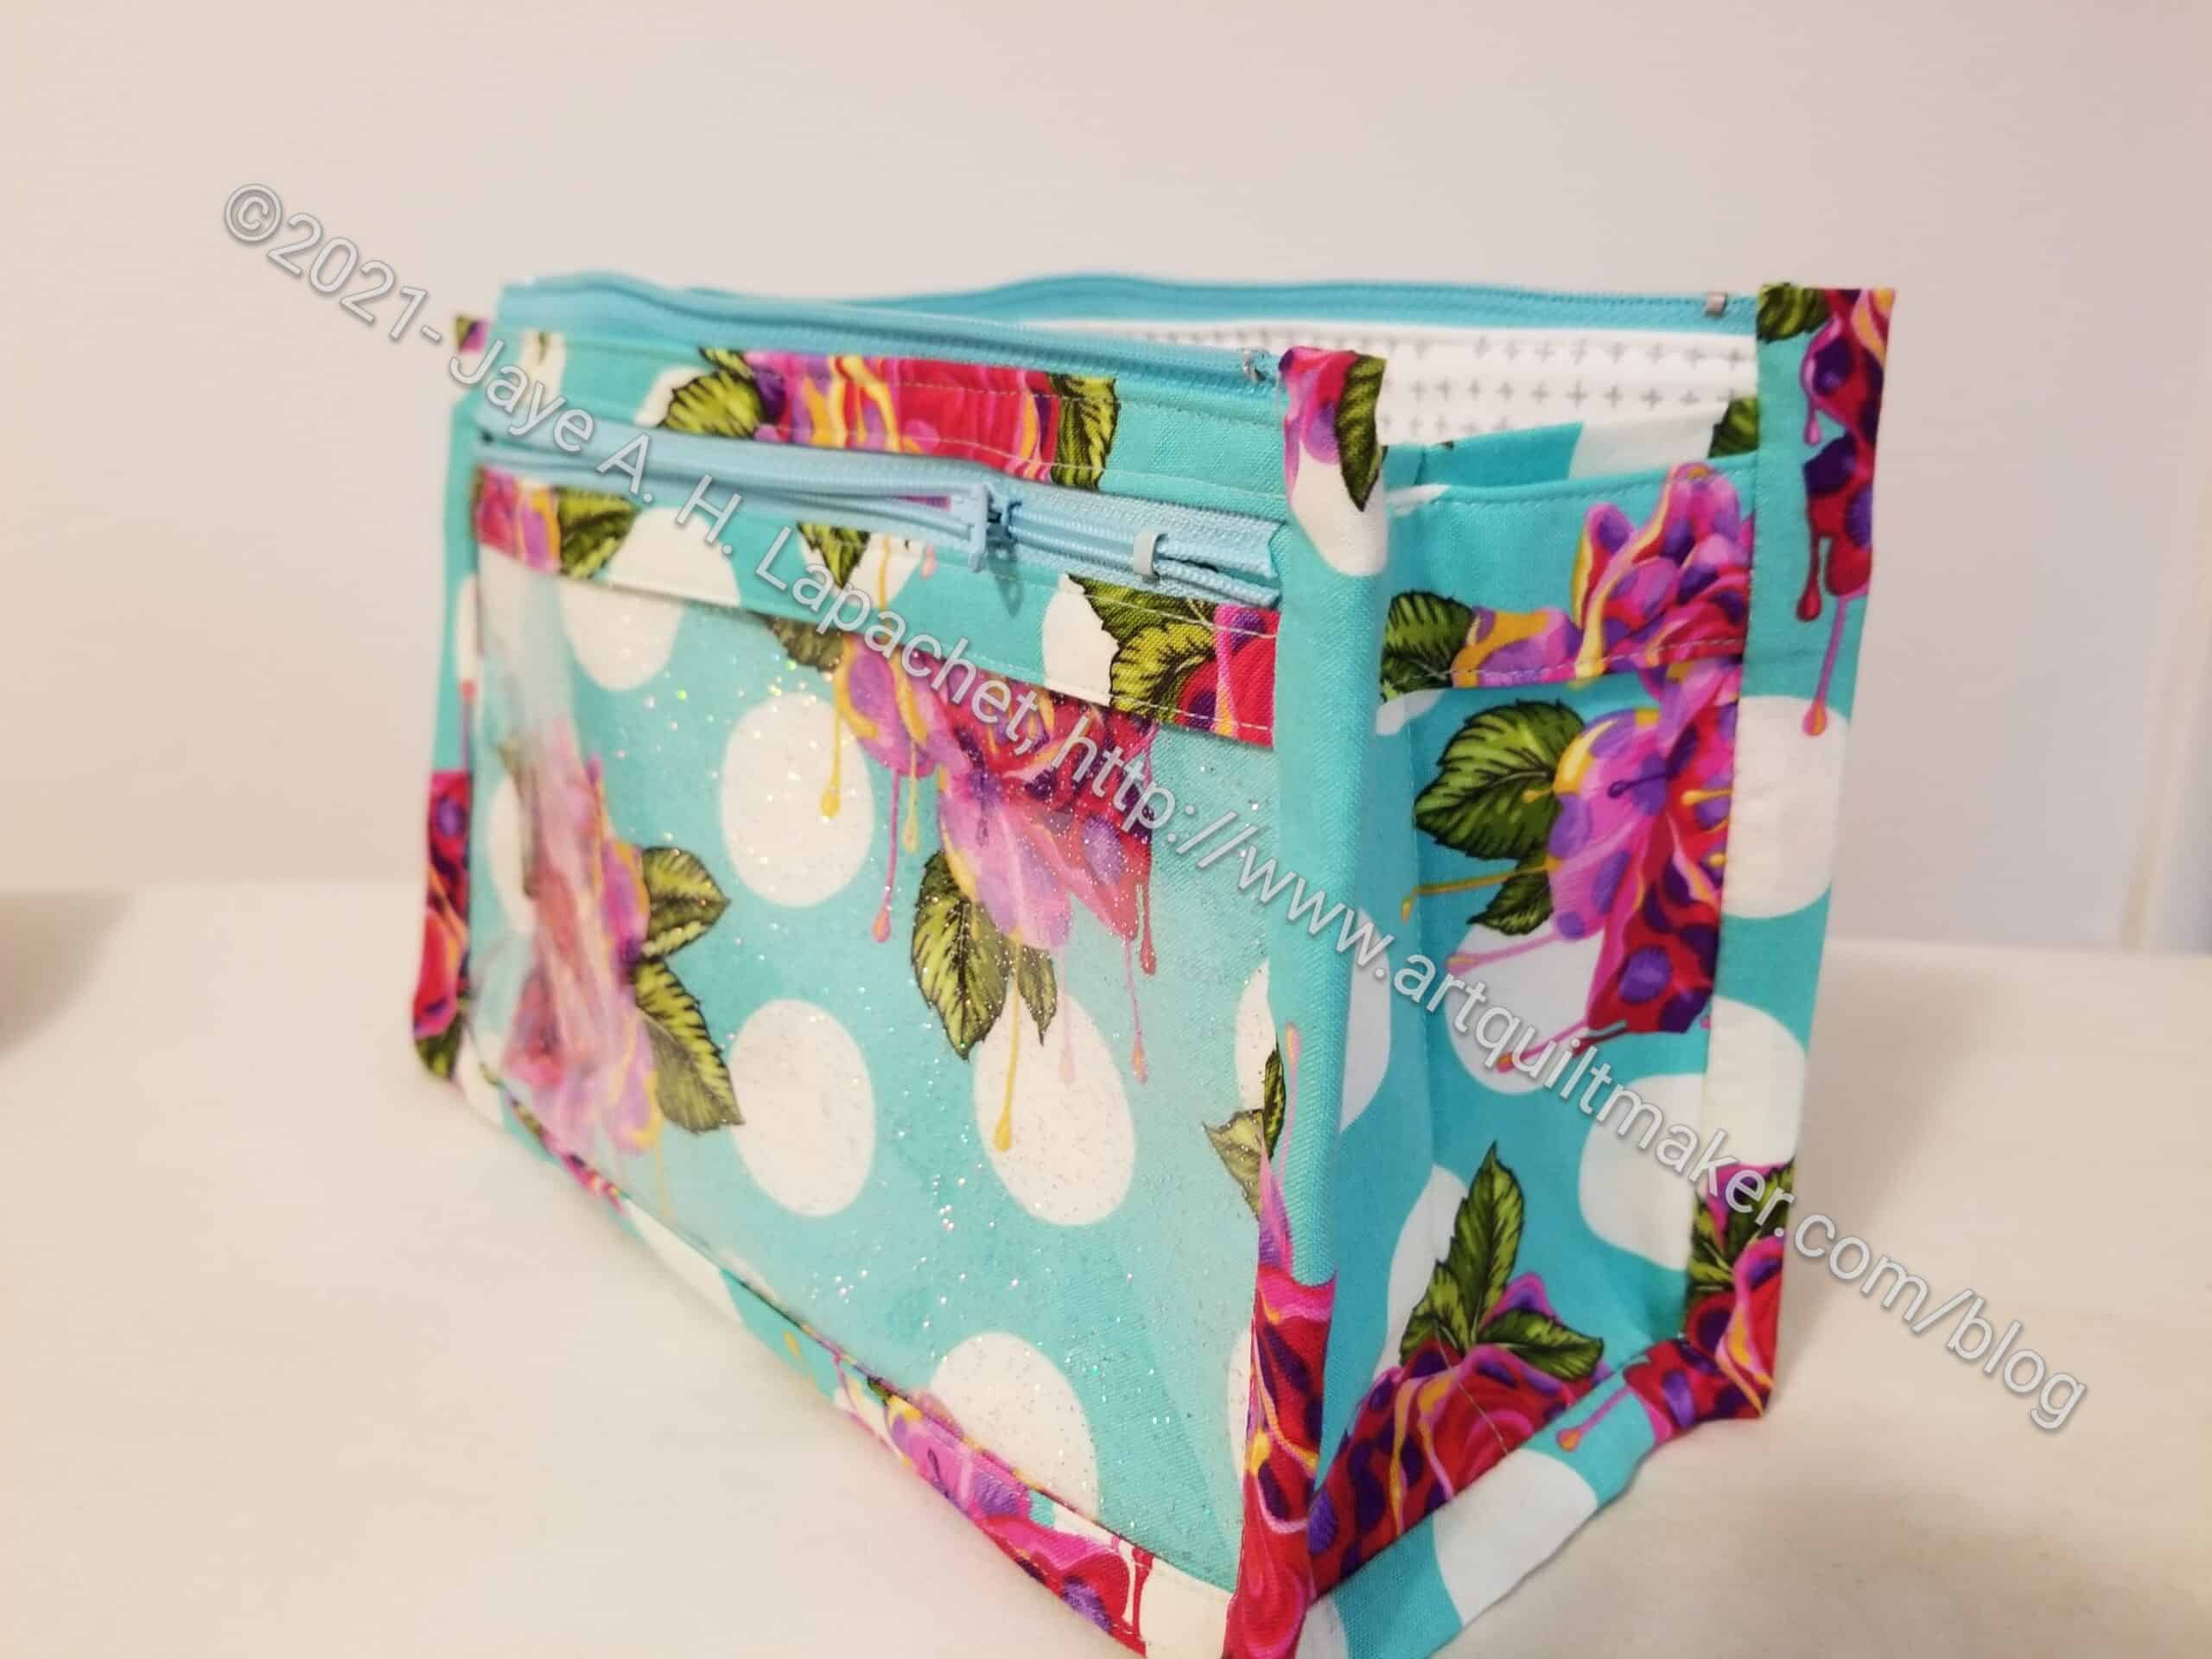
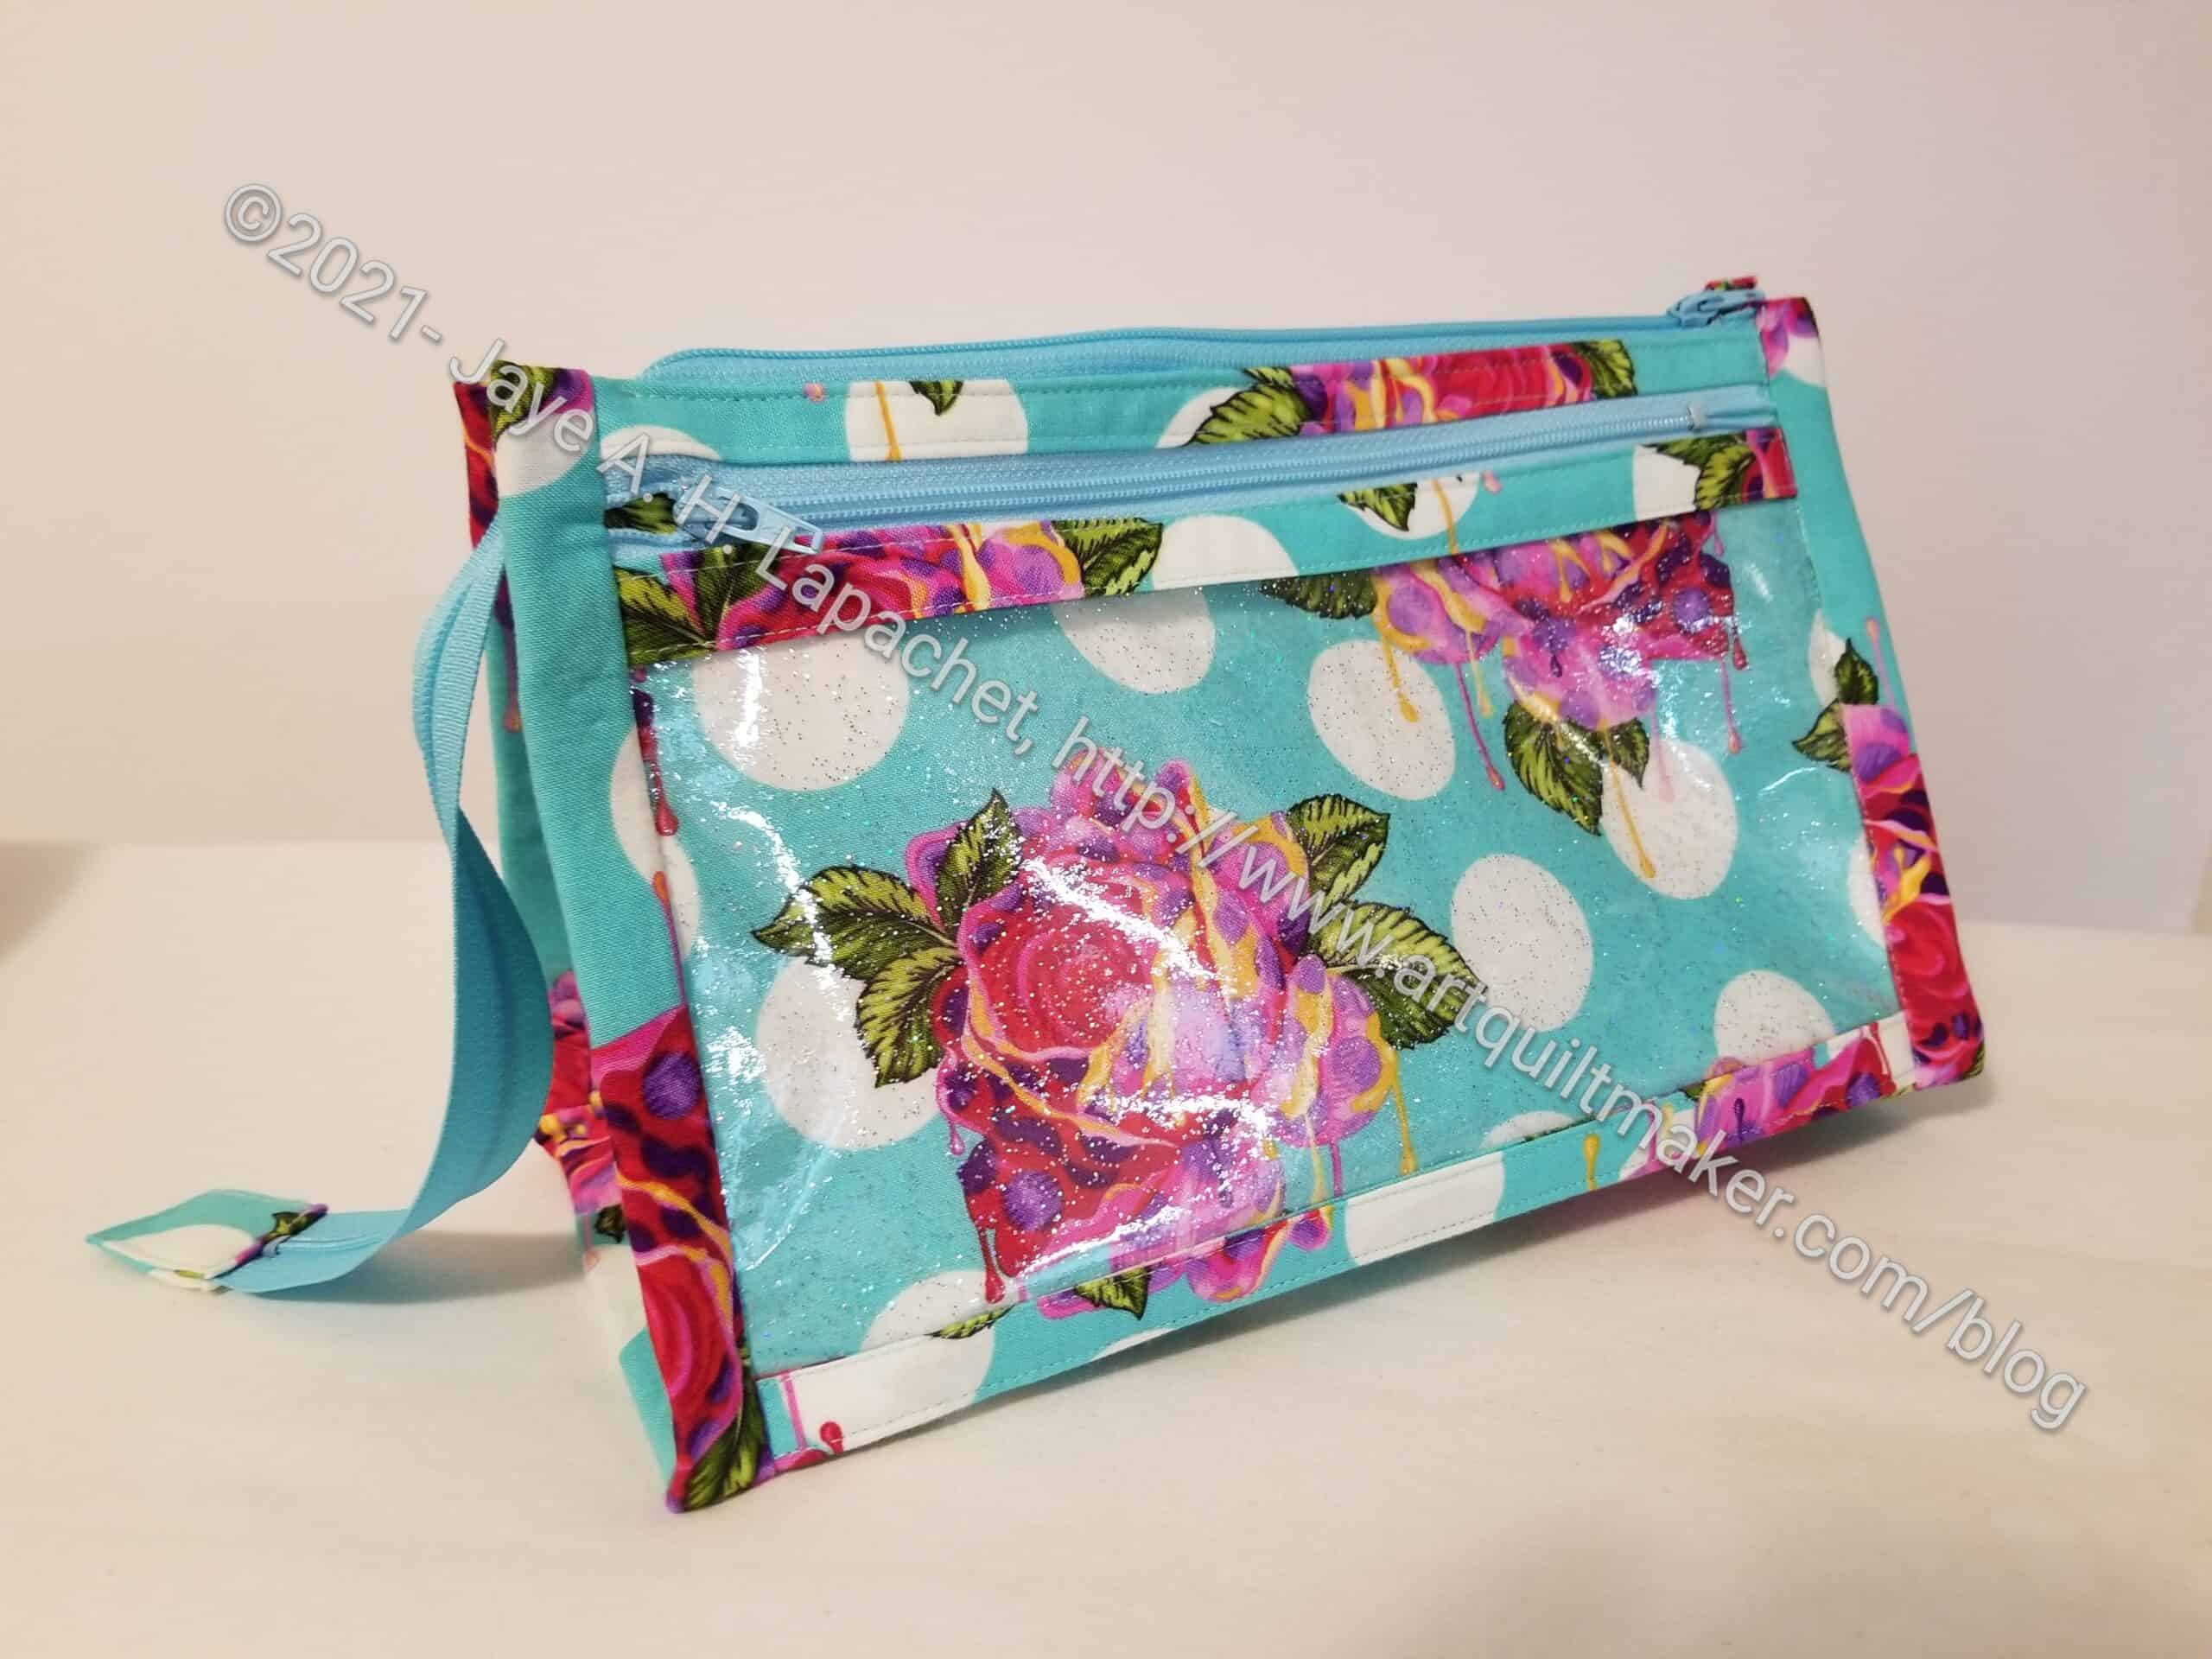
Dripping Roses Inside Outside Pouch -3/4s view
The finished size is 10 x 6 x 4, so not huge, but big enough for the miscellany I need for this project.
I showed this at Sew Day the other day and people went wild for the Sparkle vinyl. It was funny, but also nice that they admired it. People got on their phones and were buying some then and there. Mary pointed out that it was easier to see and cut with the sparkly bits in it. I didn’t think of that, but she is right.
Dripping Roses Inside Outside Pouch
There are two things I might do different. I used a longer zipper than the pattern called for . I wanted to make the pouch then not wait for a zipper order. Also, I have a bunch of zippers, so why not use them? This one is pretty long, so I might sew it into a loop or something so it doesn’t drag or get caught on things. I am tucking it inside the bag and that seems to work.
The long top zipper has a zipper tab on it, but the small side zippers don’t. I think I would add them. I think they would look better with zipper tabs. I would have to sew all the way around them, because the fabric would be fully enclosed once the zipper parts were fully enclosed. I may make a couple more of these and will try it. I could also try a longer zipper,, but I think I used the recommended size.
I have to admit that I didn’t have the original idea to make this pouch this way. I saw someone else in the La Pass BOM group had made one using the Dripping Roses and I really liked it. I remembered that I had the pattern and could also make one. It was the Dripping Roses that really pulled me in.
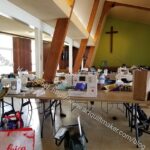
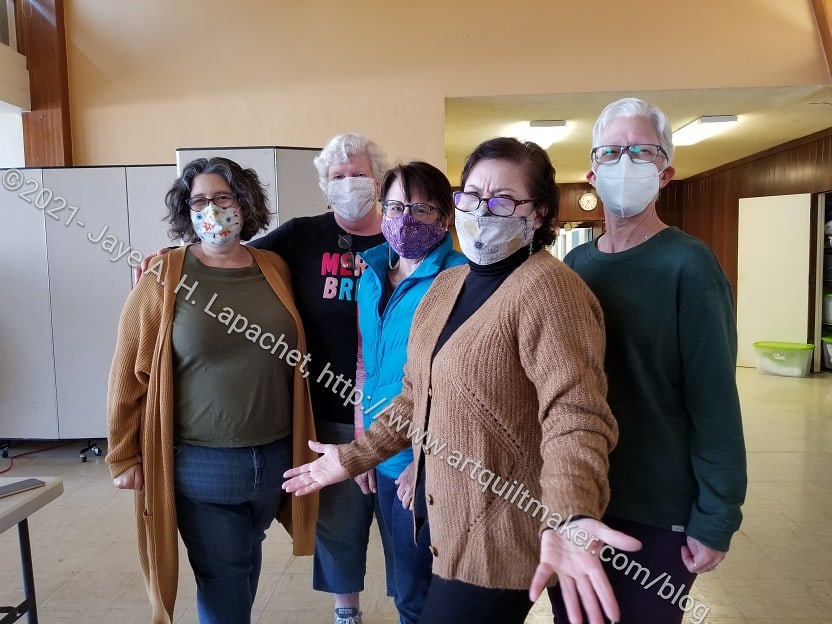
You know its a party when the wagon parking lot appears! This was only, but people had gone off with others to move more items. There is a lot of moving of heavy sewing machines and things for Sew Day.
Yes, we had Sew Day AND a party yesterday. It was such a happy and cheerful time. I think everyone really needed a boost and this was it.
Most of my favorite people were there, though a couple couldn’t make it for various COVID (blech!!) related reasons.
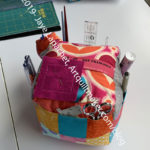
December Sew Day Workspace
My workspace was pretty barren, because I forgot my Brocade Peony STB, which had all of my La Pass sewing supplies in it! I just had to walk over to the couch where I have been working each night, pick it up and toss it in my Go-To-Meeting bag. Did I do it? No.
La Pass M5 shapes cut out
Fortunately, I did have my La Pass Inside Outside pouch, my fabric and my rotating cutting mat. The pouch had my templates so, after borrowing a rotary cutter I was able to do something. Cutting out my shapes for M5 was a good use of my time, too. I was able to get all of the shapes cut out. I thought I would do more sewing on M3, but every little bit helps get the La Pass project done.
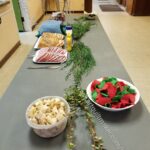
Setting the table
Leftovers
There was a nice table set up. Someone brought a garland and the buffet table felt very festive. We really did a number on the food. It was quite delicious so a lot of it was gone. Bonnie made some fabulous roasted vegetables (vegees at lunch???!!??). People said Gerre’s scalloped potatoes were good. They had flour so I couldn’t try them. They make me want to try making them. I love scalloped potatoes and usually can’t eat them.
Sue brought a baked Brie, for which she bought special gluten free crackers. She realized that I couldn’t eat the baked Brie because of the pastry. We had a good laugh. She is really nice and usually thinks about bringing a GF portion for me.
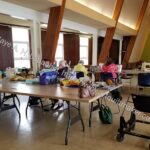
Fun Sewing Mess Before Lunch
Fun Sewing Mess After Lunch
People did sew quite a bit, so there was a lot of fun sewing mess around. There was a lot of handwork happening, including 3 people doing needlepoint!
2022 BAM Officers
Our new officers were introduced, most of them we know and love.
All in all, it was a lot of fun and I am glad I went.
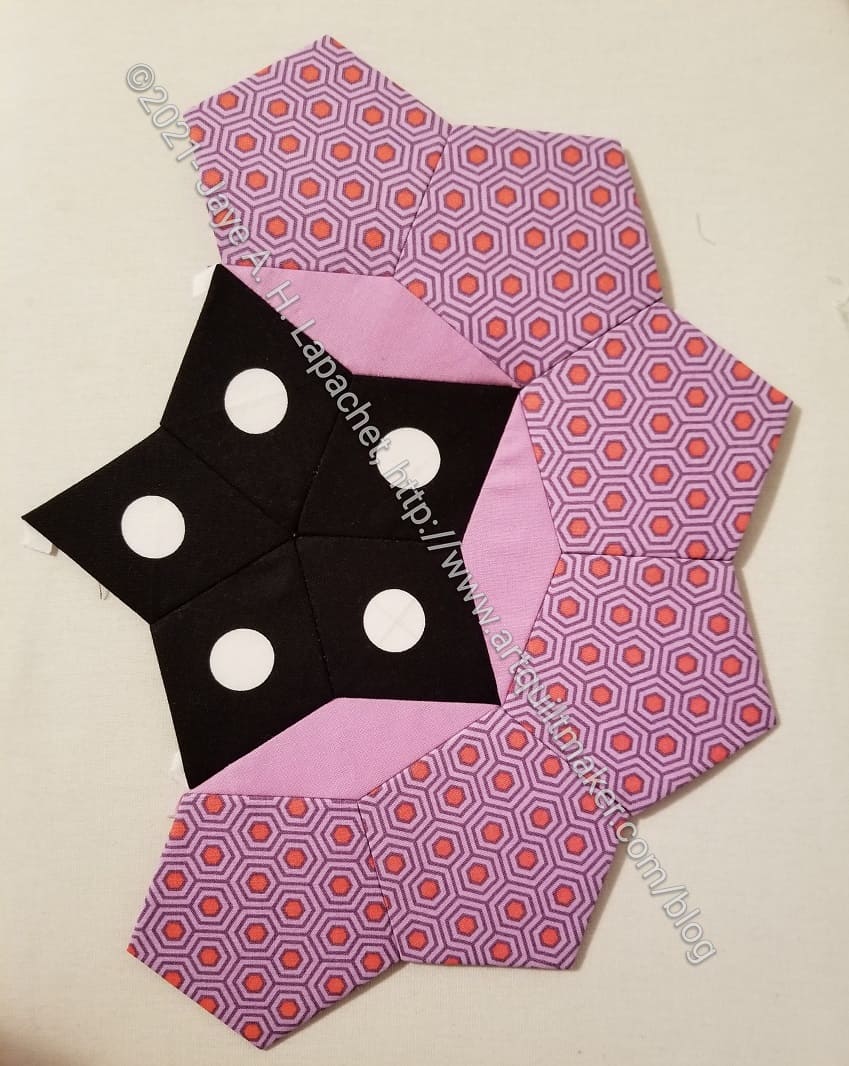
I never used so much basting glue in my life as I have with M3. To be fair I never used glue for basting until I started La Pass. When I started I used the same refill as I had for M1, M2 and most of M4. I might have refilled once and the sum of those months is around 300 pieces.
So, why did I have to refill at least twice for M3? It kind of scares me, because that means a lot of sewing!
Regardless, M3 is basted (remember I skipped M3 because I had just finished M2 when M4 arrived?) and I have started to sew parts together. There are 3 partial Rosettes that need to be sewn. The first one is above. It is probably the easiest (no damn stars!). I saw someone else line up the polka dots and I liked that idea very much, so I did it, too.
I had a moment of panic when I realized I didn’t have enough of the pentagons to make a ring, then I remembered I was only making partial rings. It is very strange not to be making full circles.
I know it is all about progress right now. I am not finishing a lot except for bags. Stay tuned for a possible apron finish!
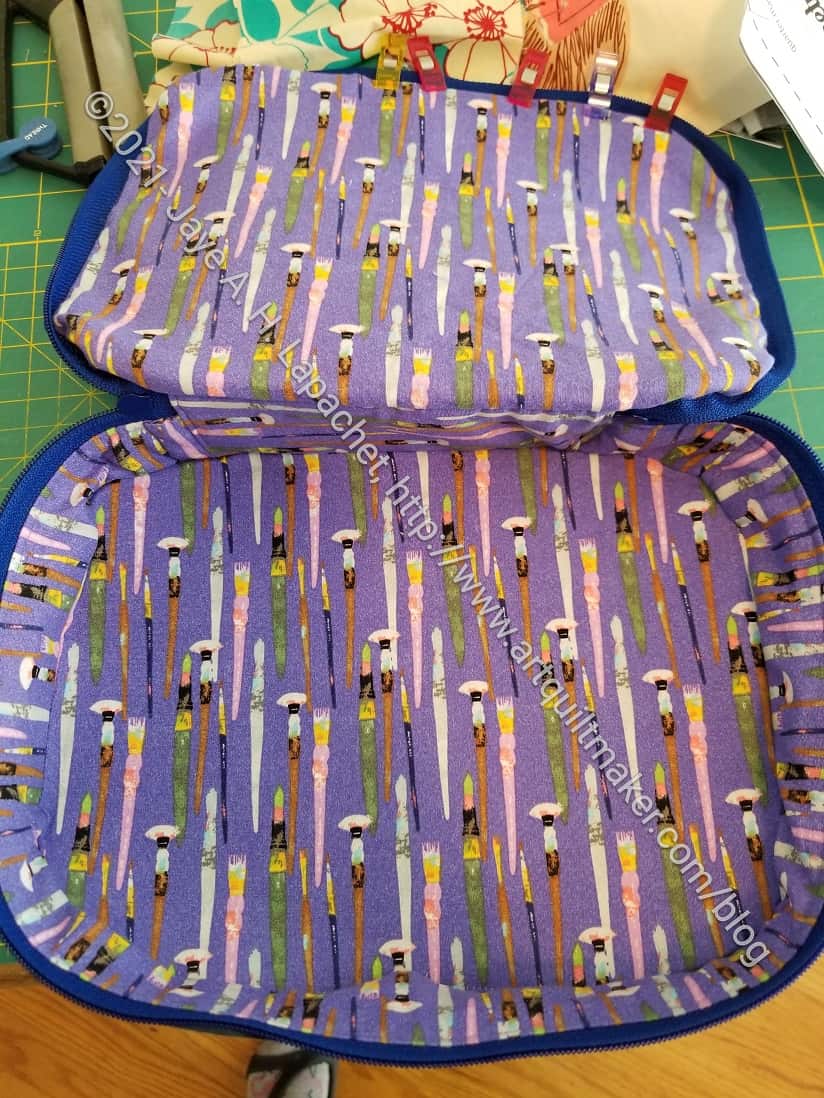
I am making slow progress on this pouch (which doesn’t seem like a pouch). The thing finally looks like something, but more of a suitcase than a pouch.
I like the finished look of this project, but I am finding it difficult to understand the directions. I know that is crazy when you look at the other complicated projects I have made, but it is true. This project is all sew, then rip, sew, then rip.
Yes, I am using the video. I just don’t understand it.