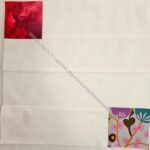
This piece is a little different from #1 and #2, because of the red. I have been feeling like I have a lot of red fabric I am not using. I decided just to put some red sashing on this quilt and see what happened. It is not a favorite of the series, but it isn’t ugly either. Next time, I’ll stick with the monochromatic look.
I like making these strip quilts, as I have said, as they use up scrap and make great leaders and enders. The problem with the white is that I have A LOT of white scraps and I can’t seem to use them up quickly enough. I am pleased that I didn’t use any white background fabric in Lupine. It loaded up my black scrap drawer, but stayed away from the white.
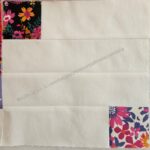
A week ago was the Community Sew Day at the Guild. After doing some pre-sewing, I also sewed another quilt using the same pattern at Sew Day. SueG sat next to me and followed my lead on sewing blocks my way.
Sue used her own materials, which was a lot better for precision. We sewed quite a few blocks, but Lee Ann took them all to sew together before I could take a picture.
I tried to keep the packs I chose in the same color family as Sue’s blocks, but I was really distracted and am not sure I succeeded. when I get a photo from Lee Ann, I’ll share it.
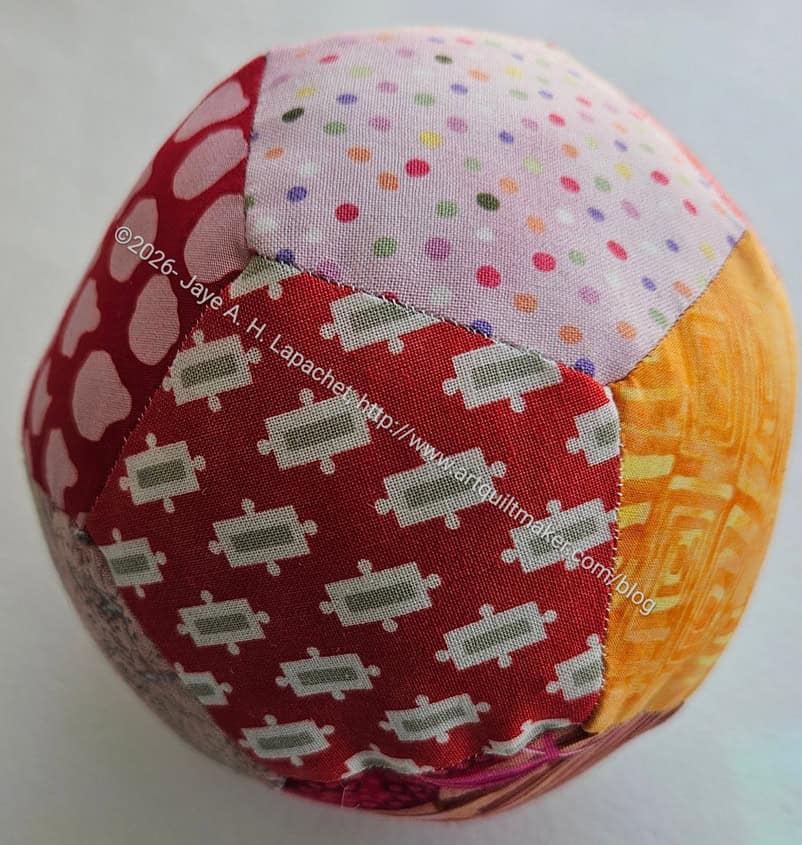
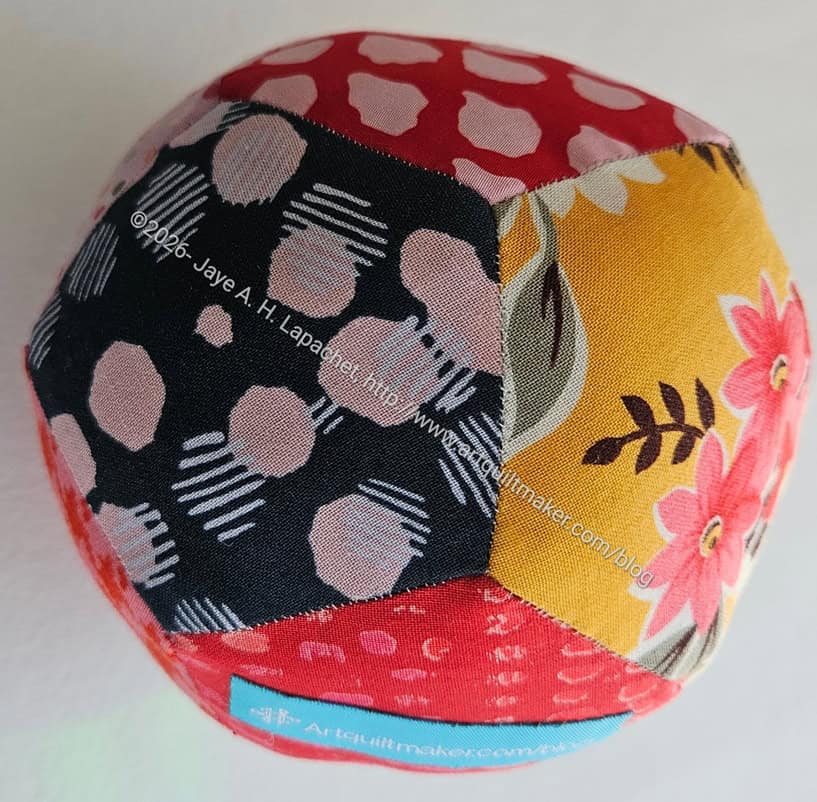
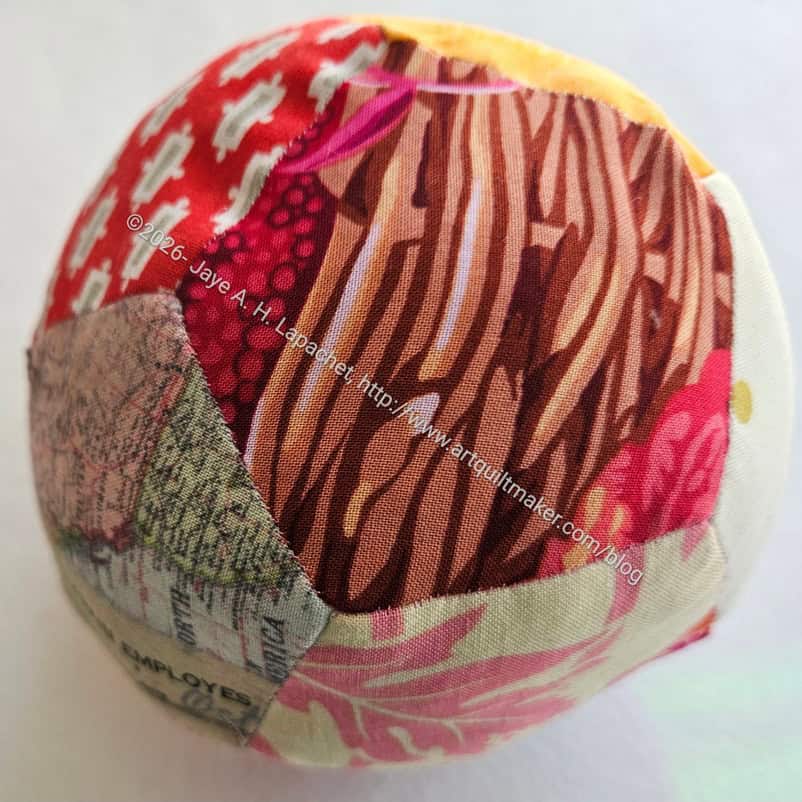
I finished another EPP Ball a week or so ago. This one is heading off to a Farmer’s market for my friend to sell. It’s a new adventure for me and we will see how it goes.
I have never wanted to sell my creations, because I love making things and want to continue to use it as a method of expressing my creativity as well a way to reduce stress.
EPP Ball #11: orange & pink
This foray has a fairly low commitment. I am sending her two items to sell. I priced them on the high side, so we will see. I don’t want to encourage orders or people telling me what colors to use.
This one does not have any Beanie Baby pellets inside it. I had a reason for not including them, but I don’t remember what it is. I am working on another one and will add the pellets.
EPP Ball #11: orange & pink
Working on this project has made me want to get back to La Passacaglia, which is languishing.
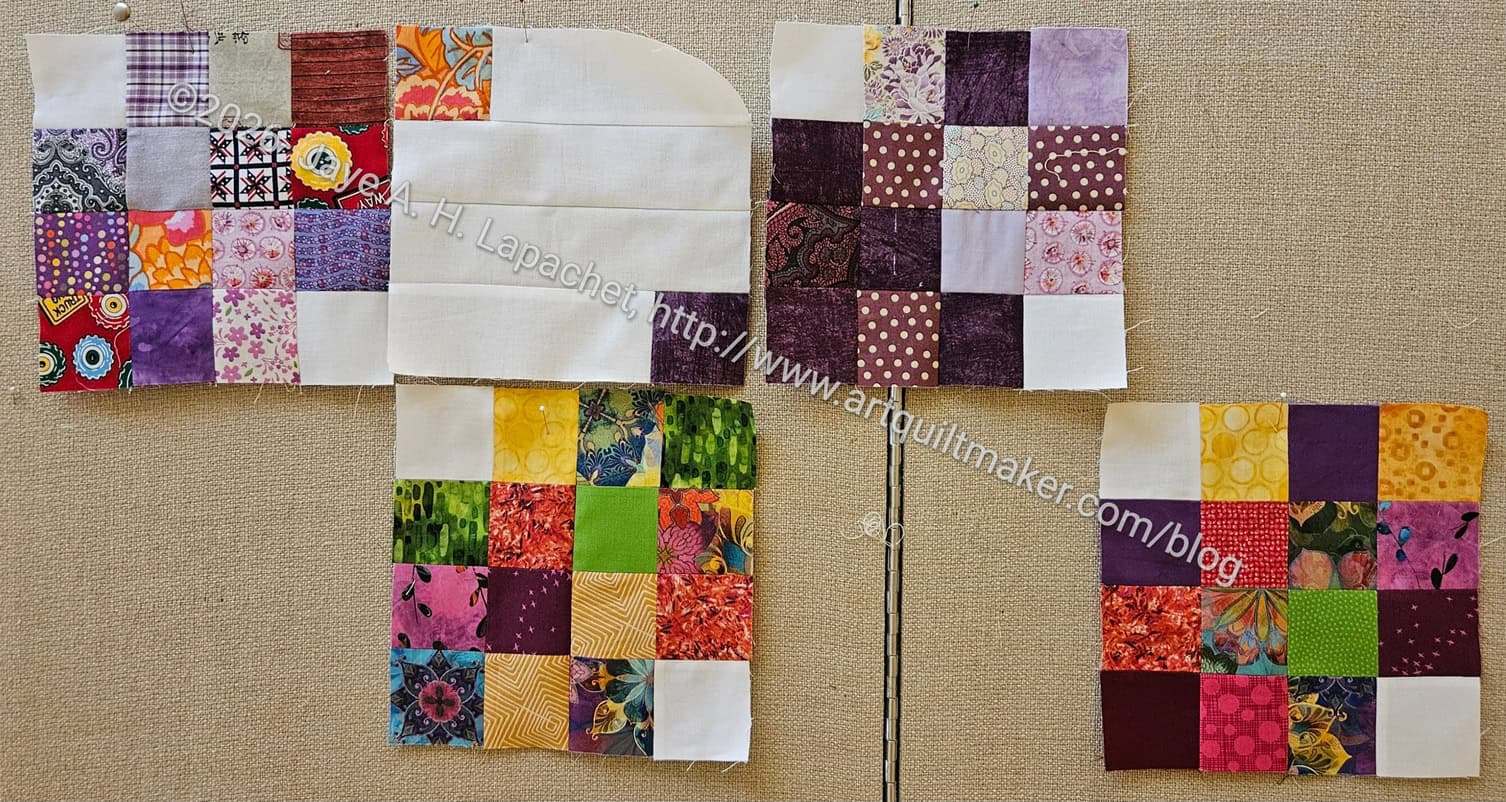
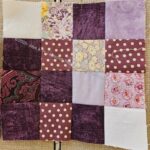
My preference at Community Sew Days is to bring a top (+back, etc) ready to be quilted and work on my own projects. Since I am now guild president, I decided I needed to be a good citizen and work on the project with everyone else. Still, I worked ahead to make some blocks.
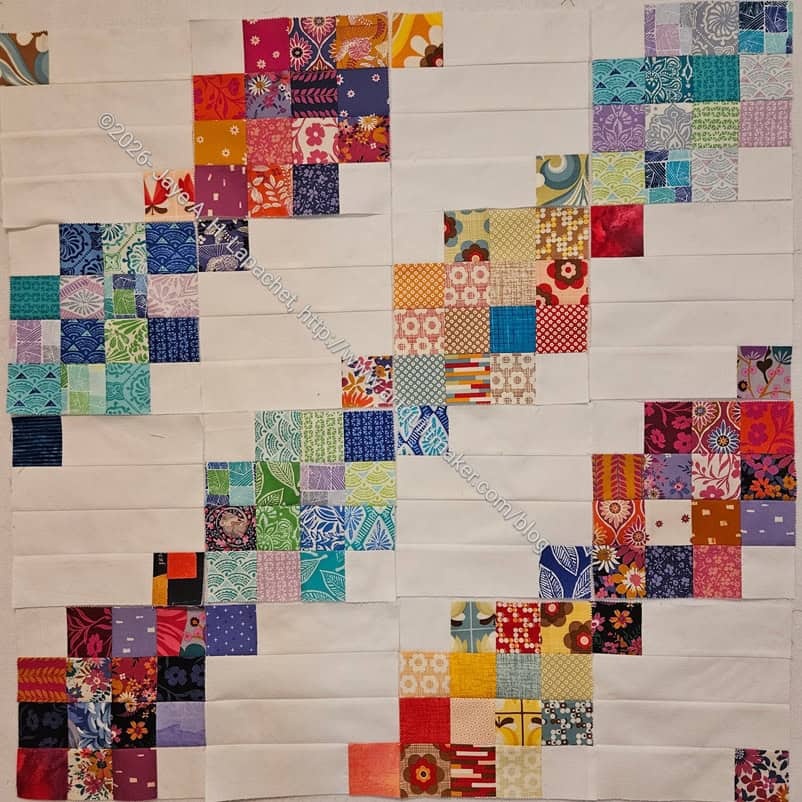
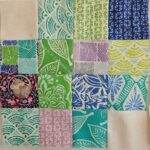
I used 3 mini-charm packs and what’s left of my white fabric to make the blocks for the quilt top. I thought they would be incorporated with everyone else’s blocks, but I made the wrong pattern, so Sue and I put the rest of the blocks needed for a quilt together using this pattern.
I worked with the Community Quilts Team’s materials to start a second quilt and wasn’t as happy. I prefer my own cutting, so I know what problems I might encounter with cutting mistakes. I’ll go back to my original plan if there is another Community Sew Day.
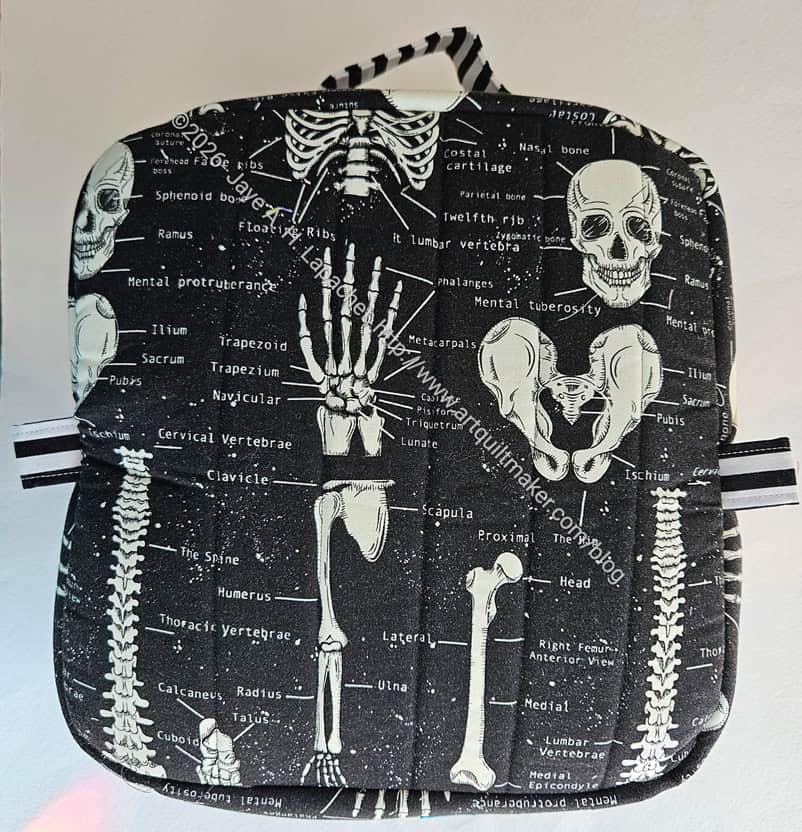
When I sewed the Bone Enigma I followed the directions exactly with regard to rivets. The directions say to add rivets before assembly. The rivets can go anywhere, but I wanted to put them on the ends of the handle, just to reinforce it. It is at the stage of assembly shown in the photo where the directions say to add rivets.
Peony Enigma with rivets – full
This is great except for Enigma bags already completed. I decided I wanted rivets on my Enigma bag. The bag is already complete, so I consulted with Mary and we decided it could be done. We had to squish the top a little, but the overall procedure worked and my bag now has rivets on the handle.
Peony Enigma with rivets – detail
I wanted silver, but Mary thought a gunmetal finish would look better. I am pleased not to worry about ripping out the handle.
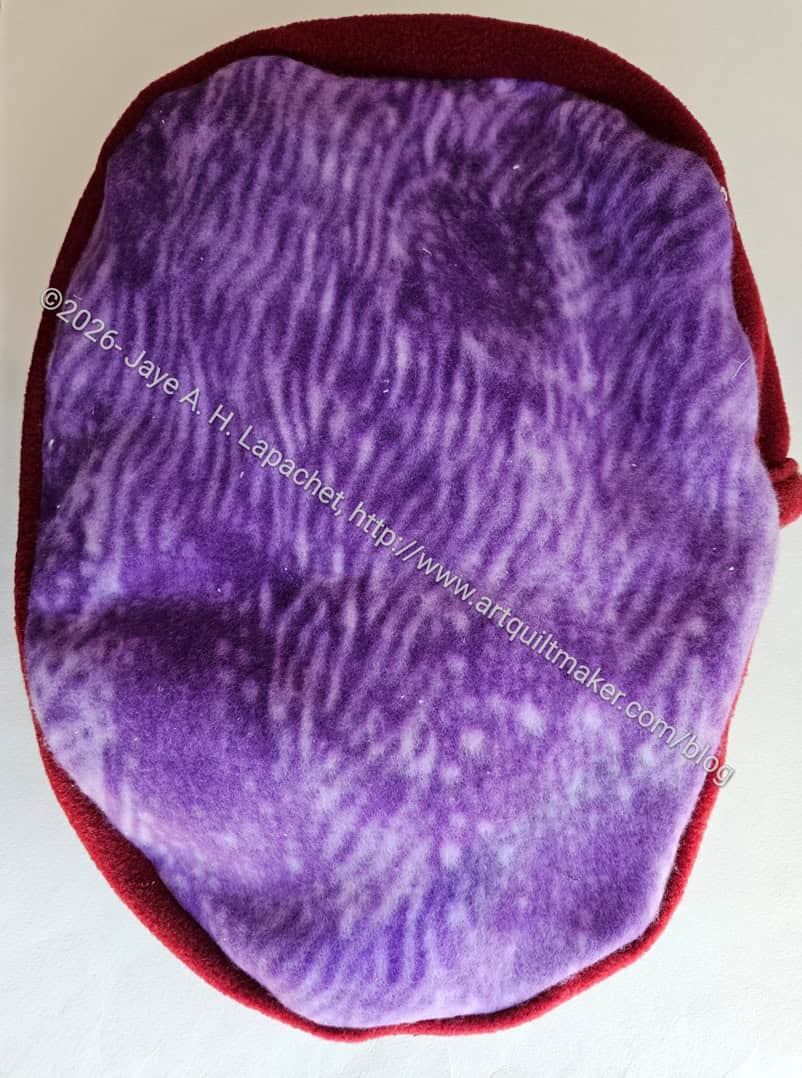
I have had the fleece for a Pet Bed sitting around for a long time. I finally sewed it together last week in order to bring it to Sew Day.
One of the things that spurred me on was the bits of batting I had laying around from the various quilts that I have mostly finished recently. The guild is not using schnibbles for pet beds any more as they don’t make for soft and comfy beds. Also, they are hard to wash. This is sad as I still have a lot of schnibbles. We are working out a plan for their use in another way.
This wasn’t my fabric so I don’t get any credit on my Fabric Used spreadsheet.
Megan’s Bone Enigma has been on my list for awhile. It doesn’t show up on any of my 26 Projects lists, because I hadn’t started cutting or sewing. It only shows up on my UFO Challenge list, because I have been wanting to make it for awhile and hadn’t quite gotten to it.
I could have waited to write the “All the Enigmas” post, but I will have to write another one as I am already cutting others out.
Megan’s Bone Enigma-interior
This bag goes with Megan’s Hand Bone Hackney. She said she liked this fabric and I hope that is true. I bought it for another purpose for which the fabric will not be used. I did make several projects from it, but still have at least 1.5 yards left.
One thing I did on the bottom, which are pieces that need to be quilted, was fuse the fabric, both lining and exterior, to the foam using MistyFuse**. I had forgotten to cut the lining and exterior larger before quilting and wanted to try and mitigate shrinkage. I think I could have left the bottom unquilted, because the MistyFuse really adhered well to the fabric. I was kind of surprised since the MistyFuse has been laying around my workroom for years.
I am pleased with how the center looks. I just feel like it came out really well. The fabric, a Birch Organic, looks really great.
Megan’s Bone Enigma-bottom
I tried really hard to line up the fabric so that the motifs were oriented in the right way.
In the photo of the bottom you can see how the motifs are oriented towards the top. See the handle? When the bag is closed the part of the bottom with the skull forms the back of the bag and that skull as well as the other motifs are right side up.
Megan’s Bone Enigma-bottom-> back – closed
Cool, huh? Sadly, I did not match up the motifs on the top piece with the back piece. I was pretty proud of myself for doing this much, though I don’t think anyone will notice. *I* notice and that is what is important!
Megan’s Bone Enigma-top closed
I am on the fence about the striped handle and pull tabs. I didn’t have any solid black at the time I cut those. The design works pretty well, but I think a solid black would have been better. Or maybe a black and grey stripe? Not sure, but I’ll have to think about it. I did use this same strip on the handle of Hand Bone Hackney, so that is something.
An unintended effect looking at the top is that the handle is enclosed by two hand bone motifs! It looks kind of cool.
I also used MaryC’s rivet press at Sew Day to put rivets on the handle. I am super excited about that!!
Megan’s Bone Enigma -side
Megan’s Bone Enigma -side
I still love the diagonal zipper. I thought the zipper tape I chose would be too large, but it worked out ok.
Well, even though that number hasn’t been picked in the UFO Challenge, I have finished it. I am giving it to Megan today, so needs must.
**Obviously, you should shop at local quilt shops and small businesses. However, if you are too busy or can’t find what you need there, I use Amazon affiliate links and may be paid for your purchase of an item when you click on an item’s link in my post. There is no additional cost to you for clicking or purchasing items I recommend. I appreciate your clicks and purchases as it helps support this website.
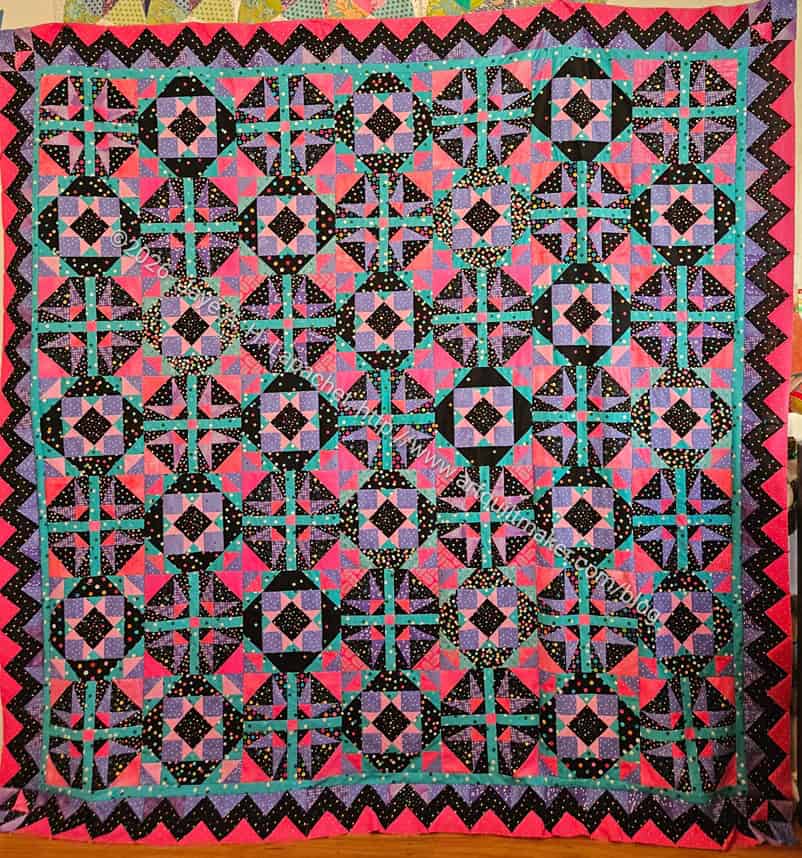
Lupine is ready to go to Colleen for quilting. Not a great photo, but the quilt is large and doesn’t fit well on my design wall.
I am really pleased with how it came out. It is a but pink and purple, but doesn’t scream ‘little girl’ to me. I think the black really helps give it a good over all feel.
In addition, black can be depressing. It did make my workroom a little dark, but overall the pink, purple and Carousel blue keep the black from creating a look that is too depressing.
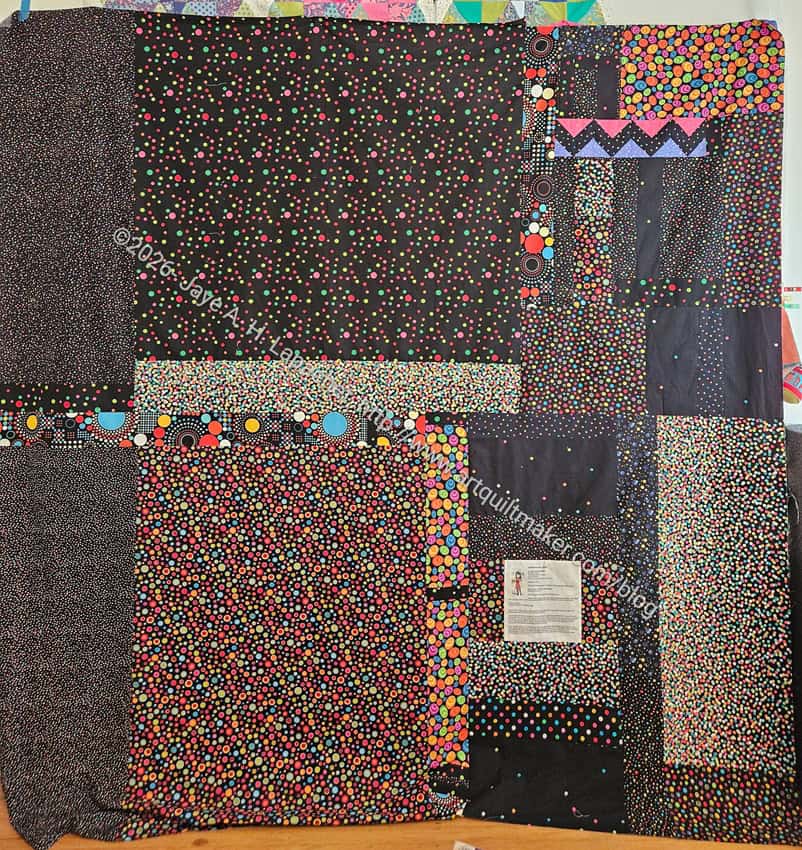
Lupine back finished
I also finished the back. Mom said it looked a little brown, but I definitely used colored dots on black for the most part. One of the prints, a large-ish piece, middle bottom, does have dots that have more brown in them than I would normally use.
This project used up most of my dots on black fabrics.
I am waiting for a black solid in order to make the binding. I was going to use a pink that matched the border (AGF Cherry Lipgloss), but Lil Sissy pointed out that a black (AGF Caviar) would contain the piece. I think she is right.
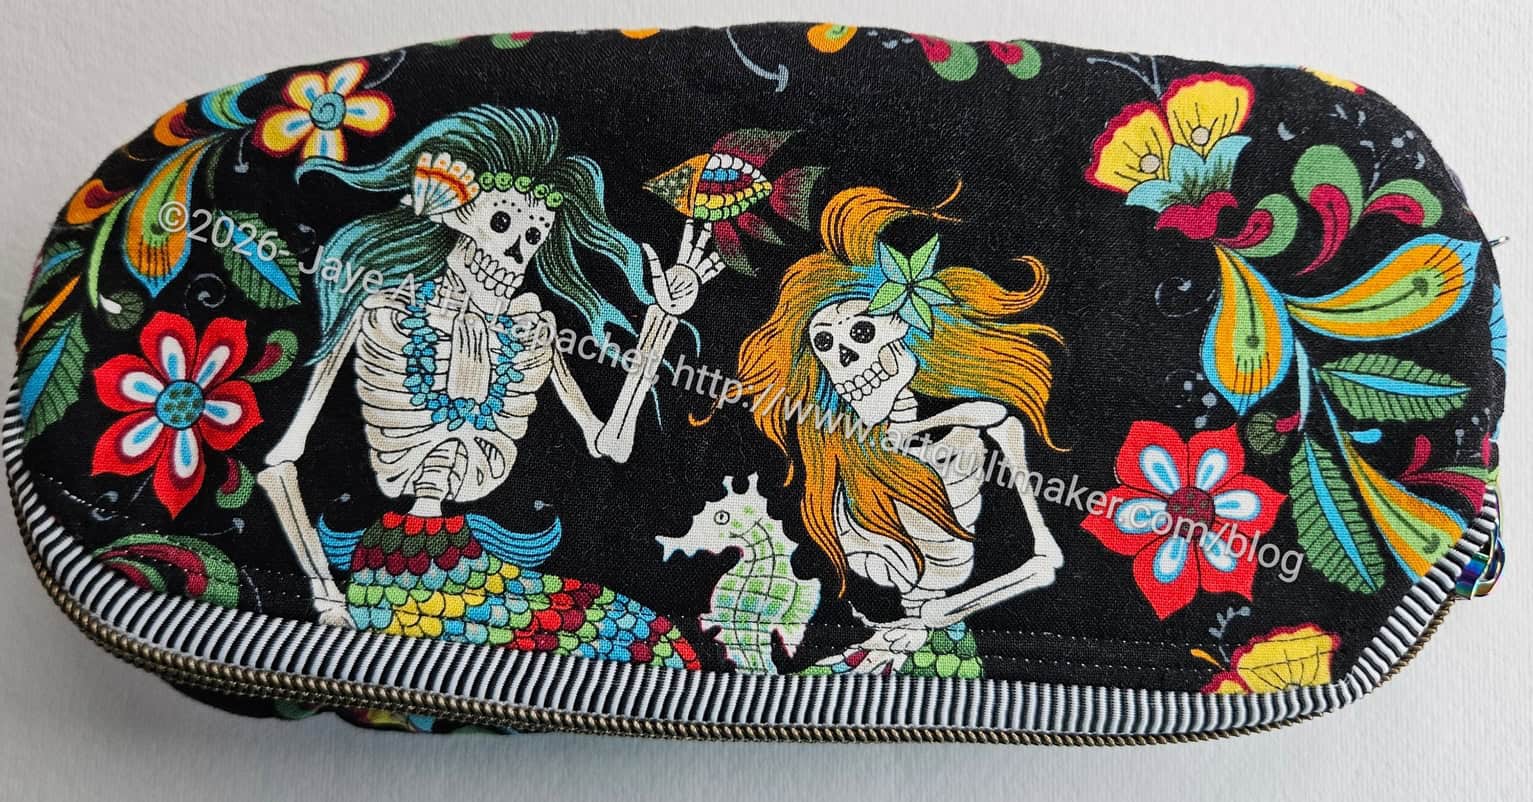
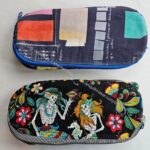
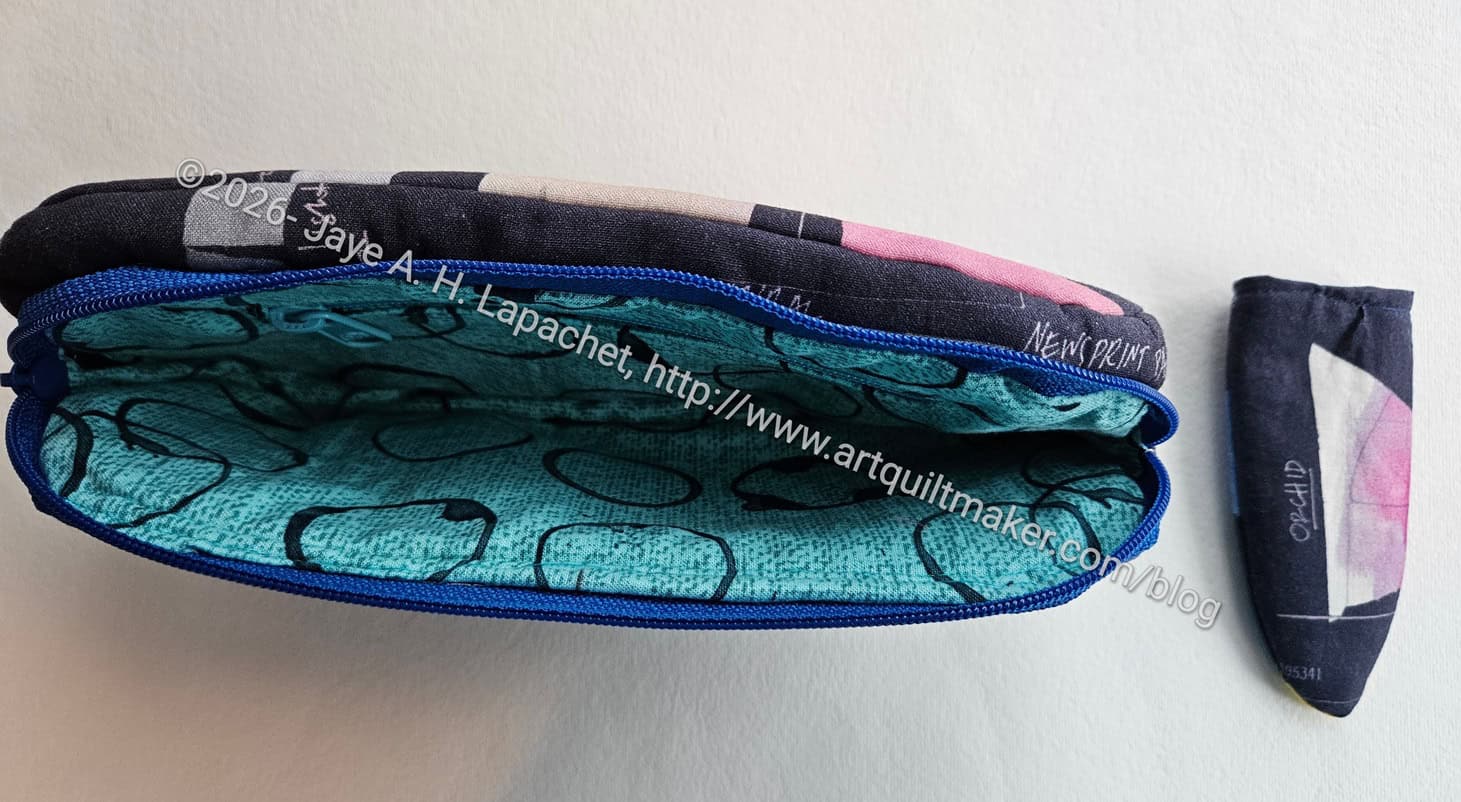
I finished the Tadpole I made for Gerre’s International Women’s Day celebration. This is another Sew Sweetness pattern I bought and hadn’t yet made. I made this one at the same time I made Carrie’s.
Gerres’ Scissor Sheath
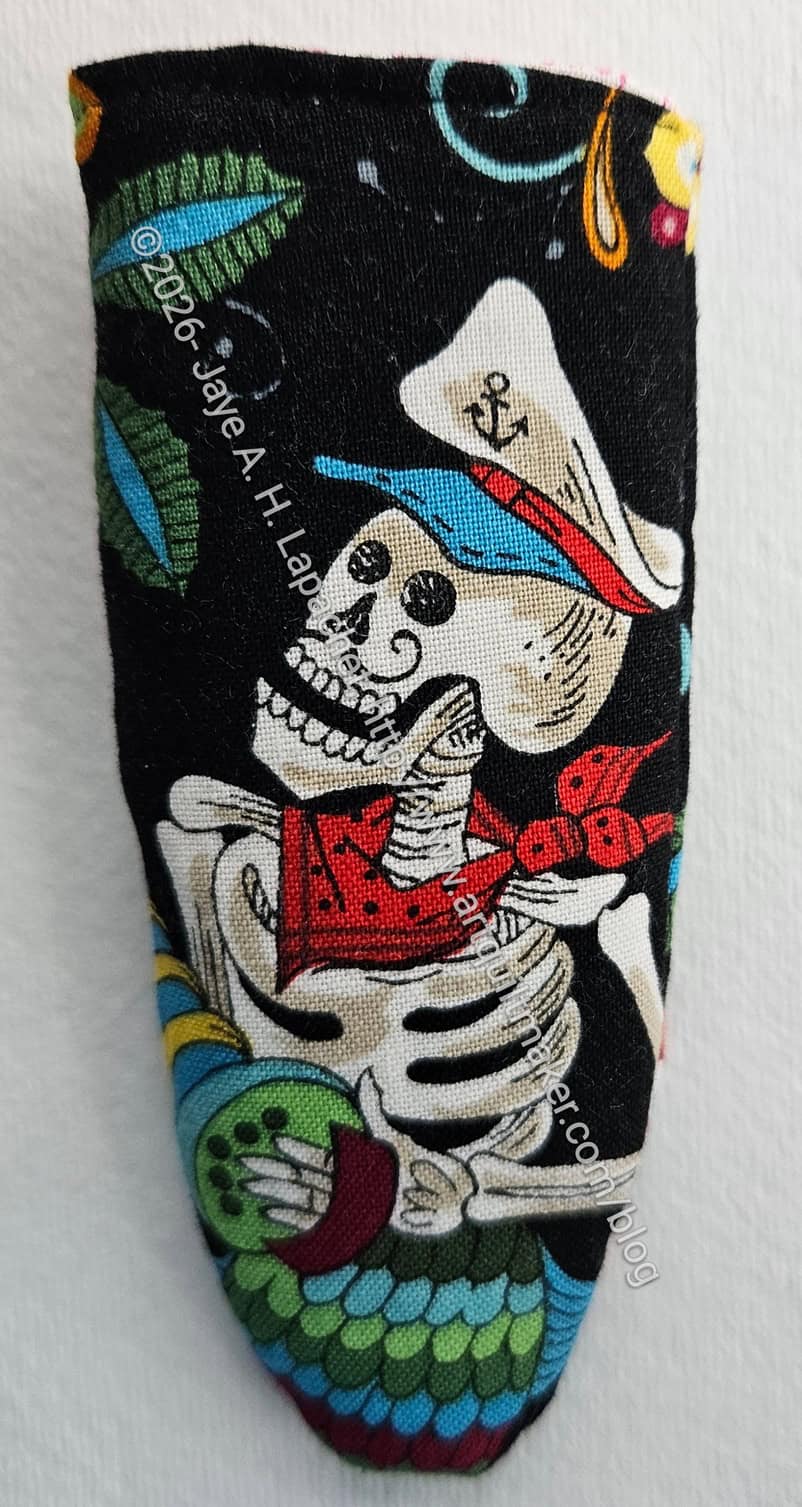
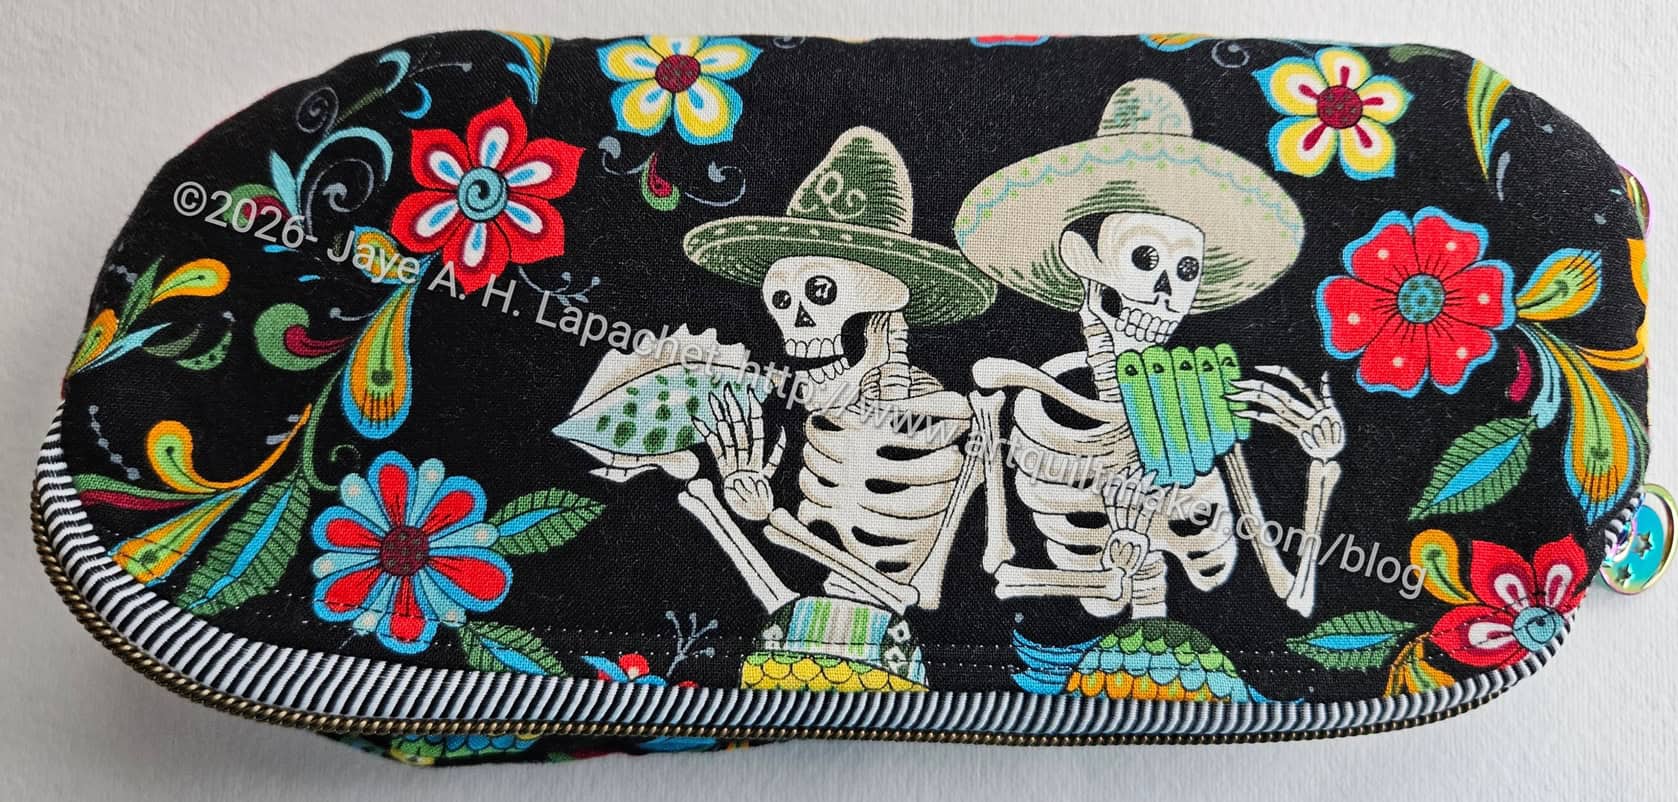
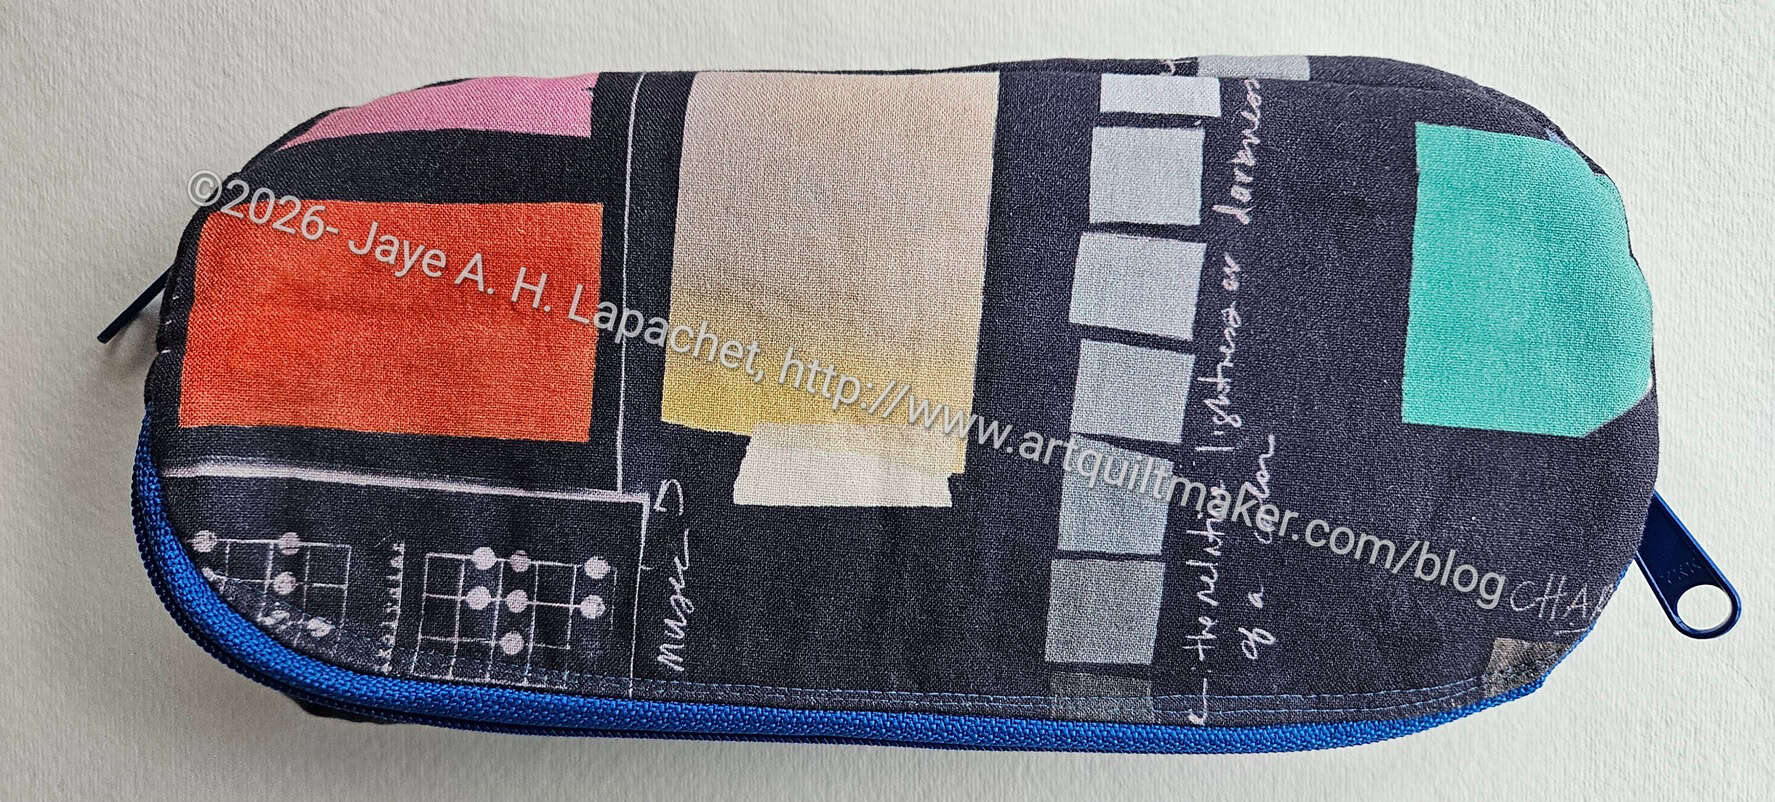
The fabric I used was the same used for another of Gerre’s bags, the Enigma Pouch. I am not a huge fan of this fabric as it looks a little too creepy for me. However, first, I am almost out, and second Gerre said she really likes it. I decided to use it up and then I can get back to the Alexander Henry Dia de los Muertos fabric I also use for her gifts. Yes, I have used a few different fabrics for her gifts. She was the first one, I think, for whom I started making sets of bags. It took me awhile to settle into the process.
This fabric does provide some good fussy cutting opportunities. Since I don’t have much of it left, I am using all the bits.
Gerre’s Tadpole other front
This pouch is more 2 sided than Carries, because of the fussy cutting opportunities. It is interesting how different the two sides are. However, all the figures are skeleton mermaids or mermen. I mostly cut off the tail of them. I suppose I could have turned the fabric 90 degrees and included the tail. Considering the design of the pouch, that might be a better way to orient the fabric. I guess I’ll have to make another one to see. 😉
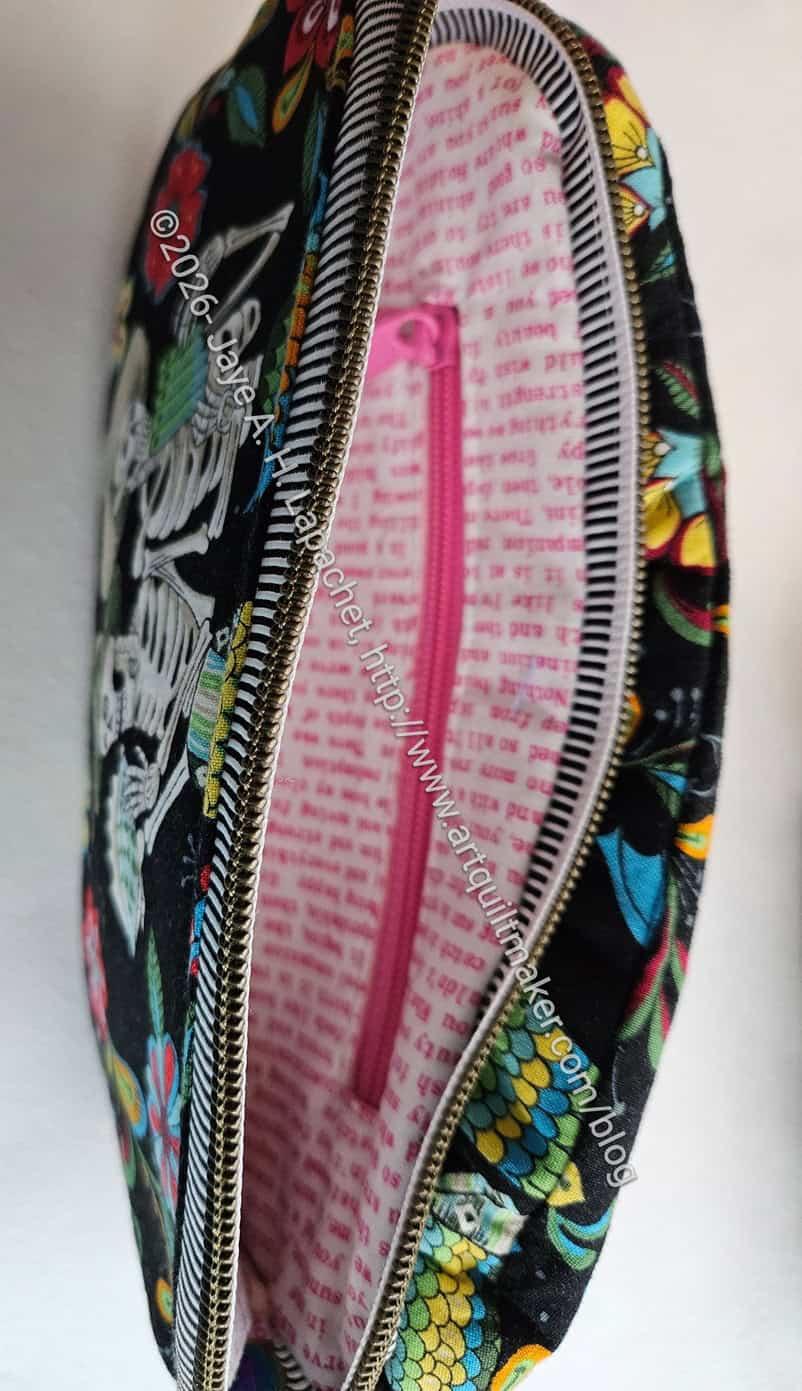
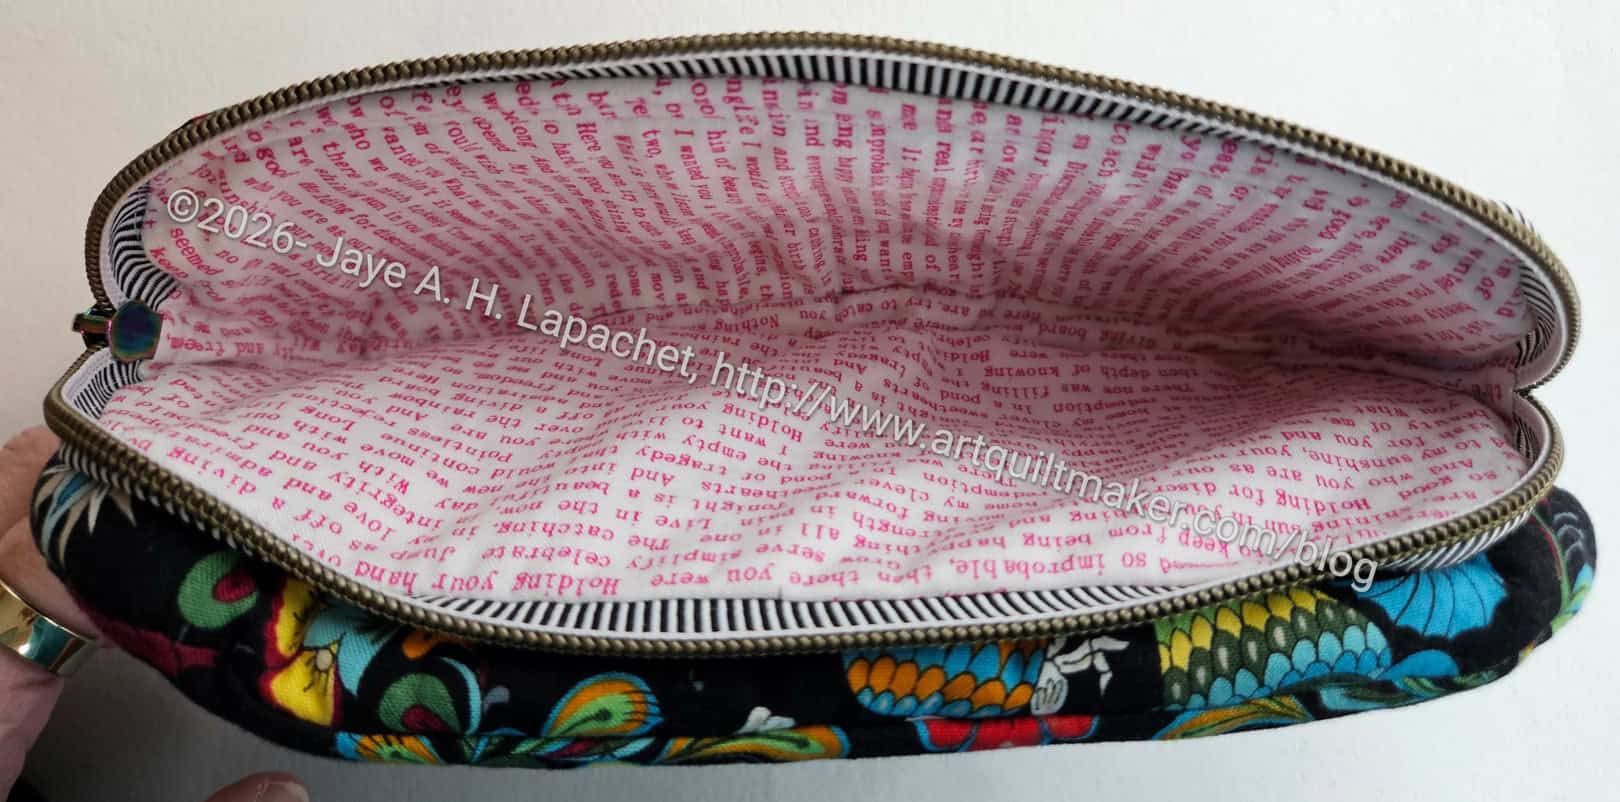
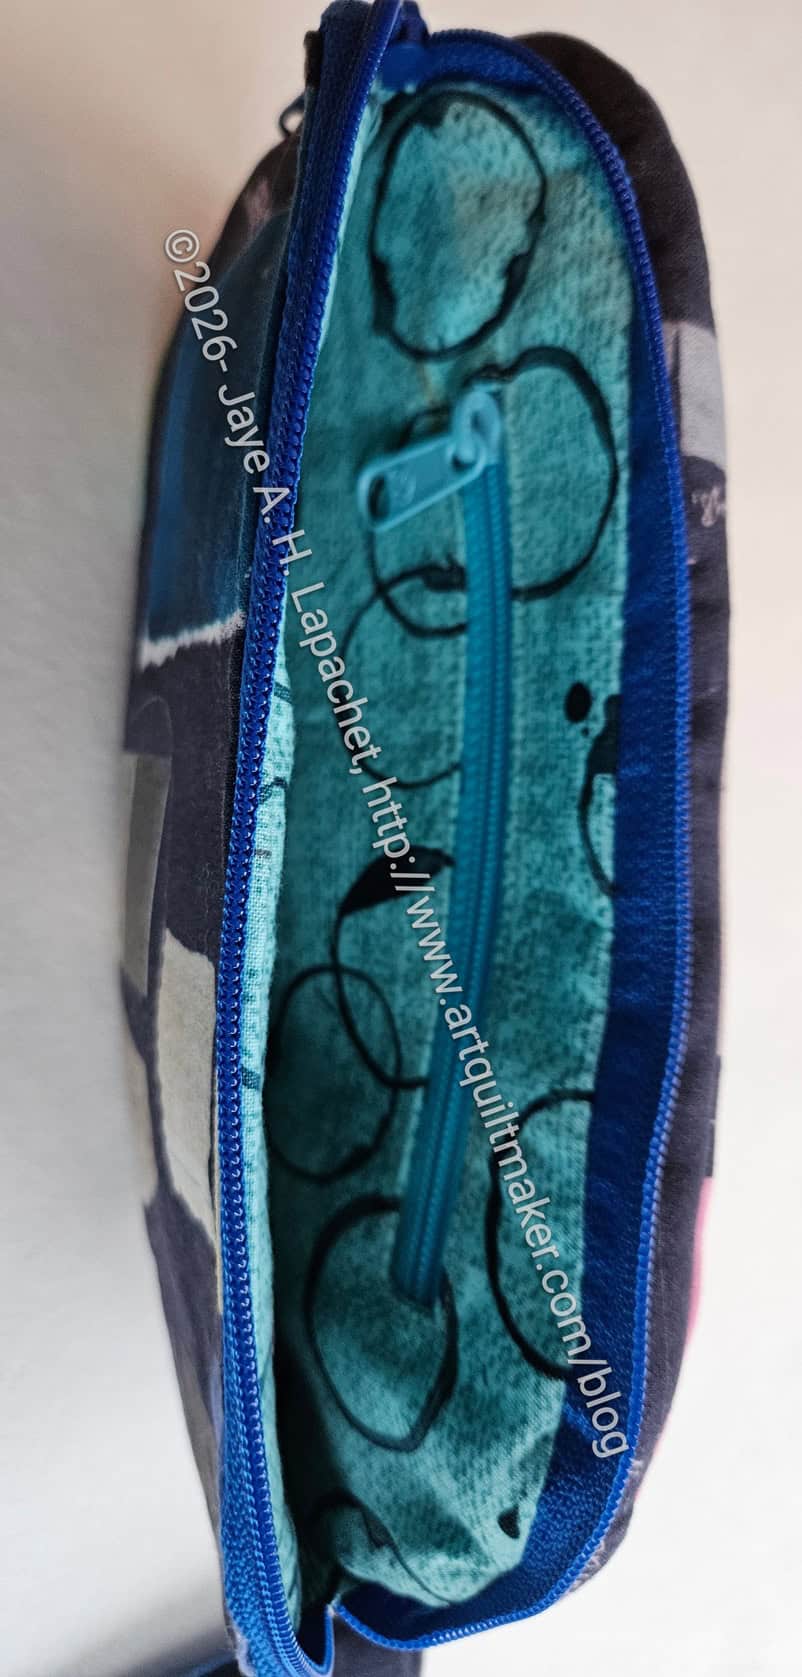
Gerre’s Tadpole interior
As mentioned, I followed the pattern exactly, which I might not do if I make this again.
I also put an interior zipper pocket on one side of the pouch. I think this pocket could be used for extra rotary cutter blades. They might not be obvious, but a reminder could be using this same side for a rotary cutter.
Gerre’s Tadpole – interior
I am paying closer attention to making sure the linings are not saggy baggy. I am pleased with the way the pockets came out.
Two Tadpoles – front
Two Tadpoles – other front
Both Tadpoles look good, I think. I need some practice to make them better, but this is a useful pouch.
Lil Sissy was in town last week for 12 hours on her way to a sun, sand and scuba diving adventure. She called me a few days before and I cut her in on my day’s plans: museum, GF Chinese food lunch. Then we did some things she wanted, namely getting supplies for some jackets she plans to embellish.
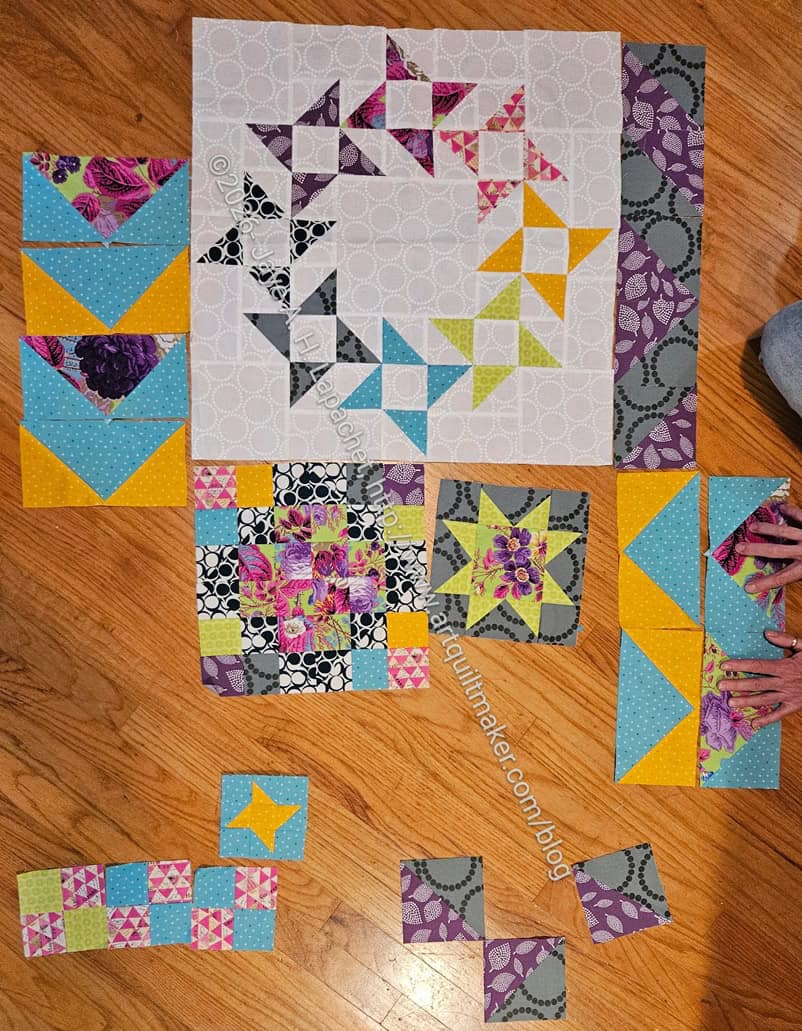
Once we were back and my house she saw my BAM BOM blocks and I let her play with them. We used the ‘design floor’ (LOL) since the design wall was full to bursting.
BAM BOM Flying Geese -Lil Sissy arrangement
It is always interesting to have an artist who uses a different medium play around with quilt blocks. I laid them out in a more or less conventional way. She immediately saw diagonals in places I hadn’t noticed.
She wanted me to make a bunch more Flying Geese so I can really lean into the diagonals. I’ll think about that.
BAM BOM HSTs -Lil Sissy arrangement
She also played with the Half Square Triangles (triangle squares) a bit. Again, she leaned into the diagonals. This arrangement has good possibilities even if I do have to make more HSTs. I think it would look cool to weave the diagonals behind the other blocks.
BAM BOM Friendship Star Wreath
Finally, we talked about my big Friendship Star Wreath and whether I should re-make it with a dark background. She said no, but I might still do it. That white shrieks at me.
The Tadpole is a pouch that I bought as part of a 4-pack with the Cosquilla pattern last June. I am glad to say that this isn’t the first time I have made a bag from this 4-pack.
Carrie’s Tadpole front
The Tadpole (weird name, I know) is a useful pouch with two pockets that can secure scissors, rotary cutters and other similar types of tools.
Tadpole with interior zipper
One pocket is on the top and the other is on the bottom so you have to kind of flip it around to get at both zippers.
One of the pockets includes a small internal zipper pocket. This pocket could be added to both of the larger zipper pockets. I am not sure what I would put in that interior zipper pocket, but I do think that, generally, the more pockets the better. In this case, that might not be true if I were to put something in there and then lose it or forget about it. I look forward to seeing what Carrie says.
Tadpole open with sheath (Carrie)
The pattern includes a scissor sheath. I bought Carrie a nice pair of scissors to go with the pouch and the sheath can be customized to fit the scissors. I wanted to do that, but I didn’t want to open a new pair of scissors. I am not 100% sure the sheath is very useful with sharp scissors. It is definitely cool to have a matching scissor adornment, but I am concerned that sharp scissors will cut through quilting cotton. I might make the scissor sheath out of cork or pleather scraps in the future. It wouldn’t match, but it might be useful.
I made this first one in the fabric I use for Carrie, the Carrie Bloomston Color Theory fabric. I was able to use some smaller pieces, which was nice.
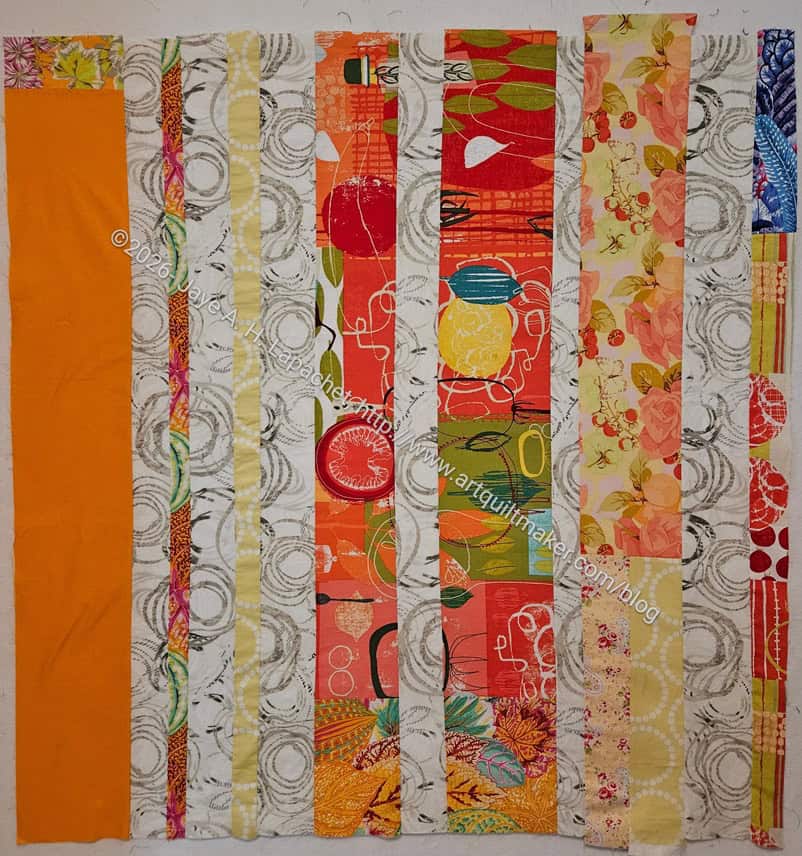
I wanted to make a second donation top for the year and going through a stack of fabric helped. I found the neutral background and that cemented my resolve.
I used the edges that Colleen cut off of Gelato #2 to start this donation quilt. That back was quite large, so I had long pieces from which to choose.
I shoot for about 40×40 for these quilts so a yard of fabric total works. The neutral I found was a half yard.
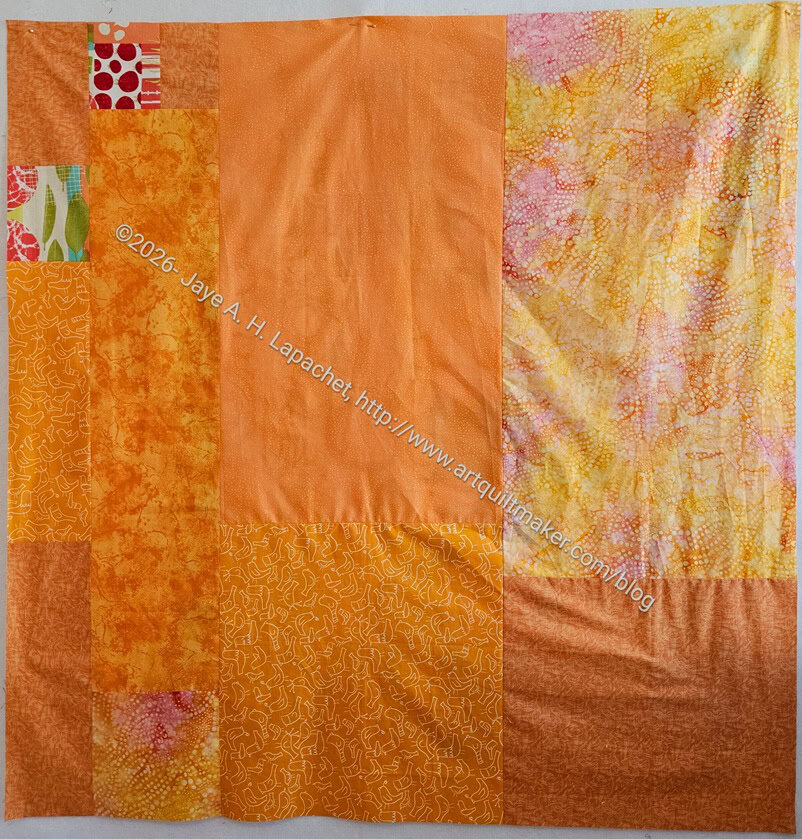
Ends n.23 back
Except for the back, I didn’t need to dig into my bins of fabric. I chose some light oranges for the back, then dutifully measured and put together some batting scraps for the batting.
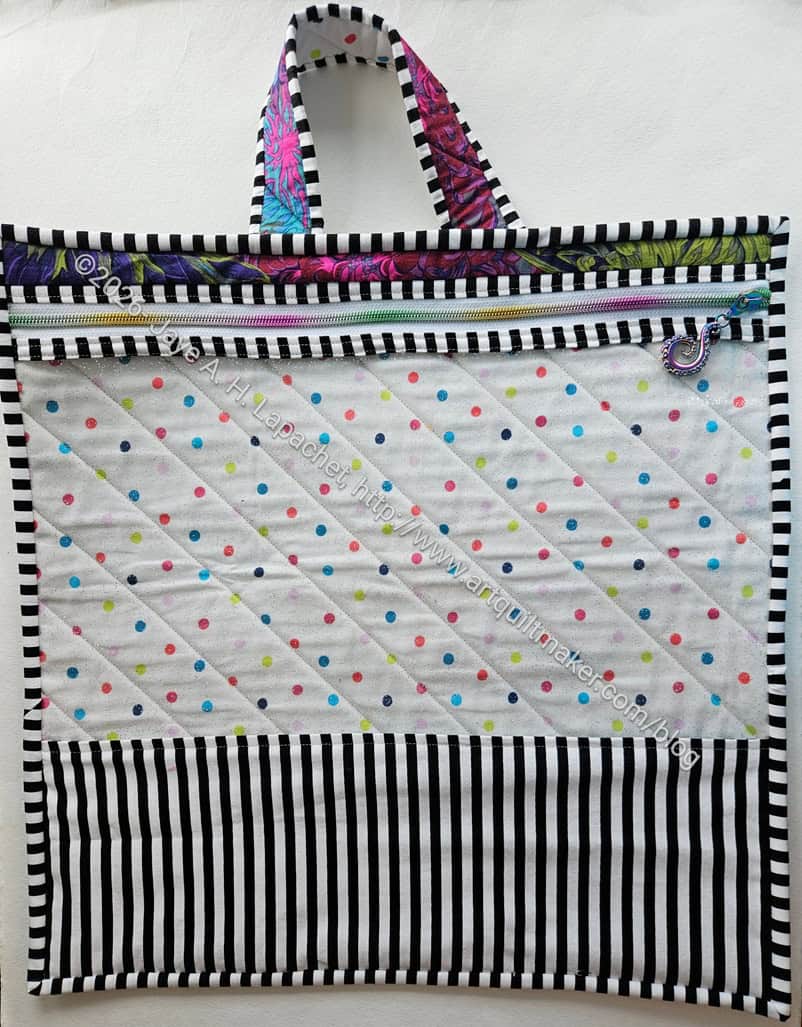
I finished the Project Bag that has been on my list for a long time. Or what feels like a long time. The last time I posted about project bags was a year ago and I was thinking about making this project bag.
I wanted to make sure that the zipper tape was covered. The ByAnnie patterns don’t always take care about that and it is a particular annoyance of mine. I know it doesn’t really matter, but I like the zipper tapes completely covered, even on the inside.
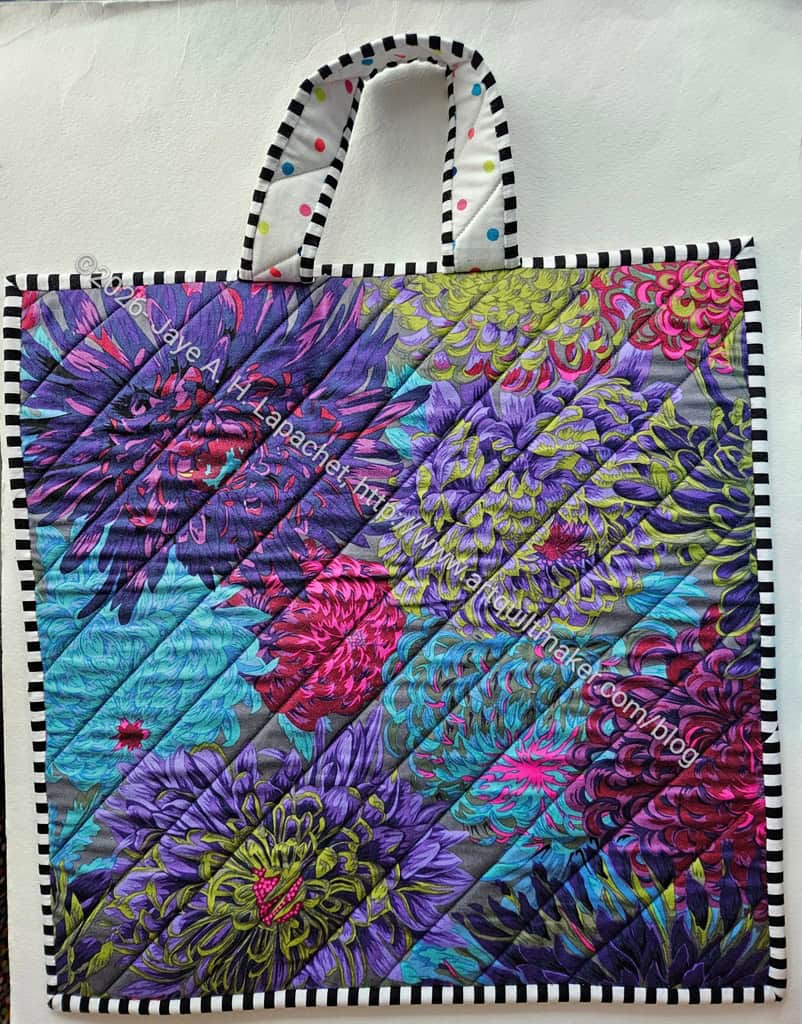
My extra large project bag-back
MaryC uses a technique where she folds a piece of zipper tab fabric in half and slips the zipper tape in then sews and folds the excess back. I tried that this time and found it worked well. My only problem was that I made the piece too small in width. I had to add an an extra piece on top to close the gap. Still I liked the technique. I just need to figure out a better size for the zipper tabs. I think I might have read the pattern wrong and reading it correctly might help. We’ll see if I make this bag again. I think I have enough project bags for the moment. I don’t want too many as it will encourage UFOs.
This is #9 on the guild UFO challenge. I’ll bring it to Sew Day to show off.
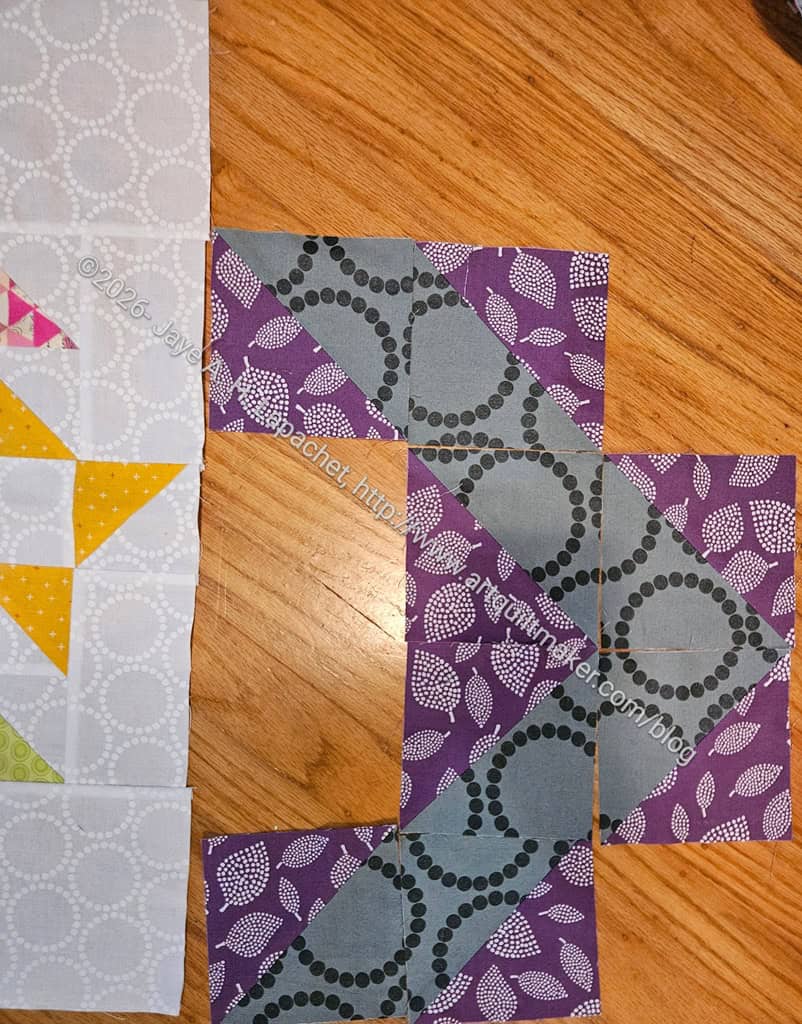
This block (for Month 3) took me a long time and I had some detours along the way. Finally, I finished it.
I am not 100% happy with it. I would have liked to use the grey Pearl Bracelets, but I didn’t have enough.
Using the white Pearl Bracelets as the background introduces another color of background into the piece and I had hoped to avoid using white for the blocks. Since I have not used white in any of the other blocks I have to figure out how to make it work.
First step: go see if I can find more grey Pearl Bracelets. Doubtful, but you never know.
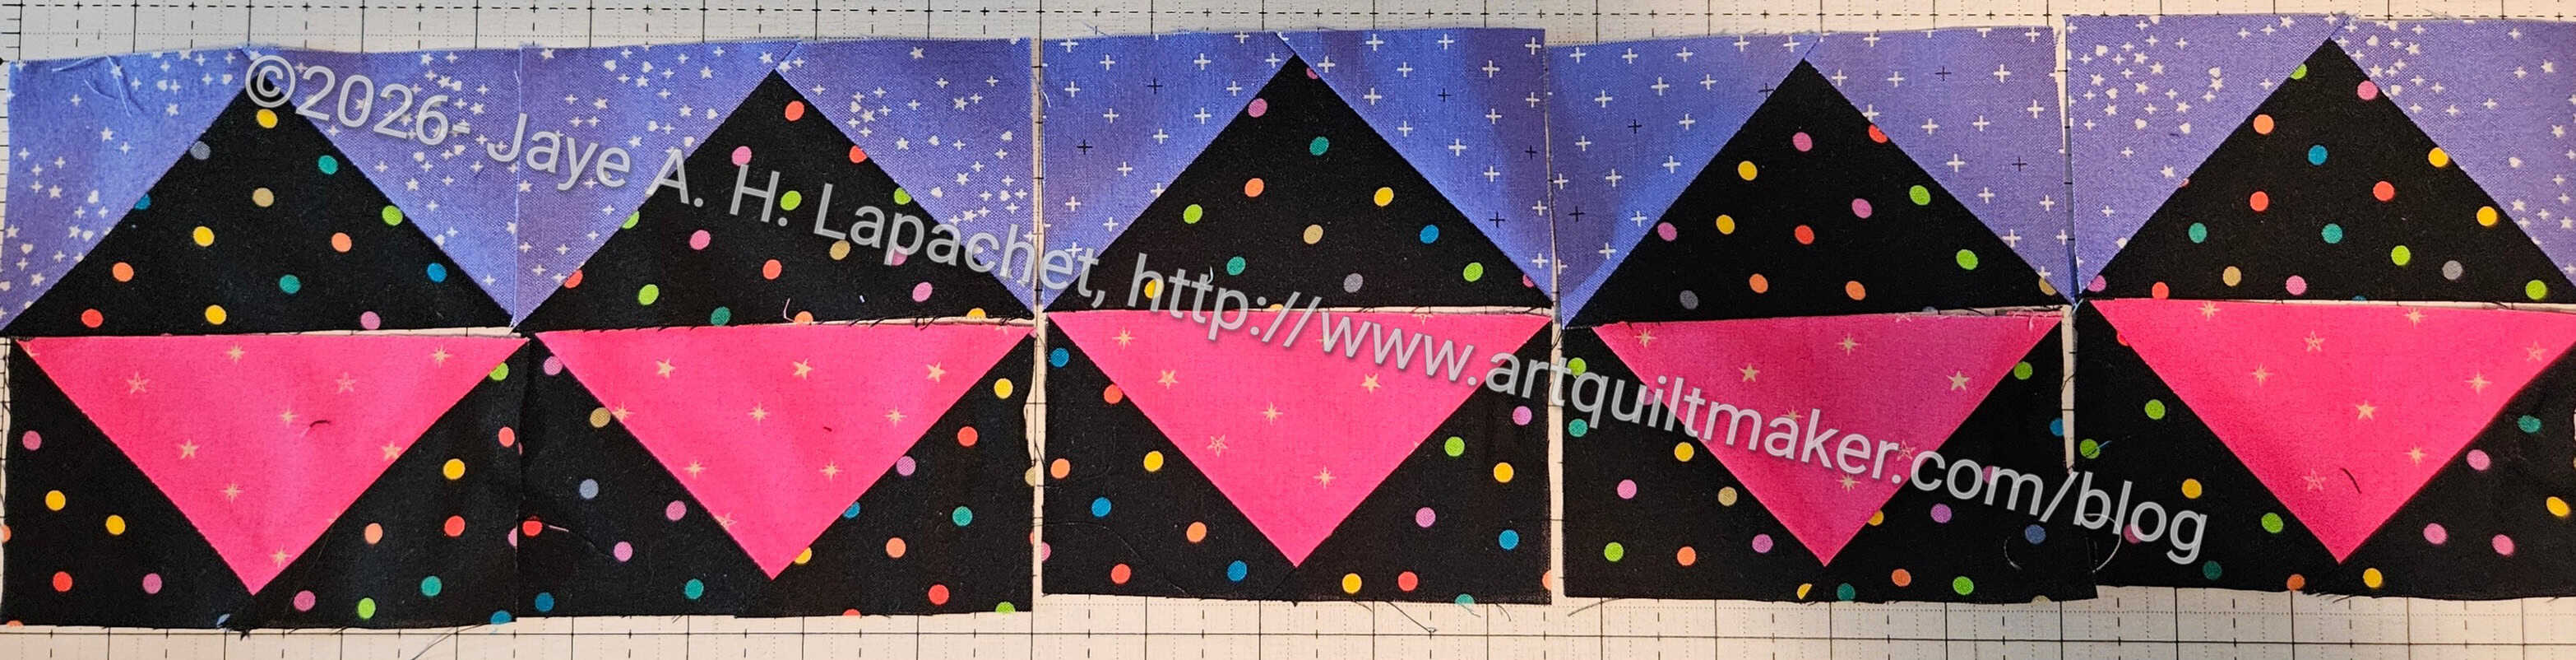
The directions were to assemble two Flying Geese so it looks like the above. The look was ok, but didn’t grab my attention.
Option 2:
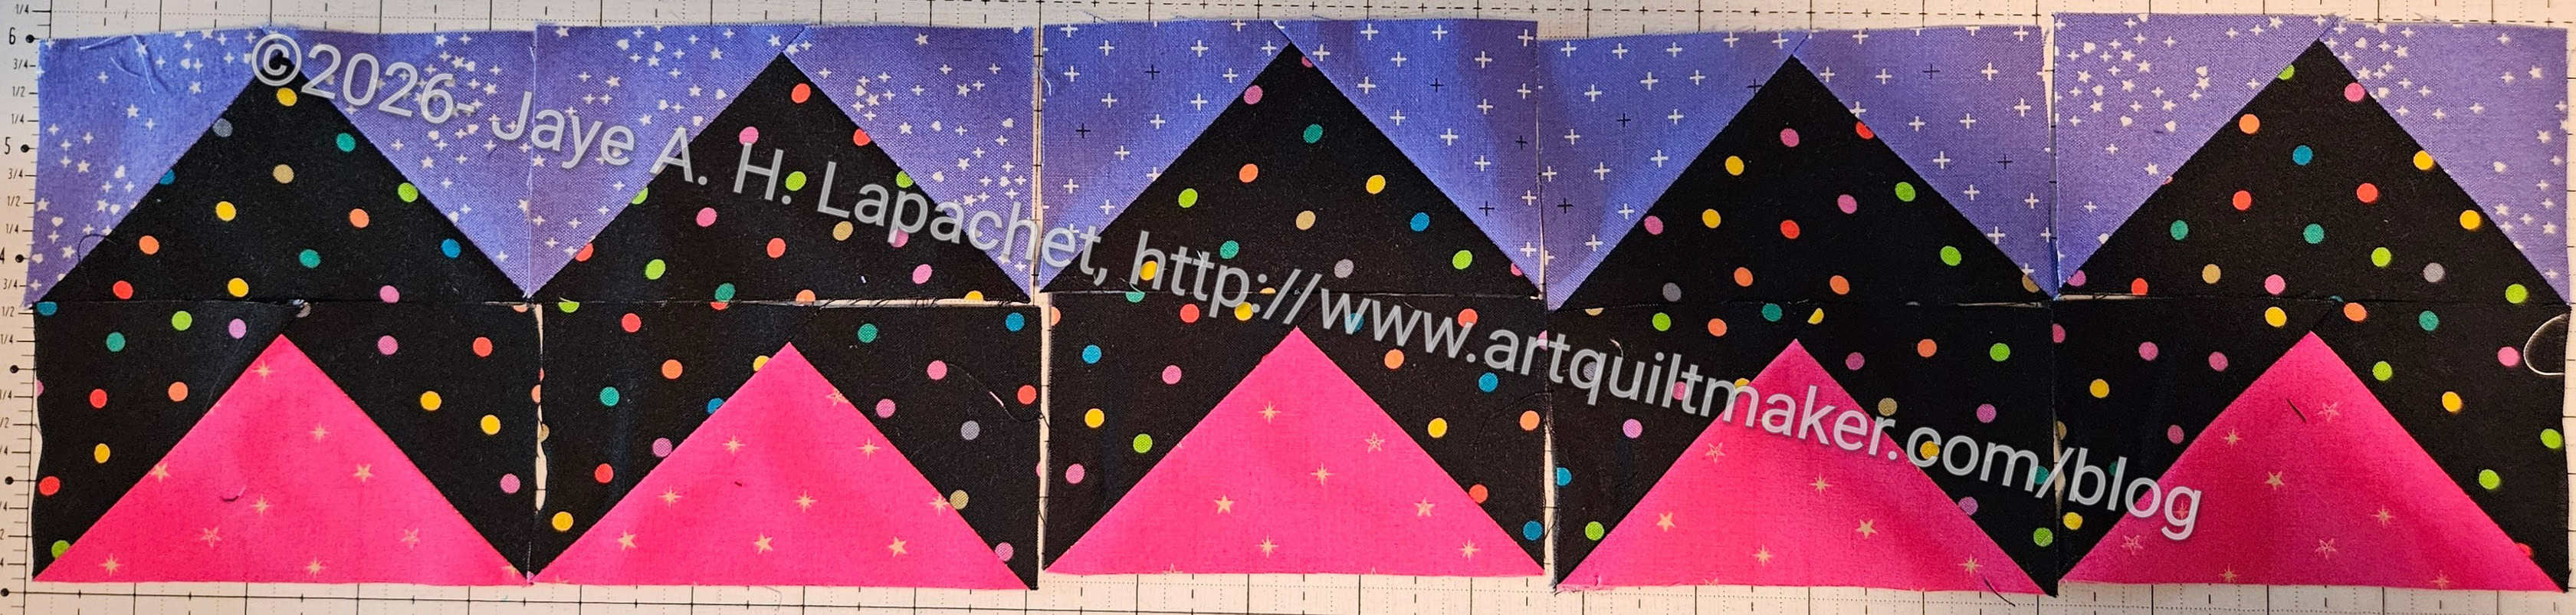
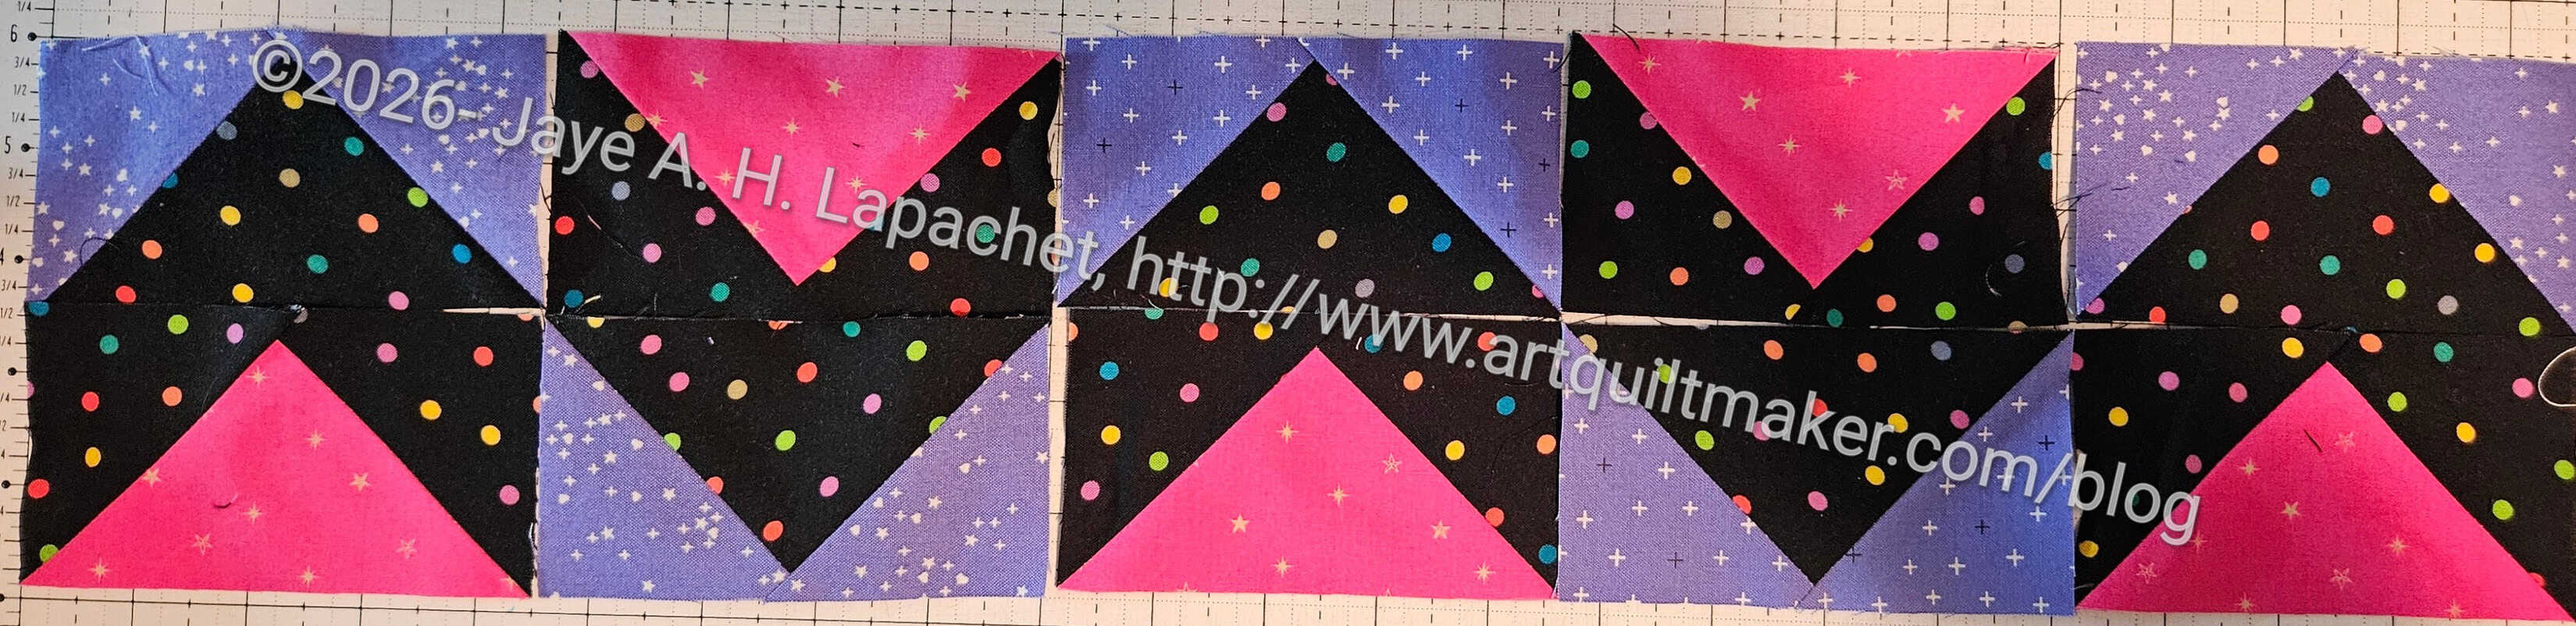
Zigzag Lupine border
I saw a zigzag border that someone made and tried that with my fabrics. This option looked more cohesive to me.
Option 3:
Alternating chevrons Lupine border
Just to see if another configuration would be better, I tried alternating chevrons. This wasn’t terrible and created a lot of movement, but I thought it was a little confusing for the viewer.
I went for option 2 and started sewing long rows of Flying Geese together.