More May Donation Blocks

As I mentioned the other day, I have been in a sewing drought and that affects all aspects of sewing, including my donation sewing. I took some time over the long weekend to sew as much as I could. Part of that included sewing some 16 patches.

I am trying to use similar fabrics so there are sets of blocks that people can use. My colors, especially the backgrounds can differ from what others use. I felt like making some blocks that would work for boys. It was fortunate I had some greys left over from the Triple Star. Not many, but some to add to my pile to donate when I go to the meeting in June. And this group does not include my work on the Spiky 16 patches.

26 Projects: Continuing to Progress

I have held off starting any new quilt projects, though I sorely want to. Some of the projects on my dream list are calling my name LOUDLY.

Finished 2018 Quilt Projects

The list is finally getting to the point where I feel like it matches what I am feeling. Five quilts is not shabby for 5 months.

Finished 2018 Non-Quilt Projects

Doing Good

In Process
The ‘In Process’ is used to denote projects on which I am actively working or pretending to stitch. I try not to put away projects, because that will ensure I never work on them

  • Pies and Points from 2016 Victoria Findlay Wolfe class. Julie and I had a playdate towards the beginning of April. I brought this piece with me so I could cut more elements (Julie has a Sizzix). I am more excited about this piece now. I thought I had done more, but I couldn’t find more than 2.5 sewn together pieces.
  • English Paper Piecing Project– half hexies – I have added about five stars. I also found some grey (did I buy it for this project or on spec?) that will be perfect for the border. Remember last time when I said I couldn’t find the diamond papers? I gave up and bought more. I haven’t actuallly made a border yet, but I have all of the supplies. I bought a template to go with the diamond papers. Joann at Paper Pieces was very helpful.
  • Stepping Stones #2 – This piece is back on the design wall, I made a few blocks last weekend. I need to cut more patches and continue to sew more border blocks.

Still WIPs
I still have WIPs. Who doesn’t, after all? A project in the ‘UFO’ category means I am stalled. A nicer way of saying UFO is a WIP. The list is a lot shorter and the projects are newer, for the most part.

  1. Aqua-Red Sampler – I need to lay the blocks out and put the piece together. No new progress, but it is coming up on the list.
  2. BAMaQG Color Round Robin – no progress. I decided quilting it myself was stupid and it would never get done with the other quilting projects I have. I will make a back and send it off to Colleen. This will be a gift for the grandchild of a friend.
  3. City Samplerblocks all made. The long term goal is to sash the blocks and put the top together. In the meantime, due to some seam allowance issues, some of the blocks are smaller than others, so I will have to adjust them in some way – either ripping and resewing, adding a piece or two to the block, or with sashing. This is my sticking point. I need to finish measuring all of the blocks before I can move on that is just a tedious task. Once I know what I am facing for each block, I can probably move forward. I am not looking forward to it, thus no new progress.
  4. FOTY 2017 – pieces cut. Need to layout and start piecing. No new progress.
  5. Handbag Sampler – this is a project about which I had forgotten. The blocks were teaching samples when I taught a sampler class the time before I started writing the quilt class sampler tutorials. I found one block recently, but otherwise I actually don’t know exactly where the blocks are hiding. I have an idea and will crawl up in the far reaches of my fabric closet soon and see if I can find them. I haven’t even found a picture of all the blocks.
  6. Lobster – I still have more stitching to do and then I need to quilt it.
  7. Pointillist Palette #4: Fourth is a series of 6 quilts; needs tiny square patches sewn together. No progress.
  8. Self Portrait: started in 2006 at a class at Quilting Adventures in Richmond, Virginia. I am still stalled on this again. As my oldest (I am pretty sure) UFO, I put it on my blog and out into the Twitterverse and Diane suggested that I not consider this as a self portrait. I think that strategy is a great idea. I am now trying to think of a new persona for her.
  9. Serendipity Lady Quilt: no new progress.
  10. Under the Sea: class project; like the design and am happier with the colors. I have a new idea for it, which is to make a pillow and gift it to a friend.
  11. Black and Red quilt – This came about because of two other projects. I made a whole bunch of bias tape as part of my failed attempt at doing the Mighty Lucky Club a few years ago. Another part of the inspiration came from my class with Tina of Little Blue Cottage fame. This was going to be for a nephew, but I think it will be for one of my SILs and BILs. I have rectangles cut and some bias tape ready. My next step is to sew the bias tape to the rectangles like pickup sticks. I don’t have any photos of this, so you’ll have to trust me.

Small Projects in Process

Most of my progress involves thinking or just cutting.

  • All Rolled Up Tote – part of Crafty Gemini Organizer Club, so on my list, but I haven’t actually started
  • White on black dots cell phone wallet
  • Solid black cell phone wallet
  • Chubby Charmer with Good Fortune charm pack – gift
  • 4-Zip Organizer – part of Crafty Gemini Organizer Club, so on my list, but I haven’t actually started
  • Tool Tote – I bought the pattern at QuiltCon and started cutting it out at Sew Day in March. I found some more of the fabrics I want to use
  • Ultimate Project Organizer – another project from the Crafty Gemini Organizer Club, also on my list, but not yet started

Ready for Quilting

  • Octagon 9 Patch: I finished the top on May 5, the back and binding on May 6. This piece is finally ready to be quilted.

In Quilting Process

  • BAMaQG IRR –The sandwich has been basted. I machine quilted a couple of lines to stabilize it. I am making slow progress on hand quilting it using Big Stitch. I
  • Thanksgiving tablemat – I have the correct feet and just need to get busy.
  • Theoretically, the Tarts Come to Tea is in the quilting process, though I haven’t worked on it in a while. See above.

Binding

  • nothing at the moment

Hunting and Gathering

  • 30 Something: I continue to cutting 1.5 inch squares. I am pretty sure I have the 800 I need, but I am not ready to sew them together yet, so whenever I have a chance to cut more I cut more. It will give me choice when the time comes. I’ll have to think up a new name for this quilt, too. My next step is to figure out if I need to cut other sizes of squares and switch from cutting 1.5 inch squares to cutting the new size.
  • Blue Gradation Quilt: cutting 2.5 inch x 4.5 inch blue rectangles. It has to end sometime. I wasn’t sure I was ready to put this together, but I think I am. I might do a couple of gradation quilts in a row just to get the practice.
  • Blue Lemonade: cutting blue, green, purple 2 inch squares. I used a lot of these squares for En Provence, so I am slowly cutting more.
  • FOTY 2018: I have started cutting 2.5 inch squares for the 2018 version.
  • Pink Gradation Quilt: cutting 2.5 inch x 4.5 inch pink rectangles
  • Spin Wheel: really not started, but supplies gathered. I might have to cut some more background fabrics. I probably have enough fabrics and just need to decide to start.
  • Windmill quilt: Still hunting and gathering. I am supposed to be cutting a variety of greys for the background, which required the purchase of a new template. I should be able to get going again

Other

  • Stepping Stones #3 using the Macaron pre-cuts from Hoffman. I have all the fabric in pre-cuts and am just waiting for space (and desire) in my schedule.

I bought some fabric, so I am down on net usage. Still gross usage is just over 101 yards (46 net; yes I have bought about 50 yards worth of fabric this year!). I am pleased, but I want to hit 50 yards net as soon as possible. If I could make it to 100 yards NET used by the end of the year, I would be ecstatic. It is good to have goals!

What’s on your list?

Creative Spark #25: Make a Soul Box

A Soul Box is a way to do “soul archaeology…while making a meaningful reminder of what is most important to you?” (pg.105).

In this chapter, Bloomston gives the reader a list of supplies to make an actual box. This is a very physical activity. Sometimes, making something that is not in our regular media leads to a new place in your chosen medium. I get so much inspiration from making books, folding paper and gluing paper to things.

You can see the last post on this topic from a few weeks ago.

Nota bene: we are working through Carrie Bloomston’s book, The Little Spark. Buy it. Support the artist. Play along. There is much more to each spark than what I am writing. The original chapters will help you. Go buy Carrie Bloomston’s book, so you get the full benefit of her fabulousness! You can see my book review, which is what started this flight of fancy.

Finished: Fabric of the Year 2016

Finished: Fabric of the Year 2016

Fabric of the Year 2016 is finished. I actually finished it a few weeks ago, but getting photos without the help of the YM is a challenge.

I didn’t spend as long on it this year, but the fabrics were also quite a challenge: many fewer solids and tone-on-tones, which are easy to gradate.

2016’s shape was a 3 inch square and that was pretty easy to put together. I’m not sure about the border, but I am not taking it off.

Finished: Fabric of the Year 2016-back

The back was super easy to make! It came together so well. I was shocked, because I often struggle and fight with backs.

Various & Sundry 2018 n.5

Administravia

Check out the new privacy policy. WordPress wanted me to write one because of GDPR.

Fabric, Products & Supplies

Cotton & Steel is losing all of its founding designers! No details as to why, but Craft Industry Alliance has some news and RJR will be continuing with the brand. I have to say that I haven’t been buying the designs from Cotton & Steel lately. They just weren’t me. Stay tuned.

Tula Pink’s new Zuma line (with seahorses!) is available at some sites for pre-order.

I never heard of Wefty before, but got to know more about the company when I read her post about Quilt Market in Portland.

Media

Meander Publishing is closing both Machine Quilting Unlimited and Modern Quilts Unlimited magazines effective immediately. “The final issue of Machine Quilting Unlimited (July/August 2018) will be distributed in digital format only, not print. There will be no more Modern Quilts Unlimited issues.”

Projects & Tutorials

Sarah Goer turned me on to Fabric and Fiction. I read to much via audiobook to participate, but I love the idea. I don’t know where they are in the cycle, so take a look and see when you can jump in.

In Color Order has a tutorial for a patchwork drawstring bag.

Holly of String & Story created a video that will start you off on FMQing feathers.

Other Artists

Quiltmaking is a wonderful thing. I love the way different people can take a block and make it look completely different. As you know, I am using EPP papers for my half hexie star quilt. I found a post on Instagram using the same papers, but with a different and clever look!

I was pleased to see Peg, a librarian friend who now quilts, is making a fabric of the year quilt with her 2017 fabrics.

Remember my post about Symmetry? Here is a library that has gorgeous symmetry! I am sure the angle of the photo had something to do with it, but it is still a great photo. Yes, I now follow the photographer on Instagram.

Happy Birthday, Modern Quilt Studio.

Spiky 16 Patch n.4

Spiky 16 Patch n.2, block 4

I am back to working on the second Spiky 16 Patch donation quilt.

Over the long weekend, I got a chance to sew together some of the bias rectangles I had prepared. It turns out I made a lot of the ones I already had and very few of the ones I needed. Sigh.

I sewed the ones I had prepped together anyway and cut the 5 inch strips required for the rectangles. I was cutting for the Stepping Stones, as mentioned, and just used some of the same blues and greens I was using for the Stepping Stones to prep more.

There is something comforting and satisfying about making these Bias Rectangles. I really like the Split Recs ruler. I think it works really well. Yes, I trim, but I get really nice HRTs out of the process and they are a joy to sew. I am trying to think of different blocks to make from HRTs. I have units to make several more of these Spiky 16 patch blocks, except for the HRTs of which I am chronically short. 😉

Spiky 16 Patch n.4, quilt 2

I did finish this block and I am pleased with it. These are really nice blocks. I will lay out the piece on point when I get a chance.

Stepping Stones n.2 is Back….Again

I have been in a sewing drought for the past few weeks. Not because I didn’t want to see but because I had no time.

Stepping Stones n.2 Border Block- side

On Saturday, in the late afternoon, I got back down to business. I came back from being out most of the day and started sewing on the Stepping Stones n.2 blocks.

I still haven’t cut all the pieces I need to finish the border blocks. I have been cutting and sewing alternately which allowed me to sew 2 blocks together before dinner and that small amount of progress really made me feel great

Finished: Sewing Machine Mat

Sewing Machine Mat from above

I finished my sewing machine mat Friday evening after work. I got off a little early for the holiday weekend, which was nice and had some time to sew before the DH got home from Grand Parlor**

I had very little left to do, but it just seemed like something was always grabbing my attention away from sewing. There is a lot of house stuff going on and it just has to be dealt with step by step.

Sewing Machine Mat from front

There were a couple of things I did differently. Vanessa of Crafty Gemini called for the threadcatcher to be held on to the mat by a loop (see an image on her site). I thought that design looked weird-I didn’t want stuff hanging off of the mat I was making, so I used sew-in magnets. I used two on the threadcatcher. It will not hold up to heavy garbage, but the threadcatcher is named “threadcatcher” and not garbage can for a reason. Since I had my giant stack (ooops purchase!) of sew-in magnets out, I used a set for the pincushion as well. The pattern calls for a snap.

The snap and the loop work fine! I just wanted a little different look.

I also made mine a little wider to accommodate a machine with a larger throat. The pattern was really good about mentioning this type of adjustment.

Sewing Machine Mat - threadcatcher detail
Sewing Machine Mat – threadcatcher detail

I think the project came out very well, but I am not a huge fan of this particular pattern. I think the threadcatcher is too big and somewhat unnecessary. Most of us have a garbage can by our sewing machine. I also think the pink cushion is extraneous. How many pincushions do you have?

However!

This is a great piece to have on a retreat where you may not have all of your pincushions or a garbage can nearby.

I found a pattern in Issue 35 of Love of Patchwork & Quilting magazine. I am going to make one of those as well – sometime – just to compare.


**I had to leave early to go back to work.

Creative Spark #24: Shine Your Light

“You have to let go of the feeling that you don’t deserve to be happy or that you could never have the freedom that you seek” (pg.102)

In my journal, at the back, I make a list of the small sewing achievements I make every day (in a good week). It might be something like “sewed 2 HRTs – 5/25/2018” or “finished a 2 inch strip of binding on Triple Star quilt – 5/18/2018.” I used to just put finished items on that list, but the entries were too few and too far between, so this is my comprise. These are seriously small victories, but I do it to make myself feel accomplished.

Celebrate the small victories. Pat YOURSELF on the back. Believe in yourself.

Carrie says that “believing in yourself is a practice. The more you practice, the better you get. And the more you practice, the more able you are to accept your limitations and shortcomings, because there is always another chance to try again, to do it differently and maybe better” (pg.102)

You can see the last post on this topic from a few weeks ago.

Nota bene: we are working through Carrie Bloomston’s book, The Little Spark. Buy it. Support the artist. Play along. There is much more to each spark than what I am writing. The original chapters will help you. Go buy Carrie Bloomston’s book, so you get the full benefit of her fabulousness! You can see my book review, which is what started this flight of fancy.

Spiky 16 Patch n.2 Again

I have been looking at my three Spiky 16 patch blocks and trying to decide if I can get away with a quilt made from 3 blocks. As I mentioned, I need to make some HRTs and I haven’t had a chance to finish them up.

Spiky 16 Patch - offset test n.1
Spiky 16 Patch – offset test n.1

I had an idea to make sort of a square with the on point blocks offset. the effect wasn’t quite what I was expecting.

Spiky 16 Patch - offset test n.2
Spiky 16 Patch – offset test n.2

I tried to offset the blocks again leaving space for a fourth block. It still didn’t work the way I expected. It isn’t what I want.

Spiky 16 Patch Long Layout Test

Finally, I thought about the Donation quilt that Kathleen and I put together from color blocks. This gave me my last idea of the day for laying out three blocks.

I don’t think three blocks will work, but I wish they would. I’ll get busy making more blocks

Book Review: Stitched Sewing Organizers

Stitched Sewing Organizers: Pretty Cases, Boxes, Pouches, Pincushions & MoreStitched Sewing Organizers: Pretty Cases, Boxes, Pouches, Pincushions & More by Aneela Hoey

Lynette has been bringing a variety of sewing organizers, pouches and organizers to Show and Tell over the past year or so. As you know, I like making bags. I admired and asked Lynette about the various projects as she brought them in. One day she asked me if I wanted to borrow this book. She had an extra copy. I jumped at the chance. It sat on my shelf for awhile, but today I finally har the opportunity to read it.

Short answer: great book, go buy it now.

One thing I really liked about this book were the thumbnail photos of all of the projects right at the front of the book (pg.4). The thumbnails have the page number of the project alongside.

In the Introduction the author, Aneela Hoey, says “I have become addicted to making sewing pouches over the last few years. I think it is the combination of being able to create something both stylish and at the same time practical…” (pg.7). I like this explanation, but for myself I like these types of useful organizer patterns for gifts. I like to give things I make as gifts, but I don’t always like to give a quilt on a deadline. These pouches , holders, trays and pouches make good options.

The first 25 pages cover Materials and Supplies (pg.10-13), Tools (pg.14-15), Basic Sewing Techniques (pg.16-23) and a section called “Making the Projects” (pg.24). The final 100ish pages are instructions for making the projects.

Hoey talks the materials and supplies section as items that are useful to have on hand (pg.10). She suggests using the best fabrics and discusses interfacings in such a way that makes the reader understand why she uses the products she is using. I also like that she tells us exactly what her favorite products are, including brand (pg.11), and why she likes them. The author’s instructions about vinyl are a little different than Vanessa of the Crafty Gemini, but probably work just as well. She does not mention special machine feet, which can be useful (pg.12).

Except for a few items, the tools mentioned are very basic. Every quiltmaker will have them already, which means a quick start to making most of the projects! The items I probably don’t have, and with which I am least familiar, are the fusible tape and a drawstring threader (pg.14-15). It is always good to learn how to use a new product or tool.

In the Basic Sewing Techniques section, Aneela talks about some standard machine settings she uses such as “slow speed setting,” “needle down,” etc (pg.17). I thought this approach was a clever way of getting around the tendency to try to teach people to sew in 10 pages or less. The author also includes a well illustrated tutorial on installing zippers (pg.18-19). This tutorial can easily be supplemented by some YouTube videos or in person learning with guild-mates. I liked that the author included some basic directions for trimming corners (pg.20), “sewing the gap closed” (pg.21) and inserting a magnetic closure/snap (pg.22). These are skills which are expected in some patterns, but which aren’t often covered in books. I thought they were pretty useful.

In the “Making the Projects” section, the first page covers what Aneela means by certain terms and how to use the project sheet at the back of the book (pg.24) . This means the reader has something to which to refer, if s/he does not understand some terminology.

The project part of the book is divided into four parts and starts with a section called “Small Things” (pg.25). This is where it would be nice to have more thumbnails of the projects in this section. Project include a needle book with a tie closure (pg.26-29), a fold-up pouch (pg.30-33), tape measure cover (pg.34-37), and a green tomato pincushion (pg.38-40).

One of my favorite projects from the book, the Fold-Up Sewing Folio (directions pg.42-49), kicks off the “Cases and Folios” section (starts on pg.41). Of course, it would be the longest pattern in the book up to this point! 🙂 In this section, Hooey shows how some of the smaller projects from the Small Things section can be used along with the cases and folios.

The Two-in-One Case (pg.50-54) looks like it would be a great gift. The author uses different closures on each project, including a button and button hole (pg.55-62). While a good learning experience, I would probably stick with sew-in magnetic closures despite my rule that says I should make the pattern as it reads the first time. I did buy about 30 magnetic closures at one point by accident, which are taking up space in my supplies box.

The Pouches section starts on page 63 with a lifestyle shot of all the project in this section. YAY! That works for giving me an idea of what is included in the section. It is interesting to see what can be considered a pouch! The first project is the “See-it-All Pouch” (pg.64-68) reminds me of the Crafty Gemini Roadtrip bag. I know there are a limited number of variations in all bag and pouch type projects. I am not suggesting fraud of any kind. I think it is interesting to see the difference between the two patterns. A maker could certainly add a lobster clip and D ring as suggested by Crafty Gemini to Aneela’s pattern and have a different look. The corners on Hooey’s pattern are very professional looking.

The Drawstring Pouch (pg.74) would make a great gift bag. The other projects in this section include the Triple Pouch (pg.74-82), the Boxy Pocket Pouch (pg.83-90) and the Big Zip Pouch (pg.91-94). I really like all of these projects and would consider sewing all of them. I finally noticed while reviewing this section that the project name is printed at the bottom of the pages, throughout the book, covering that project. Very useful feature!

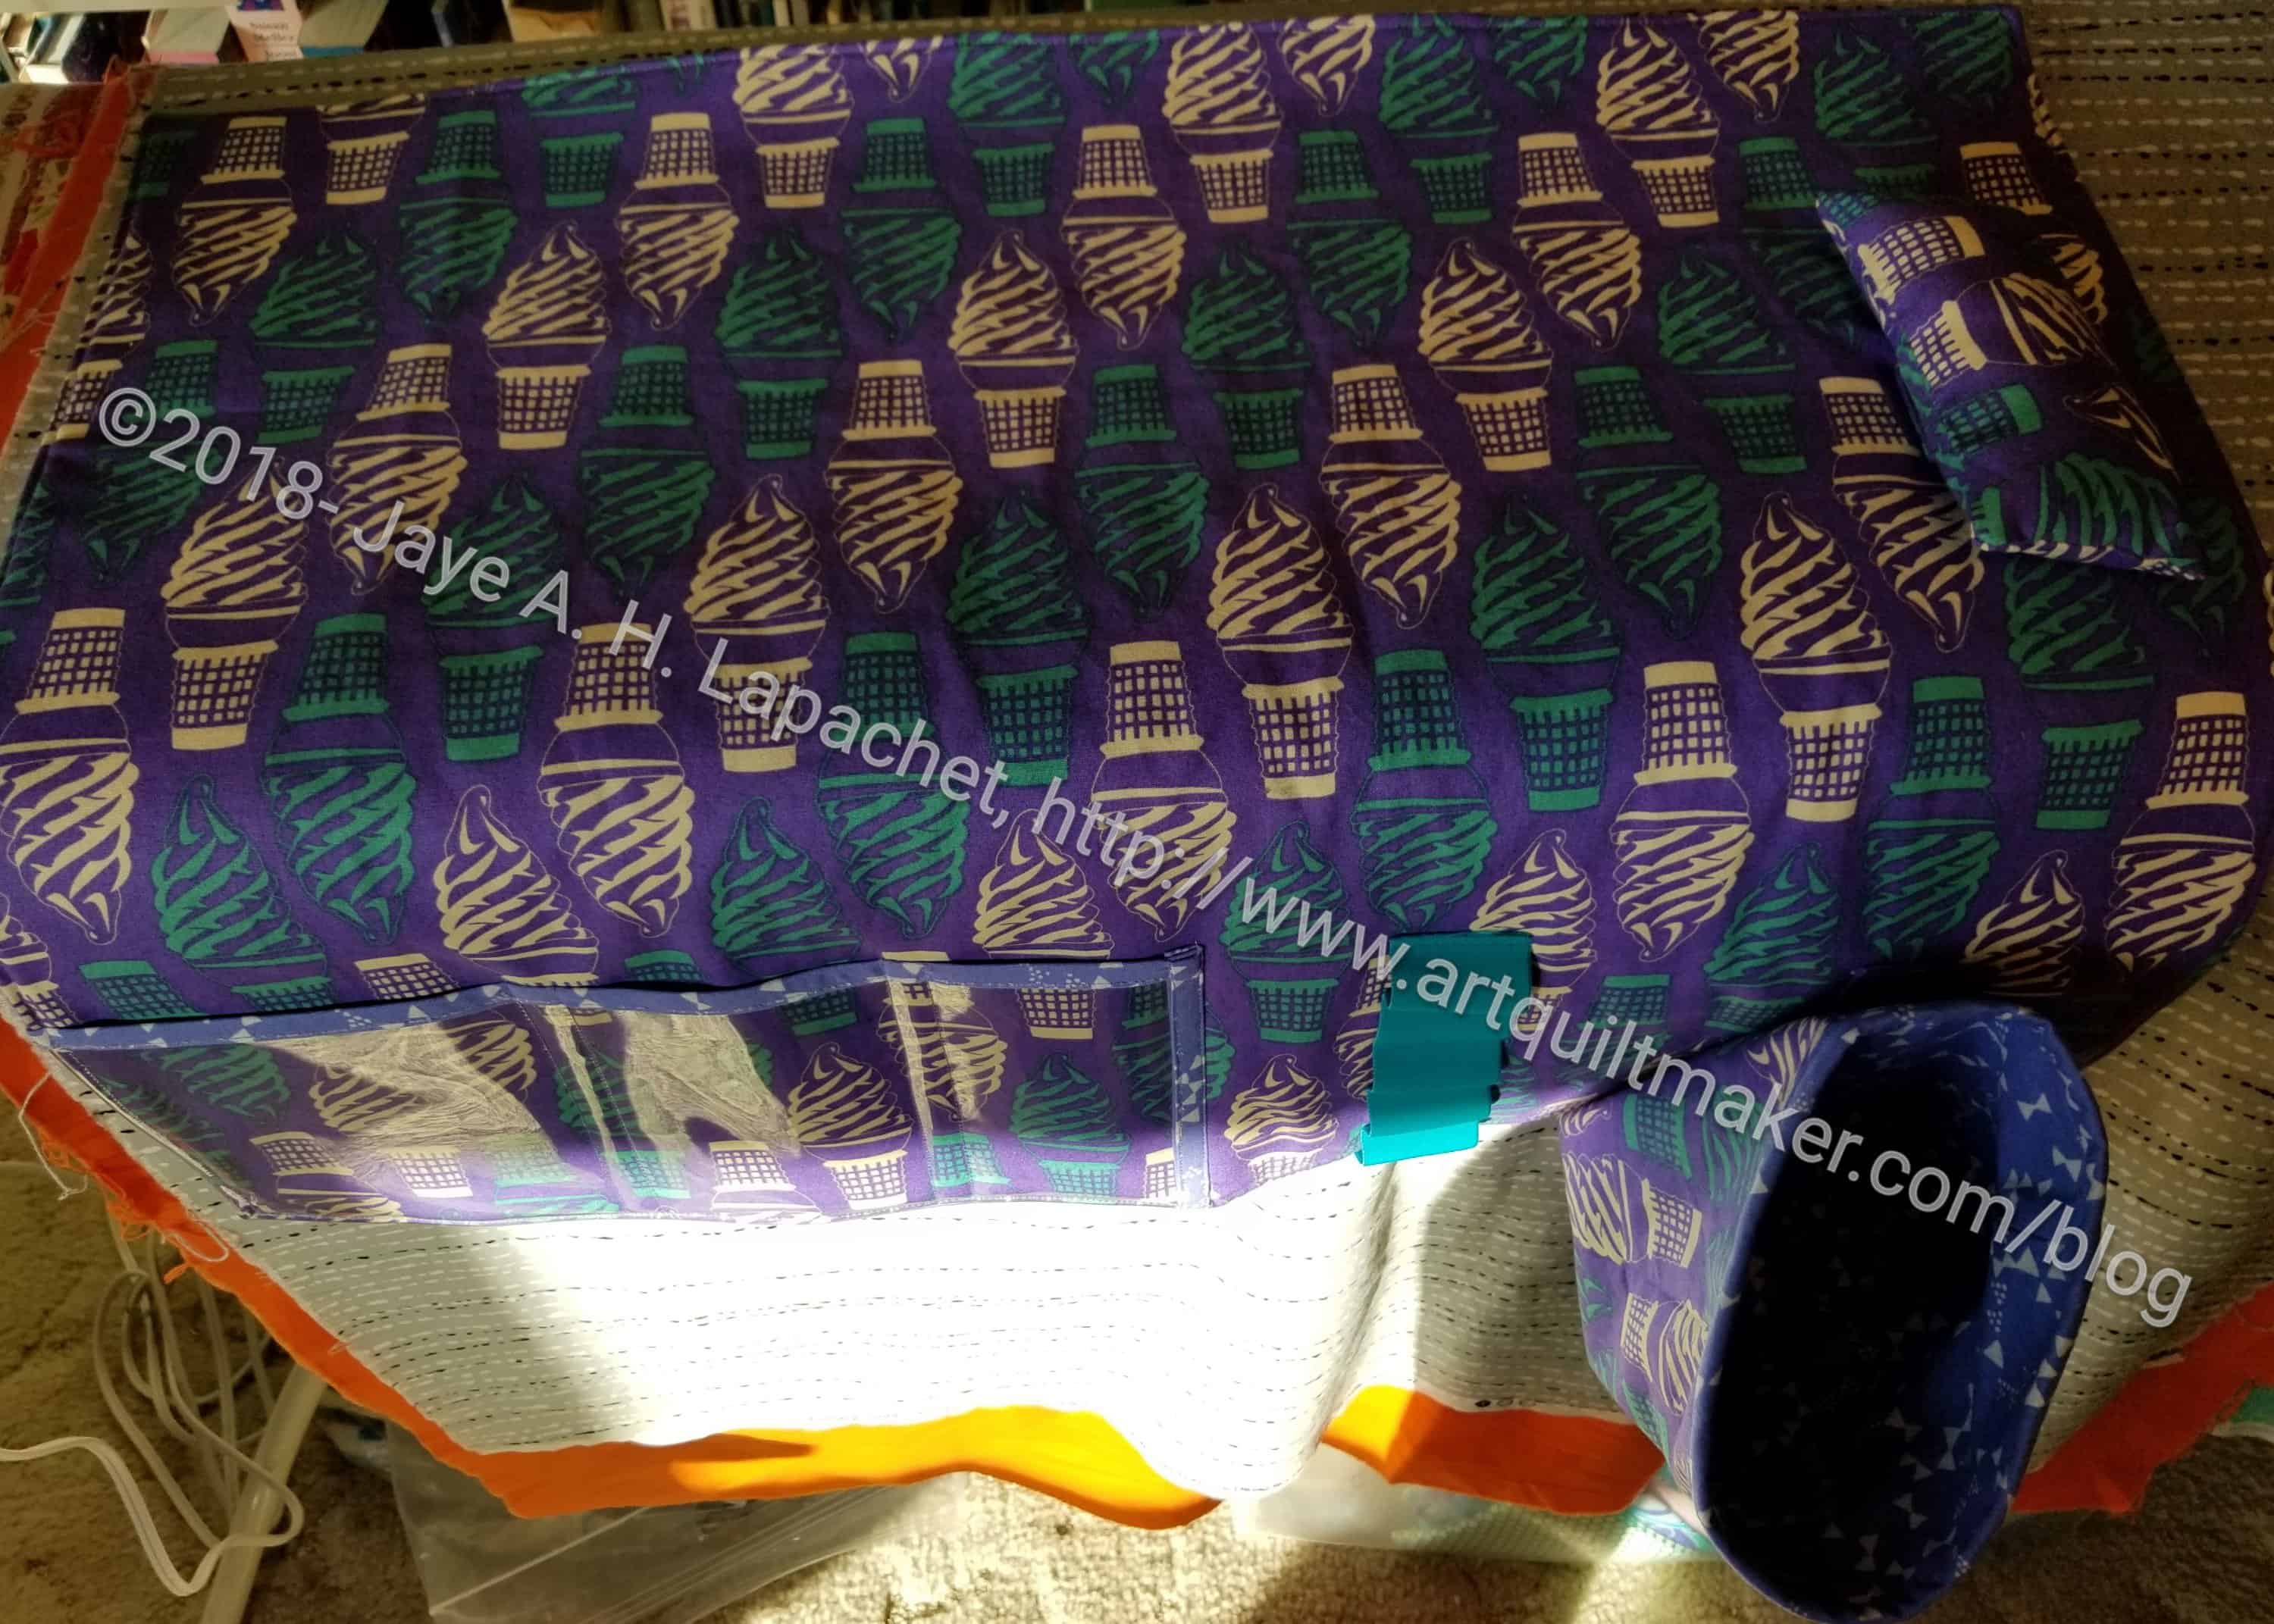
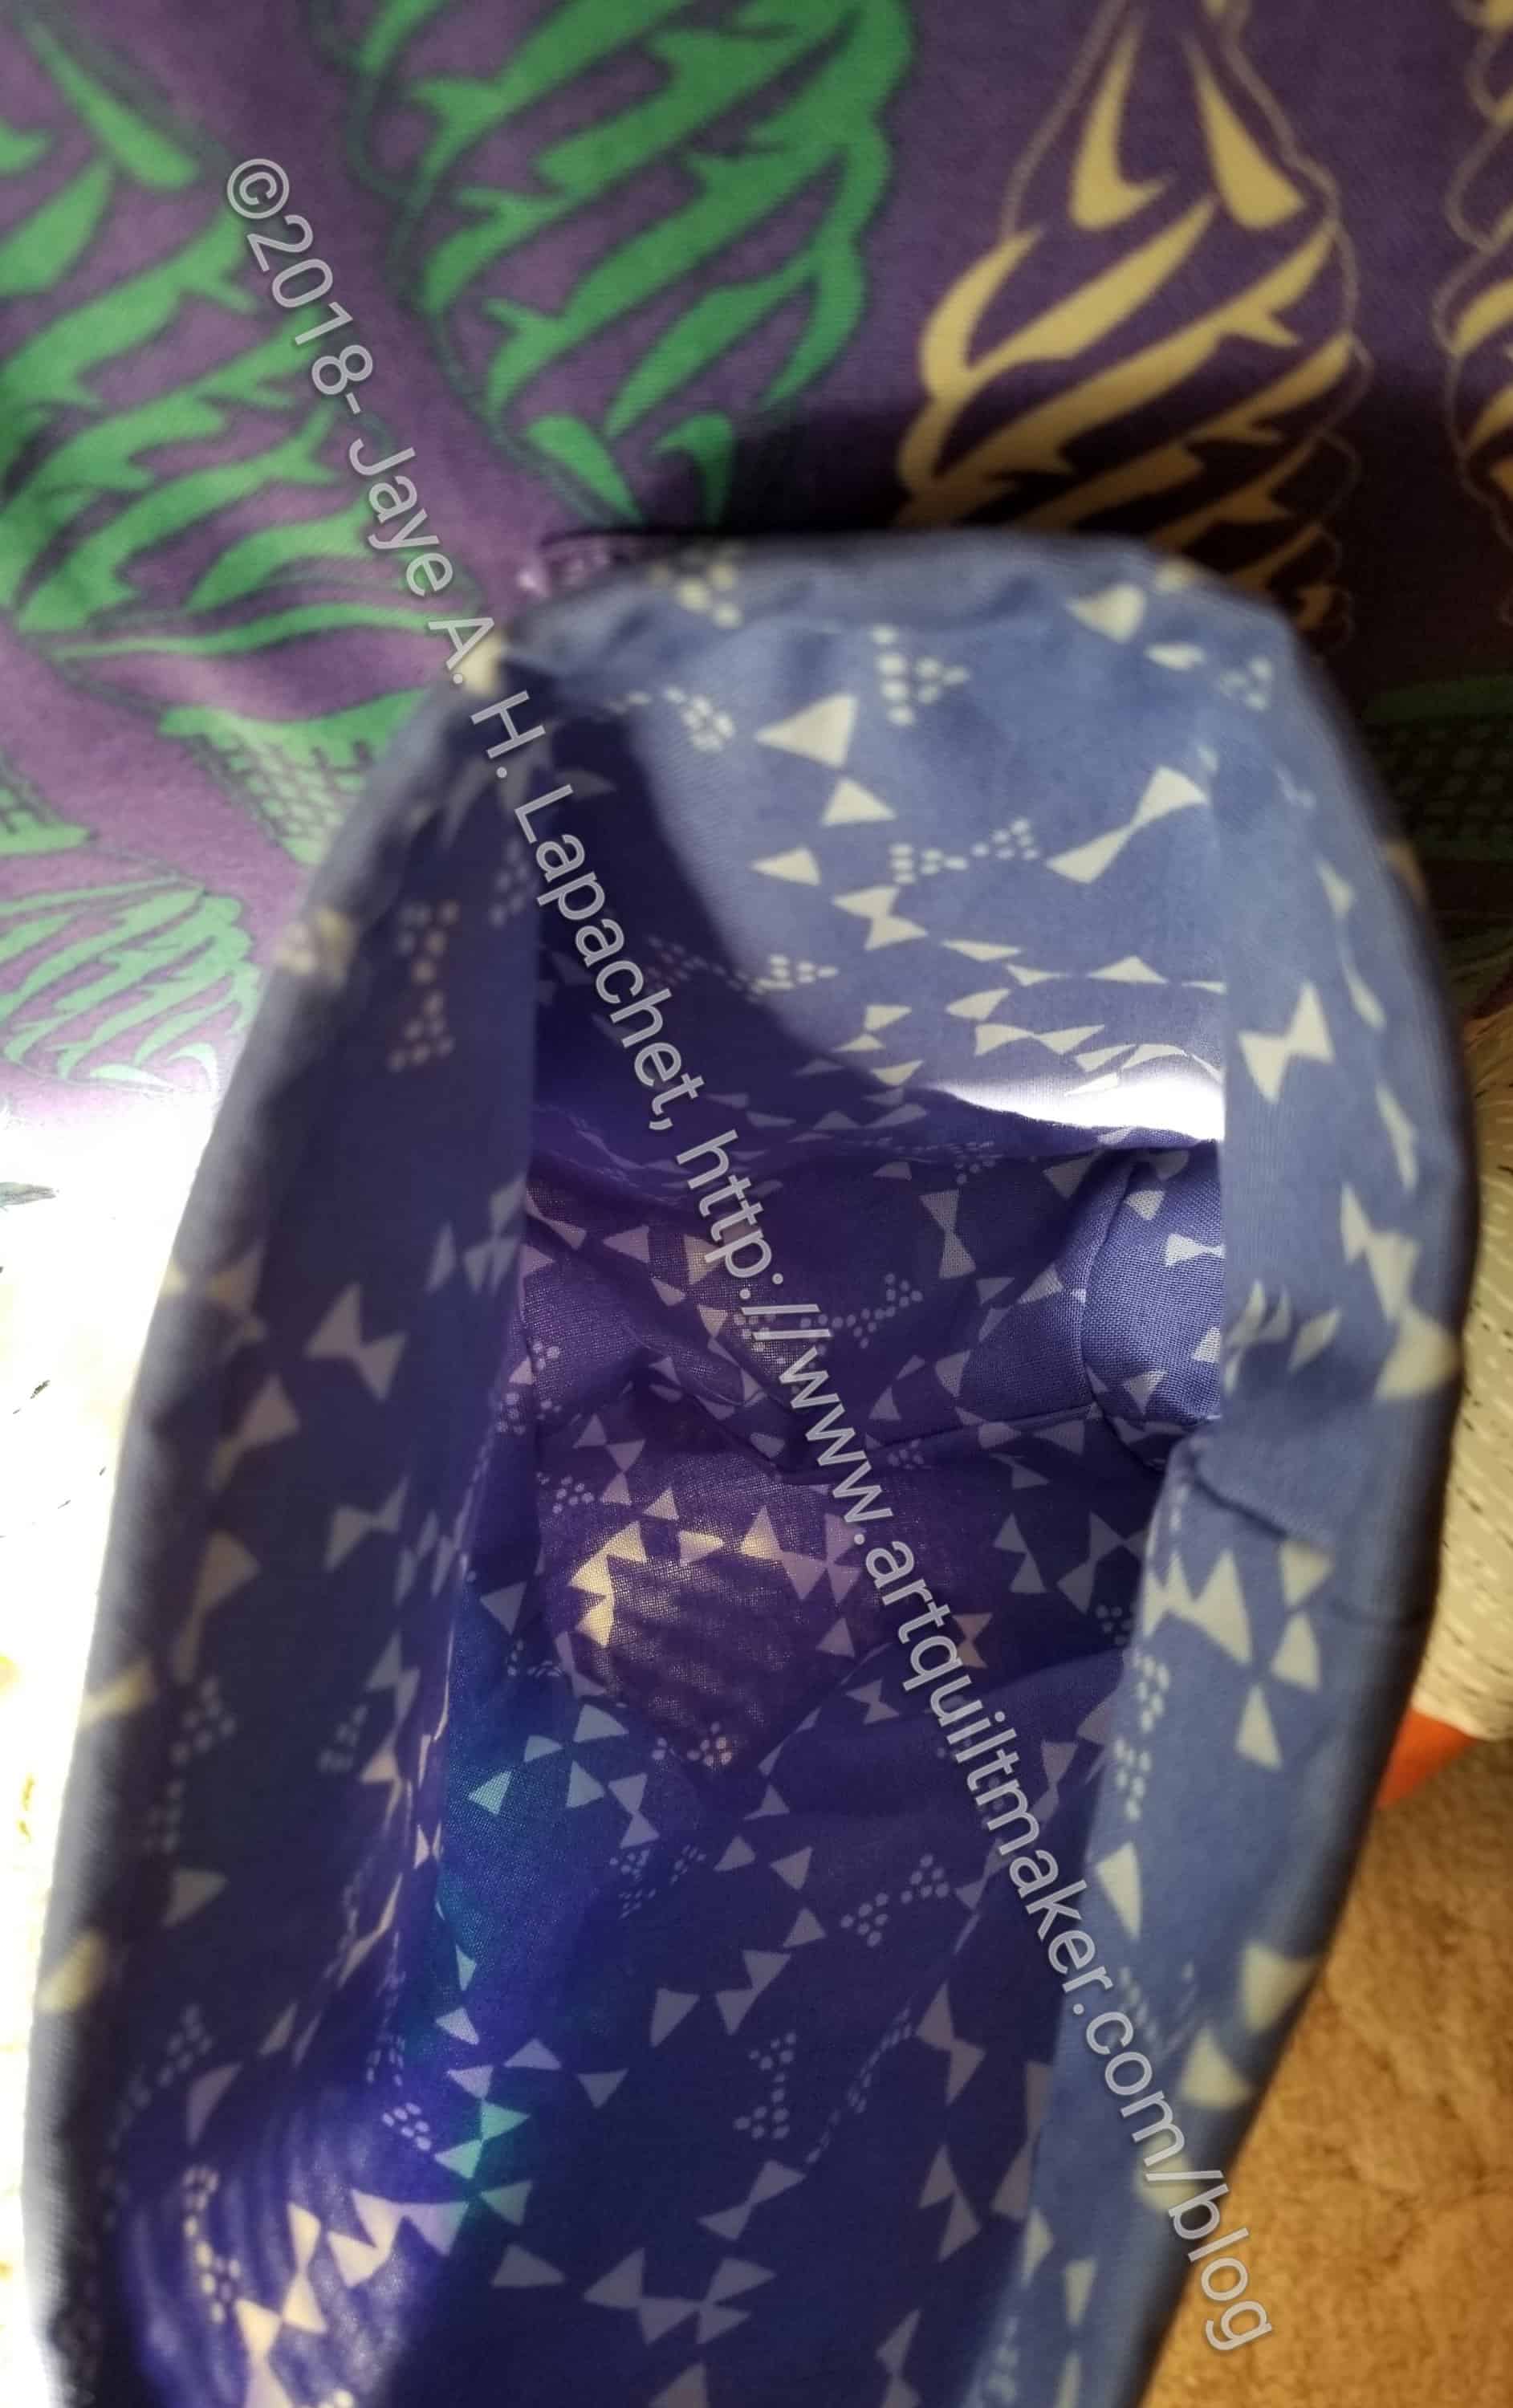
The final project section is called Boxes and Totes. On the section’s title page, Aneela Hooey included another lifestyle photo of all the projects. Hooray! Again, I like it because it gives me a frame of reference. From this section, I especially want to try the Fabric Boxes (pg.96-100). They are great for organizing the little things that clutter up my sewing and cutting tables.

This is a great book. I can imagine making most, if not all, of the projects included. For me, this means good value for dollars spent on the book (even though it is a loan!). Because the topic is bags/pouches, I don’t mind it being a project book. I still do need the directions for making 3D items.

I would highly recommend this book if you want patterns for gift items or if you want to organized your own sewing supplies for on the go sewing. Go buy a copy now!

View all my reviews, including the non-quilt books I read

Pointillist Palette n.4 Revisited

Every month or so I have been going on and one about various projects on which I need to work. It occurred to me that some of the projects are so old that I should haul them out and take a new photo. I sighed hugely at the work involved in that little project, because some of them are well stored. I do think it is a good idea not just for you, but for me as well. I started with something accessible. The last time I looked at these pieces and parts was in 2014.

Pointillist Palette in process

The pieces and blocks for Pointillist Palette quilt n.4 (??) are in my sewing table, so I was able to pull them out (and shake them off a bit) fairly easily.

The reason I think this is a good exercise is that I can see what I have. As you can see I have 5 blocks already made and many squares cut.  I am sure I need at least twice as many blocks, but this is a good reminder of what I have.

Also, looking at the pieces and parts reminds me I need to look at what my original idea was for this quilt. Was it a Night theme or did I already do that.

See the other Pointillist Palette quilts in the Gallery.

HRTs in Process

HRTs in May
HRTs in May

A lot of what I am doing at the moment is prep. Cutting fabric that I can’t sew together now, but will do so later. Pressing fabric that will be cut whose small pieces will eventually be sewn back into a large piece of something. This is the sad nature of Hunting & Gathering.

As I mentioned the other day, I have been cutting clues for more Spiky 16 patch blocks. I have quite a number of 16 patches waiting to be spiked, so there is a never ending need. For some reason that I can’t remember right now, I couldn’t actually get fabric under the machine, but I could cut and I cut a lot.

I have to say and I am really liking the Split Recs ruler by Studio 180 Designs. I can cut gazillions of these pieces without thinking twice. Watch the video!

More FOTY 2018

FOTY 2018 - mid-May
FOTY 2018 – mid-May

I have a very small update for FOTY 2018.

One of the things about cutting 2.5″ squares is that I can cut and cut and cut and still only have covered a space approximately 12 inches by 15 inches. When I go to put this quilt together, this will come in handy as I can add all of the dark squares I want and realize my dream (finally).

Most of the pieces cut are from new fabrics that have pressed and were waiting on my ironing board for me to cut them up. I was looking for blues so I could make more HRTs. I found I needed more of the right facing rectangles to make the last Spiky 16 Patch block I need for a donation quilt.

Project Organization

Project boxes
Project boxes

A few weeks ago, I mentioned that I had bought some project boxes. I have few boxes and baskets that I used for various things, mostly gathering fabrics together for various reasons that I often quickly forget. I hadn’t really used project boxes before. After I brought the boxes home, I actually did put projects in them almost immediately.

While this is a teetering stack, it actually works a lot better than the stack of fabrics I was using before. First, all the stuff for a project is all together. I can even put smaller trays of cut pieces inside the larger boxes. Second, they are much easier to move. I pick up one or two, put them aside and then the step stool is usable again. Finally, I don’t have to hunt around for materials. All the materials are in one place (3 might be the same as 1, but they are different in my mind).

After I got the larger boxes organized, I cleaned out the smaller boxes and re-purposed them to organizing projects as well. The small box with the handle has all of my Crafty Gemini Organizer Club supplies in it except for that fusible foam stuff, which doesn’t fit. It would fit in one of the larger bins, but all I had was the smaller one. Needs must.

Two bins have fabrics and such for the Stepping Stones n.2. That is a lot of organizer bin real estate devoted to one project, but scrappy projects will do that to you. I hope to finish that project soon (though I haven’t worked on it recently, so not sure how it will happen.

All in all, I am pretty pleased with this solution. I need to sew more to get through projects, but that is a completely different issue.