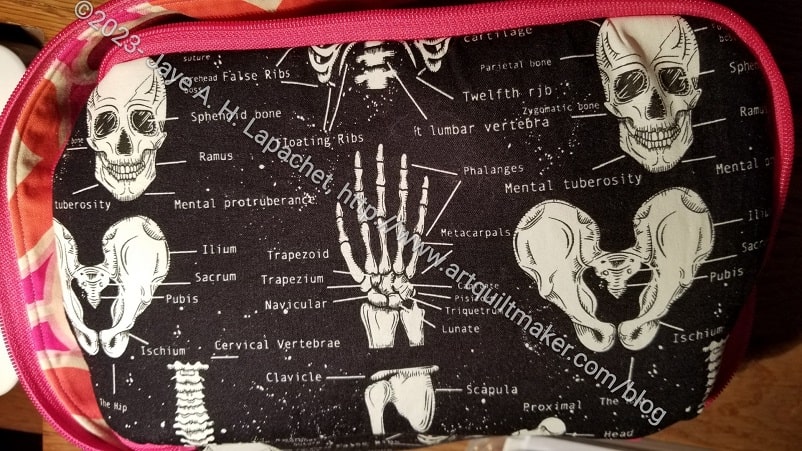
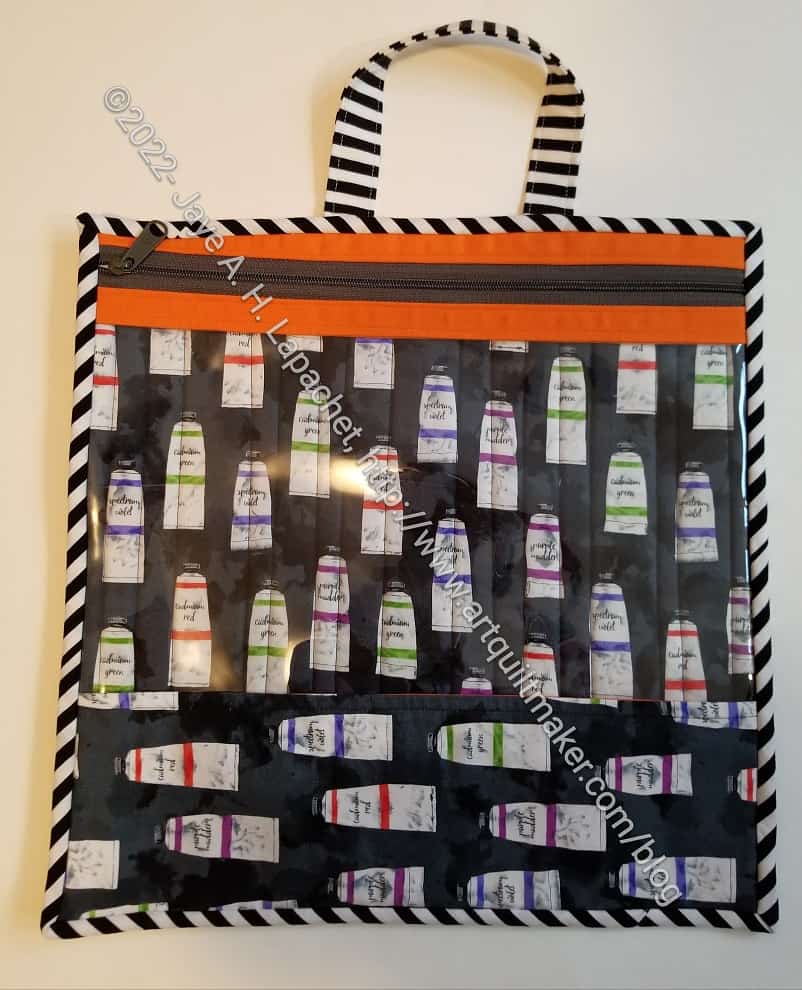
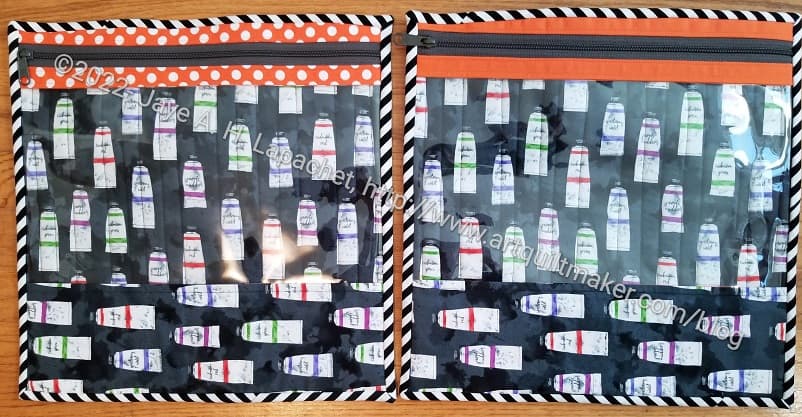
I made another Hackney. It is a gift for a friend. As you can, no doubt, see this one also uses the Timeless Treasures fabric that I used for the Skeleton Hackney.
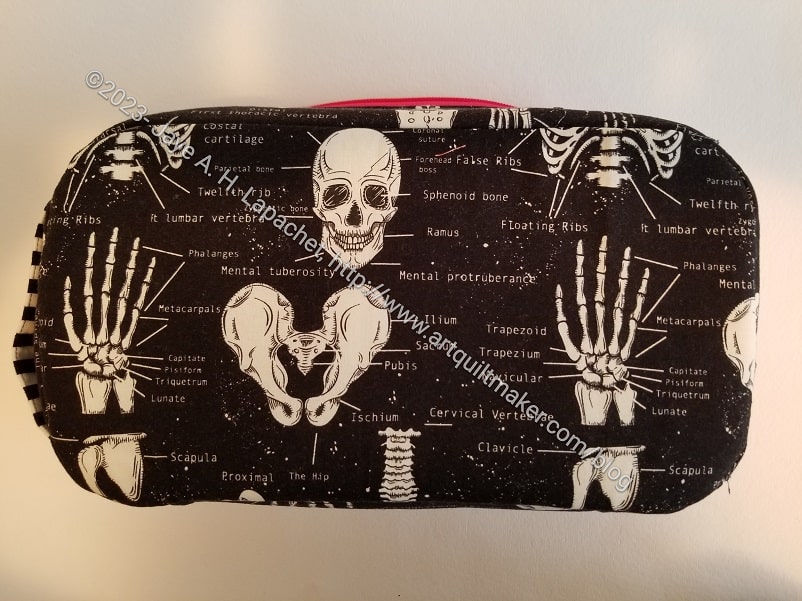
Hand Bone Hackney bottom
I talked about this one in another post. I am really liking the pink zipper, of which you just get a slight glimpse. It is a fun addition to the somber skeleton fabric.
Every time I make one of these, I feel like getting a Switch and seeing if it would really fit in here. Stupid waste of money since I probably wouldn’t play with a Switch. Still, I am curious.
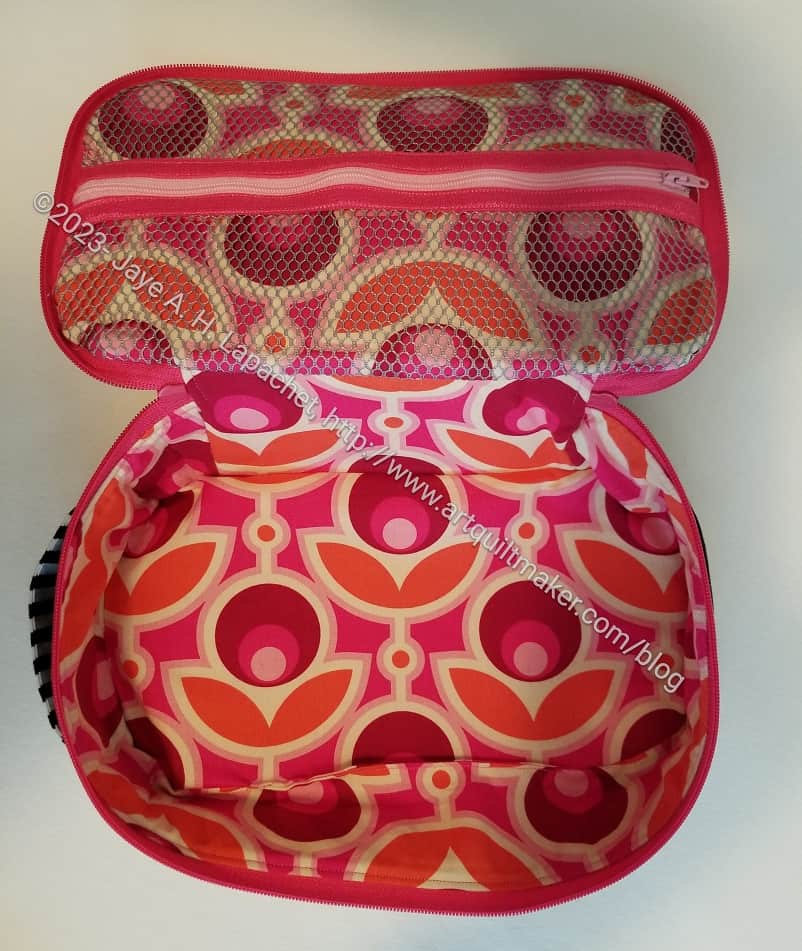
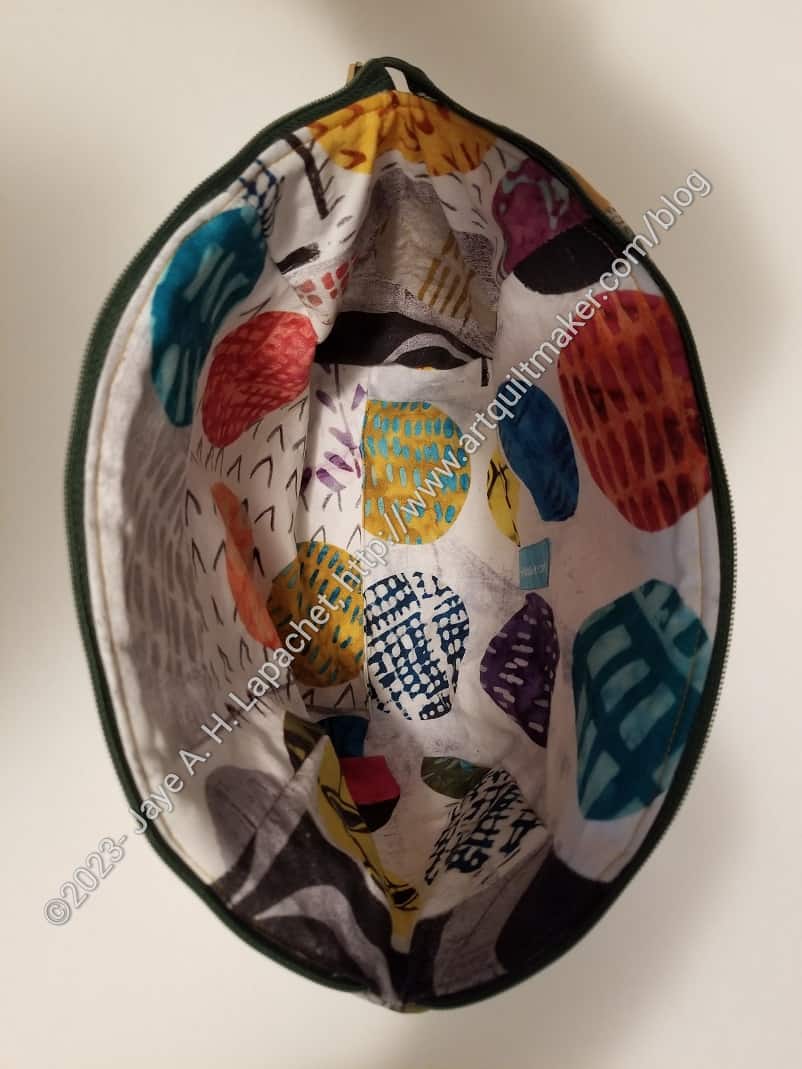
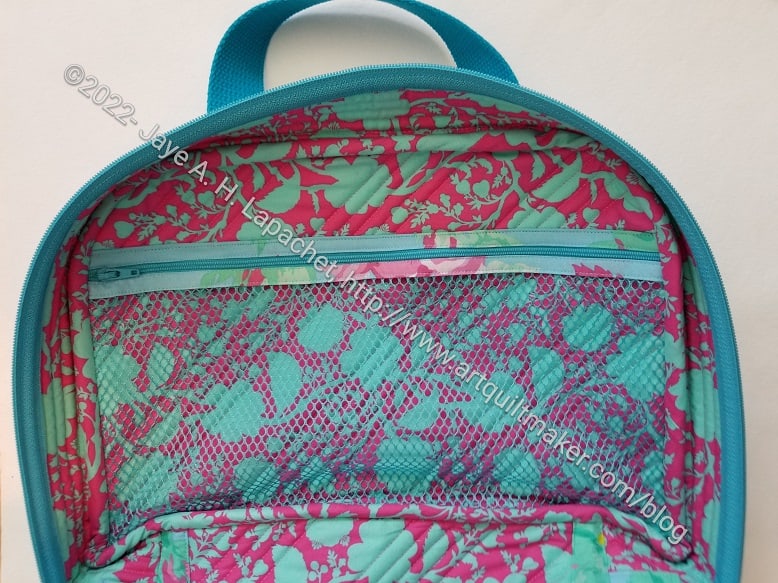
Hand Bone Hackney -interior
I used an older Joel Dewberry fabric for the inside and it is cheerful. I am making another one as a gift and I am going to change the mesh pocket for something different. Maybe a vinyl pocket?
I think the mesh pocket looks ok and I did a good job. There is something about having the zipper where it is that bugs me.
Hand Bone Hackney – handle
I added a handle, because I think it makes the bag more useful. I haven’t quite figured out the placement and I think this one is a little too tight. It was a little hard to get my hand around it. I also sewed through the lining as well and that caused some challenges for later steps in the process. Since the handle isn’t part of the pattern and I have to add it before the whole thing is put together, I think I am doing ok. I’ll do better next time.
I had some leftover fabric after making the New Year’s pillowcases for the nephews. Since I’d still like to have napkins for every holiday, I decided to make some New Year’s napkins. I had just enough to make two napkins, which is enough for us, but no guests.
NYE Napkins
I don’t know when I bought this fabric, but it has been awhile. I picked out some fun backing fabrics and whipped these up pretty quickly. We used them right after I made them and I am pleased.
I can’t remember when I finished this pouch, but I did finish it. I remembered to check to see if I showed it to you after I mailed it. Since I haven’t had time to sew lately, I am running out of projects to show you, so I am glad to show you this one.
The zipper, from this angle, looks a little strange, but it works fine. I am not sure why it looks like that, but I will try again harder next time.
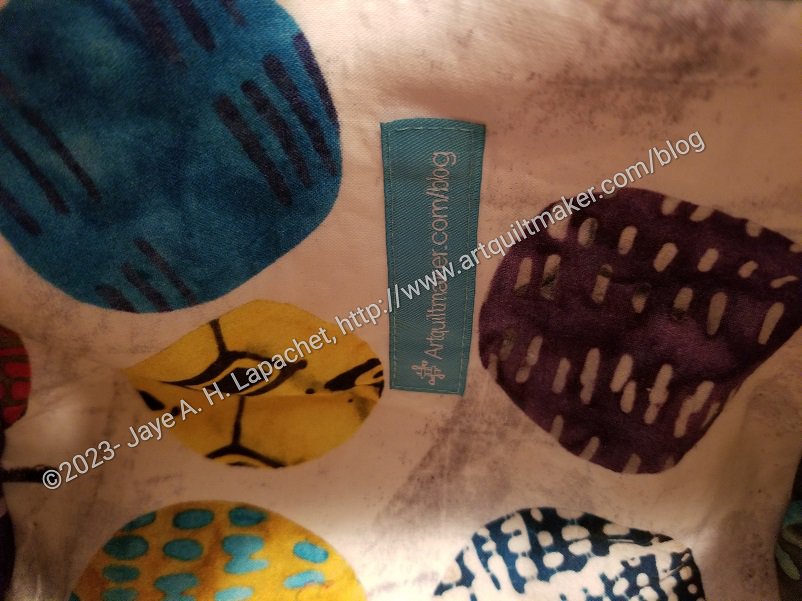
Venetia’s Cotton Candy Pouch -interior
The inside is also a Marcia Derse fabric and is really fun. This is the large size. It is big so you can fit a lot in it. I know Venetia brings a large bag to work, so perhaps she can use it for cords or something like that.
I am still thinking about the Odicoat and how to incorporate that substance into more of my bagmaking. From what I know, this pattern doesn’t lend itself to Odicoat application. I’ll have to try it some time. I’d like to try it after I put a pouch together. I will have to try it on a test pouch in case it gets ruined.
Venetia’s Cotton Candy Pouch -interior label
I used another Wunderlabel for this pouch and am pleased to see it not clash with the fabric.
One of DH’s cousins no longer eats sugar and made a kind of deal about it with me last year. I have a lot of feelings about this, but put them aside and made a bowl cozy for them.
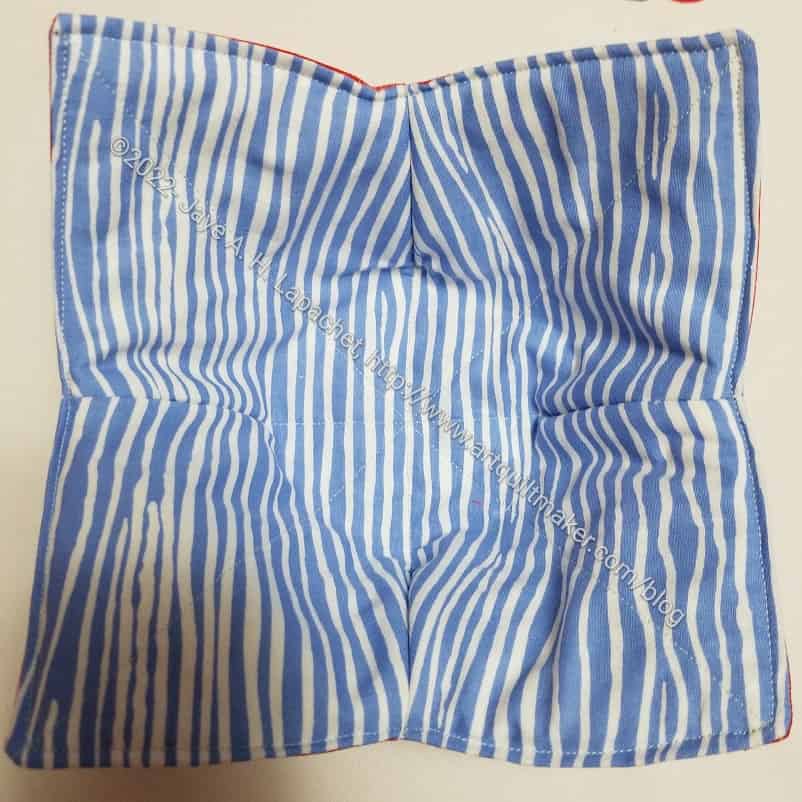
I like the way this one came out. I didn’t think too hard when I chose the stripes, but they came together in the darts really well. DH asked for red and blue and this was a blue that I thought would look good but not too patriotic.
Bowl Cozy bottom for B&D
This might be the first bowl cozy where I didn’t have to rip out any seams!
Yes, another bag as a gift for Julie. I actually finished this in September, but couldn’t show it until now, after it was presented.
I chuckled to myself as I cut out the bag at Super Sew Day right under Julie’s nose! She may have noticed the fabric, but I just didn’t make a big deal out of it.
I didn’t have a good sense of how large these bags would be. I hope this one isn’t too small. It will work for a bag or accessory project for sure, but probably not for a large quilt project. Julie doesn’t knit or crochet, but she does have embroidery projects and this will work for one of those as well.
It is, as I may have mentioned, a fairly easy project. I think the ByAnnie patterns seem overly complicated sometimes. The directions are very complete and I have grown attached to the binding instructions, but in general I think they seem overly complicated.
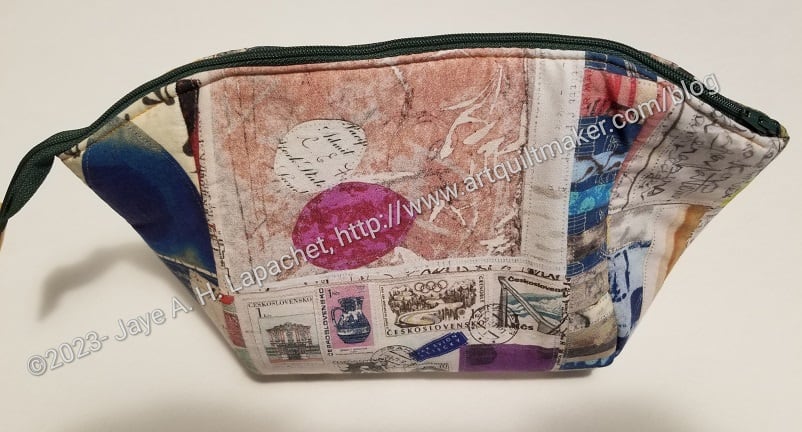
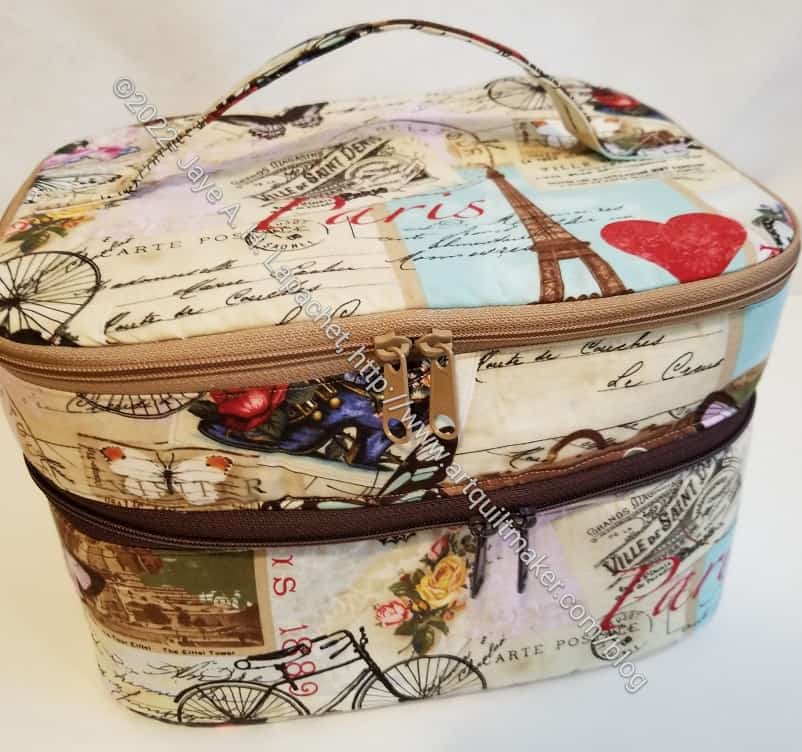
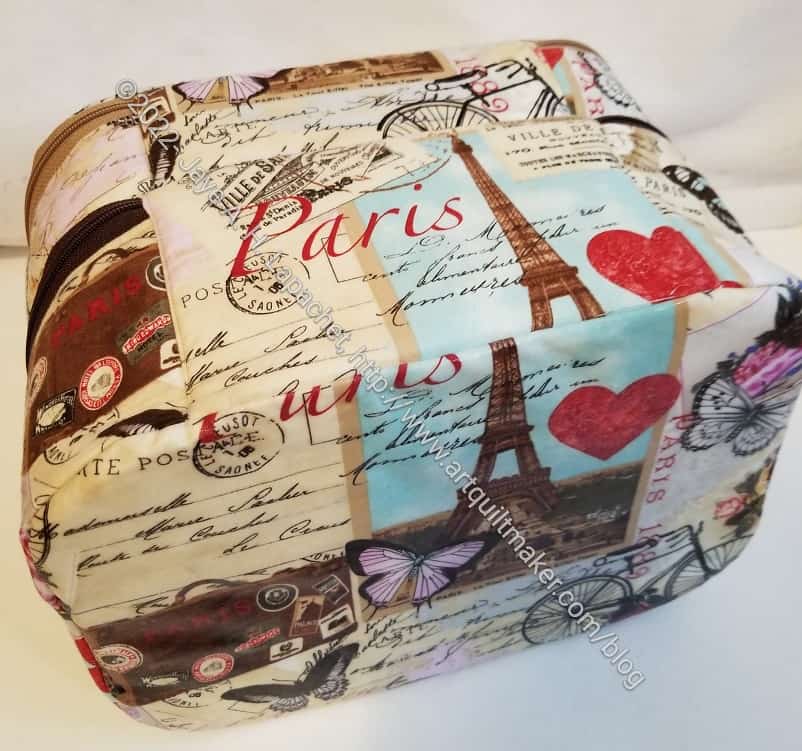
The Percheron Pouch ended up very well. Despite my despair when I was finishing it, it turned out fine.
Although I am not a fan of brown and beige, I think the brown and beige handbag zippers work with the Paris fabric.
Percheron Pouch: bottom has OdiCoat
There is a little bit of turquoise in the fabric to liven up the bag. I fussy cut the top so that the Paris motif shows, which means that most of the turquoise is on the bottom.
I was also able to fussy cut -sort of- the Paris motif on the back panel. The back panel makes up the hinge assembly for this bag.
As you might remember, I put Odicoat on the bottom to help keep the bag clean. You can’t really tell that there is anything on the bottom.
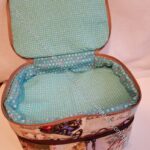
Percheron Pouch – top inside
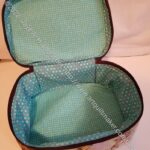
Percheron Pouch – bottom inside
I chose a dusty turquoise for the inside or lining fabric. The lining is a little baggy so I need to work on that on the next one. Without putting Odicoat on the inside I am not sure how I would use one of these. I’ll have to think about it since I may want to make another for myself.
I still plan to make another since I figured out why the thing was so hard to put together – and I want to get it right. This is an interesting bag and I think it makes a great gift.
I made a bunch of these project bags as Christmas gifts. Here is one I made for Mom.
Of course, I used the paint tube fabric. I still have a lot of it, so there are more bags in Mom’s future. The ByAnnie pattern** includes four sizes. This is the large size, but I don’t think it is very large. It is about half again as wide and tall as a sheet of notebook paper.
Mom’s project bag back
I was kind of surprised at the size, actually, though I do have issues with understanding how big something is in real life when I look at an image online or check dimensions. If I had known the size, I would have made the extra large, which is also included in the pattern.
I am not sure I’ll make this pattern again. While it wasn’t difficult, once the quilting was done, I am not sure it is useful. There is no gusset, so how much stuff could actually fit? I don’t know. I haven’t tried one. Maybe for EPP pieces?
Two project bags for Mom
I hope these are useful despite the size. My Mom always finds good uses for the bags I make her.
**Obviously, you should shop at local quilt shops. However, if you are too busy or can’t find what you need at quilt shops, I use affiliate links and may be paid for your purchase of an item when you click on an item’s link in my post. There is no additional cost to you for clicking or purchasing items I recommend. I appreciate your clicks and purchases as it helps support this blog.
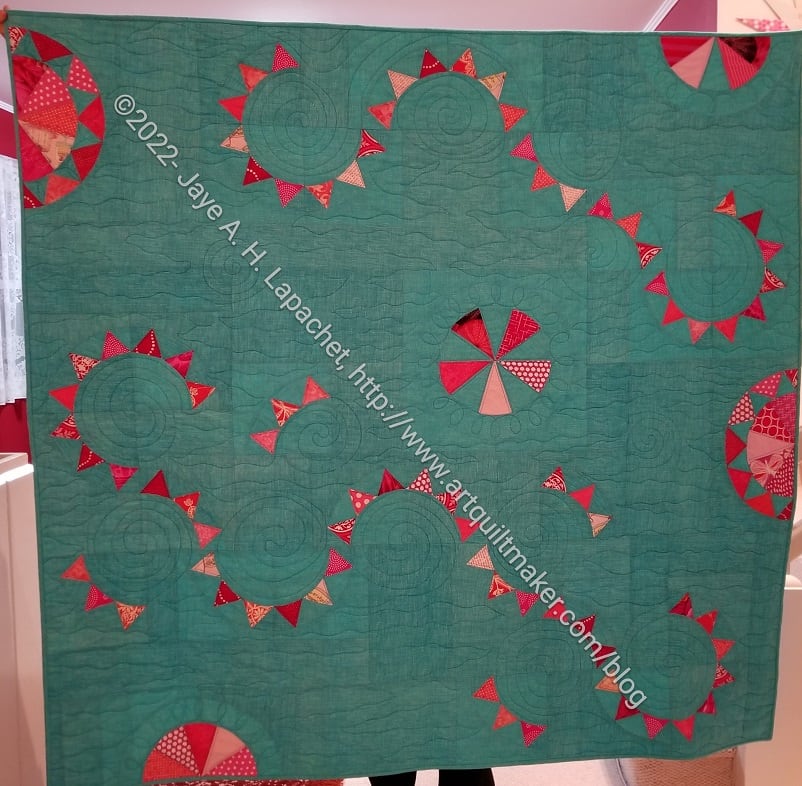
Ends n.13 is finished! I got to see it briefly at the meeting 10 days ago. It is such a hodgepodge of fabrics! Erin quilted this one as well and said that she enjoyed quilting happy looking quilts. This one is certainly cheerful.
We had a discussion of how many quilts we have given away and are in the neighborhood of 130 for the year. That is really great for a small guild like ours.
I am pretty pleased to say that the binding didn’t take very long. I am finished with Pies and Points.
I am not sure I ever made a quilt with so much background before and I keep looking at it and wondering. I am not sure why. I definitely like the quilt. It really has a fluttery type of feeling, which was part of my point.
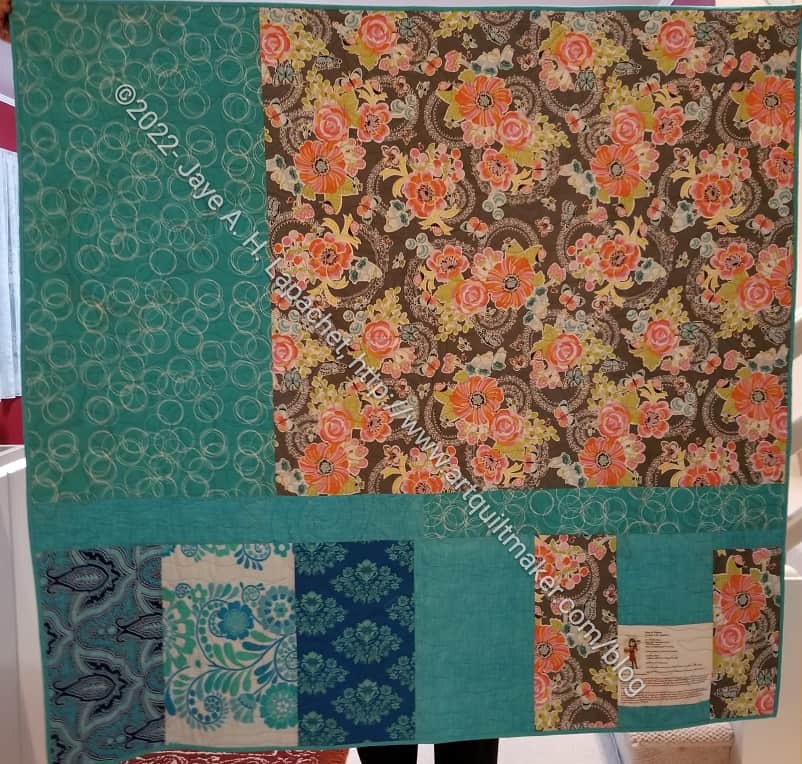
Pies & Points back
I didn’t do anything special for the backing – just sewed a bunch of fabrics from the ‘backs’ bin together.
I really wanted to make Mary something for helping me with the Westchester top.
When she made the ballgown I needed for Political Wifery, I made her a group of gifts, including Tooly McToolston. I don’t think she really liked the colors I chose, because I have never seen them again. I don’t mind since it is the thought that counts and once I give a gift, people can do with it what they want. Mary C. is also a GREAT seamstress, quiltmaker and bagmaker, so she make whatever she wants. However, I wanted to use the gift grouping experience to inform my future fabric choices. I took the opportunity to look around her studio at everything there to see what I could see in terms of colors and patterns. It is a great space!
Small Pattern Weights for Mary
I had some of the t-shirt material left, so I decided to use that. For some reason, pattern weights were on my mind. I knew Mary would use them. I found some patterns for the weights. The pattern I used, basically, was from Tea Rose Home. I had to request access to the free template, but the owner was very quick about responding. I made a small batch of those pattern weights. I found them small and not very heavy.
She uses rice for the filling, but I used Beanie Baby pellets**. Rice is a little on the pricey side right now and the Beanie Baby pellets (Poly Pellets) are more hypo-allergenic than something like crushed walnut shells.
I used the full size of the ruler rather than the size of the template. When finished, the weights were larger, but not a weird size. They were also heavier and, thus, more useful, I thought.
Pattern Weights and all the accoutrements
I did augment the weight with some washers I bought at Home Depot. I measured the side of the larger weights so I knew what would fit once each weight was sewn. I put the washers in and then filled the rest with Beanie Baby pellets**.
Pattern Weights for Mary C.
I was pleased with the set in general. I gave them all to Mary at Sew Day following our t-shirt session. She said she uses pattern weights all the time, so I hope this will be something she can use.
**Obviously, you should shop at local fabric, knitting shops or quilt shops. However, if you can’t, please know that I use affiliate links. I may be paid for your purchase of an item when you click on an item’s link in my post. There is no additional cost to you for clicking or purchasing items I recommend. I do not recommend items I don’t like. I appreciate your clicks and purchases as it helps support this blog.
I finally finished the Westchester Top. Really Mary C. finished it for me. I went to her house with the full intention of having her tell me what to do then doing it. She was able to finish most of it very quickly.
One problem I had is that I couldn’t find the directions. I think I must have made a folder for the project and left it somewhere (or hidden it) in my workroom. I’d like to find it and see if the directions are included in the hard copy pattern or if the directions are in the video course only.
I knew the course was in my account, but on my phone, I could only see the hack parts of the course. Fortunately, Mary knew what to do and just serged the whole top, the put the neck and armbands on. She top stitched some of it and I top stitched the rest at home.
I think the top came out pretty well. I have a pattern that fits. I would make the neckline higher if I made this again.
This is a free pattern from Crafty Gemini. You do have to print and tape together the pattern pieces. I bought the hard copy pattern so I wouldn’t have to do that (laziness and printer ink).
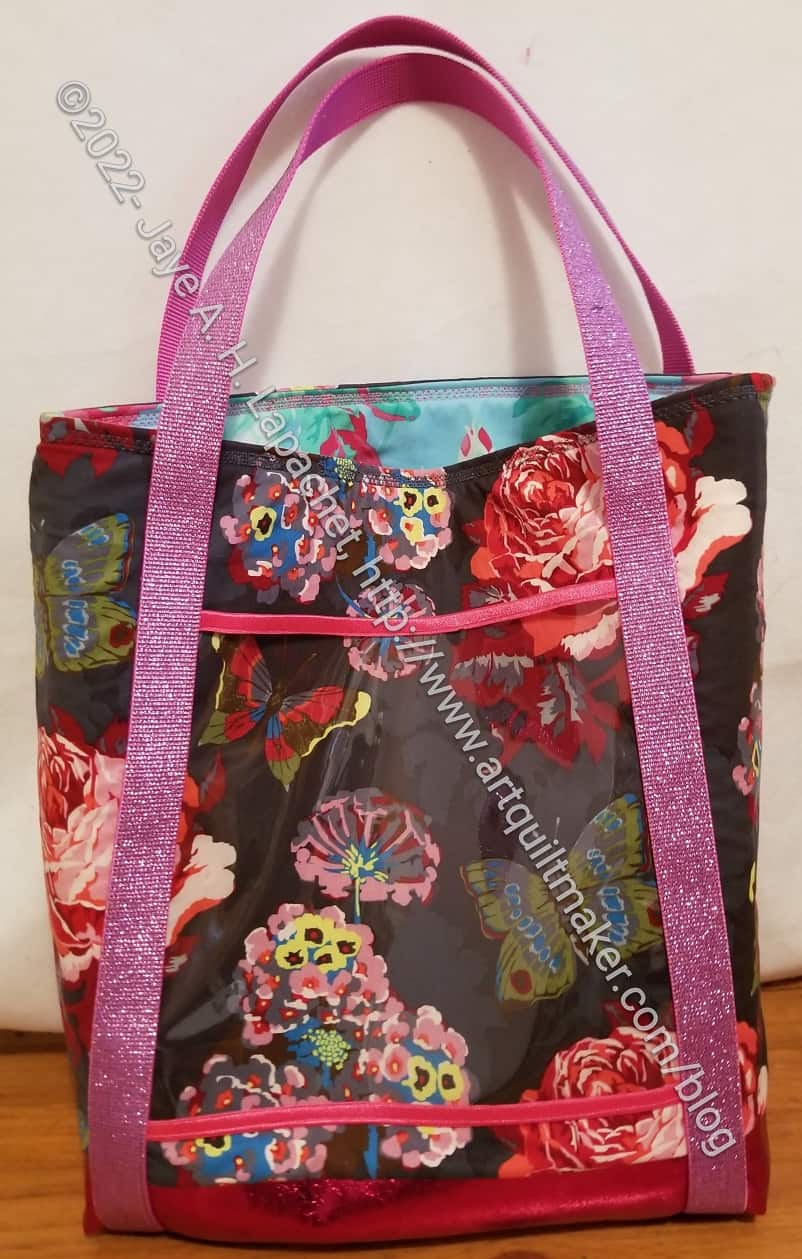
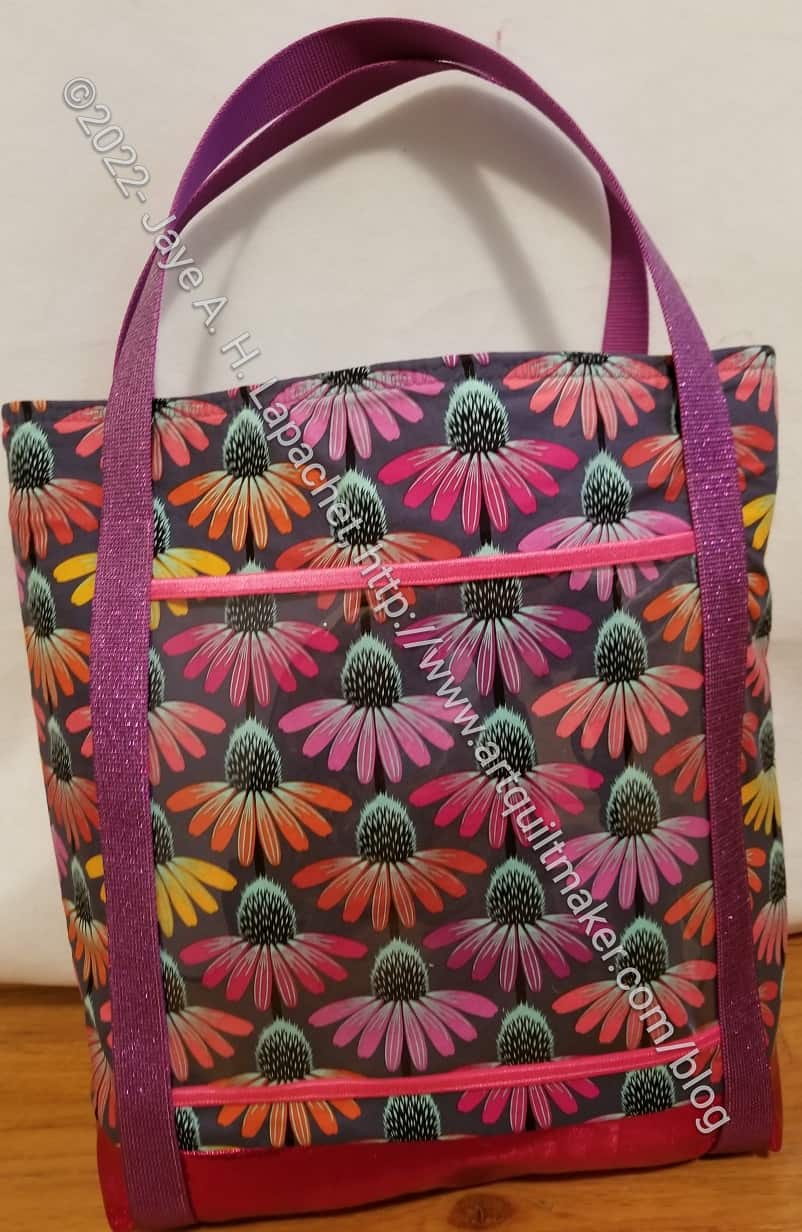
I finished the Essential Totes last week. I am really pleased with how they came out and am plotting when to make more.
Both totes are way more glittery than anything I normally make. I am kind of liking a little more glitter than normal in my life.
I have to give most of the credit to Natalie of SewHungryHippie. The pattern, Essential Tote, is designed by Natalie. It is my first experience with her patterns and I found it to be a really good pattern: clear, easy to follow, no stupid overly complicated steps, well written. I resisted buying it for awhile, but ended up purchasing it in the end. She had some Spanish Crimson soft vinyl and some glitter webbing in her newsletter and I couldn’t resist. Buying the pattern enabled me to make something right away with both unusual (unusual purchase for me) products.
Finished Echinacea Glow Essential Tote
The exterior fabric I used on both is from Anna Maria Horner. One is Echinacea Glow and the other is Clippings. These are sturdy totes, as well, since both have foam lining.
The bag supplies call for exterior fabrics such as canvas. I used regular quilting weight fabric and it worked fine.
I did make some changes to the pattern. I used the Spanish Crimson soft vinyl for the bottom. This meant I had to change some of the cutting directions. I cut the exterior fabric 20 x 15.5 and the spanish Crimson soft vinyl for the bottom at 20 x 5.5. Then sewed the two pieces together to make one exterior piece 20×20, which I, then treated as one piece. 20×20 was the original size I was required to cut for the exterior. You could make the bottom larger by adjusting the cut sizes if you wanted. Make sure your final piece ends up 20 x 20 and everything will be fine.
I only put one vinyl pocket on the outside of each tote. Next time, I’ll put one on each side next time. I was just lazy about my cutting.
I think next time, if I use the same idea of a different bottom, I’ll make the vinyl pocket a little larger and have it sewn into the seam with the bottom fabric.
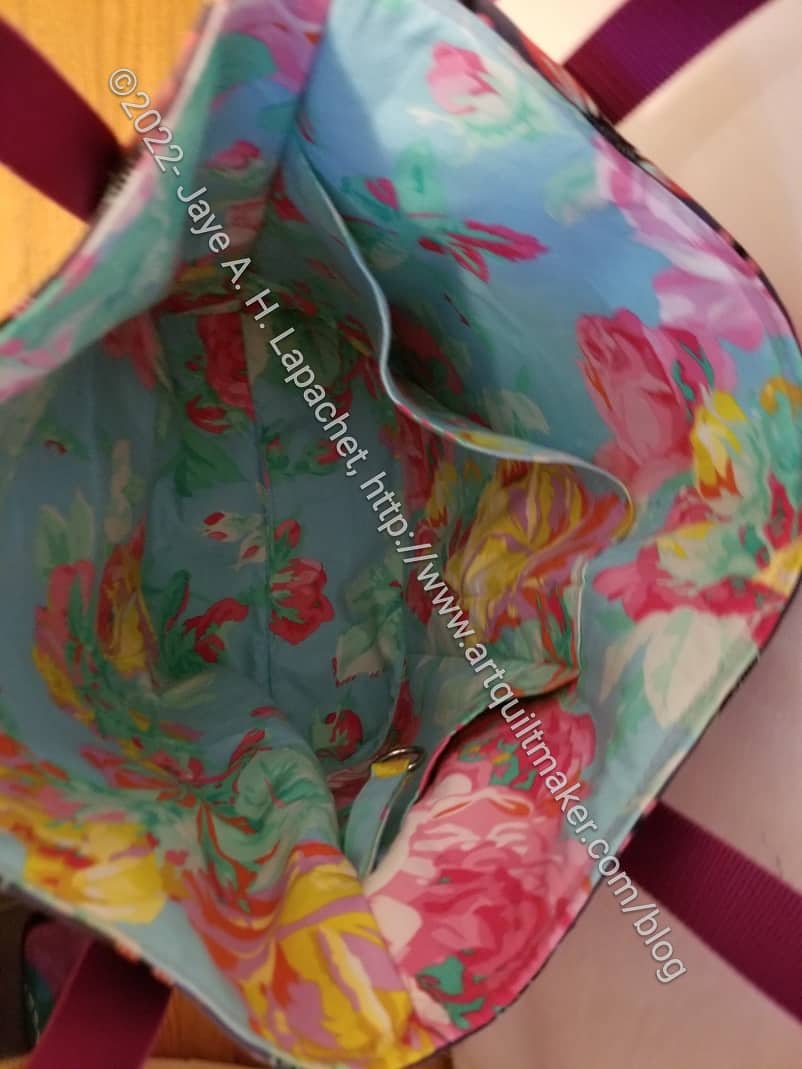
Essential Tote: Echinacea Glow Lining
As usual, I added a leash to the inside of both totes. You can see in the bottom of the photo, left. I never know when I’ll want to lash my keys or a pouch to my tote.
The pocket fit very well with the bottom boxed corners of the tote. I was impressed! I also used the measurements in the pattern, so mostly I was impressed that following directions actually worked. LOL!
Essential Tote: Clippings Lining
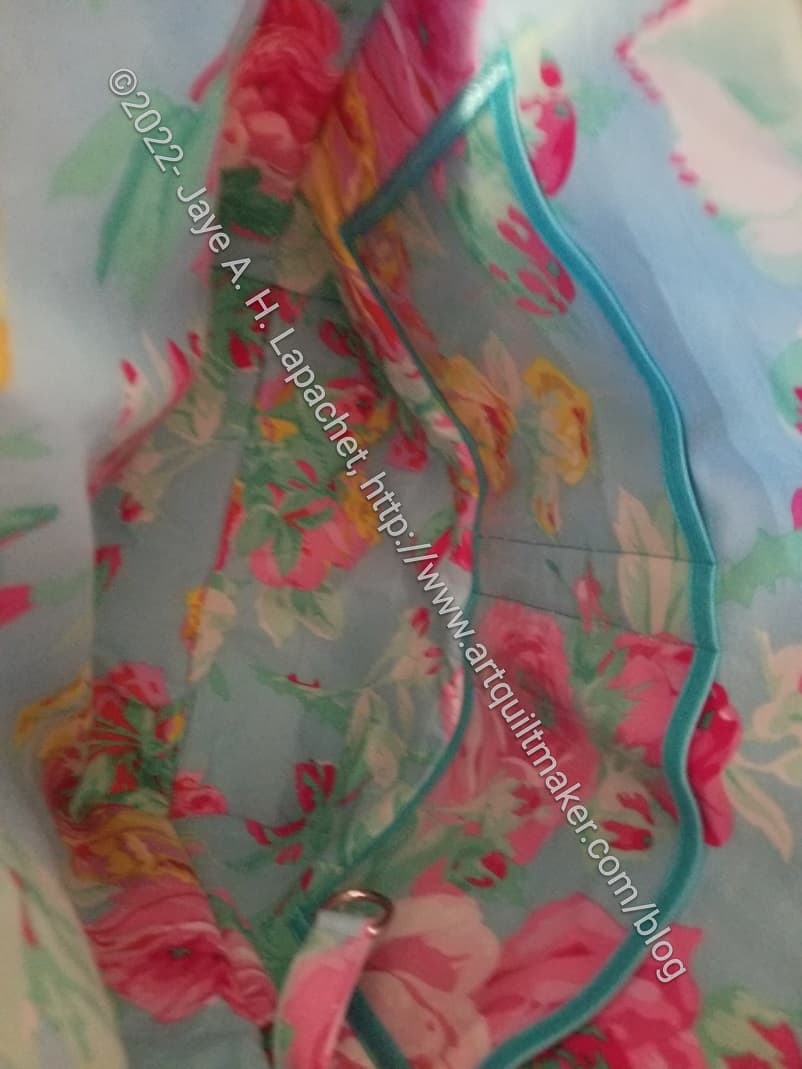
The pattern calls for vinyl interior pockets, but I was running out of vinyl (shocking! I bought a lot back a million years ago and I thought I still had a lot. Apparently not.), so I made a fabric pocket for one bag, which will be fine. I had enough vinyl to make a slightly smaller, vinyl pocket (photo, right) for one of the bags. The vinyl required that I cover all of the edges. It was a hassle, but the results are good.
I used that Philip Jacobs rose lining, because it makes me super happy.
Essential Tote lining bottom
I am pleased with the great sewing job I did. It isn’t perfect, but everything came together really well.
I showed Tim and he liked the bag. I also showed it at Sew and Tell. People liked it.
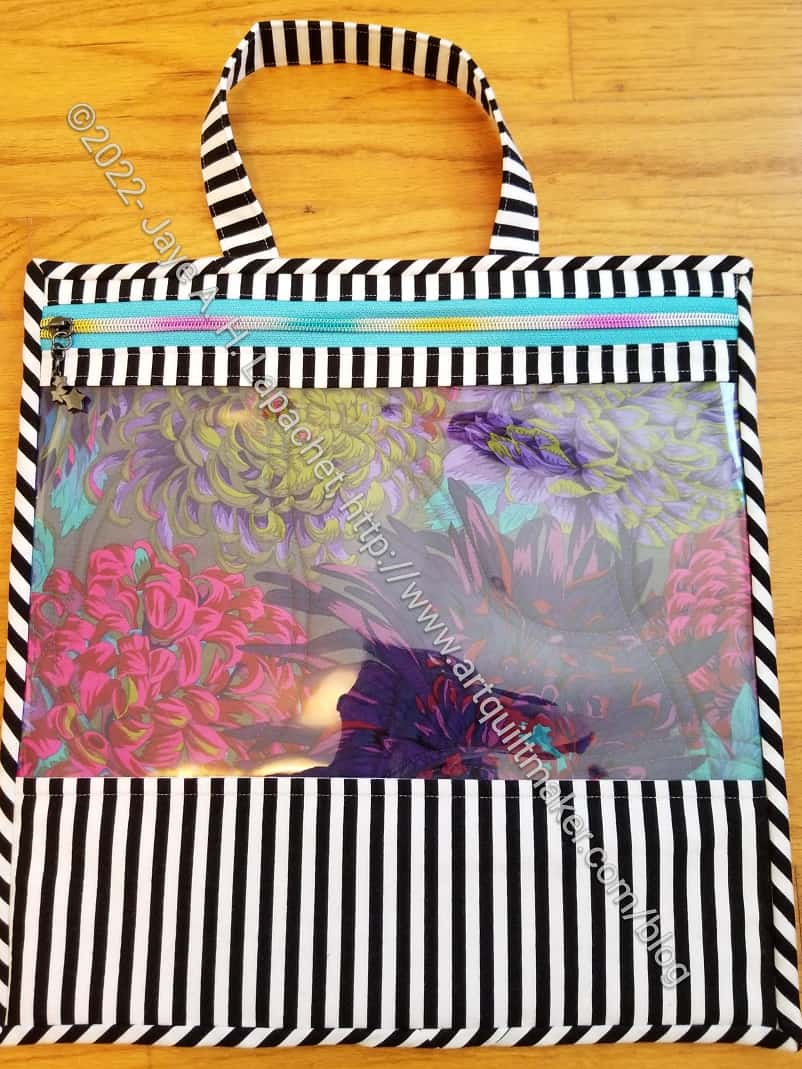
I have been wanting to try this pattern. I was thinking that a project bag might be a good gift for my bag recipients, but I wanted to try it before committing to another ByAnnie pattern. I think, in general, ByAnnie patterns seem overly complicated, but the projects usually turn out well.
I cut out the pieces at Super Sew Day, then finally sewed it together. I used one of the pieces of zipper I got for my birthday. I love it. It is so pretty. I also used more of the Philip Jacobs Chrysanthemum fabric like in the Without a Trace/Take a Stand bag and the APfE v.2.0. I am pleased with the binding, too.
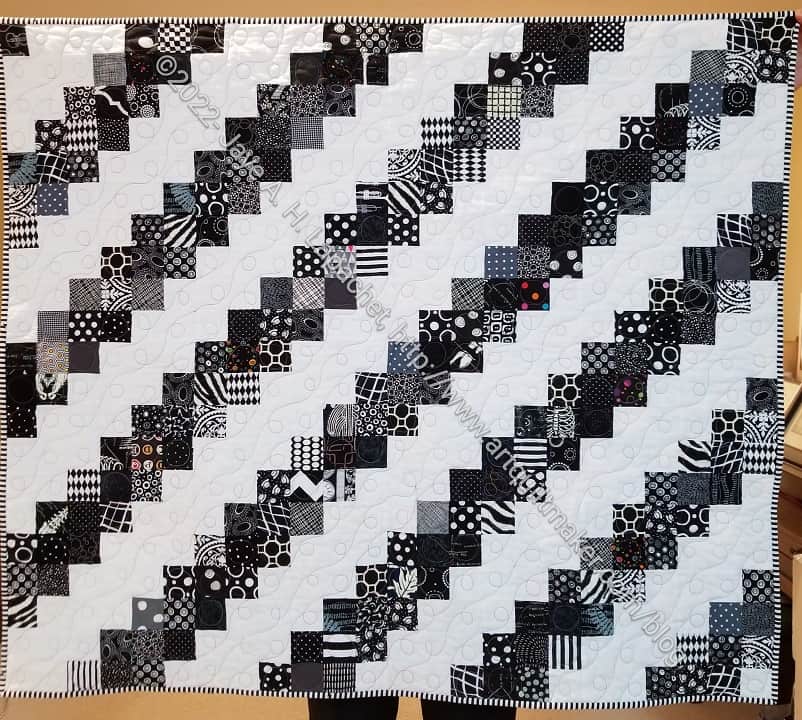
The Diagonal Nine Patch is finished. I am really pleased with how it came out. Of course, Colleen’s quilting makes it, but my choice of the various white on black fabrics looks really good, too. Even though the blacks have little to no contrast, the variety of prints makes each square stand out well.
I am also pleased with the striped binding. Striped binding is the best and I am glad I am able to use some of the stripes I have been saving.
I really like this pattern. I think it has a lot of potential. I got an idea for one of the Niece-phews quilts I have been meaning to make from making this quilt.
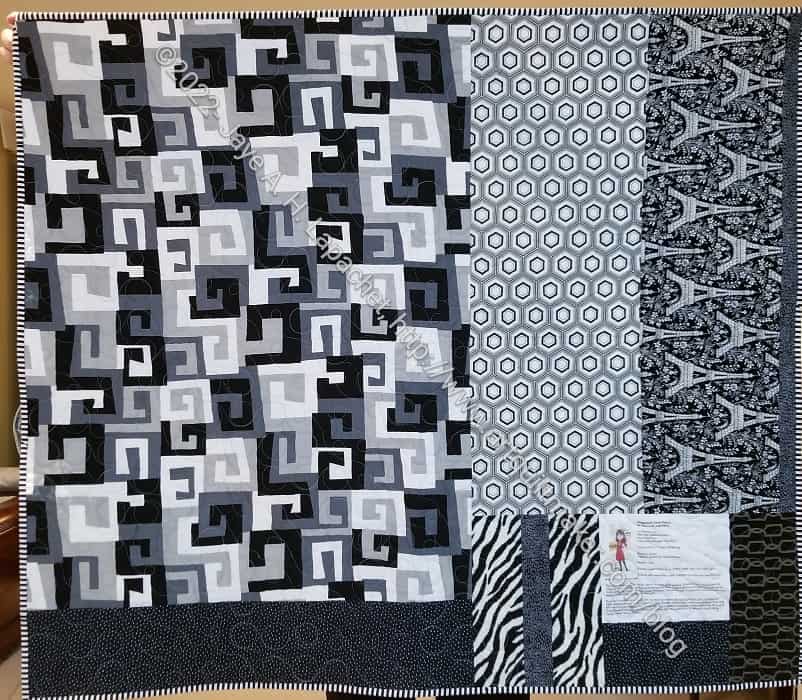
Diagonal Nine Patch back – Finished
I do like the back. That large print on the left is really good. I am also pleased with my use of it. Some prints are great as they are – not cut up.
A number of these prints were leftover from the Cityscape (Black & Red Improv) quilt. I am glad I used them. They have been sitting around for awhile.
I finished the Diagonal Nine Patch just in time. The baby shower is this weekend. I may have just enough time to make a storage bag for the quilt. We’ll see.
I really like the way the zipper came out. It works as expected. I was a little disappointed in the zipper on the my Take a Stand bag. It just seems weird to use.
Sunset Project Bag: front panel
Sunset Project Bag: back panel
I fussy cut the front and back panels to take advantage of the beautiful roses. The yardage I have left now looks a bit like Swiss cheese, but I am more interested in a good looking bag than non-Swiss cheese fabric.
I would have preferred pink or light blue handles, but I don’t think the darker turquoise looks bad. The handles came from some cotton webbing I have had around for a long time. It was time to use it.
Sunset Project Bag: inside full
The inside came out particularly well. The True colors fabric I used looks great. I thought that I would want to save it for something special, but what? I don’t have a lot of it left, but I decided to use something that would make me happy when I opened the bag and now I am really glad I did. I need to remember to use the good fabric.
As you can see the bag opens flat. Vanessa from Crafty Gemini uses this bag for knitting (or maybe crochet?) projects. Opening flat provides good access to the contents. With balls of yarn, however, they might roll away if the bag was opened flat.
Sunset Project Bag: inside mesh pocket detail
The mesh pocket works well and will allow me to see what is inside. The pocket is a good size, I think. I wonder if there are other pockets I should have added, but I think just tossing in a pouch with additional supplies will work. What are pouches for anyway?
Sunset Project Bag: inside binding detail
The other side has no pocket, but you can see that I had to bind the raw edges on the inside to cover them. I machine sewed one side of the binding, then hand sewed the other. It wasn’t as much of a hassle to hand sew this bag’s binding as it was to sew the binding on my Take a Stand bag or my A Place for Everything v.2.0 bag. I still stabbed myself several times. One of the risks.
I am struggled with the finishing. I like to poke out the corners and make the bag nice and finished looking. In this case, I have rolled the seam joins, I have also pressed them and poked them out. Nothing I have tried will get them all the way out. I am not sure why, but maybe the binding since it is on the back of the joins.
I think it came out pretty well, though there are some things I would like to change.