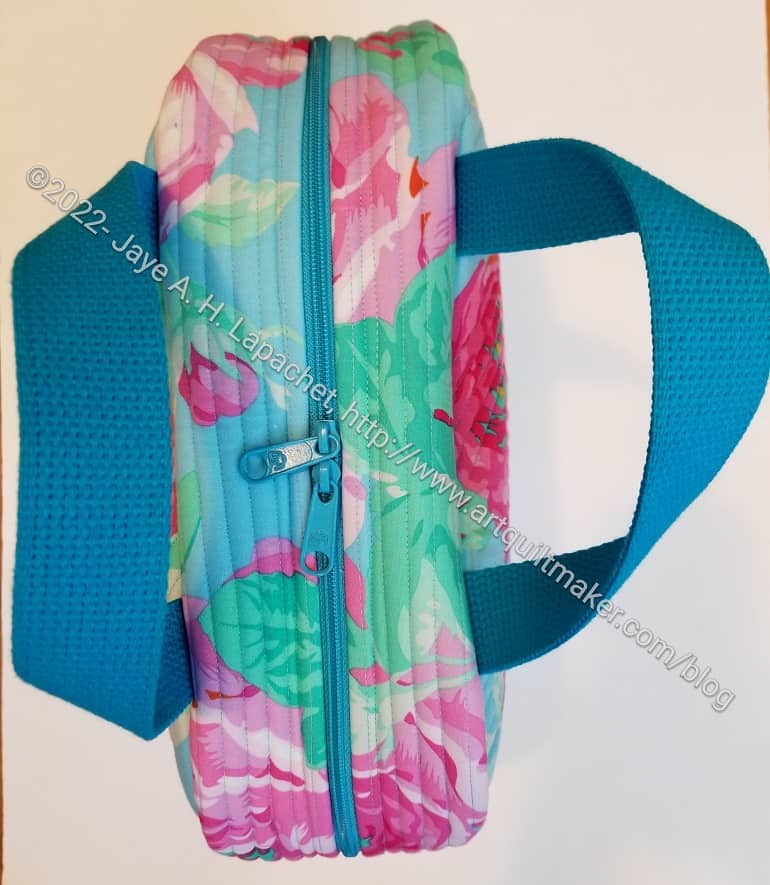
I finished the Sunset Project Bag not long after my last post. I like the shape and how well it stands up.
The fabric is one I unearthed when I was looking through my fabric for the correct colors for pieces for Orange You Glad. I thought I had used up all of this old Philip Jacobs fabric. Even though it doesn’t match my Take a Stand bag or my A Place for Everything v.2.0 bag, I like the way it came out. The fabric seems cheeful and light to me.
I really like the way the zipper came out. It works as expected. I was a little disappointed in the zipper on the my Take a Stand bag. It just seems weird to use.

I fussy cut the front and back panels to take advantage of the beautiful roses. The yardage I have left now looks a bit like Swiss cheese, but I am more interested in a good looking bag than non-Swiss cheese fabric.
I would have preferred pink or light blue handles, but I don’t think the darker turquoise looks bad. The handles came from some cotton webbing I have had around for a long time. It was time to use it.

The inside came out particularly well. The True colors fabric I used looks great. I thought that I would want to save it for something special, but what? I don’t have a lot of it left, but I decided to use something that would make me happy when I opened the bag and now I am really glad I did. I need to remember to use the good fabric.
As you can see the bag opens flat. Vanessa from Crafty Gemini uses this bag for knitting (or maybe crochet?) projects. Opening flat provides good access to the contents. With balls of yarn, however, they might roll away if the bag was opened flat.
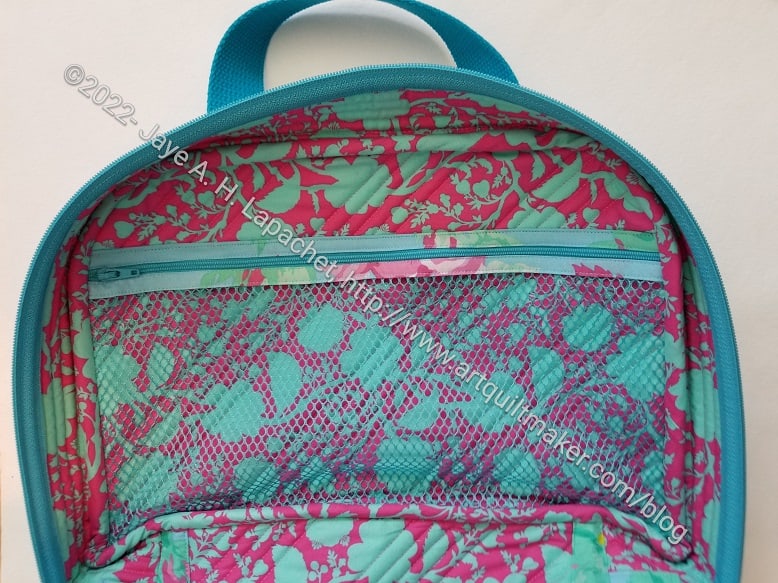
The mesh pocket works well and will allow me to see what is inside. The pocket is a good size, I think. I wonder if there are other pockets I should have added, but I think just tossing in a pouch with additional supplies will work. What are pouches for anyway?

The other side has no pocket, but you can see that I had to bind the raw edges on the inside to cover them. I machine sewed one side of the binding, then hand sewed the other. It wasn’t as much of a hassle to hand sew this bag’s binding as it was to sew the binding on my Take a Stand bag or my A Place for Everything v.2.0 bag. I still stabbed myself several times. One of the risks.
I am struggled with the finishing. I like to poke out the corners and make the bag nice and finished looking. In this case, I have rolled the seam joins, I have also pressed them and poked them out. Nothing I have tried will get them all the way out. I am not sure why, but maybe the binding since it is on the back of the joins.
I think it came out pretty well, though there are some things I would like to change.