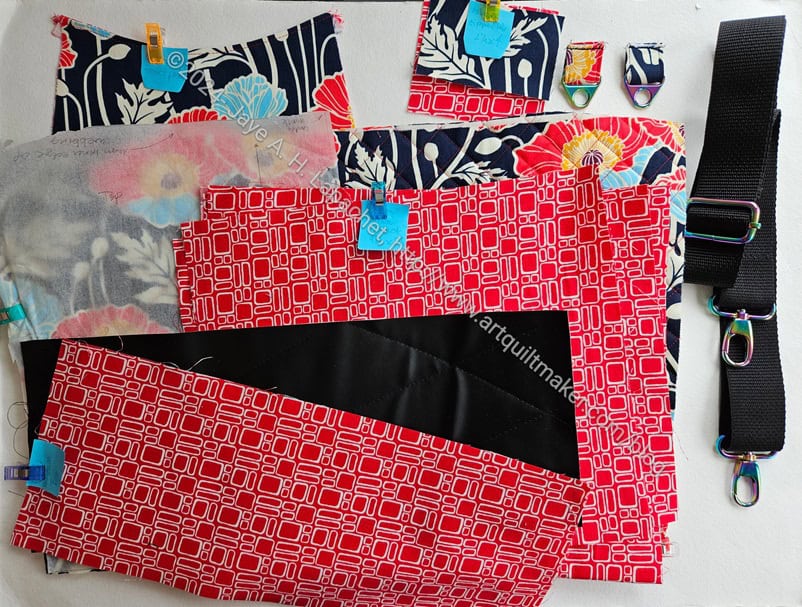
I spent the Sew Days over the weekend working on the Oxbow Tote, which is the sort of group project instigated by Sue S. This project is not going well for me. I have to ask if all of my bag projects start out this way and then I get over the drama or if this is particularly annoying this time?
First, I didn’t have enough fabric in the correct orientation to make the large size. I needed more width to make two main exterior panels. That was irritating, but I decided that the regular size would be fine. It wasn’t what I was planning so I had to do a mind shift.
Then, I had to do the worst part of this bag, after cutting, which was quilting. It took me a whole day to quilt the main panels. Fortunately, I was entertained by Tim and Julie and the rest of the quilt gang. I was only in a moderately bad mood when I finished instead of completely miserable and submerging my head in a vat of chocolate.
Once I was done with that I was able to fine cut the pattern pieces. They are not square, so I rough cut the pieces to allow for shrinkage and, then, quilted them. After that step, I felt like I had some success. I put the cross body strap together as well as the side loops that will hold that strap.
I have more to do, but feel I am over the hump for now.
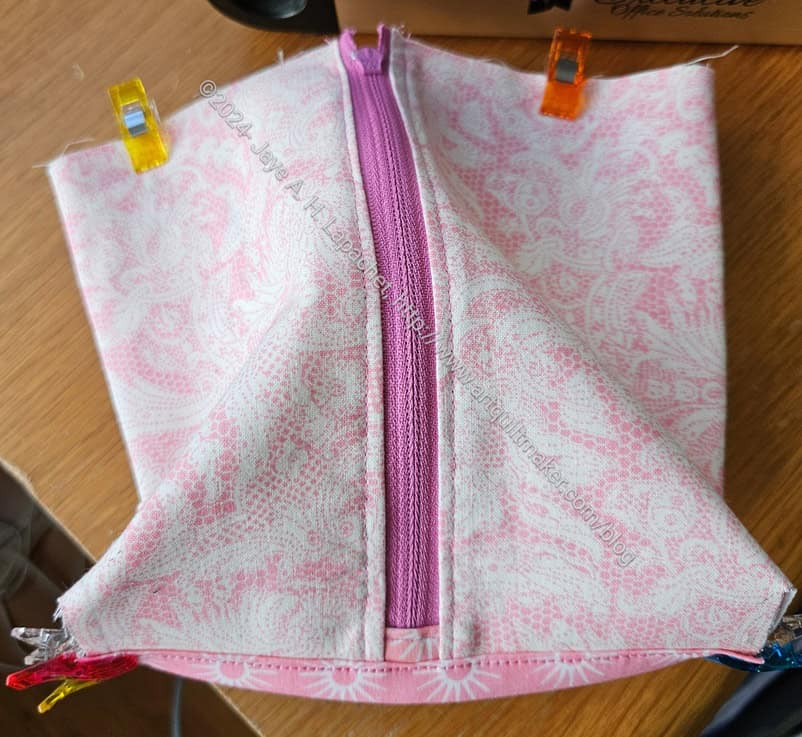
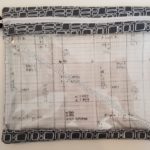
I finally started the Petunia Pouch and it is a fairly easy project so far.
I don’t have a lot of experience with Sotak Handmade patterns. I have made 2-3 projects from her patterns. I watch her reels on IG and am so impressed with how easy the projects look.
Petunia Pouch in process
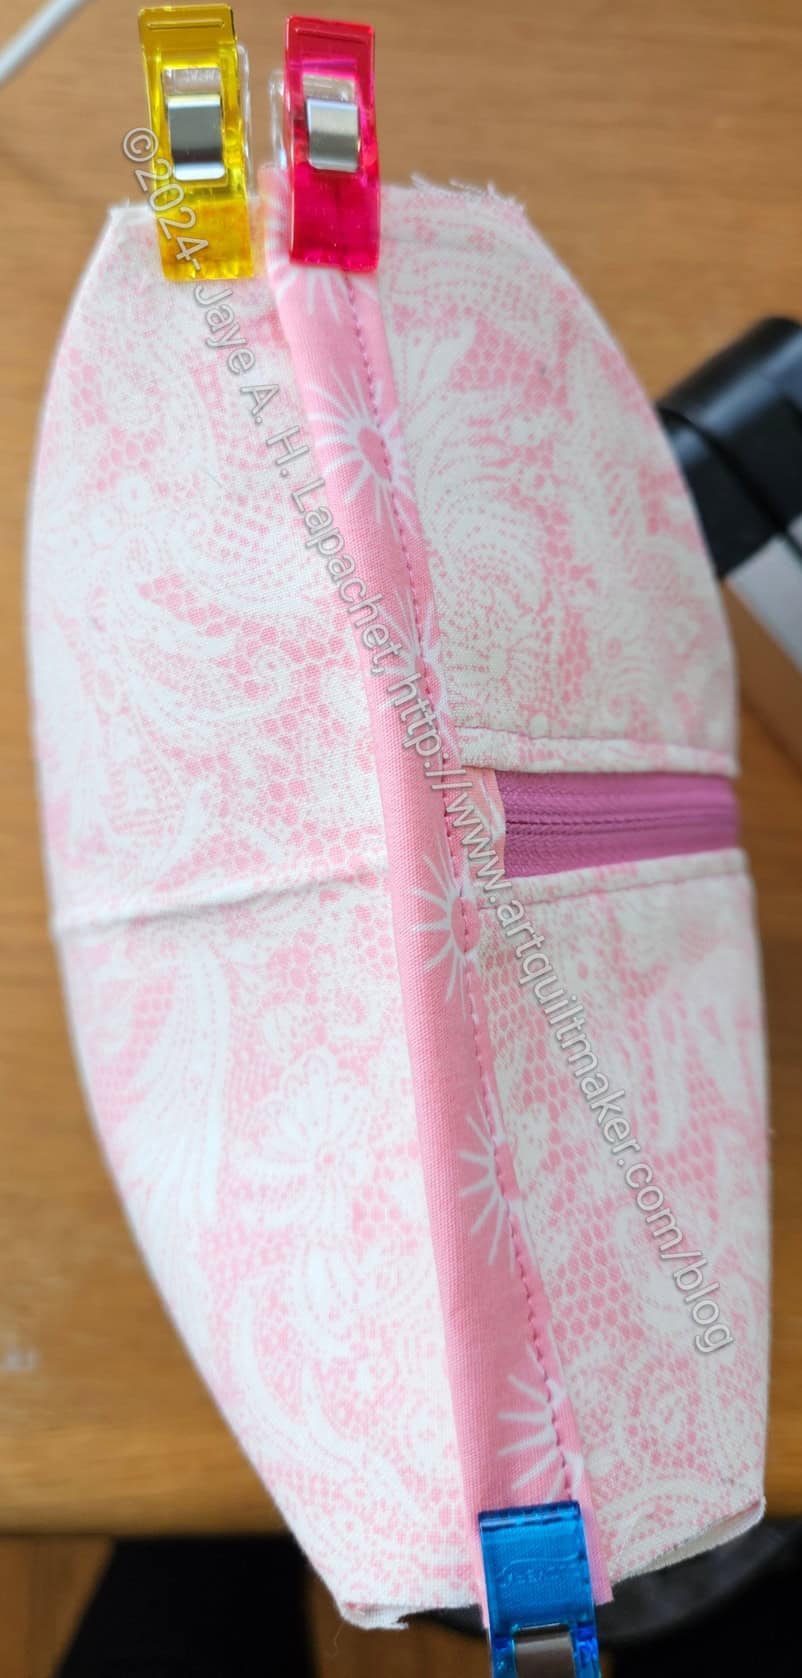
I found this one to be easy, so far as well AND the zipper looks good.
One thing is putting binding on everything. It is a pain, but it makes all the edges look good.
After finishing the Retreat Bag on Friday, I have FINALLY finished all of the projects in the Crafty Gemini Organizer Club.
This club started in the 2018, so it has been awhile in the making. I really did pretty well with the first few projects. The last three were the ones that took me longer than I thought they should. Still, life gets in the way.
I have so much more experience now with bags. I suspect that Vanessa, of Crafty Gemini, does as well and she would make these projects differently if she were designing the club again.
I haven’t used all of the projects. For some reason, I was saving them until all were done. I don’t know what that was about, but I am going to put them into circulation.
I keep looking at the Zip Away Organizer and thinking that the construction is similar to the Day Trip Wallet from Sew Sweetness. The Day Trip Wallet is a project I have been putting off because of the tight curves required in the construction.
These are the projects in gallery form. I don’t have all of the projects anymore.
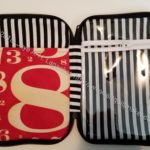
Roadtrip Bag – front
Zip Away Organizer – open
Crafty Gemini Sewing Machine Mat
4 Zip Organizer: closed
All Rolled Up tote with handles: open
Ultimate Project Bag – interior – with Road Trip bag
Crafty Gemini Retreat Bag -full interior (finished)
I am not sure which ones I will make again. I think I will make the Project Bag again, but with some modifications. I am finding project bags to be very useful. Not only do they use up fabric, but they keep all the pieces and parts of smaller projects together.
I won’t make the Road Trip bag again, though I like the size. It is very similar to the I Spy pouches from Sew Sweetness and I like the I Spy pattern better. I like making a window of the vinyl and not having it in a seam that needs to be turned. Of course, I have better vinyl now. I do like the leash on the Road trip bag, but I don’t like it next to the zipper. In fairness, I could have put it on the wrong side.
A few weeks ago I bought a couple of new patterns when Sotak Handmade was having a sale. I am sure you saw the Little Pyramid pouches I made. I have also made a Purse Organizer from one of her patterns.
I cut out the Petunia Pouch over the weekend. This is a different kind of pouch. It has a zipper up the middle of the front. From the pattern, I can’t exactly tell how it all goes together.
I do like Sotak Handmade patterns, so I am hopeful that this is a good pattern.
Yes! After YEARS I finally finished the Retreat Bag from the Crafty Gemini Organizer Club. WooHoo! I can’t tell you how excited I am to cross this one off my list.
Why? I think, mostly, I am glad to have it done. I have not found a bag yet that I am SUPER excited to use and this is no exception. I hope that it will be a good bag to use, but I am not optimistic. Sad but true.
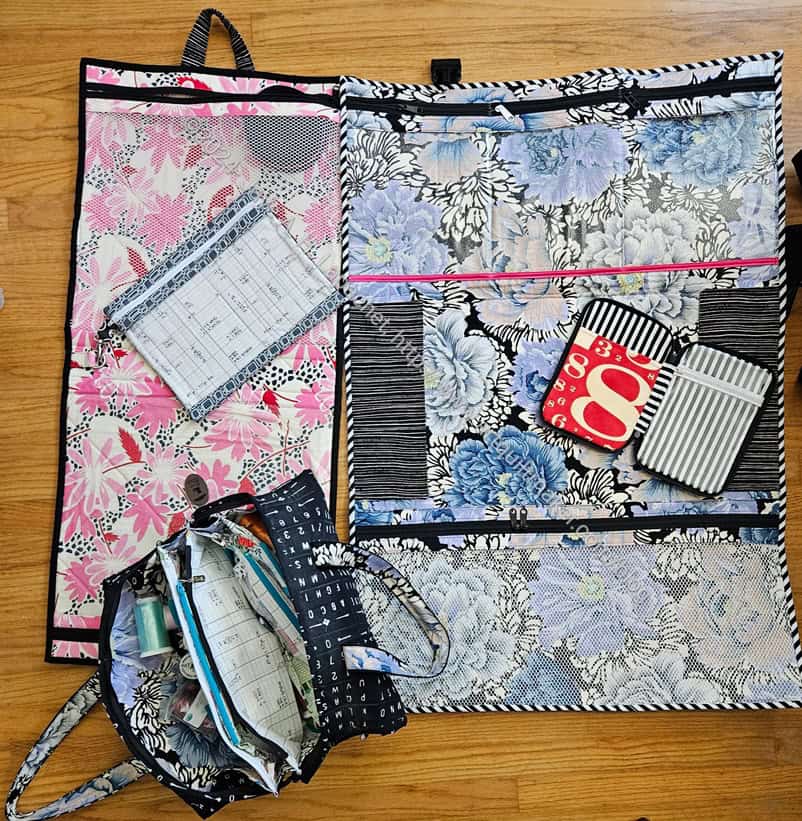
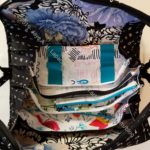
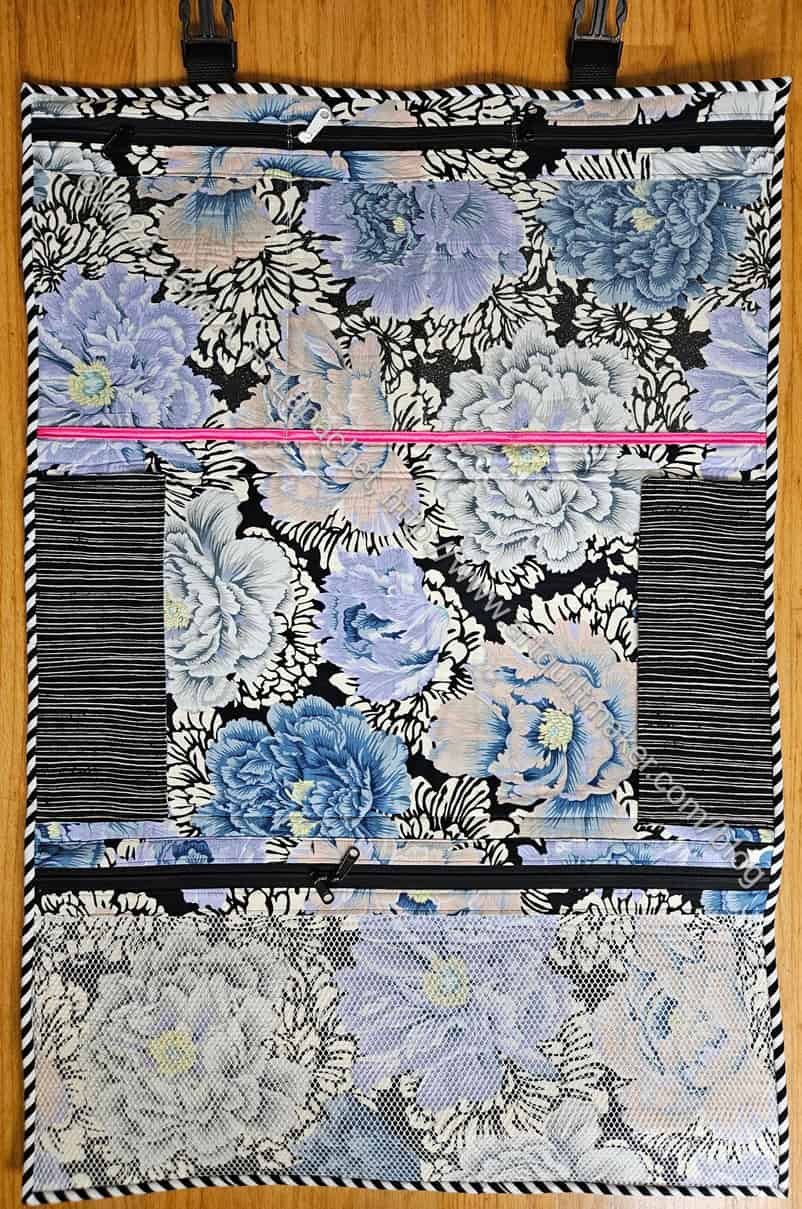
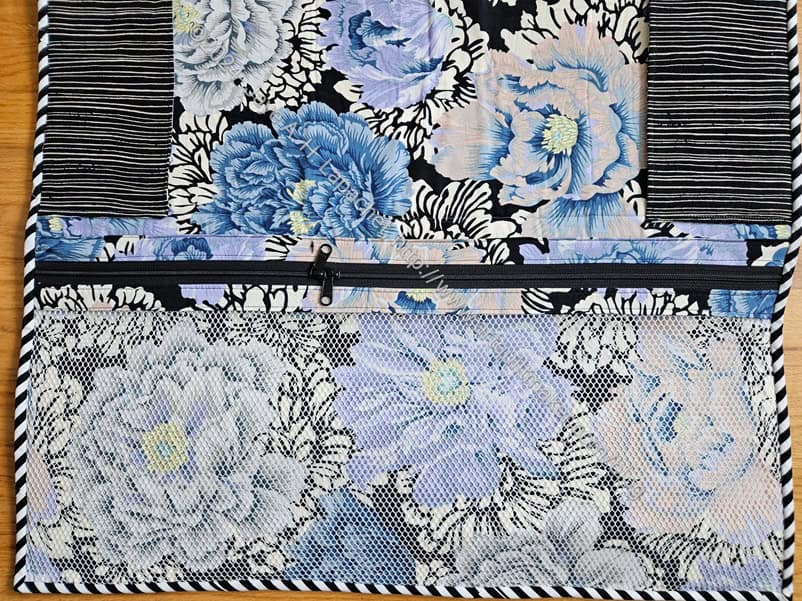
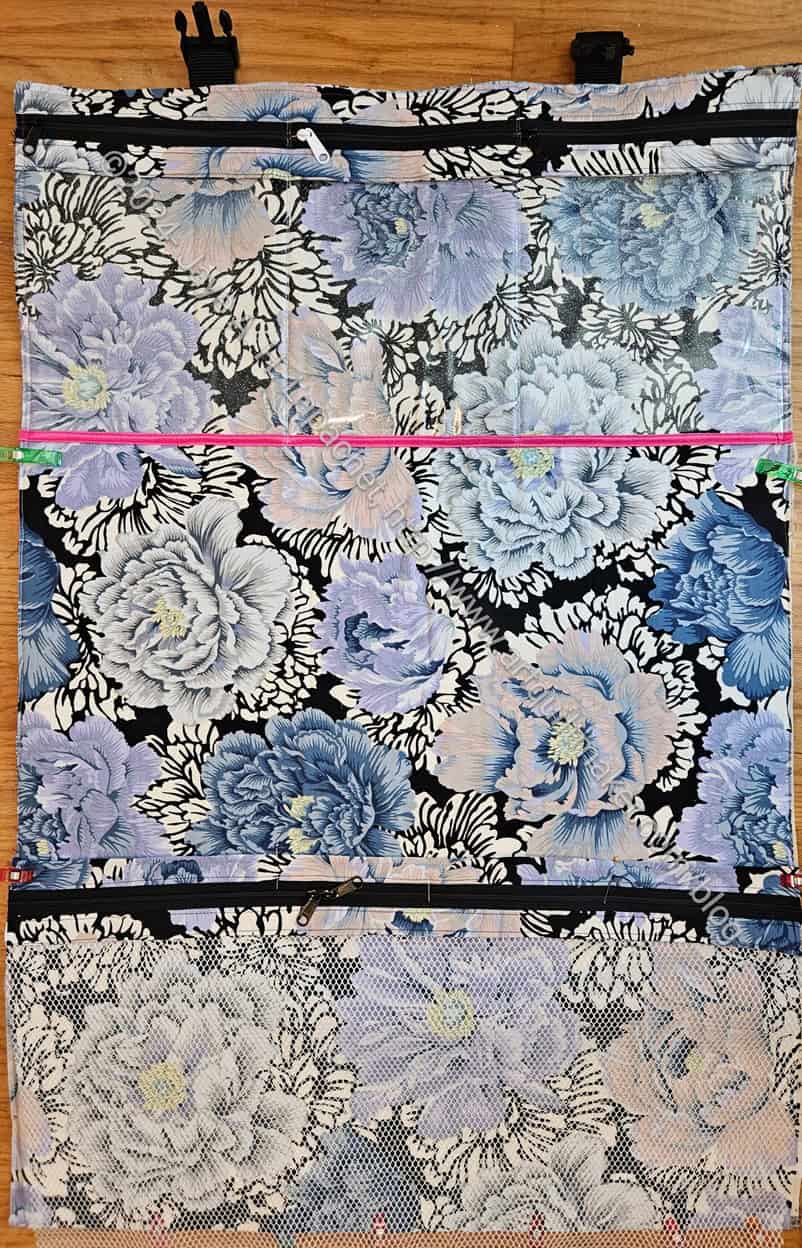
Crafty Gemini Retreat Bag -full interior (finished)
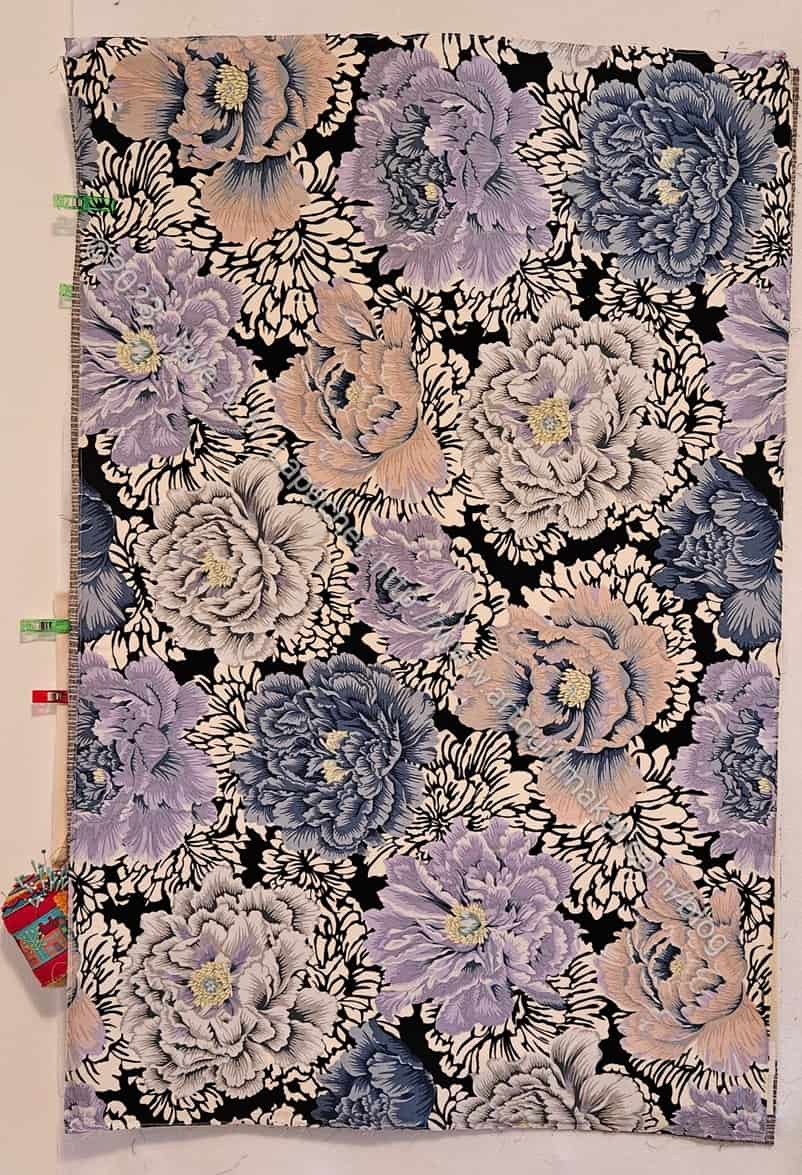
The inside uses that fabulous Brocade Peony fabric from Philip Jacobs. I LOVE* that fabric. I have a lot of it, because I love and have used it quite a bit, but have never found the exact perfect project for it. I’ll keep looking.
As you can see (and I partially showed before), this bag has three interior sections. The top section is divided into three pockets. The middle section is open with pockets on the edges to hold a long ruler and other long things. The bottom is a mesh pocket. The mesh pocket is the one I sewed on upside down and had to rip out.
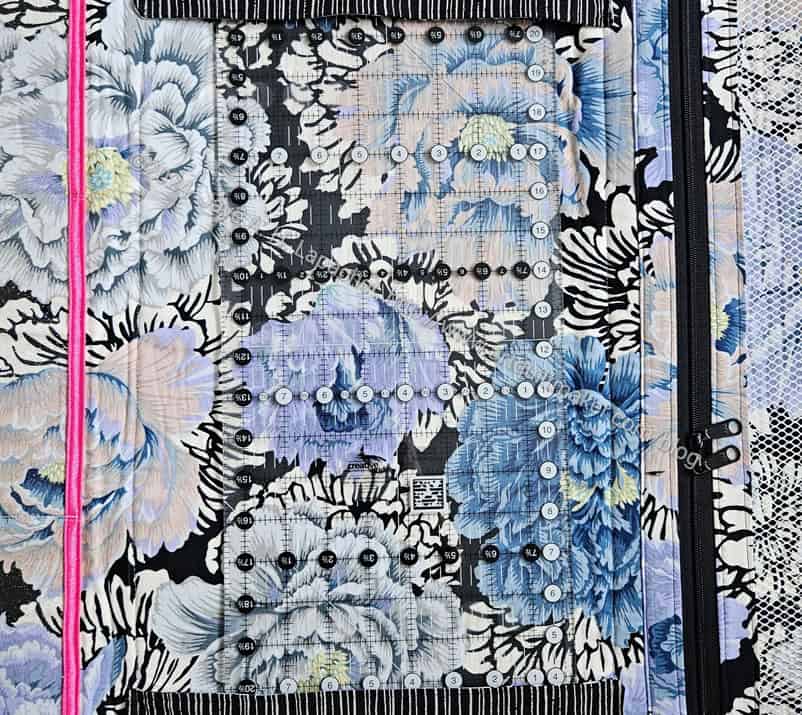
Crafty Gemini Retreat Bag ruler pocket
As soon as I finished the bag, I tried the ruler pocket, because I like that idea. Predictably, it is not sized well for Creative Grids 6.5 inch x 24.5 inch rulers.** I was able to get the ruler into both pockets, which holds it very well. It wasn’t easy to get it in and getting it out meant straining the pocket seam almost to ripping. As you know, Creative Grids rulers are half an inch longer than most Omnigrids rulers and that half inch makes all the difference in this project.
Crafty Gemini Retreat Bag – partial interior (finished)
Now, I should have known that this would be a problem and constructed the pockets differently. If I were to make this bag again, I might make one of the center pockets a flap with Velcro.** This would mean that I could slip the ruler into the top, then press the flap over the rest of the ruler. I’ll have to look at that pocket and see if I can still do that. I have an Omnigrid 24 inch ruler**, but I almost never use it. Frankly, it probably doesn’t matter as the long ruler I bring with me to Sew Day is the Karen Kay Buckley Adjustable ruler**. It is less likely to get broken in transit, because it breaks down into 4-5 pieces. Really, I don’t even really need this pocket. Again, I should have thought about that in advance. It is possible that I could remove the “ruler pockets” and add another zipper pocket to the center even with the binding already stitched down. If I don’t do something, then that center area is just wasted space. Bleah!
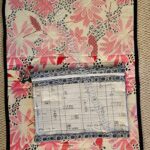
Crafty Gemini Retreat Bag – top zipper pocket
The zipper pocket will, I hope be useful. It will definitely be more useful made out of vinyl than it would have been made out of fabric. The “out of sight out of mind” adage is alive and well in my life.
I think dividing it into three was a good move even though I can’t put larger items into it. I think packing a large pocket full would have made it misshapen eventually. I am not sure what I will use this bag for, so that could also never have happened.
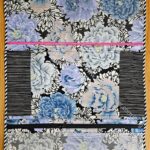
Crafty Gemini Retreat Bag – mesh pocket
The mesh pocket is one large space. The problem described above might happen below. Oh well. I don’t want to worry about it until I have to worry about it.
I like how the white mesh works with my Brocade Peony fabric. I can still see the design, but it tones down the Brocade Peony colors (motifs?) just a little.
In general, this pattern was pretty straightforward to put together. It was on my list for 1,000 years, because I just didn’t get around to it. As is usual with Crafty Gemini patterns, the written instructions are very basic and, for me, almost unusable. There are no pictures, because the videos that come with the Clubs and projects are very detailed.
*What is it with me and CAPITAL letters today?
**N. B. : Obviously, you should shop at local quilt shops and small businesses. However, if you are too busy or can’t find what you need there, I use Amazon affiliate links and may be paid for your purchase of an item when you click on an item’s link in my post. There is no additional cost to you for clicking or purchasing items I recommend. I appreciate your clicks and purchases as it helps support this blog.
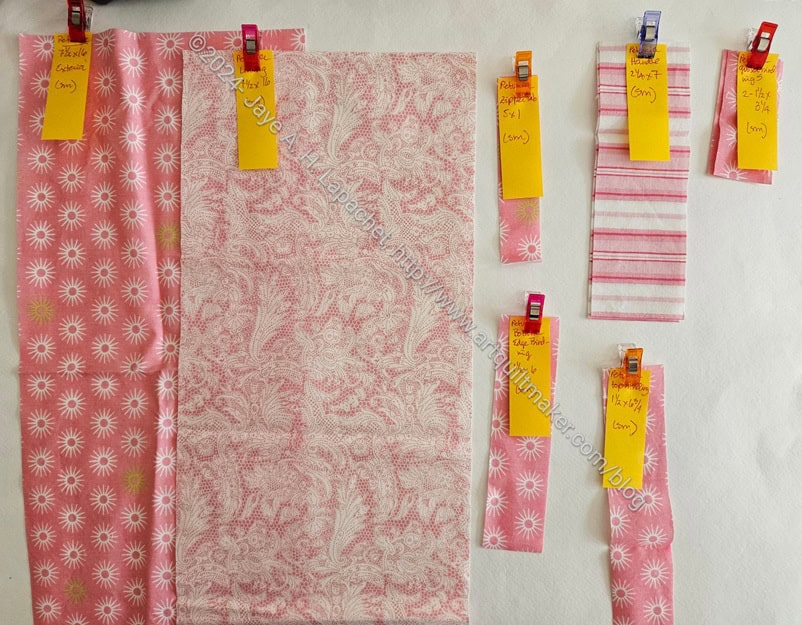
The Pink Project is done, but I have decided that I am not done with this idea. I have packaged up the pouches and they are ready to send off to the president of our organization. I like having an opportunity to make pouches for a good cause and try out new patterns.
I had a tote from the organization I used to hold them all. Next time I’ll have to use one of my tote patterns and put all the smaller bags inside. Here are all the pouches for The Pink Project v.1:
Yes, I added the Friesan to the mix even though I originally made it for me. It has been sitting on my shelf unused since it came back from the Fair. I can always make another.
All the others were made for this project. I have a new pattern from the Sotak Handmade sale, the Petunia Pouch, that I plan to make for v.2 of the Pink Project.
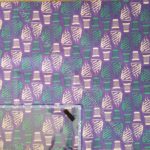
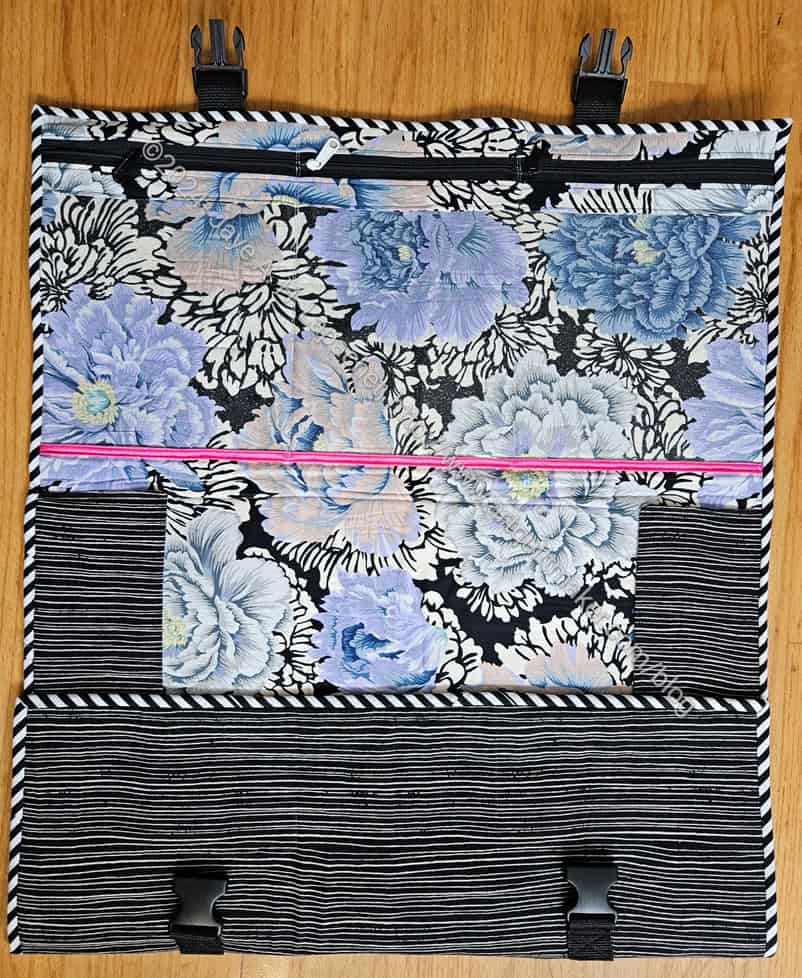
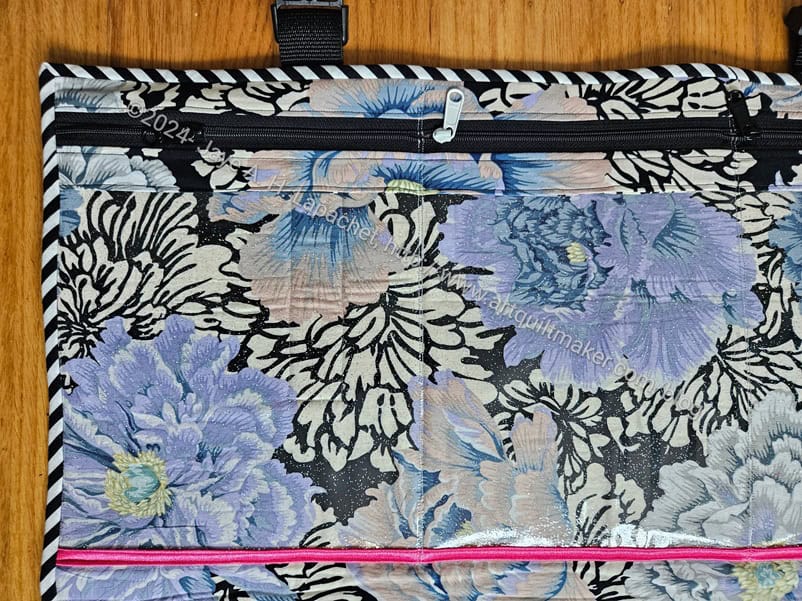
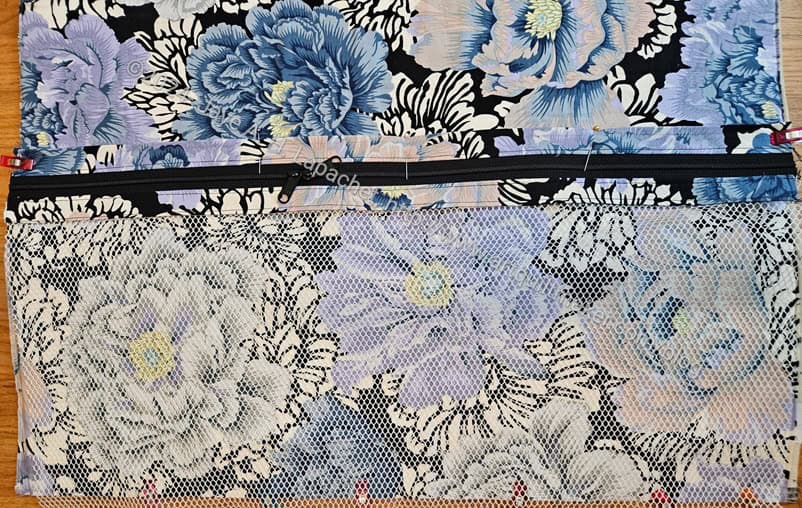
I made some progress on the Retreat Bag over the last few days. This is the mesh pocket shown where it will go on the bag. You can see where it is if you compare the Brocade Peony fabric on the top and the bottom.
I used white mesh, so the colors in the bottom of the photo are a little duller.
Retreat Bag interior
I actually sewed this on to the main part of the Retreat Bag, but I sewed it upside down, so I had to rip it out and now it is just clipped where I want to sew it.
I thought about not ripping it out and opening the bag like a book, but decided it would be handy to be able to hang the bag up and not have the zippers on the bottom.
I had to clear the Retreat Organizer off the design wall, which encouraged me to start working on it. I made small amounts of progress after work each night last week. I feel well into now and was sad not to be able to work on it yesterday.
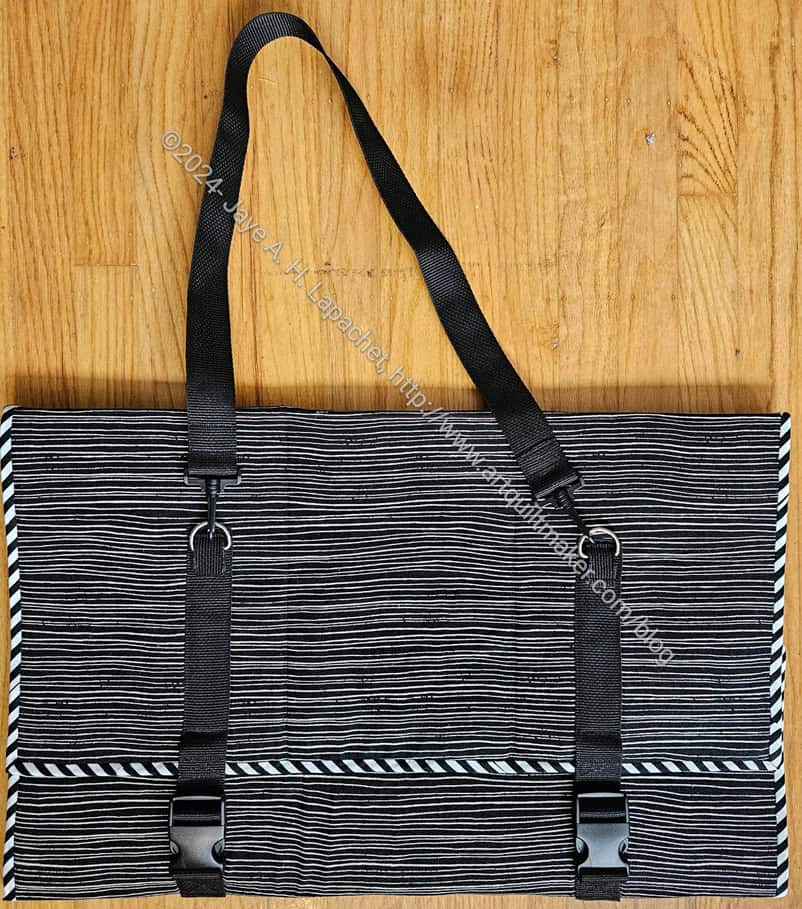
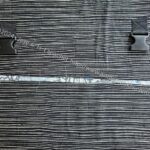
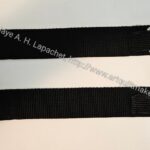
Retreat Organizer exterior with buckles
Retreat Organizer exterior buckles
First, I was on the hardware step, so I added buckles and made straps. In the photo above (left) I have the female side of the buckles attached to the exterior. On the right you can see the male side of the buckles with the straps attached, but not attached to the exterior of the bag.
In this pattern, the straps are appliqued to the exterior not appliqued and sewn into a seam.
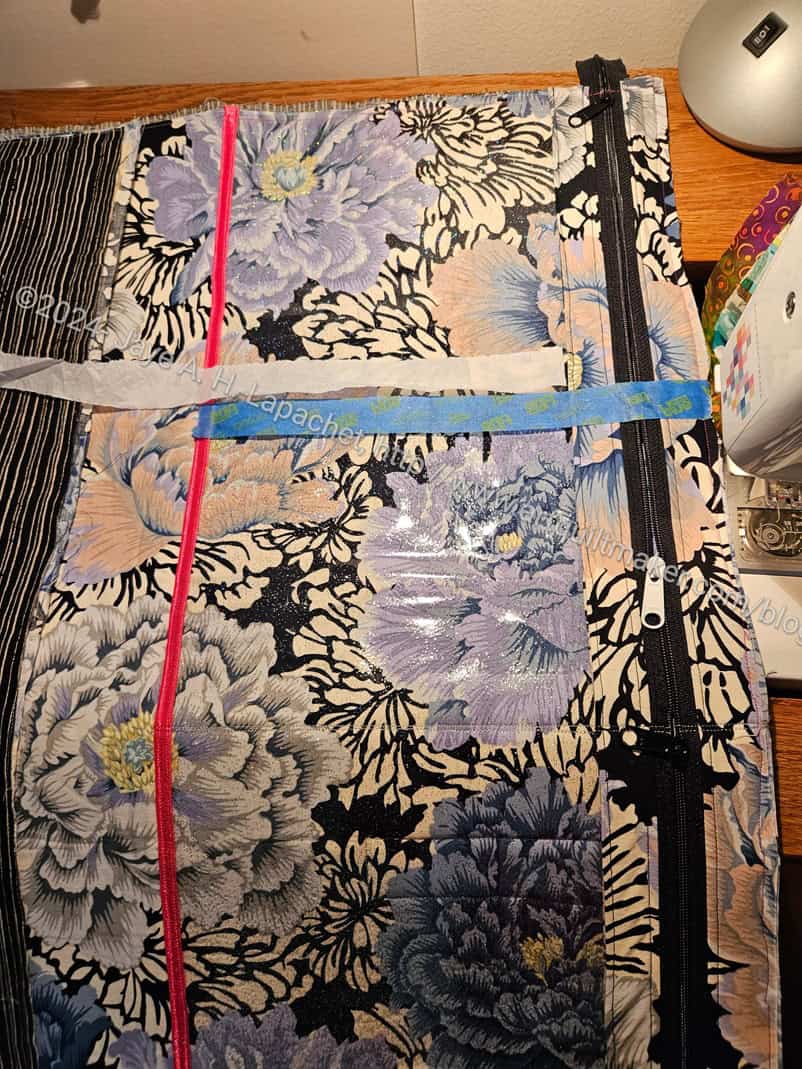
Retreat Organizer interior vinyl pocket
I also worked a little on the interior. This is one large pocket that has been divided into three.
This was originally supposed to be a fabric pocket. For me, out of sight is out of mind, so I made the pocket(s) out of vinyl. I put some fold over elastic** over the edge to avoid looking a raw edge.
On the picture you can see some tape and tissue paper, both of which I used to sew the dividing lines on the vinyl. These are pockets you could customize. I almost left one big pocket, but decided even a vinyl pocket might become a black hole of doom.
This project is off the design wall, which is great, but it is now spending most of its time on my ironing board. I really need a larger work table.
You can find this pattern with all of the videos on the Crafty Gemini website as the Retreat-in-a-Bag project.
**N. B. : Obviously, you should shop at local quilt shops and small businesses. However, if you are too busy or can’t find what you need there, I use Amazon affiliate links and may be paid for your purchase of an item when you click on an item’s link in my post. There is no additional cost to you for clicking or purchasing items I recommend. I appreciate your clicks and purchases as it helps support this blog.
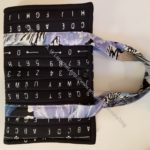
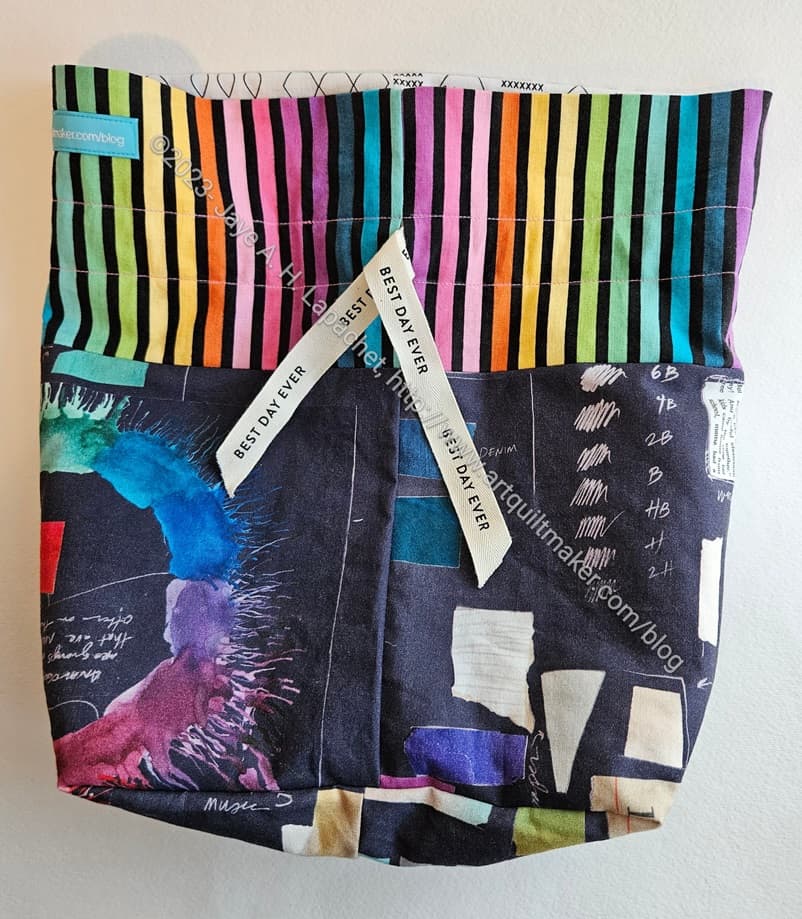
As I said the other day, I had three gifts to make in the early part of March. One of them was a birthday gift for Carrie. Since I was pressed for time, I made a lined drawstring bag. I did an assembly line with Gerre’s bag and got them done in an afternoon.
You can’t see it very well, but I tried to fussy cut an entire color wheel for the outside of the bag.
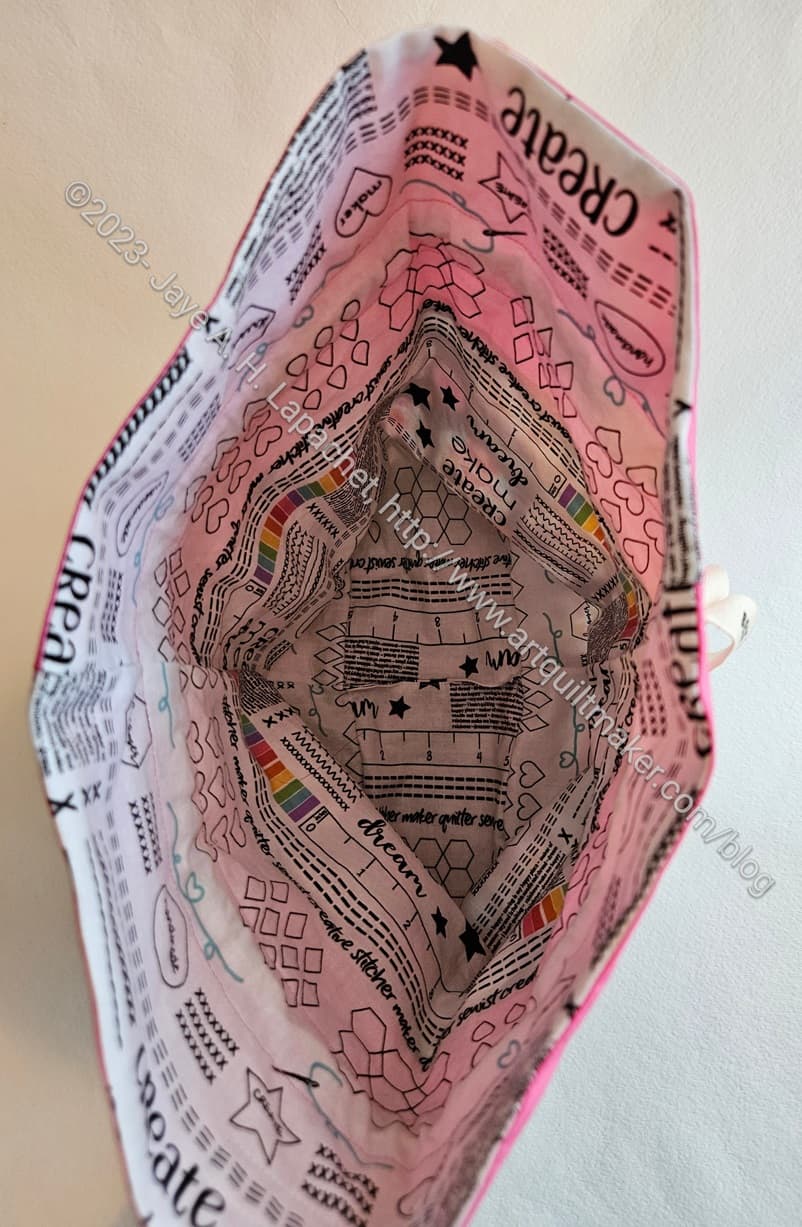
Carrie’s Lined Drawstring Bag – interior
I use some of the Create ‘I’m a Maker’ fabric I bought just for this purpose. I installed it upside down, but Carrie can see it easily when she looks at it, so I am going with that as a design choice. 😉
This time I put labels on the outside of the bags, which I thought looked nice. I didn’t stuff them and take pictures (see above reference to time pressure).
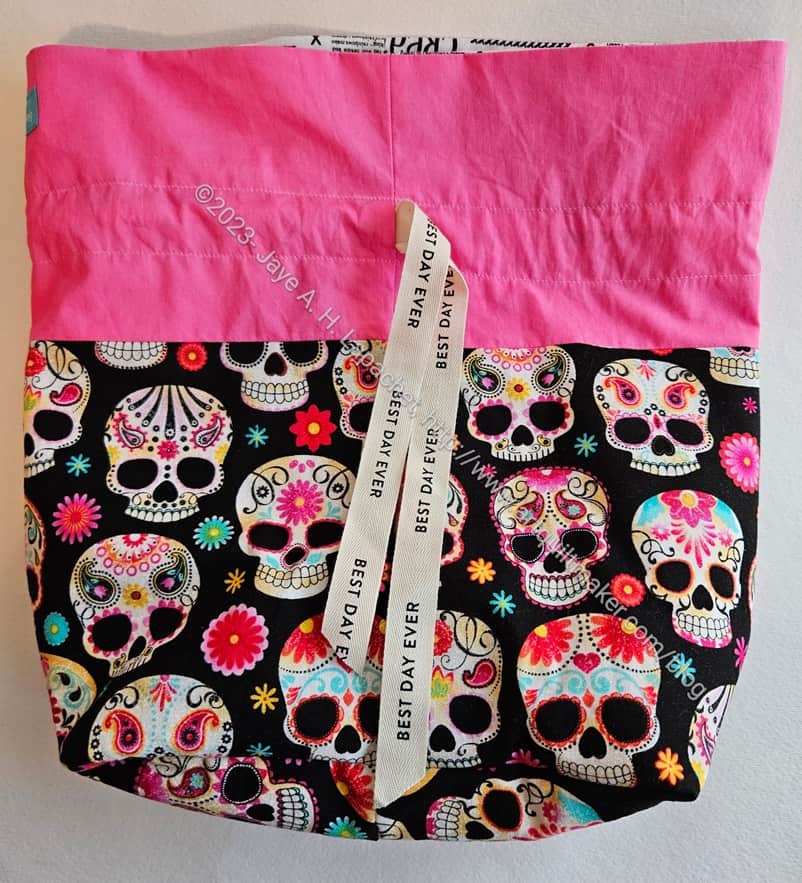
International Women’s Day came around and I forgot to post about the bag I made for Gerre.
Lined Drawstring Bag for Gerre
I was a little pressed for time and had three gifts to make, so I pulled out the Lined Drawstring Bag pattern from Jeni Baker, In Color Order. As I have said before, this is a great pattern and I should make more of them.
I always have trouble with directional fabric, so I drew a picture this time, like I have done in my I Spy pattern. I hope it will help me next time I pull the pattern out.
I put a few fun things in the bag and sent it off.
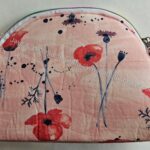
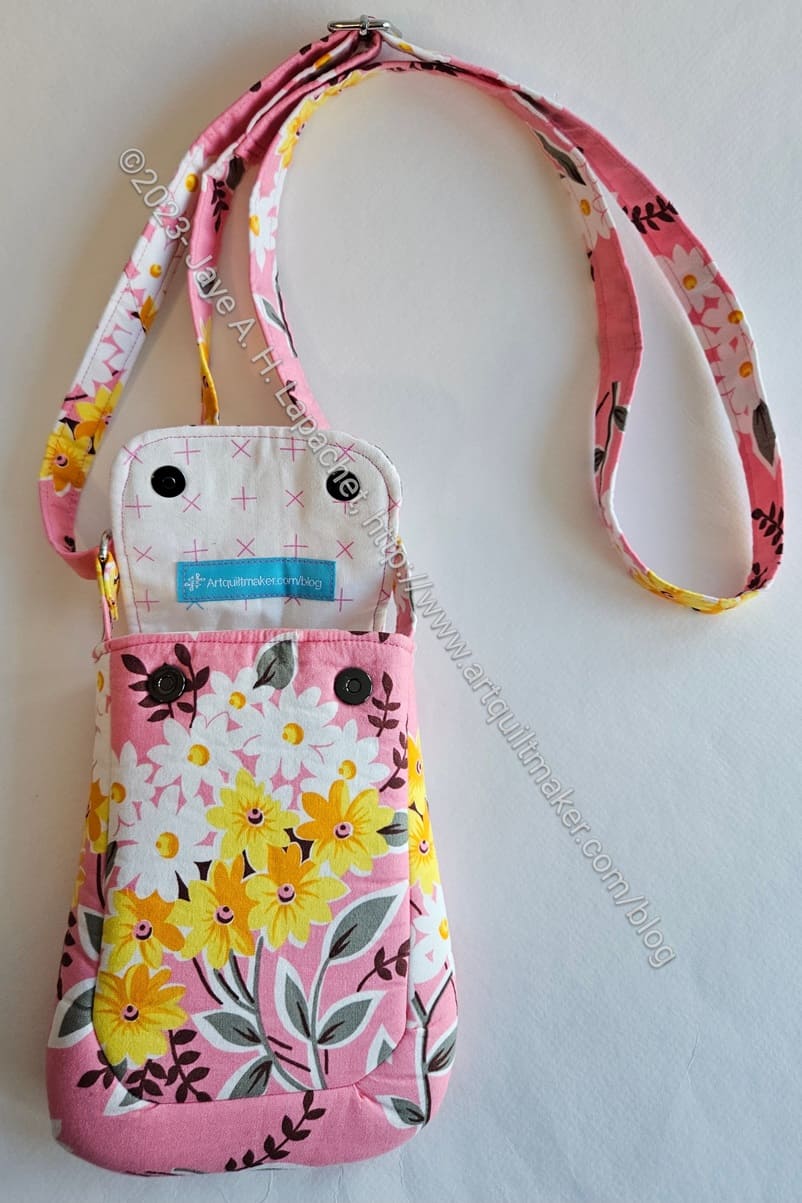
I made good progress since last week and the Sweetbay Crossbody bag is almost done! I just have to press it!
Putting this bag together was a little tricky, mostly because it is so small. The other thing I found interesting was that the gusset isn’t the same on both sides. You can see how it bulges out a little bit. it is very round on the bottom corners. I think that is from the gusset. The directions say to put the front panel on one side of the gusset and the back panel on the other. It was a novel way of putting a bag together.
Sweetbay front, open: finished
I remembered to put a label in the bag. It might be a little too prominently placed, but it is what it is.
I have to admit that I thought about the label placement on that flap A LOT. It seems silly, but I wanted it to be right side up when I opened the flap, which required some thought. I did have to move the label once before I put the flap lining together with the flap exterior, because it was too close to the magnetic snaps.
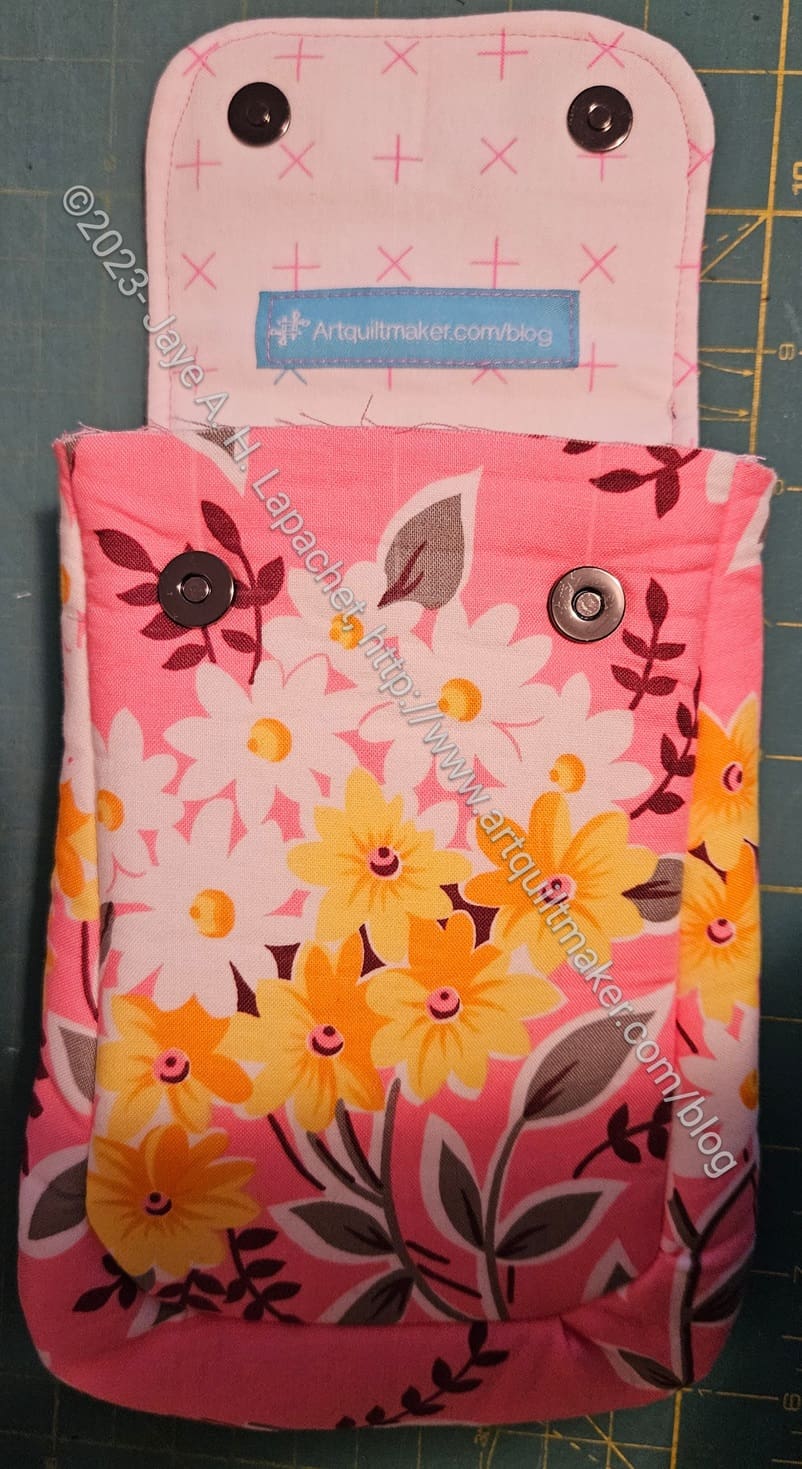
Sweetbay magnetic snaps detail
I am really pleased with those magnetic snaps. Not all of my hardware matches on this bag, but those snaps are awesome. They are small. I didn’t even know I had them until I looked through my hardware bag and found them. The brand is Sally Tomato and I will definitely be buying them again.
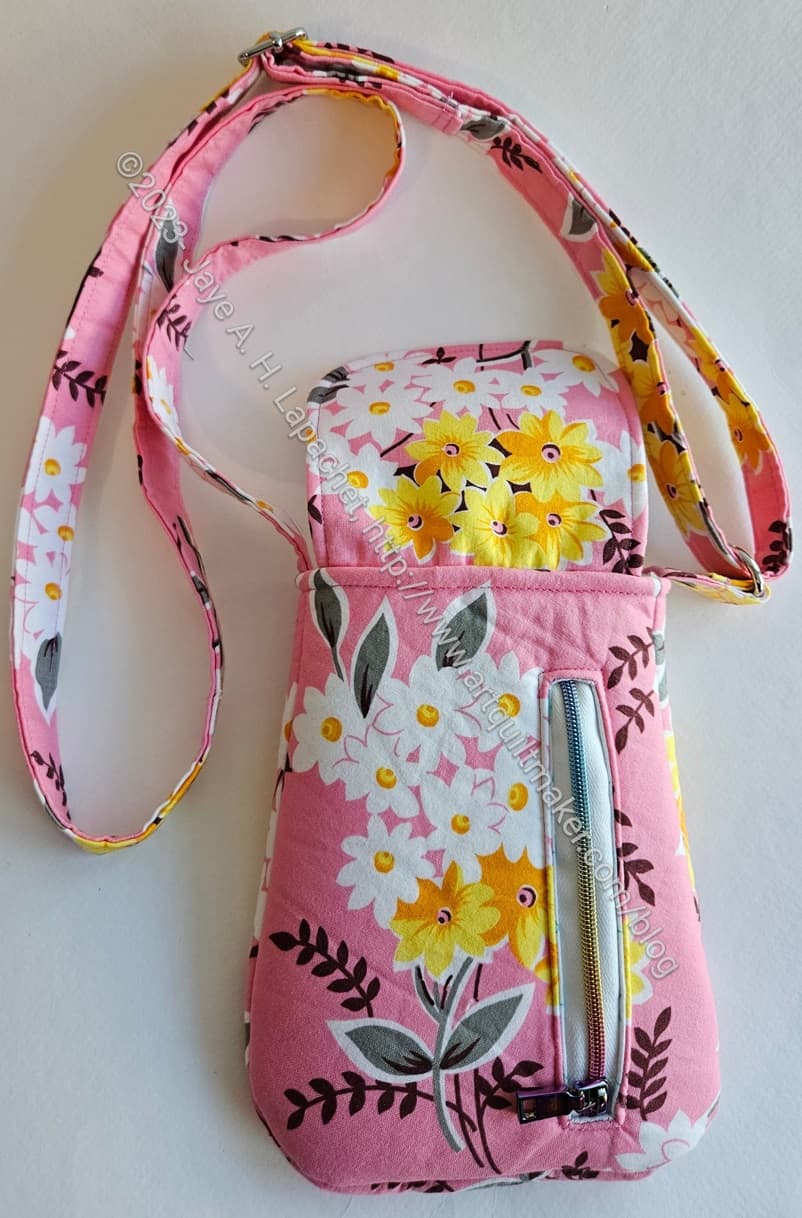
Sweetbay back: finished
I used a leftover piece of zipper by the yard for my exterior pocket. i was glad, because I have few leftover pieces that seem too long to toss. This was the first time I found a use for one of the pieces.
I think I would prefer to install it with the head at the top when it is closed, but I am just happy I was able to install it.
I also sewed the edges of the pocket to the seam allowance so the pocket wouldn’t sag once the user put something in it. I’d like to try perfecting my internal zipper pocket technique. I need to make a few more.
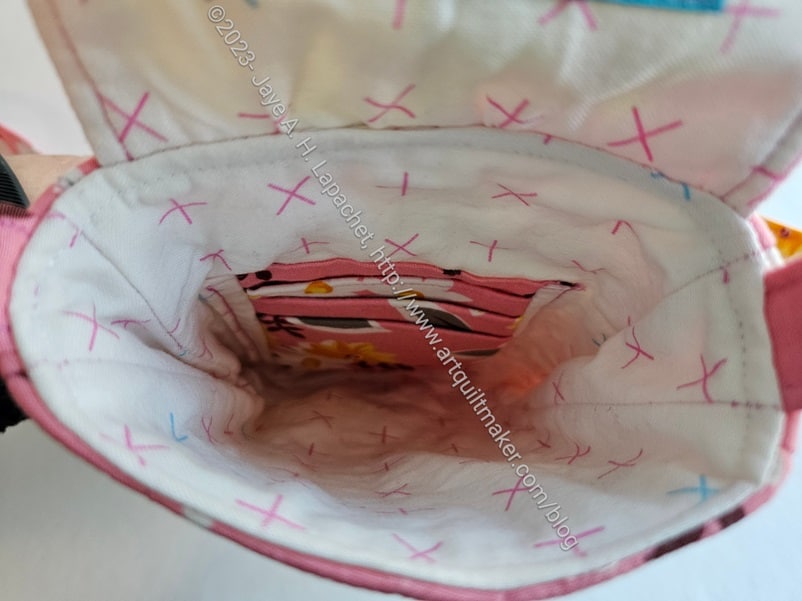
Sweetbay interior: finished
This is really a bag you take along with only a few things. It is really small on the inside.
This will go really well with the other Pink project bags.
Not sure what I will make next. I’d like to make a big tote bag, but I already have one for The Pink Project.
Yes, I made a start on the Crafty Gemini Retreat-in-a-Bag project. In the 26 Projects list, I call it the Retreat Organizer. It doesn’t look like much because it is only two large pieces of fabric sandwiched together with Soft & Stable**.
I stopped working on it so I could finish Christmas gifts and haven’t gotten back to it yet. This may be the oldest bag ever. I really have to finish it.
In addition to Christmas gifts, I was also stalled because I was trying to decide whether to embellish the webbing like I did with the handles for the All Rolled Up bag. I finally decided just to finish the %$#@ bag. once I get back to it, I will just put the webbing handles on as is. If I decide to make another one, then I’ll think about embellishing the handles. I am not sure fancy webbing was available in 2018 when I bought the kit. Now, I can choose from Tula Pink webbing and the various webbing offered by Sew Hungry Hippie. I am sure a lot of other places have fun webbing as well.
One of the things about this project is that very large pieces of fabric and foam have to be cut. With my small cutting table, it is a big challenge. I could have used the dining room table, but didn’t think of it at the time.
Perhaps I’ll have time to work on this project next weekend.
**N. B. : Obviously, you should shop at local quilt shops and small businesses. However, if you are too busy or can’t find what you need there, I use Amazon affiliate links and may be paid for your purchase of an item when you click on an item’s link in my post. There is no additional cost to you for clicking or purchasing items I recommend. I appreciate your clicks and purchases as it helps support this blog.
I am keeping up with the Sew Sweetness Sew-a-long for the Sweetbay (that’s a lot of Ss and Ws!!) crossbody bag. This bag has a lot of prep and it started with week 1 and continued to this week.
Some of this week’s work was adding interfacing to all of the pieces that were not interfaced last week.
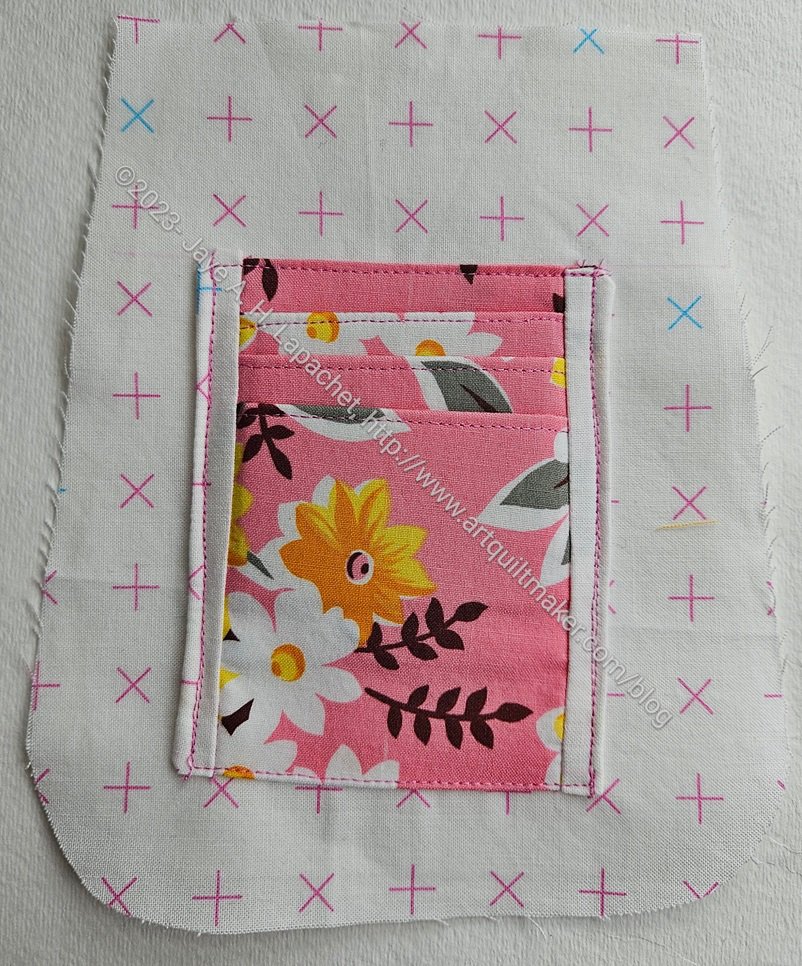
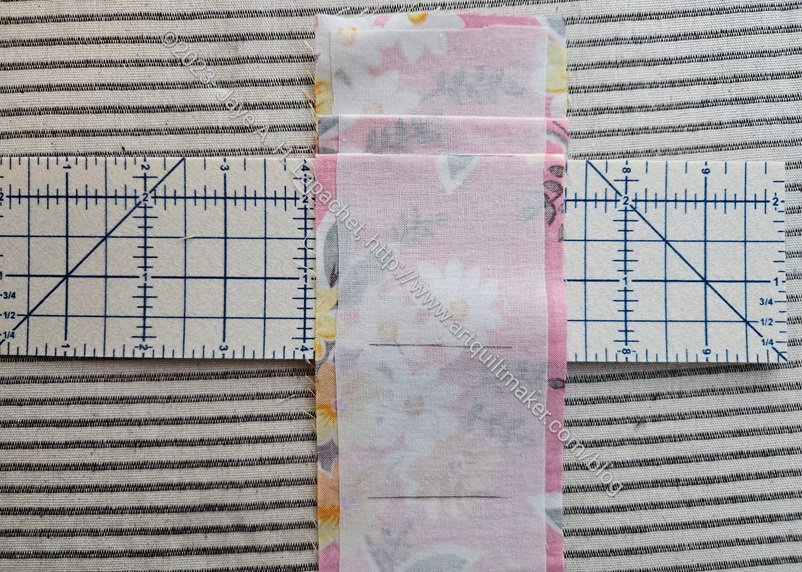
Sweetbay credit card sleeve
I also had to make the credit card sleeve, which didn’t turn out quite as expected. The written directions were a little confusing, but I walked away and came back and was able to figure out what to do.
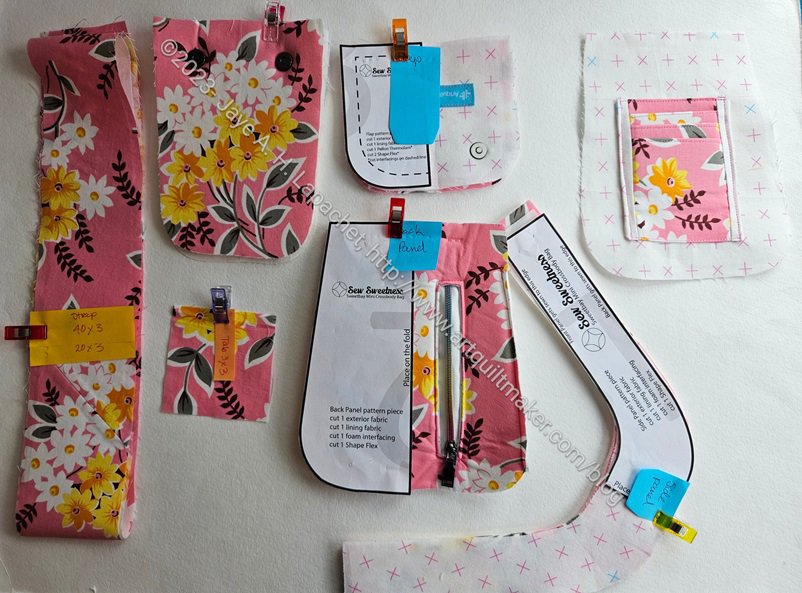
Sweetbay credit card pieces
In order to make the compartments, we were supposed to use a template made from the pattern pieces on the back. I was super pleased that I figured out how to make slots that I could mark through. I know this seems really dumb, but it felt very convenient and like an excellent solution.
This pattern does not have a acrylic templates and I am not sure why. I think the credit card sleeve would have been a good candidate for templates.
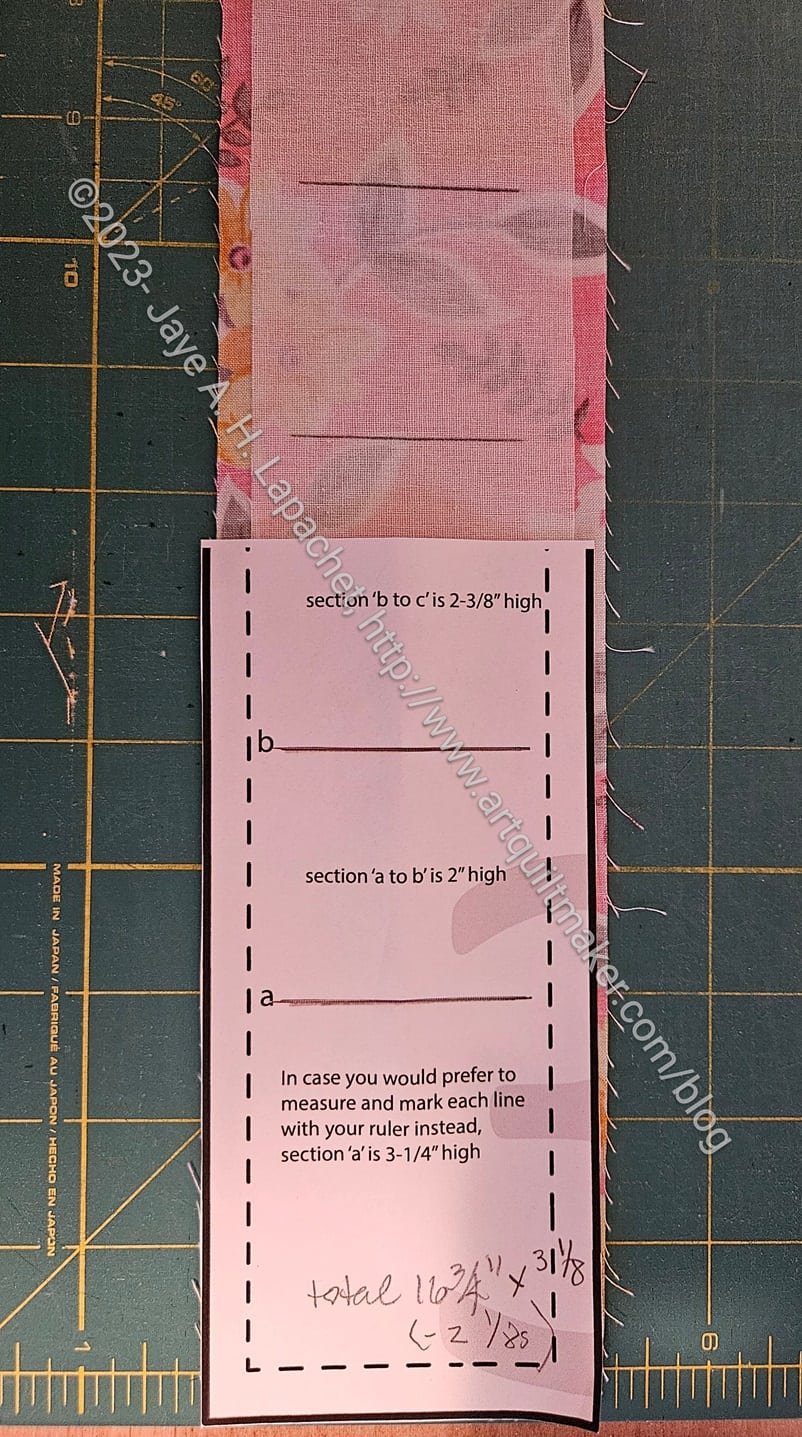
Using the hot ruler
I also made good use of the hot ruler from Cyndi for this project. This was a Christmas gift I received and the more I use it the more useful I find it. It makes the folds a little thick, so if I need precise measurements, I need to be very careful. Other than that, I am finding it to be very useful.
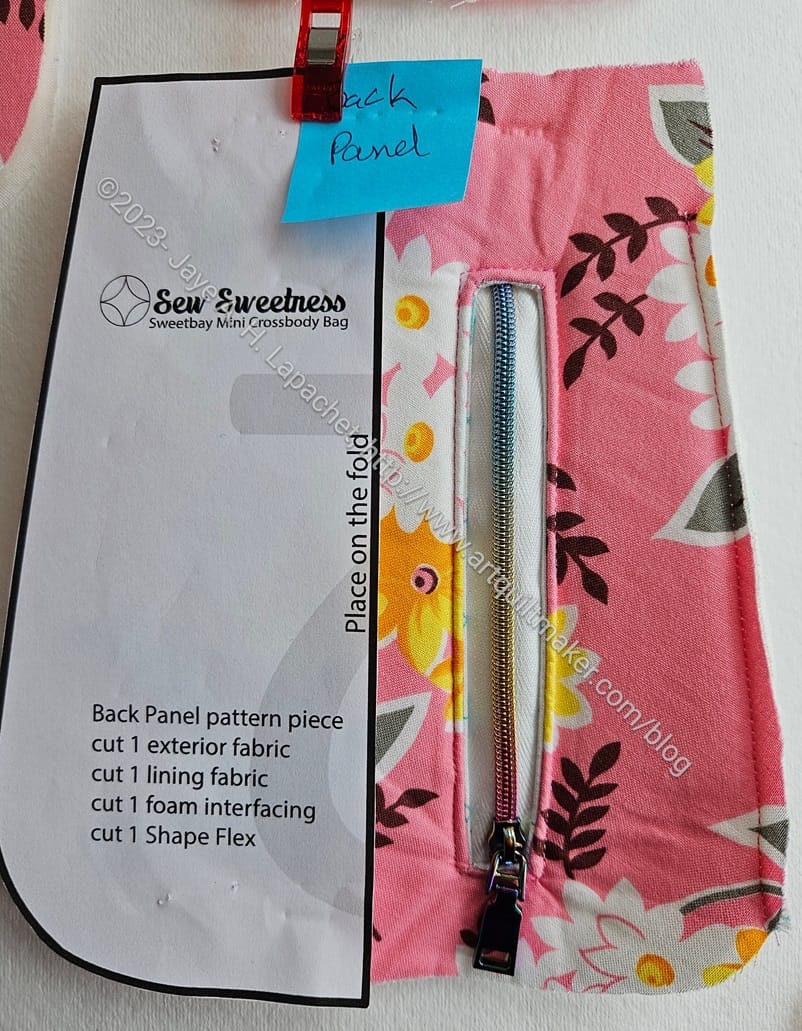
Sweetbay back zipper pocket
I added to the prep work by adding a vertical pocket in the back flap. Vertical pockets look really cool. I also thought that back flap was the perfect location for additional storage, so I created an internal zipper pocket.
I had to remember how to do it, so I looked it up in a couple of books. First was Lisa Lam’s The Bag Making Bible**, which got me started, but left out (or I couldn’t find) some crucial information, so I switched to The Complete Bagmaking Masterclass** and got the info I needed.
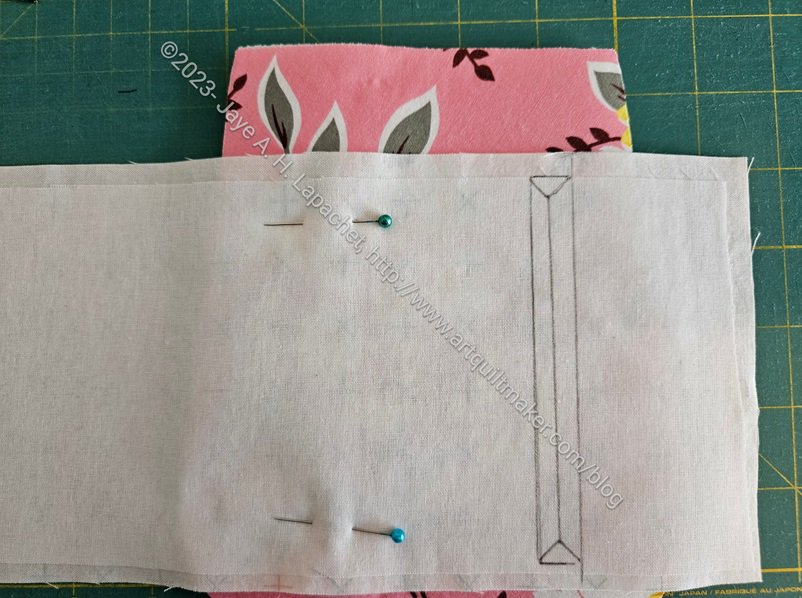
Sweetbay zipper pocket in progress
One problem I had, which wasn’t critical was that I didn’t leave enough fabric on the short ends of the zipper pocket. See how there is barely half an inch on each small end? It worked, but it isn’t really enough and I had to be super careful to make sure the foam and exterior fabric got caught in the seam when I sewed the zipper in. It worked, but I sweated! Hopefully, I’ll remember next time.
Once I had all that done I was kind of exhausted. I am very pleased that I am making progress and keeping up with the Sew-a-long.
**N. B. : Obviously, you should shop at local quilt shops and small businesses. However, if you are too busy or can’t find what you need there, I use Amazon affiliate links and may be paid for your purchase of an item when you click on an item’s link in my post. There is no additional cost to you for clicking or purchasing items I recommend. I appreciate your clicks and purchases as it helps support this blog.
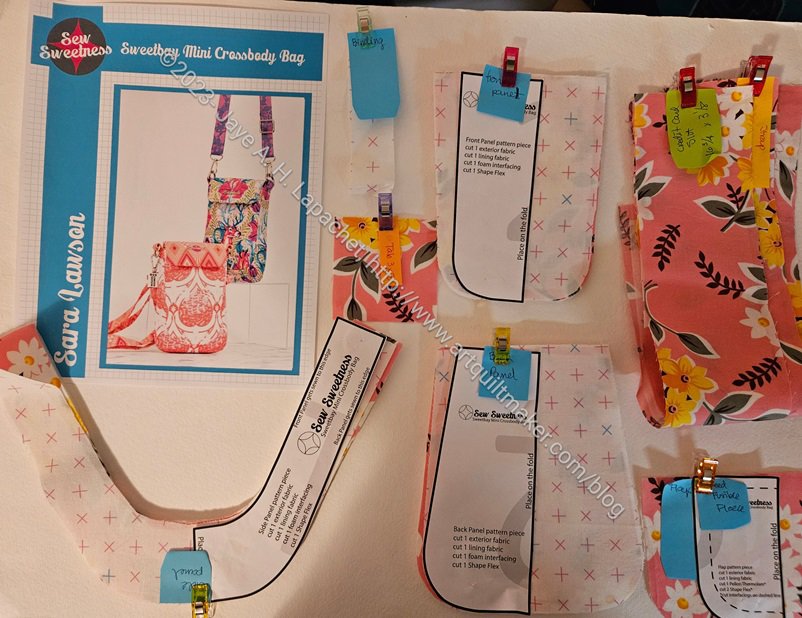
I am making a Sweetbay Crossbody Bag for the Pink Project. The Sweetbay is one of the patterns that Sara released in February. One of the reasons I am making it is because Sara is having a Sew-a-long and I thought that was a good reason to use one of the new patterns. I also wanted to try a smaller crossbody bag. The Daytrip Wallet is still on my to do list, so this will get me closer to that project.
Except for one piece of interfacing, I was able to cut out the whole project, so I am on time with the sew-a-long. Next up is sewing!
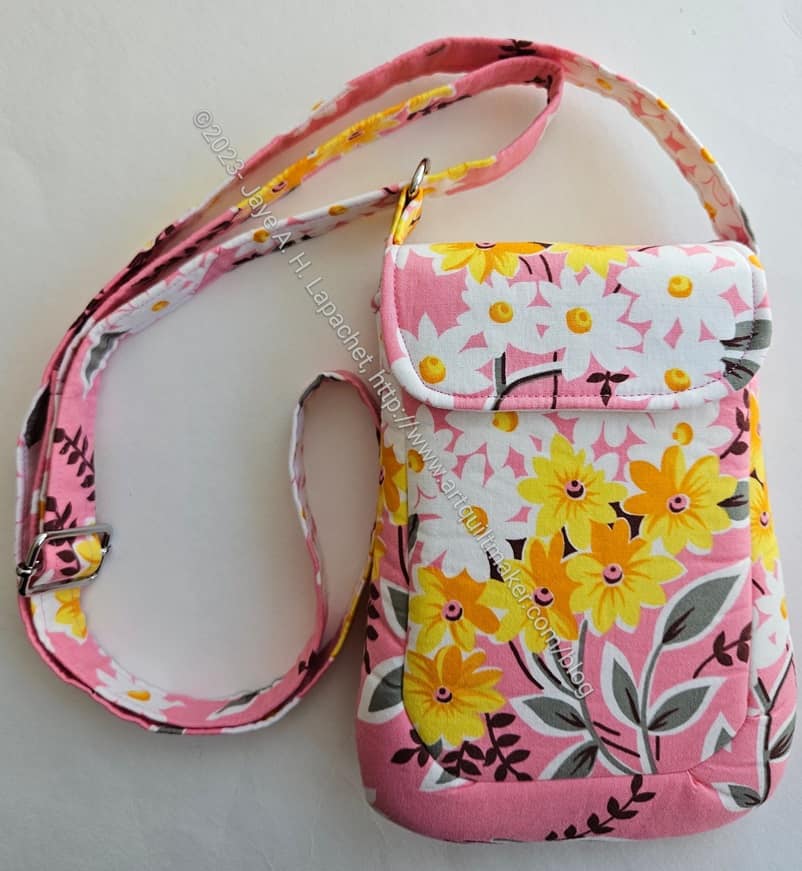
This looks like one of the Minikins, but is a separate pattern from the Minikins.
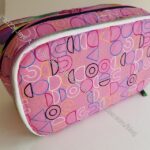
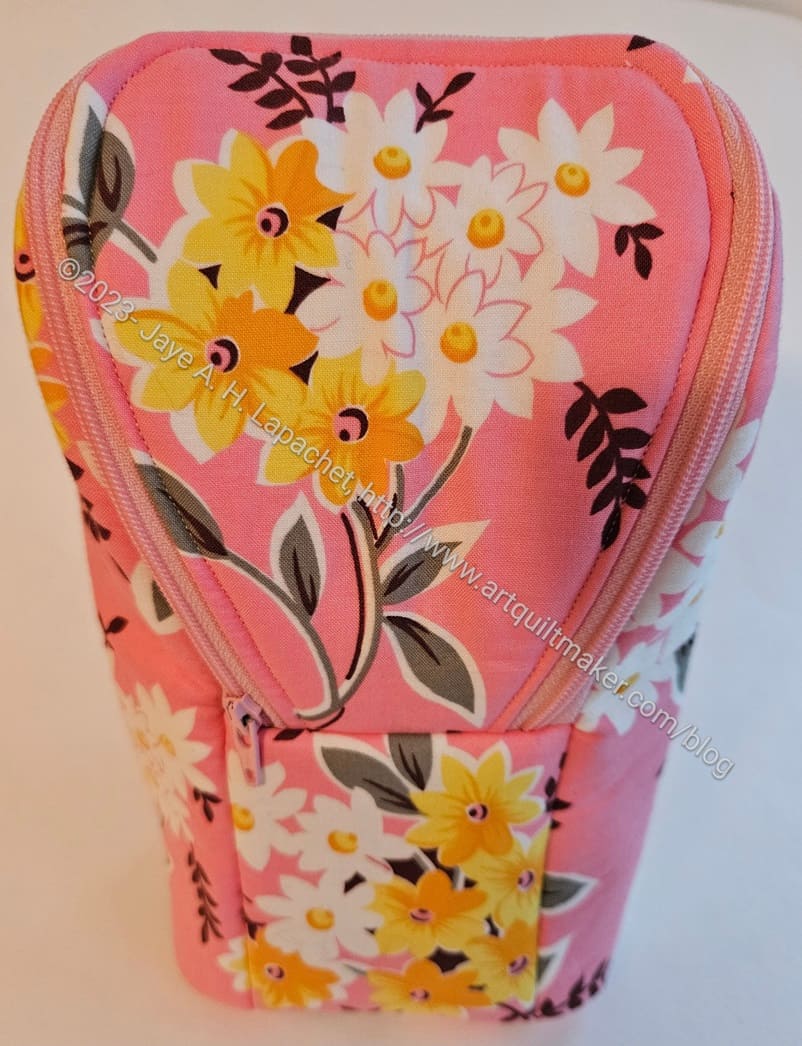
This Pink Piebald went really quickly and I am pleased. There are a couple of techniques I need to practice and some other things I want to do differently to make this pattern more to my liking.
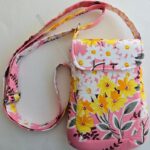
I am super pleased with the fussy cutting on the front. The flap is big enough for a whole spray of flowers, which I think adds a nice look to the pouch.
The front panel has less space, but I was able to center flowers on the whole piece.
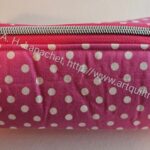
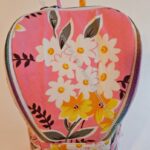
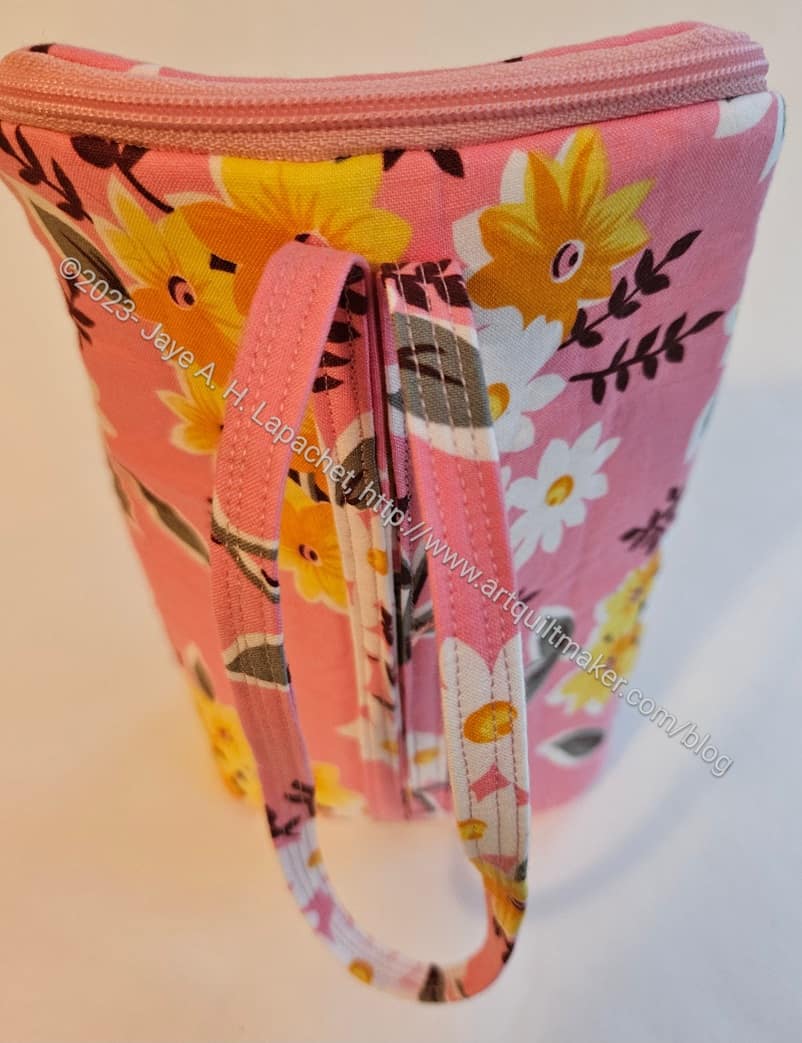
Finished: Pink Piebald – back with strap
The back requires a much larger piece of fabric and I didn’t really fussy cut it. I didn’t think it needed the extra care since the back is partially covered by the strap. I did try to center one of the motifs, though the strap means you can’t really see it.
As mentioned, the strap is longer than the pattern shows. I tested it out as a wristlet and I think it will work. SIL#4 knits and I thought it might be a good project-on-the-go bag. I am going to ask her. The audience for this bag won’t really care or notice, I don’t think. I think they will be pleased they can use the pouch as a small purse.
Finished: Pink Piebald – lining
I ended up making the inside (lining) from the fabric I originally planned to use for the exterior. It is a little darker than I usually use, but I didn’t want to waste the pieces I had already cut. I think next time, I will see about fussy cutting a surprise onto the flap lining.
As a reminder, this pattern is from Sew Sweetness and is from Minikins Season 3.