I have the best raffle team ever! At the meeting last Saturday, a couple of them came through with MORE gifts. These raffle baskets are going to be the best ever.
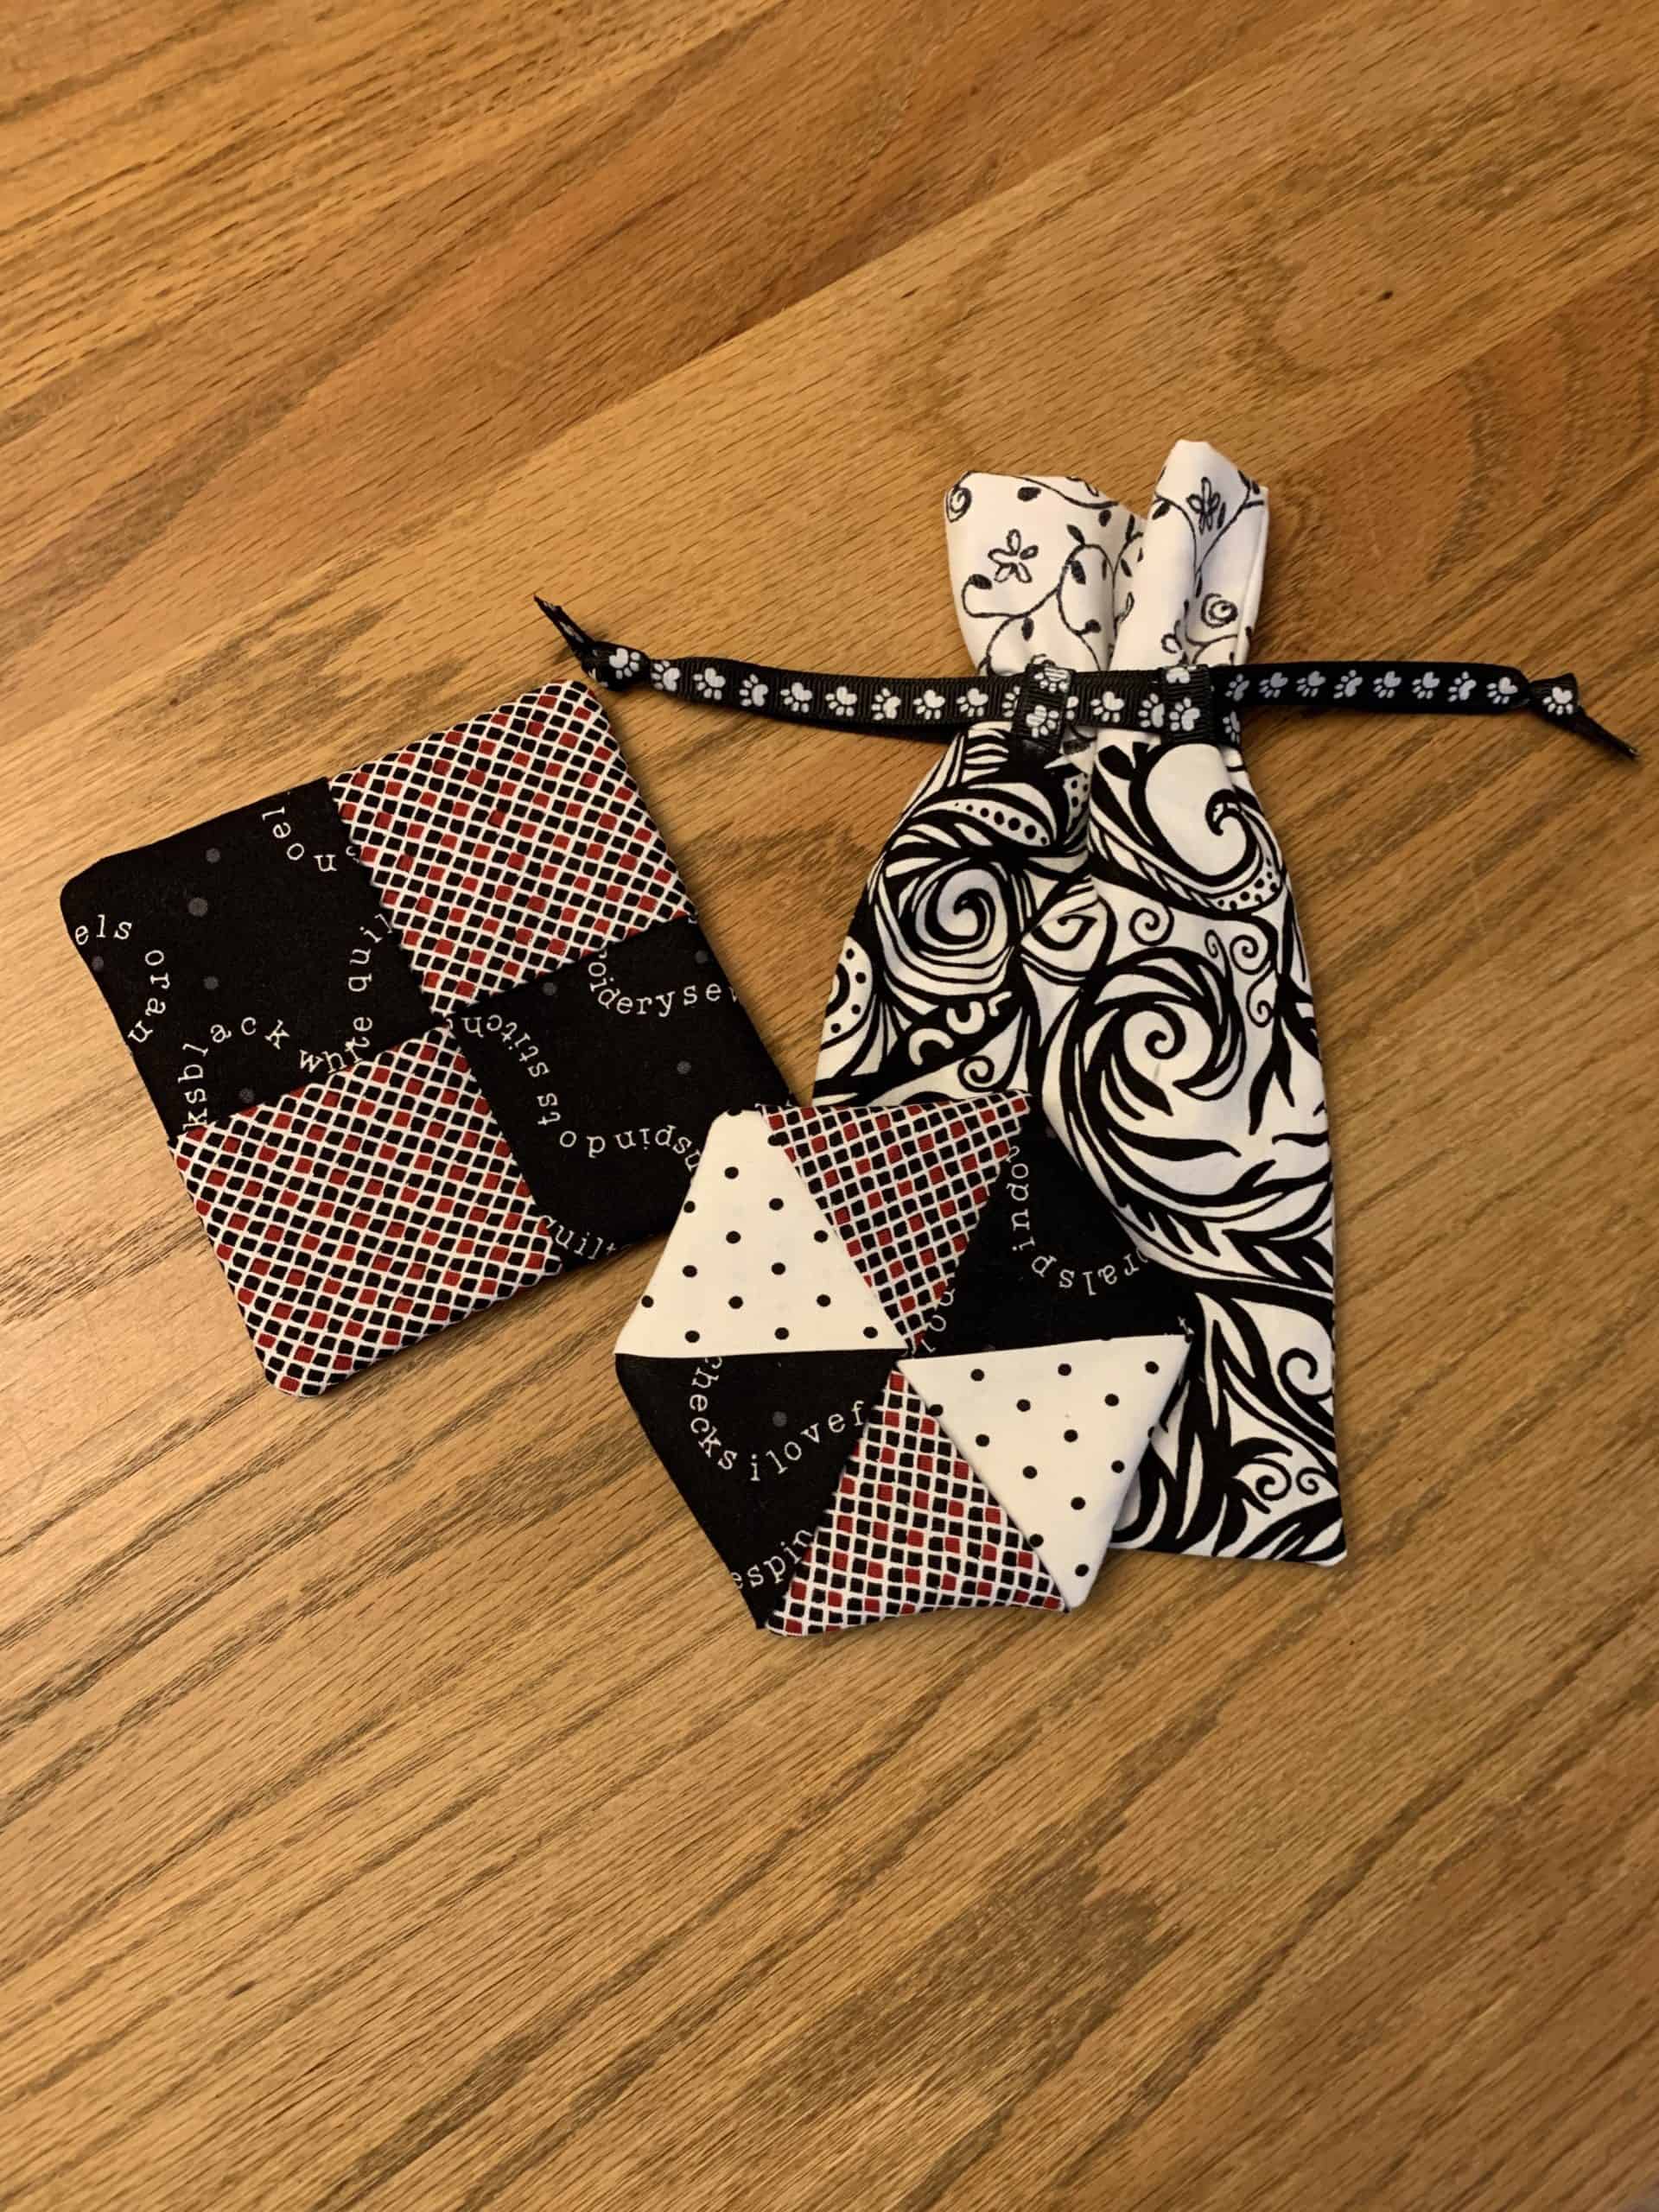
Cheri’s Raffle Gifts
Cheri started in on some bags and coasters. I need a bunch of those little bags for stocking stuffer gifts! 😉
She tried out a few things and found they took too long, so she is trying some different patterns. Cheri only made them for a couple of months with the first pattern. AFter she decides on a new pattern she will work on the rest of the months. We have time.
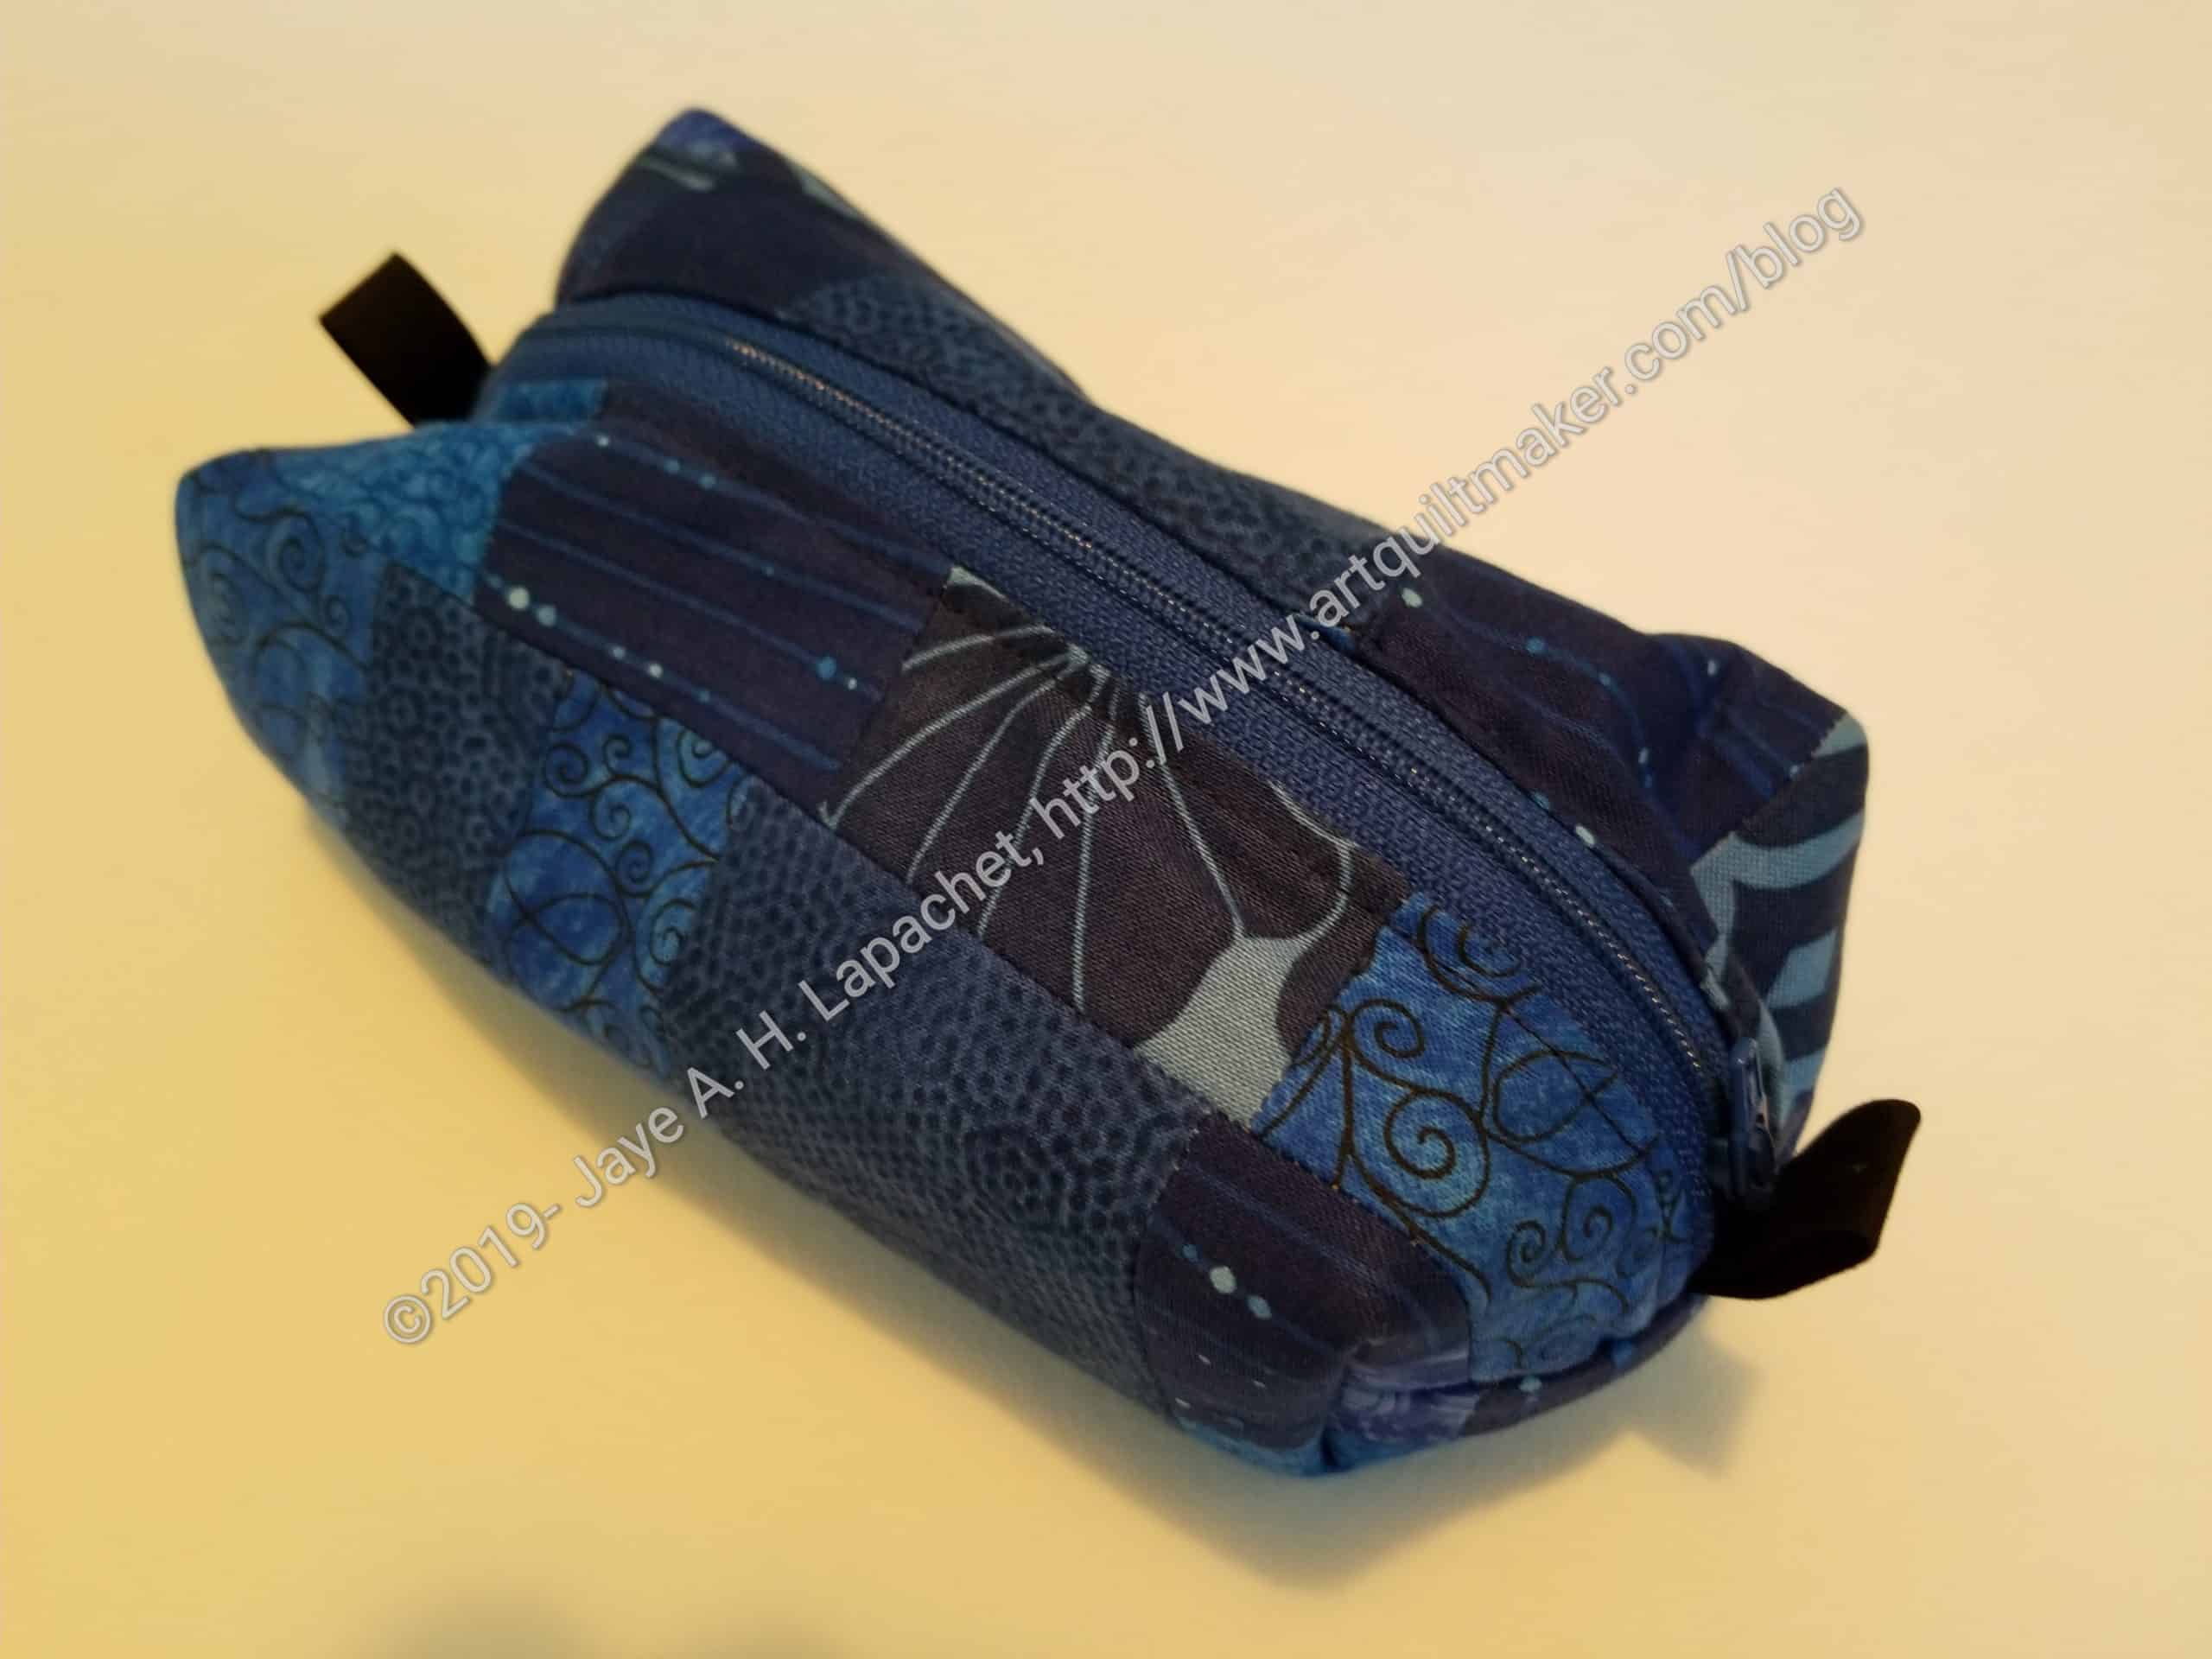
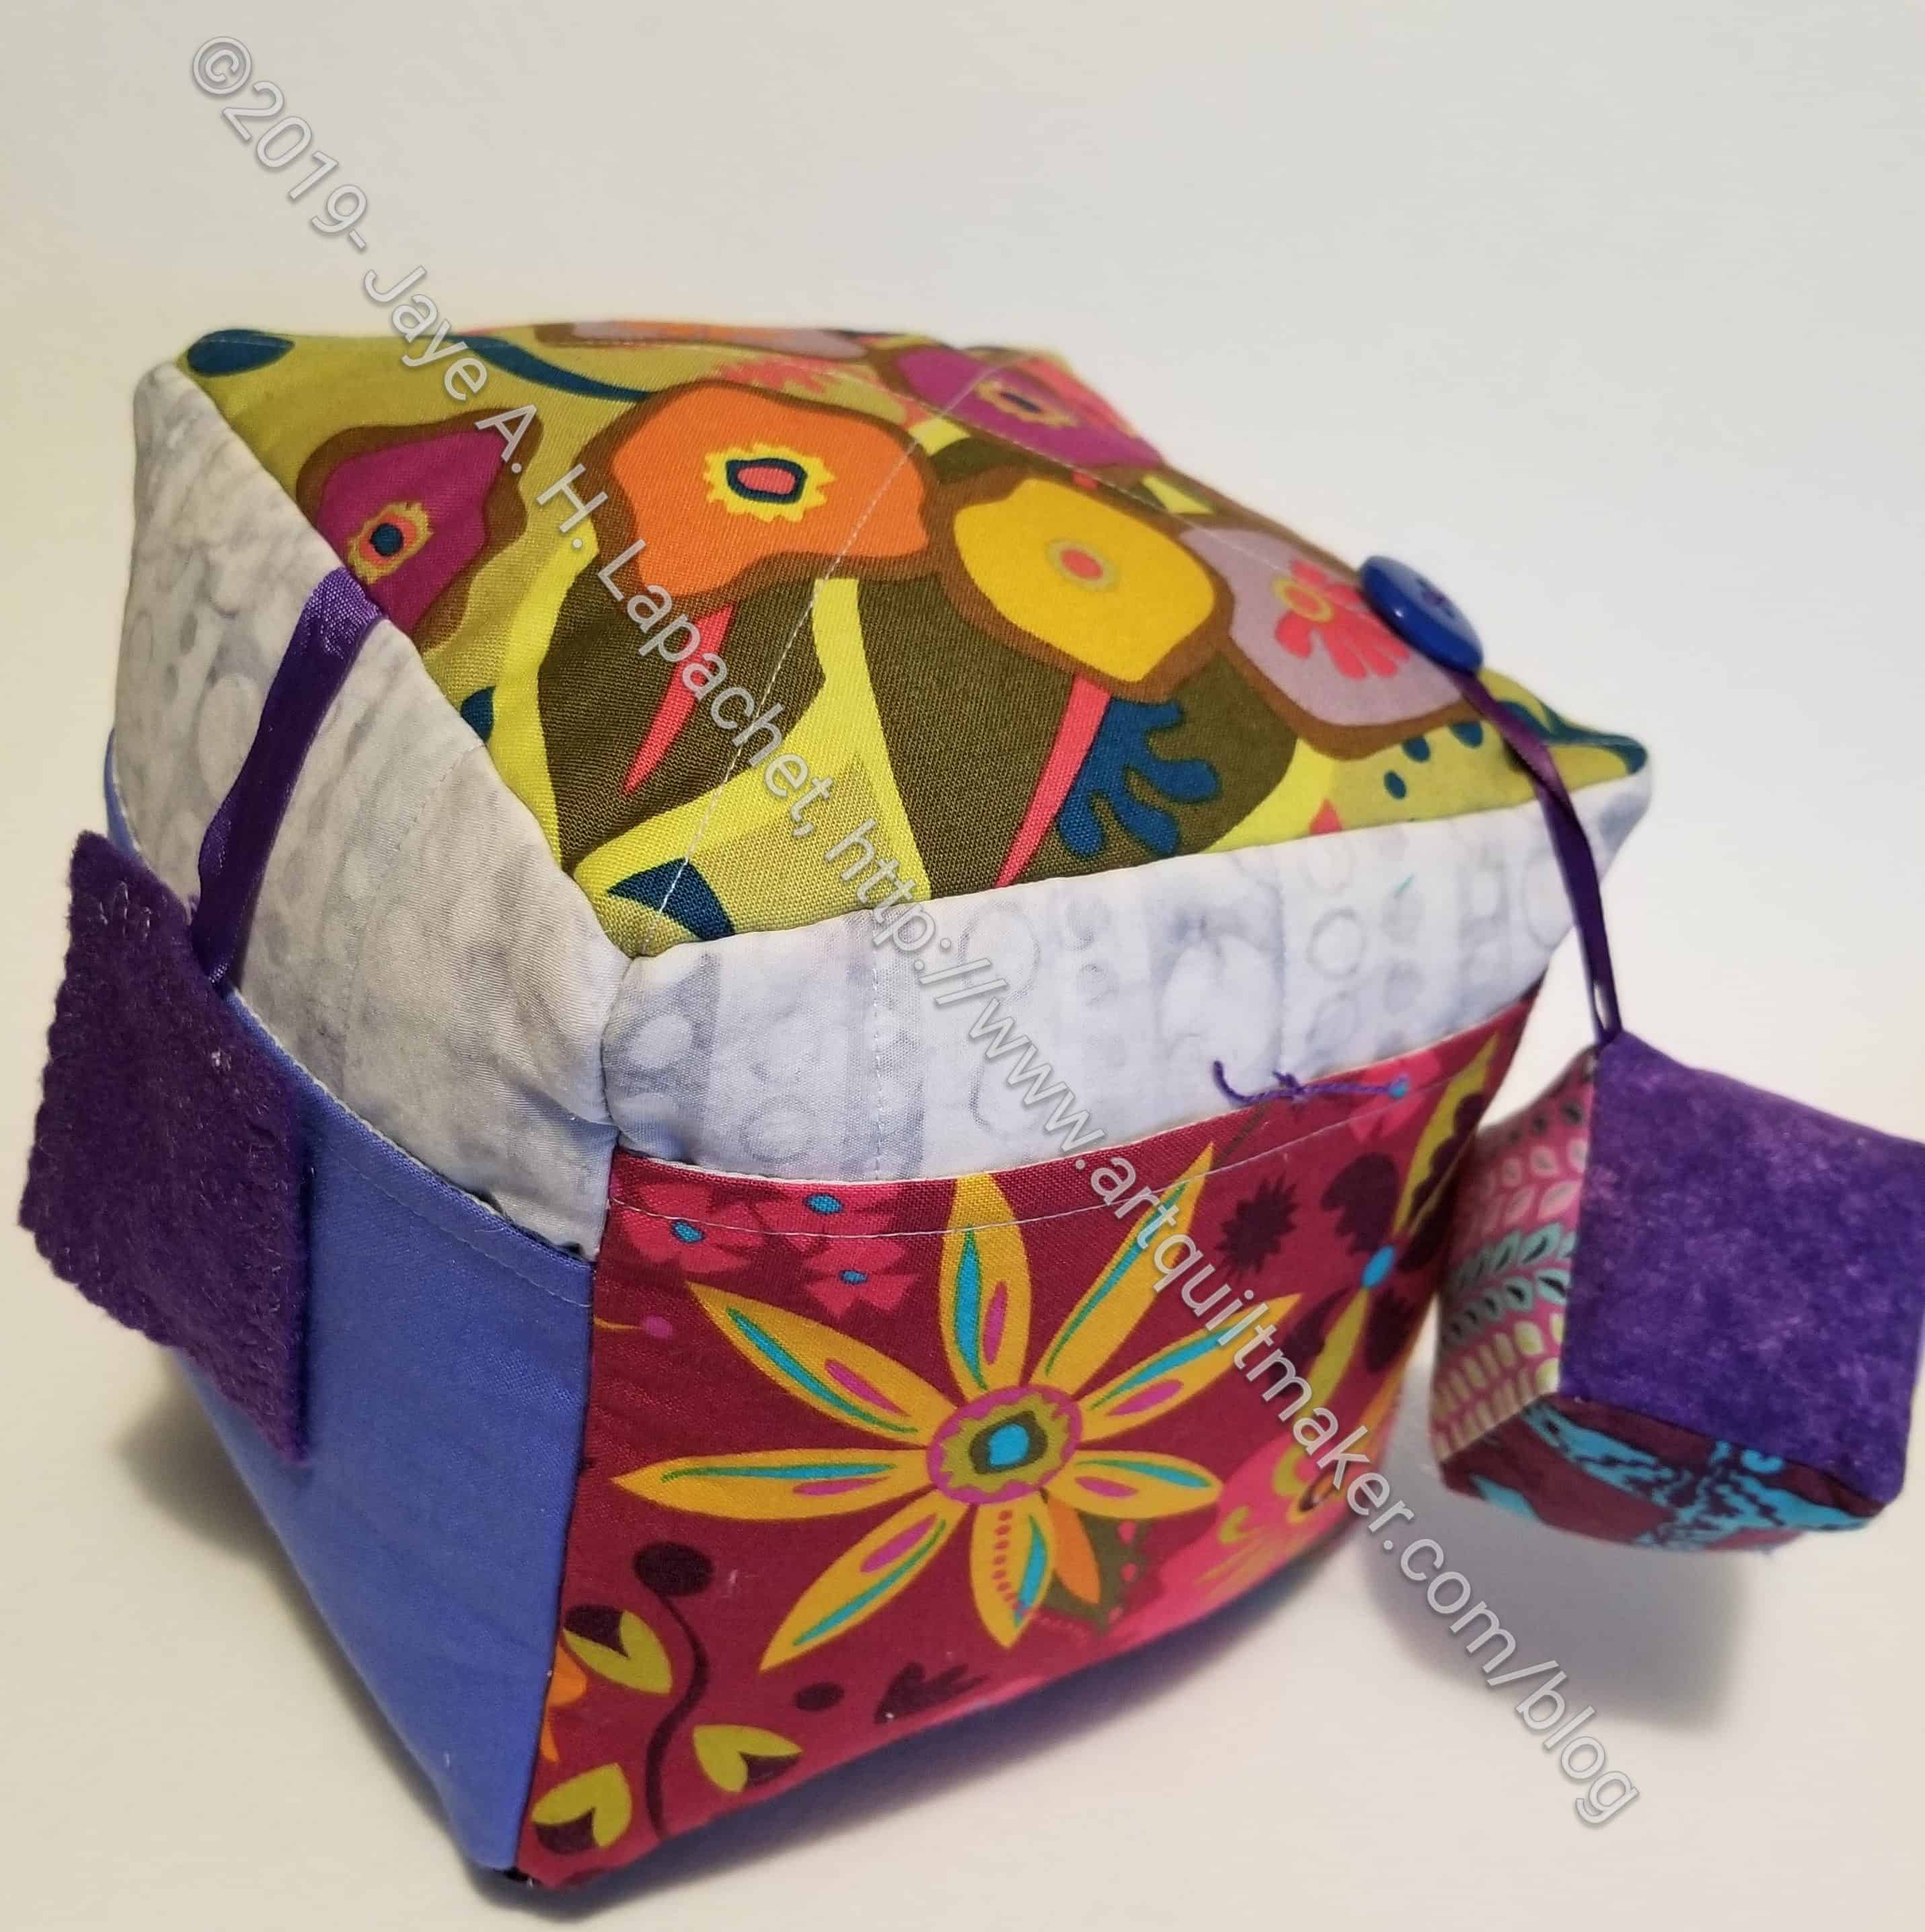
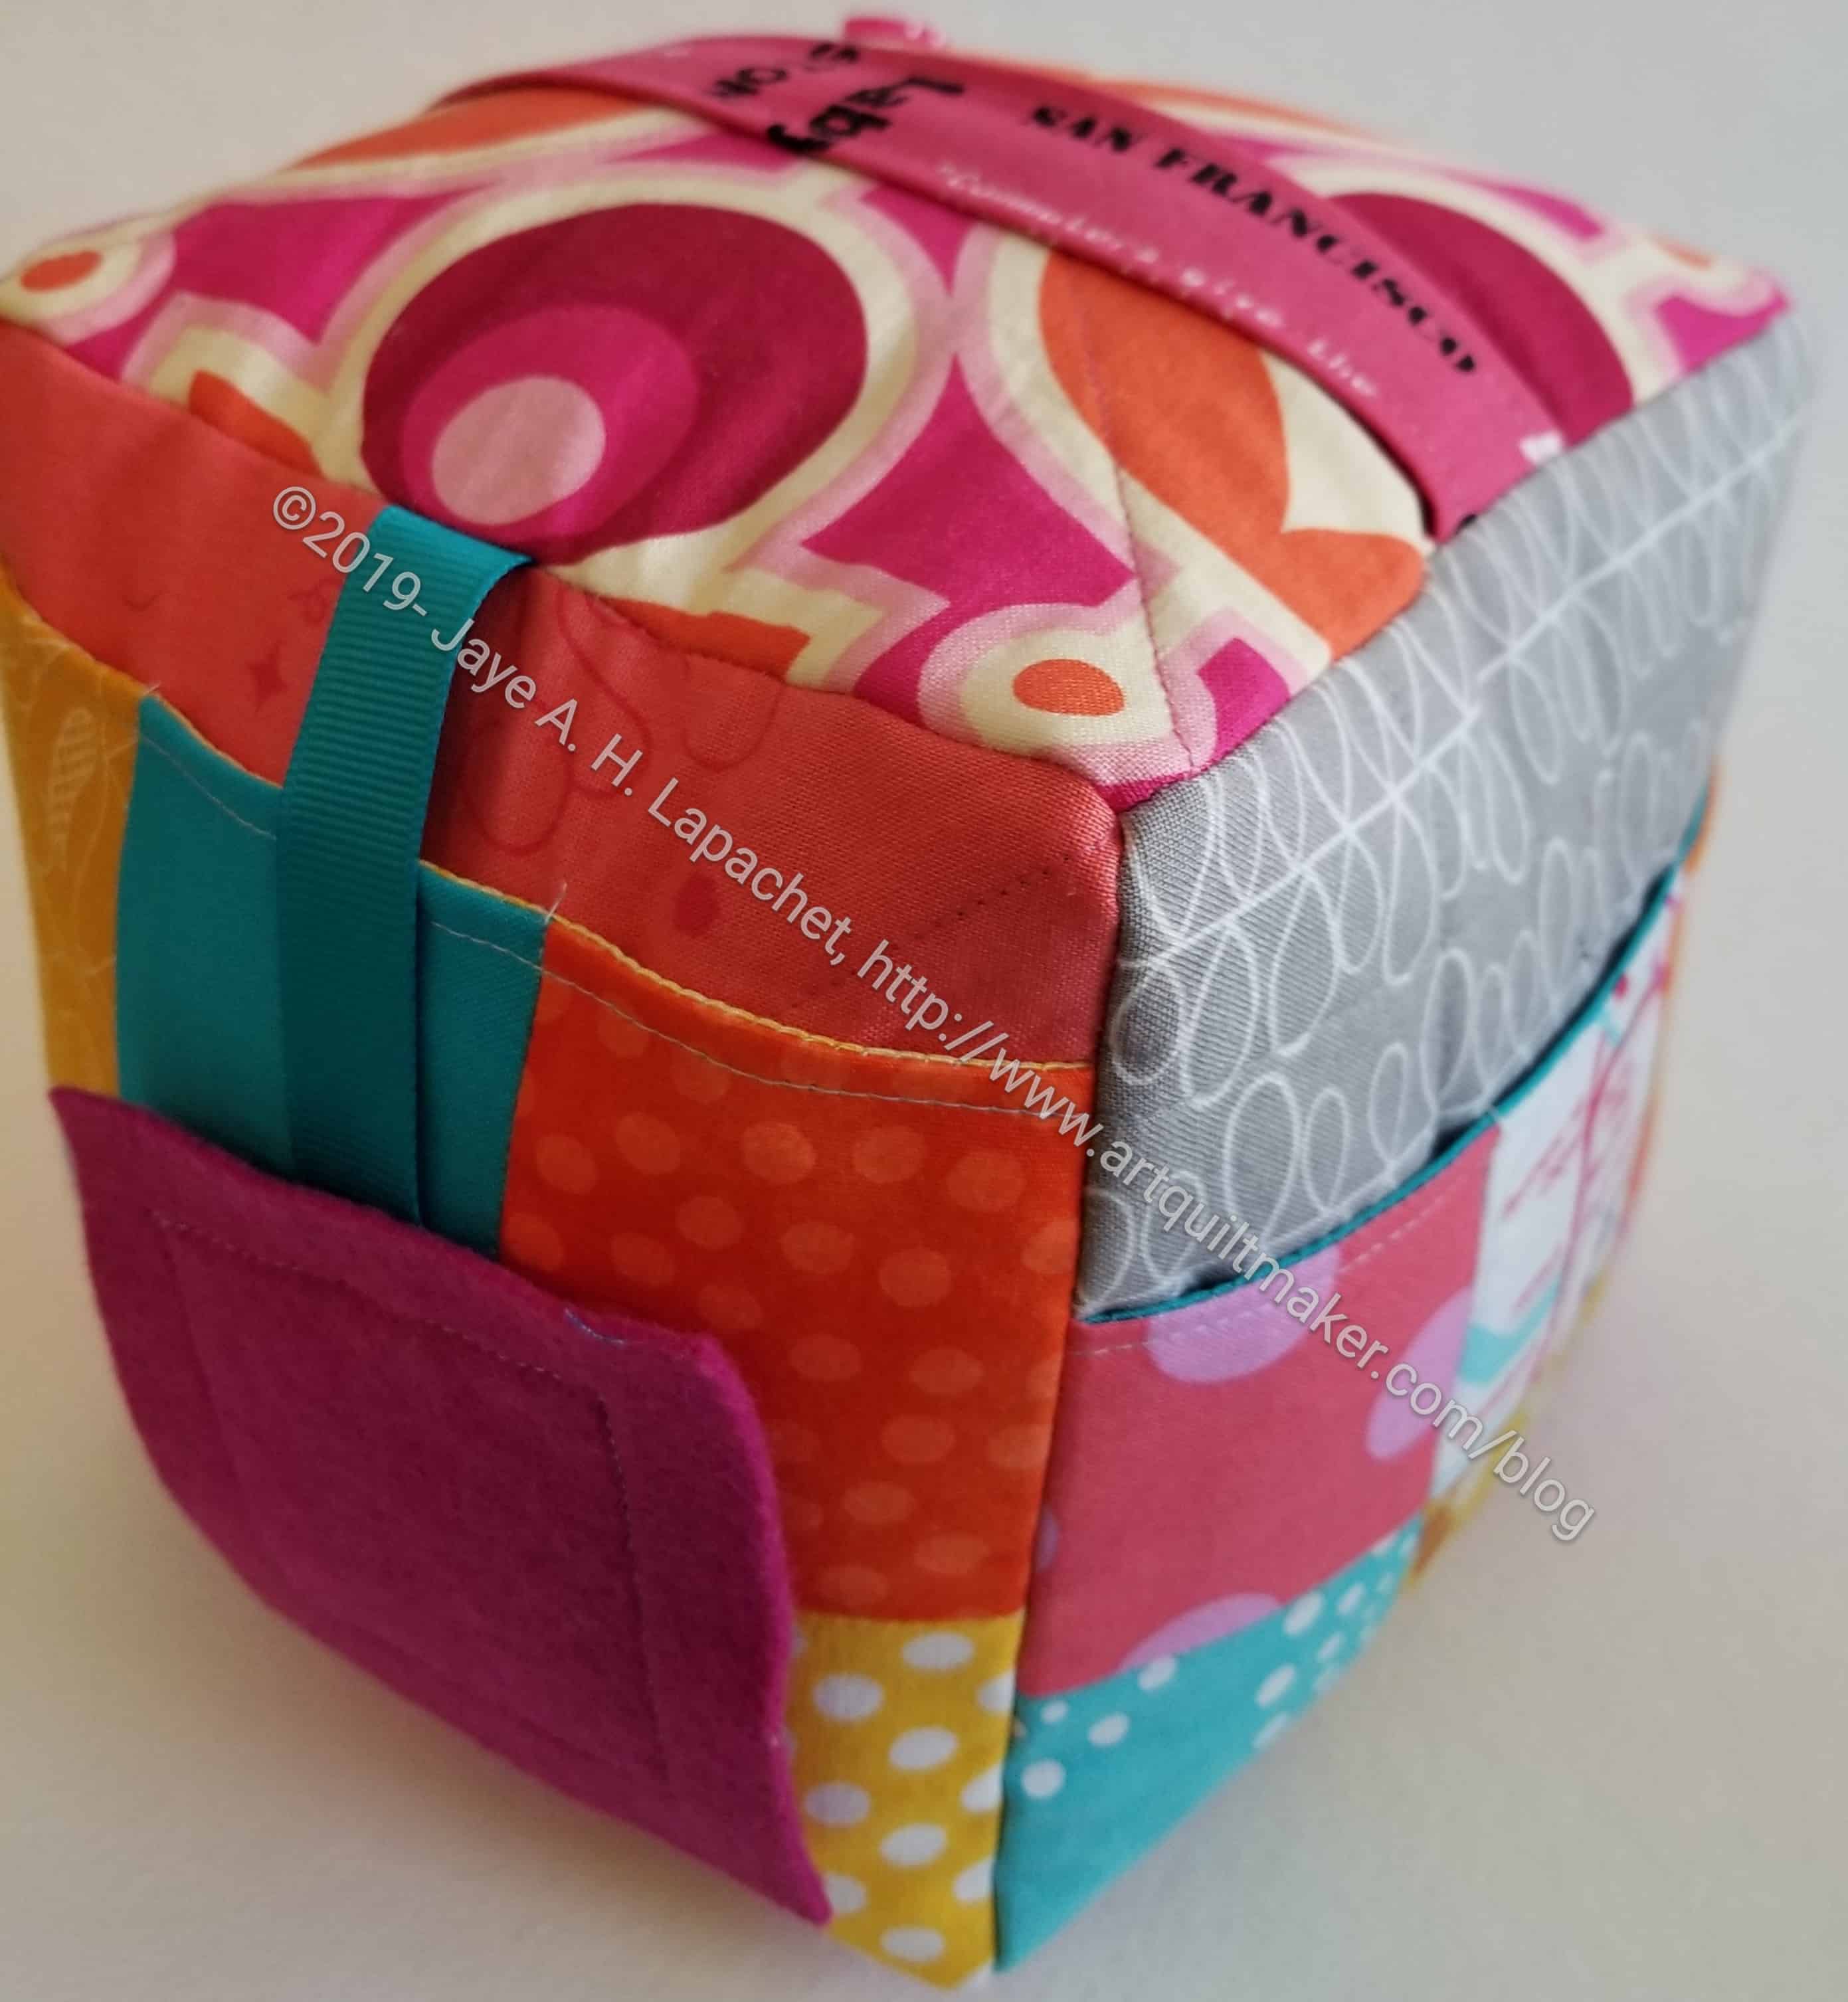
SueG’s boxy bags
Sue G also made some small boxy bags. Aren’t they adorable?
She made three or four. I forgot to take photos when I brought them home. Since I organized everything, I don’t want to undo all that hard work. I’ll get some photos when I stock the bags.
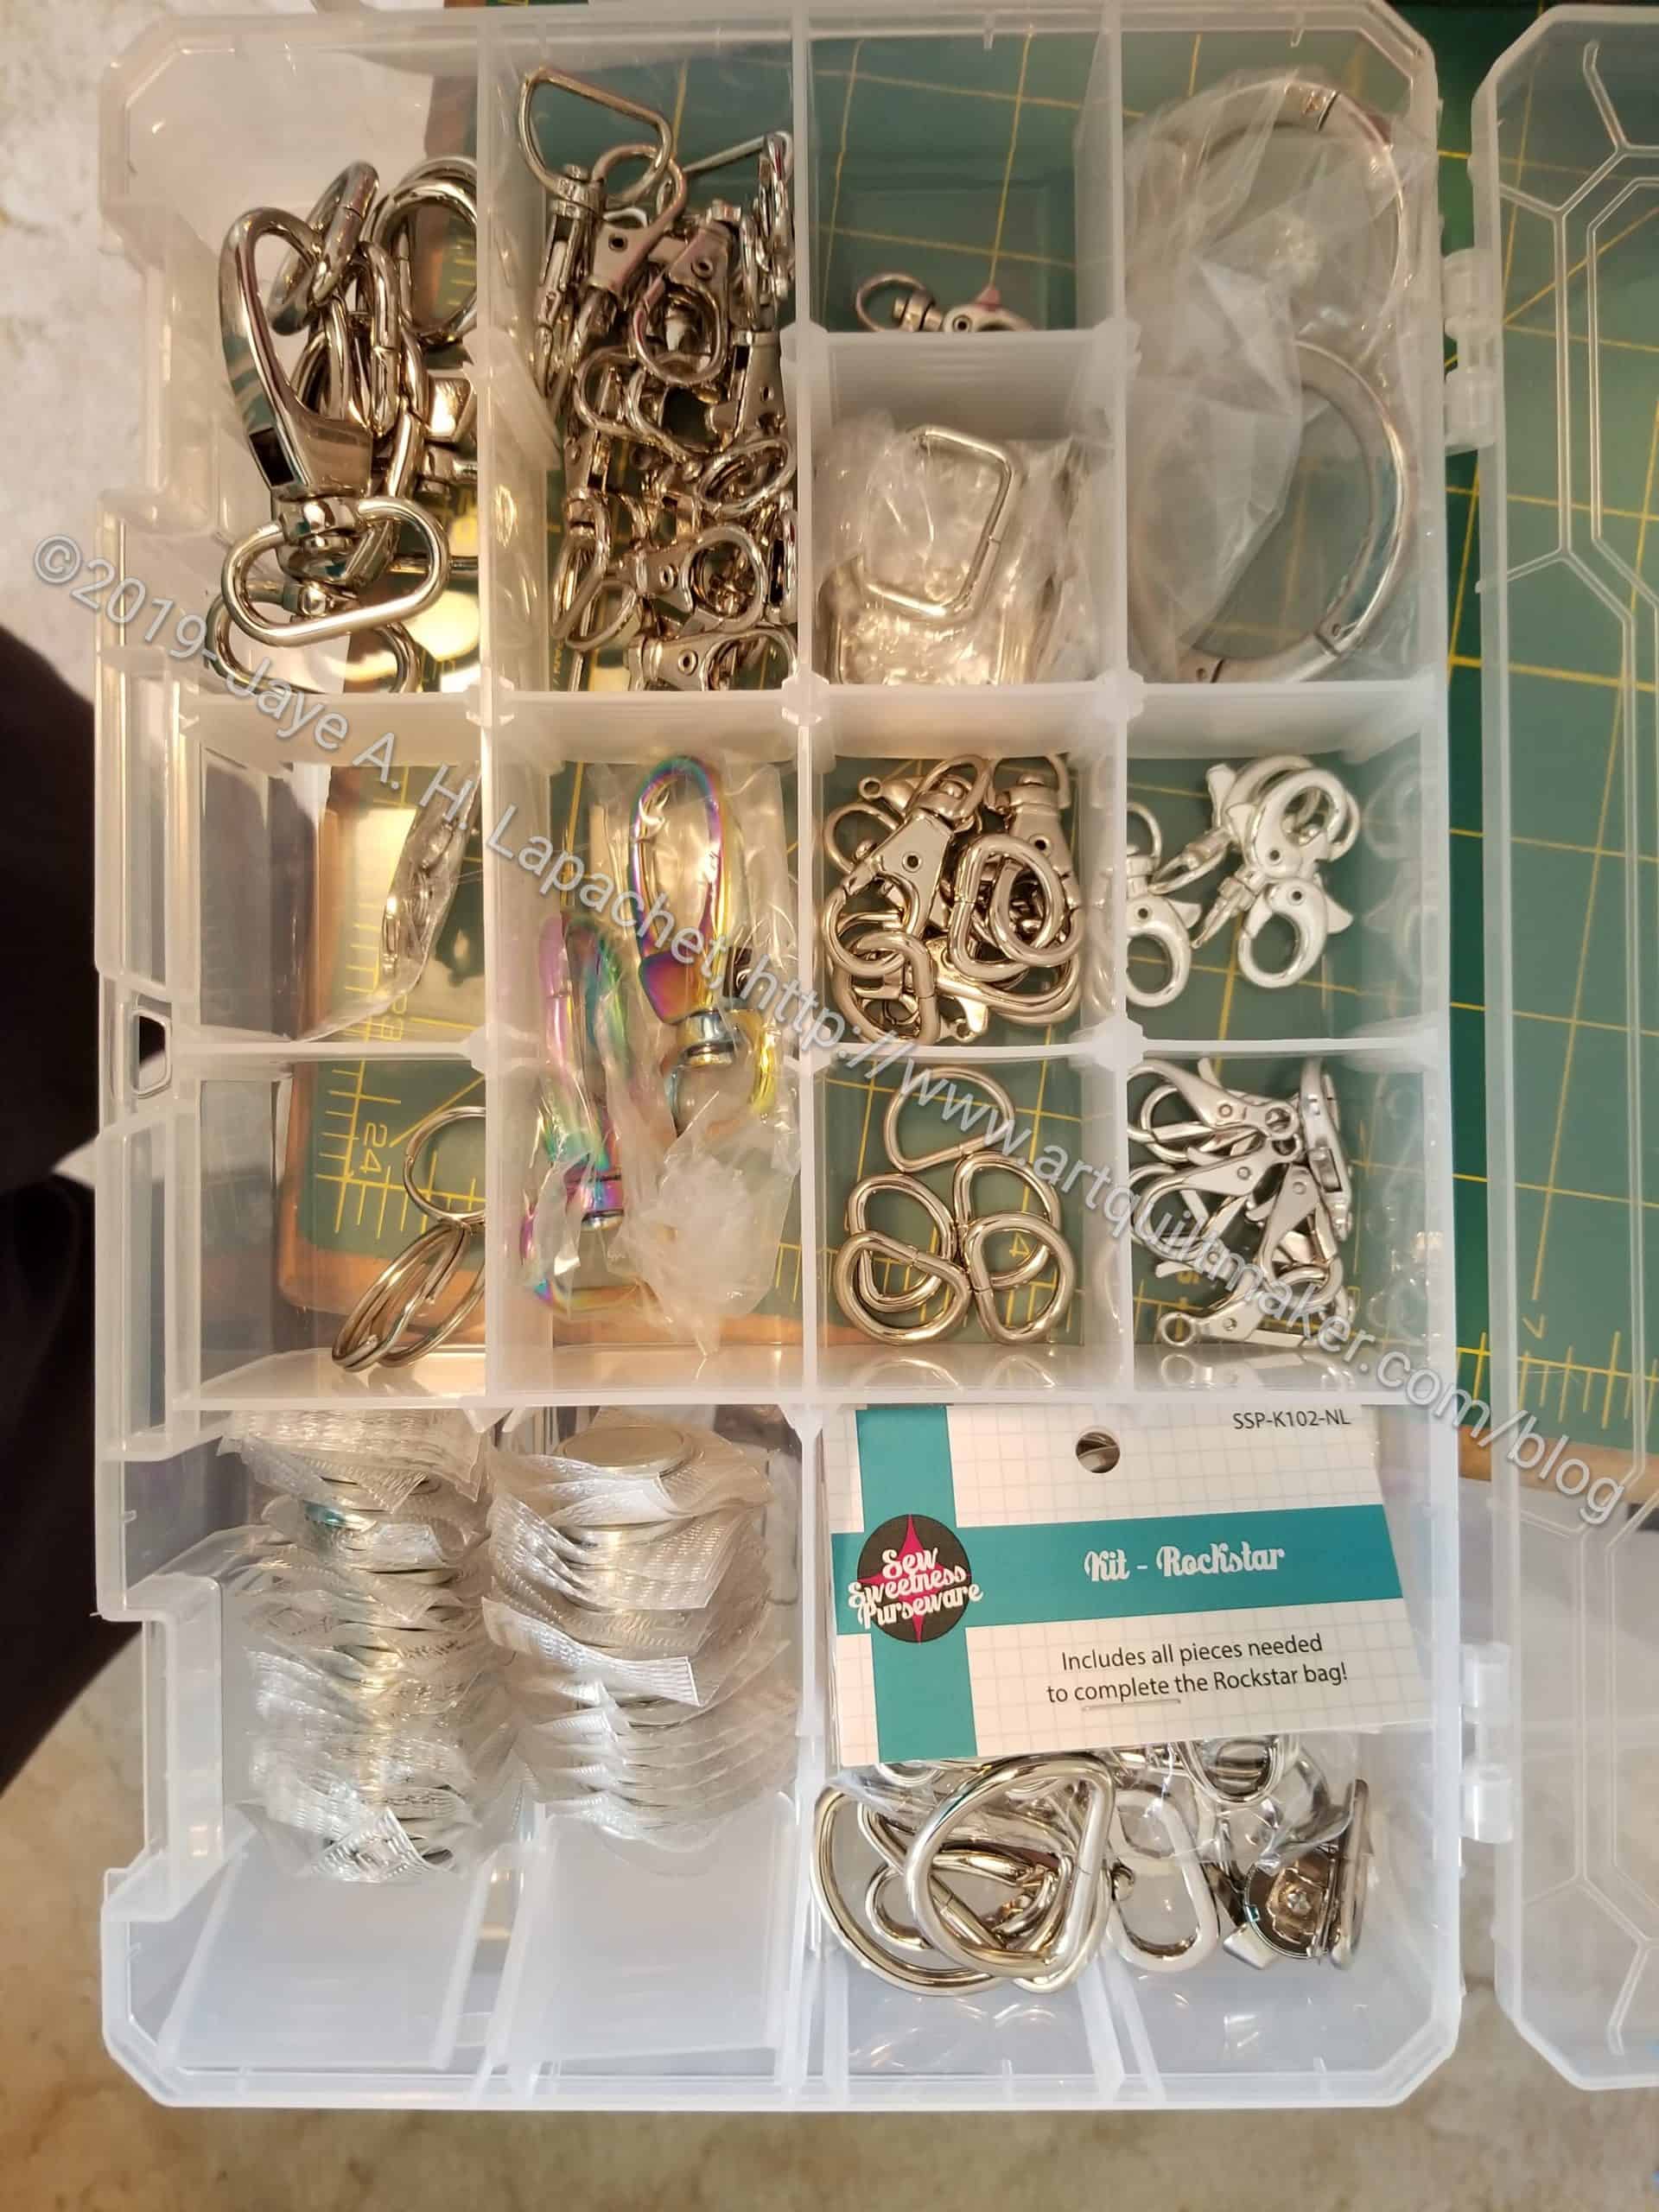
I finished the Tool Tote awhile ago. It has just been sitting around. I thought about giving it as a gift, but I made it with fabric that I used for several bags I wanted to make for myself. Thus, I hadn’t found a purpose for it until recently. I decided to use it to organize the hardware and supplies I use for bagmaking.
I had put a few tools in it, so those had to go somewhere else (or will have to go somewhere else).
Tool Tote with bag supplies
These supplies weren’t disorganized, but they weren’t in great shape and I was having a hard time keeping track of what I had. Since the Tool Tote was there. It was also the right size to hold the Art Bin I got last birthday. I filled the Art Bin with little pieces of hardware. I put the zippers and things on top.
It isn’t a huge tote and if I buy a lot of supplies before I use up the ones I have, I won’t have space. Perhaps that is a good thing. It is good to be organized.
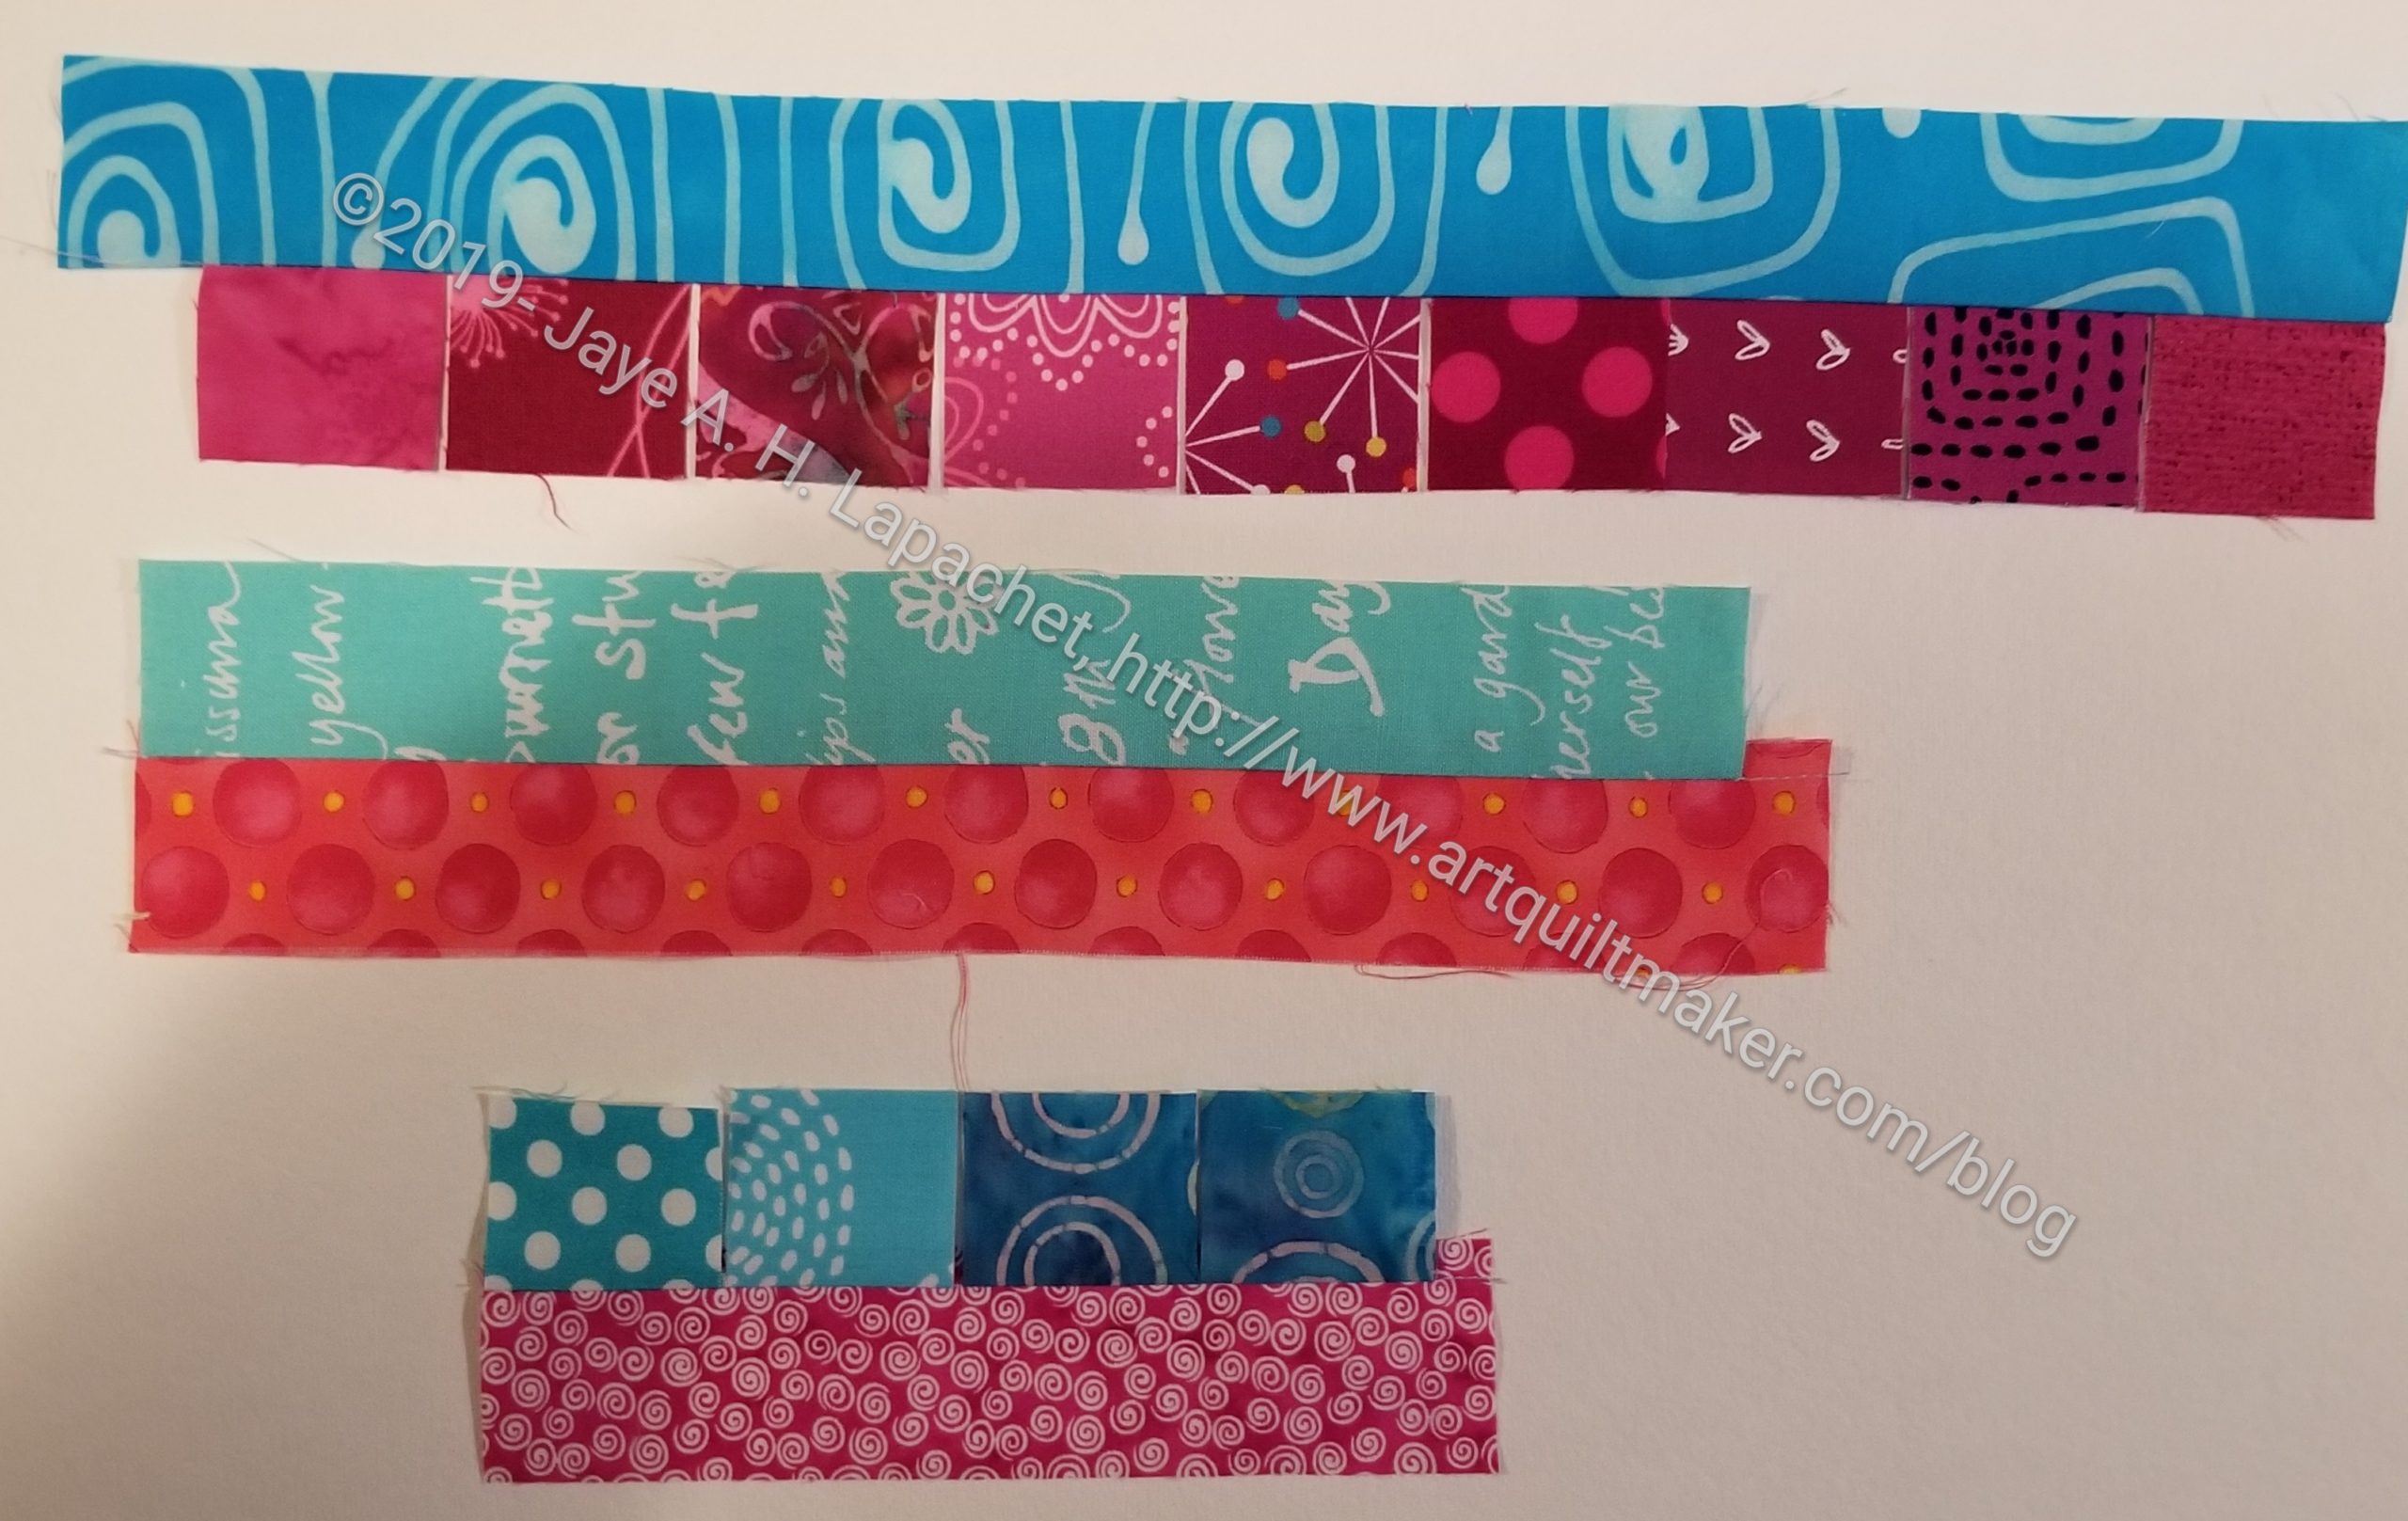
I was able to finish Frolic! in record time. I downloaded the clue. When I looked at it I realized that I could do the clue at Sew Day, I sewed strips really quick and took everything to Sew Day to cut up.
This clue was an easy one, but it was done very quickly and it seems like an eternity ago that I did it. I am already working on Clue 3.
The other day I talked about the first Mega-Pinnie that I made. I got a really sweet thank you note with a photo that really shows how the Mega-Pinnie is used.
I photocopied some of my tools and stuck them in the pockets before I wrapped the piece so she would know there were pockets. This is kind of an unusual tool and I don’t think many people have seen it.
I am so pleased. I might need to make another one! 😉
I was working on the Frolic! piecing and I realized that I was doing chain/strip piecing in a different way.
In strip piecing, you put two strips right sides together and you sew up one side. In this case, I had one long strip and a bunch of smaller strips and squares. I lined up the various bits and pieces on the long strip and just sewed. Later, I cut the pieces apart to the appropriate length.
It works and is great, because you can get some scrapiness without as much cutting.
Mine is a little different as it has a leash and a lobster clasp, so it can be clipped to another bag. I don’t know if I have made Julie a bag with a D-Ring. I’ll have to put it on the list for next year.
I made this Mega Pinnie as kind of a test. It was the second one I had made. I thought I would use it as one of the raffle prizes.
However, we are having a Winter swap in a few weeks. Last year, people didn’t show up so others did not get their gift. I decided that I would donate it as an angel gift for the swap.
I didn’t go as crazy on the pockets, so the pockets are larger than on the Swap Gift Mega Pinnie. I also forgot the handle. I think it will be great, though.
Yep, we are all about gifts here on the blog right now. In case you hadn’t noticed. I am having a hard time wrapping my head around the fact that Christmas is coming. I just don’t believe it. It would probably help if I got some decorations up.
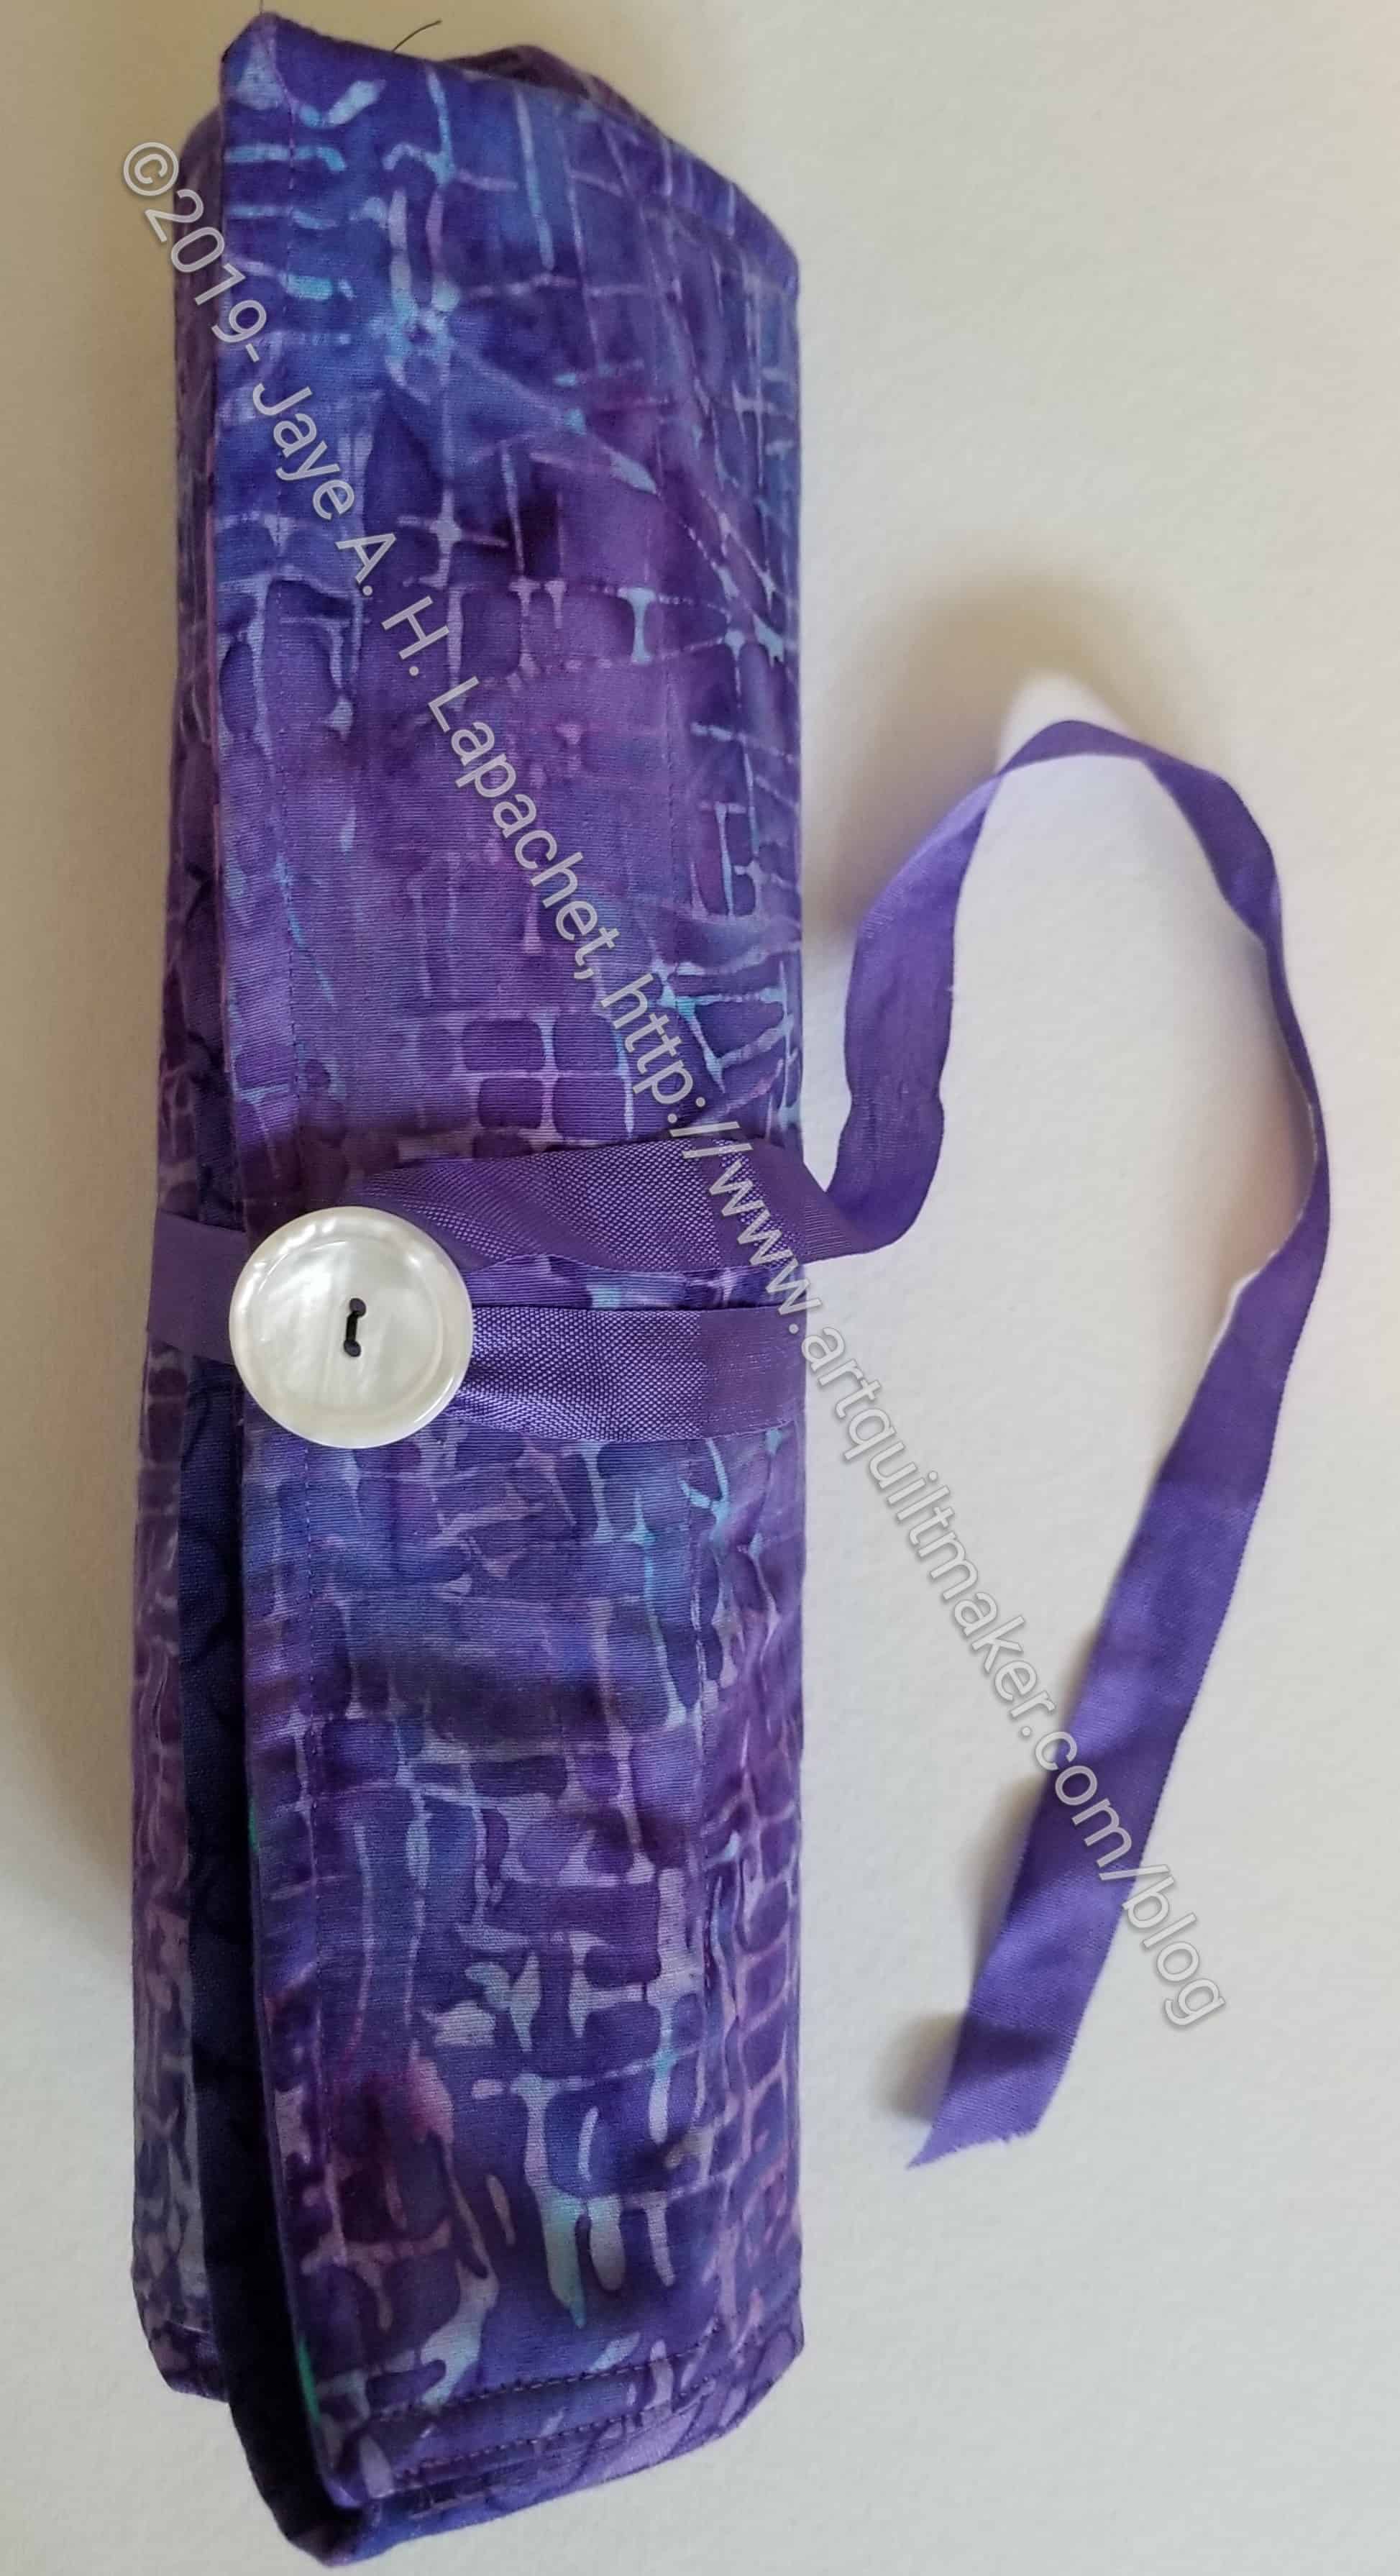
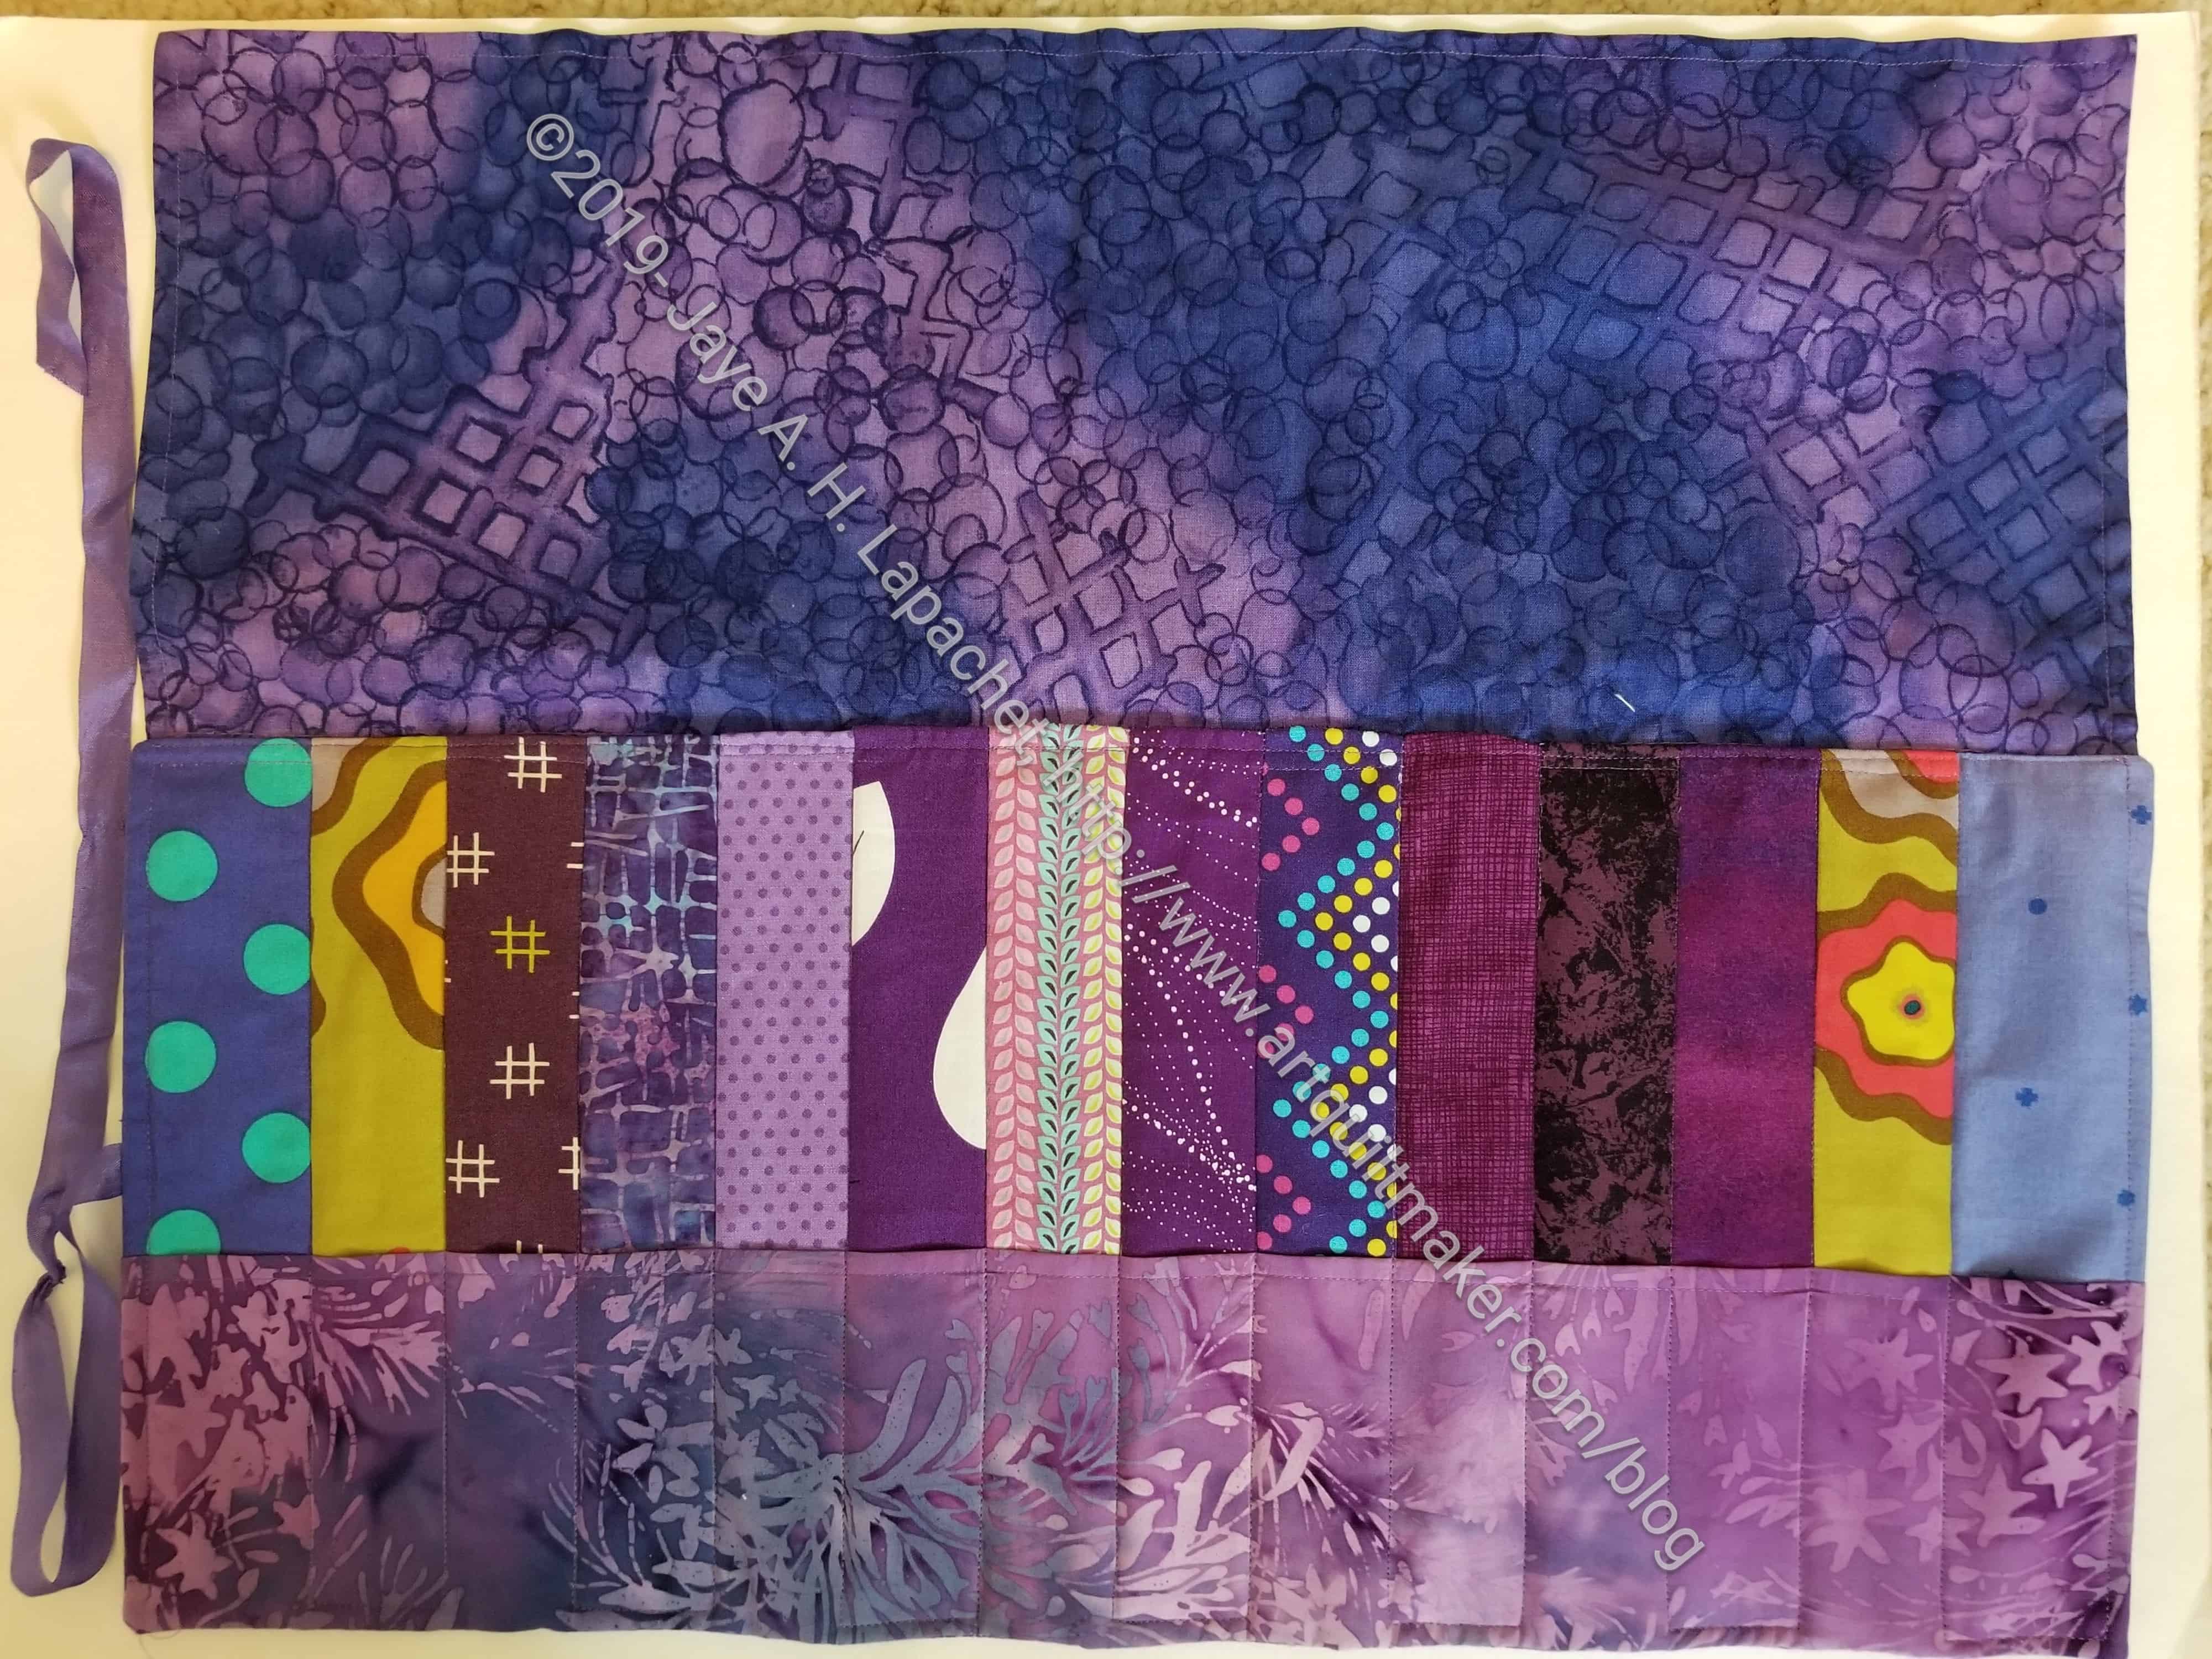
Still the practical part of me knows that Julie’s birthday is before Christmas and I needed to get her gifts done before the Thanksgiving frenzy arrived. So, I also made this pencil roll for Julie. I thought I made her one before but couldn’t find any evidence. She wanted one with a flap. Apparently, the one without the flap leaked writing implements. I have had this experience with mine and keep it upright in order to keep the implements where they belong.
Julie’s Pencil Roll, open
I was really pleased to choose fabrics for this pencil roll. I found some great batiks that I had been hoarding. I also threw in some lime/icky greens. They go well with purple and will tie this piece to the Undercover Maker Mat she made. I knew she would like them.
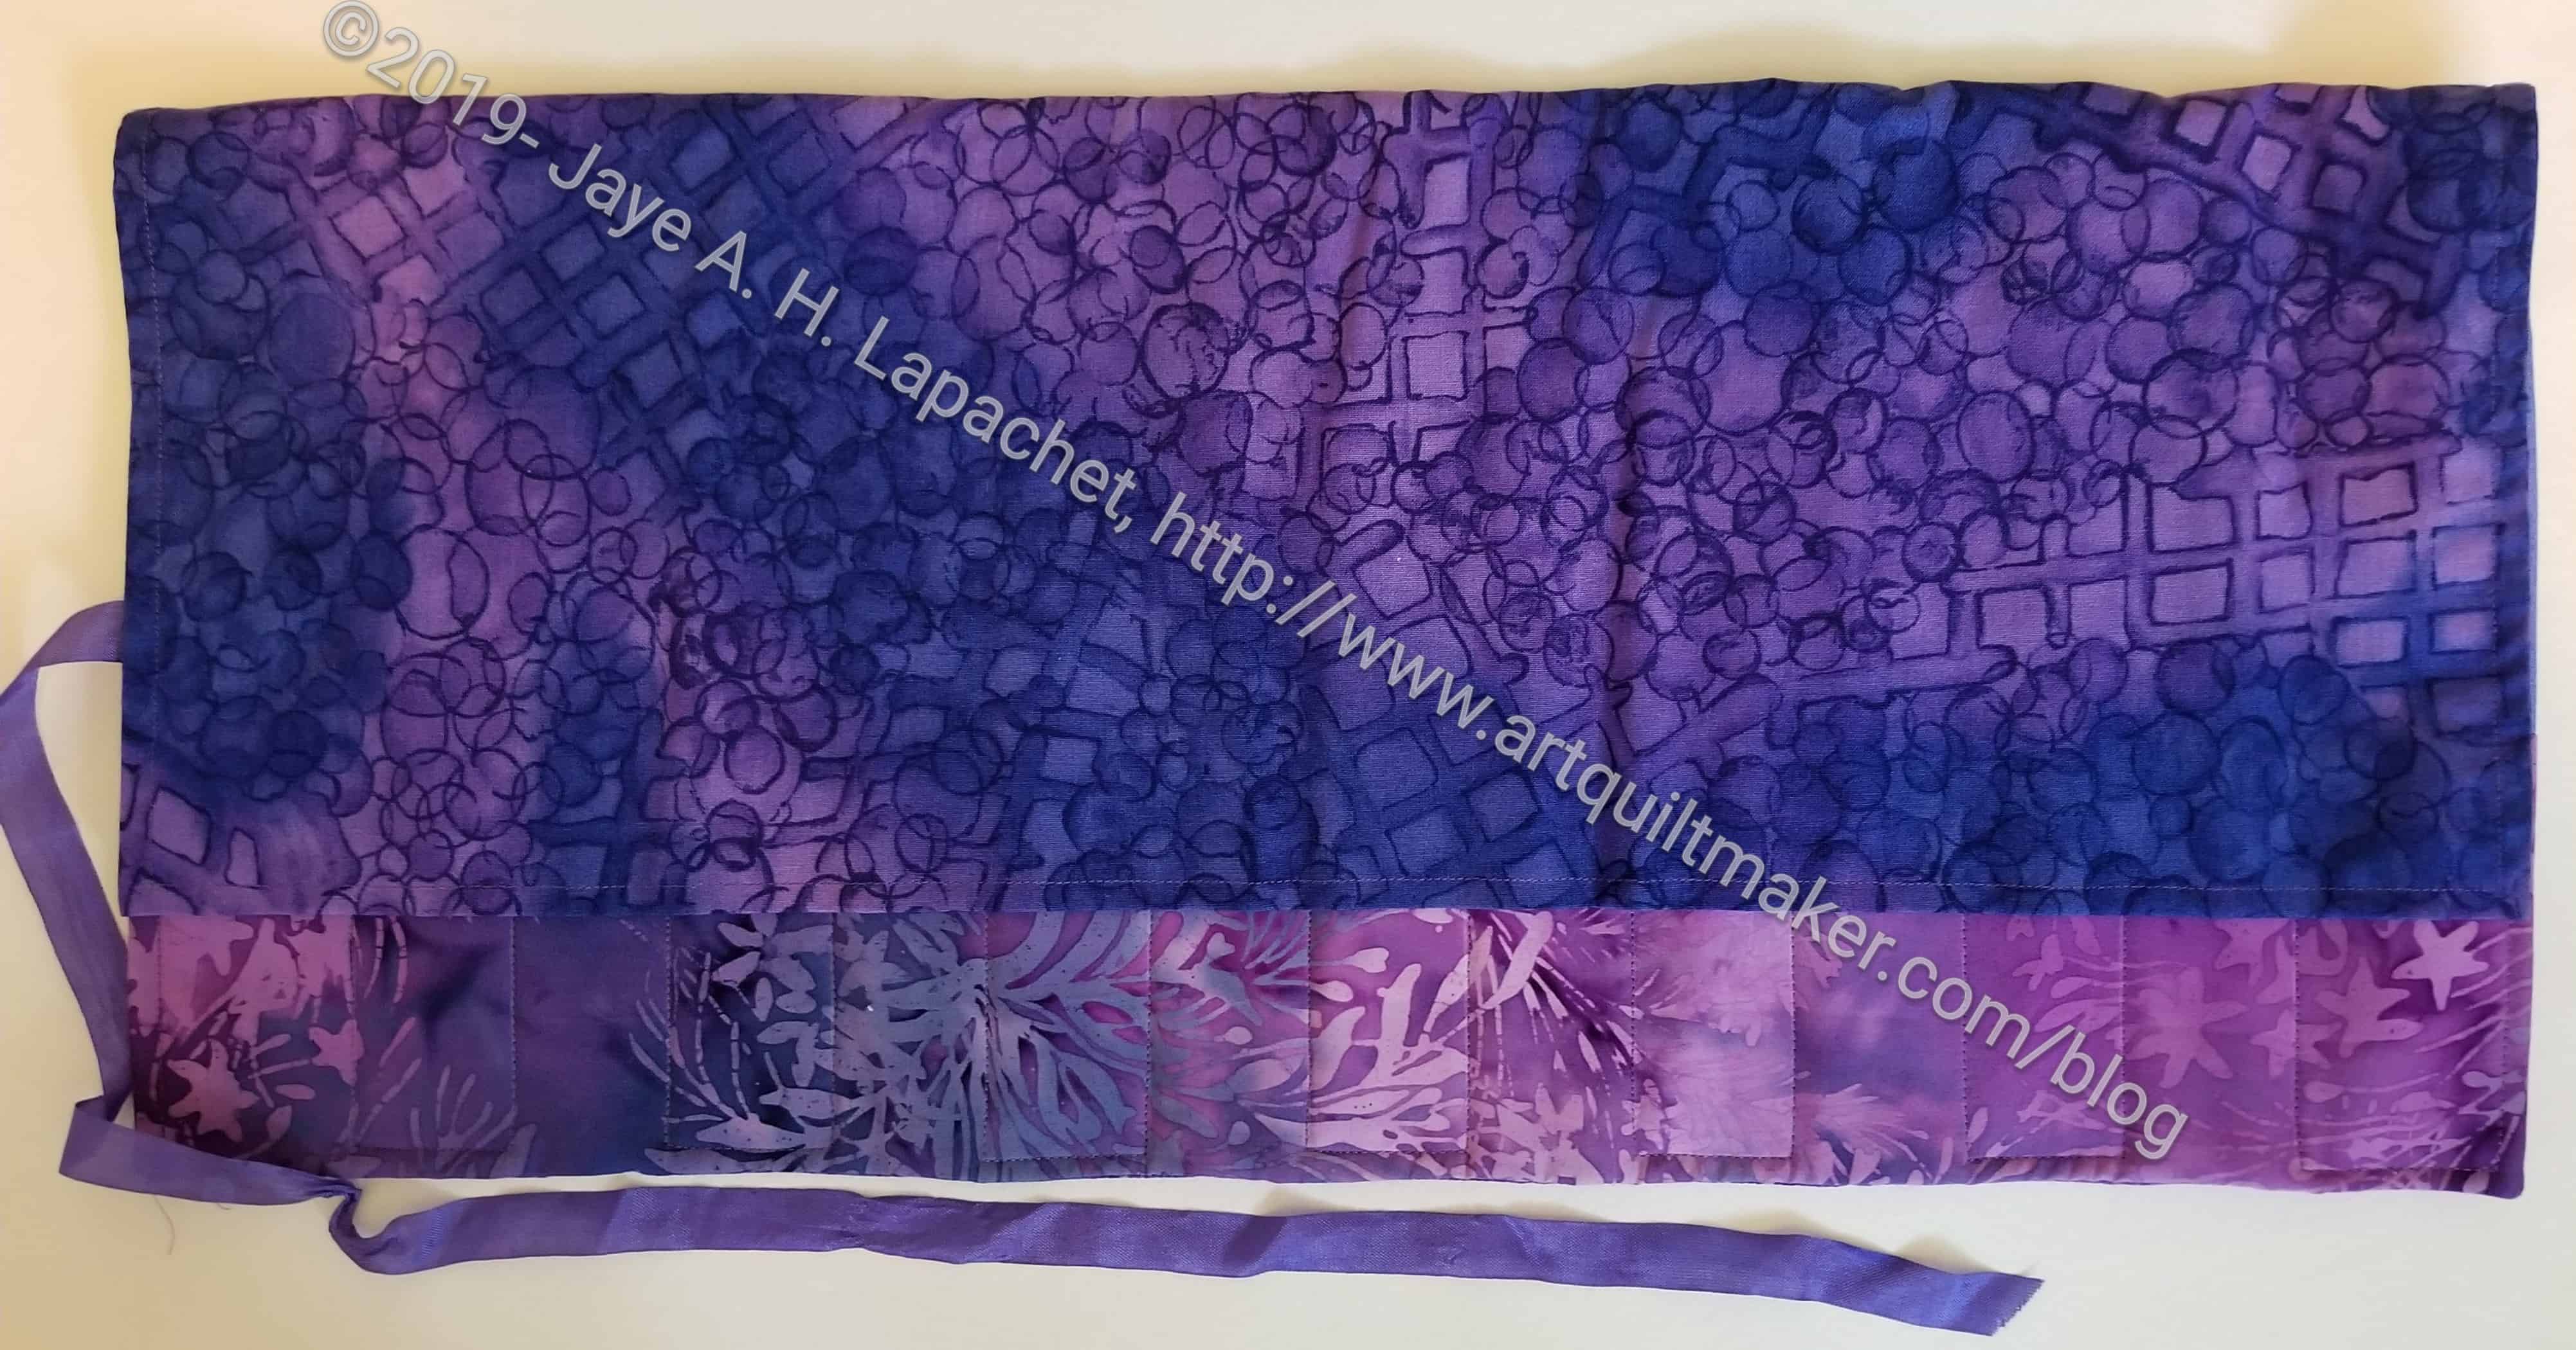
Julie’s Pencil Roll, flap down
I left the top open to turn the piece and I won’t do that again when the pencil roll has a flap. I had to carefully stitch the thing in order to make it look right on the top.
These don’t take long to make and I might make some for the officers. I don’t know if they are pen people, though, so perhaps a scissor cozy is better?
As mentioned, I had to make a swap gift for the Winter Extravaganza Palooza at the guild. In that previous post, I talked about the pattern. Since then I have been contemplating WHY I chose what is, basically, a giant pincushion.
Short answer: I don’t know.
Long answer: it is kind of a strange gift, but it is useful. It reminds me of the cube I made for the YM. It is also different from other things I have seen. The pockets can hold scissors and seam rippers, etc. I photocopied a variety of tools and put them in the pockets to show how the pockets can be used.
Mega Pinnie with needle felt
The baby pincushion (Mini Pinnie) can be removed from the Mega Pinnie and used away from its giant mom. There is also a piece of felt designed to hold needles.
The top has a handle, which can be used to hold the full Mega Pinnie.
As I usually do, I filled the piece with some Beanie Baby pellets as well as stuffing. I didn’t use wool roving on this one; I used poly-fil because I needed so much of it. I hope I put enough of the Beanie Baby pellets in the square to keep it anchored. I know I could have put more in it.
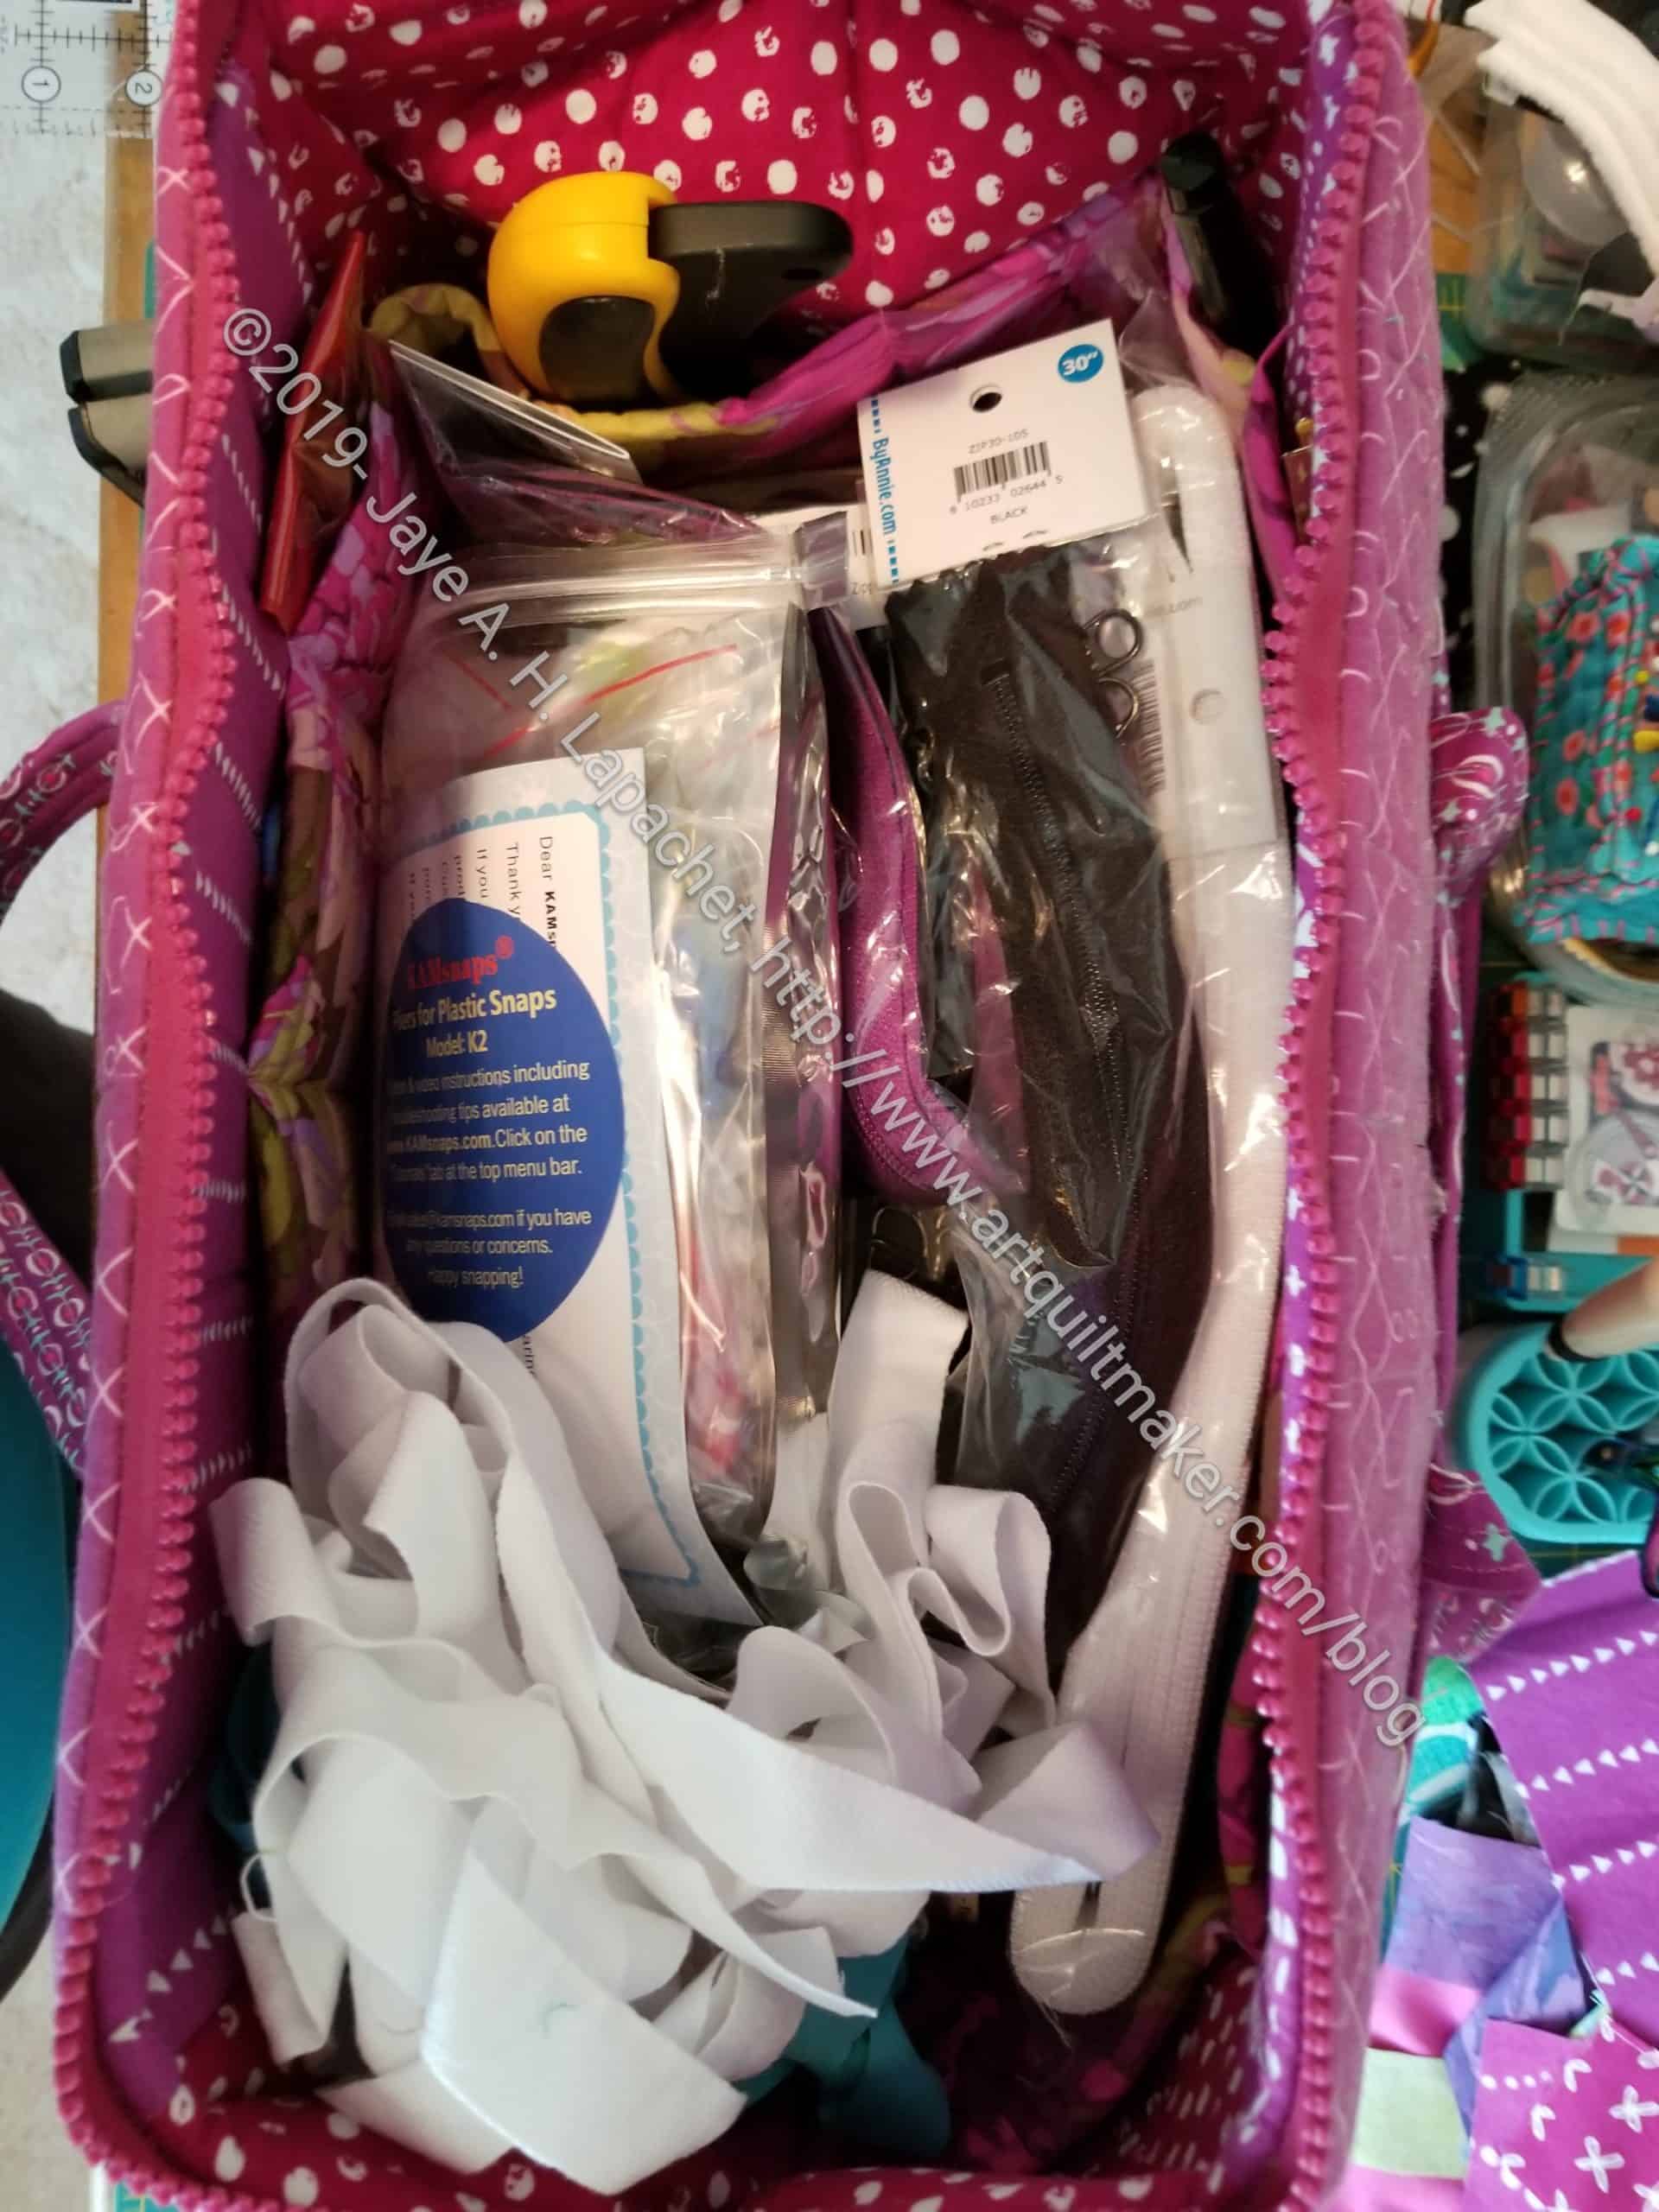
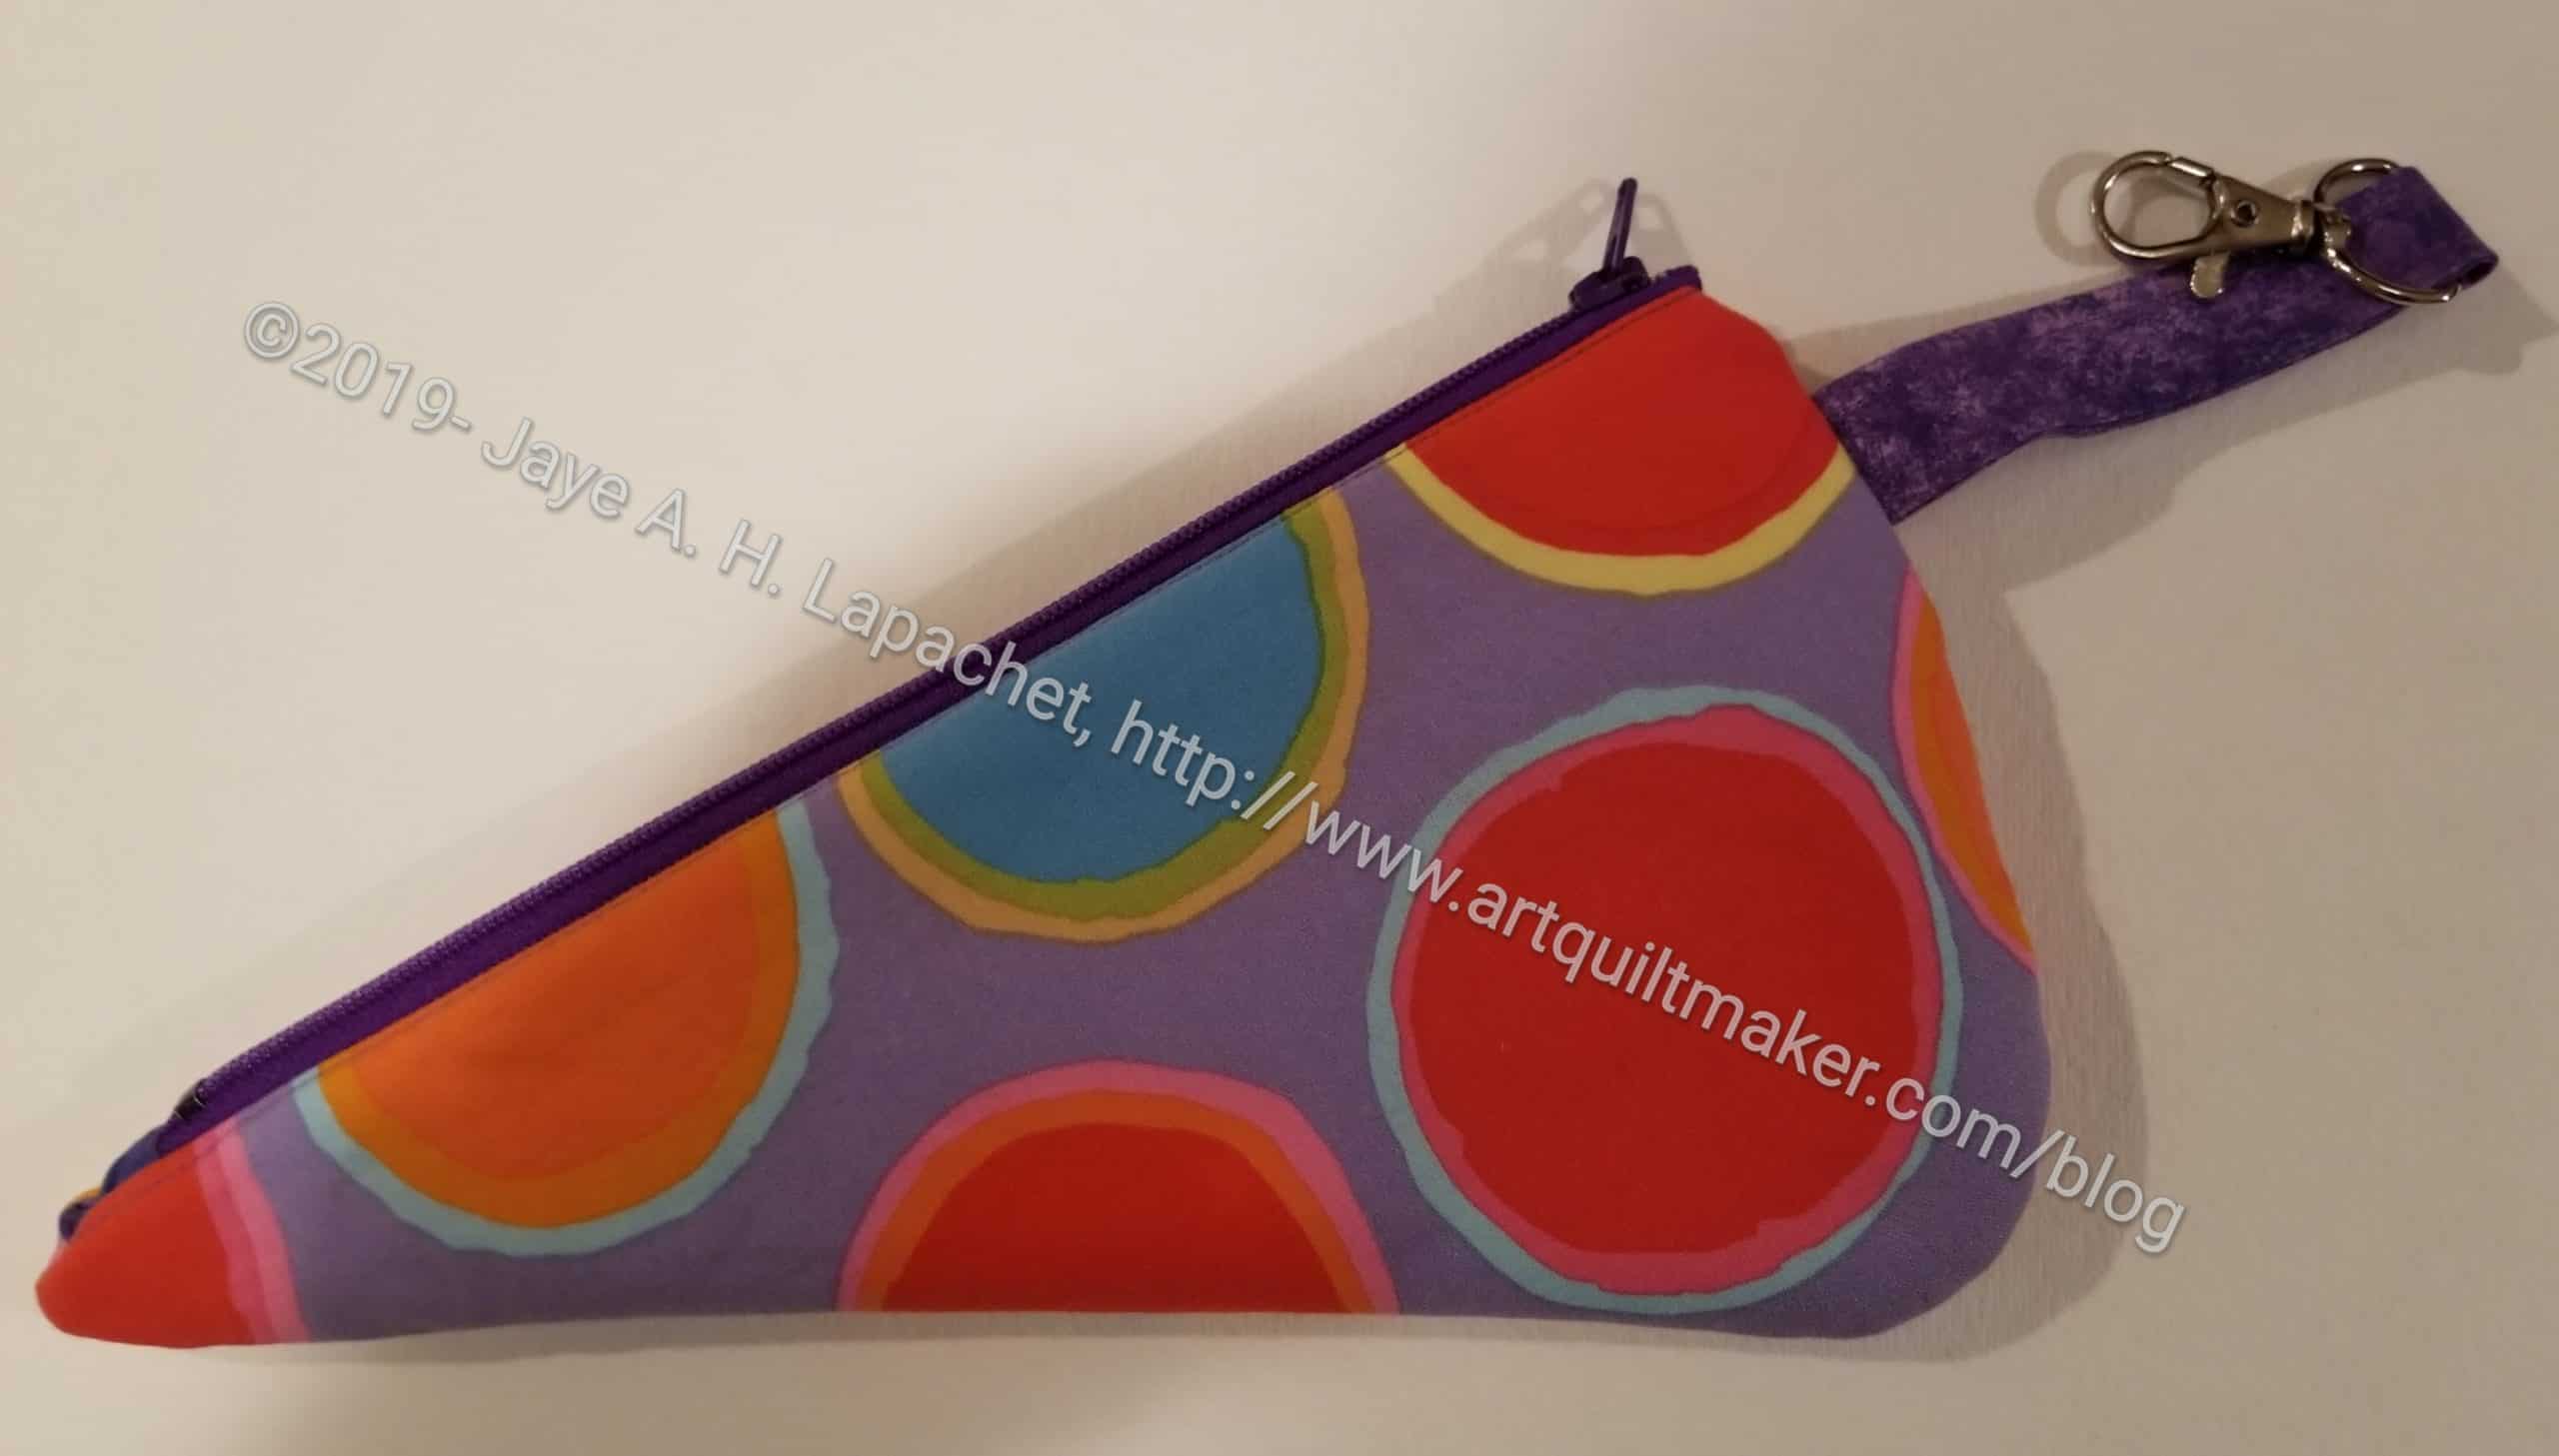
I have been working on gifts for almost all of November. That makes it hard to have anything about which to post. The people for whom I am making gifts read my posts. I have almost finished the major gifts for the upcoming holidays, which is a relief. However, I have some gift bags to show you.
Julie Gift Bags
I talked about gift bags and making them as I go along earlier this year. It hasn’t worked out completely as planned. I had plenty of leaders and enders projects in the donation quilts I have been making. Also, because bags are good mind sorbet, but boring if you don’t need mind sorbet. Also, I have a lot of small gifts to wrap and small bags are quicker, but also fiddly-er. I will have to buckle down and find some small bags in my stash of bags or make some. The only other alternative is to wrap with actual paper and tape. Bleah.
I wanted to make gift bags in which to wrap the gifts. I have had some fabrics waiting to be made into gift bags. There happened to be some purple that was perfect for some of the gifts I have made.
One of the things that was in the first Frolic! clue was a mention of Bonnie Hunter’s Scrap User System. I had forgotten about her system, but was reminded when I clicked on the link and started reading the article.
2019 Cutting Chart
I don’t do exactly what Bonnie does, but I do a version of it. As I have mentioned, I cut certain pieces out of every piece of fabric I use or buy for future projects. As I mentioned the other day, this sometimes comes in handy when I work on a project that needs certain unit sizes that I have cut. This is the point of Bonnie’s system.
My cutting varies from year to year depending on what projects I have going, as I have said. I like the idea of cutting up all of my scraps into usable pieces, but it just isn’t practical for me. I like the compromise I have made. It breaks up my cutting, as I have also said. I have the pieces I need for my next projects ready to go when I am ready to sew. I have something (cutting up pieces of fabric) I can do when I have a few minutes free.
I also like having random shapes and sizes of fabric in my scrap drawers. I would be able to make interesting journal covers or the improv donation quilts without them.
I think the key is to think about different systems and make them work for you.
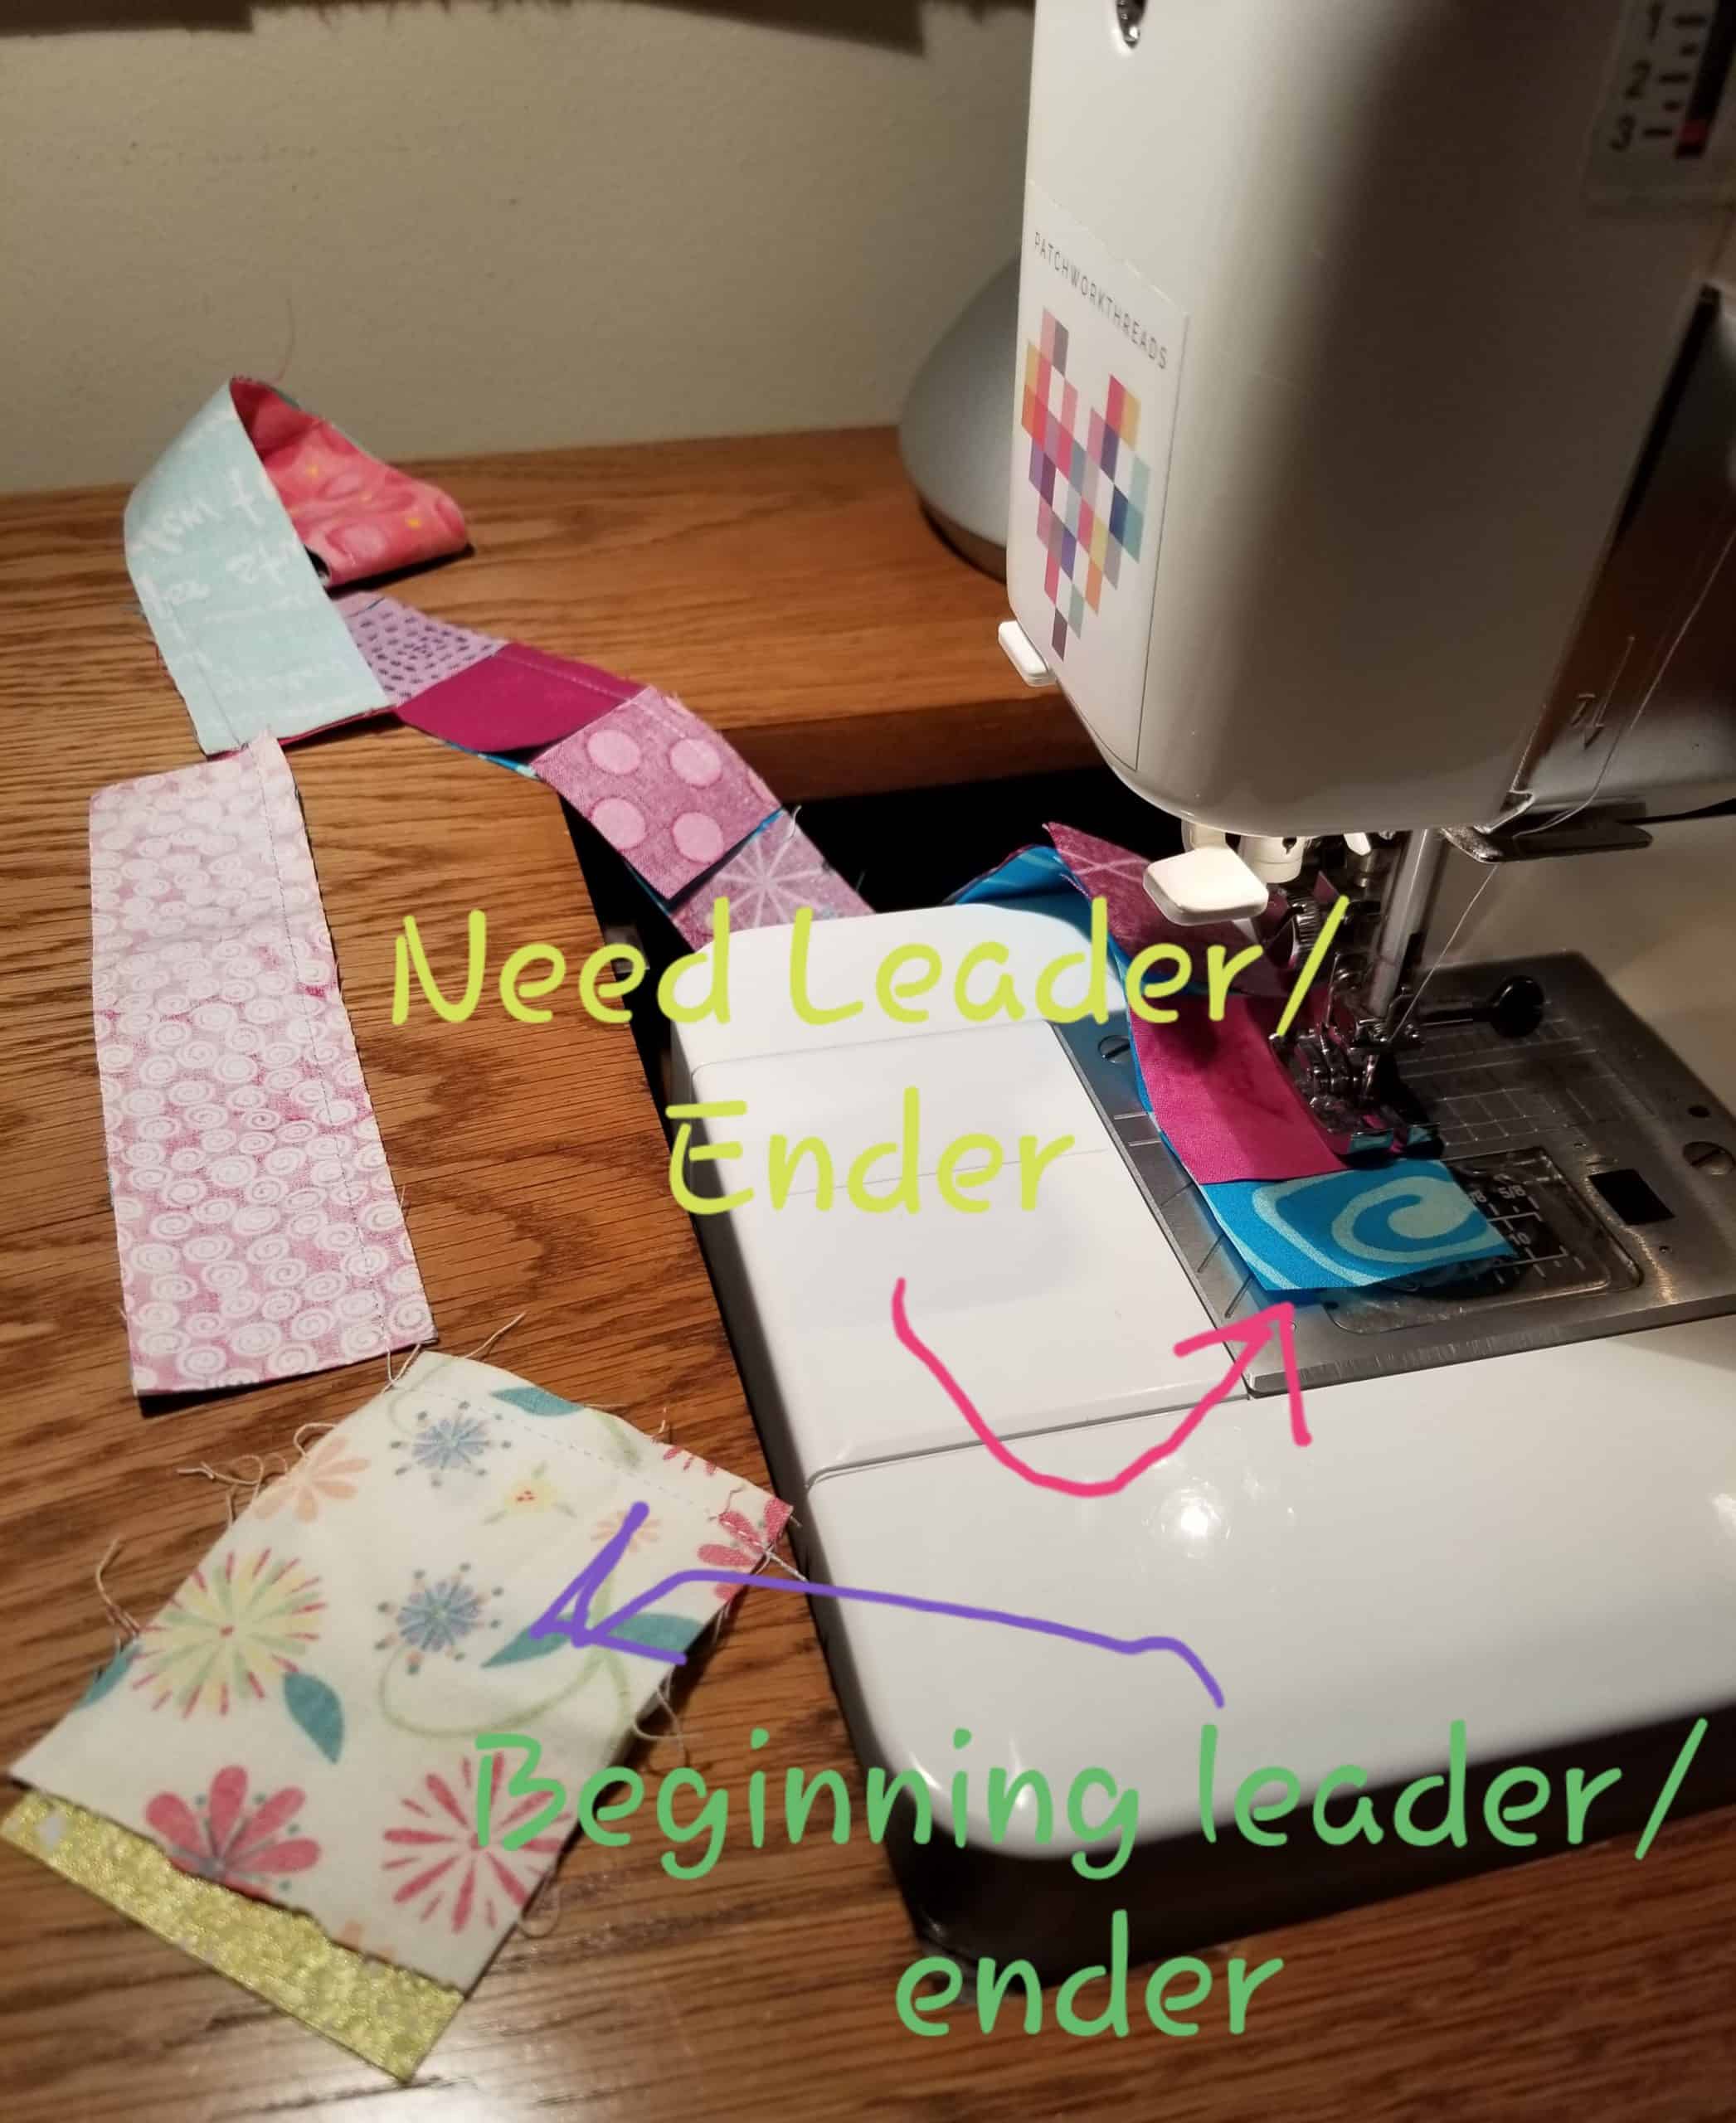
A few weeks ago, I wrote about a leaders and enders demo I did at my guild. I am not sure if I changed any world views, but it was a good way to clarify the process in my mind.
As I was working on Frolic! this week, I realized that chain piecing and leaders & enders are related, but not the same and thought I should clarify.
Leaders & Enders Clarification
Chain piecing is where the quiltmaker sews piece after piece without cutting the thread. Leaders and enders are used instead of a thread bunny.
I got used to using leaders & enders when I made my FOTY quilts. It is not really possible with those projects to chain piece. I have to keep the units in an exact order on the design wall. If I chain piece they get mixed up. Thus, I put two FOTY units through the machine and end with an ender. I go press and replace the FOTY combined units back on the design wall and grab two more units. I put this FOTY set of units through the machine, which means that my ender is now a leader. I put another ender through the machine and cut off the FOTY unit and the leader.
In the above photo, you can see me chain piecing. There are a number of Frolic! units after my leader (the white pieces). I won’t cut off the last unit until after I have sewed on an ender. I adjust how I piece depending on the look I want.
As I have said before, you can use anything as leaders/enders. I have used gift bags, bag parts, other quilts. Most frequently, I use pieces for my donation quilts.
The key is to use leaders and enders to improve your productivity.
I have copied the resources below from a previous post. As I have said before, Bonnie Hunter is the leaders & enders queen.
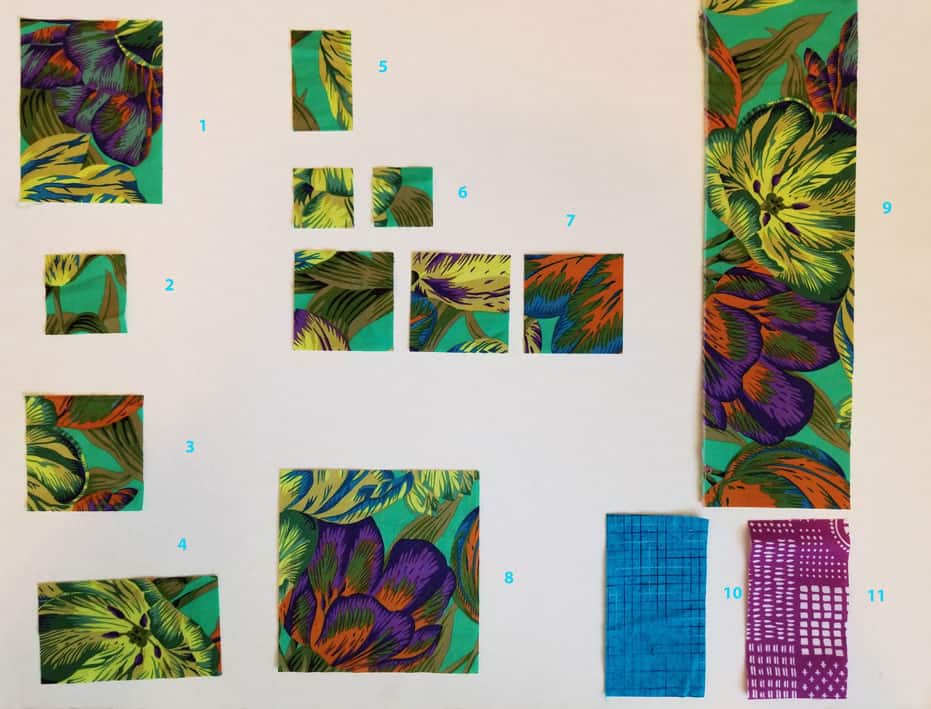
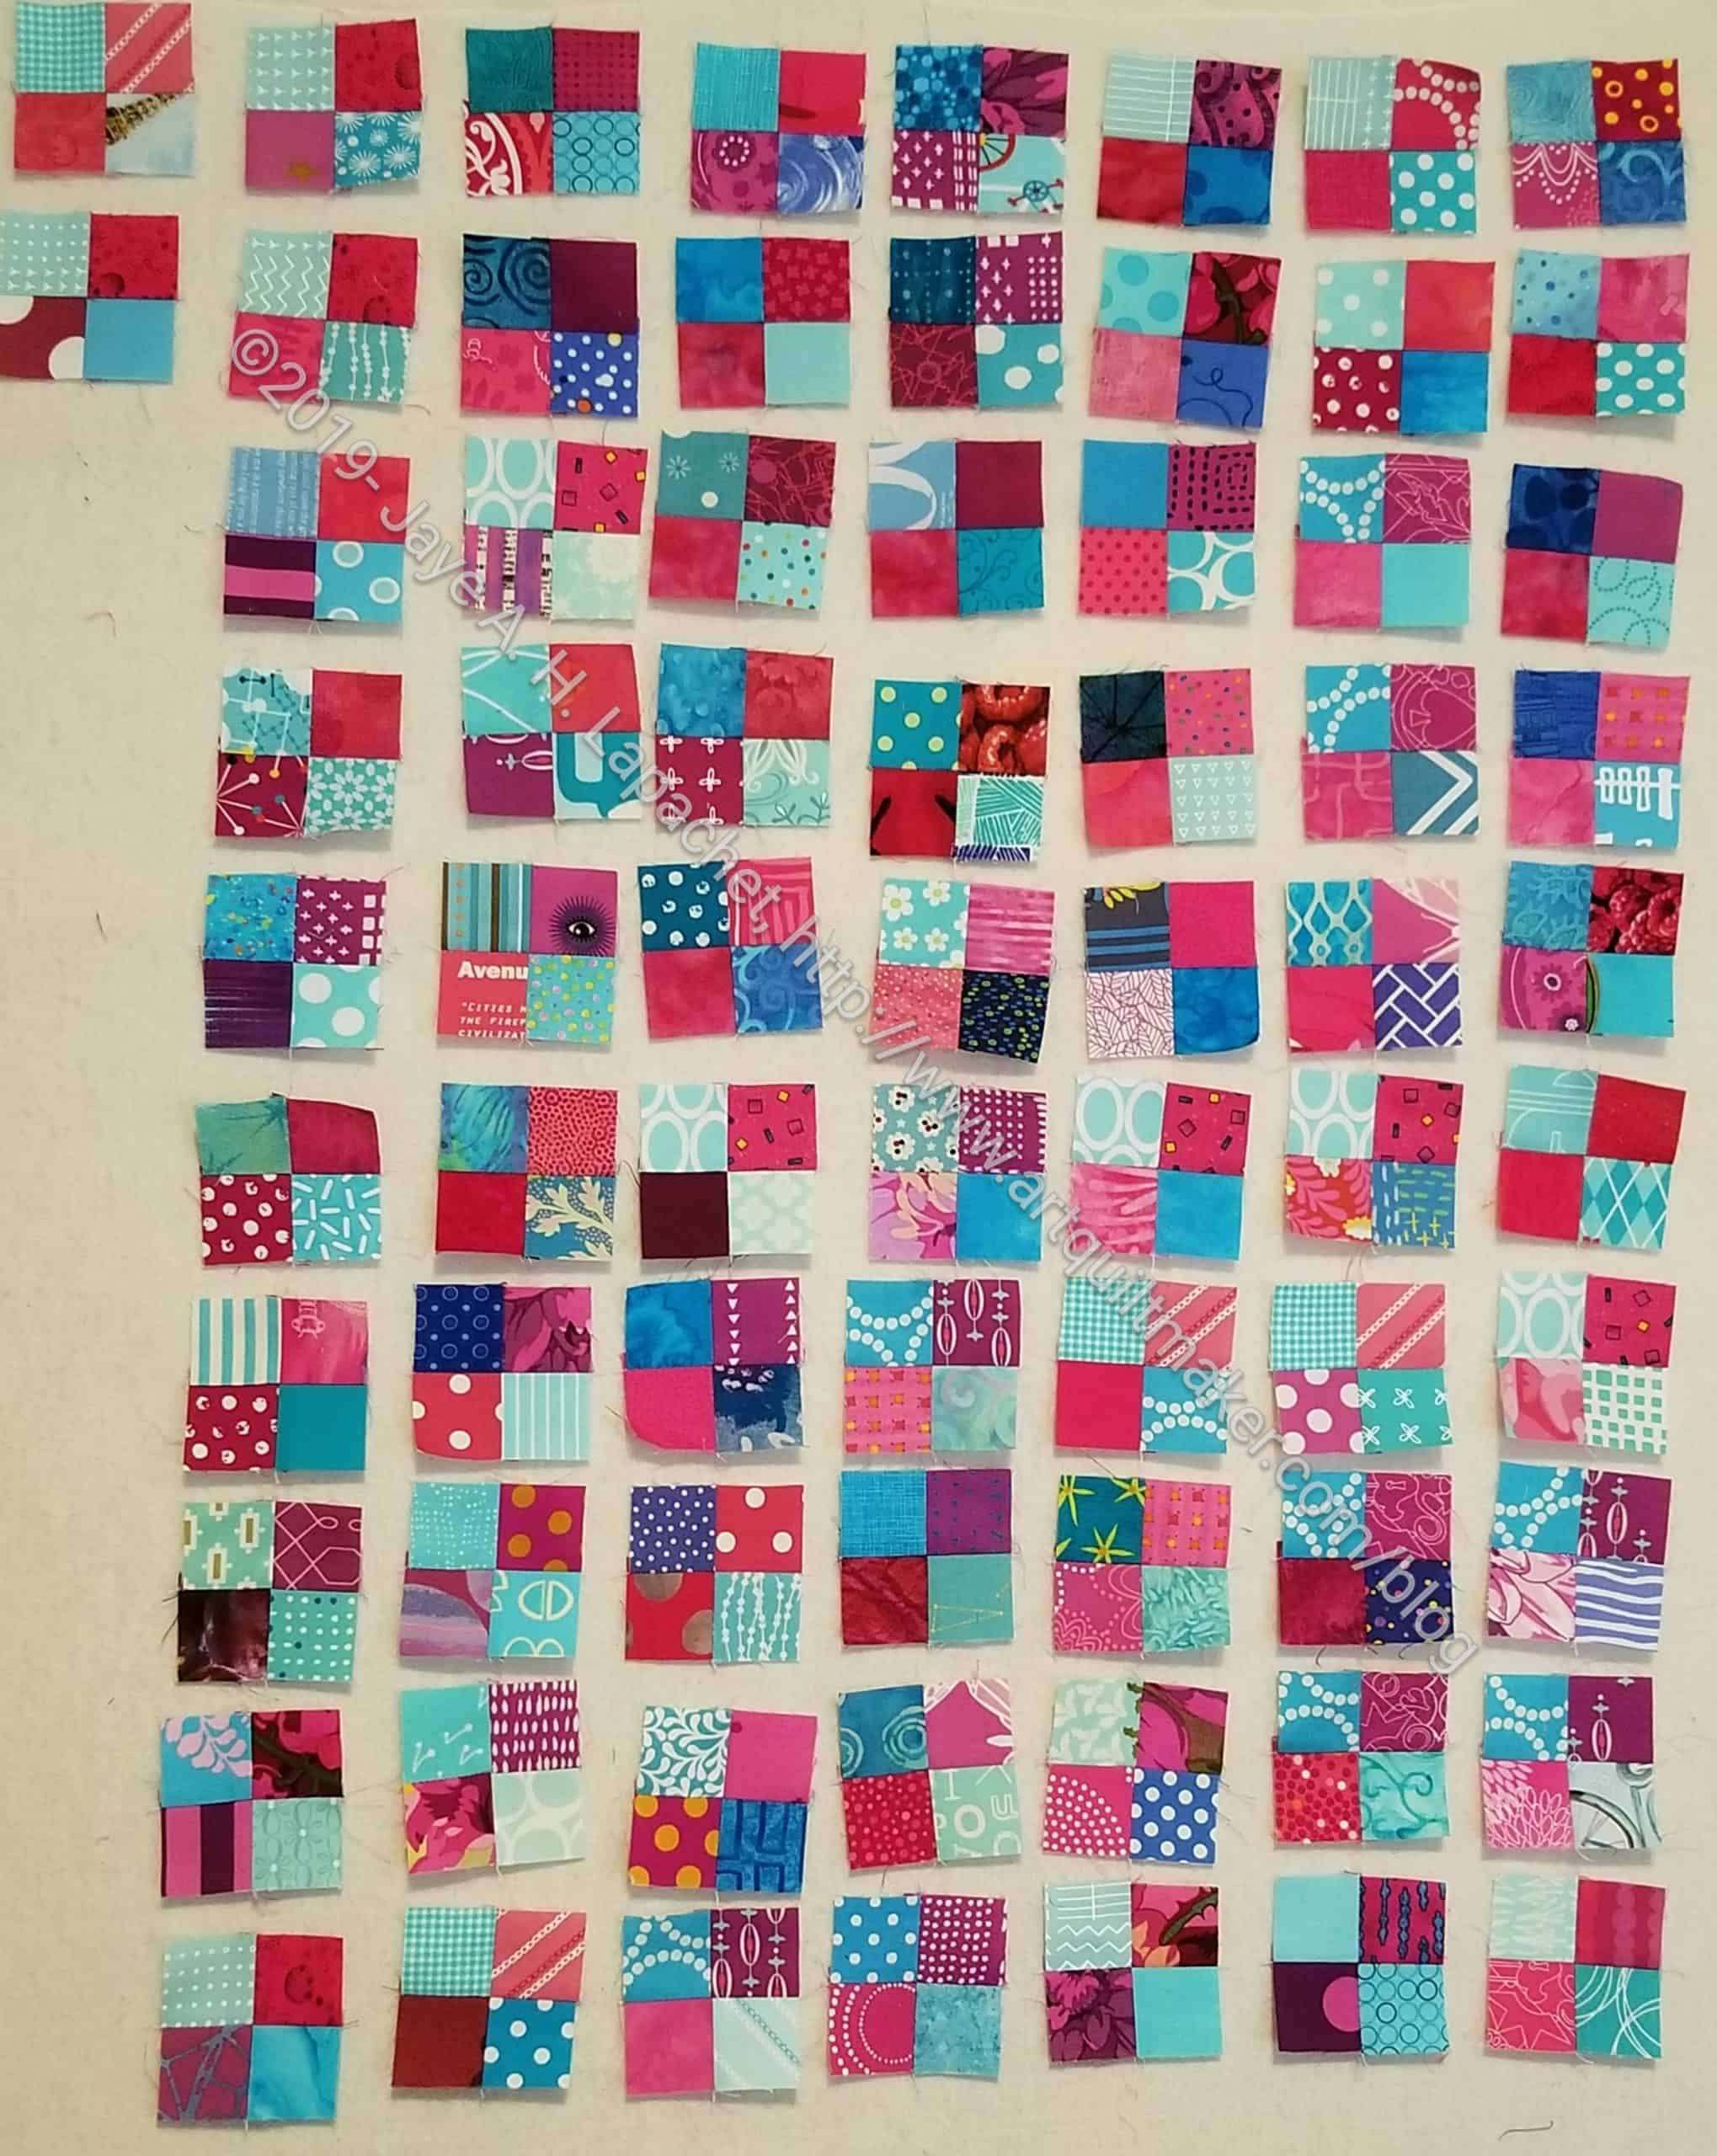
I am working on the four patches for the first clue. They are taking more time than I would like (WHY am I in such a hurry lately???), but I am doing a couple other things in the process. First. I looked through my pink scrap drawer to find some pieces of raspberry fabric. I cleared a little bit of random bits of scraps out either my tossing them into the “to be pet bed filling” bag. There is slightly more space in my pink scrap drawer, but most of the fabric were not the right raspberry.
I also looked through a lot of fabric. I have bins of fabric, but I also have some stacks of fabric. I looked through all of them to find the right colors. I had to press and cuts small strips of fabric in order to create a lot of variety. I don’t know what the next steps are so I can’t tell if the pieces I have made so far are going to be right for the project overall. I guess we’ll see.
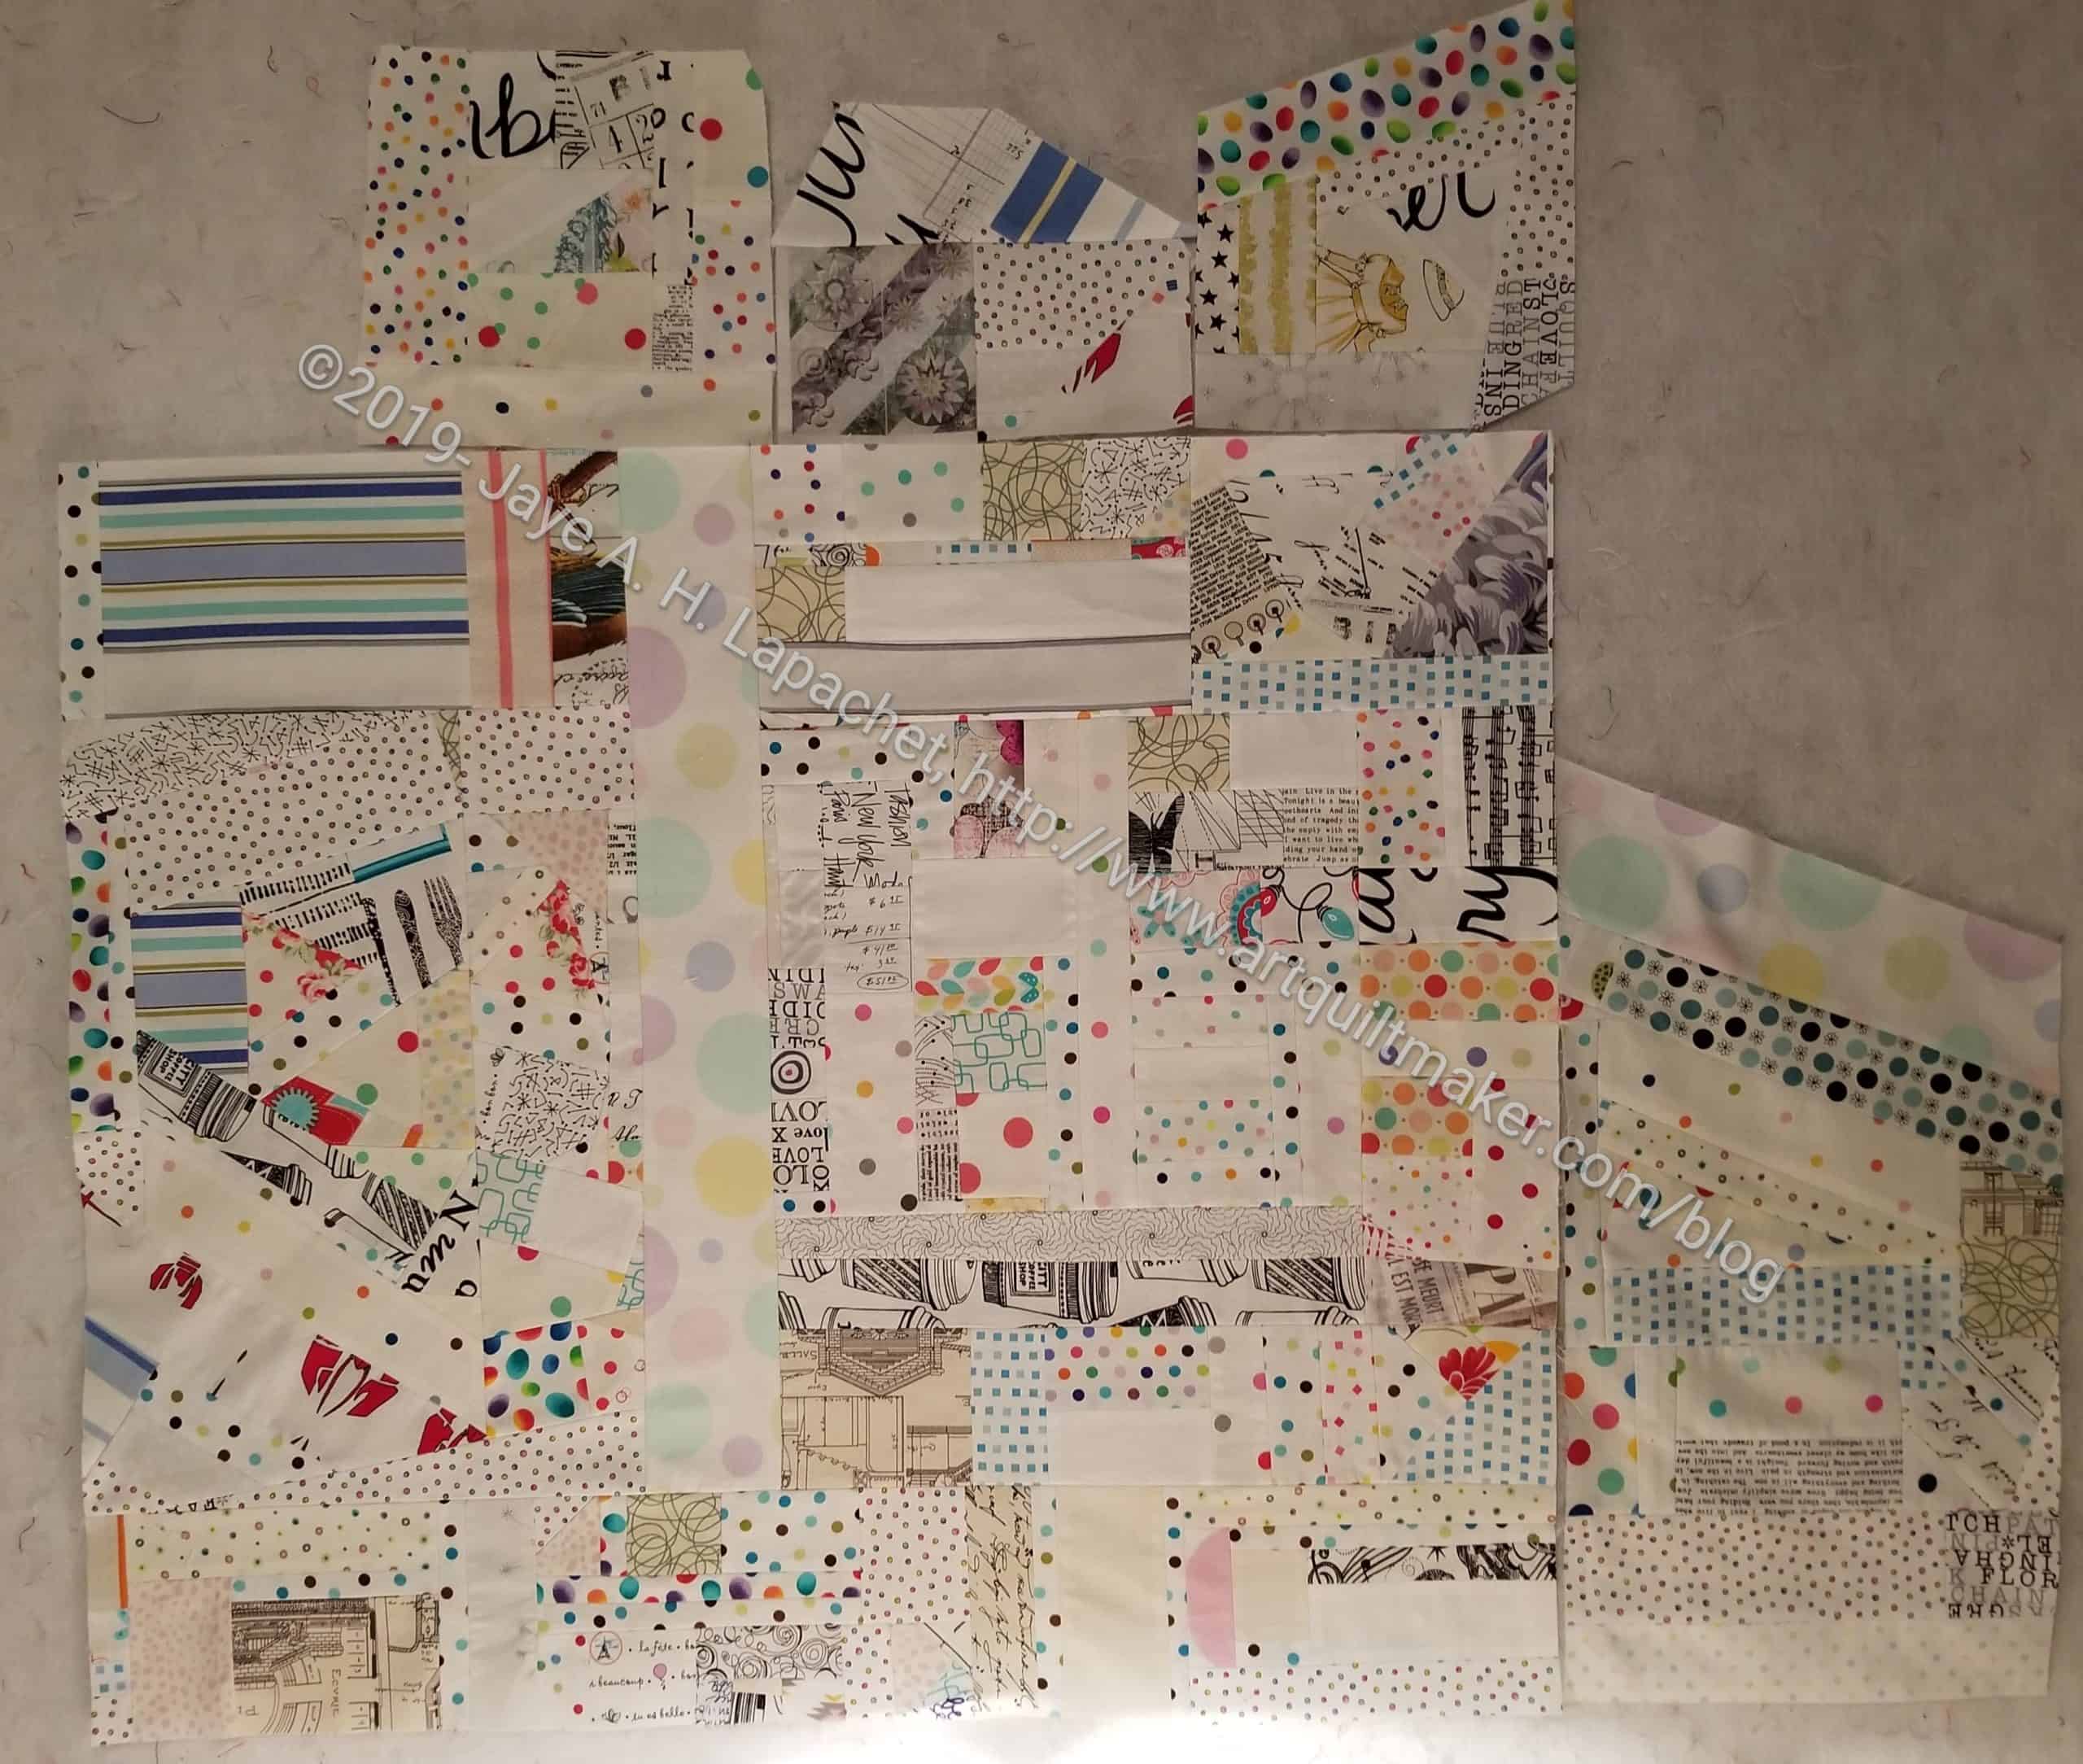
I have been making some progress on the White Improv piece. I am not working as fast as I would like.
It is looking good, I think, different than the others, but interesting in its own way.
The pieces I have in my scrap drawer are a trial, however. There are many, many pieces of great fabric in stupid lengths. They seem to always be wrong. I am making it work, though.
Bonnie Hunter released her 2019 mystery quilt on Friday. All of the clues will be posted on the Frolic! tab on her site. Normally I wait to see what the quilt looks like, but I decided to do it. One reason was that when I read through the whole first group of instructions I was, once again, impressed with Bonnie Hunter. She may not have an MQG aesthetic, but she has sound techniques and good designs.
I am mostly following her color scheme so far. There is only one clue, so that isn’t saying much.
One of the reasons I decided to do this was what Bonnie said about cutting. She said
“When cutting, do NOT leave the ruler line you are measuring by on the mat NEXT to your fabric. Get it UP ON THE FABRIC. Be sure the line is ON the fabric, not next to it. Don’t leave the line on the mat.”
This is something I never have been able to find out. Nobody really taught me to rotary cut, so I never knew where the lines on the rulers went until I read this post. I should be embarrassed to tell you, but I am not. I make quilts I love and I have good technique. It can always be better and this is me getting better.