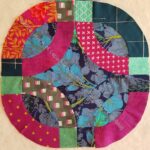
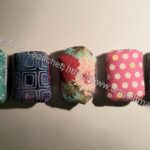
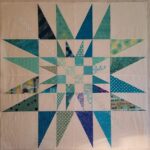
I made some more rings from Saturday’s class and the Put a Ring On It pattern on Sunday and during the week.
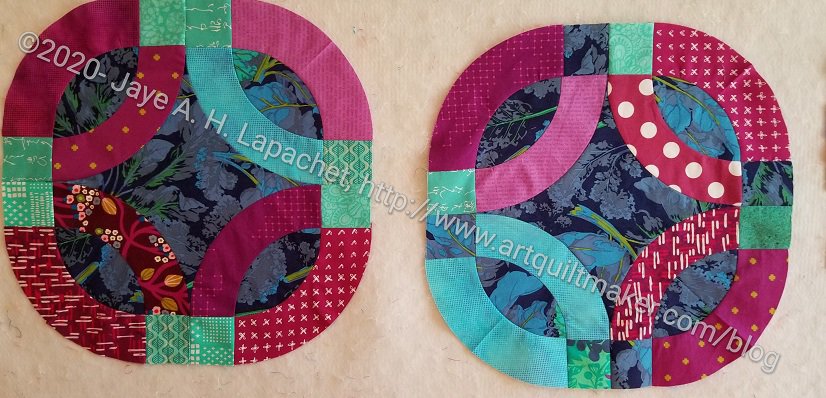
New Ring 2
New Ring 1
I was trying some hide and seek type effects with the ring on the left, but I won’t be repeating that. I am not taking it out and it will blend in fine with the other rings.
They don’t look that great (or terrible) on their own, but together they look a lot more interesting. Still, I am making some progress.
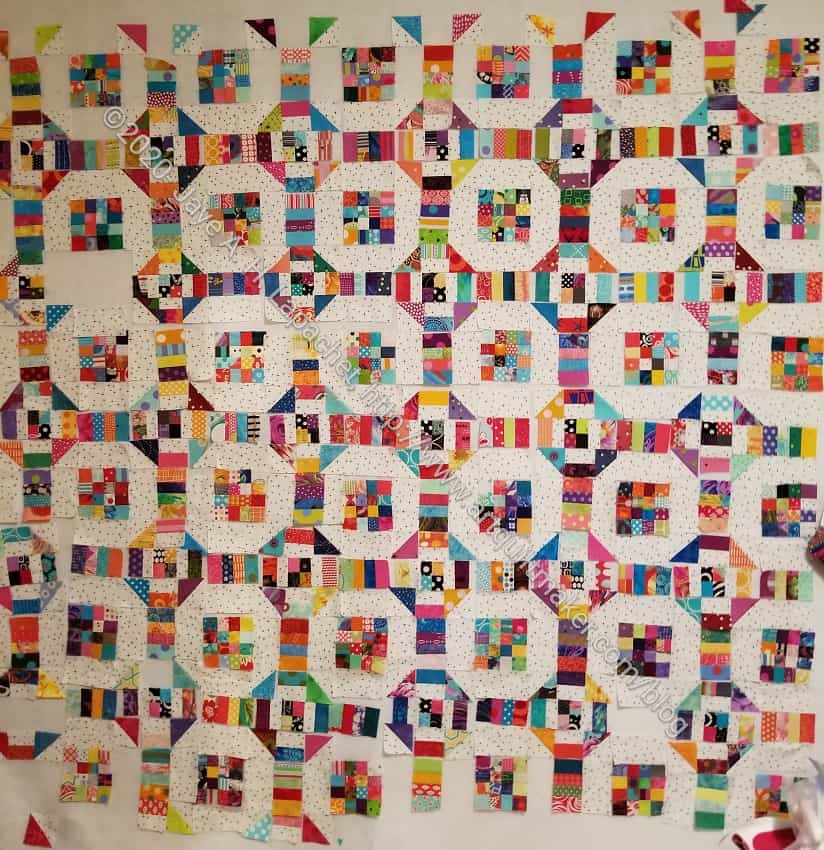
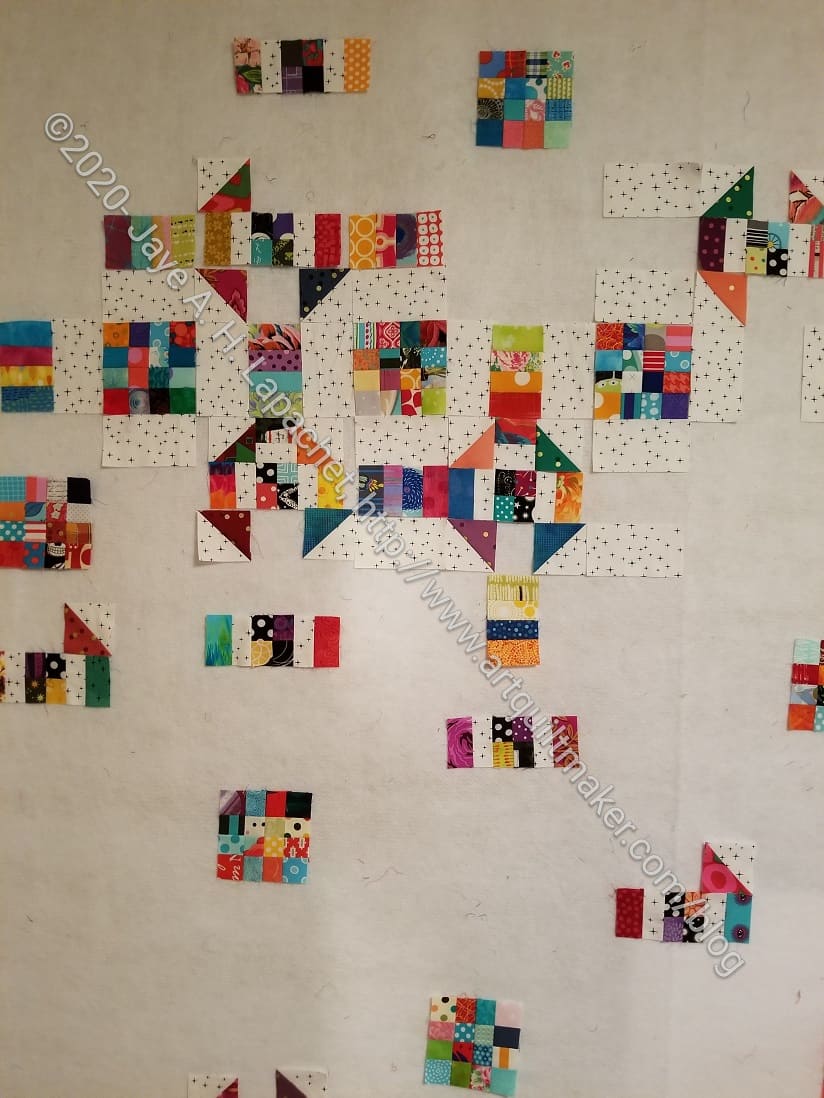
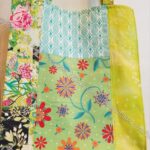
I worked quite a bit on Scrap Dash over the weekend, using the project as leaders and enders while working on my Latifah class project. It didn’t look super before class, though i was making progress. By the end of class on Saturday I had made progress with which I was happy (photo, left). The pattern was really starting to emerge and I was getting excited about putting blocks together. I was able to do bits and bobs in between the Put a Ring On It rings. Every little bit helps.
Scrap Dash, Sunday afternoon
I continued working on Sunday, a little more on Scrap Dash than on the rings. I feel like I made really excellent progress. While I don’t have all of the pieces for Scrap Dash on the design wall, I do have a significant number.
I have also started to put some of the blocks together.
Sadly, I found out I don’t have enough of the 1.5 x 2.5″ rectangles for the border. I need to think about whether to cut a million more, leave off the border or do something else. I haven’t yet used the rectangles in blacks, whites and greys for the center of the quilt. I might try and see if they look good as a border. I don’t think I have enough for a whole border, but it would be a start.
I can’t even think about fitting a border on the design wall, so I’ll have to see once some of the blocks are together and the seam allowances have shrunk up.
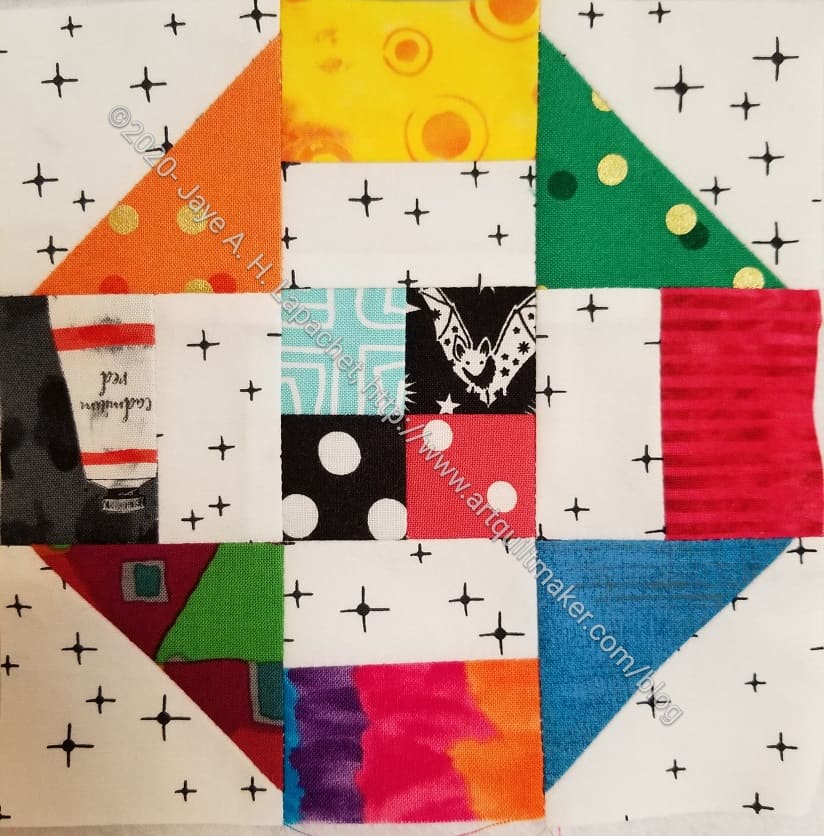
Scrap Dash Churn Dash
Speaking of which, I have sewn a block or two just to see what they look like and to shrink up the seam allowances so I can fit more on the wall.
You can see the background, which I think really makes the quilt look bright.
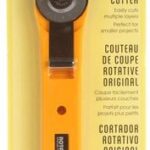
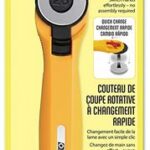
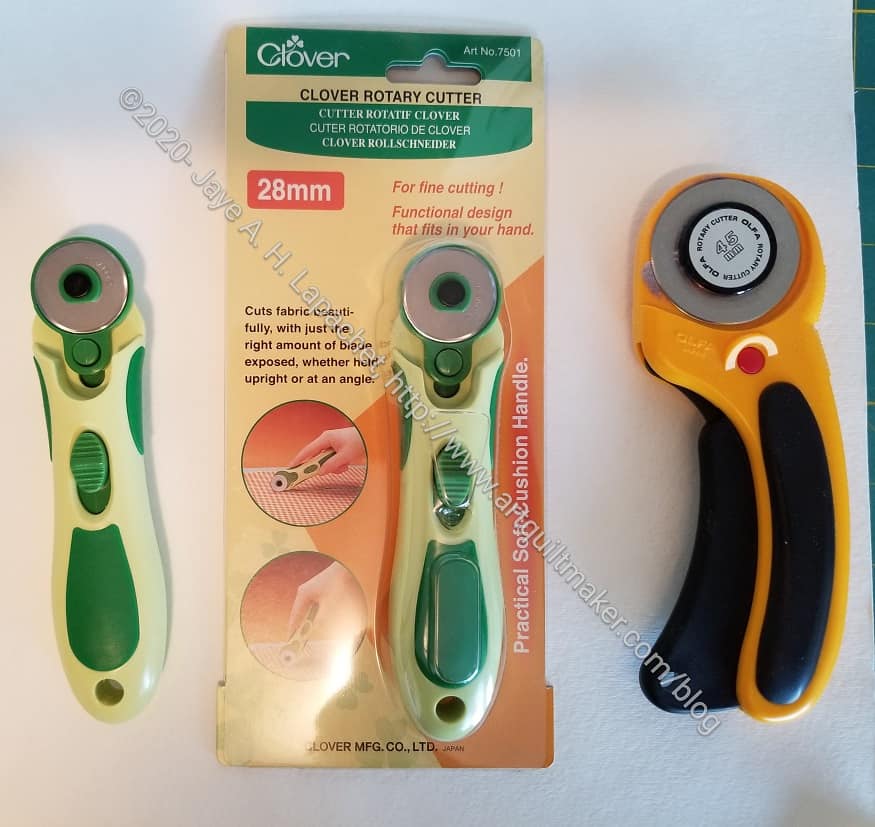
One of the things that Latifah wanted us to use in class was a 28mm rotary cutter. This is used for the inset Clammy cuts, especially on the 8 inch Clammy, which are used to cut the arcs.
I thought the class was a good opportunity to try a new cutter since I would be cutting a lot with the 28mm. The handle of the one I have isn’t comfortable so I shy away from it as much as possible. The new cutter came midway through class so I was able to try it out a little during class and a lot after class. I love the Clover 28mm cutter!**
Current rotary cutters of choice
The handle fits really well into my hand. It doesn’t have an automatic closing mechanism like my favorite 45mm rotary cutter**, but the closing mechanism is very easy and convenient to use. I am sure having a new, sharp blade didn’t hurt the experience either.
Clover has a 45mm rotary cutter** and I am tempted, but I like the curved shape of the Olfa 45mm. I’ll stick to what I have for now.
Big thumbs up to the Clover 28mm cutter**. Try it if you are in the market for a new 28mm cutter.
**I use affiliate links and may be paid for your purchase of an item when you click on an item link in my post. There is no additional cost to you for clicking or purchasing items I recommend. I appreciate your clicks and purchases as it helps support this blog.
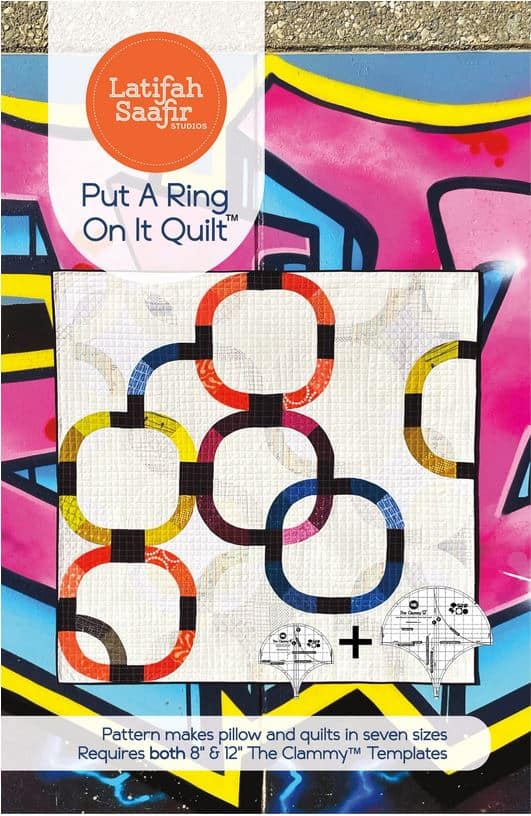
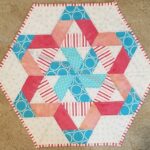
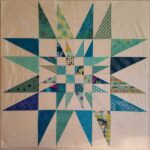
Even though I can teach a vast number of quiltmaking skills, I don’t know everything. The guild hosted Latifah Saafir on Saturday via Zoom to teach us her pattern, Put a Ring on It*.
This pattern uses two of Latifah’s Clammies, the 12 inch** and the 8 inch**. I was super pleased to receive these as gifts between my birthday and Christmas.
The pattern is fairly complete and pretty easy to follow. The class was worthwhile, because Latifah gave us tricks and tips and helped us troubleshoot. The Clammy tool and the pattern really make this, essentially a Double Wedding Ring, pattern accessible to almost anyone. Obviously, I wouldn’t suggest it as a first quilt or if you haven’t tried curves, but otherwise, you can do it.
Martha Negley Vegetables
We had to select fabrics and cut pieces before class. I used an older Martha Negley fabric for the background. The background isn’t very much of the quilt. I wanted something different after looking at all the various versions of this quilt plus other DWR versions online. I didn’t want to make the traditional light background. I also didn’t want to copy the version on the cover. I thought of text prints for the rings, but defaulted back to my Frolic! color scheme with a variety of red-violets and the dark blue.
Two Rings Finished
During class I was able to finish two rings. I wasn’t pleased with the green I chose for the squares. That was one good thing about being at home. I was able to grab some other fabrics and switch them out. I’ll mix up the rings so the green doesn’t look like big green blobs in the center of the quilt.
I am making a 9 block (1 ring=1 block) quilt. It will be about 48 inches x 48 inches. I didn’t want to commit to something larger and even this number of blocks is feeling like too much. I am going to power through. If I can get a ring a day done this week, I can finish all the ‘blocks’ by the end of the week and be ready to put the quilt together at the weekend. I don’t want this to become a UFO. I want to get it down and ready for quilting.
What I really wanted out of this class was to learn to use the Clammy rulers. I think I have started on that process, but didn’t get very far. This class was all about the Put a Ring On It pattern and making that. Learning various Clammy techniques was not on the agenda. That was sad. I hope Latifah comes up with a Clammy Sampler class. I get the sense that this tool is an awesome method for making circles in quiltmaking.
*No affiliation. Both a PDF and print pattern are available. I got the printed pattern and really liked the format.
**I use affiliate links and may be paid for your purchase of an item when you click on an item link in my post. There is no additional cost to you for clicking or purchasing items I recommend. I appreciate your clicks and purchases as it helps support this blog.
Yes, I think I am calling this quilt Scrap Dash instead of 30 Something.
Scrap Dash (30 Something)- April 7, 2021
I spent some time on Wednesday standing in front of the design wall and rearranging various units. The more I do this the better it looks.
I can also tell what I need to work on next. In this case, I need more half square triangles. I prepared a bunch for sewing at Craft Night, but haven’t actually sewed them yet. The process in this quilt was: 1. cut squares; 2. draw lines; 3. sew; 4. cut apart; 5. square up. I don’t really mind this process, but I wish they had chosen a better system like using the Simple Folded Corners Ruler. I wasn’t able to find a tutorial using the size pieces I had already cut, so I just went with the drawing method.
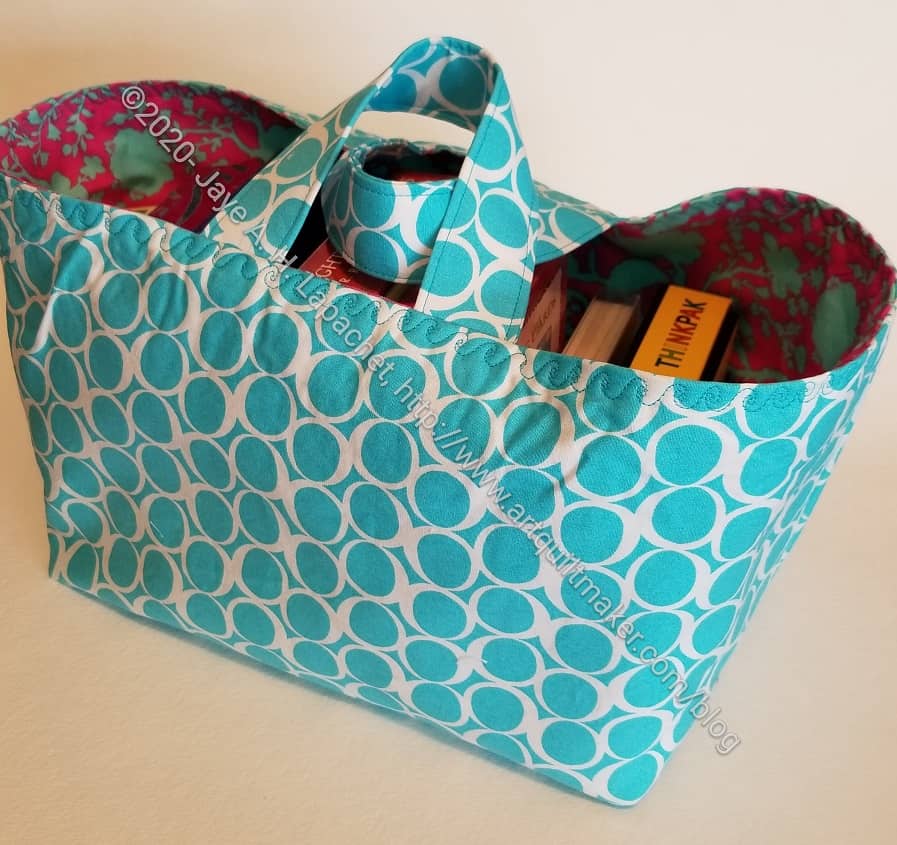
I finally made a One Hour Basket that has been on my list for a long time.
I finally made it thinking I was making it for the multitude of remotes I have in my workroom. I am not going to use it for that, because I used fusible fleece and not Soft & Stable, so it wasn’t as stiff. I wanted a One Hour Basket that I could use to organize my various card decks. This one won’t work for the remotes, but it will work for the decks.
I have undoubtedly become a Sew Sweetness groupie. I want to spend time making all of the projects I have in my library.
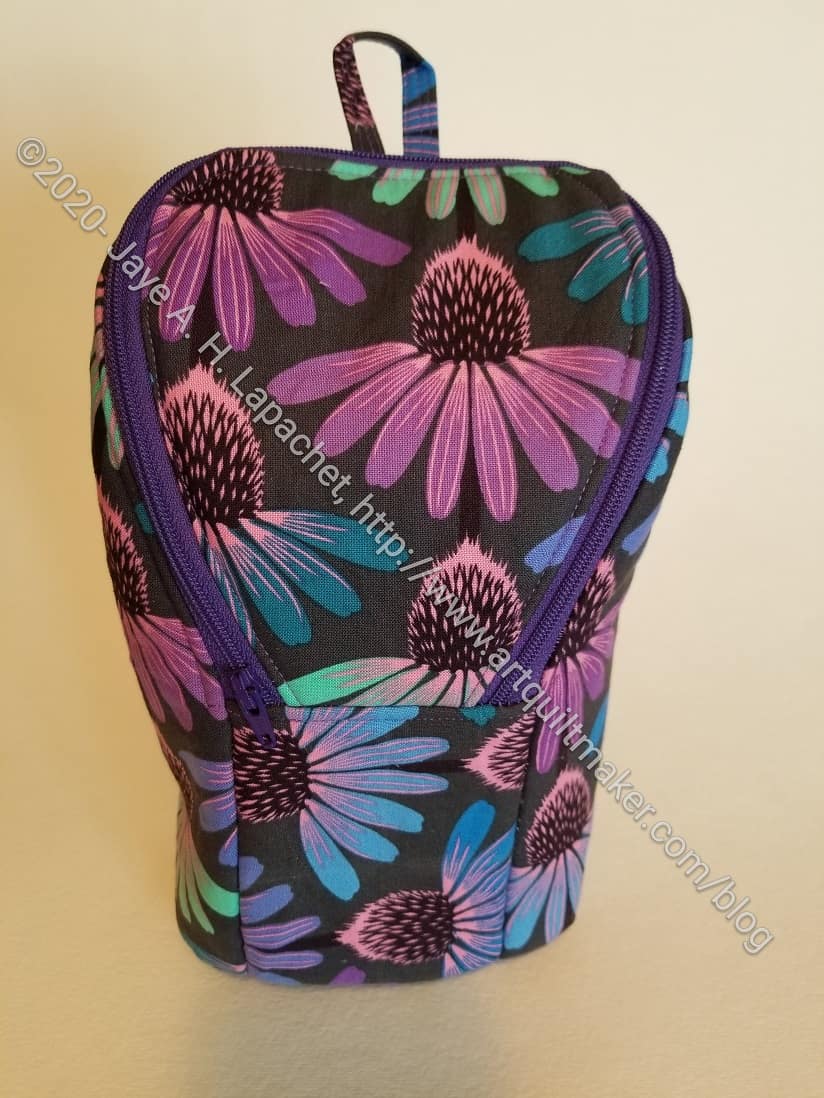
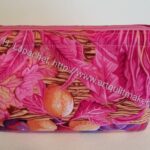
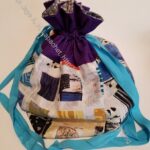
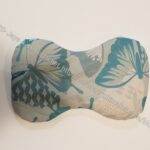
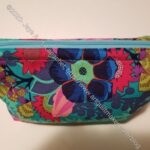
The Piebald Pouch is my first finished project from Minikins Season 3. I have to say that it went better than many of my other pouch and small bag projects. For whatever reason, all of the pieces and parts went together smoothly and I had very little trouble.
Except for the front panel. You can see that I didn’t line up the flowers properly, so the ones on the front panel are sideways. I still like it.
The pouch is a little bit of an odd shape. This one is for me and I am not sure how I will use it.
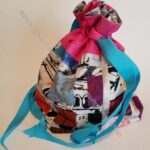
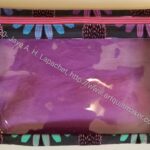
Piebald Pouch – open
This was a fairly easy sew. I started it last week and would have finished it sooner, but have been so swamped that I just didn’t have a moment. It was fun and a charge to finish it on Sunday.
One of the reasons I wanted to finish the HST Donation Top/Back was to free up space on my large design wall.
30 Something/Scrap Dash- early April 2021
I have a lot of pieces and part ready to sew together for the 30 Something top and I was having trouble envisioning how the whole thing was going to go together. I needed to get it on the design wall.
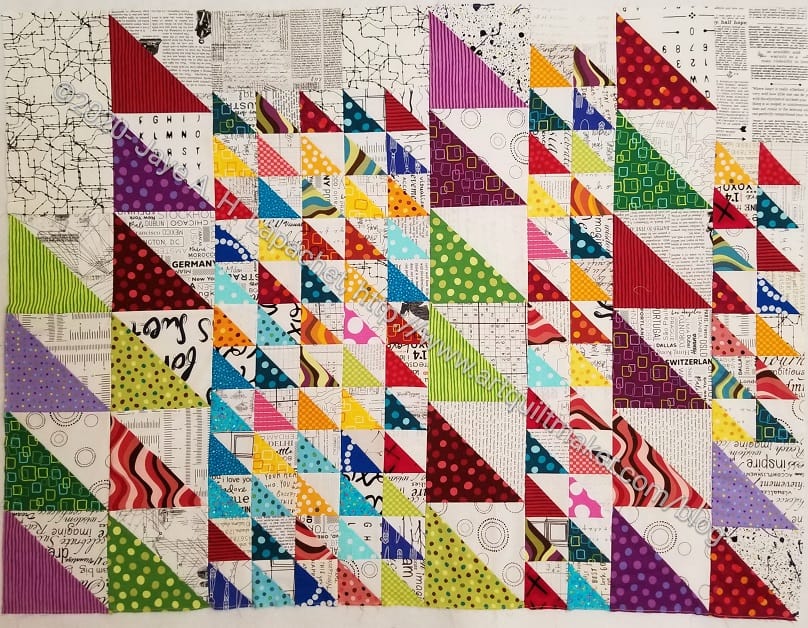
I have to say that I was kind of regretting cutting all the pieces for this quilt. Once I saw it start coming together, I got really excited. I think my fabrics look a lot better than the 1930s vintage and repro fabrics in which the original was made.
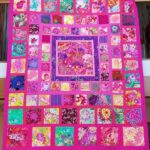
My background is an Art Gallery black on white called Raise the Volume from the Capsule Collection. I love the look of a background the doesn’t change amidst all the vibrant scraps.
I have been thinking about the title of the quilt. 30 Something just doesn’t cut it and I don’t like it anyway, but the quilt was not speaking to me in terms of a name. As I put the parts on the design wall, I realized that some of the blocks were Churn Dash blocks and I thought of the name Scrap Dash. I’ll have to see if it sticks.
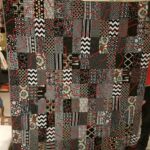
I finally sat down on Friday afternoon and worked to finish this top. I really wanted to get it ready for quilting and it had been hanging around for too long. I am pleased with how it came out and look forward to seeing how it gets quilted.
HST Donation Back
I am going to show it to Tim, then send it on to another guild member for quilting.
I tried to use as much of the Pop Parade fabric for the back as I could.
A long time ago I wrote about ‘Grandma Betty’s’ quilt. I finally asked my Mom about it. She said that Grandma Betty was our Great Grandpa George’s girlfriend. It was her car they drove from Chicago to Los Angeles. Apparently, she made this quilt for my Grama. Mom said that my sister has it now. It makes me really happy to know more about this quilt. I’ll try to find out more about Grandma Betty. I think she was long gone by the time my mom came on the scene.
I was amazed and thrilled that Tim had bound the small Kaffe donation quilt he quilted a few weeks ago. He put a binding on it sometime last week! He almost never does that, but wanted something quick after cleaning his studio all day.
He machine bound it, but that was a good choice since the quilt will go who knows where.
BAM Kaffe Community Quilt by Patti (detail)
I love the quilting – spirals. They look so great.
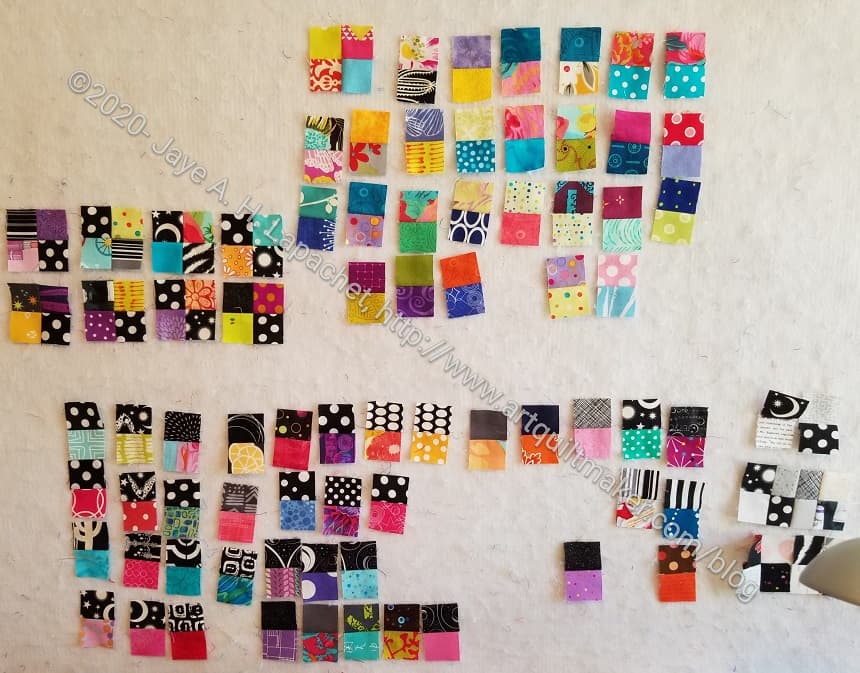
I have been using my 30 Something project as leaders and enders while I work on my quilt class presentations and the UCAB tutorials. It is slow going, but I can see light at the end of the 4 patch tunnel.
There are 4 Patches at the center of some blocks. I decided to use some black and white in those 4 patches, so the quilt had a tiny bit of structure. We’ll see how it looks.
Also, it the photo, you can see that I started making random 4 Patches. Those may end up somewhere in the quilt or as a basis for a super tiny Spiky 16 Patch. We’ll have to see.
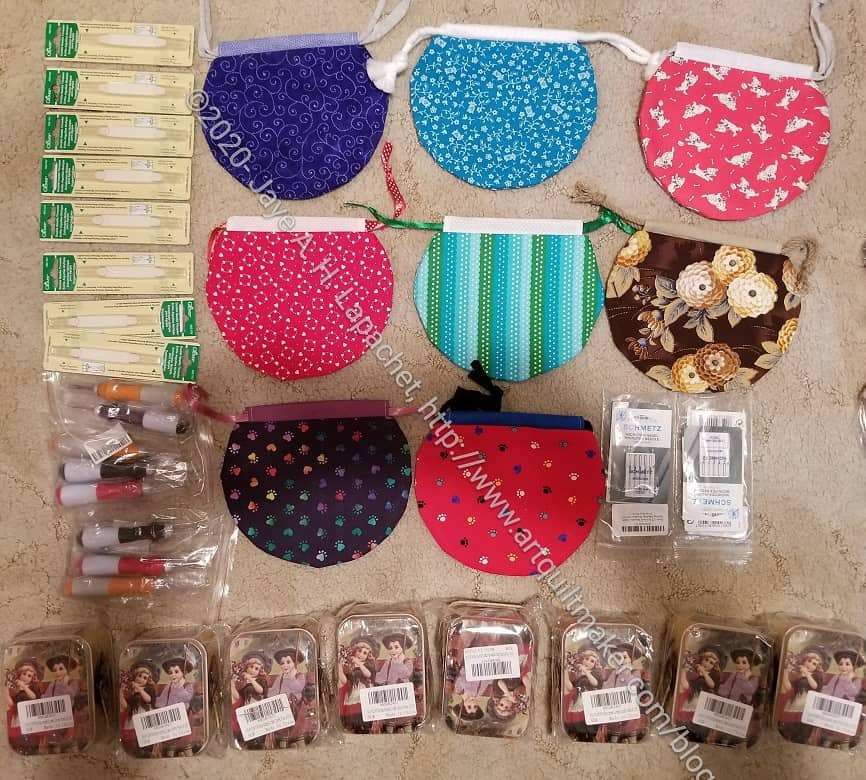
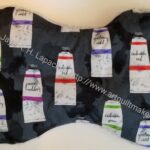
I was thrilled and amazed by the largess I received this week from my team of Door Prize people.
First, Cheri gave me a full year’s set of coasters and bags. She had given it to me last year, but I told her to hold on the gifts until the next month, then we stopped meeting. Tim picked up the items from her house and I picked the items up from him.
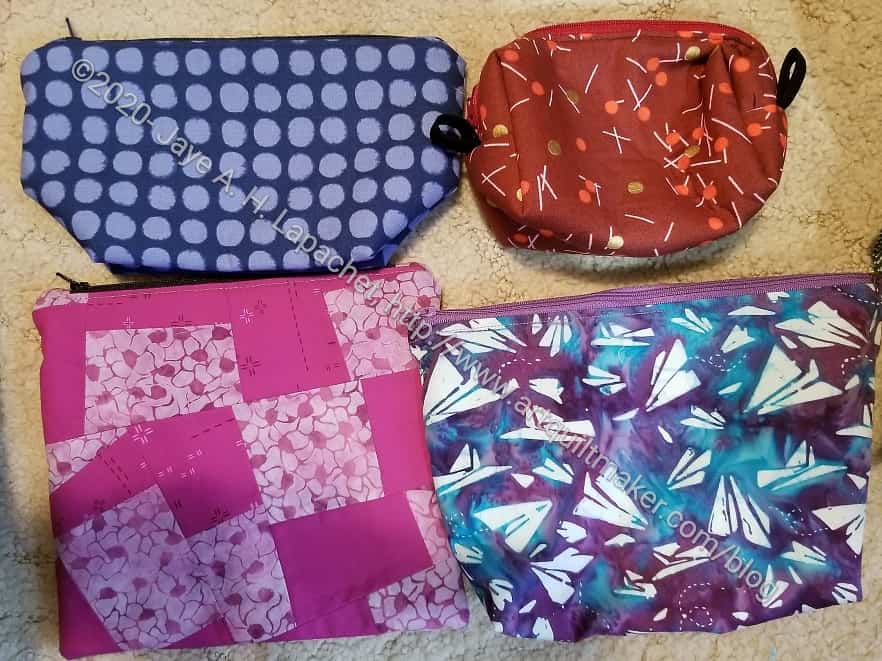
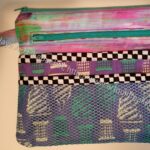
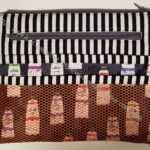
Sue’s Zipper Pouches
Next, SueG brought me fabric and some zipper pouches. I am all set on zipper pouches and have some good fabric to include with future bags.
The purple and blue paper airplane pouch was actually made and donated by Tim. It goes well with Sue’s contribution, though.
Carrie’s Door Prize efforts
Finally, Carrie made some cut little bubble bags and sent me needles, needle threaders and WonderClips to include in future bags.
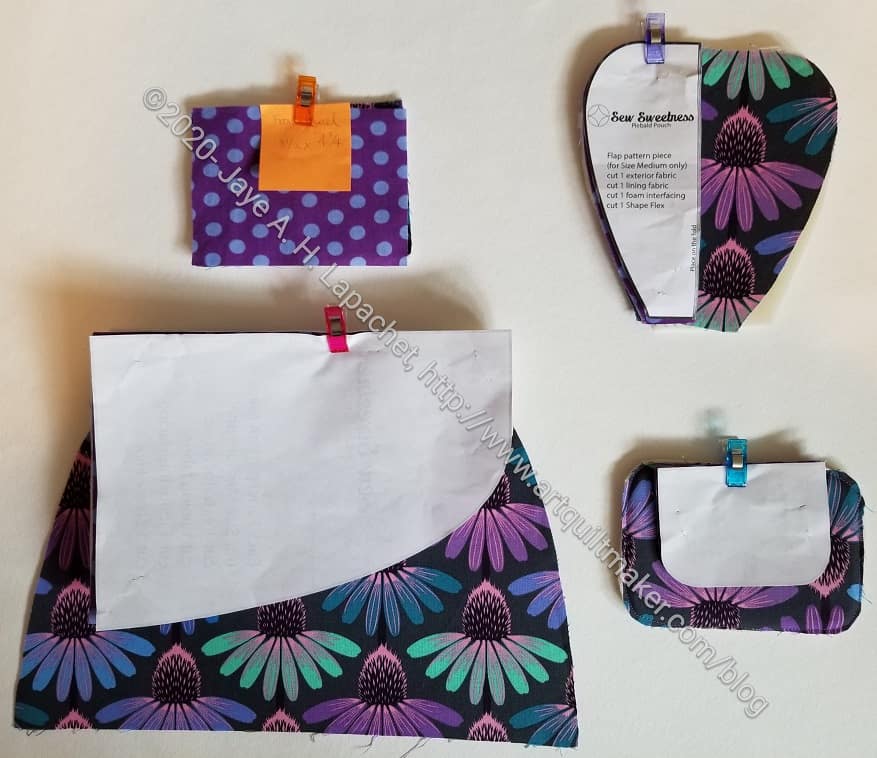
I started my first project from Minikins 3, the Piebald Pouch. I like the shape. I know you can’t tell the same from these weird pieces. Upper right hand corner holds the top.
Despite the plethora of zippers I have, I didn’t have one for this pouch. I will soon, however. In the meantime, I am making as much progress as I can.
My idea is to update SIL’s yarn minder with this pouch. This version is not it. I want to make it for myself first, then hack it. The yarn minder version will include a shoulder strap and a double head zipper.
Check out the finished project on Sara Lawson’s Minikins page.
In Process or To Make
The ‘In Process’ is used to denote projects on which I am actively working or are on the design wall waiting for me to stitch. I am continuing to try not to put away projects. I find putting a project away ensures I never work on them, because I just lose steam.
Most of my progress involves thinking or just cutting.
One Hour Basket for organizing my decks of cards – Creative Strength, mindfulness, etc. I may switch to one of the Minikins or a Catch All Caddy projects for this purpose.
One Hour Basket for my stuff that tends to accumulate on the dining room table. I may switch to one of the Minikins projects or a Catch All Caddy for this purpose.
One Hour Basket for DH’s stuff that tends to accumulate on the dining room table. I may switch to one of the Minikins projects for this purpose.
Retreat Organizer – another project from the Crafty Gemini Organizer Club, also on my list, but not yet started
Superbloom tote using Hindsight fabric – not started
Ultimate Project Organizer – another project from the Crafty Gemini Organizer Club, also on my list, but not yet started
Ultimate Carry All Bag gift – Bag-a-Long for BAM – I have the inside pockets made and am struggling with the front pocket for one of them.
Ultimate Carry All Bag for me – I have the two large pockets made for the second one and am working on the small front pocket.
I decided that some of my projects are in a different class because they are hand piecing or embroidery or beading. They take longer. Thus I created a new category and have moved some projects here.
Still WIPs
I still have WIPs. Who doesn’t, after all? A project in the ‘UFO’ category means I am stalled. A nicer way of saying UFO is a WIP. The list is a lot shorter and the projects are newer, for the most part.
Handbag Sampler – this is still the forgotten project. It should be on the UFO list. The blocks were teaching samples when I taught a sampler class some time before I started writing the quilt class sampler tutorials. I found one block recently, but otherwise I actually don’t know exactly where the blocks are hiding. I crawled up in the far reaches of my fabric closet to see if I could find them and they weren’t where I thought. I am sort of mystified as to where they could be. I haven’t even found a picture of all the blocks. Sad.
Lobster – I think I might make this into a tablerunner for the buffet. I think that will be a good and fun use of the piece even if the colors aren’t quite right for the dining room.
Pies and Points from 2016 Victoria Findlay Wolfe class. The last time I worked on it was when Julie and I had a playdate in April 2018. I brought this piece with me so I could cut more elements (Julie has a Sizzix). I lost my excitement about this piece shortly thereafter and still have to get it back. Thus, I had to move this to the WIPs area.
Pointillist Palette #4: Fourth is a series of 6 quilts; needs tiny square patches sewn together. No progress.
Serendipity Lady – I am still planning to take this piece to be framed.
Who Am I? – This piece is still languishing. Perhaps having a larger design wall will help me regain momentum. The amount of satin stitching I was facing was a problem until I thought of BIAS TAPE. I am going to make the words with bias tape, perhaps different widths, then I won’t have to sew the satin stitching. Red Scribbles and Friend Julie helped me come up with this solution. Now I just have to do it!