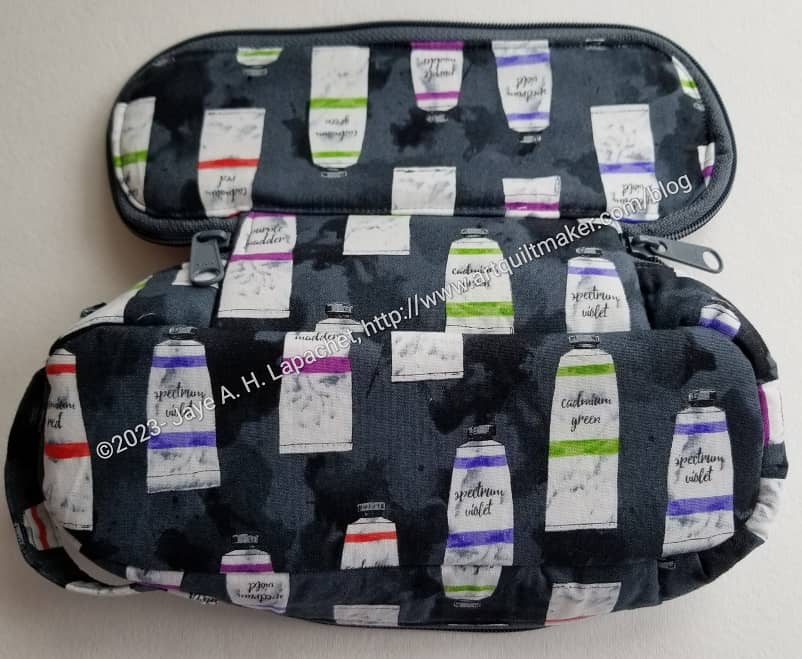
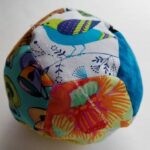
I know I showed these separately the other day, but I had to show you how they fit together. Aren’t they cute together?
As mentioned, I think the small one came out the wrong size, but I still think it is cute. I think it could be useful, too. It would fit very well into not a very large purse for … small items – makeup, sweets, toothbrush and toothpaste, etc.
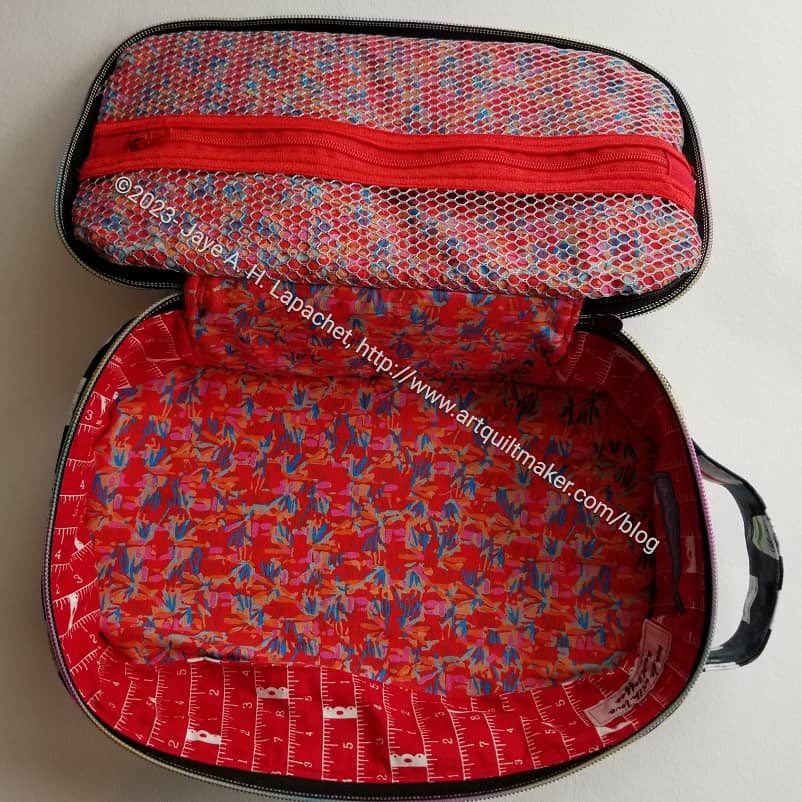
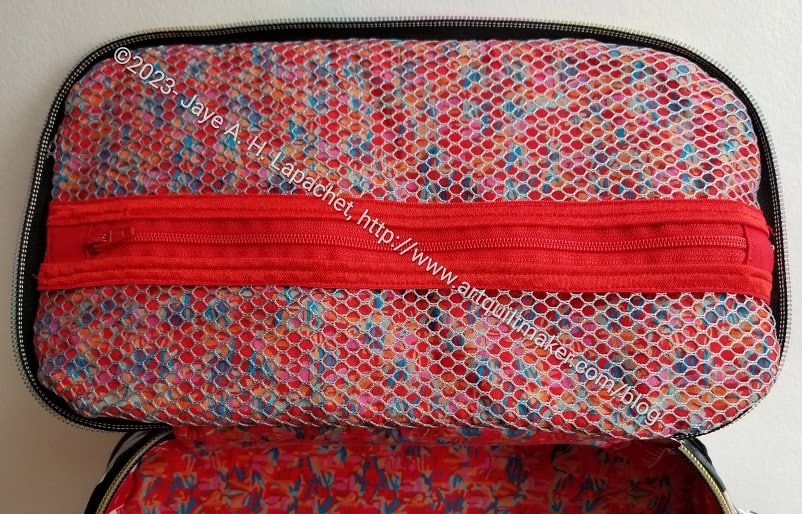
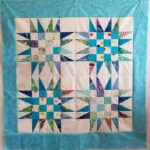
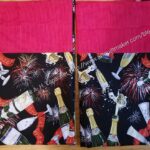
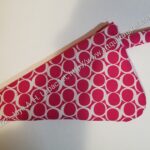
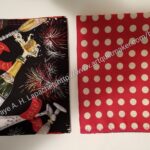
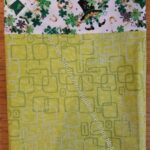
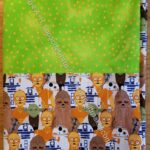
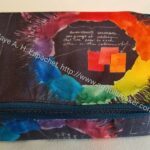
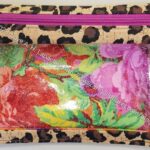
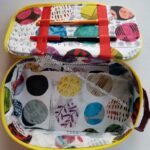
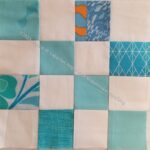
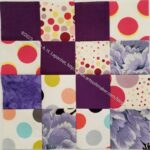
Two Hackneys for Mom – interior
The small one also fits inside the large one. I am not sure why a person would use it that way. It is an observation, however.
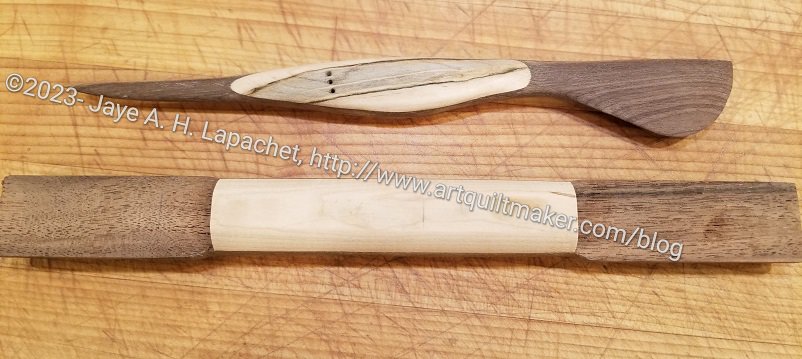
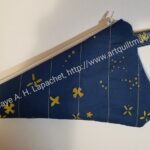
I have touted the fabulousness of the Modern American Vintage tools. Since I was sewing with Mary, I brought my travel tool bag. In it was my fabulous turning tool. This was partially because I keep it in my travel bag, but I also wanted to show Mary.
Making a turning tool
We had a long talk about it, then we showed it to Mary’s husband, who has a wonderful wood shop and is a great woodworker (carpenter?). He immediately said to just buy from Modern American Vintage (which you should do!), that he couldn’t make it as well or as inexpensively as MAV. As the day wore on, he got more intrigued with the idea of the tool. By the end of the day he had started to try making one of the tools.
This is the same as deciding you want to try and make a certain complicated bag or a difficult quilt block. I loaned him the tool so we’ll see what he comes up with.
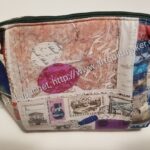
I finished this bag back in June. I couldn’t show it until today, because I intended it to be a birthday gift for Mom. She sometimes reads my blog, so I had to keep it a secret.
This was problematic as back in June, I was struggling to keep up with posting. Work was really busy and I was struggling to sew, which meant I didn’t have a lot to post. I should have finished another bag for someone who doesn’t read the blog, but wanted to try finishing one of the bags I cut out with the Cricut.
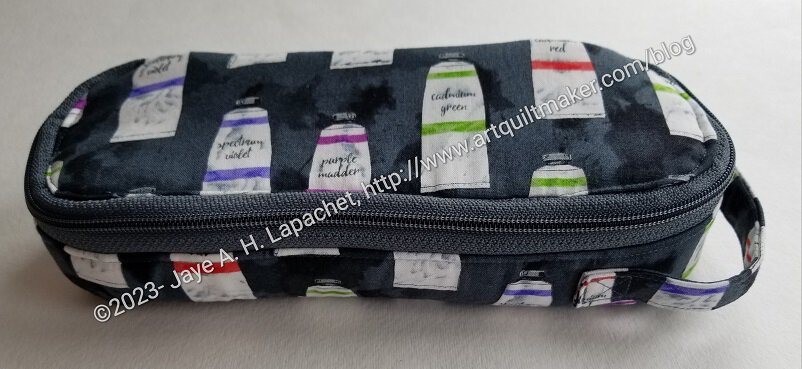
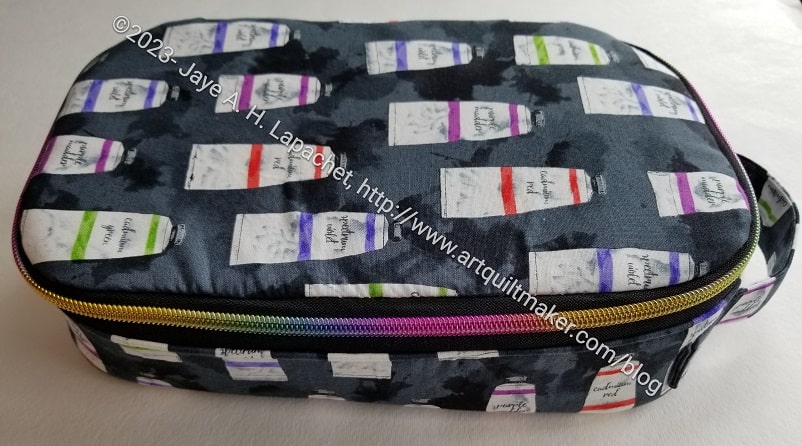
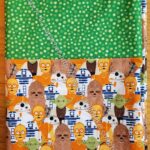
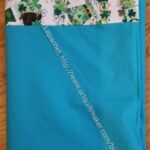
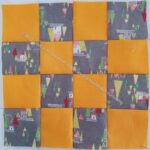
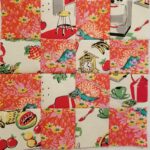
Paint Tube Hackney – open/exterior
Regardless, I finished this bag. I was concerned at first, because it was the small sized version of this bag and I thought it would be harder to sew. It was a little tight in places, but I was able to easily finish it.
I had to recalculate the handle size and position. I was a little off, but it will work.
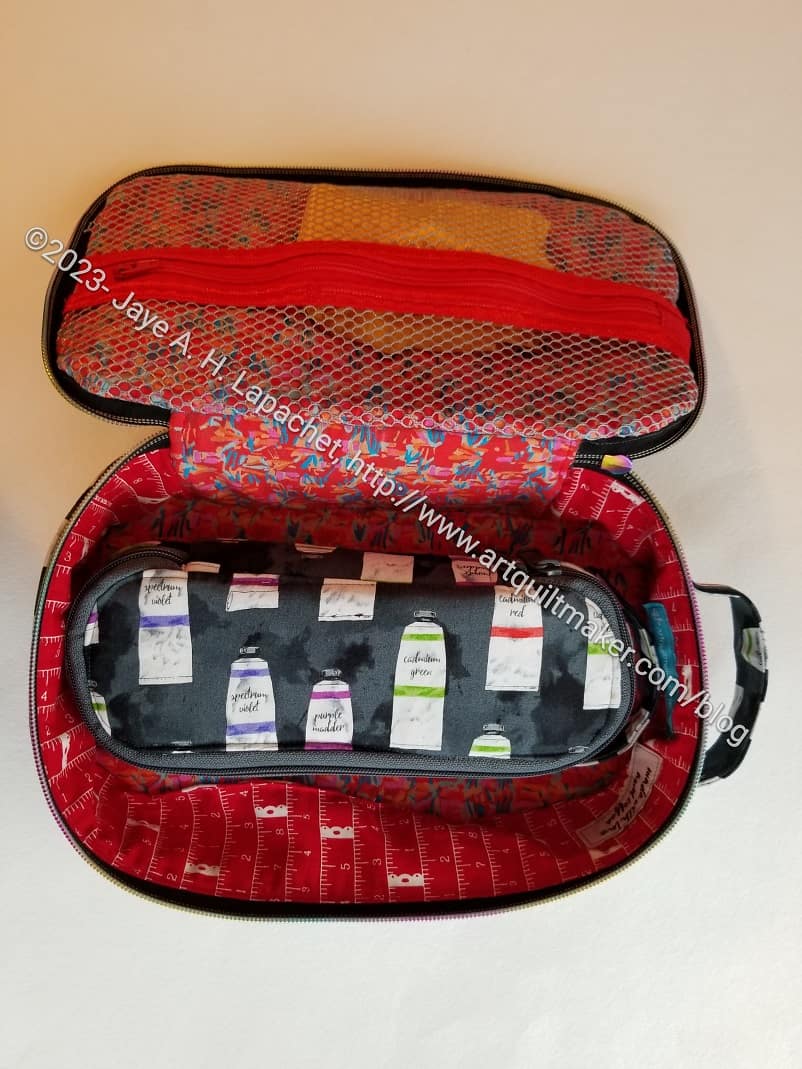
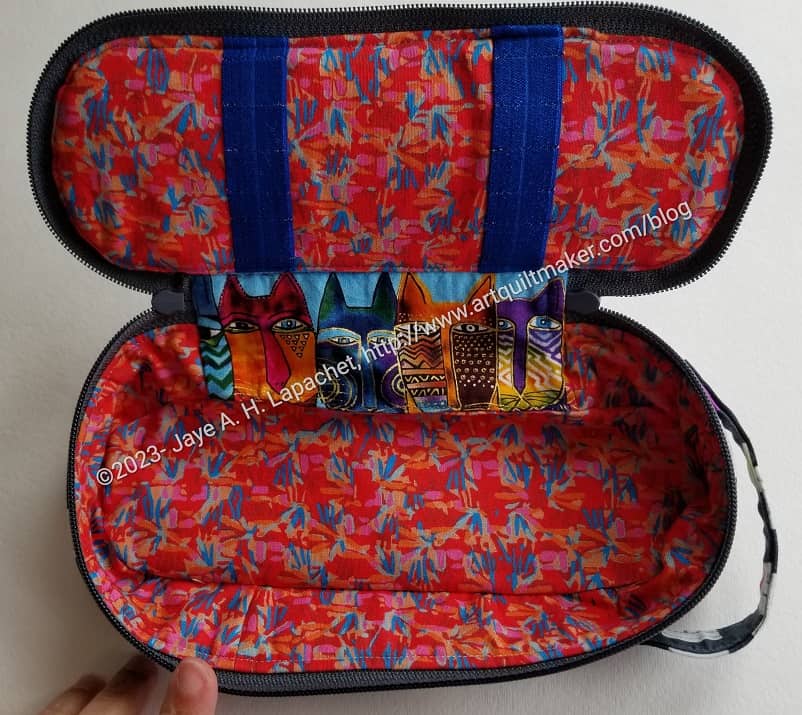
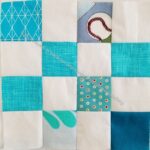
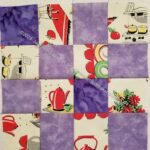
Paint Tube Hackney – open/interior
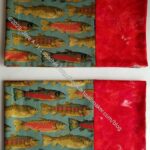
I think the back panel is a great opportunity for fussy cutting, so I took some of the Laurel Burch fabric I bought for mom and cut out some of the cats. I think it looks cute.
I also made a tool holder in the top instead of the mesh pocket. I didn’t want to fuss with that tiny space and I think the tool holder / elastic bands will be more useful for Mom.
I couldn’t go to Sew Day, because I was driving my mom to Portland. Instead we had a Sew Day with Mary M on the way and that was a great substitute for the guild Sew Day I missed.
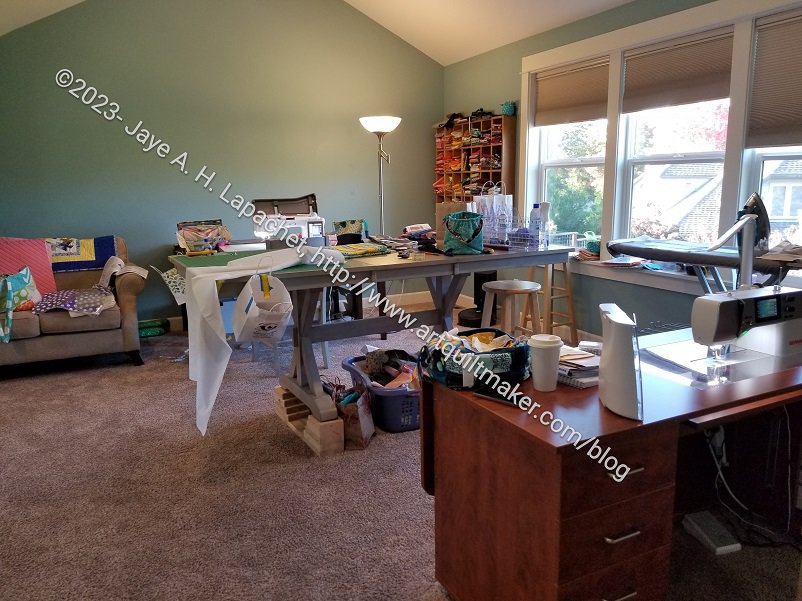
Mary M’s workroom
She has a large and fabulous workroom. We both sewed there and Mom worked on her hand project with no issues and we didn’t trip over each other.
This is only half the room. To my left is a small office area where Mom sat near the window to hand quilt.
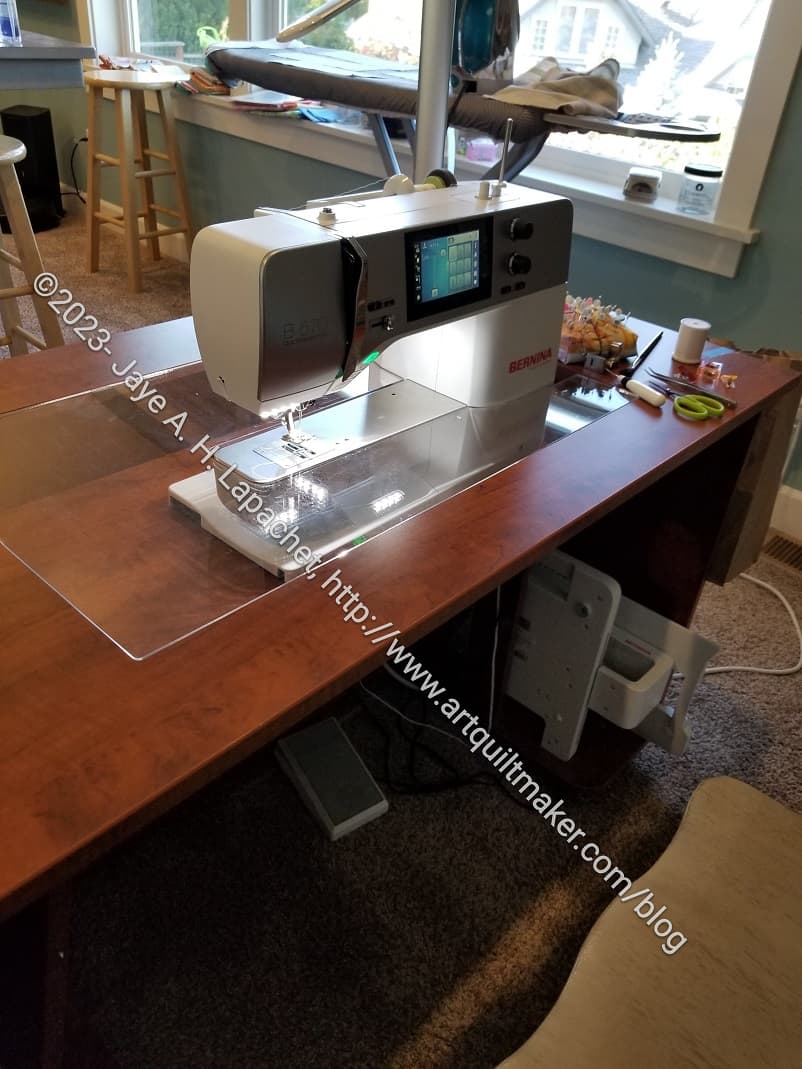
Bernina 570
You can see that she has two very nice machine, a Bernina 570 and a Crescendo by Baby Lock.
Berninas were out of favor, sort of, for awhile, but I know 3 people who have purchased one in the past year or so. Mary bought this machine, the embroidery module and the table from a friend who decided to go back to baking. She was still getting used to it when I was there.
Mary’s Crescendo
I sewed on her Crescendo. I never tried a Baby Lock before, but really liked the machine. I was quilting some parts for bags and the machine helped me speed through the work.
I have seen the ad on the YouTube video I watch for the invisible join tutorial. This is a very helpful video on how to join the ends of binding that you may have missed when I posted it the first time.
I used the automatic cutting feature, which I have never used before, the laser and the button for foot up and down. All of these features worked together to make quilting some bag parts much more palatable. It is also fun to try a different machine.
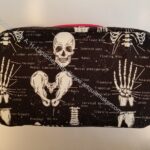
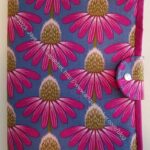
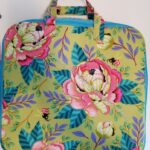
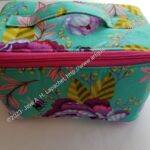
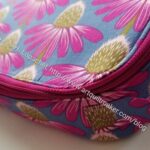
I have made a number of these Hackney bags, but this one is special as it is for my mom for her birthday, which is today!
This one also really came out well. I am super pleased with it.
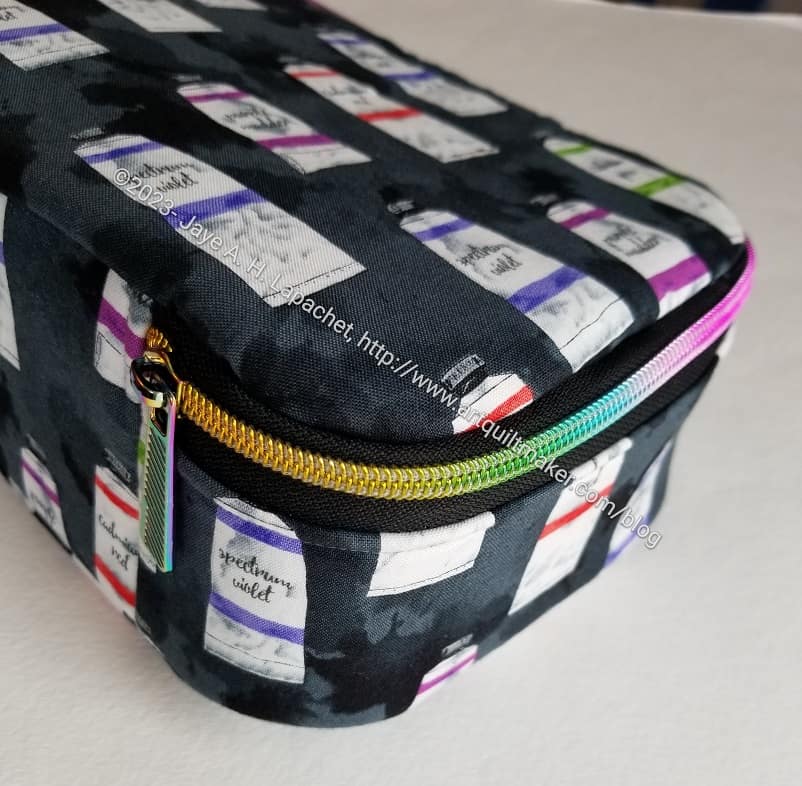
I used some zipper tape I have had for awhile. I bought it from Sew Sweetness in January in both black and white. I am pleased with how the rainbow metallic of the zipper teeth enhance the look of the paint tube fabric. I did forget to add a second zipper head, but the bag will still be able to be closed with a zipper, so no problem.
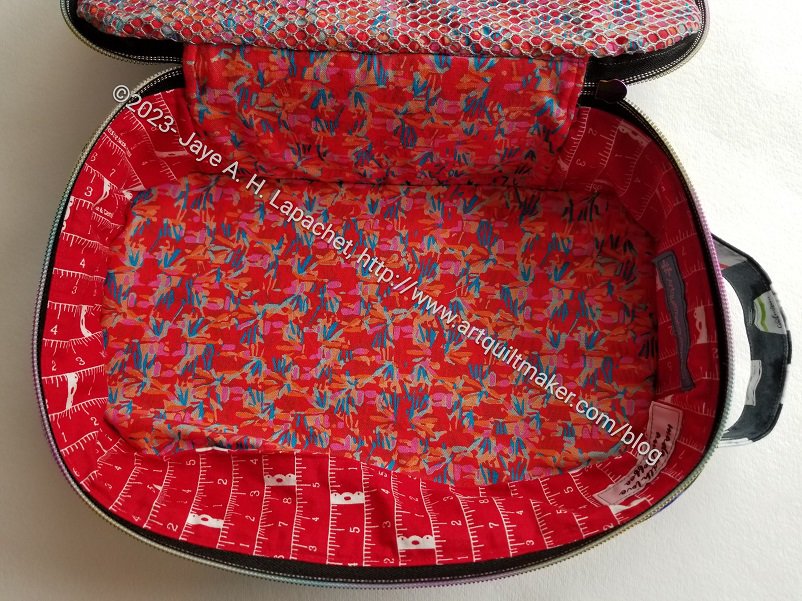
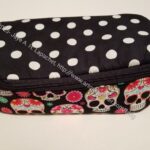
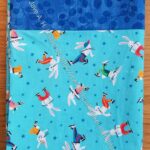
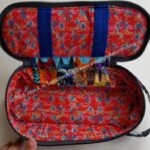
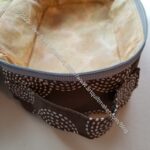
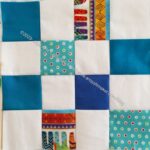
Mom’s Hackney Bag: interior
I used a more Decovil** and DecorBond** than in other Hackneys. Note, I didn’t add an excessive amount, just a bit more. I have to remind myself that I like structured bags and I should add more appropriate interfacing when I need to.
I thought I had a ton of red fabric, but I didn’t have quite enough for the front panel of this bag. I still think it looks nice. It looks very cheerful on the inside.
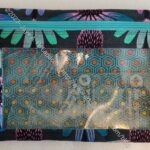
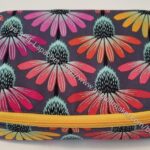
Mom’s Hackney Bag: interior mesh pocket
Yes, I made the mesh pocket again. As I said before, I think they are useful; I just don’t like making them, but practice makes perfect. I think I would like to try making it a different way. I don’t want to fold the edge of the zipper tape as much as the pattern says. The edge of the zipper tape gets ensconced in the seam allowance, so there really isn’t a reason not to leave it raw. It is easier and tidier not to go through all of those layers of folded zipper tape anyway.
I will say that the fabric I found matches the zipper and the foldover elastic very well.
I think I still need more practice making the inside.
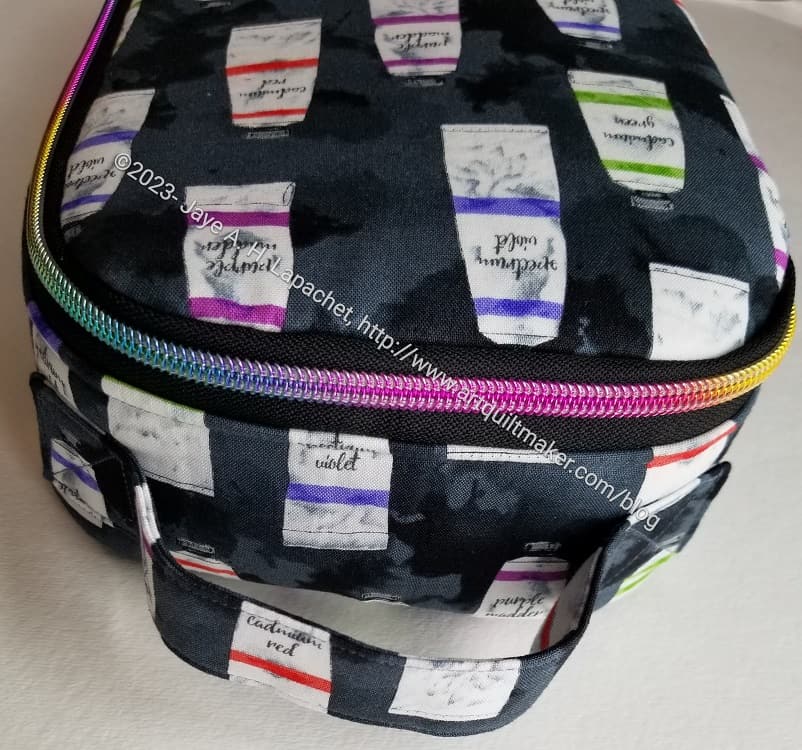
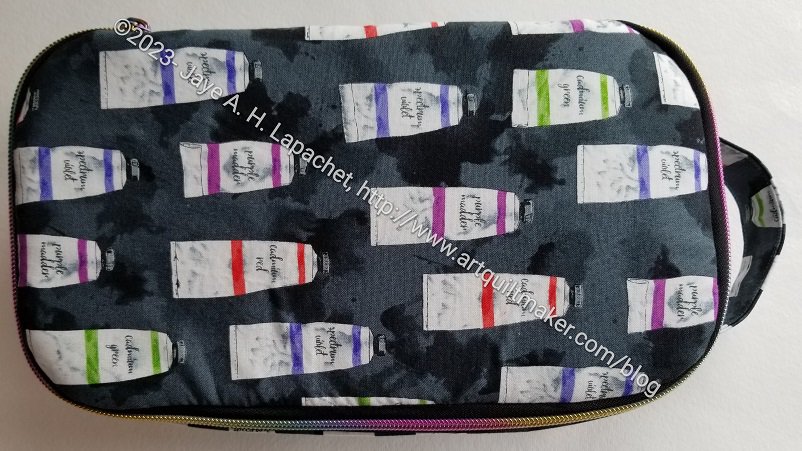
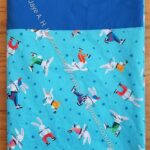
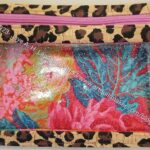
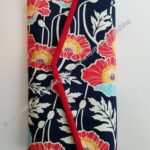
Mom’s Hackney Bag: exterior
The outside looks very good, though.
I oriented the directional fabric a little differently this time. I oriented the top exterior piece so the paint tubes are right side up when the bag is being carried. The bottom paint tube are oriented at a 90 degree angle from the top.
Mom’s Hackney Bag: handle
The handle is also in the right place, which makes me really happy.
One thing I haven’t figured out is where to put the handle in terms of the distance between exterior top and exterior bottom. I hope I remembered to measure where this handle is placed before I gave it away. 😉
Mom’s Hackney Bag: interior bottom
I am doing a better job of remembering to sew my labels in. I wrote myself a note on the pattern, so sewing in a label has become another step in the process. You can see the labels in the photo on the right. I try to include one of my Wunderlabels as well as a label from my 2022 Advent Calendar.
Mom’s Hackney Bag: exterior top
So, another Hackney under my belt. I feel like writing another post showing them all. Maybe I should make myself one.
**N. B. : Obviously, you should shop at local quilt shops and small businesses. However, if you are too busy or can’t find what you need there, I use Amazon affiliate links and may be paid for your purchase of an item when you click on an item’s link in my post. There is no additional cost to you for clicking or purchasing items I recommend. I appreciate your clicks and purchases as it helps support this blog.
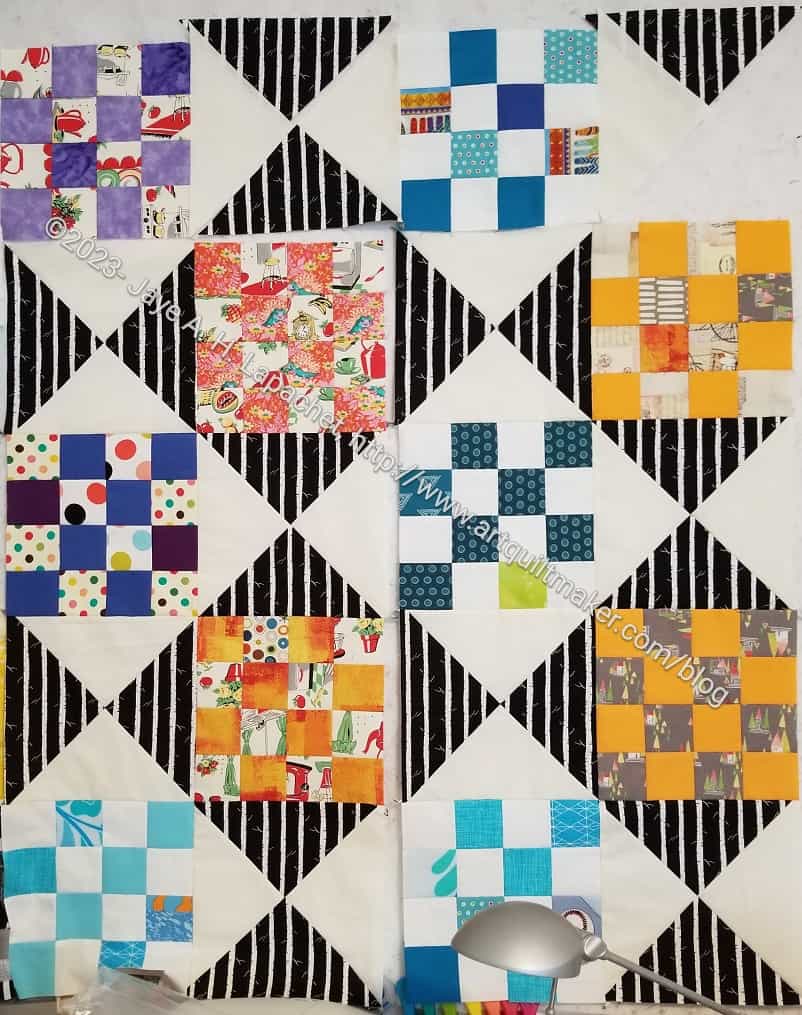
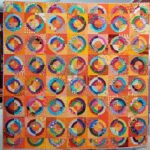
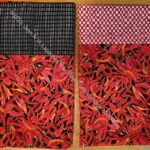
The QST 16 Patch donation quilt is coming along pretty well.
I used some random blocks I had been making for the guild, as I mentioned, but I also added a few more to make the quilt just a little larger.
I used some of that striped black fabric I bought a lot of twice( !!!) by accident. I think I have enough of that stripe to make another one of these quilts. Of course, I should finish this one first. 😉
This project has turned into a little bit of a problem. Not because of the project itself, but because I lost the directions and couldn’t remember the name of the project. I kept thinking ‘poncho’, but, while unusual, capelet is much nicer sounding term. Fortunately, a friend came through and I have the directions again.
The last time I talked about this project was in 2020, which I found after my friend emailed me. I am really glad she was willing to help. I didn’t do my normal librarian thing when I got this pattern – creating a folder on my computer and storing the directions there, adding metadata in case I couldn’t think of the name. Who know why I didn’t do that? At least I know that a little bit of organizing is super helpful, especially for a craft I only work on sporadically.
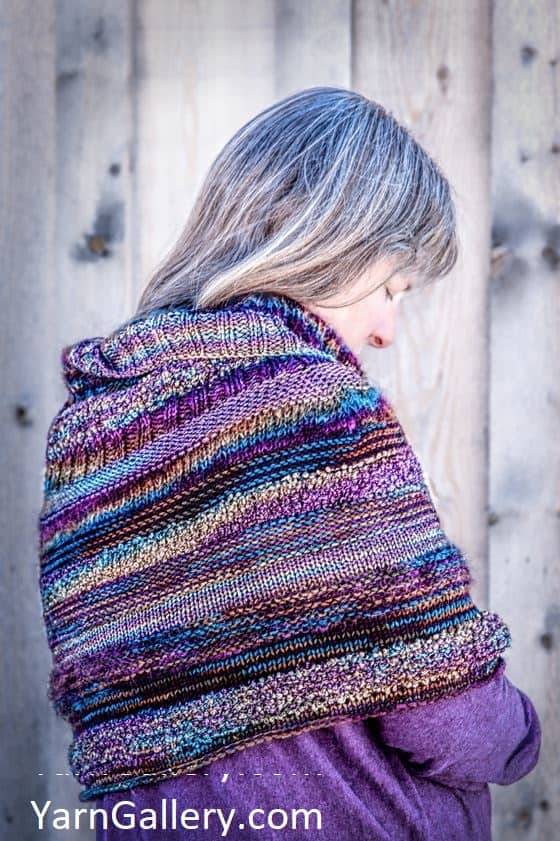
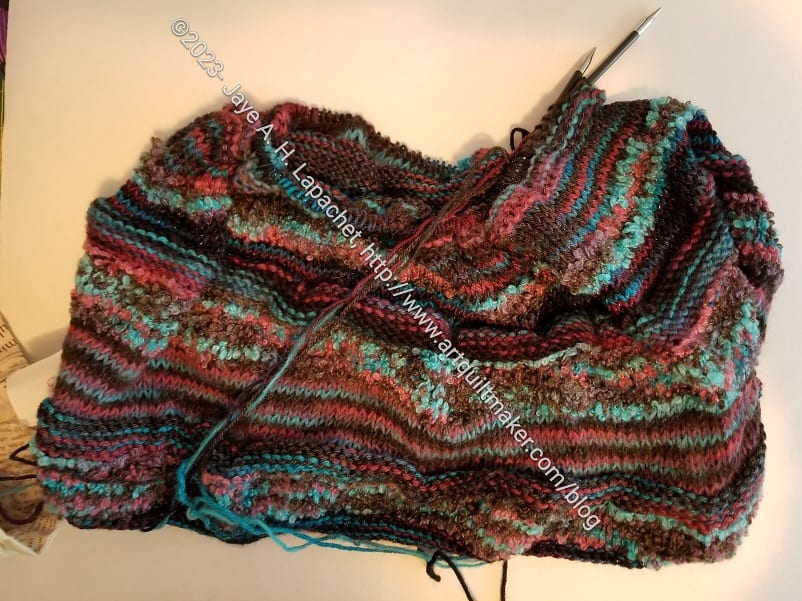
Woodland Capelet in process
I got a link to the Ravelry page where this project lives and added it to my account. I think this is the first time I have added a project to my account. I have never found a record type called ‘random scarves I make up myself’.
I am taking this with me on an upcoming trip and it would be great to finish it. I may not finish it as the pattern says exactly, but I hope I have enough time to finish it. I’d like it off my to do list.
Yep, I finished the top and back. I feel much lighter now that it is done.
I am also pleased with how it turned out. I don’t know if I will make this pattern again, but it is possible.
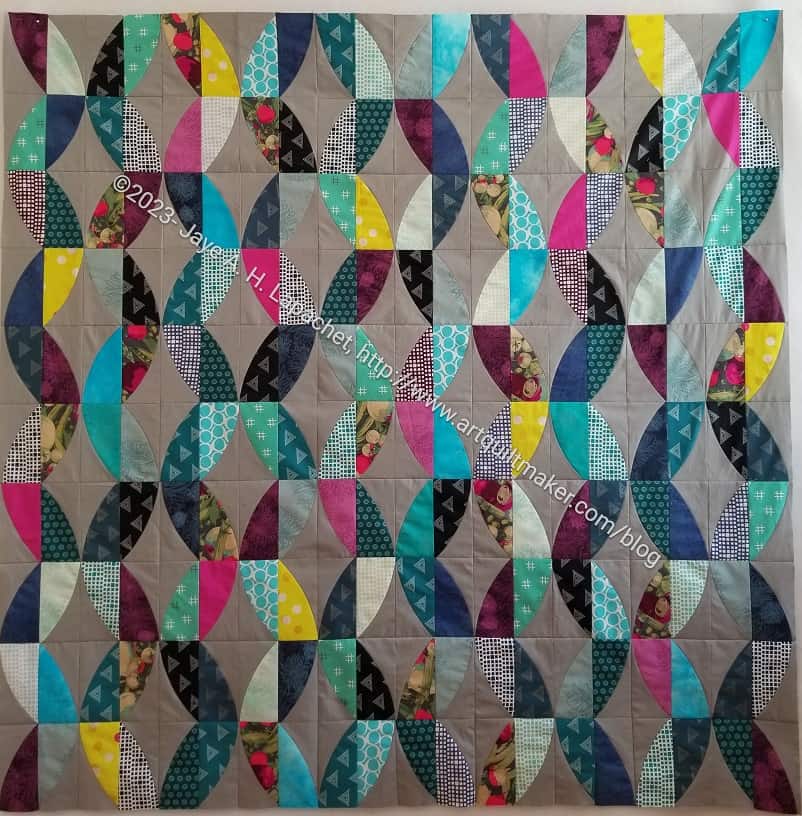
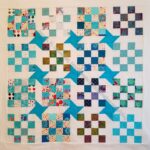
I am sure I said somewhere when I worked on the Metroscape quilt or the Mod Lights tablerunner that the Quick Curve ruler projects come out really well. Not all of my points match up in this quilt, but they are close enough in most cases.
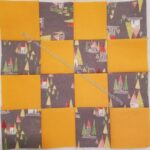
Metro Twist back
I put the back together relatively quickly. The label is a little lower than I normally sew it, but I wrote Colleen a note about in case I forget to tell her if I ever see her again. 😉
Another project off my list. My pile of quilts for Colleen is growing.
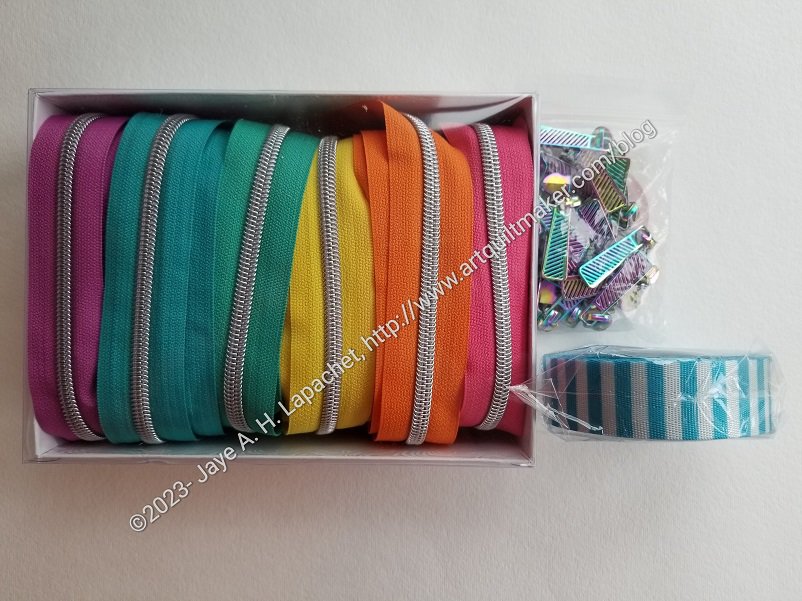
I LOVE this box of zippers from Sew Hungry Hippie. They are super fun colors. I’d love to find a project where I could use a bit of all of them.
I decided to use Modern Background Colorbox by Zen Chic – Bermuda Crosses on White for the background of my La Passacaglia quilt. I have 2-2.5 yards. I am almost sure that is enough, but did a web search to see if it was still available. I ended up finding some at Quilted Thimble Cottage and ordered it. Better safe than sorry, right? I have to say that I was thrilled with the service from Quilted Thimble Cottage. The owner called me to check something about my order and then gave me a free yard of the fabric! Their stock isn’t completely up to date on their website, but what they have is interesting. If you need some Half Moon Modern, they have a few pieces left.
Sue Spargo has a wide variety of labels in her shop. She has a wide variety of generic ‘made by me’ type labels as well as labels with images and icons. One group is called the Sweary Sewist. Lots of f**k on those labels!
Last month, Lynette gave a demonstration of various interfacings for bags. She used a pattern she bought at the Fat Quarter Shop. I was looking for one that might work for such a project (despite the fact that I have 5 million pouch patterns!). I kind of wanted to try a pattern with a template. I have been seeing some of these pop up as advertisements in various social media feeds. I found one from Quiltd that wasn’t exactly what I wanted, but I thought looked interesting and useful.
As I was looking through the Center Street Quilts videos on IG, I saw a video of the Stella Pouch with a clear back. A second video shows a lot more of the steps, if you aren’t hung up on sizes. I hadn’t heard of the Stella Pouch, but, seriously, there are about 2 million pouch patterns and I think I am attracted to the charcoal grey with the rainbow Flying Geese. The samples shown in the pattern are not as interesting. I do think the fact that a short video of the finished pouch is included in the shop listing is interesting. This shop does love quilting their fabric and foam and then binding the inside raw edges. I do not love that technique, but the rainbow Flying Geese pouch with one side made from vinyl wouldn’t be possible without using that technique.
Need a gift or a scissor holder for yourself? Check out this YouTube tutorial. It holds three pair!
While I was chasing Chasing Tigers links, I came across a tantalizing picture of a “Little Busy Bag“. Unfortunately, there are no pictures of the inside and it looks like a regular cross body bag. I think the Sew Sweetness Daytrip cell phone wallet from Minikins Season 2 might be a more useful option. Smaller, yes, but more organized.
Media, Books and Articles
I talked with Cyndi about her Parallel Universe quilt, which got us on to the topic of Gyleen, Ebony and Latifah’s second joint mystery quilt, The Elemental Mystery Quilt. We looked up a picture. They have a choppy design sense. I don’t mean this in a bad way. The elements are put together into chunks. Later, I looked up a podcast about the project.
Events, Shops, Exhibits and Shows
One of the good things about being in a guild is that you hear things. One thing I heard is that there is a new shop, Coastside Quilt Studio, near me. It is actually on the way to my favorite grocery store. I haven’t been there yet as the shop hours are not very convenient for working people, but I’ll go take a look when I am able.
**N. B. : Obviously, you should shop at local quilt shops and small businesses. However, if you are too busy or can’t find what you need there, I use Amazon affiliate links and may be paid for your purchase of an item when you click on an item’s link in my post. There is no additional cost to you for clicking or purchasing items I recommend. I appreciate your clicks and purchases as it helps support this blog.
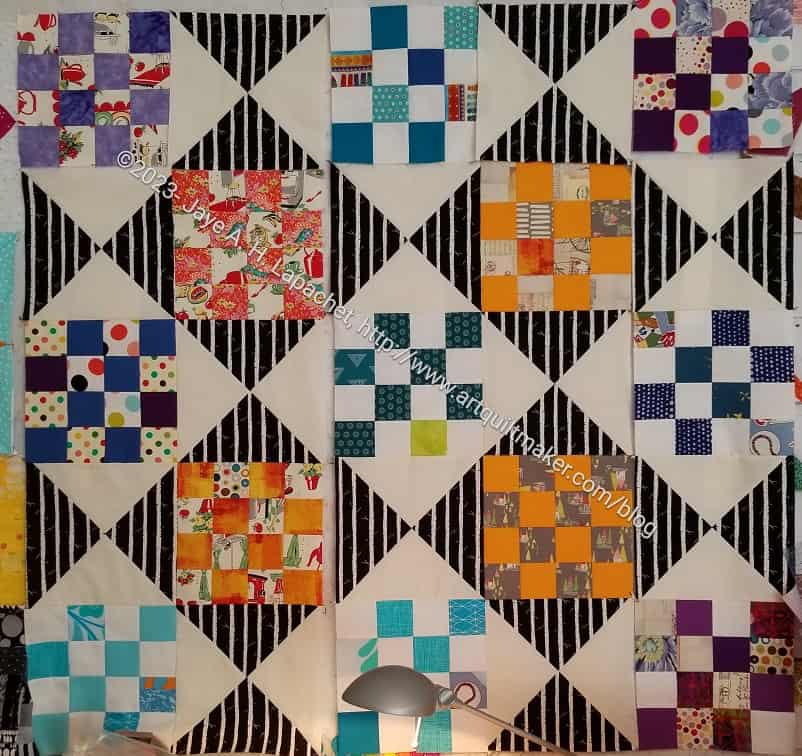
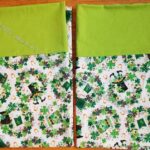
The other day, I talked a little about my design process. I also inferred that I wasn’t going to waste time designing when I could be sewing, so I went and started this quilt for the BAM Community Quilts project.
QST 16 Patch #1 – start
I did start sewing and I made a good start with some of the blocks I showed a few days ago. I thought I might as well use them, after all.
I was pleased with the black and white stripped fabric. I think it looks unexpectedly good.
I don’t quilt much and I enjoy the collaborative effort of making a top and allowing someone else to quilt it. Thus, the quilts below are mostly tops, but I will include a finished quilt once someone else finishes it for the group.
The ‘In Process’ is used to denote projects on which I am actively working or are on the design wall waiting for me to stitch. I am continuing to try not to put away projects. I find putting a project away ensures I never work on them, because I just lose steam.
Quilts (machine work)
Metro Twist -sewing blocks together
Quilts (Handwork)
I decided that some of my quilts are in a different class because they are hand piecing or embroidery or beading. They take longer. Thus I created a new category and have moved some projects here.
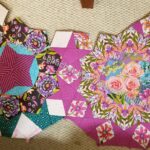
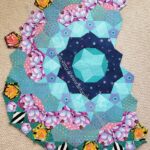
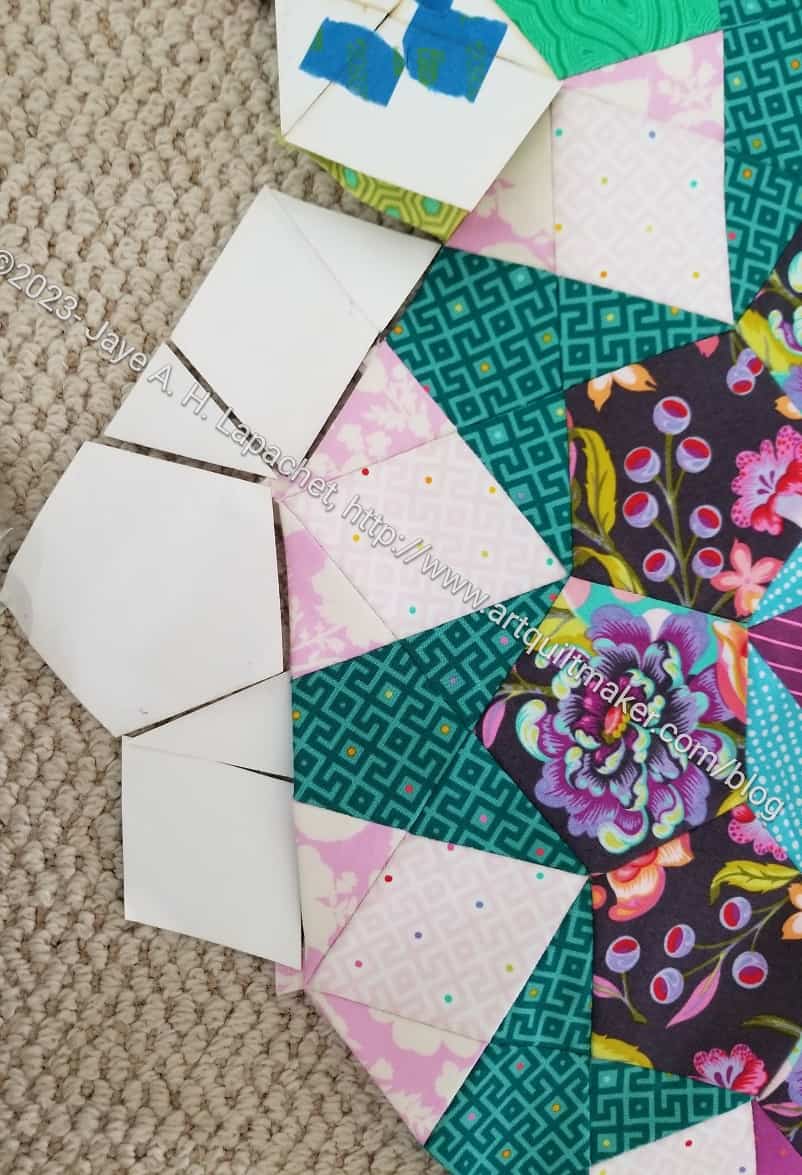
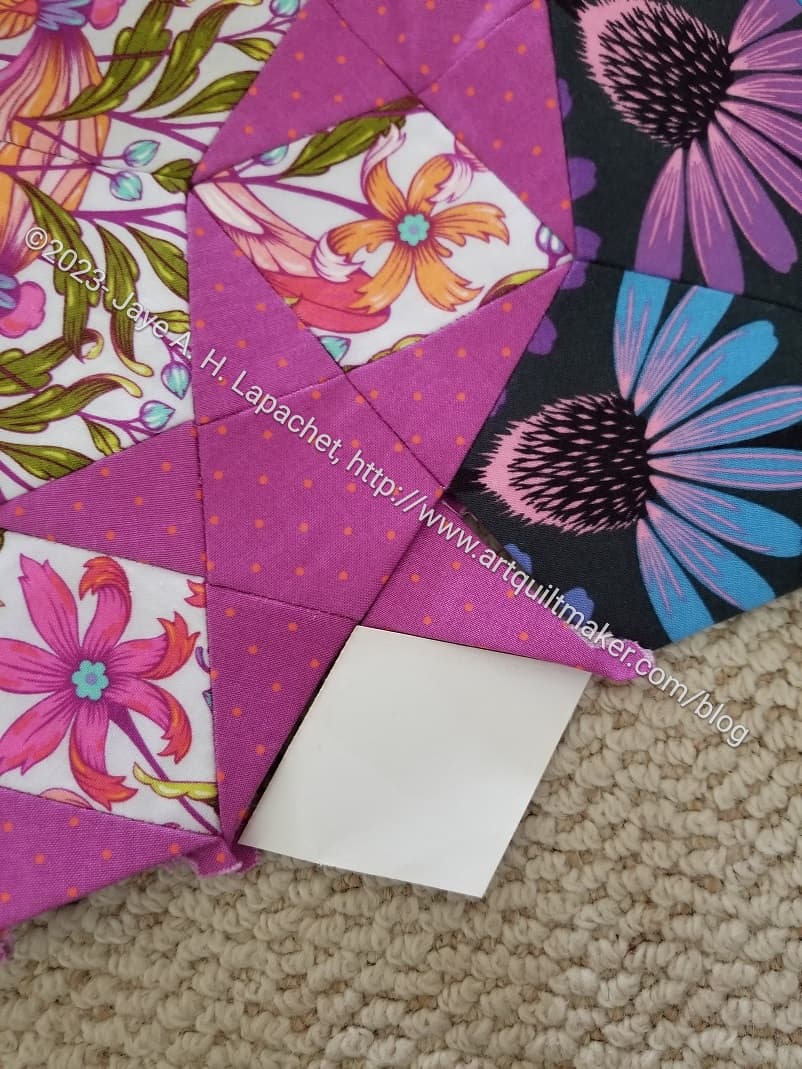
La Passacaglia – The rosettes are all assembled. I am ripping out the papers and deciding what to do with the border.
Most of my progress involves thinking or just cutting. I don’t have a bag in process at the moment.
Ultimate Project Organizer – another project from the Crafty Gemini Organizer Club, also on my list, but not yet started. I did pull the fabric, supplies and reviewed some finished photos that others posted, so I am one step closer.
Retreat Organizer – another project from the Crafty Gemini Organizer Club, also on my list, but not yet started. Recently, I saw one of these made up and I am not so nervous about it. I did pull the fabric, supplies and reviewed some finished photos that others posted, so I am one step closer.
Rose Petrillo bag – I found the pieces for this bag cut out, but not sewn.
Superbloom tote using Hindsight fabric – not started. I did pull the fabric, supplies and found a photo I plan to use as inspiration that others posted, so I am one step closer.
Still UFOs
I still have UFOs. Who doesn’t, after all? A project in the ‘UFO’ category means I am stalled, it hasn’t been worked on in awhile or it is waiting its turn to be worked on. The list is a lot shorter and the projects are newer, for the most part.
I am annoyed that some of these are still WIPs. I just need to work on them!
Handbag Sampler – this is still the forgotten project. I found one block in the not-too-distant past, but otherwise I don’t actually know exactly where the blocks are hiding. I crawled up in the far reaches of my fabric closet to see if I could find them and they weren’t where I thought. I am sort of mystified as to where they could be. I haven’t even found a picture of all the blocks. WTH?
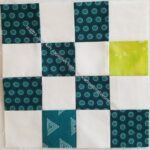
I thought I wouldn’t make as many blocks this month as I was working on other projects. Also, I have had less time lately. I was pleasantly surprised at how many I was able to finish while working on the Metro Twist assembly.
I have the feeling that the border might take me as long as the top of the quilt. If it weren’t for that one fabulous rosette, I might just cut off the edges and move on with my life.
Finishing points and adding background
I did do some organization the other day, which gave me almost a week of evenings with hand sewing ready to go. I know there will be an end, but I haven’t seen it yet, so it seems to be an ever ending process.
I do get small bonuses, which include finishing some points, like the green ones shown in the photo, that I didn’t expect to finish. They will be sticking into the background, so will show up nicely.
At least I hope they will.
Finishing up a star
There is a certain amount of hunting and gathering that I have to do at least once a week. I have to figure out which rosettes to finish and which to cut off, then how I will deal with the background.
I just have to get some straight edges, then I can sew larger pieces of fabric to those edges and be done.
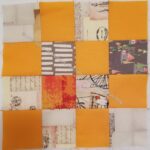
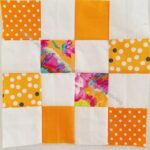
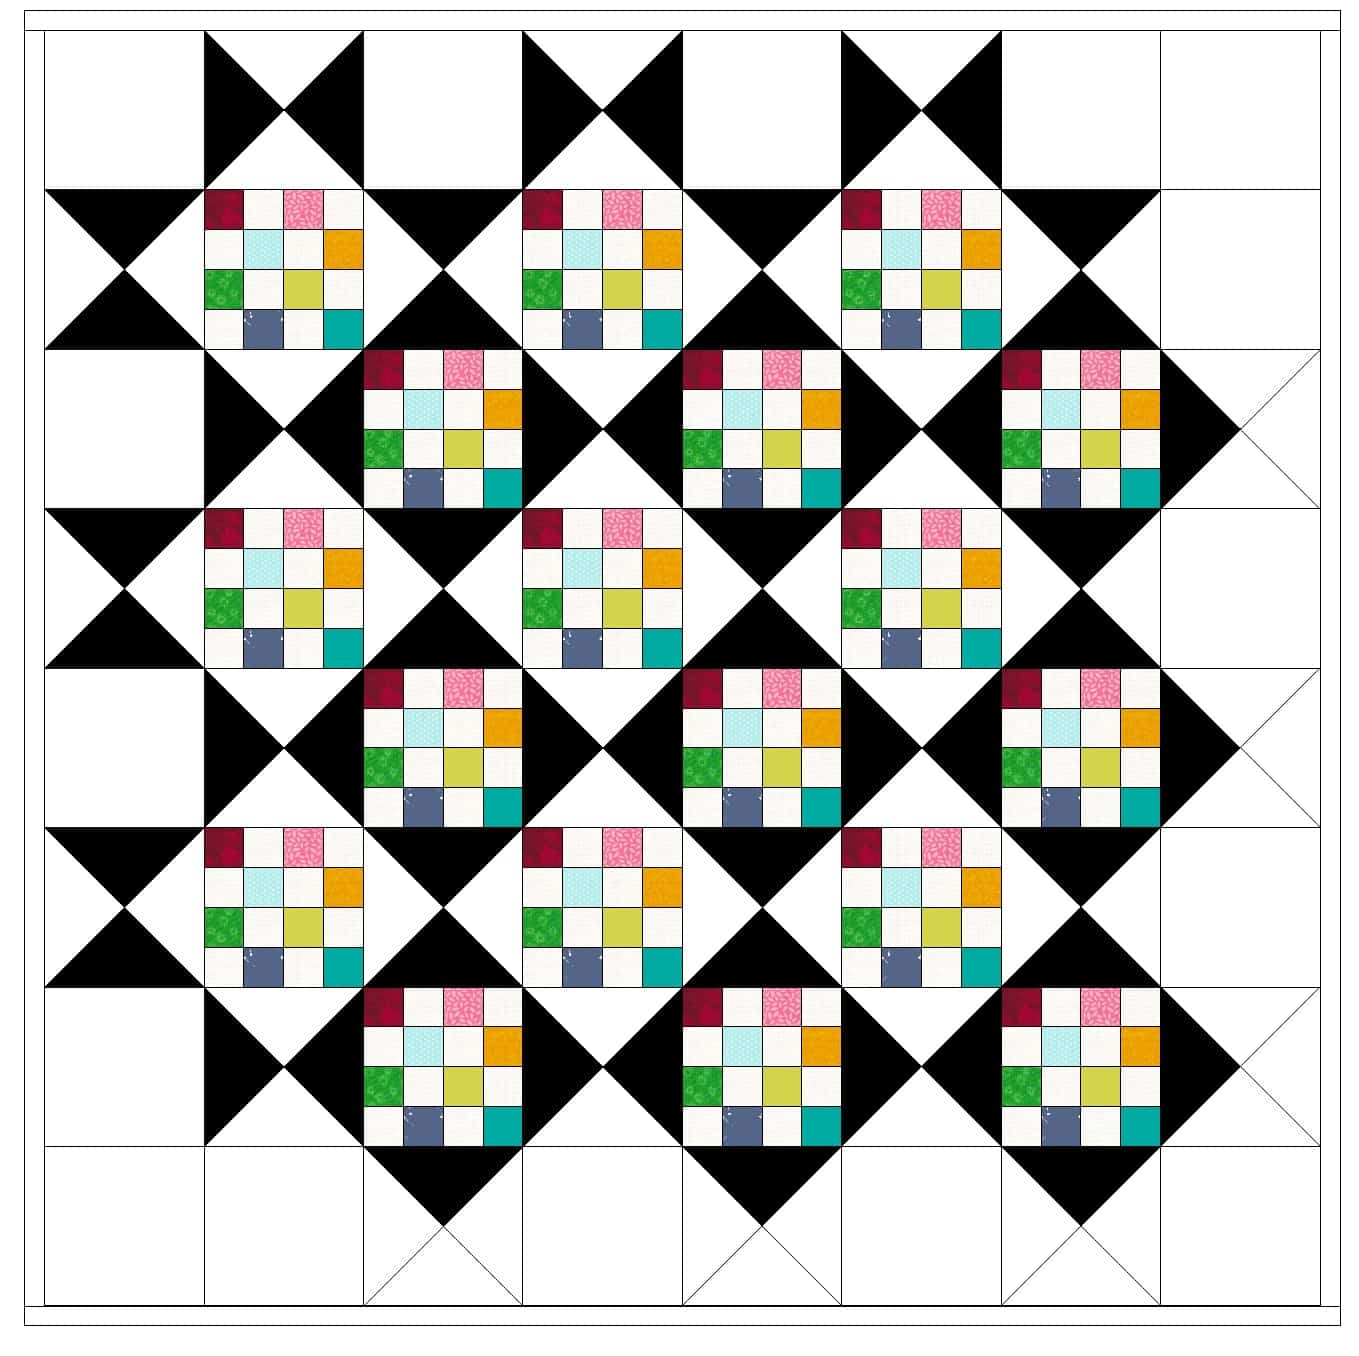
I saw some quarter square triangles (QST) somewhere and started to think about them in conjunction with the guild’s 16 patches. I looked up the dimensions for making QSTs in my trusty Around the Block** book. That simple block was not included. I was trying to avoid firing up EQ8, but had to as I couldn’t get the design out of my head.
QST 16 Patch – cut off
The first design I made is ok. You can see the design and the secondary design. However, some of the motifs are incomplete. You know how I like my designs to be finished, so I decided to try and finish off the edges.
I wanted you to be able, at least, to see the full Ohio Star motif (block) even if I couldn’t finish off all of the secondary designs.
QST 16 patch, design 2
Honestly, I didn’t think through the whole process and wasn’t really prepared for a full-on EQ8 design sessions.
I took a stab. I immediately ran into problems. You can see that doing what I wanted wasn’t straightforward. I think I could have resolved the problem by adding another row of 16 patch blocks, but I didn’t want to make the quilt larger than it was. It will be a baby (ish) quilt for the BAM Community Quilts Project.
For the moment, I decided to leave it and go back to sewing. The second design is fairly asymmetrical, which means true Modern Quilters would probably like it. I don’t dislike it; it just doesn’t achieve my goal. I’ll work on it again another day
**N. B. : Obviously, you should shop at local quilt shops and small businesses. However, if you are too busy or can’t find what you need there, I use Amazon affiliate links and may be paid for your purchase of an item when you click on an item’s link in my post. There is no additional cost to you for clicking or purchasing items I recommend. I appreciate your clicks and purchases as it helps support this blog.