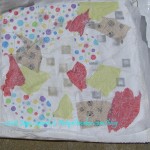
One thing I didn’t say, I don’t think was that I have been obsessing about making a new journal cover since last weekend. I was about out of pages in my journal and have become so used to carrying around a journal covered in lovely fabric that the thought of not having a cover was almost unbearable (definitely being overdramatic here. Bear with me). The week at work was brutal. One thing after another continuing on to Friday when I was supposed to be off. HAH!
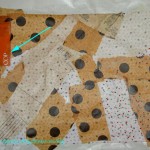
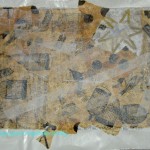
I bought some specific fabric for journal covers and they all had some kind of text or lettering printed on the surface. There are a couple of pieces with cupcakes and bakery words that I also want to use, but these two green-ish/tinged copper roof colored fabrics are the first I have used to make journal covers.
This was a good project for Friday when my work email kept binging for my attention. They were very easy to make and, as I said, the tutorial measurements are nearly perfect. These were especially easy to make because there was no piecing.
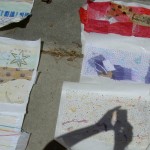
Advertising Journal Open
I like these journal covers, but I also started mosaic piecing some oranges together to make a pieced cover. I am kind of feeling like I should spend some time on one for a change. I am using orange and the leaders and enders method of piecing. I needed some leaders and enders when I was making the Hurricane Sandy quilt blocks and this seemed like a good solution.
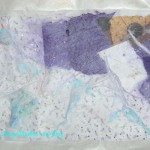
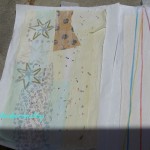
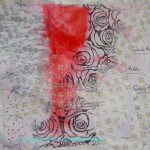
Letter Journal Cover
I started writing in the letter journal this morning and it is nice to have a new journal. Sometimes my journals get so full of bits and pieces that they get hard to write in — too lumpy. That wasn’t the case with the previous Tina Givens aqua and red journal cover, but I was ready to look at something new.
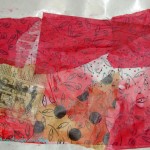
I read an article yesterday that the Post Office is running a fairly significant deficit. This makes me want to cry, because I love sending and receiving letters (even if I have to scramble to find the time to actually write them). It is so fun to receive a real letter or package. This journal reminds me to write letters and postcards. At least I hope it will. The color, as I mentioned briefly, reminds me of the copper roofs of the old buildings and palaces in Austria (other countries, too, but I am really thinking of Vienna).
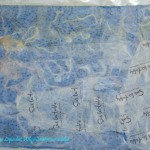
Letter Journal Open
I now that many people don’t want to buy these Miguelrius journals, so I want to try out a journal cover pattern from my friend Chris or make a new tutorial, if hers doesn’t work for me. I want this pattern to be more accessible to more people. If you have adjusted the sizes, I would love to hear about or see what you make.
Earlier this week I wrote the Quilt To Do List, because I had these little things rattling around in my head nagging. Also, I had nothing else to write about having not sewn and already gone on and on about the Spiderweb. I mean how much can you tolerate about Spiderwebs?
I had kind of a brutal week at work. It wasn’t crazy busy, but everything was hard and the most difficult partners and associates were asking me for the impossible. I really wanted to just be at home today and rest. I might be getting a cold, but I feel like I need to rest.
No, I haven’t accomplished the whole list. The Hurricane Sandy blocks for Vesuvius Mama are done. I had to rummage around for some fabric like she wanted and found some very interesting stuff in the process. More on that later.
I had never made a Disappearing 4 Patch before, though I knew the concept from the Food Quilt‘s Disappearing 9 Patch Design, so I knew the concept. This was a good excuse to try out the Disappearing 4 Patch. I don’t remember if I thought the Disappearing 9 patch was fiddly. I thought the D4P was kind of fiddly. I think I like the D9P a little better, but I am always up for learning a new blocks and I think the D4P has some interesting design possibilities. And I can make blocks until the cows come home. I don’t need to like them much to make them. You’ll have to wait for photos as I forgot to take them!
Letter Journal Cover
I wrote really small all week and made the last few pages of my journal last. I still have about half a page left. I don’t know whether that is an accomplishment or cramping my creativity. Anyway, the first thing I did this morning was start cutting for a journal cover. I decided that I would make two, then I wouldn’t be behind when I ran out of pages next time.
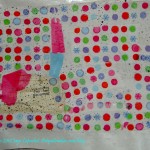
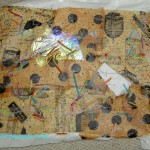
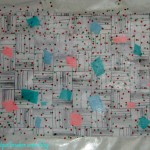
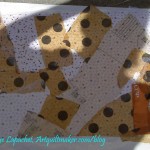
Advertising Journal Cover
I had already ironed fabric that I bought for journal covers, so I cut pieces. The journal cover tutorial is now really right on in terms of size. I have tweaked it a bit lately and the covers went together with little to no problems in terms of size. Also, no frustration either. Nice.
I’ll put up more photos and info later. This post was supposed to be a quick “hi. hello” and it is turning into a dissertation.
I really should have made the binding today, because I could have watched TV and sewed down the back. I just didn’t think of it. Perhaps tomorrow.
I was tired on Memorial Day and think I needed a break from the Corner Store. We were out late the night before watching the Bridge fireworks, so I got a late start. My head was spinning from the work I accomplished on the Corner Store, so I worked on some smaller projects.
I finished my current journal, so I needed a new journal cover. I really like having a journal cover on my journal now. Need and desire convinced me to make a new for the fresh journal. I wanted to use one of the Philip Jacobs fabrics, but I also wanted to add interest, so I did a bit of piecing.
Journal cover open
The back is all Philip Jacob, which means I can look at it whenever I want. The bits of pink peeping on the front make me smile.
I sewed on a merit badge, fixed my pants and listened to a book. I also beefed up my supply of donation blocks. I think I am up to 6 of the pink one now.
I also worked on the next Swoon block. Stay tuned for more on the Swoon blocks.
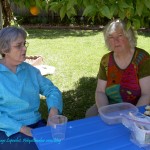
Last Saturday, CQFAers met at Sue’s house where she tried to teach us the secrets from Stitch Alchemy, a book by Kelli Perkins. The idea is to make fabric paper – a combination of fabric and paper. I hope to use mine for journal pages for journals like the Red Journal.
Rhonda's Raffia
I don’t share well, but space was limited and Rhonda (of BAMQG fame – she plays with both teams 😉 )and I ended up next to each other. She is a great tablemate! We shared well and she is extremely creative. I felt like an idea-less boob next to her. She is like me in that we just got down to it. We also had fun.
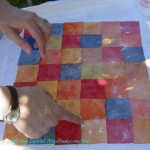
During the time I thought of texture, because of the podcast I had just recorded with Sandy. I have a lot of schnibbles from pressing fabric so I brought that with me and adhered them to the paper. Sue wasn’t sure if it would work but it was worth a try.
The next step is to paint the fabric. We will do that at the next CQFA meeting.
I found myself needing a journal cover last Sunday when I finished the last page of my previous journal and was facing the naked cover of a new one. Since I was wrecked from the Daylight Savings Time change, I thought a journal cover would be an easy project. It turned out great and it warmed me up for working on some of the diamonds.
I wanted to use as much of the fabric intact as possible (this is one of the big problems I have with hand dyes. I find them too luscious to cut up!) so as to preserve the dots. The dots didn’t land exactly where I would have liked them to land, but they are good.
I call this my Sonja Journal Cover, because my friend Sonja made the fabric-well, dyed it or waxed or somehow made the pretty color and applied the pretty dots.
I know that I am going to start the FOTY 2011 quilt next week, so I have been working on smaller projects. I have, either, been finishing projects in process or making items I have had on my mind.
Here is the Blue Belle Fleur journal cover that I finished this week. I started it some time ago and the pieces ended up in a pile on my old cutting table while I worked on the Stepping Stones quilt.
I set up my new cutting table and found them in the process.
For this journal cover, I worked on putting pieces of the fabric (stamps, postmarks, writing) that I liked where I could see them. You can see, in the top photo, left, where I have done that.
Belle Fleur Journal Cover - inside
The inside ended up with a really nice full piece of the Belle Fleur fabric. I am not much of a butterfly person beyond the norm, but in this context, they look really nice.
I am not sure why I decided to pair this fabric with black. I think the black works well with the Belle Fleur, but I don’t remember why I chose it. Perhaps it was handy. I was using those black fabrics for the Food Quilt, so I have a feeling there strips available.
Belle Fleur Journal Cover - outside
The only part of the fabric I didn’t get was a bird head. Oh, well. I have some bits and pieces of the fabric left, so I will keep trying.
You can make your own journal cover by checking out the tutorial. If you are not using the Miquelrius journals, you will need to adjust the size to the size of your journal.
Frustratingly, I had trouble with the size. The size of the journals hasn’t changed so I don’t know what the issue is. Perhaps not measuring? I had trouble getting the cover to fit the journal. I think this is why I want to finish a project rather than leaving it lie for a long time.
For a long time, I had an idea in my mind that I would make two pencil rolls for some friends who worked with me on the Primal Green show. Somehow the pencil rolls never got made. Then, the idea morphed into journals as I worked on the Purple Journal and I got in the groove of making the pages. I ended up just kept making more and more pages until I had enough for the two additional journal.
I used the Circa 1934 mosaic piecing pieces that I had started when I got off track for Julie. The words are appliqued on to the cover using raw edge applique’ (straight stitch down the center of the letters). I started out with a freezer paper template using my own, slightly stylized, handwriting. I am not much of a calligrapher, so I reworked the design of the letters until I was happy.
It took me a long time to cut out the freezer paper templates. The letters were thin and I didn’t want to rip them. It was meditative. I wanted the words to be subtle so I chose another fabric from the group I used in the Stepping Stones quilt.
Good Job Journal - backGood Job Journal closed
I might have put the words on the back so that the closure wouldn’t cover them when closed, but I didn’t think of it. That is one reason why I like to work in a series (which sounds so much more arty than “make projects over and over”) – so I can learn and do better the next time.
On the other hand, it kind of looks like a surprise. You get a little peek of something else, then you open the closure and see the words.
Good Job Journal - signatures
The signatures are the same or similar size to the signatures in the Purple Journal. I left a little more space to write and draw on these pages and thought about the Design Series Sandy and I have been working on while I embellished the pages. This project gave me the opportunity to get a little design practice in without starting a new quilt.
Well Done Journal - closed
These two journals are really twins: cut from the same cloth and made at the same time.
I didn’t pay a lot of attention to the design while I was piecing, because I knew it would be ok. One thing that encouraged me on to add the words was the large expanse of that mustardy dot that ended up on the front. It is really too big of a piece for the front. One large piece of fabric in this mosaic piecing technique does get the piece to the right size faster, but also looks boring. It is, however, a great background for words.
Well Done Journal - open
Shocking as it might seem, I stitched on the words AFTER I put the cover together. That means I stitched through the manilla folder which provides the base and gives the journal shape.
The ‘Well’ word was more tricky than the ‘Good’, ‘done’ or ‘Job’ words. I think the fact that they are taller and thinner were part of the issue. My second ‘l’ is leaning a bit more than I intended, but I think it looks ok. If I had thought of it I might have used a light fusible to keep the words in place while I sewed them.
Well Done Journal - signature 1
I made a big effort in these two journals to vary the types of paper and put more blank pages in.
I didn’t realize until I started on the signatures for Good Job and Well Done that I was making mini art pieces as pages rather than embellishing pages to add interest and providing space for the recipient to write.
Well Done Journal - signature 1
Andrea, at A Work of Heart, where I took the original class, had a lot of great ideas about embellishing pages and adding interesting things to them. She also has a huge supply of all different types of items that could be used for pages, in addition to interesting paper.
I have a smallish bag of paper to use. I found an envelope in it, so I added that to one page so the owner could tuck bits into it. In some cases, I also sewed down only two sides of a piece of paper to embellish so that something could be tucked behind that embellishment as well. I like to tuck things into my journals and imagine that others might, too.
Well Done Journal - signature 2
On the left, which is the last part of signature 1, you can see that red strip of paper. That is the kind of embellishing that I was trying to do.
In signature 2, on the left, you can see how my stitching shows up on the first page of the signature, but embellishments are actually on the back of the page.
I also try to position the edges of the pages a bit unevenly. I wanted to highlight the handmade nature of the piece and also draw attention to some of the handmade paper I used.
Well Done Journal - inside back
The inside back cover isn’t terribly interesting. I put a pocket on the Purple Journal, but forgot to do so on these two journals.
I thought the card with printed words saying good-bye in different languages was appropriate to put on the last page. I am sorry that I don’t remember where I got them, because I would like to get a few more. I had a few so I think each of these recent journals got one.
Well Done Journal - Good-bye detail
I also like the small images printed in between each of the words.
In this photo, you can also see that I used a zigzag stitch to adhere the paper to the other pieces of paper. I used the same color thread and the same stitch throughout both journals. I played around with the setting a little bit to get a width and length that I liked. I remembered to not make the stitch length too tight or close together (like a satin stitch) otherwise it would have torn the paper.
I think that little bits can be tucked behind the Good-bye card.
The bad thing about this project is that it makes me tempted to save much more paper than I really should save. I really don’t have any place to keep paper and A Work of Heart is too far away to depend on for a ready supply of paper. I guess that is another reason to use a lot of blank paper and embellish it slightly.
Well Done Journal - back
Mosaic piecing is not only good for journal covers, but it is a great way to get something done that you don’t have to think about too much while working on another project. Remember leaders and enders? Mostly, when using fabric, I sew like colors together, but in this case, I used a group of fabrics I had used for a quilt, the Circa 1934 + fabrics. You can see that my cover includes a half square triangle piece. I didn’t use it in the quilt, so why not give it additional life?
The Red Journal cover had a lot of super tiny pieces, but not all mosaic quilting needs to use super tiny pieces. Larger pieces become larger faster. In some way, Pieced Backs are a larger version of mosaic piecing. Of course, a cover can be made much more simply from two pieces of fabric. Piecing like I have done is not required.
Things I would like to try for next time (not that I know when next time will be):
use Timtex or similar for the base. I kind of want to see how that works and whether using a more fabric friendly base would be better.
use batting for the cover and see how a softer cover works.
push the limits on how many pages I can fit into a journal this size. One problem is that the sewing machine needle gets dull, so I have to make all the pages at once or keep track of a “for paper use only” needle and keep switching out the needle. It would be great to use the leaders and enders technique for making the pages.
try to put more blank (or nearly blank) pages in the journals. I want people to be able to use these as a journal, so more blanks would be one way to do that.
Three Journals, 2012
So, above are the three journals. I am really pleased.
Awhile ago, I decided I wanted to make Julie a really special gift for her birthday. I decided on a journal similar to my Red Journal as a gift. The date slid as my November and Decembers were pretty busy and it ended up as a Christmas gift.
She is a purple person, so I decided to make the cover from some of my purple scrap. I had quite a few from the Purple quilt, so it wasn’t difficult. However, I got really busy and distracted right before her birthday, so I didn’t finish it. Then December was really busy and I didn’t finish it in time to give it to her for Christmas. I told her about it and promised her it would be done.
I did work on it over the holidays, but in the course of being distracted, I somehow got off track and started making her a new cover out of the fabric I used for the Stepping Stones quilt.
Huh? I know. Not sure what was happening in my mind, but there you have it.
Purple Journal Signature 1
Finally, I stopped working on the cover and turned my attention to the pages. The point is to make signatures (groups of pages). I was going for 12 pages in 2 signatures, which, when folded in half, would give 48 pages total to write or on which to journal.
I have a small stash of random, scrap paper, which I got out and started sewing together. This process ruins the needle for fabric, so I worked on all the pages I needed. As I worked through this process I decided to make two more journals for other gifts and made the pages for those, too.
Purple Journal Signature 2
Since my needle was ruined for fabric anyway, why not? I’ll talk more about those journals later.
You can use any kind of paper, but you shouldn’t use ALL really thick paper. You need to use different weights otherwise it is too hard to bind at the end.
I sewed the various pieces together to make 8.5″x11″ sheets, which I, then, folded in half. Julie will have to use different pens to write on the different papers as some of the papers are shiny and won’t work with roller ball type pens. It will be interesting to see what she does with it.
Purple Journal Back
I have been struggling with what it means to be an art quiltmaker lately (for awhile, actually) and whether I am or not. I think this project puts me firmly in the camp of art quiltmaker.
I am on the last section of my current journal and know I will be needing a new journal soon. I have gotten used to using journal covers and thought it was time to make a new one. I have been using the Innocent Crush cover since I made it. Even though I have made others, none of them have felt the way the Innocent Crush journal cover feels.
Finished Fall Journal
Still, I enjoy using journal covers and I want to perfect the process, so I made a new one.
I am pleased with the fabrics I used – all scraps and bits from other projects, though the letters and numbers were a perk from Bear Patch Quilting in Minnesota.
I am glad I was able to use the Belle Fleur fabric, but I am a little annoyed that the piecing all ended up the back. I might switch the cover around so that the piecing is on the front even though that will mean that the letters are upside down. I might not care, but we will see.
Yes, I knew while I was working on this that I should be working on the Stars for San Bruno #3 quilt. I haven’t been in a really great mood, so I haven’t wanted to work on it, since I don’t want to infuse it with bad energy. I may have to eat more chocolate.
Finished Journal
I decided to photograph this end up from above so you could all see the front and back.
I have heard mention of ‘lifestyle’ photographs that seem to be popular on blogs right now. I don’t have a photograph studio, so this was the best option I could think of at the time.
Bear Patch Quilting gave out small pieces of fabric (about 10″x10″), which is where I got the letters and numbers and fabrics. Apparently, they give them out to everyone who purchases something in the store. I think they were called Bear Paws. I was allowed to choose the fabric I wanted from a box they kept under the counter. I asked what kind of fabrics they used and the owner said that they cut from current fabrics.
Using Wonder Clips
One thing that worked out really well was the Wonder Clips. Again, I bought these in Minnesota. I had been wanting to try them for binding. I was tempted to buy the large size package, but decided to try the small one first. Good thing, because they worked fine for binding but not for my process. I already poke myself plenty with the needle and the clips stuck out too much for comfortable stitching.
I had a brain wave, however to use them to sew the journal cover together and that worked great! Using straight pins works ok, but it hard to insert them into the fabric when the cover is on the journal, but not sewn. I need to have the cover around the journal so that I get the fit right. The clips worked really well, because they didn’t interfere with the journal. I loved them for this purpose!
There is a link to the journal cover directions from the tutorials page on the toolbar (just under the AQ banner) above. You will see the submenus if you put your mouse over AQ Info. I welcome your suggestions on making this tutorial better.
A couple of weeks ago I went back to A Work of Heart for a Juicy Soul Retreat. I really had no idea what a juicy soul was or how it could be retreated. I went because I needed a bit of a creative change and Andrea and her good energy were just what I needed.
Andrea
It was the right thing to do. I really enjoyed the day, got a lot done and got my head a bit straighter than it was.
Finished Cover + Marker
I thought about the journal I wanted to make and wasn’t sure so I bought a new journal and brought my Purpose journal as well. I was thinking I might be able to add to that one.
One of the things that was different about this class than the other journaling classes I have attended at AWOH was that we all introduced ourselves and shared a little bit about ourselves. Some people shared why they were there-what they hoped to achieve- and others shared something about their art. My friend, though quite young, is staring retirement in the face and she was there to work on figuring out what’s next.
That struck a chord with me and I started working on the new journal. Some of the techniques for making backgrounds were similar to those I had used in other AWOH classes, but there was plenty of new stuff as well. Also, I don’t take notes in Andrea’s classes; I try to absorb the techniques, so I don’t remember some of the nuances from previous classes.
Darcy’s Background
I tried to get the backgrounds for the new journal done, but there just wasn’t enough time. It was probably a good thing. I have to remember that it isn’t about the finished product, but about the process.
The ProcessAWOH Hearts
Andrea is revamping half of her studio space and she has some of her work displayed on the new shelves there. I love the hearts. The pink background is such a wonderful pink. It isn’t too sickly sweet or light.
She has a project of her own in which she is creating 1000 houses-images of houses. I love the idea of choosing a shape and creating a series using that shape. The house shape is simple, but has a lot of possibilities. Hearts would also work. A 1000 is an amazing number of pieces of art. It is large enough to be a challenge, but also obtainable. She eventually wants to raffle the collection off to raise money for a charity.
I am kind of stuck in my ways when it comes to daily writing journals. TFQ introduced to me to the Miquelrius journals and I have never looked back.
I received these journals on the right from DH for Mother’s Day. I wasn’t exactly sure what I was looking at when I opened the beautifully wrapped gift. The spiral with the old book covers did not compute in my mind.
I admire the Art Deco (Nouveau??) design on the cover of the brown book, but really appreciated both when I opened them. The pages of the books have been replaced with blank, recycled paper.
Recycled Journals Open
There are a few pages from a book in the journal, but mostly the pages are blank.
DH works for a large educational institution and they are constantly having different events. They recently had a Green Fair and that was where he found these. I thought it was very sweet of him to pick journals for me. I guess he noticed that I write in my journal a lot. 😉
Now I have to decide whether or not to make a cover for these when I use them.
Perhaps I should have used more blues and greens and held on to this for summer? Nah! I was ready for some cheerfulness after the unbelievably grey skies of the past few weeks.
My plan worked. My plan was to alleviate the depressing grey that was shrouding my town. It worked! Today was beautiful out! Blue skies… no clouds. It was gorgeous, even from the window of my office. And, peeking out of my bag was this cheerful (bordering on loud and obnoxious??) journal cover. It made me smile every time I caught sight of it.
I used the Philip Jacobs fabric I bought at Always Quilting after PIQF 2010. I still want to make a bag or something larger, but I haven’t gotten to it yet.
I didn’t plan on centering the flower, but it was a pleasant surprise.
Journal Cover - open
I used a bit of hand dyed fabric for the inside and added a little to the edges of Philip Jacobs fabric to add interest.
I have finished all of the pages my current journal, which has the Innocent Crush cover. I am sorry to be finished with that journal, because I wanted to carry it around in the Innocent Crush Flea Market bag. Adrianne brings her Flea Market bag to the BAMQG meetings and I admired it again at the last meeting. I wasn’t happy with the way my bagn turned out so I took it apart – not the whole bag yet, but the straps. You can kind of see the unevenness in the photo (the one I linked to above). I like the fabric and the design and didn’t want to just abandon it. When I made the bag, I was not able to sew the straps smoothly which meant that I tried to ease the handles together, which, further, left tucks in them. I didn’t like the way the tucks looked. I have unsewed the handles and am working on lining them up better. I haven’t done any further sewing on them. We’ll see.
Yes, I can reuse the Innocent Crush journal cover and I might do that. For now, though, I am loving the cheerful and fun Philip Jacobs cover.
This is a quick project. I made the journal cover in about a half an hour on Saturday morning.
I didn’t do any massive gift making, but it turns out that I did make a fair number of gifts. I wanted to test the journal cover tutorial and use the fabulous bas relief fabric I talked about a few weeks ago for someone who would enjoy and appreciate it. My pile of gifts for Friend Julie looked a bit pathetic, so I rushed out and bought a journal and made her the journal cover with this fabric.
I had a fat quarter of the fabric and I wanted a journal that would show off as much of it as possible. Flax had a huge pile of black sketchbooks on sale, so I rummaged through them and finally came up with a 10×10″ size. I thought it would be a useful size and show off the fabric nicely.
Bas Relief Journal Cover Open
It turned out to be a bit too big for the fabric, because, of course, of the requirement that book has to open. As a result the pockets for the covers are a bit small – only about 2.5″, but I hope they will stay on when she is drawing.
I had some trouble with the measurements. This is a different journal than the Miquelrius journal and I needed different measurements, so I adjusted the instructions in the tutorial and have, hopefully, made it more clear for future.
Bas Relief Journal Cover Closed
I think I centered the fabric nicely and it is shown off well. I thought of a lot of different ways of wrapping it and ended up with just a ribbon. I salvaged the ribbon from somewhere, but pressed it and it is of nice quality, so it looked nice.
Hopefully, the gift will spur on a plethora of creativity at Julie’s house.
I made these journal covers in November and December, but didn’t get a chance to post them.
TFQ told me that she made journal covers for all of her journals. I got tired of using the blue one, so I made a quick one (the b/w dot) and thought I would just transfer that cover to each new journal. I tired of that plain cover very quickly. It showed me why piecing a journal cover is important: the piecing adds visual interest. I left the b/w dots on the journal for which I made it after I wrote the last page and made yet another journal cover with the Anna Maria Horner Innocent Crush Grape. I don’t love/adore that fabric, but there is something about it I like. It is also a more complex and, thus, a more interesting fabric than the dots.
I think I will see about making a new cover for each new journal I start. I don’t know if I will piece the next one. I have plenty of fabric and can make a journal cover in a half an hour if I don’t piece it. On the other hand, pieced covers are more interesting and I could piece bits together as leaders and enders. My scrap basket is starting to overflow and I need to do something with the scraps. Stay tuned.
This fabric was included free when I ordered the Mexican food pillowcase fabric from Whichway Quilting. It is beige/taupe/tan (no info on the selvedge on my piece) so I wasn’t very excited about it. However, when I washed and pressed it, I noticed the incredible dimensionality. It made me think that this fabric would make a really cool journal cover or pencil roll. I only have a FQ, so the project would have to be small. Also, it isn’t as if I don’t already have a thousand projects on my to do list. We’ll see.