Pockets

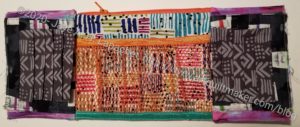
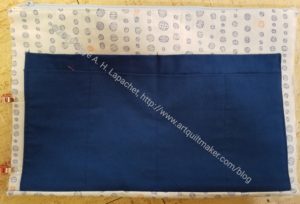
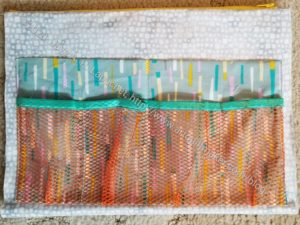
Ultimate Carry All large Pocket #1

I spent the weekend working on my Ultimate Carry All Bag. I really needed to get on it since a few people have already finished it, like Cyndi. I am supposed to be one of the leaders, after all!

I already made the small front pocket, which is actually the third sewing step. As I think I mentioned, I don’t recommend skipping steps, but I needed to create the tutorial. Needs must.
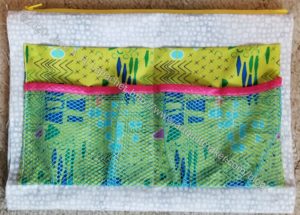
Ultimate Carry All large Pocket #1 back

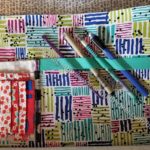
With the small front pocket done, I only needed to create the two larger pockets. The one shown above is pocket #1 and is almost finished. I haven’t sewn up the sides or made the pleat in the bottom.

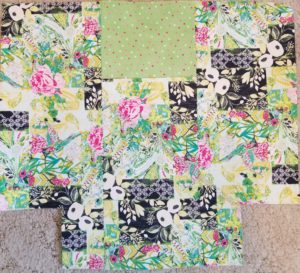
The green pocket with the pink binding on the mesh is the back of pocket #1. This is a hack I added. There was nothing on the back of this pocket. I know I might put stuff in it and forget about it. Still, why not have more pockets? More pockets are better IMO.

Pocket #2 has the pen holder. I don’t like white elastic, so I used more of the ByAnnie double fold elastic. I like the variety of colors and the elasticity. I wasn’t sure I would put the pen holder elastic on, but I did. Actually, I shortened it and added another Clippy pocket I thought it would be useful.

I made a ton of t mistakes and a lot of ripping went on over the weekend. These pockets are not difficult, but the instructions are unique. Also, I am experiencing a low level of anxiety generally and that is making it hard for me to focus on something as complex as bagmaking. Working on the HRTs is satisfying and not too difficult.
Almost Perfect Binding

I am working on another Running with Scissors tote. Yes, I am a glutton for punishment.I am trying to get my head around the process.

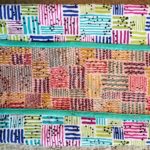
I was able to get the stripes in order this time, which was great.

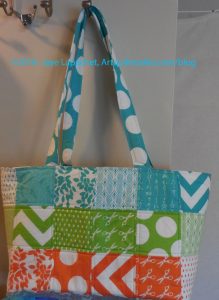
Running with Scissors tote binding

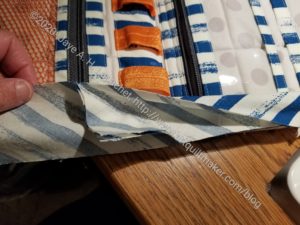
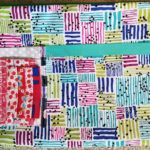
I also did the binding really well. I am pretty pleased with how it looks.

This time I did better , thought I still don’t have a handle on the process. It is as foreign to me this time as it was last time. I think this might mean I have to make another one. 🙂


More Running with Scissors

I am working on another Running with Scissors Tote and am heading towards finishing. It is another gift, so I can’t show the whole thing right now.

Running with Scissor Tote -Mesh Tape Trick

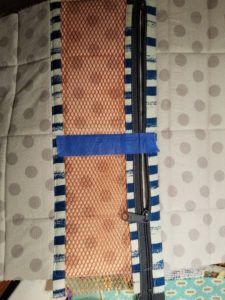
I did want to show my tape trick, though. The directions say to mark where to sew – to divide the mesh pocket in half. It is difficult to mark mesh, so I had a brainwave and used blue tape.

I did not sew through it, but sewed next it, where I would have marked a line on regular quilting fabric.

I am kind of proud of myself for this little idea. I hope you can use it, too.

More on the Clippy Pocket Hack

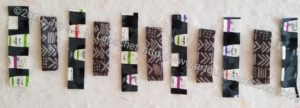
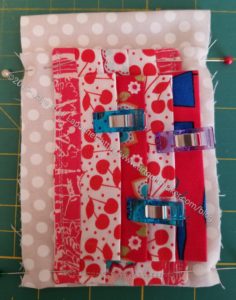
Pieces for the Clippy Pocket placket- ready to sew

Yesterday, I talked about the Clippy Pocket hack and how my version came out. You can incorporate the Clippy portion into anything – pincushions, other bags, needle books. The key is making the placket/”flap ladder” then incorporating it into an existing project. You can make the placket into a piece that can be appliqued to another project.

Try to think about how you can incorporate something like this useful section into a project on which you are working. You can find the original instructions in Love of Patchwork & Quilting , issue 39. It is available digitally in the Apple and Google Play stores.

UCAB Front Pocket

I skipped over the two larger pockets in order to make sure the Clippy pocket hack worked when incorporated into the overall pattern. It took me awhile to get this pocket made even with the pieces all cut out. Adding the Clippy pocket means that there are a number of extra steps needed to make the Clippy holder. Still, I am pleased with the way the pocket came out.

UCAB: Short Front Pocket

It is a bit of a riot of color. 😉 I didn’t really mean it to be as riotous, but I didn’t think through the backing for the side pockets with regard to the Clippy hack when I was cutting. I hope the rest of the inside won’t look crazy.

Still, I have been making such minimal progress on sewing in general that I am pleased with this small amount of progress.

Officer Thank Yous

Officer Gifts: Speedy Pouches

The other day I talked about finishing up the Officer gifts that I was making. They were finally finished on Friday night before the meeting. Fortunately for me, DH didn’t get home until late, so I had some extra time to work on them.

As mentioned, these pouches are fairly speedy to make.

Officer Gifts: Speedy Pouches-ending

I am pretty happy with the way they came out except for the ending. That was my fault as I stopped reading the directions and just finished them.

I thought about using this pattern for the inside of the UCAB, also as mentioned so I have been mulling over how to add a leash. It doesn’t work with the binding used in the pattern, but the pattern calls for a super long piece of binding, most of which is not used. I could turn the ending in to a leash instead of cutting it off. That would also alleviate the problem of one of the ends. I might try it.

Officer Poolside Tote – that Wasn’t

Officer Poolside Tote

My organizational system for officer bags is a mess and part of that is not posting about this bag. The last time I mentioned it was when I was having a zipper challenge.

I finished it quickly, which I think was a direct result of making it right after Mom’s tote. There are some quirks to this pattern, which hit me even after making a couple of these. One of them is the handle details on the front and back. Makers have to make sure they cover the raw edges of the front and side panels.

Officer Poolside Tote - inside
Officer Poolside Tote – inside

I am pretty pleased with the fabric selection. I would like to figure out how to put a slip pocket on the inside. I don’t think it would be terribly difficult. I think it would just require some deft measurement and having an already made up tote on hand might be the way to figure that out.

BAM Thank Yous

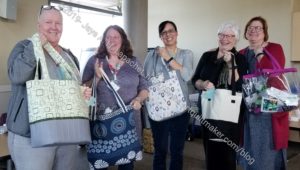
2019 Officer Thank You Presentation

A five month project finally came to a close over the weekend.

Every year for the past few years I have gotten a group together to make gifts for the officers. At first, I didn’t think they needed anymore quilt projects, so I had the idea of making them a bag and having guild members fill the bags with small gifts. This has proven to be very successful. In the last few years, I have brought postcards, so people who cannot bring gifts can convey their thanks in writing.

Both Angela and Rhonda posted photos of their gifts, which is a good way for you to see the variety of made and bought gifts. Rhonda’s bag was a quillow, so she got a bonus and the colors are perfect for her as she loves the Japanese indigo style.

We had an extra bag, so I took mine back and will use it for something else or for next year. I have to think of a way to be better organized as I forgot one person who had agreed to make a bag early on.

Now I will start working on next year.

UCAB Clippy Pocket – prelude to a tutorial

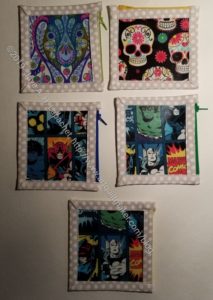
We are moving full steam ahead on the Ultimate Carry All Bag. members of the guild who are participating worked on cutting out pieces of the bag on the last Sew Day. Next we will begin working on pockets. To that end, I needed to work on an alternative/hack to the vinyl badge holder pocket.

Clippy Pocket Test
Clippy Pocket Test

I don’t want or need the vinyl badge holder pockets Natalie uses in the pattern. I also don’t like the idea of vinyl being so close to an ironing surface (front of the bag). I do need a place for a few WonderClips, however. To that end, I took the pattern for the Clippy pincushion, which was in Love of Quilting, issue 39 and adjusted it for use instead of the vinyl badge holder.

The photo shows one of the three test pockets I made. If you have the pattern, this is one of the end pieces of the front pocket. The directions for that section start on page 14. I am still working on perfecting the construction. I think I have the sizes down, but I am still tweaking the construction to take bulk into account.

I was absurdly pleased with my work on this pocket. Of course, part of that feeling was that I was relatively successful. If the Clippy/Wonderclip pattern sizes had been off, I might have felt differently. Still, I didn’t resent the time I took working on this piece of the bag.


N.B.: I will not tell you how to make the whole bag. In order to make this bag, you need to purchase the pattern from Quiltessa Natalie. She also has an Etsy shop where you can also purchase it. We would love to have you join us in making this bag.

Gift Post #10: Julie’s Mega-Pinnie

Mega- Pinnie for Julie

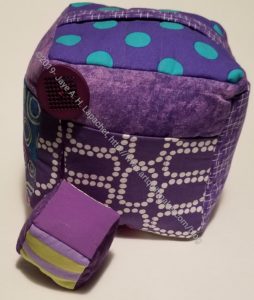
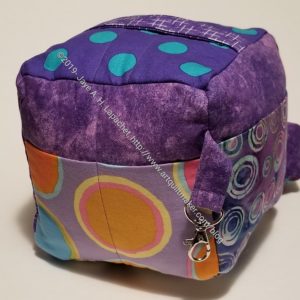
This is the Mega-Pinnie I made for Julie. I am really pleased with the fabrics I used. They were mostly handy, but I did crawl into the ‘attic’ of the fabric closet to make sure I found the most special fabrics to use for her version.

I gave it to her when we went out on New Year’s Eve. I forgot to photocopy tools to put in the pockets, so I had to explain that there were pockets and that always feels awkward to me.

Julie's Mega-Pinnie with lobster clip
Julie’s Mega-Pinnie with lobster clip

It occurred to me when I was explaining that it would be a good caddy if you wanted to carry some stuff to another room and work on a project away from your studio.

I’ll have to make her something to which she can clip the Mega-Pinnie.

I might be done with these Mega-Pinnies for awhile. I have an idea for one more, so we’ll have to see.

Chubby Charmer Does Double Duty

We are taking a break today from your regularly scheduled end of the year/holiday extravaganza that is the blog,. I want to show you that quilted things are not just pretty. They can also be useful.

Half Moon Modern Chubby Charmer Finished

Remember my Half Moon Modern Chubby Charmer? This is a bag I worked on for a long time, mostly, because the fabric was so precious I couldn’t think of a ‘good enough’ project for it.

Fortunately, I still like the fabric and still use this bag.

In fact, this bag does double duty as present transport during the holidays. To do that I have to clean it out. I actually use the large pockets for my collection of pie servers and knives. You might think dishing up pie is easy, but with 40 people who want to try everything, 7 desserts and two gluten free diets that will make people sick if wheat wafts past them, I need multiple implements and a strategy. That strategy includes knives (BIG knives) for cutting recalcitrant crust and pie servers since you don’t serve with a knife.

One of the attractions of the Chubby Charmer is that it is big. Big enough to bring a quilt to show and tell. And big enough to bring my pie implements, a mixer, a metal bowl, plastic bag with whipping cream (unwhipped) and 25 small gifts to the Christmas Eve celebration and some back home again.

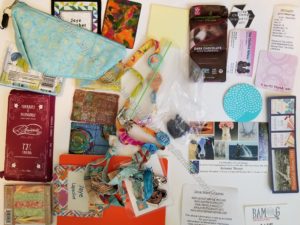
Chubby Charmer pocket contents

In order to use this bag for a non quiltmaking purpose, I had to clear it out. All the large items went on the floor, but I needed the pockets, too. All the small things went on my desk. Later when I had a few minutes to look at them, I was sort of amazed and shocked at the variety and non-variety.

What I was most interested in were the multiples of things:

  • in that cool aqua pouch is a selection of pens. More than one.
  • 3-4 nametags?! I guess I can share with a friend or really want people to know my name.
  • Two chocolate bars: emergency and backup emergency, I guess.
  • 3 ATCs, because you never know when you are going to need a random ATC.
  • Out of date meeting and exhibit flyers. Good for nostalgia, I guess.
  • Multiple post-it notes. You can never have too many pens or post-it notes.

I put most of the stuff back in, if it wasn’t out of date or spoiled. I did spread out the nametags among other various bags. Better to have one than none.

What’s in your guild bag and do you use your bags for other, non-quiltmaking purposes?

Zipper Challenge

I don’t think I really had a good tag for this post, which means I will probably never be able to find it again. 😉 It is all about zippers.

I am faithfully following the pattern for the Poolside Tote. This is the third Poolside Tote I have sewed.  I am not sure why, but I always have trouble with different parts.

This time I struggled with the facing. I also wondered about the zipper. On mom’s version and on my knitting bag, I just used slip pockets. On this version, I cut zipper pockets, which I didn’t remember. I guess it forced me to make pockets with zippers.

Zipper pocket
Zipper pocket

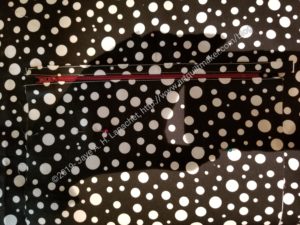
The directions for the pockets were pretty good. I didn’t have much trouble except for lining up the stitching. One side is hidden, so I leapt that hurdle. The only question I had was about the size of the zipper. The pattern called for a 10 inch zipper and that just seems weird to me. It seems too small. There are holes at the ends and no directions for zipper tabs. Obviously, I can make my own zipper tabs, but I just wonder why the designer asks for such a small zipper. I wonder if a 12 inch zipper would be better?

Are there rules for the size of zippers one includes in patterns??

This is not the end of the world. The zipper works fine and nobody will put something so small in the pocket that it will fall out if the bag falls over. This is just a puzzle about which I am curious. I might try the bag again with a 12 inch zipper.

Mondo Bag Finished

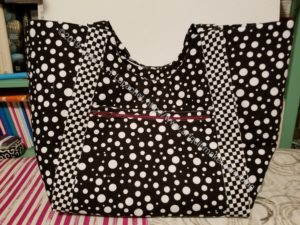
Mondo Bag
Mondo Bag

I have worked on this project a little bit over the past several months, but decided I needed it out of my workspace. I finished it on Sunday.

It is big!

I thought of using it as an officer bag, but I really like the fabrics I used. I think I will keep it and use it to carry my hand quilting project around.

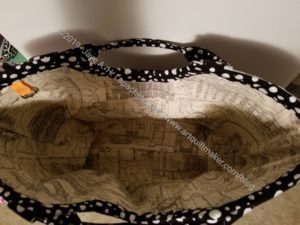
Mondo Bag lining and handles

Again, the method of construction foiled my attempts at organizing the fabrics. I still think it looks good and I really like the lining and handle fabrics.

UCAB Pockets

Lynette and I met about the BAM Bag-a-Long  at Sew Day the other day. We went over the sketches she made for cutting and she also made a test pocket.

It turns out, from the test, that we need to make sure the participants buy the zipper sizes that are given in the pattern. The way Natalie finishes the zippers is a lot easier with zipper tape than it is with zipper teeth. This thought/method of making is contrary to the way most bag patterns are written.

UCAB test pocket
UCAB test pocket

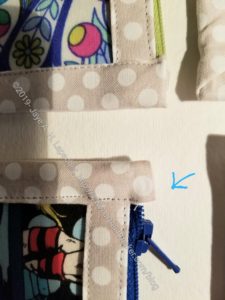
It was interesting to see the large pocket finished, because you can see the flange (look for the WonderClips) in a big way. It is very clear that there is a different construction going on to finish the secondary pockets and keep them away from the edges.

Lynette said that it made the directions a little difficult to understand. Still, the thought of keeping the bulk away from the edges is a good one.

The bottom of the pocket also has a pleat so that larger non-flat items can be included.

I plan to make a sample of the small front pocket so I can test out making a WonderClip holder. I hope to get it done by the next meeting.

Resources

  • Purchase the pattern and sew with us-N.B.: we will not be providing step by instructions, but will be posting here with tips and tricks
  • Tour of the bag -Instagram
  • Bag-a-Long project post – 9/27/2019
  • Thoughts behind the bag – 8/7/2019
  • Free video instructions
    • UCAB episode 1 : preparing for sewing pockets
    • UCAB episode 2 : sewing pockets, discusses thickness of pockets
    • UCAB episode 3 :badge holder pocket technique
    • UCAB episode 4 : Large pocket, installing zipper
    • UCAB episode 5 : installing a swivel hook, front and back of bag, front and back pockets
    • UCAB episode 6 : insert pockets into side panels
    • UCAB episode 7 : very brief video showing how the piece looks after installing the pockets in the side panels
    • UCAB episode 8 :Brief video showing the finished bag. No sewing.

Silvia’s Jane Market Tote

Silvia's Jane Market Tote
Silvia’s Jane Market Tote

I started a new Jane Market Tote over the weekend. It will be a gift for my NSGW friend Silvia. She drove me all around while we were in SoCal and found Cat’s Quilting Corner, which was a great shop.

I am really pleased with how it is coming along, though I am annoyed at myself for cutting another lining wrong! I seem to do that every time with this pattern. I think I will make a template, as ridiculous as that sounds.