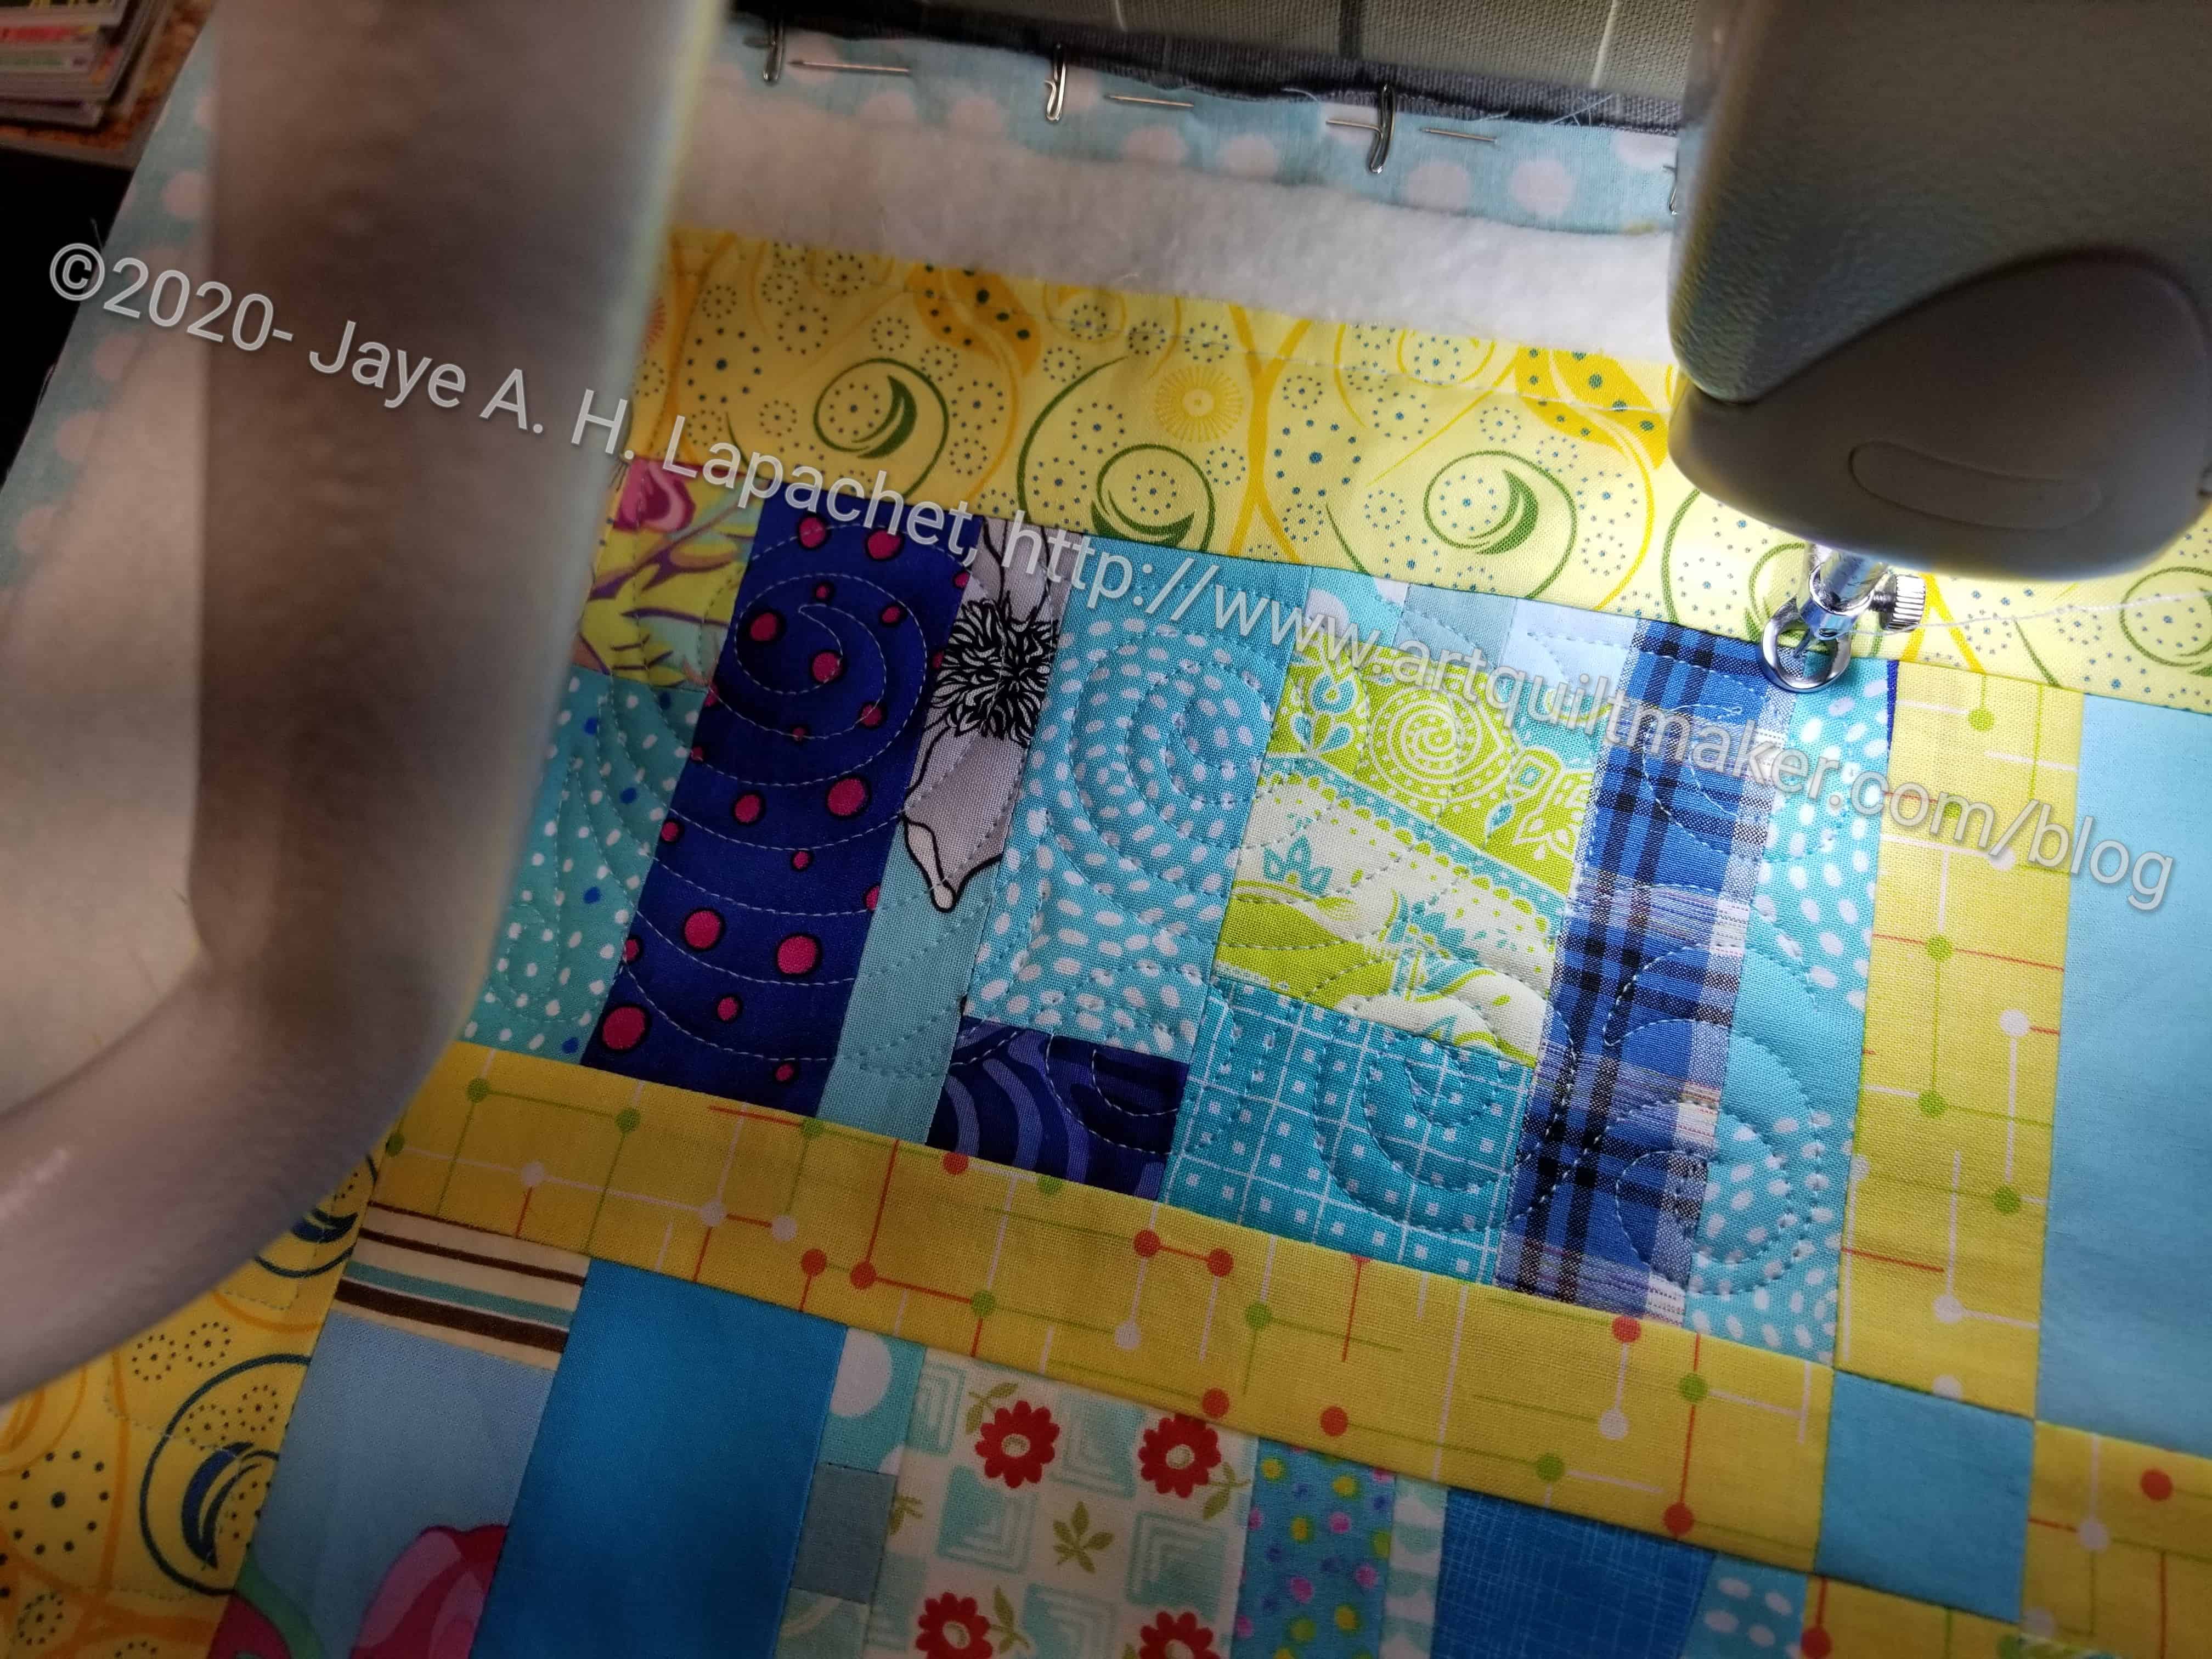
Tim got his longarm up and running again. To test it and practice, he quilted some donation quilts, including the one I talked about the other day. He showed them to me when I stopped by a few days ago.
The good thing about these quilts is that they are actual quilts not just tops. The bad part is that I can take no credit for any of them. Still, like the designs he used for quilting and the patterns are fun, too.
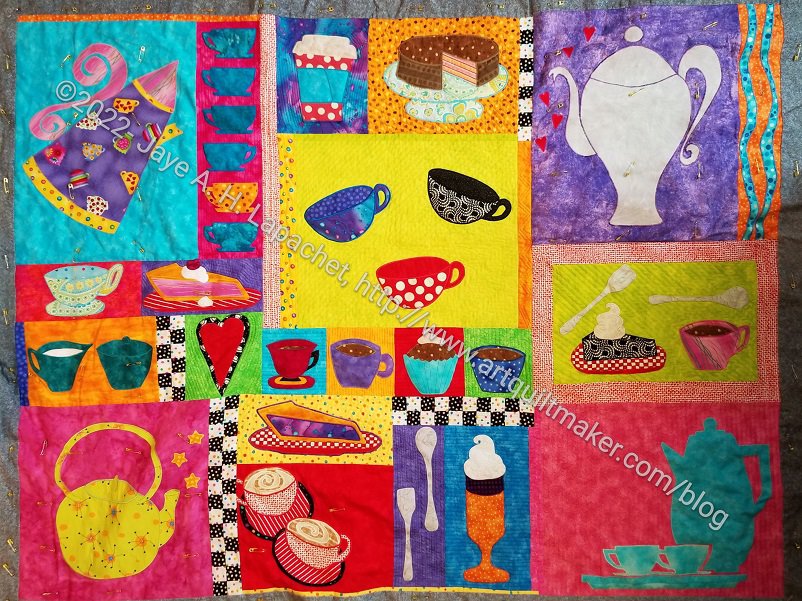
Donation quilt quilted by Tim
This one uses a similar block to my Corner Store quilt. The arrangement is different than the one I used and makes me want to revisit the block. Maybe it would be a good idea for a donation quilt?
On both quilts Tim used different quilting patterns in the foreground and background. I think that adds to the quilts.
The testing was good as he is ready to quilt his Courthouse Steps quilt. It also means more quilts for BAM to give to those in need.
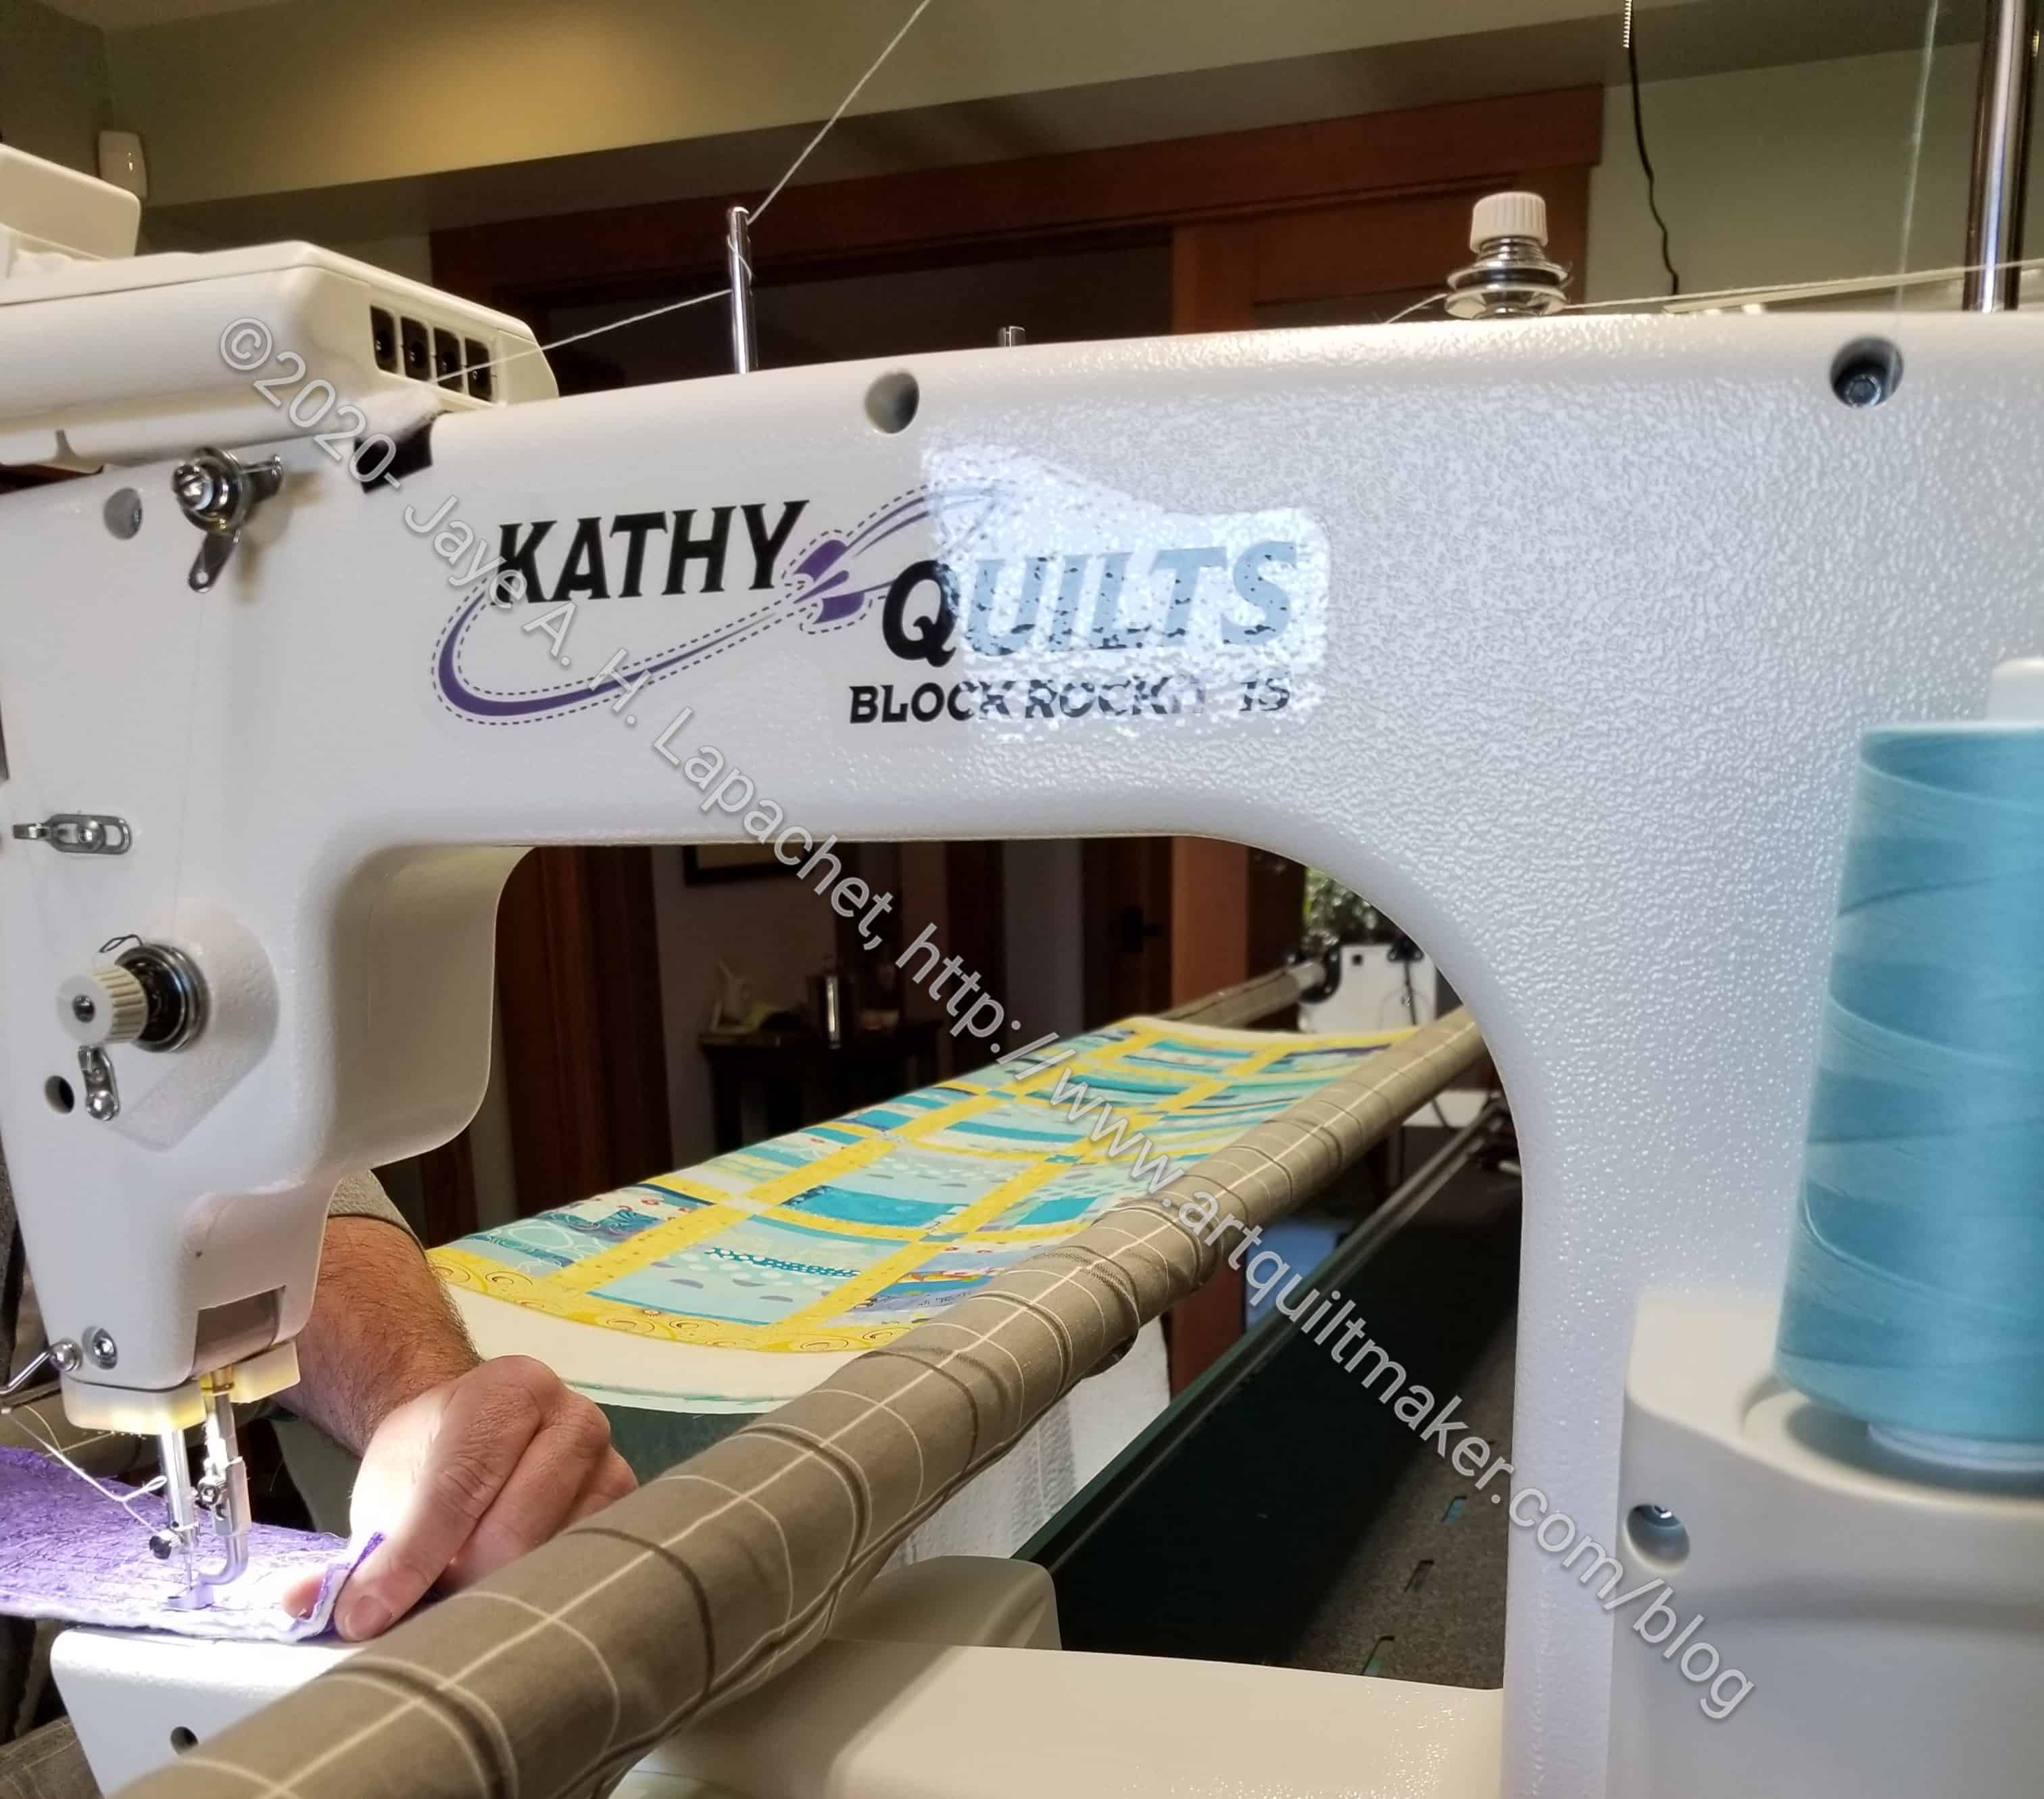
I took some materials for a couple of ByAnnie project bags with me to sew while I was visiting Mary. I don’t often travel with my machine when I got to Portland, because I don’t want to bring any more stuff than I already am. Mary was kind enough to let me use her Crescendo.
I wasn’t excited about using a different machine and a different brand. It can be hard to create different habits or not use the habits to which I have become accustomed.
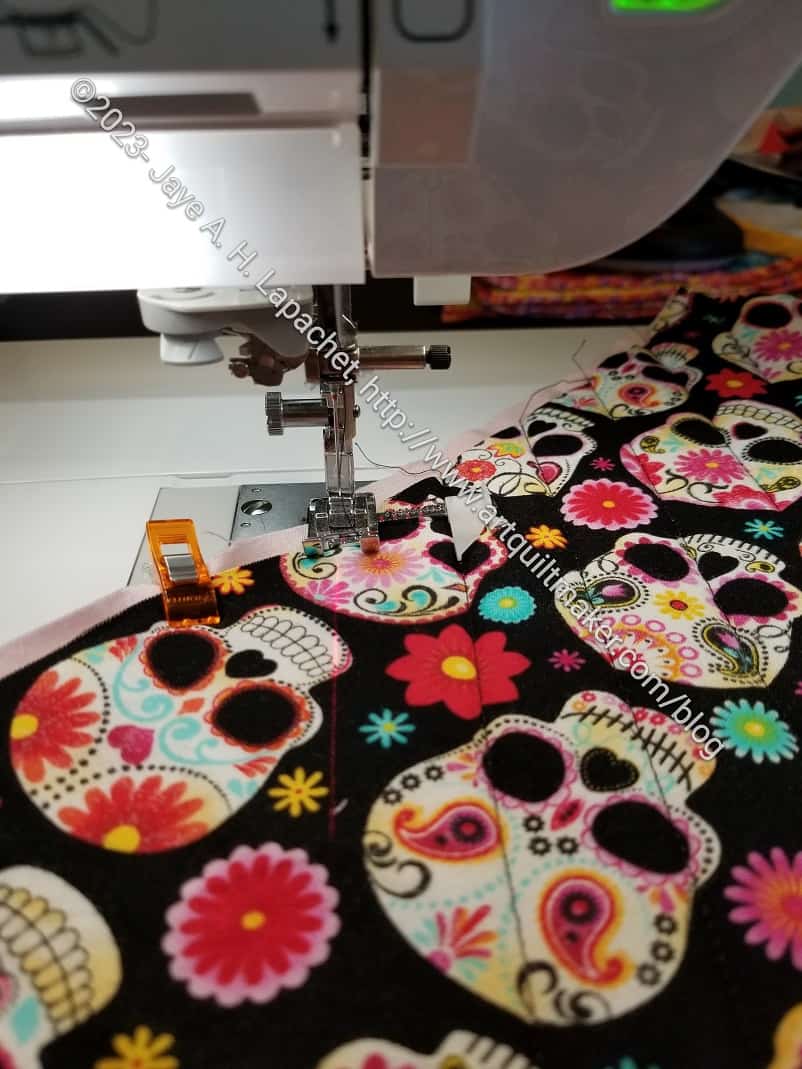
Using the laser
I was amazed at how easy the machine quilting was on Mary’s machine. As I mentioned before, I used the button to move the presser foot up and down and I used the automatic cutter. While the pieces I was quilting were not large, they seemed to go really quickly. No drama, no problem. Actually, I barely had to do anything. Yes, I had to guide the fabric, but that was it. I used a light touch and it felt like the machine was doing everything. At one point I used the laser to guide the needle. I didn’t really need the laser since I was following the side of the foot, but it was fun to try it out.
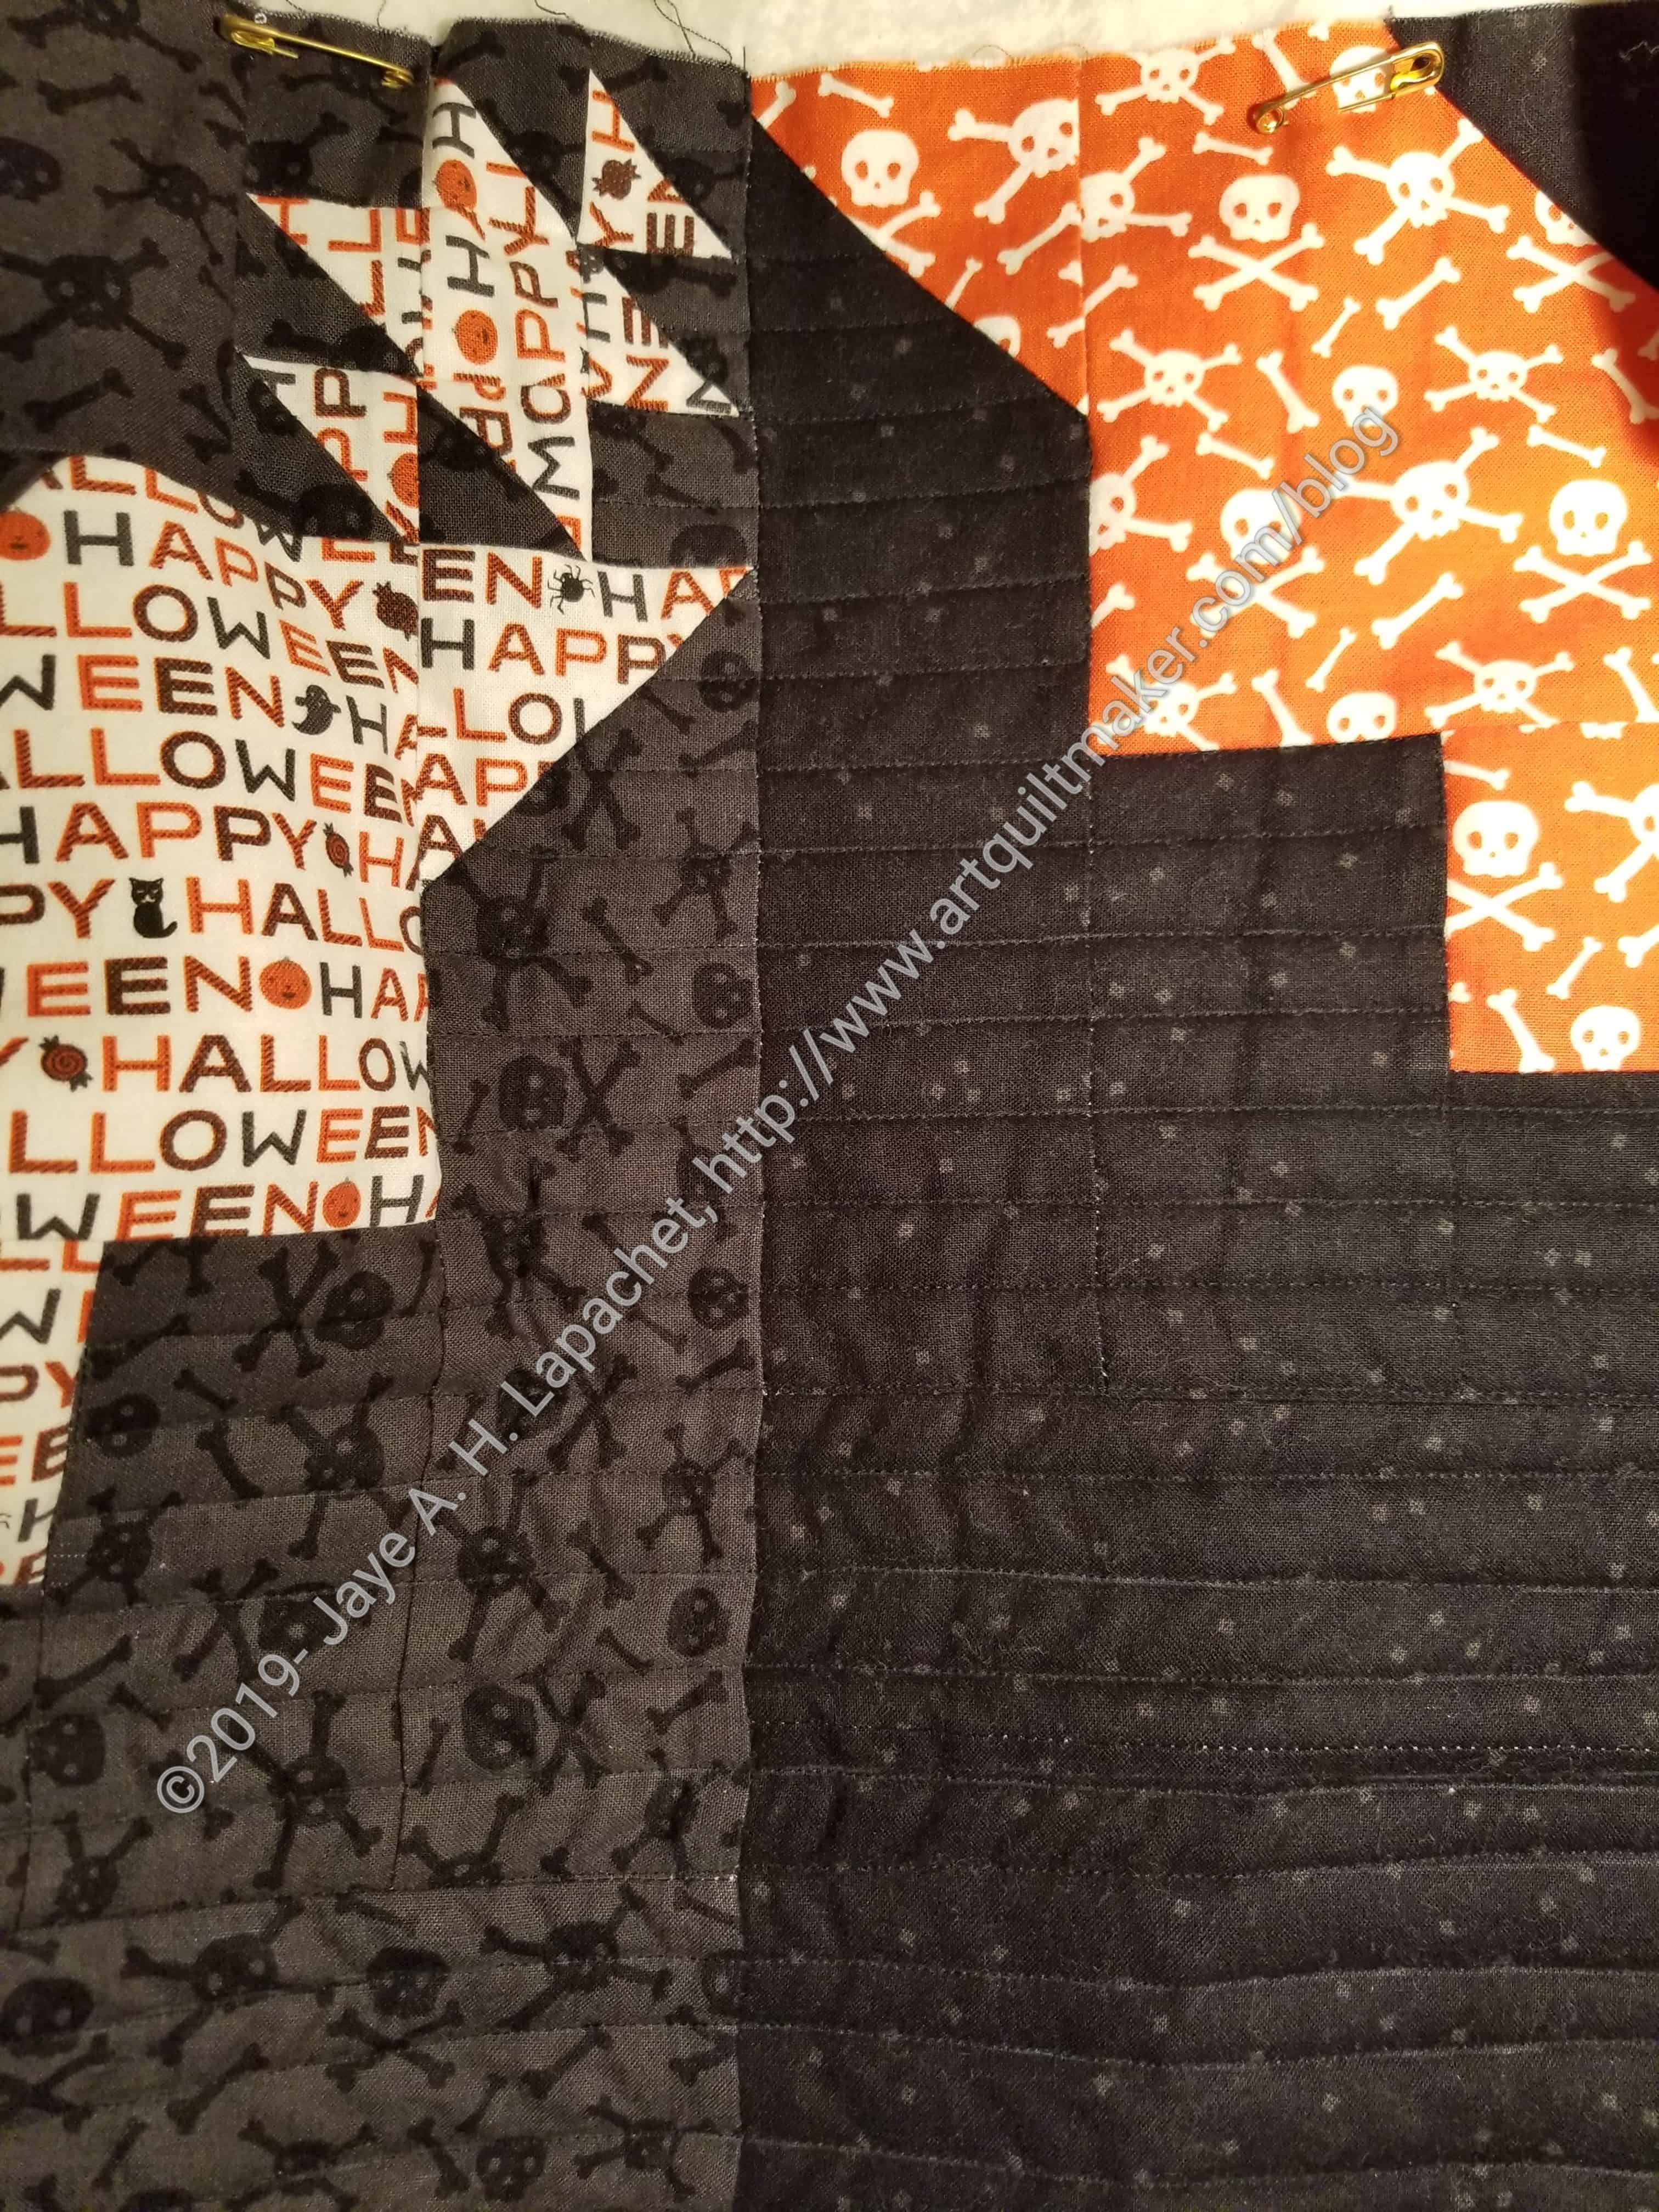
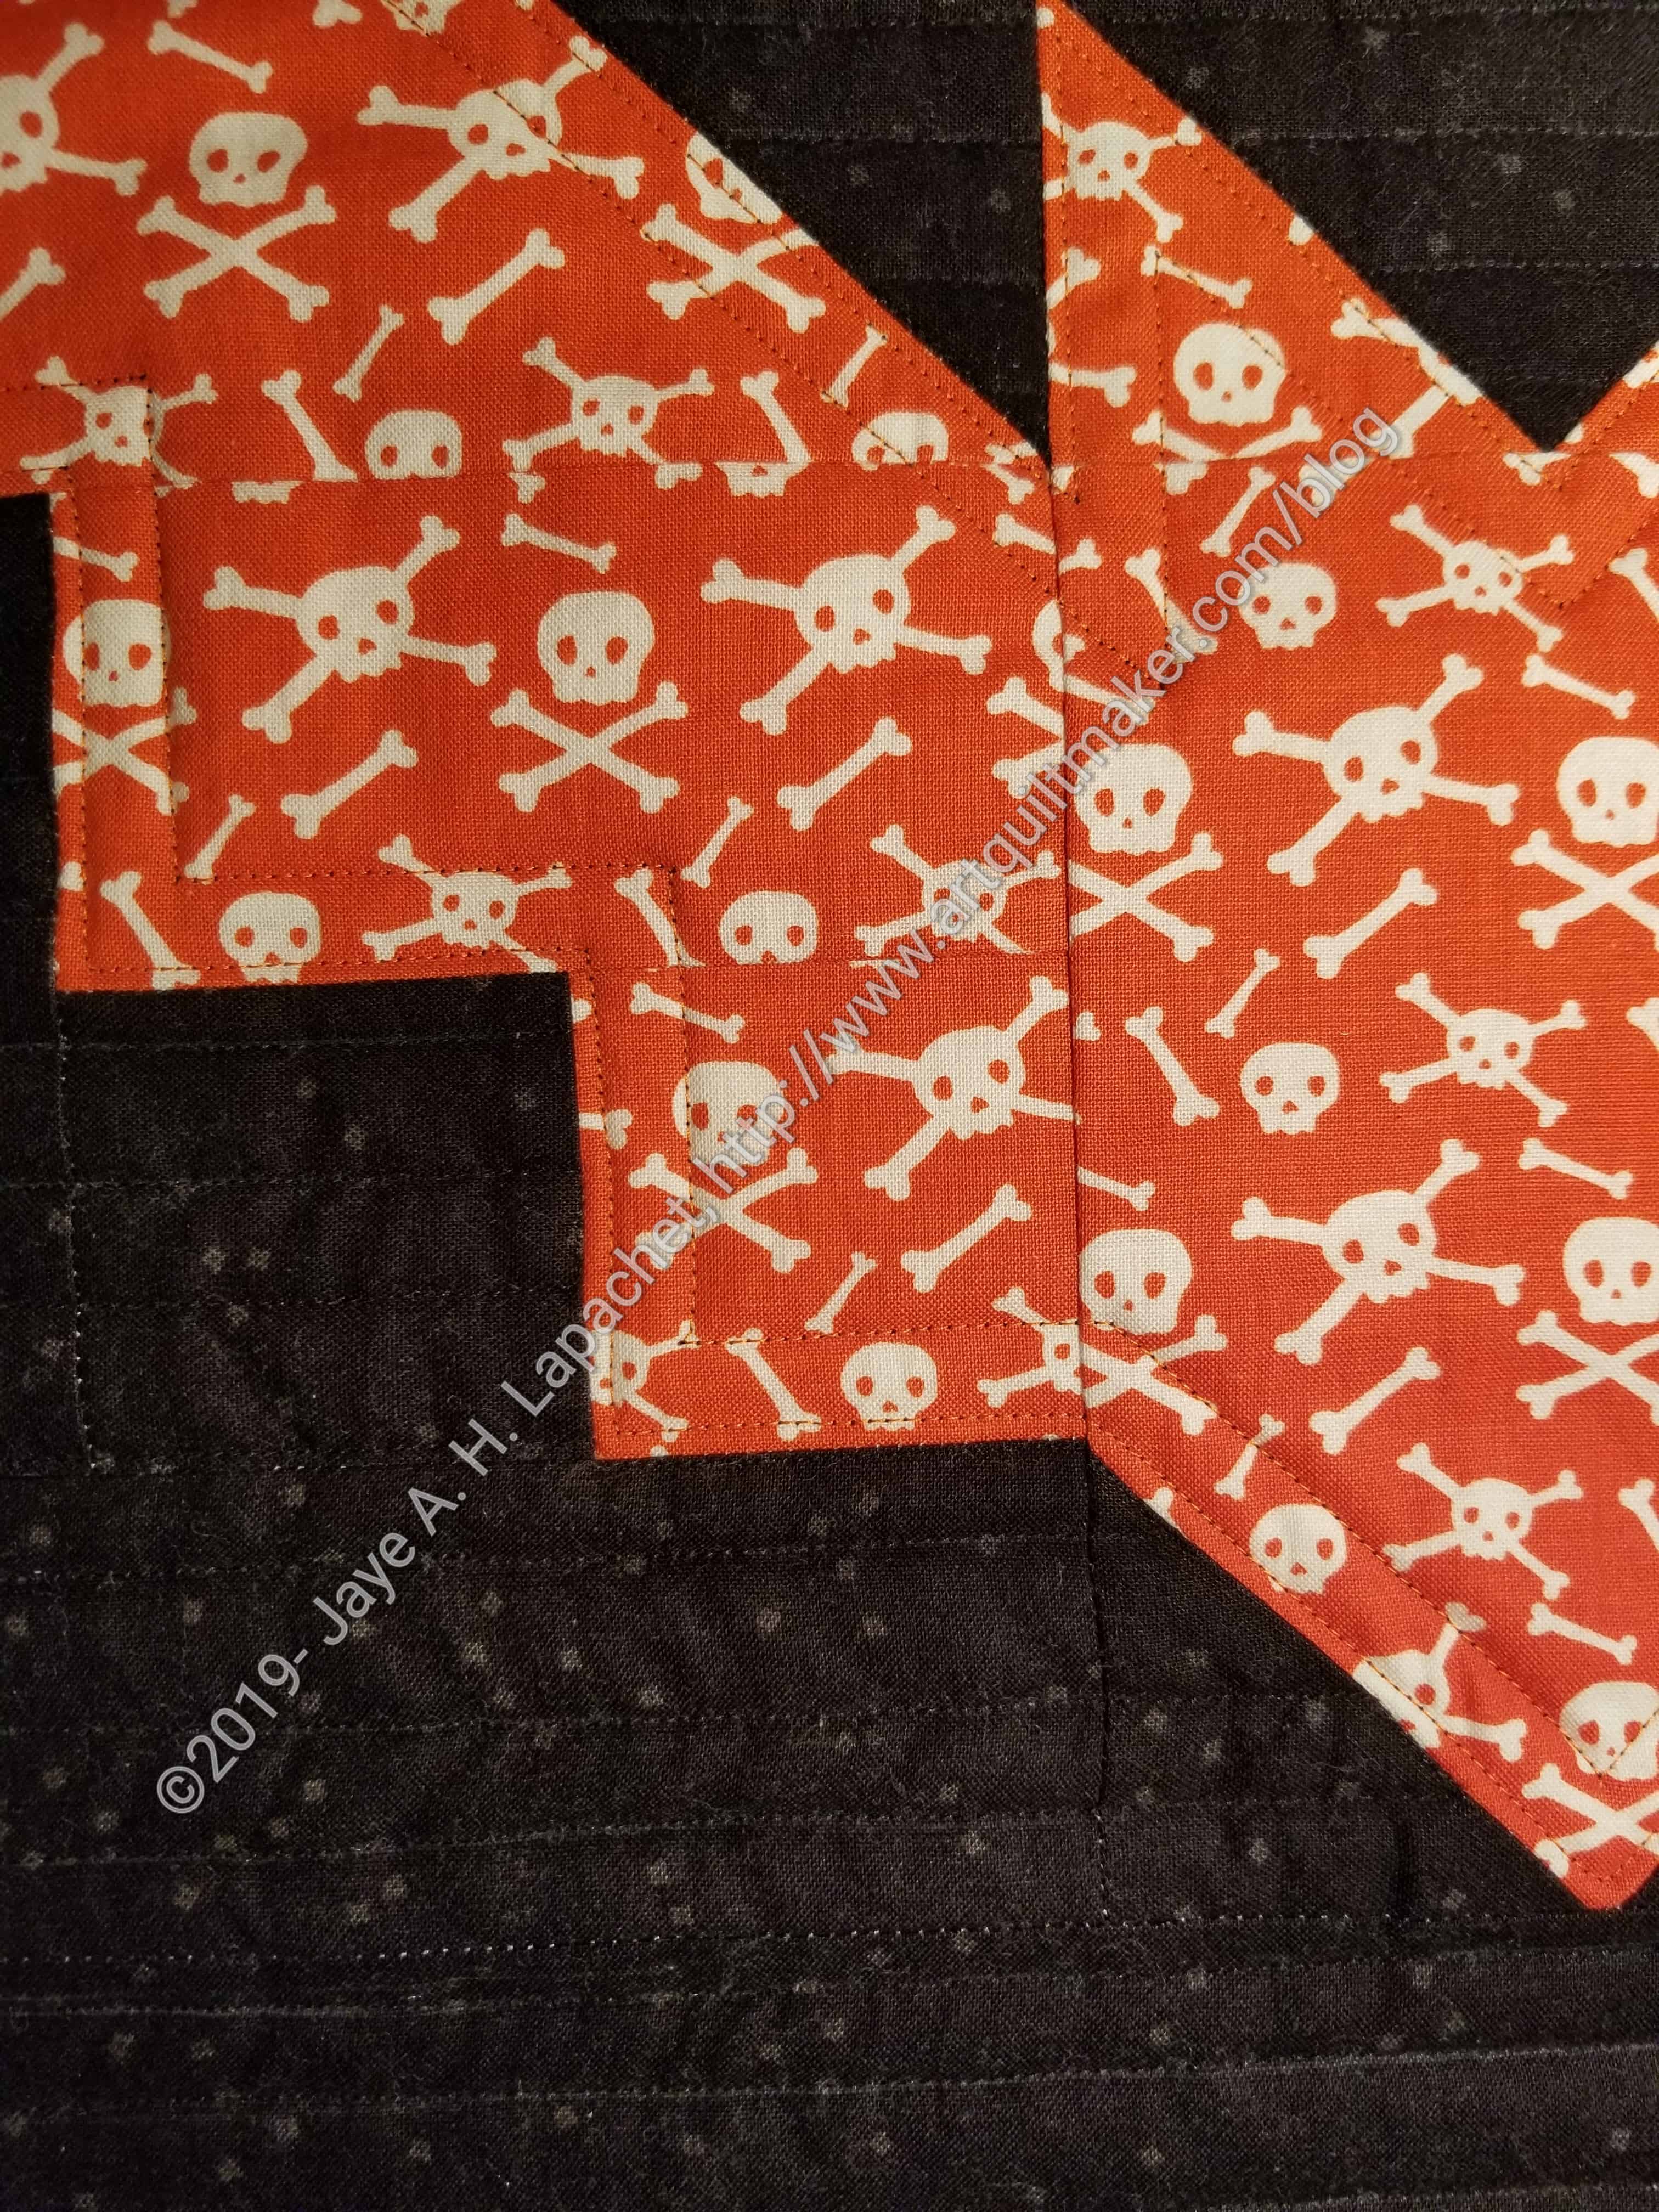
Quilted lines in skulls
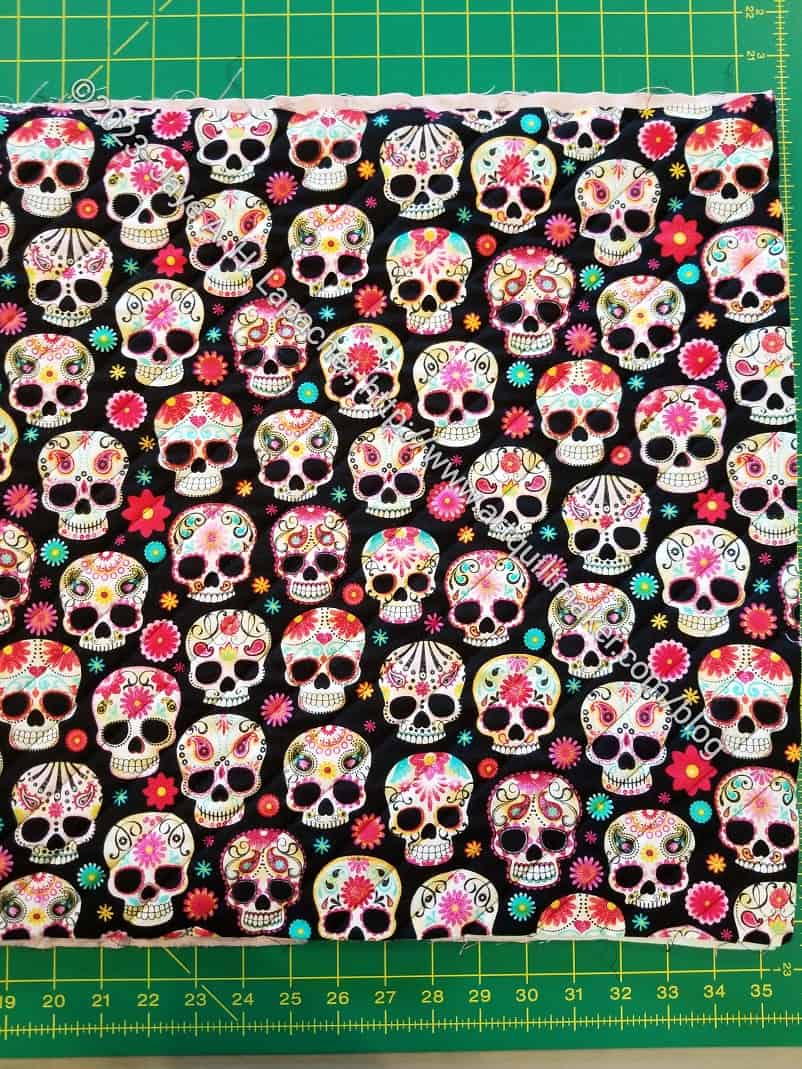
I didn’t worry about doing fancy machine quilting; I just did some straight lines and used a foot with an attachment that means about an inch from the previous line. You can see the white guide on the right in the photo above.
I am pleased with the way the quilting came out and am also pleased with the process in general. Now all I need to do is put the bags together.
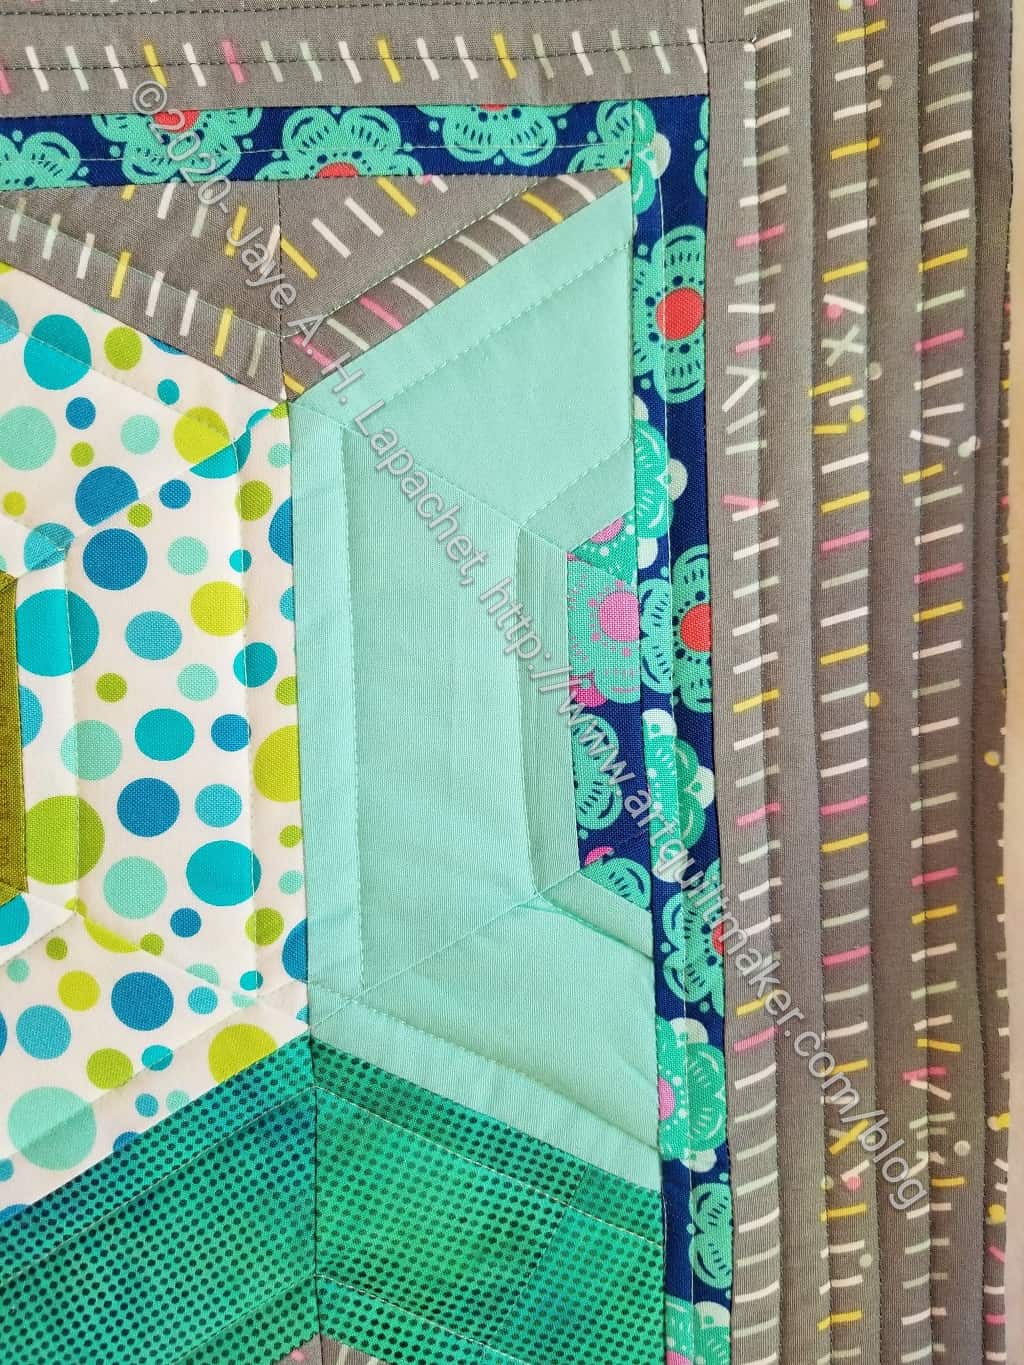
I know the photo I posted the other day didn’t show all of the tiny quilting lines.
In this series of photos you can better see my obsession. The first photo, left, shows the back of the upper left hand corner.
There are some parts that are not as heavily quilted as others. I was using the quilting on the front to express my vision. In this piece, the quilting is part of the design.
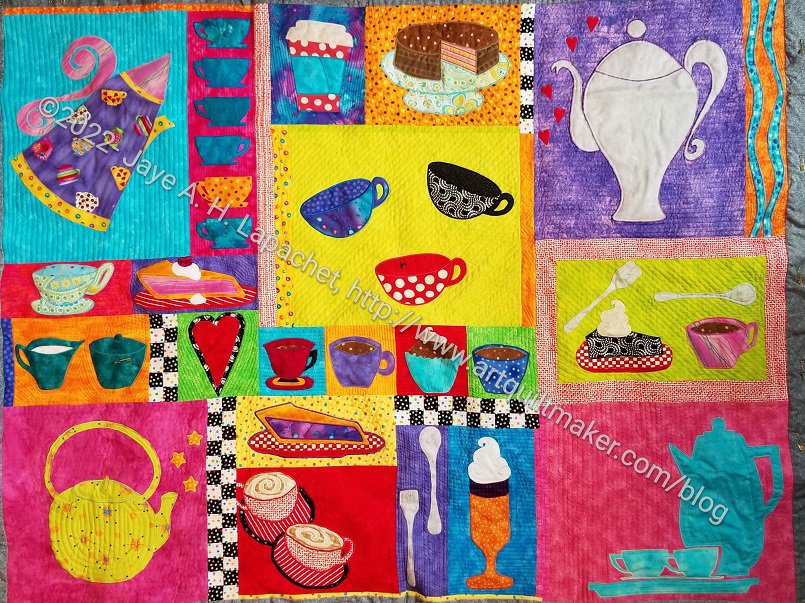
I struggle with the quilting being part of the design. I love piecing and never want the quilting to overshadow my piecing. In strictly geometric quilts, like Frolic! and Flying Around, this is usually not an issue when Colleen quilts for me. Her quilting fits really well into the design of the piecing. It’s different with a quilt like the Tarts Come to Tea.
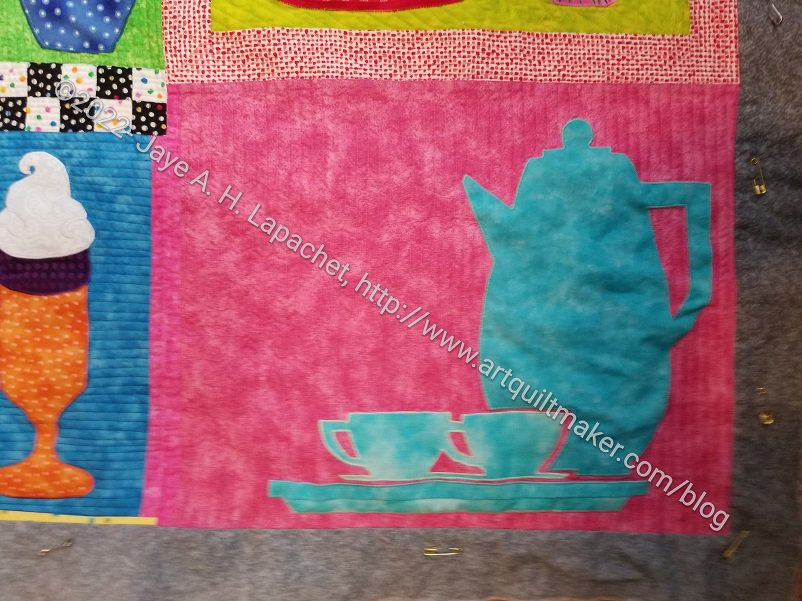
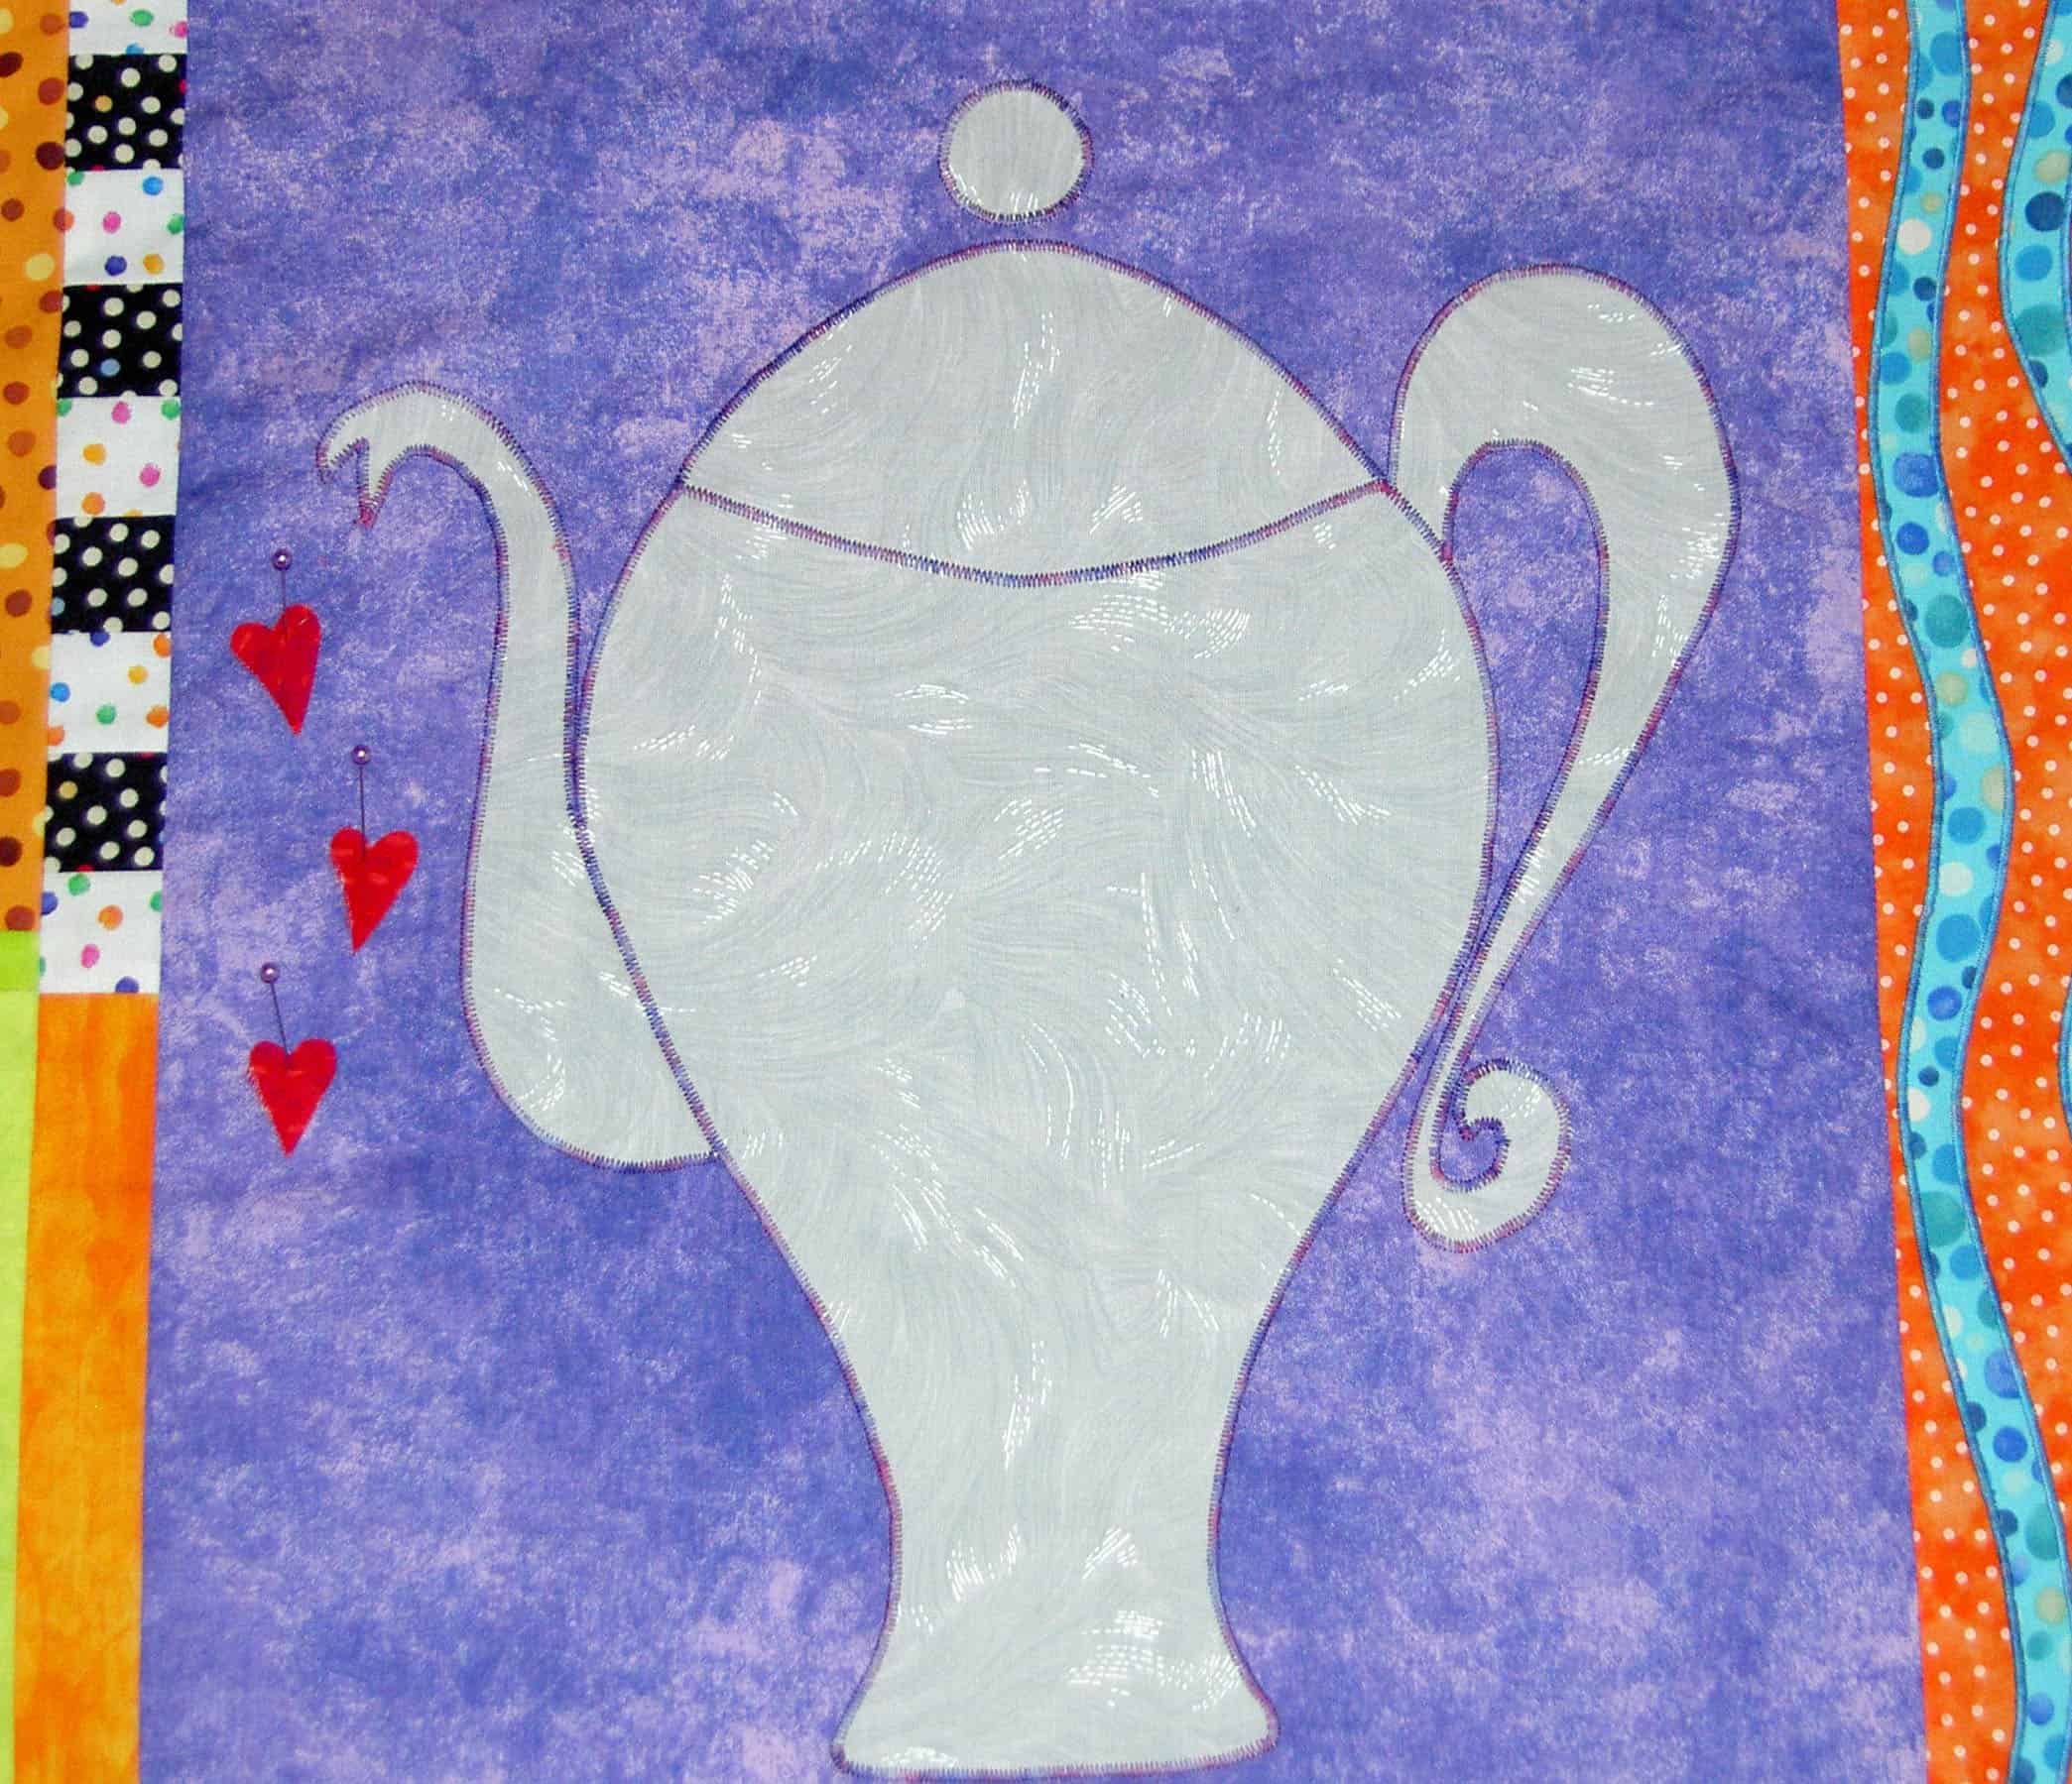
Tarts quilting detail, upper left
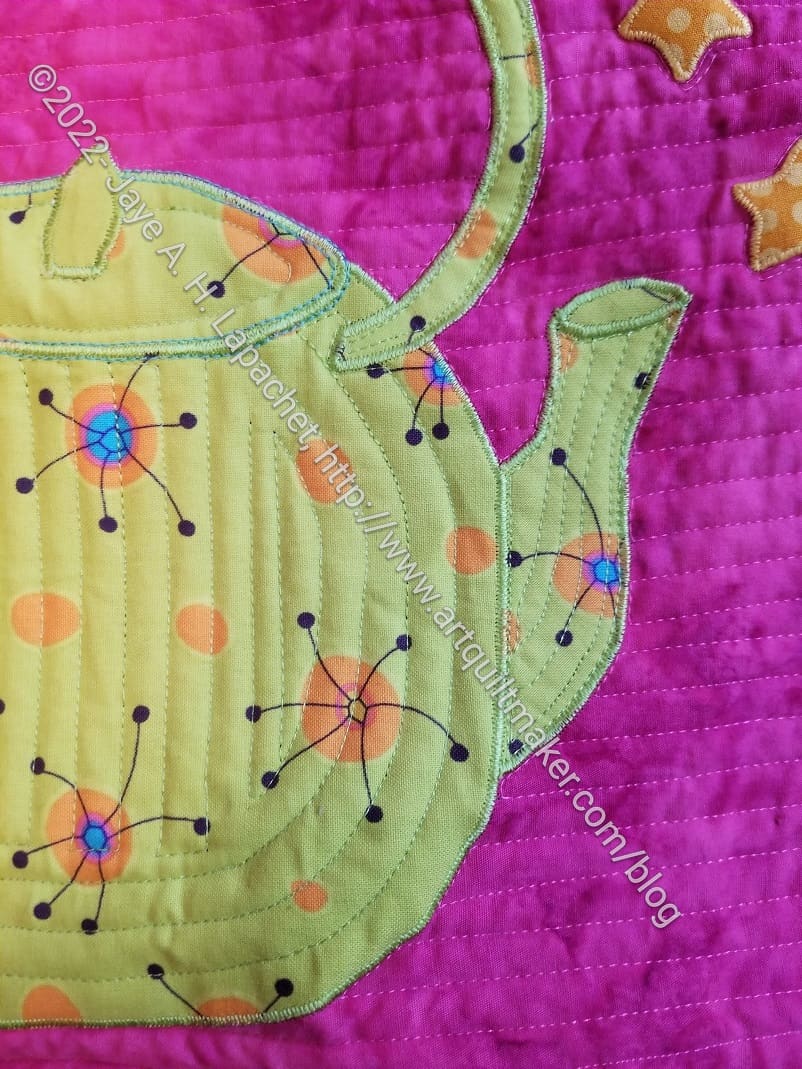
In the second photo, an extension of the area covered in the first photo, you can see more of the differences in the density of the quilting.
The body of the triangular carafe is a lot less densely quilted than the the background, for example. I really struggled with how to quilt the larger tea pots, as discussed in September when I finally broke that barrier. I am not sure I did the right designs in the those larger teapots. My skills were not up to more curvilinear or loops and swirls designs, which might have worked better in the round green kettle and the tarty silver teapot.
Tarts: Tarty Silver Teapot – back detail
The quilting on the Tarty Silver Teapot shows up very well on the back. I did quilt in some gentle curves, though if I had had Colleen quilt it, I might have had her try to mimic the scrollwork or leaves and vines you see on some antique teapots.
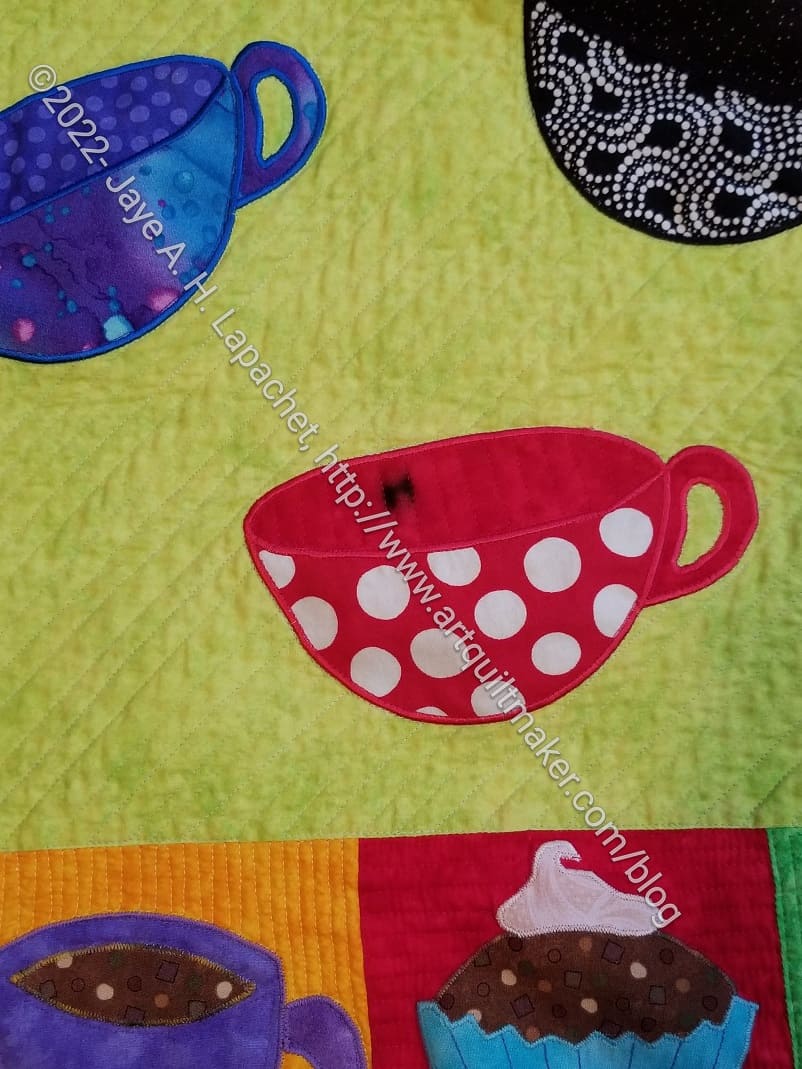
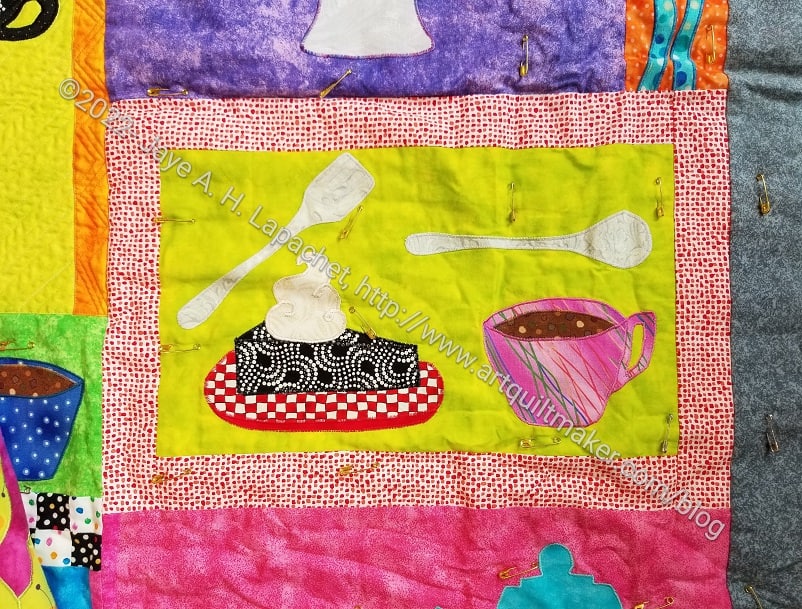
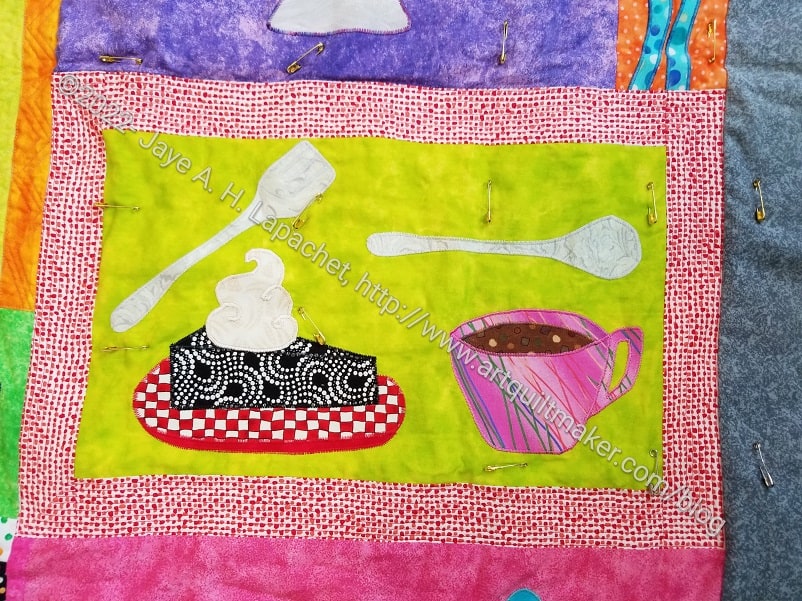
Tarts quilting detail, right middle
In some respects the idea that the quilting is an integral part of the design shows up in my choice of thread color. Also, as it my usual philosophy, when the quilting lines were not part of the design, I want them to disappear.
I used the same thread on the back and front when I started the quilting. I think I really should have used thread colors that matched the fabric colors on the back. I think it would have looked better, but it doesn’t really matter now. I don’t think anyone will really care and I don’t know that I will put this quilt in a show, but I like to do my best work and this doesn’t feel like my best work.
Tarts quilting detail, cake
I am pretty pleased with how the quilting on the cake turned out. The cake is in the upper center of the quilt. I really like the way it turned out on the front. I kind of think using the stripe for the center of the cake was genius (if I do say so myself!). I like how the layers of the cake (horizontal) have been highlighted in the quilting. The quilting on the top of the cake is another plus. I love the way it looks like the pieces have been cut, or scored so they are ready to cut.
OMG. Quilting is endless. Over the last weekend I thought I was making progress. Today I am convinced I will never finish quilting this quilt. Sigh.
I finally tackled the large teapots. I am still following the edges and hoping I don’t ruin the quilt. I feel the space it too big to leave it completely unquilted, especially with the close quilting of the backgrounds. The teapots looked baggy. So, I held my nose and dived in. I am choosing threads that match the fabric, so hopefully the quilting won’t show too much.
Tarts Tea Kettle – quilted
Tarts-Tea Service Tea Pot – quilting in process
I think the tea kettle looks pretty good. I am not so sure about the teapot in the tea service. I think I will rip some of the quilt in the Tea Service teapot out.
If I never quilt anything again, it will be too soon.
After finishing The Lobster project, I had to decide what to work on next. The Tarts have been on the side burner (not the back burner!) for a few weeks, so I spent a whole afternoon machine quilting parts of it. I finished a checkerboard and I quilted one whole large corner block. I felt so exhilarated. I really felt like I had crossed some kind of barrier to finishing. I feel like I am nearing the end.
Tarts – Tea Kettle quilted
Don’t get me wrong! I do NOT feel exhilarated by machine quilting itself. I feel exhilarated because I am making progress. I am nearing a point where I can put the binding on and call it done….finally.
I am really running up against my limitations as a machine quilter with this project. I want to do some free motion quilting, but I am not good enough. Any but the most gentle curves are too difficult and not satisfying using my pseudo walking foot method. I would need a lot of practice for the kind of FMQ I want and I am unwilling to do the work.
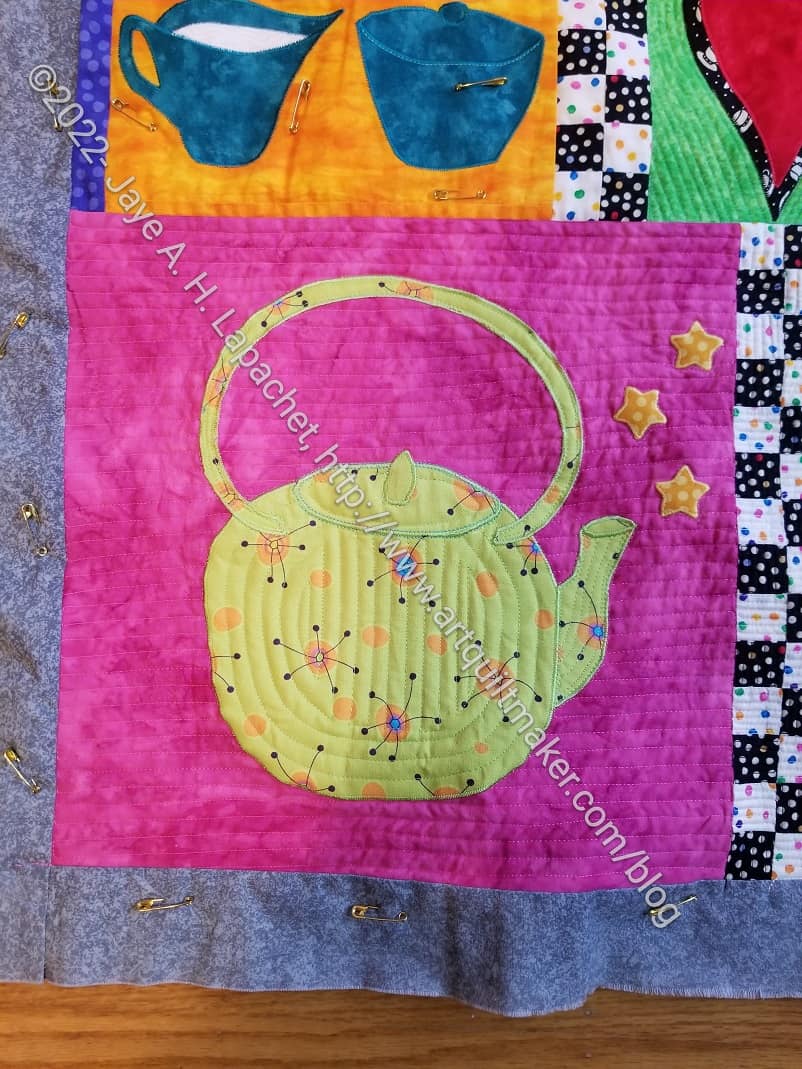
Tarts: Lime Green Round Teapot quilted
I crossed another barrier by quilting the lime green round tea pot.
Up until this point I had only quilted backgrounds, not wanting to ruin the teapots and tea kettles. I might be over that fear after quilting this one.
You can see some gentle curves in this quilting. That is about the extent of what I can do with the machine quilting method I am using.
And there is some bad news.
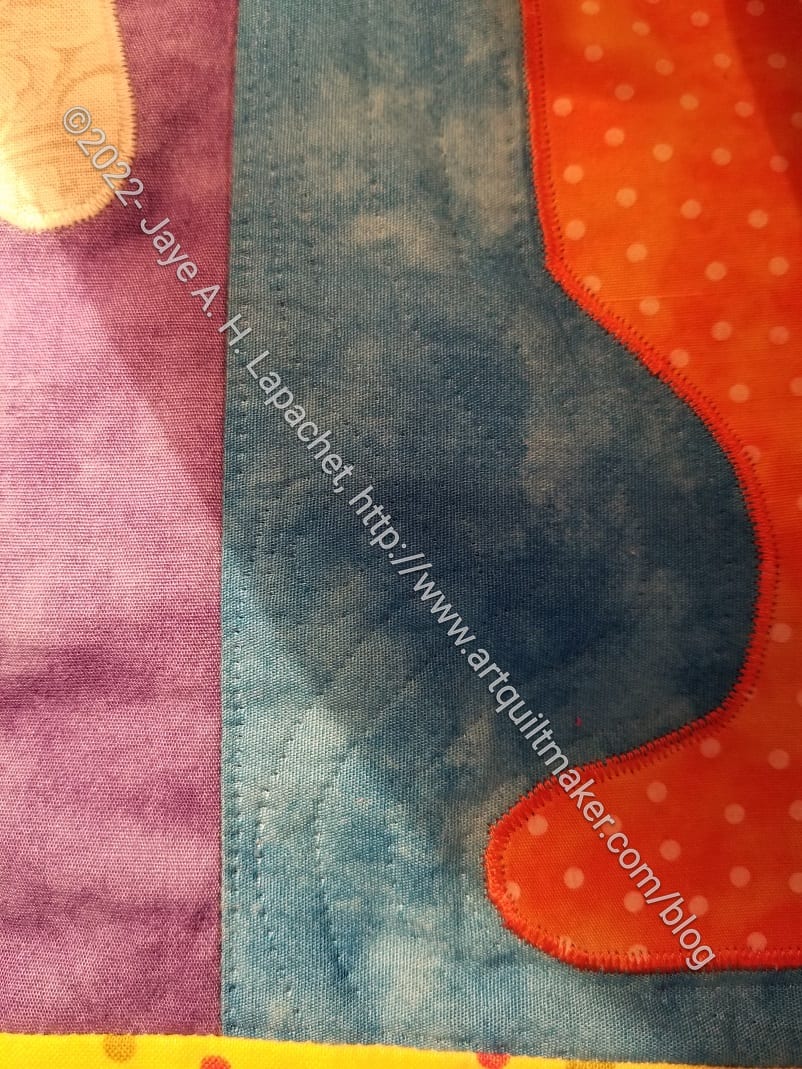
Tarts: burn
I burned the quilt. Well, really the quilt got burned. I don’t know exactly how, but I think the quilt was shoved up against the light I have behind my machine for too long. The burn is worse on the back, but does go through to the front. It might look ok in the grand scheme of things, but I’ll have to consider what to do.
Despite the burn, I like the style of this quilt and am thinking of recreating the quilt, “He Tried to Make it up to Her”. I have been thinking about all the different kinds of fusible I have. After contemplating the feelings around the Tarts, it occurred to me I could remake ‘He Tried’ and then have Colleen quilt it. something to think about.
As you can see from other posts I am not continuously quilting on the Tarts, but it is a project I try to work on every day.
I was pretty excited about how the frame went after my first post, so I worked quite a bit on it. The bloom, however, is off the rose, as mentioned in my last post. Still, I am soldiering on.
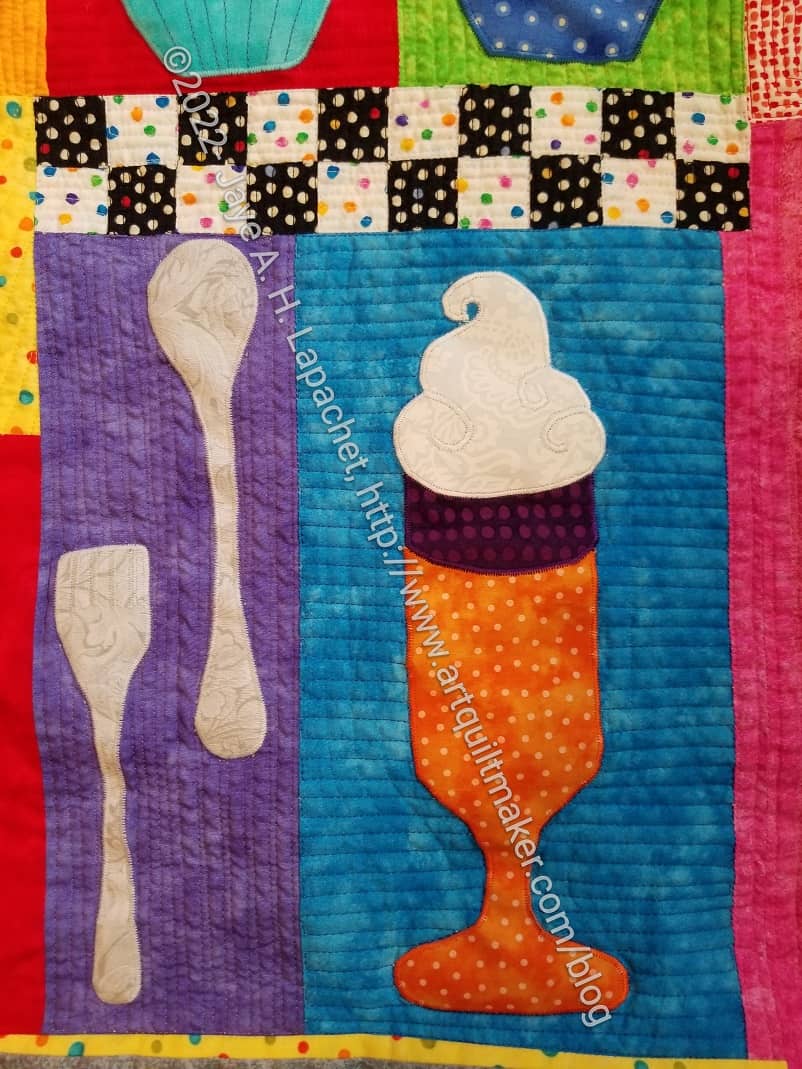
Tarts: Latte glass quilting
My latest efforts are some smallish blocks on the center bottom, a latte glass and some silverware. I thought I could do some straight-line curves around the latte glass. I wasn’t happy with it and I ripped it out and went back to straight-line quilting the background.
I like dense quilting and I like my quilts flat so straight lines are working best for me.
I am done with the novelty of quilting. The bloom is off the rose.
Tarts: Pink corner background quilted
Still I am quilting. It took me all day to quilt one corner background of the Tarts. The quilting looks good, but it was tedious and took a long time. No, I am not doing free motion quilting; I am doing straight-line quilting, which is the type of quilting I can sew successfully and, thus, be happy with.
Am I tempted to rip out the quilting and take it to Colleen?
Yes.
I am going to hang in there. I have made so much progress after years of no progress that it would be stupid to rip it out. Still, I am tempted. Quilting is terrible.
Yes, after YEARS of having this project on my to do list, I have pulled it out of the project box and started to finish the quilting. First, I am obsessed at the moment with crossing things off my to do list. Frankly, I am sick of looking at the same items month after month. Second, I need the project box for something else.
Now that you are back in your chair a second time after being gobsmacked on to the floor, you read that right. I am machine quilting a real quilt. It isn’t a king sized quilt or anything, but it is also not fabric for a bag or a tablerunner. It is real quilting on a quilt.
Tarts: quilting center right
I started working on it last Friday. I started with the frame of one of the blocks. I thought some straight line quilting would get be back in the groove.
The good thing about that red frame is that the quilting would not show if I used red thread.
You are probably remembering the Cha Cha Cha table runner. Yes, I quilted that myself, as well as some fabric for bags this year, so it’s not like it has been 20 years since I actually quilted anything. It has been about 10 years since I worked on this project. Recently, I have decided that UFOs are a bad thing for me and I want to eradicate them, as much as possible from my workroom.
I had the box of thread I used for the other, already quilted Tarts blocks, so I picked out the red (Maderia rayon I used to use for embroidery) and got busy.
Tarts: quilting finished center right
I was pretty pleased with how the process worked. I was a little nervous about doing the frame before the center, but it ended up all working out.
I was particularly pleased that the quilting made the frame flat. It seemed really puffy when I started (first photo, above). I know that I need to work from the center out and I am doing that, mostly. I started with the frame, because I didn’t want the quilting to show while I worked out stitch length, etc.
Tarts: quilted frame detail (center right)
I think the stitching looks ok. It is not Colleen’s stitching, but it is not terrible either.
Onward. Maybe I’ll finally finish this quilt, but one thing at a time.
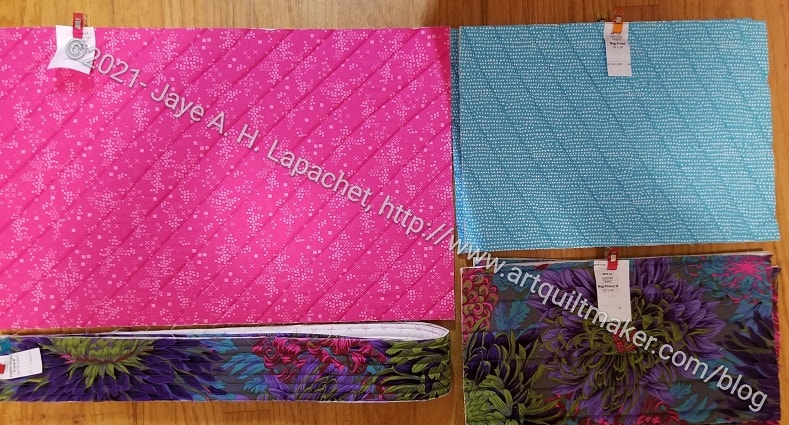
I bought the supplies for the ByAnnie A Place for Everything Bag when I was waiting for the La Pass BOM to start. A lot of people in the group decided to make the bag to keep their project in. I thought it was a good idea and bought the supplies.
I thought I would make it over Labor Day weekend, but didn’t get around to it. I have been strategizing and finally decided that cutting all the pieces that needed to be quilted and quilting them first would really help with making the bag once I had time to sit down and do it.
I spent a good portion of time on Saturday picking out fabric. At first I was sure I would use Brocade Peony fabric, but I just wasn’t feeling the love. I searched through a lot of fabric and, finally, I chose a Philip Jacobs Chrysanthemum print because it was different. It is darker than I usually like, but had some pink and turquoise in it, so I can those colors as accents.
APfE v.2 quilted pieces
Sunday, I quilted almost all day. Well, I cut out pieces for the bag and quilted. I know it doesn’t look like a lot of work, but the quilting really took forever. I got more done than I thought I would, but I still have a lot to do.
I plan on making as many of the smaller pieces as I can, and, of course, cutting out the regular,non-quilted pieces so when I do have time to put the bag together, I won’t have to stop to make handles or zipper tabs or whatever.
I am really pleased with what I got done on Sunday.
Yesterday, I taught a class on machine applique. In the course of the discussion, I brought out Down the Drain to show different examples of satin stitching. I also showed The Tarts Come to Tea.
This brought up the idea of quilting, which I tried to gloss over, but my intelligent students wanted to know why they had never seen the Tarts and I had to admit that I hadn’t completed the quilting.
I felt silly admitting that the quilt was partially quilted and languishing in a project box. Will I get back to it? Maybe. They didn’t think it was weird or out of date looking, so it might be time to get back to the quilting. I quilted Down the Drain and survived the process, so perhaps it is time to get back to it?
We had a guild meeting on Saturday. Our speaker was Christina Cameli. She is a machine quilter and I wasn’t that excited, but I really loved the presentation and her.
She had the guild send photos of several people’s quilts. People sent quilts where they needed help with the quilting. I was amazed and impressed with her suggestions.
I liked her because she was very calm and listened to the people engaged with her. The presentation seemed to be about the quilt and not about her. She used Adobe Draw to write/draw on the images. This was an effective way to show what she was thinking.
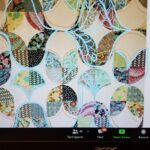
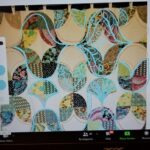
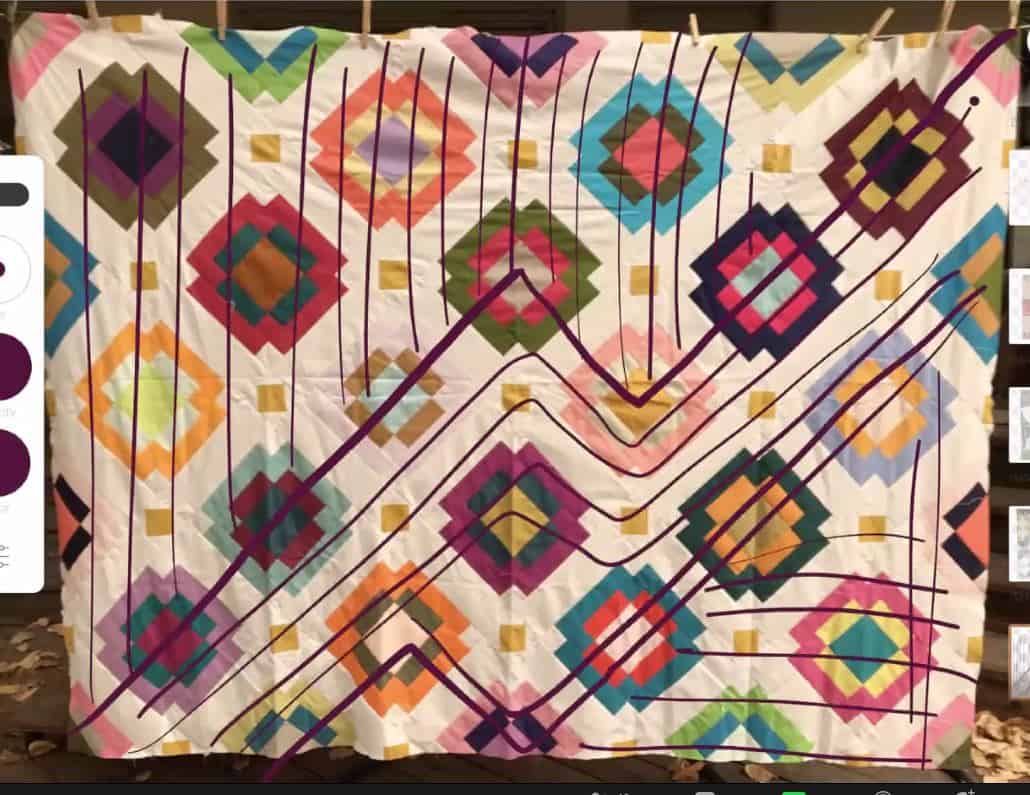
Gerre’s suggestions from Christina Cameli
Gerre’s suggestions from Christina Cameli
Gerre’s suggestions from Christina Cameli
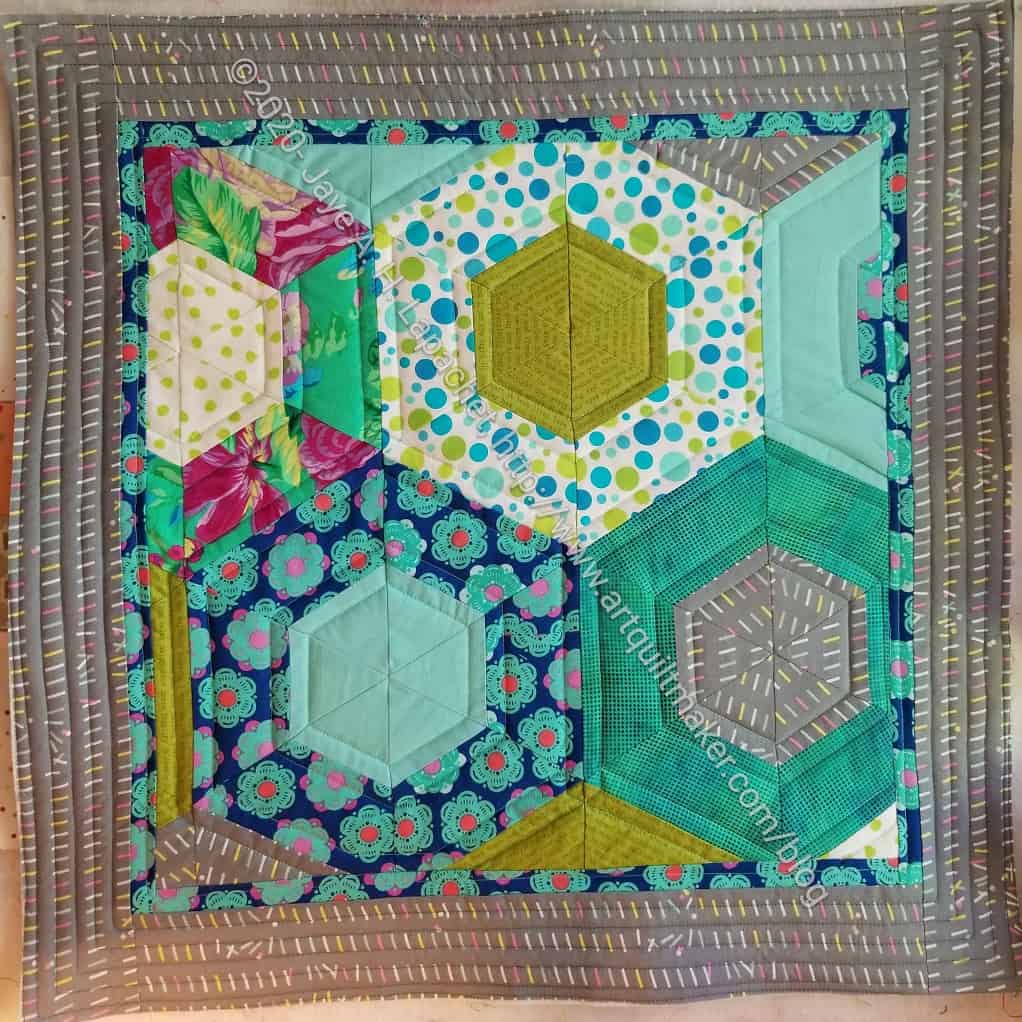
I really liked her suggestions for Gerre’s quilt. Christina asked what Gerre was thinking and what kind of quilting she enjoyed, such as FMQ, walking foot, straight line, etc. This is a quilt Gerre started in the Jen Carlton Bailly class. I love the bold prints she used. Christina suggested putting leaves and flowers in the curved pieces. I thought that was brilliant and Gerre liked the idea, too. I thought the idea was really innovative, but fit in with the spirit of the design.
Melinda R’s scrapbuster quilt
Melinda showed a scrapbuster quilt. Melinda talked a little about her thoughts. Christina shared that she felt like the brown vertical strips were bars and she suggested wavy lines to soften them. I thought the brown lines were quite dominant so this suggestion was a good idea. I couldn’t get over the thought that this was the back of a quilt and not the front. Of course, it isn’t my quilt, so my opinion means nothing.
Maria’s Radiate quilt
I am not sure how Maria felt about these suggestions. I am not a fan, though I think the vertical lines in the upper left are effective.
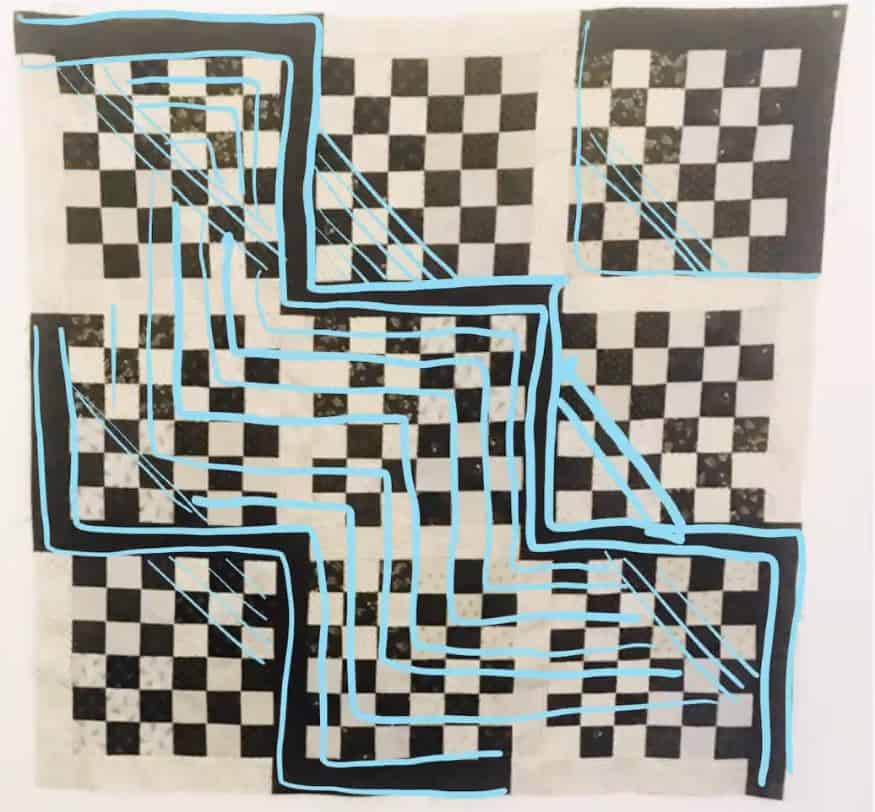
Pati’s Graphic Black & White
Pati had a bold, graphic quilt to show. I thought the lines following the stair step piecing what what I would do. I really like the diagonal lines Christina suggested. They are unexpected, after seeing the stair step quilting, but fit in with the implied diagonal on the checkerboards.
Christina really thought outside of the box, but not in a weird way. The quilting designs she suggested were in line with what the quilt needed.Ii was very impressed.
You can find Christina on Instagram at @afewscraps. I was impressed with the four books she has written, the multiple online classes and television demos before I knew she was also a nurse-midwife and the single mom of two kids. I am even more impressed with her now. Her books are:
**I use affiliate links and may be paid for your purchase of an item when you click on an item link in my post. There is no additional cost to you for clicking or purchasing items I recommend. I appreciate your clicks and purchases as it helps support this blog.
I spent some time earlier this week quilting the Jawbreaker. I made good progress on it, but it took me longer than Lucky Charm. Finally, after a second session, I finished it. i swear I have quilted more this year than in a long time. All the projects are small, but I am still quilting them.
Jawbreaker Quilted
Jawbreaker is evenly quilted, but has less quilting than Lucky Charm. I used the Rotary Even Foot and that worked pretty well. I just did straight line quilting – nothing fancy.
Jawbreaker quilted – detail
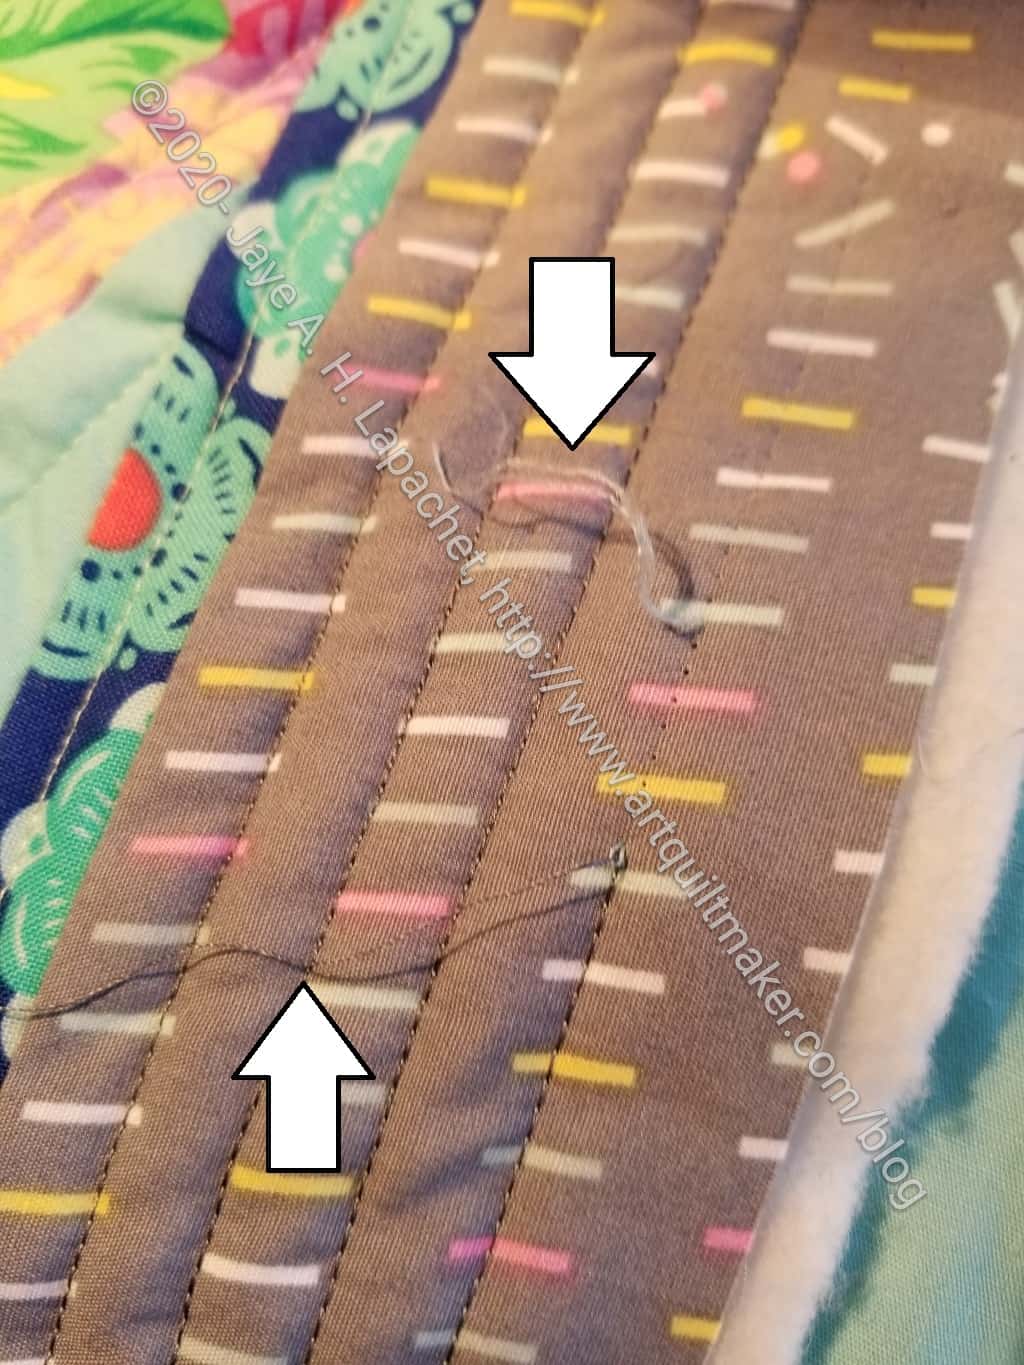
One thing that made me a little crazy is that the light green thread I used shredded periodically.
Jawbreaker thread shredding
It didn’t shred all the time, but I noticed it at least twice and I found it strange. I very seldom have this issue with Aurifil. In the photo, you can see that the charcoal was fine, but the light green was shredded.
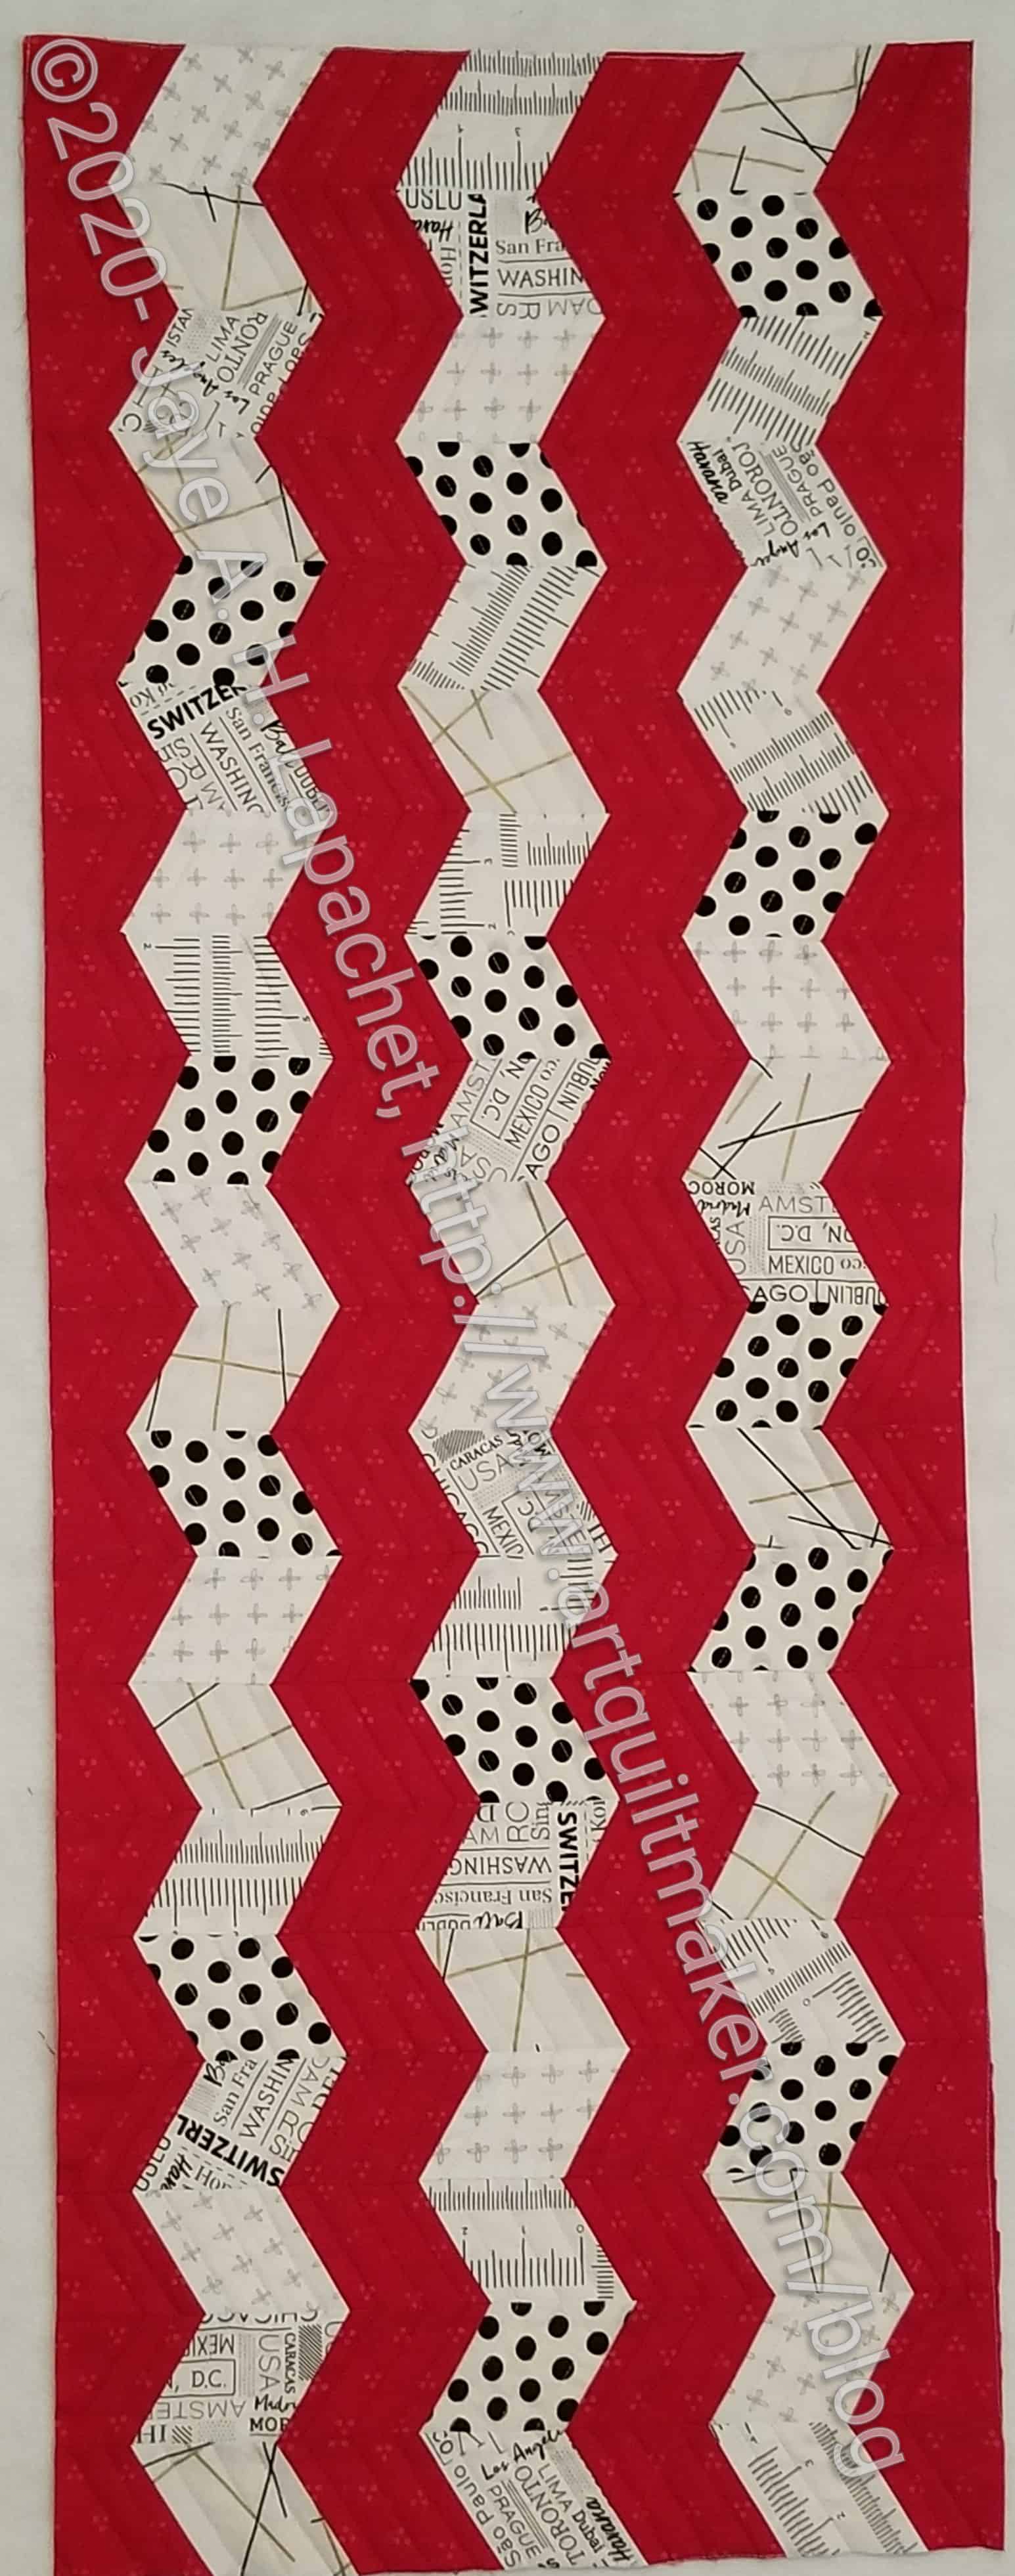
I really don’t want these Journey2Nebula projects hanging around clogging up my UFO list. Since the next project started yesterday, I sat down on Sunday an did some simple quilting on the Red Text table runner. It will be for my buffet (if I didn’t mention that before) and I would like to get it done so I can use it for a little while before I need to set up the decor for Thanksgiving.
Red Text Table Runner – quilted
I quilted most of it while talking on the phone to the YM. I used the Rotary Even foot rather than my usual clear applique foot. I wasn’t happy with it for other uses, but thought it worked pretty well for quilting straight lines. I definitely didn’t have to worry about the layers shifting. I also liked it because it was quiet. Unlike the walking foot, this foot didn’t clang and make a ton of noise while I was sewing.
I don’t like quilting that much, but it was a good task to do to stay off my foot.
I also made the binding, but it was a little too big, so I need to adjust it then hand stitch the binding to the back of the table runner. I am excited to have it finished!
I went to retrieve a piece of fabric that Tim quilted for me. I will be making bags for our dining room table leaves. Because making quilts and never showing them in person is not fun, I brought some of the donation tops I have made since March. Tim has a number of my donation quilts to quilt. I told him I just wanted to show him the quilts, but he insisted on keeping a couple of them to quilt. Tim kept the Traffic Jam quilt, the Plaid donation quilt and this one.
Blue Strip quilting detail
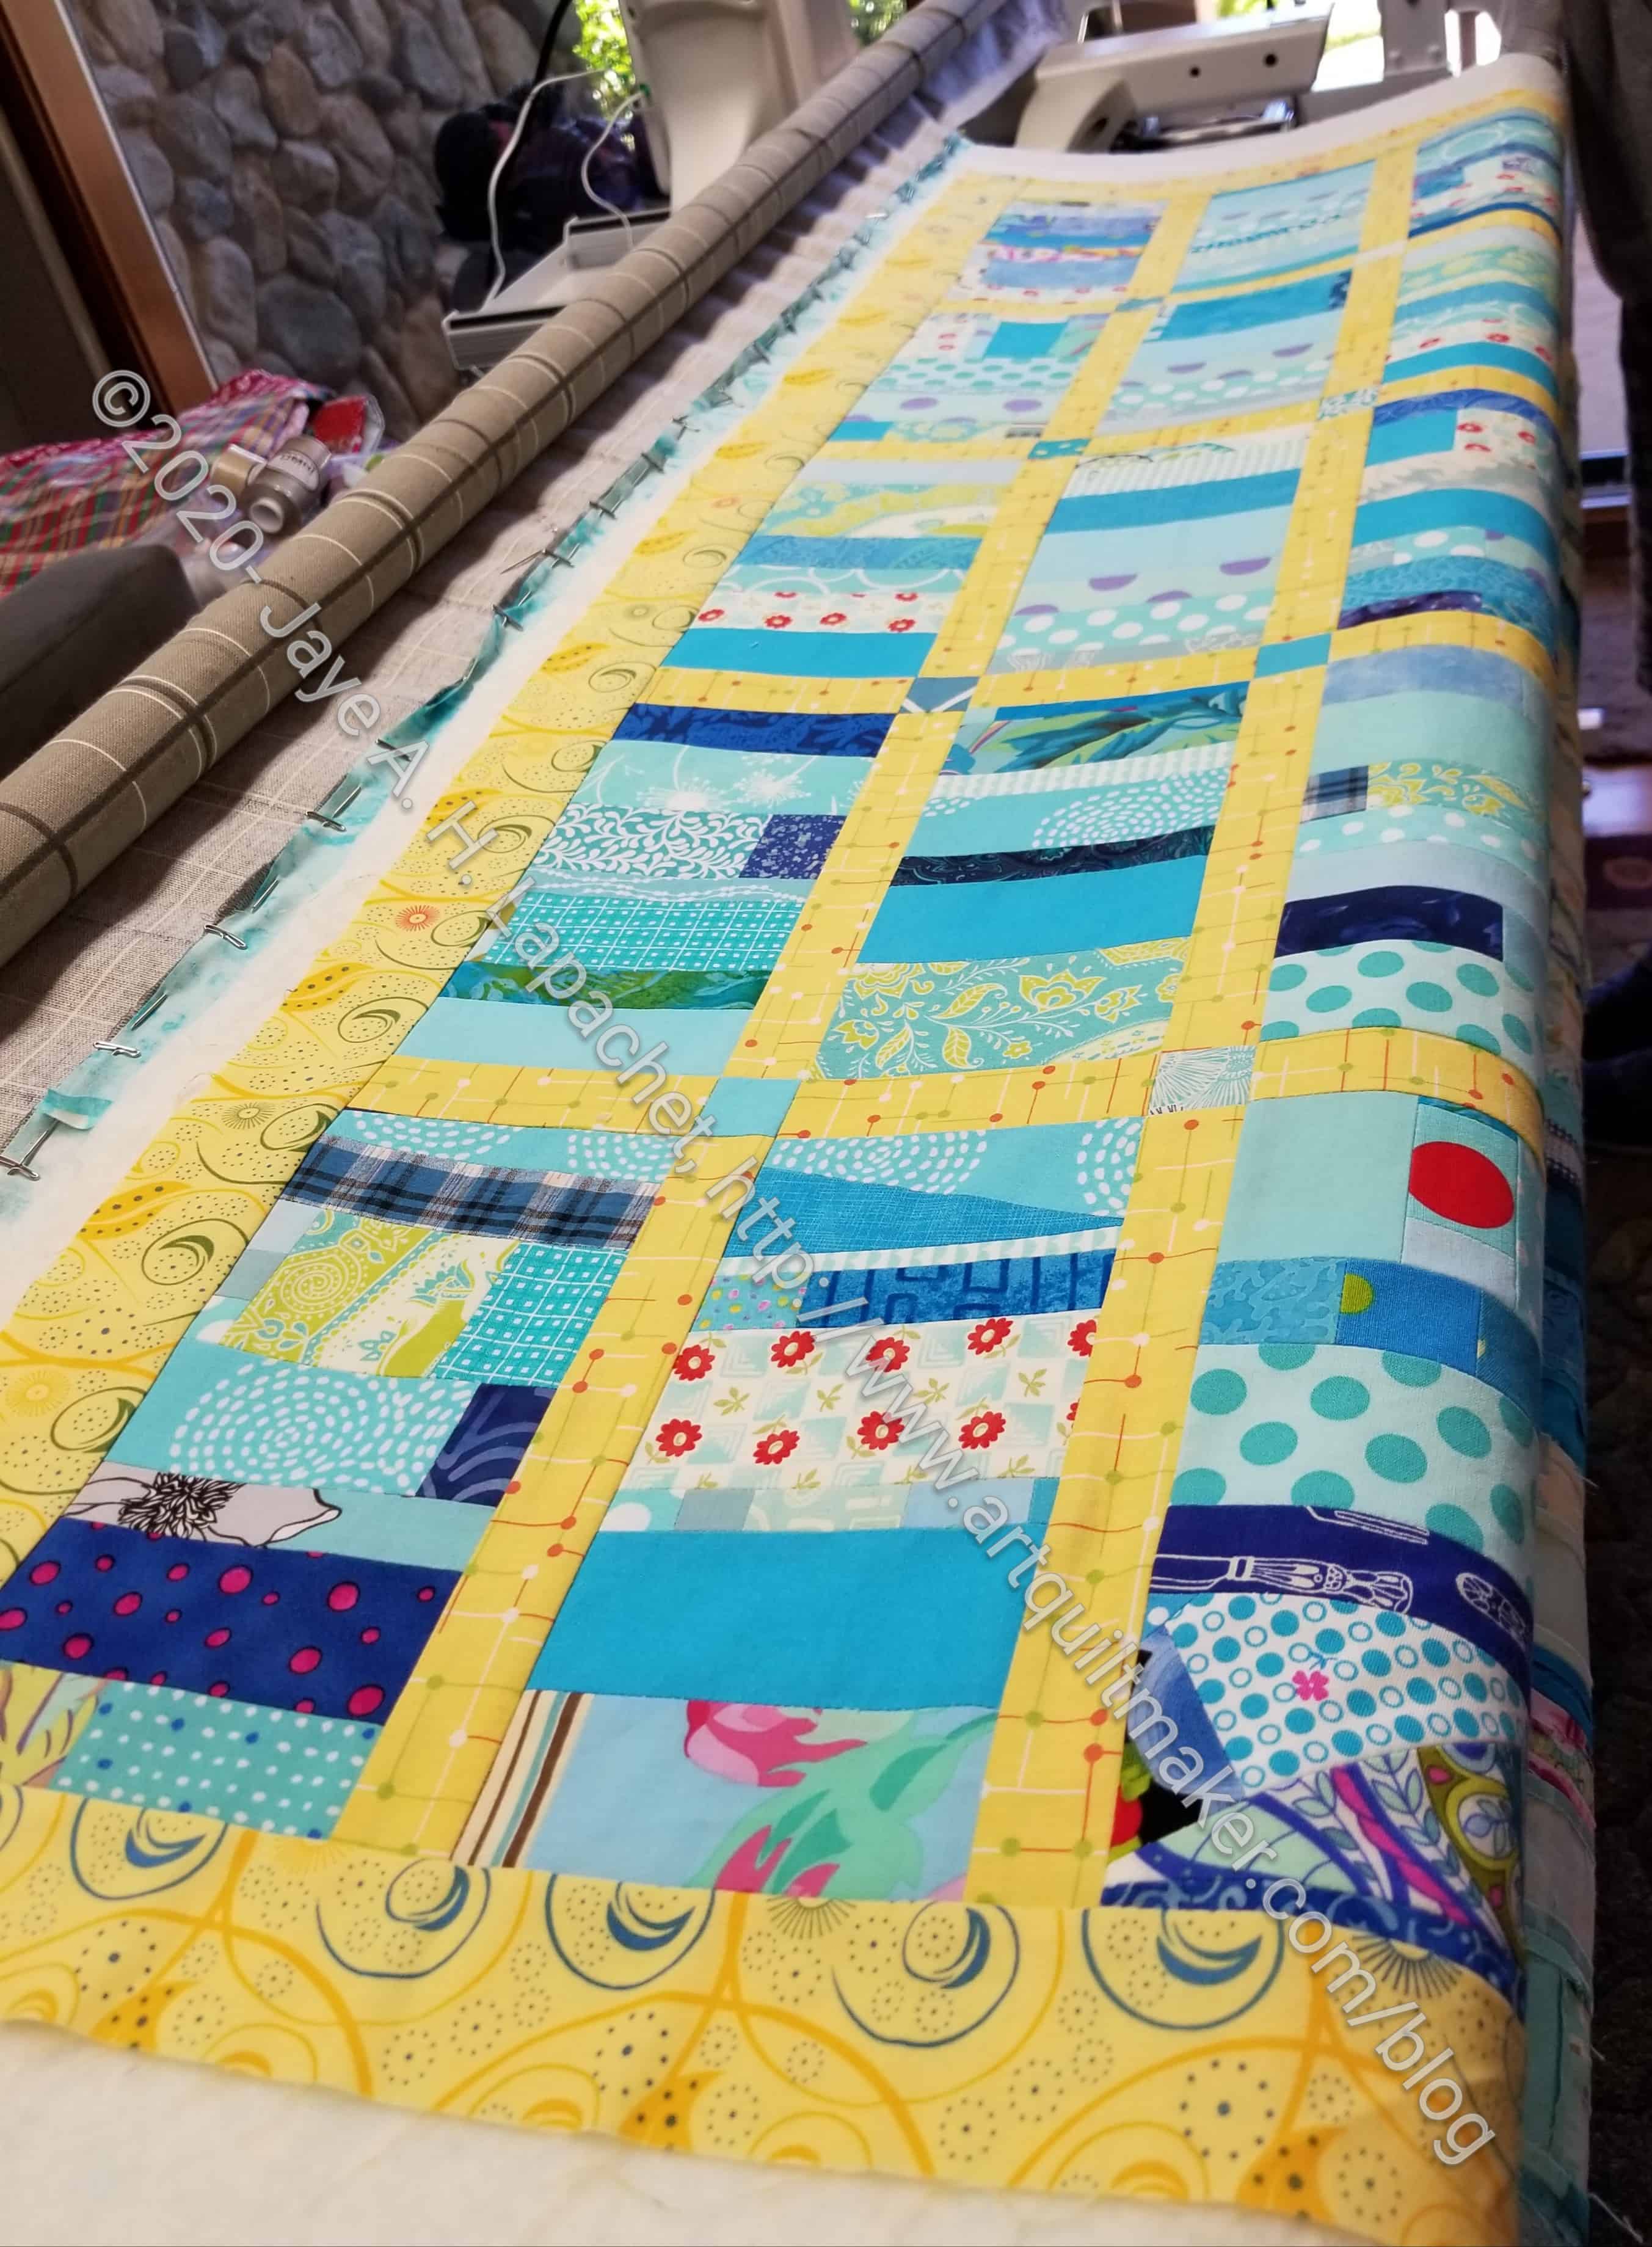
I didn’t argue with him, but I insisted on helping him load one of the quilts, the first Blue Strip donation quilt on the longarm. I made this back in March. Since then it has been languishing in my ‘going to guild’ bag. I was just about to ask if anyone wanted to quilt some quilts. I will still do that for the 2 Spiky 16 patches I have, but I have many fewer to try to pawn off.
Blue Strip on the longarm
If I help him get a quilt on the machine, he quilts it relatively quickly. It is also good practice for me, so we pinned this piece to his leaders, he tested the stitch length and did a bit of the quilting to test out the machine and the pattern. I am pretty excited that these quilts are out of my bag. I told Tim I would be back to help him get another quilt on the machine.
I got back to the Bat Tablerunner over the weekend. Yes, I quilted.
Bat Tablerunner, quilting in progress
I quilted for about an hour on Sunday evening. I felt really good about the work I did. I feel like I accomplished something. The quilting was simple, but it looks nice. I felt energized and was ready for another session on Monday. I quilted for about 4 hours on Monday night while DH watched the football game.
I suffered yesterday as 4 hours of machine quilting was a bit much. I knew I was going overboard, but I really want to get this piece done before Saturday’s meeting. I need to break up my work, though so I am not in pain.
Bat Tablerunner, quilting in progress
I was able to finish the background on Monday and make a start on the bats. I know I just need to do what I can do and hope that I can be done by Saturday.