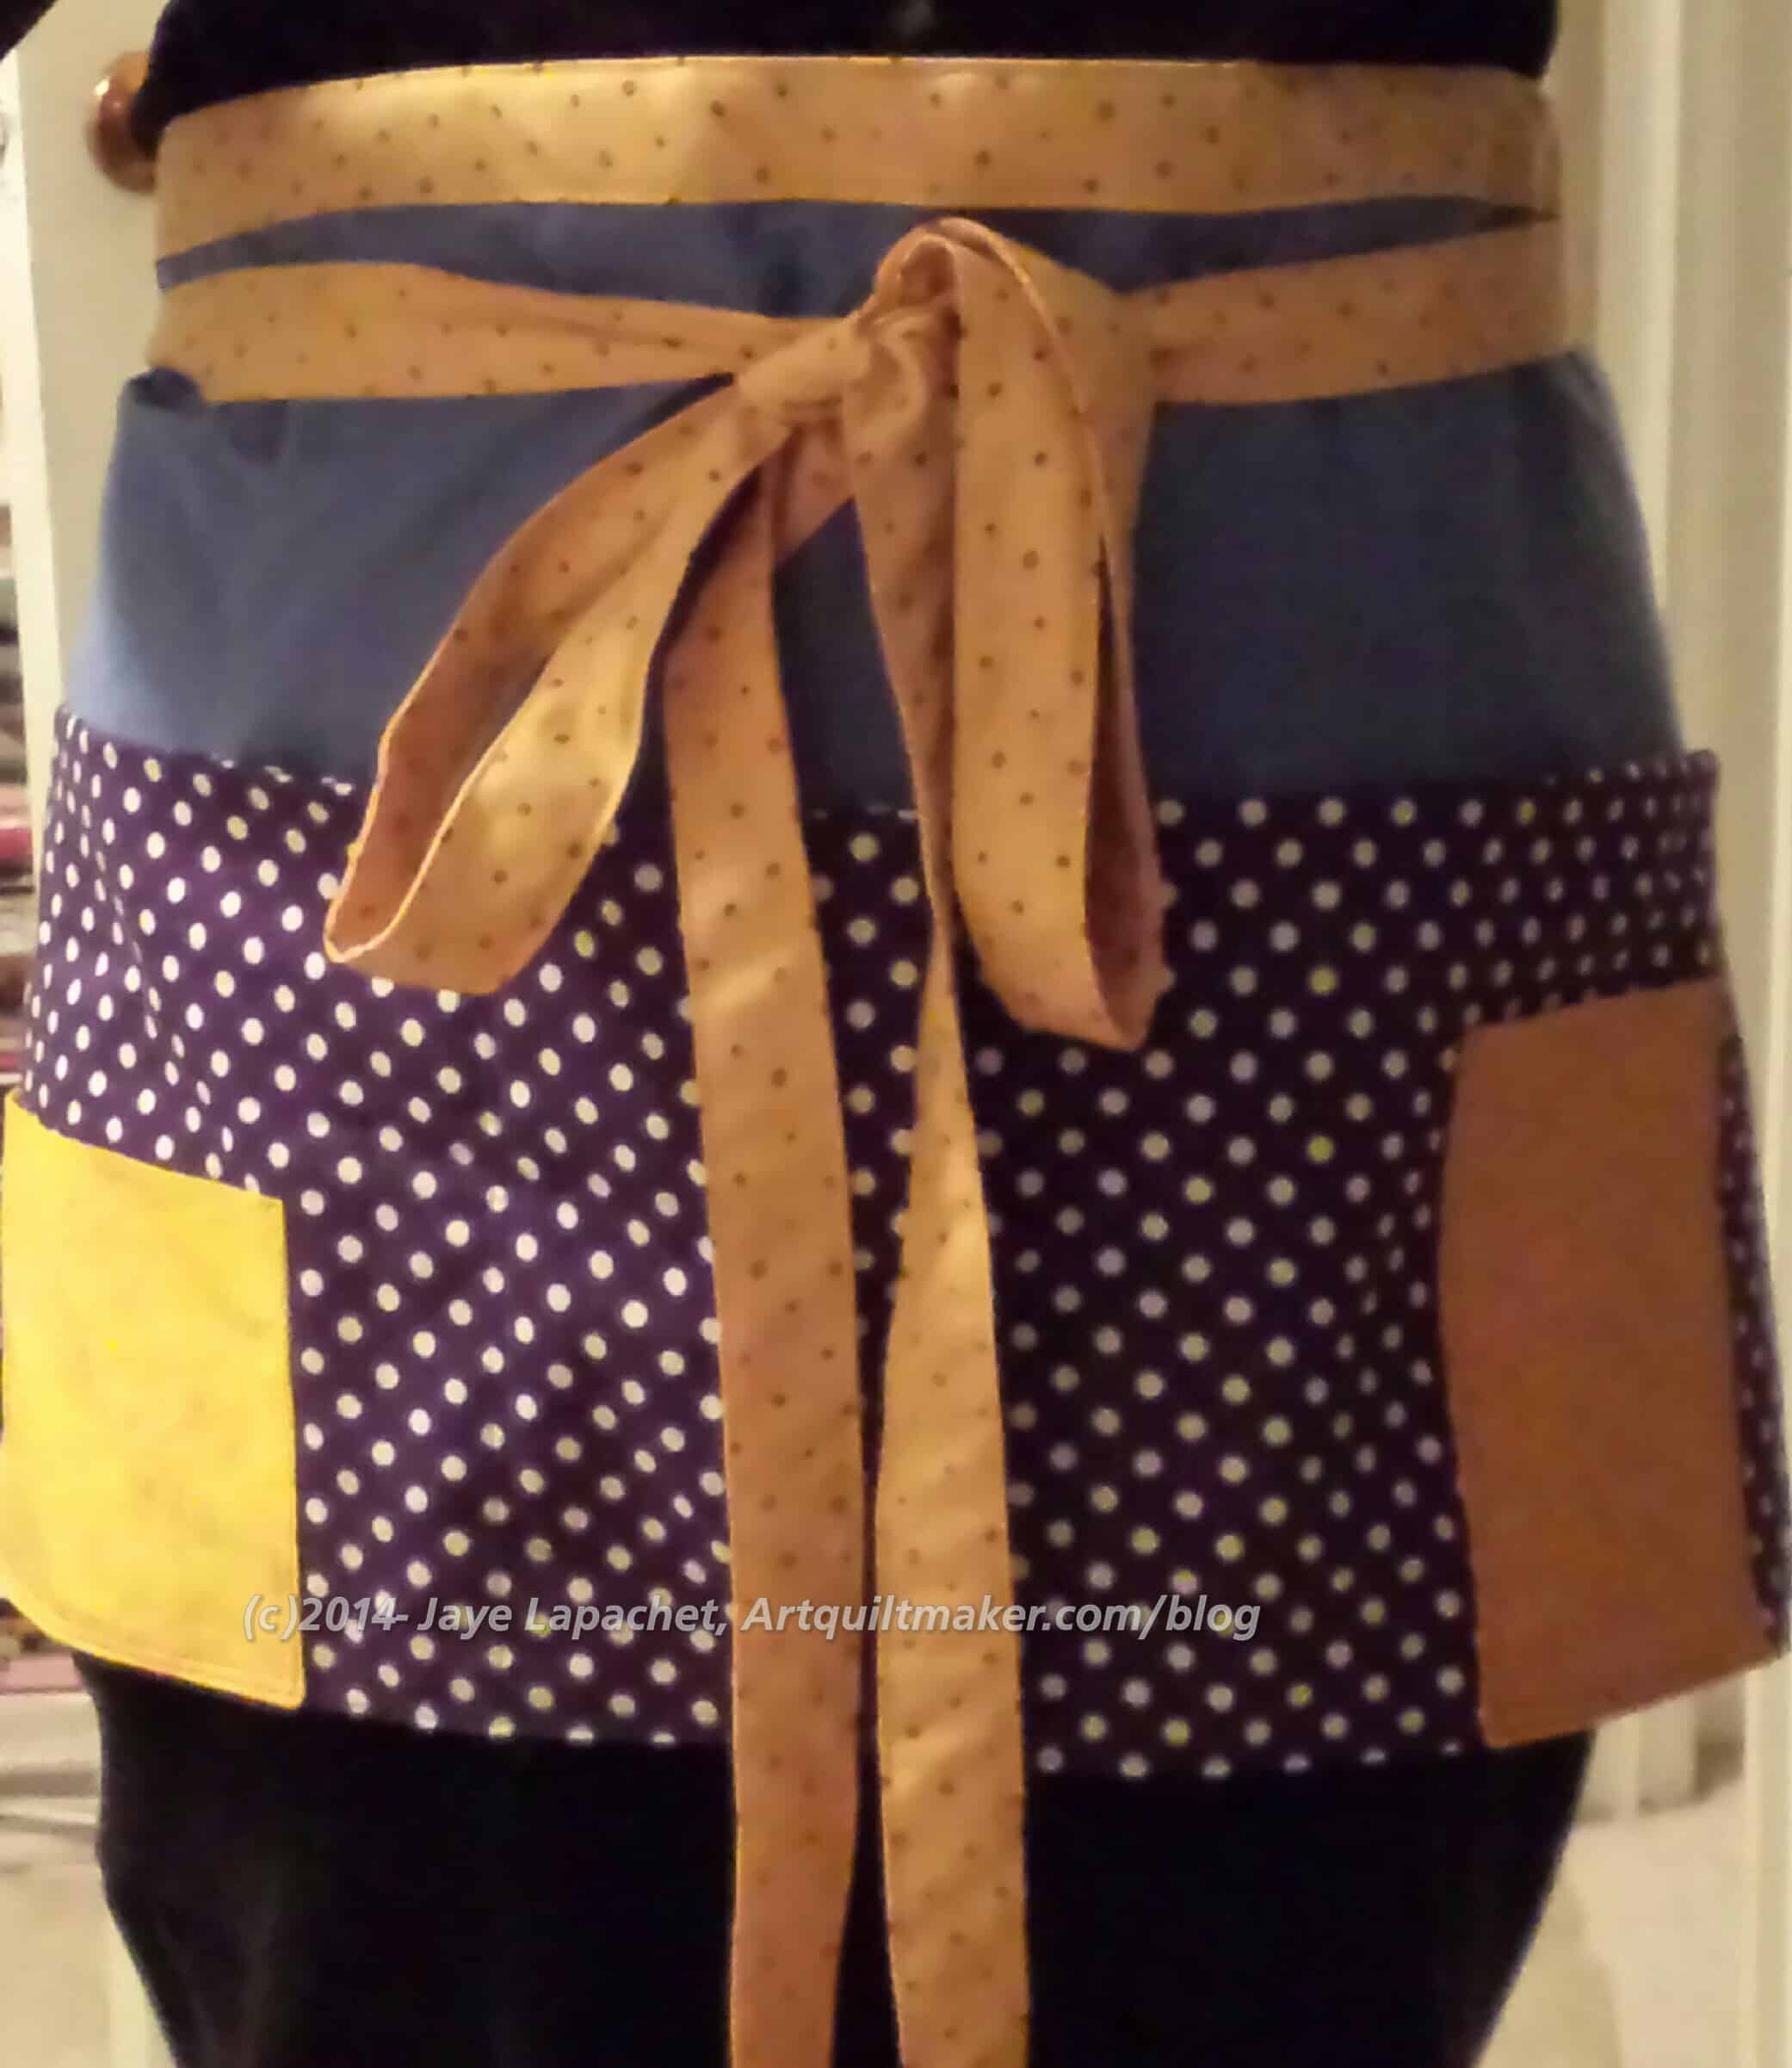
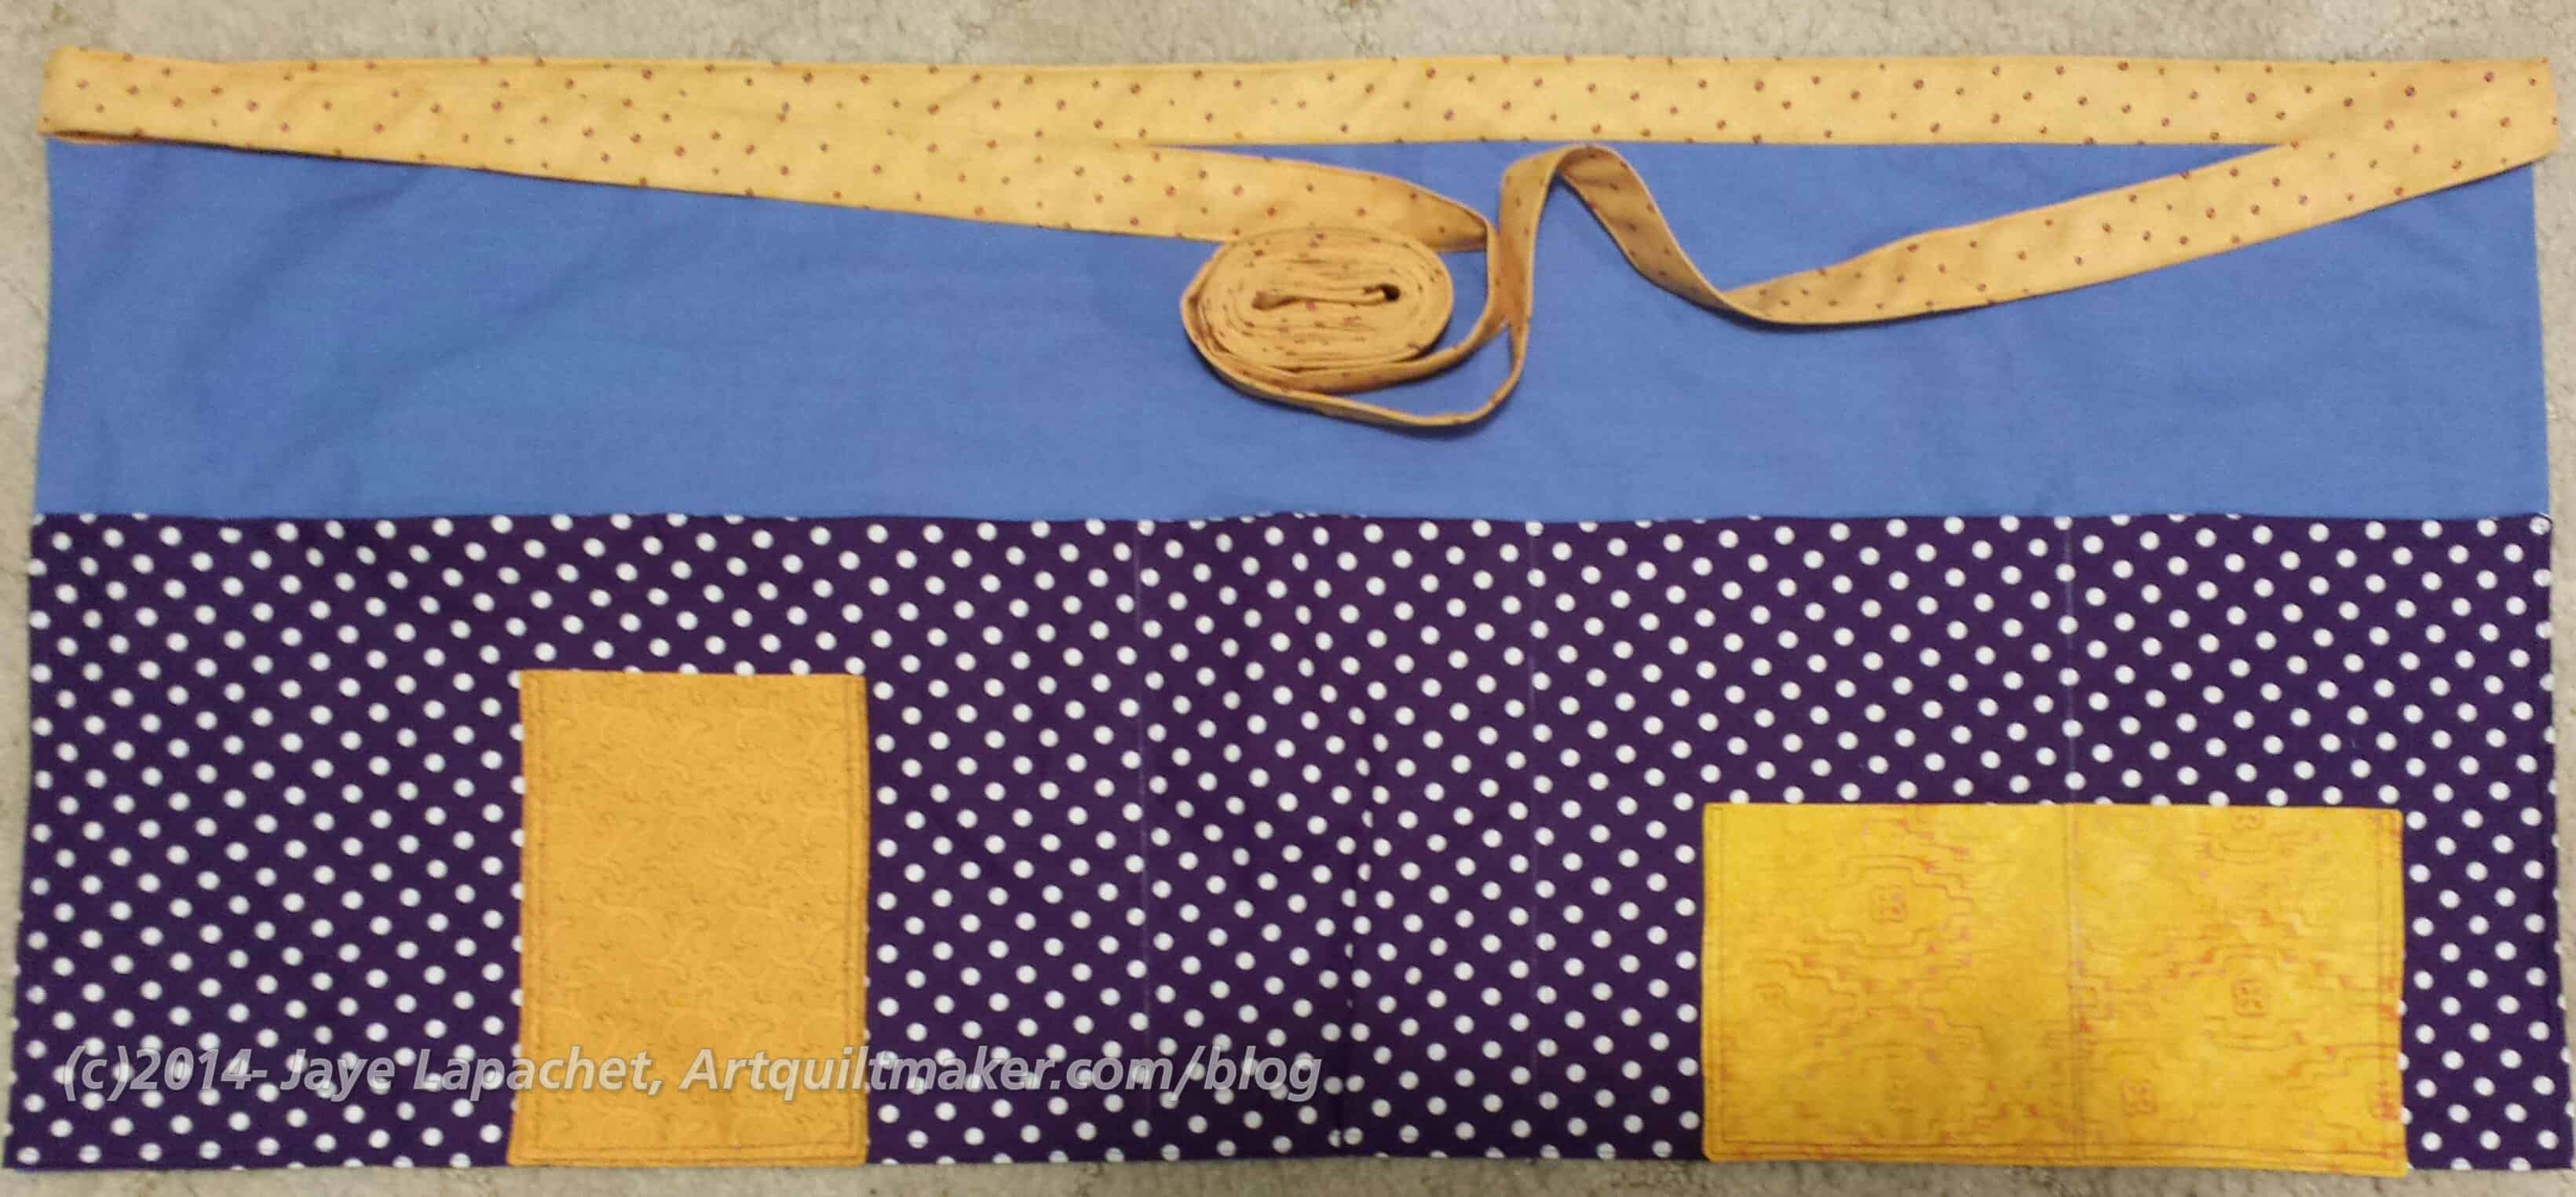
I can probably classify this as a hack. Really, I don’t know about the hack thing, because I made the apron without the Amanda 7 Pocket Cafe Apron pattern.
ARHS Grooming Apron
I couldn’t find the pattern and, after cleaning my workroom, I called my mom and had her measure the apron I made for her. I looked at the previous blog posts and went for it. I had to kind of make up the pockets, but I think it will work well.
A few months ago, I volunteered at the Young Man’s Band Review. I was assigned to the grooming team, which means that I followed the head of the grooming team around and carried stuff she needed to fix buttons, cut hair, adjust hems and jackets. At that time I thought it would be really useful to have an apron.
I finally had a chance to make one and it took me about three to four hours. The hardest part was pressing the seams. I really dislike that part, because I can never get the seams as flat as I want them.
I have to say that I enjoyed making this apron a lot more without the pattern than I did before. I think the problem with the pattern’s printing/font size was too small.
Regardless, I think the apron came out really well and I hope it will be useful.
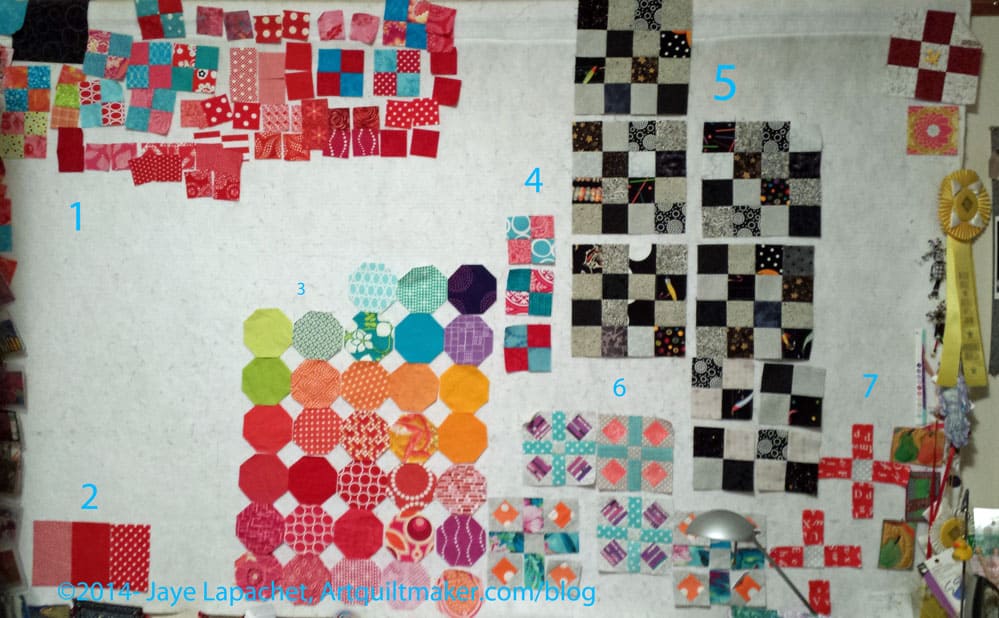
It seems a little odd to keep posting these photos of what looks like the same design wall week after week. Still there is some difference. You can see the blocks I am making for the project TFQ and I are working on.
The octagons are still there, because I am still stuck on the Russian Rubix border. I got a little push in the right direction, but I just I haven’t had a chance to do any sewing. I will be really happy when I have a chance to finish the border so I can get the octagons off my wall and put something else up there.
1- As in the previous week, these are the pieces and parts for red and turquoise four patches. Ir eally need to find some more turquoise fabrics.
2- These patches are the start of the newest batch of FOTY 2014 rectangles.
3- Octagons from the Russian Rubix quilt top.
4- Finished red and turquoise four patches
5- Donation blocks, mostly finished, but one in process
6- PIQF Inspiration blocks in process
7- PIQF Inspiration blocks in in cutting stage
I am linking up with Judy Laquidara’s Patchwork Times
I have been a little off fabric buying for the past couple of months, but that seems to have abated. Despite not feeling the love for any new fabrics, I kept looking at Cotton & Steel. Who couldn’t with all the hype?
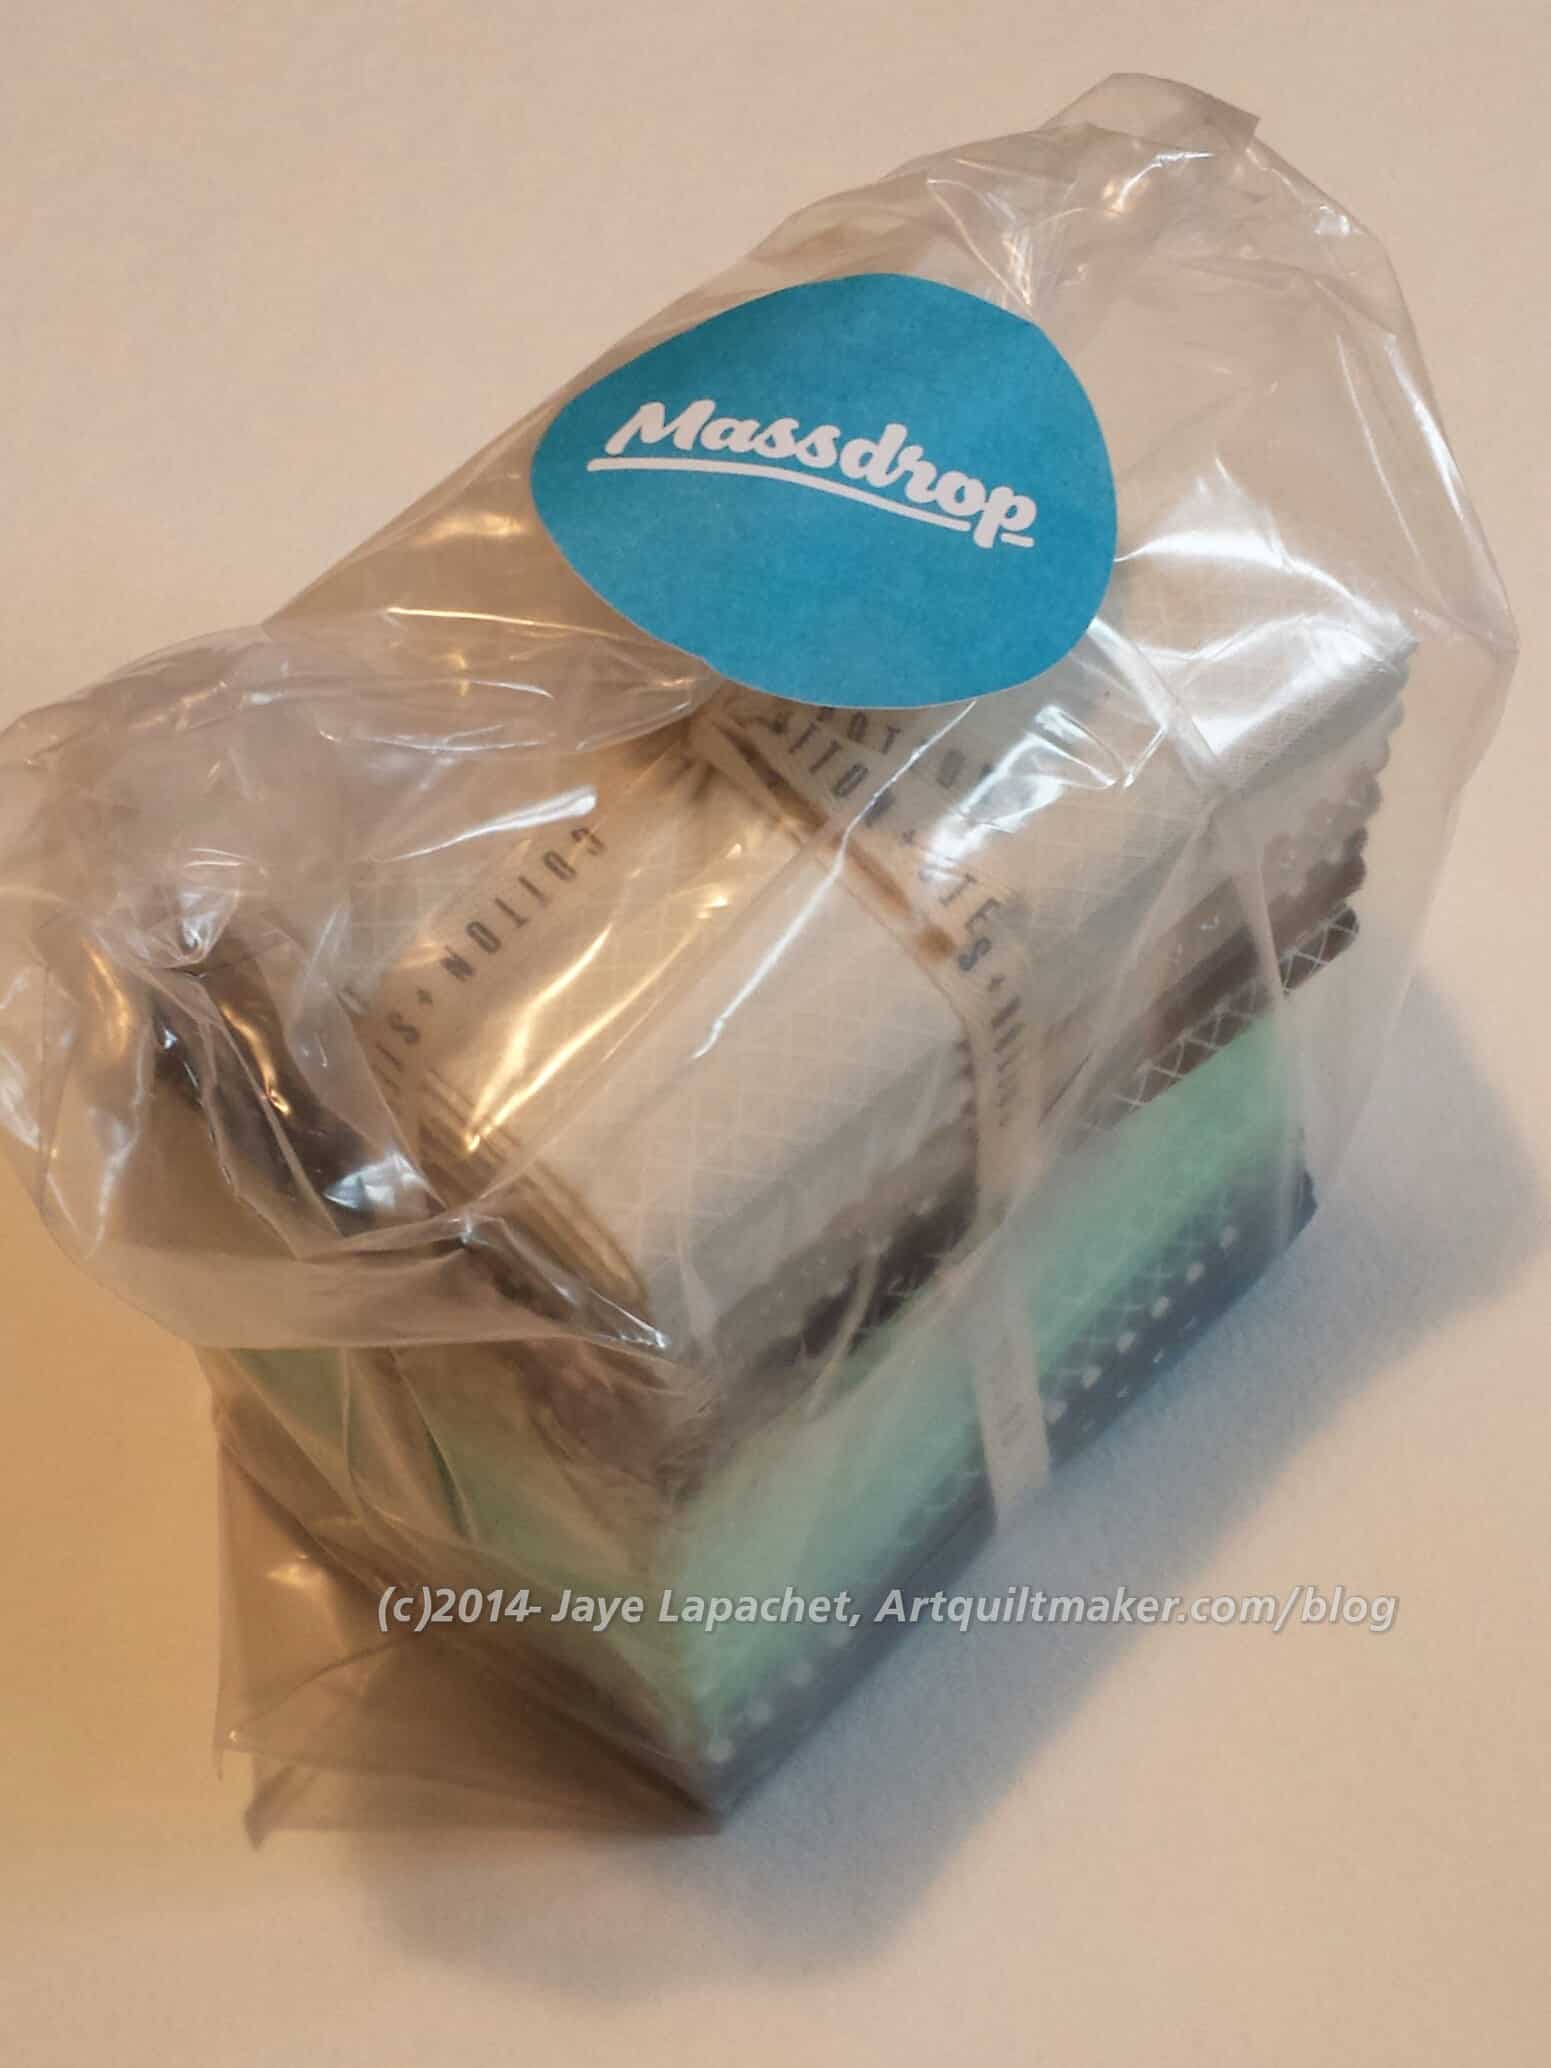
I am not that fond of the fussy-cuttable prints, but liked the tone-on-tones. I hadn’t yet gotten myself together to go and seek out the prints I wanted when I saw that MassDrop had an interesting offer. Interested parties were allowed to choose two FQ bundles of the tone-on-tone color groups of their choice. Note that this drop is closed now, but you can request that it be opened again.
MassDrop order arrives
Right before I left for Houston, I received the bundles. I didn’t really have a chance to open it as a lot was going on the few days before I left. I was excited about the cute little packets of fabric, though.
Went to Houston, came home and had a lot of stuff to do around the house, related to work, etc. Finally, I dragged my cutting table out of the closet (I store in the Fabric Closet when not in use or when we have guests or when someone is vacuuming) and began unearthing the rotary cutting mat. What a mess! I have a lot of projects in process, as you know, and it just creates chaos. I am in creative chaos stage right now.
One of the things I unearthed was the package above. Of course, I opened it.
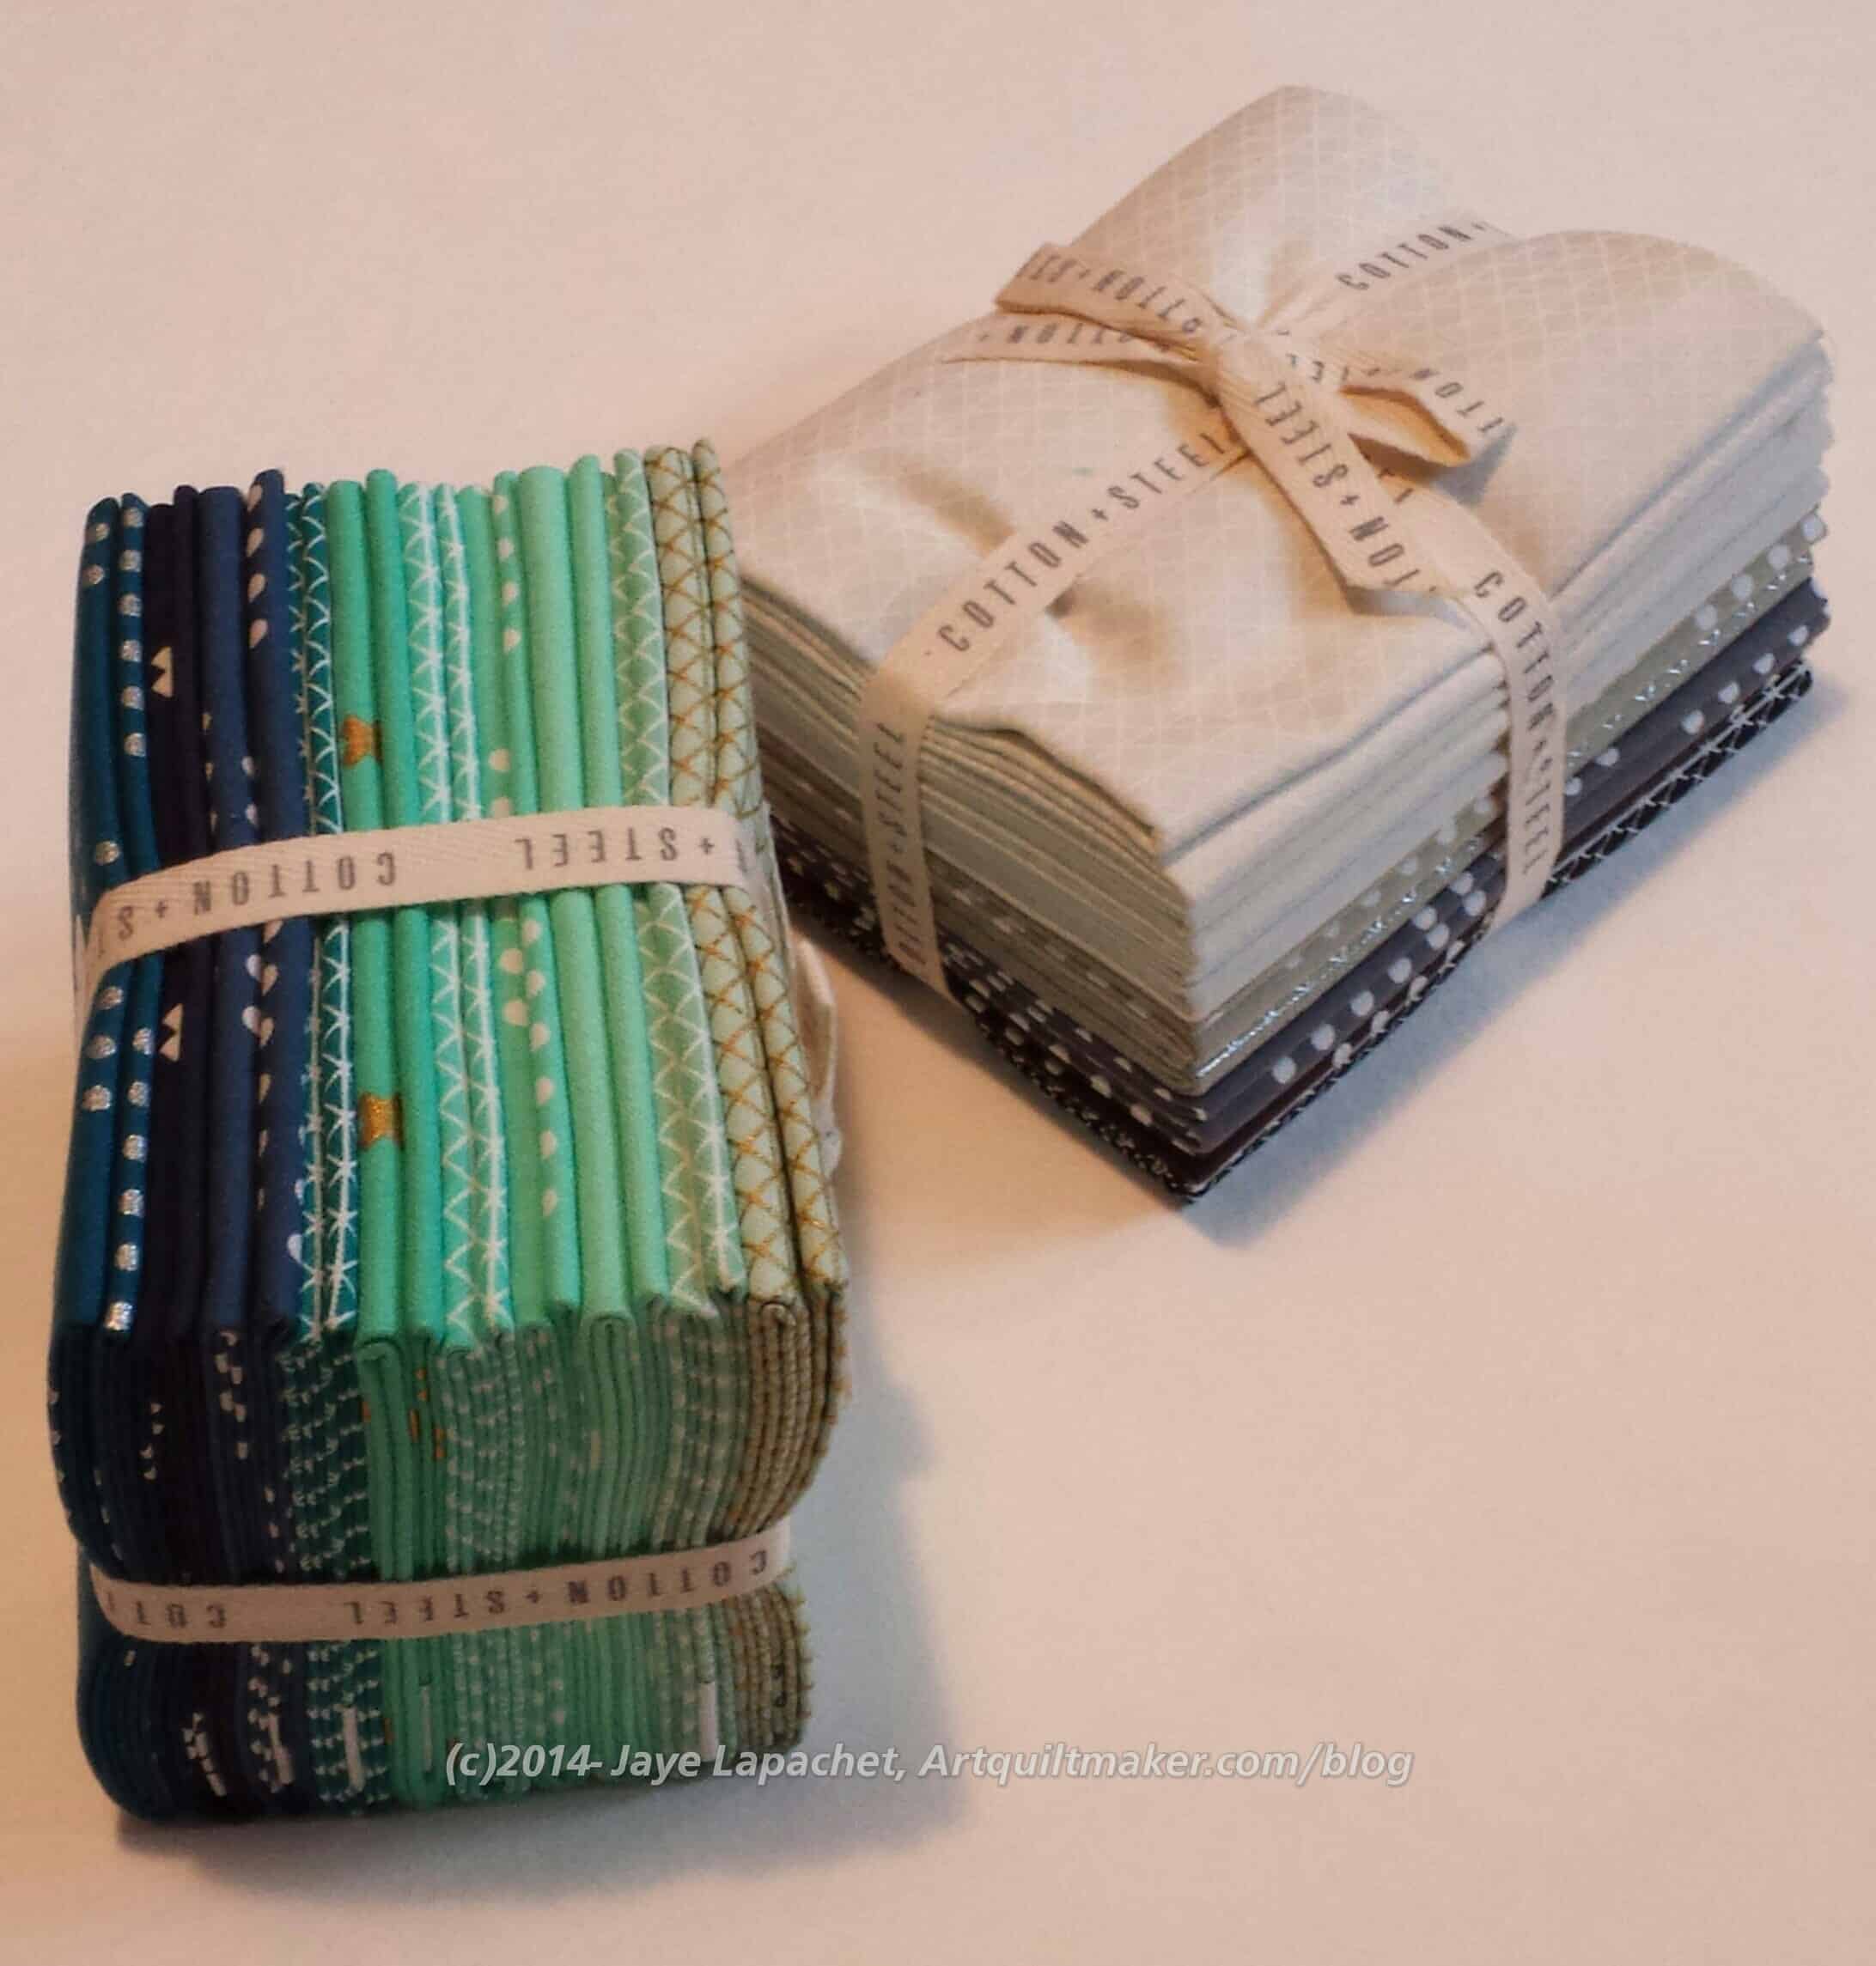
Cotton+Steel Open
Inside were two FQ bundles. Normally, I buy larger cuts of fabric, because you never know when you will need to make a border. Considering that I have plenty of fabric, especially in the blue range, I think fat quarters are plenty. I also have a project in mind for the neutrals.
There are a couple of kind of ugly greens (the ones on the end-right), but they look ok with the others.
Now I can I can say I am in the ‘in’ crowd and not just trying to be in the ‘in’ crowd. 😉
I do have to say that once I got them out of the MassDrop packaging, I didn’t want to take the FQ packs apart. They were just so compact and adorable. I gritted my teeth and did it, though.
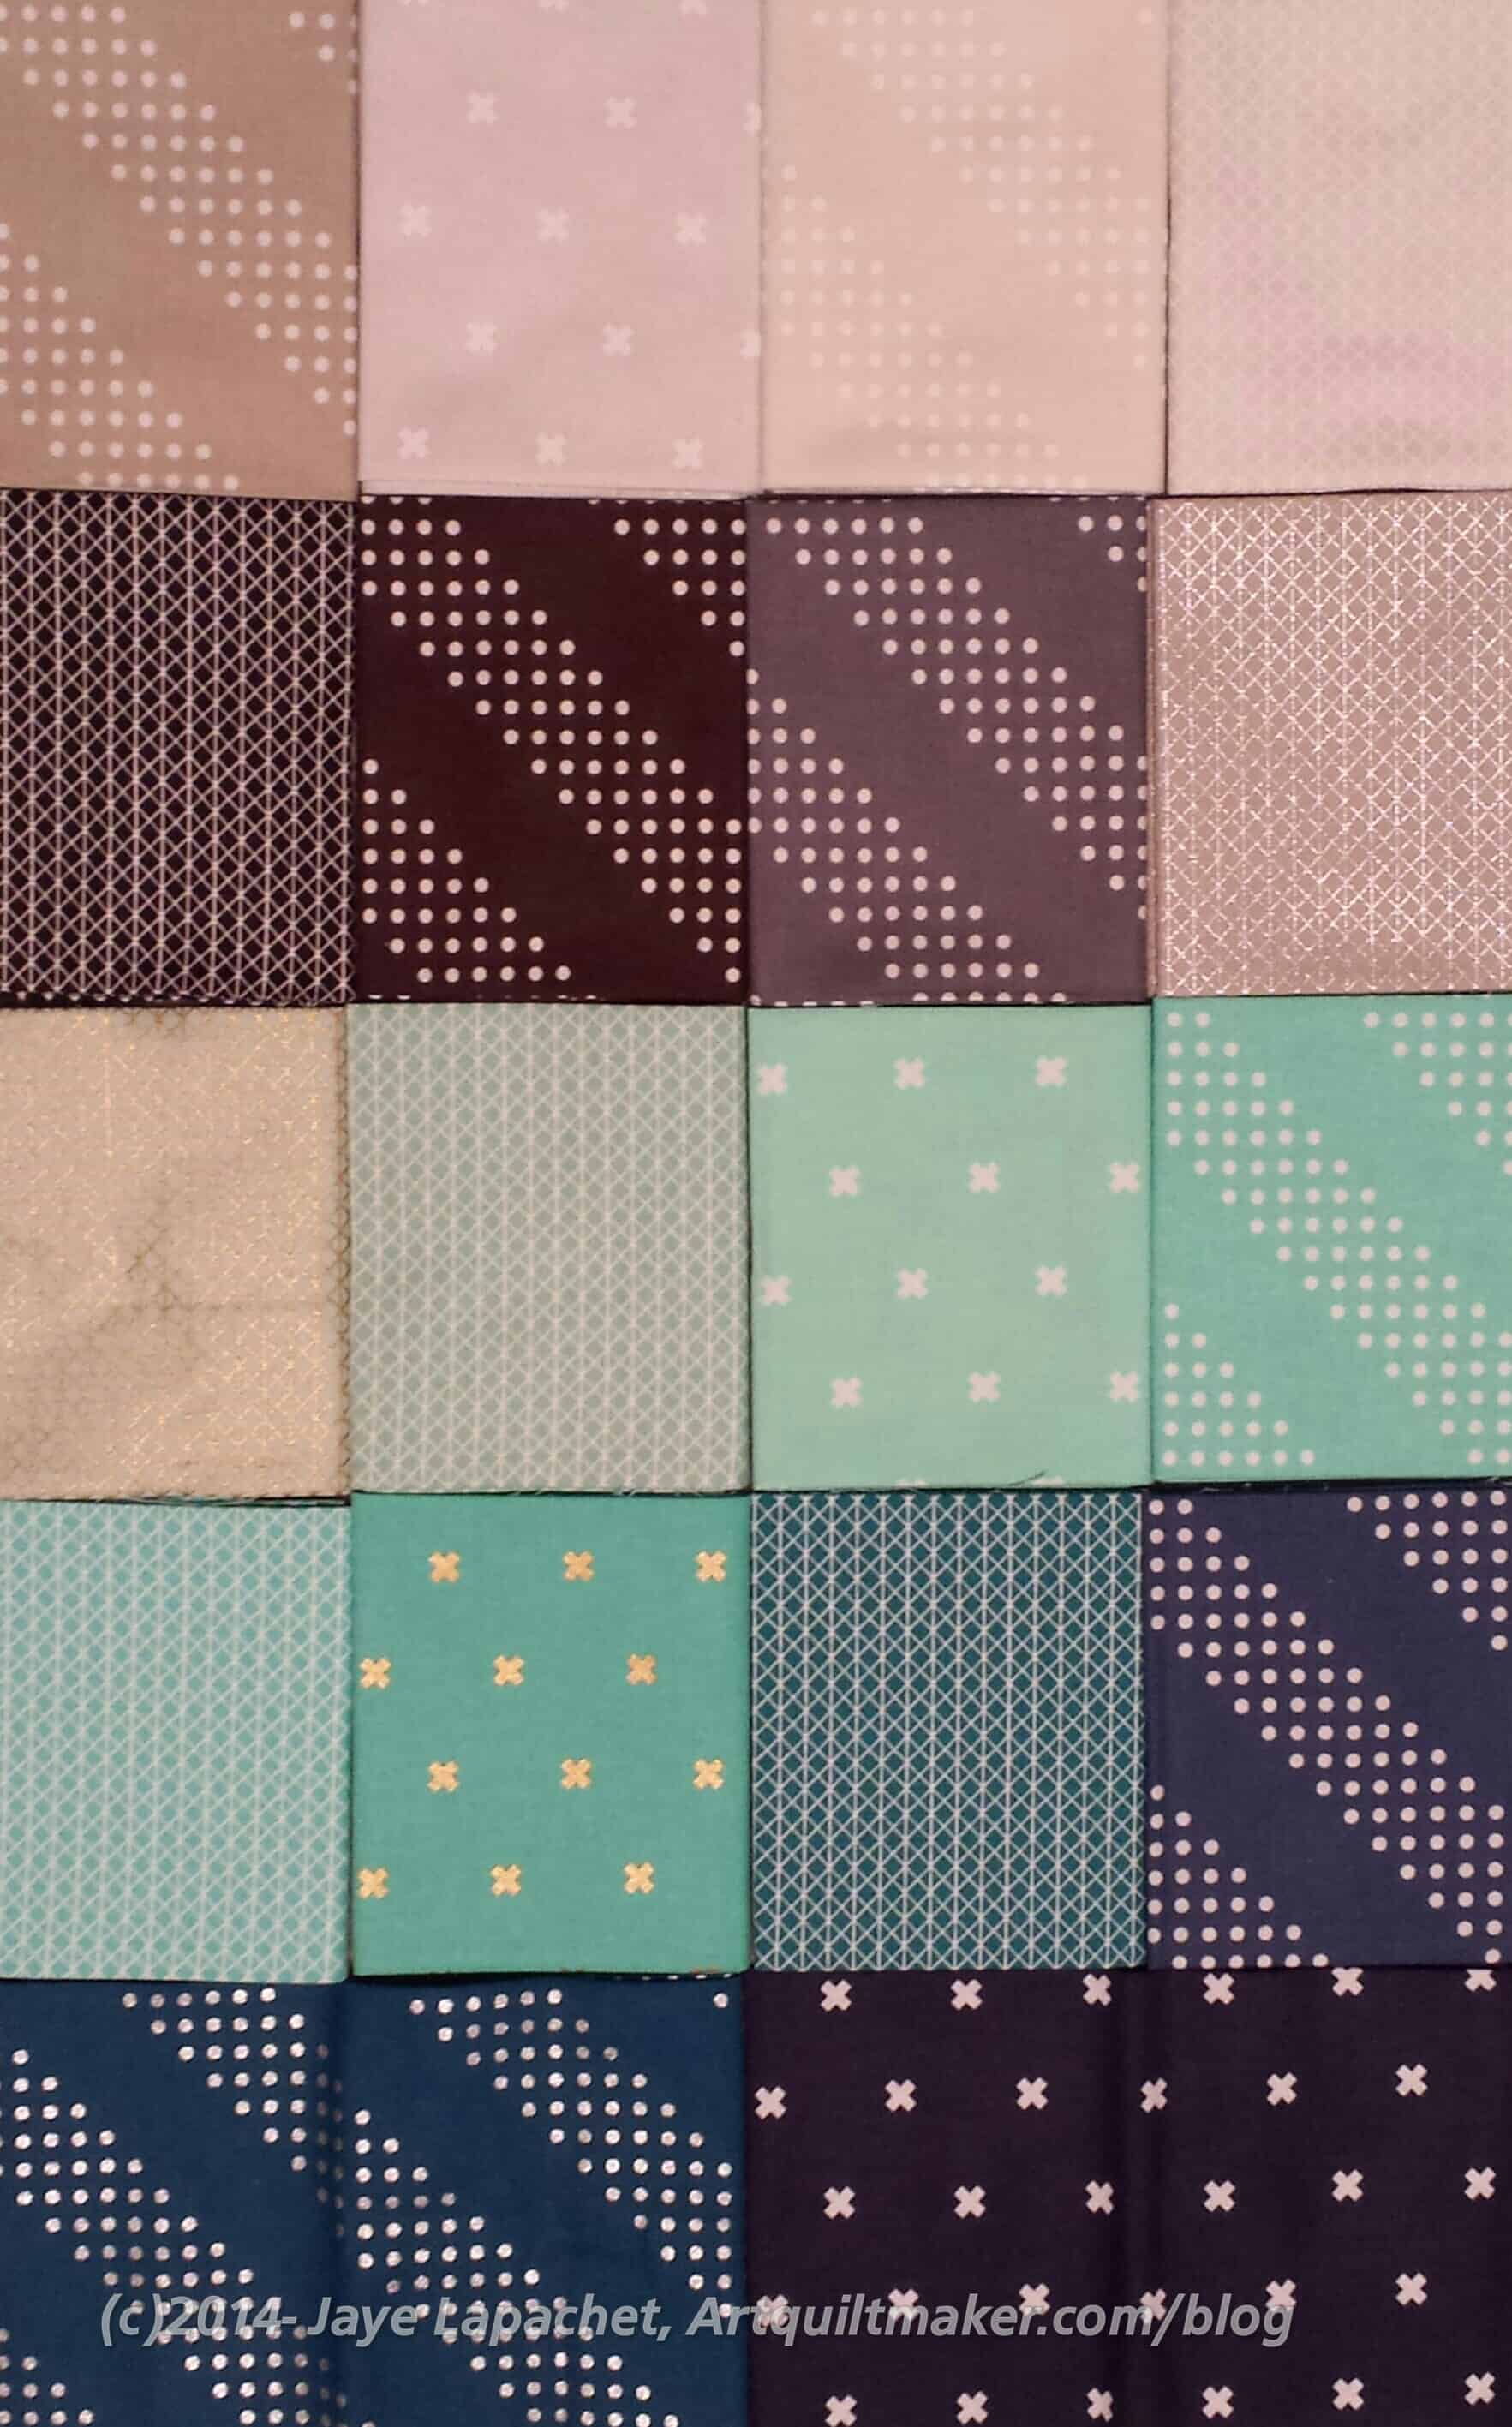
All Cotton+Steel
The fabrics all go together pretty nicely and as soon as I was the blue and green pack, I will add them to my pile for Tale of Two Cities.
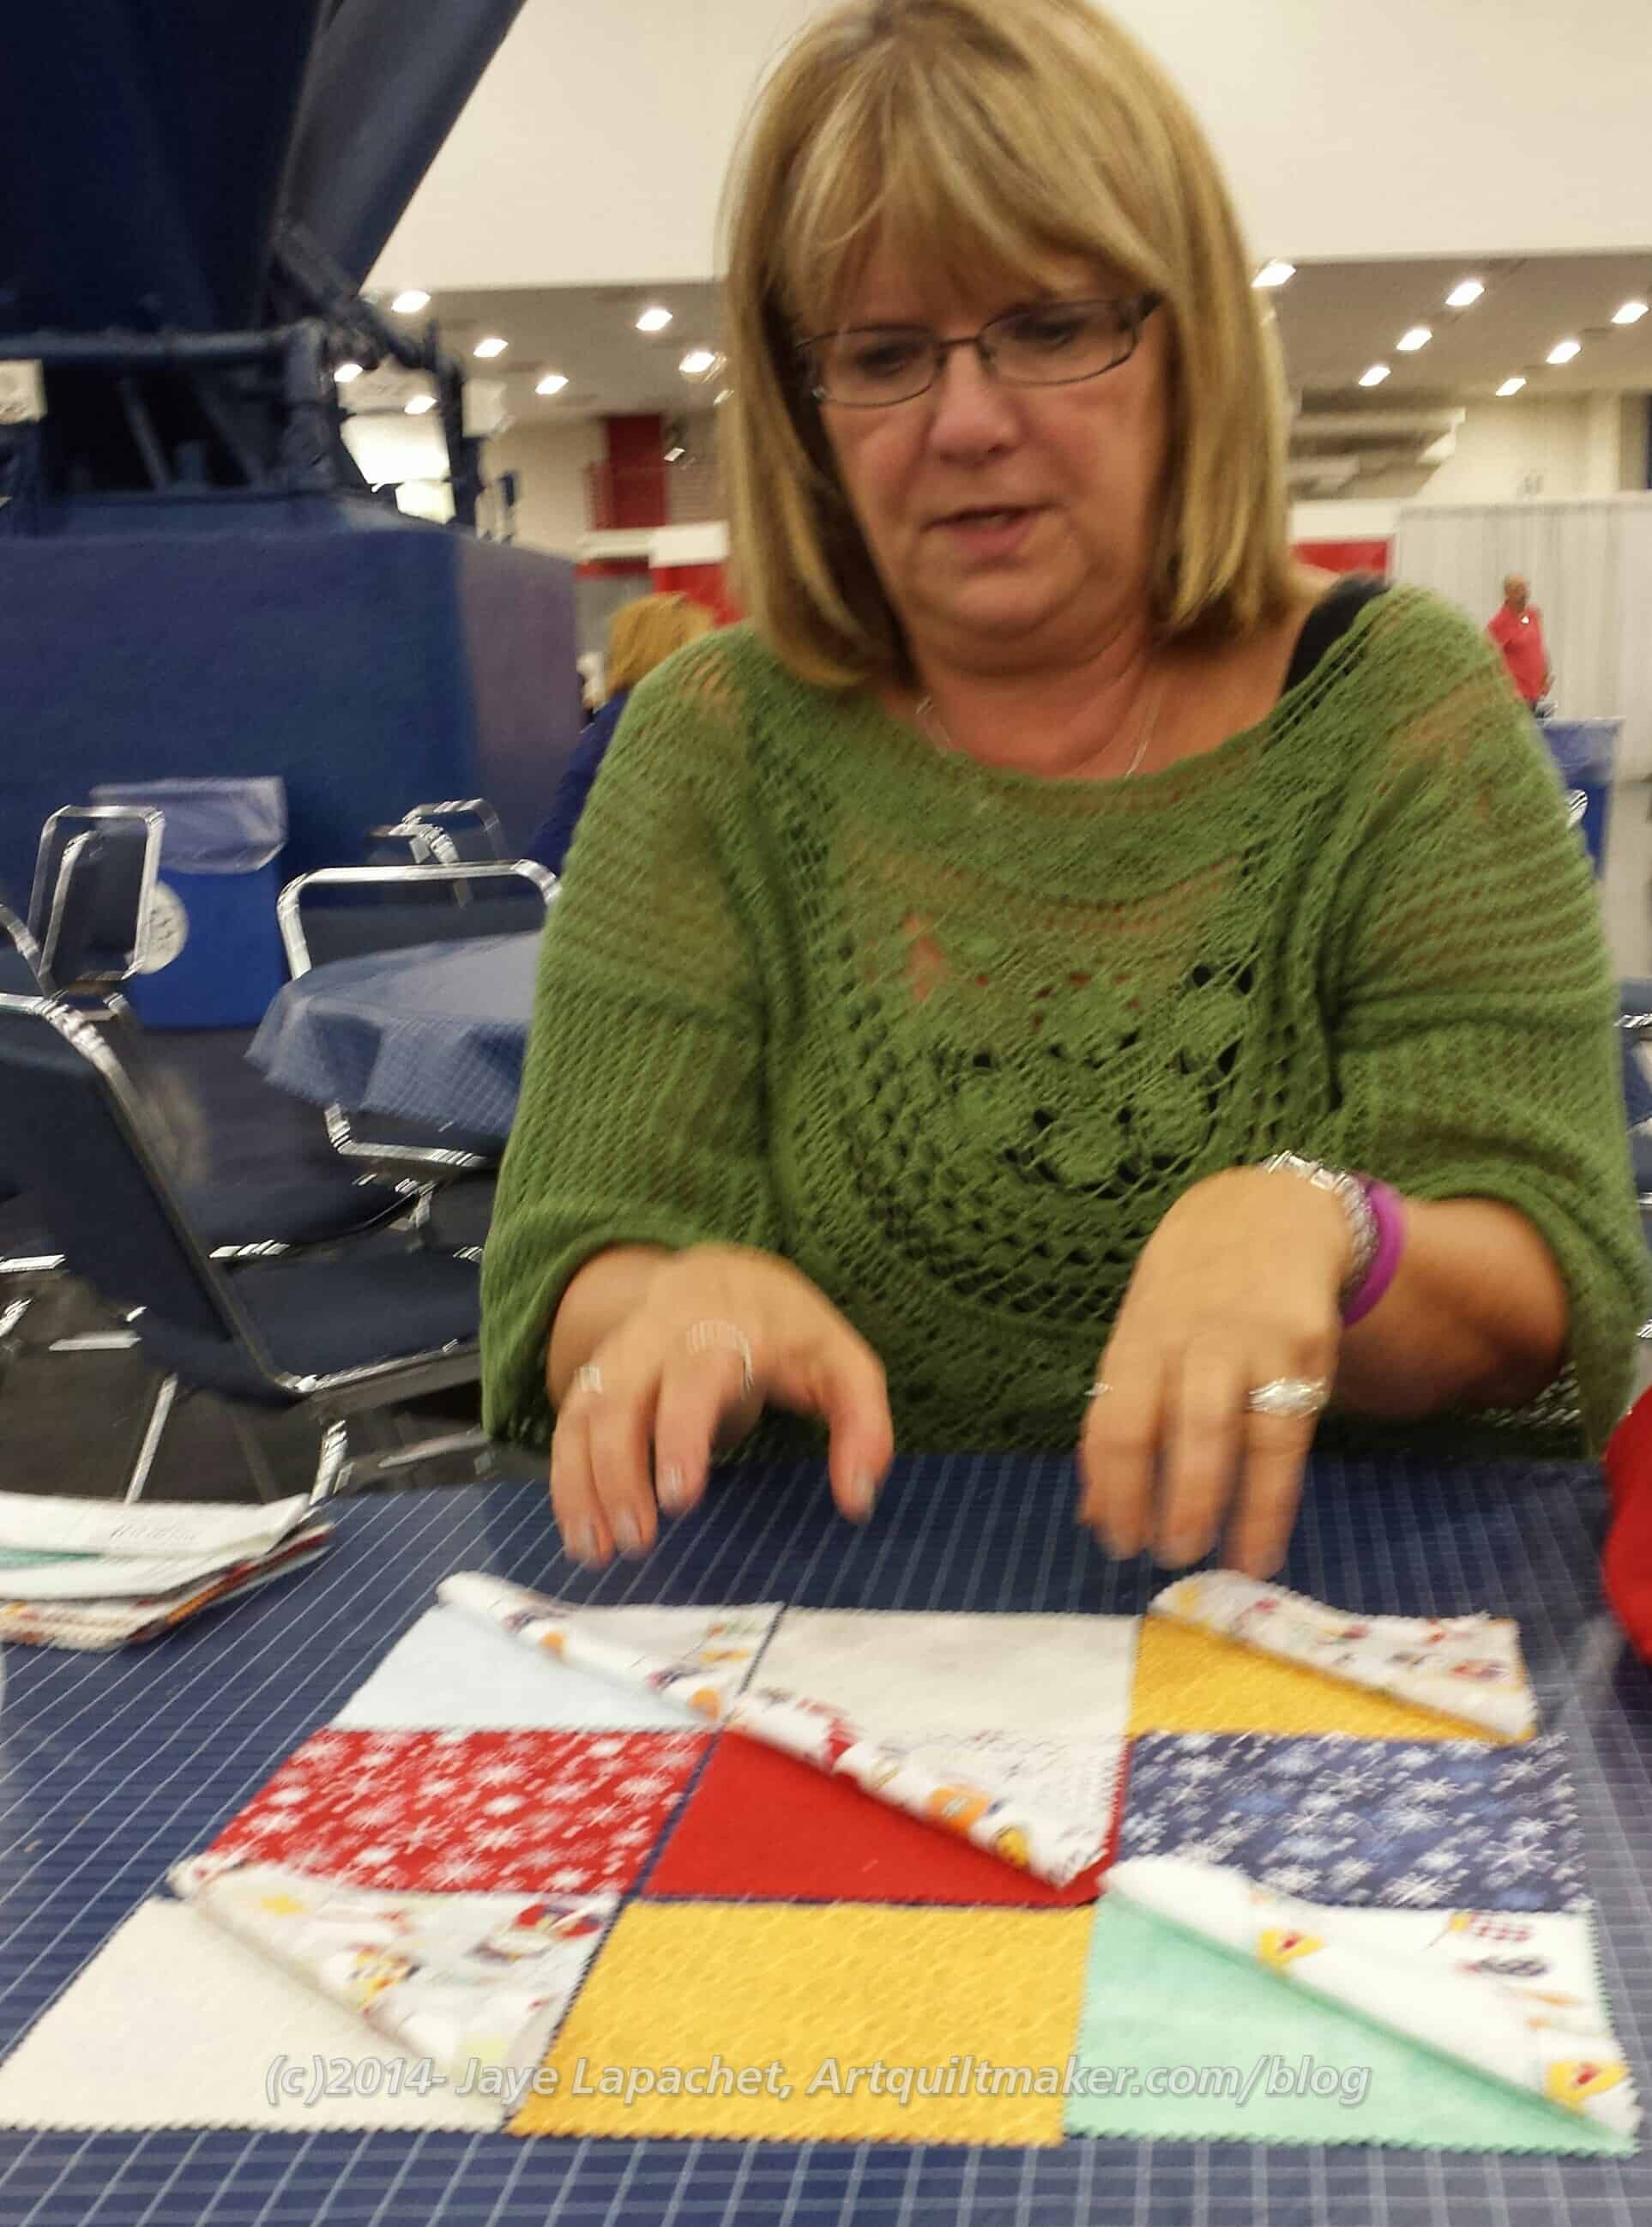
The first thing we did after Julie and I met Marie Bostwick for breakfast 😉 , was look at quilts. Mom and Miss Vickie met us near the beginning of the quilts and we got on with it. We had barely started looking at the quilts when I had the best quilt experience EVER. We were signing blocks and chatting with the ladies at the QOV booth when a man walked up and asked if they were the ladies who made quilts for wounded soldiers. After they said yes, he said he woke up in the hospital in Germany with a quilt wrapped around him after he was injured in Iraq. It was clear this act of kindness meant a lot to him. OMG! I almost cried. He started to leave when they called him back and kind of swarmed him. They asked him to sign a block and just generally treated him like a hero. It was so great to see him as the walking epitome of some of the charity work in which I engage as well as chatting with the ladies. Very moving.
Miss Vickie
As I said, Miss Vickie joined us. It was fun to see the quilts through her eyes. She has clear ideas about what she likes and what she doesn’t like. She is not a quiltmaker, but will be soon. 😉 She bought some fabric and some charm squares and started playing with them while we had an afternoon break with candy bars and chips. We are staying with her north of Houston in the best B&B ever.
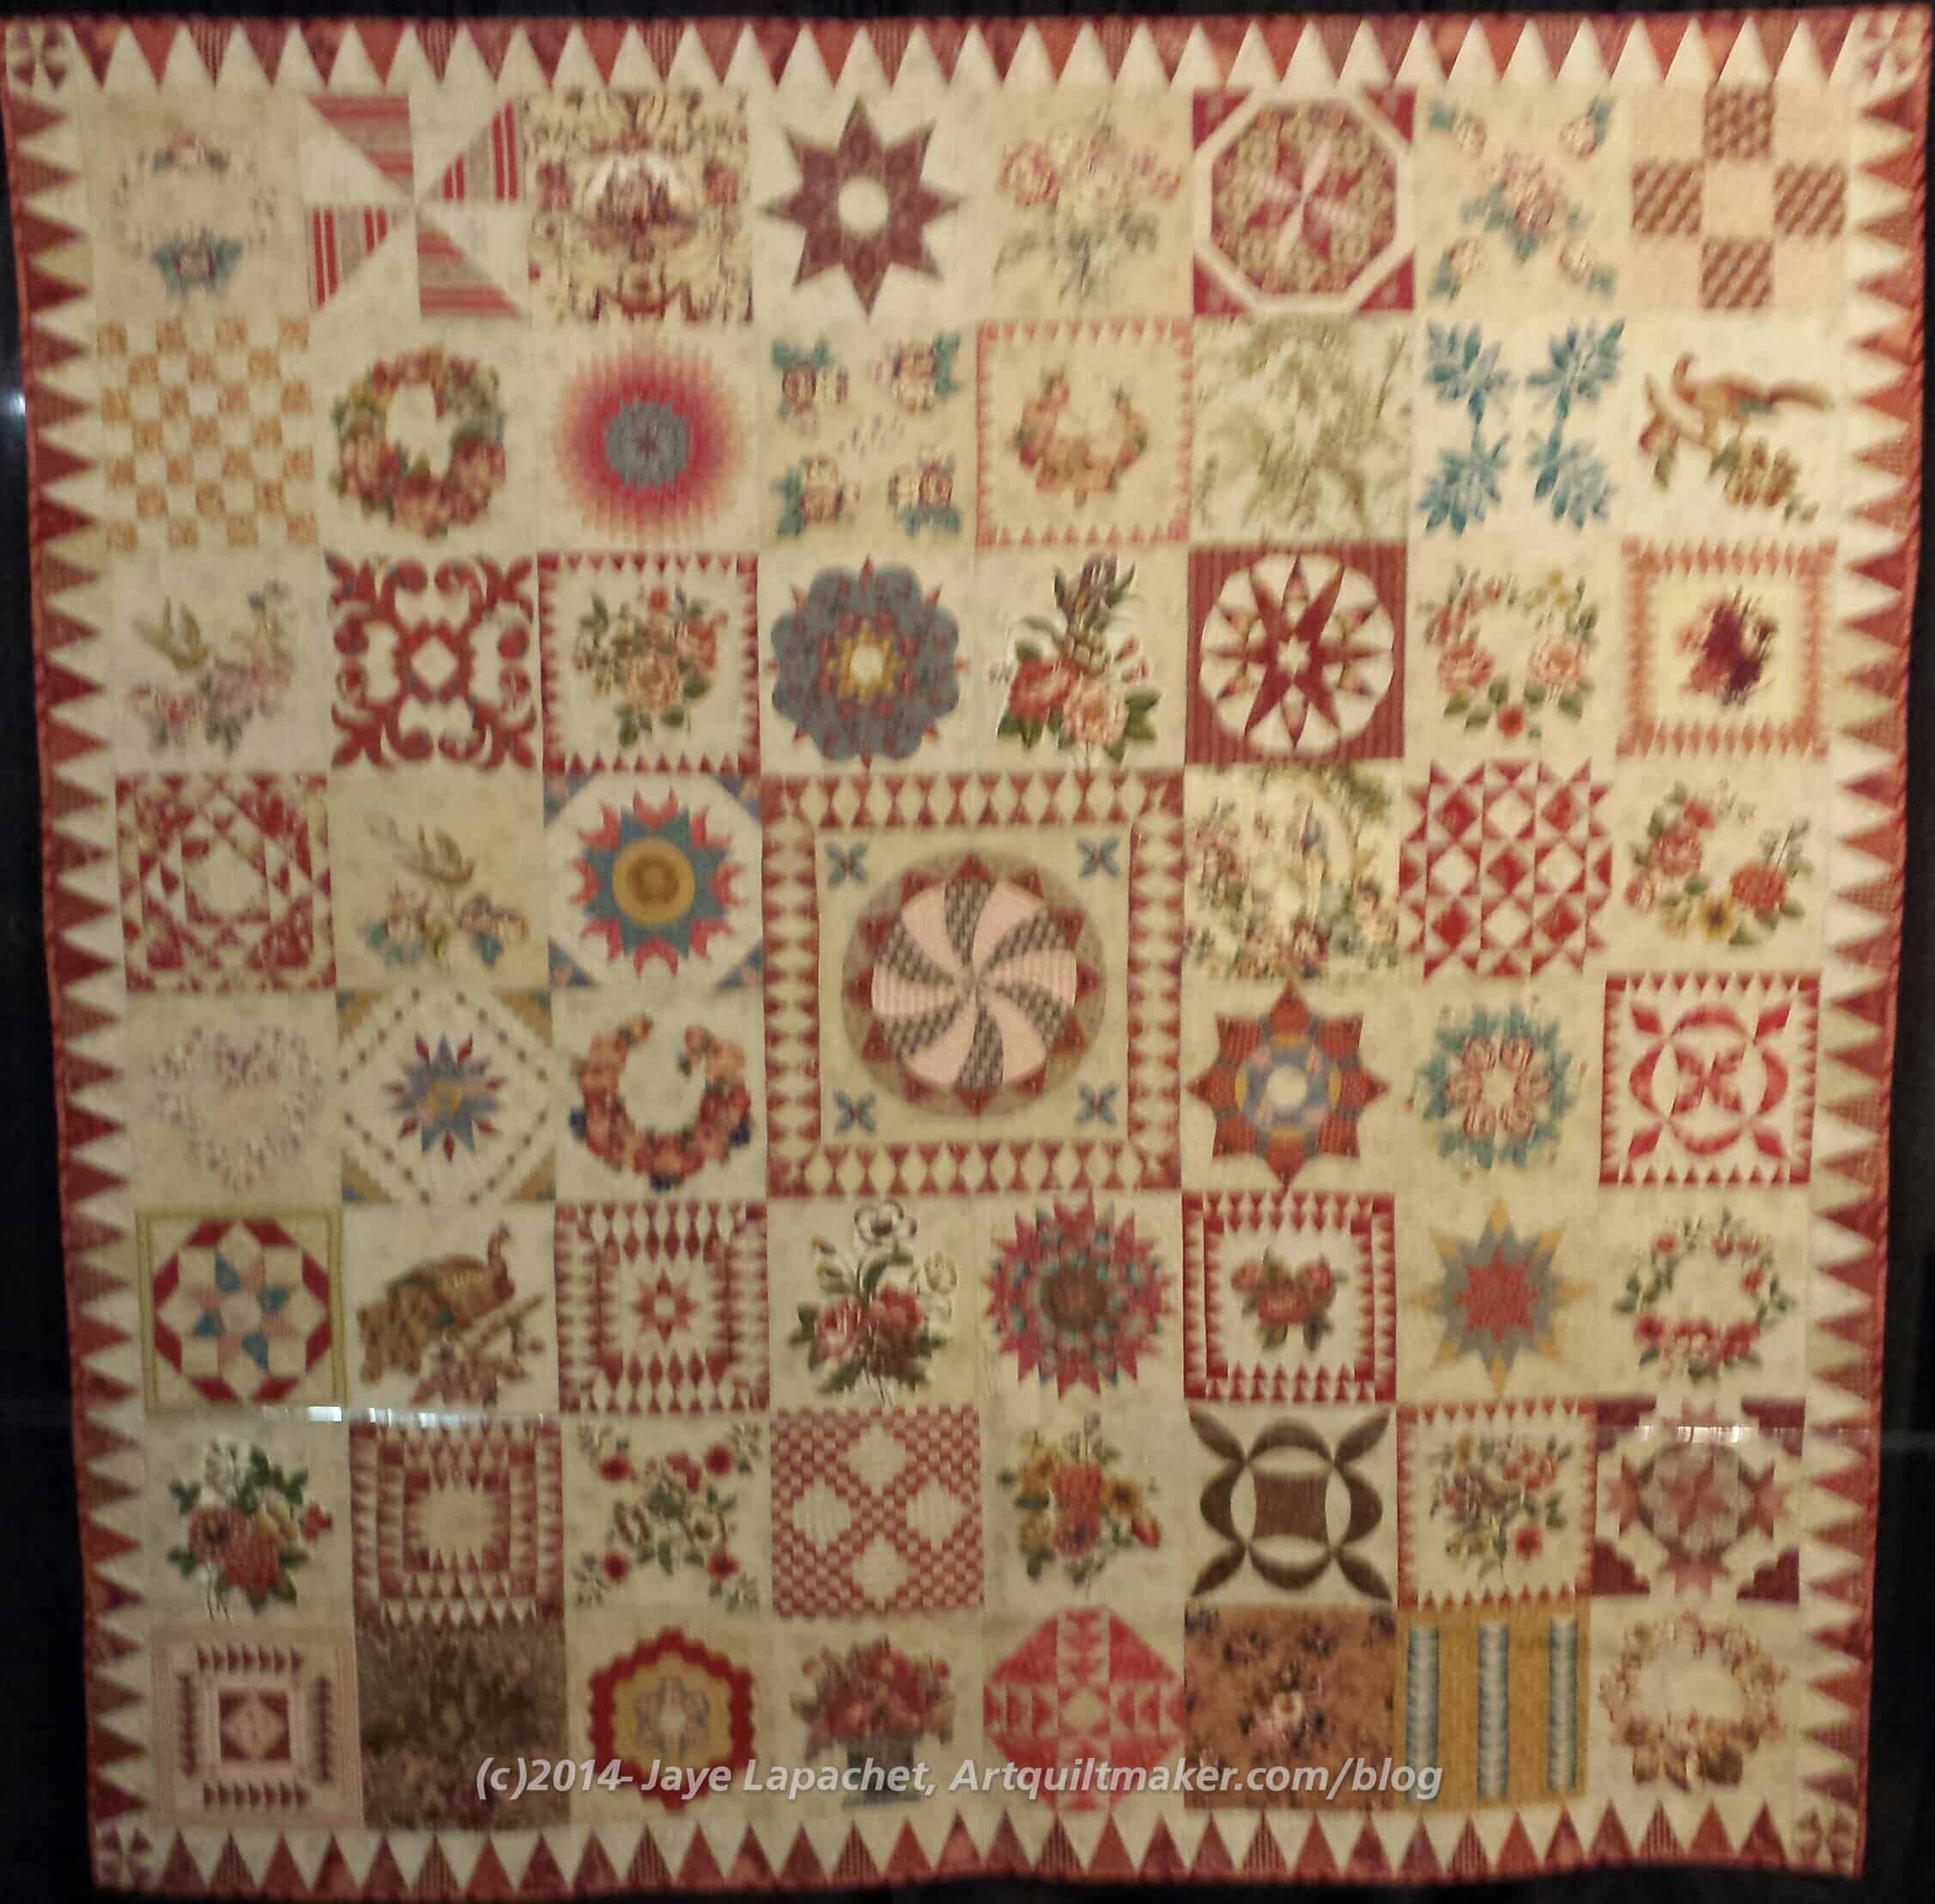
This show was similar to Long Beach in the set up, though there were quilts that were entered to be judged and awarded prizes. This was not the case at the Long Beach show. There were a lot of special exhibits: 500 Traditional Quilts, a collection of quilts from a Dutch Cancer survivor, a Bonnie Smith exhibit, Beatles exhibit, a Modern Quilt exhibit and some others I am sure I am forgetting. My favorite exhibit was the Farm to Fabric exhibit, which was an exhibit of quilts made from the American Made Brands solid fabrics. I like the idea of the company, which is that the cotton is grown in the US and the fabric is made in the US. That alone would encourage me to buy some of the fabrics, but when I saw the quilts, I couldn’t believe the colors! They were clear and gorgeous. There was something about the colors. They were different, and kind of glowed. I tried to find some in the vendor hall, but didn’t succeed. I was really excited when I saw the quilts and wanted the fabrics RIGHT NOW. ;-)They have a “find a retailer near you” feature and I see that there are several shops near home that sell them, so I will give myself a treat and go and look.
Inspired by Libby exhibit
The other exhibit that was really moving was the Inspired by Libby exhibit. This was an exhibit of quilts that are being auctioned off (website above) to add to Libby Lehman’s medical fund. They were done by famous, or well known, quilt artists. I just loved Libby Lehman’s class. I am so glad I was able to take one from her and feel really sad that she can no longer sew. I hope it is temporary and she will be able to get back to it.
The prize winners were almost all applique’ quilts. They were amazing applique’ quilts, but I really wonder if you can win an IQF prize with a pieced quilt? I was kind of sad looking at them, because I will never make a quilt like any of the prize winners. I am not sad about that; I just don’t want to spend the rest of my quiltmaking career making one quilt that my heirs can enter after I am dead. I have a lot of fabric to use.
Morrell’s Quilt by Di Ford
In terms of random themes I noticed myself looking at: lines (like grass), circles and turquoise. If you are surprised at all by the turquoise, you haven’t been reading long enough. 😉 Circles have been on my mind for awhile. Part of that is the The Circle Game by Jen Kingwell quilts that have been popping up all over the web. Also, though, I have been thinking I need a challenge. <Nota bene: I might be over that, though, with the &^%$# Russian Rubix border.>
We took some time to talk to the NASA people who were there. They were talking about the program they have with local high schools to get their equipment sewn. NASA donates sewing machines, like Jukis, to high schools and trains teachers, then the teachers train the kids to make things like sleeping bags that astronauts use in space. Not only are the kids learning a skill, but they get to know that their sleeping bag is keeping an astronaut alive in space. I thought it was great.
We checked out the vendors on all the days. We went back and forth. When the visual stimulation got to be too much, we went into the vendor hall and looked around.
We also met a Twilter, Glenna. Of course, she didn’t look anything like what I imagined, but she spotted me and was very nice. We only chatted for a few minutes, but it is nice to put a name with a face.
I saw some cool keyboard fabric at IQF and thought that would be an interesting prompt. Not sure how I will render it, but something along the lines of #197. We’ll see.
Keyboards are actual instruments, but other types of instruments also have keyboards
computer keyboard
Swype iOS keyboard
QWERTY
wireless keyboard
split keyboard
virtual keyboard
Keyboard Magazine
WASD Keyboards offers custom mechanical keyboards, custom Cherry MX keycaps, and other mechanical keyboard accessories.
keyboarding skills
iKey’s SLK-97-TP-BLK keyboard provides users with all the functionality of a full-size keyboard and mouse in a slim, compact package
Corsair Raptor and Vengeance lines of gaming keyboards offers a variety of models to match your play style, the types of games you like to play
Post the direct URL (link) where your drawing, doodle, artwork is posted (e.g. your blog, Flickr) in the comments area of this post. I would really like to keep all the artwork together and provide a way for others to see your work and/or your blog.
We are also talking about this on Twitter. Use the hashtag #CPP
The Creative Prompt Project, also, has a Flickr group, which you can join to post your responses. I created this spot so those of you without blogs and websites would have a place to post your responses.
Yes, I went to Houston. We arrived on Wednesday and left on Monday.
The bad part was that I didn’t get enough steps and ate too much.
The good was so much. I can’t even begin to tell you how many fantastically gorgeous and amazing quilts were there. Even if you go once, you must go to this show. YOU MUST! Not only were there a gazillion fabulous quilts, but there were so many vendors I couldn’t take all of them in. The whole thing was amazing.
I really liked the vendors, but ultimately there was a lot of fabric, a lot of thread and a lot of people.
Janome 8900
I took the time to look at the Janome MC 8900 in person. It is the machine that seems to be the right price for the right amount of features. None of the shops I have visited near my house have it, so the giant Janome booth was the place. I saw that it is a real machine and not as scary as it looks in pictures.
The guy was really nice and did the demo on a regular, if not slightly thinner, piece of quilter’s cotton. All the demos I have seen are done on felt, which, of course, makes the stitches look fantastic. The machine has a lot of decorative stitches and a knee lift. I do have to find a place where I can try the machine out myself.
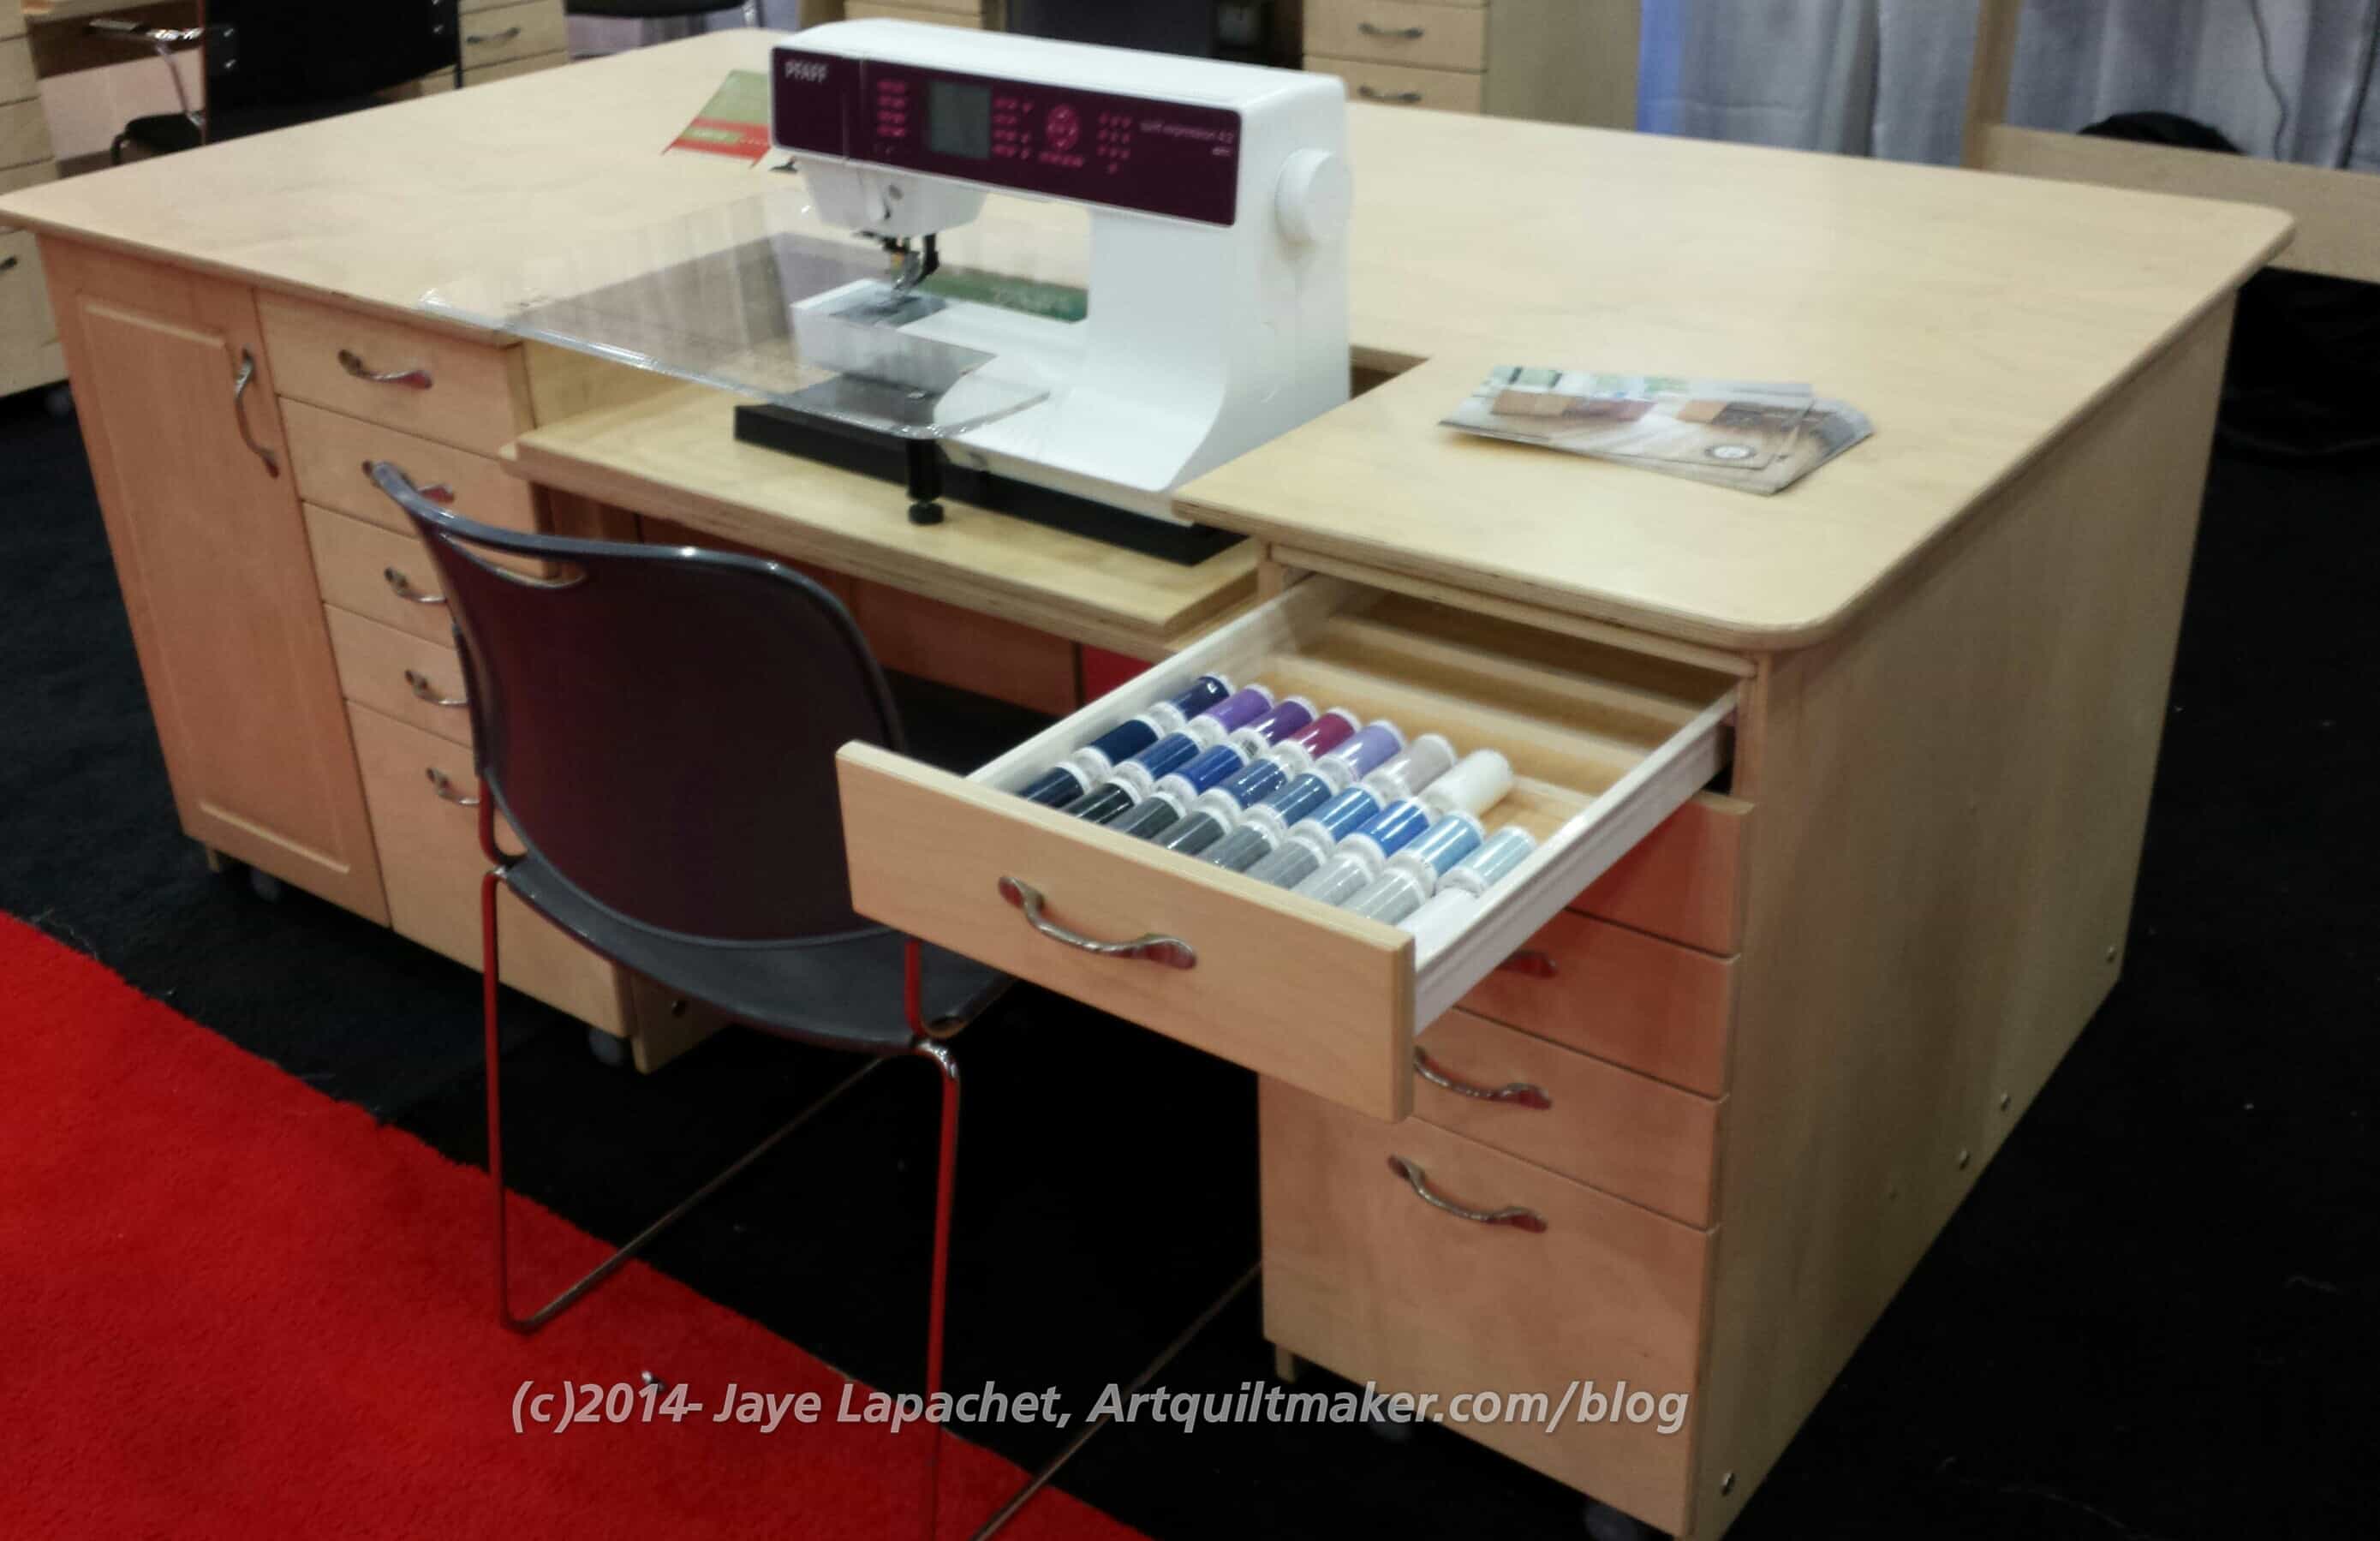
Sewing Cabinet
Another thing I did was take the opportunity to look at the array of sewing cabinets.
My absolute favorite cabinet of the models I saw was this one from a company in Ontario called EddyCrest. It is solid wood (birch) and would be shipped to me for only $100. I also really liked the guy. He was not a smarmy sales guy and I got the impression that he actually works on the cabinets. He was really humble and nice. I don’t know the cost of this particular model (top left) because this is too large for my room and I probably wouldn’t buy it. I love it, though, especially the thread drawer.
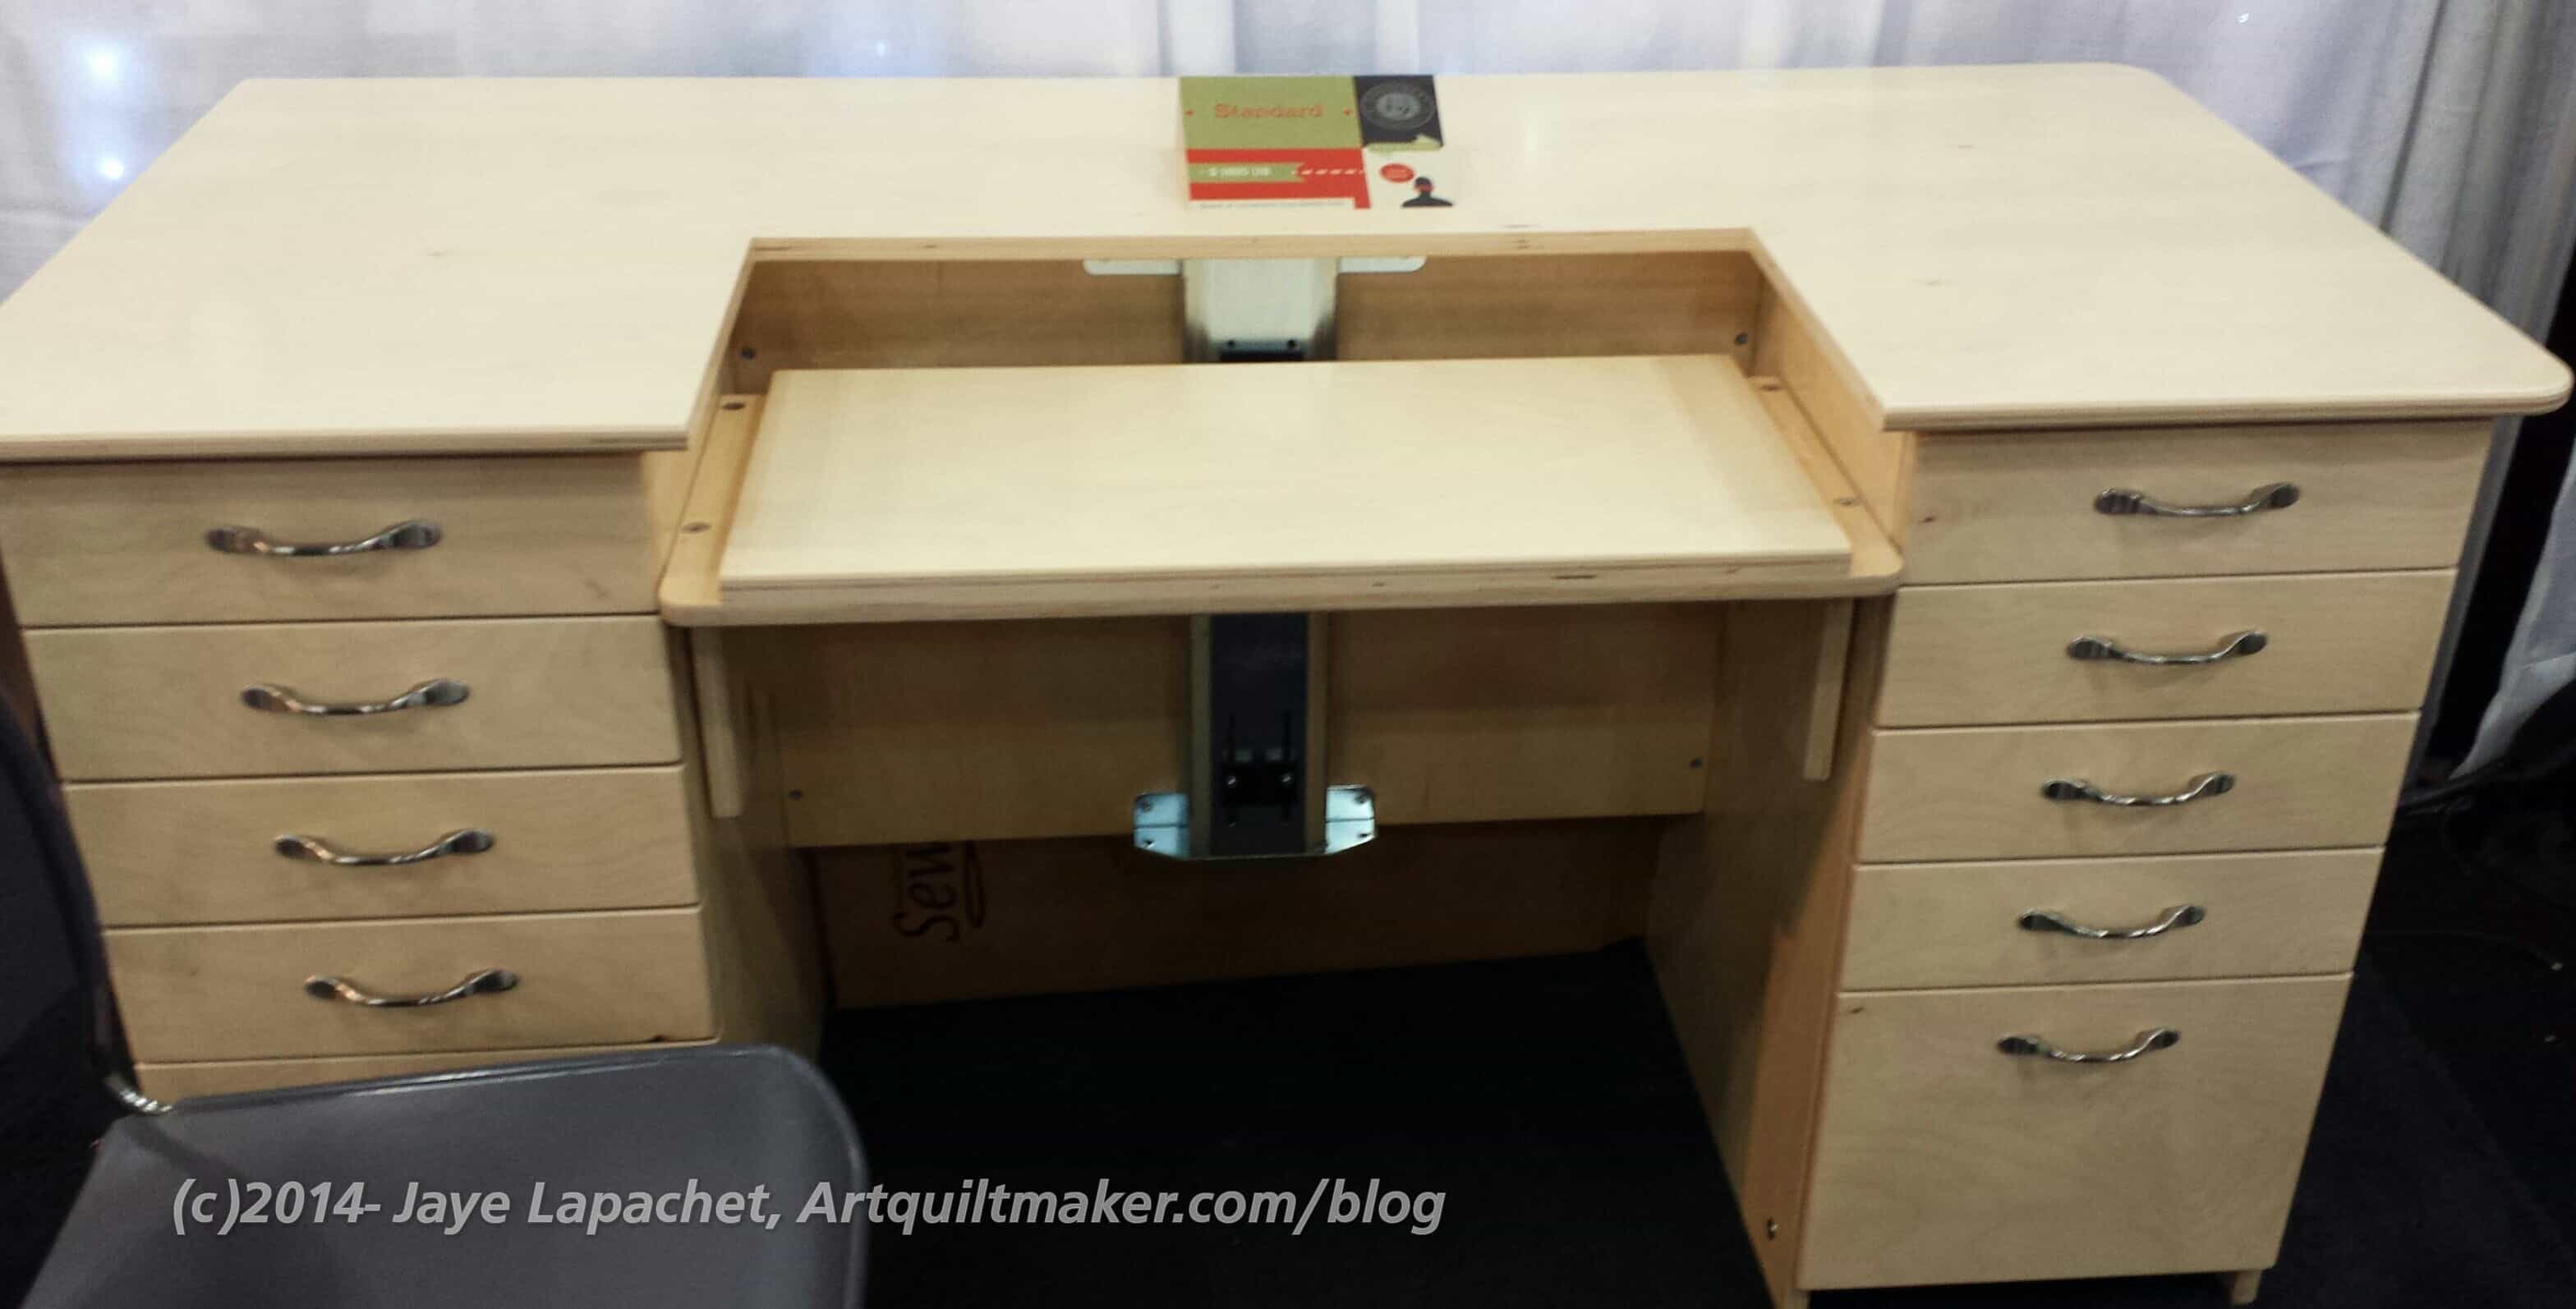
Smaller Sewing Cabinet
If I buy a new cabinet, and, if I buy it from this company, I would probably buy the smaller version. This is a little different configuration than my current cabinet, but a little better, because it has drawers on the right, which my current cabinet doesn’t have. It also has a wider space to the right and I keep a lot of stuff over there for easy access.
This size cabinet isn’t as large as the other one, but I am pretty sure the back is larger than mine. I’ll have to go to the website and look at the sizes.
I also asked about the flip up back, which is fabulous for quilting. He said that he could add one on this size cabinet, which is great. Not that I quilt that much, but I wouldn’t want to give up that feature.
As I said, there were tons of other vendors, mostly fabric, but other stuff as well. I bought fabric for the music quilt, which will have a couple of other prints, such as a keyboard and some fabric that says BLAH BLAH BLAH as a small ode to being a high schooler and a teenager.
We brought mom’s cousin on the second day and, I think (fingers crossed), turned her into a quiltmaker. She has a long way to go, but bought fabric, a rotary cutter and a Creative Grids ruler. I am kind of excited, but we will see.
Hallowe’en 2014
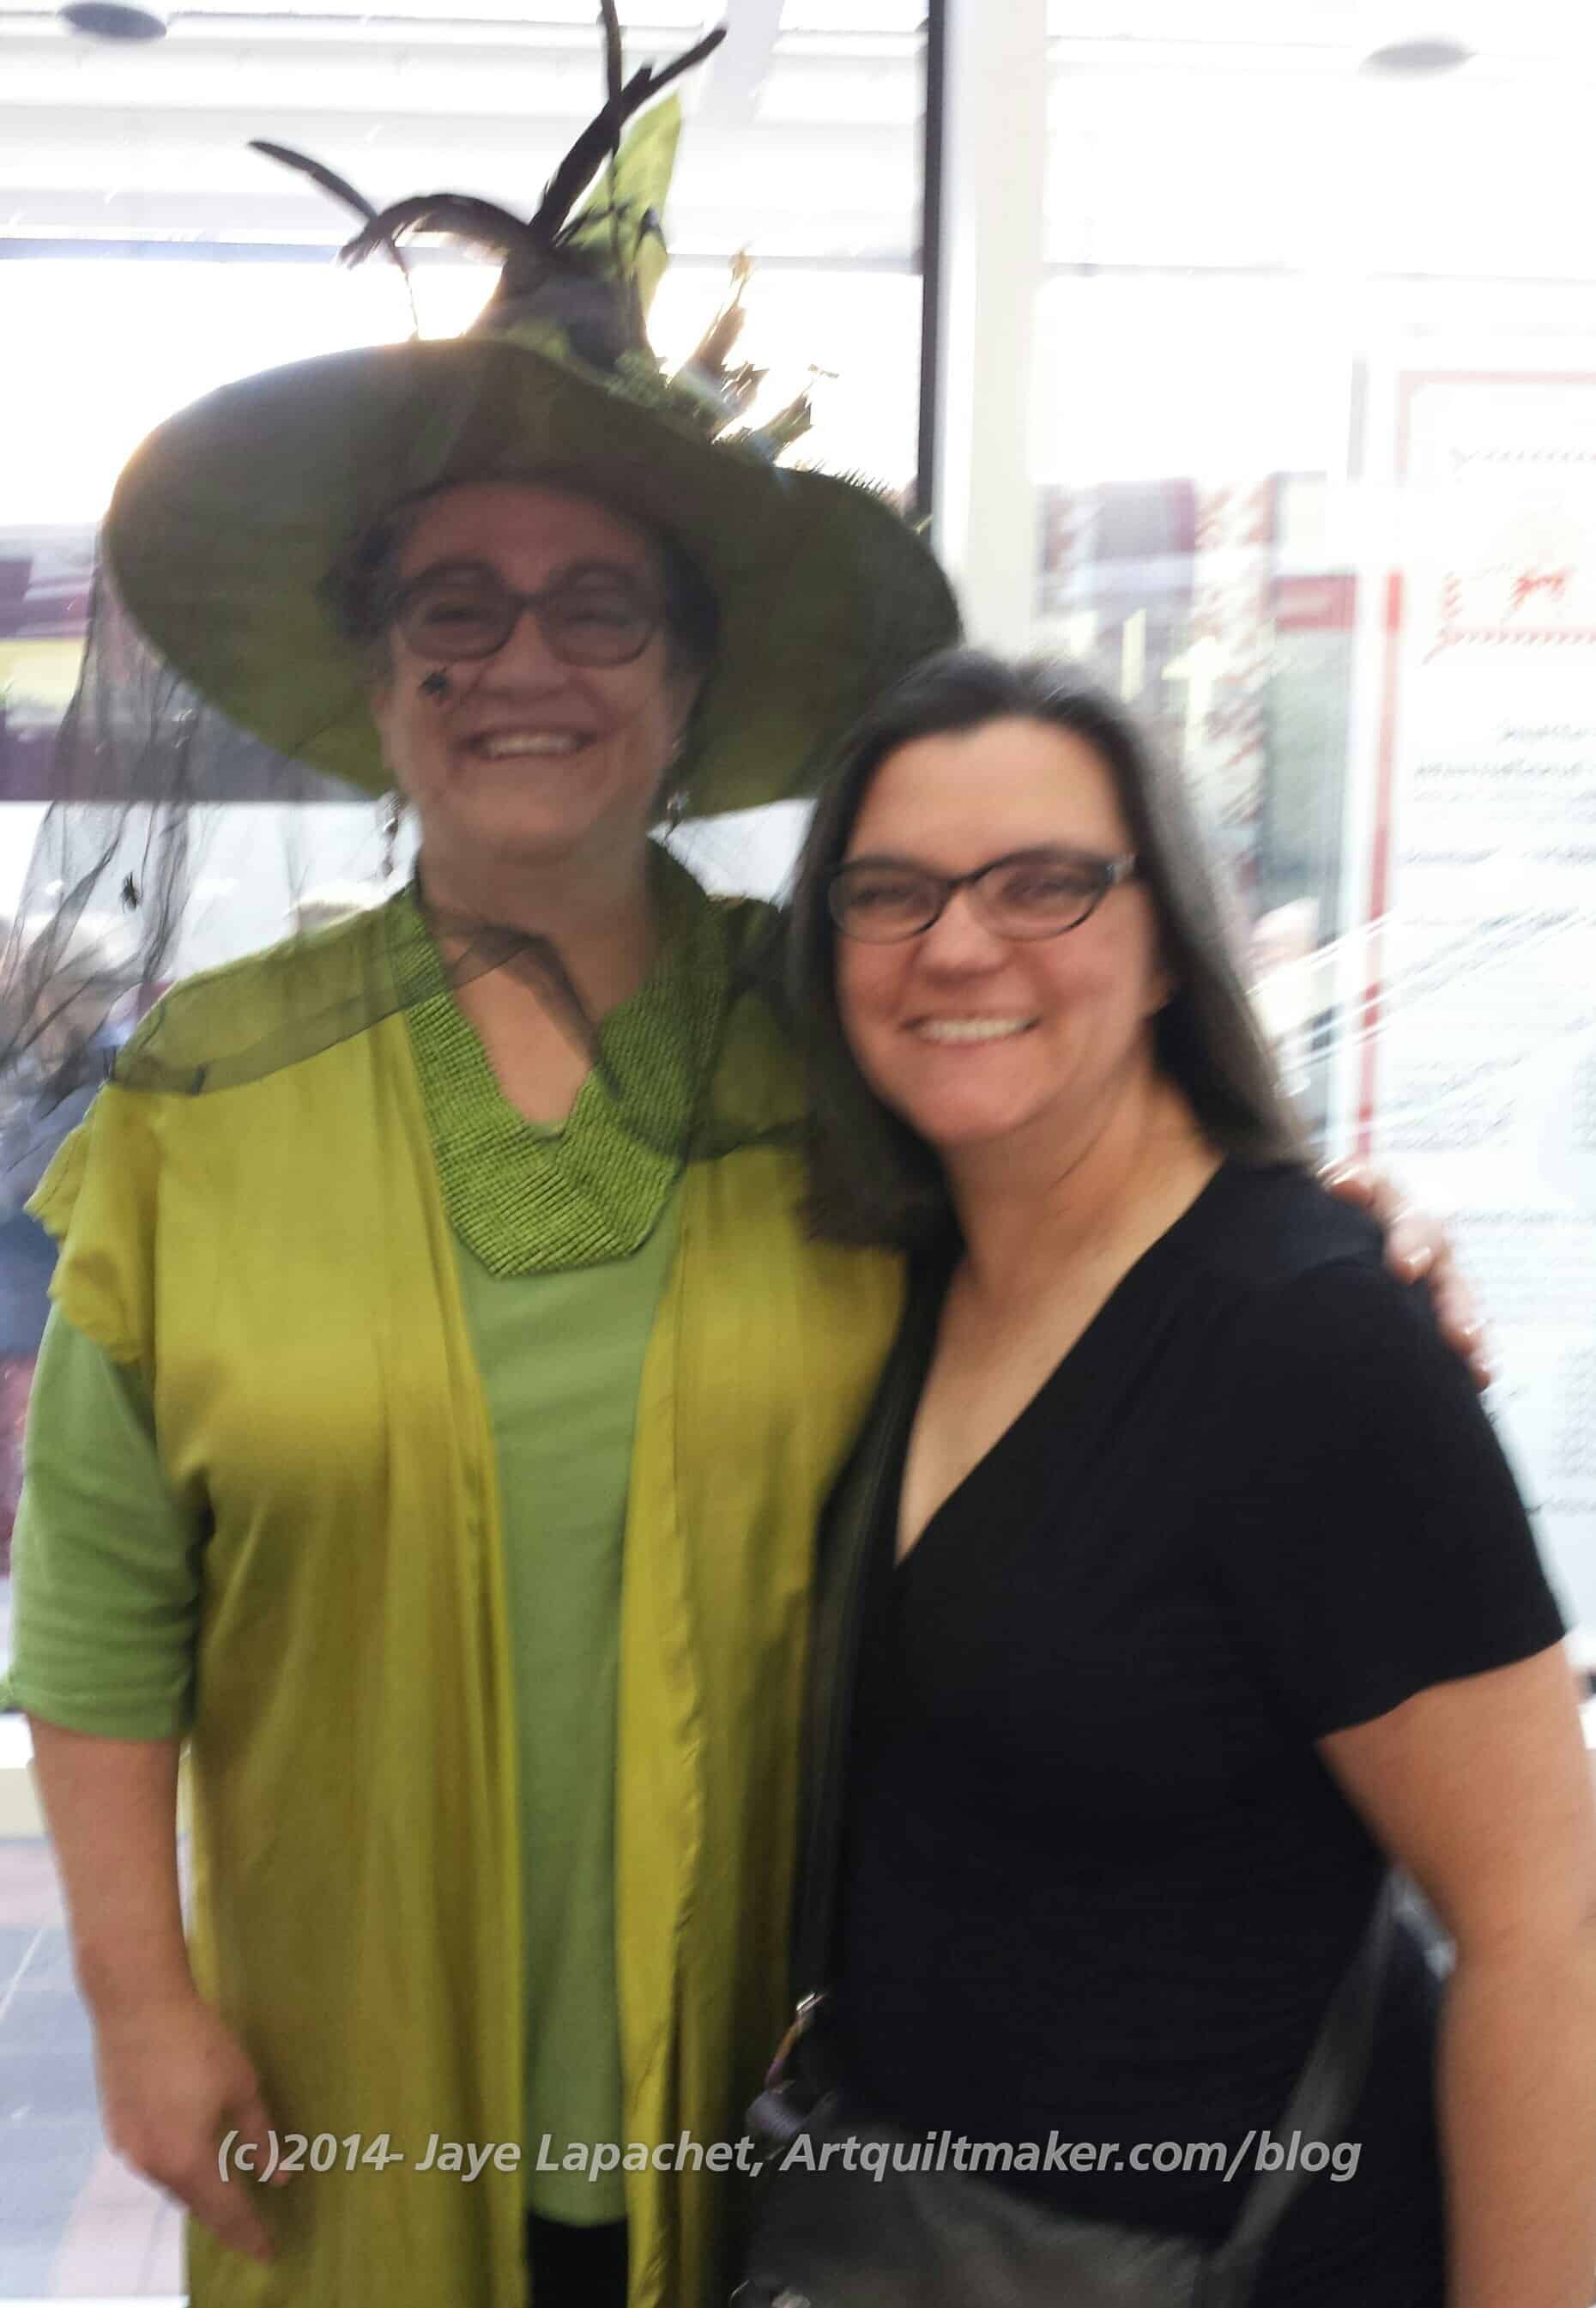
The most fun thing ever was Hallowe’en. I wore a black skirt, leggings and a black shirt. I wanted a black tutu, but settled for the skirt. I wear glasses so it is hard to wear a mask on the front of your head. I bought a mask and mom made eyes to put in the eye holes and I wore it clipped to the back of my head. Friend Julie wore her green witch outfit sans green makeup. People saw us, especially at the beginning of the day, and wanted pictures with her or both of us. It was really fun.
There were sooooo many quilts that we barely made a dent.
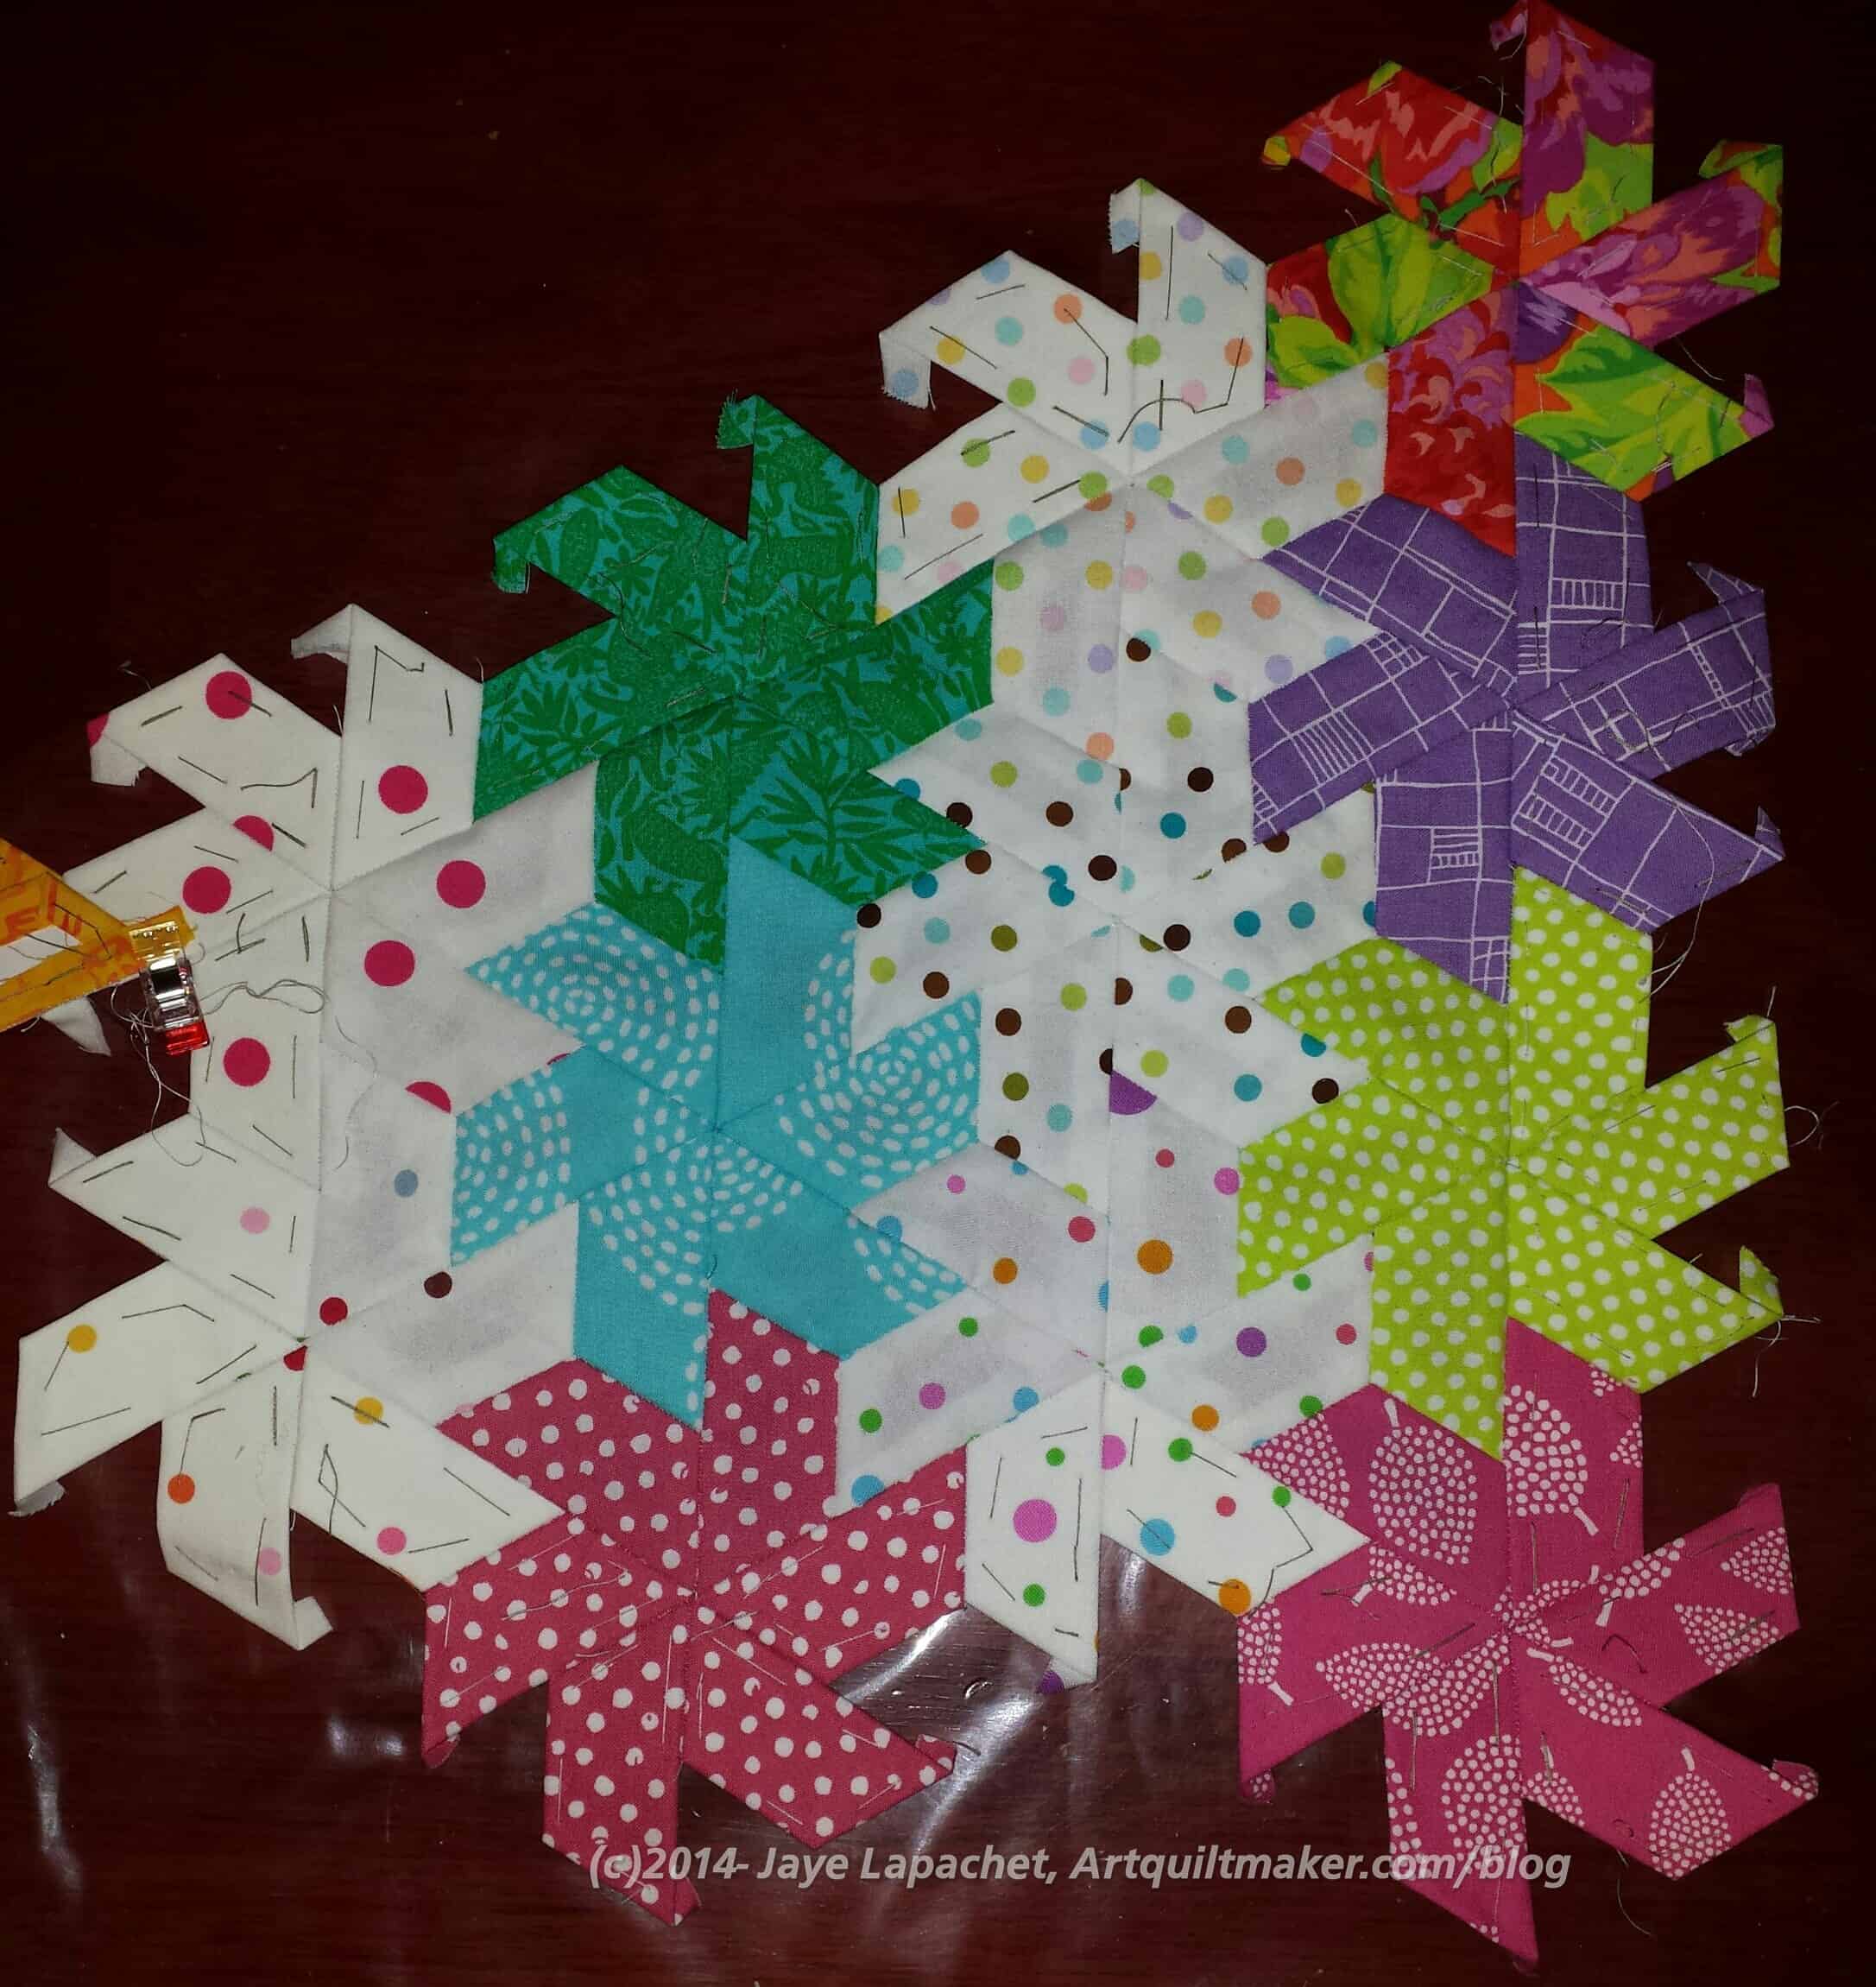
My English Paper Piecing half hexie stars are growing into a giant cluster.
I forgot to rotate the photo. What I think of as the bottom is the line of stars with the dark green and Philip Jacobs flower print on the diagonal on the left.
I have some diamonds that will make the border straight. I don’t know what color I will make them, but I would like to decide and make a few to get the feel of how the piece will look. There will be no black stars, so, perhaps, black? I hoping for a look like those 1930s quilts which just have a spark of black. I’ll have to try it out and see how it will look.
I recently finished adding a whole big section, or what I thought was a whole big section and it really turned out to be about four blocks. I thought it was a larger section when I was doing it, because of the twisting of the stars that needs to take place to get them together. I think I will add one star at a time from now on.
My biggest problem is the background stars. I need to make more and keep forgetting to cut the bright white dot fabrics until I am sitting and doing it.
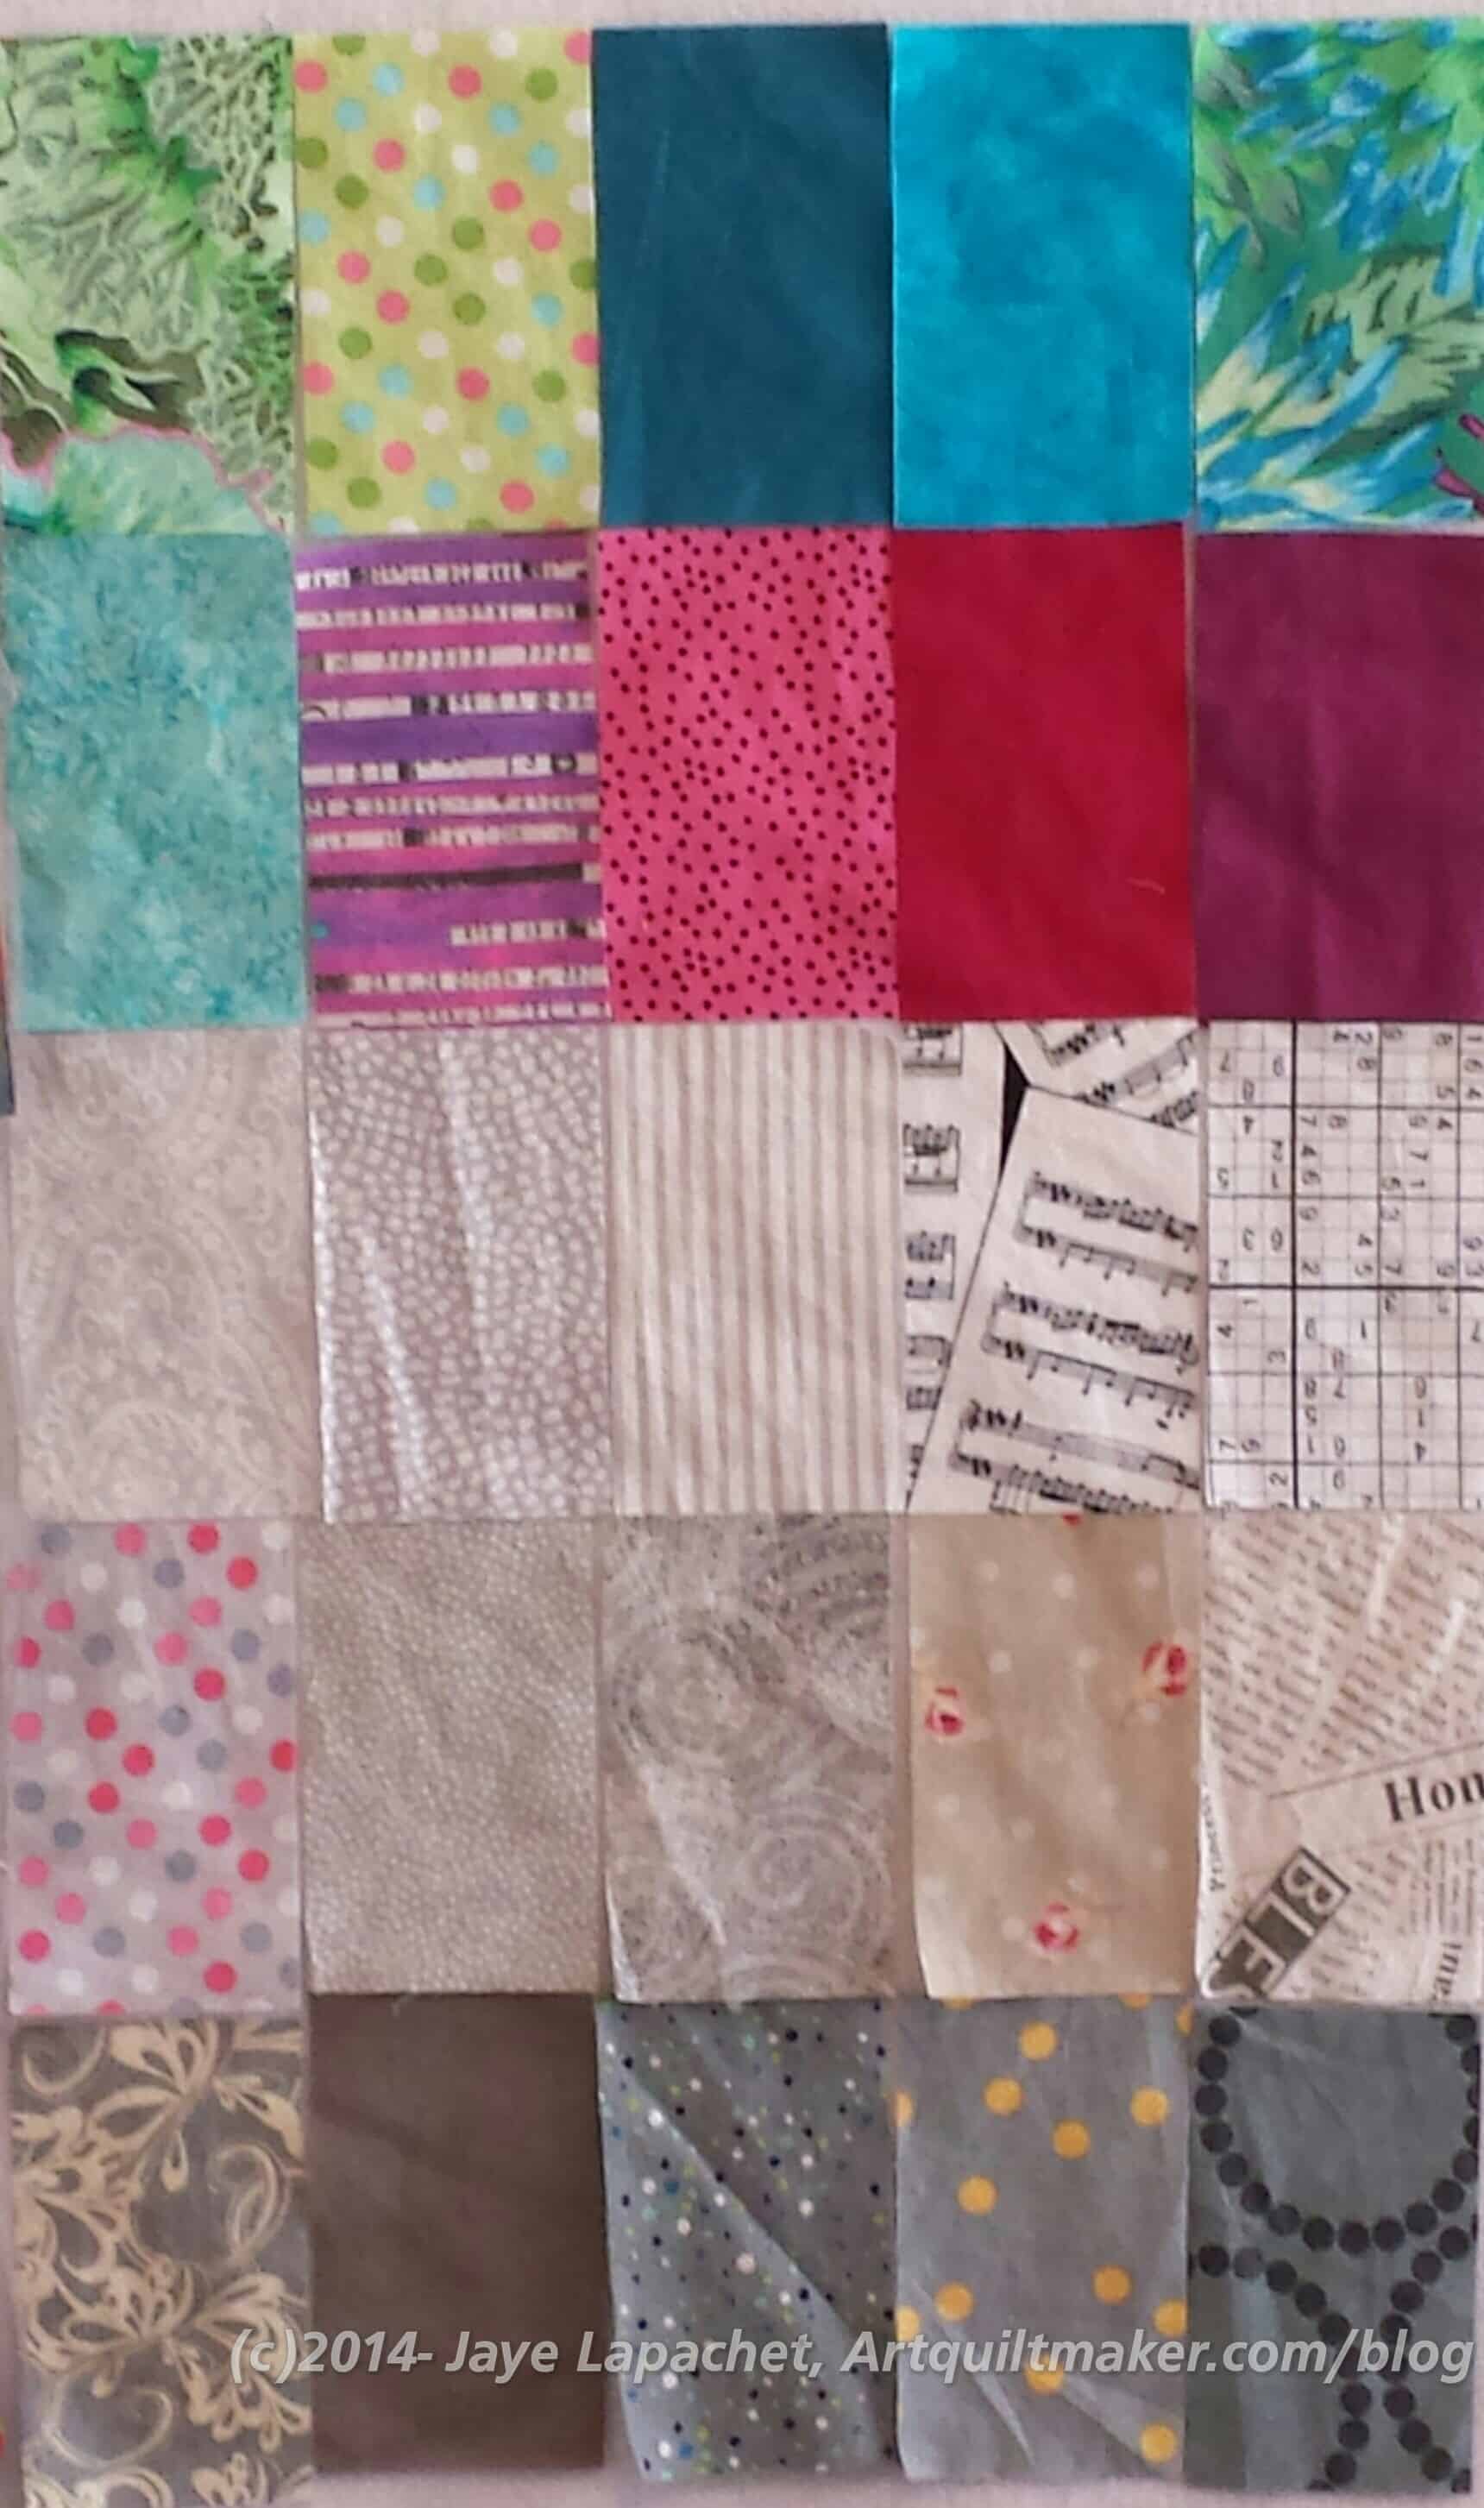
I went back in time to look at the tags for my last FOTY post and was shocked to see that it was August that I last posted. I really couldn’t believe it, but I looked at the various Design Wall Monday posts I have posted recently and those same FOTY patches were there with very few changes. I actually took a picture of this group (above) right before the picture of the design wall for yesterday’s post, so next time I do a DWM post, you will, hopefully, see a new batch of FOTY patches.
The reason it took me so long, aside from being really busy during the week is that the last load of fabric I washed was grey and light neutrals, which I found really depressing to press, so I kind of avoided doing it. TFQ saw the pile and got down to business, so now I have newly pressed fabrics from which to cut patches.
I also have a lot of great fabrics waiting to be washed and I should make time so the patches can go into FOTY 2014. The new year isn’t that far away and pretty soon, I’ll be sorting thesepatches into color groups and picking the shape for FOTY 2015. WOW! Time flies.
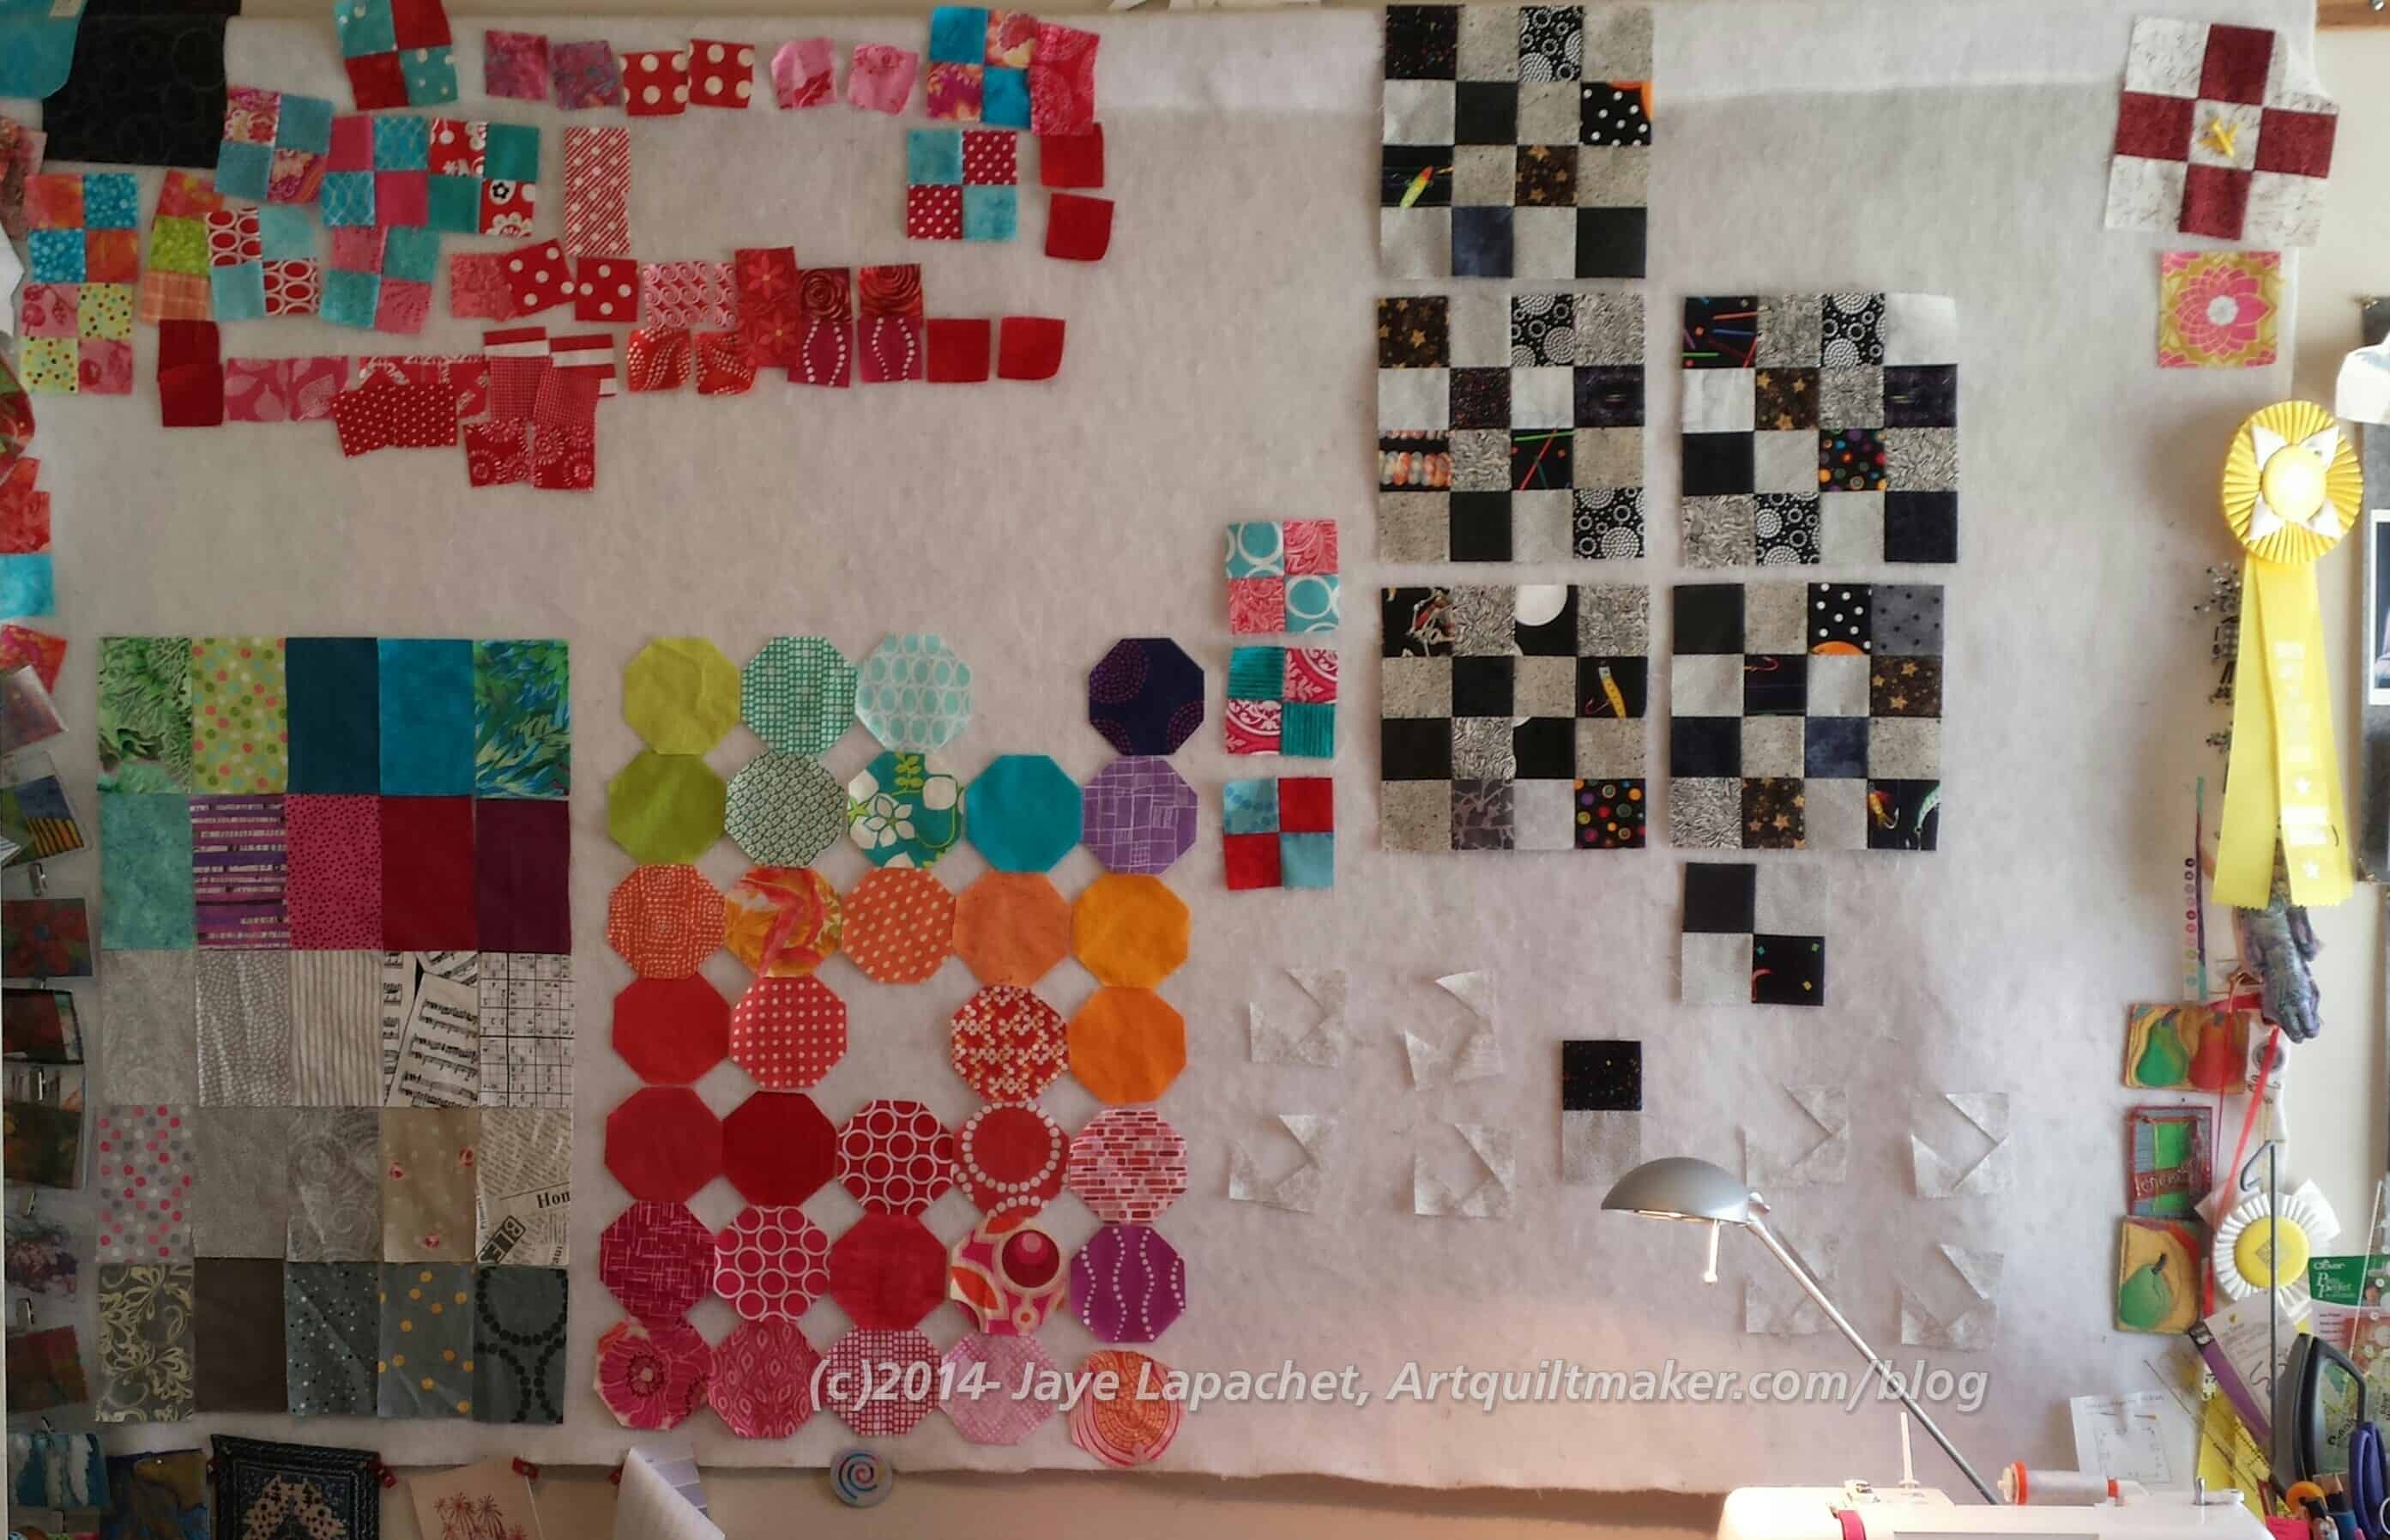
My design wall is shockingly similar to the last time.
Fewer octagons.
Similar black and grey donation blocks.
If you zoom in, you can see the beginnings of the Modified Garden of Eden blocks I started after we went to PIQF. You have to zoom in, because all you can see are some grey triangles that are similar in color to my design wall.
I finished filling in the space for the FOTY 2014 blocks, which you will hear more about later this week.
Red and turquoise four patches are pretty much the same. I am in desperate need of some turquoise squares, which is kind of shocking since there is no shortage of turquoise in this place.
I really should do a What’s on the Design Floor, because all of my half baked projects are on the floor right now. I really have to get those octagons and the Russian Rubix out of my life.
Jacket magazine: Quarterly review of new writing, with poetry, creative prose, interviews, reviews, and informative feature articles.
Definition: “A jacket is a mid stomach length garment for the upper body. A jacket typically has sleeves, and fastens in the front or slightly on the side. A jacket is generally lighter, tighter-fitting, and less insulating than a coat, which is outerwear. Some jackets are fashionable, while others serve as protective clothing.” (Wikipedia)
letterman jacket
Columbus Blue Jackets
flight jacket
Life jacket
Definition 2: “In other contexts, the term typically refers to a tight-fitting covering, often for protective purposes, for example:
Post the direct URL (link) where your drawing, doodle, artwork is posted (e.g. your blog, Flickr) in the comments area of this post. I would really like to keep all the artwork together and provide a way for others to see your work and/or your blog.
We are also talking about this on Twitter. Use the hashtag #CPP
The Creative Prompt Project, also, has a Flickr group, which you can join to post your responses. I created this spot so those of you without blogs and websites would have a place to post your responses.
Field jacket, a jacket that is worn by soldiers on the battlefield or doing duties in cold weather. The field jacket came about during World War II with the US Army introducing the M-1941 and the M-1943 field jacket and issued the jacket to their troops. The most well-known and the most popular type of military field jacket that is on the market today is the M-1965 or M-65 field jacket which came into US military service in 1965.
Jean jacket or denim jacket, a jacket falling slightly below the waist, usually of denim, with buttoned band cuffs like a shirt and a waistband that can be adjusted by means of buttons. Also called Levi’s jacket (see Levi’s)
Kilt jacket, one of several styles of traditional Scottish jacket worn with the kilt, including the Argyll jacket, the Prince Charlie jacket, and a type of tweed jacket
Manteau, a loose cloak or mantle, often used to refer to the long overcoats worn by women in Iran
Mess jacket or eton jacket, similar to a tailcoat but cut off just below the waist. Worn as part of mess dress and formerly as the school uniform of boys under 5’4″ at Eton College until 1976 and at many other English schools, particularly choir schools[3]
Motorcycle jacket, a leather jacket, usually black, worn by motorcycle riders; originally to mid-thigh, now usually to a fitted waist
Sport coat (US) or Sports jacket (UK), a tailored jacket, similar in cut to a suit coat but more utilitarian, originally casual wear for hunting, riding, and other outdoor sports; specific types include a shooting jacket and hacking jacket
Do you remember the Corner Store quilt? I started this tutorial back in 2012 and decided that I would post it. I don’t know why I never finished it, but here it is, a blast from the past. Good topic for a Throwback Thursday, don’t you think?
I thought a tutorial might be in order for these Corner Store blocks, so you can start on your own. Why would you want to make these blocks after I felt so miserable about the top I made? Because you can choose a different background. You can make the pieces larger. You can do a better job. I have laid the groundwork. Go forth and do better!
Supplies:
Basic sewing kit
Rotary kit
Square rotary ruler in a size slightly larger than the cut size of your blocks (I used a 6″ x6″ Creative Grids ruler)
Sewing machine
Leftover triangles or squares cut in half on the diagonal. There is no particular size, though larger triangles will be easier to work with.
Background fabric to accommodate the size of your quilt.
First cut some 4×4 squares of your background fabric. Note, you do not have to use white (or Kona Snow as I selected). I would, in fact, suggest something not in the white or cream realm. I think a nice light yellow or creamy kind of grey would look better. Yes, if you choose something else you may need to eliminate triangles in that color range. It will be worth it, because the triangles will show up better against a background that contrasts well.
Nota bene: The triangles you will cut are right triangles. You can take some squares and cut them in half on the diagonal.
Also, you can choose a different sized background square. You can start with a large square to accommodate very large prints in the triangle portion. The directions are the same regardless of the sizes you use. Experiment and see what look appeals to you.
Next: find scraps or cut triangles from yardage. Cut different sized squares in half on the diagonal or use a triangle ruler to cut the shape. You do not have to be precise and there is more movement in the quilt if the triangles are different sizes. The only guideline on size is to make sure that a little bit of the background shows once you sew the triangles to the background.
Once you have your triangles and background squares, it is time to prepare to sew.
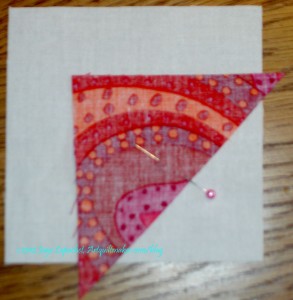
Pin Triangle to background
Next: Position a triangle on your background square, right side of the triangle down on the right side of your background fabric, and prepare to pin in place.
Before you pin, you will need to fold the triangle back on itself, approximating a quarter inch seam so you can ensure that your triangle covers the foundation/background fabric.
If the ears of the triangle are about a quarter inch over the edge of the foundation/background fabric, you should be in good shape.
If you have the Judy Martin Point Trimmer, you can trim off the ears of your triangle and position the now blunt edges of the triangle against the two sides of the foundation/background square.
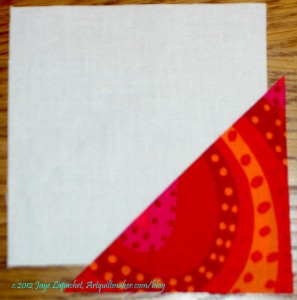
Sew and press
Sew along the hypotenuse (the long side) of the triangle using a quarter inch seam allowance, then press the triangle back along the seam line.
Once you are sure your triangle has covered the foundation/background fabric, you can fold back the triangle and trim the excess foundation/background fabric away.
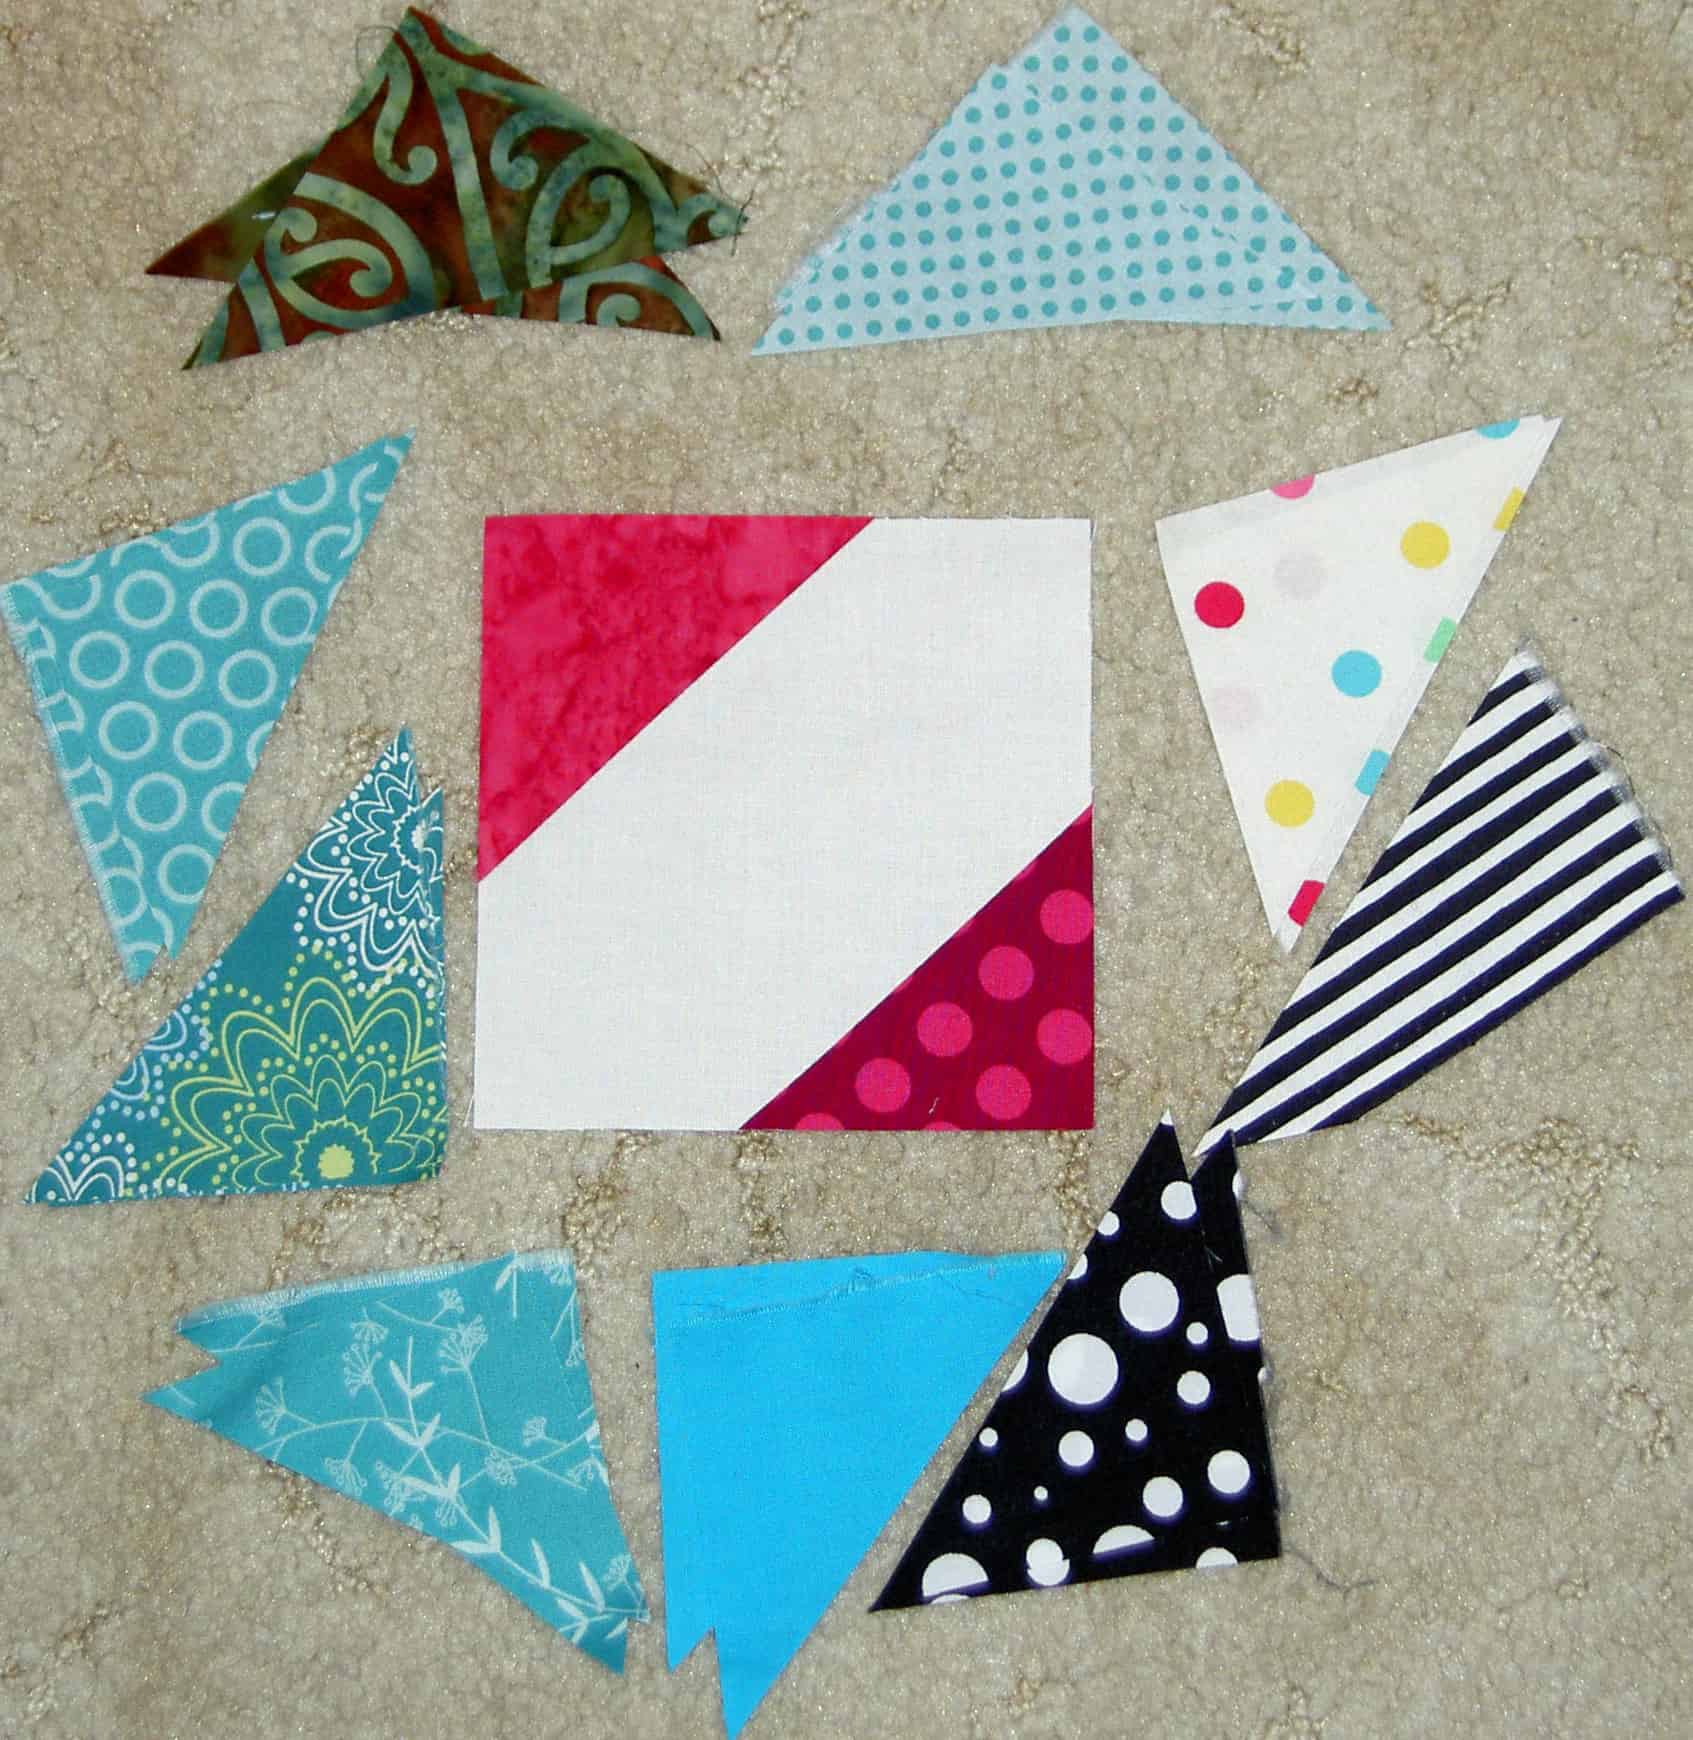
Corner Store block and patches
You will need to put two triangles on each square, so follow the directions above for the second triangle. Once both triangles are sewn to the foundation, use your square ruler.
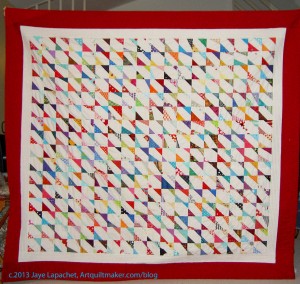
After while, you will have a big stack of blocks. My quilt has 288 blocks. It is large enough to top a double bed, but my BIL uses it as a large nap quilt on the couch. You can make more or less blocks, depending on the size you want. (Nobody pays me to do this so you’ll have to lay out the blocks as you make them and figure out your perfect size on your own.)
Layout the blocks. Shuffle them around so different colors are touching each other and you have a pleasing layout. Using my tutorial on Chunking, sew your blocks together.
I wanted to give the quilt blocks some space, so I added an inner border that matched the background fabric and then added my outer border.
Corner Store Finished
And this is what you get if you make a whole lot of these blocks!
_______________________________________________________________________
I am linking up with Jenny over at Quiltin’ Jenny blog
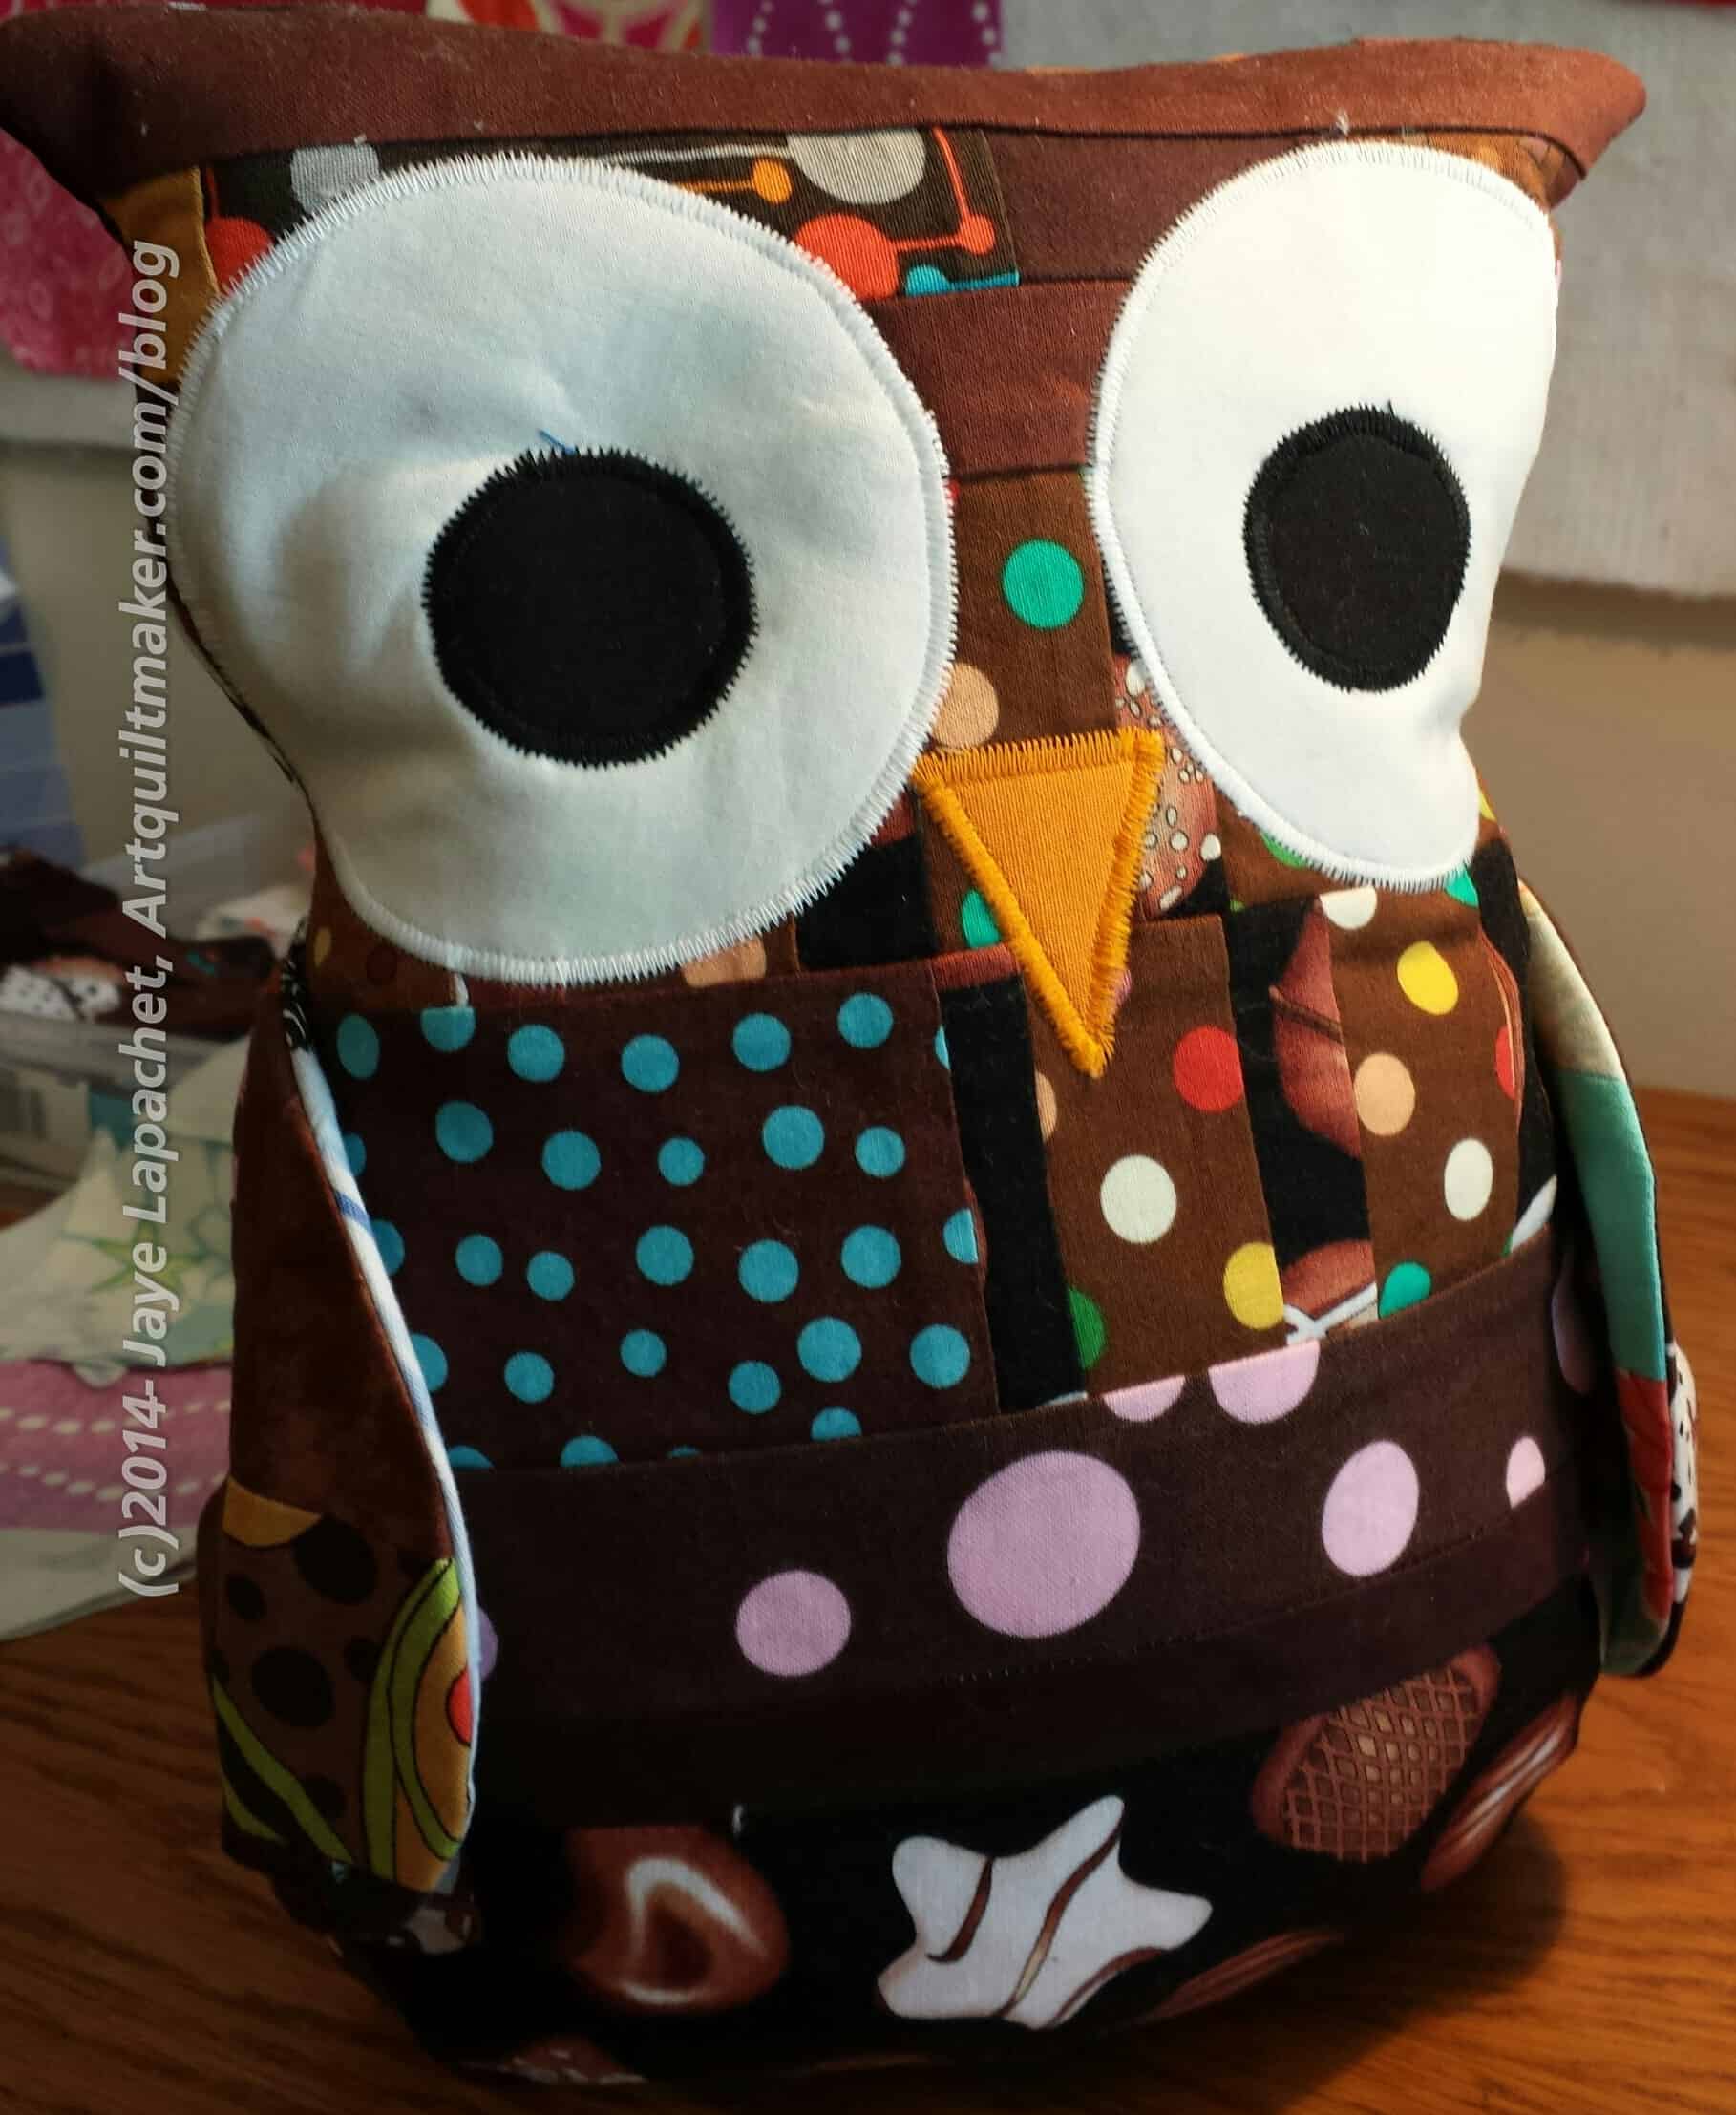
I made another Henry for another friend, which I mentioned last time. He is almost completely together. The last part is sewing up his bottom. He is also covered in lint, so I really need to use my lint roller on him.
I had enough almost enough schnibbles (sorry, Amanda, I’ll have to refill my schnibble bag before I can fill the next cat bed) and supplemented it with some leftover batting. I also found another bag of trimmings from an old, old quilt. Fabric is still sewn to the batting, so I think I will rip the fabric off the batting before I try and use either for a project.
I added on the beak and eyes using a loose satin stitch.
I also made the wings 3D again. I thought that was a fun touch.
He didn’t go together as easily as Henry 1. Some of the thick seams that result from the mosaic piecing process ended up in awkward places. This caused seams I was trying to match to get out of alignment, forcing me to rip more than I normally would.
I tried not to curse and only to put good energy out there into Henry as I don’t want to send a gift filled with bad juju. Goofy, I know, but there you have it.
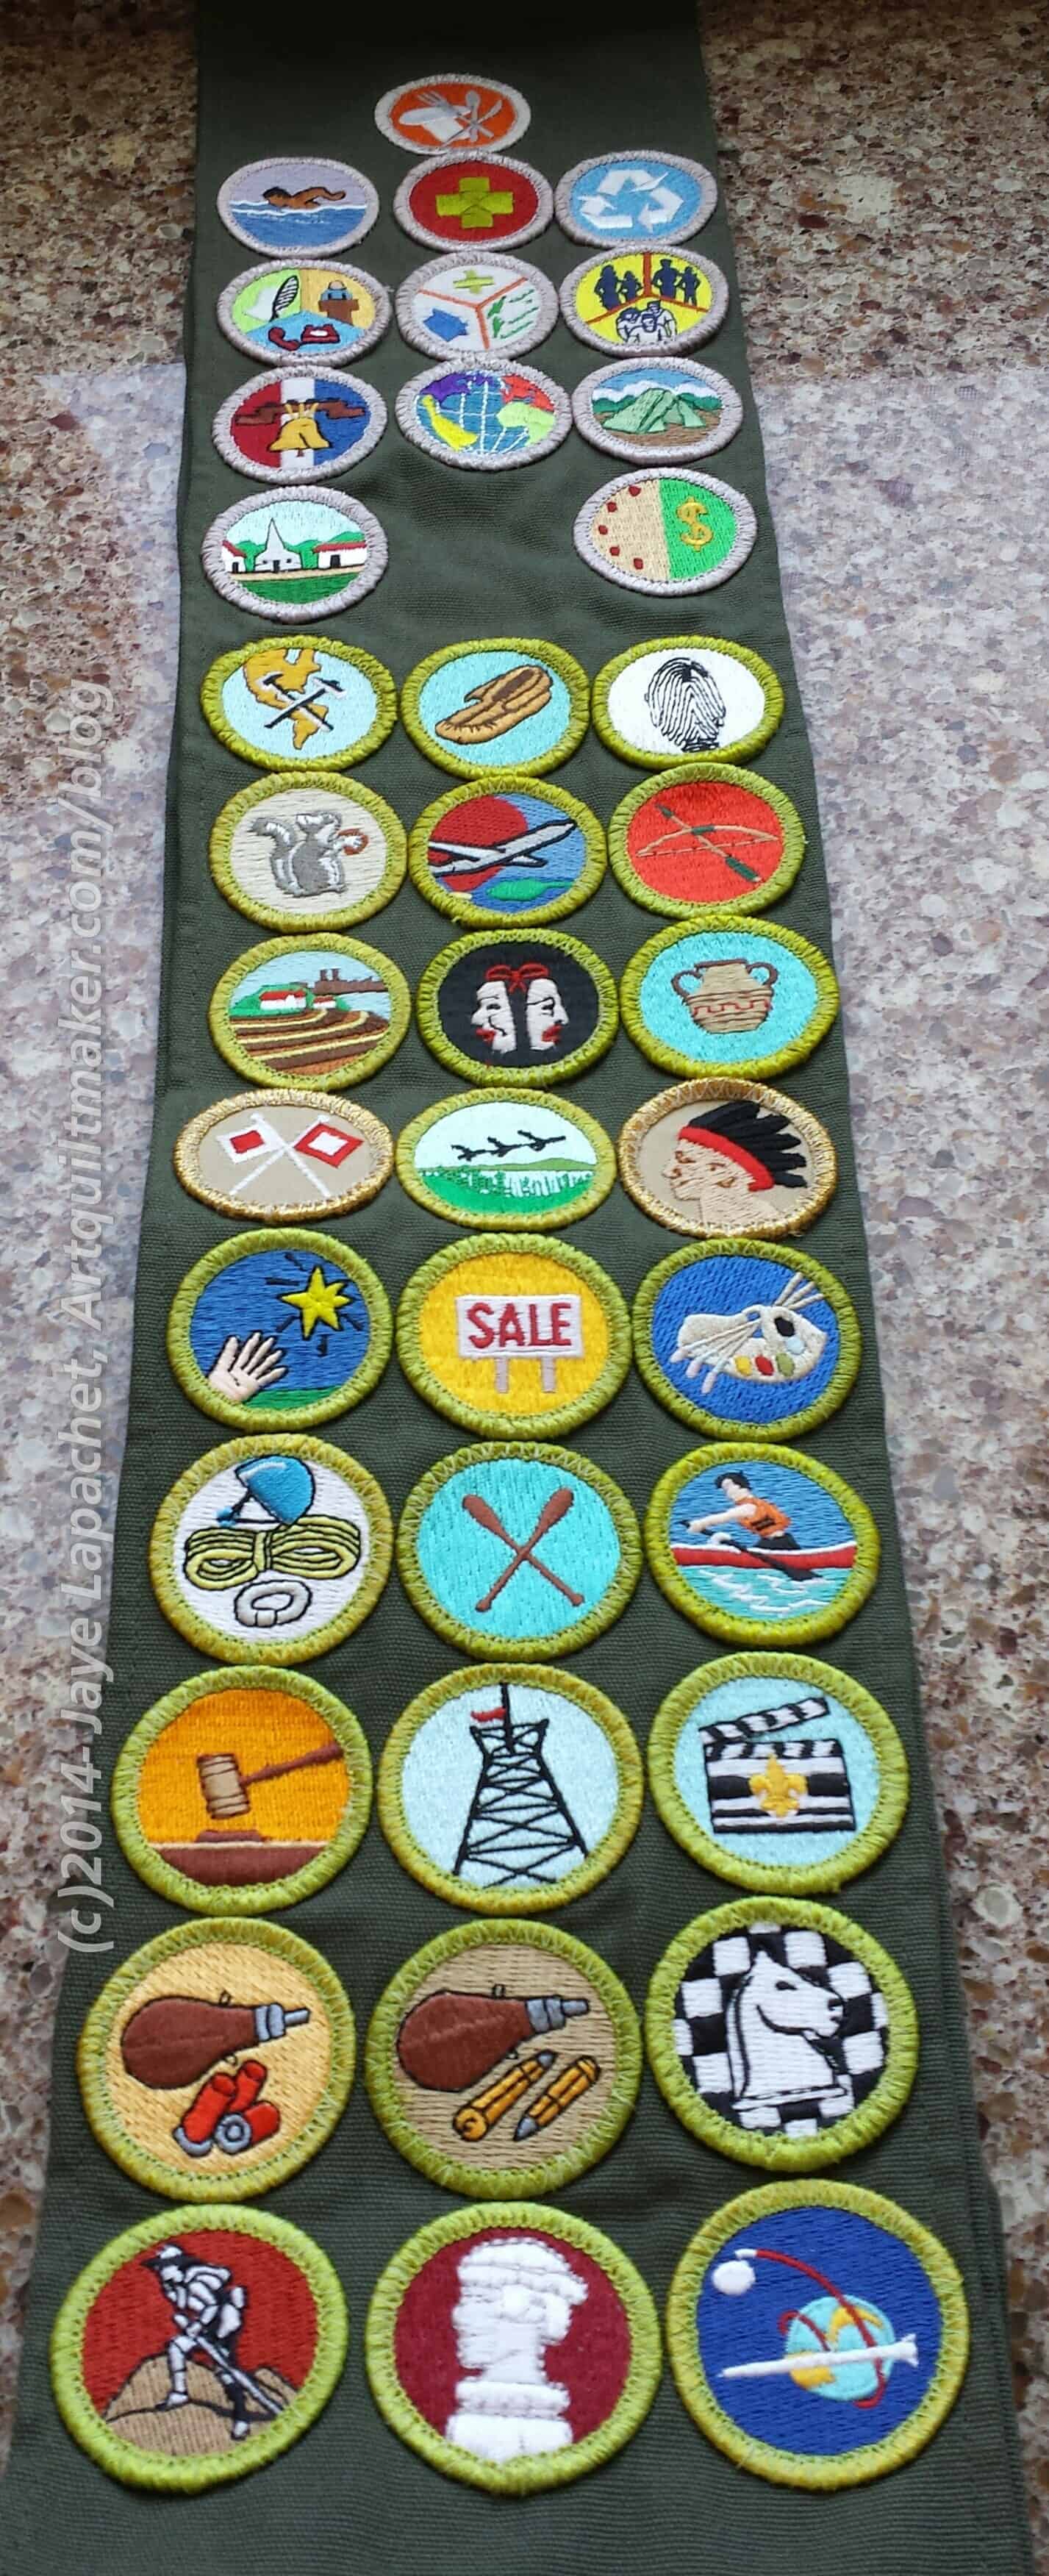
I think the last time I sewed merit badges was almost a year ago. That can’t really be right, can it? Perhaps I just didn’t write about it.
The Young Man earned 5 merit badges since last May’s Court of Honor, a couple of them were at his last summer camp as a youth scout. The others he just had to work at on his own.
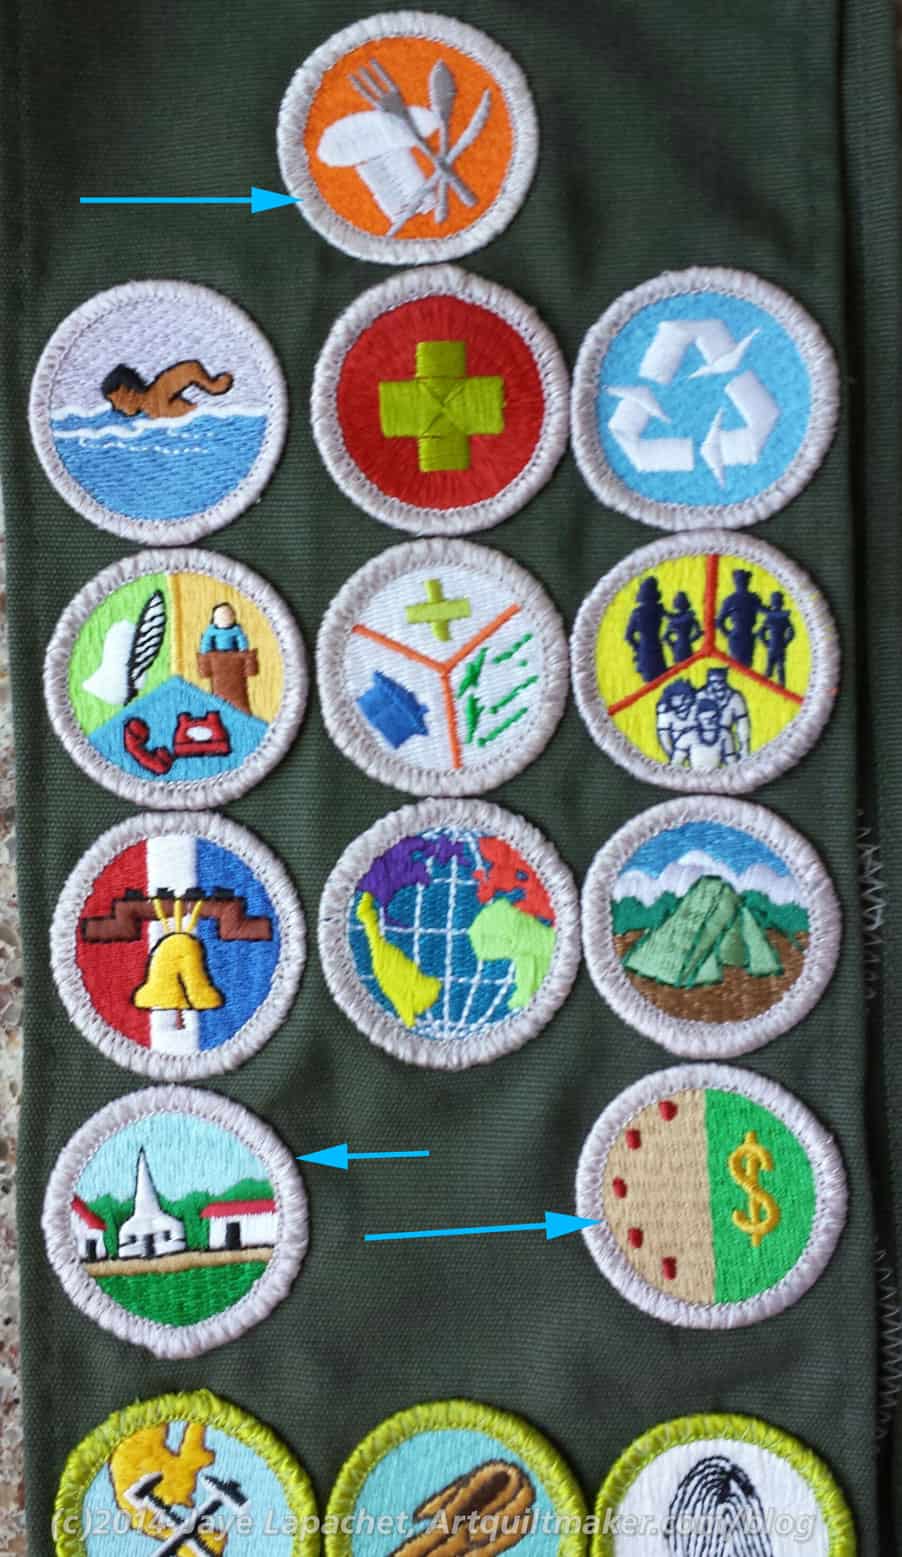
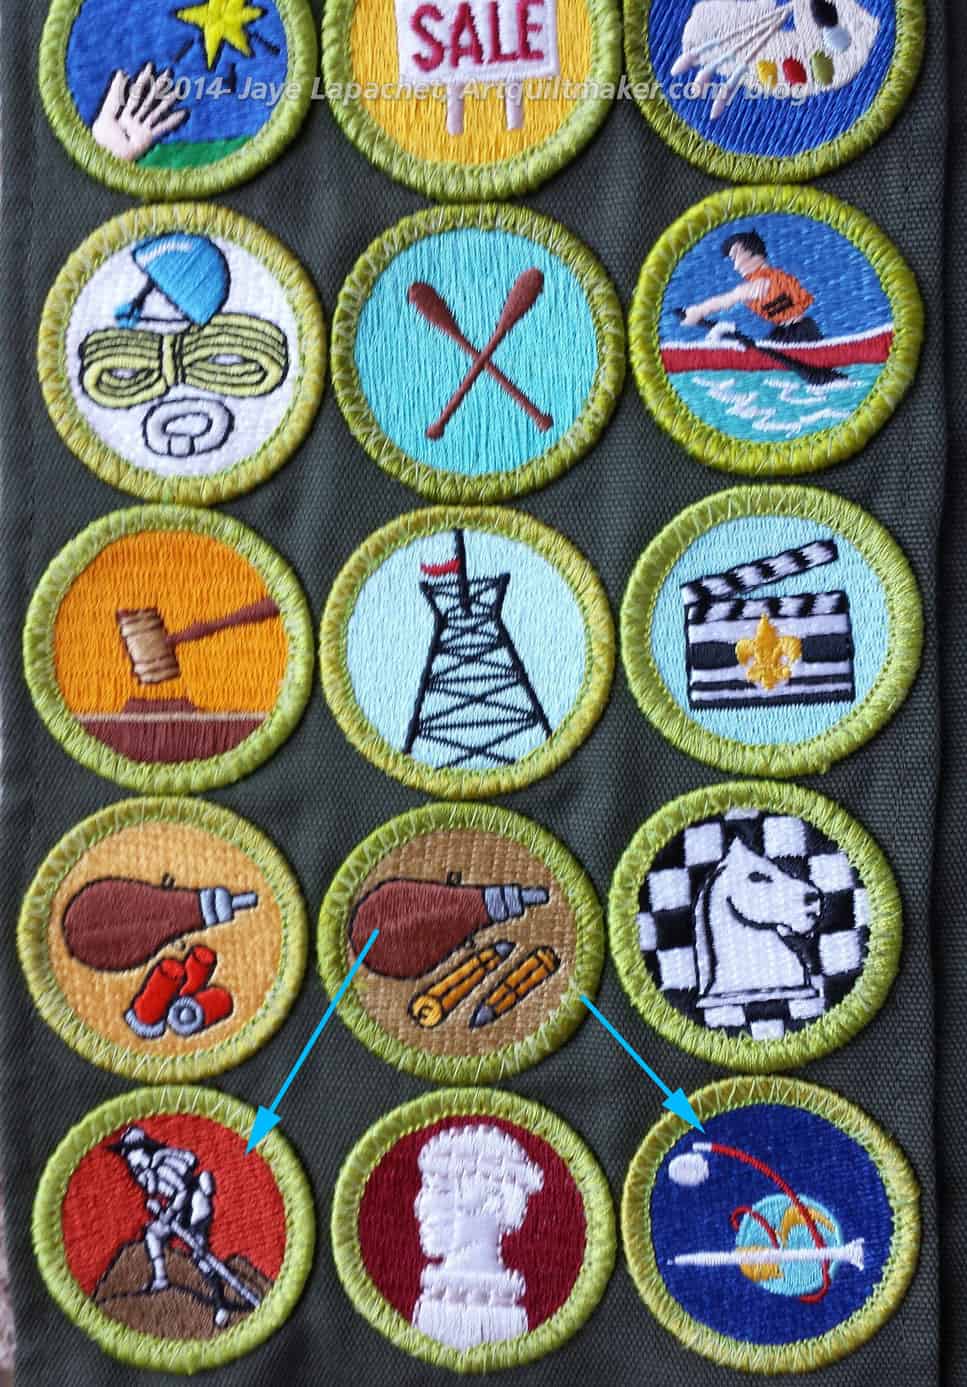
Eagle Required
So, the other day, I sewed on 5 merit badges: Cooking, Personal Management, Space Exploration, Scout Heritage, and Citizenship in the Community. Three of the above were Eagle required. Most are really useful skills, though they still don’t have sewing. The empty spot is for the last merit badge. He has one more to earn before he can be an Eagle. He just has to do the paperwork and then he will get that one signed off. With luck.
Non-Eagle required badges
These little pieces of cloth represent a lot of work and for a kid whose organizational skills make librarians cringe. It is amazing that he could get this far.
I know I should be saying this when he gets his Eagle, but I am so proud of what he has done so far that I just can’t help myself.
To make this more quilt/fabric related, I use the following to sew on the merit badges:
Aurifil #2600 for the Eagle required badges
Aurifil #1231 for the non-Eagle required badges
Janome zigzag: 3.5mm width, 1.5mm length. You can go about 1mm longer on the length. I just don’t like the stitches to get beyond the border.
The title of this post is so boring I just don’t know if I can stand it. It says what it is and you can find it easily but there is nothing interesting in it at all. 26 Projects was a lot more interesting.
I can’t believe it is October. January-Febuary-March seem like they were yesterday and now we are full on in Fall and thinking seriously about Thanksgiving and Christmas. Yes, Halloween is in there, too.
I still have WIPs. Who doesn’t, after all, but the list is getting a lot smaller.
Aqua-Red Sampler – Frances and I haven’t really worked on this for a long time. I really want her to finish her hexagon block before we move on. I think she has progressed so much since we started that I wonder if I should just tell her how to put the quilt together and be done with it.
The Tarts Come to Tea: I still haven’t worked on this since April 2011, though, periodically, I think about working on it.
Pointillist Palette #4: Fourth is a series of 6 quilts; needs tiny square patches sewn together. I still haven’t worked on this, though, I do think about it. The Lunns have a new line of PP fabric out. I am curious to see the new colors. I only saw a few at PIQF
Self Portrait: started in 2006 at a class at Quilting Adventures in Richmond, Virginia. My career counselor breathed new life into this project for me. She asked a simple question and the end result was inspiration for this piece, but I kind of lost steam again after printing images on paper to try out different designs. Lately, I have been feeling like I need to finish this piece as it should be a good reminder for some other stuff going on in my life. Perhaps that will spur me on.
Under the Sea: class project; like the design, but not the colors much. Possibility for abandonment. I have to face reality.
Ready for Quilting
Wow! Everything on this list is new, as in it was never on the original 26 Projects list.
Table runner: Basted; needs quilting and binding. I am planning on free motion quilting this myself for practice, which may be a challenge when my main machine is not working. (Not on original list)
In the Finishing Process
Nothing at this time, which is kind of odd.
In Process
I decided that I had better put in an ‘In Process’ category. The difference, at least in my mind, between ‘In Process’ and ‘UFO’ is that I am actively working on a project that is “In Process.”
Spin Wheel: really not started, but supplies gathered. I probably have enough fabrics and just need to decide to start.
Stepping Stones #2 using Bonnie & Camille fabrics Bliss, Ruby, Vintage Modern: made two test blocks, but still in the thinking stage while I decide on the background colors. I want the contrast to be good.
Stepping Stones #3 using the Macaron pre-cuts from Hoffman. I just remembered this project. It isn’t started, but I have all the pre-cuts and should think about actually using them.
Windmill quilt: Still hunting and gathering. I will use a grey for the background, because if I use more of the cut fabric patches, the pattern will be lost. The pieces are too oddly shaped and I don’t want to lose the pattern in a mass of scraps
Abandoned
Nothing so far for 2014
You can find the last update for the Current Projects list provides a good comparison to this month.
I thought you might want to take a look at the first list I made, the one with the 26 Projects. I started the list in October 2011. I have made REALLY GOOD progress. Up until last month, I was still planning to stop this post when I had no more projects from the original list to write about, but now, that the end is in sight, I am not so sure. It is so useful to keep track of all of my projects. Since I still have some pretty old projects on the list, I don’t have to decide right now.
*New – Project started after I started working on the 26 Projects list
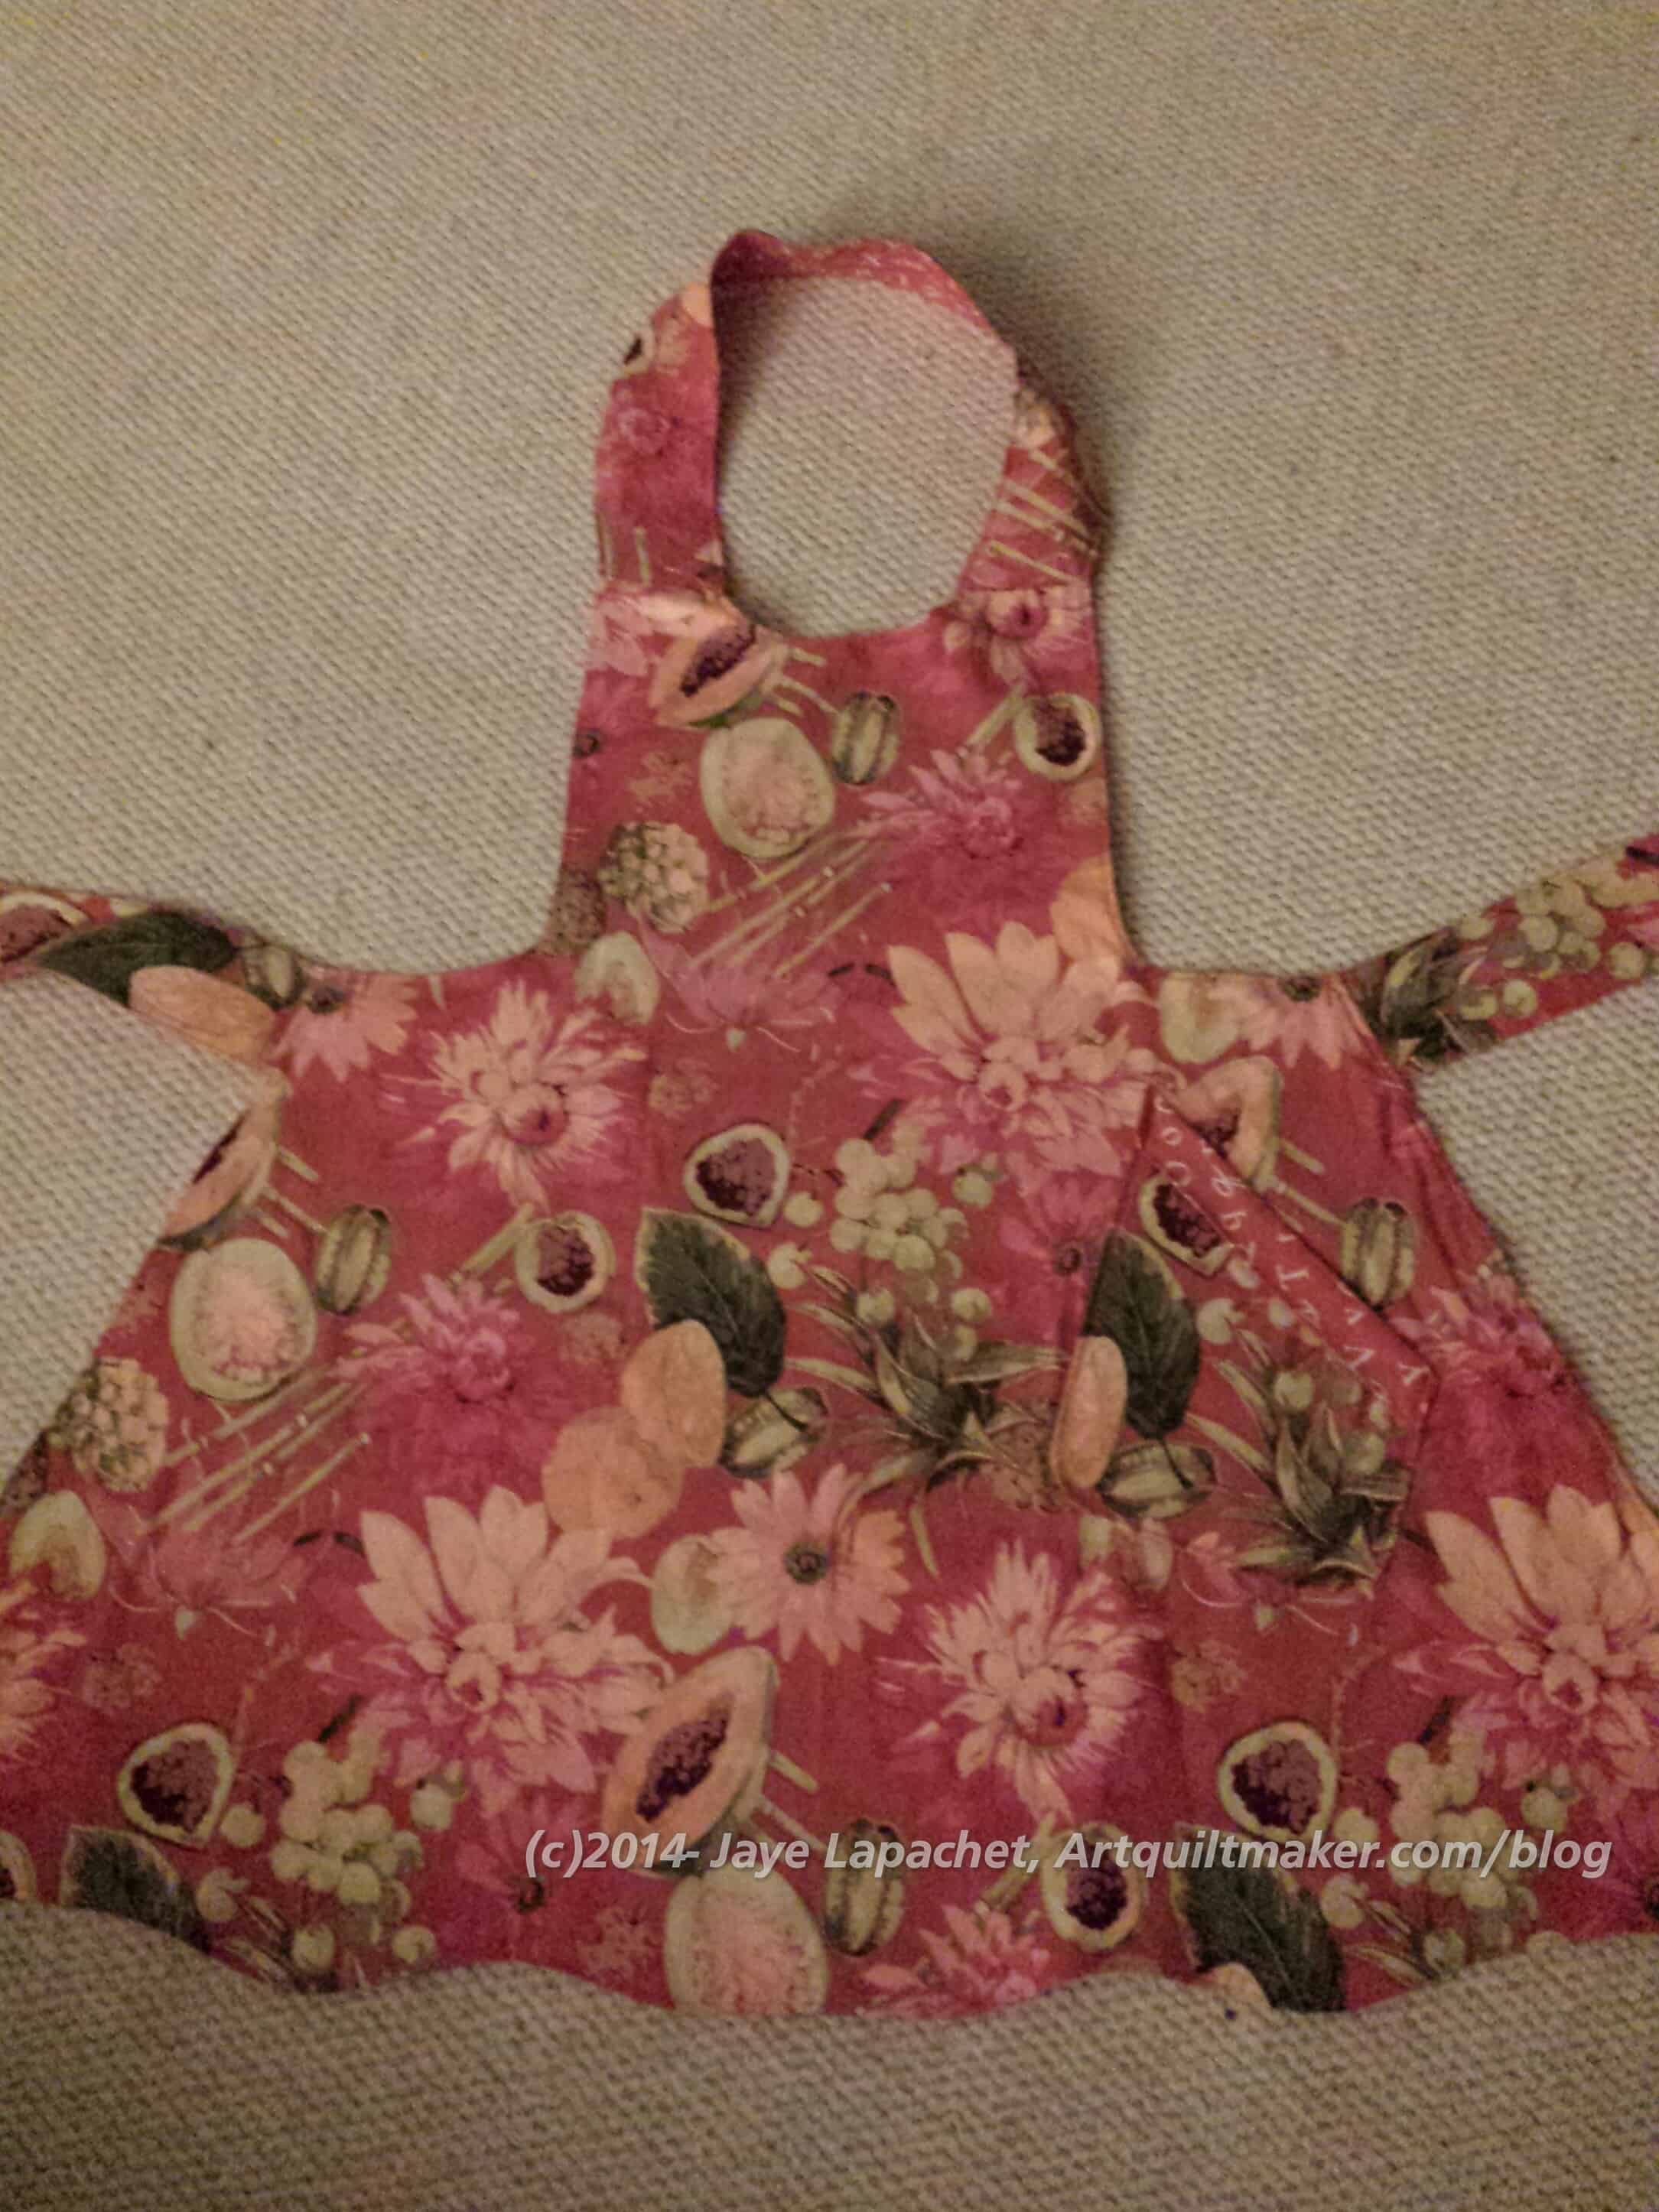
I finally finished one of the aprons I started 1,000 years ago. I needed a translator to help me and TFQ signed up for the job. Of course, I felt stupid when TFQ read the directions and explained what I needed to do, because it seemed so simple. I found it easier to hear from someone else what to do. It really makes me wish I had learned more garment sewing when I was younger. I am sure she didn’t roll her eyes at my lack of understanding.
Anyway.
The first apron is finished. I am happy. I wasn’t really very far away from putting it together and it didn’t take very long to sew it together. TFQ really helped, not only with the reading, but also with the pressing.
Finished is relative, however. I was sinking threads the other night and found a raw edge on the neck piece, where it slides into the body of the apron. I haven’t decided if I will take that part off and resew it or just use a bit of Fray Check.
I haven’t decided it I like this apron. I think I am still a little angry at the pattern for being written the way it was. I still have one more to finish (so I have a choice, you know). Soon I should be wearing the apron to keep grease and other food yuck off my clothes.


 4x4 squares")