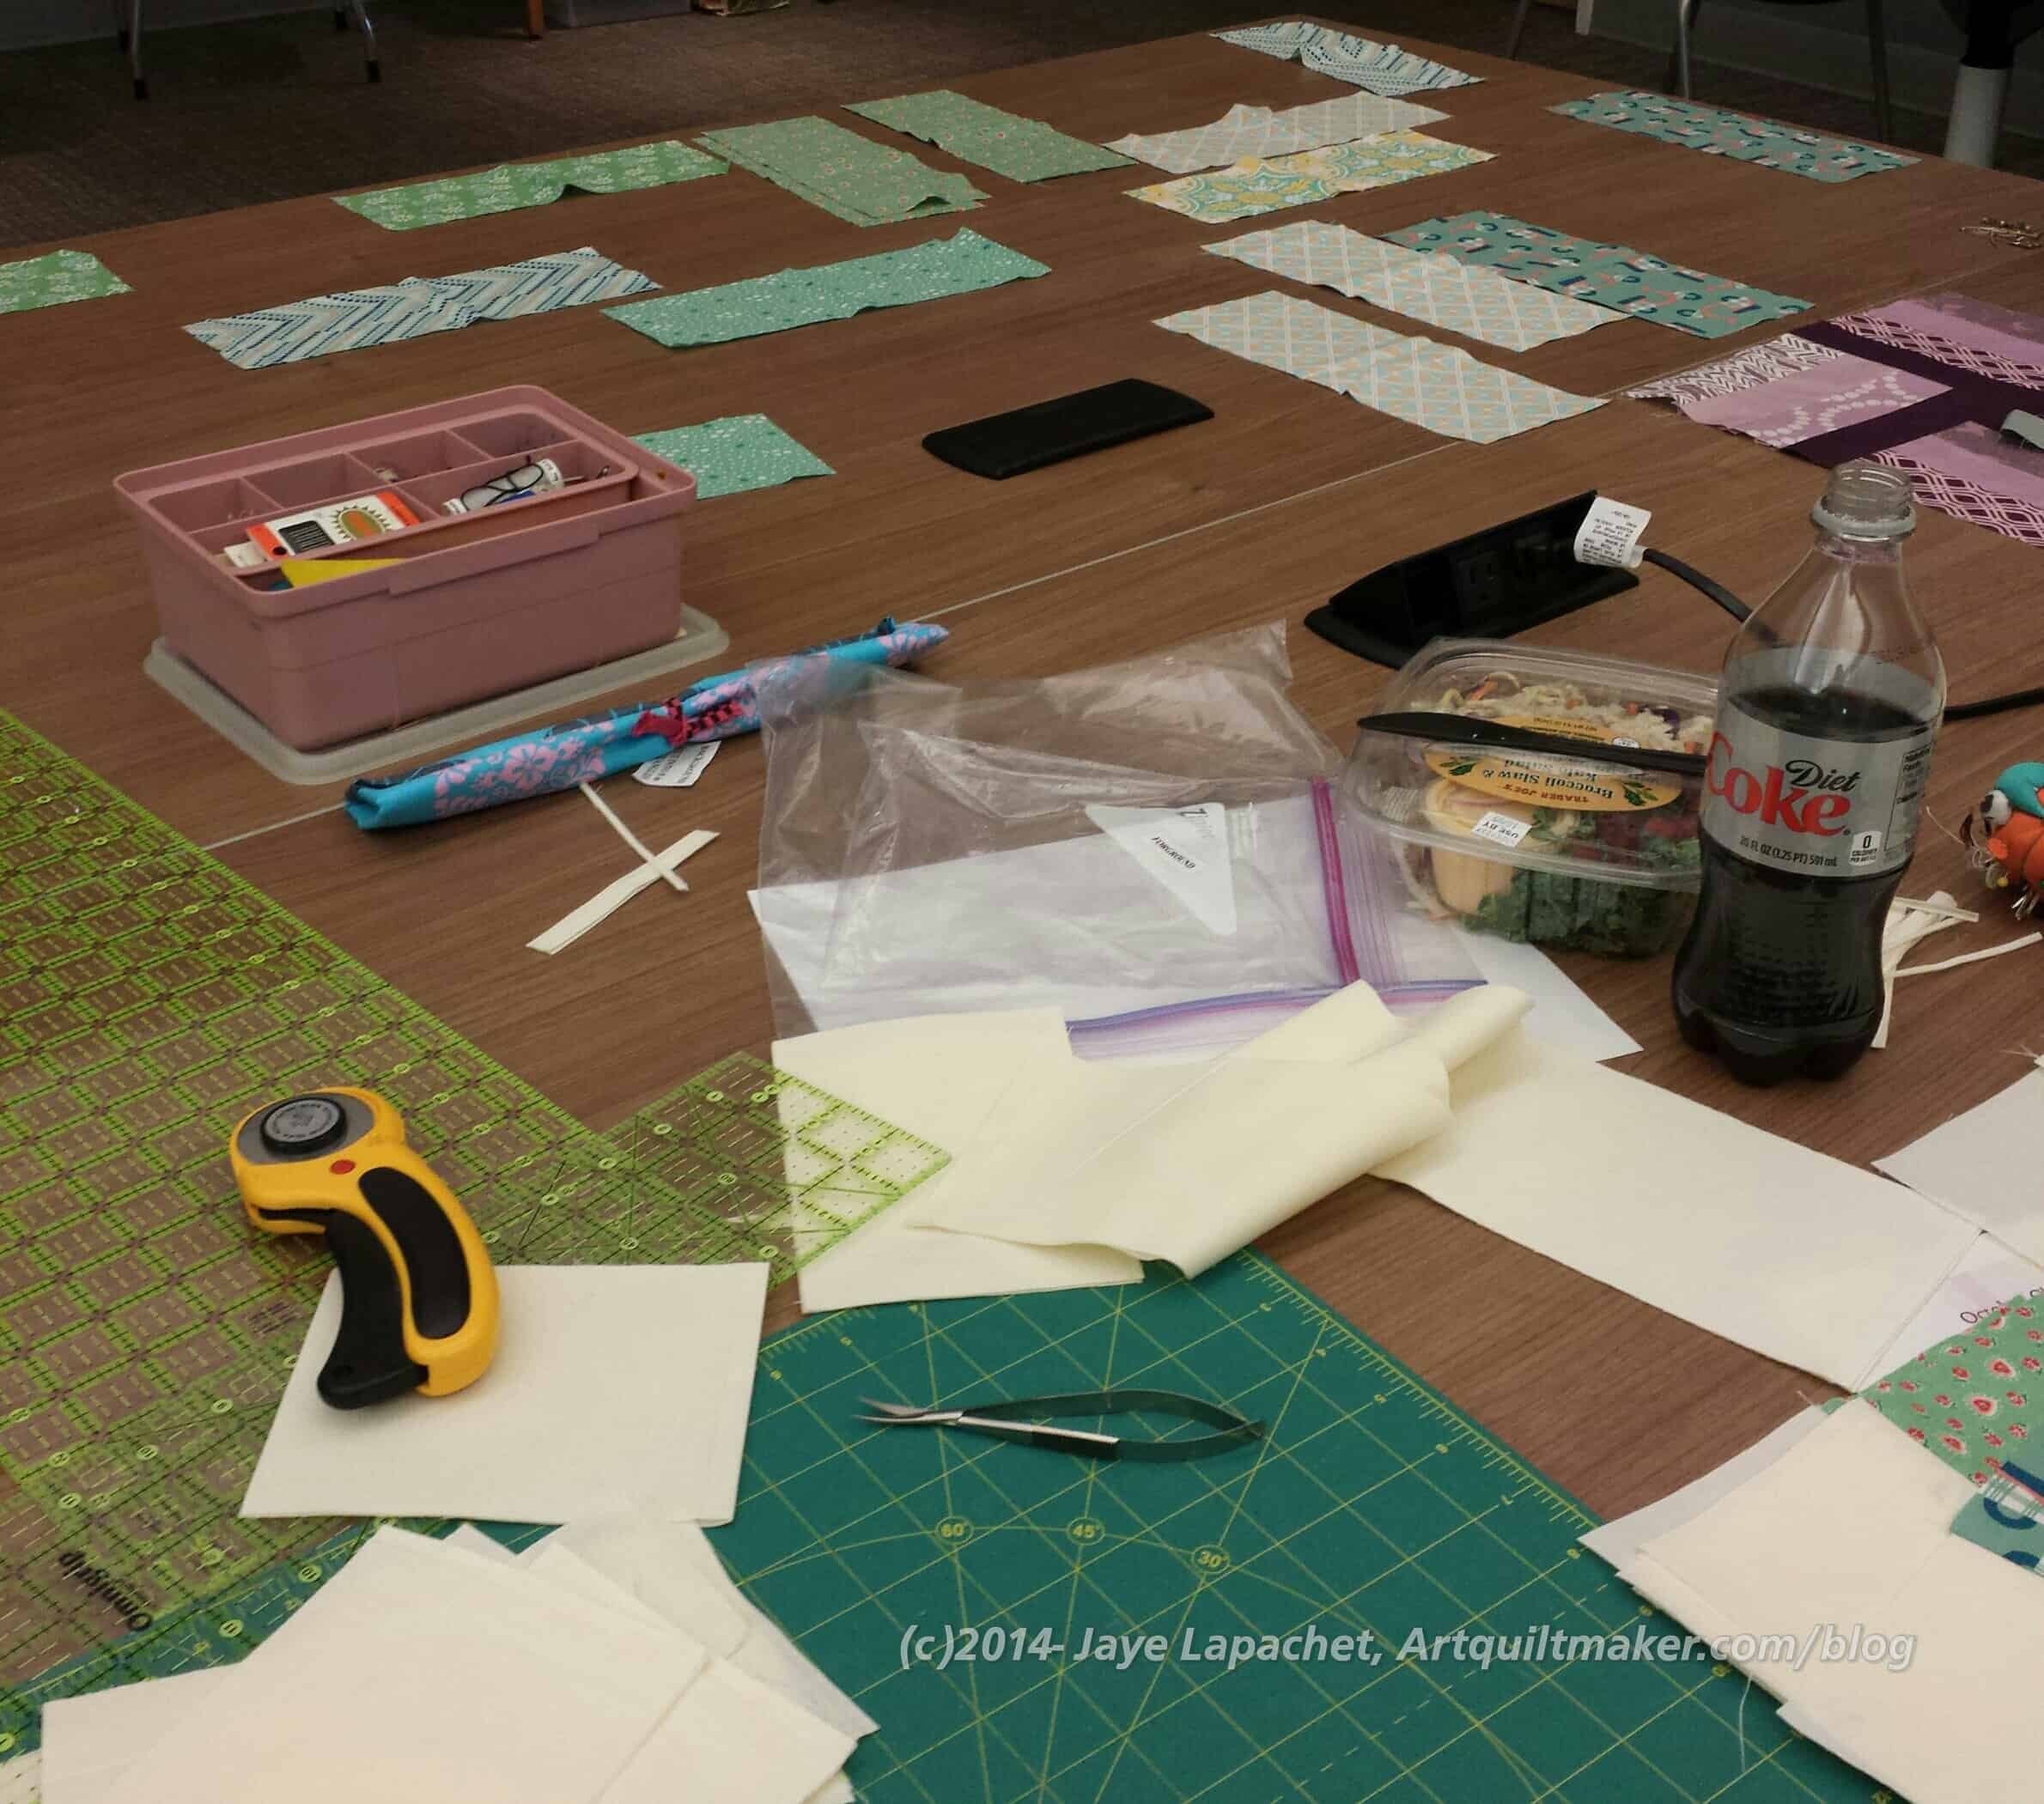
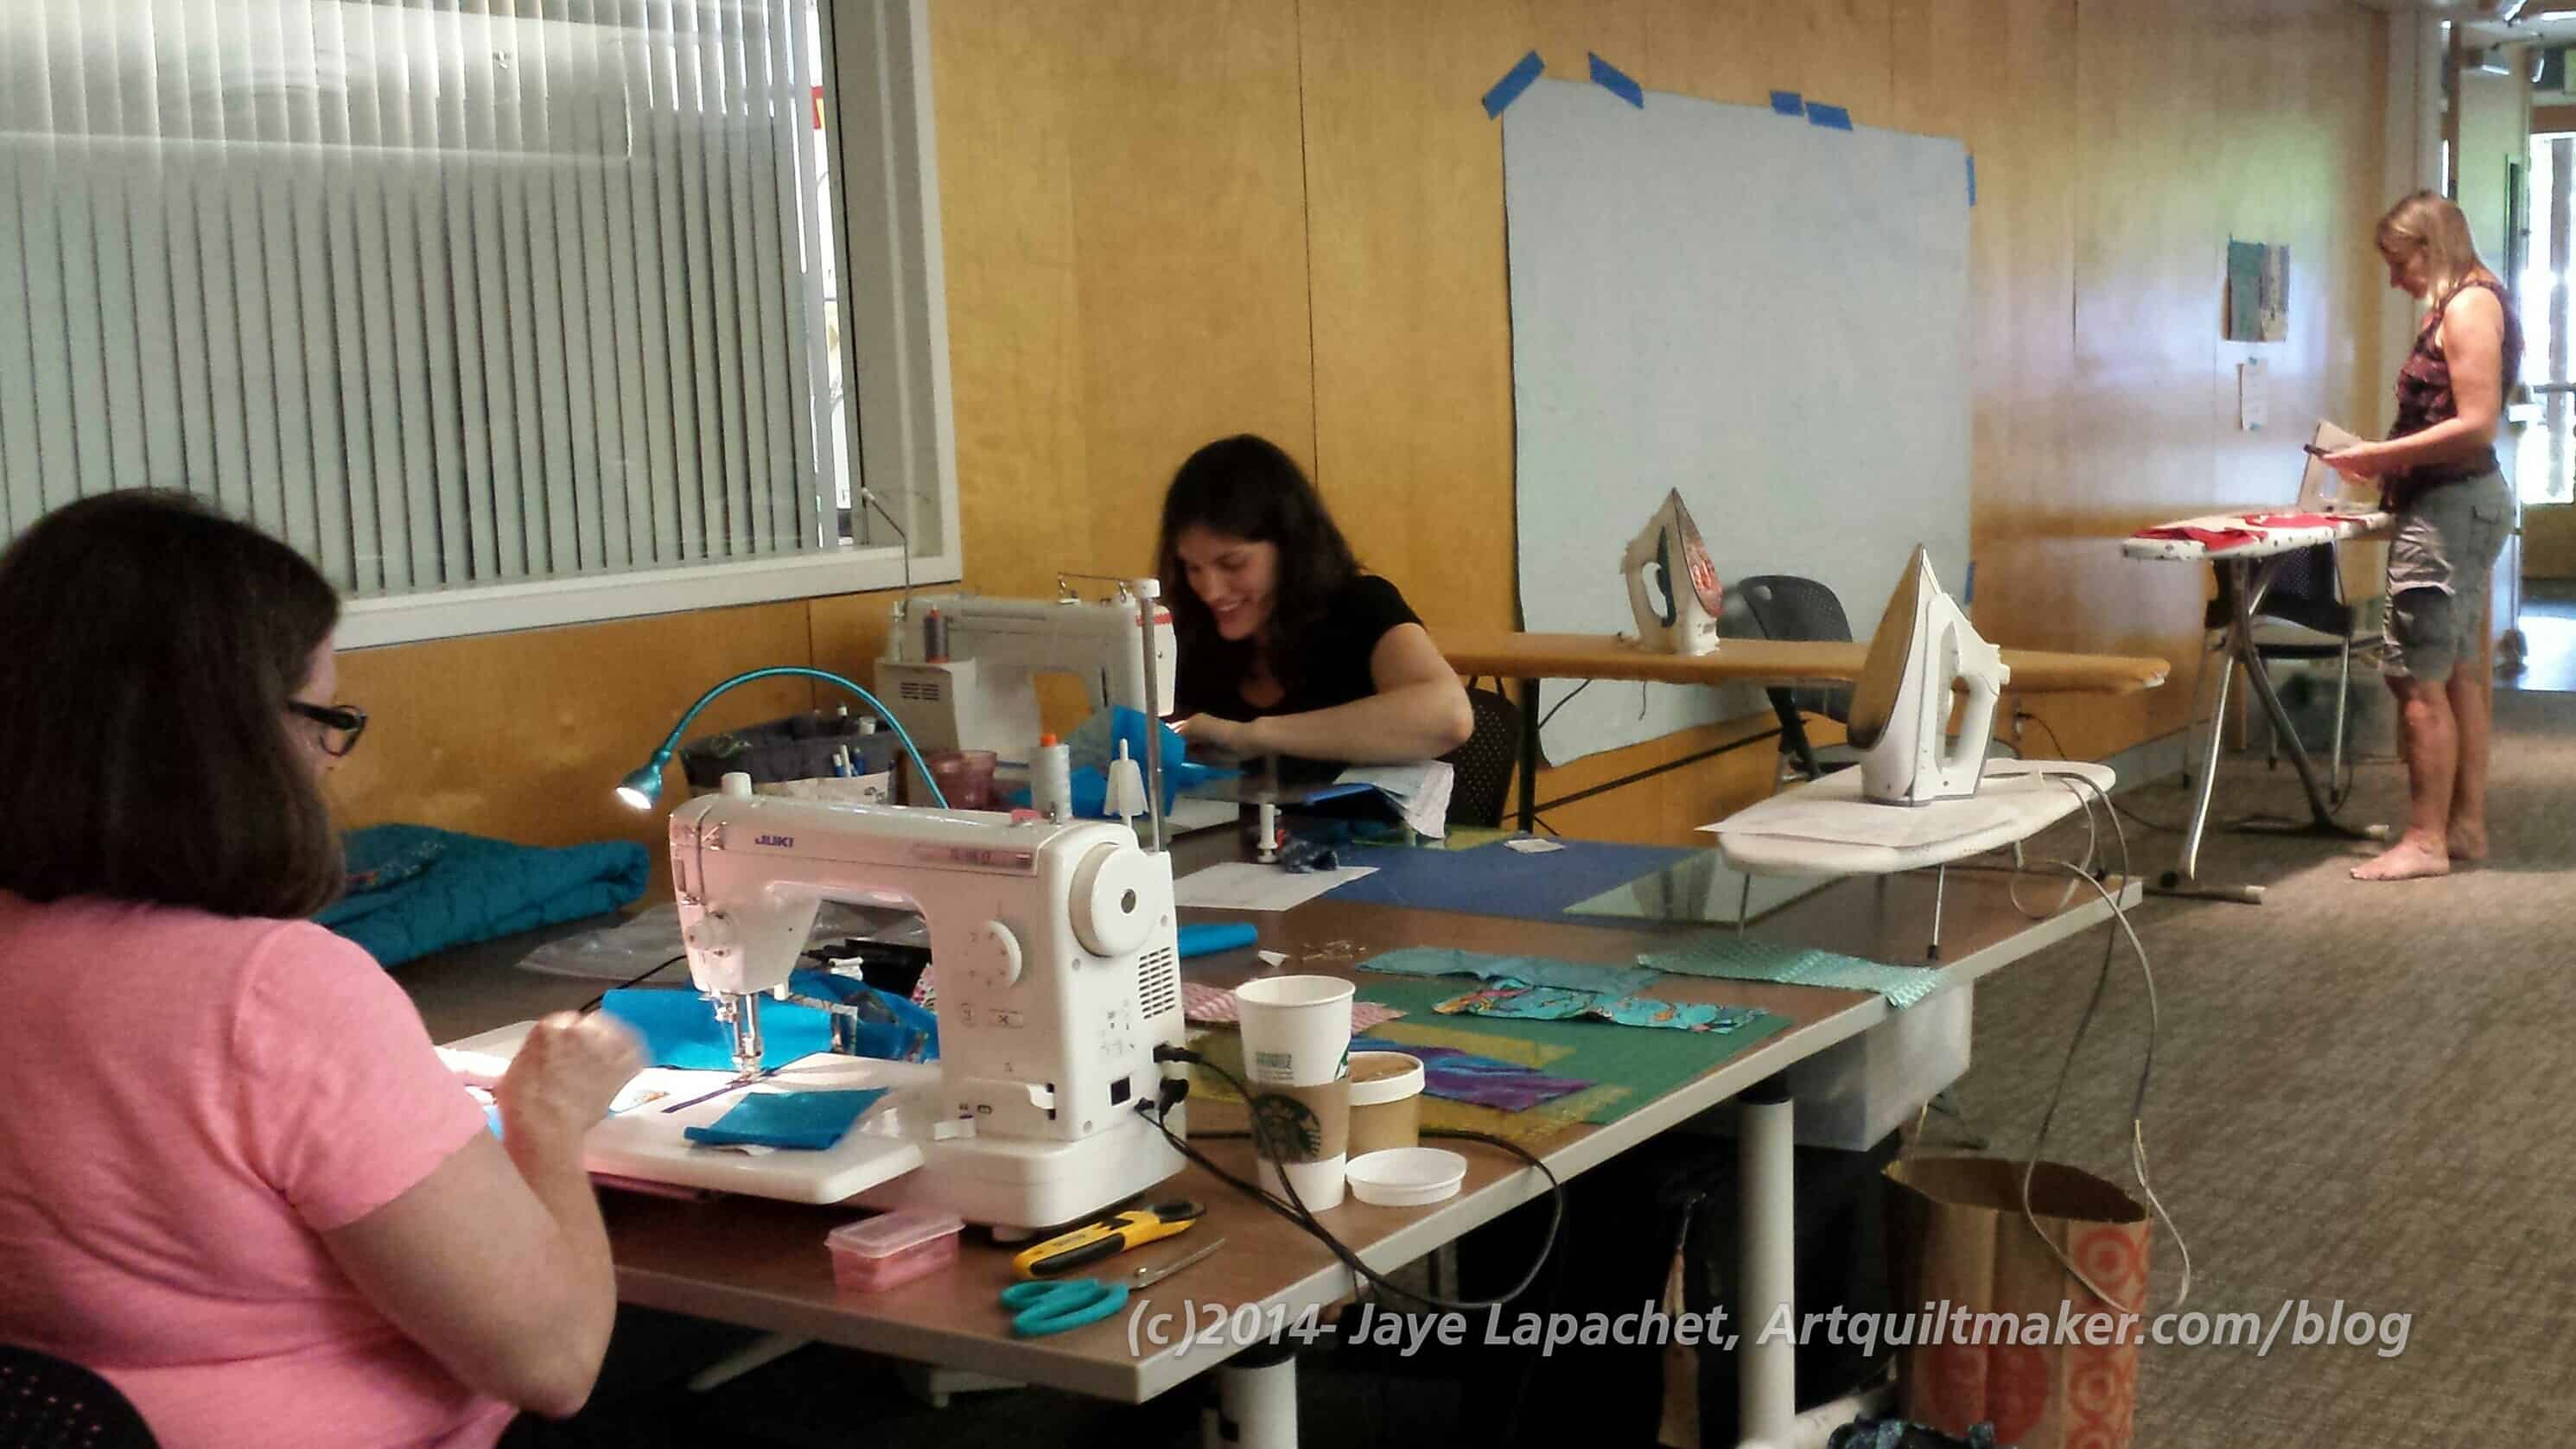
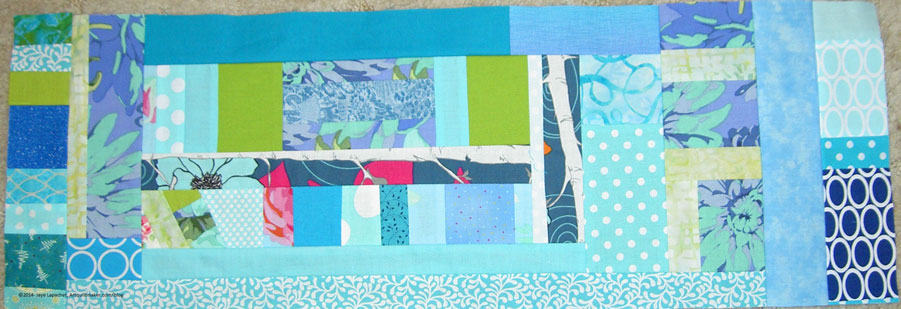
As I mentioned yesterday, Gerre and I teamed up for the Charity Race Sew Day. we were 4th in line to pick fabric and ended up with a variety of green colors. Gerre and I looked at each other in disappointment, but knew that the recipient would like it and got to work.
We pushed two tables together and used that as our workspace. We laid out most (the table wasn’t THAT big) of the pieces, cut the background and Gerre started sewing.
Gerre & Jaye Blocks
After cutting the background, I paired up pieces and parts and handed them to Gerre. She put them through the machine. I cut them off, pressed them, then paired them off again with other pieces and handed them back to Gerre to sew.
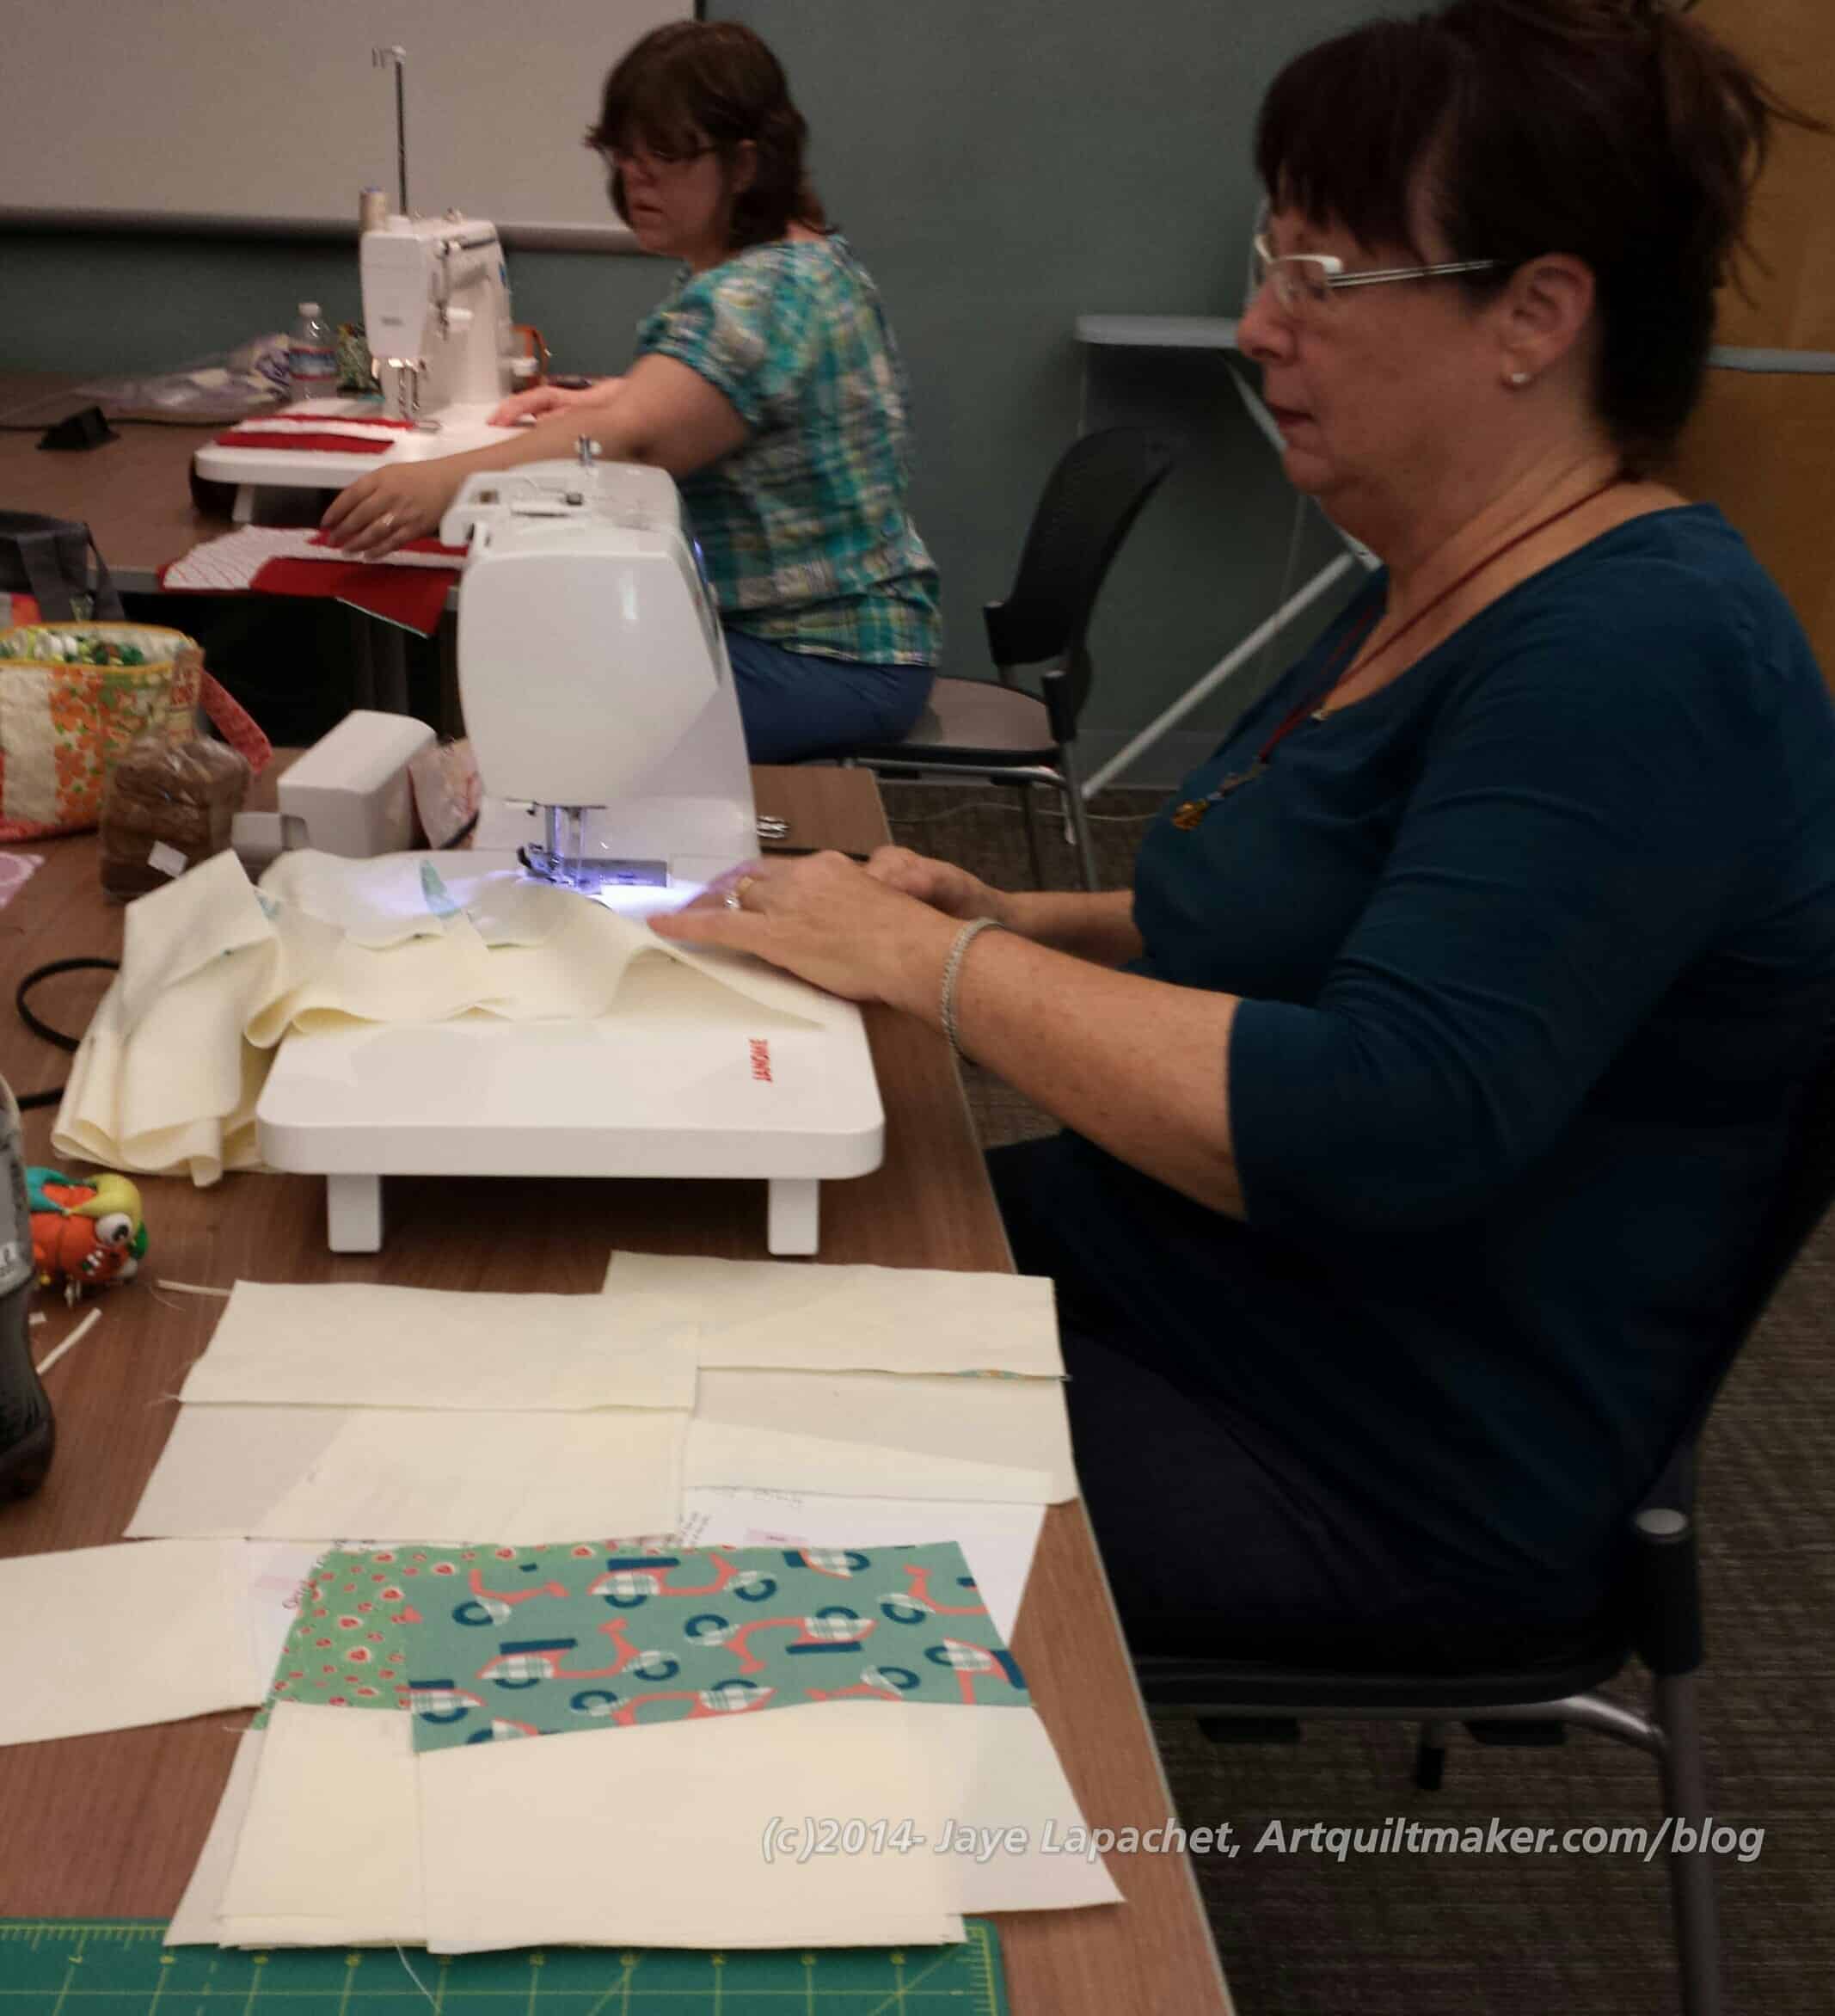
I thought we did very well and sewed pretty quickly. Still, we weren’t first with a finished top. I don’t sew very quickly in general, and, though I wasn’t sewing, I was pleased that we were able to finish as quickly as we did with little or no drama. I was organized and got Gerre the pieces she needed efficiently. She was a sewing rock star. Our system worked.
After we finished the piecing, we found a vintage sheet that was large enough for the back and layered and basted the top. I thought we were being nice for some other guild member, but Gerre said that she will quilt it. I offered to bind it so the piece will be done when we hand it in.
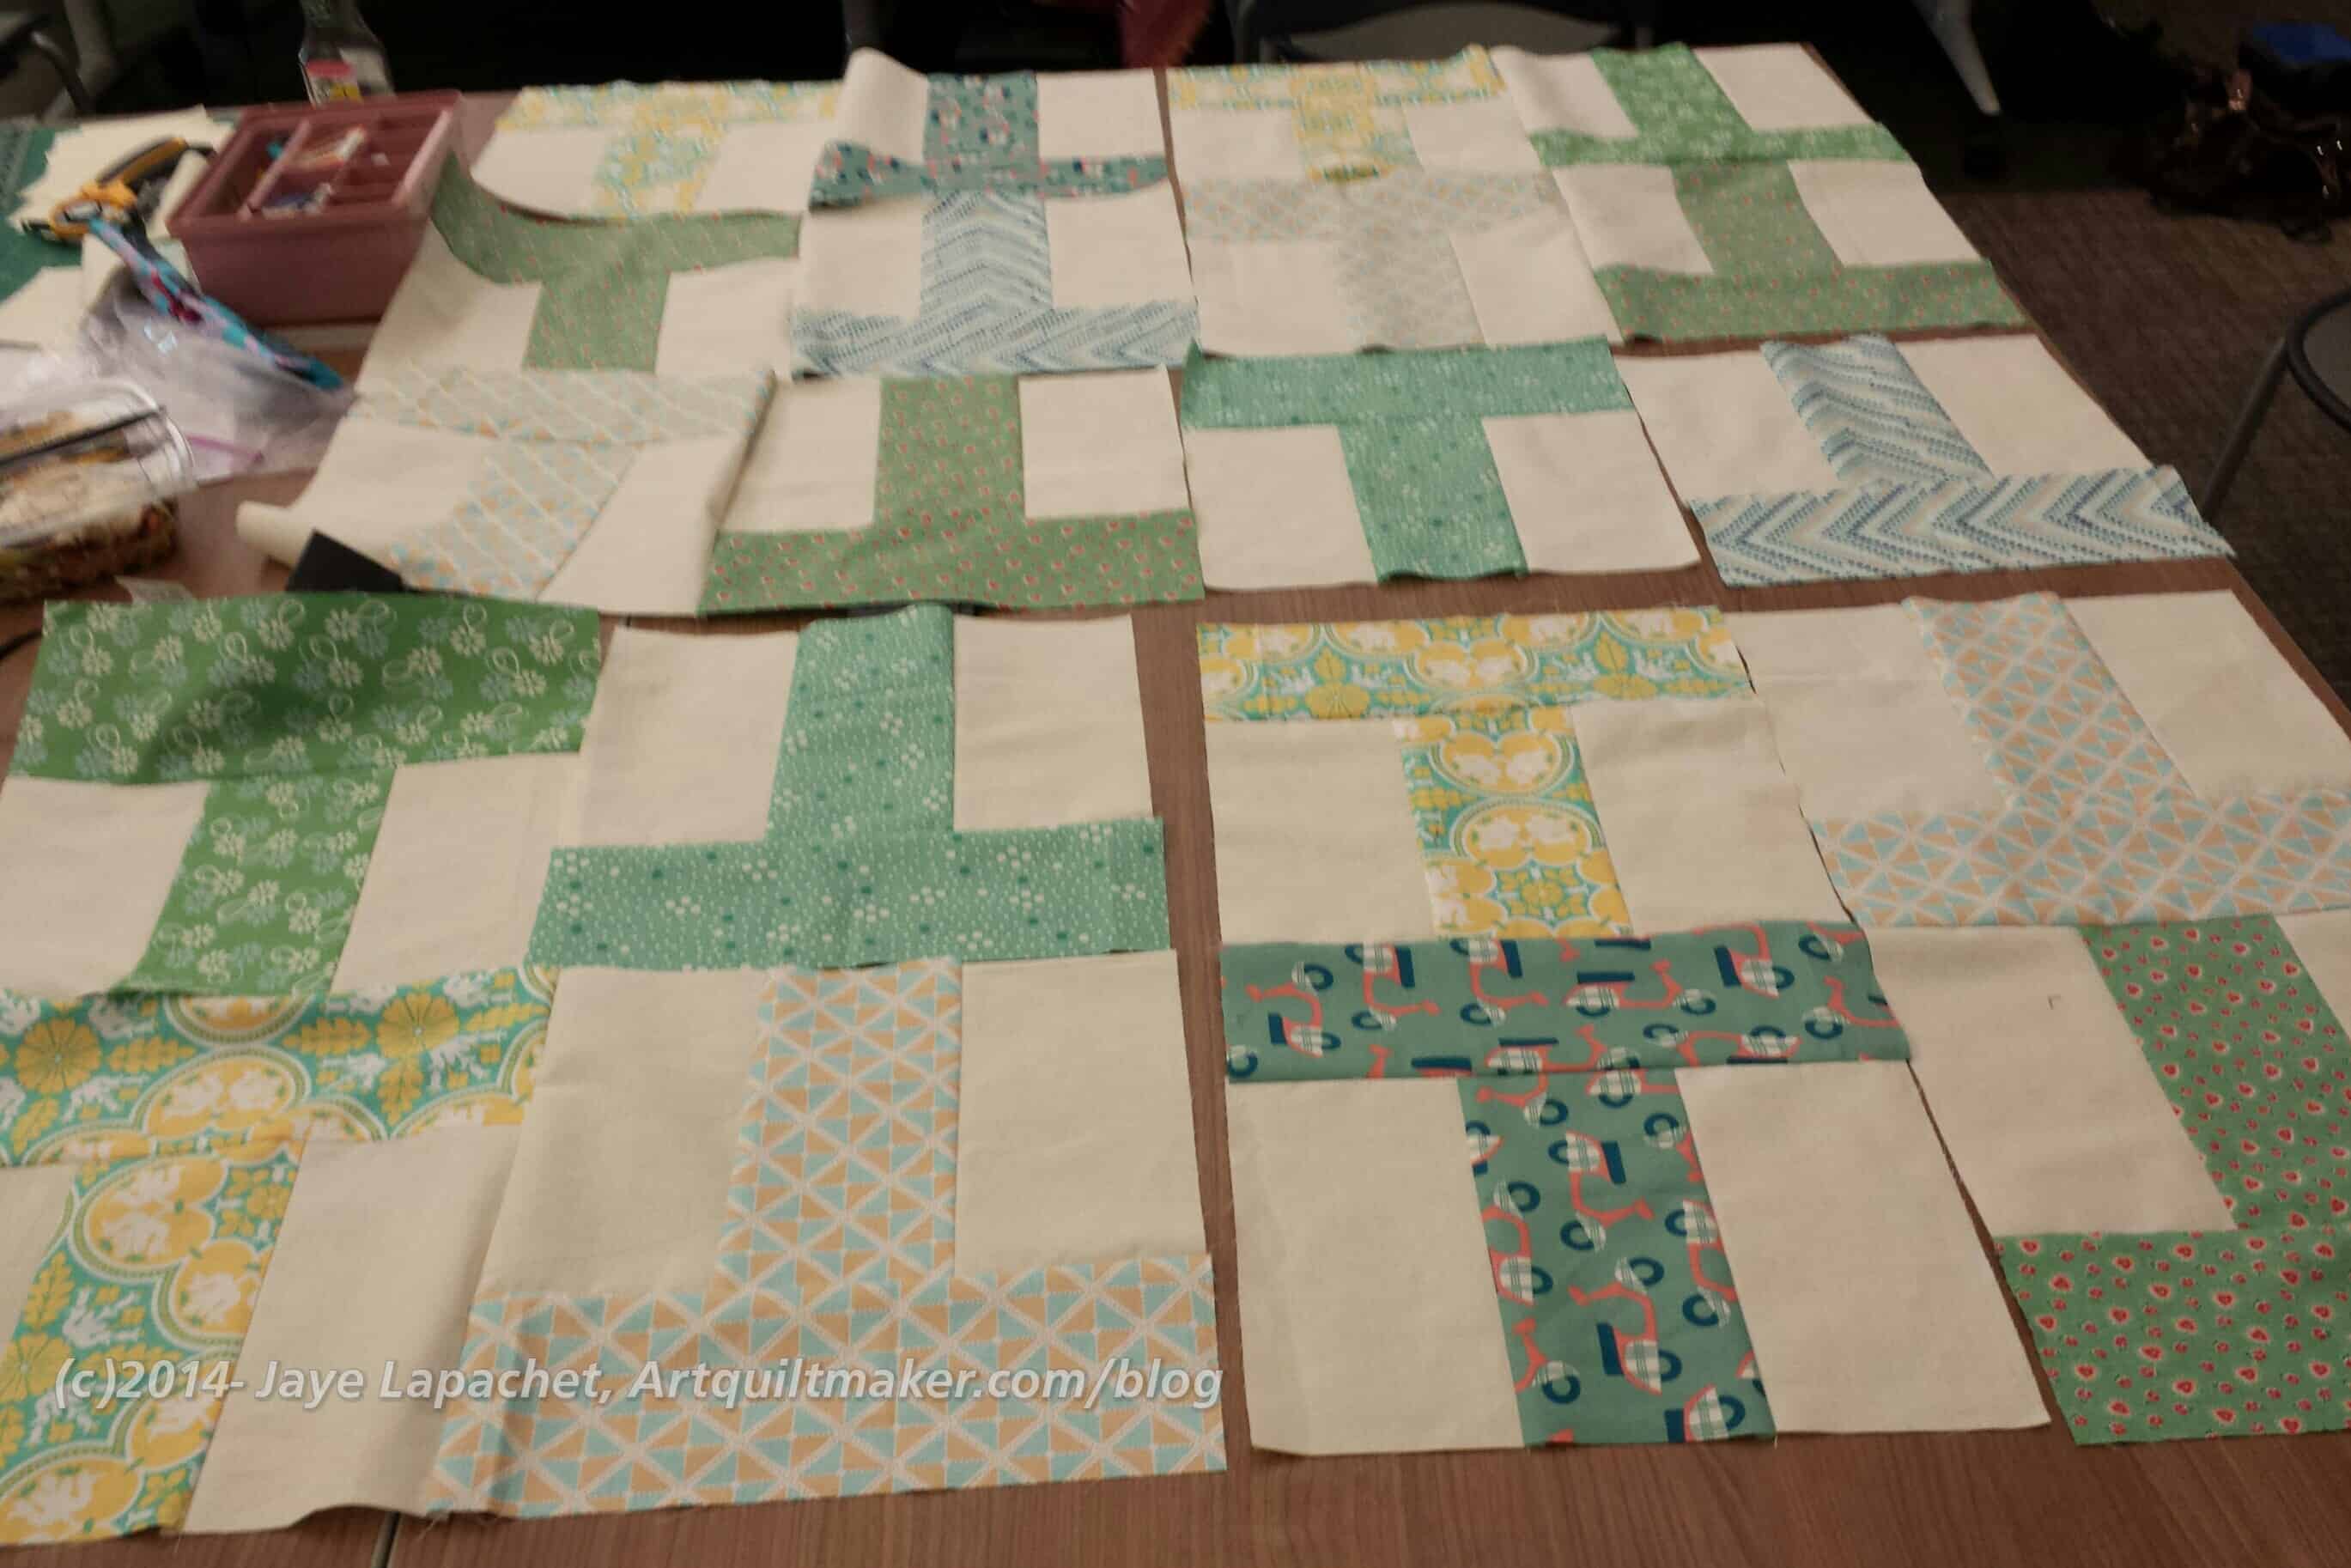
Gerre & Jaye Blocks: Chunking in Process
I showed Gerre how to “chunk a top.” It is harder if you don’t have a design wall and lots of leaders and enders. That plug lump in the middle of the table didn’t help, though it was useful for making the machine work. We started making postage stamp blocks in between to try and keep the T blocks in order.
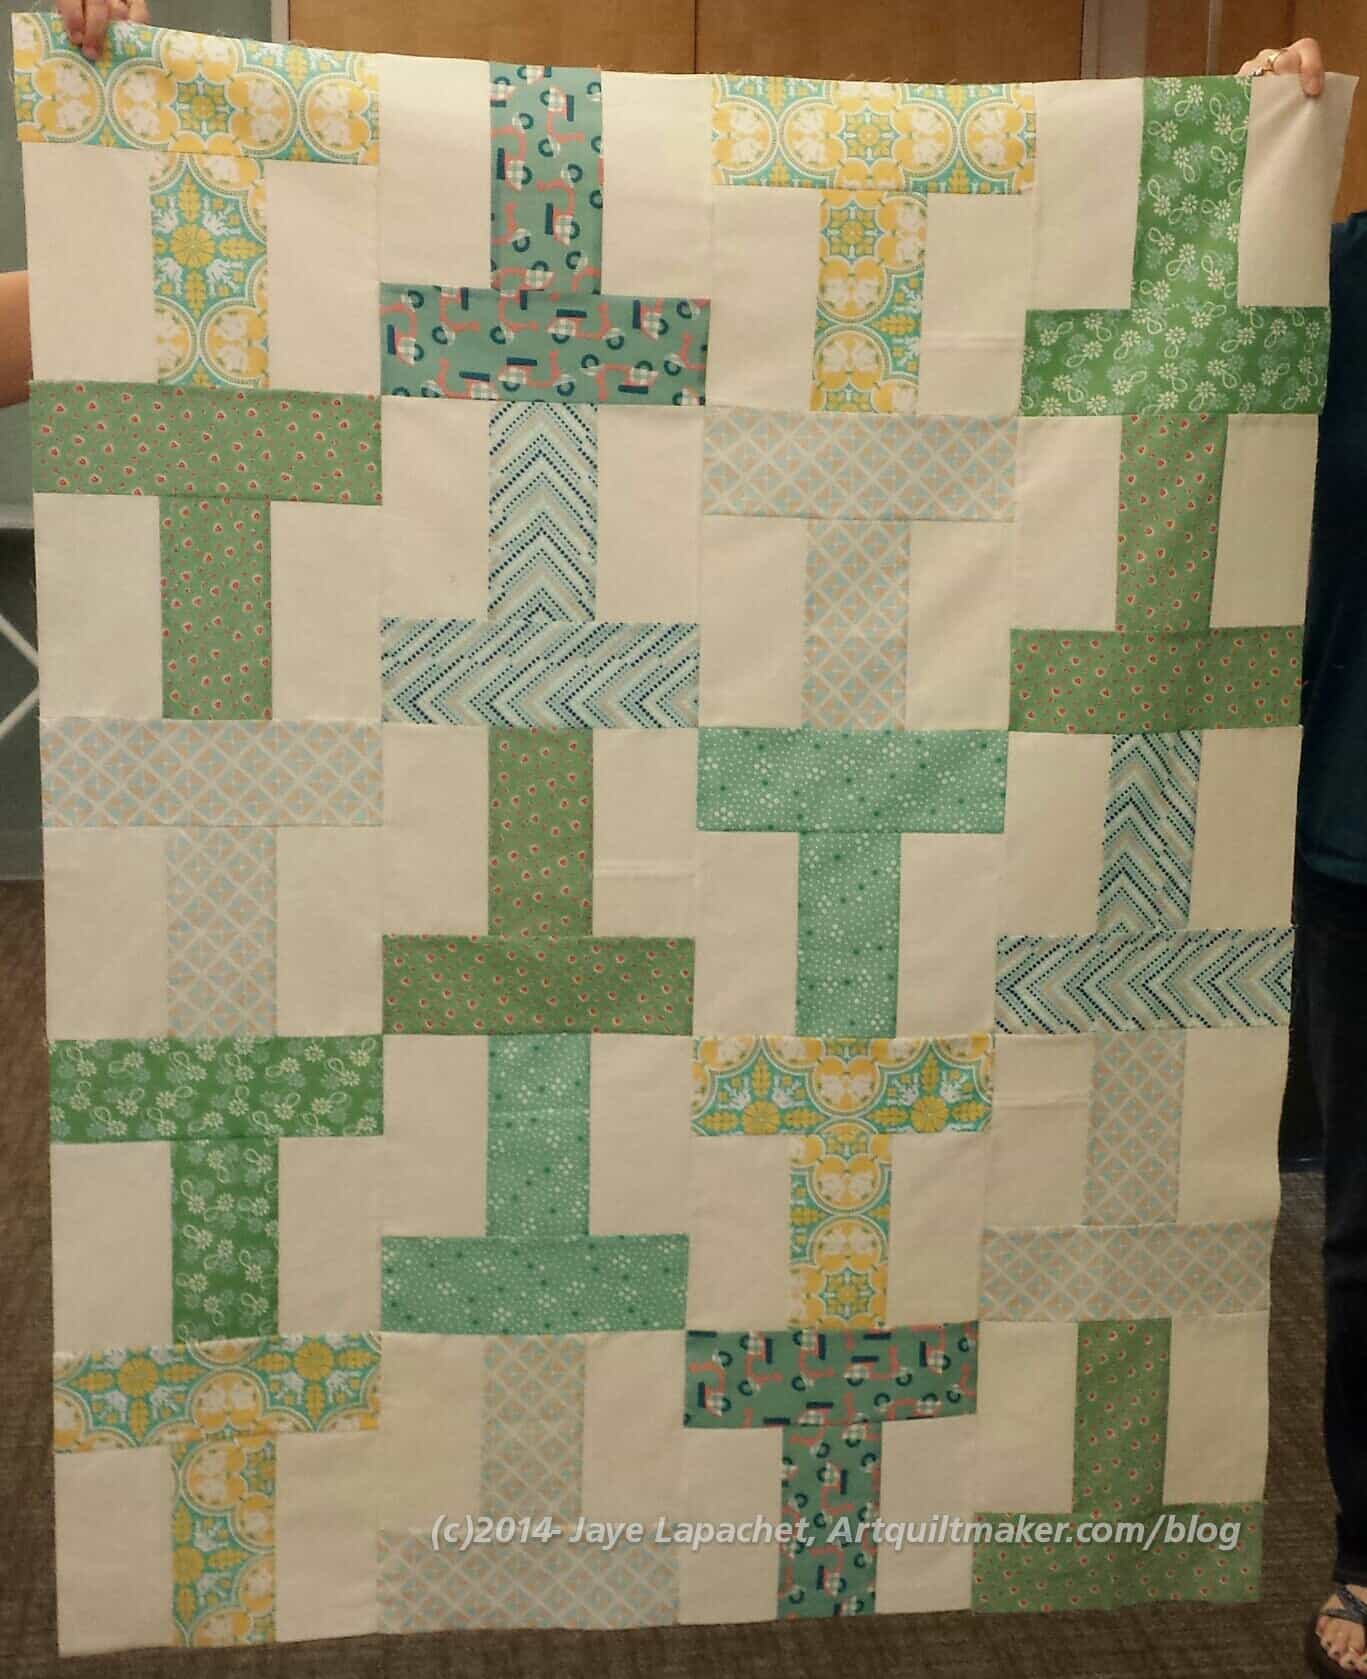
I really think this is a great pattern for charity quilts. It is interesting. There are lots of ways to put it together and it comes out well. I want to work with Gerre again.
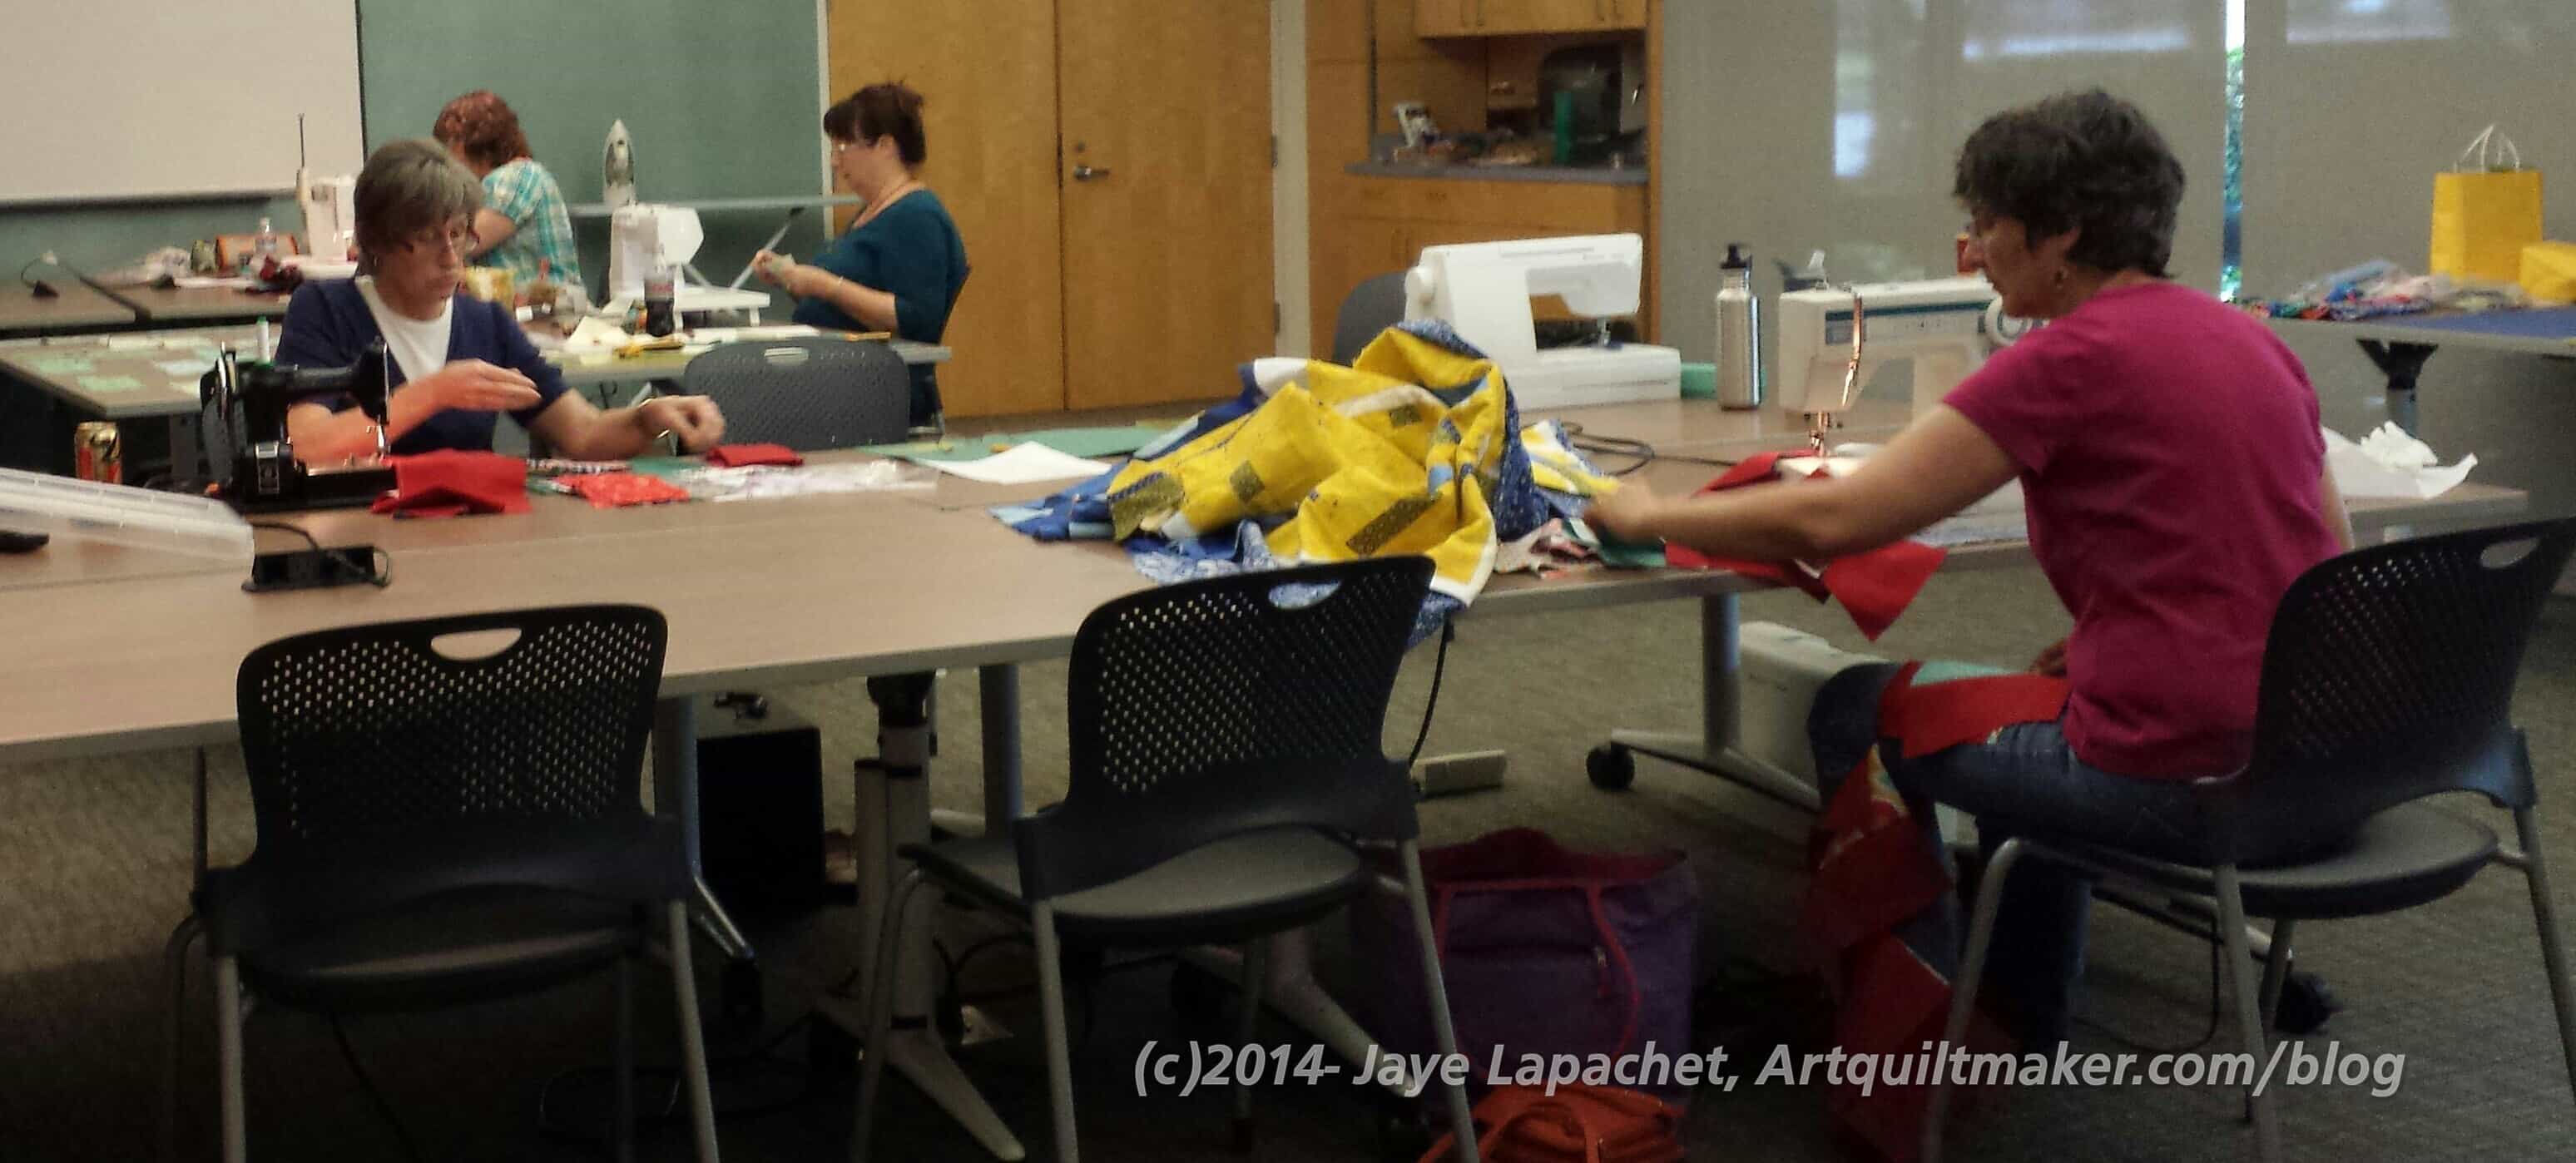
Peggy and Michelle did a great job organizing the Charity Day Race Game and 8 of the quilts we made were from the kits Michelle and Peggy put together before the event. They are awesome, dedicated and well organized.
Worker Bees
We all got kits and set to work. Peggy had done a lot of the cutting already, so we all only had to cut backgrounds and sew.
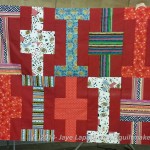
Michelle and Jennifer worked on a red version of the T quilt with a lot of Joel Dewberry Notting Hill fabric.
I was on a team with Gerre and she took the first sewing shift. I wasn’t really paying attention to how other teams organized their sewing and cutting and pressing and pinning, but our organization worked very well.
Rhonda and Ruth worked on a turquoise version with some Pearl Bracelets and a lot of fish fabric.
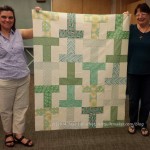
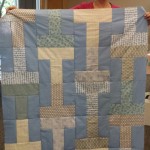
Diana worked on a pastel version with some Aneela Hoey fabrics and Jennifer finished a second green top that really looked like light in a forest.
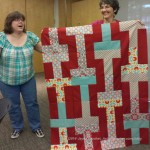
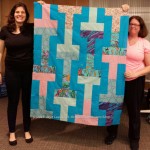
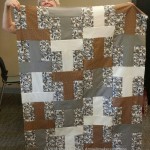
Karen and Joelle finished another red top with a lot of card game fabric that they joked they would give to Kenny Rogers. Peggy made a brown version that looked like candy and Michelle finished a second top with a blue solid background. Gerre and I finished a top with green Ts and a light background. the quilts all used the same pattern, but were so different and fun.
Jennifer & Michelle
Ruth & Rhonda
Joelle & Karen
Jaye and Gerre
Peggy
Michelle 2
Diana
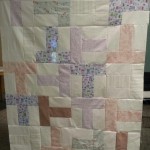
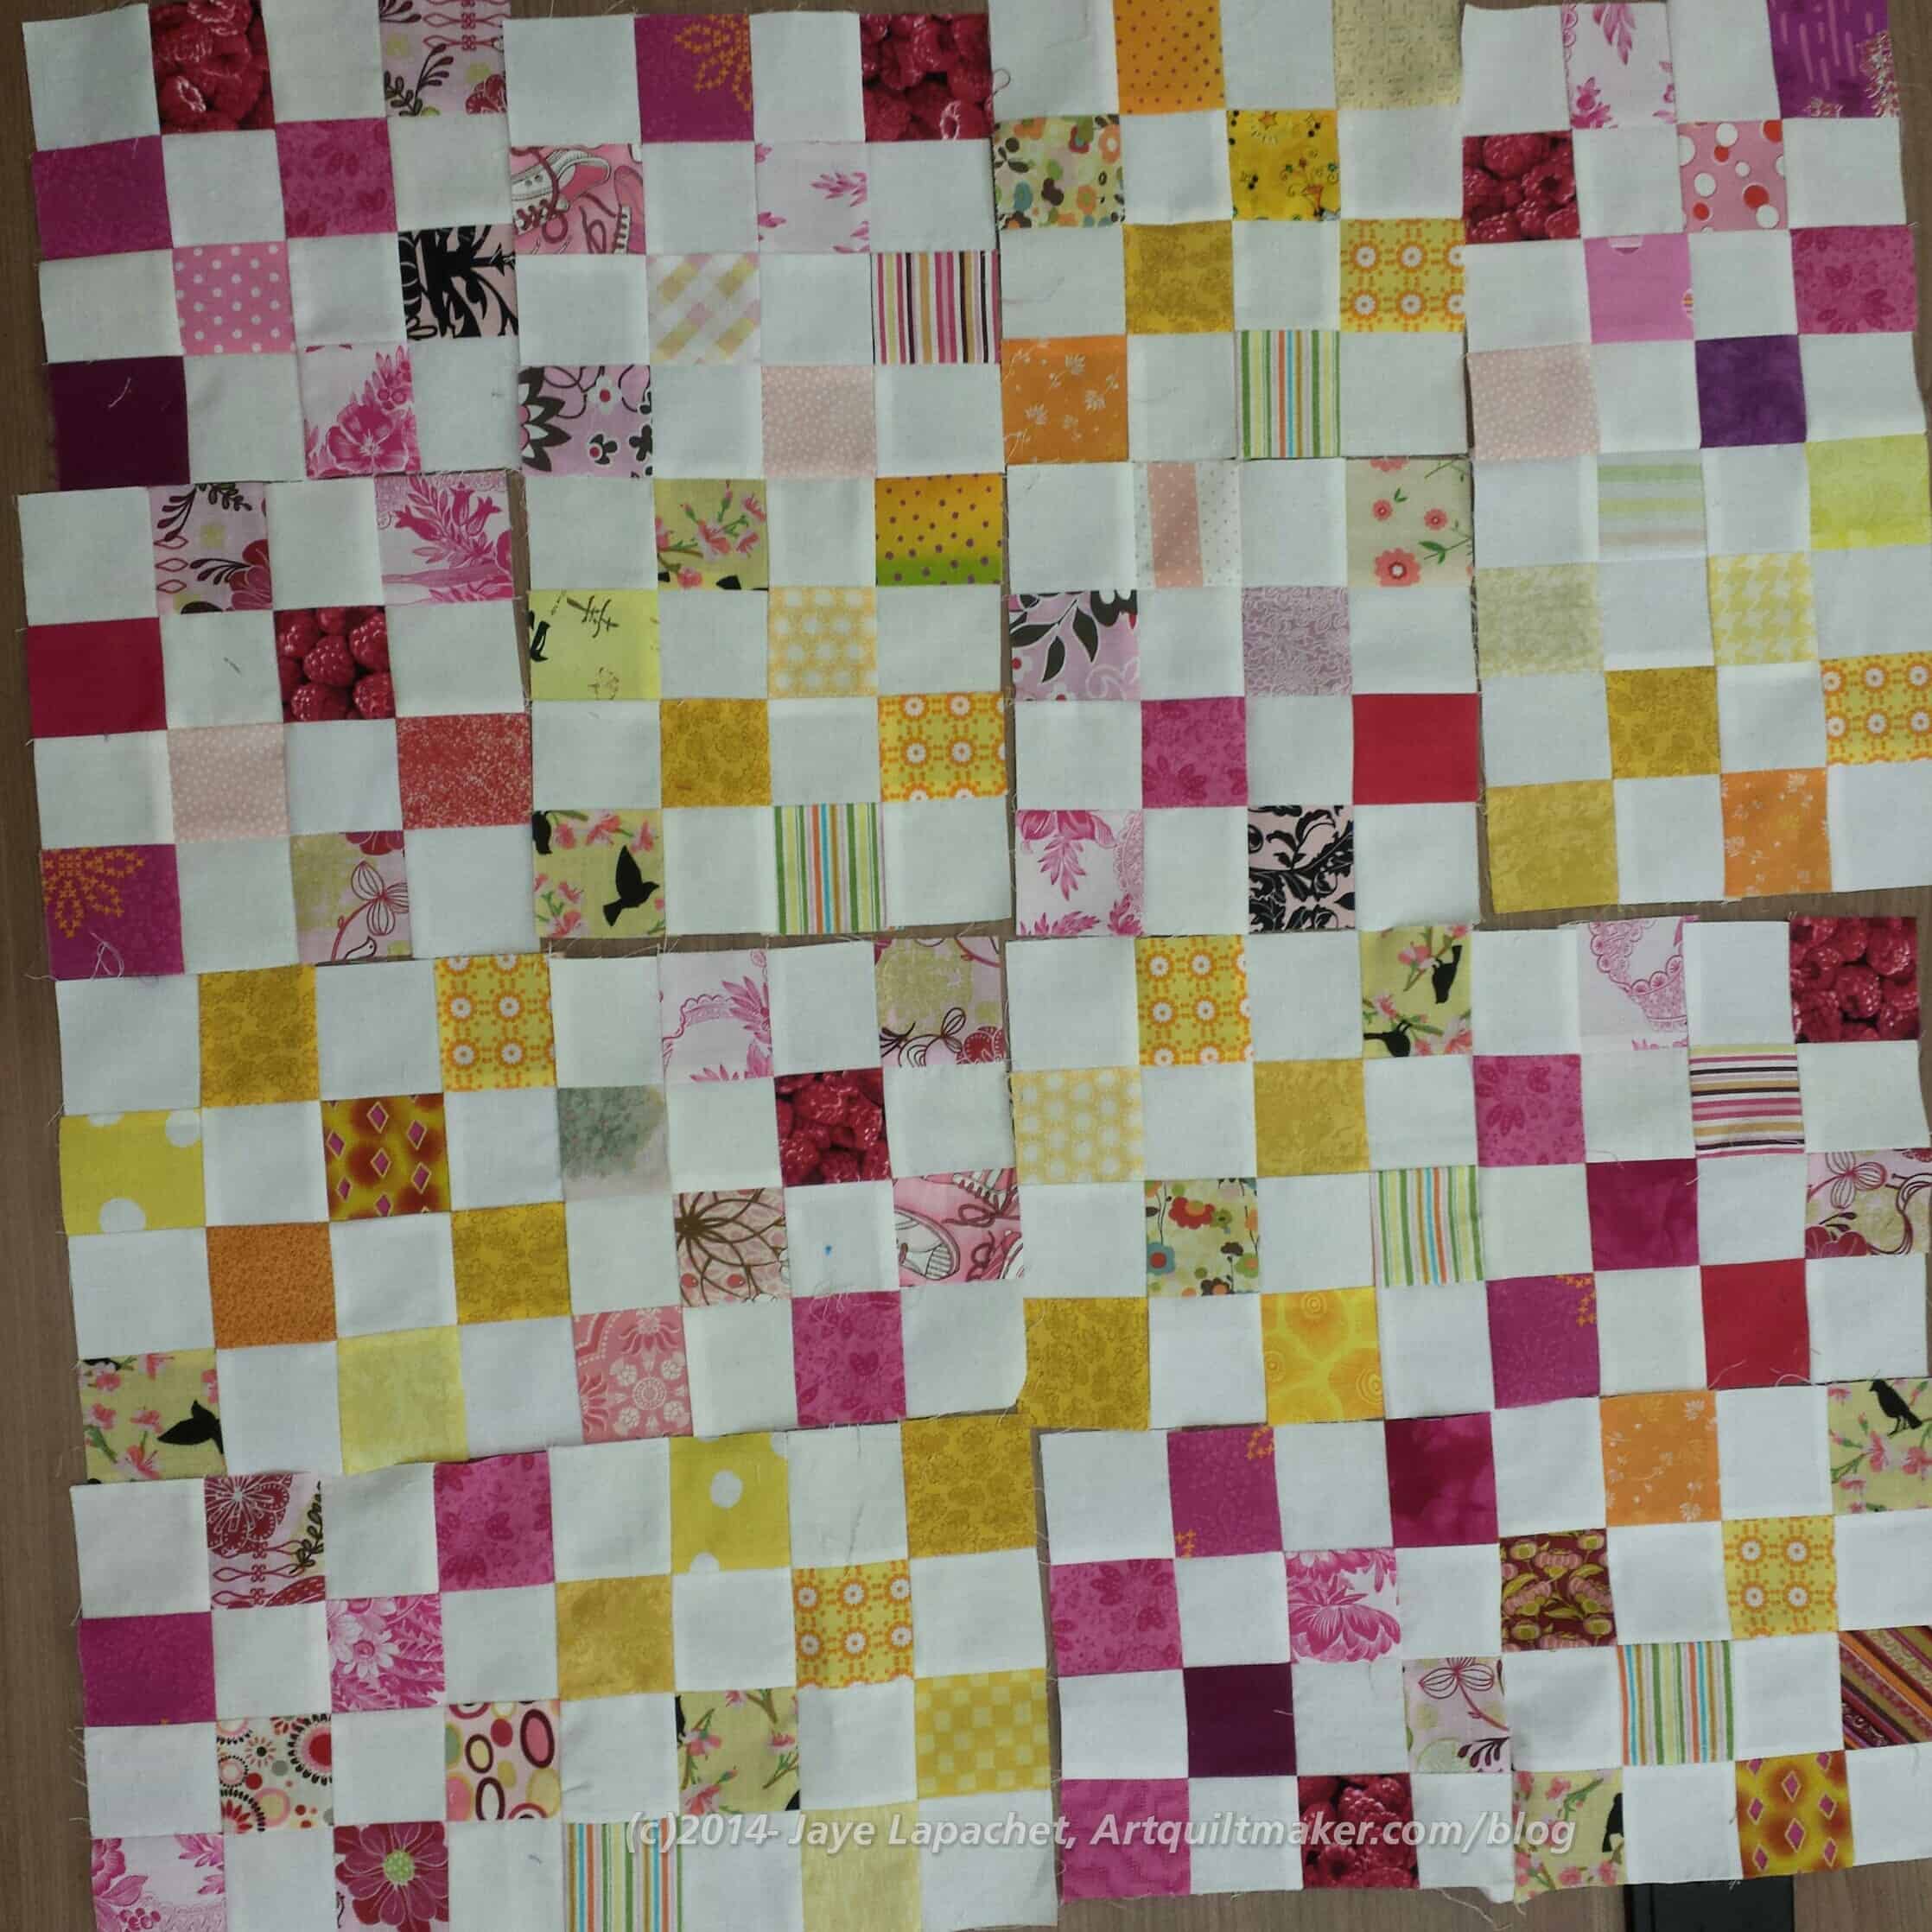
Gerre & Jaye’s Bonus Quilt
After the T quilts were done many people worked on making postage stamp blocks, including Gerre and I. We made as many pink and white postage stamp blocks as we could, then we added in some yellow and white blocks in to bring the quilt up to size. We didn’t finish it. Gerre put me in the sewing driver’s seat and I kept screwing up when sewing the blocks together, so we pinned the blocks together and Gerre will finish the top at home.
You have seen a number of donation blocks and quilts I have made for BAMQG using the postage stamp pattern. I wouldn’t have called it a postage stamp pattern; I would have called it a 16 patch, but postage stamp was what the Charity Girls called it, so we’ll move on and fight about names later.
The most recent quilt (still in process!) is the Black and Grey Teenaged Boy Donation Quilt. You know it; you have seen it 100 times. I make those blocks as meditation and to do something good for others. There is something about making those blocks that feels infinite. Infinite possibilities. I think simple blocks have that quality.
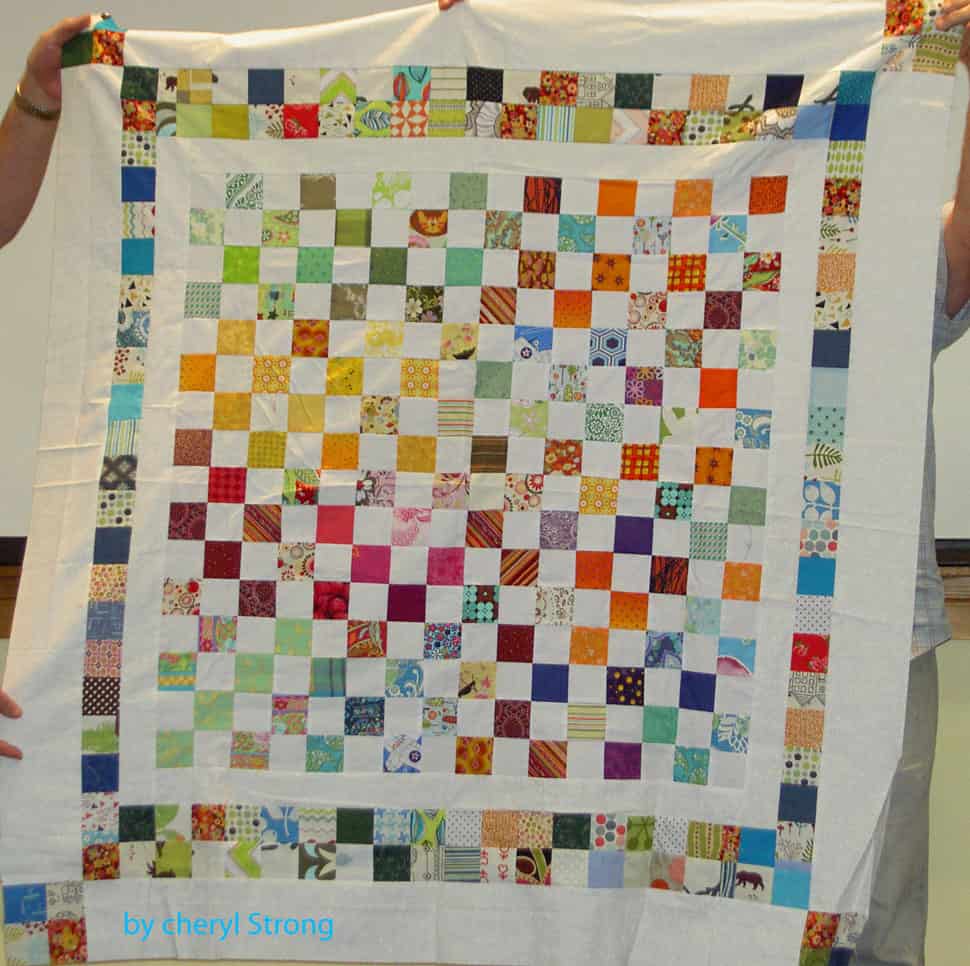
Cheryl’s Postage Stamp Quilt
Cheryl’s quilt is a perfect example. She took a number of different blocks, put them together and added an awesome border to make this donation quilt.
One thing is that I could use a lot of different scraps. I could use a similar border idea to finish the Black & Grey Teenaged Boy Donation Quilt. Perhaps I will use this idea when I make the next donation quilt.
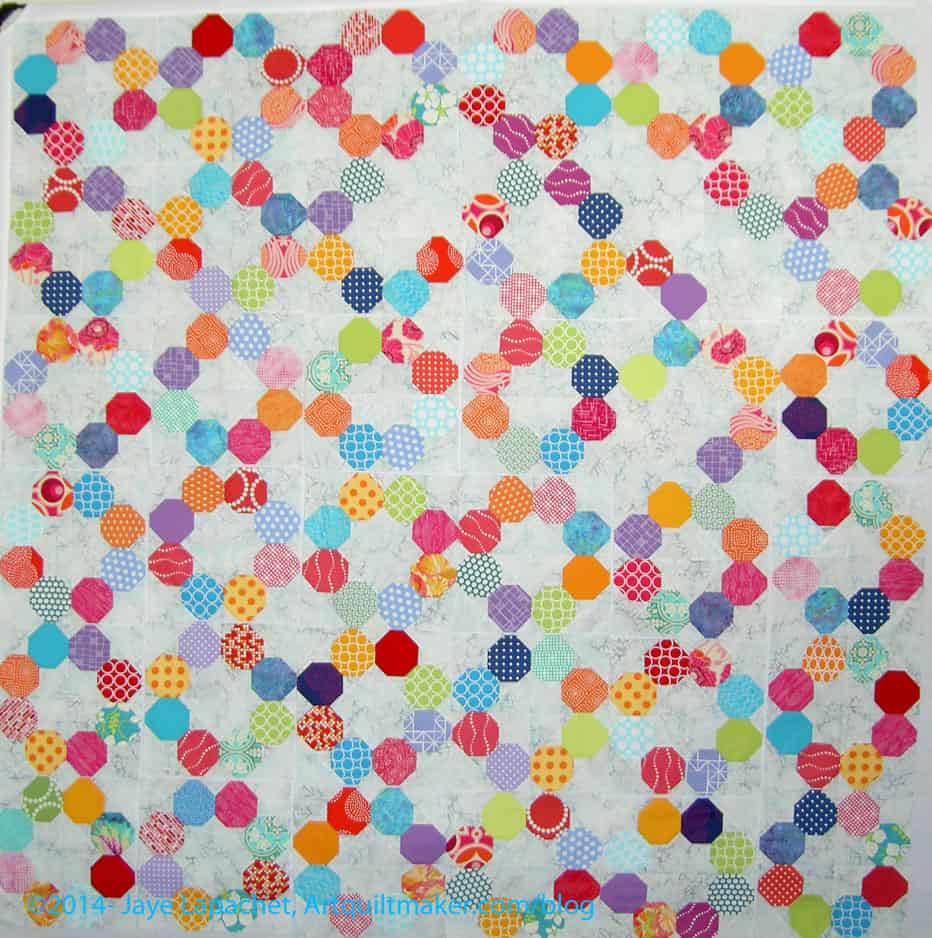
Lots of stuff is about process with me lately. That includes the Russian Rubix. I worked on it, finally, over the weekend and came up with, what I think, is a good idea: Dropping out.
By dropping out, I mean that I replaced some of the quarter squares with blank pieces of the background fabric and allowed the pieces to float. There wasn’t much else I could do with this very distinctive pattern and it seemed like the best solution after not really liking the idea I floated last time.
Dropping out chart
I made a chart of where the blank areas were when I took the last photos. I have moved things around a bit again, though.
As I said in the previous post, I told you that I wanted to cover the raw edges and mid-week last week I had a few minutes over the course of a couple of nights. I started making binding for the inside and pinned it over the raw edges.
I used strips cut on the straight of the grain. I didn’t need to make bias strips, because I didn’t need to curve around anything that requiring some give.
The process I used to make the binding, very briefly, was to cut the strips, fold in half, then open and press the raw edges towards the center. Finally, I laid the pieces in a T, or cross, shape and pinned them to the bag. With that prep work done, I was able to find a time and just start sewing.
Sewing Binding
Pretty early on Sunday morning I put the bag under the machine and began sewing the binding down. It was so great to be able to start sewing right away. I thought this process would be awful and it really wasn’t. Yes, I had to sew slowly. Yes, I had to keep the handles and scrunched up bag body out of the way. Would the process have been better, if I had put this on before the top edge binding? It probably would have a looked just a bit better, but it really looks great.
Finished binding
I used thread to match the binding in the top of the machine and thread to match the outside of the bag in the bobbin. Yes, there are lines on the outside of the bag, but it doesn’t show much unless you look really hard. The Muggles won’t know.
So, I am really pleased with how this bag looks. The crosses look a little odd, but I like to think of it as a design element. I can try something else next time.
A relatively small member of the carp family (which also includes the koi carp and the crucian carp), the goldfish is a domesticated version of a less-colorful carp (Carassius auratus) native to east Asia. It was first domesticated in China more than a thousand years ago, and several distinct breeds have since been developed. Goldfish breeds vary greatly in size, body shape, fin configuration and coloration (various combinations of white, yellow, orange, red, brown, and black are known).” (Wikipedia)
Presenting Flash Tattoos x Goldfish Kiss (the GFK H20 collection to be exact) – a line of innovative jewelry-inspired temporary tattoos.
Goldfish is the easy to use solution for creating gorgeous, individual websites with the latest HTML5 technology in little time.
Carnival prize
Goldfish Memory (2003 movie)
World of Warcraft Tiny Goldfish – available from the Anglers
Goldfish VoIP services
The goldfish is a form of wild carp that has been kept by humans as pets since at least 970 A.D.
Post the direct URL (link) where your drawing, doodle, artwork is posted (e.g. your blog, Flickr) in the comments area of this post. I would really like to keep all the artwork together and provide a way for others to see your work and/or your blog.
We are also talking about this on Twitter. Use the hashtag #CPP
The Creative Prompt Project, also, has a Flickr group, which you can join to post your responses. I created this spot so those of you without blogs and websites would have a place to post your responses.
Shockingly, I am almost done with another journal. I ordered a new one so I will be ready and it took forever to arrive. I have been waiting to finish this journal cover so I could measure using the actual journal. It isn’t like I don’t have 30 around, but most have covers on them and I was being lazy with the knowledge that a new journal was imminent.
This mosaic quilting piece came together so easily that I almost didn’t realize I was finished with the top. That is what leaders and enders will do for you.
I thought I would finish it this past weekend, but I worked on the Russian Rubix instead and also put the black and grey donation pieces through the machine.
Like the Pink Rose Journal cover, I made an effort to piece smaller pieces. It is so much more interesting when there is more piecing. I still have to back it (have a piece of fabric already picked) and add the interfacing then I should be ready to use it. Stay tuned!
This review is all about a book by my pal, Lisa Fulmer. I am reviewing her book as part of her blog tour. Take a look at her Craft Your Stash website while you are here!
Lisa and I met through her former workplace where I would hit her up for prizes and giveaways for my blog and guilds with which I am involved. I even got her to join CQFA for a year. No renewal, sadly, but I live in hope.
Craft Your Stash is Lisa’s first book, but she writes a column for her local paper and writes a blog, marketing copy for her clients and, generally, knows how to put her thoughts into words. I think this book reflects that.
The first 18 pages are intro and background for the projects. If you read the introduction, which is only half a page, you will get a feel for what you can expect from the book.
The first section is called Tools and Techniques. Guess what it is about?
In this section, Lisa has a note about the metric system. She accompanies all of the measurements with an equivalent metric measurement. I have never seen that in a quilt or craft book that I can remember and I think it is a great idea. Yes, our friends who are used to metric are probably smart enough to convert, but really, why should they have to do calculations before they start a project? Great job, Lisa!
The subsection on Stash Essentials is broken up into several sections, which are fully supplied with your must-haves in that category:
Surfaces
General tools
Adhesives
Embellishing,
etc.
Each subsection is then broken down and Lisa writes about differences in quality, amounts, fun points and gives examples of how things look. She has a photo of two different grades of acrylic paint and how they look on the same type of paper (pg.9). Nice touch, I think.
Next comes a section on organizing. The main image for this section is fantastic. It really makes me want to buy some little bowls and containers. The problem is then I would have to also buy the charms and shells to put in them. 😉
Lisa’s tone is very conversational, but written in a way that is still grammatical and not offputting. As I read, I thought “she is just like me” and, though I know Lisa and I know she is just like me (except way better at embellishing and painting!), I appreciated the tone and style of writing, because it wasn’t boring craft book prose. It made me want to read on.
In the section on organizing, Lisa shows pictures of different solutions from the pricier to those you can pick up at your favorite thrift store AND how to use them (pg.14-15). Each item has a brief description of what she uses it for and how the reader can use it. If none of these work for you, you will get ideas about how a slight variation could work for you. The other thing I noticed was that everything was labeled. First purchase: label maker!
Clearly I didn’t read the table of contents as carefully as I could have because I was surprised by the Design Basics section. On the first page (pg.18) is what Lisa terms “a crafter’s best friend”, the Color Wheel. this lovely surprise is followed up with the various color wheel combinations: primary colors, tertiary colors, warm and cool colors, analogous color schemes, etc. This is a good reference to have if you don’t have these tools in another place. Refer to them!
This section also includes some of my pals, design principles and elements. Balance is first (pg.22-23), followed by Unity (pg. 25) and some others (I can’t give away all of Lisa’s secrets.
With all of this preparation under your belt, you are ready for the projects, which start on page 26. The projects all have variations, so the reader is encouraged to use the projects as a guide, though there are complete supply lists and tools required for each project. One of my favorites is the Mosaic Scrapbook Layout (pg.31), which looks like a game board. I might have to send Lisa a blank scrapbook page from my sadly neglected son’s scrapbook project and say pretty please. 😉 If she won’t make it, the directions are very clear for me to make on my own. Now you can stop laughing.
The projects flow into each other, but are unique. From personalized cards (like business cards) to the Mosaic Scrapbook Layout to Shaker Cards (pg. 34). The idea seems to be that if you have your paper out, let’s use a bunch of it while adding some skills and not boring the reader.
The photos are really fantastic. I find myself wanting to look closer and closer at the detail, which is very clear. I also love the colors and color coordination on each photo. Lisa has a lot of in progress photos and does some black and white layouts (pg.40-43) to show placement for the greeting card set (pg.37-39).
The projects have a lot of elements, pieces, parts, but there isn’t a sense of too much nor of charms and beads added to move them through the stash. These projects are well designed and I wouldn’t be embarrassed to have any of them at my house. I would use the cards right away, hang up the suncatcher (pg.50-53) and gift the shadow box. No qualms.
For those of you with a lot of fabric around, there are three projects for you to try so you can make some space for new fabric.
The tips and techniques shown in the projects can be extrapolated out and used in your own ideas. I see this book as a skillbuilder as well.
And last, but certainly not least, there is an index. It is one page, but it is a full page and it is an INDEX. I love indexes and am so glad to see it. It makes things so easy to find, even in craft books.
Finally, Lisa is having a nice big giveaway on her blog as well. She will have a giveaway using Rafflecopter as part of the tour. The prize will be a copy of the book, plus a generous selection of crafty swag to add to YOUR stash – She is willing to ship internationally to the winner, so get busy adding your name. Check out the posts below:
If you don’t win, go buy a copy. Here’s how (as if you didn’t know):
Purchasing information
The formal release date is September 1st and it should be in stores by mid-to late September (list price $16.99). Amazon will start shipping orders on October 1. Want a signed copy? The are for sale on Lisa’s website now ($16 + tax/shipping). Shipping is going on now.
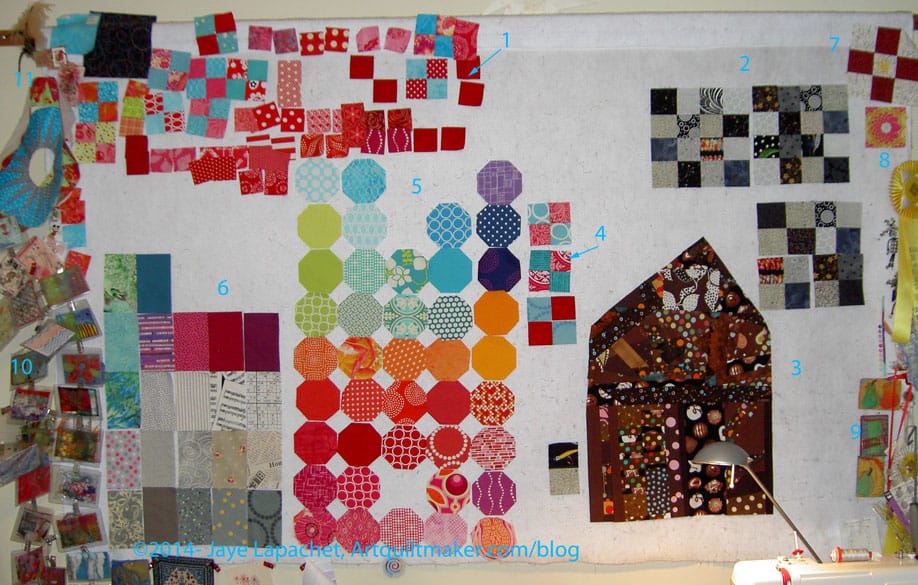
Again, my design wall looks remarkably similar to what I posted last time. C’est la vie. I have to remind myself that it isn’t speed that I am going for (though sometimes it isn’t true), it is engaging with the process that is important.
#1: I am still making those turquoise and red four patches. I have a lot more patches than blocks at the moment, though fewer than last time, because I did indeed get busy and made a few. I still have too many other leaders and enders at the moment to make real progress on any one quilt top.
#2: I have a few more squares finished for the Teenaged Boy Donation Quilt and some in progress as well. I dug out some more blacks and greys to add some variety. Some came from the edges of the T-shirt quilt and I thought it was a good use of that remnant.
#3: I decided to make another Owl, like Henry. I took the leftover mosaic piecing from Henry and added some more to it. I am also most out of chocolate brown so I hope the piece is large enough. I haven’t gotten the pattern out to check, but I will soon.
#4: some red and turquoise 4 patches in process. I used a few for leaders and enders, though I have enough leaders and enders to see me through nearly an eternity of projects.
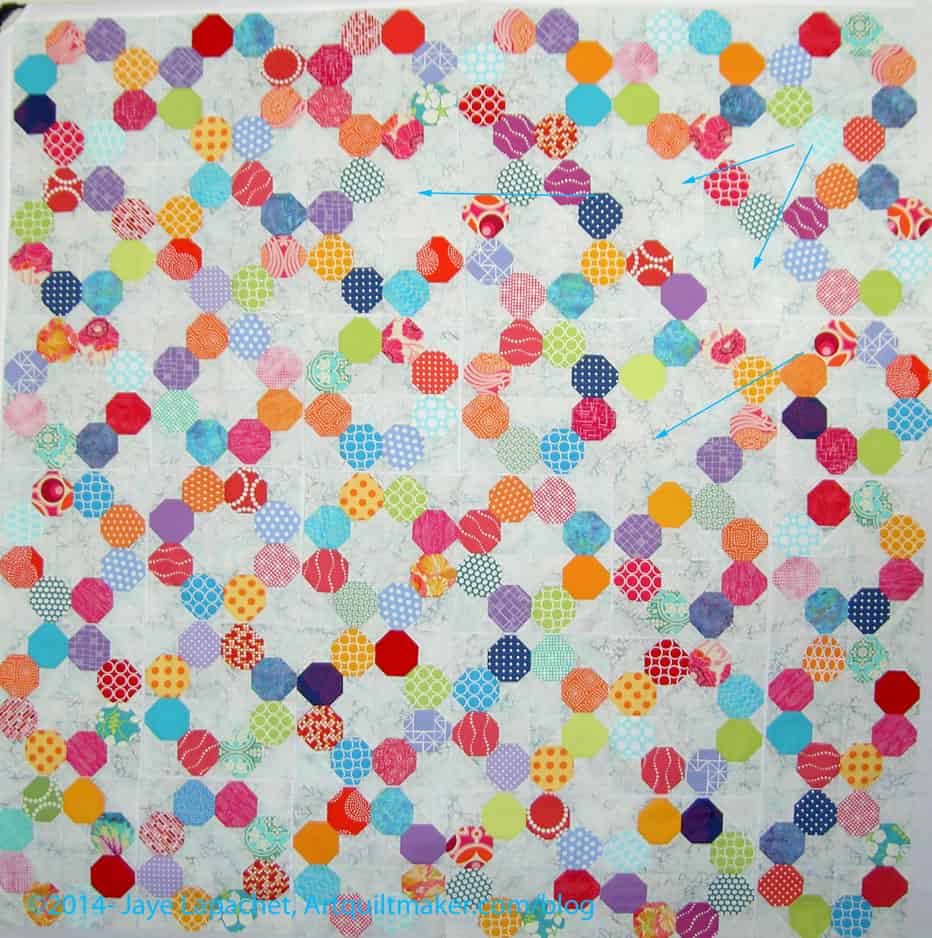
#5: those octagons are still taking up a lot of space. As you might remember, I decided I would start with the top row and sew all of the octagons in each of those colors. The goal was to get the small triangles sewn to the octagons, so the next step would be to make the blocks with a variety of colors. My idea was that once the stack on my sewing table had been sewn, I would take the octagon off the design wall and sew that, thus reducing the space being hogged on my design wall. It didn’t work. It didn’t work because partway through my grand plan I have enough blocks to make a BIG quilt and many more octagons. I have to mull over ideas, which includes putting octagons in the scrap bin or making journal covers out of them. I have a border idea that will use a bunch more so we’ll just have to see.
#6: this group of FOTY 2014 patches has also been up there a long time. I started in on the big pile of fabric that I talked about last time, finally, and made a group of patches. It is not enough yet for a full post, but I am getting there. One problem is that it was a load of neutrals and those are very depressing to press one after another. It has to be done, so after the Band Review Saturday (4:30 am start) I was too tired to sew and pressing seemed the thing.
#7: the block is still on the design wall. As I said before, I made the 9 patch, but the Young Man sewed the button to the middle in Cub Scouts as part of a rank advancement, I think. Every time I look at it a flood of emotions hits me:
Why doesn’t Boy Scouts have a sewing merit badge?
Wishes that I had sewed more with the boy when he was small and somewhat interested.
I am still trying to think of a project in which to include it.
#8: that little Art Deco-esque flower is from one of the first swaps or challenges put on by BAMQ. I thought I would use that flower as the center of something and haven’t yet gotten to it.
#9: those are some of my favorite ATCs. I keep them near my sewing machine so I can be reminded to be creative.
#10: (far left) those are finished ATCs that I have swapped with other CQFAers. I put them in those plastic name badge holders people get at conferences and hang them up. I really need a clothesline or something, but have never gotten around to it.
#11: Paper pieced Mariner’s Compass made in a Barbara Barber class. I intend to finish it. I even still have the pieces, the pattern and the directions. I suppose it should go on my To Do List.
A little while ago I participated in Kelly’s monthly BAMQG Challenge, which was to quilt a half yard fabric sandwich. The goal ended up being to make a bag from this piece. I wasn’t entirely happy with the quilting, but I didn’t sincerely dislike it either. The quilted piece laid around for awhile, but it was on my mind. It is only recently that I made time to start the bagmaking part. Part of the delay was because I couldn’t understand and extrapolate out from Kelly’s excellent directions. You know me. Sometimes I can read and read and the words look like gibberish. She was very patient with me and agreed to give me one step at a time. Broken down I could do it.
Supplies:
1 yard of fabric (2 different half yard pieces will add interest)
1/2 yard of fabric for straps and other fiddley bits
12″ x 42″ (or WOF) ShapeFlex
12″ square of coordinating fabric for binding
batting slightly larger than 18″ wide to accommodate the half yards above
Sewing machine and supplies to machine quilt/free motion quilt
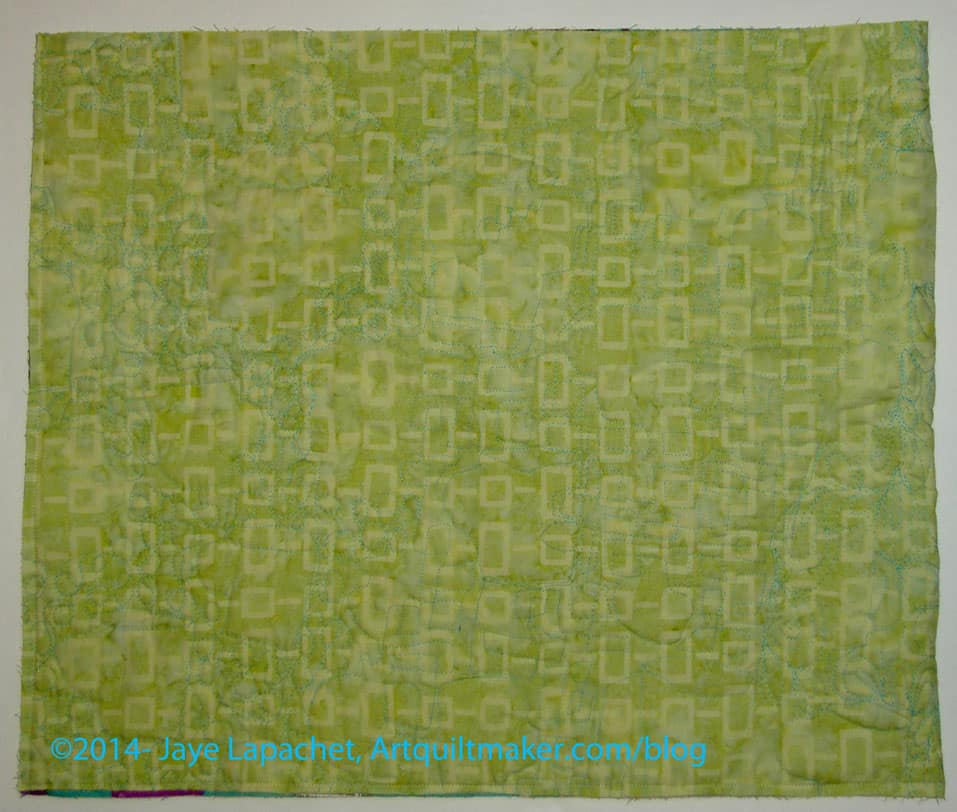
Layer and sandwich 2 half yards of fabric with batting
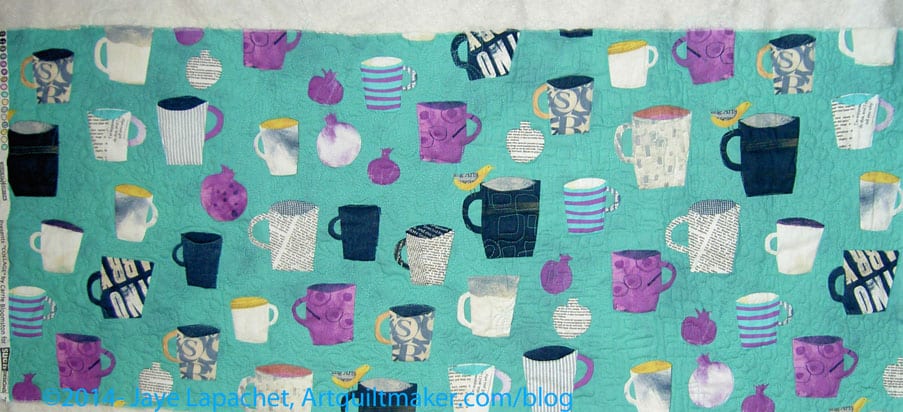
Full Piece Quilted
Free motion quilt piece as desired. Shown is the piece that I did back in April. I know pieces of fabric don’t magically quilt themselves and I am not saying they do. It took me some time, but it is good practice and this is a good use for those practice pieces. Go back to the previous post and look at the different quilting designs I used.
Kelly didn’t have me make the straps until after the bag was put together. I like to make all the fiddley bits first, so they are ready to go when I am on a roll making the bag and ready for them. That means: make the straps whenever you want. You should make them your favorite way. Here are the directions for making the straps that I used for this bag:
Cut 2 strips 6″ wide by WOF. You could make them 5.5″ and they would be a touch skinnier.
Cut 2 strips 5 3/4″ x WOF from ShapeFlex (If you make the straps skinnier, you need to adjust the size of the ShapeFlex. I cut it smaller to reduce bulk in the seams, which can get quite hefty without trying.
Press ShapeFlex to wrong side of fabric, following the manufacturer’s directions.
Fold each 6″ fabric backed piece in half and press well.
Open the pieces you just pressed and fold raw edges to the center.
Press folded edges.
Fold entire strap on original center fold again. Raw edges should be inside and strap should measure about 1.5″.
Optional: Depending on what you want to use the bag for, you can further line the straps with something like Timtex or Soft & Stable.
Topstitch along both edges very close to the edge. You can use a decorative stitch or two lines of straight stitching to add interest
Squared up Quilted Piece
Square up your quilted piece by trimming the excess batting and raw edges.
Fold trimmed piece in half RST* and sew along side and bottom edges ONLY. Only the top will be open. You will have a flat piece that looks like an oversized iPad cover.
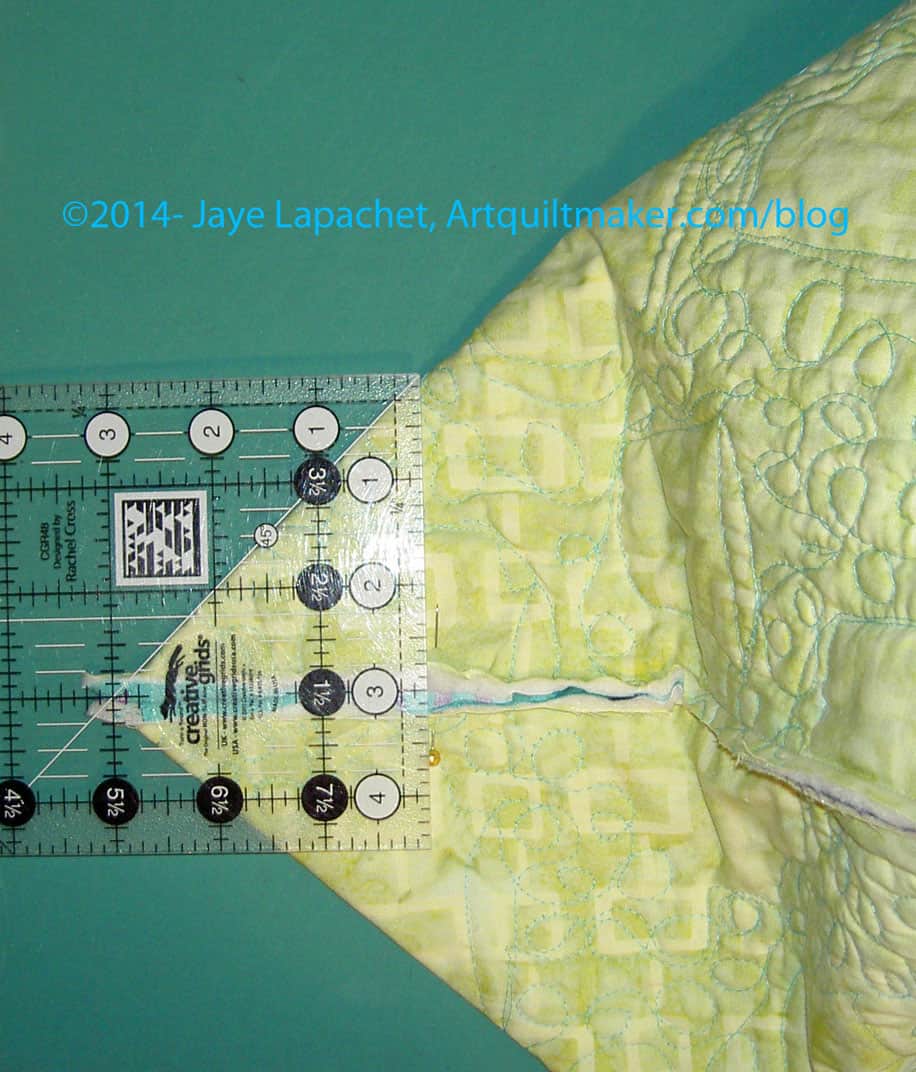
Measure to Box the Corners
Box the corners. Kelly does a minimum of 2″ from the side seam. FYI: there is no seam on one side, so I pressed the fold and treated the folded part as a seam. I used my Creative Grids 4.5″x8.5″ ruler to try out different corner sizes. I ended up doing a 3″ box, using pins to try out the size and see what I liked. You can see in the photo that I was able to use the side and bottom measurements to help decide. I had to see how big the bag would be and how it work as a bag I actually used. Once I decided on the size of the boxed corner, I drew a pencil line across the corner to know where to sew. I placed a couple of pins across the drawn line to hold the bottom in place. Then I sewed on that line to make the box. in the picture, I sewed along the short end of the ruler from diagonal line to diagonal line using the center seam as the straight line.
Corners Boxed
Optional: Trim off the excess corners to reduce bulk. I like to do this because I don’t like the excess to interfere with my stuff once I start using the bag. Also, small stuff that migrates to the bottom of the bag gets tangled up with them. Since this bag doesn’t have pockets, small stuff will migrate.
Press raw seams open. You’ll have to stick the iron inside the bag.
This is the point where, when I make the next version, I will sew binding over the raw seams. If I knew someone with a serger, I would serge them, but I don’t, so binding it is. I could just leave the raw edges, but that just seems wrong. On this version of the bag, I did this step later, but it makes sense to do it after the corners, so there is not a lot of other stuff to worry about and you won’t have to fold the ends of the inside binding over, because you can cover the raw edges of the inside binding when the top binding is sewn.
Make a bias binding like you would for a quilt. You will need about 50″. I cut my square (see list of supplies) into 2.25″ wide strips on the diagonal. The Judy Martin Point Trimmer ruler makes it really easy to sew the strips together. I suppose you could use straight of the grain binding, but I think a bias binding works well.
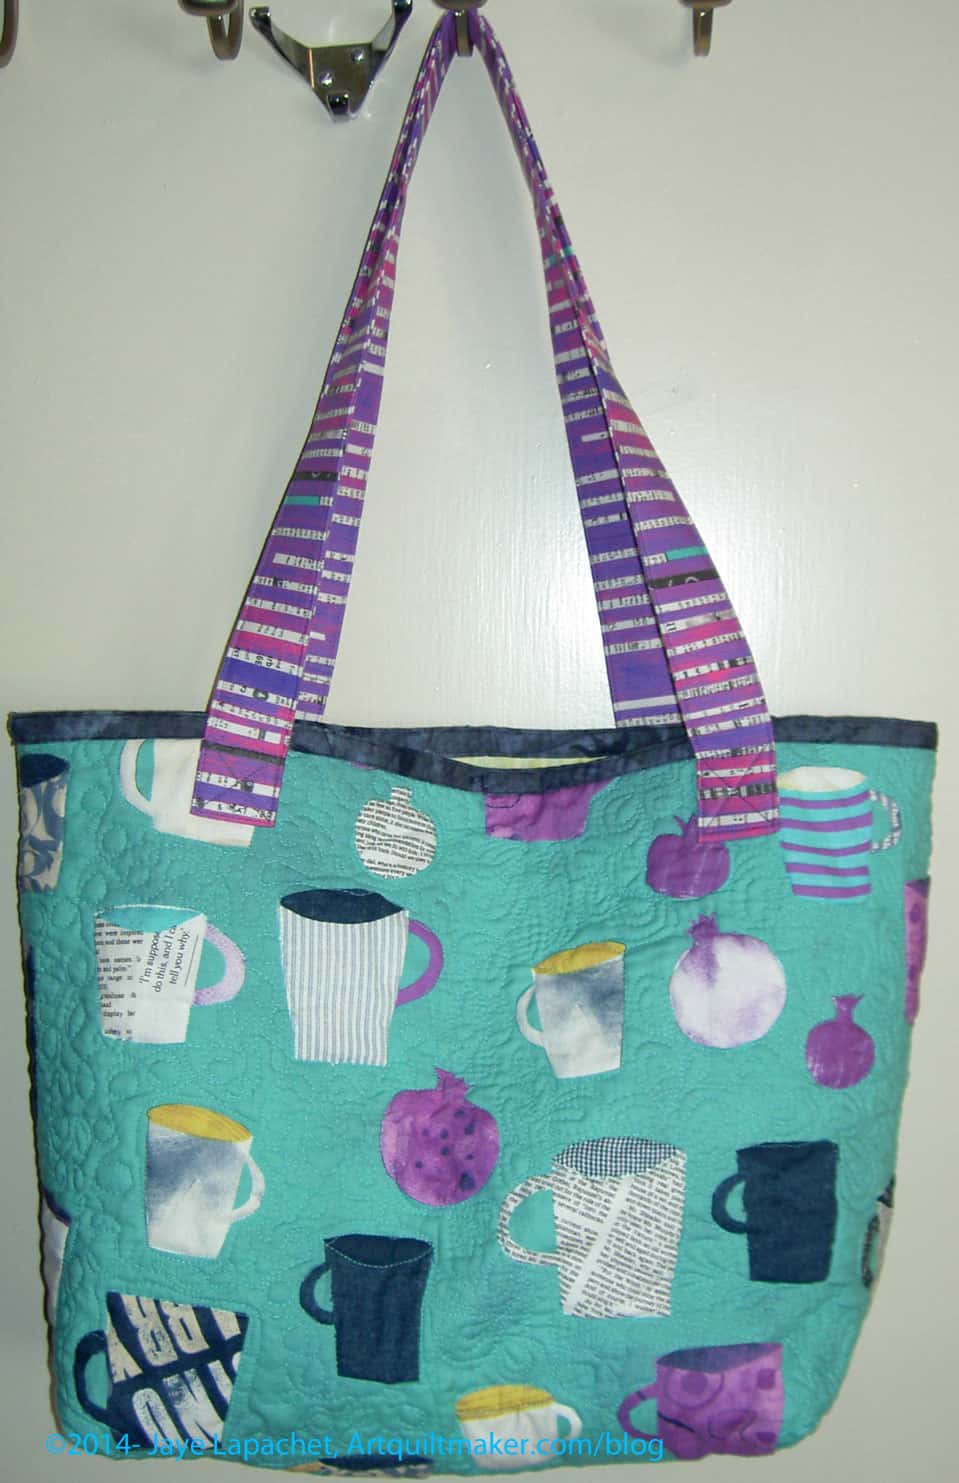
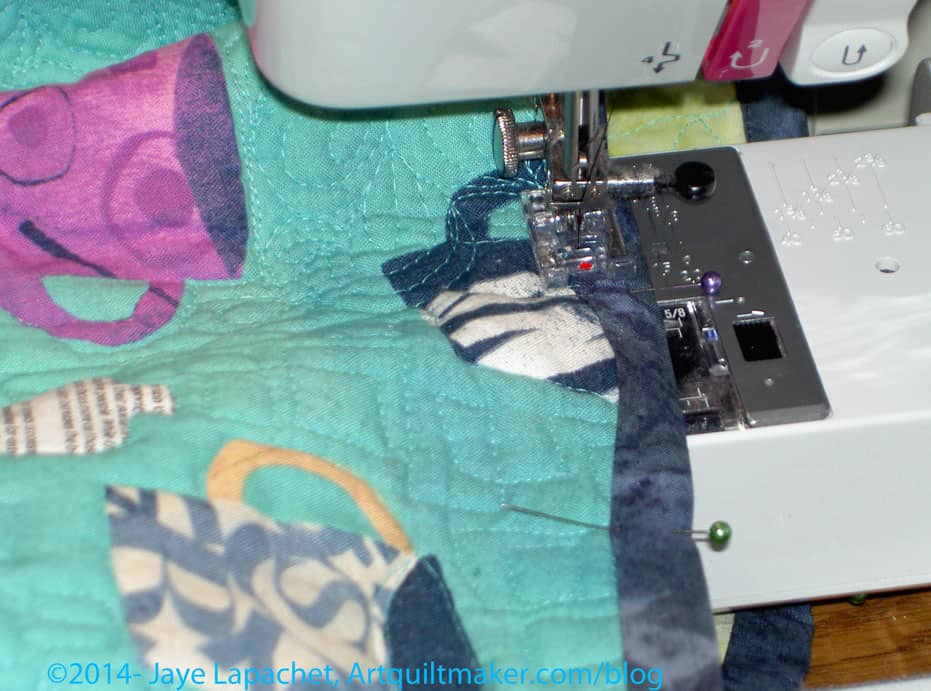
Add binding
Bind the top, covering the edges of the binding that covers the inside raw edges (step above). I sewed along the bottom first, making sure I caught the underside as well as the top. When I finished I sewed along the top of the binding as well. I thought it made the bag look more finished and added some interest (must be my favorite term today). I used an extra piece of binding leftover from the Spiderweb quilt and I am glad I used something that mostly matched. On another version, I would plan ahead better and use a coordinating fabric or the strap fabric.
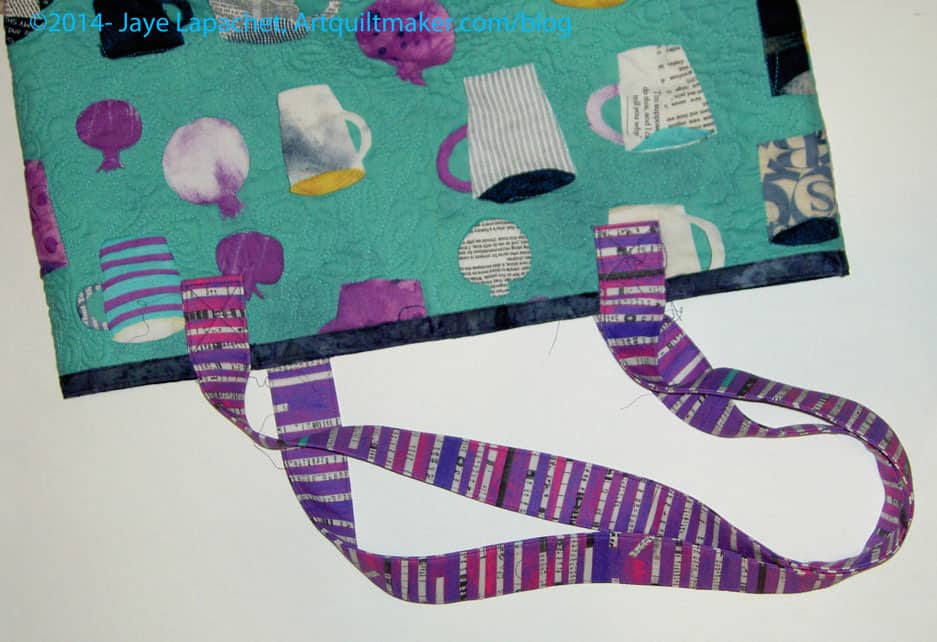
If you haven’t made your straps, make them now.
Test the length of the straps until they are right for your height. I used WonderClips at different lengths to find the right length, then I trimmed the original length to my custom length, which was about 36″.
Flatten the bag carefully so the edge of the side is folded. This means that the edge of the side measures an equal amount from the side seam to the edge of the side as is the top. Measure two inches from this fold.
Place a pin at 2″ that you just measured.
Measure 2″ down from the top and place a pin parallel to the top of the bag. This makes a half square where you will place your strap.
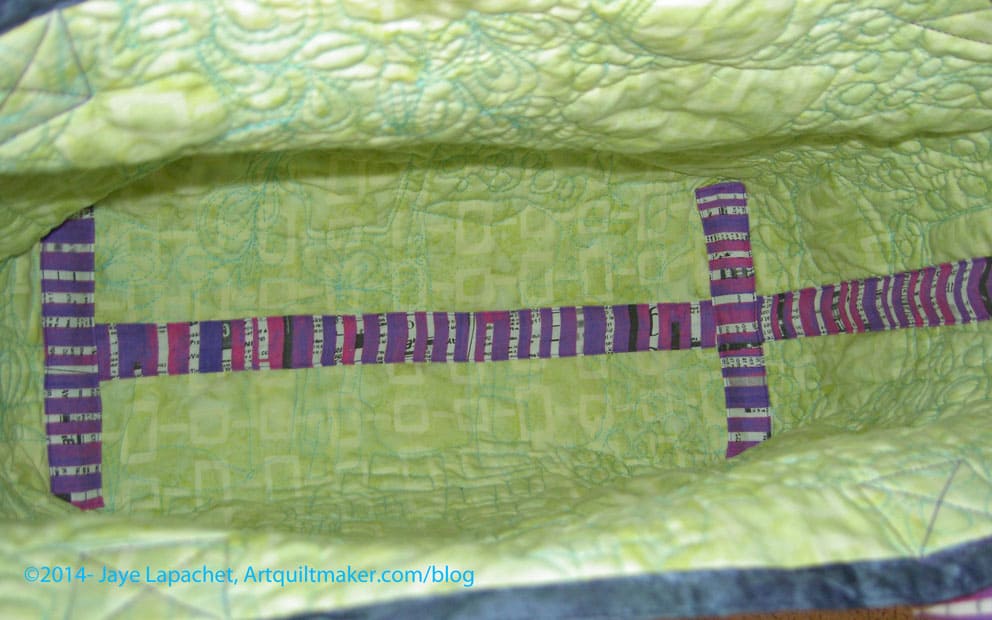
Fold the end of the strap 2″ up and place the folded edge right beneath the bottom of the binding.
Sew the straps to the bag, making a box with an X in the middle. Go around the edges and the X a few times.
Optional: After you sew on the straps, sew along the fake edge of the side (see step 14) from the top to about 4″ from the bottom. Do this on all sides to make the bag into a box.
You are finished! You have made the bag. Hooray!!!
A Variety of Notes:
Crazy as it sounds, I am now thinking of fabrics I can quilt that would look awesome in bag form. I know. I think I have lost mind.
I like my bags to have pockets, but I also don’t like the stitching to show through, so I didn’t put any in this bag. You could make a lining and add it before you sew on the binding, then you wouldn’t have to cover the raw edges with a binding. You could sew the pockets to the lining. You’ll have to figure the measurements out yourself. Of course, your beautiful quilting would be covered.
I still have WIPs. Who doesn’t, after all, but the list is getting a lot smaller.
Aqua-Red Sampler – Frances and I are back at it regularly and I give Frances full credit as I have been letting her “drive the bus.” I did work on the hexagon tutorial as promised. It is ready to post, but I could have taken a few more photos and might still do that. If you look at it and think there are a paltry number of photos, check back.
The Tarts Come to Tea: I still haven’t worked on this since April 2011, though, periodically, I think about working on it.
Pointillist Palette #4: Fourth is a series of 6 quilts; needs tiny square patches sewn together. I still haven’t worked on this, though, I did find a bunch of squares already made. That makes me hopeful.
Self Portrait: started in 2006 at a class at Quilting Adventures in Richmond, Virginia. My career counselor breathed new life into this project for me. She asked a simple question and the end result was inspiration for this piece. I am working on printing images on fabric and looking at the shoulder fabric. I am still trying to decide about a mouth and I need to find some monsters. 😉
Under the Sea: class project; like the design, but not the colors much. Possibility for abandonment. I have to face reality.
Ready for Quilting
Wow! Everything on this list is new, as in it was never on the original 26 Projects list.
Table runner: Basted; needs quilting and binding. I am planning on free motion quilting this myself for practice, which may be a challenge when my main machine is not working. (Not on original list)
In the Finishing Process
Nothing at this time, which is kind of odd.
In Process
I decided that I had better put in an ‘In Process’ category. The difference, at least in my mind, between ‘In Process’ and ‘UFO’ is that I am actively working on a project that is “In Process.”
Spin Wheel: really not started, but supplies gathered. I probably have enough fabrics and just need to decide to start.
Stepping Stones #2 using Bonnie & Camille fabrics Bliss, Ruby, Vintage Modern: made two test blocks, but still in the thinking stage while I decide on the background colors. I want the contrast to be good.
Stepping Stones #3 using the Macaron pre-cuts from Hoffman. I just remembered this project. It isn’t started, but I have all the pre-cuts and should think about actually using them.
Windmill quilt: Still hunting and gathering. I will use a grey for the background, because if I use more of the cut fabric patches, the pattern will be lost. The pieces are too oddly shaped and I don’t want to lose the pattern in a mass of scraps
Abandoned
Nothing so far for 2014
You can find the last update for the Current Projects list provides a good comparison to this month.
I thought you might want to take a look at the first list I made, the one with the 26 Projects. I started the list in October 2011. I have made REALLY GOOD progress. Up until last month, I was still planning to stop this post when I had no more projects from the original list to write about, but now, that the end is in sight, I am not so sure. It is so useful to keep track of all of my projects. Since I still have some pretty old projects on the list, I don’t have to decide right now.
*New – Project started after I started working on the 26 Projects list
It isn’t really frosty out and we hardly ever get any significant frost, so this prompt is just as mysterious to me as it is to you. Onward!
Jack Frost
window frost
Robert Frost
Does Frosty the Snowman count?
Frosting on a cake? Does that count
Definition: “Frost is the term for several types of coatings or deposits of ice that may form in humid air in cold conditions, usually overnight. In temperate climates it most commonly appears as fragile white crystals or frozen dew drops near the ground, but in cold climates it occurs in a greater variety of forms.[1]”
Hoar frost
Frost Strike – spell in World of Warcraft- Instantly strike the enemy, causing 1% Frost damage
Frost Dessert Lounge (I couldn’t resist – the image of chaise lounges and people wandering around with yummy desserts made me add this. They aren’t paying me, so no links)
Frost Mage
Frost is a slow and heavily-armored Warframe that is able to utilize offensive and defensive skills to both his own and his team’s advantage.
David Frost
The Frost Chronicles
Frost (2012 movie)
World of Warcraft DPS Frost Death Knight Guide for PvE raiding.
The Patricia & Phillip Frost Art Museum at Florida International University, Miami.
Post the direct URL (link) where your drawing, doodle, artwork is posted (e.g. your blog, Flickr) in the comments area of this post. I would really like to keep all the artwork together and provide a way for others to see your work and/or your blog.
We are also talking about this on Twitter. Use the hashtag #CPP
The Creative Prompt Project, also, has a Flickr group, which you can join to post your responses. I created this spot so those of you without blogs and websites would have a place to post your responses.
A few weeks ago, Sandi, of Quilt Cabana Patterns, posted a playmat she made. It reminded me of Throwback Thursday (#TBT) and how Quiltin’ Jenny always posts something from her pre-blogging days. I wasn’t very productive in pre-blogging days, but I do have quilts that only show up on Artquiltmaker.com about which I have never written.
Playmat
The Playmat is one of those quilts.I made this quilt in about 1997 or 1998.
The Playmat was one of the first projects I worked on when I was a new mom. I hadn’t been sewing much, was only marginally connected online (remember this was in the dark ages with no Twitter or podcasts or blogs) via the QuiltNet listserv.
I don’t remember why I decided I needed to make a playmat, but I really used it to lay out on the floor so the Y.M. (previously the Tiny Bubba) could lay on it. Later, he sat on it, but as soon as he started crawling, we used it briefly in the stroller, but he would throw it off and out, which became annoying.
I made this quilt very quickly and used a pillowcase technique to avoid binding it, then quilted it myself. I notice now that the edge is all bias. Not sure what I was thinking, but the piecing is much more interesting (if the color combo doesn’t hurt your eyes) on point than a straight set.
The back is a nice cute bears in King Arthur garb print. I know I didn’t want to cut it up and I used it for a quilt for Friend Julie‘s younger son as well. I’ll try and add that photo to this post.
Every time I turn around, I am kind of shocked that it is September. Even in my journal, I keep starting to write June when I write the date. I don’t know why. I did that all through last year as well and had no good reason then either.
Anyway. Lots of BAMQG this week.
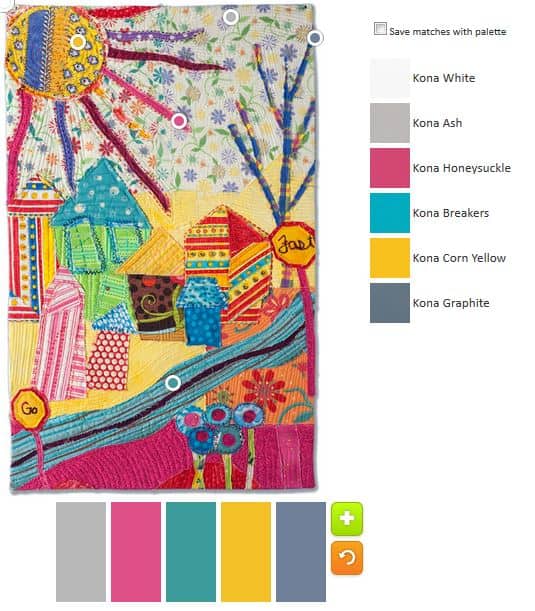
Play-Crafts Palette Builder
The meeting was awesome, as usual. The best part was the talk by Anne Sullivan of Play-Crafts.com. She gave us all a lecture on Color Theory. I know a couple of things about color theory, but I learned quite a few things. There are things called color models, which I have heard of before. One of the models is called Hue, Saturation & Value (HSV). It is a color model created to be more intuitive and show color relationships.
Anne also talked about the basics of color theory, contrast, and color schemes. Anne has the passion of someone who loves color. She has clearly done the research of a person dedicated to something she loves. I looked at her website and found nothing on color until I went to the patterns and tutorials section and there were some tutorials on color there.
We had some business as well.
Elections are next month.there will be a couple of new positions available: liaison with MQG and the Opportunity quilt coordinator
Charity will host a Sew Day on October 4. We will work in teams to create charity tops.
Amanda still has no reliable source for Cat Bed donations. She had a few that were already made, but not stuffed, so people took those. I gave in the neon orange bed. It got a few laughs. [BTW, I forgot to take a photo of that cat bed, but it was just neon orange, so nothing interesting. Also, I was able to cut a top and bottom, but not a gusset from the remaining Polartec. I hoped that Amanda would have a bit more fabric, not in neon orange from which to make the gusset]
The quilt display at the Los Altos Library will happen Dec 1-31 and Peggy has forms to fill out.
There were a few more packs of fabric for the 2014 Opportunity Quilt. The blocks are due at the October meeting.
PIQF is during the next meeting. 🙁 Poor planning on the Mancuso’s part IMO.
Retreat dates are still in process.
Amish exhibit – quilts are due. I didn’t do one, but people have to arrange for a dropoff with Kelly. People showed their quilts during show and tell, but no photos were taken as people were concerned that others wouldn’t attend the show if they had already seen the quilts.
I don’t know if the small groups met, because I was busy and missed mine.