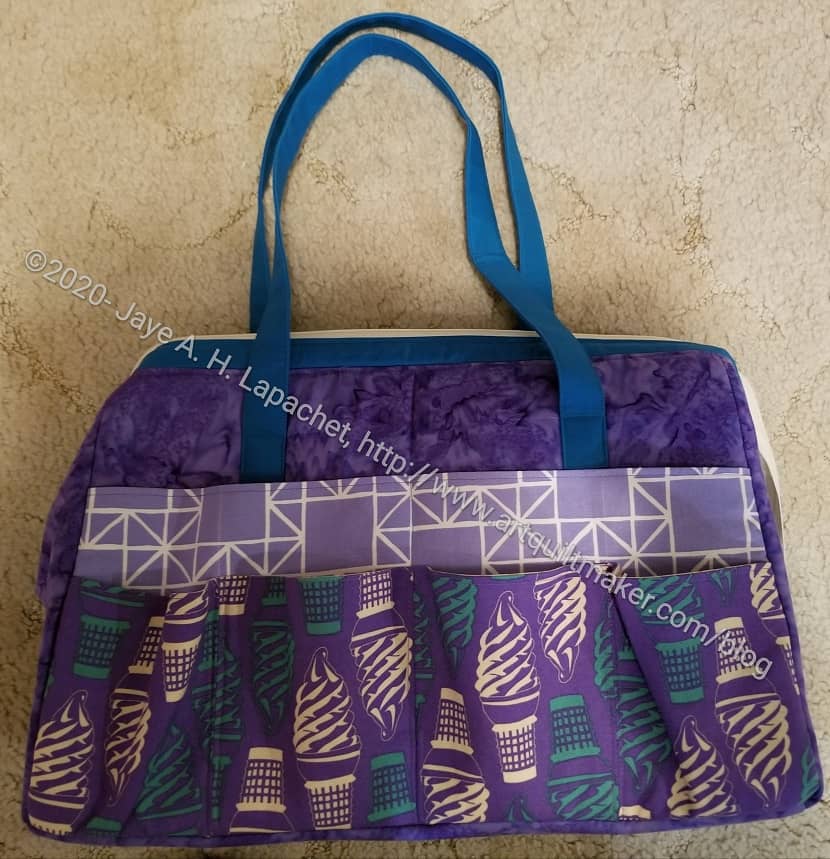
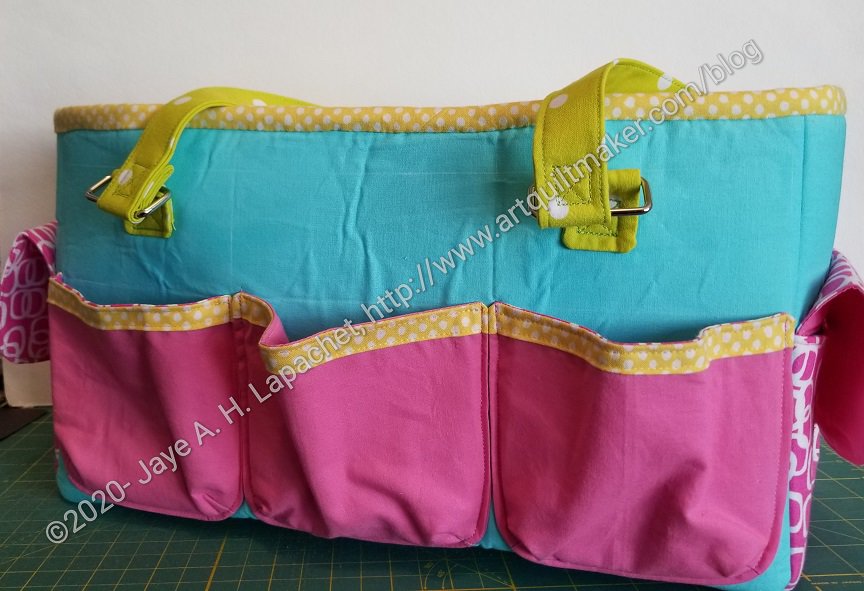
I finished the Sheffield Tool Bag. After I figured out the zipper panel (by watching the video), this bag went together very quickly.
It is a gift so look for a post later this month with more details and more photos.
Commentary about works in progress, design & creativity
I finished the Sheffield Tool Bag. After I figured out the zipper panel (by watching the video), this bag went together very quickly.
It is a gift so look for a post later this month with more details and more photos.
I haven’t been working on donation blocks lately, for the most part, but I have made a few.
For the moment, these are earmarked for the quilt I plan to make with a bunch of different colors of strip blocks. I may have mentioned it before, but I don’t remember. I had a few leftover blocks from the other Color Strip projects, so I thought a multi-colored quilt would be a good idea. I am collecting blocks right now as I make the other donation quilts. I have a ways to go before I can put a quilt together. I haven’t done pink or yellow and and I have more green scraps so I can make some green blocks.

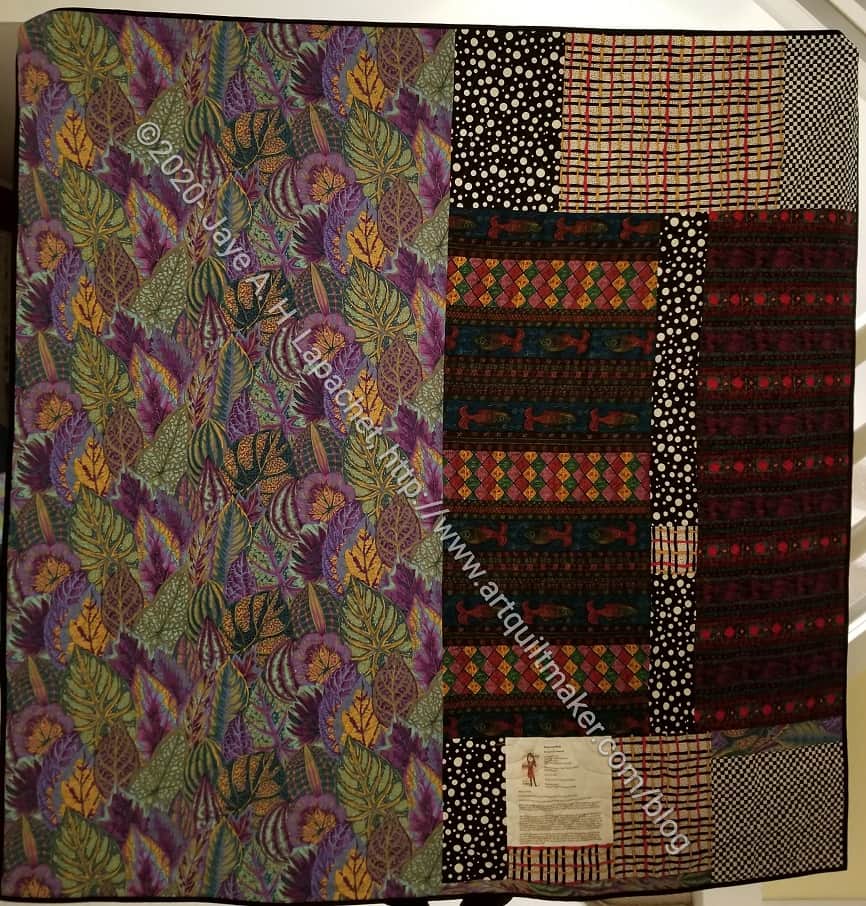
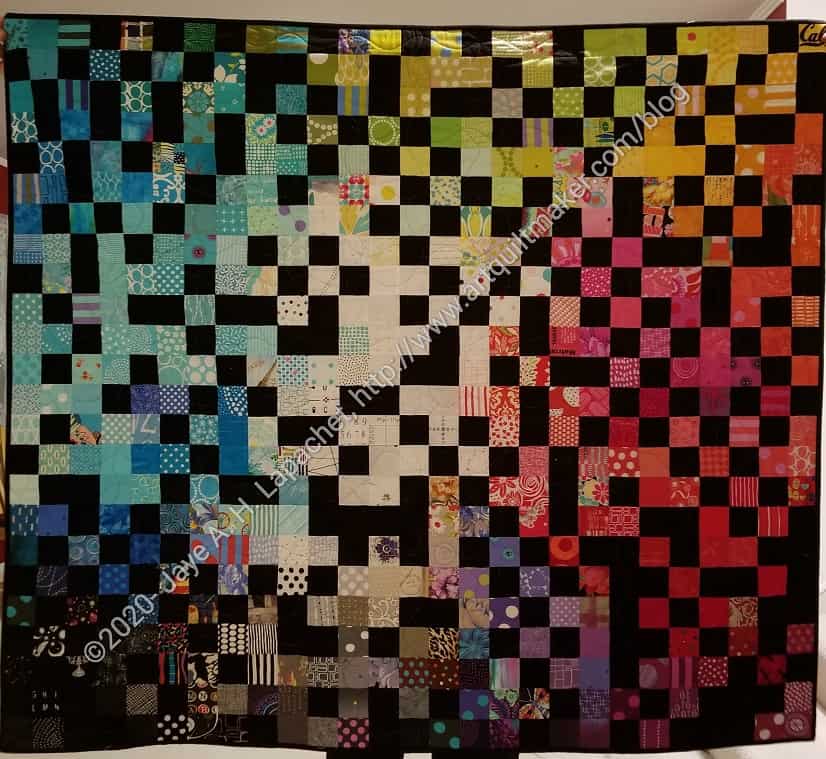
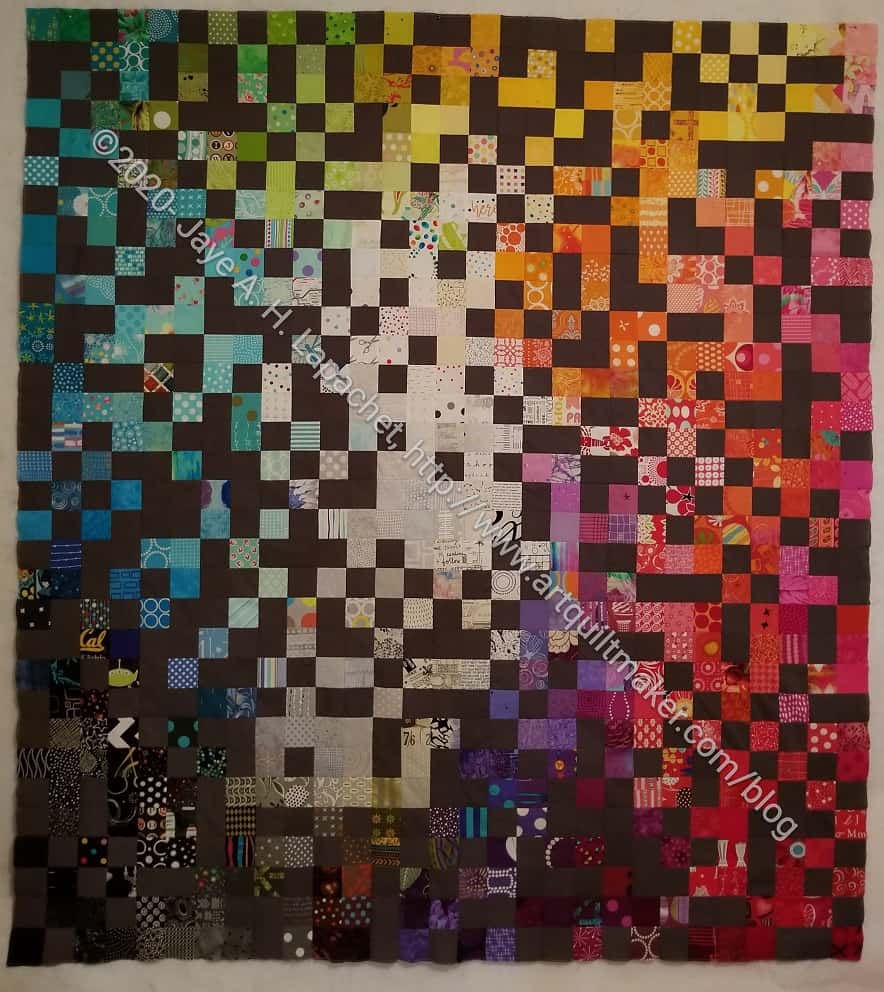
I finished the Black Windmill on Monday night. It is a Christmas gift, so I took it straight to the Post Office Tuesday morning and these are the only two photos I took. DH was kind enough to be my quilt holder.
In this version of the windmill quilt, the windmills are much more hidden some of them can be seen, but most the variation in colors hides the others. As mentioned, I kept sewing until I used up all of the pieces. I want to be done with this pattern, though it is possible that I will make another one at some point in the future. We’ll see. For now, I am done with the pattern.
I am finally posting about a finished FOTY 2018. I actually finished the binding a month or so ago, but somehow it never made it on to the blog 9as far as I can tell!). I finished the top in July and took it to Colleen shortly thereafter.
Once I got it back, I had to sew the binding and the sleeve. The piece is ready to hang and I can move on to getting FOTY 2019 quilted.
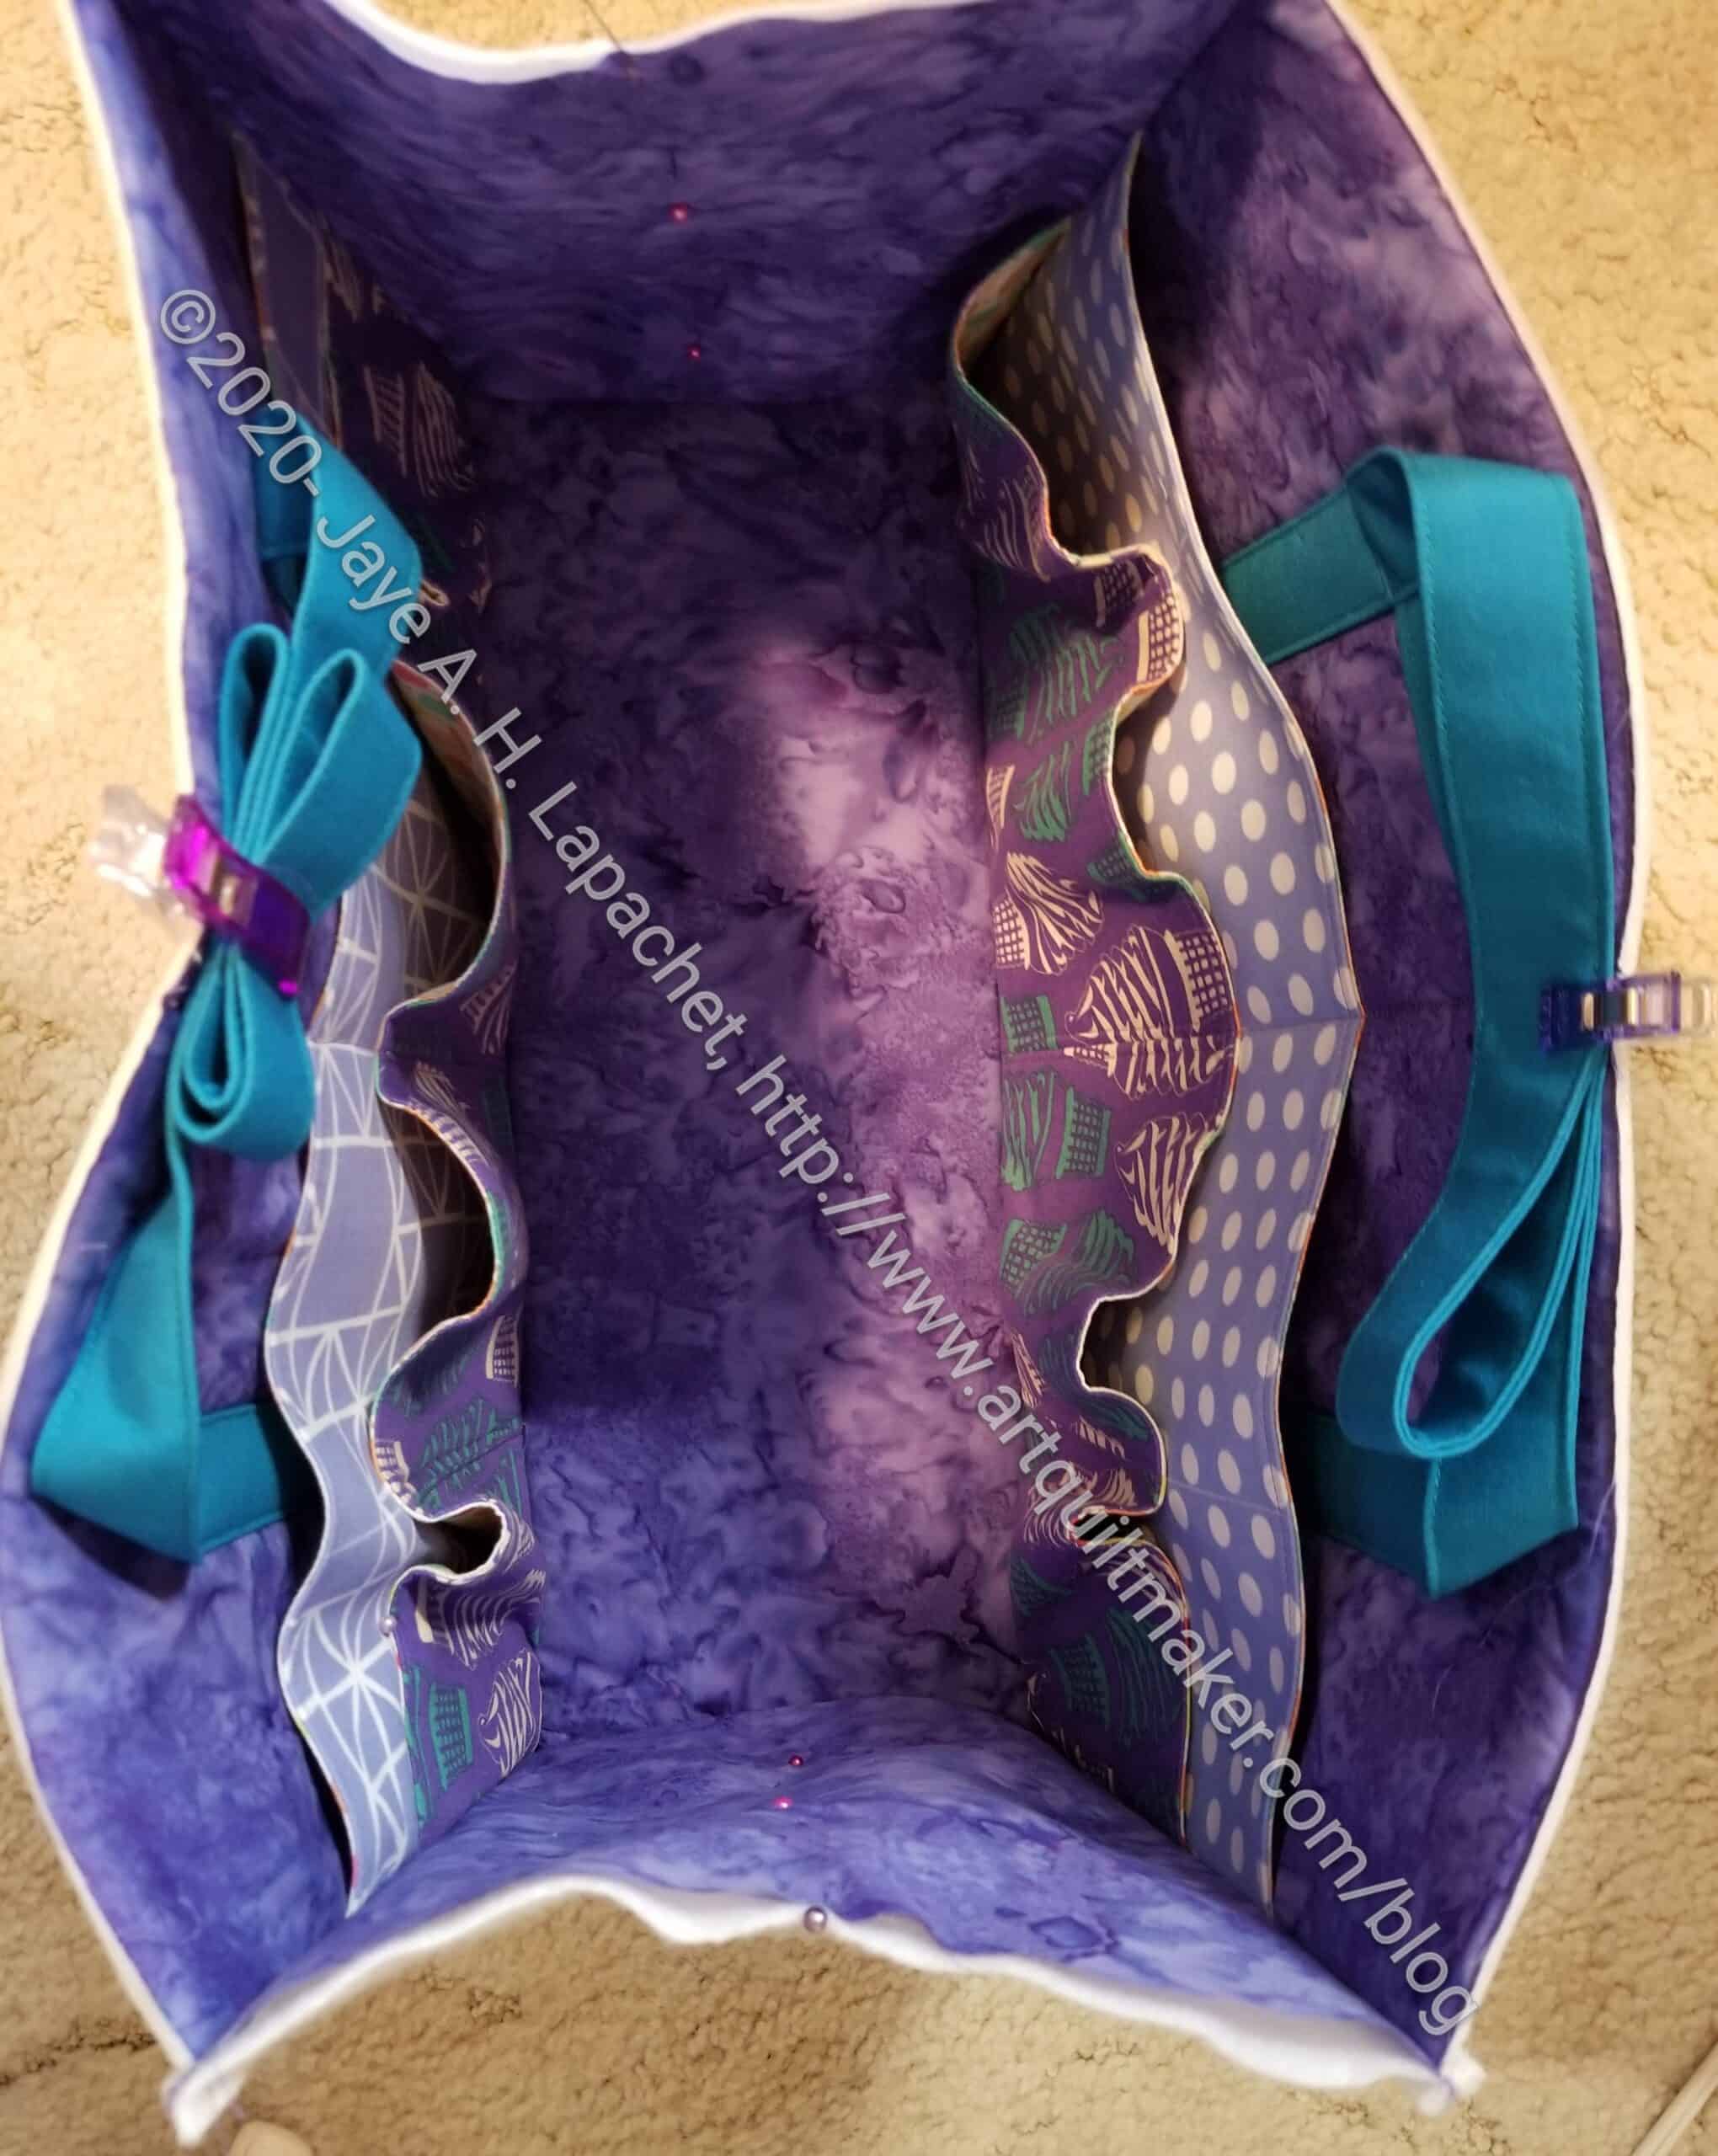
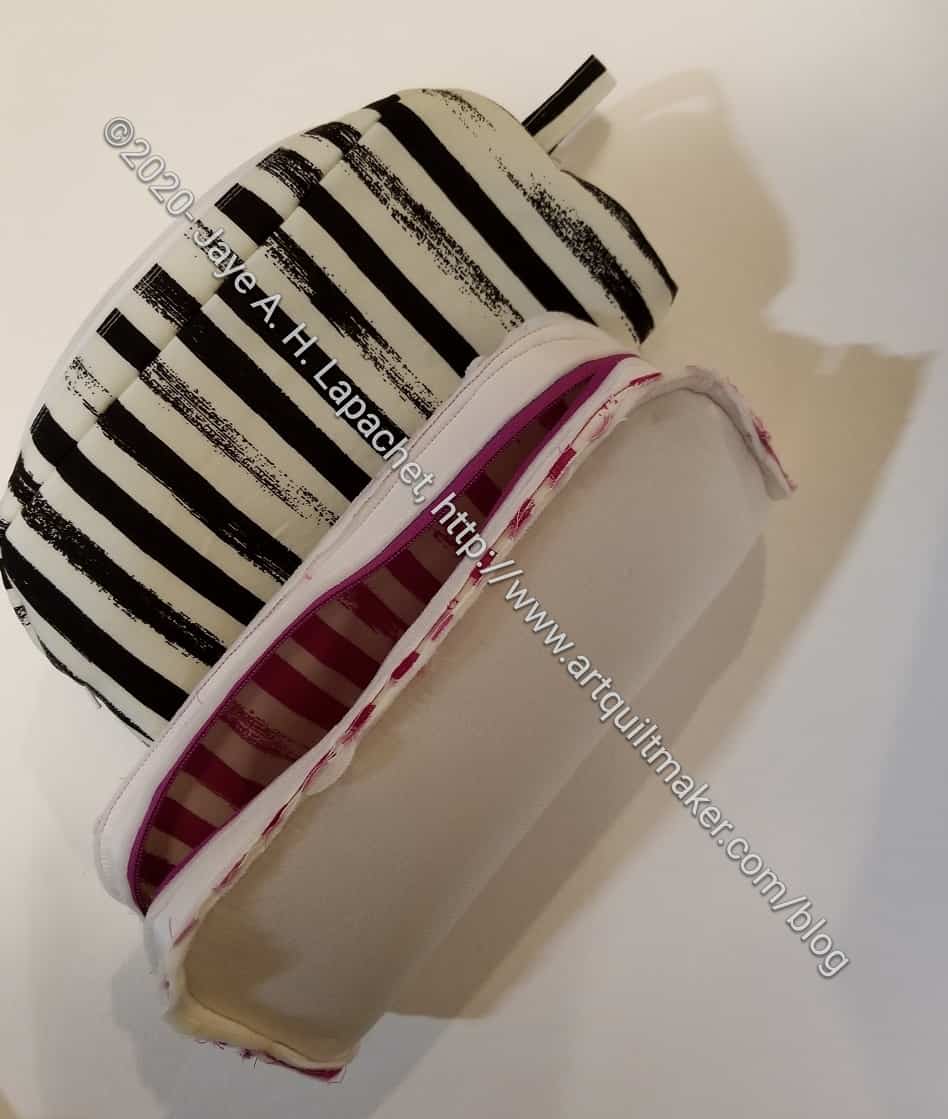
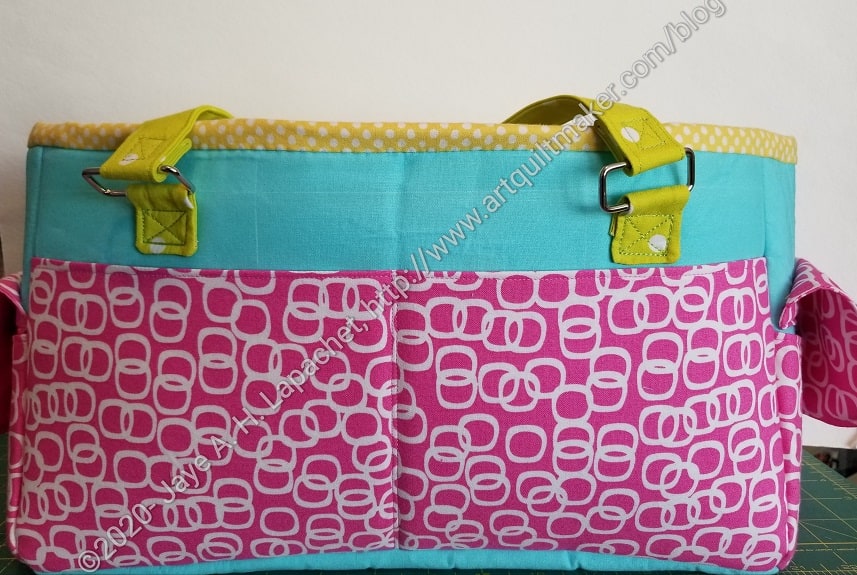
I made good progress on Sunday on the Sheffield Bag. There was very little ripping until I got to the zipper installation, which was all ripping all the time.
I have the handles clipped so they are out of the way. You can see a good view of the various pockets. I think the pocket construction on the gathered pockets would be much easier than the similar pockets on the Oslo Craft Bag. If I make the Oslo Craft Bag again, I will use this pocket construction.
I am kind of on a Sew Sweetness binge lately, aren’t I? Oslo Craft Bag, Sidewinder Pouches and the Sheffield Bag all within a month. I do have quite a few of her patterns and feel like I need to make my way through them.

I finally sewed the embellishment down to the third of the three Sew Together Bags I am making. I also received the zippers so I can proceed. Last time I received the zippers in two days and this time it took over a week. I guess the mail is really jammed up.
While I was waiting, I appliqued this strange hexagon design on to the outside of the third STB exterior. I think it kind of looks like a DNA strand. I think it will be ok once the bag is complete and rolled up.
I really need space to layout the fabric pieces so I can move forward, but I just don’t have that space, so I have to make the best of it. As soon as I finish the Sheffield bag, space constraints will lessen.
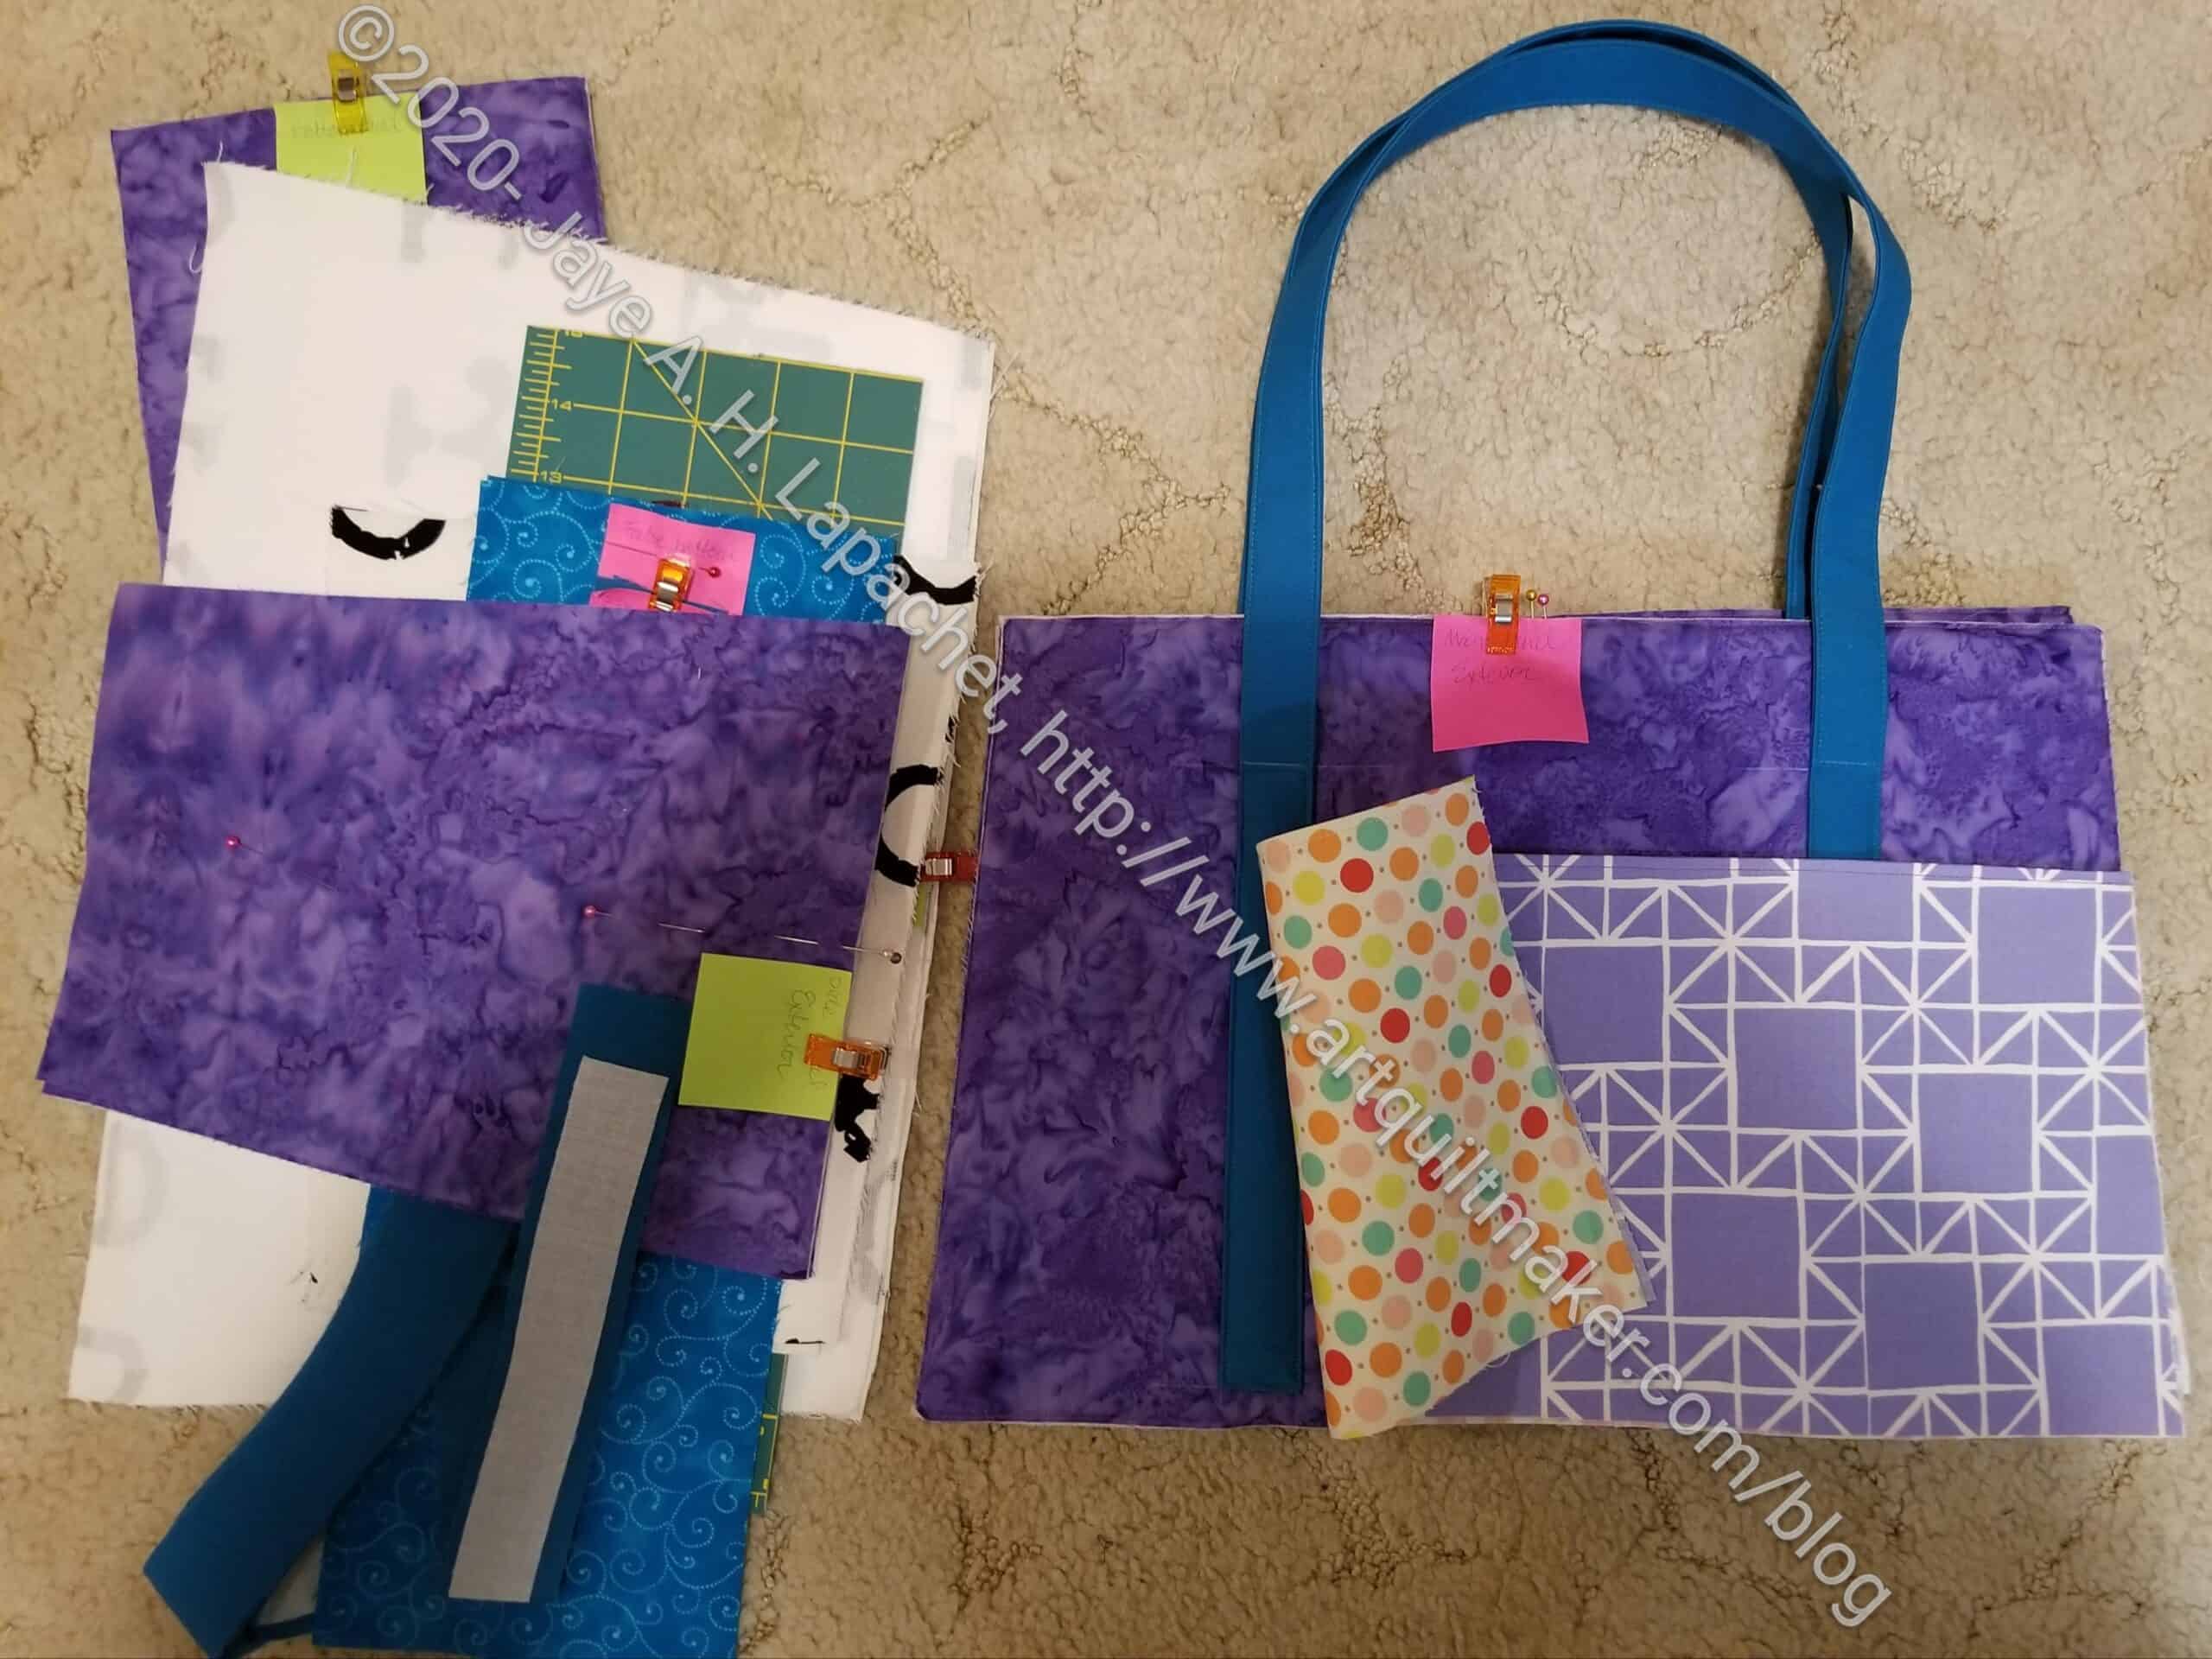
I started cutting out the Sheffield Tool Tote last week during Sew Happy Hour. I really got busy on it Friday, which is when I finished the cutting and, then, yesterday I started the sewing. Cutting out projects really makes me feel like I am getting nowhere so making pockets and the exterior made me feel like I was making progress.
This is a pretty structured bag by Sew Sweetness. It is similar to the Quilts Illustrated Tool Tote I made a few years ago (?). I bought it as part of the His, Hers and Furs bundle when that bundle was on sale (no affiliation). This is the first project I have made from that bundle.
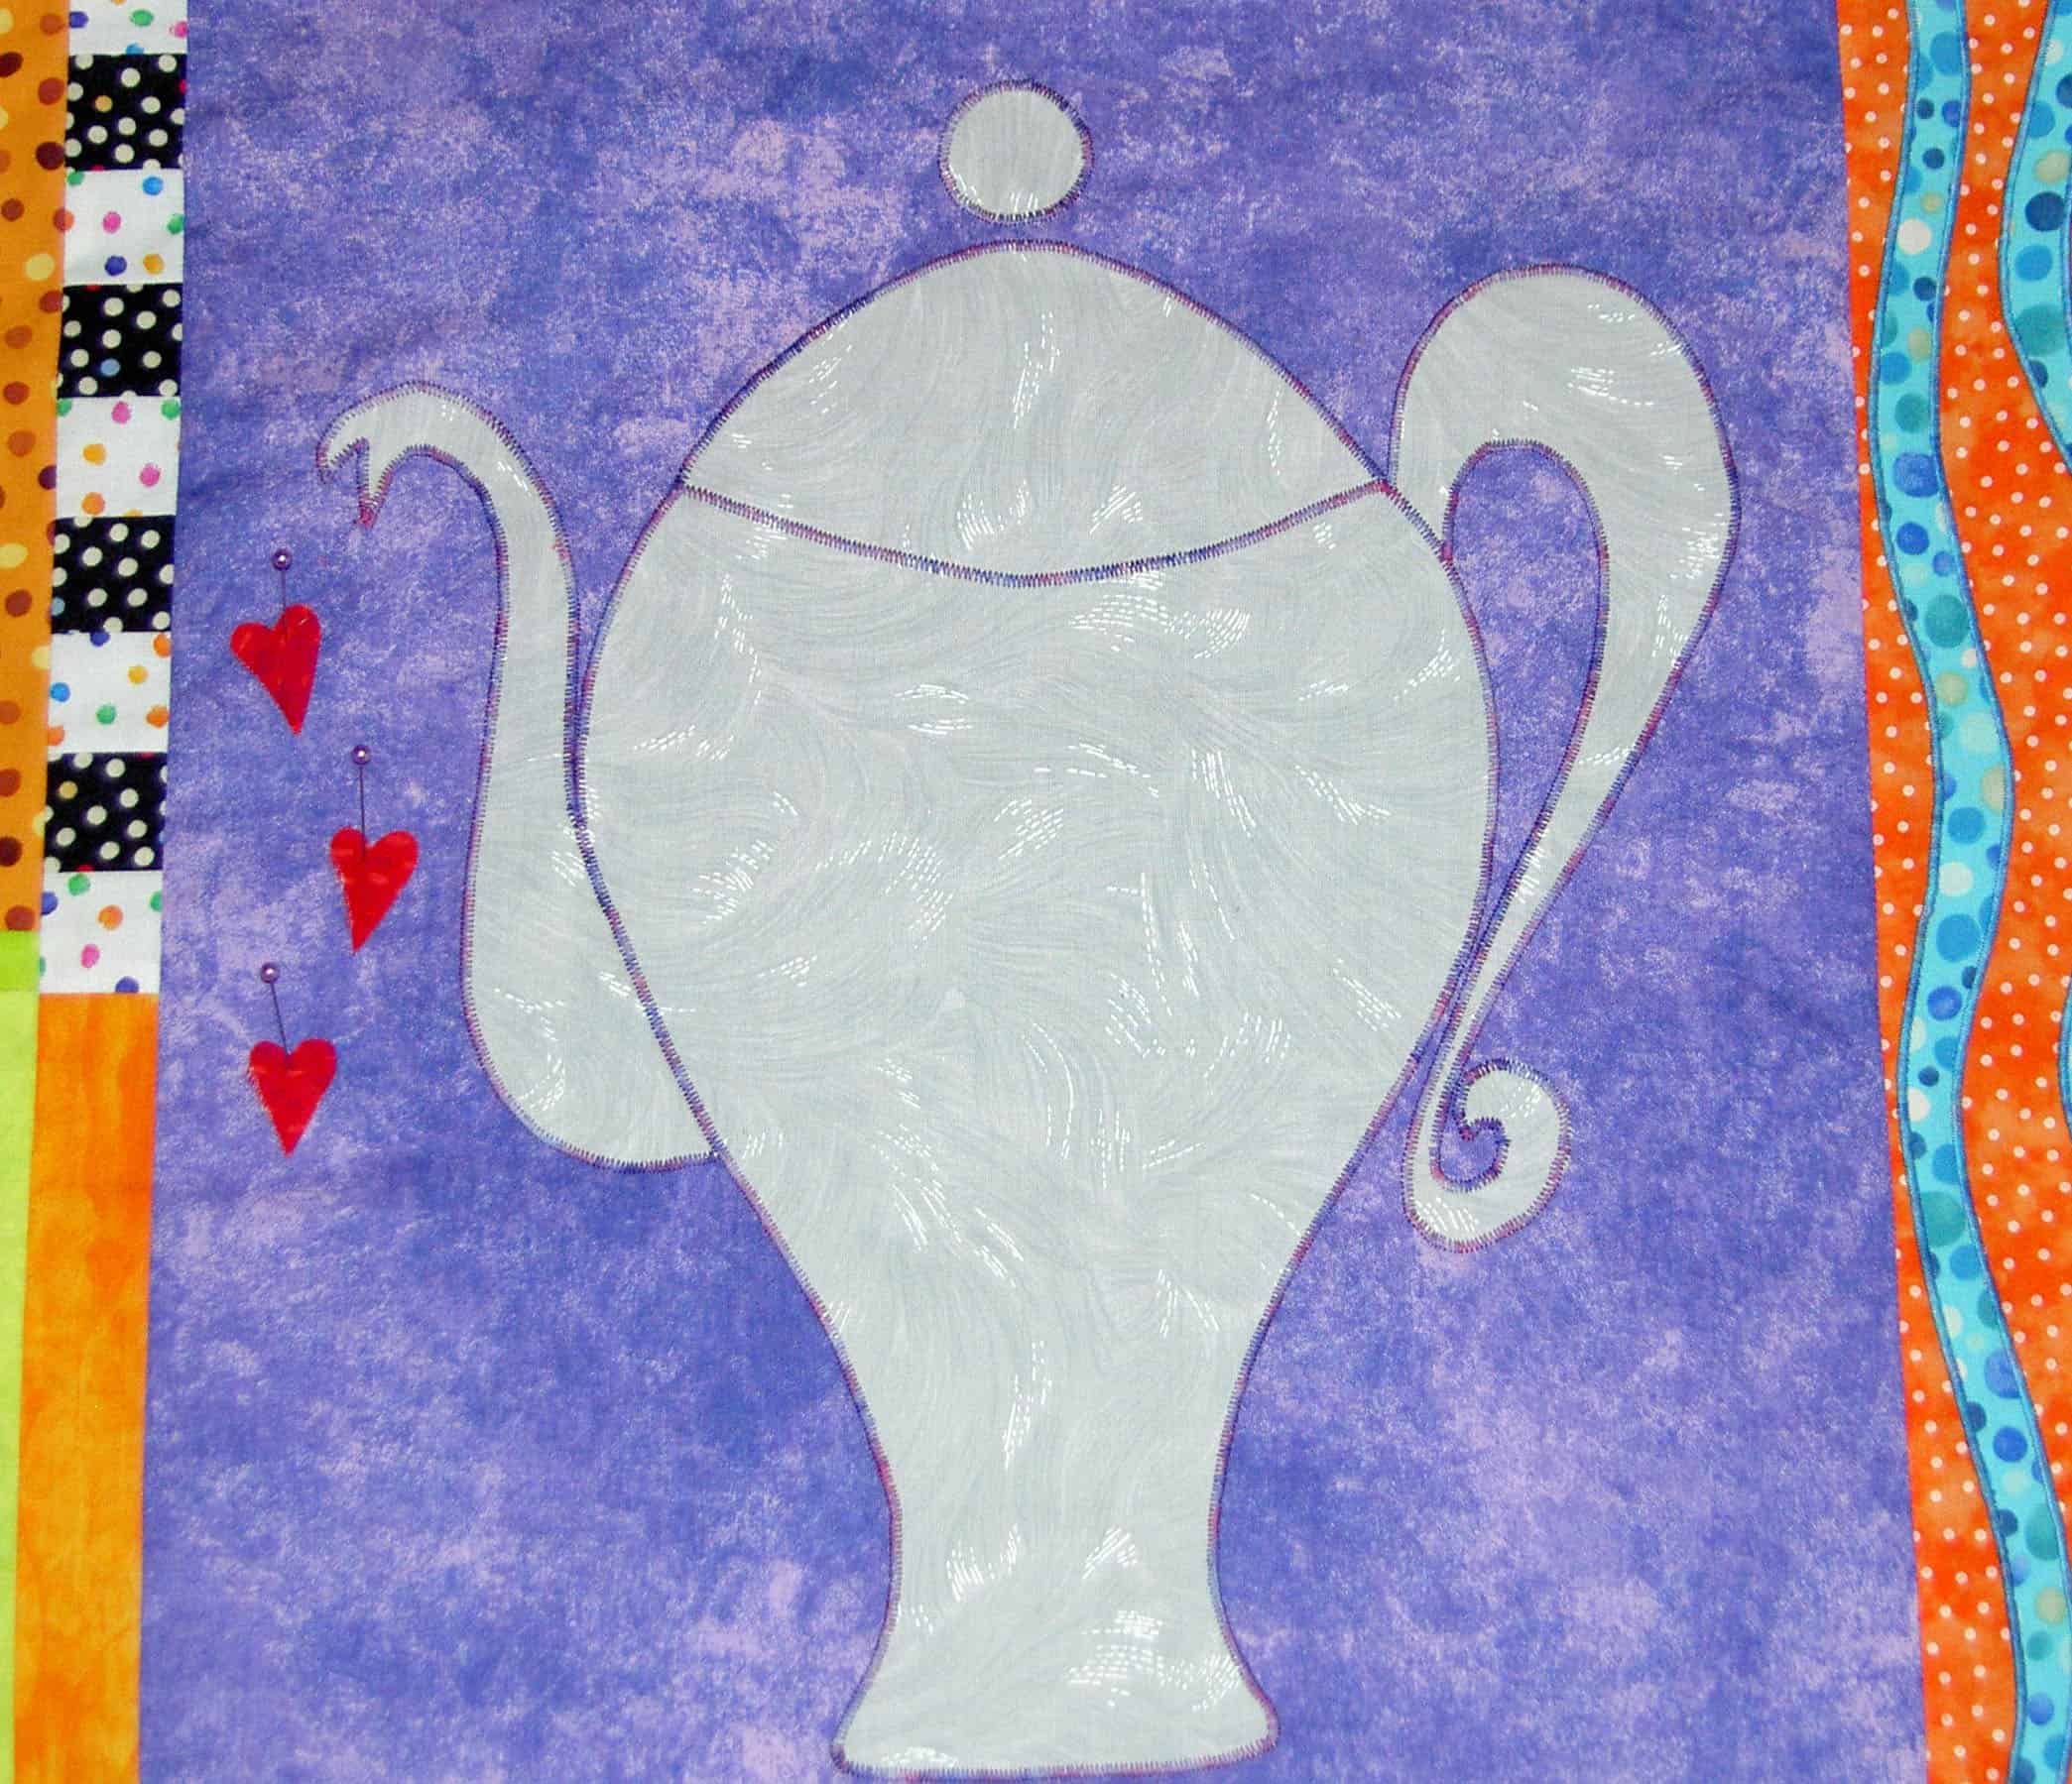
Yesterday, I taught a class on machine applique. In the course of the discussion, I brought out Down the Drain to show different examples of satin stitching. I also showed The Tarts Come to Tea.
This brought up the idea of quilting, which I tried to gloss over, but my intelligent students wanted to know why they had never seen the Tarts and I had to admit that I hadn’t completed the quilting.
I felt silly admitting that the quilt was partially quilted and languishing in a project box. Will I get back to it? Maybe. They didn’t think it was weird or out of date looking, so it might be time to get back to the quilting. I quilted Down the Drain and survived the process, so perhaps it is time to get back to it?
Sidewinder pouches from Minikins Season 1 have been on list for Christmas gifts. I finally started them last week. While I was on the phone, I cut out most of the pieces. I say most because I found out later that I forgot to cut out several pieces. I found out once I started to put the pouches together. I guess I was paying more attention to the call the cutting. Oops!!
I decided to make 4 of these pouches for various family members. Part of the reason I wanted to make them was the striped fabric version in the Minikins ad is so cool looking. I also wanted to make use of the patterns I bought. I have made several Cotton Candy pouches from Minikins Season 1, but I want to make more of the projects. Also, I enjoy making pouches and there are only so many I can use.
I have to say that I felt giddy after making good progress on Saturday. It wasn’t that I didn’t struggle a little, but I was just so excited about how cute these pouches were turning out to be.
I still have a bit of work to do on them, but they will be great. I hope the recipients like them.
I participated in the swap that was part of the guild year end party. Sadly, I can’t show all the gifts because we were all on Zoom, but I can show my gift. Of course, you saw the gift I made, the Oslo Tote, earlier this week.

I received a tea cosy.
As you can see the colors are perfect for me. They mimic the colors of my Aqua-Red Sampler. Some of the fabrics are even the same.
The front has a little pocket. I don’t what I could put in there aside from tea, but I’ll think about it.
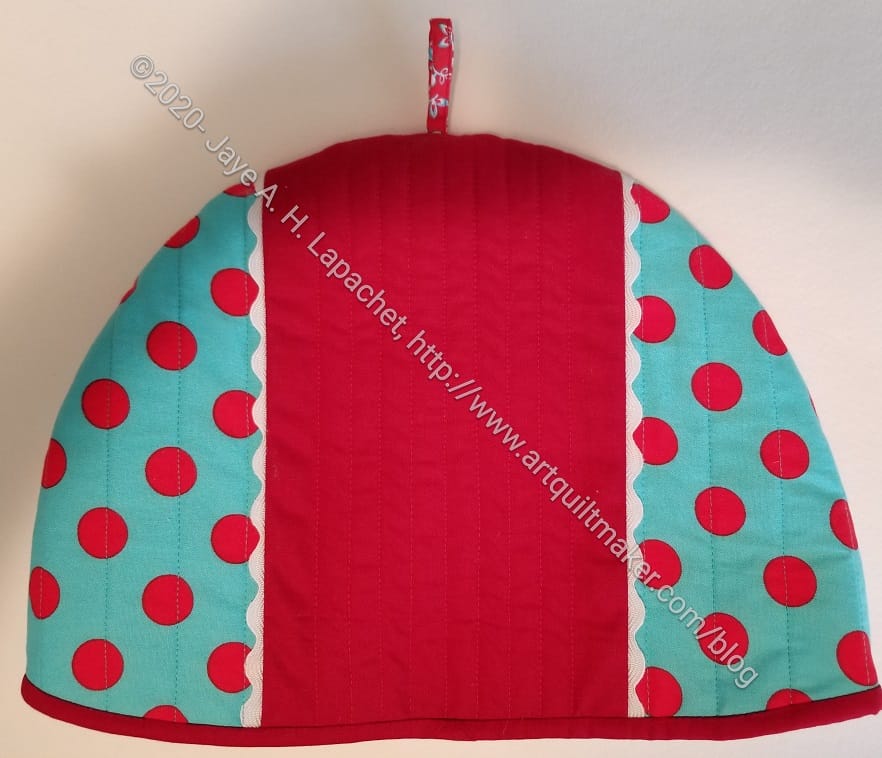
Cyndi made it (it was a one-on-one swap, which I didn’t know until I received my gift) and she did a great job. Of course, I asked for turquoise and red, but she chose great fabrics in those colors.
Swaps are fun way to challenge myself. I am not often up for such a project, but I try and participate in swaps the guild sponsors.
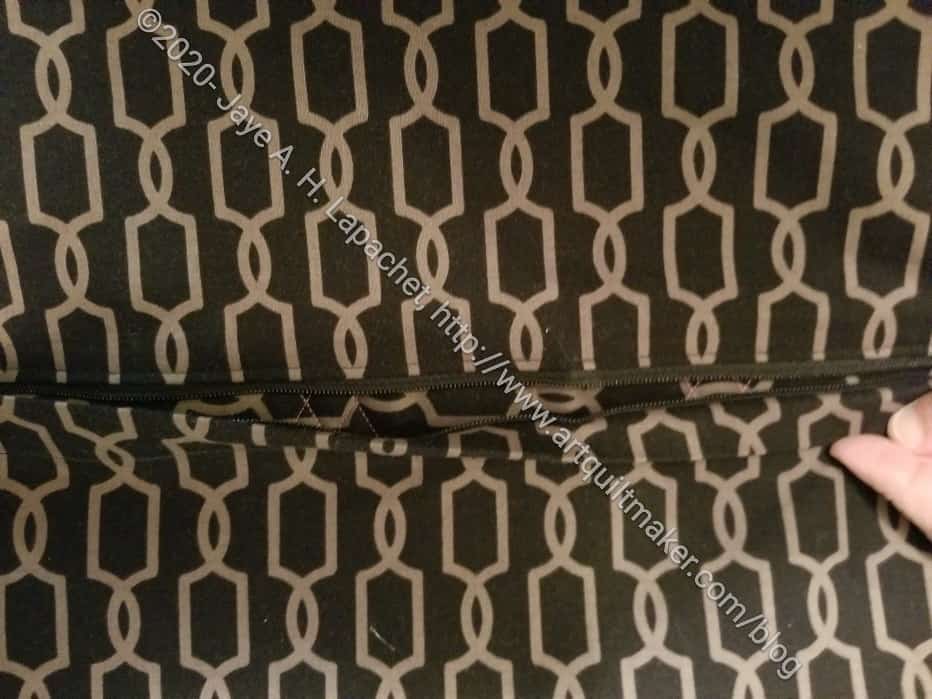
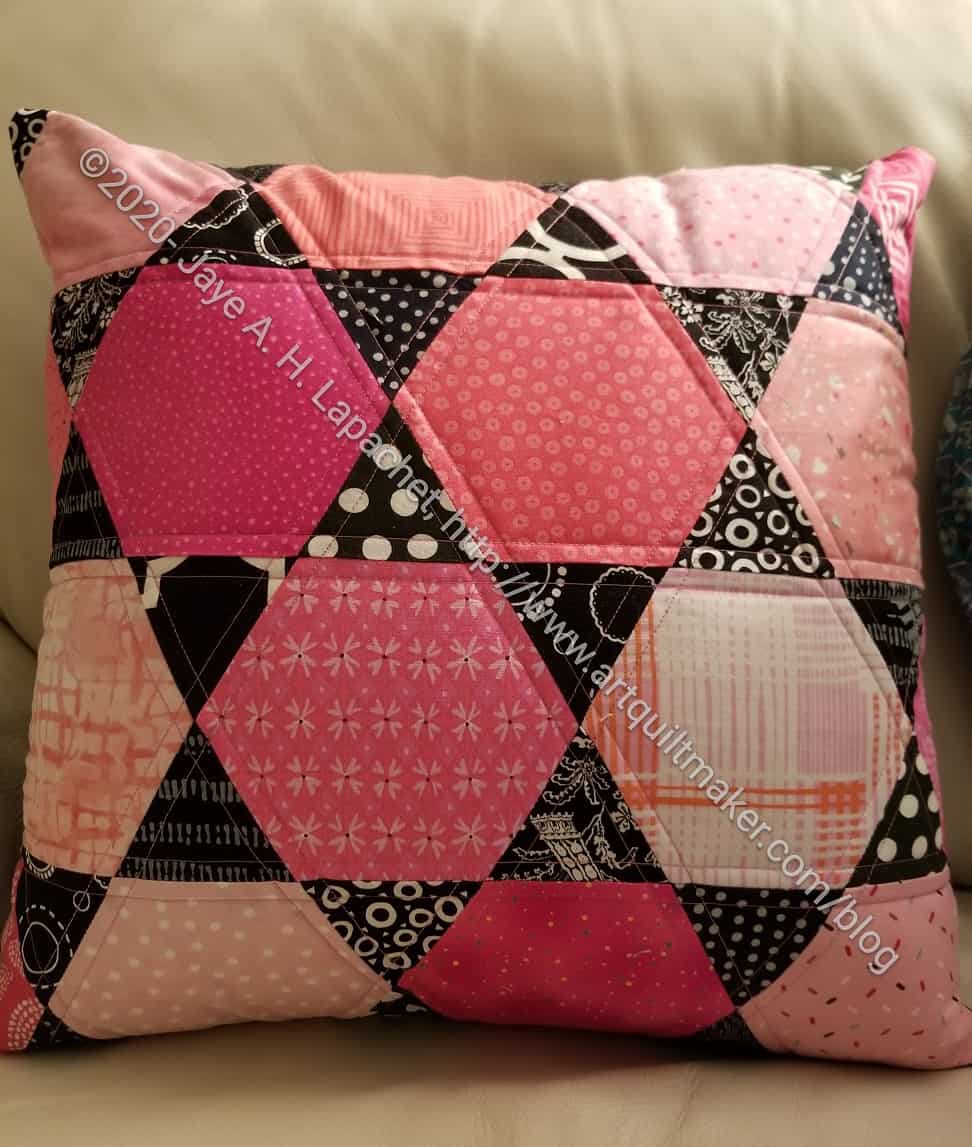
As mentioned previously, I found some directions for putting a zipper into the back of a pillow cover. I tried the process and was really pleased with the outcome. It works really well!Not only were Sotak Handmade’s directions clear, but there was room for the maker to make the process his/her own.
I used a smaller zipper than my pillow back and added zipper tabs to make the zipper fit the back. This worked really well and I have nice stops on the back.
I also like this technique, because the zipper is covered, which is something about which I have been wondering.
I am so pleased with these directions and how they worked on my pillow cover. I plan to use them again for future pillows. They work so much better than the overlapping option. Also, this technique is much easier than the Spoonflower zipper in the seam option. There are reasons for having a multiple options and I can see using the Spoonflower method when I have a great piece of fabric on the back.
I finally finished Candy Dish!
It is nice to finally have this done. I am kind of over the Journey2Nebula project. It is sad, because I was eagerly anticipating the Gazebo project.
I still plan to make the Gazebo table topper** soon. I want to complete the whole group of projects.
**I use affiliate links and may be paid for your purchase of an item when you click on an item link in my post. There is no additional cost to you for clicking or purchasing items I recommend. I appreciate your clicks and purchases as it helps support this blog.
I joined the most recent guild swap and made an Oslo Craft Bag for Cyndi. She said she wanted any kind of tote bag. I was on the fence about this bag as it doesn’t strike me as a straight tote bag.
A few years ago I wrote about this bag and have been wanting to make one ever since. This was a great opportunity. I put a note in the bag that I would make her a real tote if this wasn’t what she was expecting. I thought about making her a Multi-tasker tote as well, but lost steam and didn’t get to it. I kind of want to make her a Superbloom tote as well.
This bag went together with no problems. I thought the pockets with the yellow binding were a little too fussy. However, I like it that they have dimension. I don’t know if I would make them the same way again, but I like to make the pattern as is the first time, as you know.
I saw another version in the Facebook group (a good use of FB, IMO) where the maker put two pockets like the top photo shows, but put a second mesh pocket over the first. I am thinking about making another one and I might do that. I like mesh for some reason, though I am not sure what it is good for in terms of storing sewing items.

I was disappointed in the interior. Not the design, but the saggy-bagginess of it. The seam allowance was 1/2 inch, which I thought meant that Sara had included enough to take up some of the lining so it wouldn’t sag. No such luck. The exterior was sewn with a 1/2 inch seam allowance as well. I tried a few things to make the lining fit better. Short of taking the whole thing apart, none of my efforts worked.
It is a nice rectangular bag and I think it would be useful for various tasks including bringing things to Sew Day. We’ll see what Cyndi thinks.
I finally finished FOTY 2019. It seems like it took forever. I starting putting it on the wall on September 11, but I had just torn the ligament in my foot and I just couldn’t work on it.
I started to make some slow progress starting around October 4. I didn’t really start sewing anything until about October 31.
These quilts usually don’t take that long, but like many things in 2020, this piece took more time. I am going to move away from UFOs and make something I haven’t started after working on a few bags and Christmas gifts.

My class is doing foundation paper piecing.
I am not a fan of foundation paper piecing, but I do see it as an essential skill, so we are working on it.
In the past, I have taught this class using the New York Beauty block, which I love. I decided to change so that the block would focus primarily on the piecing rather than curves as well as foundation paper piecing.
The image above is one that I just can’t believe. I can’t believe such a weird looking compilation of fabric shapes can end up looking like the block below.

I used a pattern from Wombat Quilts (a really good site, if you haven’t been there) called Cactus Compass block. Even I made the block! Despite all the swearing and ripping, it came out pretty well.
Yes, there are a few fabric problems. I didn’t notice them until I was finished with the block and stood back to look at it. I don’t know how it happened, but such is the result of foundation paper piecing.