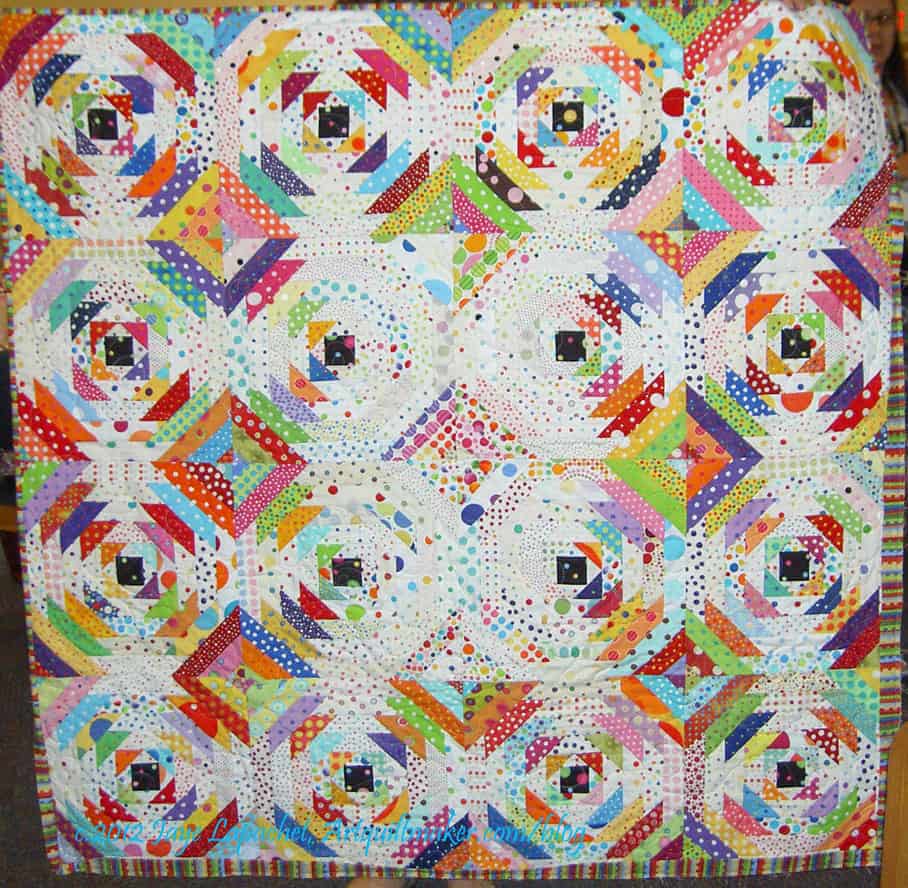
As I have mentioned, I am teaching a quilt sampler class based on my series of tutorials. The class teaches much more than the tutorials offer, including dissecting blocks and quilts so students can think about construction and try things without having to buy a pattern every time* they want to play a little bit.
One of my students is looking at tile and other non-fabric designs and thinking about them in terms of making the design into a quilt. I am thrilled.
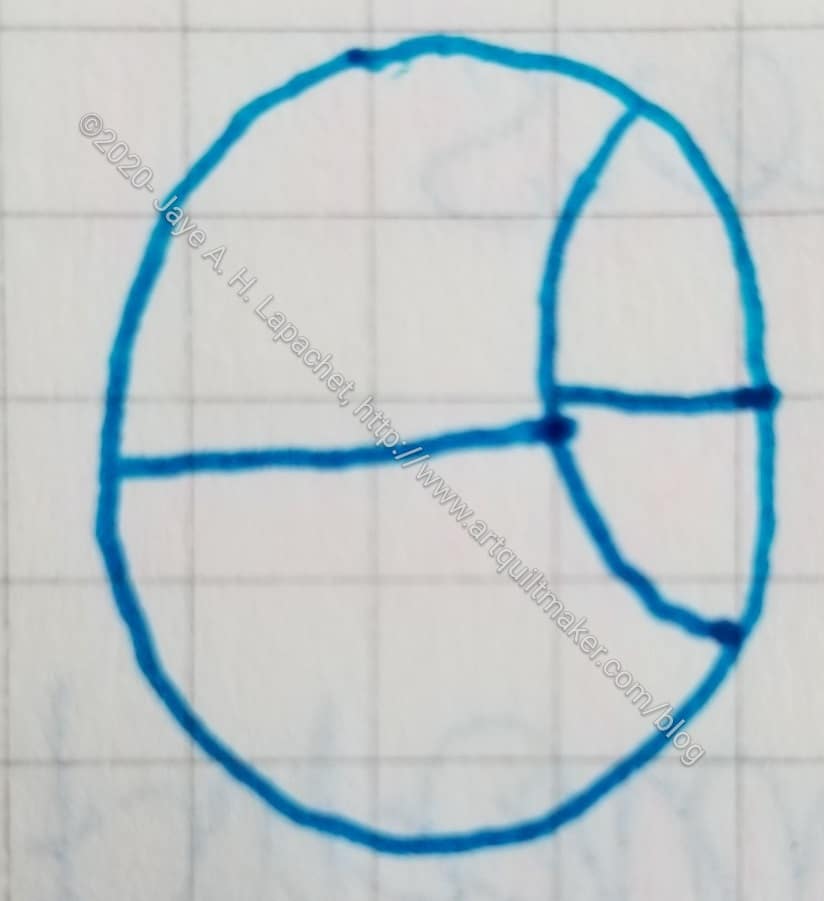
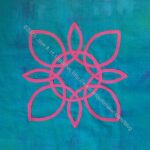
Divided Circle Design
She sent me a design this week that she has been thinking about. I didn’t get all the straight lines lined up, but you get the idea. I thought of the Sew Kind of Wonderful QCR ruler** and how the designers of those patterns have you make units with straight lines and then cut them up.
I thought about that for awhile and think that it would be a good way to construct the block overall. However, I had to figure out how how to get the Orange Peel joined into the circle.
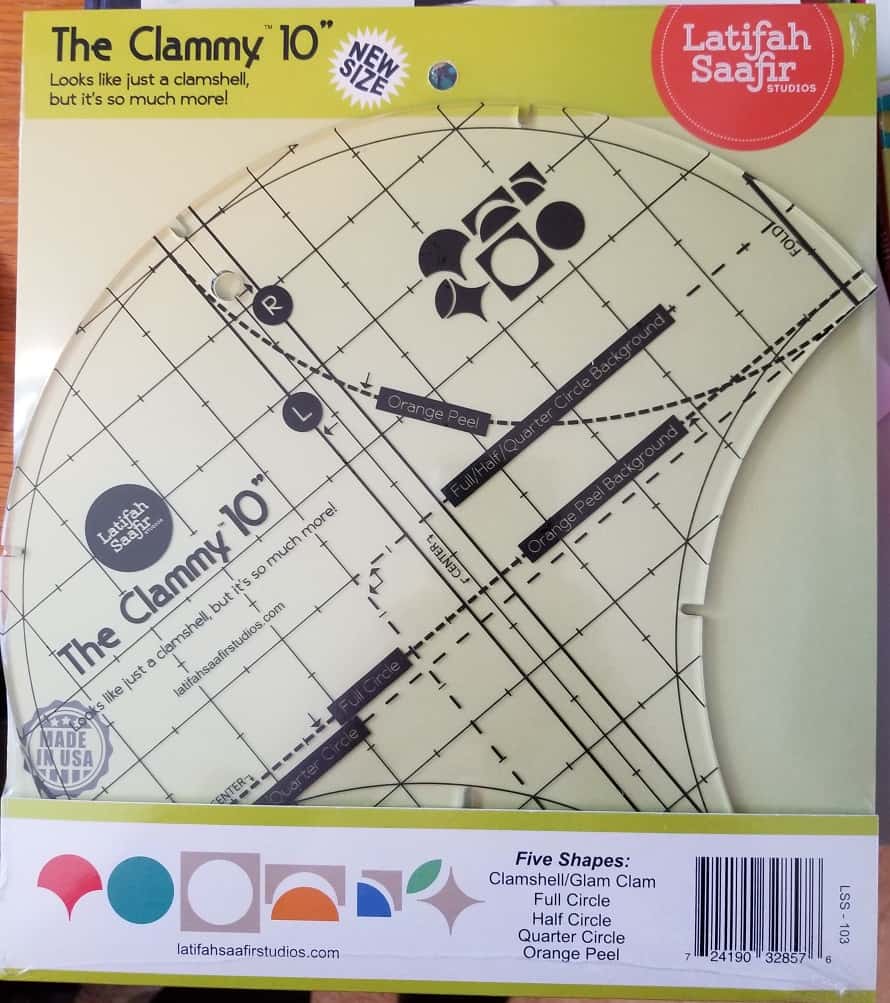
Since I got the Clammies for my birthday from Gerre and my SIL, I decided I would try them out. I played around for awhile cutting circles and trying to figure out how the Clammy** worked. I was moderately successful once I figured out the seam allowances. I look forward to watching her videos and getting more expert instruction on using the Clammy. I wasn’t able to watch the videos while I was playing, because I was at Craft Night.
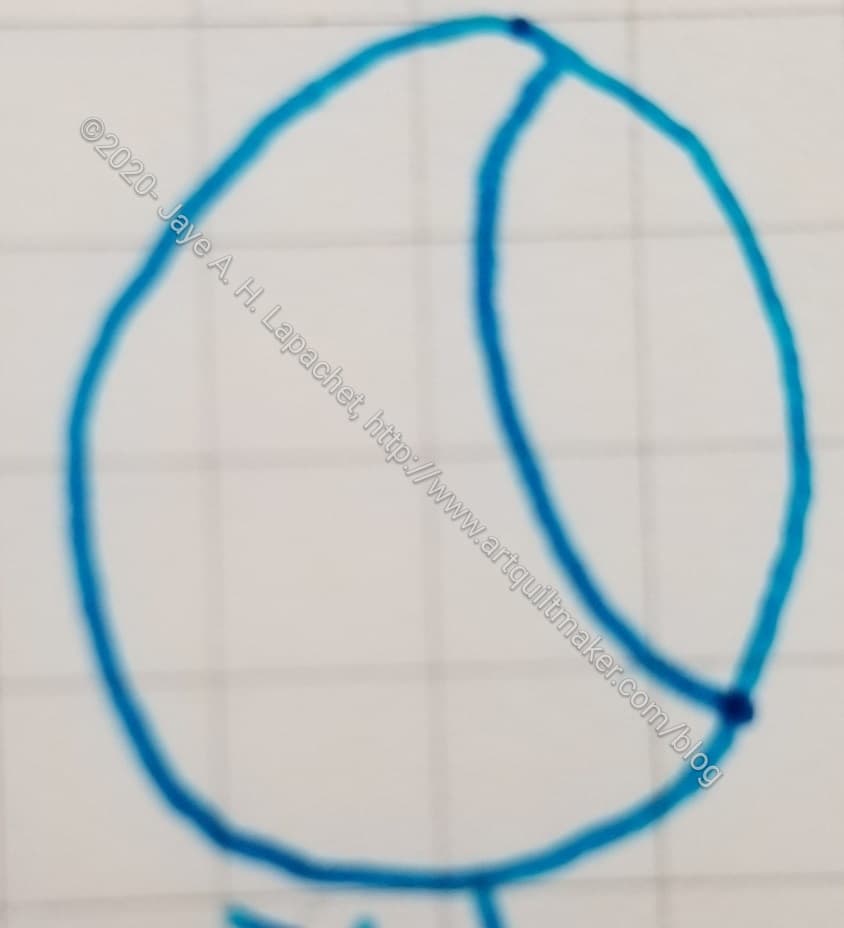
Completing Circle with Orange Peel
I decided that I would worry about dividing the circle later and would start with a circle and an orange peel. I figured I can always break up the shapes later.
I kind of like the possibilities for this shape. It could be a ‘phases of the moon’ type quilt design.
After some fabric wasting, I found that I was ready to cut out some circles and orange peel. I had high hopes that I would be successful.
Fabric Completing Circle with Orange Peel
WRONG! I got the basics, but don’t have enough seam allowance for the orange peel to fit exactly and complete the circle.
Hhhmm. I decide that my next step would be to cut the orange peel with the larger Clammy and see if that works. I suspect Latifah did not anticipate this design and one Clammy cannot be used to cut these pieces. I am keeping an open mind.
Stay tuned.
*N.B. I am not trying to put independent pattern designers out of business. I am not advocating copying the designs of others in order to avoid paying them. I often buy patterns since it is easier than redrawing complex designs myself. I find, however, like with Ring Toss that I didn’t need the pattern once I had the templates. Also, I just wanted to try it and was glad I hadn’t spent more money since I didn’t end up doing anything with the design. Knowing how to deconstruct a block or a quilt improves creativity in quiltmaking.
**I use affiliate links and may be paid for your purchase of an item when you click on an item link in my post. There is no additional cost to you for clicking or purchasing items I recommend. I appreciate your clicks and purchases as it helps support this blog.
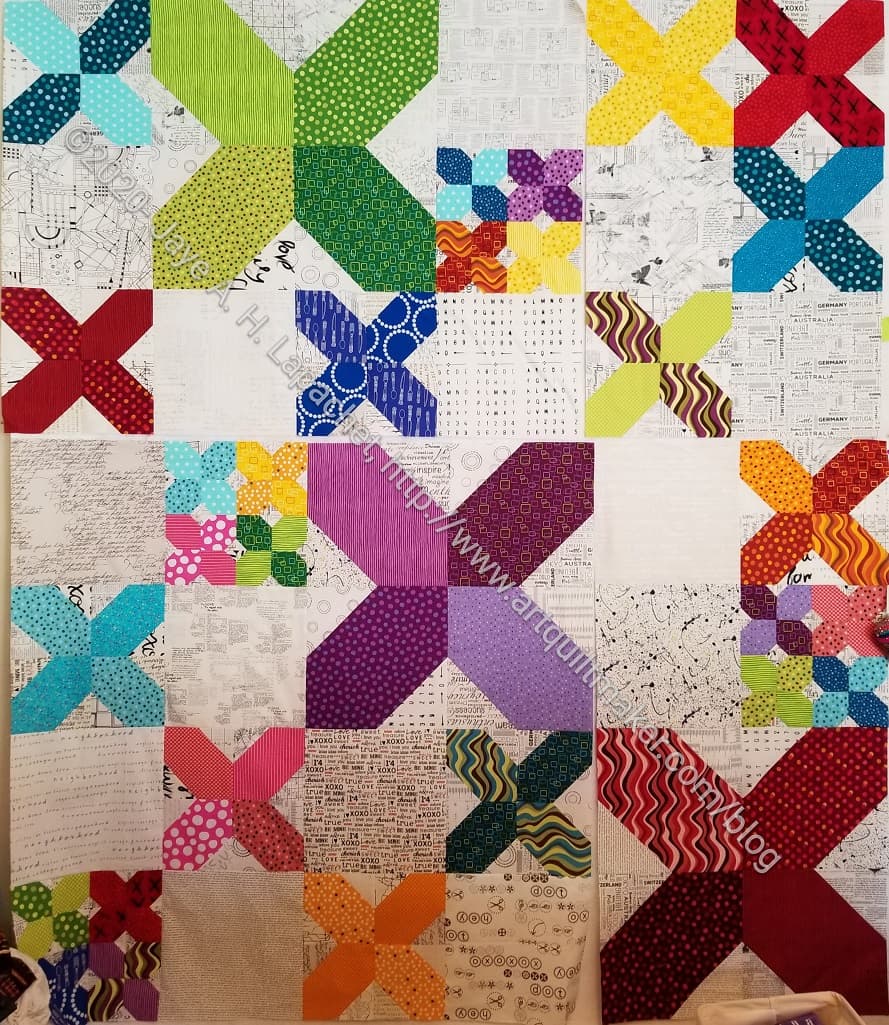
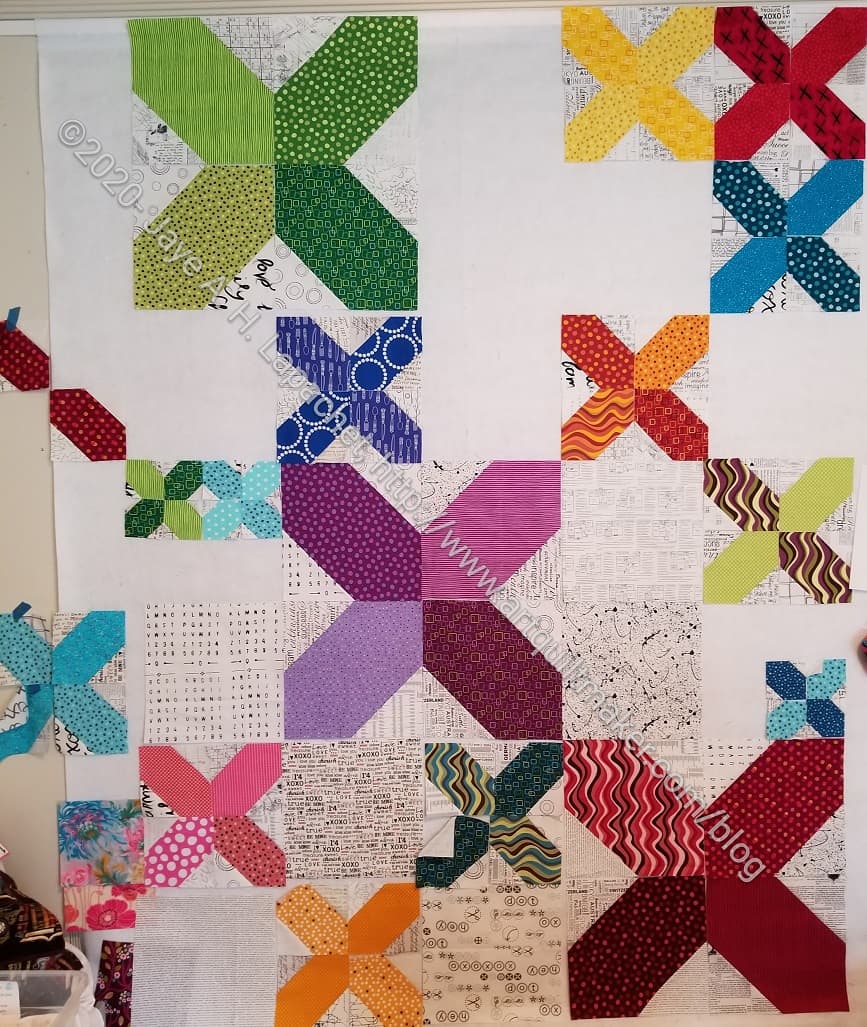
I almost finished the X Quilt top. I have two or three seams left on the top and I am really eager to finish it. I just don’t want to work on it any more. Perhaps I don’t like the fabrics I chose. Pop Parade has dull rather than clear tones and that depresses me a little bit. Perhaps the background low volume text prints aren’t right for the size of the blank squares.
I don’t know. I just know I want to be finished with it. I don’t know what I will work on next. I have a few bags to finish for sure, but no quilt in mind except the HST donation top.
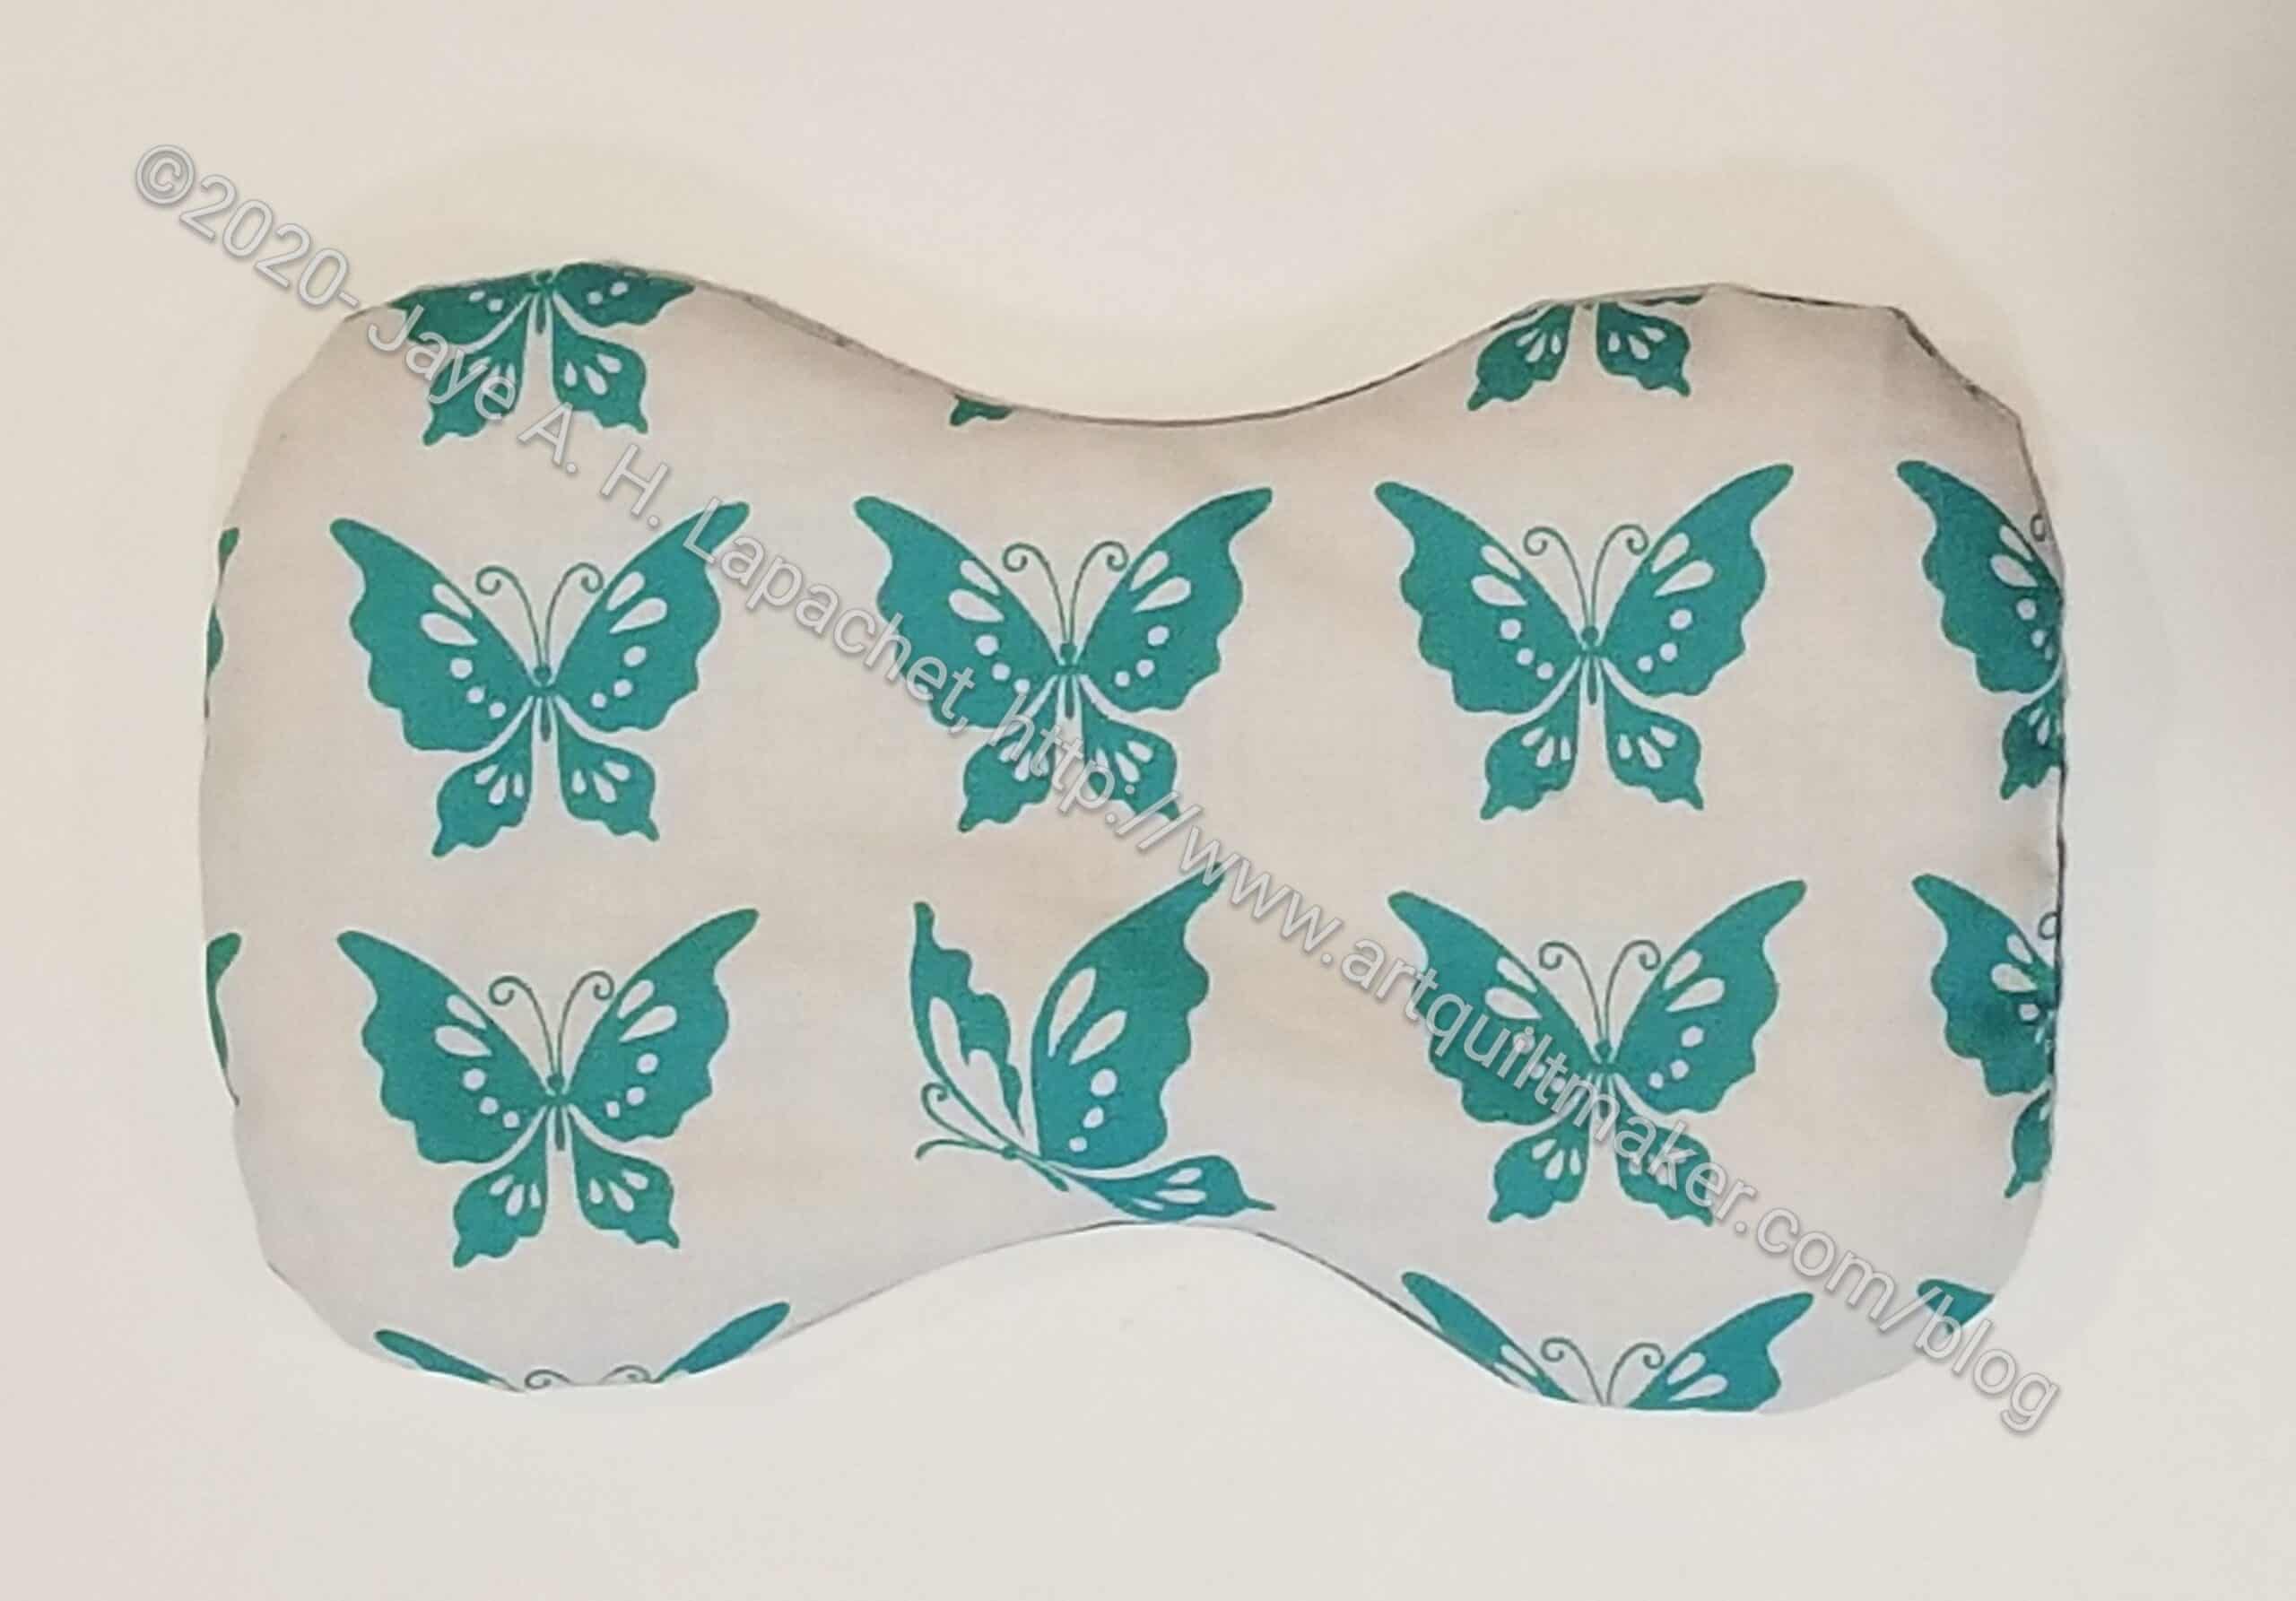
Yes, I seem to be on an eye mask kick. I bought a large bag of rice and, with this mask, have used it up, so my eye mask efforts are finished for now. I like making a project a few times so I can get it right. This project will be a good quick gift going forward, assuming I buy more rice I want to use in eye masks and don’t want to eat.
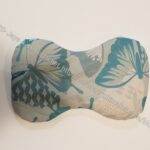
Renee’s Eye Mask – back
Renee is the Grand President of the Native Daughters of the Golden West. NDGW is the female version of the Native Sons of the Golden West. There are more dresses and more pomp and circumstance as well as more efforts to assist with various California History related projects. They also have a vibrant effort to help kids in various ways through their Children’s Foundation. If you are interested in joining, check their website. It is definitely an organization trying to find its way with a new generation, but there is potential and they do a lot of good.
The Grand President will be having a Parlor visit in April. Apparently, people make gifts and the Grand President opens them at this event. I am not able to attend this year, but I feel a special rapport with Renee, so I made her a gift. I will drop it off with the District Deputy and it will be sent on to her. Her theme is butterflies, which guided my choice of fabric.
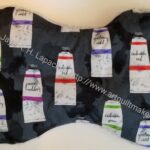
Another late birthday gift came in on February 6. I love getting late gifts, because it makes my birthday last longer. This latest gift came in on February 6 and it totally made my day. The bad part was that I didn’t know who it came from. A week or so later, Gerre contacted me and told me she was my fairy godmother! 😉 What a fabulous surprise! Another bonus is that now I have 3 Clammy sizes. I need to try them out!
I have seen people’s work using on the Parallel Universe mystery quilt. Reviews are good, so I am not afraid. I just need to make some time.
Articles, Media, Exhibitions and Shows
One of my students told me about Gyleen Fitzgerald’s Butterfly Seam technique for Y Seams. You can see this technique demonstrated on The Quilt Show #1403. While I think the way I teach Y seams (inset seams) is valuable, Gyleen’s technique is revolutionary. Gyleen’s technique is a lot easier to understand if you understand my method first.
You know that 1″ square for printing patterns? My nemesis? I know for many it has become despised during the pandemic, because we have no or fewer options for getting patterns. Help is here in the form of a post about adjusting the size of your patterns and blocks by Barbara Brackman.
The Craft Industry Alliance has an article about Sara Lawson of Sew Sweetness and her video add-ons.
Floors are a great place to get inspiration. This article about the world’s best libraries shows a number of tile floors that could be used as quilt settings.
Books, Fabrics, Notions & Supplies
Barbara Brackman has a new line of fabric out called Ladies Legacy. It is based on a sampler quilt from the Civil War. In conjunction with this new fabric, on her Civil War blog she is leading an appliqued block of the month based on New York albums. The first block will be up there as a free pattern on March 31st. Some of the money from the fabric goes to support the Quilt Research Center at the University of Nebraska Special Collections, which includes a comprehensive collection of vintage quilt patterns and papers from some of today’s best-known quiltmakers.
Friend Julie wrote about her adventures in pre-washing Jane Sassman Hand-Crafted solids by Free Spirit. Julie writes “They are advertised as “hand-dyed” with mottled surface imperfections. I found that the hand of the fabric was truly lovely, with a slightly nappy softened surface, called peached.” Don’t avoid them; just make sure you pre-wash!
I am not left-handed for rotary cutting, but I know some of you are. I saw the Left-Eze tool on the A Left Handed Quilter blog and thought you might be interested. It is described as being used to trim the selvedge, cut Half-Square Triangles (HST), cut Quarter-Square Triangles (QST) for Hourglass Blocks (and others), Flying Geese units, and Squares. Let me know if you try it out.
I watched a Facebook Live presentation with Kaffe Fassett and Brandon Mably. It was fun and I found out about Zappy Dots, where Kaffe Fassett Studios has a ‘shop’ various products using their designs. Nice gifts.
Projects, Classes, Patterns & Tutorials
Quilt & Surface Design Symposium has released their catalog of classes. I would love to take another class with Rosalie Dace or a class with Jane Sassaman.
Remember that I recently made a composition notebook cover? After that I found that Sara of Sew Sweetness has a 10 minute version. It’s 10 minutes because she doesn’t have to worry about raw edges. In the Sew Sweetness FB group one member made the notebook cover and wrote ” Just finished this notebook cover using alligator cork, based on Sara’s pattern. I read quite a few comments that the pattern was too small for most composition notebooks, so I did some measuring and came up with cutting the cork to 10.5” tall by 16” long, and cut the 5” wide panel covers to 10.5” as well. I also added the inside pocket, the bookmark and the pen loop. So much fun to make and feels really high-end. I’m going to make some extras to have on hand for gifts. ” I am thinking that if I made another composition notebook cover, I will use the 10.5 inch measurement and see if that works.
A friend asked me to make a skirt or curtain for her kitchen bar. I don’t have the time right now, so I pointed her to a sink skirt pattern. I haven’t tried it, but it was the concept I thought of when I read her message.
Sharon from Color Girl Quilts is hosting a quilt-a-long using the Rise Above pattern by Charisma Horton. I love the layout of this quilt. I do not love all of the blocks, but changing them out would be easy enough. I like the alternative setting for a sampler quilt.
Kerry Goulder (KidGiddy on IG) talked about the Sew Plush Mini Planner. This is an organized needlecase pattern available on her Etsy site. I thought it looked a little like the Floral Supply Case from Clover and Violet, but smaller and made specifically for needles.
The guild will be making Japanese aprons. We will all be working on our own projects, but helping each other. Right now we are sharing pattern options. Maria found a list of multiple patterns in this style. The good part about the article is that it gives a mini review of each pattern as well as a download link where available.
The Zenaida backpack is a really interesting bag. I like the shape, though I might put a cross body strap on rather than the backpack straps. I worry about the requirement for leather. I wonder how it would be with canvas or quilting cotton?
I thought about including some of Friend Julie’s Cornucopia links. It’s much easier to point you to her post. 🙂
Recently, Roberta Horton died from Lymphona. Roberta Horton may be an artist that modern quiltmakers haven’t heard of. She was an author, teacher and an amazing quiltmaker. Her books, especially An Amish Adventure** and Scrap Quilts** were really inspirational at a time when quilt books weren’t as prevalent as they are now. I used to belong to EBHQ and I still follow them on Facebook. The current President wrote a post, which is how I heard about Roberta: ”
The sad news reached me today that our beloved Roberta Horton passed away Thursday afternoon, February 4th. I don’t have any more details at this time, but I want to reflect a moment on what a gift her life was to us.
It’s impossible to overstate her impact on our guild, on quilting nationwide and even worldwide. Roberta made her first quilt in 1972. She was an important bridge between the quilters of the Depression, who carried the craft with them for love through the post-war prosperity that suppressed the craft. Roberta caught the baton, and passed it to us. She was there, already teaching, when the Bicentennial revived interest in quilting. She taught the first state accredited adult education classes in quilting back in 1973! I know of a number of long-time Guild members who learned to quilt from Roberta. Roberta and her sister Mary Mashuta were EBHQ founding members.
Roberta stretched beyond tradition. There had been Story Quilts before of course, but her exploration of her European heritage through her quilts helped popularize the form. Her exploration of ethnic fabrics, and the design influences of artists worldwide helped make EBHQ in the early days, before the Studio Art Quilters Association (SAQA), a welcoming home for the burgeoning Art Quilt movement. And she taught all of this, through Albany Adult Education and beyond. She wrote 5 books on quilting, donated some of her most important quilts to the then new San Jose Museum of Quilts and Textiles, and was honored nationally and internationally.
She was also an avid gardener, and two years ago at the East Bay Mini Maker Faire I had the honor of teaching a Woman Of A Certain Age, who had known Roberta for decades from the Garden Club, how to piece a nine-patch, as we shared stories of our beloved friend from different contexts.
Roberta was unfailingly gracious, welcoming and kind to me, a much younger MAN, encouraging my sometimes strange quilts!
Keep her memory close, and I challenge YOU to challenge yourself, as SHE did; learn, this year, a new technique, use some unfamiliar fabric, and always, always, teach whomsoever you may.
“And gladly wolde she lerne, and gladly teche.” -slightly altered from Chaucer, “Canterbury Tales”
I have asked the Web Support Team to create a Forum Thread on the Discussion Board where we can share our memories of Roberta.
May her sister, Mary Mashuta, Be Comforted In Her Loss, along with all of Roberta’s family. And May Her Memory Be For A Blessing. I’ll pass memorial details as I get them.
**I use affiliate links and may be paid for your purchase of an item when you click on an item link in my post. There is no additional cost to you for clicking or purchasing items I recommend. I appreciate your clicks and purchases as it helps support this blog.
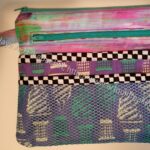
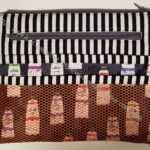
Sotak Purse Organizer gift #1 – finished January 2021
Sotak Purse Organizer gift #2 – finished January 2021
Doing Good
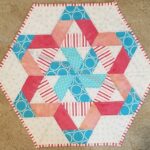
Double Spiky 16 Patch #2
Double Spiky 16 Patch #1
Double Spiky 16 Patch #1 donation top
Double Spiky 16 Patch #2 donation top
In Process or To Make
The ‘In Process’ is used to denote projects on which I am actively working or are on the design wall waiting for me to stitch. I am continuing to try not to put away projects. I find putting a project away ensures I never work on them, because I just lose steam.
One Hour Basket for organizing my decks of cards – Creative Strength, mindfulness, etc. I may switch to one of the Minikins or a Catch All Caddy projects for this purpose.
One Hour Basket for my stuff that tends to accumulate on the dining room table. I may switch to one of the Minikins projects or a Catch All Caddy for this purpose.
One Hour Basket for DH’s stuff that tends to accumulate on the dining room table. I may switch to one of the Minikins projects for this purpose.
Retreat Organizer – another project from the Crafty Gemini Organizer Club, also on my list, but not yet started
Superbloom tote gift – it is all cut out and I just need to take the time to sew it together.
Ultimate Project Organizer – another project from the Crafty Gemini Organizer Club, also on my list, but not yet started
Officer gifts for January 2021 – working on the project and nearing completion
Ultimate Carry All Bag – Bag-a-Long for BAM – I have the inside pockets made and am struggling with the front pocket. I really need to get busy on this
Westchester shirt – this is a Crafty Gemini pattern. I bought the fabric at PIQF in 2018. I started working on the pattern, then needed help from Mary. She gave me some advice and I need to get back to it.
Handwork
I decided that some of my projects are in a different class because they are hand piecing or embroidery or beading. They take longer. Thus I created a new category and have moved some projects here.
Still WIPs
I still have WIPs. Who doesn’t, after all? A project in the ‘UFO’ category means I am stalled. A nicer way of saying UFO is a WIP. The list is a lot shorter and the projects are newer, for the most part.
Handbag Sampler – this is still the forgotten project. It should be on the UFO list. The blocks were teaching samples when I taught a sampler class some time before I started writing the quilt class sampler tutorials. I found one block recently, but otherwise I actually don’t know exactly where the blocks are hiding. I crawled up in the far reaches of my fabric closet to see if I could find them and they weren’t where I thought. I am sort of mystified as to where they could be. I haven’t even found a picture of all the blocks. Sad.
Lobster – I think I might make this into a tablerunner for the buffet. I think that will be a good and fun use of the piece even if the colors aren’t quite right for the dining room.
Pies and Points from 2016 Victoria Findlay Wolfe class. The last time I worked on it was when Julie and I had a playdate in April 2018. I brought this piece with me so I could cut more elements (Julie has a Sizzix). I lost my excitement about this piece shortly thereafter and still have to get it back. Thus, I had to move this to the WIPs area.
Pointillist Palette #4: Fourth is a series of 6 quilts; needs tiny square patches sewn together. No progress.
Serendipity Lady – I am still planning to take this piece to be framed.
Who Am I? – This piece is still languishing. Perhaps having a larger design wall will help me regain momentum. The amount of satin stitching I was facing was a problem until I thought of BIAS TAPE. I am going to make the words with bias tape, perhaps different widths, then I won’t have to sew the satin stitching. Red Scribbles and Friend Julie helped me come up with this solution. Now I just have to do it!
I put together the latest door prize. It was given away at the meeting last week and Alison won. I need to send it off, which means, finding a box, addressing it…. You know, the usual mailing tasks.
I really like the tote bag, which is from a pattern by Aneela Hoey, the Kit Supply Tote. It was made by Angela.
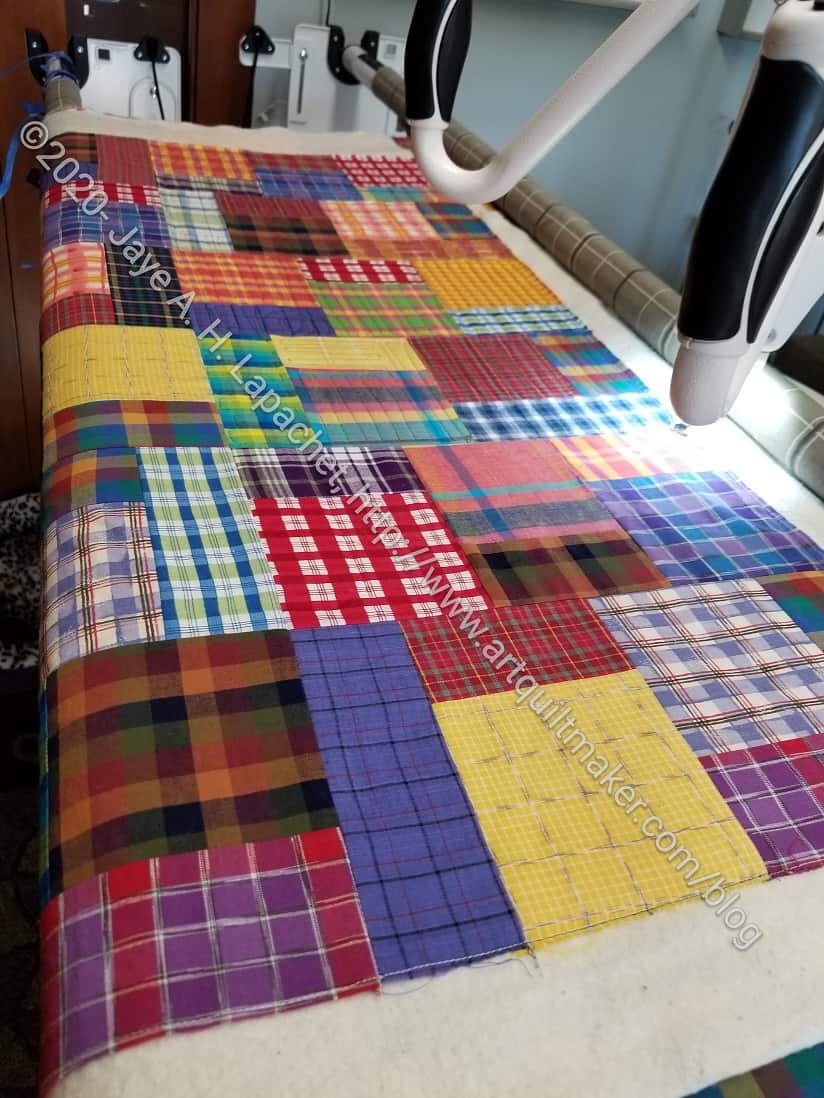
Wednesday, I helped Tim put the piece on his longarm and he started to quilt it.
He is quilting a combination of squares/rectangles and swirls. He is not doing an all over pattern, but is quilting in the piecing, which I like.
He and I have talked a lot about our tastes in quilting, so he knows I like my piecing to shine. He does all over patterns for some community quilts, but he often does custom for the quilts I have made.
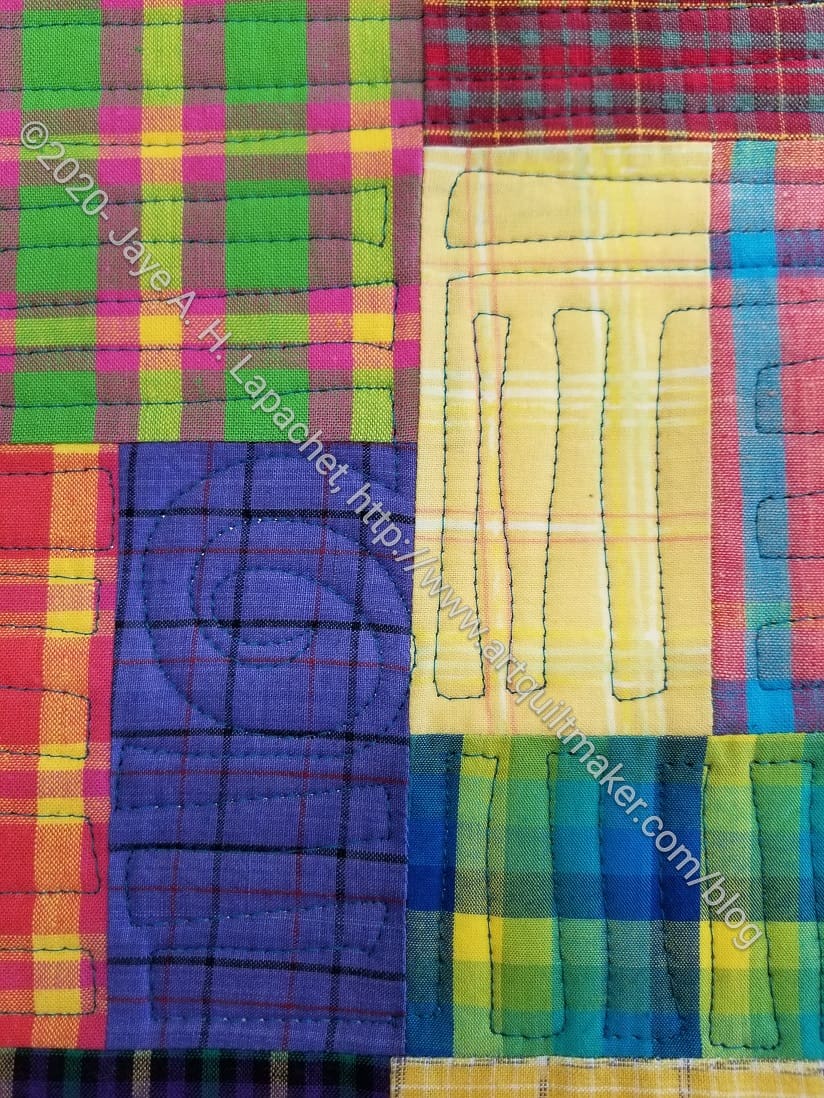
Plaid Donation Quilt in progress – detail
For donation quilts I do not tell him how to quilt them. I let them go after I am done piecing and let him decide the best design. Like Colleen, longarming is really his jam and he is good at it. It is also something he enjoys. I leave him to it. In this case, he focused on the blocks and did a couple of different motifs in the various patches. He combined spirals and rectangles, which I thought looked really good.
I went to have lunch with Tim. I ended up helping him put two small baby quilts on his longarm. One of these was picked up from the guild community quilt project dropoff/pickup time the other day. He thought since the quilts were the same size they could be loaded on the machine and quilted at the same time.
KFC Community Baby Quilt by Patti S
It didn’t quite work out. We still got both quilts on the machine and he was able to finish quilting Patti S’s quilt. The plaid donation top I made was half quilted when I left.
I was impressed with his work on one quilt. I thought he might get two done, but quilting is tiring.
Patti S’s quilt was made from Kaffe Fassett fabrics, perhaps a jelly roll (or Free Spirit equivalent). I know she is trying to clear out her fabric closet, so this might be an older group of fabrics. It is a fun quilt and I thought the quilting would just sink right into it, but the quilting sparked up the top even more.
KFC Community Baby Quilt by Patti S – detail
I like the swirls that Tim used to quilt the piece. I always enjoy watching him work on the longarm. He is so careful and knows so much about how the machine works. It makes me want to try it out, under his guidance, sometime. Shocking after my bad experiences longarming before.
Yes, we wore masks the whole time we were together and both of us are really careful otherwise. We are about the same age so we have awhile to wait for our vaccines. We have, however, kind of ended up in the same bubble and it has helped to relieve the tedium.
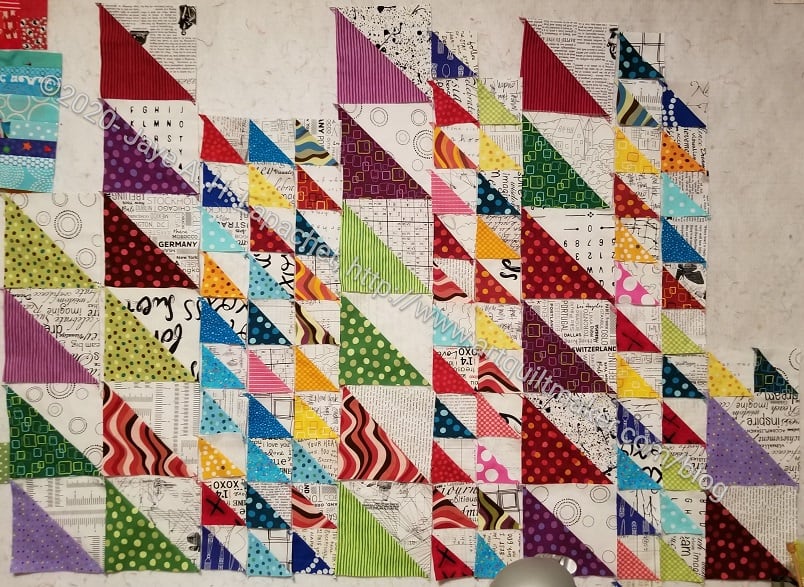
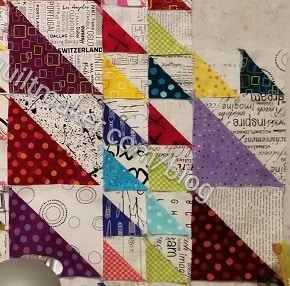
I am working on the X quilt and the HSTs at the same time. My iron is acting up so some of my lack of progress has been because of not having a working iron. I have a makeshift solution in place and am making progress again.
I have pressed all of the large HSTS and have a few more small HSTs to press. Since there are only 3 large X blocks, that limits the number of large HSTs with which I have to work. As I said before, I am thinking about adding sashing. Some of my final decision requires looking at all of the HSTs in one place. I have to see them all together and decide if I have enough for a donation quilt or if I need it to be bigger. This current layout is about 49wx35h. Kind of a weird shape, but we will see.
Pop Parade HSTs – mixing it up
I am also not sure if I want to mix up the large and small HSTs in the same column.
I laid some out together just to see what I thought. Again, I have to see what I think. Also, the layout depends on the sizes I have to work with and I haven’t delved into that problem yet. They all look like they will fit now, but the current layout doesn’t take seam allowance into consideration.
I was thinking that I don’t often write about my dream projects. The last time was in June of last year. This time, I put in photos, not of finished projects, but notes and ideas so you can understand what I am talking about.
Art Institute of Chicago Fusible Applique’ (Ticker Tape Style) Quilt
Whole Cloth Quilt Design
Status: Dream state
Pattern: Original, I have the version of the pattern I used for the Whole Cloth quilt, shown left, and I will use it as starting point.
Fabric: Turquoise and red, mainly, but other colors for the leaves and flowers, perhaps
Steps: need to fuse a bunch of turquoise to some piece of fabric in the ‘ticker tape’ style so I can cut it up into small pieces. I am thinking of making it similar to the Whole Cloth Quilt and using red, again, for the background.
Thoughts: I might make another one with turquoise on top of red with just two pieces of fabric. I’d really like it if someone else would apply fusible to a bunch of turquoise for me. I also have to figure out how to keep all those little pieces on the fabric without satin stitching around each one. I absolutely don’t want to do that.
Art Institute of Chicago Fusible Applique’ (one sheet of fabric) Quilt
Status: Dream state
Pattern: Original, I do have a version of the pattern I used for the Whole Cloth quilt and I will use it as starting point.
Fabric: Turquoise and red, mainly
Steps: need to fuse a big piece of turquoise to SoftFuse or similar, then cut out the image and fuse it to the background. I would satin stitch all around the image. I don’t know that I can make one continuous piece, but will try. The image would be similar to the Whole Cloth Quilt and using red, again, for the background.
Thoughts: I might make it with turquoise on top of red with just two pieces of fabric.
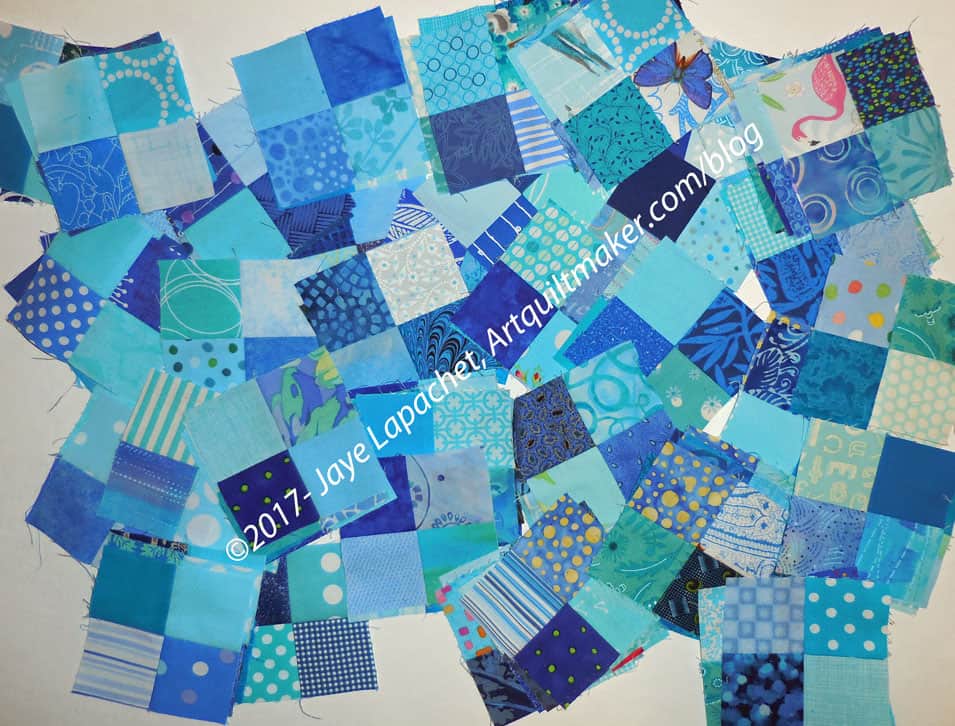
Thoughts: I can’t decide if this is still a dream or if it is already started since I have cut a lot of rectangles. I just need to arrange it and start piecing. The original idea stemmed from the FOTY quilts. I just decided to do a monochromatic version – using just blues, in this case. I probably have more than enough patches now. I just need to slot the time into my schedule.
Blue Lemonade
En Provence 4 Patches (formerly for Blue Lemonade)
Thoughts: I probably had enough squares to make this quilt, but then I used a bunch of them to make En Provence. I have cut quite a few more 2 inch squares, but probably still need more.
Easy Street
Status: have pattern/ dream state
Fabric: pinks
Pattern: Easy Street by Bonnie Hunter
Thoughts: I really liked Daisy‘s version of Easy Street, which she calls Cherry Bomb (she thinks of the best names for her quilts) in terms of color and feel. I don’t want to copy her, but if I do this quilt, I’d like to have the same pinky-red feel to it. One challenge about a mostly monochromatic quilt is getting enough contrast. I look forward to that challenge. Not sure this will become a reality.
En Provence #2
En Provence Finished
Status: Dream state
Pattern: En Provence by Bonnie Hunter
Thoughts: I loved the one I made before and can’t stop thinking about it. I may have to make another one, but I can’t figure out what colors to use next. The ones I used before were almost perfect.
Feathered Star Block (or quilt?)
Status: Dream state.
Pattern: I haven’t decided on a particular feathered star
Fabric: I decided not to use a layer cake and will use the scrap 2.5 inch squares I have been cutting. I love the cheerfulness of Scrapitude Carnivale, as I say over and over, and am not done with that fabric combination yet.
Thoughts: I thought about using dots on a white background as the background, as I did with the Scrapitude Carnivale quilt. It makes the Scrapitude quilt look so cheerful. I probably wouldn’t call the quilt Good Night Irene. I am less enamored of the pattern and may use it to make a donation quilt.
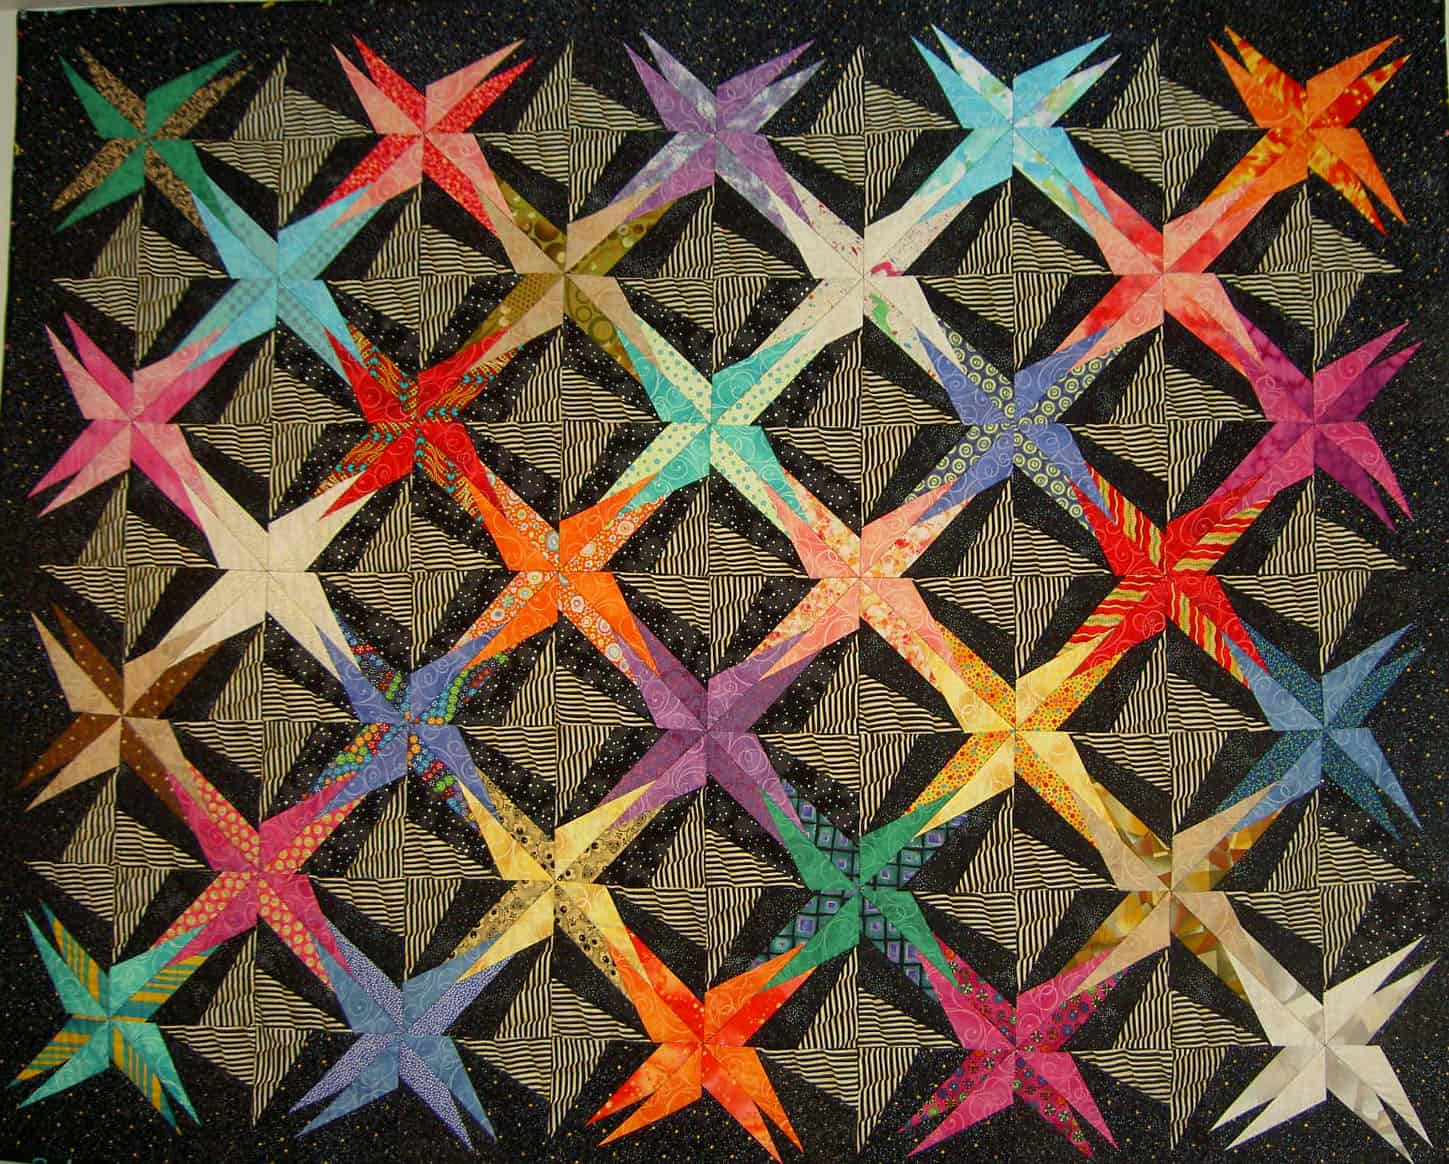
Interlocking Triangles Quilt(s)
Spiky Stars
Status: dream state
Pattern: This is an idea that I designed myself. I made two quilts and have variations on the pattern to make more.
Fabric: I have a few different collections of fabric I want to use. It seems more important to me now to get those used. Most are rainbow colored; I also have a lot of stripes to use
Thoughts: This is a quilt from which I get a lot of bang for my buck. The visual impact is tremendous. The easiest way to do the spiky triangles is with paper piecing. I am not that big of a fan of paper piecing (read my laments about the Spiderweb‘s paper piecing). I made Spiky Stars using templates and that was meditative and won a prize, so it is doable.
Jack’s Chain Quilt
Status: dream state
Pattern: Jack’s Chain, a continuous pattern
Fabric: bright scrappy, consistent centers
Thoughts: This is one of the first quilts I saw hanging in a quilt store and thought of making. I have seen a number of variations lately using different hexagons in the center. It occurred to me recently that I could do four rings and make a pillow cover instead of a whole quilt. Partially, I thought of this because I saw an EPP pattern for this quilt. Taking on another large EPP quilt right now is not in the cards. I could also make the pattern larger, making the piecing for a quilt much quicker. Sometimes, I still like the smaller version idea better. But I think I could piece this quilt without EPP. I could make the pieces large, which would make the pattern go faster.
Music Quilt
Status: dream state, but not very inspired
Pattern: Top will have a piece of music the Young Man can actually play. That will probably be applique’
Fabric/Colors: music prints and tone-on-tones with a little red
Thoughts: The Young Man has requested this quilt as his high school graduation quilt. I missed that deadline and now I have missed the college graduation deadline. I printed out the piece of music he sent me. Now I need to make into an applique’ or do something else (print on fabric?). If I can manage to make it.
Pineapple (Hunting and Gathering)
Pineapple quilt
Status: I have some strips cut.
Fabric: dots. Have most of the strips cut. Will be much more selective about which strips I use.
Pattern: Pineapple log cabin
Thoughts: I haven’t given up on a Pineapple quilt despite my frustration with the previous attempt. I bought a different ruler: a Creative Grids Pineapple ruler in hopes that it will work better for me
Silk Colorblock quilt
Colorblocks 2
Status: I have the fabrics and the plan
Fabrics: silk dupioni and cotton in brights (of course)
Thoughts: I have made a couple of, what I call, Colorblock quilts over the years. One was the Kona Challenge in 2011, another was my 1990 Colorblocks 2 and the first one, Colorblocks, also made in about 1990. I bought the silk fabrics at the Marin Needlearts show about a zillion years ago and they have languished waiting for me to learn to back them so I can use them. I think I have that covered now and there is nothing stopping me except time and will.
Fabric: Scrappy with controlled scrappy background
Thoughts: I like the construction of this quilt and am convinced that I will make it. Another one just waiting for time and the will. After adding the correct size piece to my cutting sheet, I have continued to cut and cut. I now have quite a large stack of patches waiting for a background color.
Out of the Dream State: Below is a list of projects that were on this list at some point that I actually made or am working on:
Half Moon Modern Quilt I made a Chubby Charmer instead of a quilt and am happy with that choice.
Medium Mondo Bag – I actually made the Midi bag. I think I might have another pattern to make another one, so I will have to try it out without the class.
MetroScape quilt is finished, working on the binding
I didn’t get a lot of sewing done last week as I was preparing new material for my class. I have always had a great deal of respect for teachers, but I have even more now. Preparing new material for my students takes a lot of time.
The stack of these HSTs, which are being created from cutting the lozenge blocks using the Simple Folded Corner ruler** continues to grow. I didn’t think I would be able to make any kind of good sized quilt, but I think I will be able to make at least a baby quilt. I don’t plan to lay it out like you see above. Depending on how many HSTs there are, I may add sashing between the columns.
I still have a lot of HSTs to iron, so this design will grow based on the number of pieces.
This is definitely not the final design.
**I use affiliate links and may be paid for your purchase of an item
when you click on an item link in my post. There is no additional cost
to you for clicking or purchasing items I recommend. I appreciate your
clicks and purchases as it helps support this blog.
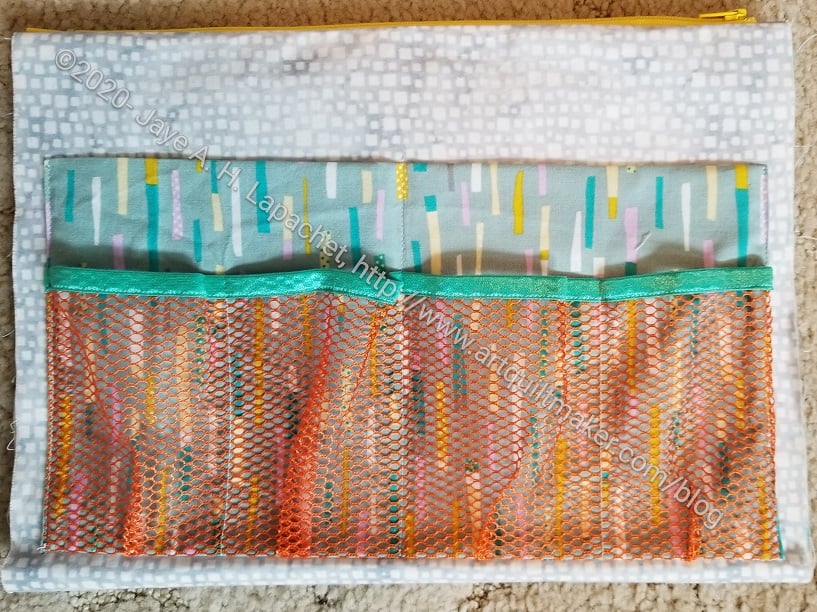
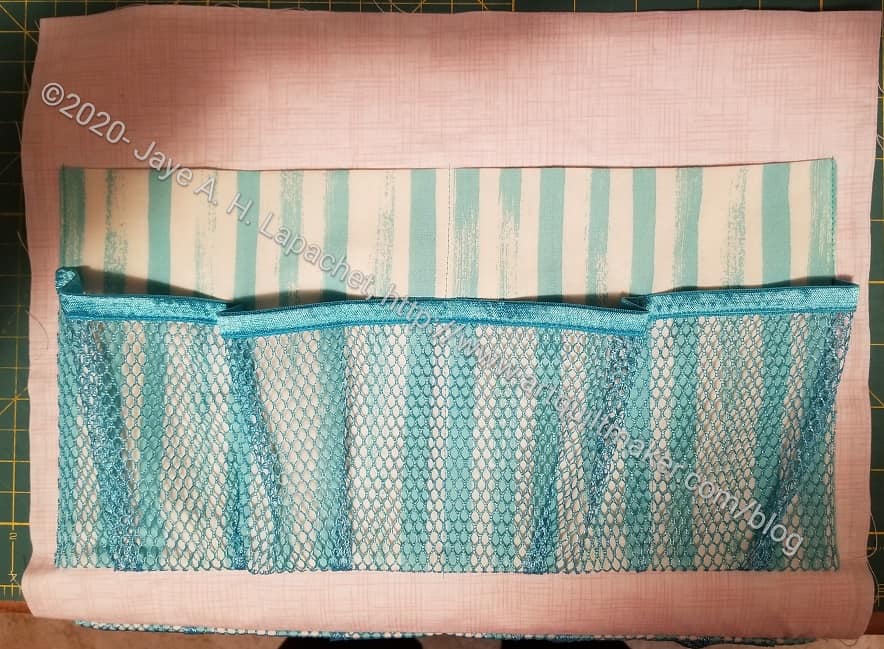
Last year at the guild Lynette and I started leading a sew-along with the Ultimate Carryall Bag pattern from Natalie Patton. The pandemic kind of blew the idea out of the water in the sense that we had thought about it. I decided that we needed to get back on track, because people had bought the pattern and cut out the pieces. On Sew Day earlier this month, I went into a Zoom breakout room and gave people a tutorial on making one of the large pockets.
Today we are starting to make one of the large pockets. We will work on the front pocket.
Tutorial:
First, mark all of your pieces using the tags that Lynette made.
Next, go through your pattern and mark all references to cut pieces with the numbers Lynette created. If you don’t do this, you will have no idea which pieces I am talking about.
N.B. I am using two different pockets, which use different fabrics, to illustrate this tutorial.
Note: I am just calling out a few supplies. You will need to check the pattern for a full list of supplies
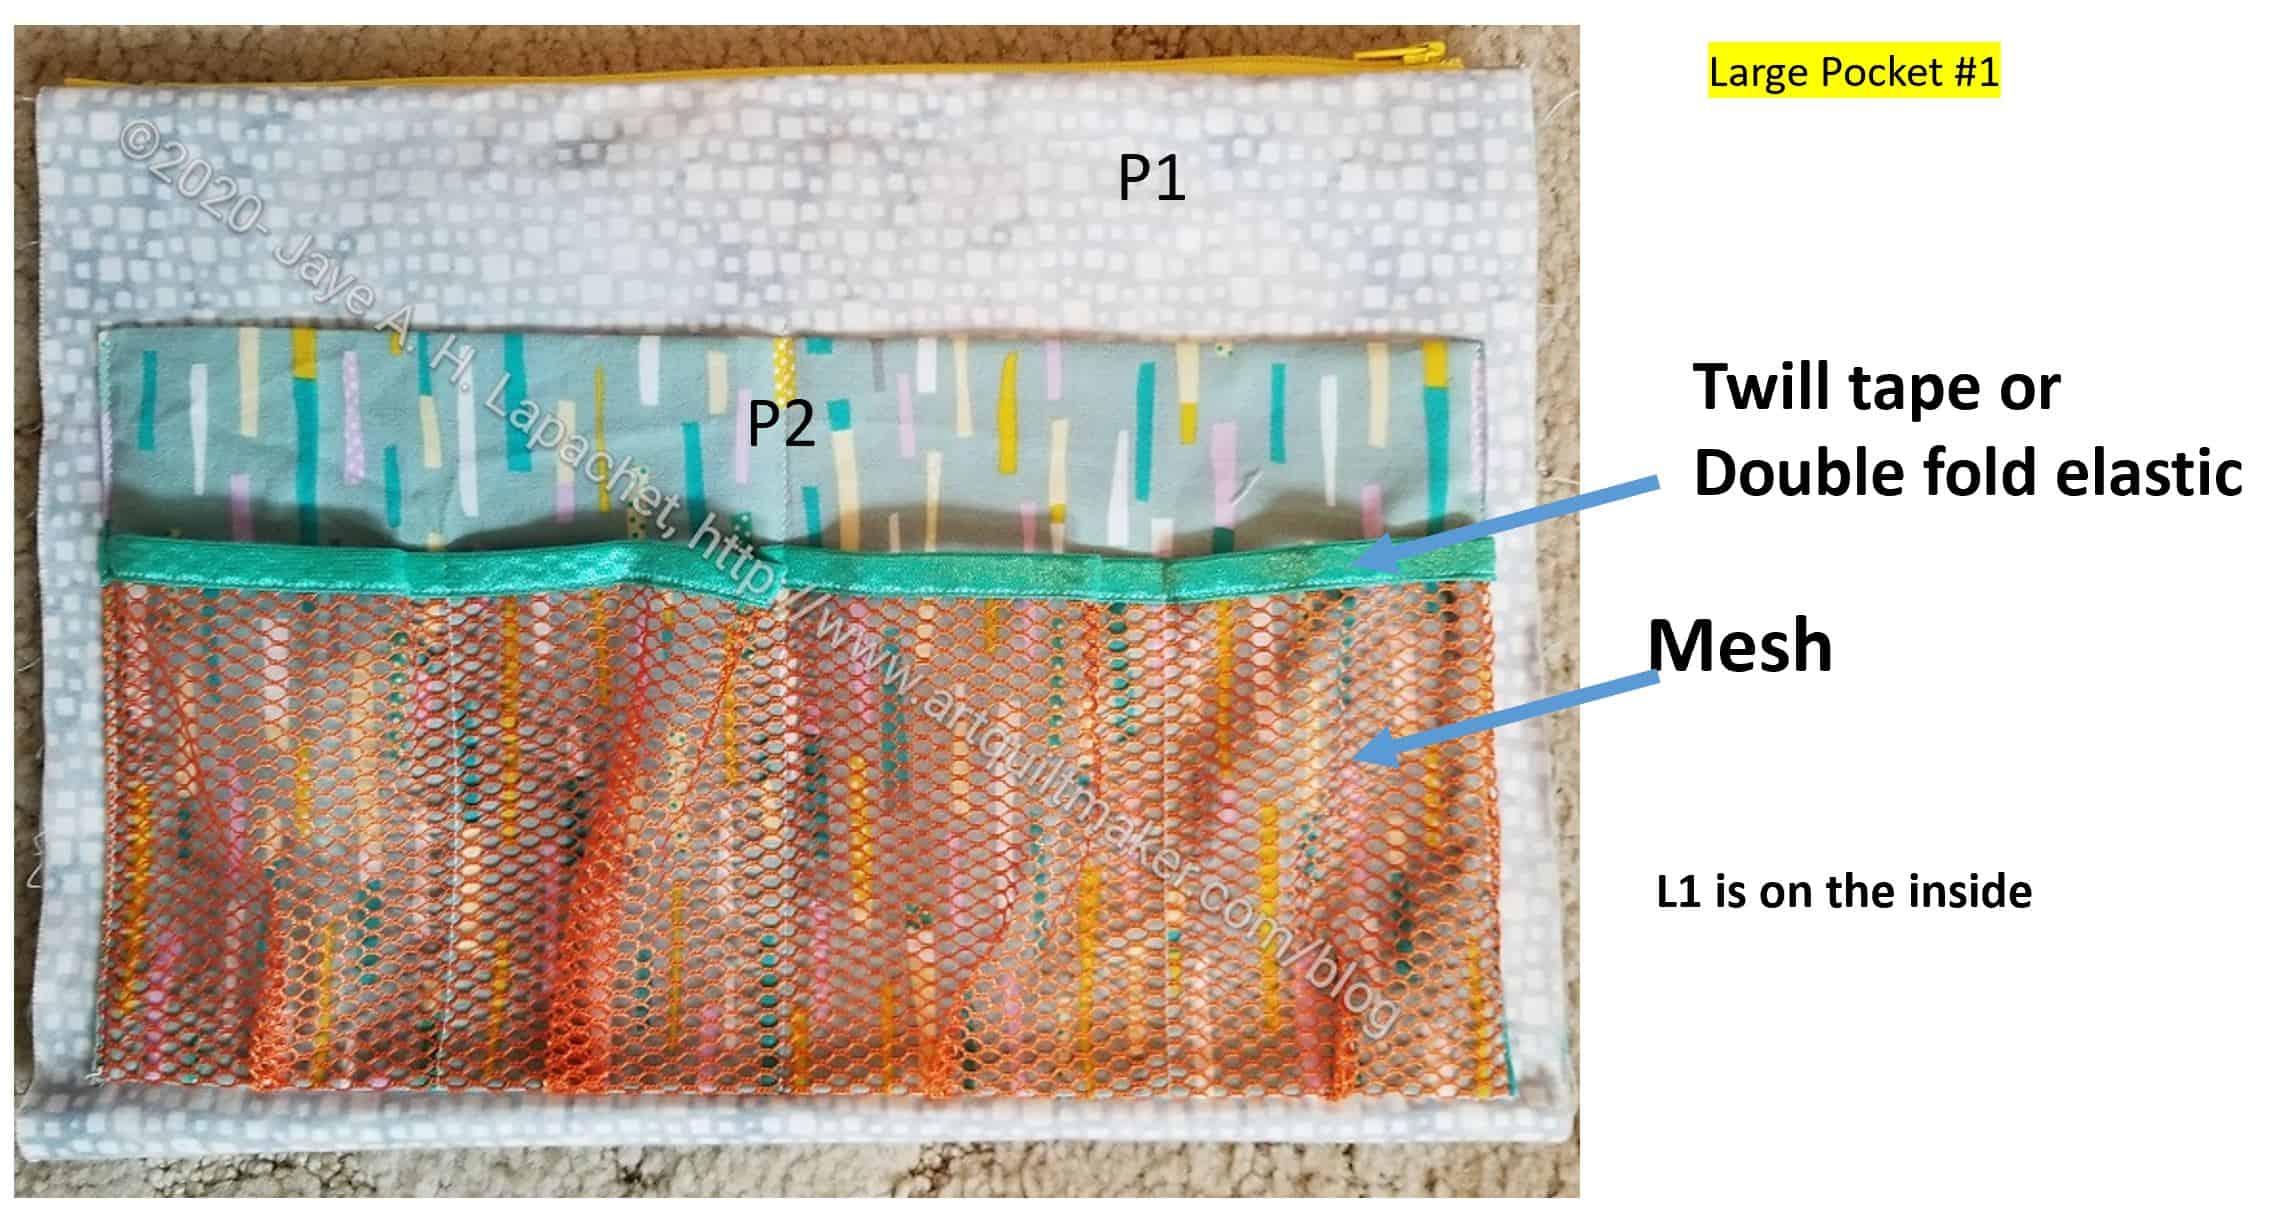
UCAB Large Pocket 1 Outline
With everything assembled, you should be ready to sew.
N.B.: instead of twill tape, I use ByAnnie’s double fold elastic (AKA fold over elastic). I like the way it matches the mesh and I like the way it folds over exactly in half so I can machine stitch it. If you are using Twill Tape, you will have to bind the mesh in best way you know.
UCAB Bind Mesh Pocket
Mesh Pocket
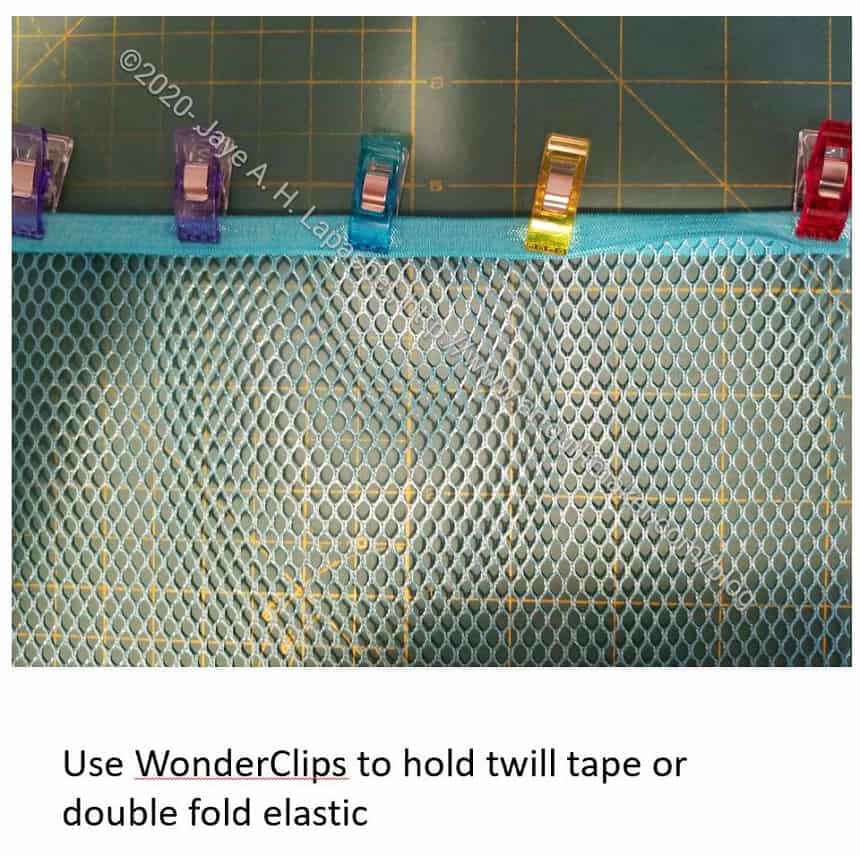
The first step is to bind the top of the mesh pocket. Take the fold over elastic and fold it in half. Use WonderClips to hold the elastic in place.
Using matching thread, sew along the edge of the binding closest to the mesh. I used a straight stitch.
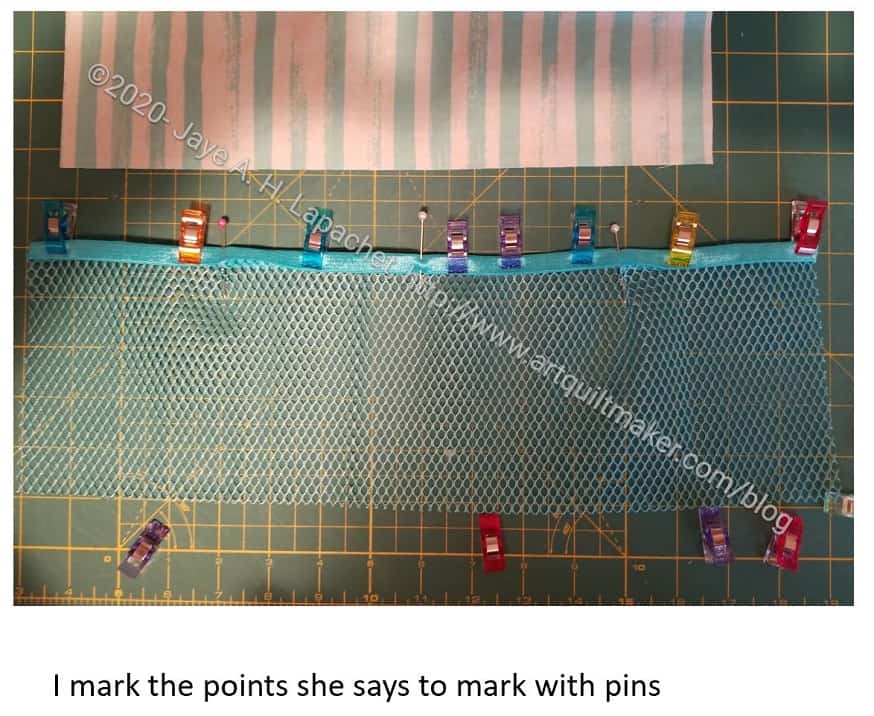
Mark Mesh Pocket in halves and quarters
Once that is done, mark the pocket in half and in quarters. I used pins.
N.B.: In the picture on the left, I have marked the mesh pocket in halves and quarters with pins, but I have not yet bound the mesh with the fold over elastic. Ignore the clips in this photo.
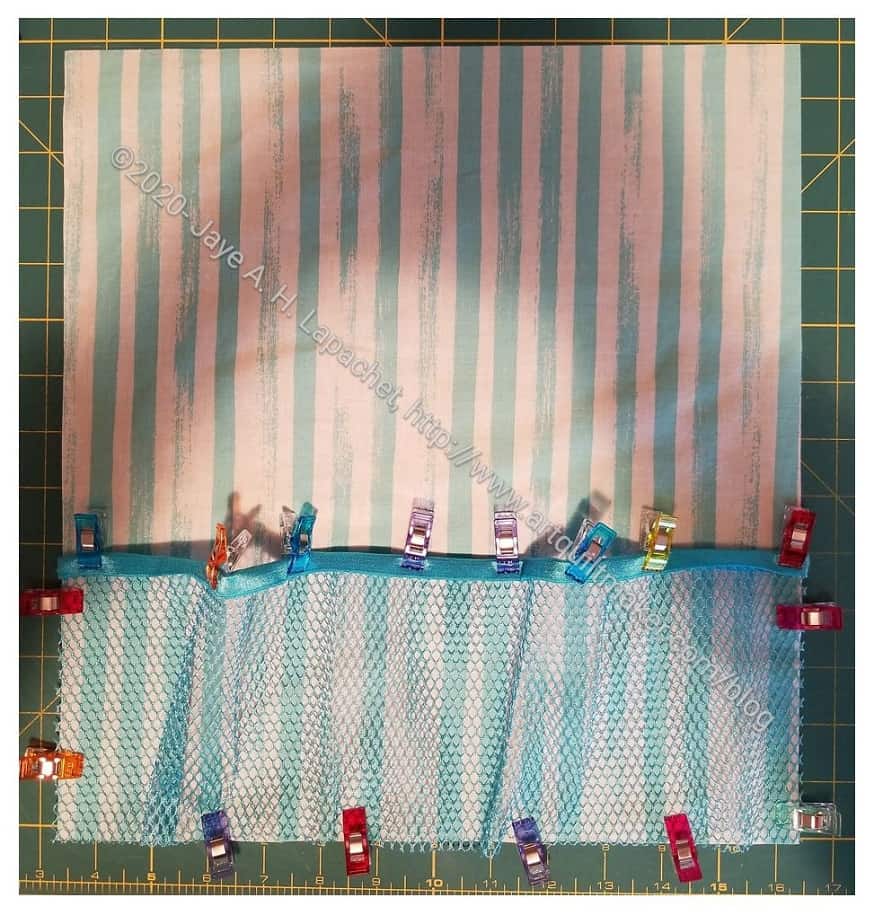
Add Mesh Pocket to P2
Clip bound mesh pocket to P2
Clip the bound mesh pocket to the bottom of P2.
You will need to ease the excess mesh fabric into pleats at the bottom of P2.
I used as many WonderClips as I needed to keep the mesh in place. It is a little bit challenging to keep in place. It isn’t exactly slippery, but it doesn’t stick to the quilting cotton like another quilting cotton would. Sew the bottom of the mesh pocket to P2, sewing the pleats you clipped in place as you remove the clips.
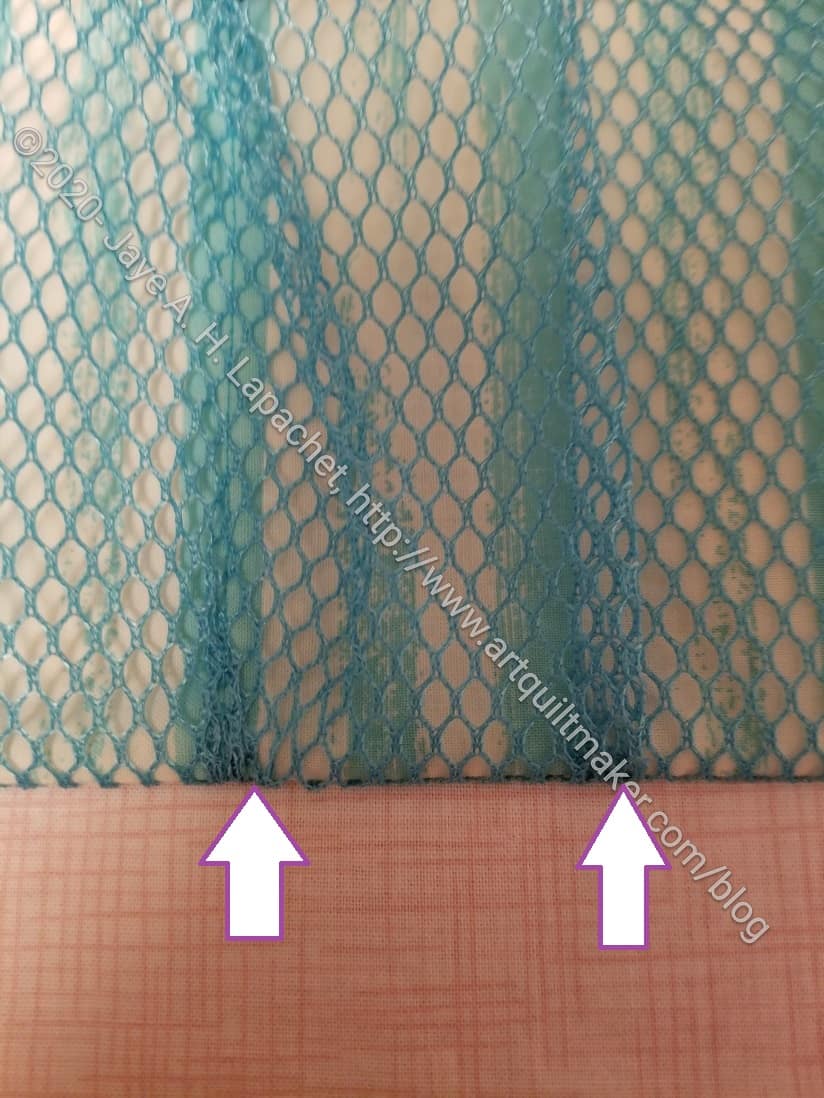
Mesh Pleats
After you sew the bottom of the mesh pocket to P2, you will notice that the mesh will look like the picture on the left on the bottom where you have pleated the mesh. This was a little bit of a challenging concept for me to understand. I don’t make many garments, as you know, which may be the reason. Also I had to figure out why to pleat. The pleats give the pocket dimension so you can use it for things that are not flat. You could also make this pocket with vinyl instead of mesh, if you want. I don’t really talk about that in this tutorial, but make the pocket the same width as P2 as bind it with quilting cotton rather than fold over elastic.
Fold top of P2 down RST
Fold P2 down towards the bottom RST. The top of P2 will cover the mesh pocket.
Clip or pin the sides in place to secure. Watch out for the other Wonder clips that you used for the mesh pocket. It would probably be bad if you sewed over them.
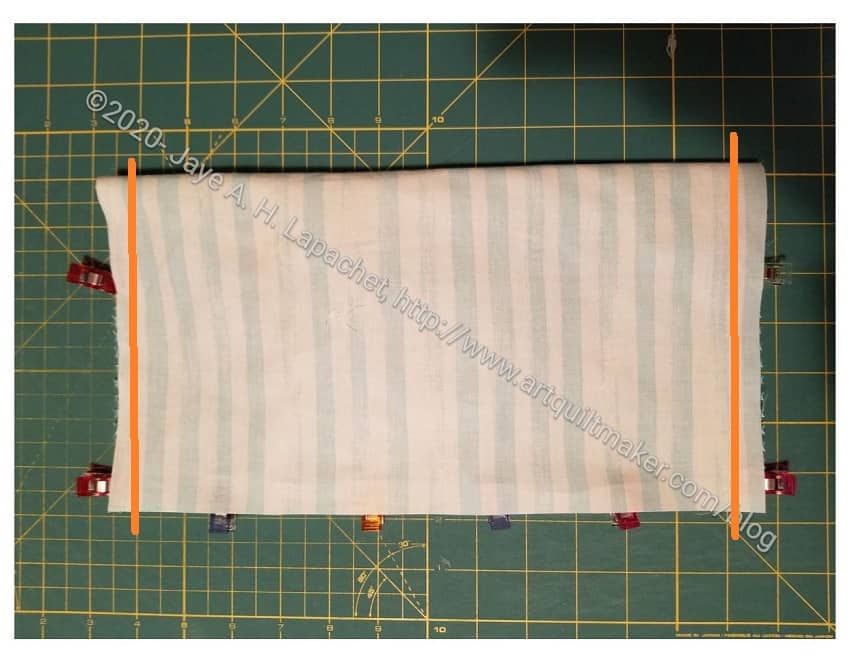
Sew Down Sides of P2
Sew down sides of P2 only. The orange lines in the image on the right indicate where to sew.
Backstitch at the top and bottom to secure.
Before turning, I pressed the seams on the sides open, being careful about the mesh. I was also careful not to press the top fold yet.
Turn P2 right sides out.
Press again, watching out for the mesh. ByAnnies mesh doesn’t seem to melt when pressed, but I was still careful.
Also, now press the top fold.
I pressed the bottom seam allowance inside the P2 pocket and sewed it closed when I sewed P2 to P1, which I will talk about in the next tutorial.
UCAB P2 pocket sewed to P1
P2 is now finished. In the photo, I have already sewn it to P1, but I will talk about that next time.
Use the seam allowance indicated in the pattern. Tip: Natalie, the designer, sometimes switches seam allowance sizes so pay attention to those directions.
I made two of the P2 pockets and put them on both sides of this large pocket, using the same directions. In the next tutorial, we will sew the P2 pocket to P1 and add the zipper.
I originally wrote this to support Bay Area Modern‘s various swaps and activities. Once their new website was live, the blog was discontinued. I think this is a useful post (and not just because I wrote it!), so I decided to rewrite it, update it and post it here.
Please note:
I haven’t tried all of these patterns
I use affiliate links to support this blog. Please see the full notice at the bottom of the page
Some patterns have a cost
Generally, I have just made lists of ideas. Where I know about a pattern or specific tutorial or project, I have noted it.
Links break. I do check them, but you might need to search. Fortunately, there are usually multiple patterns or tutorials for the same item (or type of item)
Apron
Flapper Apron by Decades of Style. I have made a number of these aprons. With a few adjustments they come out really well.
Sew4Home’s Festive Half Apron with Extra Large Pockets tutorial
Sewing pattern companies such as McCall’s, Simplicity and Vogue all have apron patterns. The packets often include multiple styles.
Backpack
Sew4Home’s Sporty Summer Sling bag tutorial (this company changes the names of their projects, so if the link doesn’t work, do a search)
Bunting
Camera case wristlet – pattern
Camera pouch – pattern
Camera strap – tutorial by ikatbags.com Catch All Caddy by ByAnnie
Car trash bag – pattern
Car ditty bag – tutorial
Cargo Duffel 2 – Noodlehead revised tutorial on the Robert Kaufman site
Casserole carrier- Sew Sweetness pattern
Cell phone sling
Changing pad – pattern (make sure your giftee has a baby!) Might be useful to look at my vinyl tips and tricks page.
Checkbook cover tutorial from SewVery
Clipboard (fabric covered) – tutorial from SewVery
Clutch bag – pattern from Clover & Violet
Coasters
Coin purse
Cold pack tutorial from SewVery
Composition book cover tutorial from Hip to Be a Square
Craft organizer tutorial
Cup holder/ coffee cozy
Cushions / Throw pillows
EPP Travel Kit
The Zen of Making pattern and tutorial. Make sure you look at the link for the optional pin cushion and other tutorials on EPP.
eReader /Tablet bags and cozies
Book Style Kindle cover tutorial from Clover & Violet
Keychain
Lanyard (tutorial)
Light switch plates (covered) – tutorial from Craft Buds
Luggage tag tutorial from Clover & Violet
Manicure roll-up bag tutorial from Hip to Be a Square
Mask
Mini ironing table (pattern/tutorial)
Mini quilt / wall hanging
Mug rug
Name tag
Napkins
Needle safe
**I use affiliate links and may be paid for your purchase of an item when you click on an item link in my post. There is no additional cost to you for clicking or purchasing items I recommend. I appreciate your clicks and purchases as it helps support this blog.
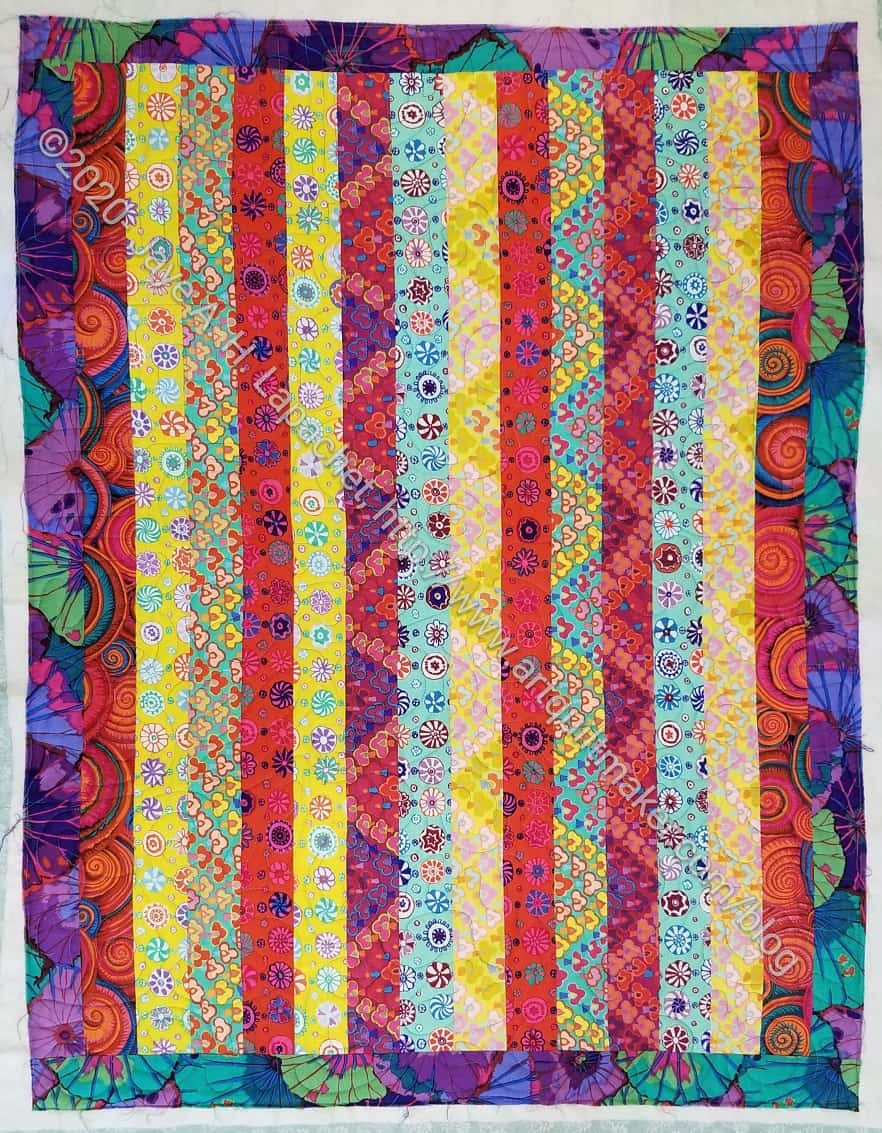
Although everything went along very well, I finished up sewing on Sunday somewhat dissatisfied. I think I felt like I figured out the sewing and was done, but here was a bunch of pieces on my design wall that were not a quilt top.
I turned off the sewing machine and lights and left the room. I ate dinner, worked on my puzzle and thought about this quilt.
I decided that one issue is that I don’t want to keep it. I am making it because I wanted to use the Pop Parade by Metro for P&B Textiles fabrics. I also think the design is clever. Still, I don’t want to keep it and didn’t know who should receive it. I have four-ish more quilts to make in the Niece-phews series. None of the people who will be getting a quilt seemed right for this one. I thought about giving it the YM. He is always up for a new quilt. Finally, I received an email from a friend. She is going through a tough time and needs a quilt. Voila!
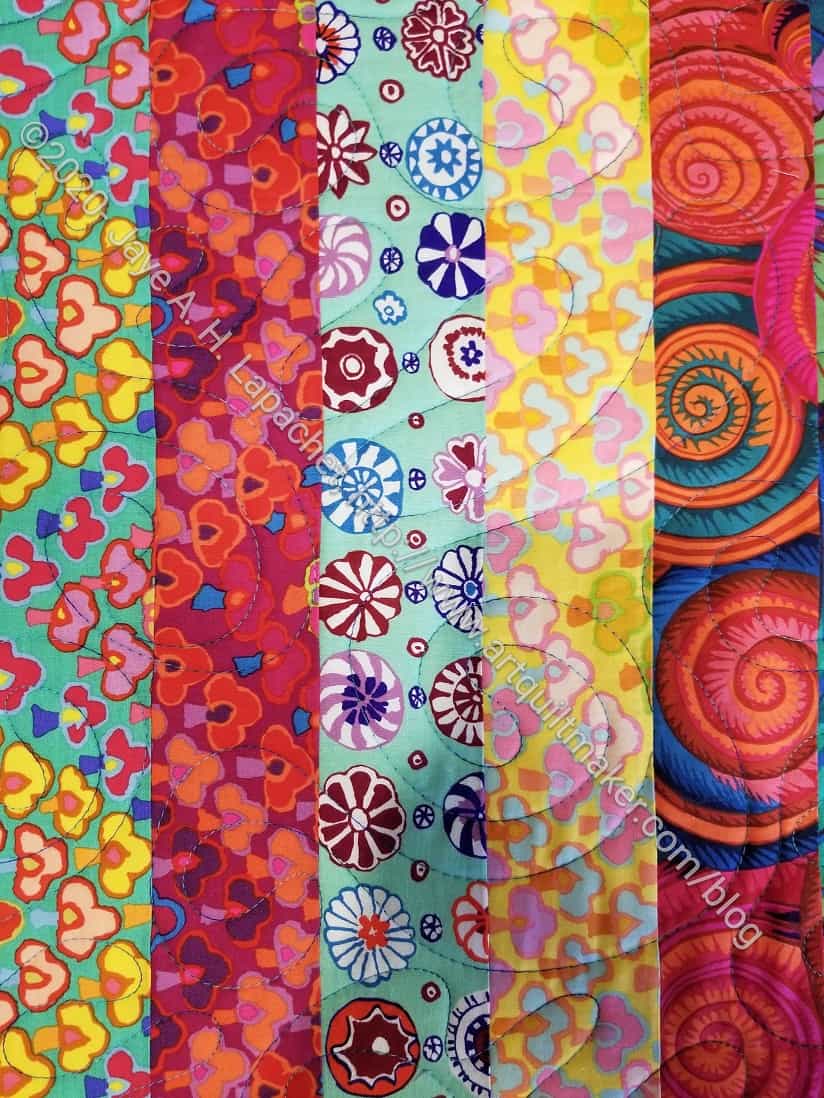
This quilt is also a cautionary tale about saving fabrics for the perfect project. When I bought Pop Parade, I was pretty excited about them. Now, not so much. The dots are great, the other motifs are great, but the colors are somewhat dull. I see it especially in the pinks. I prefer bright clear colors.
I didn’t have enough of the Pop Parade to make this quilt, so I added in some other fabrics and that makes the overall look better. I love the text and low volume fabrics I am using for the background. I was kind of upset I had chosen those if the quilt wasn’t going to someone I like as I am using up large pieces of them. Now I am excited that my friend will receive it. I am sure she will like it.