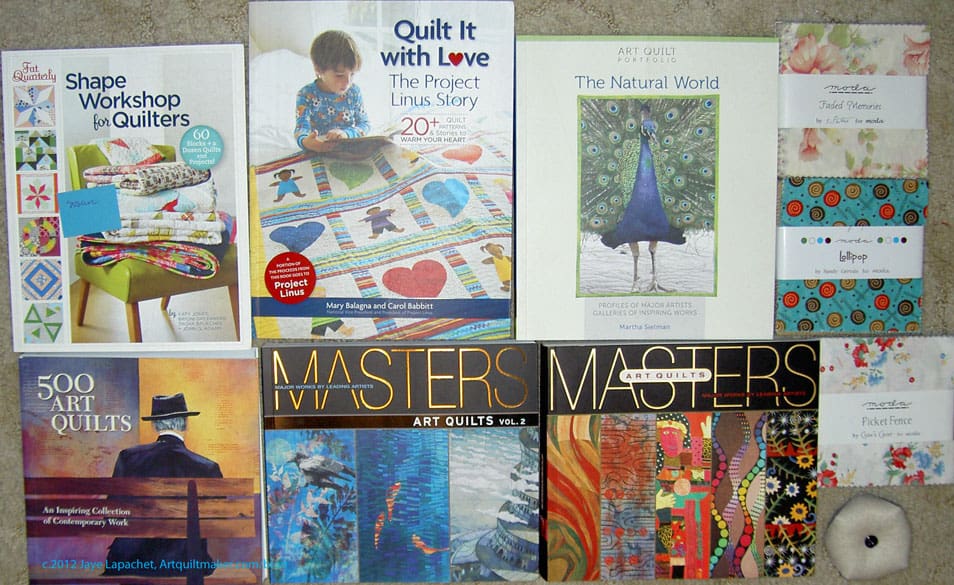
I had it on my list to deal with the disposition of a couple of projects and the Flower Garden was one of them.
Once I pulled it out of the closet, I was a little sorry to see it go as I do like the stitching and the border, but I still don’t like the flowers, so off it goes to a better life. I am going to use the border idea again, perhaps in piecing, definitely in fusible applique’.
Of course I will do stitching with Perl cotton in other pieces.
There is a woman making two quilts (one is done) for a mutual friend. Another participant decided to make a quilt for the first quiltmaker.
Are you confused yet?
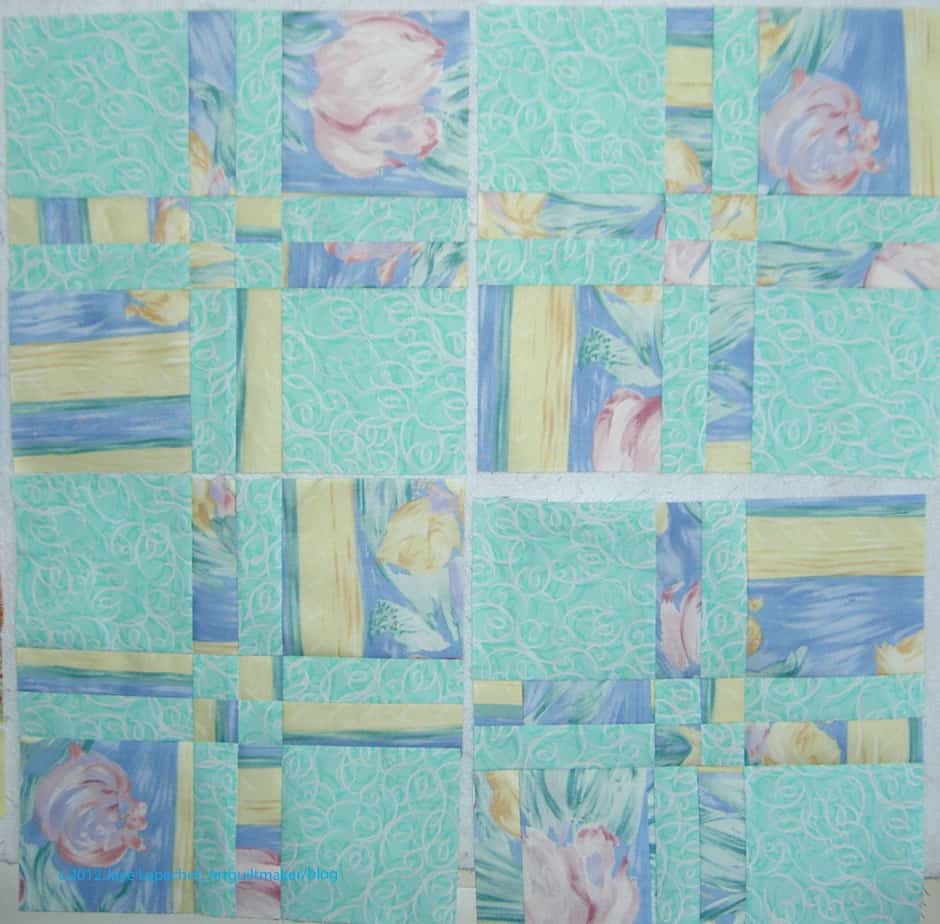
I made this block to send along to contribute. I often, as you may have noticed make stars, especially the Sawtooth Star. I like Sawtooth Stars. I think star blocks give a lot of bang for their buck. I wanted this one to be as cheerful as possible. As you can see, I used fabrics from the A-B-C Challenge.
It is already sent off and I will probably never see it again.
a class or function designed to receive incoming events from another object or function.
wash basin
Definition: A sink (also sinker, hand basin and wash basin) is a bowl-shaped plumbing fixture used for washing hands, for dishwashing or other purposes. Sinks generally have taps (faucets) that supply hot and cold water and may include a spray feature to be used for faster rinsing. They also include a drain to remove used water; this drain may itself include a strainer and/or shut-off device and an overflow-prevention device. Sinks may also have an integrated soap dispenser.
A carbon sink is a natural or artificial reservoir that accumulates and stores some carbon-containing chemical compound for an indefinite period. The process by which carbon sinks remove carbon dioxide (CO2) from the atmosphere is known as carbon sequestration. Public awareness of the significance of CO2 sinks has grown since passage of the Kyoto Protocol, which promotes their use as a form of carbon offset.
Take 5 minutes (5 minutes only!!!) to do any kind of artistic response: poem, doodle, quilt, sing, dance, pastel, pencil. ANYTHING counts. No rules; just do it!
Post the direct URL (link) where your drawing, doodle, artwork is posted (e.g. your blog, Flickr) in the comments area of this post. I would really like to keep all the artwork together and provide a way for others to see your work and/or your blog.
The Creative Prompt Project, also, has a Flickr group, which you can join to post your responses. I created this spot so those of you without blogs and websites would have a place to post your responses.
Sigh. Camille Roskelley was featured on House of Turquoise. I love her house. I love her house, because it is beautifully decorated, but also because there are no giant stacks of paper or baskets of laundry. I am tossing things into the Goodwill bin right and left, but it doesn’t help me get to a look like Camille’s house. Sigh.
Short introduction to the Fat Quarter Shop’s new You Tube Channel. The quilt behind Kimberly in the intro is cheerful. Kimberly tweeted tons during Market earlier in the week. Go look at her Twitter feed (@fatquartershop) and click on the links to see new fabrics, etc)
I saw a video on the Quilt Bear Website for a new trimming ruler by Karen Montgomery. It looks like a great idea for snowball blocks and I am thinking of making one in orange since I saw Michelle’s at a recent BAMQG Meeting.
The Library of Congress has a new website with a lot of old newspapers called Chronicling America. Of course, I did a search for quilt in California in the late 1800s/early 1900s. I found a picture of a quiltmaker stitching away on a sampler quilt in the SF Call. The article is about quiltmaking and mentions various patterns. You can read it by zooming in. More coolness from the Library of Congress.
Need some special templates? Read about Brye Lynn’s find, Customplastic on her blog. Hhmm, what do I need to make?
I don’t really want to get into it with you, but this annoys me. Not the blog post, but the selvedge statement.
I found a Flowering Snowball pillow on the Cut to Pieces blog. Her pillow is really nice looking. I was so surprised to see that someone else found this pattern and actually made it. Love it!
I had to write a new post and the Renewed Jelly Roll Race has an interesting story. I know a lot of you have heard it all before, but I hope I changed it up a bit so you wouldn’t be bored. I also didn’t make that the only post of the day. See? I am always thinking of you, my dear readers. 😉 I thought about the Flowering Snowball, but it isn’t done yet, I don’t have a photo. Blah. Blah. Blah. If you feel like it, there are a lot of gorgeous quilts on the site that you could look at after you nominate and vote for my quilt. ;-). Here is the schedule:
October 26 – 31 Linky open
November 1 – 4 Nominations are made (this is where you nominate me)
November 5 -8 Vote for your favorites
November 9 Winners announced
I also saw this palette quilt-let via a link from the Blogger’s Quilt Festival. I have been wanting to make a palette block for my mom as part of larger quilt, which isn’t designed yet. Food for thought for sure.
I also this interlocking wheels pillow. I don’t know if that is the real name, but that immediately leaped into my mind when I saw it. Shape Moth has an interesting way of combining colors.
I also saw a CakeWalk quilt from Mountain Musings. The fabrics are very cheerful and remind me of the fabrics I am using for Flower Sugar Hexagon quilt. The maker links back to the designer’s blog and the story of what a CakeWalk is is very interesting. I have never heard of it before. I really liked this blog, in general. It wasn’t all quilts-all-the-time, but it had a nice feel to it.
One thing that surprised was how many quilts were from patterns. At least the makers acknowledged and/or linked back to the pattern makers. If you have never designed your own quilts, tell me what is stopping you. Perhaps that is a tutorial I can work up.
So far I have gotten some wonderful comments from people on the Renewed Jelly Roll Race. I am not the only one who is confused by the popularity of the technique! One person asked me to write a pattern!
Fabric, Supplies and Tools
I was asked recently to write some tutorials on EQ7. I haven’t done it, but the topic is on my radar. I saw an EQ7 tutorial for printing foundations from an Alabama artist. He doesn’t seem to tag his posts, so I would have troll through it to see what other EQ7 info he has posted. Too bad. Tagging is useful. I haven’t had a chance to explore yet, but it might be a source of additional information for you. Let me know what you find.
Other
Ellen Rushman wrote her Master’s thesis, called Modern Quilting: A DIY Discourse, for her degree from the College of Education and Human Sciences, major in Textiles and Clothing Design and has posted it on the UNL website for your perusal. The thesis explores the Modern Quilt movement from the perspective of quiltmakers who self identify as modern quilters or were at a meeting where interviews were taking place. Ms. Rushman concludes that the Modern Quilt movement is both an aesthetic and attitude.
Did you see the tutorials I posted this week? Part 1, part 2 and part 3 of fusible machine applique’. These will soon be posted on the Tutorials page as well. I really had to break it up into three parts. No sane person could write a post that long and no sane person could read a post that long. Hope you were able to follow along. Let me know if anything is unclear. I know the parts about how you turn your fabric to get a smooth zig zag are tricky. I know my brilliant readers will rise to the occasion.
I am really not starting this quilt, but it is firmly in the hunting and gathering stage. I have wanted to do another Stepping Stones quilts since I made the first one now that I know the color placement.
I thought this would be a good quilt design on which to use the various Bonnie & Camille lines I have (Bliss, Ruby, some Vintage Modern).
The idea has been on my mind and this week, I just got a bug in my ear to try out the colors. Not sure I like the great. It is kind of dark. I like the tone of the grey in the middle patch on the right, but I am not sure about the other greys. I have another block underway and will see when I put the two blocks together.
We are making the Flower Wreath block. To find out how to make templates, including the ring, see Part 1 for making templates and Part 2 for making the ring and positioning the ring on the background.
Flower Wreath
Now we are going to stitch the ring. If you haven’t started, check the Supply List in part 1 and grab your 3″x5″ tearaway backed fabric. Your ring should be applied to the background and ready to stitch. If your ring is not fused and ready to stitch, go back to part 2.
I stitch in layers, so that the stitching is easier, there are fewer starts and stops and the piece looks more finished. Now that you are ready to stitch, it is time to choose your thread.
Choose thread
Whenever you choose thread, you must consider the stitch. If the stitch will be dense like a satin stitch, you should choose the color by looking at the thread wrapped around the whole spool. That will give you a better sense of the color the satin stitch will end up.
It you will be using a straight stitch, you should unreel a bit of the thread and look at one strand on your fabric. You may need to pool a little of the thread together – less dense than the whole spool and more dense than one strand.
Now set up your machine for zig zag stitching. You will need to choose a stitch density. I like a semi-open zig zag that is not too wide, because it uses less thread and looks more interesting. Dense satin stitching, however, can really highlight and outline each piece. I use the following settings on my machine:
Ring: width: 3.0, density: 0.45
Flowers: width: 3.0, density: 0.45
Leaves: width: 2.0, density: 0.5
Flower centers: width: 2.0, density: 0.5
Even if you haven’t chosen all the fabric, I like to get the ring stitched down first, so I can audition the other fabric without worrying about the ring. Yes, it is fused and shouldn’t go anywhere, but I still like it to be stitched down.
In order to choose the stitch density, you will need to test. Get the tearaway backed sample piece you have prepared and start testing with the width and densities I have provided above. Stitch lines of zig zag stitching 2-3″ long using a contrasting thread similar to the thread you will be using to stitch the ring. Adjust the width and density on your machine until you are pleased with the look.
Stitch ring
Put the ring on the machine and start stitching. I always leave a long tail that I can pull to the back and tie shut later. My zig zag does not automatically tie the ends. If your machine is more advanced you may not have to tie a knot on the back. I don’t want my zig zag to come out if it gets snagged while being used, which is why I tie the ends.
I use my applique’ foot, which has a red arrow in the center to stitch out the zig zag. I place the tip of the red arrow on the raw edge of the ring and follow it around. You should stitch with needle down or use the hand wheel to put the needle down when you stop. If the center point on your foot gets off the raw edge of your ring, stop and readjust. Stop with the needle down on the outside of the ring’s curve whenever you need to readjust the needle to accommodate the curve. Turn the fabric to the left to get the center point of the foot back on the raw edge of your ring. The stitching will be slightly closer together on the inside of the shape, when the needle punches the fabric to the left, and more open on the outside of the shape or when the needle hits the background.
Tail of thread
When you have done about half – 3/4s of the stitching on the ring, stop and pull the beginning thread to the back and tie it off, if you need to.
I tie the beginning off before I get to the end, because the beginning and ending threads can get tangled up and make it impossible to make small, neat knots. I have tied all four ends together in a pinch, but prefer to make the knots as small as possible.
Fold work back to tie
I also use this technique also if I have to stop and pull the work out of the machine because of thread breakage or necessary bobbin refill.
I fold the work back (I only used my pincushion so I could photograph what I was doing. Normally, I just hold it with my wrist as pull the front through to the back and tie the ends together. I don’t take the work out of the machine unless there is a good reason – like a big knot, or thread breakage, etc.
Completely stitched ring
Once your knot is tied, continue stitching to where you started. I don’t overlap much once I get to the beginning, perhaps only a stitch or two, because I don’t want the look to be too different.
I pull the work out of the machine and tie off the ending threads. You may not need to do this if your machine does it for you.
Now do the same thing, but on the inside to finish stitching down the ring. Once you have stitched both the inside and outside of the rings, your ring will be complete and you will be ready to place the leaves and flowers on the ring.
If you have not already done so, choose the rest of your fabrics. You will need fabric for the flowers (1-4 fabrics) and leaves (1-20 fabrics). If you have not cut out and fused the wreath to the background, please go back to part 2. The leaves can be the traditional green or you can use something else. If you use one color, you might want to mix up the prints to increase interest. You can also use different colors. Make the block your own.
Make visual decisions visually
I thought about making the leaves green to make them more realistic, but decided I was still of a mind to use a variety of turquoises and aquas and keep my quilt’s color scheme of aqua/turquoise with red consistent. I found more leaf fabrics in my scrap basket. It is important, with my limited color scheme, to make sure the viewer can see the individual leaves. For that, I will need to have enough contrast between the various aquas and turquoises. Remember, when choosing your fabrics, to make visual decisions visually. Put your potential fabrics on the background and step back to look at them. From my test piece (right) you can see that there are a variety of tones of aqua and turquoise. Some of them blend a bit into the background. I want movement and interest.
Cover fusible with fabric
Once you have chosen all of your fabrics press the wrong sides, cheek to jowl, to one side of the fusible.
You are not going to be able to cover every inch of the fusible, which is why you have a pressing cloth or applique’ pressing sheet. If you press directly, the fusible that is not covered by fabric will end up on the bottom of your iron.
Cover this piece with a press cloth and press the fusible to the fabric following the directions on your fusible’s packaging.
Trace leaves & Flowers
Make all of your leaves and flowers. Flip the fusible so that paper side is up. You will be able to see your different fabrics through the paper. Place a template face DOWN on the appropriate fabric and trace with a writing implement. I use a Sewline pencil, but you can also use a pen, regular pencil or anything. I wouldn’t use a Sharpie even though I don’t think the paper will allow the marking to bleed through to the fabric.
Once you have traced all pieces**, cut them out right inside the drawn line. You should have 20 leaves, 4 flowers and 4 center flowers.
Take all of your pieces and arrange them the pleasing way. Arrange them into the position you want them to end up once they are fused. You are doing this to look at the effect. Once you are pleased with the arrangement, take a photo or sketch out placement.
Fuse & Stitch Flowers
You will need to stitch the flowers first, then the leaves and finally the flower centers. The flowers and leaves are on the same layer, so you can stitch them in any order. Anything that will be covered by another piece will need to be stitched before you fuse the covering piece.
Place the flowers on the ring using the press marks you used to place the ring on the background (or fold the background in quarters and finger press again). Place them symmetrically along the ring, or in a pleasing way to your eye.
Fuse them into place and get ready to stitch. You can also reference the machine applique’ tutorial for more information. Again, pay attention to where the layers of the design are placed. If there are leaves that you want to place under the wreath, you will need to satin stitch them before you fuse the wreath down entirely. For the flowers, you will need to satin stitch down any parts of the design that will be covered by another piece of fused fabric, such as the centers. The design will look better if you satin stitch a layer and then fuse the next piece down.
Place the interfacing under the background. You could use a machine basting stitch to stitch the interfacing temporarily to the background, but pinning works fine, too. You will need to zig zag with the interfacing under the background.
Stitching flowers
Satin stitch all the other pieces down using the thread you chose. When you stitch, the middle of the stitch will cover the outside raw edge of each piece. I line up the red arrow on my foot (see photo) with the sharp edge of that raw edge. The pieces you will satin stitch have curves, thus you will need to manipulate the stitch so it is smooth. This means that you will need to stitch with needle down.
Stop stitching to create smooth curves
Stop with the needle down on the outside of the curve for the leaves and flower petals. For the inside point between the flower petals stop above that point on the inside. If you do not have a machine that automatically stops with the needle down, then you can use the hand wheel to move the needle into the downward position when you stop. Do this carefully without moving the fabric. Once the needle is down you will need to assess the way to turn the fabric. Always turn the fabric very slightly to ensure a smooth curve. You may only need to take one stitch before adjusting the fabric again in order to get around the curve smoothly. For the outside curves, generally, you need to turn the fabric to the left to make a smooth curve. (Updated 10/30/2012: My engineer SIL says: You turn it clockwise for outside curves and counter clockwise for inside curves.) The stitching will be closer together on the inside of the shape and more open on the outside of the shape when you move in this direction. For the inside point of the flower, between the petals, you will need to take a slight adjustment of the background to the right. For the pointy ends of the leaves, stop the needle on the outside of the leaf near the point and adjust the fabric to the right very, very slightly. Take one stitch, stop on the outside of the point again. Adjust very slightly to the right. Your goal should be to get the needle into the same hole on the inside of the leaf until the arrow or line on your machine’s foot is in line with the raw edge of the other side of the leaf. When you move the fabric always keep the needle down. Before starting, take a few of the shapes, e.g. a leaf and a flower, make some test pieces and do a test on junk fabric so you get the feel of the procedure. This is not something you should work on when you are pressed for time.
Arrange leaves
Once you are finished with the flowers, change your thread and adjust the width and density of your stitch, if desired.
Arrange the leaves in a pleasing manner. I placed 5 at a time on the background and stitched them down.
Stitch leaves
Arrange and stitch all of the leaves. My photo shows only 10 sewn leaves.
Place the centers on the flowers and stitch them down. Follow all the directions above for tying off and moving the needle to create a smooth curve.
Back of block
Once you have stitched all the pieces, rip off the tearaway. I use a seam ripper to get the ripping started on pieces that are surrounded by stitching.
Once you are finished with the entire stitching and tearaway ripping, trim the background down to 12.5″
**Nota bene: These pieces have no right direction. You can trace them any way and apply them anyway and they will look fine. Pay attention if you are cutting out letters or another motif that has a special direction. Put the right side down on the paper backed fusible and trace the motif backwards.
I am entering the Renewed Jelly Roll Race into the Blogger’s Quilt Festival. Amy’s Creative Side is putting on the Blogger’s Quilt Festival. My entry number is 430 (though on some screens, it seems to show up as 431. Very strange). If you haven’t entered, don’t, because *I* want to win!
Me, yes. You can win next time. 😉
OK, truly, I also would like people to be exposed to my blog. Do you have a friend you can refer?
Here is the schedule:
October 26 – 31 Linky open
November 1 – 4 Nominations are made (this is where you nominate me)
November 5 -8 Vote for your favorites
November 9 Winners announced
Renewed Jelly Roll Race
The Renewed Jelly Roll Race is my most recent finish. I have another quilt that is nearing completion, but I am pretty excited about the RJRR! It really is a quilt that came out of something I was going to toss. I felt like the original Jelly Roll Race quilt was a huge, ugly failure. An ugly duckling into a swan.
I became intrigued by a discussion at my Modern Quilt Guild about Jelly Roll Race quilts. I had heard of them in passing, but during the discussion, finally understood the concept. People wanted to do the quilt top at a meeting. I sew slowly, so I didn’t want to race.
I bought a Jelly Roll and got to work sewing the strips together. For a person who doesn’t like really long seams (I prefer chunking!), this project was kind of a nightmare of long seams. It was kind of a tedious job and I soon realized I had no control over color placement, no control over fabric pattern placement. Basically, I had no control.
Jelly Roll Race – Finished Top
This was a problem for me. While I like serendipity and happy accidents, this quilt was not turning into the successful result of a happy accident. It was turning out very, very badly. My fears were confirmed when the top was done.
I liked the colors. I liked the fabrics. I sincerely disliked the top.
I put it away and left it for awhile hoping it would grow on me. Periodically, I took it out, hoping I would like the top and be willing to put some work into finishing it. My heart sank every time I saw the top and I began wondering what the designers of the Jelly Roll Race concept were thinking.
I began looking at other JRR tops and all of them looked cute or interesting. ARound this time, I heard a CraftyGardenMom podcast. Tanesha was also working on a Jelly Roll Race quilt. She said she cut 20″ off the first strip to make the quilt more irregular. If I had read any directions I might have known that. I wasn’t about to rip all those seams and start over, but I did feel a spark of hope that all was not completely lost.
Jelly Roll Diamonds
Last year I finished a very successful quilt from my Fabric of the Year series called Fabric of the Year 2010. This quilt is made with diamonds and I still have the Creative Grids ruler. I came upon it and the spark of hope grew brighter. Since the top was languishing, I decided to be drastic. I decided that I would cut the top up into diamonds. What is the worst that could happen? The top could not be any uglier or anymore useless than it already was.
I tried sewing the diamonds together by themselves, but VERY quickly realized that the diamonds were busy and needed their space.
I sewed the diamonds together in chunks with Pure Elements Linen as the sashing. I go into quite a bit of detail about the construction in a post from February. I sewed and sewed and sewed. The sewing seemed never ending. Diamonds are not hard to sew together, but you do have to pay attention and there were a lot of them. I ripped out a lot of seams to make lines match up. There are a few that don’t, but I can live with them.
Renewed Jelly Roll Race – back
DH helped me with the math, but I still had quite a few diamonds leftover. I decided to put the extras on the back. You could say that the quilt is two sided, but the quilting wasn’t design with the back in mind.
The back is my typical pieced back, but I haven’t done anything like the big off kilter diamond in a long time. I kind of like it.
This is an original design and there isn’t a pattern. If you want to make one of these quilts, make a Jelly Roll Race quilt that you dislike. 😉
The coup de grace may be that this quilt was chosen to be part of the New Quilts of Northern California exhibit at the Pacific International Quilt Festival, which was held in Santa Clara, California October 10-14, 2012.
So, the bottom line is that this hideous mess was salvaged into something that I like. I want to make another Jelly Roll Race to see if I tame the technique even a little bit.
Fabrics:
Pure Elements Linen by Art Gallery/Pat Bravo Designs
Terrain by Kate Spain Jelly Roll
Random purples for the back from my stash
Blogger’s Quilt Festival Stats
Finished quilt measures : 61?x 61?
Special techniques used : Jelly Roll Race Technique
We are making the Flower Wreath block. To find out how to make templates, including the ring see Part 1.
Flower Wreath
Choose your fabrics. You will need fabric for the flowers (1-4 fabrics), leaves (1-20 fabrics) and the wreath (1 fabric). The leaves can be the traditional green or you can use something else. If you use one color, you might want to mix up the prints to increase interest. You can also use different colors. Make the block your own.
I am going to try and use a variety of turquoises and aquas to keep my color scheme in the aqua/turquoise with red range. I have a few of the leaf fabrics picked out from my scrap basket, but need to find more. It is important, with my limited color scheme to make sure the viewer can see the individual leaves.
Cut piece large enough for ring
The ring is the biggest pain to deal with so I deal with it first before I even really think much about fabrics for the other parts. I decided to use one of the Pat Bravo Pure Elements solids in the turquoise range, but more on the green side. I haven’t used it in this quilt before. I picked it to highlight the leaves a little more.
Cover fabric with fusible
Now you need to make sure that your fusible will cover your fabric.
I used a package of Steam-a-Seam 2 Lite, but there are many fusibles that will work just fine for this project. Use what you know how to use or what you have on hand.
Tear the paper carefully off of one side of the fusible (or follow directions for your fusible) and stick it to the fabric, smoothing it carefully so there are no puckers or bubbles. The fusible is sticky so you can stick to the fabric and reposition it until you are happy.
Back of fusible backed fabric
Since the pieces I had were 8.5″x11″, I needed to cover an extra piece (bottom of the photo above) that was wider than the 8.5″ width of the fusible. I cut a piece from the fusible (white part in photo above) and re-positioned it to cover the part of the fabric I need for the size of the template.
Once you are happy, fuse the 2 sided fusible (should have the paper left on one side) to your ring fabric. Follow the directions on the package or website. You may want to cover your ironing board and the piece with junk fabric or an applique’ pressing sheet to keep your iron and ironing surface clean.
Turn your fusible backed fabric so that the paper left on the fabric is face up, as in the photo above. Place your ring template face down on the paper and trace around it with a pencil.
Ring cut out
Cut out the ring carefully on the line. I used an X-acto knife to start the center. I did use a pair of fabric scissors, but not my Gingher scissors. It is kind of hard to know what to do, because you are cutting both fabric and paper and you need a nice sharp edge. I use a pair of my mid-range scissors and hope for the best. They still seem sharp even after a bit of this type of cutting.
Fold the ring into quarters and finger press lightly. Again you will be lining up the folds to center the ring.
Retrieve your background. Fold the background into quarters and finger press, so you can see the folds.
Line up ring on background
Remove paper from the ring.
Line up the folds of the ring on the folds of the background. If they are all in alignment, there should be a ring fold snuggled with a background fold evenly. If you want to check, measure from the edge to the ring. You do need an absolutely square block for this to work.
Press the ring onto the background so it sticks.
Carefully bring background with the ring stuck to it to the iron. Check to see that your ring is still in place. According to your fusible directions, press the ring into place.
Your ring should now be firmly ironed on to the center of the background.
Leave this piece on the ironing board temporarily.
Get the tearaway you purchased (or had) and cut two pieces of tearaway stabilizer a little bit larger than your background. Place your background on top of the tearaway and pin it to the background. This will provide stability and prevent the piece from puckering when you zig zag stitch the pieces.
You are now ready to machine applique’ your first part of the block. See part 3 for machine stitching the block.
Frances and I are back in action with the Sampler class. I am excited, but nervous because I haven’t done this in awhile. The next class is about fusible machine applique’.
Flower Wreath
Supply List:
Notebook for notes
Pen to take notes 😉
Mechanical Pencil
Fabric (at least 4 different, preferably more greens to create variety in the leaves; scraps work well)
Fabric Scissors
Paper scissors
Small ruler
Glue stick
Template plastic
Dinner plate or compass
Fusible web, such as Misty Fuse or Steam-a-Seam 2 or Steam-a-Seam Lite
Applique’ pressing sheet
Tear away stabilizer (the size of your background)
Iron
Ironing surface
3″x5″ piece of fabric backed with 2 layers of tearaway stabilizer
Cut a piece of fabric for the background .5″ to 1″ bigger than the finished size of the block. If you have a regular background fabric, use that, if not use a coordinating fabric. I took a look at my current blocks to help me decide what background I wanted to choose. This is a coordinated scrappy quilt, but I also wanted to find a background that would work well with the applique pieces that I was planning to put on top of it.
After cutting out a background, you need to put it aside for the time being. You will need it after you make the templates and the ring.
Rough cut pattern out for templates
Cut out all the templates from the paper. Leave a little of the paper around the edges. Feel free to adjust the design of the flowers or leaves, if you want the shapes to be a little different.
All patterns rough cut
In the photo above, you can see all of them templates rough cut out, except the circles. The circles print from EQ7 on two sheets of paper. You will need to rough cut the two pieces for each circle and then tape them together. In order to tape the pieces together, hold each piece for one circle in a hand up to the light and match them up you. Before you hold them up, have the tape ready just to tack the pieces together. You can use a light box for this procedure also.
Fold circles in quarters
Fold circles in quarters to make a line down the centers. This will help you line them up to make the ring for the wreath.
I never did this before and had to figure it out, but it works pretty well.
Layer Circles
Using the folds, layer the circles together so you can see the black line of the upper circle. Draw a line around the smaller circle using the smaller circle as a template. You will be drawing on the larger circle. Use a soft implement (pencil or roller ball pen) that doesn’t skip to draw the circle. Once you have drawn the circle, you can put the smaller circle away with your other templates. I use a zipper bag for all of the pieces and parts.
Check width
Fold up the larger circle. Check the width of the ring of the wreath using a small ruler to make sure it is even. Once you are happy with the line. Cut along the line without opening the circle.
Complete Ring Pattern
Once you have cut out the ring, open up the ring.
Now you are ready to make the templates. Grab all of your patterns, your template plastic and your glue stick.
Glue the paper templates to the template plastic.
No template plastic on folds
The only tricky part is for the ring. I avoid the folds in the pattern and only put the template plastic on the parts of the ring where the fold isn’t. Why? Because I want to be able to fold this piece and put it in a zipper bag. Also, by adding the template plastic in quarters you save template plastic and you can use smaller pieces. Finally, you don’t end up with a circle of leftover template plastic.
Trim the templates to the line on the pattern.
Front & back of templates
Depending on the kind of template plastic you have, your templates will look something like the photo above.
Part 2 will talk about choosing fabrics etc.
You can find more detail about machine appliqueing directional motifs, such as letters in a separate tutorial.
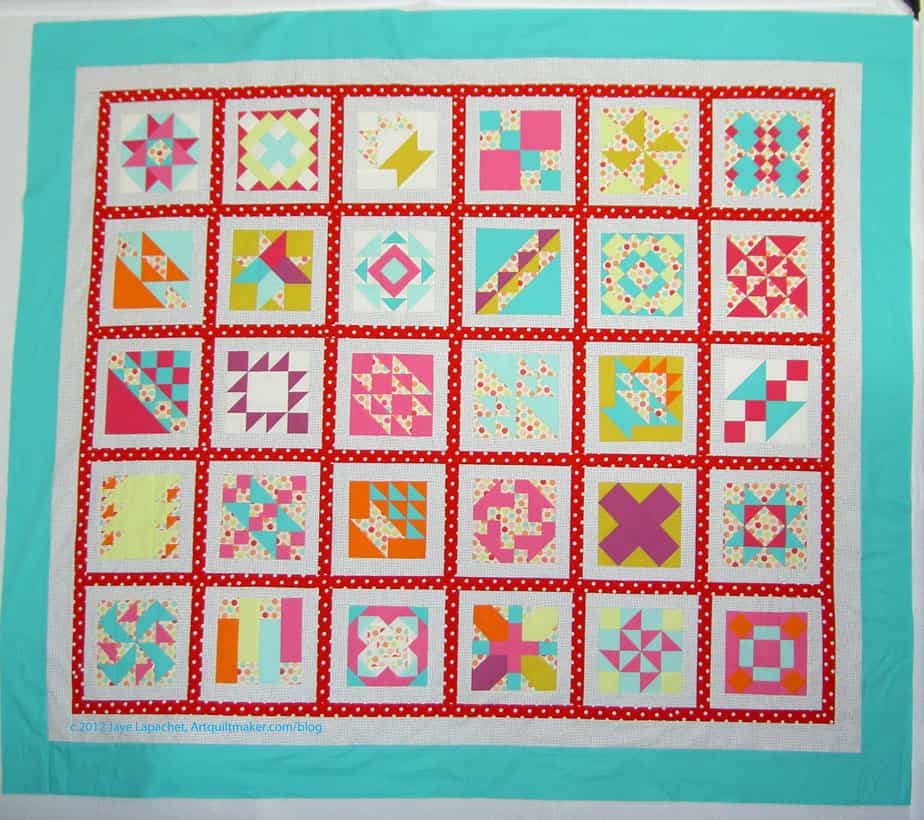
You will be pleased to know that the sashing drama is over. The quilt top is double sashed.
“Double sashed” means that I have sashed each block and then added sashing between the blocks.
A-B-C Sashing Complete
I did not chunk this quilt and I am partially sorry I didn’t.
One of the benefits of chunking is that all of your sashing lines line up. When you put a quilt together in rows, it is possible that your sashing lines will be off from row to row.
I did not sash, because I didn’t want to have the checkerboard problem I had earlier this year with the inside border for FOTY 2011, which was that the white looked weird because it didn’t line up problem. I wanted to have really long pieces of sashing so that there would be as unbroken a line as possible.
At this point I am not sure it would have mattered. I am pleased with the red and white dot fabric I used. I think it is inspiring me to have a Year of the Dot in 2013. We’ll have to see if I can figure out what that means.
A-B-C Sashing in process
Next step is to figure out what else I need to do for the borders. I worked on different things last weekend, but didn’t come up with anything that excited me. If I had more of the Sevenberry red dot, I would put a thin line of the grey around the edge and then a fatter strip for the border. I don’t want to go hunting for more fabric. I’ll find something I have to make it work.
Sandy from Quilting… for the Rest of Us announced the Black Friday Sew-in on Big Tent yesterday. Here is her message:
” Do you, like me, want to avoid the Black Friday shopping rush like the plague? Join me for our second annual Black Friday Sew-In! I’ll have a giveaway on my blog that day–instructions will be there for how to enter. I’ll also be opening up a linky for any bloggers or podcasters who want to do their own giveaways for BFSI. Plus, if you’re on Twitter, follow the fun using #BFSI (Same hashtag as last year but that’s okay–you’ll be able to review last year’s fun if you just keep scrolling down.)
Event Details
What: Black Friday Sew-In
Who: Quilting…for the Rest of Us Quiltcast Supergroup
When: Fri Nov 23, 2012, 12 am – noon EDT “
Pam at Hip to Be a Square has been mentioning on her last few podcasts. Hope you will be able to join in. If you are not on Twitter, you can watch along via Tweetchat by typing in the hashtag #bfsi and watching the scroll of tweets fly by.
Definition: In Euclidean geometry, a convexquadrilateral with at least one pair of parallel sides (see definition below) is referred to as a trapezoid in American English and as a trapezium in English outside North America. The parallel sides are called the bases of the trapezoid and the other two sides are called the legs or the lateral sides. A scalene trapezoid is a trapezoid with no equal sides or angles, in contrast to the special cases below. A trapezoid with vertices ABCD is denotedABCD.
Take 5 minutes to do any kind of artistic response: poem, doodle, quilt, pastel, pencil. ANYTHING counts. No rules; just do it!
Post the direct URL (link) where your drawing, doodle, artwork is posted (e.g. your blog, Flickr) in the comments area of this post. I would really like to keep all the artwork together and provide a way for others to see your work and/or your blog.
The Creative Prompt Project, also, has a Flickr group, which you can join to post your responses. I created this spot so those of you without blogs and websites would have a place to post your responses.
I know what you are all going to draw, paint or sing and what I am going to draw, so I am going to stop trying to find non-math Trapezoid things.
The time is really flying by. I was thinking about ordering my turkey next week (maybe the week after). I bought some pumpkin for Thanksgiving and Christmas pies last week in my attempt to get ahead of the major shopping in the next few weeks. I am behind. Behind in blogging, my house feels like a wreck, behind in cutting new and used fabric. Everything.
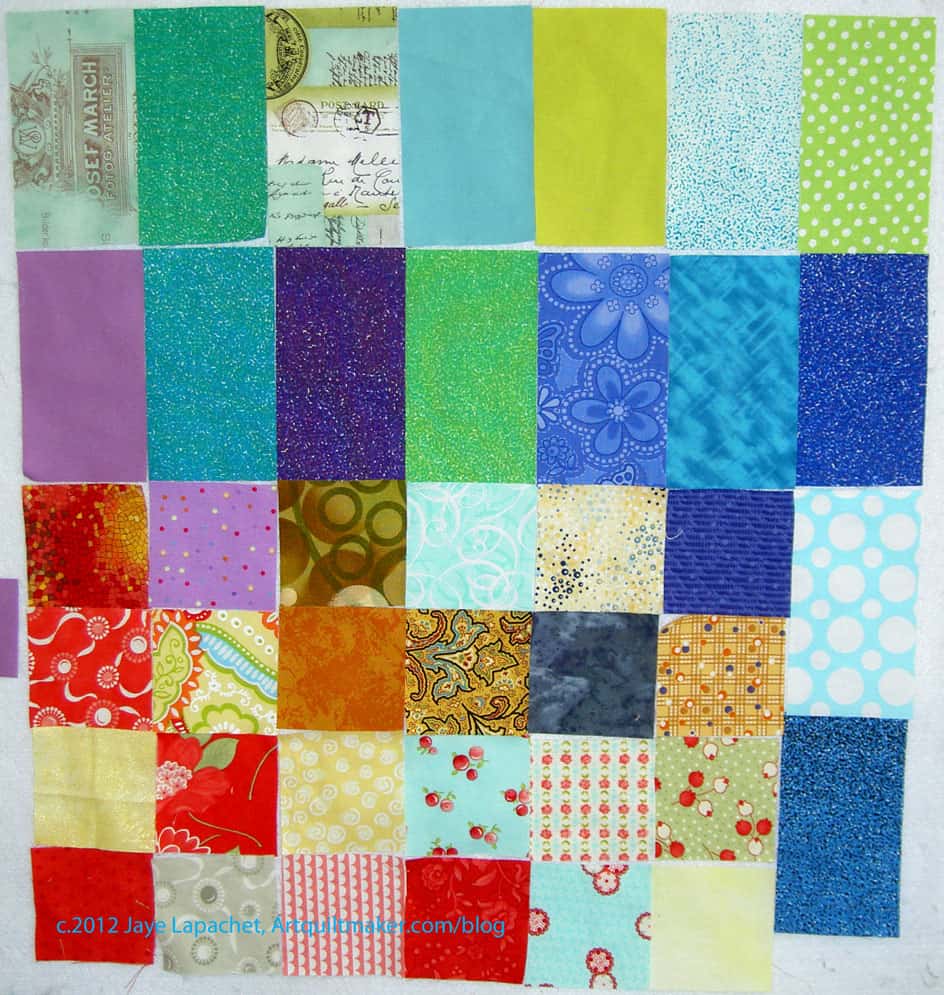
Case in point: it has been almost two months since I last posted FOTY fabrics. The last blog post was in late August! Gracious!
Still I was able to get some new fabrics cut up. I was also able to scrounge some squares from fabrics I have been using. Are you able to see the projects I was working on in this group?
I see some blocks I made, a journal cover I made and a few fabrics slated for journal covers I will make. One reason I love this project is that it is like a memory book in fabric.
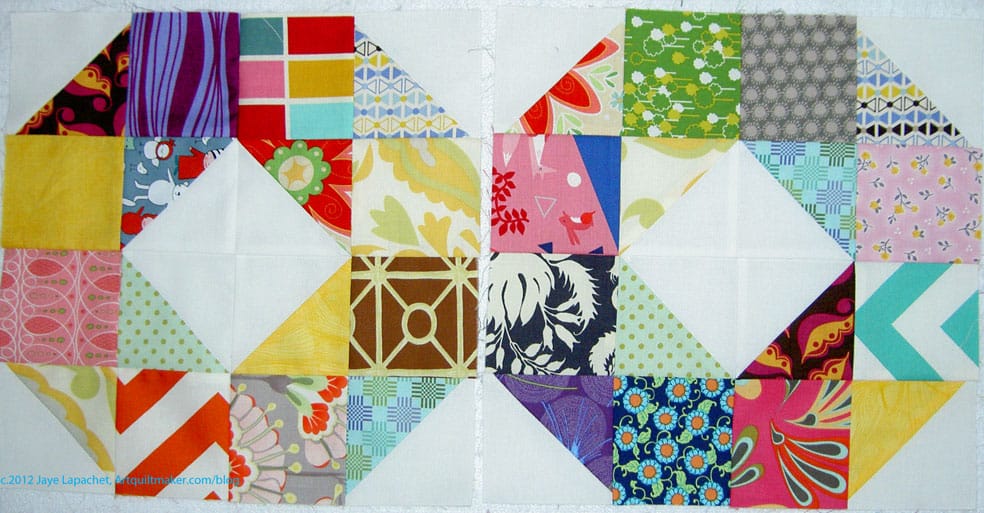
I decided to try out the 3rd quarter blocks (though I thought they were for the 4th quarter. I am behind – whatever), Patchwork Wheel, for the Charity Girls at BAMQG. The kits I picked up made 2 blocks each and they are quite…exciting? Loud? Wild? blocks. I don’t know which. I kind of like their exhuberance, though.
The square parts were already cut, but I had to make the HSTs. No problem. They included the fabric cut the parts and I drew a line down the middle and sewed. Worked like a charm.
I have to say that I did start putting these together stupidly. Instead of waiting to finish the HSTs and then put the blocks together in 4 patch segments, I sewed allt he squares together and had to put them together in rows. Yes, I could have unsewed, but I didn’t.
Patchwork Wheels Finished
They came out well. There is nothing hideous about them.
When I saw the four of them together, i decided I wanted to make an entire top from such blocks just to see how it would turn out. Jennifer is saving some kits for me, so I can make more blocks and sew them together in a quilt.
Yes, the fabrics are wild and crazy, but I think they will be perfect for some kid with a wild streak in her. It hought of making some HSTs for the the project using my Triangle Technique but I am not sure if that would be helpful. Each pair of squares makes 8 HSTs and I think the blocks look better scrappy. I’ll have to see.
Donation blocks 1-4/Yellow & Pink
I wanted to finish another top before the next meeting , as a result, I have been making yellow and pink checkerboards.
These blocks are really cheerful and I am enjoying making them.
I am doing something a little different with these blocks. After the mosaic result of the pink and green blocks, I decided to be a little more choosy about the pinks and yellows I chose. The pink with the gold rings (upper left block, lower left corner, last row, 2d patch) is about the darkest pink I am using. All of the yellows are light and cheerful. I weeded out some of the Pat Bravo yellows-tending-towards browns for this particular project. There are a couple of pinks that are a bit too light and some different pinks that blend a bit with one of the Pat Bravo yellows, but all-in-all I am happier with how this project is turning out.
Donation blocks 5-8/Yellow & Pink
At the moment I am out of yellow and need to cut some more before I can make more blocks. I do have some that I sewed together randomly to white, black on white, etc. I could rip those out, but I don’t know if I am that ambitious. We’ll see.
I want to clear off my sewing table of 2.5″ squares and pink and yellow were what I had left. Good thing they go together. I might give away the rest of the squares and move on to something else. We will see.
Pink & Green Donation Quilt back
Finally, I took a photo of the back for the Pink and green donation quilt. These colors are a little darker than the fabrics on the front of the quilt, but they are first quality fabrics that I was not going to use in my own work. I really liked some of them, but the pattern or the colors prevented me from putting them into a quilt. I hope someone will enjoy this back.
Jennifer told me today that the group has made 93 finished quilts for charity this year. I think the one I put the binding on might be 94. I would love to believe that is some kind of record for a guild. Probably not, but I like to think this program was a success. Jennifer and Deborah are rock stars.
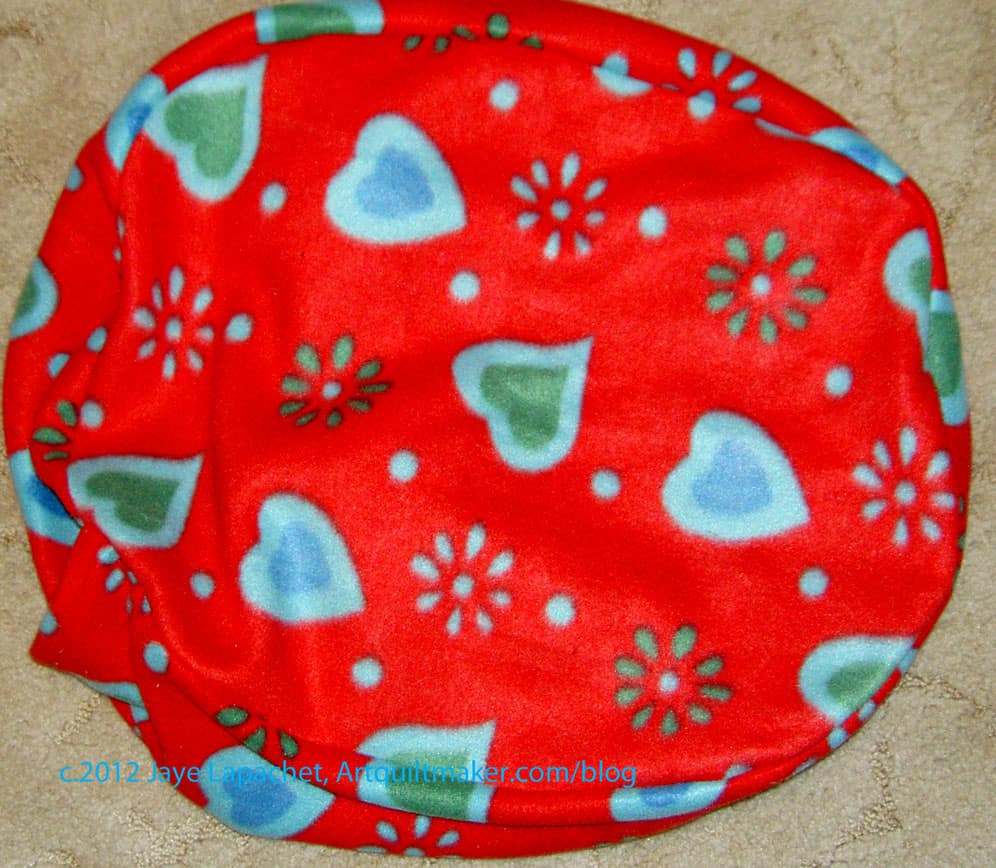
After the skirt misadventure, TFQ and I decided to make a charger case. I was using a very elegant vegetable bag crammed full of tangled cords and that was the inspiration.
We used a SewCraftyJess tutorial for a jewelry case and modified it slightly.
Charger case – closed
Some of the modifications we made had to do with size.I also noticed that Jess, who did the tutorial, must have had a different type of vinyl (I used the leftovers from my clear bag project), because she did not need a roller foot or tissue paper. I need both of those at various times to force the vinyl through the machine. I don’t think this is problem/issue if you are using some of the flannel back oilcloth and keep the flannel side against the machine bed. For the purposes of this charger case, I couldn’t guarantee that I could have something between the vinyl and the machine bed at all times. This is when I put the tissue under the vinyl. Yes, the bits of tissue paper had to be picked out with tweezers, but that was the lesser of two evils (the first evil being me screaming and berating the vinyl, my machine, etc). I have some tweezers with very sharp points and long handles and they worked very well.
Charger case – half open
Also, as the layers built up (vinyl twice for top stitching, zipper, etc), the thread started to break, so I lengthened the stitch length and that worked better. I might use a larger thread than 50wt if I made another charger case.
I thought not stitching the back to the front would be a problem, but it seems not to be, though you could stitch all the way through the layers if you wanted.
The tie was a bit of a puzzle. I ended up machine sewing it to the center of the binding on one of the short ends. It seems to work fine. I might try velcro or a magnetic snap if I made this again. I used the technique for making the ties that I use for making bag handles (4x desired width, fold in half and press, fold outside edges to press line and press again, fold on original press line, stitch around entire outside edge). The ties would have had more style if I had made a point at the end.
I am pretty happy with how it came out, though I am thinking that aqua dots might have been a better choice for the inside. I wanted something light so I could see what chargers were where. All of these little tweaks are why I made things more than once – to see if my imagined tweaks would work better.