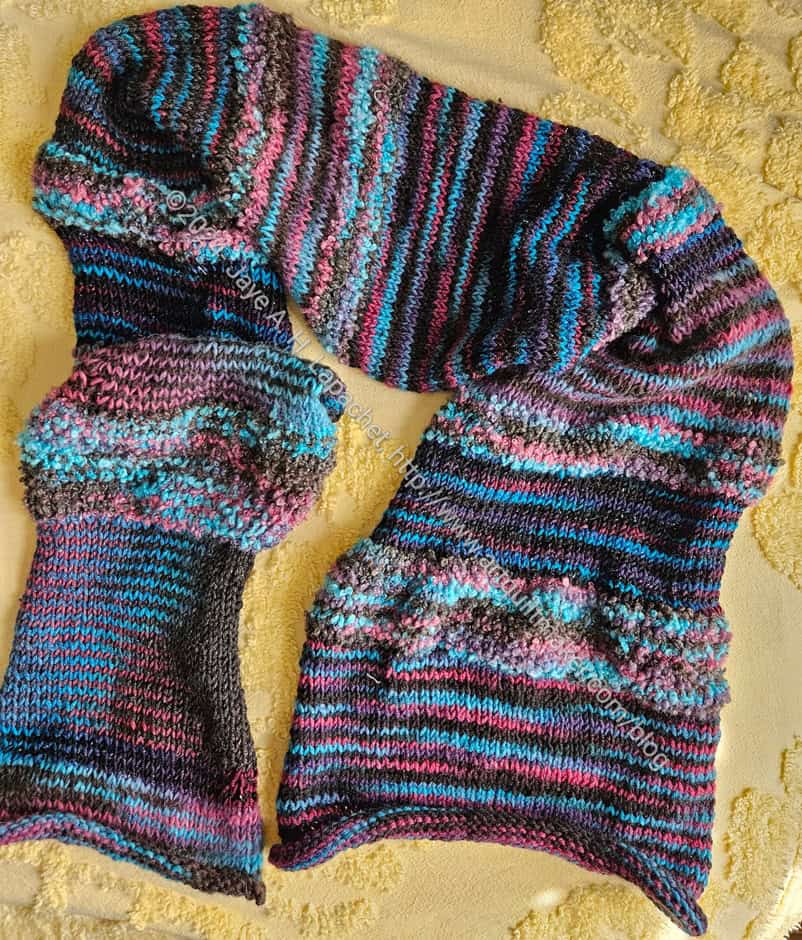
I finally finished the knitted scarf I made from the Woodland Capelet yarn.
I ripped out the Woodland Capelet and decided to just make a scarf. I was not enjoying making the Woodland Capelet.
There was one yarn that was super fuzzy. The strands were not uniform and I had a hard time seeing the stitches. It really made this scarf (and the Woodland Capelet) unpleasant to knit.
I was going to put the scarf in the donation box, but Mom said that one of the ladies her church helps would like it, so I gave it to her.
After my last kit project, I am going to stick to scarves. I enjoy making scarves and don’t need challenging knitting projects when I have challenging quilt projects. I need relaxing knitting projects.
It is, at least, another project off my to do list.
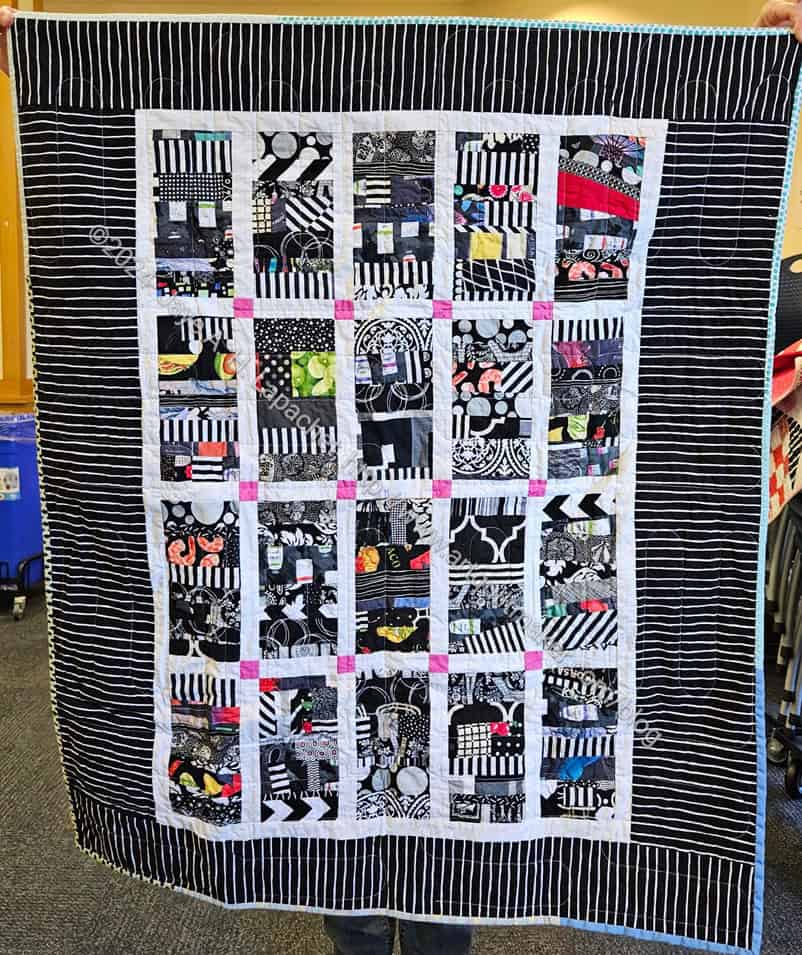
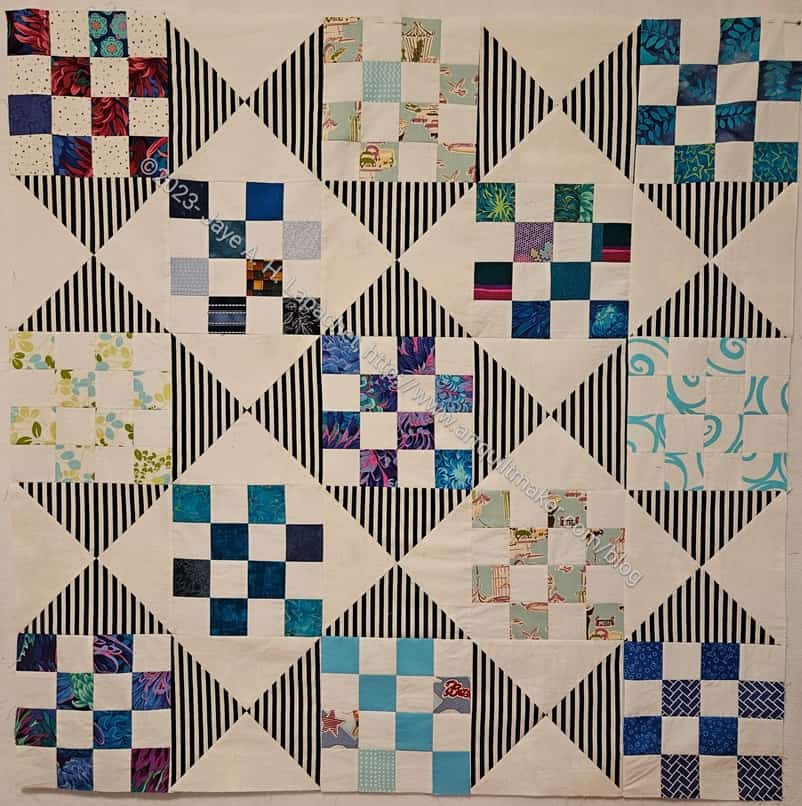
At the meeting the other day, Erin showed the Black Strip #2 donation top, which was quilted and she had finished binding. Hooray!
I finished the top in January so it hasn’t been that long. She wanted to pick up the blues in the blocks, so used more blue than I would have in the binding. It looks nice however!
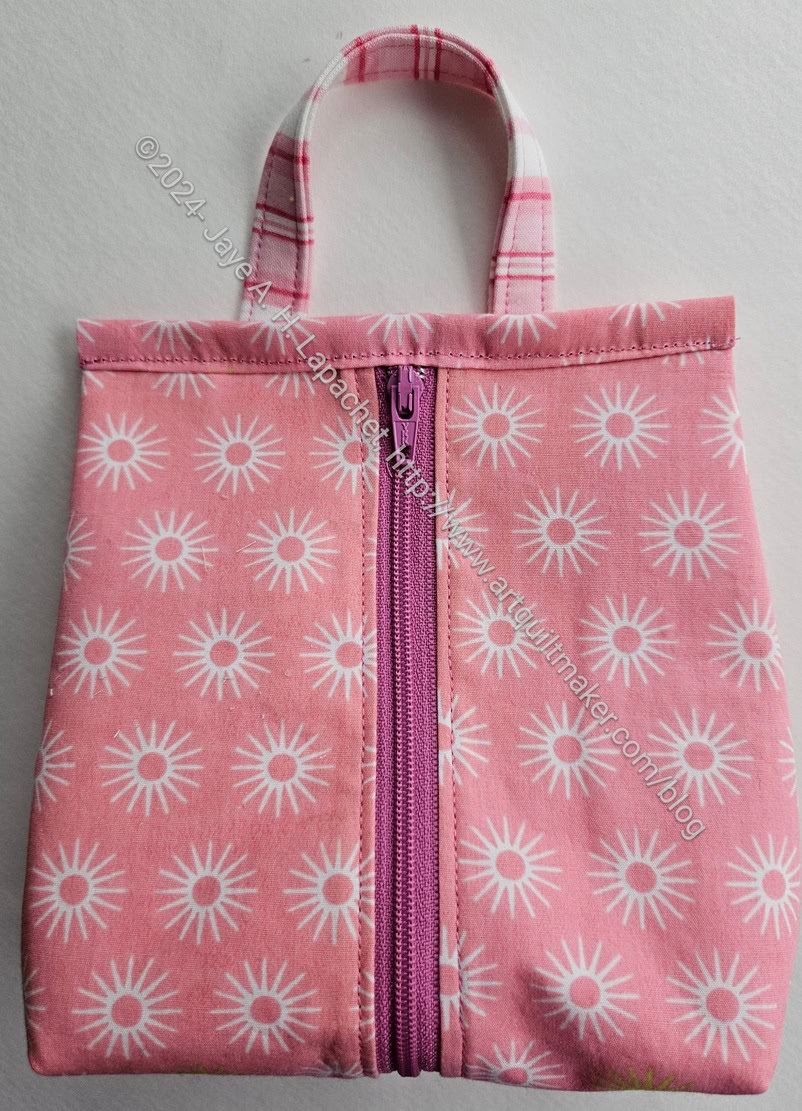
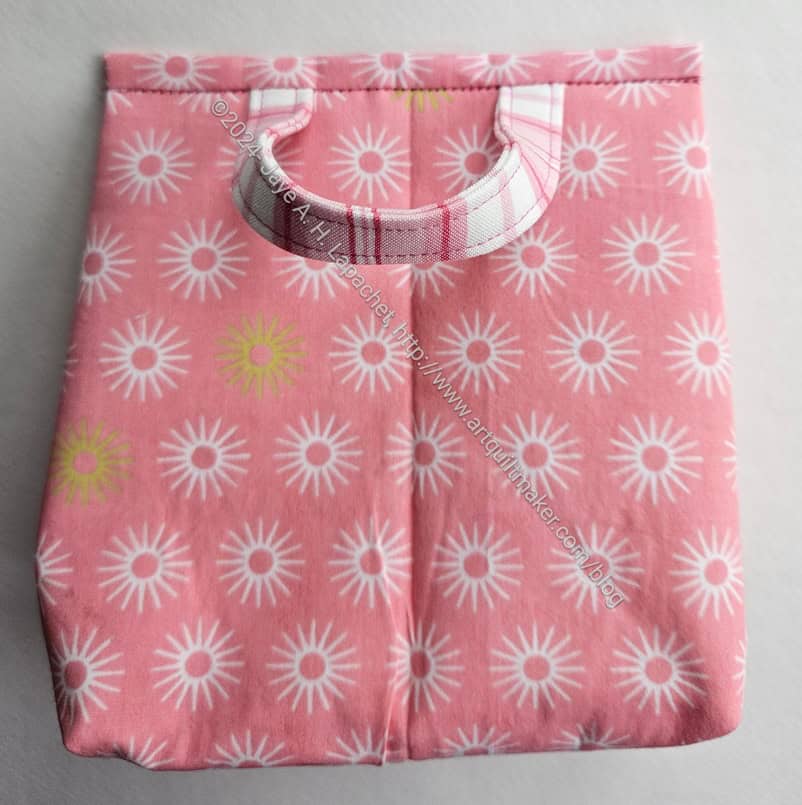
This was an easy pouch which would make a quick gift for a little girl as a small purse. I am not sure what else it could be used for.
This is a pouch for the Pink Project. As I said before, this is a Sotak Handmade pattern. I thought it went together well.
Some of the binding was a bit fiddly, but not annoyingly so.
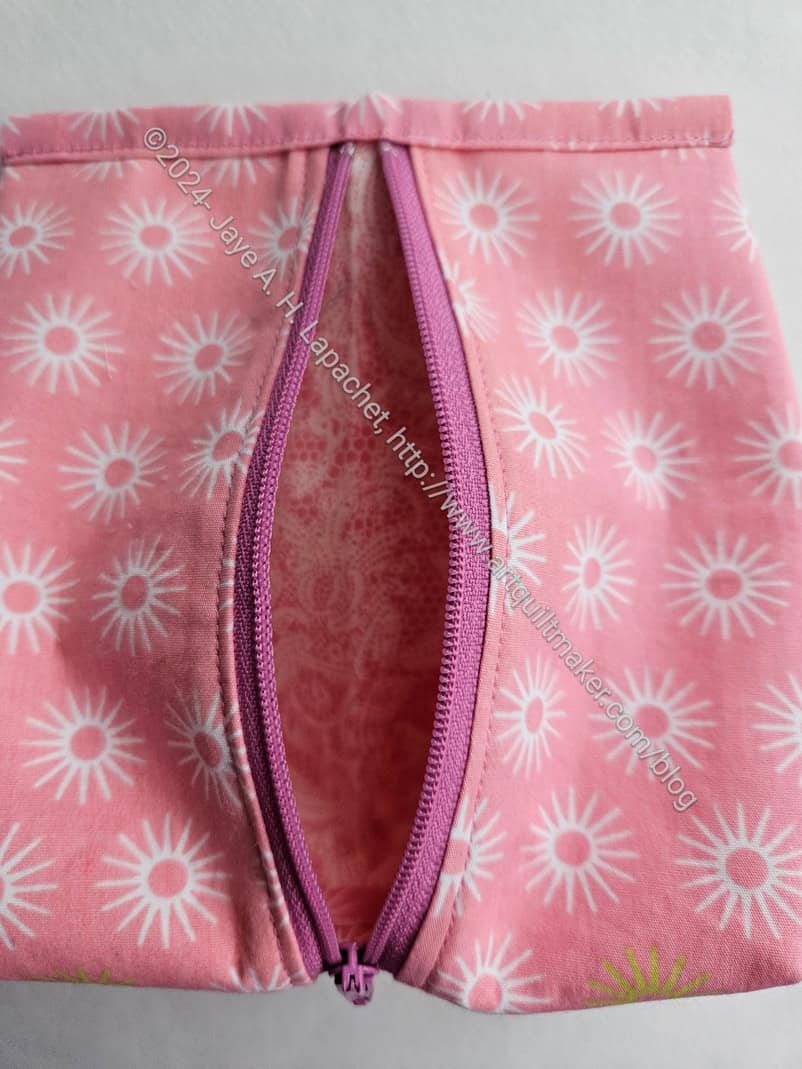
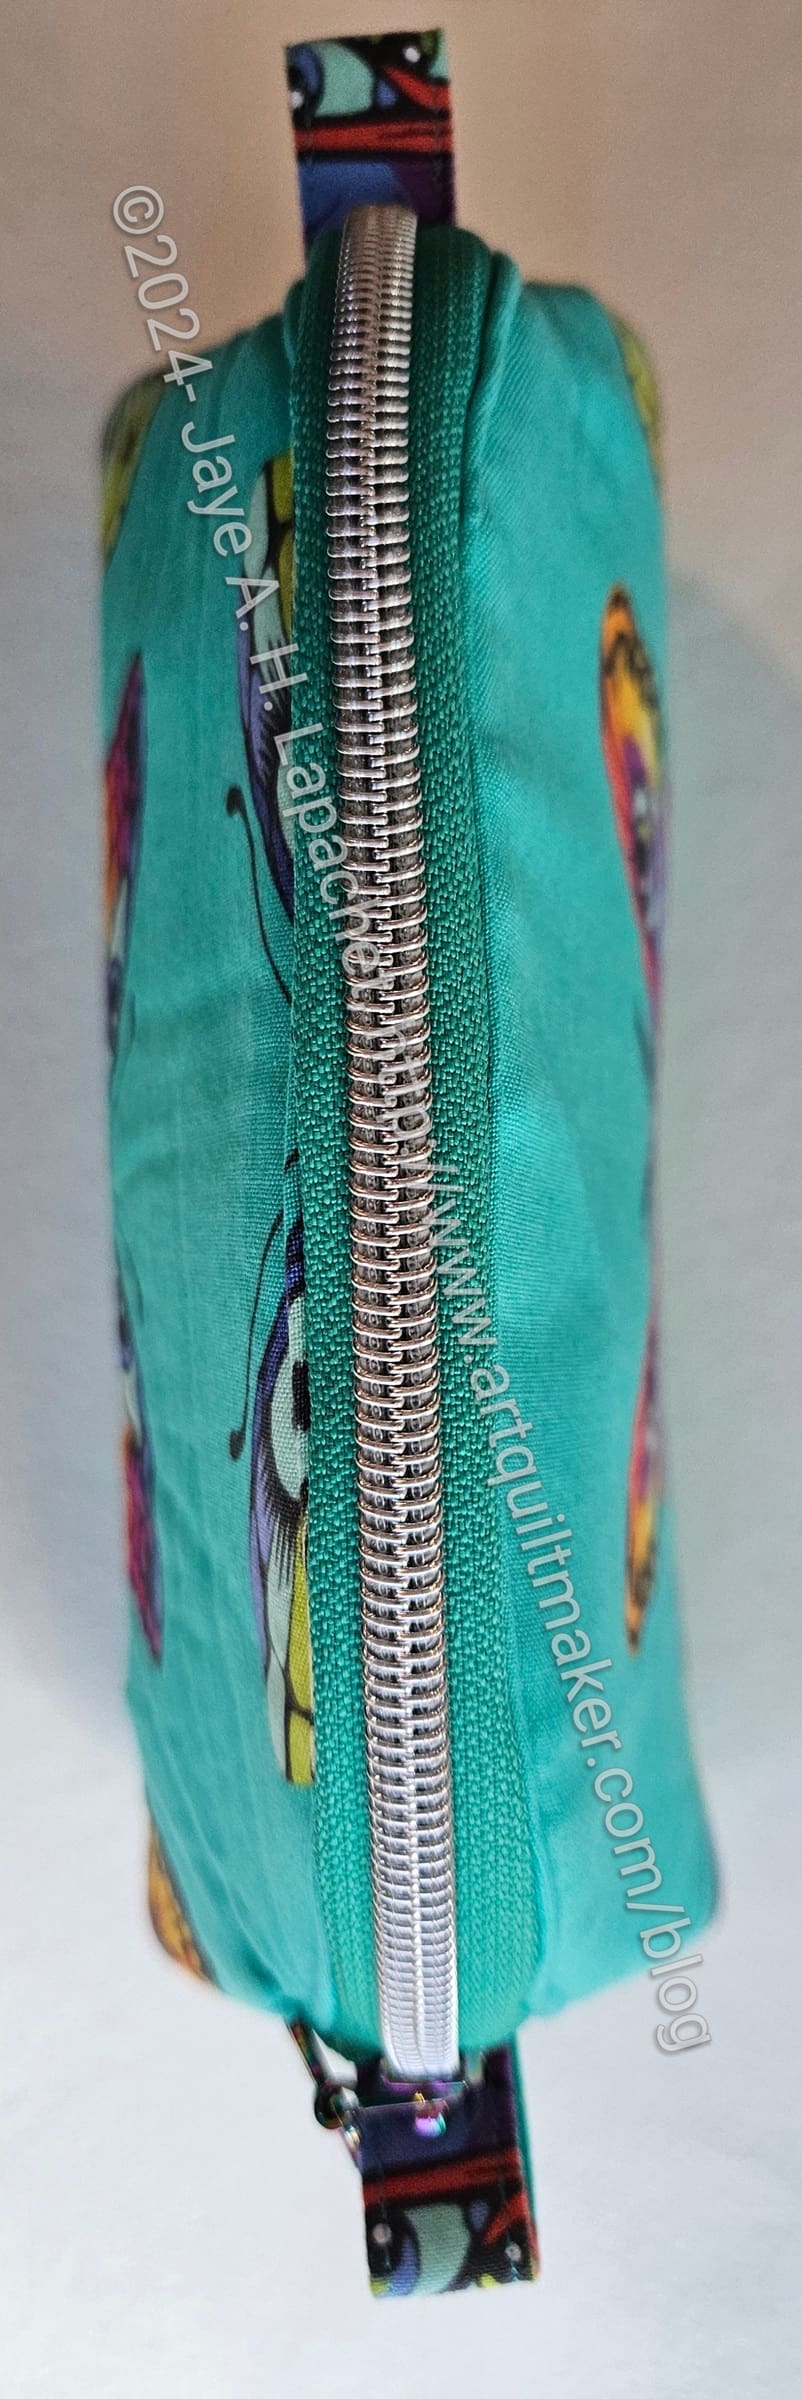
Petunia Pouch – zipper open
One of the good things about this pouch is the size zipper it needs. It needs either a 6 or 8 inch zipper, which I don’t use that often, though I have several waiting for projects. I am sad that the only zipper I had of the right size and closest to the color of the fabric was orchid. I suppose I could have cut down a longer zipper. Maybe I’ll do that next time.
I have to say that looking through all of my pinks and using them is really fun. I had forgotten about this Monaluna print (is that designer still around?). I like the sunbursts a lot and the pink is kind of a petal pink.
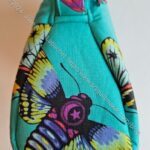
Petunia Pouch – back
I am not sure the handle would stand up to carrying around heavy things. I sewed over the handles a couple of times to try and reinforce them.
This was the last bag for this year’s Pink Project. I’ll see about making some more pouches for next year. I need to make a large tote as I don’t have one of the organization’s bags to put all the pouches in. I have many tote patterns and it will be fun to look through them and choose one.
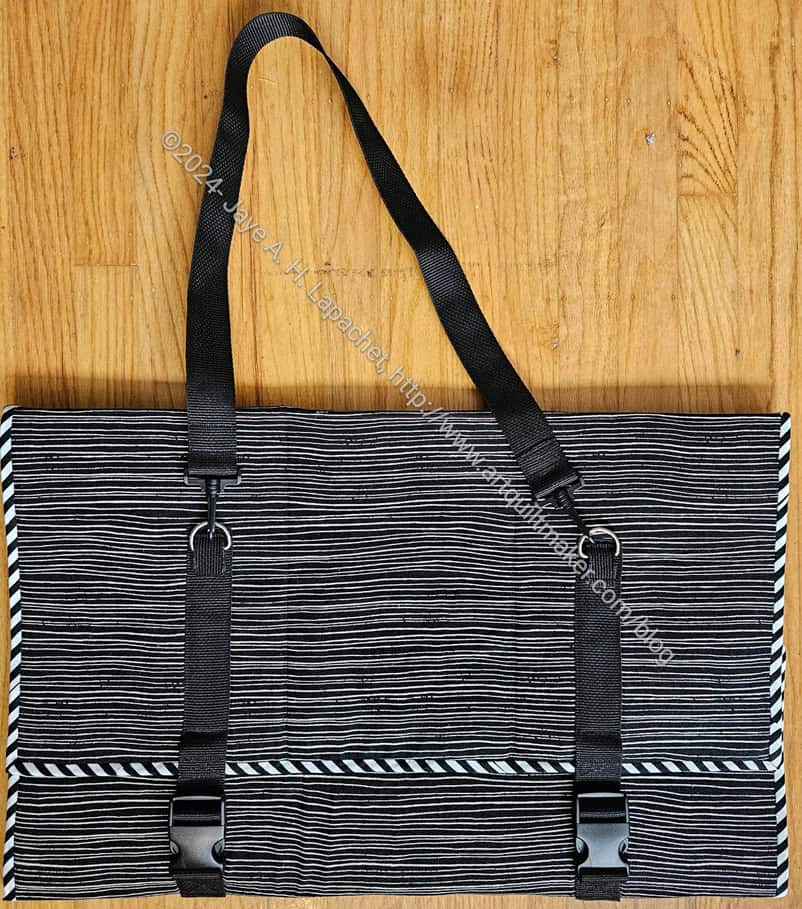
Yes! After YEARS I finally finished the Retreat Bag from the Crafty Gemini Organizer Club. WooHoo! I can’t tell you how excited I am to cross this one off my list.
Why? I think, mostly, I am glad to have it done. I have not found a bag yet that I am SUPER excited to use and this is no exception. I hope that it will be a good bag to use, but I am not optimistic. Sad but true.
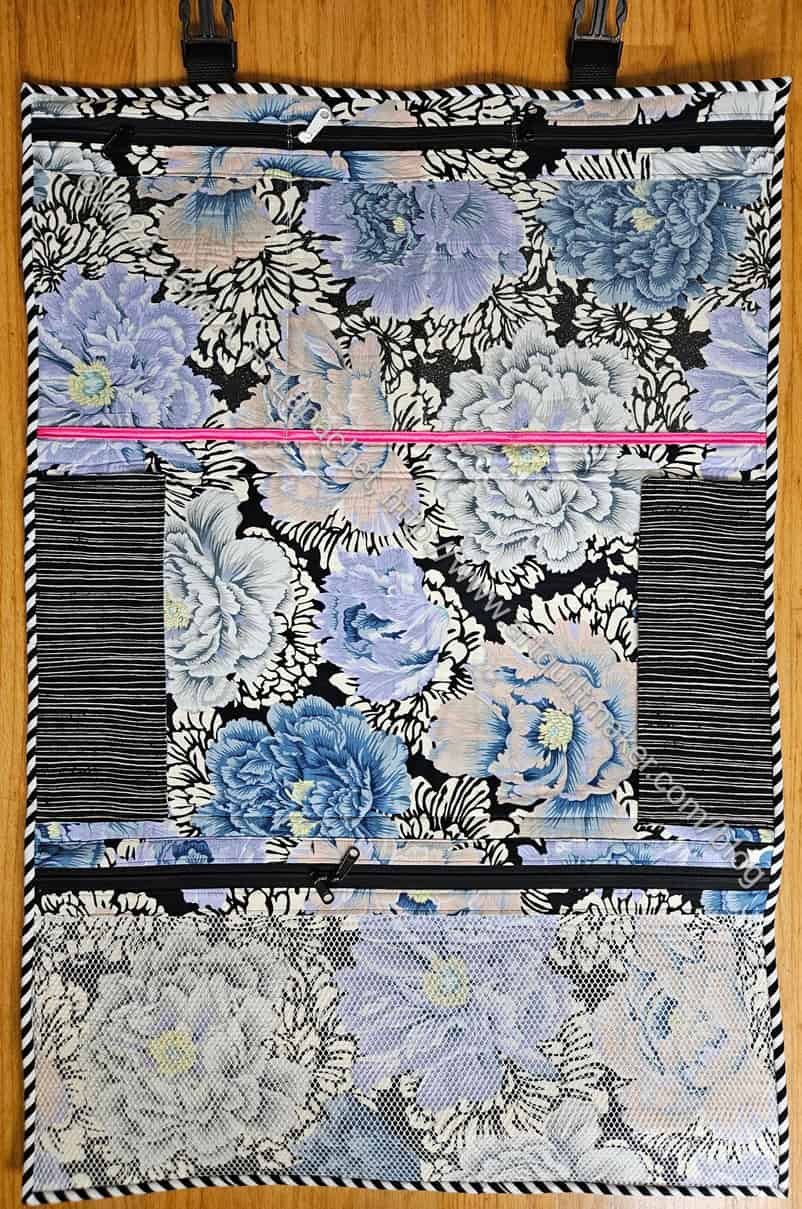
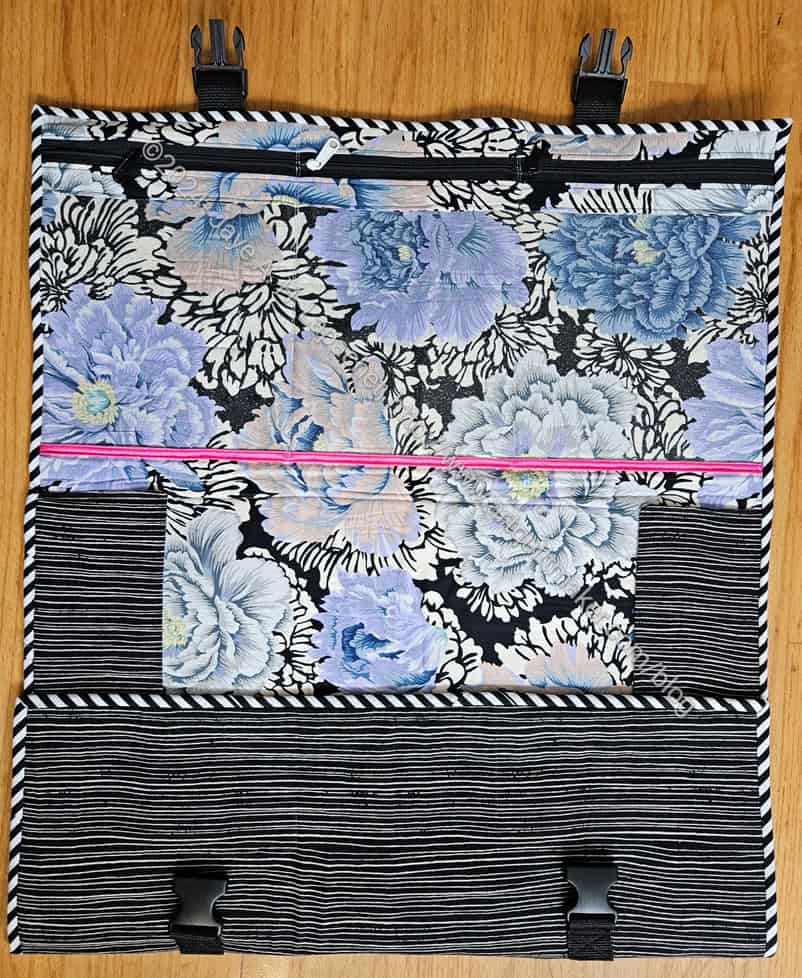
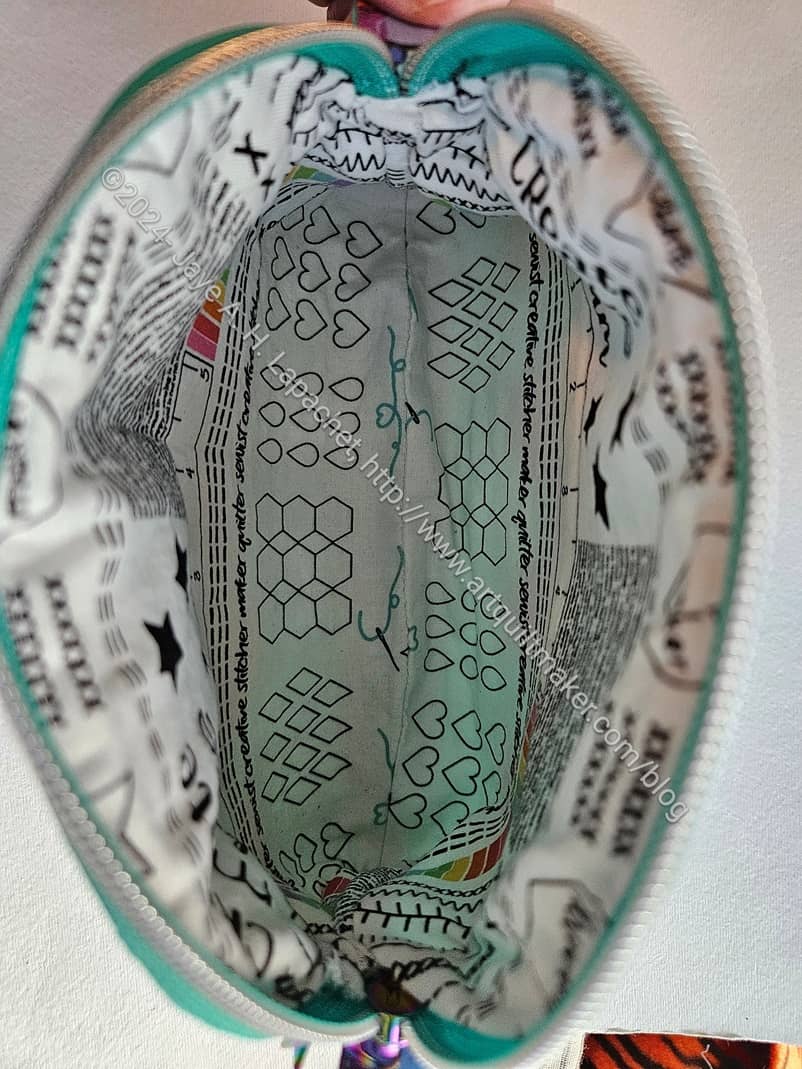
Crafty Gemini Retreat Bag -full interior (finished)
The inside uses that fabulous Brocade Peony fabric from Philip Jacobs. I LOVE* that fabric. I have a lot of it, because I love and have used it quite a bit, but have never found the exact perfect project for it. I’ll keep looking.
As you can see (and I partially showed before), this bag has three interior sections. The top section is divided into three pockets. The middle section is open with pockets on the edges to hold a long ruler and other long things. The bottom is a mesh pocket. The mesh pocket is the one I sewed on upside down and had to rip out.
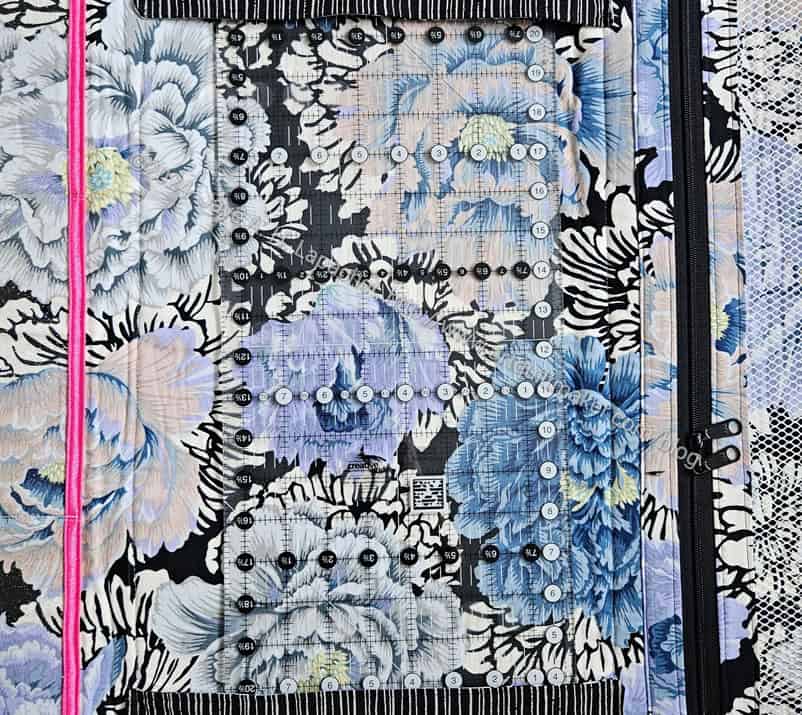
Crafty Gemini Retreat Bag ruler pocket
As soon as I finished the bag, I tried the ruler pocket, because I like that idea. Predictably, it is not sized well for Creative Grids 6.5 inch x 24.5 inch rulers.** I was able to get the ruler into both pockets, which holds it very well. It wasn’t easy to get it in and getting it out meant straining the pocket seam almost to ripping. As you know, Creative Grids rulers are half an inch longer than most Omnigrids rulers and that half inch makes all the difference in this project.
Crafty Gemini Retreat Bag – partial interior (finished)
Now, I should have known that this would be a problem and constructed the pockets differently. If I were to make this bag again, I might make one of the center pockets a flap with Velcro.** This would mean that I could slip the ruler into the top, then press the flap over the rest of the ruler. I’ll have to look at that pocket and see if I can still do that. I have an Omnigrid 24 inch ruler**, but I almost never use it. Frankly, it probably doesn’t matter as the long ruler I bring with me to Sew Day is the Karen Kay Buckley Adjustable ruler**. It is less likely to get broken in transit, because it breaks down into 4-5 pieces. Really, I don’t even really need this pocket. Again, I should have thought about that in advance. It is possible that I could remove the “ruler pockets” and add another zipper pocket to the center even with the binding already stitched down. If I don’t do something, then that center area is just wasted space. Bleah!
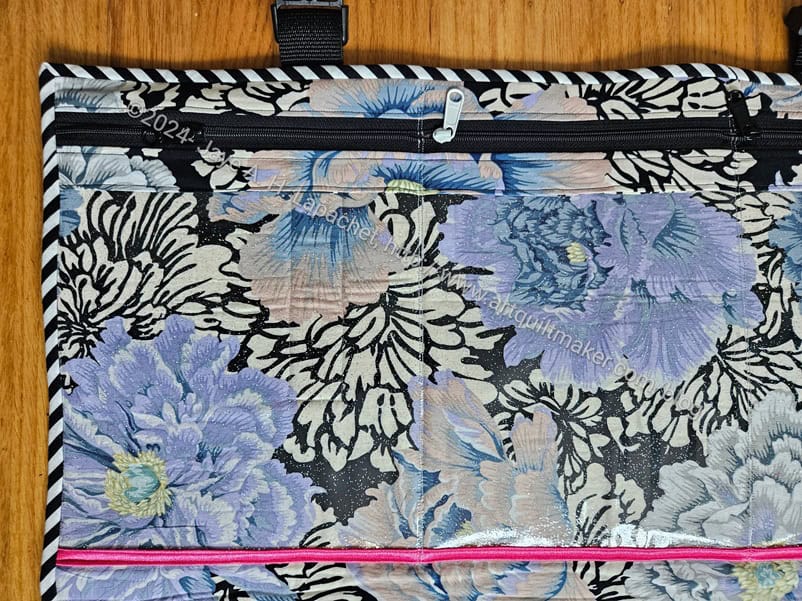
Crafty Gemini Retreat Bag – top zipper pocket
The zipper pocket will, I hope be useful. It will definitely be more useful made out of vinyl than it would have been made out of fabric. The “out of sight out of mind” adage is alive and well in my life.
I think dividing it into three was a good move even though I can’t put larger items into it. I think packing a large pocket full would have made it misshapen eventually. I am not sure what I will use this bag for, so that could also never have happened.
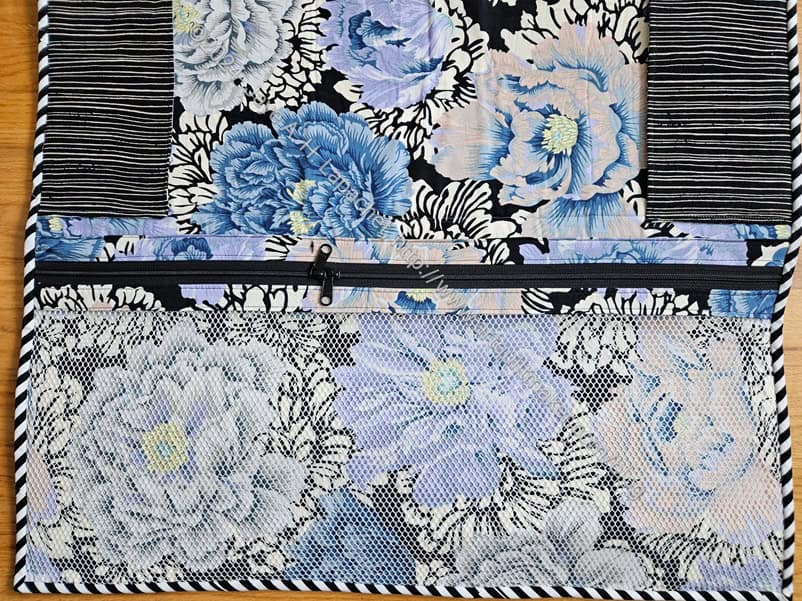
Crafty Gemini Retreat Bag – mesh pocket
The mesh pocket is one large space. The problem described above might happen below. Oh well. I don’t want to worry about it until I have to worry about it.
I like how the white mesh works with my Brocade Peony fabric. I can still see the design, but it tones down the Brocade Peony colors (motifs?) just a little.
In general, this pattern was pretty straightforward to put together. It was on my list for 1,000 years, because I just didn’t get around to it. As is usual with Crafty Gemini patterns, the written instructions are very basic and, for me, almost unusable. There are no pictures, because the videos that come with the Clubs and projects are very detailed.
*What is it with me and CAPITAL letters today?
**N. B. : Obviously, you should shop at local quilt shops and small businesses. However, if you are too busy or can’t find what you need there, I use Amazon affiliate links and may be paid for your purchase of an item when you click on an item’s link in my post. There is no additional cost to you for clicking or purchasing items I recommend. I appreciate your clicks and purchases as it helps support this blog.
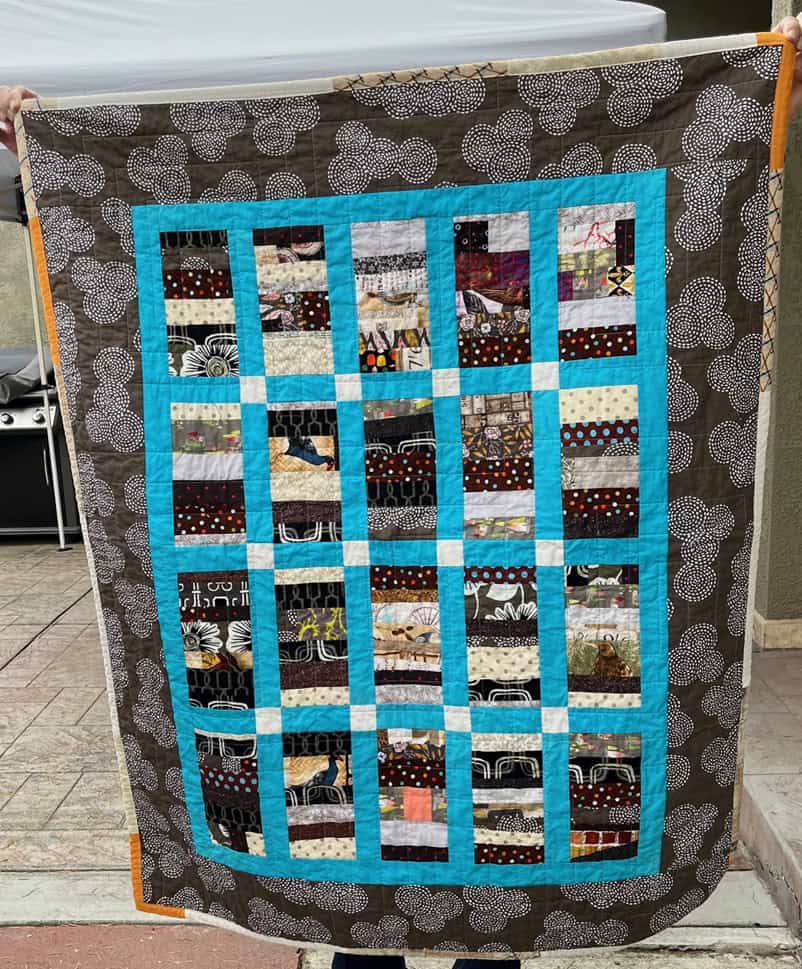
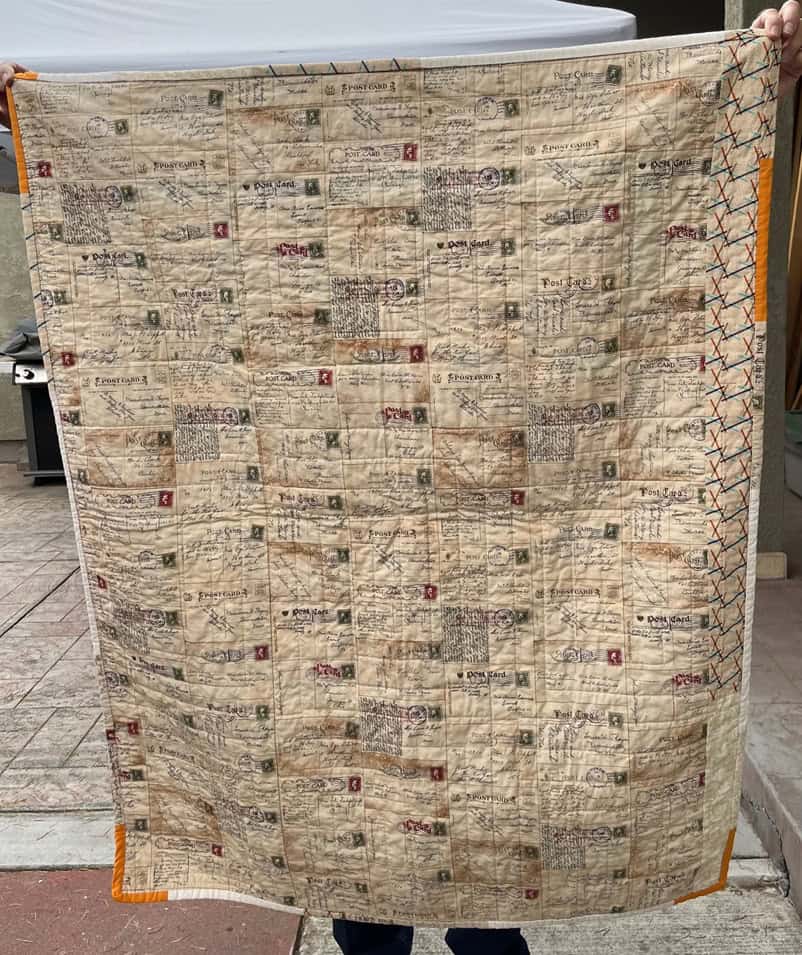
This quilt was finished and shown at the last meeting. Joelle left before I could take a photo, but she was kind enough to send me some. I forgot that I made this way back in February. I thought it was a more recent project.
Carrie did the binding, but I am not sure who quilted it. She added some orange, which I thought was a bold choice. It kind of goes with the turquoise. It is always interesting to see the choices that others make. It is a good exercise in not being in control of every step. As I have said a million times, I love the team effort.
Brown Strip donation quilt back- finished
The back is one piece of fabric, a postcard print, which I would love more if it weren’t beige!
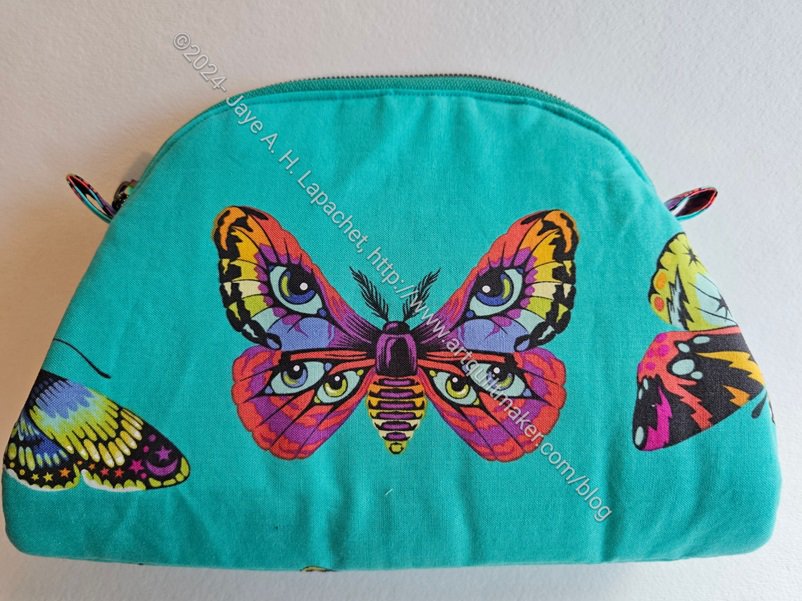
I finally took some time on Mother’s Day to finish this pouch. It has been laying around for a few weeks. It was the perfect project for Mother’s Day. I got to sew AND I finished something.
Palomino Pouch – end
This is the second one of this pattern I have made. It is a fairly easy project, though the turns on the curved end are tight. Again, I did some fussy cutting, which I think looks nice.
I know this isn’t exactly pink; it’s more peachy, but it does show the range of pinks. I am definitely in the “give me bright pink” like the Bluestem Pouch camp. Still, this is a nice soft look
I was also pleased that the gluing together part worked for me this time. I had a better idea of how to do it and I am sure that helped.
The other thing I did was to sew down the quarter marking areas. I did a few steps over the quarter marking to tack the various pieces in place, then I went around the whole pieces. That worked pretty well, though those curves are tight for my machine.
Palomino Pouch interior
The inside looks like an inside.
I used a leftover zipper and one of the zipper pulls from Sew Hungry Hippie. I also forgot to put a label inside. Oh well.
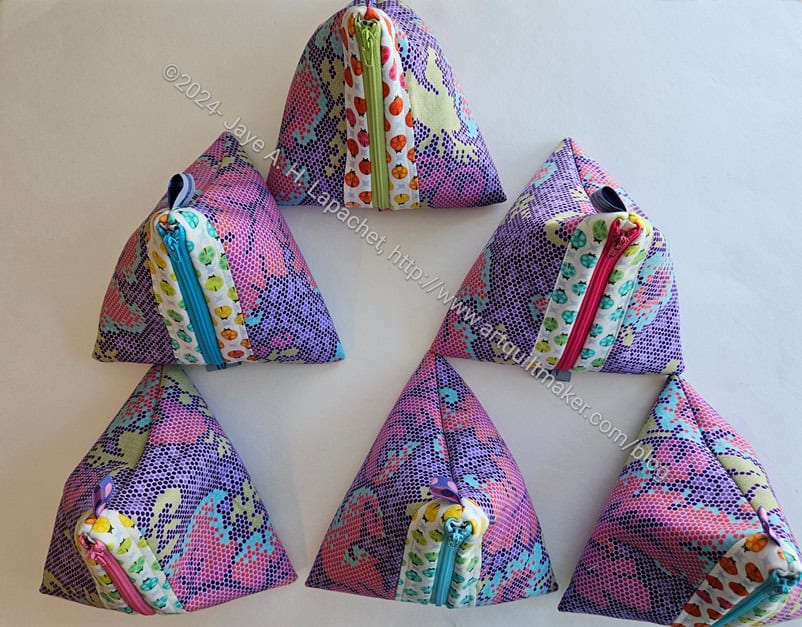
I finished the Little Pyramid Pouches in the middle of last week.
I am pretty pleased with how they came out. The zipper instructions are exceptional and I am REALLY pleased with the zippers. Mary C did give me a little info, which helped me shorten the zipper
They are a little on the large side. I think I might try the small version even though Mary C said that size was hard to turn.
Little Pyramid pouches
This project was a good opportunity to use some of my shorter zippers.I don’t use 6 or 8″ very often, but I have a fair number.
I think I would choose a solid or a tone-on-tone for the accent strip (currently ladybugs) in the future. I think it would highlight the main/exterior fabric.
Still, all the Tula fabric do coordinate so they don’t look awful or anything.
Little Pyramid pouch – interior
I pulled out some older fat quarters of dot fabrics for the interior of all of these pouches. I was glad to use some of them that have been hanging around for awhile.
The lining is a little baggy. There were no directions for using a larger seam allowance (though I could have missed them). I’ll have to check to see and then adjust for future versions.
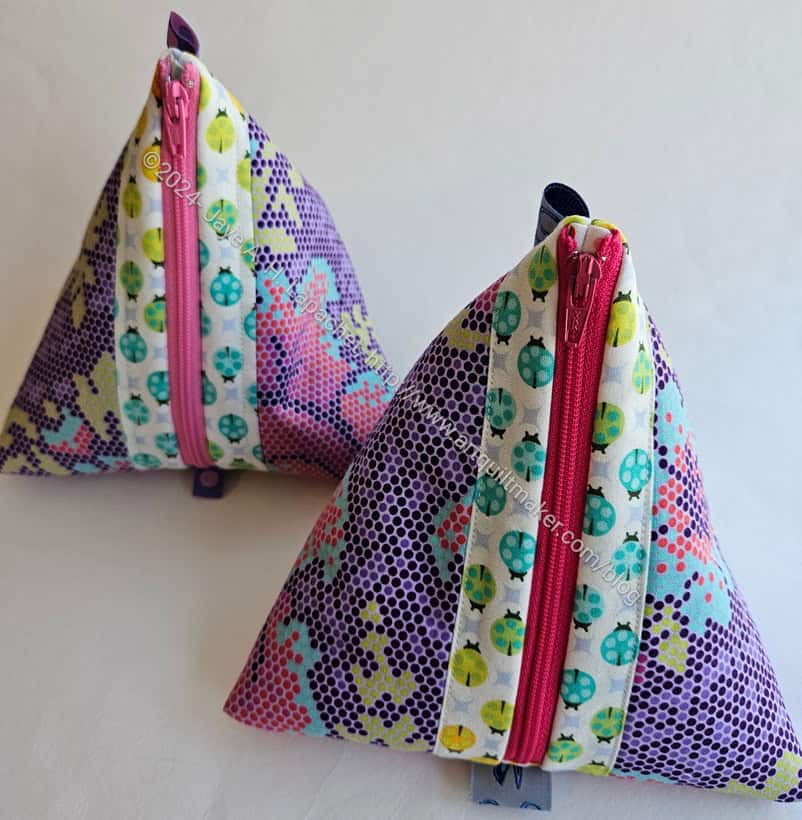
Little Pyramid pouch – back
This pattern also uses ribbon or sewn tabs and those came out really well also.
You can see the bit of ribbon at the top. I used the leftovers from another project.
This was a fun project. I am going to try the Petunia Pouch next.
The Palomino is finished! I am going to make another one right away. This pouch has only a few pieces and with the way the side panels and zipper are inserted, it is very easy to put together.
This is a gift for a friend and the fussy cutting is important.
Palomino Pouch-lining Finished
It really went together pretty well, in general. I had some trouble inserting the lining. It does have the same glue closure as the Piebald. Not so great as I missed the instruction to stop at the 1/4 inch mark when sewing the lining together, so the edges shredded a bit (Moda fabric) when I ripped out some of the stitching. It would be really helpful to have a free arm when making this pouch. Now I know, so I’ll do better next time.
No drop-in lining or binding: perfect.
Palomino Pouch-top Finished
The zipper I used is one of the set I bought from Sew Hungry Hippie. I wonder if Natalie of SHH collaborates with Tula on the colors? The green matched the butterfly fabric exactly.
I thought it might be a little big, but the pattern called for a handbag zipper. I tried two zipper pulls, but it didn’t work with this pouch design so I took one off.
Palomino Pouch-side Finished
Palomino Pouch-side Finished
I took the opportunity to fussy cut the side panels as well. I can’t help that these motifs run into the partial motifs on the main panels, but I still think the side panels look good.
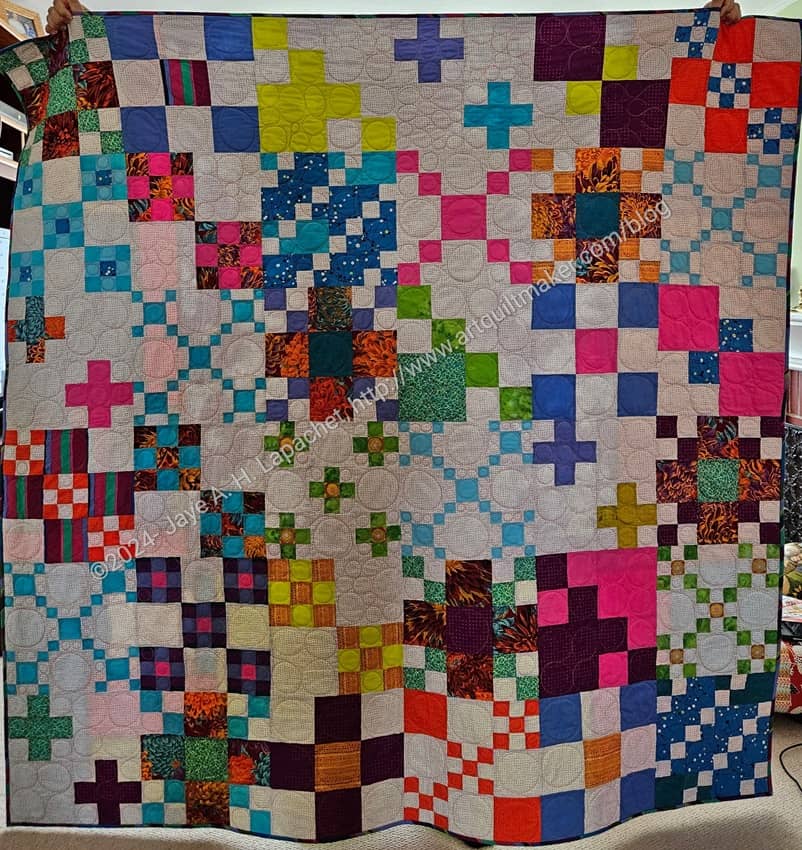
I finally finished Scrappy Celebration! I am well in time for my niece’s wedding and shower. Now I just need to decide if I want to enter it in the Fair.If I do enter it, I’ll have to add a sleeve.
I don’t have much else to enter. If I do, it would mean not giving it to her at her shower, but I think that would be ok.
I am pleased with how it came out, but I think I want to make another quilt, or something complicated, with my man Phil’s Chrysanthemum print. I don’t know why I like the colors so much, but I do.
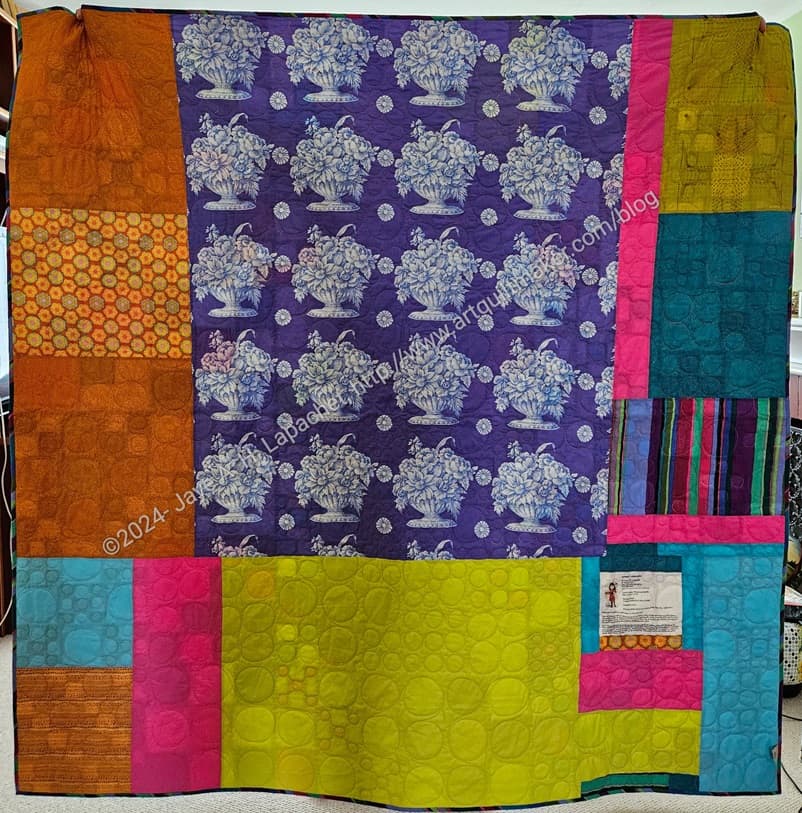
Scrappy Celebration – back
The back isn’t super interesting. I was reading the New Jersey issue of QuiltFolk. They said that this type of back makes the quilt a 2-sided quilt! Who knew?
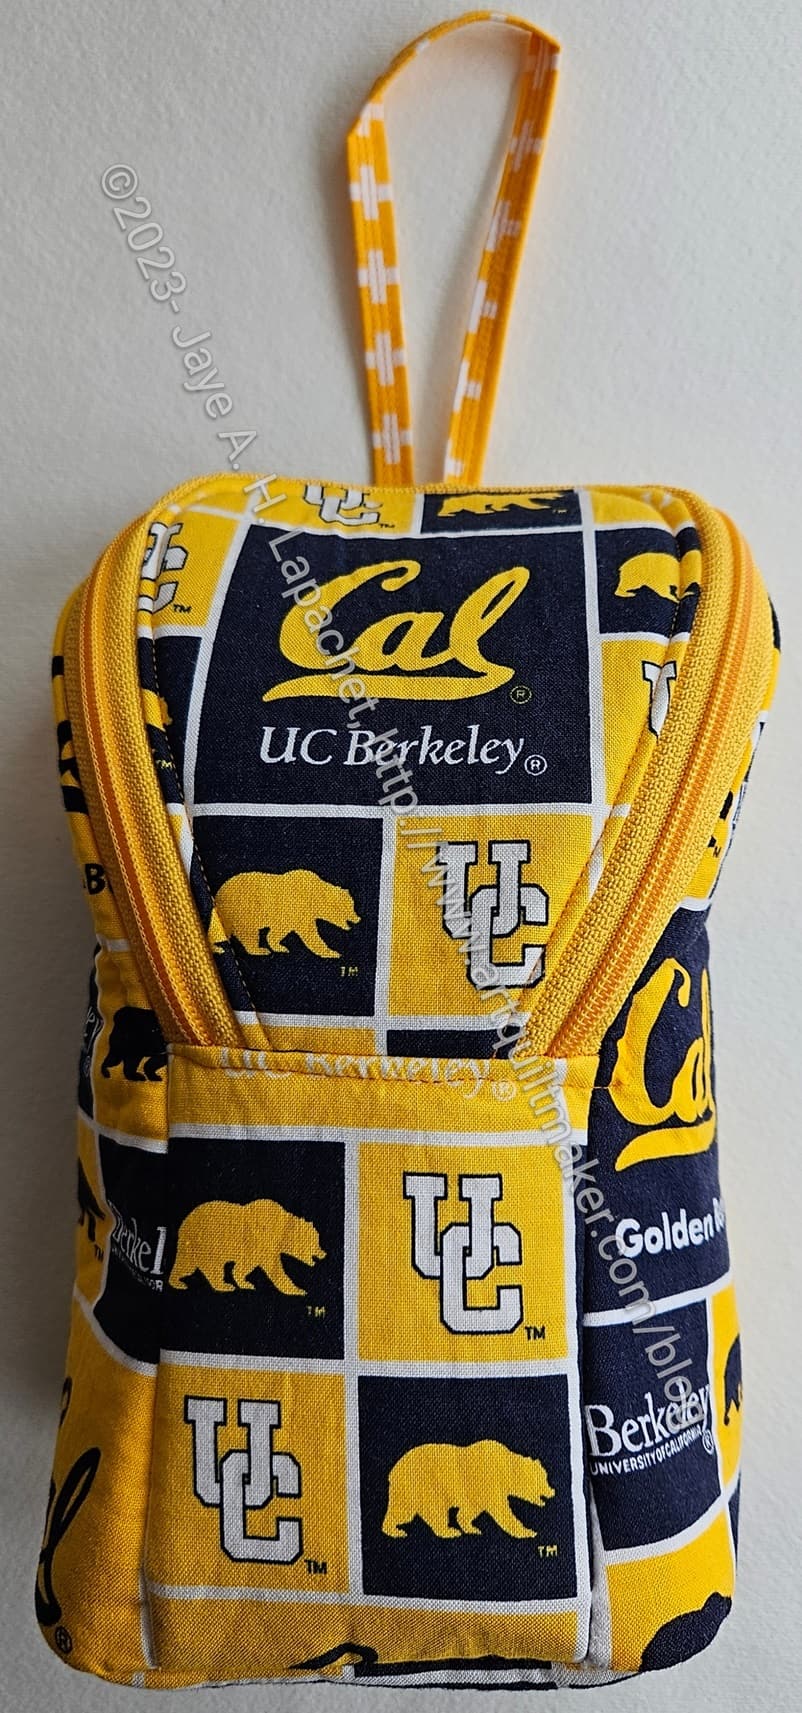
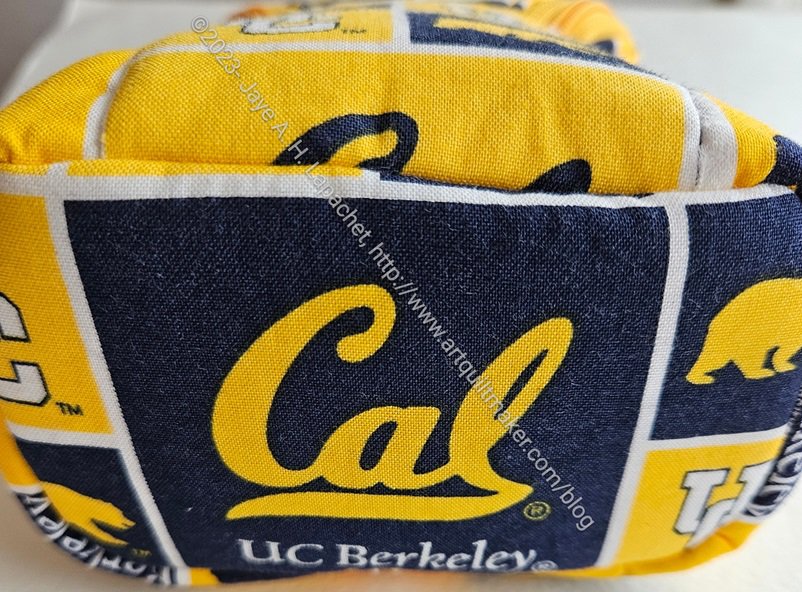
Yes, the Cal Piebald is finished. I think it came out really well. The fussy cutting, as mentioned, looks great!
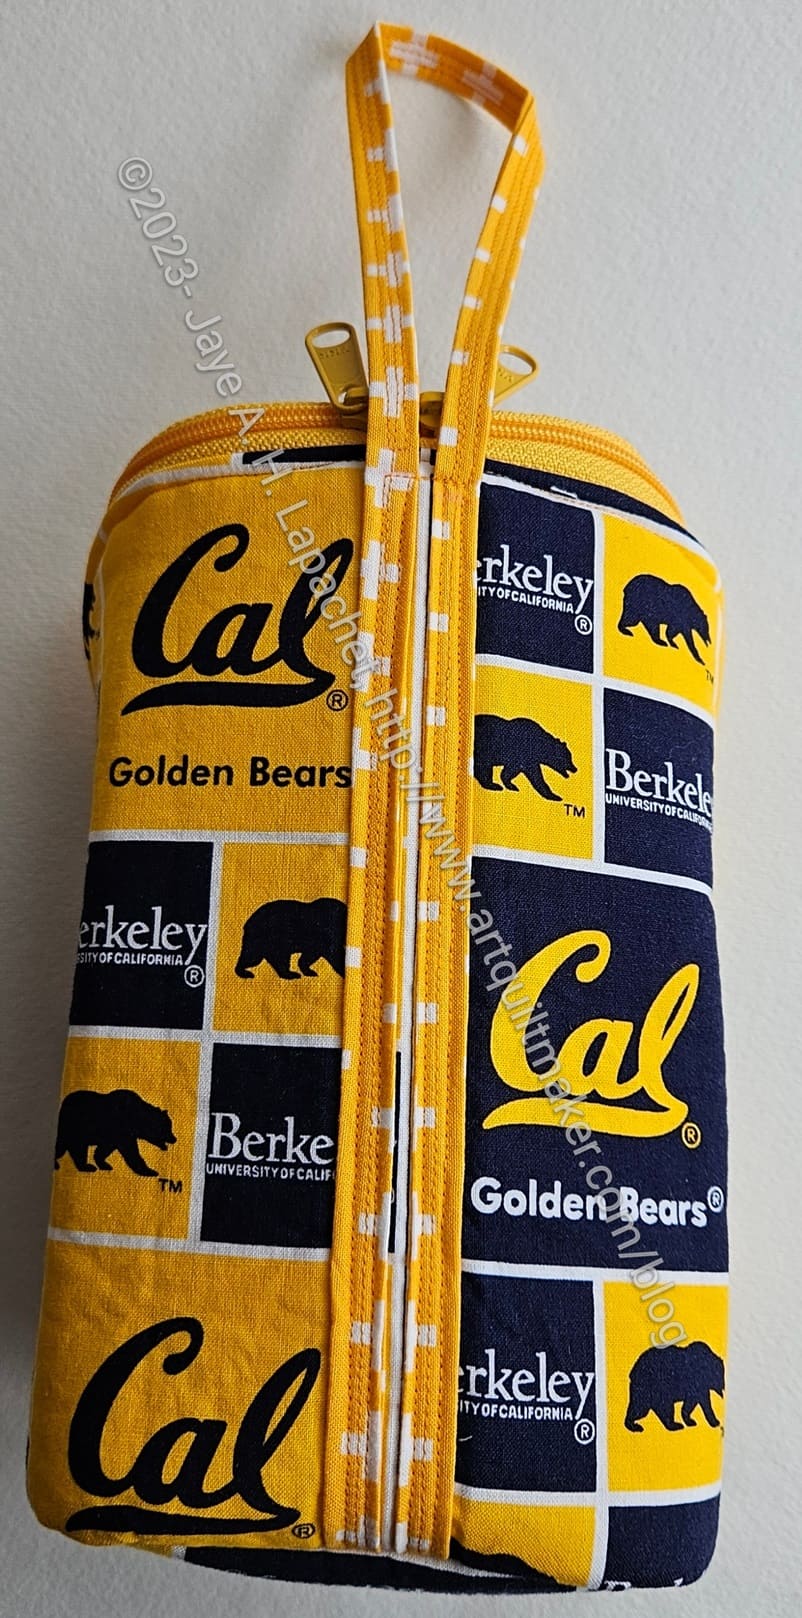
In this image you can see the long loop I talked about when I started it. I used my own hand to figure out the length and I think it is ok. We’ll see what SIL #4 says.
Cal Piebald – bottom
I also fussy cut the bottom even though it won’t be seen very often.
One of these days, I’ll have to try adding Odicoat to a finished bag to see what happens. I am thinking a lot about what happens when people actually use the bags I give them. I want them to use the bags, so I should prepare them better to be used.
Cal Piebald – back
This pattern has an interesting stitching pattern for the loop/handle. The directions say to stitch the the part of the loop not attached to the bag with 4 lines before attaching it to the bag. This meant that I had to calculate exactly where the loop hit the bag, thus there was a bit of pfaffing around with my hand in the loop and trying to mark where I thought the loop would end.
Note: if you make the loop the size indicated in the pattern, there is no pfaffing around.
The rest of the loop is stitched to the bag using the four lines again. I think it is pretty secure.
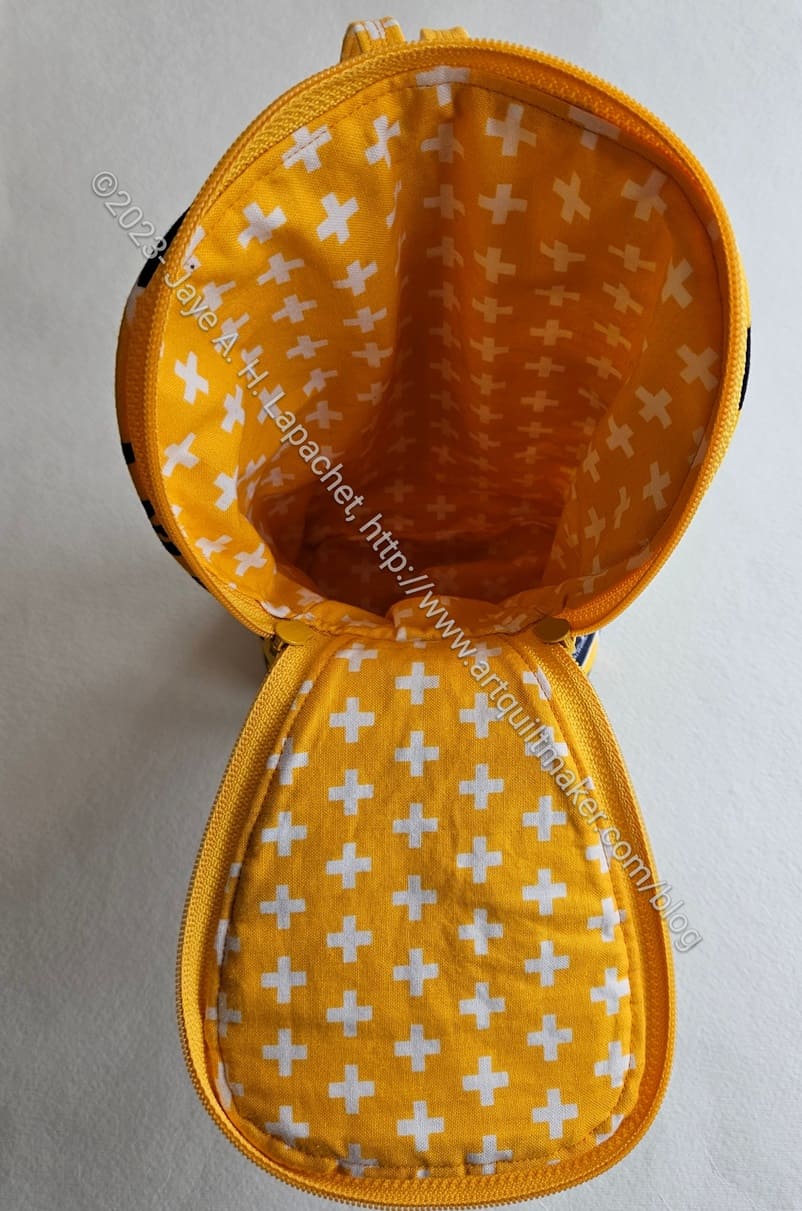
Cal Piebald – interior
I think the lining matches really well. It is a little bit baggy, which is weird, but it isn’t terrible, so I am not going to stress about it. I sewed the lining with a fatter seam allowance, so it shouldn’t be baggy. Who knows? Another mystery to try and solve while I make other bags.
So, this is done. I am pleased. I am not sure when I will give it to SIL #4. I’ll see about giving it to her when I see her on the weekend.
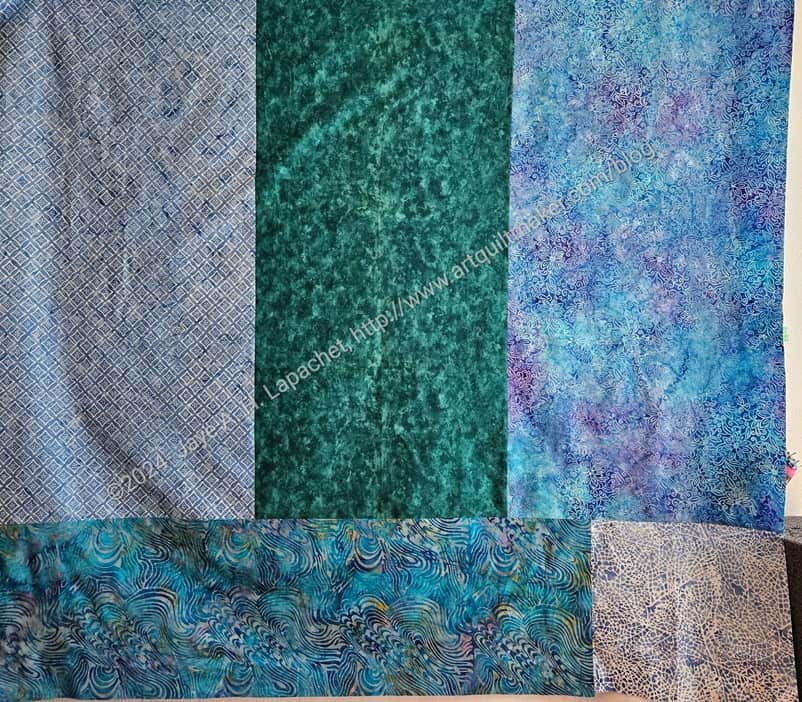
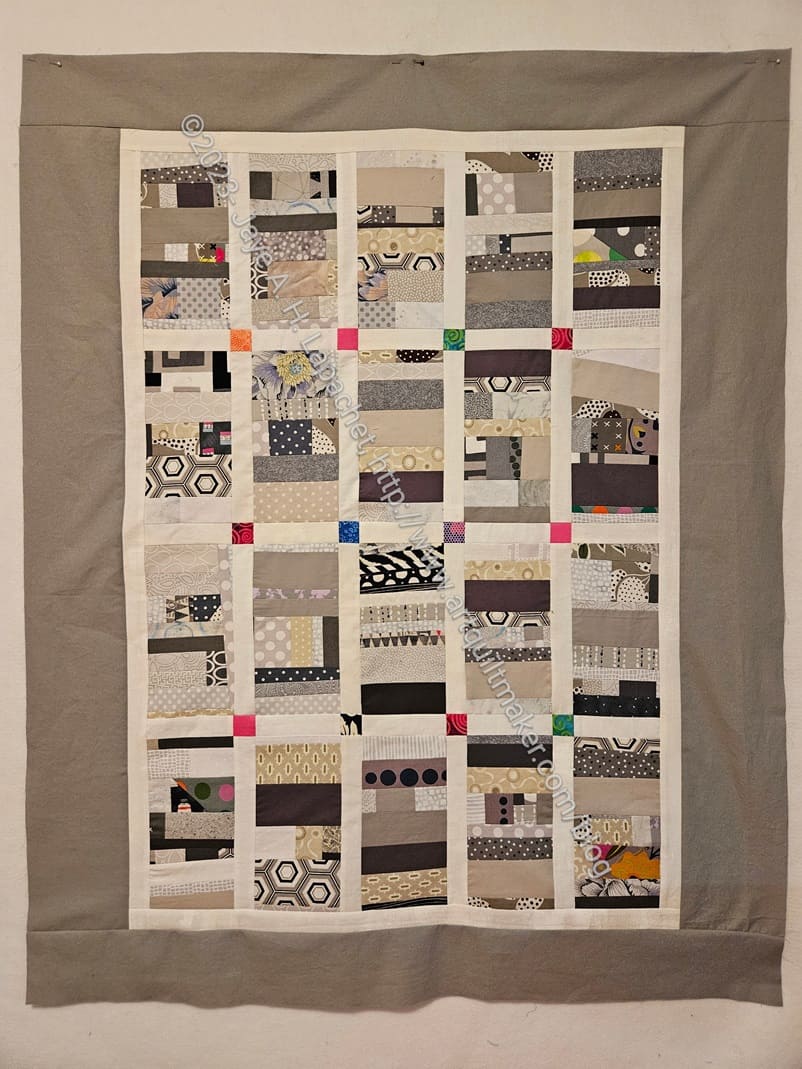
I am really pleased that I was able to finish the Grey Strip #2 donation top the other day.
I got all the blocks together and, again, the quilt was a weird shape – long and thin vertically. I didn’t like it, but I also don’t have enough grey scraps to make 4 more blocks. I know that is good news, but it didn’t help me here. I also really didn’t want to spend the time.
I decided that I would make the side borders larger than the top and bottom. The blocks are 4.5 inches unfinished. I cut the borders 5 inches unfinished and I think the top looks like it will be a useful size.
I found a large piece of grey last time I was rummaging in the fabric closet, so I used that for the back. I didn’t have to do any piecing! Yay. Next up is another QST 16 Patch.
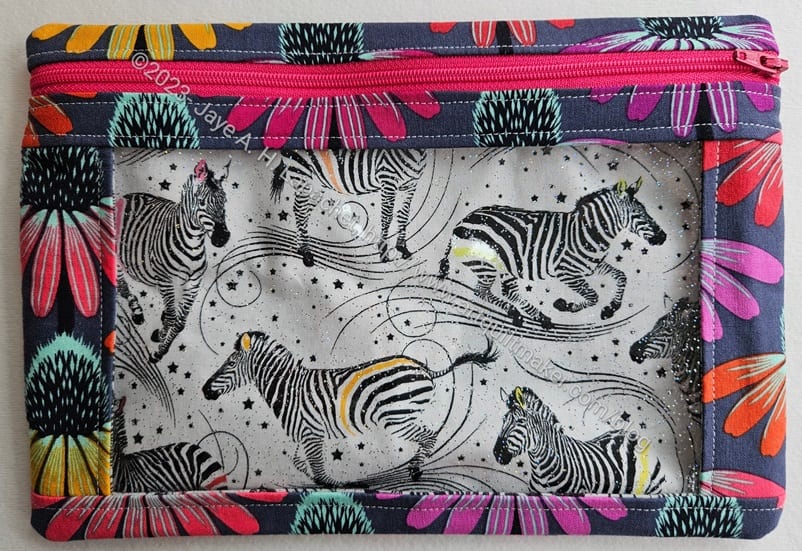
I started and finished another I Spy pouch very quickly last week. I needed another one for the Falabella templates, which I found when I was rummaging for the Piebald templates.
I went out of my way to use the zebra fabric and I had just enough left for the various lining pieces.
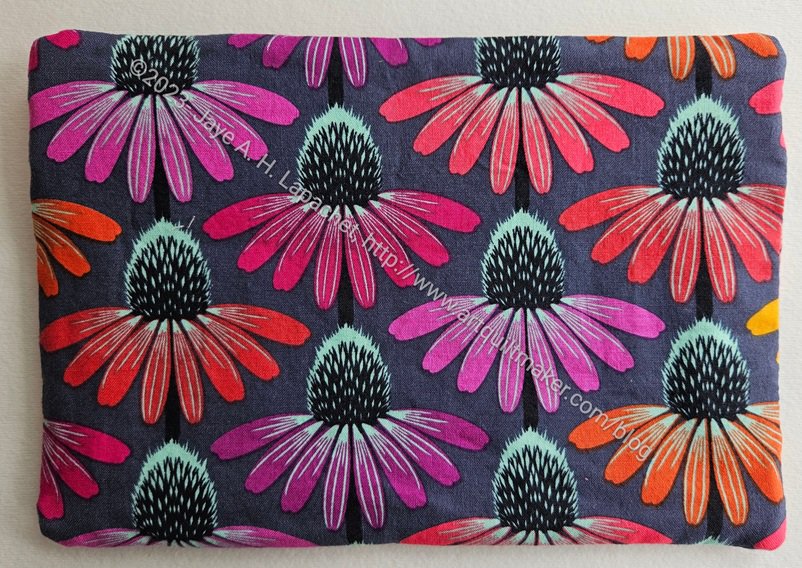
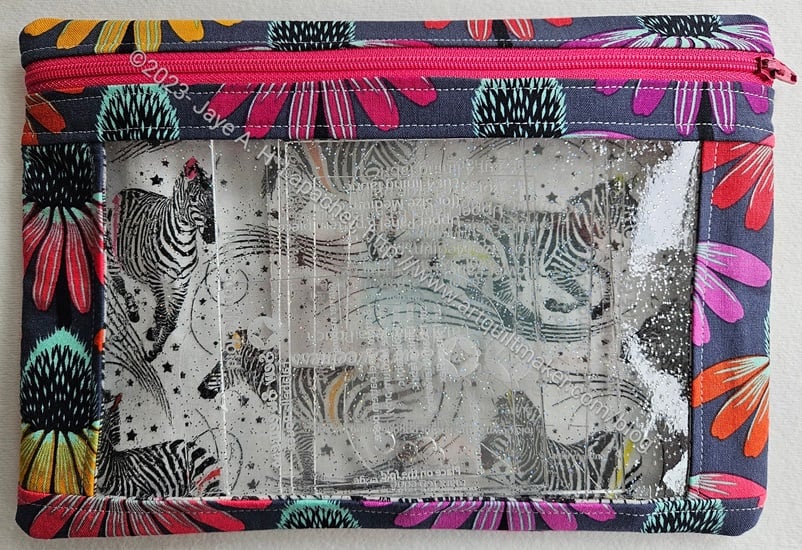
Zebra I Spy – back
As I have with all of the other I Spy pouches, I used the Anna Maria coneflower fabric again. I had some leftover from a previous project and was able to use it up. Some wrong cuts aren’t always useless even if they aren’t useful at the moment. 😉
Zebra I Spy – front, full
The templates fit nicely inside this medium version.