|
Tag: Machine Quilting
This tag is for posts about quilting on a domestic machine. Use the “longarm” tag for posts about longarming.
Week/end Work
Since I returned from Long Beach, I have been trying to sew a lot. I have a lot of new fabric and I want to play with it. I don’t feel like I am sewing enough, but I am trying.
One of the first things I do is wash and press the fabric. This is a big bottleneck right now. The washing, as I may have mentioned, is done. Since I am not finished pressing so I am, basically, pressing as I need a certain fabric.
The first thing in my sewing adventure I did was cut out and prepare pillowcases for sewing. there is a lot of pinning in the Twiddletails pattern. So far, I have made a total of 3 pillowcases and have two more cut out and ready to sew. I wrote about this a little bit in my post entitled Pillowcase Party. This is ongoing. I have a lot more pillowcases in me, but I am dealing with incremental progress on a number of projects right, so I have very little to show for it.
“Incremental progress on a lot of projects” means that I am working on a lot of different projects and haven’t settled down to one yet. I have been cutting pieces for the Frosted Stars quilt, cutting diamonds, working on tote bags, cutting various patches, trying things for the Zig Zaggy Quilt, etc.
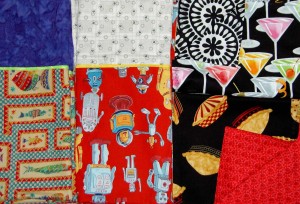
The robot pillowcase (middle), which will be donated, is new. I finished that one quickly yesterday. The two pieces on the right are napkins. I saw the pie fabric and had to get it for napkins. I make pies at Thanksgiving and Christmas and it fits into our family culture. The martini fabric was just fun and not something I would use in a quilt, so napkins again.
I don’t really like making napkins, because the seams don’t press well for me. I LOVE using cloth napkins though. I love seeing different fabrics. I love people’s comments when they sit at my table. I love choosing which one I am going to use for the next few days. I also think it is great way to spread fun fabrics throughout my life.
The napkin fabrics won’t be in FOTY 2010, because I only bought a half yard of each and I use two FQs for each napkin. I like generous napkins and I don’t want to square them up. This time I used two new fabrics (the pies and martinis) and found two fabrics that had been around for awhile with which to pair the new fabrics. When I brought them downstairs the boys were already claiming their favorites.
I finally made the sleeve for the Chocolate Box, so that quilt is nearly done.
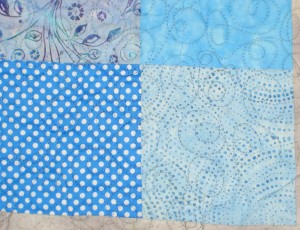
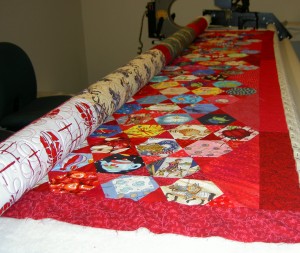
I also went longarming last week. I am not longarming a monster quilt again. The process didn’t go smoothly and only a small part of it was because of the size. I think it is good to find my limitations. For longarming, I think mine limit is a twin sized quilt.
The shop is having problems with their machine, but it was still functional. We spent two hours working through the machine not working. I quilted about 4 blocks (6″ finished) and we had to rip out all that quilting. Evelyn, my helper, was awesome. We talked about our quilting while we worked on the machine. She told me about her family. Another lady came in to help. No dice. The machine wasn’t working. Finally, one of the owners came in and told us we were using the crappy thread that couldn’t be used with the longarm machine.
My question was why was that thread in the longarm room if it wasn’t to be used for longarming? If it was in the room, I would certainly choose it!
We changed the thread and the machine worked like a charm. Sigh.
The good part is that I got a lot of practice stopping and starting, which I needed.
I was too tired to trim the quilt, so it still needs to be trimmed and it needs the binding of course.
There is more to do and I need about a week to just sew with no other obligations.
Basting & Quilting
I am trying to force myself to sew, so last Friday, I planned a day to baste the Tarts Come to Tea. I am not in the groove since I was sick and that is a weird thing.
It has been a long time since I basted a quilt. The last time I remember doing it was on our kitchen floor before we remodeled the kitchen 3 years ago. I think it was a long time before the remodel, too.
I wasn’t sure how long it would take me, so I planned to spend the whole day. First, we had to set up the tables, which we planned to do the night before.There was NO way I was crawling around on the floor and the tables are large enough so this configuration was the perfect size. When we went to set them up, one was missing. SIL and BIL kindly offered to come over and bring our table back (it gets shared around the family) that evening. Once it was found and delivered, DH and I set two of them up downstairs. It was a tight squeeze downstairs, but worked fine in the end.
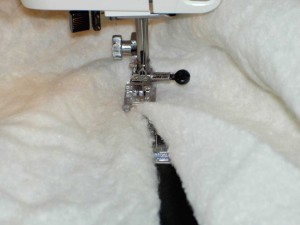
First, however, I needed batting and I didn’t remember that critical piece of information until I was at class at 7am on Friday morning. I did remember the night before and vaguely thought about looking to see if I had a piece, but didn’t get to it. The gang was over watching the Lakers vs. Celtics game. I looked when I got home from class and found nothing big enough. I did find two leftovers I could piece together. I have pieced batting before and think I learned the technique from one of Harriet Hargrave‘s books. I just use a big zigzag and butt the two pieces of batting together but not overlapping. Once quilted, there is no problem with shifting or anything. I try to use the biggest pieces possible and not have too many seams. This a good use of leftover batting.
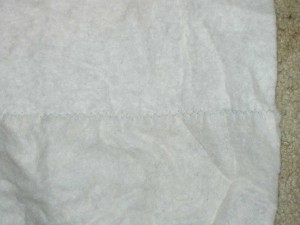
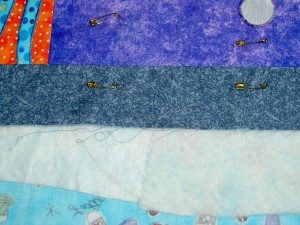
If you look carefully in the photo above, you can see the zigzagged seam. I thought about turning the piece over and going over it again, but decided that would be overkill. I did pay attention to where the seam ended up in the quilt (lower photo). I want to keep track of where it is as I quilt so I can see if there is any difference in how that section looks. Obviously, I won’t highlight it. I just want to see how it comes out.
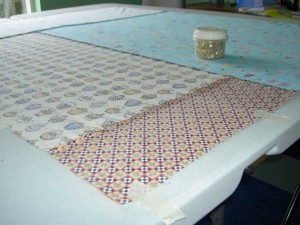
For the first time ever, I basted on a table. One of the things that was preventing me from quilting my own quilts (and there are many) was basting on the floor.
The two tables made a HUGE, GIGANTIC difference on how my body felt afterwards. I am no longer the limber gymnast I was at 15 and crawling around on the floor just isn’t an option! This basting experience was awesome! I sat or stood around the table and listened to some podcasts while I pinned. It really put me a good mood to move forward on the rest of the process.
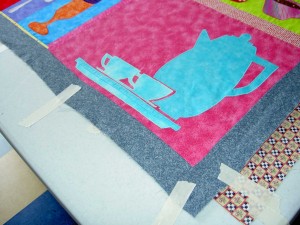
One of the things about a quilting border is that it protects the end seams. Sometimes seams on the edge of the quilt come apart as I work with the quilt. The quilting border, which I like to add (though don’t always remember), help keep those seams tidy. I talked a bit about the quilting border in a previous post.
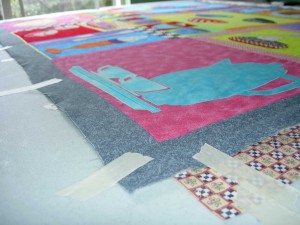
I tried very hard not to stretch the quilt top or back while I was taping regardless of how tempting it was to make the piece tight as a drum. It was taut, but not tight.
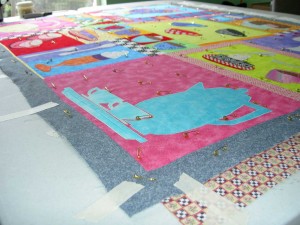
I tried not to put pins in the actual motifs, thought I had to do so on occasion. I find that the combination of the fusible and the safety pins creates a hole. If I get a hole, I rub it with my fingernail, but sometimes it stays even with that treatment.
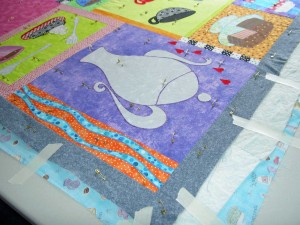
You can see above that I broke my self imposed rule. The curvy teapot was just too large a space to go without pins. I am scared that there will be a giant ugly hole. We’ll see.
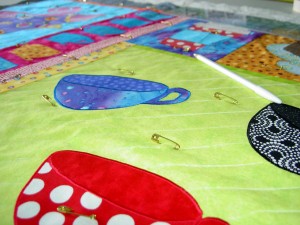
In my first quilting class, I learned to use a white pencil to mark quilts. They are difficult to use, but are not permanent. The thing I like about them is that they are white and not permanent.
I don’t like that I can’t sharpen them to a really find point. I also don’t like it that I have to go over and over the line. I found as I was quilting, that the light in my workroom (and the foggy grey weather) made it hard to see the white lines as well.
Deirdre sent me some .9mm chalk ‘lead’ that can be inserted into a mechanical pencil. I am sure these will work better, but haven’t had the chance to go to a stationery store and get a new pencil.
Despite these problems, I am not prepared to try a water soluble marker. I may leave my quilts marked and unquilted for years and I know that won’t work with a water soluble marker. Nadine Ruggles has a great podcast episode giving instructions on using a water soluble marker. I feel more confident with her instructions supporting me, but still don’t want my first effort to be on this quilt.
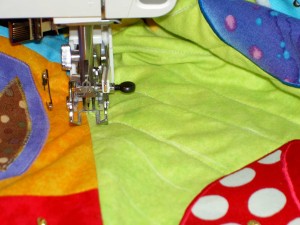
After the above photo of the curvy teapot and my brilliant success at basting, I was ready to quilt. Mentally, I was ready to quilt.
I know that I quilted Beach Town last year. Beach Town, however is small and does not need quilt wrestling. I don’t remember the last time I quilt wrestled. It had to be more than 10 years ago. Aside from the quilt wrestling aspect of quilting a large quilt, I was reminded that I am not a fan of the actual designing of quilt motifs. I have to look at my Flickr set. I don’t know if any motifs will be appropriate, but I will, at least, look.
I did some basic quilting on the 3 Cups block. It isn’t enough. I should have remembered that I like my quilts to be densely quilted. Now I don’t know whether I should quilt within the lines I created using a free motion foot or whether I should leave it and move on. I don’t like the puffiness. If I go back and quilt more, will I get folds or tucks?
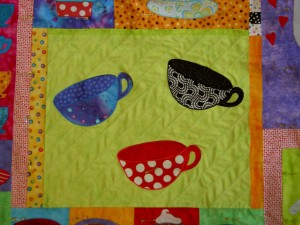
Let me know your thoughts on how this block looks. I went around each cup (in the green) with green thread, but didn’t do any quilting within the cups. I think I need some. Again, I have to think about giant holes through the fusible.
Longarming a FOTY
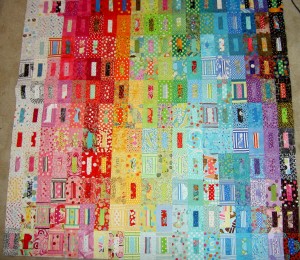
I need to stop with the large quilts. However, I like making large-ish quilts, though. The problem is that I am too short to photograph them. Perhaps I just need to win the lottery and have my own personal photographer at my beck and call?
OK, enough with the fantasy world.
I went to Always Quilting on Friday and quilted FOTY 2009. It has been awhile since I went there to quilt a quilt on their Gammil longarm; July 2009 to be specific. I was pleased that they had tidied up the quilting room. I had enough space to spread out.
General Thoughts
- I need more practice at setting up the machine.
- Photos are better taken by someone else so you can continue quilting while still getting process shots.
- I had an easier time monitoring stitch length and speed and am more pleased with both after this quilting effort.
First, I trained for my longarming day. It can be quite hard on my body, because, essentially, stand up for 6-8 hours. I took the day off work on Thursday, so I wouldn’t be exhausted Thursday night and then have to get up and go stand in front of the longarm on Friday.
I also brought a second pair of shoes and switched halfway through. I would love to see them get one of those industrial rubber mats to put in front of the machine. If I see one on Freecycle, perhaps I will get it for them.
So, the biggest problem with my longarming is that I don’t have enough time practice. Time is relative, too, because it involves making a top and a back I want to quilt myself, taking time to spend a whole day quilting the quilt and getting a slot. That being said, I am much more pleased with the stitch length and quality this time around. I felt a lot more comfortable with the stitching than I thought I would. I wasn’t as anxious about ruining my quilt.
I forgot to put a quilting border on the quilt, which sent me into a bit of a panic when I was pinning the quilt on to the machine’s leader, but I couldn’t do anything about it, so I let it go.
I could just quilt a bunch of pieces of fabric and give them away as comfort quilts, but it still costs money to do the quilting. Perhaps I can find a way to get the details stuck in my head without paying to learn. I did sign up for another longarming day at the end of July. I have to confirm it does not conflict with a trip I am planning.
I did the same pattern as I stitched on FOTY 2008 and the Eye Spy. I also practiced during the week before my session. I didn’t do as much practicing as I would have liked, but I think it was enough.
I try to be well mannered, which involves not ignoring people when they talk to me. It was a little bit of a problem on Friday when I was either trying to deal with the machine or concentrating on driving the giant machine. Other customers kept walking in and talking to me about the quilt. It was really nice to be complimented, but I just couldn’t concentrate on them and the work I was doing. The fabulous Roberta, one of my helpers at the shop, was annoyed when I mentioned it, because people are not supposed tojust walk into the longarm quilting room.
Lil Sissy stopped by on her way to the airport. She forgot my coffee, but beggers can’t be choosers. It was great to show off a bit for a non quilter. She, of course, wanted to drive the machine. I couldn’t let her, because she hasn’t taken the class. She did take some in process photos, which was great except for the person in them!
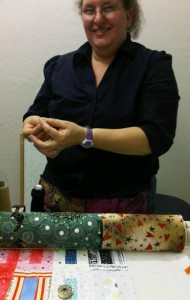
Roberta and Diane were my helpers. It is so great to have them there to assist. After my needle broke and I had three bobbin changes, Roberta knew I was a bit done for and just took over changing the bobbins for me. She talked me through, but was a godo teacher in that she knew when not to push and when to let the reins out a bit.
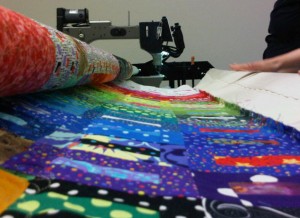
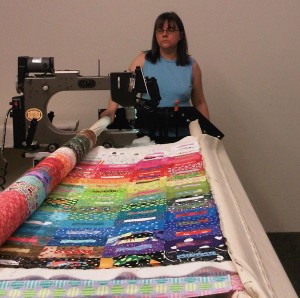
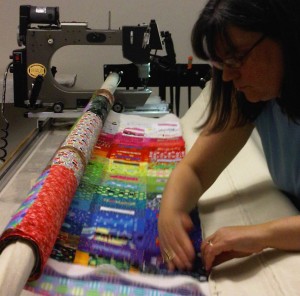
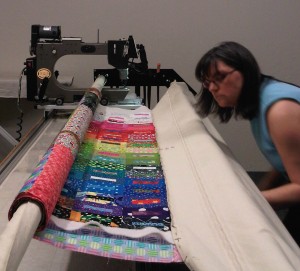
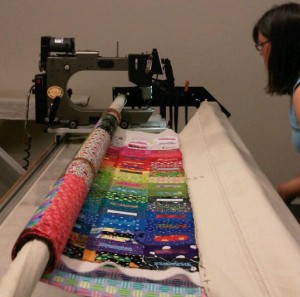
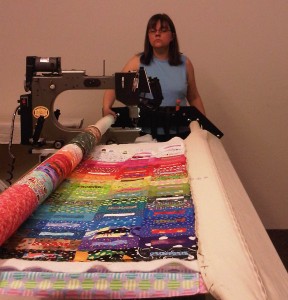
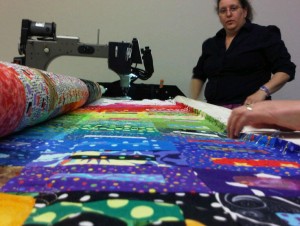
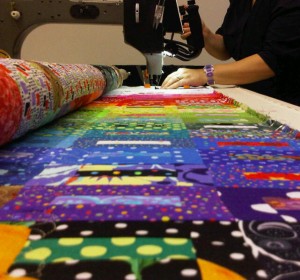
Yes, I ran out of bobbin with a 2×2 grid of blocks left to do. I quilt really small motifs – at least I did on this one.
I am really pleased with the way it turned out and may quilt It’s a Merry & Bright Wrap myself, too.
2 Quilts Have Returned: Chocolate Box
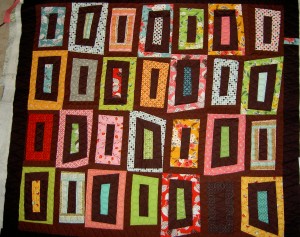
I am really pleased with the quilting on the Chocolate Box.
The whole quilt came out really well, which was surprising, since I don’t usually use much brown (as you might have noticed). I did like that brown – kind of a warm, rich, chocolatey brown.
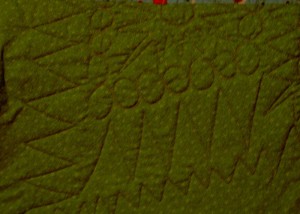
Colleen of Sew Little Time Quilting did a fabulous job. I told her what I wanted and she executed it perfectly.
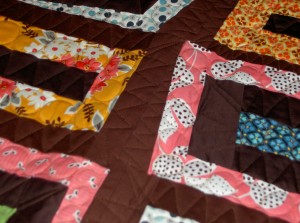
The quilting looks just as good on the front as on the back.
Now I have a total of 3, yes THREE, quilts to bind and sleeve. I had better get busy!
2 Quilts Have Returned: Passionate Purple
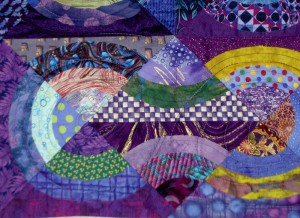
As you may remember, this is part of a series of Bullseye quilts I am working on with JulieZS and Adrienne.
I tool Thursday off of work so that I could rest up for my quilt marathon. One of the things I did was to go and pick up my quilts from my longarmer. Passionate Purple was one of them. Now I just have to finish it. However, after looking at the quilt for a few days, I am thinking that I may take it back and get her to do some more quilting on it. It just isn’t flat enough for my tastes. I don ‘t mean flat as in I pieced it badly and it pooches. I mean flat as in the quilt is quilted within and inch of its life and there is no pooching from unquilted areas.
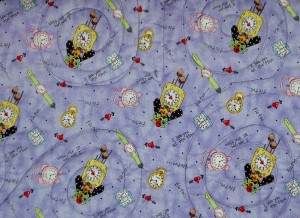
Here is a little of back. Perhaps you can see how much unquilted space there is?
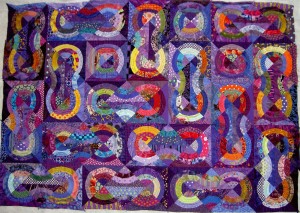
Here is the full piece. I don’t think you can see the quilting at all in this picture.
I am struggling a bit with my camera lately and am hoping it will not die.
Inspiration Thursday
Tomorrow is my longarming day. I plan to quilt FOTY 2009. As a result I have quilt designs on the mind.
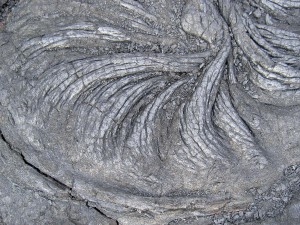
What do you think of that swirled design? I am thinking of looking at it as a line drawing. This is not the design I plan to use for the FOTY 2009. It is just a photo that spurred some thoughts of quilt designs in my mind.
K. S. Perino Pencil Roll
This pencil roll is one of the best that I have seen. First, it is gorgeous. Next it is even more useful because of the little zippered pouch that the artist added (note to self: learn to put in zippers!). Finally, the little details such as the fabulous machine quilting and the little charms on the ends of the ties really make the piece.
I am thinking that one of these would be great to replace the ziploc bag in which I carry my PITT pens around.
|
Tarts Progressing Slowly
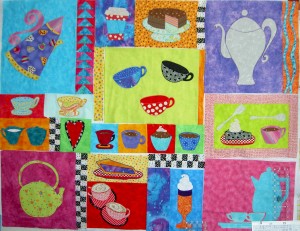
I was determined to get at least one of the blocks done this weekend.
I took the easy way out and worked on the smaller block. No block is easy, regardless of how small.
Every block requires a background which I must choose while considering the surrounding blocks. I was determined to use that purple/blue dotty swirl (see bottom middle next to the frothy drink). I love that fabric and think the quilt needs another piece of it somewhere. I cut it, confidently put it up on the design wall and stood back to look.
Blech.
Failure. It bled into the background of the frothy drink and just didn’t stand up to the blocks around it.
Sigh. Back to the drawing board for a new background. After consulting with myself, I decided that the area could stand a purple backround, yet it would have to be a different purple.
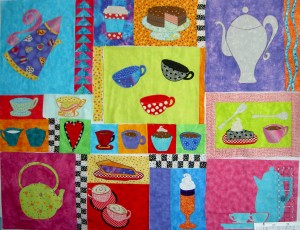
I looked at the background of the grey teapot and decided that I should bring that color down to the bottom of the quilt. I found a piece of a similar violetty-purple. It isn’t the exact same fabric and it is more subtle. I was pretty happy that my second choice seemed to be a good one.
It does add a seventh instance of purple to the quilt. I think that I am ok in terms of the “Odd Rule,” which I understand to be a design element or principle, which says that an odd number of related elements make the piece more interesting. My mother, an artist, reminds me of this all the time. I have to balance design principles for art with design principles for quilts. I believe, that there is, at least, a slight difference.
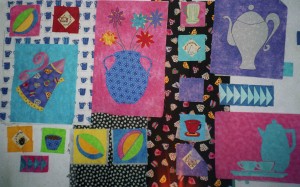
Here is what the Tarts looked like at the start of the design process. This is really a Here to There type moment.
It has really come a long way and TOTALLY changed direction. Notice I took out all the coffee-themed fabric. I bought that fabric all for this quilt. I have tons of it and now ask myself what I am going to do with it. Backs and tote bags, I guess. I also had a melon shape thing going at the time. There are a lot more classic quilt elements – more Flying Geese, Square in a Square, lots of sashing. The blue and pink Flying Geese that have survived the design process this long are really a remnant of the original idea I had. Time to move on!
Longarming FOTY 2008
I spent time yesterday machine quilting the Fabric of the Year 2008 quilt at Always Quilting. It took me 3.25 hours from the time I started pinning the piece to the machine until I took it off. It was the fastest I have ever done longarming-all three times I have quilted a quilt on the longarm! I can’t really take all the credit credit for the speed, however. I did focus on the longarming, but the helper did everything for me except the actual quilting.
The quilting part is actually the speediest part of the longarm process. The other parts of the process are pretty time consuming. You have to, first, pin the quilt to the leaders on the machine afer you center it. When the bobbin runs out of the thread, you have to wind and change the bobbin and start up again, etc. While these tasks sound really straightforward, they add to the time it takes to move the process along.
Since I am not an expert, all of these tasks take me longer. I need to learn how to complete the whole process alone. In order to get the process straight in my head, I need time. I need time to think and make logical connections between the tasks while I am quilting.
Today was not the day to do this. They wanted me to quilt my quilt and get off the machine. They had a Kid’s Camp going and needed to have one of the girls finish her quilt after I was done and by the end of the day. As a result, anything except for the pinning and the quilting was done by my helper. I didn’t ask her to do this. She just, basically, muscled me out of the way and did it. It was fine. I have had a long week or so and was tired.
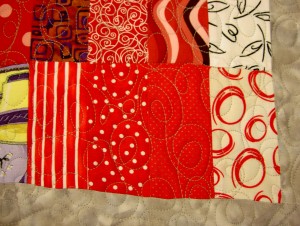
I am particularly fond of the quilting in the red next to the red circles with white background.
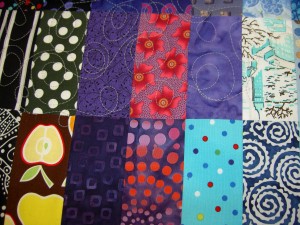
I stopped in this spot for some reason and snapped a picture so you could see an image of quilting and non-quilted spaces. See how tight the quilt is? You could bounce a quarter off of the top.
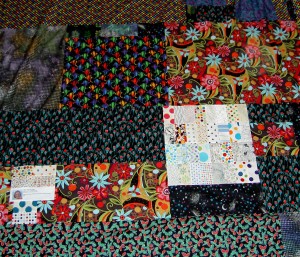
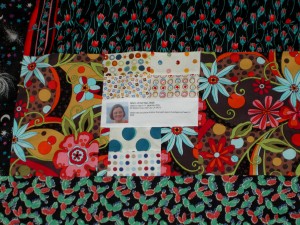
I make my labels by printing on fabric something that I type into a word processing program, like Word.
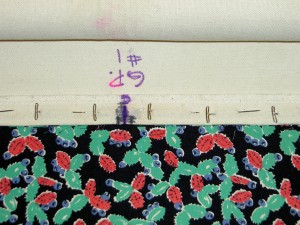
This is how the back looks after pinning it to the leader. I was looking down from the top.
Here is how the back looks from the other side when it is pinned to the leader. I am trying to collect pictures of the entire process in an effort to make a visual tutorial for myself, but it is taking me awhile.
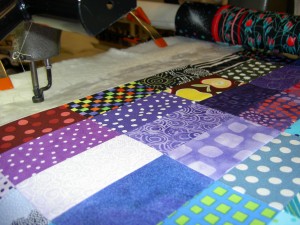
After you finish a row, you have to cut the threads and move back the controller to the left side of the machine to start the next row. Before you can start quilting, the quilt needs to be rolled up to an unquilted section.
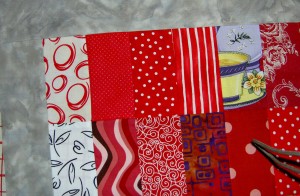
I don’t like borders that much, especially if the quiltmaker has just slapped them on to make the quilt bigger. However, I decided to add these borders so I would have something other than the piecing, which I like, to trim in order to square up the quilt. I wrote about this issue in a post from 2005 when I was binding Feelin’ Blue. I added a grey that had been hanging around the fabric closet for awhile. The ladies at the quilt shop were a bit horrified that I was going to cut this off. They liked the grey.
It was something I tried and it worked ok. There was still one corner that got a little distorted. We’ll see how it looks after I put the binding on.
Beach Town Progress
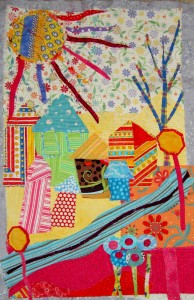
I spent 10 hours in my workroom on Sunday. I spent most of it machine quilting Beach Town. The piece is relatively small, so I was surprised that it took so much work. The really surprising thing is that I have more machine quilting to go!
It was surprising, because I thought I did most of the machine quilting during my last session. It turns out that I really wanted the quilting much closer together. I filled in some areas I already done. The new areas were quilted much closer together – only about 1-2 stitches apart.
The skinny tree needs some more stitching. It is raveling away and I’d like to save it before it goes completely.
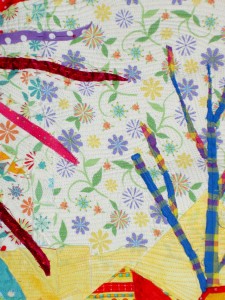
I really hope you can see the machine quilting in this picture, because that is how it is almost all over the piece. There are a few sections left to do, but the bulk is done.
I was thinking, for future Pamela pieces, that I really needed to get the machine quilting done before I start in on the hand stitching. Not that the hand stitching hampered my machine quilting at all. It just makes better sense to do the machine work first and finish with the hand work.
Beach Town Progress
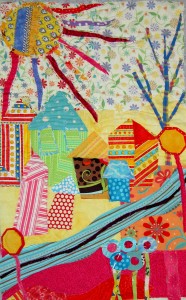
A friend on FB asked me to post Beach Town. As you regular readers know, I get around to posting everything eventually and this past week has been a bit of a challenge. I wondered whether I should post this on Monday to give you more days to look at, but eventually decided just to stack up a couple of posts today and get through the backlog. When I prepare posts and set them to post on a future date, I can’t link to them until they are posted.
I spent Monday afternoon and evening working on the machine quilting of this piece. I still have the purple part of the road and the sky as well as the flowers to quilt, but am mostly done.
I am pleased with how the piece is shaping up. I liked the fluffiness of it before I began the quilting. Now I really like how flat it gets after quilting.
I have to remember to machine quilt it before I start the hand stitching. I know that will be hard in future Pamela Allen classes because of he flow of the class and how excited I get about the pieces I create in her classes.
It took me a long time (well, a month, which seemed like an eternity) to get back to this piece. I learned something from my mistakes, though:
- cover the batting somehow
- stick or pin everything down really WELL
- Ensure the pieces are large enough to overlap to prevent gap-osis
- machine quilt before hand stitching

I do need more quilting on the sky. I just went around each sunbeam in order to tack down the repaired part of the sky. The other part of the sky is just too fluffy, so I will quilt some more in the area on the right of the piece.
I spent a lot of time on the tree, so that the lean, straight shape would be maintained. I think I succeeded?!
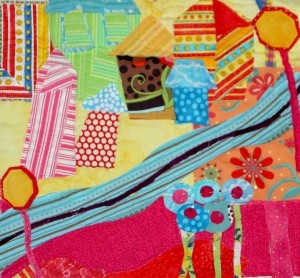
Quilting the bottom was a little more of a challenge because I didn’t want the quilting to stand out. That meant a lot of stopping and starting with new colors. That is ok. I spent some time in the evenings during the week working on little bits of the piece. As I mentioned I still need to quilt the purple part of the road and I think some hand stitching will be required.
I don’t know if I will machine quilt the flowers. I am not that into free motion quilting right now. I may just tack them down a little and then do some detailed hand stitching. It may be that I just bead them to try and maintain the look of the color statement. I haven’t done anything there yet, so I will have think about it some more.We’ll have to see.
Inspiration: Quick Note
I know that I ignored you all weekend. I spent about 24 hours over the three days sewing and really got a lot done. It is difficult to be at work today, because I am still desperate to be at my sewing machine. Needless to say, I have a ton to discuss.
Quick recap:
- Teacher pillows: done! Not wrapped
- 4 Infinity blocks done
- Beach Town: repaired and 3/4s machine quilted
Photos, etc to follow.
More on Longarming
Last weekend, after longarming all day on Friday, I spent time on bindings. I made and machine sewed the bindings for Eye Spy and the Crazy Test. Last night I worked a bit on doing the hand sewing on the Eye Spy. Neither of these quilts will have sleeves, so once the hand sewing is done, they will be done.
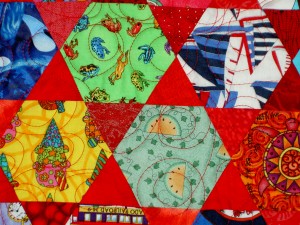
The pattern I used to quilt this quilt with is called Double Bubble. I wanted to use the same pattern as Thoughts on Dots, but I didn’t remember to look carefully at it before I left. I am pleased with this pattern and may used it again for the FOTY 2008 quilt.
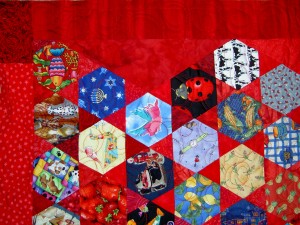
[click photo to view detail of quilting]
Practice does make perfect as well. I thought I did pretty well the first time, but my stitches improved immensely this time. I didn’t add a practice piece to this quilt and it turned out that I didn’t really need it. I worked really hard at going the same speed regardless of what I was doing. I didn’t always succeed, but I improved.
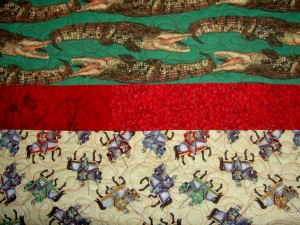
Here is the famous crocodile fabric quilted. I think using it worked out really well.
My next longarm day is in April and then I have no more quilts to quilt, so I need to get on the stick if I want to keep up my momentum. We’ll see.
A Binding Away From Finished
Fortunately, today was just the kind of weather I enjoy. It was cool tending towards cold, but clear with some big fluffy clouds around. The light was really gorgeous and it helped me get into a calm mood before I got to the machine.
I spent my day quilting the Eye Spy on the longarm machine. In my February 8 post, I old you that my next longarm session would be on March 2. Instead I went today. My assistant for Monday bailed and Friday works much better for me, so I changed the date. As I sit here, the Eye Spy is completely quilted. YAY!
I woke up with one of those “who stuck a knife in my temple/forehead” kind of headaches. They happen periodically especially during times of stress, but I wasn’t happy about it. I drank a whole bunch of water and caffeine and ate more protein than should be legal so I could go on about my day. Amazingly, longarming is a good antidote to a headache!
I was more familiar with most parts of the process this time and the session went a lot better. I completed a larger quilt in a slightly shorter amount of time. I didn’t have to stand as long and it was slightly less expensive.
I used an easier pattern which contributed to completing the larger quilt faster. I tried really hard to manage a consistent speed and to make the designs larger. As the day went on I did tend make smaller motifs, which I will have to work on.
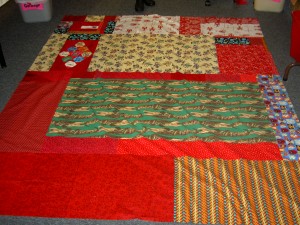 The crazy part about the whole process was the back. I spent last weekend, when I wasn’t shopping for headstones and wasting time, making sure the top, which has a lot of bias, was stable. I only started the back and figured I could do it this coming weekend. Then I changed the date of the longarm session and totally forgot I hadn’t made the back. Huh?? I don’t know what I was thinking. Fortunately, I remembered on my way home. I spent the evening, in between life stuff, making the back. They never go together as quickly as I think they should, but it all worked out.
During my last session, I felt like I had a really steep learning curve. This time, I had more of an idea of what was happening and knew, basically, what to do when prompted. By the end of the day I was starting the rows myself without assistance. I really in absorption mode – trying to absorb the process. I didn’t take as many notes. I still needed a lot of help and reminders, but I have made a lot of progress and was much more confident. I do want to go over my notes tonight and see how they jive with what I remember now that I have two sessions under my belt.


