Finished: Flagler

Flagler Backpack
Flagler Backpack

I finished the Flagler right at the end of the weekend. I am pleased with the way it came out. I really like the spots against the stripes.

I put a piece of Peltex in the bottom to make it stand up better, but the sides are still kind of floopy.

I think the type of pocket on the front requires a careful selection of fabric.

Flagler Backpack back

The back and straps are all stripes. I kind of like the limited palette. I realized that this palette is very similar to the Peacock Bag.

At some point I bought some large rainbow finish lobster clips. I used one of them on this inside of this bag. It pulls a little on the lining, but you know that I feel lobster clips are useful.

Flagler Backpack inside

I didn’t think of it before but I might try spraying it with some stain prevention spray.


Starting the Flagler

Flagler Bag Pieces
Flagler Bag Pieces

The Flagler bag is the first bag in Crafty Gemini’s 8th Bag Club. I took some time to cut it out over the weekend.

The bag really doesn’t have a lot of pieces, unlike the A Place for Everything bag, so it didn’t take me very long to cut it out.

I wasn’t going to make this bag, because I didn’t think I would use it, but then I thought it would be great for my nephew. He has a new baby and may need to carry around a small amount of her stuff for quick trips.

Flagler in process
Flagler in process

I had seen that spot fabric recently and looked for it for a long time. I almost gave up finding it, but am glad I kept looking because I think it will look good with the stripe.

I was able to get some of the sewing in, too.

Quilt Class: Preparing for Quilting

If you, mostly, do not quilt your quilts yourself, then part of your quiltmaking process should be preparing your quilt for your longarm professional. You can read my longarm rant which implies things to think about when choosing a longarm quilter, but regardless of who you choose, you will still have to prepare your quilt.

To be honest, when I get to the “YAY! I have finished my top” stage, I am done with the quilt. However, I also don’t want a bunch of tops laying around, so I am working on finding the Zen or meditative qualities of finishing my quilts.
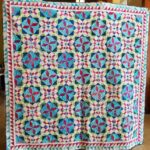
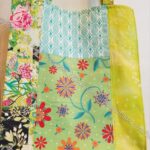
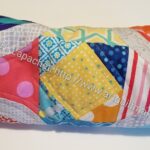
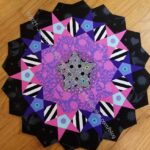
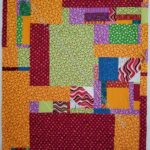
Top

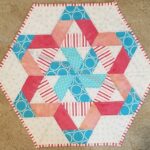
My tops are what they are. I press as I need to press, which is usually towards the side. Sometimes my tops have points where a lot of seams meet. I don’t try and change that piecing, but I make a note and point those areas out to Colleen and usually tell her to avoid them.

If there are no borders, I sew around the entire edge about 1/8 inch from the edge. This stabilizes the seams that intersect on the perpendicular with the edge.

Back

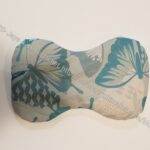
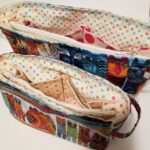
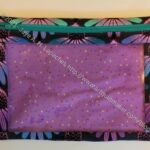
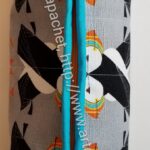
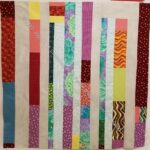
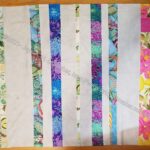
However, when I get to the back, I do try to be nice. Part of the process or creating the meditative space in my head of finishing my quilts deals with the back. I no longer piece tiny squares together to create a coordinated back. I try to use very large pieces of fabric, which not only enables me to finish the back quickly, but also lessens the number of seams on the back for the longarmer.

My personal, fabulous longarmer has never complained about seams, but I also don’t want her to become frustrated with me. I make pieced backs. That is just what I do. I see no good reason to buy additional fabric for the back when I have perfectly good fabric in my fabric closet that is not being used.

Lately, I have started to try to remember to press the seams open on the back. It doesn’t really matter in terms of back construction, IMO, but it lessens the number of layers that the longarm needle has to punch through. My personal, fabulous longarmer has never said one way or the other, but I figure that it can’t hurt.

If I know that the end of the seam will be on the outside of the quilt or NOT crossed by another seam I will also backstitch. I do this on the front also, so that the threads don’t pull apart as the quilt is being stretched on the longarm machine. Of course, I don’t always know, but I do my best.

I try to make the back at least 8″ larger (4″ on each side and 4″ on top and bottom) all the way around than the size of the top. To do this, I lay the top on my design floor and build the back on top of it.

Post-it Notes are your Friend

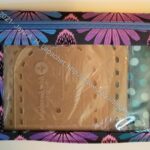
I measure the top and the back and pin a post-it note to the quilt saying what the sizes are. I use hot pink post-it notes. My quilts are generally square, but usually not perfectly square. They are often off by an 1/8″, but not much more. If I put the post-it note on, the longarmer clearly knows what s/he is dealing with and can’t blame me later for lousy piecing (Well, s/he can, but I can just look at him or her sarcastically and not feel bad).

Top and Bottom

You might think that any idiot could tell which is the top and bottom of your quilt, but that is not always the case. I had a quilt where the back was really large – much larger than the 4″ all around that I normally make it – and my personal, fabulous longarmer put it on sideways, because I didn’t mark the top and the bottom. She is not in my head, though she is in my fantasy life head , so now I put a post-it note with the word ‘top’ on both the top and the back. Top on the post-it note means “dude, this is the top of the quilt.”

Pins

I take them out as I piece. There is no later. If my personal, fabulous longarmer runs over a pin I left on the quilt, I pay to have her machine repaired. My fault, my problem. That is why I take pins out of the seams, rather than running over them.

Embellishments

I embellish with anything 3D AFTER the quilting is done. If there is some reason that I put a button or beads in a section of the quilt, then I pin a very bright post-it note to that area. I also point it out to her when I bring the quilt to her. If my personal, fabulous longarmer runs over an embellishment on the quilt, because I didn’t warn her, I pay to have her machine repaired. My fault, my problem.

Press, Press, Press

As much as I despise pressing the top and the back I do it just before I take the quilt to the longarmer. Then I hang the top and the back on a pants hanger. The pants hangers have to be tough and have really strong clips, because those quilts are heavy. If I don’t press the wrinkles will not ‘quilt’ out.

Binding

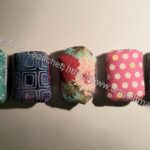
My longarmer attaches my binding on side with the machine for me, so I include a binding with my top and back. Generally, I put it in a plastic bag and attach it to the hanger so it doesn’t get lost.

This is the last step. Once the quilt is on the hanger, it is ready to be taken to the longarmer.

Keep in mind that your personal longarmer might have different requirements for how you prepare your quilts. Make sure that you know what those are before you take your quilt to be quilted.

Some La Pass M3

Center Rosette #7, La Passacaglia

I had a few meetings last week in which I could sew. I got a little bit of M3 done before I started in on M4.

Yes, that says Rosette #7 and, no, you aren’t crazy. I haven’t made Rosettes 2-6 yet. We are jumping around.

In the photo, I am showing the back because it is still in progress. I am pretty pleased with the way this rosette is coming together. it is fitting together much better than the M2 part of Rosette #1. It is smaller and that could be a factor.

I have one more seam to finish before the center is done. As I said, I am going to move to M4 and finish M3 catch as catch can.

Bagmaking Hazards

The other day I made a Retreat Bag. These bags are free patterns from Emmaline Bags. You do need a frame if you don’t want the bag to be a super widemouth with no structure.

Frame Injury
Frame Injury

Somehow I made the casing too small and really had to tug and push the frame through. My finger came out the worse for wear, which is a good reason to make the casing the correct size.

I rubbed the skin off, but got the frame in place just before the bleeding started. It is very painful, so make sure you made the casing the correct size.

Installing Zippers Tips

One of the things that came up when I was making pouches over the weekend was the zippers. They are always a pain, so I made some changes tot he way I work.

Washaway Tape
Washaway Tape

Because of the video on making an internal zipper pocket, I was reminded of the washaway tape**. I have had this tape for awhile and use it sporadically, but need to be prompted, because I tend to forget about it.

I followed Sara’s directions exactly on the second one, which means that I lined up the tape with the edge of the zipper then pressed the fabric close to the zipper before I sewed. The second one came out much better than the first.

Small zipper foot
Small zipper foot

I dug out a zipper foot that I haven’t had luck with and really worked with it. For the first time I had success using the zipper foot. This was the small zipper foot that clicks on to my machine without the use of any screwdrivers. I was surprised that it actually worked this time. Perhaps I was doing something wrong before.


Taping zipper tapes
Taping zipper tapes

Next, the tape at the end of the zipper tape where the zipper opens, e.g. opposite the stop, is loose. Most patterns say to sew the tapes together, which is a hassle and mostly doesn’t work for me. Since the ends would be hidden inside the pocket, I decided that I would try  tape instead of sewing the end of the zipper together. I used regular  Scotch tape and it worked great. I didn’t have to rip out any stitches or deal with a scrunched up fabric and thread nest. It was also fast.


**I use affiliate links and may be paid for your purchase of an item when you click on an item link in my post. There is no additional cost to you for clicking or purchasing items I recommend. I appreciate your clicks and purchases as it helps support this blog.

New Turning Tool

The other day I talked about Modern American Vintage, a wooden tool small business. They describe their business as making heirloom quality quilting tools.

The Bernard
The Bernard

I am constantly on the lookout for the perfect turning tool. I looked at their website and bought a ‘Bernard‘. This is the best turning tool I have ever used.

It doesn’t show in the photo since I took the photo before I used it, but the small end of the tool got all of my corners poked out without going through the fabric. It also feels good in my hand. I highly recommend this tool, especially if you make a lot of bags and need to poke out corners.

Large Retreat Bag Zipper

While this is the first Large Retreat Bag I have made, it is the third Retreat bag I have constructed (total). This is a free pattern from Emmaline Bags that requires a frame. The frame is not free, but also not very expensive. The frame allows it to open all the way (widemouth), providing easy access to all of the contents.

I like this bag, but the Large size is LARGE. I am not sure what I would use this size for so I don’t know that I will make a large one again, though I have another frame, so I might.

Sugar Skull Interior

The pattern doesn’t call for it, but I put in an interior zipper pocket. Tim thought up the idea of an interior pocket to use to turn the bag. This means I (we) can turn the bag without leaving the bottom seam open. Yes, the bottom of the interior zipper pocket is left open, but it is much more hidden than the bottom.

It has been awhile since I made an interior zipper pocket (also called a flush pocket), so I screwed up a few times on the first one. I definitely didn’t remember how to do it at all and had to get Tim to remind me which resources he used. I did find a couple of tutorials, but they were lacking.

The most helpful tutorial was Sara Lawson’s video (of Sew Sweetness), which is the one Tim uses. I started out using the directions in the book, the Bag Making Bible** by Lisa Lam. The part after the zipper installation are a little skimpy, so the video filled in the gap.

I made two of these bags over the weekend and the second zipper went much more smoothly. Now I have a couple of gifts ready for the holidays. As a result, check back to see the whole bags.


**I use affiliate links and may be paid for your purchase of an item when you click on an item link in my post. There is no additional cost to you for clicking or purchasing items I recommend. I appreciate your clicks and purchases as it helps support this blog.

La Pass M4

La Pass, M4 BOM Fabrics

I received the La Pass M4 fabrics and such.

We are off of the purples and on to pinks. I like these fabrics better, except for the hats. I might even use the zebras.

Lindsay thinks there is less work in M4, which means that I may have time to get it done and get back to M3.

My desk is a big mess of English Paper Piecing fabrics, papers, Sew Tites, basted pieces and tools.

Various & Sundry 2021 #12

Projects, Classes, Patterns & Tutorials

My friend Marty showed me Kohatu Patterns website. She was making a pumpkin tablerunner. I decided I want to make a pumpkin tablerunner for my buffet after seeing her blocks.  I was interested in the patterns, but not as much as the blog, which has some very interesting tips and tricks. She calls them Modern Quilting Guides.

Lindsay pointed me to an older Tula Pink project called Rainbow Waves. It is a basic Storm at Sea quilt, but the fabric selection is GREAT.

Watch Sara from Sew Sweetness as she talks about the magnetic snap die for a rivet press.

If you want to sew along with me, get the A Place for Everything v.2 pattern from ByAnnie. Watch Tula Pink’s video on her versions.

I thought about joining KnitStars this year. It looks awesome, but I slapped myself and didn’t. My knitting skills are not up to the challenge even though I want to pretend they are. Also, remember when I said I was super busy?

Bonnie Hunter has written the introductory post for this year’s Mystery Quilt, Rhododendron Trail (I can see this name quickly becoming RT!). I will definitely read and save the posts, but I am going to wait for the reveal to see if I want to make the project. I do like the colors, however. The pinks and turquoise/aquas are right up my alley. That Burgundy/ Garnet, however, ruins the look for me. Bleah.

Emmaline Bags has a tutorial for installing an internal zipper pocket into a bag. I still like Sara’s video.

Books, Fabrics, Notions & Supplies

Stash Fabrics has a Kona themed wall calendar. Even if you no longer use a wall calendar, this one would be a great year long color inspiration piece.

Modern American Vintage has some beautiful tools. They make wooden point turners, seam rippers and Hera markers. Often wooden tools are over the top, but these are simple and gorgeous. They also have an IG account.

I found a shop called Mashe Modern. They have a great selection of fabrics and great prices. It is a great addition to the list of shops from whom I should not buy more fabric. < LOL >

I am thinking about getting the block-of-the-month option for making Tula’s Butterfly quilt. Petting Fabric has two great selections of fabric. remember when I talked about being super busy? That is what is holding me back.

I am a huge fan of color cards. They are very useful for online shopping and for identifying, especially, solids when they show up on your doorstep.  I have been using mine to differentiate between the Free Spirit solids, Sweet Pea and Freesia, in my Pink Door La Pass BOM fabrics. It comes in very handy for such things. Hawthorne Supply has a good selection.

Media and Inspiration

I haven’t been surfing much lately, so I missed some of Julie’s posts over at High Fiber Content. Take a look at Friend Julie’s August Cornucopia for more, interesting links.

Do you like mid-century modern designs? Carrie P pointed me to a site with a ton of mid century modern designs. They really should open a Spoonflower shop and make the designs available in fabric and wallpaper, etc.

I follow Sara Lawson of Sew Sweetness on Facebook, as you know since I can’t shutup about her, and get to see the creations of of her other followers. One is Stephanie and she has a great shop filled with bags. She uses lots of Tula Pink fabrics, if that is your jam. She showed some fabulous Daytrip Wallets, but they never made it to her shop.

The International Quilt Museum presented “Abstract Design in American Quilts at 50: Raising the Profile” with Dr. Jonathan Gregory on June 9. The video is now on YouTube

Exhibits & Shows

Did you attend PIQF? I didn’t for the first time in, maybe, 15 years. I have scaled back my attendance in recent years, but have always gone. I wasn’t up for dealing with the crowds this year. Apparently, there were no crowds. I’d love to hear your thoughts about the event, if you attended.

Other Artists

One of the things I enjoy about fiction set in England is how well versed the fictional British are with poetry. I think they are often assigned poetry in fictional schools and it carries over into their fictional lives where they quote it at appropriate times in their fictional days. I read Shel Silverstein poetry to my son and he demanded more and more. Beyond that and a few long poems in high school, I am woefully under-educated in poetry.  One of my exceptional nieces (I have a few), Michaela, is a talented performer. She has recently started a YouTube channel where she reads poetry.

The County Library System is creating a makerspace and they need supplies. Take a look at their wishlist and buy something or send them a gift card. I hope they get the Cricut so I can try it out.

Melody Johnson of the Chicago School of Fusing fame is creating some really great knitting lately.


26 Projects 2021 #10

Because of the workroom redo I am only making progress on small projects. It doesn’t feel like I am making much progress, but I have to count the progress in the workroom as progress even though it mostly doesn’t involve fabric directly.

Finished 2021 Quilt Projects

Finished 2021 Small and Non-Quilt Projects

This category covers bags, toys, aprons and knitting as well as other non-quilt projects.

Looking at all of these accessories and small projects makes me excited to make more. I just don’t have time to do as much sewing as I want. 🙁

Doing Good

In Process or To Make
The ‘In Process’ is used to denote projects on which I am actively working or are on the design wall waiting for me to stitch. I am continuing to try not to put away projects. I find putting a project away ensures I never work on them, because I just lose steam.

Quilts

  • The circle quilt is on the design wall, which is folded up in the YM’s room

Small Projects to Make or in Process

Most of my progress involves thinking or just cutting.

  • One Hour Basket for my stuff that tends to accumulate on the dining room table. I may switch to one of the Minikins projects or a Catch All Caddy for this purpose.
  • One Hour Basket for DH’s stuff that tends to accumulate on the dining room table. I may switch the pattern to one of the Minikins projects for this purpose.
  • Percheron Pouch is cut out, some interfacing is applied and the pouch is ready to sew
  • Retreat Organizer – another project from the Crafty Gemini Organizer Club, also on my list, but not yet started. Recently, I saw one of these made up and I am not so nervous about it
  • Superbloom tote using Hindsight fabric – not started
  • Tessuti Japanese Apron – cut out and ready to sew. I am figuring out how to make it reversible.
  • Ultimate Project Organizer – another project from the Crafty Gemini Organizer Club, also on my list, but not yet started
  • Ultimate Carry All Bag for me – I have the inside pockets as well as the front panel made. I am working my way through the exterior and hope to finish soon. FINISHED! See above.
  • Westchester shirt – this is a Crafty Gemini pattern. I bought the fabric at PIQF in 2018. I have the pattern pieces cut out and ready to sew. I was held up by the supply list which wanted a Jersey needle. SIL #2 and Mary C said that a regular knit needle was fine.

Handwork

I decided that some of my projects are in a different class because they are hand piecing or embroidery or beading. They take longer. Thus I created a new category and have moved some projects here.

Ready for Quilting

  • Nothing at the moment

In the Quilting Process

In the Finishing Process

  • Gelato – need to sew on the binding
  • Scrap Dash – need to sew on the binding

Still WIPs
I still have WIPs. Who doesn’t, after all? A project in the ‘UFO’ category means I am stalled. A nicer way of saying UFO is a WIP. The list is a lot shorter and the projects are newer, for the most part.

  1. Handbag Sampler – this is still the forgotten project. It should be on the UFO list. The blocks were teaching samples when I taught a sampler class some time before I started writing the quilt class sampler tutorials. I found one block recently, but otherwise I actually don’t know exactly where the blocks are hiding. I crawled up in the far reaches of my fabric closet to see if I could find them and they weren’t where I thought. I am sort of mystified as to where they could be. I haven’t even found a picture of all the blocks. Sad.
  2. Lobster – I think I might make this into a tablerunner for the buffet. I think that will be a good and fun use of the piece even if the colors aren’t quite right for the dining room.
  3. Pies and Points from 2016 Victoria Findlay Wolfe class. The last time I worked on it was when Julie and I had a playdate in April 2018. I brought this piece with me so I could cut more elements (Julie has a Sizzix). I lost my excitement about this piece shortly thereafter, but I am ready to work on it as soon as I get my design walls back up.
  4. Pointillist Palette #4: Fourth is a series of 6 quilts; needs tiny square patches sewn together. No progress.
  5. Self Portrait: started in 2006 at a class at Quilting Adventures in Richmond, Virginia. I am still stalled on this again. As one of my oldest (I am pretty sure) UFO, I put it on my blog and out into the Twitterverse and Diane suggested that I not consider this as a self portrait. I think that strategy is a great idea. I am now trying to think of a new persona for her.
  6. Serendipity Lady – I am still planning to take this piece to be framed.
  7. Who Am I? – This piece is still languishing. Perhaps having a larger design wall will help me regain momentum. The amount of satin stitching I was facing was a problem until I thought of BIAS TAPE. I am going to make the words with bias tape, perhaps different widths, then I won’t have to sew the satin stitching. Red Scribbles and Friend Julie helped me come up with this solution. Now I just have to do it!