More Pies & Points

Pies & Points More Progress

I worked really hard over the past weekend to get this quilt pieced and off the design wall. I didn’t succeed, but made good progress.

As I worked on this quilt, I realized that I was more interested in working with Victoria Findlay Wolfe than this actual quilt. I will finish it — I am excited about getting this quilt off my UFO list, but I am not excited about the project in general.

There are some things I like about it. I like practicing curves and I am enjoying the pinks.

I started another quilt (stay tuned for photos) as leaders and enders about which I am much more excited and I am eager to get busy with that one.


La Passacaglia Month 12

Month 12 arrived and that means 6 months to go after this.

La Passacaglia Month 12 fabrics

At first glance I was not that excited about the fabrics this time. Lots of Tiny Beasts and, as I have said, I do not want animals looking at me for eternity. Also, I have had enough green. I want more turquoise. I need to balance those feelings with “I already bought the fabric and need to use it.” I took a good look to see what I wanted to change out with the fabrics.

As I looked closer, I found that there were some possibilities with most of the fabrics, though there are a couple I will change out.

Stag fabric in fussy cut mirror

First I got out the fussy cut mirror** to look at different aspects of the stag fabric. This required me to take a good look at the fabric. I found that there were two kinds of orchid type flowers I could use instead of the stag’s head.  The first one was ok, but the second was very appealing. I particularly like the middle.

I am still cutting, so I haven’t done it with all the ‘suspect’ fabrics, but will.

I also decided I would use the ombre little fluffy clouds/sunset (PWTp 177-Dragonfruit from the Daydreamer line) fabric for the middle of the stars. Pink Door had white for those centers. I want the whole star to be one color.

The racoon fabric from Tiny Beasts will probably go as it is basically a tone-on-tone if I eliminate the racoon motif. Same with the squirrels, though there are some interesting vine patterns that may work for fussy cutting. However, they are green.


**Obviously, you should shop at local quilt shops. However, if you are too busy or can’t find what you need at quilt shops, I use affiliate links and may be paid for your purchase of an item when you click on an item’s link in my post. There is no additional cost to you for clicking or purchasing items I recommend. I appreciate your clicks and purchases as it helps support this blog.

Happy Independence Day!!

For those of you who celebrate, Happy Independence Day! For those of you who do not celebrate, have a great day.

Happy 4th!
Happy 4th!


My wish, again, for this 4th is that we return to kindness, civility and working together to make a better future for our children. I have wished this before for various reasons. Post pandemic, I hope it will be easier to incorporate some of these traits into our lives as a society.

Pies and Points Progress

Pies & Points blocks - June 2022
Pies & Points blocks – June 2022

I have made a few more blocks. I don’t want to lay the quilt out symmetrically like in the class handouts. I want the eye to follow the lines around the quilt and find some surprises. For now, the surprises will be the Pie blocks placed strategically around the quilt.

Pies & Points blocks -problem

I don’t know if that idea will work. As you can see from the arrow, the blocks to do not fit together in all directions.

It isn’t that I couldn’t piece those pieces together and I may still do that. I want to consider all my options. This is one of those design challenges.

Various & Sundry 2022 #7

Admin

I updated the Quilt Class page to include more about my teaching. If you want to take a class with me check that page.

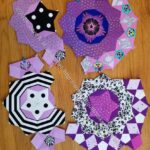
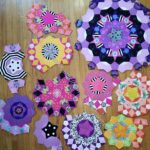
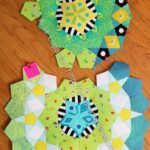
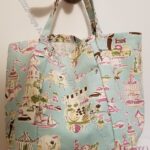
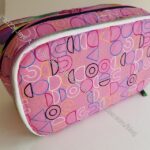
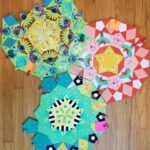
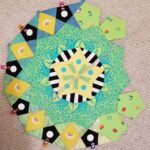
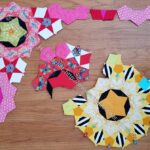
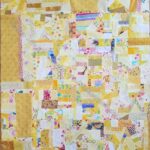
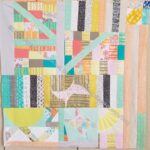
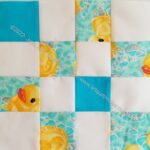
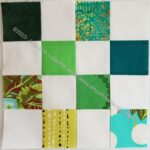
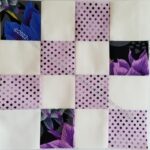
I also updated the Minikins page. I love looking at that page, because I am always amazed at how many of the Minikins patterns I have made. I have not made all by any stretch, but I have made a lot.

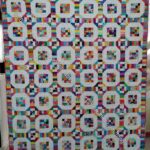
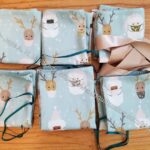
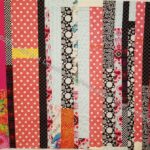
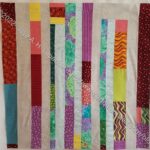
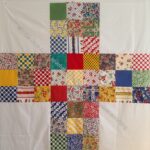
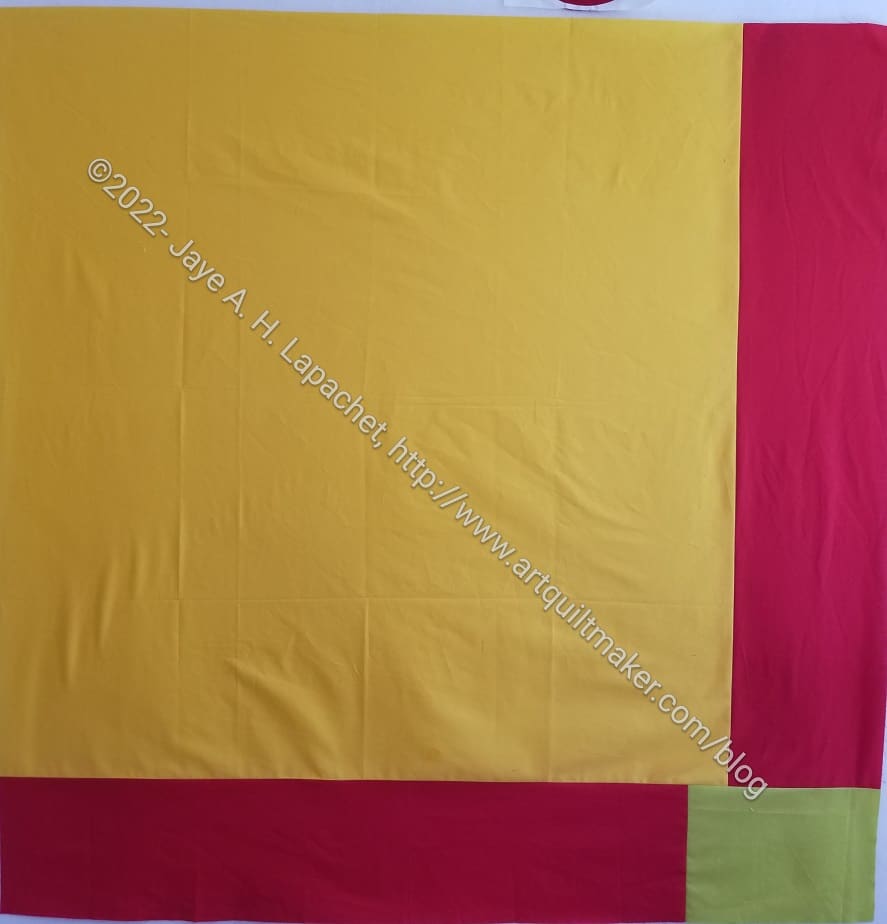
I made another Ends donation quilt so that page includes the most recent quilt as well.

Projects, Classes, Patterns & Tutorials

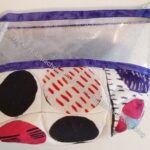
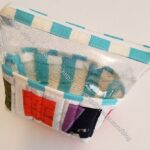
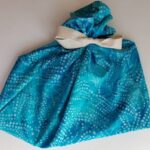
Natalie from Sew Hungry Hippie has a tutorial on sewing with vinyl. Have you seen her aqua glitter webbing? I am forcing myself to use the webbing I have then will find a pattern and get some of this. It is so fun! It also comes in other colors.

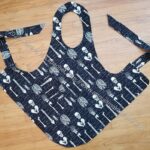
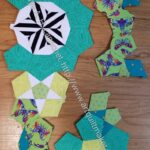
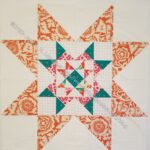
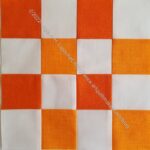
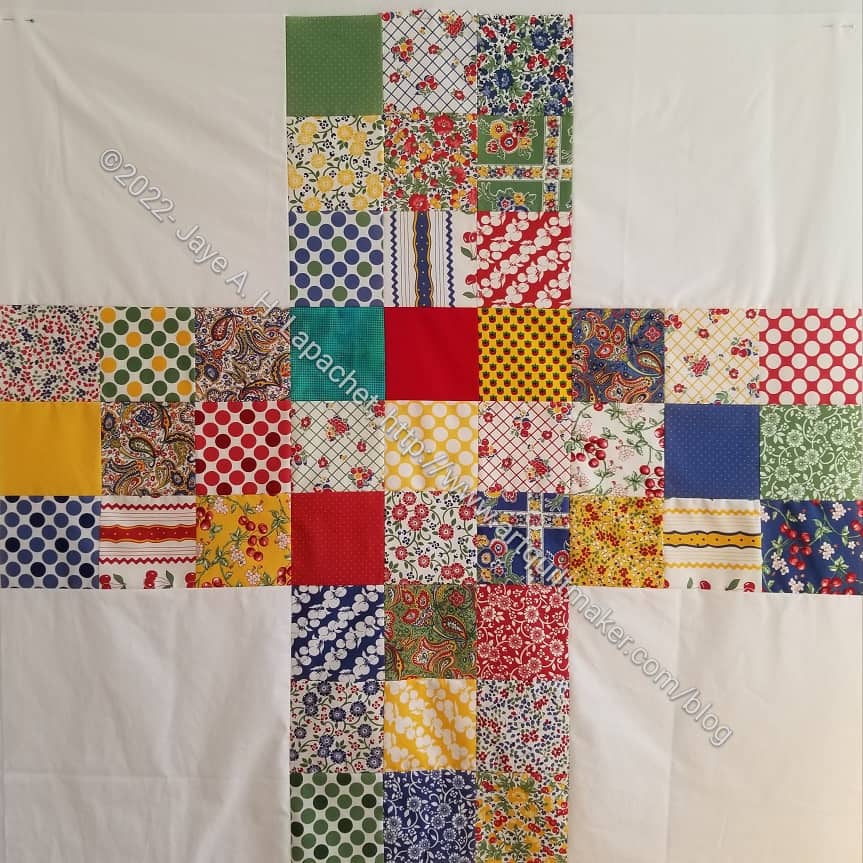
I am really disappointed that anyone would need a pattern for this simple Sawtooth Star quilt. If you take a class from me, you might need a kit because the fabrics would be hard to put together without one, but you will be able to make this in your sleep. No pattern required. –>Please note that I am not against independent quilt designers creating patterns and I am not against fabric companies giving away free patterns. I am against not learning quiltmaking in a way that allows everyone to parse a quilt design.

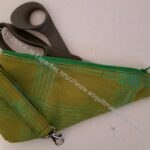
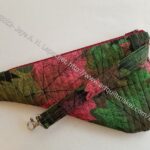
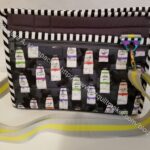
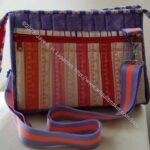
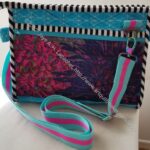
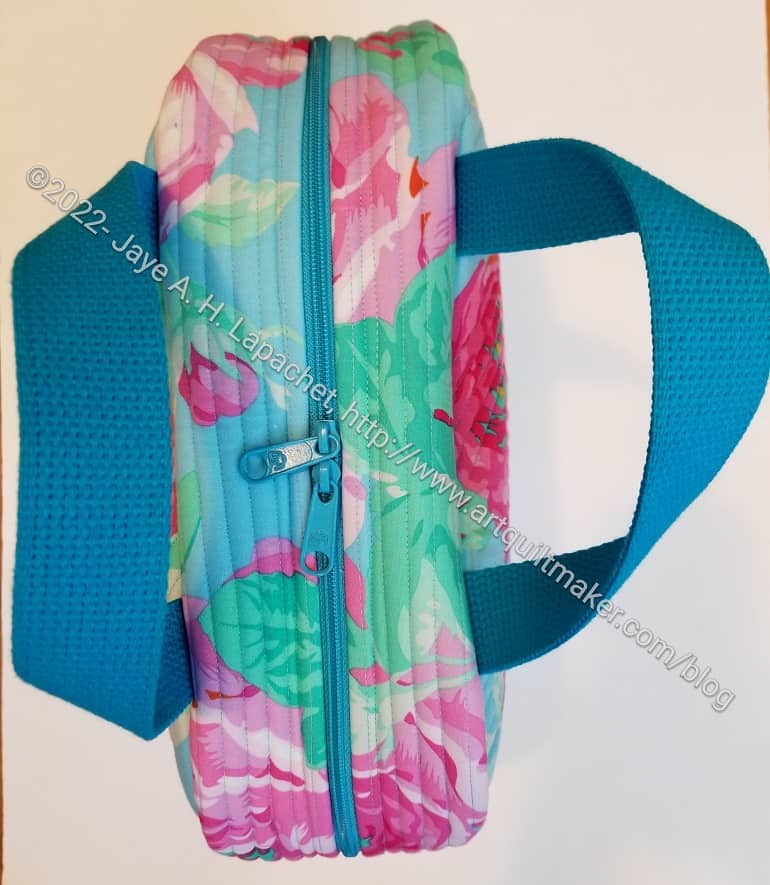
Natalie from Sew Hungry Hippie has a tutorial on rolled handles for a bag. This technique uses vinyl tubing (from the hardware store) and foam, like Soft & Stable** or Bosal In-R-Foam**.

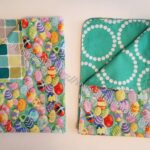
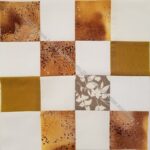
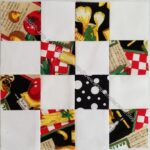
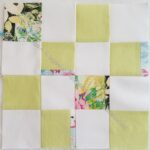
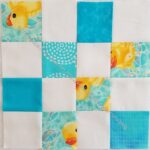
My mom wants to make a quick quilt as a gift. We discussed the various ‘Disappearing’ patterns like Disappearing Nine Patch and Disappearing Four Patch. We looked at the versions I have made, like the Food Quilts and the Disappearing Pinwheel. I found this tutorial for a Disappearing Four Patch for her and thought it showed how to make the pattern clearly.

Have you seen the Bucket hats that everyone seems to be making? They seem to be particularly popular with Kaffe fans. Natalie from Sew Hungry Hippie made a video tutorial with a free pattern link, if you want to make one as well.

Tools, Books, Fabric, Notions & Supplies

I heard about Got Interfacing. When I went to the site, it looked familiar and I wondered if I had shared here before. They call it a one stop shop for interfacing. I’ll definitely have to remember to look there when I need SF101 or a bolt of foam. Looks, however, like a UK/Canada/Aussie site.

There has been some discussion in my guild about the Oliso mini iron. I received one as a gift from Friend Julie with its own little case. Other mini/travel irons have been discussed including the Steamfast travel iron**, which got great reviews.

Articles, Tips and Other Information

Friend Julie has a great tip for storing your needles.

She has also posted her monthly Cornucopia post with lots of interesting media and tips.

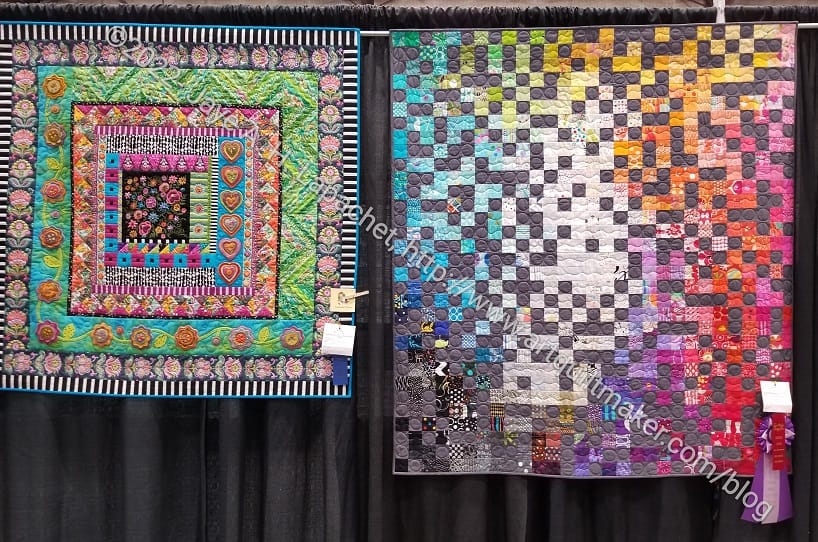
Exhibitions and Inspiration

The Tanforan shopping mall in nearby San Bruno has provided SAQA space for the Prism Play exhibit based on Joen Wolfrom’s 3-in-1 Color tool. This is a tool I recommend for my students. The post about the exhibit shows a great space.

The show will be at the Peninsula Museum of Art
May 20 – July 17, 2022
The Shops at Tanforan, Space 204
1150 El Camino Real, San Bruno CA 94066

I love this idea. I think malls that provide unoccupied spaces for art will get shoppers that may not otherwise visit the mall. Nancy and I have been kicking the idea of spaces around.


**Obviously, you should shop at local quilt shops. However, I use affiliate links and may be paid for your purchase of an item when you click on an item’s link in my post. There is no additional cost to you for clicking or purchasing items I recommend. I appreciate your clicks and purchases as it helps support this blog.

26 Projects 2022 #6

The two latest donation tops/backs put me back in the black for fabric used this year. Yay! I am going to have some time off soon, so I plan to finish some of my UFOs in order to get even further into the black. La Pass Month 12 is coming so I need to finish some more projects so that fabric doesn’t put me back into the red.

Finished 2022 Quilt Projects

Finished 2022 Small and Non-Quilt Projects

This category covers bags, toys, aprons and knitting as well as other non-quilt projects.

Doing Good

In Process or To Make
The ‘In Process’ is used to denote projects on which I am actively working or are on the design wall waiting for me to stitch. I am continuing to try not to put away projects. I find putting a project away ensures I never work on them, because I just lose steam.

Quilts

  • The circle quilt is on the design wall waiting for what comes next
  • Pies and Points from 2016 Victoria Findlay Wolfe class. The blocks are up on the design wall and I have made a few more. I am actively working on this. It is the first of the UFOs to revert to a WIP and I am looking forward to getting it off my To Do list.
  • I have my Orange You Glad blocks back and will be sewing on the last circle pretty soon.

Small Projects

Most of my progress involves thinking or just cutting.

  • One Hour Basket for my stuff that tends to accumulate on the dining room table. I may switch to one of the Minikins projects or a Catch All Caddy for this purpose.
  • One Hour Basket for DH’s stuff that tends to accumulate on the dining room table. I may switch the pattern to one of the Minikins projects for this purpose.
  • Retreat Organizer – another project from the Crafty Gemini Organizer Club, also on my list, but not yet started. Recently, I saw one of these made up and I am not so nervous about it
  • Rose Petrillo bag – I found the pieces for this bag cut out, but not sewn.
  • Superbloom tote using Hindsight fabric – not started
  • Ultimate Project Organizer – another project from the Crafty Gemini Organizer Club, also on my list, but not yet started
  • Westchester shirt – this is a Crafty Gemini pattern. I bought the fabric at PIQF in 2018. I have the pattern pieces cut out and ready to sew. I was held up by the supply list which wanted a Jersey needle. SIL #2 and Mary C said that a regular knit needle was fine. We may start a garment sewing group in the guild. I could use the support.

Handwork

I decided that some of my projects are in a different class because they are hand piecing or embroidery or beading. They take longer. Thus I created a new category and have moved some projects here.

  • English Paper Piecing Project– half hexies – I worked on this project again while I was waiting for La Pass Month 11 to arrive. I need to lay it out and figure out the bottom so I can put the border pieces on
  • La Passacaglia – I am up to date on this project and waiting for Month 10 to arrive.

Ready for Quilting

  • BAMQG IRR

In the Quilting Process

  • BAMQG Improv Round Robin – The quilt is ready to be sent to Colleen. I like the look of Big Stitch, but I have enough handwork and wasn’t enjoying working on it. I am kind of shocked at how much I got done. I do feel some regret at ripping out the completed stitches.
  • The Tarts come to Tea – no recent progress,but I did pull it out to take a look at what I had done. I was thinking that I could rip out the stitching, but I have done a lot and the stitching is pretty good. I didn’t rip anything out and will get busy on at it again at some point.

In the Finishing Process

  • Nothing at the moment

Still UFOs
I still have UFOs. Who doesn’t, after all? A project in the ‘UFO’ category means I am stalled. A nicer way of saying UFO is a WIP. The list is a lot shorter and the projects are newer, for the most part.

I am annoyed that some of these are still WIPs. I just need to work on them!

  1. Handbag Sampler – this is still the forgotten project. It should be on the UFO list. The blocks were teaching samples when I taught a sampler class some time before I started writing the quilt class sampler tutorials. I found one block recently, but otherwise I don’t actually know exactly where the blocks are hiding. I crawled up in the far reaches of my fabric closet to see if I could find them and they weren’t where I thought. I am sort of mystified as to where they could be. I haven’t even found a picture of all the blocks. WTH?
  2. Lobster – I still want to make this into a tablerunner for the buffet. I think that will be a good and fun use of the piece even if the colors aren’t quite right for the dining room.
  3. Pointillist Palette #4: Fourth is a series of 6 quilts; needs tiny square patches sewn together. No progress.
  4. Self Portrait: started in 2006 at a class at Quilting Adventures in Richmond, Virginia. After a brief burst of inspiration, I am stalled on this again. As one of my oldest (I am pretty sure) UFOs, I put it on my blog and out into the Twitterverse and Diane suggested that I not consider this as a self portrait. I think that strategy is a great idea. I am now trying to think of a new persona for her.
  5. Serendipity Lady – I am still planning to take this piece to be framed. It might need a bit of quilting first.
  6. Who Am I? – This piece is still languishing. Perhaps having a larger design wall will help me regain momentum. The amount of satin stitching I was facing was a problem until I thought of BIAS TAPE. I am going to make the words with bias tape, perhaps different widths, then I won’t have to  satin stitch everything. Red Scribbles and Friend Julie helped me come up with this solution. Now I just have to do it!

June Donation Blocks

I got back on the donation block bandwagon this month as I was finishing up the Ends n.14 (Typewriter) donation top. I didn’t make many, but every little bit helps, right?

Sunset Bag Finished

Sunset Project Bag Finished (from top)

I finished the Sunset Project Bag not long after my last post. I like the shape and how well it stands up. 

The fabric is one I unearthed when I was looking through my fabric for the correct colors for pieces for Orange You Glad. I thought I had used up all of this old Philip Jacobs fabric. Even though it doesn’t match my Take a Stand bag or my A Place for Everything v.2.0 bag, I like the way it came out. The fabric seems cheeful and light to me.

I really like the way the zipper came out. It works as expected. I was a little disappointed in the zipper on the my Take a Stand bag. It just seems weird to use.

I fussy cut the front and back panels to take advantage of the beautiful roses. The yardage I have left now looks a bit like Swiss cheese, but I am more interested in a good looking bag than non-Swiss cheese fabric.

I would have preferred pink or light blue handles, but I don’t think the darker turquoise looks bad. The handles came from some cotton webbing I have had around for a long time. It was time to use it.

Sunset Project Bag: inside full

The inside came out particularly well. The True colors fabric I used looks great. I thought that I would want to save it for something special, but what? I don’t have a lot of it left, but I decided to use something that would make me happy when I opened the bag and now I am really glad I did. I need to remember to use the good fabric.

As you can see the bag opens flat. Vanessa from Crafty Gemini uses this bag for knitting (or maybe crochet?) projects. Opening flat provides good access to the contents. With balls of yarn, however, they might roll away if the bag was opened flat.

Sunset Project Bag: inside mesh pocket detail

The mesh pocket works well and will allow me to see what is inside.  The pocket is a good size, I think. I wonder if there are other pockets I should have added, but I think just tossing in a pouch with additional supplies will work. What are pouches for anyway?

Sunset Project Bag: inside binding detail

The other side has no pocket, but you can see that I had to bind the raw edges on the inside to cover them. I machine sewed one side of the binding, then hand sewed the other. It wasn’t as much of a hassle to hand sew this bag’s binding as it was to sew the binding on my Take a Stand bag or my A Place for Everything v.2.0 bag. I still stabbed myself several times. One of the risks.

I am struggled with the finishing. I like to poke out the corners and make the bag nice and finished looking. In this case, I have rolled the seam joins, I have also pressed them and poked them out. Nothing I have tried will get them all the way out. I am not sure why, but maybe the binding since it is on the back of the joins.

I think it came out pretty well, though there are some things I would like to change.

Orange You Glad Piecing Near the End

Bullseye: Cutting the Last Circles

I am waiting for my backgrounds to be returned. Julie has them finished and I will get them when we meet for lunch.

I cut these squares as I was cutting the backgrounds. I have no idea if they will work after the other two have added their stamp to my backgrounds. However, they are a start.

Sunset Project Bag Progress

I spent some time over the weekend working on the Sunset Project Bag. As you saw, I was ready for assembly, after getting everything cut and quilted. In my mind, at least, I was ready for assembly. As I found out, I had more prep (prep plus?) to do.

Sunset Project Bag: Front panel

First, I had to add the mesh pocket. Generally, this is no problem, but I immediately found a problem: my beautiful quilting would be ruined. Ok, ruined is a little bit dramatic, but one of the lines of stitching needed to keep the mesh pocket in place would go through and show on the front. That line would not fit in with my previous diagonal lines. 🙁

Sunset: mesh pocket
Sunset: mesh pocket

There was no way out. I had already quilted what I had quilted, so I just had to move on. I know that the Muggles won’t know.

Sunset Project Bag: mesh pocket detail

The line of stitching across the top of the mesh pocket is the area that shows through

Note to self: if I make this again, use horizontal lines. I do think the diagonal lines look nice.

I will say that the mesh I chose goes really well with the pink and turquoise True Colors fabric I used on the inside.

Sunset: Out of place quilting line

You can see how the top line of stitching now shows through on the front. Sigh.

Fortunately, it is only one line not the top stitching for the other parts of the zipper assembly.

I did think about what I could do to hide the line, but I couldn’t think of anything that didn’t require remaking the front panel or unpicking a lot of stitching.

Sunset Project Bag: main zipper end detail

In order to assemble the bag, I had to make the gusset into a loop. I have done that before. It isn’t difficult, though the detail of the zipper end was something I hadn’t done before.

Sunset Project Bag: gusset and handles detail

I should have used the True Colors fabric, but I think it looks fine. Also, the way the raw edges are enclosed within the zipper are very clever. I had to watch the video to completely understand it. I don’t always watch all the steps in the video, but I usually go through a few of the steps and the videos are always helpful.

The handles are attached to the gusset, which I thought was a good idea. I had the opportunity to sew over them several times as I completed the bag.

I also added a piece of vinyl to the bottom, now incorporated into the gusset, to keep the bottom clean when I use the bag. I wanted to try that technique after seeing it in a Tula Pink Tuesday video. I only used the vinyl for the bottom, not for the whole bag. It was sticky on the bed of the machine, as is usual for vinyl. I am out of practice with vinyl and needed to reorient myself to sewing with vinyl.

I struggled with final assembly. The bottom corners had a bit too much fabric in them for me. I wonder if I could round the corners to make the assembly easier. I found that to be a real help with the Andalusian pouch, the Andalusian does not have a gusset.

Pies & Points Returns from the UFO pile

I took a class from Victoria Findlay Wolfe at QuiltCon about 1, 000 years ago (well, 2016). I think I mentioned that every time I rewrite my quilt to do list the same projects are listed as UFOs. I decided that some of these are going to get finished. I backtracked a little and decided to work on one then see how it went. Of course, I want to finish them all, but every journey requires the first step. My first step is Pies and Points.

I have also been in desperate need of a quilt project. Why starting one or jumping back into one was difficult, I don’t know.

The first step for actually working on the project was positive. I found the project and all the pieces were in the same bag. Yay! I had been talking about this project to myself for a few days, so I feel happy that I actually did something.

Pies & Points blocks from class

The second step was positive as well. I put the blocks I have made (4) on the design wall and I still like them. The background might be a bit boring, but well see how things go after I make a few more blocks.

Sunset Project Bag

Last Autumn (sheesh! Has it been that long???), at the urging (temptress-ness) of Angela I joined the Crafty Gemini 8th Bag club. I liked the bags and some of the techniques I would learn, so it was a good idea. I tried to keep up, but cutting (which you know I dislike) really kept me from keeping up. I made the Flagler backpack and that was it.

Sunset Project Bag cut out and quilted

The Sunset Project Bag has been on my mind and I finally started it. Cutting, of course, takes me so long. I tried get into a Zen frame of mind about, but almost lost it when I realized I had to quilt a bunch of pieces, too. I started and then after four lines of stitching, I decided to vary the design to leave a 1.5 inch space between four lines of stitching. I really like the way that design turned out. I think it looks like I actually know how to design quilting designs rather than just wanting to get it over faster.

I just did straight line quilting horizontally along the gussets. I didn’t want to stop and start after 20 stitches over a 35 inch wide piece.

Sunset Project Bag - fussy cutting?
Sunset Project Bag – fussy cutting?

I lined up the pieces and noticed that it looks like I fussy cut some pieces to fit together well.

Those pieces don’t go together and I didn’t plan it, but it would be nice if they did.

I am in the process of sealing the edges of the quilted pieces and will be ready to start assembly soon. There aren’t very many pieces so I should be able to finish quickly. Fingers crossed anyway.

La Pass Month 11 Finished

Another month under my belt! Good thing, because I received the notice that Month 12 is about to ship.

La PassacagliaL Month 11 finished

This was a pretty easy month, though I did cut and re-cut fabric for some of the pieces a couple of times. I couldn’t decide what fabric to use to replace the Alice faces. I don’t want animal faces looking at me and I certainly don’t want Tula’s little sister as Alice looking at me for eternity!

Pink Door’s Sandra sent a new layout that shows all the rosettes we have made. I think Month 12 will use a lot of blue. Hooray!! I plan to add (substitute?) turquoise if there isn’t enough for me.


On a separate Life note. I know today is bad for women. Power has temporarily won. While we regroup:

Radiate Positivity
Radiate Positivity

American Jane Plus Donation Quilt

American Jane Plus Donation top

I left work early on Friday and spent the time sewing. I hadn’t worked on this project since May and wanted to get it done. I thought I could make a start.

As shown in the previous post, I had a bunch of pieces for this community quilt cut and blocks sewn together. I still really only needed to find one 5 inch square to finish the last block and put the quilt together.

I started rummaging through fabric and found a piece that would work fairly quickly. If charm packs would add 3 more squares I would be super happy. Of course, who knows if I will ever make a Plus quilt again?

American Jane Plus Donation back

Once I finished that last block and cut some background fabric, I was able to finish the top pretty quickly. I had time, so I went rummaging for fabric again. I wanted to find some pieces for the back. I was hoping for one piece, but my hopes were dashed. I found a large piece of yellow solid, but it wasn’t large enough so I added some red and green. I finished just as my DH texted to tell me he was coming home. Perfect!

I am going through my charm packs and trying to use the ones I like, but don’t think I will use for my own projects. As soon as I select one, I pull it out and start thinking about (or even deciding immediately) what I will make then I get busy. This one was inspired by one of my quilts that Joelle quilted. I saw it finished and thought “I should make another one of those”.

That one used the donation squares that Peggy requests, so it was smaller. This quilt is about 41×41 inches. Nice size.

Frankly, I almost never use charm packs so I don’t know why I buy them. Well, I do know. I want just a little bit of the fabric, so I buy a charm pack.

Charm packs make great Chubby Charmers. How many Chubby Charmers does one girl need? I have three already, after all. I have a Lintott Girls book, Layer Cakes, Jelly Rolls and Charm Quilts**, so I should look there to find some patterns I might like to make. I might make another HST Sawtooth Star quilt. I don’t think I am quite done with that pattern.


**Obviously, you should shop at local quilt shops. However, I use affiliate links and may be paid for your purchase of an item when you click on an item’s link in my post. There is no additional cost to you for clicking or purchasing items I recommend. I appreciate your clicks and purchases as it helps support this blog.

San Mateo County Fair 2022 Comparison

First place vs Second place

The quilt that won the blue ribbon in the category where I won second happened to be hung next to my quilt. The quilt that won is called Threads and is by Sara Guyol of San Mateo.

I like Sara’s quilt and the only reason I can think that her quilt is in the same category as mine is that they had to consolidate categories. Mine was entered into the Quilt top made by one person/pro quilted and the class was hand guided quilting – small quilt.

Sara Guyol's blue ribbon quilt -detail
Sara Guyol’s blue ribbon quilt -detail

I really think Sara’s quilt should have been in an embroidery category if there is an embroidered quilt category. Her quilt had a lot of Sue Spargo type embroidery on it. It was a really different style of quilt than my quilt. I think of the Fabric of the Year quilts as complex in design, but they are complex to design not to piece. As you know, there is a lot of moving of pieces around before the quilt gets sewn. Once everything is in place, the piecing is easy.

I don’t think the Fair really looks at design. Design is hard to judge, I know, but if they only look at technique, I will never win a blue ribbon. I am not angry about this. Sara’s quilt is amazing and I am pleased that she won. I’d love to meet her and wish there were a reception for the artists.