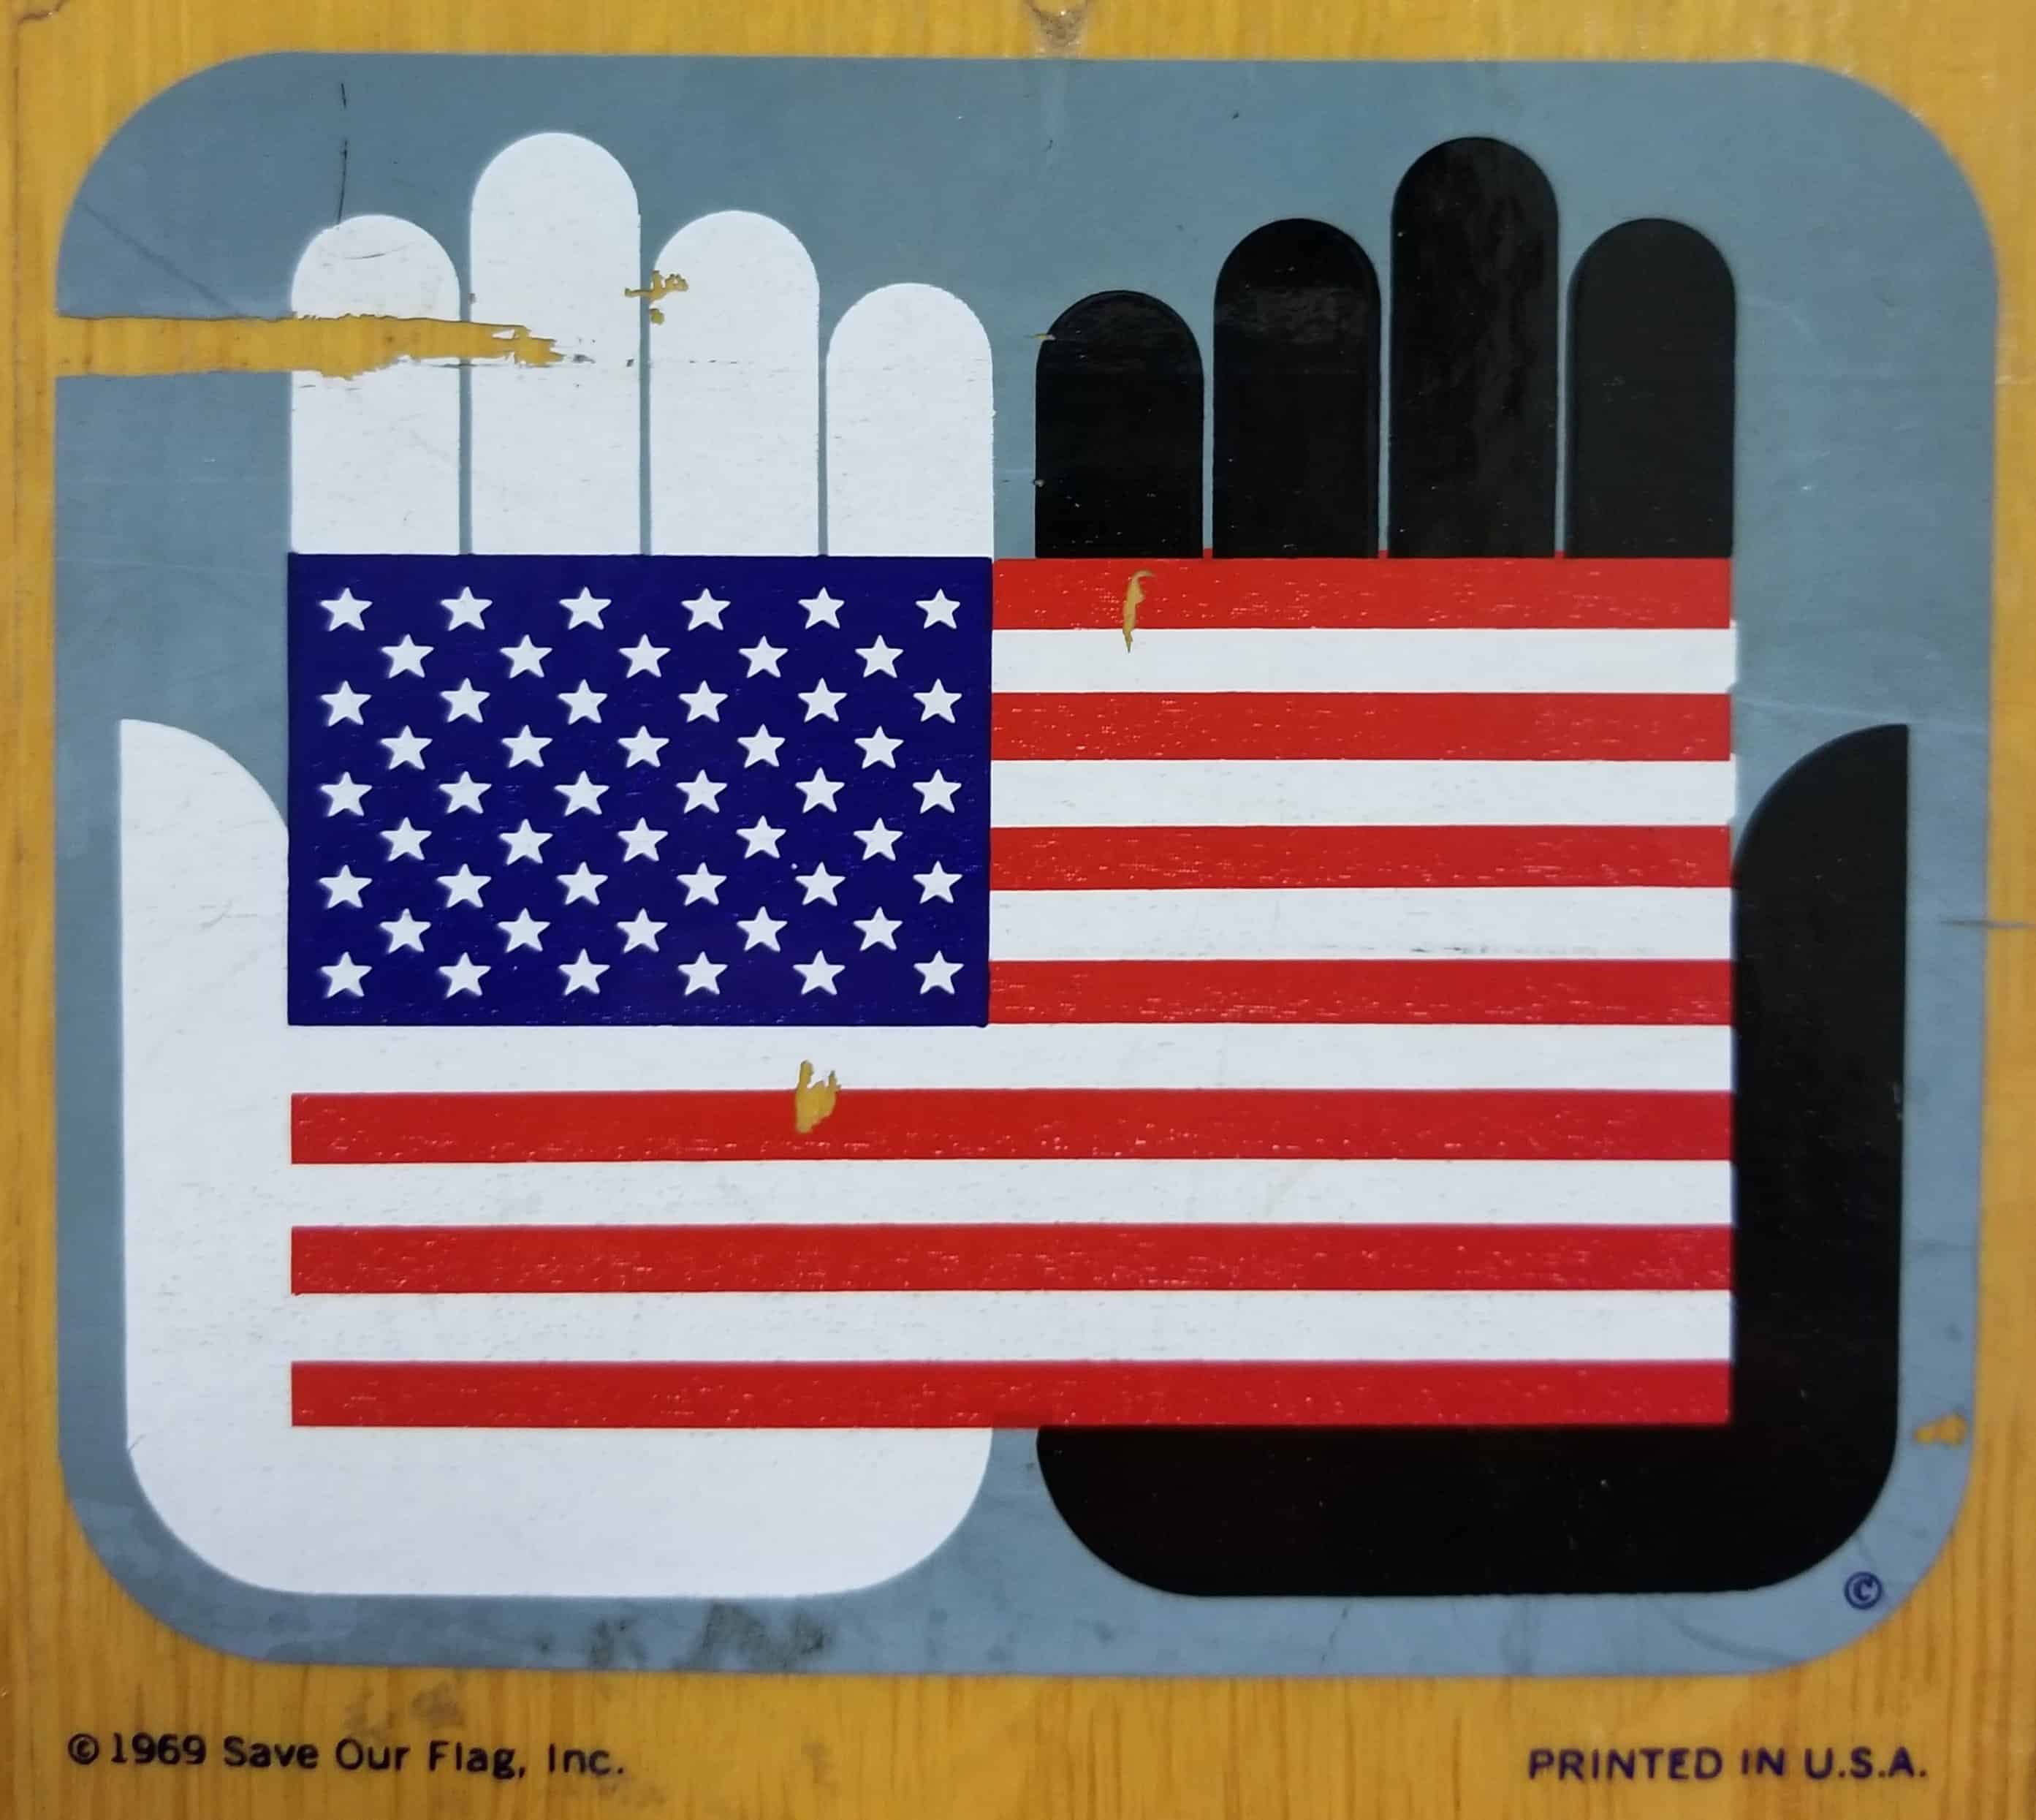
For those of you who celebrate, Happy Independence Day! For those of you who do not celebrate, have a great day.
My wish, again, for this 4th is that we practice kindness, civility and work together to make a better future for our children. I think, especially, in this pandemic time that we help others in the ways that we can.
**Yes, I used this same image last year and think it is even more appropriate this year.
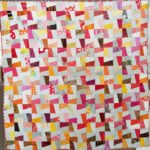
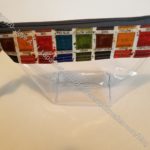
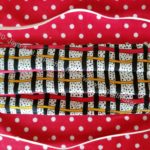
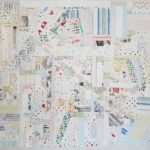
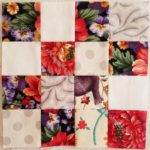
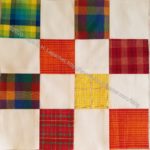
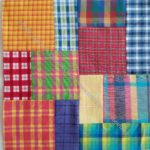
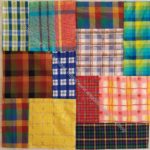
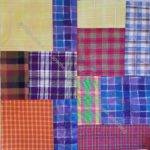
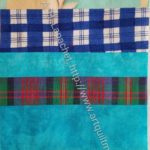
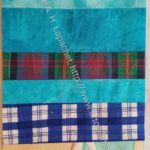
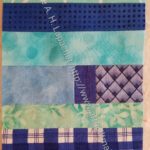
Work is closed for summer break this week. As a result, I worked like a demon all week and was able to finish the FOTY 2018 top and back. I didn’t need to finish it. Since I was taking quilts to Colleen today, I decided taking four quilts is better than taking three.
The quilt wasn’t difficult to piece since all the squares are 2.5 inches. The difficult part was keeping the pieces in order as I sewed. After I got pairs sewed together, I started using the opposite side of the quilt as leaders/enders and that made the process go faster. I also had a lot of time Wednesday to sew.
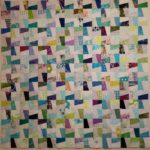
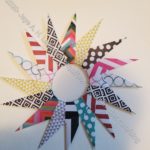
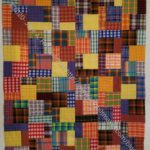
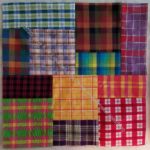
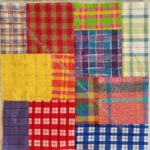
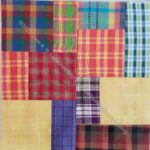
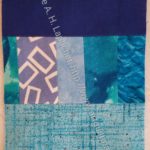
This isn’t exactly the way I imagined it to come out. I kind of wanted it to be more like Ellsworth Kelly’s piece. I think to achieve that, I needed more black.
Add the black has kind of reinvigorated my interest in this series. I might continue after FOTY 2019. Stay tuned.
I have bought more fabric, so I have lost ground on using 100 yards of fabric. I have used 38 yards net (76 total) so far this year. My numbers are going down, because I need to stop buying fabric!
In looking at some of the projects, especially the gifts, it seems like such a long time ago that I made them. I guess this is what people are calling ‘pandemic time’ when March had 5,8270 days, April had 8,322, May had 6,987 and June had 7,962.
Finished 2020 Quilt Projects
Despite adding quilt projects that have not yet been quilted to my fabric usage tally, I am not adding them to this section. This section will continue to be for completely finished quilts. I still only have two completely finished for the year, but now have 3 projects ready to go to the longarmer. This was my goal and I think any more will be gravy. Very exciting!
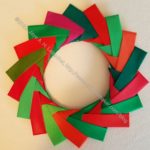
Finished: Warm Windmill
Cool Windmill top
Cool Windmill – finished March 2020 – I gave this quilt to its new owner and she was thrilled.
In Process
The ‘In Process’ is used to denote projects on which I am actively working or are on the design wall waiting for me to stitch. I try not to put away projects, because that will ensure I never work on them.
FOTY 2018 – I started piecing the squares together.
Small Projects to Make or in Process
Most of my progress involves thinking or just cutting.
One Hour Basket for organizing my decks of cards – Creative Strength, mindfulness, etc.
One Hour Basket for my stuff that tends to accumulate on the dining room table
One Hour Basket for DH’s stuff that tends to accumulate on the dining room table
Retreat Organizer – another project from the Crafty Gemini Organizer Club, also on my list, but not yet started
Ultimate Project Organizer – another project from the Crafty Gemini Organizer Club, also on my list, but not yet started
Officer gifts for January 2021 – have the pattern and the supplies. Need to start so these are ready and I am not scrambling at the last minute
Ultimate Carry All Bag – Bag-a-Long for BAM – I have the inisde pockets made and am struggling with the front pocket.
Handwork
I decided that some of my projects are in a different class because they are hand piecing or embroidery or beading. They take longer. Thus I created a new category and have moved some projects here.
Still WIPs
I still have WIPs. Who doesn’t, after all? A project in the ‘UFO’ category means I am stalled. A nicer way of saying UFO is a WIP. The list is a lot shorter and the projects are newer, for the most part.
FOTY 2019 – this is now on the list since 2019 is over and I have the squares, theoretically, ready to sew.
Handbag Sampler – this is still the forgotten project. It should be on the UFO list. Too bad I don’t have one. The blocks were teaching samples when I taught a sampler class the time before I started writing the quilt class sampler tutorials. I found one block recently, but otherwise I actually don’t know exactly where the blocks are hiding. I have an idea and still have to crawl up in the far reaches of my fabric closet soon and see if I can find them. I haven’t even found a picture of all the blocks. Sad.
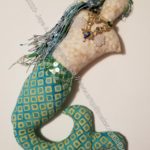
Lobster – I think I might make this into a tablerunner for the buffet. I think that will be a good and fun use of the piece even if the colors aren’t quite right for the dining room.
Pies and Points from 2016 Victoria Findlay Wolfe class. The last time I worked on it was when Julie and I had a playdate in April 2018. I brought this piece with me so I could cut more elements (Julie has a Sizzix). I lost my excitement about this piece shortly thereafter and still have to get it back. Thus, I had to move this to the WIPs area.
Pointillist Palette #4: Fourth is a series of 6 quilts; needs tiny square patches sewn together. No progress.
Serendipity Lady – I am still planning to take this piece to be framed.
Black and Red quilt – This project is creeping into my mind, so it might be up for work soon. The project originally came about because of two other projects. I made a whole bunch of bias tape as part of my failed attempt at doing the Mighty Lucky Club a few years ago. Another part of the inspiration came from my class with Tina of Little Blue Cottage fame. This was going to be for a nephew, but I think it will be for one of my SILs and BILs. I have rectangles cut and some bias tape ready. My next step is to sew the bias tape to the rectangles like pickup sticks. I don’t have any photos of this, so you’ll have to use your imagination.
Who Am I? – This piece is off my design. I have lost momentum, but I think that just has to do with the amount of satin stitching I am facing.
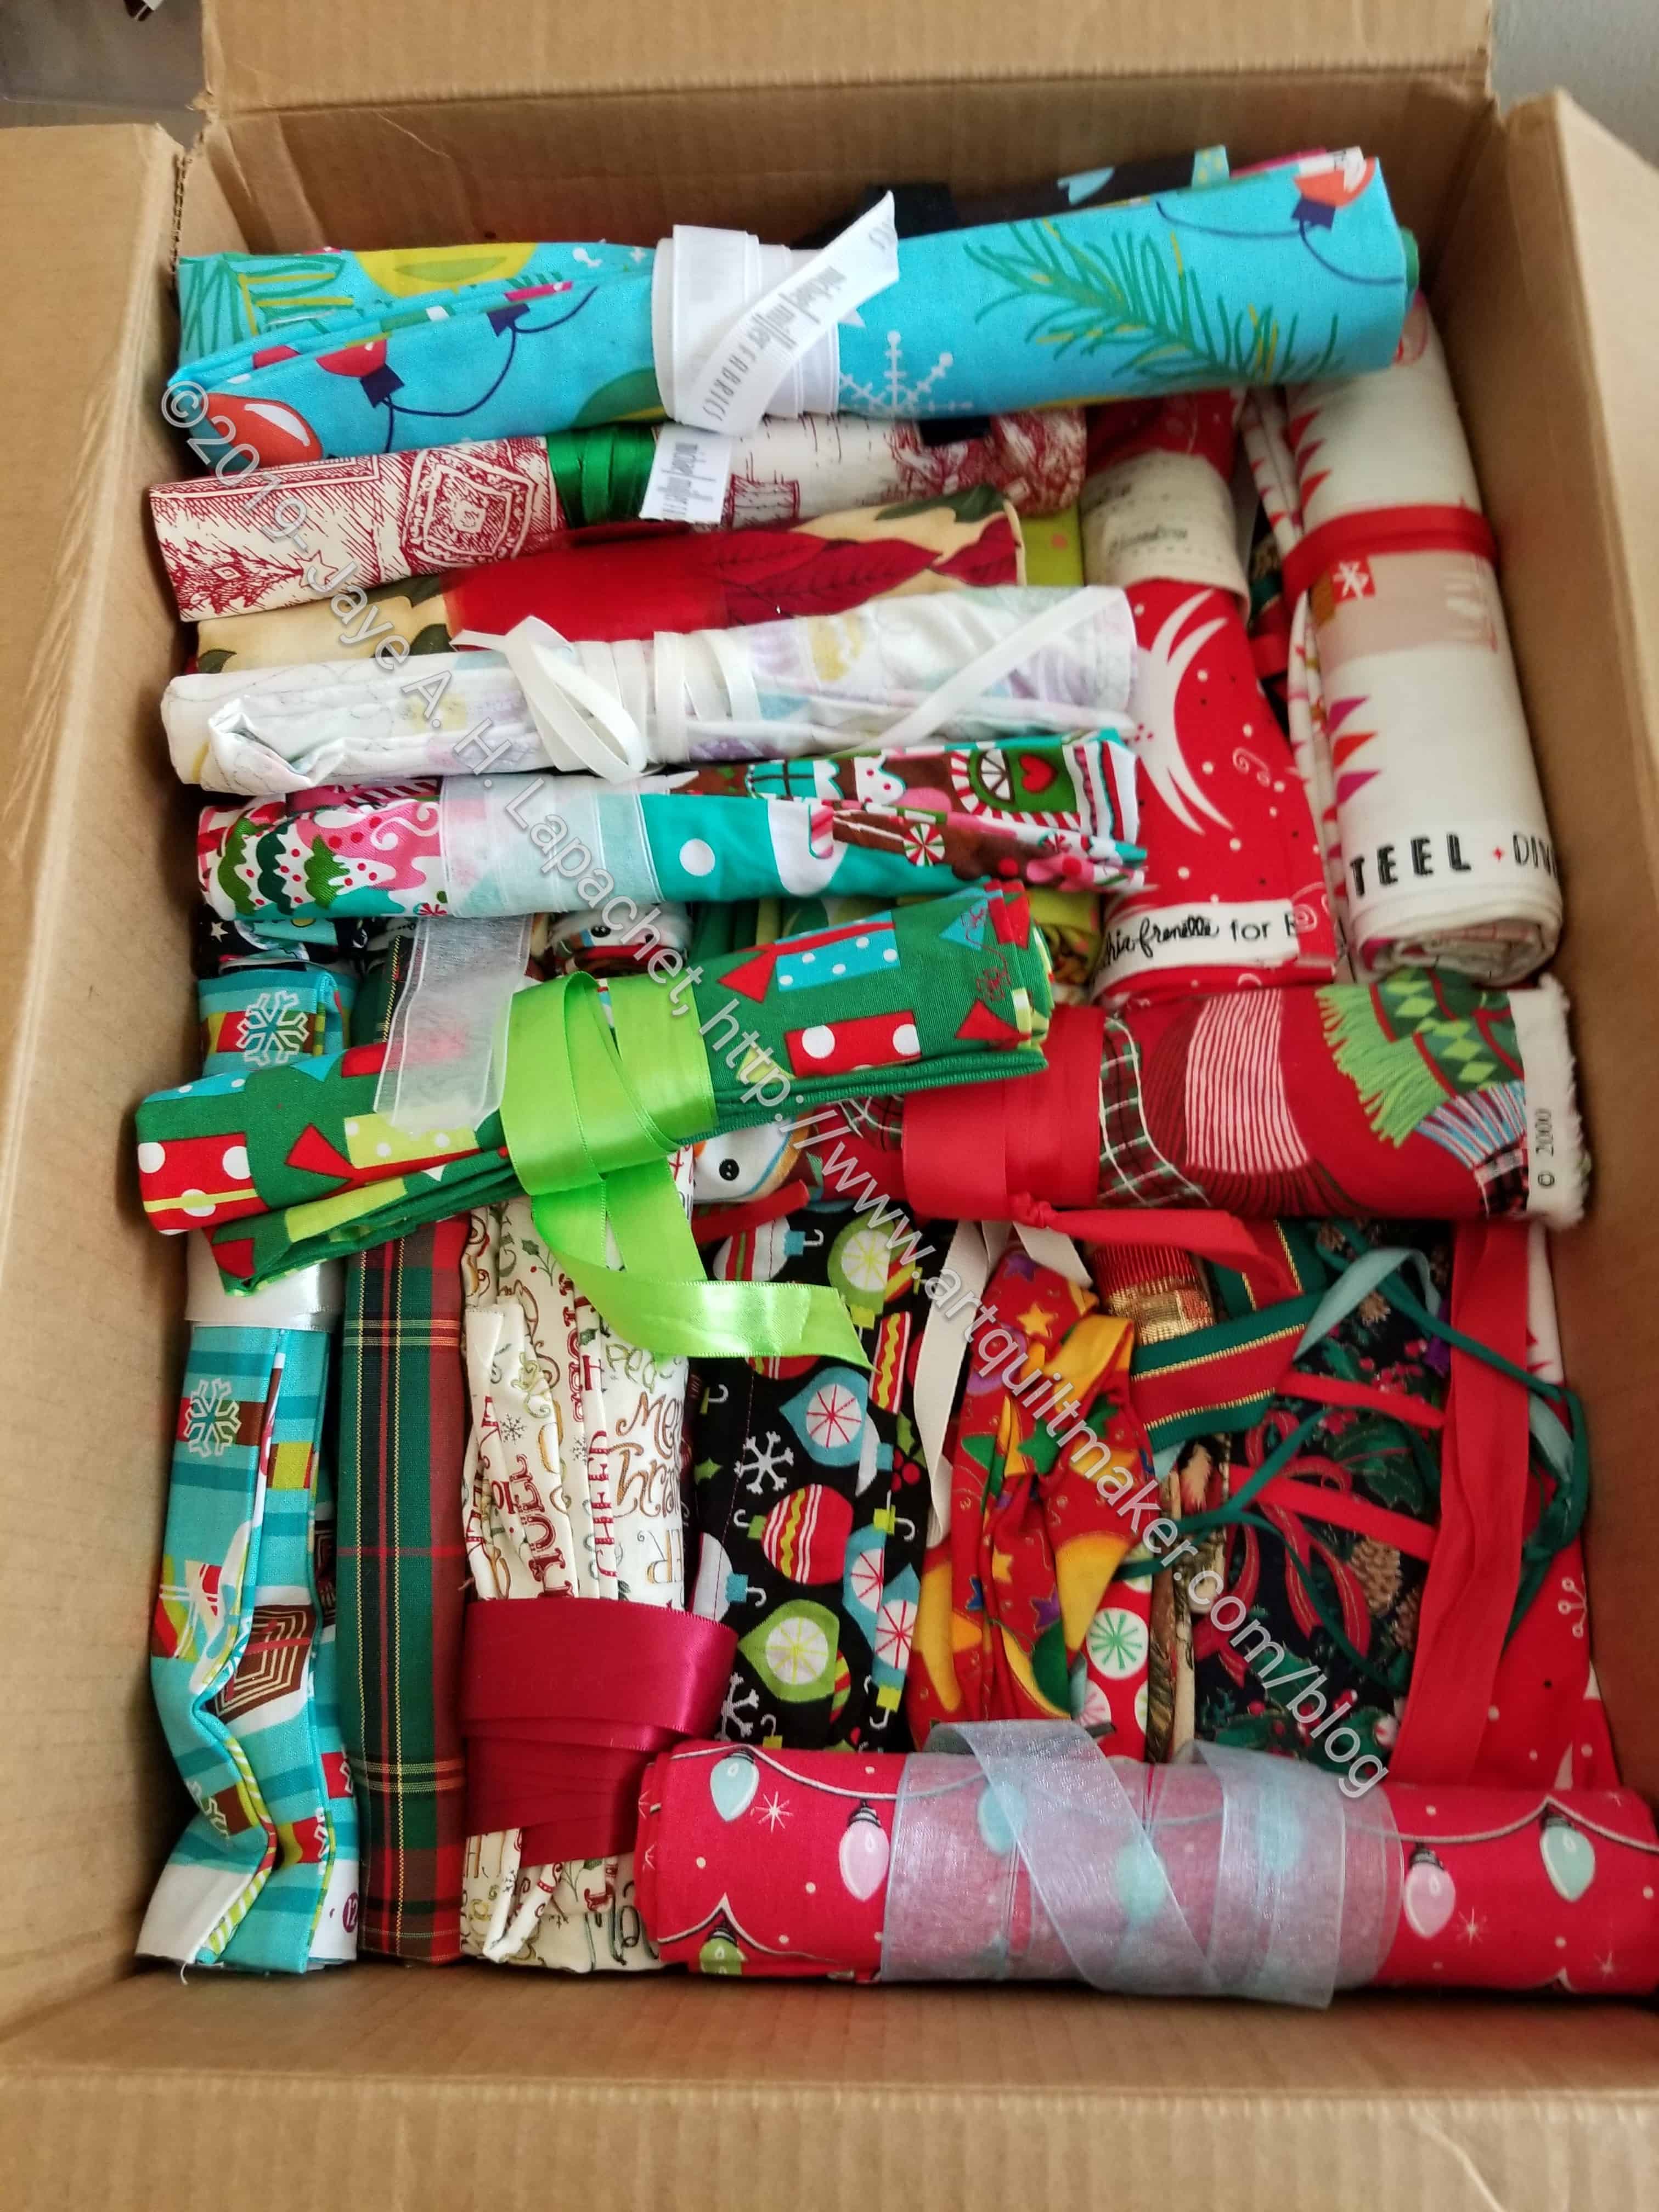
It is in July that new Christmas fabrics are generally released. This is a good time to talk about gift bags again.
December Gift Bags
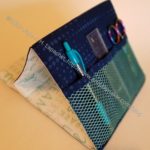
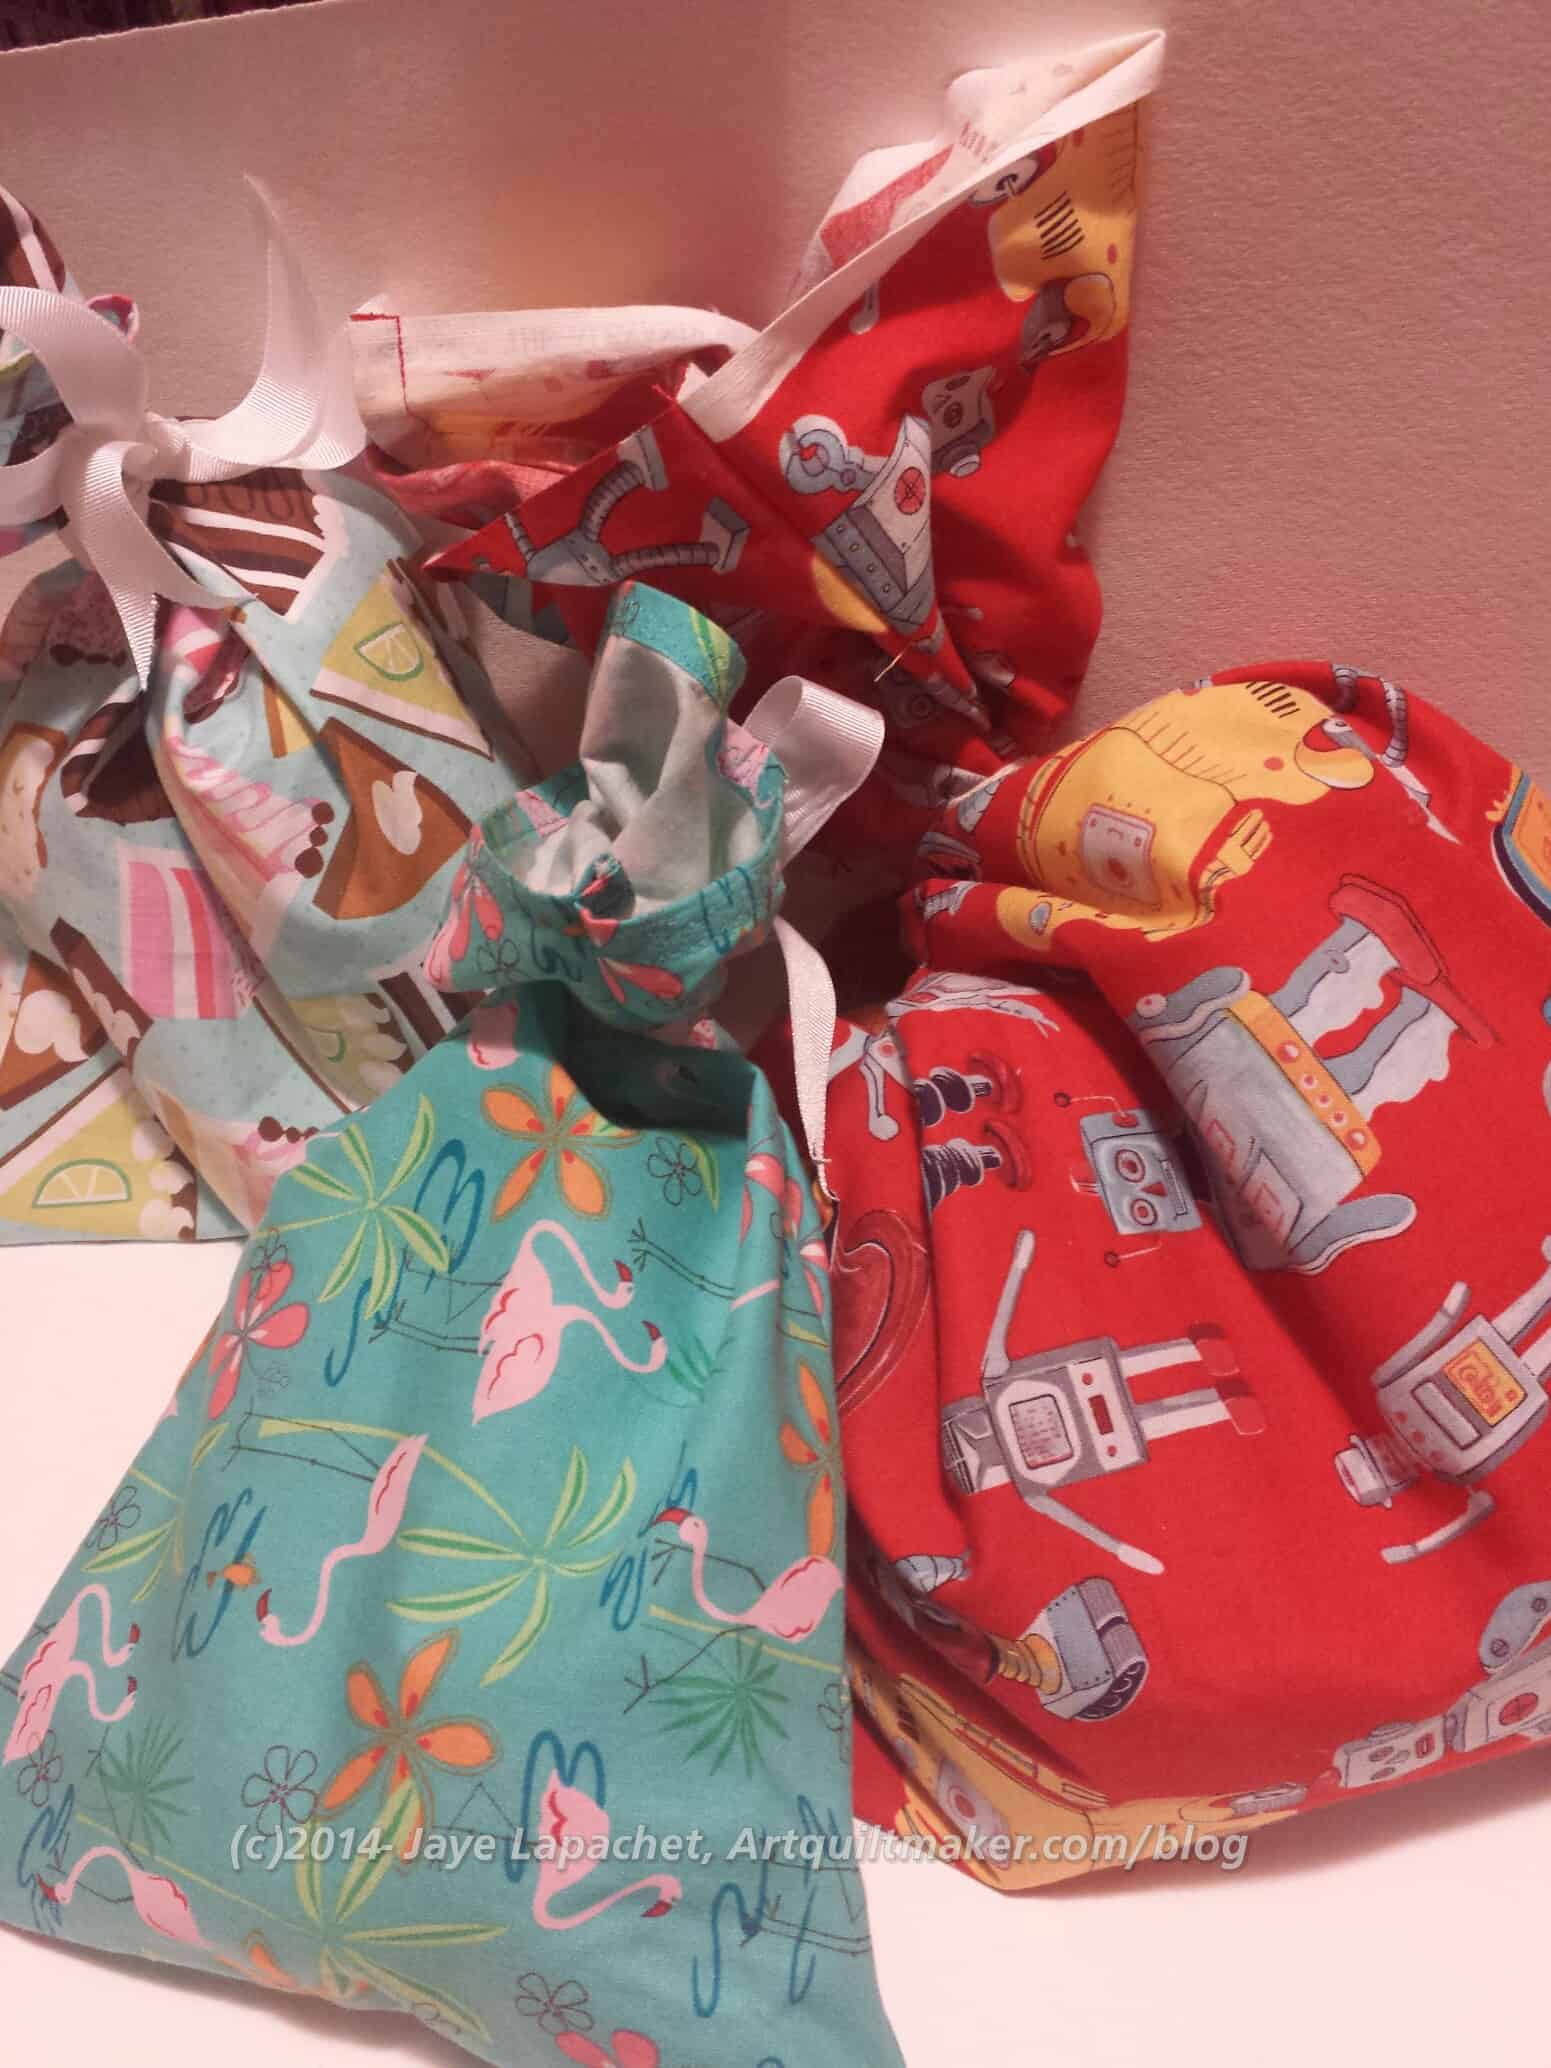
I have been thinking a lot about recycling, especially when we were home for -what seemed like- months during S-i-P. I heard a story on NPR last December a few days before Christmas. The announcer talked about how to tell whether gift wrap is recyclable and gave options for other materials to use. Also, ribbon, bows and glitter are generally not recyclable. He did not talk much about fabric gift bags. I heard this story and, as I had just been wrapping gifts in gift bags, I realized that I wanted to make another play to get people to use fabric.
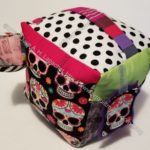
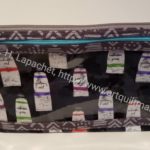
Gift Bags stored and ready for use
It doesn’t matter what holidays you celebrate, there is fabric that can be used for every type of event. We use fabric gift bags for birthdays, housewarmings – everything. My SIL and I have made enough so that the extended family use them during Christmas as well.
As I have said before, this was not originally my idea. My SIL started it and I joined in, thinking it was an excellent opportunity to use some great fabric I wouldn’t normally buy or use. It was a lot easier to make bags for the whole family when two of us were sewing. My niece now makes bags which her Mom (not a sewist) uses to wrap her beautiful handmade cards.
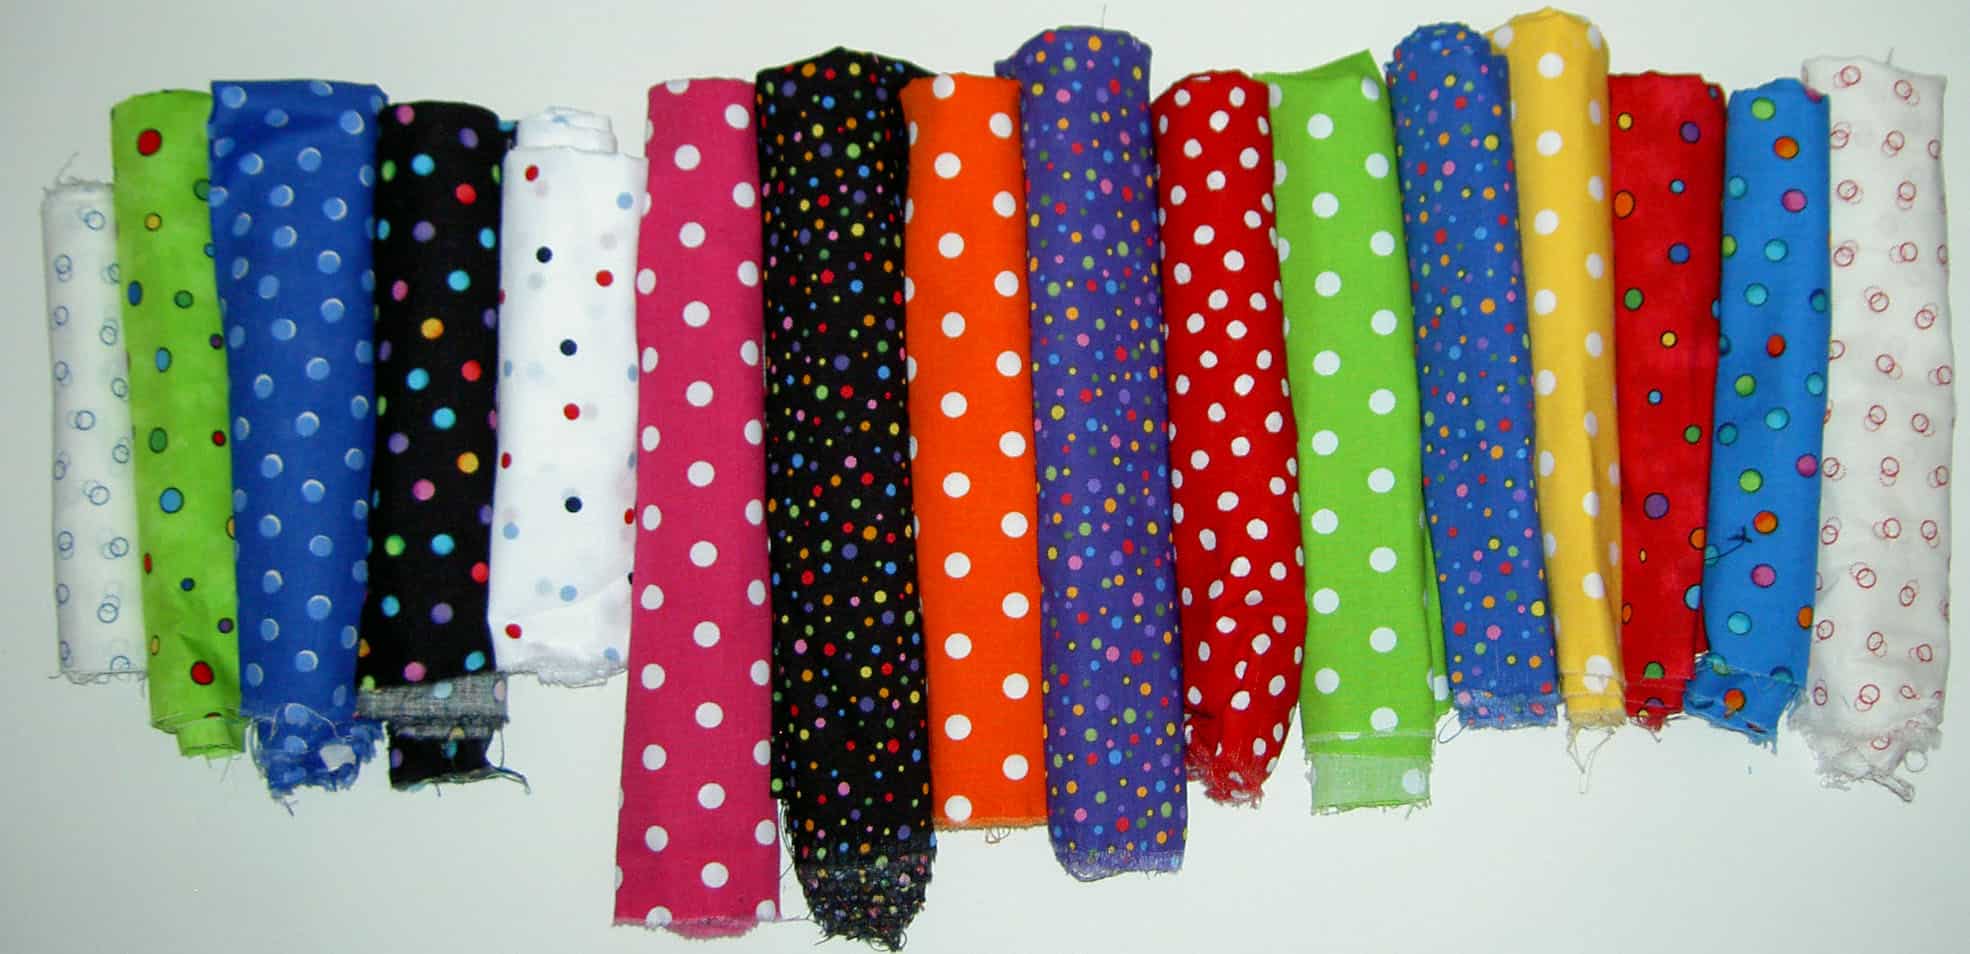
One of the reasons I like gift bags is I can buy fun and novelty fabrics for which I usually wouldn’t have a use.
Benefits:
reusable
good way to use fabric you might not use for quilts
opportunity to buy holiday fabric without committing to making a holiday (or birthday) quilt
quick way to wrap
no need to rush out to buy gift wrap
no tape or scissors needed
small children can help wrap, or wrap their own gifts
Fabric costs can be amortized over the years of the gift bag use
bags are made quickly
good opportunity to try out decorative stitches
Can quickly make a gift bag for an oddly shaped gift. I once wrapped a weed whacker in a gift bag!
Odd sized bags can be up and used for different sized gifts
I reuse ribbon I get from other places for the ties
Easy to open and close the gift bag up again if the gift tag falls off
you can use fabric you already own, orphan blocks, vintage sheets
Embellishment possibilities are endless, if you want to take the time. Gift bags are a great way to try out different techniques, stitches and embellishments
Drawbacks:
takes time to develop a stockpile
reusable gift bags have to be stored
fabric costs are not insignificant
You don’t get beautiful mounds of boxed gifts under your tree
You have plenty of time to start stockpiling gift bags. You can use leaders and enders to make them, which means that your regular sewing isn’t interrupted much .
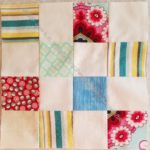
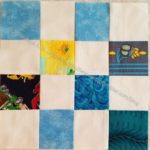
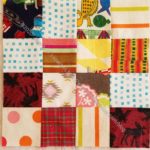
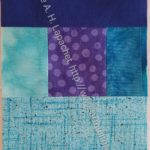
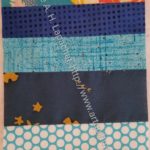
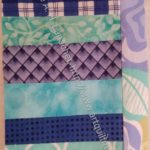
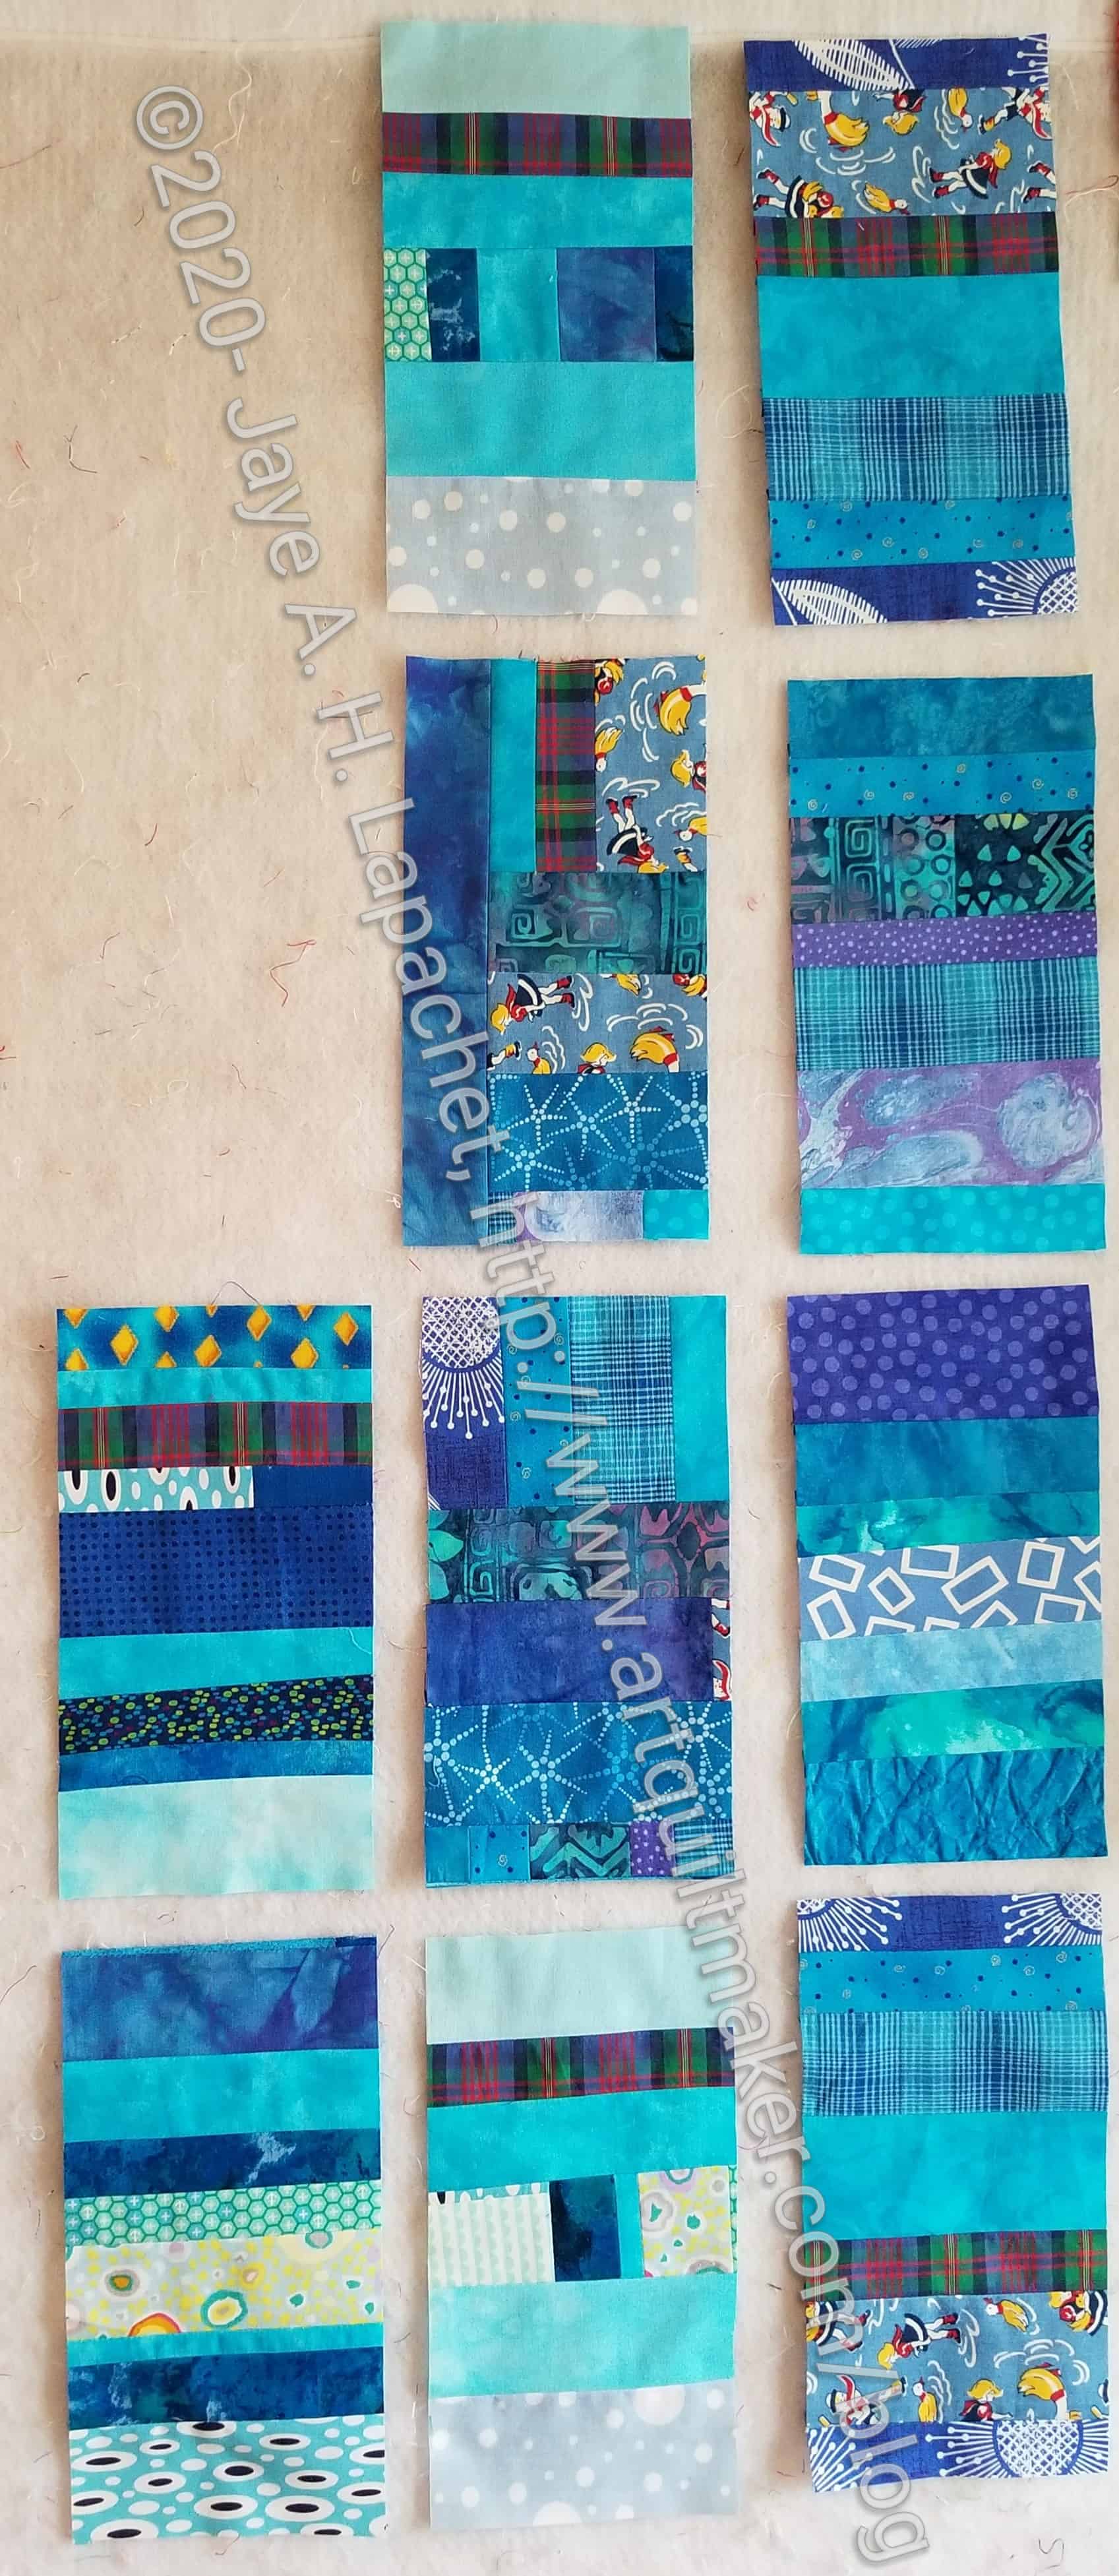
More blocks for June! I really scraped the bottom of the donation patch bin at the beginning of the month, so some blocks look a little strange. It was good to clear out that bin and start afresh.
I started piecing FOTY 2018 and that means a lot of leaders and enders. You saw the start of this quilt the other day. I made a lot of progress on making the blocks on Saturday.
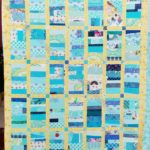
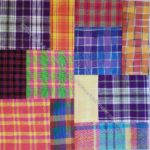
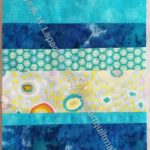
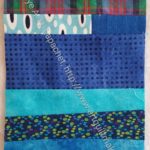
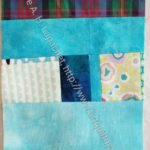
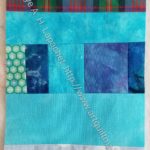
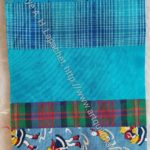
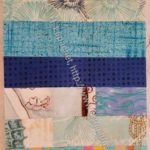
Blue Strip Donation Block #2-9
Blue Strip Donation Block #2-10
Blue Strip Donation Block #2-11
Blue Strip Donation Block #2-12
Blue Strip Donation Block #2-13
Blue Strip Donation Block #2-14
Blue Strip Donation Block #2-15
Blue Strip Donation Block #2-16
Blue Strip Donation Block #2-17
Blue Strip Donation Block #2-19
Blue Strip Donation Block #2-18
Blue Strip Donation Block #2-3
I am pleased with the progress, but really need to make progress on FOTY 2018.
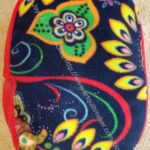
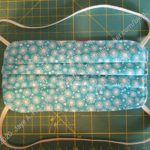
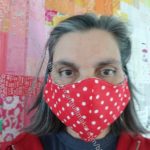
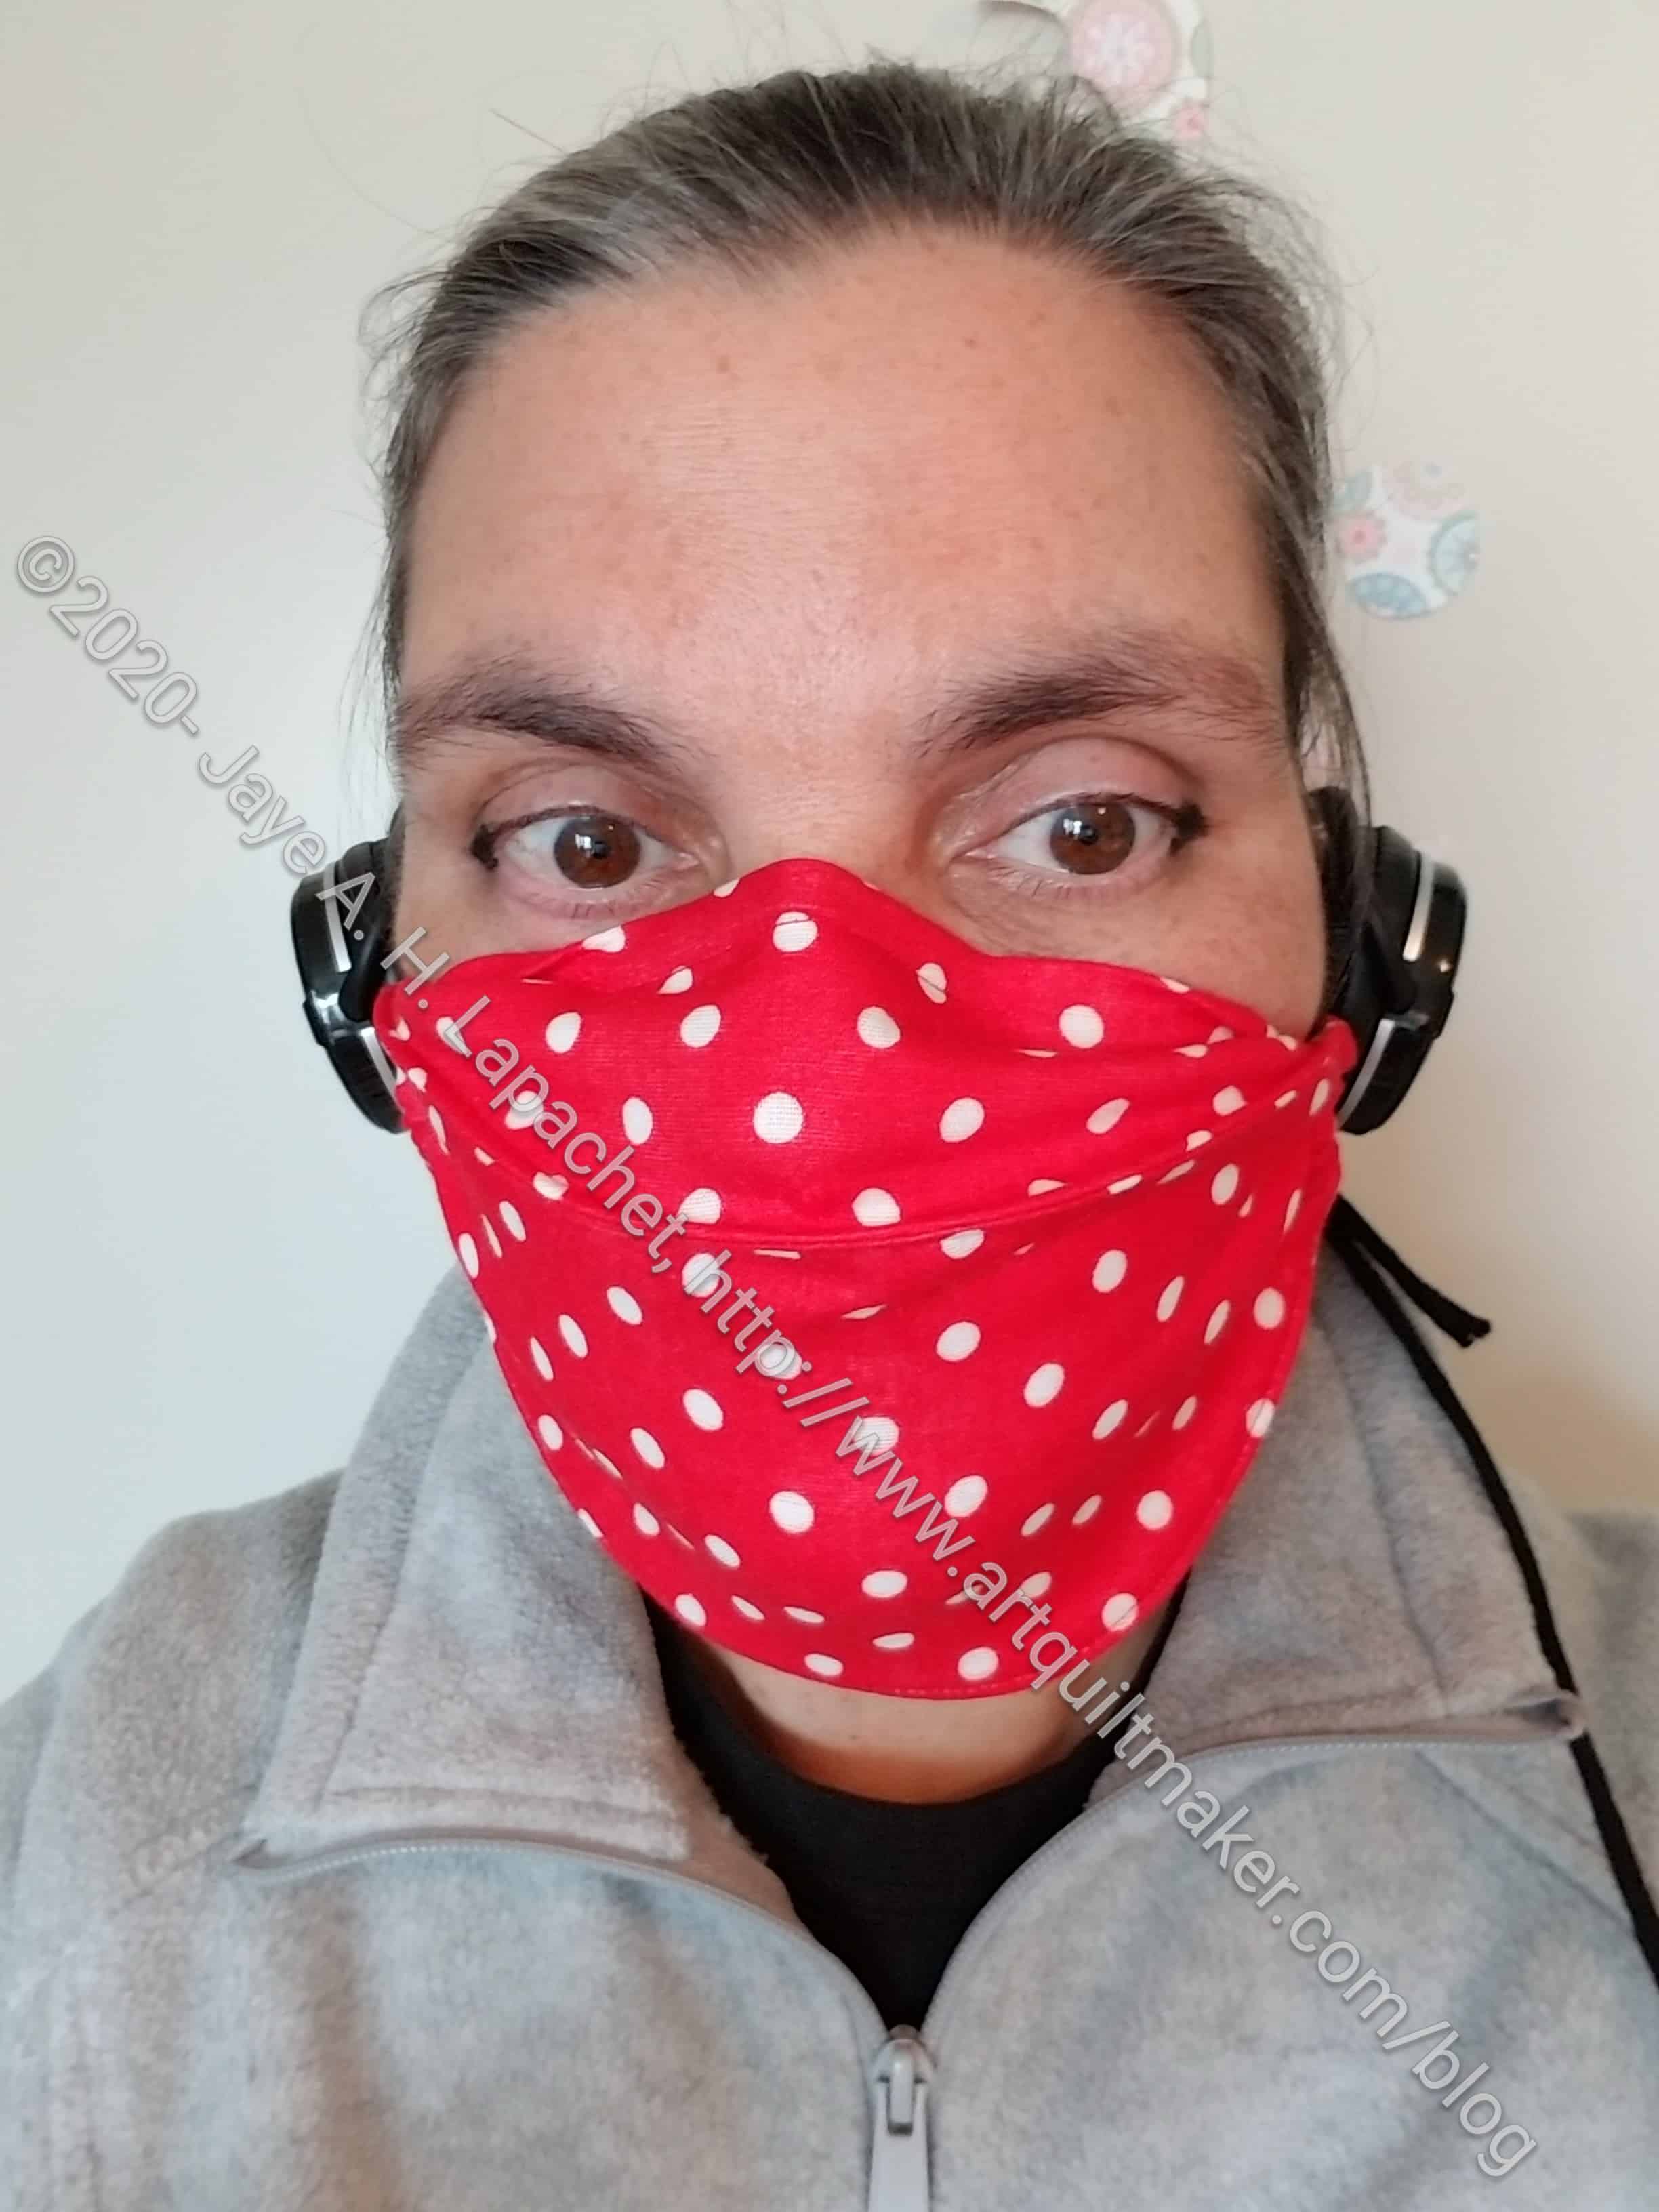
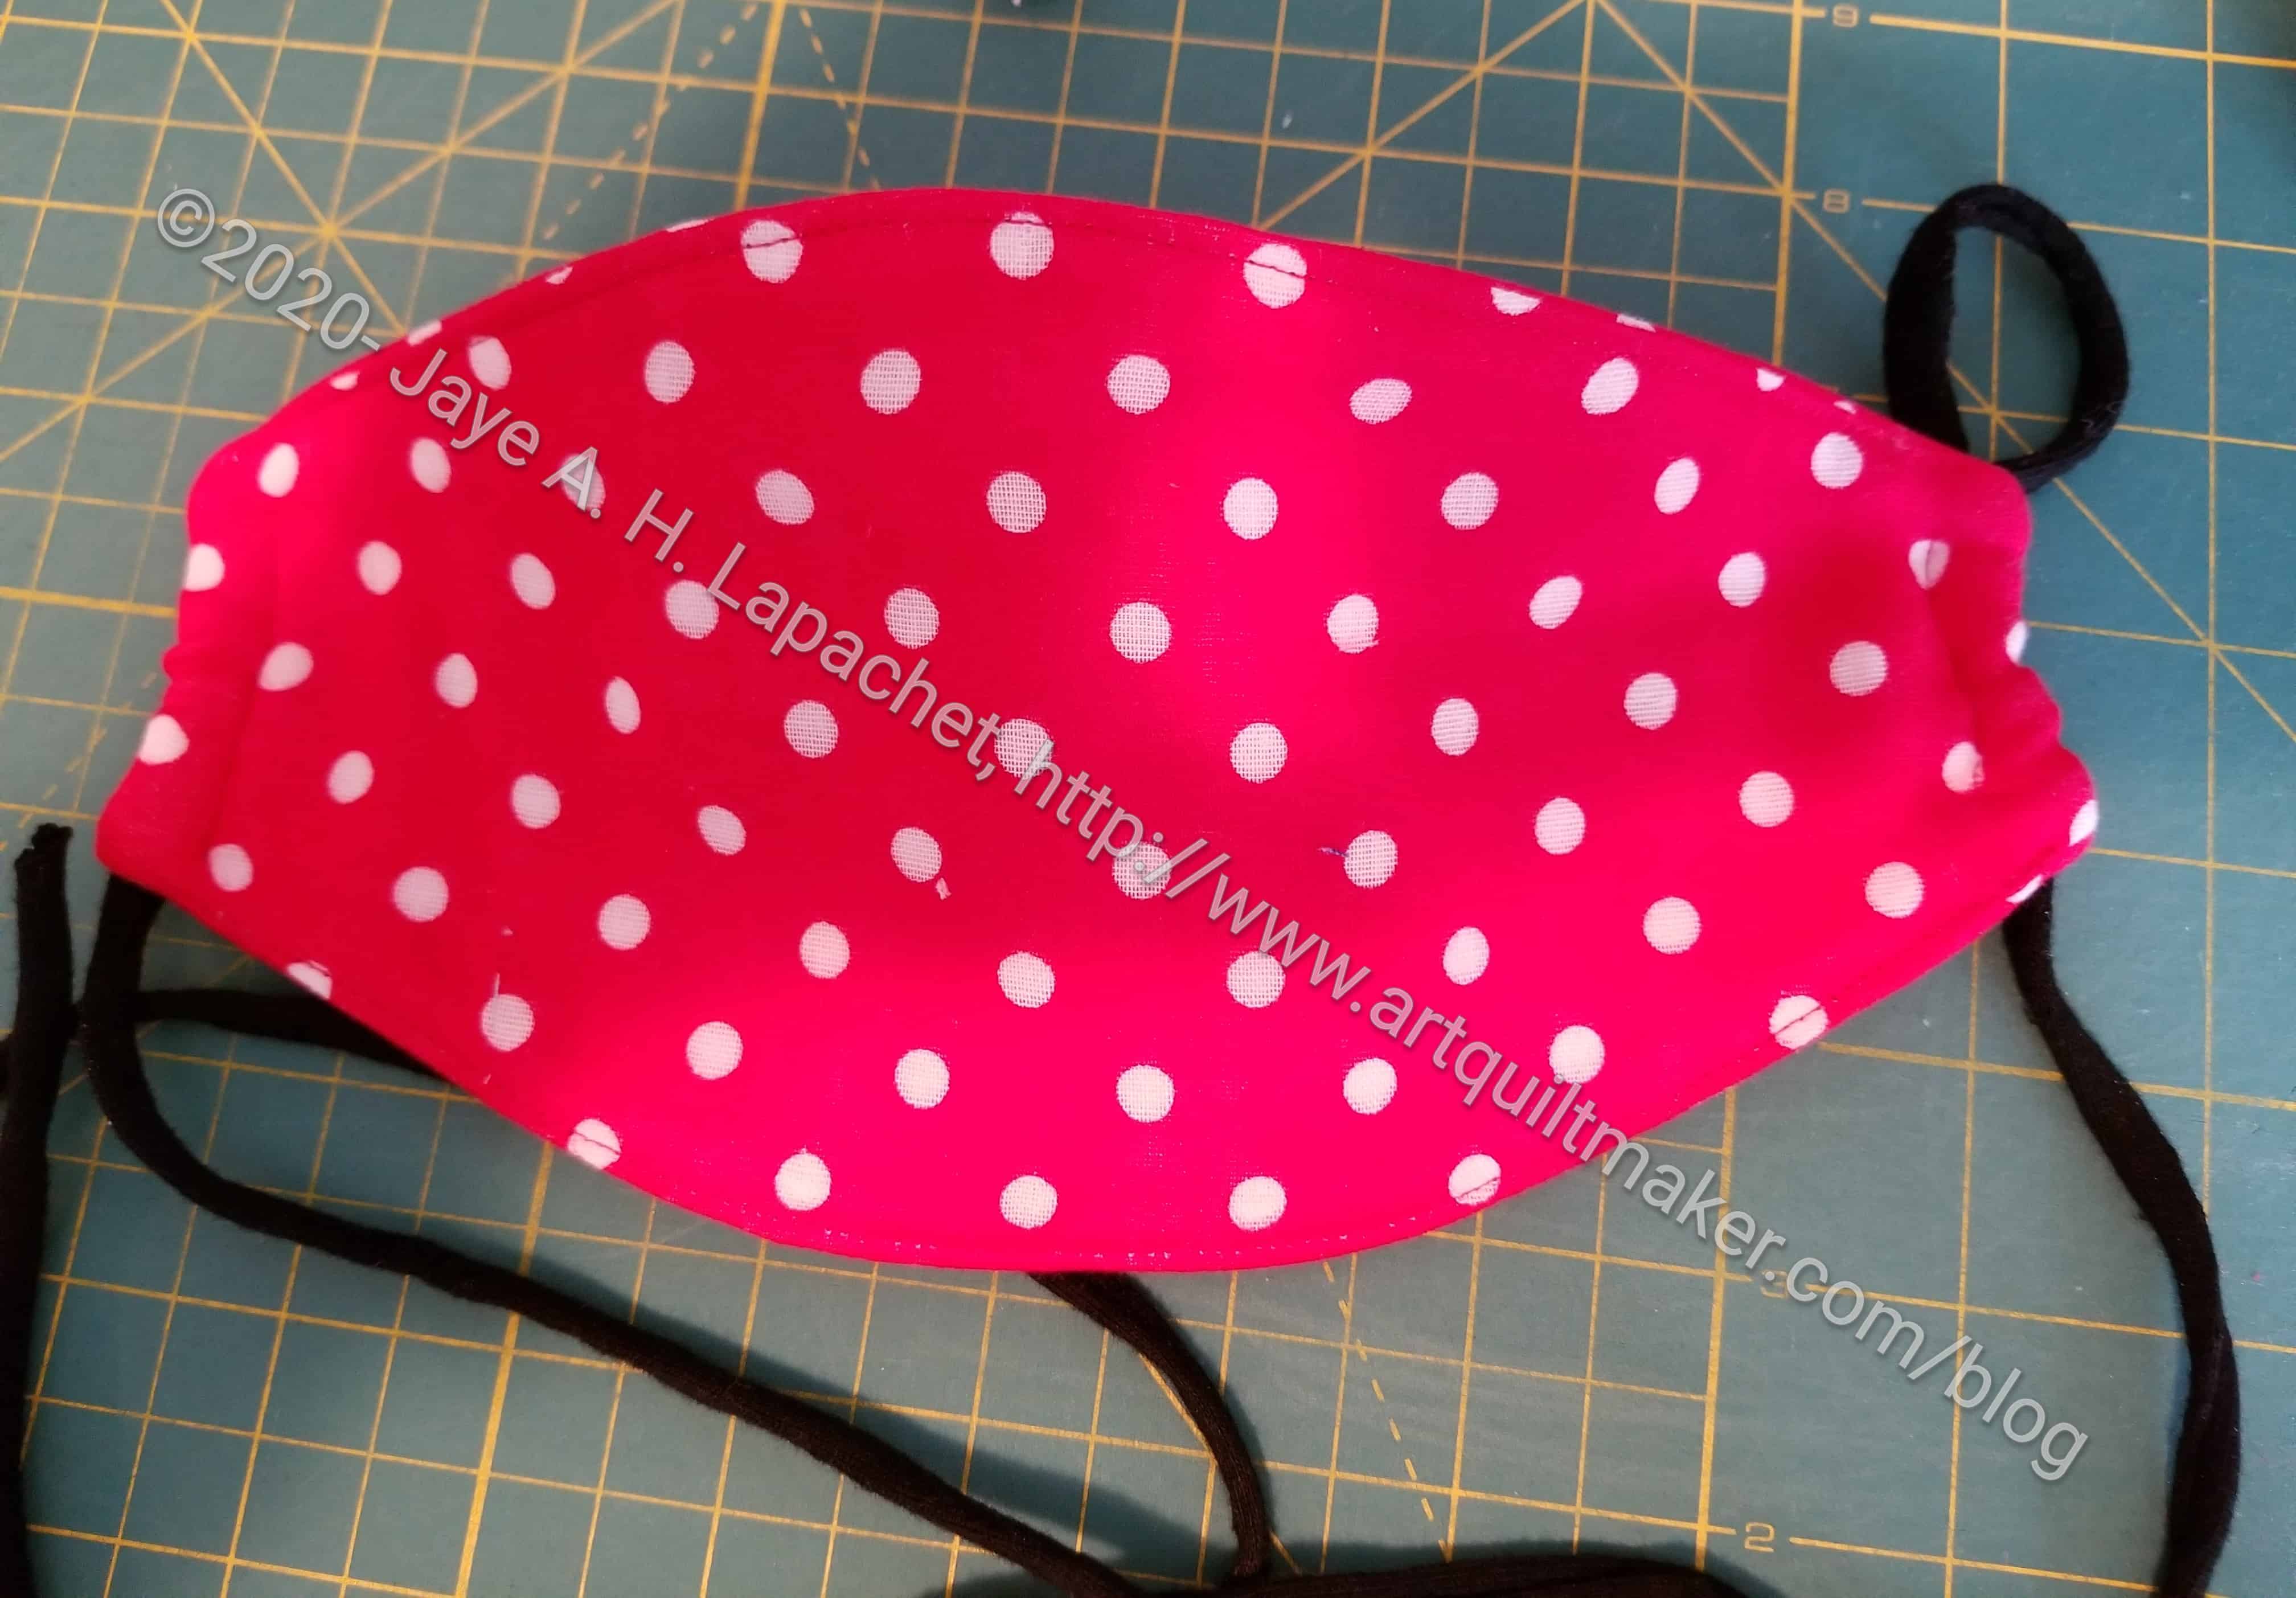
I feel like I made progress on a face mask I can make quickly that will work with my/DH’s/ YM’s glasses. The original pattern for this one came from the video tutorial I talked about before. I like this pattern because of the shape and the ease of making it. I tweaked the pattern to make it work better for us.
Some of the changes I made:
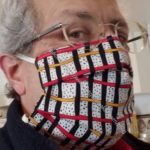
I added a nose piece. Julie sent me some nose pieces, which work really well. Since they help keep our glasses from fogging up, I have been adding them to masks I make.
I made the top and bottom gussets (not sure if that piece is a gusset or not) longer to try and ensure that the raw edges were covered. That is something that didn’t work as well as I had hoped. All the pieces were too thick and hard to sew through when I went to make the channels.
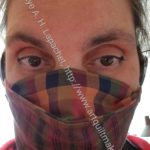
Face mask with stretchy cord
I used stretchy cord from Maker’s Mercantile and a cordlock. This allows me to really pull the mask tight around my face. The bad part is that I was wearing my hair down and the cordlock got caught in my hair. 🙁 I think it would work ok while wearing a ponytail. I don’t, however, want to have to always wear a ponytail.
It is still not ideal, but the good points are:
doesn’t fog up my glasses as much
I can pull it tight because of the cordlock
relatively quick to make
The good part of the stretchy cord/cordlock combo was that it didn’t add more stuff to my ears. I went out to drop off a gift wearing this mask and wearing glasses, headphones and elastic on my ears is too much.
Points on which to work
encasing raw edges – I think I will keep the gussets the original size from the pattern and sew the raw edges closed.
try adding elastic around the back instead of stretchy cord
The channels were to small to insert the cord. I used the Purple Thang, which worked pretty well, though it kept getting stuck on a seam, I think, inside the channel. Inserting the cord was not a smooth process. Deirdre talked about using a stainless steel straw to keep the channel open. I don’t have one of those, but my get one and try it.
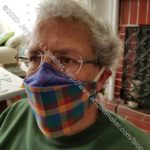
Face Mask front
This is not the same pattern that I used before, but I did use the same fabric. It is double gauze and I thought it would be comfy.
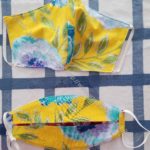
I haven’t given up on other patterns, especially the one my friend Deirdre sent me. I will try that one with a nose piece and elastic around the back to see if that works for me.
It has been quite a while since I reflected on these potential projects. The most notable change is that the Windmill patches have been turned into 3 quilts: 2 are quilted and live in new places, one is ready for quilting and another quilt, with the rest of the patches, will be in process soon.
Art Institute of Chicago Fusible Applique’ (Ticker Tape Style) Quilt
Status: Dream state
Pattern: Original, I have a version of the pattern I used for the Whole Cloth quilt and I will use it as starting point.
Fabric: Turquoise and red, mainly, but other colors for the leaves and flowers, perhaps
Steps: need to fuse a bunch of turquoise to some piece of fabric in the ‘ticker tape’ style so I can cut it up into small pieces. I am thinking of making it similar to the Whole Cloth Quilt and using red, again, for the background.
Thoughts: I might make another one with turquoise on top of red with just two pieces of fabric. I’d really like it if someone else would apply fusible to a bunch of turquoise for me.
Art Institute of Chicago Fusible Applique’ (one sheet of fabric) Quilt
Status: Dream state
Pattern: Original, I do have a version of the pattern I used for the Whole Cloth quilt and I will use it as starting point.
Fabric: Turquoise and red, mainly
Steps: need to fuse a big piece of turquoise to SoftFuse or similar, then cut out the image and fuse it to the background. I would satin stitch all around the image. I don’t know that I can make one continuous piece, but will try. The image would be similar to the Whole Cloth Quilt and using red, again, for the background.
Thoughts: I might make it with turquoise on top of red with just two pieces of fabric.
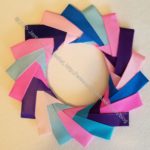
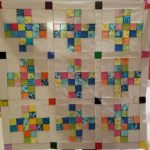
Thoughts: I can’t decide if this is still a dream or if it is already started and I just need to arrange it and start piecing. I have done a lot of cutting, so I think I have started it, thus it may not be a dream anymore. The original idea stemmed from the FOTY quilts. I just decided to do a monochromatic version – using just blues, in this case. I probably have more than enough patches now. I just need to slot the time into my schedule.
Thoughts: I probably had enough squares to make this quilt, but then I used a bunch of them to make En Provence. I have cut quite a few more 2 inch squares, but probably still need more.
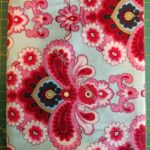
Easy Street
Status: have pattern/ dream state
Fabric: pinks
Pattern: Easy Street by Bonnie Hunter
Thoughts: I really liked Daisy‘s version of Easy Street, which she calls Cherry Bomb (she thinks of the best names for her quilts) in terms of color and feel. I don’t want to copy her, but if I do this quilt, I’d like to have the same pinky-red feel to it. One challenge about a mostly monochromatic quilt is getting enough contrast. I look forward to that challenge. Not sure this will become a reality.
En Provence #2
Status: Dream state
Pattern: En Provence by Bonnie Hunter
Thoughts: I loved the one I made before and can’t stop thinking about it. I have to make another one, but I can’t figure out what colors to use next. The ones I used before were almost perfect.
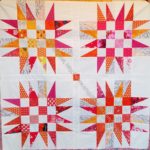
Feathered Star Block (or quilt?)
Status: Dream state.
Pattern: I haven’t decided on a particular feathered star
Fabric: I decided not to use a layer cake and will use the scrap 2.5 inch squares I have been cutting. I love the cheerfulness of Scrapitude Carnivale, as I say over and over, and am not done with that fabric combination yet.
Thoughts: I thought about using dots on a white background as the background, as I did with the Scrapitude Carnivale quilt. It makes the Scrapitude quilt look so cheerful. I probably wouldn’t call it Good Night Irene.
Interlocking Triangles Quilt(s)
Status: dream state
Pattern: This is an idea that I designed myself. I made two quilts and have variations on the pattern to make more.
Fabric: I have a few different collections of fabric I want to use. Most are rainbow colored; I also have a lot of stripes to use
Thoughts: This is a quilt from which I get a lot of bang for my buck. The visual impact is tremendous. The easiest way to do the spiky triangles is with paper piecing. I am not that big of a fan of paper piecing (read my laments about the Spiderweb‘s paper piecing). I made Spiky Stars using templates and that was meditative and won a prize, so it is doable.
Jack’s Chain Quilt
Status: dream state
Pattern: Jack’s Chain, a continuous pattern
Fabric: bright scrappy, consistent centers
Thoughts: This is one of the first quilts I saw hanging in a quilt store and thought of making. I have seen a number of variations lately using different hexagons in the center. It occurred to me recently that I could do four rings and make a pillow cover instead of a whole quilt. Partially, I thought of this because I saw an EPP pattern for this quilt. Taking on another large EPP quilt right now is not in the cards. I could also make the pattern larger, making the piecing for a quilt much quicker. I still like the smaller version better.
Music Quilt
Status: dream state, but not very inspired
Pattern: Top will have a piece of music the Young Man can actually play. That will probably be applique’
Fabric/Colors: music prints and tone-on-tones with a little red
Thoughts: The Young Man has requested this quilt as his high school graduation quilt. I missed that deadline and now I have missed the college graduation deadling. He has sent me a piece of music, which I printed out. Now I need to make into an applique’ or do something else (print on fabric?).
Pineapple (Hunting and Gathering)
Status: I have some strips cut.
Fabric: dots. Have most of the strips cut. Will be much more selective about which strips I use.
Pattern: Pineapple log cabin
Thoughts: I haven’t given up on a Pineapple quilt despite my frustration with the previous attempt. I bought a different ruler: a Creative Grids Pineapple ruler in hopes that it will work better for me
Silk Colorblock quilt
Status: I have the fabrics and the plan
Fabrics: silk dupioni and cotton in brights (of course)
Thoughts: I have made a couple of, what I call, Colorblock quilts over the years. One was the Kona Challenge in 2011, another was my 1990 Colorblocks 2 and the first one, Colorblocks, also made in about 1990. I bought the silk fabrics at the Marin Needlearts show about a zillion years ago and they have languished waiting for me to learn to back them so I can use them. I think I have that covered now and there is nothing stopping me except time and will.
Fabric: Scrappy with controlled scrappy background
Thoughts: I like the construction of this quilt and am convinced that I will make it. Another one just waiting for time and the will. After adding the correct size piece to my cutting sheet, I have continued to cut and cut. I now have quite a large stack of patches waiting for a background color.
Out of the Dream State: Below is a list of projects that were on this list at some point that I actually made or am working on:
Half Moon Modern Quilt I made a Chubby Charmer instead of a quilt and am happy with that choice.
Medium Mondo Bag – I actually made the Midi bag. I think I might have another pattern to make another one, so I will have to try it out without the class.
MetroScape quilt is finished, working on the binding
I worked on the UCAB again the other weekend. Last weekend? I don’t remember. It started off so well, then I got lost. I couldn’t figure out how to finish the front pocket.
I really tried hard to understand the pattern, but just didn’t get it, so I contacted the designer. I still couldn’t understand the explanation, so I asked Lynette.
Lynette sent me some info she had sent to another bag maker. It didn’t answer my question, but I woke up the next morning with an idea of how to make the pocket. It may not be the way the designer intended, but it will get the job done – as long as I do it!
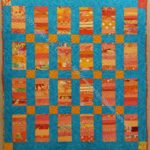
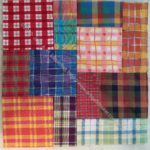
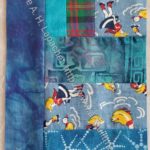
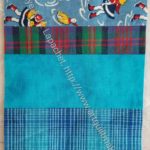
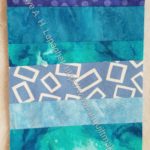
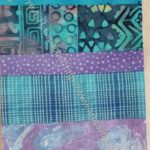
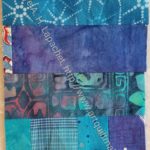
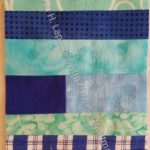
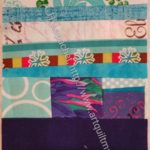
I started sewing some strips together and now I have started another donation quilt in the Color Strips & Chunks series.
It started sort of accidentally. I had a few strips left from a box that was stashed behind my old design wall. They were on my sewing table, so I sewed them together when I needed a leader or ender. Then, I opened my blue scrap drawer, which is not noticeably less full despite the last blue strip quilt I made, and used strips to make more blocks. I am pretty sure I have at least two more quilts in that drawer.
I am out of background fabrics for 16 patches, so this is a good way to use up scraps and have something for leaders and enders.
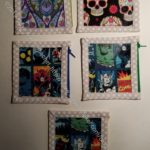
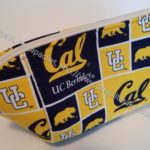
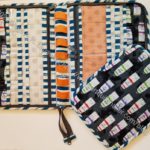
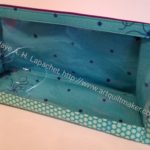
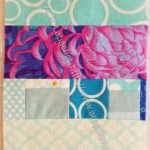
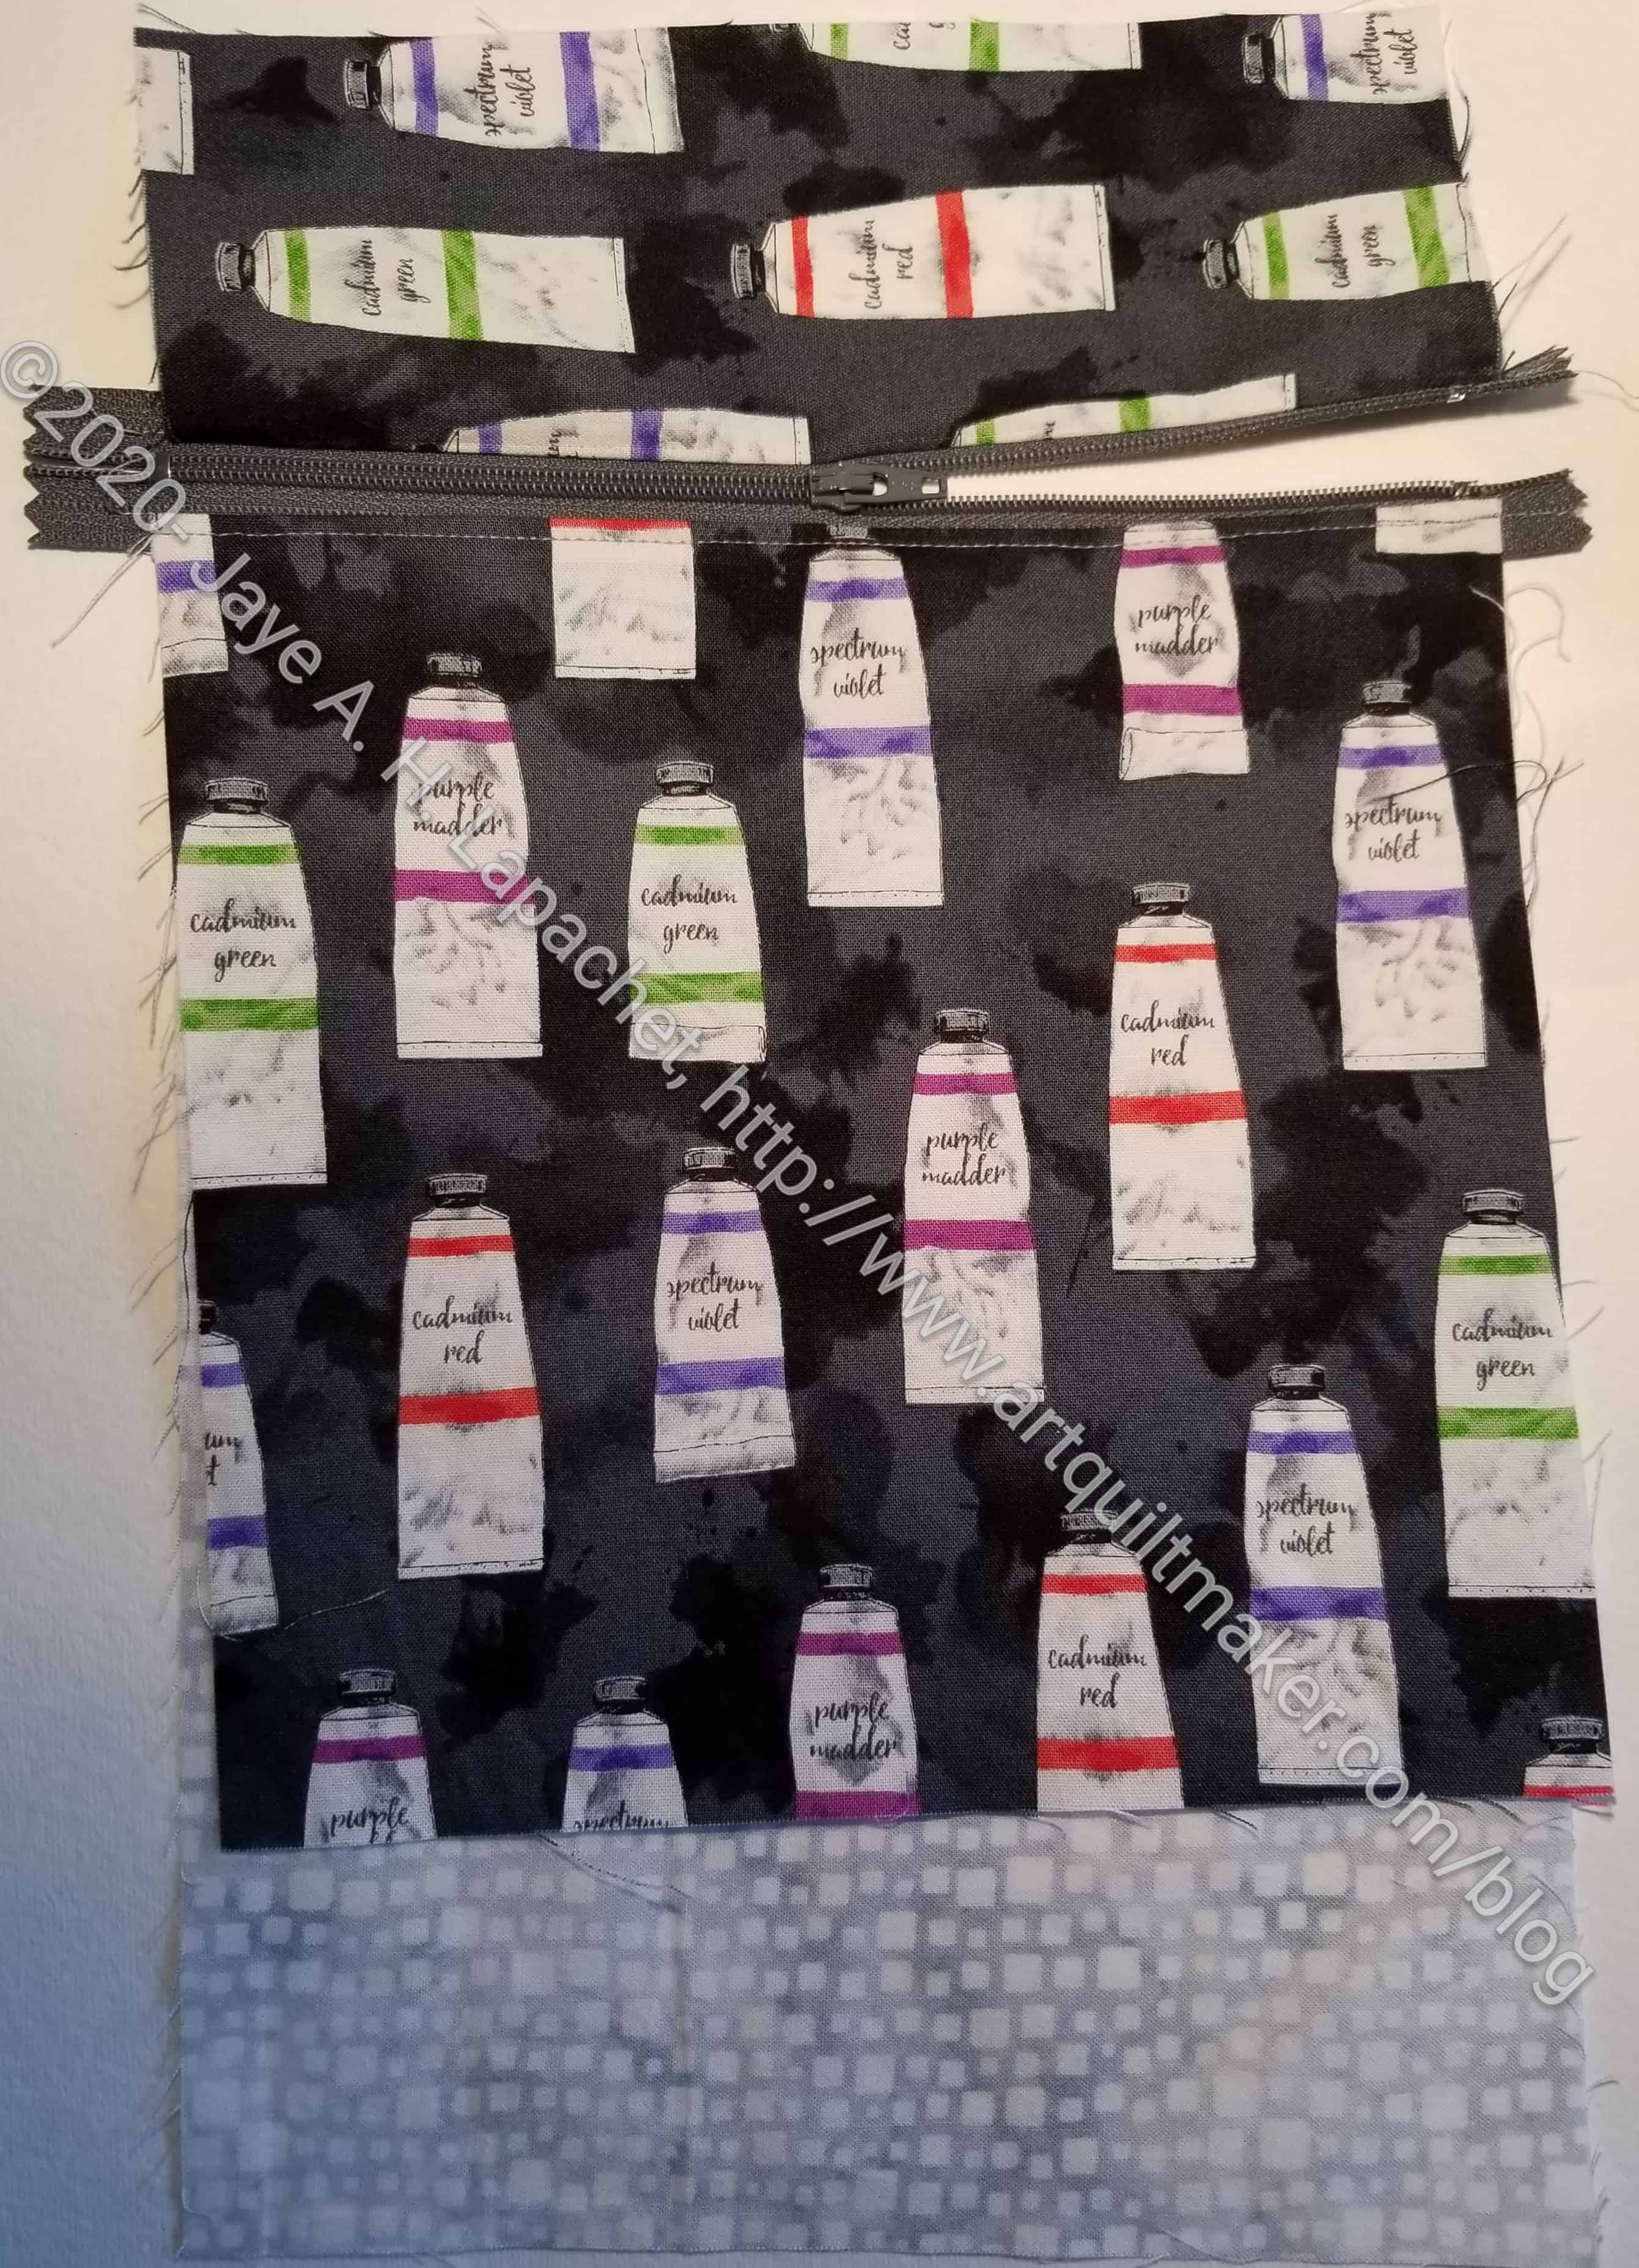
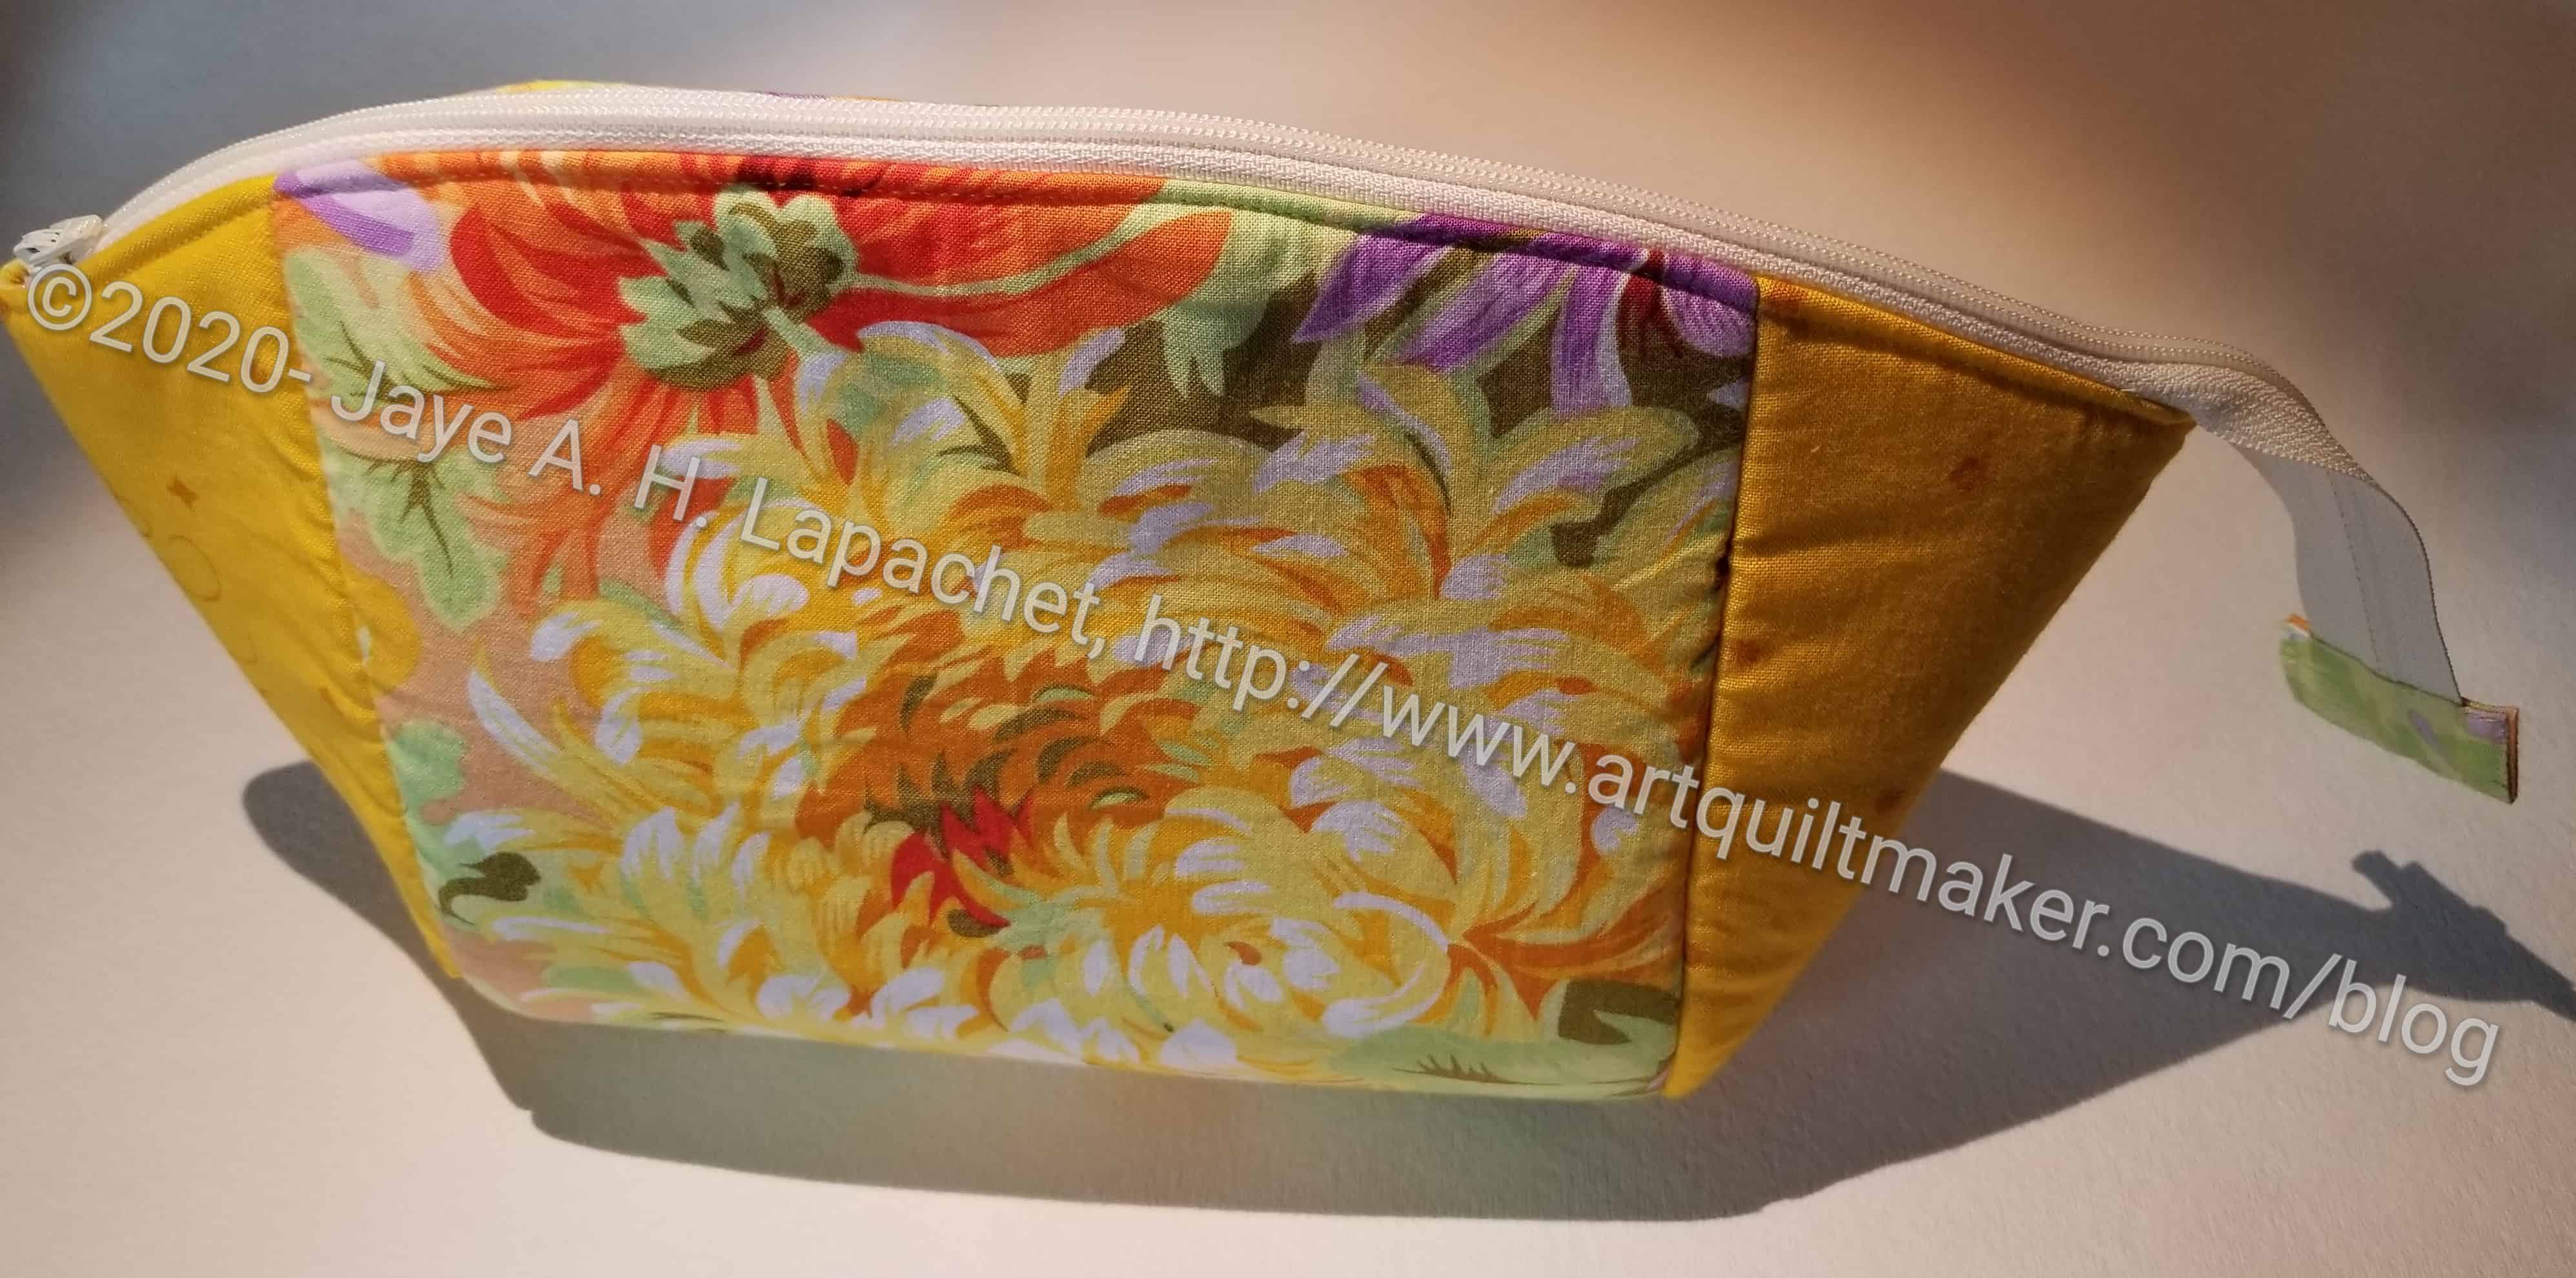
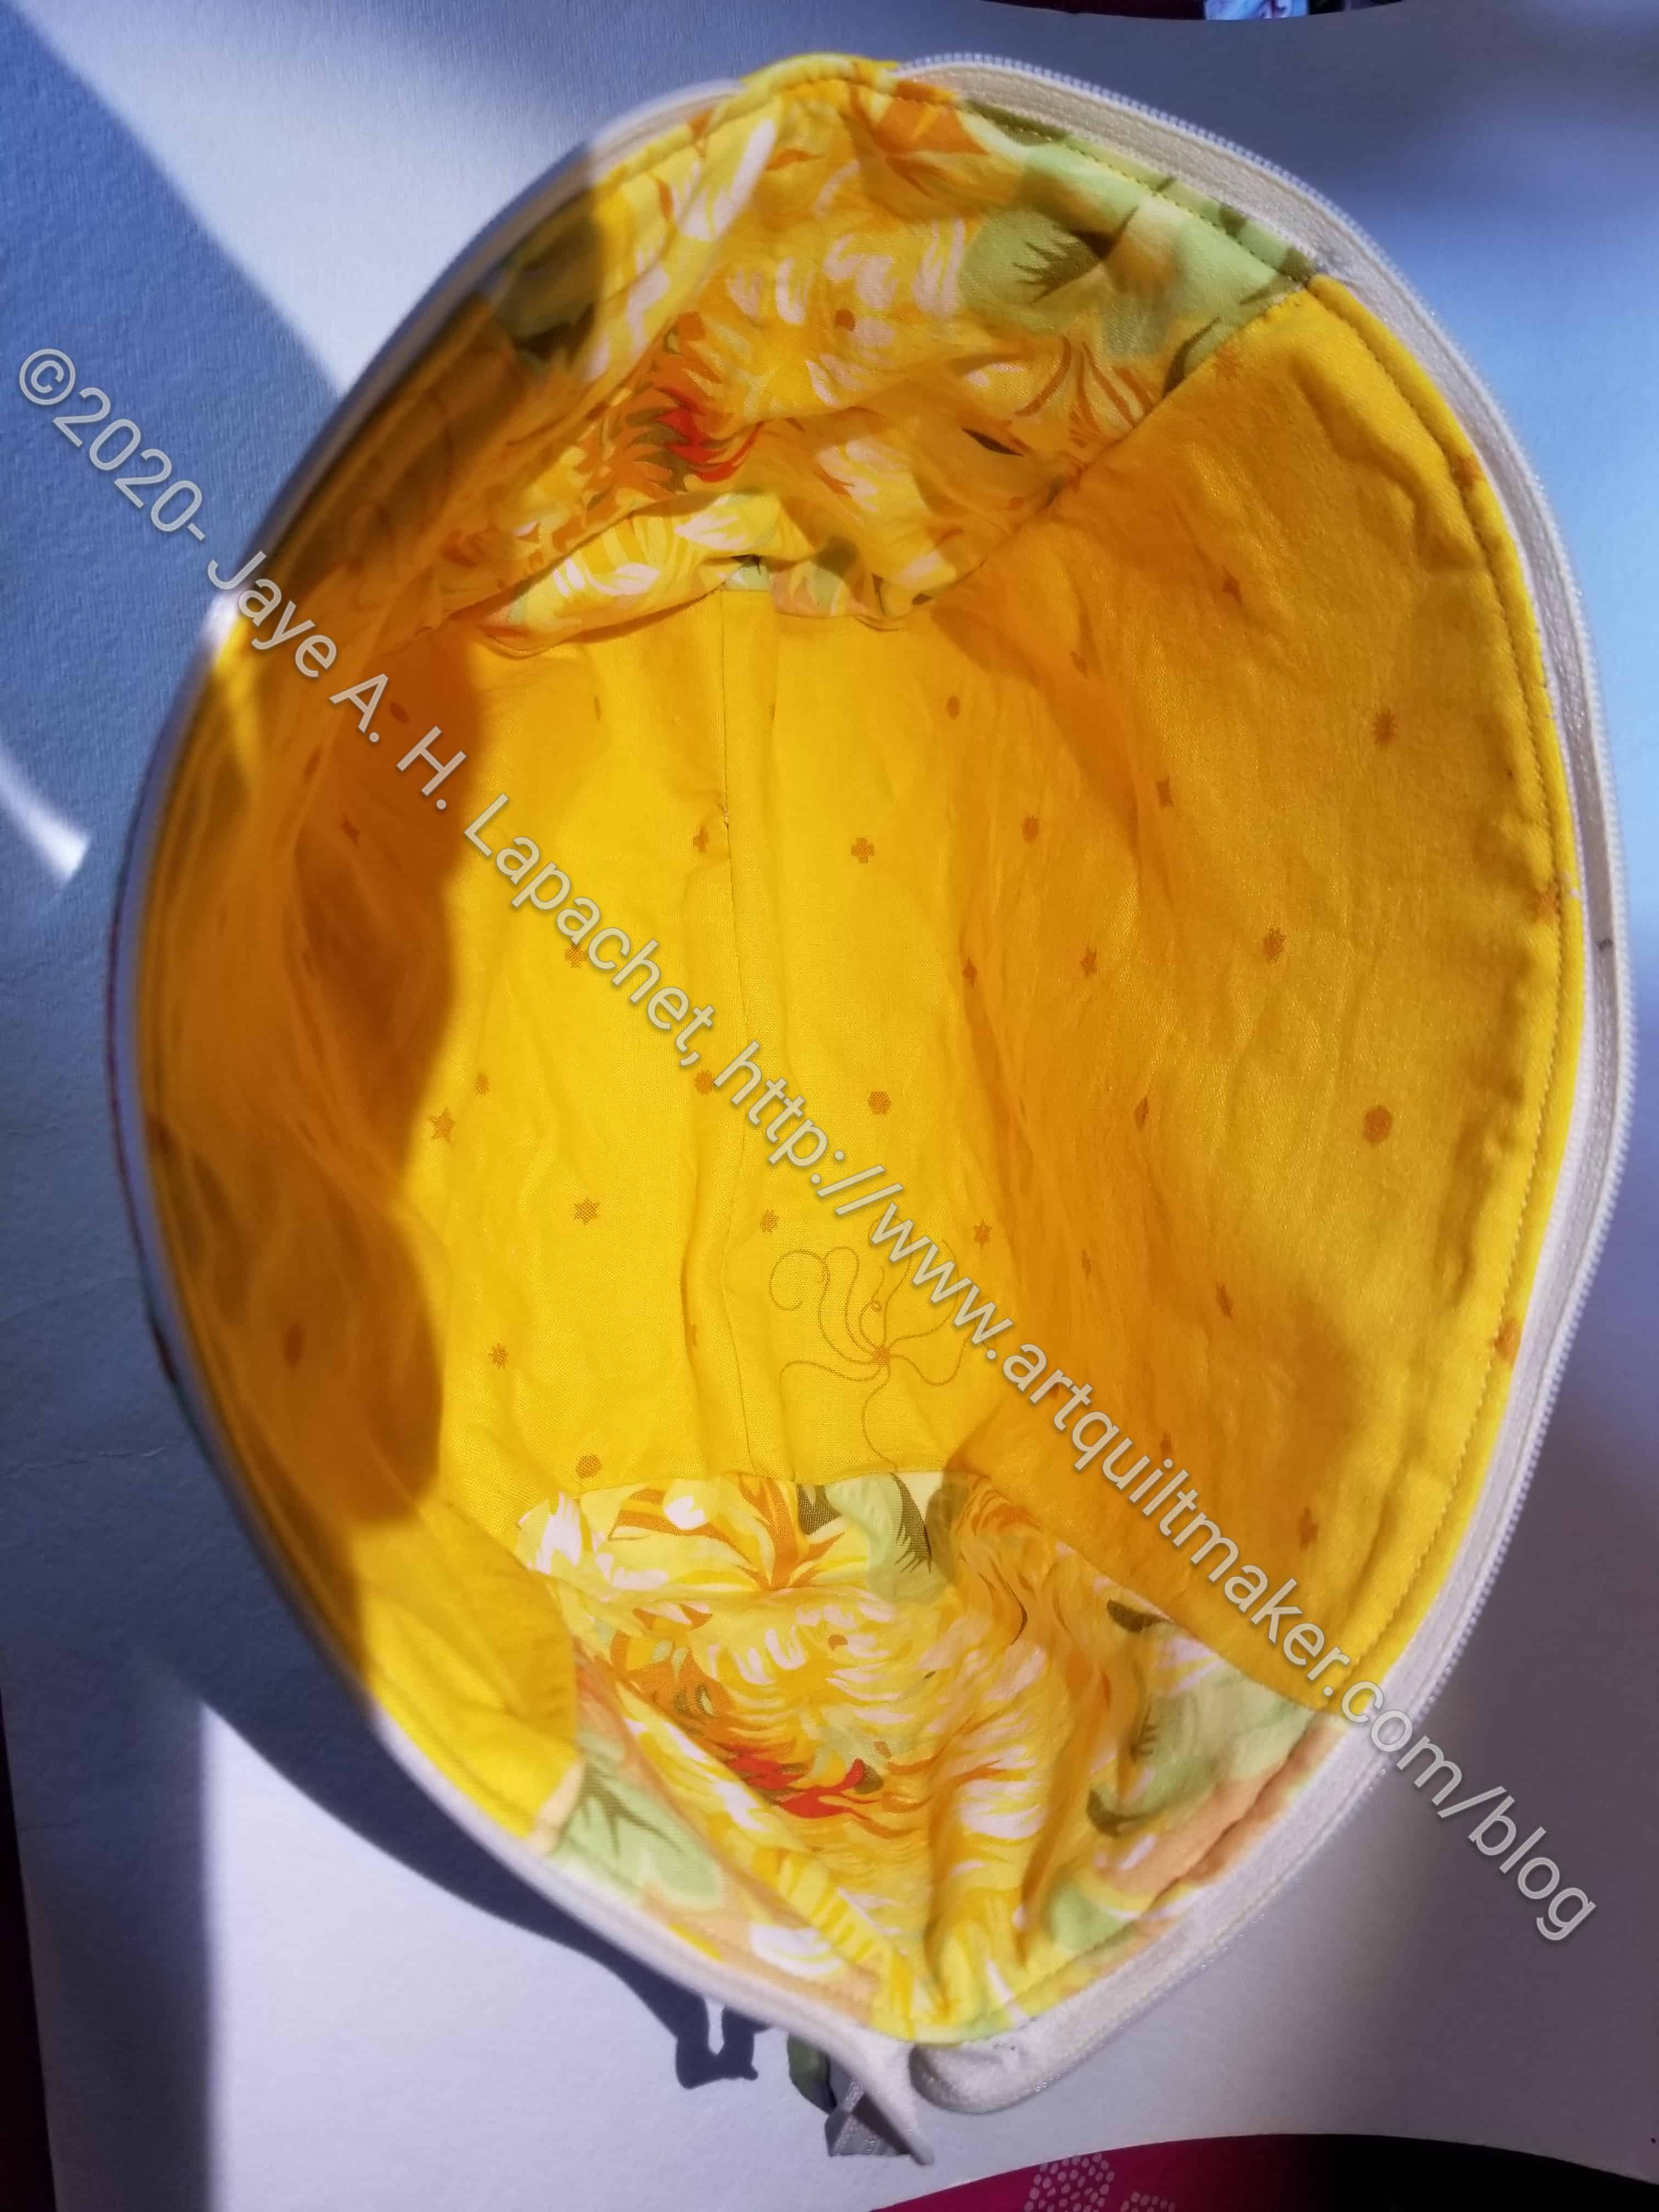
I finished another Cotton Candy Pouch over the weekend. As mentioned in a previous post, this pattern is from the Minikins Seasons 1 & 2 (no affiliation) by Sara Lawson of Sew Sweetness.
Chrysanthemum Cotton Candy Pouch – inside
I made an effort to fussy cut fabric this time so my pouch highlighted some great fabric. Sara does this in her pouches and I really like the look. I cut the side panels out of the Philip Jacobs fabric, which was not correct – I keep thinking those side pieces are the main fabrics. I decided to use them on the inside, reversing the way I put in the fabric.
I had some trouble with the zippers, but in the end the video about veering the zipper off the project and the project video finally got the thole technique into my head. I want to cement it. I think I might make another pouch with some of the Echinacea fabric I got from the last Modern Quilter’s Box.
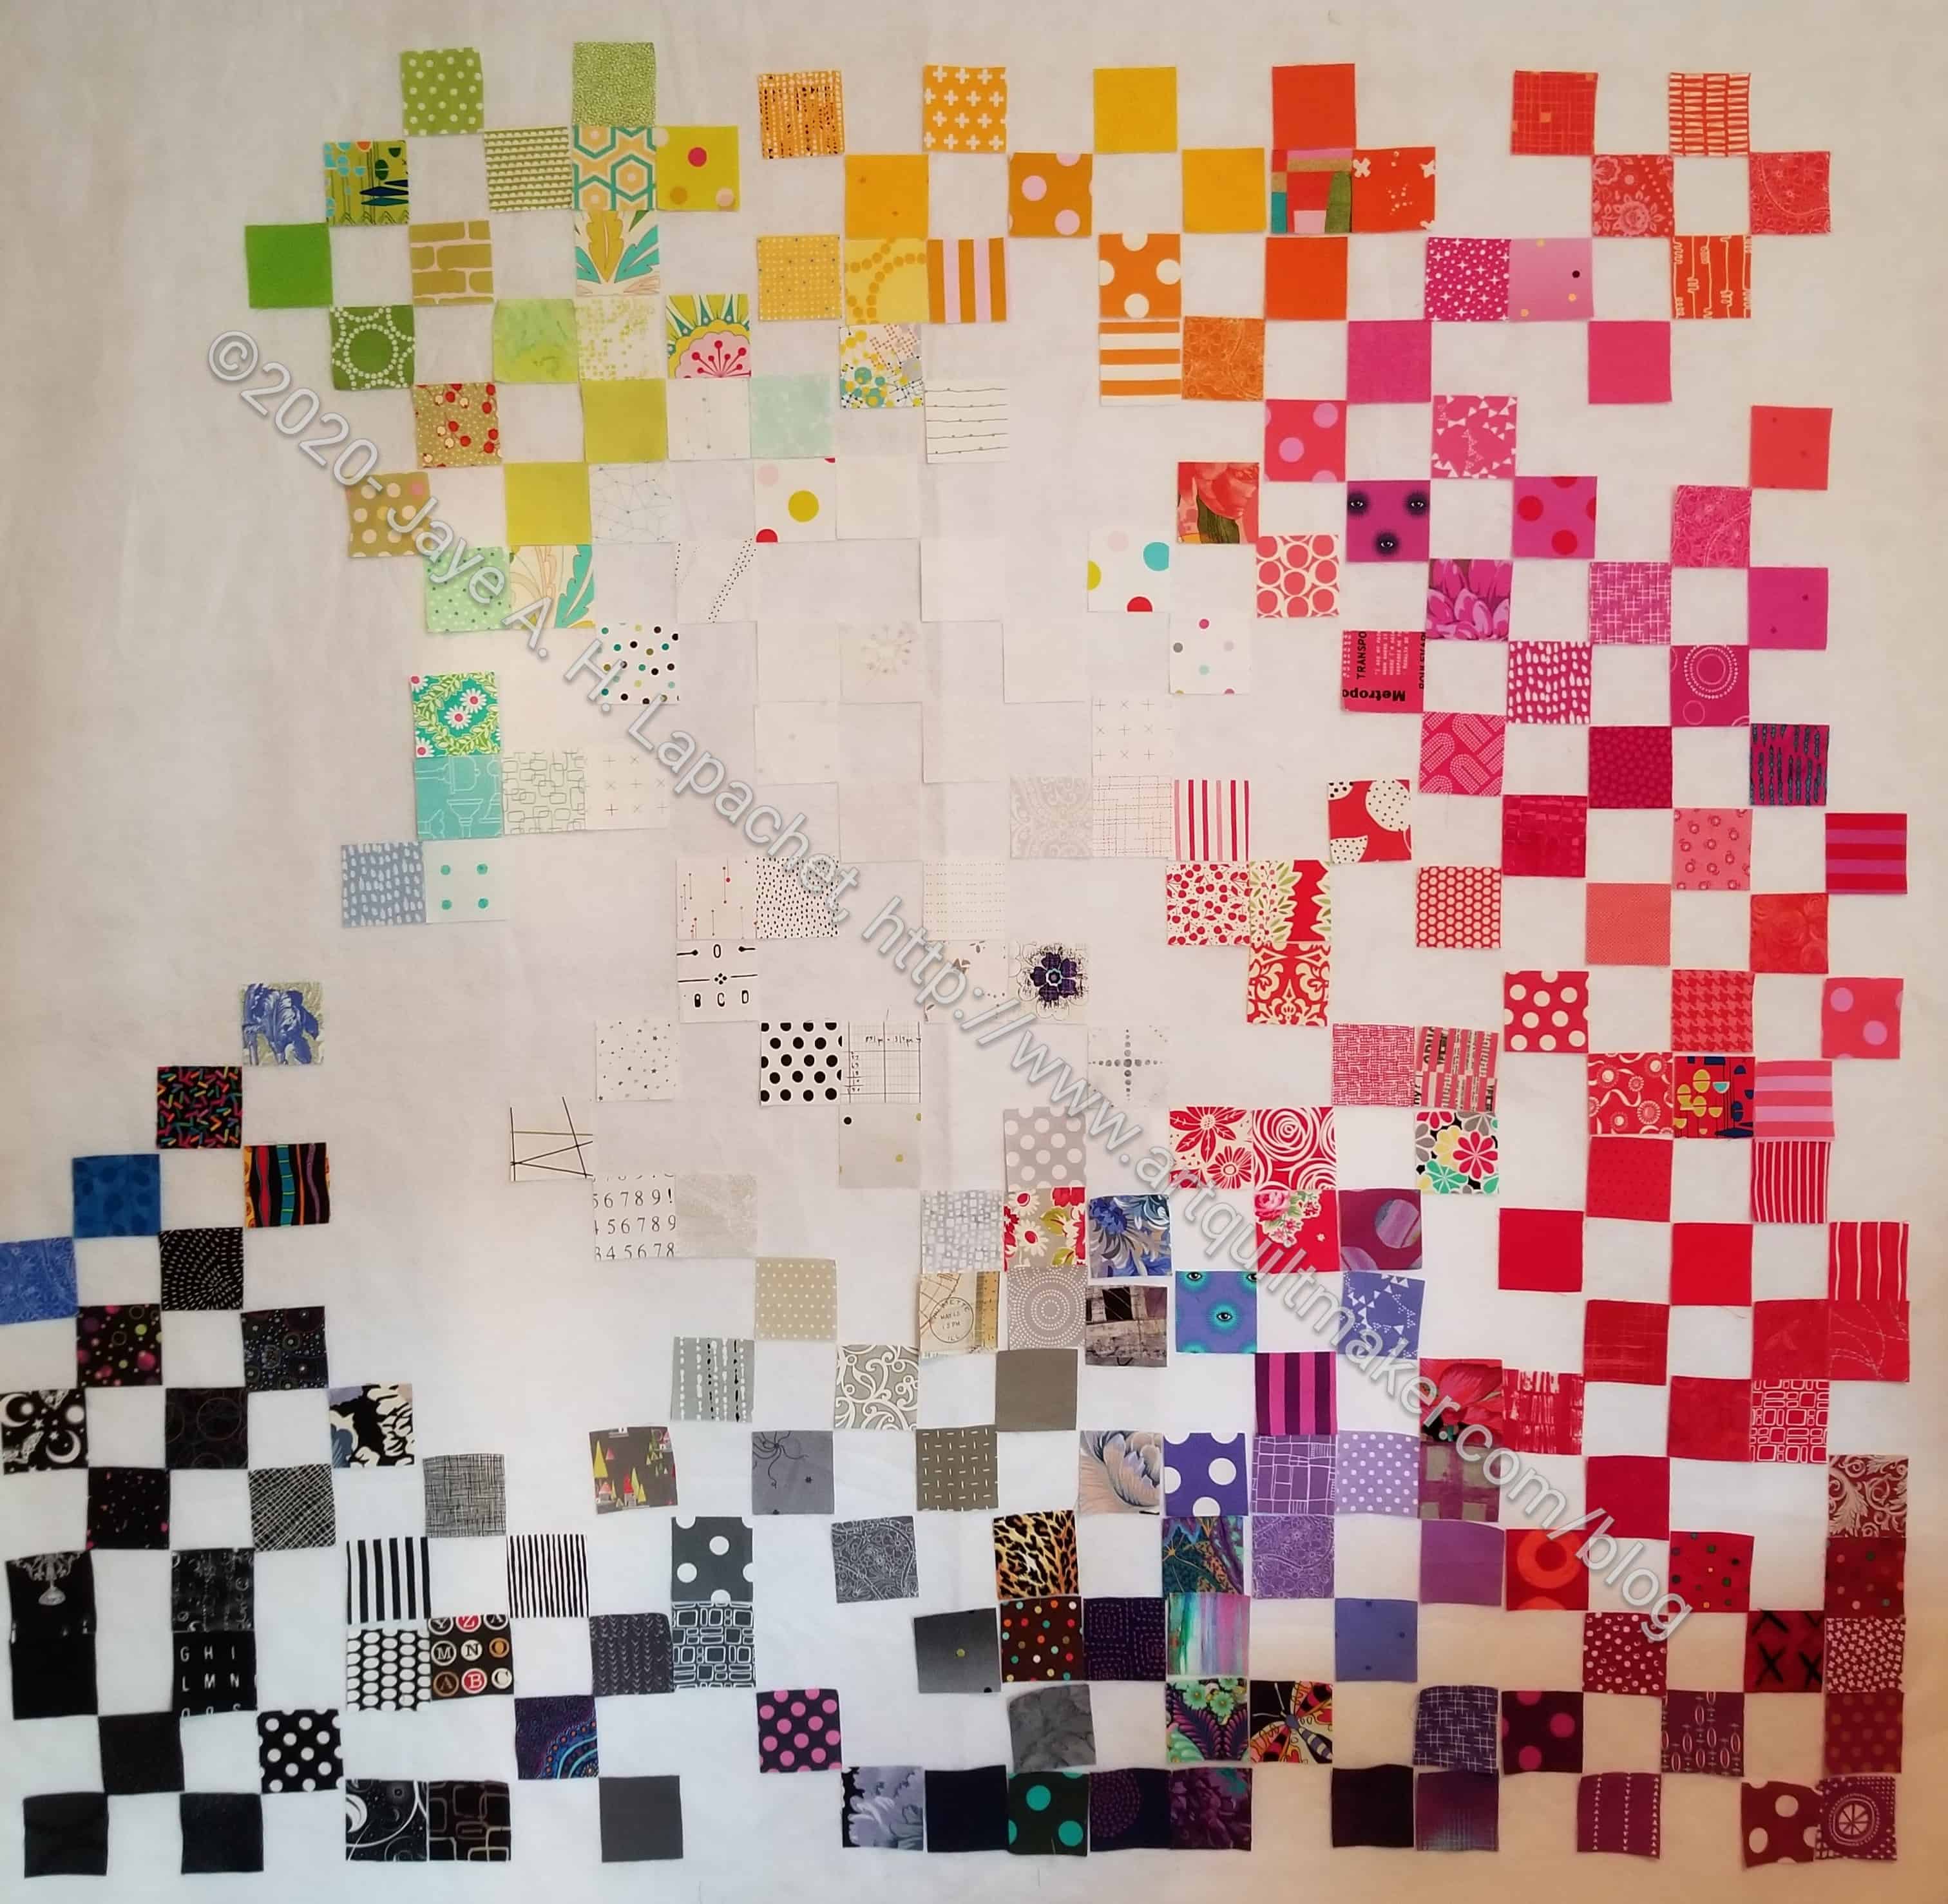
Spectrum of Colors Arranged by Chance is a 1951-53 painting (oil on wood) by Ellsworth Kelly. I saw it at the SFMoMA when Julie, DH and I visited a few years ago. I have been wanting to use the idea in a quilt for awhile. Last week, I started on FOTY 2018, which will be my piece inspired by Kelly’s work.
Last week, I started on FOTY 2018, which will be my piece inspired by Kelly’s work.
I have to say that putting the pieces on the wall has been a joy. I feel much closer to it with my new design wall. I also really like the white interspersed with the color. It is making me think of doing one with white squares as well as the slate grey I have planned for 2019.
I am also apprehensive about adding the black. We will see, though.
I am also really excited that I am working on a true UFO!!
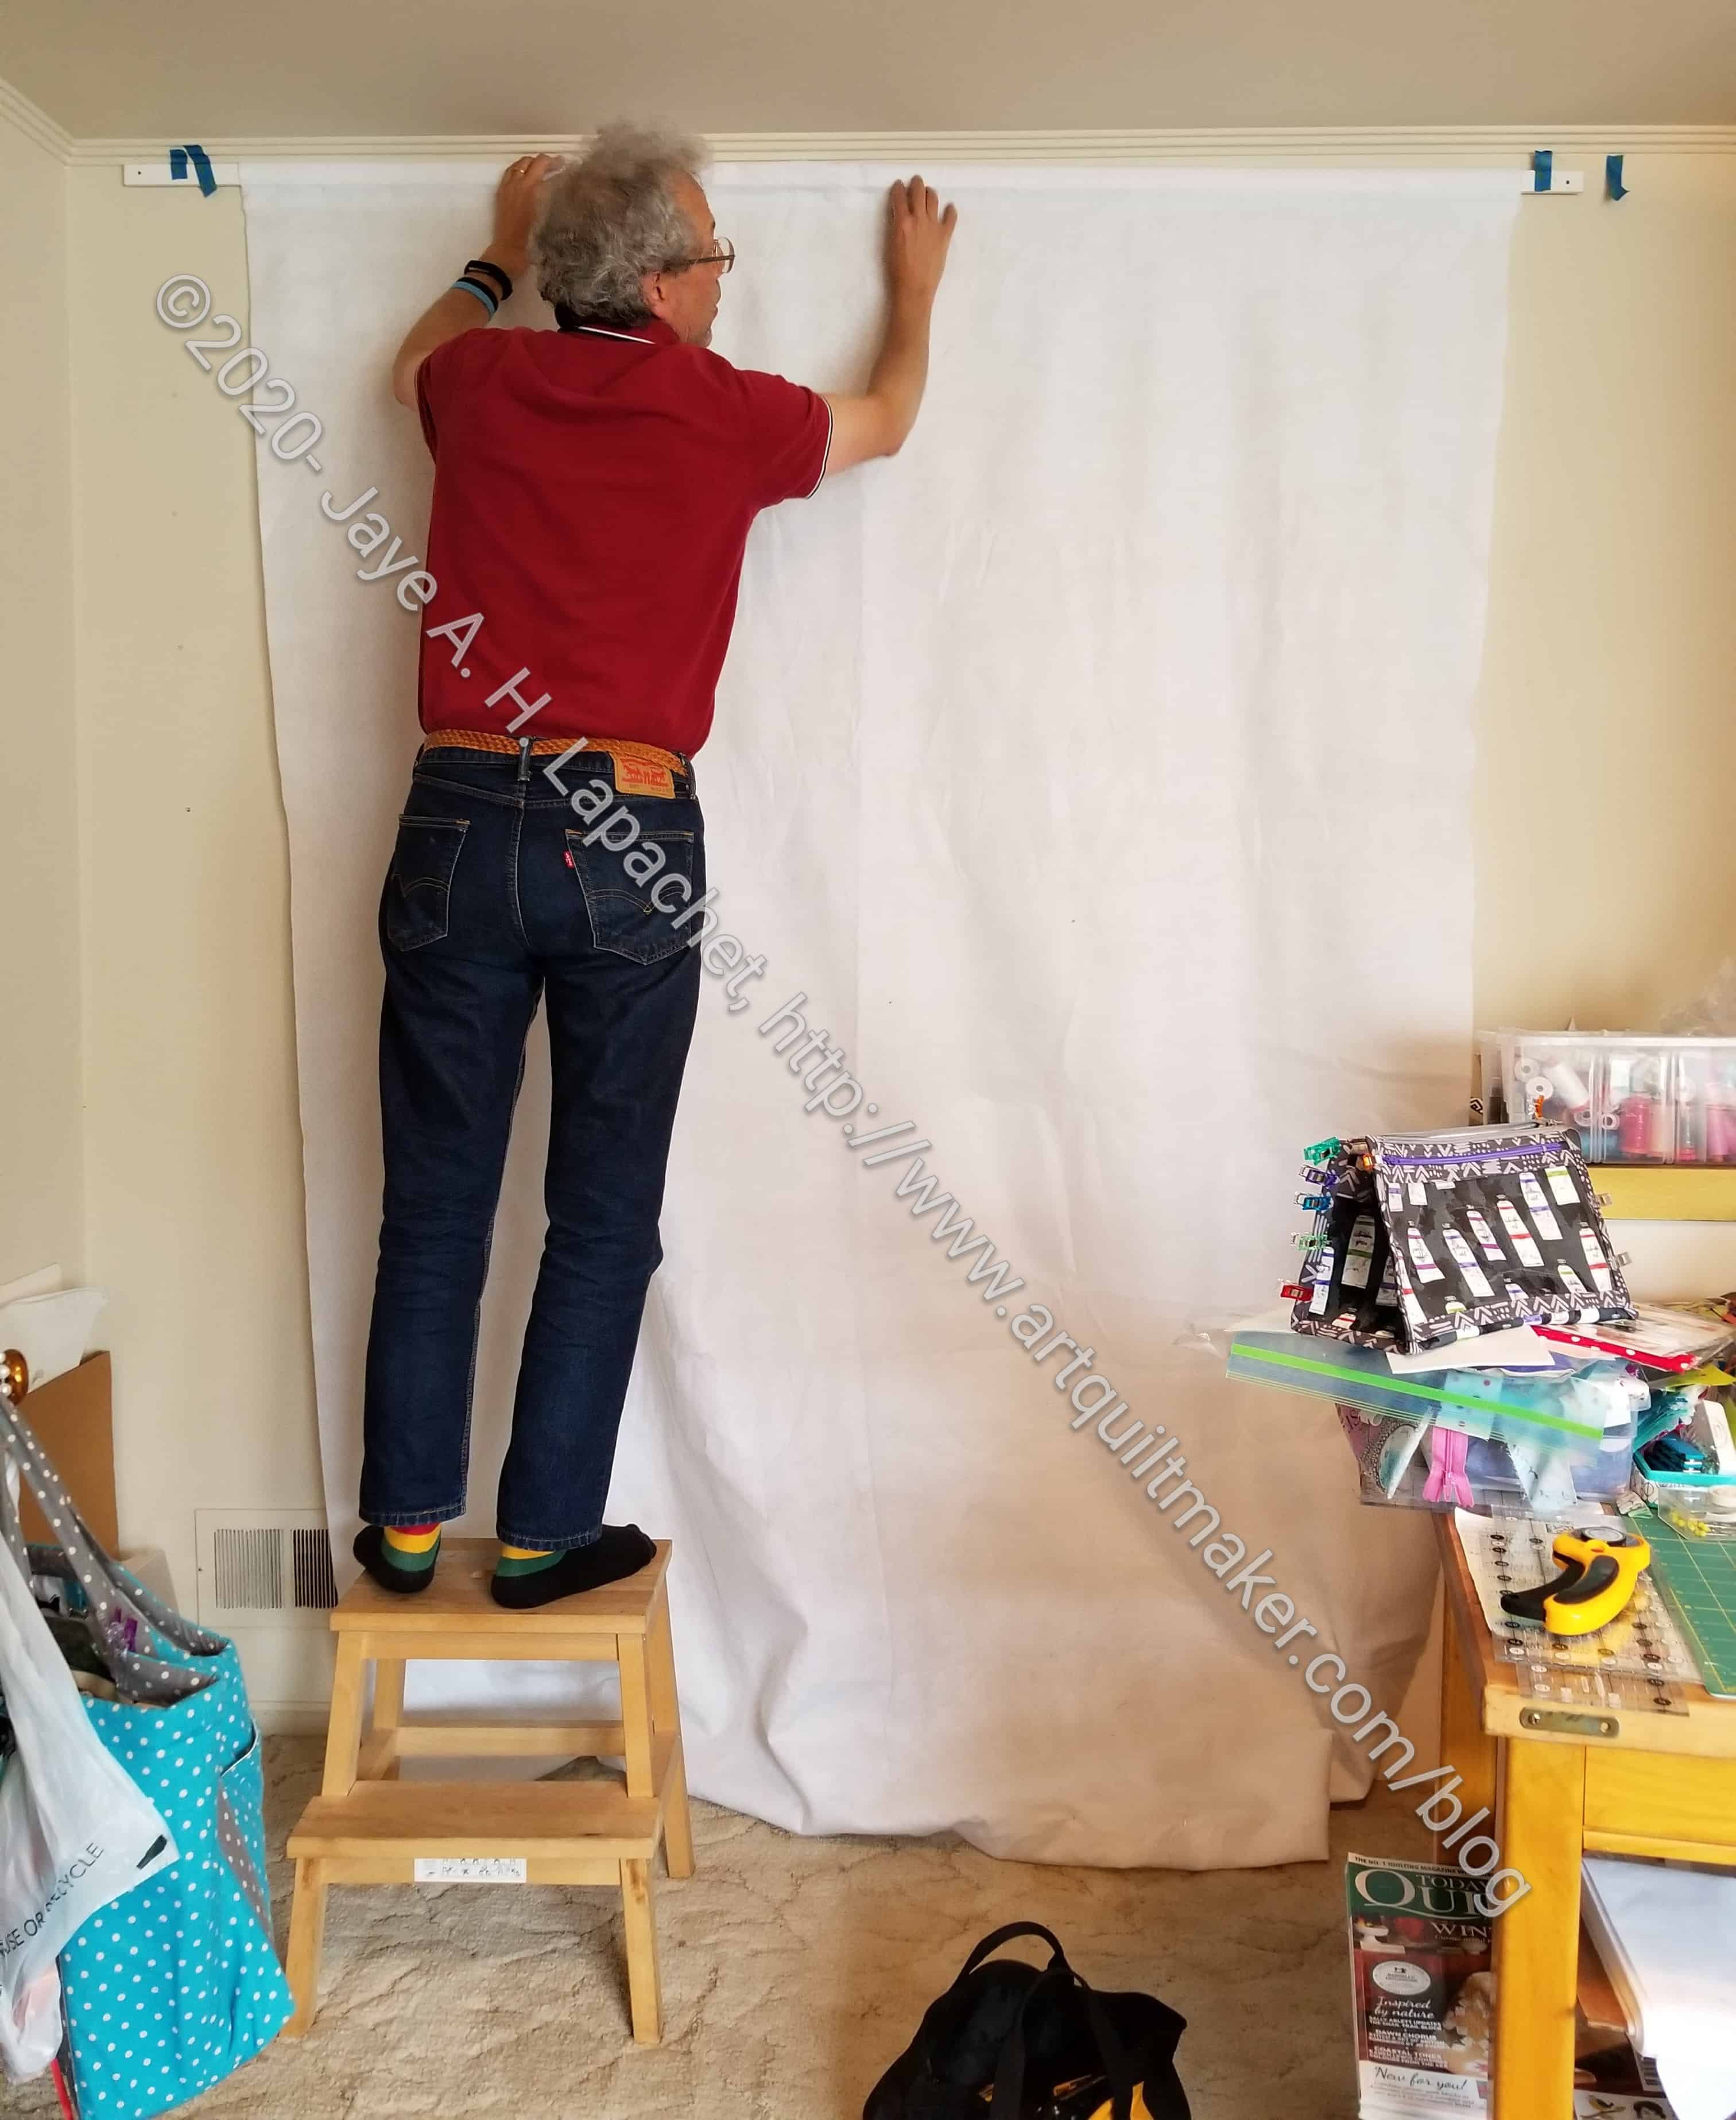
DH went out and got a piece of wood and we were able to install my new design wall.
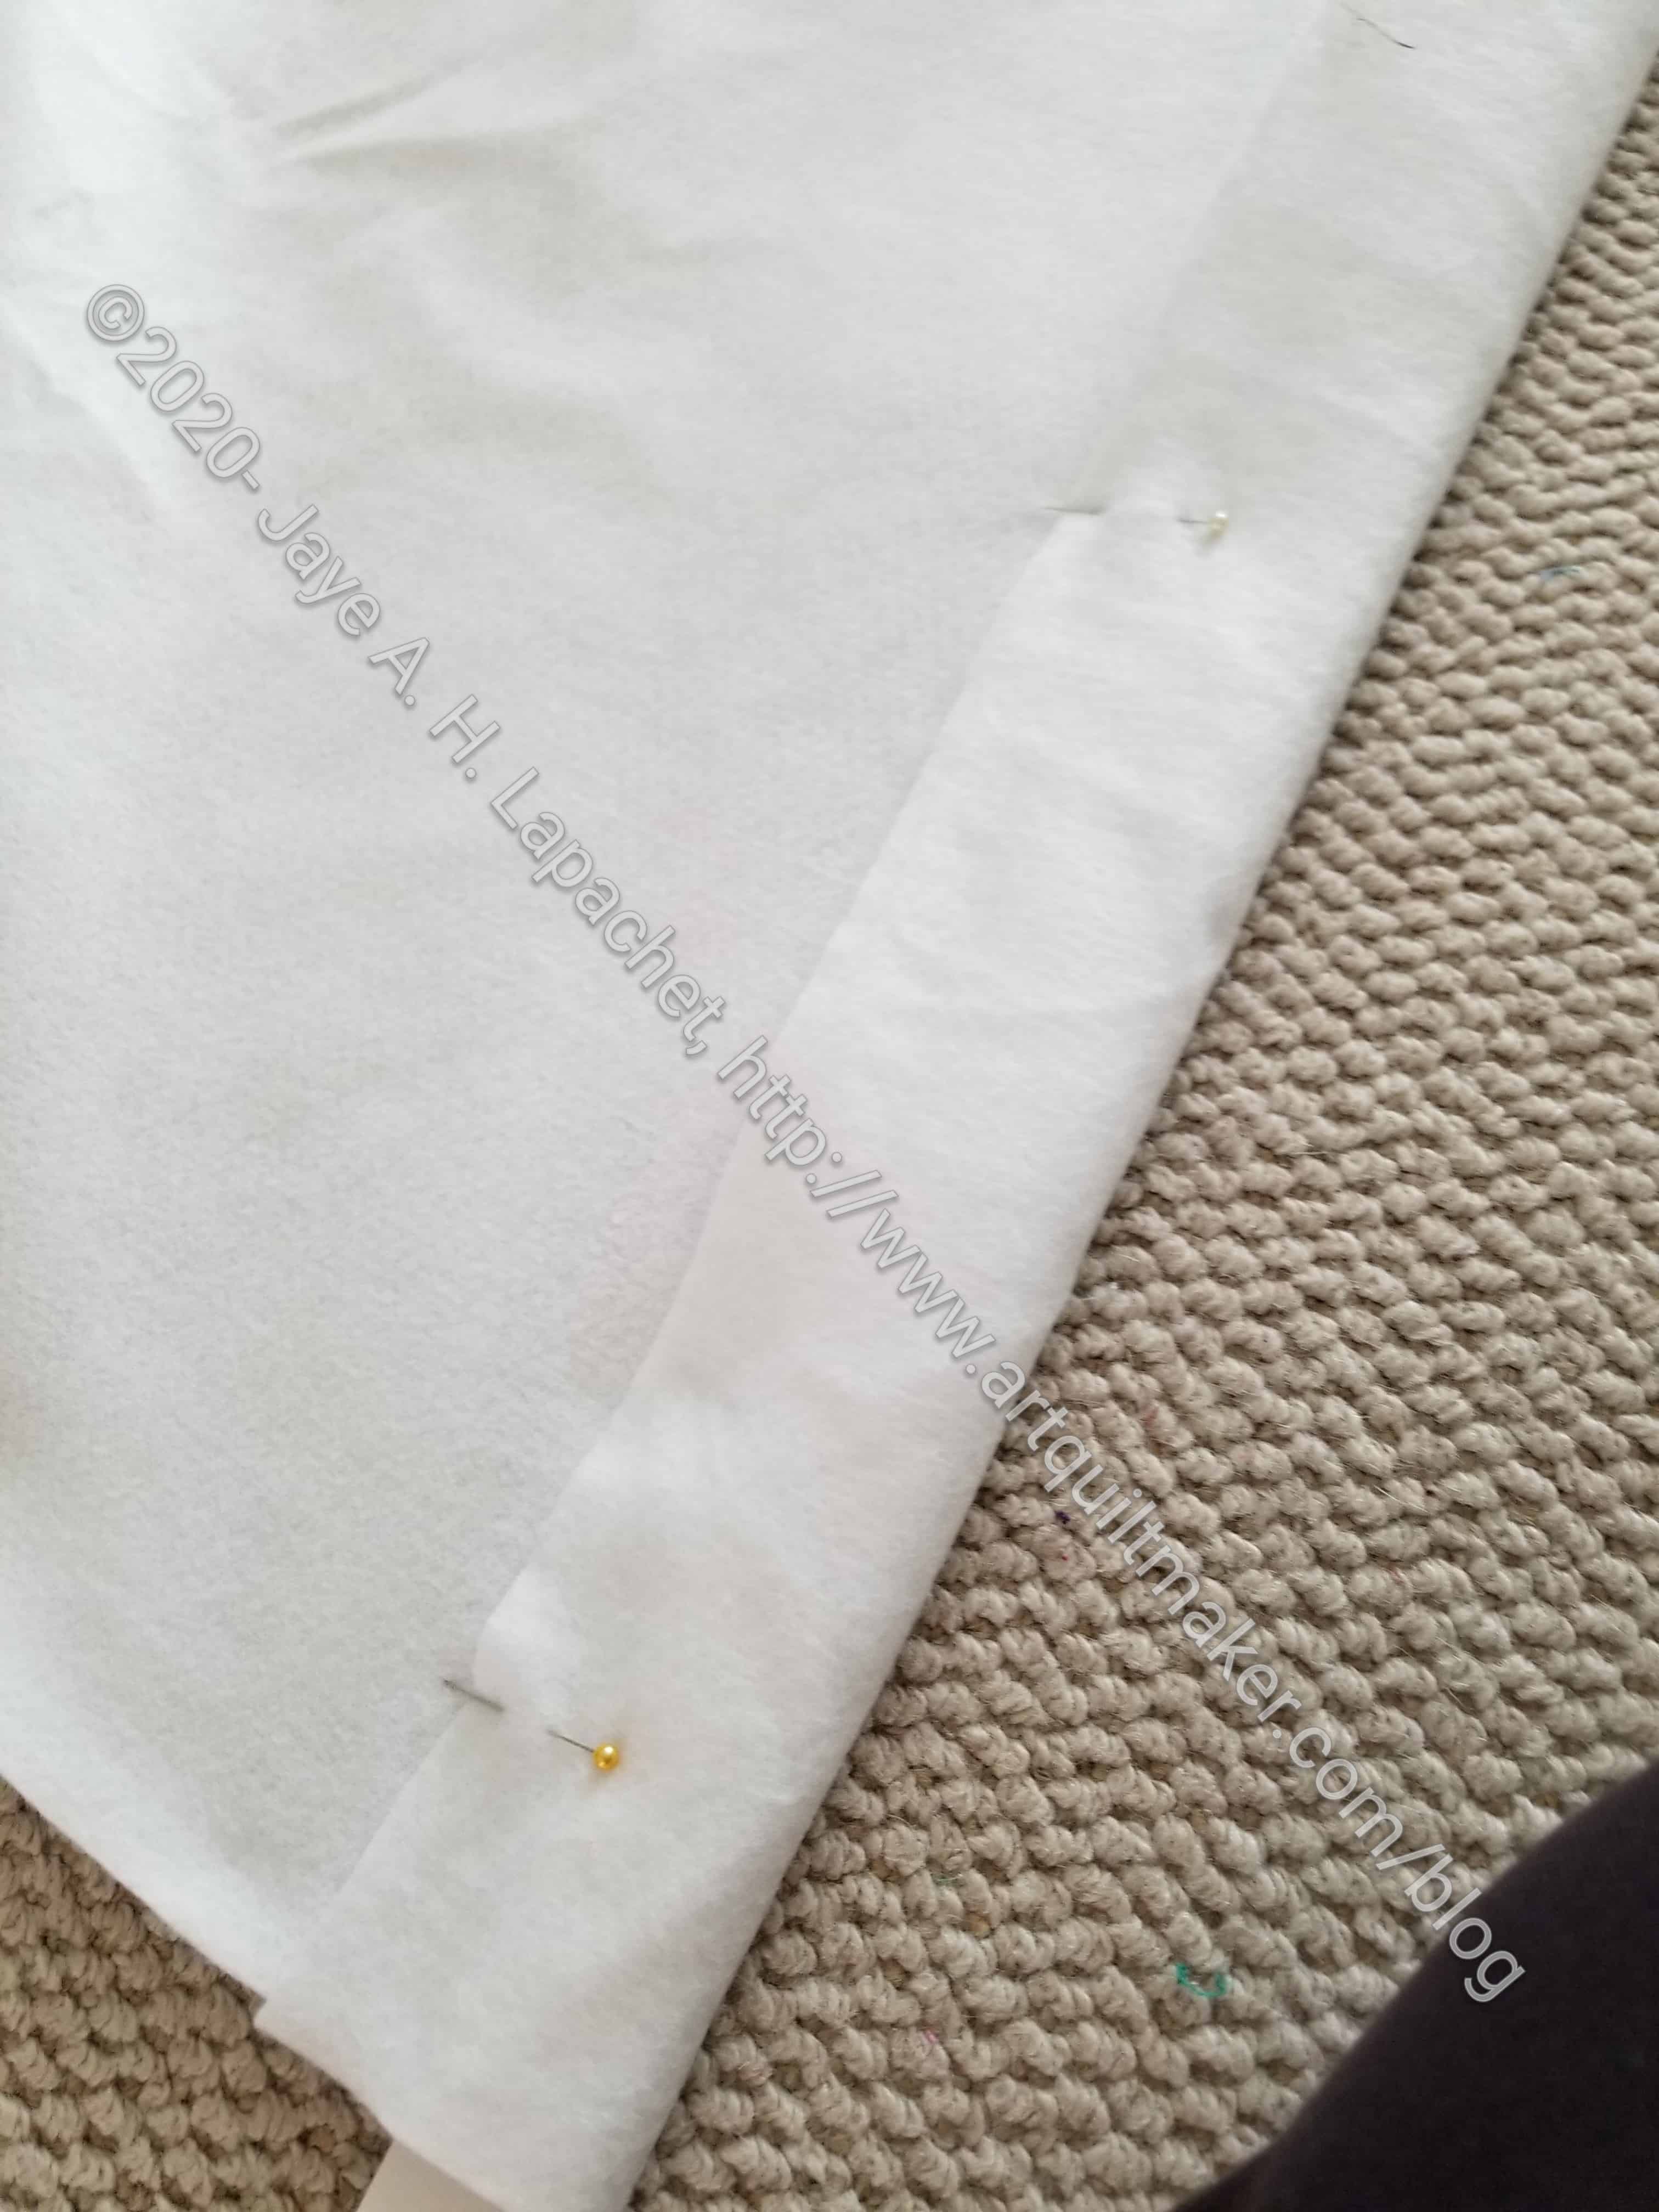
First, I made a sleeve.
Next, we slipped the wood through the sleeve and, then, screwed the wood into the wall.
The photo, above, shows my workroom in a big jumble because I had to move everything out of the way to get the design wall up.
I had hoped that 72 inches would be wider, but 72 inches is just 72 inches. It might be better that it isn’t wider, because I would just make larger quilts, I think.
Making the sleeve
Making the sleeve was a challenge as felt stretches more than regular quilting cotton fabrics.
It isn’t quite done yet. I am waiting to see if I want to put another sleeve on the bottom before I cut off the bottom. I will have to cut part of the bottom off to make space for the heating vent.