Book Review: Big City Bags

Big-City Bags: Sew Handbags with Style, Sass, and SophisticationBig-City Bags: Sew Handbags with Style, Sass, and Sophistication by Sara Lawson

My rating: 4 of 5 stars

I love Sara’s Petrillo Bag pattern and have made two of my own. She also has a very sweet tone to her blog and I like reading it. I couldn’t resist this book in hopes that she would have more of the fun shapes and clever construction methods I found in the Petrillo Bag.

Several months ago, I picked the book up to read and review, made a bunch of notes and then put it down for a long time. Why? I don’t know. This is a great book and I should have reviewed it RIGHT away. If you only read through page 19 and never look at the projects, you will learn techniques that will be useful in other patterns and projects.

First, there is a whole section on interfacing. She explains the properties of and uses for various types of interfacing. This section also has a conversion chart from American brands to Vilene. This expands the usefulness of the book and patterns to our European friends. US readers can also use this chart when making European patterns that refer to Vilene in the materials list. I was considering making a needle case from a pattern where one of the supplies listed was Vilene. This chart would have been useful.

Throughout the book, Sara also gives hints. Such tidbits as what to use to reinforce magnetic snaps, along with other tips and tricks, are scattered in little boxes throughout the book.

After the chart, Ms. Lawson provides a narrative that includes more detail on each interfacing mentioned in the chart. She tells what she likes about each one and how she uses it. Sometimes a tip or trick on adhering the particular product to fabric is provided.

Next, there is a section called “Bag Making Techniques” (pg. 12). In this section, Sara gives detailed lessons on installing zippers. I have installed zippers, but, boy, am I glad I read the section of this book. In one part of this section she gives me the perfect way to deal with those stupid zipper ends. I don’t know why I didn’t think of  her method before. Lawson also goes over making the same kind of pocket included in the Petrillo Bag pattern. By showing it separately, she gives readers the skills and provides space for the imagination so we can include it in projects of our own.

Magnetic straps, purse feet, O rings, D rings and lots of other hardware are also discussed, evaluated and defined with the same completeness as the zippers.

Sara also discusses leather handles, a topic I have never seen before. These are included in some of the projects, so tackling their peculiar requirements is prudent. I think these are an interesting addition to the patterns. I also think the manufacturers have not come out with enough colors. Many of the projects in this book, which use leather handles, have black handles rather than a color matching the fabric. It could be that Sara likes the black against some of the modern fabrics.

After explanations and diagrams concerning the the leather handles, the projects start. This book includes 12 projects: all bags of different sizes and shapes. The projects have wonderful names and are made from fabulous (modern) fabric. This section has some excellent attributes: there are at least two colorways shown for each bag. Also, the patterns, while not full-sized, are right after the directions, thus easy to find. I also like it that the finished size of the bag is included at the top of the pattern.

I would have liked to have read more about the inspiration for the bag with the pattern, but, perhaps, I am the only one who cares about such a thing.

There is no question in my mind that Sara is a genius when it comes to bag patterns. Her patterns are practical and fun. This book is beautiful to look at as well as useful. The strength of this book lies in the information before the patterns including installing zippers and how to use interfacing. As I read those pages (pg.8-19), my creative juices really started to flow.

I think you would appreciate this book. Go out and buy a copy!
View all my reviews, including non-quilt book reviews

Dream Projects #2

When I wrote the first Dream Projects post, I really wasn’t sure this would be a regular feature. I still don’t know if it will be a regular feature. However, projects I have wanted to do for awhile keep springing into my head so I am doing another post. Also, I found some other patches for blocks and quilt tops for which I had already started cutting. So many projects are taking up space in some part of my head that I can’t fit them all. I thought I had better add them to this list so I wouldn’t forget about them again.

For now, I am not dating these posts, I will just number them. I like the idea of time not passing. It seems that if I make it too easy to see how long time has passed with these projects undone, I might get depressed and I want this post to be possibilities.

Like I said last time, some of these come from the Current Projects list (Hunting and Gathering section). I don’t know if I will keep them there or move them here. Lots to work out, so stay tuned.

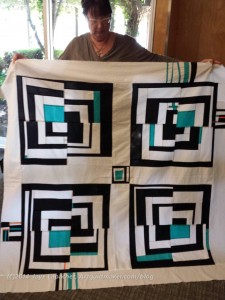
Art Institute of Chicago Fusible Quilt

  • Pattern: Original
  • Fabric: Blue and red
  • Steps: need to fuse a bunch of turquoise to something

Basketweave Baby

  • Fabric: Scrappy
  • Pattern: Fons & Porter
  • Thoughts: I like the challenge of piecing this quilt

Blue Gradation Quilt (Hunting and Gathering)

  • Fabric: blue 2.5×4.5 rectangles
  • Pattern: similar to FOTY 2008
  • Thoughts:

Blue Lemonade (Hunting and Gathering)

Easy Street

  • Fabric: pinks
  • Pattern: Easy Street by Bonnie Hunter
  • Thoughts: I really liked Daisy‘s version of Easy Street, which she calls Cherry Bomb (she thinks of the best names for quilts) in terms of color and feel. I don’t want to copy her, but if I do this quilt, I’d like to have the same pinky-red feel to it. One challenge about a mostly monochromatic quilt is getting enough contrast. I look forward to that challenge.

Food quilt #2  (Hunting and Gathering)

  • Pattern: Disappearing something, probably 4 patch or 9 patch
  • Fabric: RJR Food prints. Will use a different color for the non-food print section than I did for the Young Man’s version.
  • Thoughts: Gift for son of good friends for graduation

Food quilt #3 (Hunting and Gathering)

  • Pattern: Disappearing something, probably 4 patch or 9 patch
  • Fabric: RJR Food prints. Will use a different color for the non-food print section than I did for the Young Man’s version.
  • Thoughts: Gift for nephew for graduation

Half Moon Modern Quilt

  • Pattern: I have some ideas, but nothing definite
  • Fabric: Half Moon Modern Fabrics. I have half yard cuts, I think, plus some odds and ends and I’d like to use them together with some additional fabrics, or, at least a background.
  • Thoughts: I do think it is difficult to start with fabrics rather than a pattern.

Music Quilt

  • pattern: Don’t know
  • Fabric: music prints and tone-on-tones
  • Thoughts: The Young Man has requested this quilt as his graduation quilt

Pineapple (Hunting and Gathering)

  • Fabric: dots. Have most of the strips cut. Will be much more selective about which strips I use.
  • Pattern: Pineapple log cabin
  • Thoughts: I haven’t given up on a Pineapple quilt despite my frustration with the previous attempt. I bought a different ruler: a Creative Grids Pineapple ruler in hopes that it will work better for me.

Pink Gradation Quilt (Hunting and Gathering)

  • Fabric: pink 2.5×4.5 rectangles
  • Pattern: similar to FOTY 2008
  • Thoughts:

Scrapitude #2

  • Fabric: scrappy again, but with NO browns or blacks or super darks that look like holes; also more blues and perhaps a different background, though I do like the dots on white.
  • Pattern: Scrapitude by Charlotte
  • Thoughts: I want to try and figure out how to make the edges NOT on the bias.

Silk Colorblock quilt

  • Fabrics: silk dupioni and cotton in brights (of course)
  • Pattern: Similar to Colorblocks 2
  • Thoughts: I have made a couple of, what I call, Colorblock quilts over the years. One was the Kona Challenge in 2011, another was my 1990 Colorblocks 2 and the first one, Colorblocks, also made in about 1990. I bought the fabrics at the Marin Needlearts show about a zillion years ago and they have languished waiting for me to learn to back them so I can use them.

Spin Wheel  (Hunting and Gathering)

Stepping Stones #2  (Hunting and Gathering)

  • Fabric: Bonnie & Camille fabrics Bliss, Ruby, Vintage Modern: made two test blocks, but still in the thinking stage while I decide on the background colors. I want the contrast to be good.
  • Pattern:

Stepping Stones #3

  • Fabric: Macaron pre-cuts from Hoffman. It isn’t started, but I have all the pre-cuts and think they would make a really fun version of this quilt.
  • Pattern:

Windmill  (Hunting and Gathering)

  • Fabric: Scrappy. I will use a grey for the background, because if I use more of the cut fabric patches, the pattern will be lost. The pieces are too oddly shaped and I don’t want to lose the pattern in a mass of scraps.
  • Pattern: Come Quilt with Me Rotary templates

I don’t know if this will be a regular feature, but it might be.

BAMQG Sew Day – September

Right after CQFA, I hot-footed it, with Gerre, to the BAMQG Sew Day. It wasn’t packed, but we had to set up new tables when we arrived so we could work. It was a kind of a holiday prep day with demos on small gifts to make for the all-too-quick-approaching holiday season. I was there for the pencil case and grocery bag demos.

The pencil case is one that, using elastic, is slipped over the cover of a journal. It can also be used as a bookmark. I really liked the idea and Jolene’s way of making it.

Kelly did the demo for the grocery bags and they were like the shape of the plastic grocery bags. It has curvilinear shaped handles, which is a nice difference to some other bag patterns I have seen.

Gerre's Log Cabin
Gerre’s Log Cabin

Gerre brought a piece to work on, but ended up thinking more about the quilting than anything else. It is a great piece and I can’t wait to see what she does with it.

Angela brought her opportunity quilt materials and Ruth provided input on making up the blocks. It was good to see what Angela was doing and hear what Ruth was saying about her vision of the quilt. I had a kit and the discussing inspired me to get busy on my block.

I sat, mostly, and finished up the binding on the Wonky 9 Patch.The binding seemed to take me a long time and I became determined to finish it.

Once I was finished, I worked a bit on the Serendipity Lady. I was only able to add a few pieces to that piece and have decided to approach it a little differently. Look for more on that in an upcoming post.

Diana's Piece
Diana’s Piece

I put my two cents in when Diana was trying to figure out what to do with her piece.

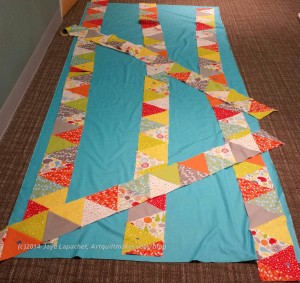
She had a limited amount of fabric and was able to make the pennant banners in the picture. There wasn’t enough to make a whole quilt so she got the blue solid and was trying to figure out a layout for the pennants. We laid out the banners a little differently than one would first consider. That brought up assembly issues, so we talked about applique’ and other options that might allow her to put this quilt together.

It was a long day, but it was also great to see friends and engage in quiltmaking.


Creative Prompt #275: Dawn

It’s a new dawn.

dishwashing soap

Dawn (Japanese: ??? Hikari) is a ten-year-old Pokémon Coordinator and a former traveling companion of Ash and Brock.

Domestic Abuse Women’s Network

Dawn French was born on October 11, 1957 in Holyhead, Wales as Dawn Roma French. She is an actress and write

Currently in the late alpha stage of development, Dawn is set to revolutionize the way we think of and play computer games.

Dawn of the Planet of the Apes

A third Warhammer 40,000: Dawn of War game from the now Sega-owned Relic Entertainment is a “strong possibility,” according to game director Quinn Duffy.

Dawn Summers was a member of the Scooby Gang, sister of Buffy Summers and daughter of Hank

Dawn of the Dragons is a free online social MMO RPG with lavish art, immersive story that offers many gameplay options, ideal for both casual and hardcore players.

Dawn of the Dragons.

nautical dawn

Dawn is breaking

NASA’s Dawn spacecraft

Definition: “Dawn (from an Old English verb dagian “to become day”) is the time that marks the beginning of the twilight before sunrise. It is recognized by the presence of weak sunlight, while the Sun itself is still below the horizon. Dawn should not be confused with sunrise, which is the moment when the leading edge of the Sun itself appears above the horizon.

During dawn (and dusk) it is usually possible (provided that the sky is cloud-free) to see approximately in which direction the Sun lies, though it is below the horizon.” (Wikipedia)

Woman’s name

dawn til dusk

Norwegian Dawn

Dawn Capital

astronomical dawn

Tony Orlando and Dawn

civil dawn

Nataly Dawn is a singer/songwriter and one half of the band, Pomplamoose. Her debut album, “How I Knew Her” was released February 12, 2013

The darkest hour is just before the dawn.

Poems written upon awakening at dawn are called aubades.

Dawn of the Dead (2004 movie)

Red Dawn (2012 movie)

Genesis 19:15

Breaking Dawn


Post the direct URL (link) where your drawing, doodle, artwork is posted (e.g. your blog, Flickr) in the comments area of this post. I would really like to keep all the artwork together and provide a way for others to see your work and/or your blog.

We are also talking about this on Twitter. Use the hashtag #CPP

The Creative Prompt Project, also, has a Flickr group, which you can join to  post your responses. I created this spot so those of you without blogs and websites would have a place to post your responses.

CQFA September Meeting

As I mentioned, the CQFA Meeting was last Saturday. It was followed closely by the BAMQG Sew Day, which meant I didn’t get home until after 6 and dinner wasn’t on the table until 7:30. I thought a lot, afterwards, if I should have spent all day out of the house after working all week. I decided that, though I missed the Young Man, it was really good for me to see my quilt pals. Also, I got a lot done.

We have been having workshops first, but on that day the business meeting was held first as we had to wait for the sun to come out. It was pretty cloudy until after 10am or even 10:30.

During the business meeting, there was a lot of talk about the upcoming show. We are getting to crunch time as the opening day draws nearer. People when off to the other room at FabMo and got help recording their audio clips. The quilts for publicity have been selected (mine was not one of them). I recorded my audio files at home last weekend, so I didn’t have to do it during the meeting. I thought some readers might be interested in hearing what I said about the quilts so I will see about posting them to quilt page for each relevant quilt. I still have to make QR Codes for my quilts.

We had show and tell and there was so much great work. I love show and tell. Everyone was very complimentary about the Wonky 9 Patch. Angela, Ann B and Sonja took at SCVQA class on wonky piecing and two of them showed their quilts. Caroline did a landscape all in black and white and talked quite a bit about framing the piece.

Of course, we had the ATC swap. I got up at about 6:30 and made mine! I got an idea and even though I wasn’t going to, I realized that I would be really sad if I didn’t get to swap ATCs, so I made mine quickly. This is the shortest timeframe in which I have ever made ATCs. I hope not to go up against the deadline like this again.

My ATCs
My ATCs

They aren’t the best art ever, but people snapped them up, which made me really happy. I did use the charms I bought at Beverly’s when I was there with Maureen. I think the charms added interest. I definitely will try adding charms again. I also think that I will put together a bunch of backs, so I don’t have to do that when I am in crunch mode. Perhaps I can make 24 backs in advance and just have to worry about the fronts each month. I won’t be at the next meeting, so I have until January to make the backs and new ATCs. I will try and do them earlier!

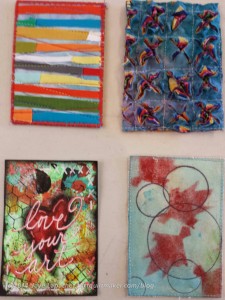
The ATCs I selected are shown to the right. (From top left to bottom right, they are by Maureen, Sue, Angela and Nancy). Angela’s were on paper and she got the idea from a painting class she took recently. I thought about getting some paper blanks to use as a base, but haven’t done it yet.  Sue used a technique that our former member Debbie did a lot of. It was a blast from the past seeing that chenille technique again.

Angela Demonstrating Sunprinting

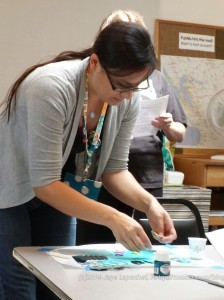
When the sun finally showed its face, Rhonda and Angela taught us sunprinting. I didn’t participate; I sat and worked on the binding of the Wonky Nine Patch, watched and listened.  I enjoyed watching everyone and talking to people while they worked. I also took a lot of photos for the CQFA Flickr group and Facebook page.

After the meeting I drove over the BAMQG Sew Day with Gerre. She is a new CQFA member, but I know her from BAMQG. She let me use her machine off and on at the last Sew Day where I forgot my machine’s foot pedal. We talked about art quilts and one thing I realized about CQFA is that people talk about their process. People are working through a process and they show the different quilts or surface design or bits and pieces of things on which they are working and they talk about it. The group is very process oriented, which I never realized until today and which I really appreciate.

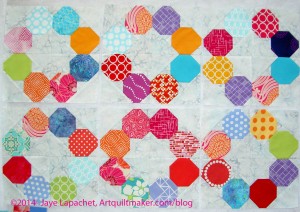
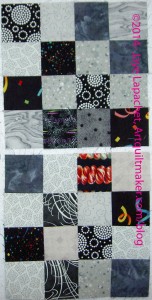
Russian Rubix Potential Layout

You might think that I did a lot of amazing work between Monday and now, but really I made the blocks I showed Monday over the Labor Day weekend and the most recent work, which I will tell you about in this post, was done this past Sunday. It just so happens that I have a lot to say on the blog and haven’t been able to keep up. I could double up topics on posts, but it makes everything so messy in terms of tagging and categorizing and finding posts later. Some of my earlier posts include multiple topics and I don’t like linking to them as I don’t know if you, dear reader, will feel like wading through a long post to find a specific topic I meant you to find. It’s all about you, you know. 😉

Russian Rubix Test Layout

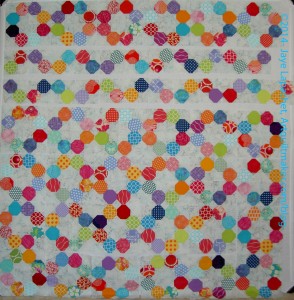
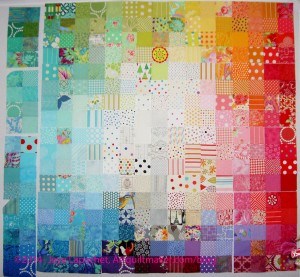
So, I got an idea in my mind and as soon as I did the Hell Binding for the FOTY 2013, I put the Russian Rubix blocks up on the design wall to see what my idea would look like.

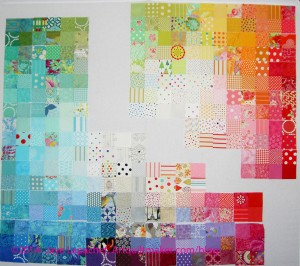
The idea is to break up one row of blocks and make them look a bit off from the other blocks so the quilt is not as boring. I would put some of the grey in between the full ring rows in order to highlight the difference.

I put the separated blocks off center from the full blocks. I don’t think there is much differentiation and the parts still look like blocks and the blocks still look like rings.

Seeing it all up on the wall like this makes me think that I should just put the whole thing together and be done with it. I have already done a lot of work on this project and I don’t want to ruin it. I am also ready to be done with it.

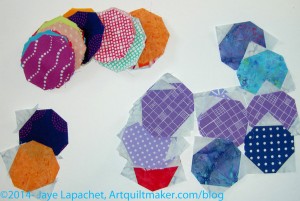
Russian Rubix Pieces & Parts

Alas, I have a ton of pieces and parts that which have not yet been made into blocks. What would I do? Make a second one? Cut squares out of all those octagons? Donate to charity?


Previous Posts:

Nota bene: I was kind of shocked that there was a dearth of posts at hte beginning of August. I feel like I have been working on this project all the time. I realized that I had been making parts with leaders and enders and not really making discernible progress until I put a bunch of blocks together.

Finished: Wonky Nine Patch

Finished: Wonky 9 Patch

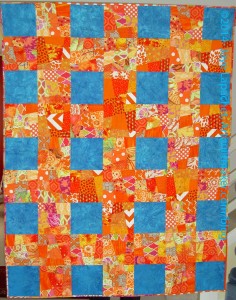
The first thing I thought after I finished this quilt was to start counting the places in my life where I needed to make note. I stopped, because I got tired. Needless to say, the quilt is done, which means this one and the Disappearing Pinwheel can head off to nephew brothers at the same time and nobody will feel sad.

I showed it at CQFA, though the binding was only partially done.  I finished, later that day, at the BAMQG Sew Day, but will probably wait to send it off so I can show it off at the BAMQG meeting. Kathleen will be there, which will make the display extra sweet, because her quilt is the one that inspired this quilt.

One of the reasons I brought it to show at CQFA was because I thought I would send it off before the next meeting, which is in November. It turns out I won’t be able to attend that meeting anyway. They are good eggs and don’t mind if the quilt isn’t finished. Everyone liked the colors and I am thinking of making another one just because this one turned out so well visually. Realistically, though, I have done what I wanted with this design and don’t really need to make another one. The oranges are just so striking that I almost can’t help myself. I have a lot of other projects on my plate (in process) and in my dream list, none of which are a second version of this quilt.

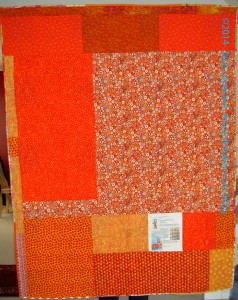
Finished: Wonky 9 Patch (back)

See more on the quilt page.

Additional Russian Rubix

Russian Rubix - Sept 2014
Russian Rubix – Sept 2014

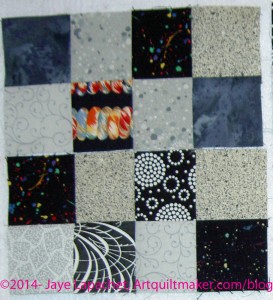
Another project I advanced was the Russian Rubix project. I made the six blocks you see on the left, but I also made parts for other blocks.

In the course of making the parts, I got an idea to make the quilt more than just a bunch of blocks. As soon as I get the FOTY 2013 top off the wall, I will try it out and take a photo.

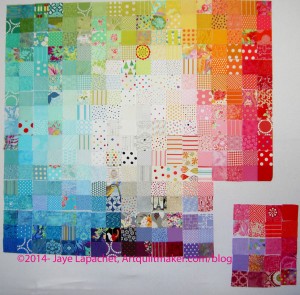
Possible Border?
Possible Border?

The above is just a Photoshopped version of what I am talking about, but I think that adding in a couple of rows like the above, perhaps spaced with a  thin piece of background in the middle of the blocks will make the quilt a lot more interesting. We’ll have to see.

Book Review: Quilt Colour Workshop

Quilt Color WorkshopQuilt Color Workshop by Fat Quarterly

My rating: 3 of 5 stars

When I started this book I loved it. The color theory section is well illustrated and explains color theory well.

When I got past the academic part of the color theory I was disappointed.

Then I looked carefully at the color sections and liked the book again.

Thus, this is a solid ‘3’ in the 1-5 scale.

There are four pages of color theory in this book, which I thought was great as I went through those pages. Then, l I realized that four pages was all there was on color theory. A cursory look told me that there was only block and quilt patterns after the 4 pages of color theory and I was disappointed. The book was basically a pattern book. Still I soldiered on and found that the authors had cleverly tied the color theory pages to the patterns and that made the entire book into more of a workbook than a 4 page color theory pamphlet with block patterns.

In the color theory sections all of the types of color combinations are explained using quilt blocks and semi-real fabric designs. This technique makes color theory more relevant for quiltmakers, because most of the use involves patterned fabric, in different scales. To that end the authors write “Value is a measure of how light or dark a colour is. Saturation is the level of black, grey or white in a color, ranging for pastel to a full-intensity colour right with pigment. With a patterned fabric you can have the same colour, but the amount of white present will affect how light or dark the fabric ‘reads.’ ” This is relevant for quiltmakers, because many, many fabrics are made up from more than one color. Often white is included in the fabric to create a design.

The authors also say “One of the problems for quilters is that colour theory is mainly used for describing the relationship of solid colours, or the mixing of them. The huge variety of patterned fabrics with multiple colours creates some interesting problems.” The Fat Quarterly and the authors have hit the nail on the head with this statement. You can see from my Fabric of the Year quilts that creating gradation is not that easy with quilt fabrics. the first problem is that   you can’t physically mix them, but secondarily, because you cannot guarantee that they will be solid. Quiltmakers, notoriously, love brightly and colored fabric.

The book explains the color relationships in multicolored fabrics and how to create a quilt using one of the color schemes described in the color theory section and the color wheel. Examples of current fabrics (pg.11) are included.

The short section on color theory is followed by a Color Wheel Quilt pattern, then by various pattern sections organized by color. Each section has a series of blocks colored in different ways and labeled with the type of color scheme it is. Larger projects and home decor projects are also included.  I like this idea for a few reasons.
1. the reader can see what blocks look like when colored in different ways.
2. the coloration of the blocks supports the section on color theory (pg.7-11) in a very graphic and overt way.
3. the made up examples of blocks using different fabrics added to the support of the color theory and difference in how the blocks look.

After the blocks in each section are a few patterns, some of quilts, some of studio and home decor patterns. The format follows for all the of the colors: blocks first, then quilts or home decor projects. The projects and blocks are based on classical patterns, but venture off in their own direction. The blocks are interesting and the quilts are a bit off the beaten path. there are a wide variety of projects that would appeal to all different kinds of people.

The last section is a few pages on techniques. One or two paragraphs describe a multitude of different techniques used to make a quilt. Photos from the various projects illustrated the section providing continuity. There is a conversion chart from English and metric systems to inches in this section. I can imagine that this would come in handy in the future.

There is a pattern section in the back with full sized patterns. You will have to put pieces together that are too large for an 8 1/2 x 11 page.

View all my reviews

Donation Quilt Progress

Donation blocks 1 & 2

Another thing I did during the Labor Day Sew-in, using leaders and enders, was to make donation blocks. As I said, I had to put a leader or ender between each piece of the FOTY 2013 pieces. That meant that a lot of other projects progressed, including the donation blocks.

I only made three blocks, which doesn’t buy me anything in terms of another row on the quilt, but I am three blocks closer to another row, which is closer to an entire quilt and that is nothing to be sneezed at.

Donation blocks 3
Donation blocks 3

Creative Prompt #274: Cold

Catch a cold

Baby, It’s Cold Outside

cold fish

cold weather front

common cold

Cold Mountain (movie)

Coldplay

cold symptoms

Cold War

out in the cold

cold remedies

Cold Case

Stone Cold Fox

cold fusion

Hot and cold

cold water bath

cold sore

Civil War’s Battle of Cold Harbor

cold storage

out in the cold

summer cold

Cold Stone Creamery

Cold Spring, Minnesota

extreme cold

Post the direct URL (link) where your drawing, doodle, artwork is posted (e.g. your blog, Flickr) in the comments area of this post. I would really like to keep all the artwork together and provide a way for others to see your work and/or your blog.

We are also talking about this on Twitter. Use the hashtag #CPP

The Creative Prompt Project, also, has a Flickr group, which you can join to  post your responses. I created this spot so those of you without blogs and websites would have a place to post your responses.

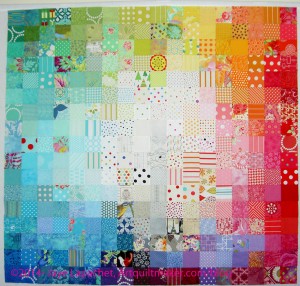
FOTY 2013 Top

Fabric of the Year 2013 Top

One of my goals for Labor Day was to finish the Fabric of the Year 2013 top. This was a daunting goal, because each piece has to be sewn to another one in a certain order.

That meant that I started in one corner (see below), sewed two pieces together, put a leader/ender in the machine right after the two FOTY pieces, sewed those, took the FOTY pieces out of the machine, pressed them and put them back on the wall before taking the next two pieces. Repeat. There are 306 pieces in this quilt, so I made progress on ~306 pieces from other projects as well.

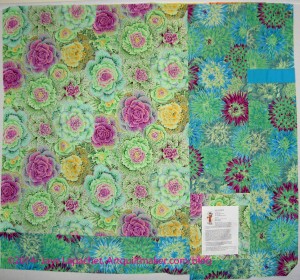
FOTY 2013 Back
FOTY 2013 Back

This project is extremely taxing in terms of piecing. I was pretty much done with the project when I finished top, so I did try to piece the back with large pieces of fabric. I used two pieces of different Philip Jacobs fabric. They go together well enough and I enjoy the large lettuces. They make me laugh. I hope I’ll still laugh when I am liking the project much better.

Normally, I would have put a quilting border on it, but I emailed Colleen and she said just to stitch 1/8″ away from the edge and that would keep the quilt from getting out of shape when it is quilted. I hope it works, because I want the shape of the quilt today to be the shape of the quilt forever. If it works, I’ll have to remember this trick for the future. I do like using ugly fabric as a quilting border, though.

Below are some photos of the project in process.

FOTY 2013 in process

LDSI Report

I wasn’t a very good participant in the Labor Day Sew-in. I only made a half-hearted attempt at participating via social but I did sew like a demon. I had a goal of piecing the top to FOTY 2013 and making blocks for the donation top.

Journal Cover Front
Journal Cover Front

I accomplished my goals and made a bonus journal cover – not the whole cover, just the front, but I did it as leaders and enders while I put the rest of the quilt top together.

I have to get some new journals before I get to use this cover. I am going to try to just use ShapeFlex on both insides of this one. If I decide to use flannel, I will measure this time. 😉

September To Do

Nos. 15-18 were added and crossed off as I wasn’t feeling terribly productive and I needed a little pick-me-up. Some of the items below have been on the list for a very long time and are getting somewhat depressing. That push a month or so ago to work on things and cross them off the list was good and I may need to do that again soon.

I found the templates for the tiny 8 pointed star and just did that one day when I was feeling a little stressed. That is off the list. Yay!

To Do List:

  1. Cut background for black wavy line 8 pointed star
  2. Sew white on black wavy line 8 pointed star
  3. Quilt Christmas table runner
  4. Quilt/stitch fish postcard – finished
  5. Wash fabric AKA The Great Unwashed (I am guessing this will never be off the list, but a girl can dream) ;-) – I washed and pressed a some flannels for receiving blankets
  6. Make stiff bucket or box for TP in main bath
  7. Make stiff bucket or box for TP in second bath
  8. Dragon Box (gift)
  9. Anna Maria Horner Multi-tasker tote (gift-due Holiday 2013- oops) – found the pattern, which is a good start.
  10. Make 3 notepad covers (gifts)
  11. Day in the Park backpack variation
  12. Cut lining fabric for Church Ladies apron
  13. Sew Bon Appetit apron
  14. Sew Church Ladies apron
  15. Make receiving blankets
  16. Sew BAMQG label to donation quilt for Band Mom
  17. Sew BAMQG label to green donation quilt back
  18. BAMQG label to Flower Sugar donation quilt back
  19. Make donation blocks
  20. Sew sleeve on See
  21. Sew facing down on See
  22. Binding on Wonky 9 Patch

To see the 26 Projects Lists, which list quilt WIPS, visit the August Current Projects update. Last month’s to Do List is about the same.

Completed small items since November 4, 2013 (prior to this month’s list)

  • Sew on sleeve for Original Bullseye
  • Kelly’s Brown Round Robin
  • Pillow from cake tea towel
  • Try plain square for center of Russian Rubix blocks
  • Hand sew bottom opening in Shopping bag for BAMQG
  • Finish binding on T-Shirt quilt
  • Secret Santa gift for BAMQG
  • Kathleen’s Round Robin
  • Make sleeve for Original Bullseye
  • Finish sewing triangles for Scrapitude
  • Take apart Ribbon Star and resew
  • Color Group donation quilt
  • Binding for Color Group donation quilt
  • Make shopping bag for BAMQG
  • Sew coffee patch to red bag
  • Sew coffee patch to bathrobe
  • Sew green and red striped 8 pointed star (probably should include an item called “find background template for 8 pointed star!)
  • Scrap Lab backpack
  • Make binding for Disappearing Pinwheel
  • Petrillo bag #2
  • Bright apron as a gift
  • Paris apron as a gift
  • Finish tote for Mom‘s auction (new 6/2014)
  • Layer, baste Christmas table runner

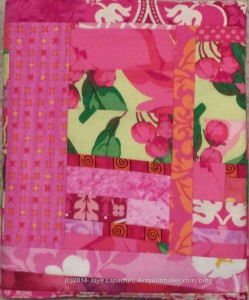
Pink Rose Journal Cover

Pink Rose Journal Front Cover

As you know I like to make journal covers for my journals. I have been using the Yellow Flower Journal journal cover on my most recent journal. Since I have been off a lot I am carrying my journal around more and spending more time with it. That means I have to look at the cover more often.

I don’t like it.

I like the fabric, but the cover itself is boring. So, I decided to make another one. I probably have at least two months of life left in this journal and I didn’t want to look at a boring cover.

Don’t worry, I don’t hate this journal cover. The Yellow Flower Journal Cover isn’t going waste. I will put it on one of the older journals that has not yet been covered.

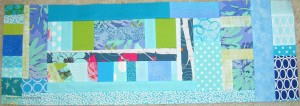
I had a piece of Mosaic Piecing to which I had been adding bits of pink and I decided that was a good start. I made sure to add pieces on all different sides and to sew various pieces together before I sewed them to the main piece that would become the journal cover.

The Good

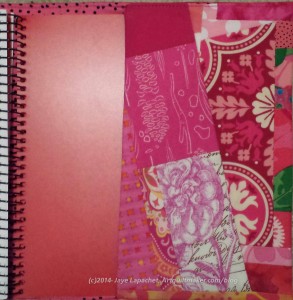
Inside Back Cover
Inside Back Cover

First, there is a lot of piecing, including some of the yellow rose fabric from the Yellow Flower Journal Cover. The piecing is not just all strips added on to the ends of the piecing which makes it a little more interesting. I was even able to add a few diagonal lines, which adds interest in terms of piecing.

Next, there are bits of pink that I really like. Some from Joel Dewberry’s Notting Hill line, various Philip Jacobs, a few batiks and some random pieces that make me happy.

Third, though I had some trouble with the interfacing and flannel, the feel of the journal cover isn’t too puffy, which I like.

Last, it is PINK! Pink makes me happy.

The Bad

I was lazy with the flannel and just eyeballed the size instead of measuring. This caused other problems later.

I had some trouble with the stitching as a result of my laziness with the flannel. If you remember, you have to stitch very close to the edge to make the journal cover fit really snugly and not floop around. By not measuring the flannel, it was too small, so I had to sew it to the seam allowance when I put the back and front together. That means that a bit of the flannel was in the seam allowance where I had to sew when  I was sewing the final step. That made it really thick and hard to sew on the corners.

The Unknown

I am not sure if this is the Good, Bad or Ugly.

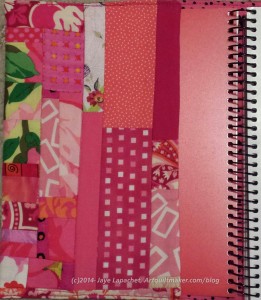
Inside Front Cover
Inside Front Cover

There was so much piecing that it was kind of a waste to try and put ShapeFlex on to the pieced side of the cover. That means that only the inside has interfacing on it. As I said, above, the cover feels ok, so I guess it is fine.

The other factor was that there were a lot of seam allowances, because of all the piecing. That made the whole piece a bit thicker, including in the seam allowances.

Finally…

Back Cover
Back Cover

Clearly, this project offers continuous learning for me. I guess I haven’t perfected the process yet and will just keep trying.