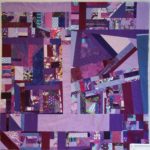
Good-bye Design Wall

PIND Design sans fabric

I sold my design. I bought the design wall at least 5 years ago, probably more. I don’t remember exactly when, though it was at a Santa Clara Valley Quilt Association show. It was an impulse buy and I had high hopes for the additional design space. Unfortunately, it didn’t really work for me, as it turned out. I know you are thinking “how can she say that?” when I have used it for many, many projects.

I was able to use it and make quilts. It just wasn’t ideal. I felt that the fabric part was too flimsy for me. The flannel wasn’t sticky enough for me either.

Empty design wall space

It is off to a new home and my workroom seems a little empty now.

Since I sold it I have the money to buy the supplies to build a new design wall. I have sweet talked DH into helping me. I need him to cover the Home Despot part of the project. I did some research at Britex a few years ago and think I know what I will get to cover the masonite or Insulfoam. I am using Quiltin’ Jenny’s guide as my basis as she has practical tips. My goal is to have a firm back so I can press patches and blocks on to the design wall. We will paint this room sometime, so I need to be able to remove the wall without too much trouble.

Various & Sundry 2020 #7

Other Artists

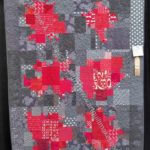
There was a discussion of Karl Benjamin at our guild meeting last week. He seems to have been pals with Ellsworth Kelley, who I have discussed here. Karl’s works are very modern quilt (in the contemporary sense of the phrase)-like. It is interesting to see how nothing is new.

Johanna Bashford has a new coloring book available as a free download. Print it on good paper! To go along with this or give you some options in terms of types of things to color, 100 museums have converted parts of their collections into coloring pages. Check out the hashtag #ColorOurCollections. Among the institutions advertising their contributions are representatives from the academic world, including Harvard University’s Countway Library and the University of Waterloo, as well as museums like Les Champs Libres and the Huntington Library.

My pal, Jeff Rutherford, was featured in an article in his local hometown newspaper. It looks like Jeff creates his masterworks from his kitchen! In his article, he mentions Timna Tarr. I have never seen her work, but was interested once I took a look around her site. Check out her Instagram feed as well.

Projects, Patterns, & Tutorials

Everyone is making face masks, which is a good thing. However, I think that there is frustration and hopelessness out there that would be alleviated by Dammit Dolls. Perhaps alternating face masks and Dammit Dolls would mitigate some of the stress we are feeling. Welcome Home Farm blog has a pattern for Dammit Dolls.

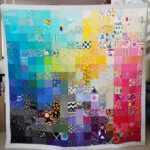
Deb Tucker’s  Blockbuster Season 5 project is in progress. Yes, the blocks use her tools, that allows you to mix and match elements. Block #48 is now available. Check out Blockbuster Season 4.

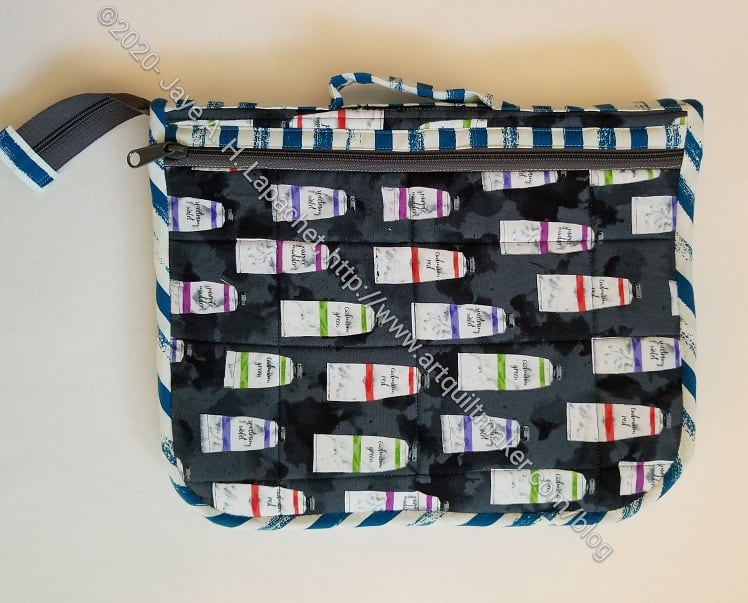
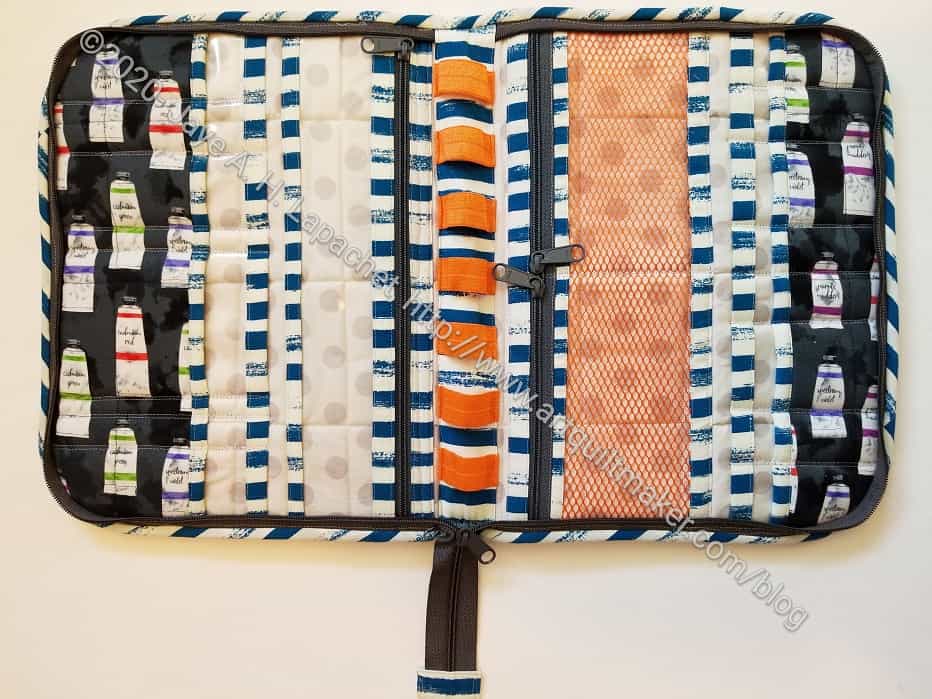
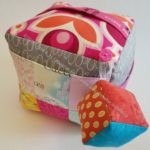
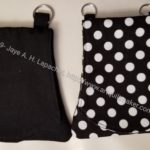
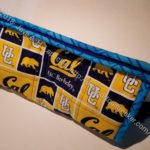
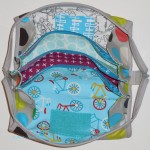
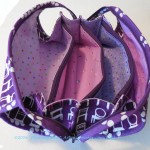
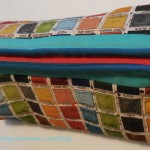
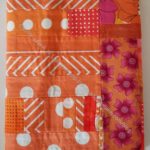
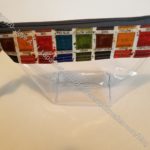
I love the look of this scrappy zipper pouch tutorial.

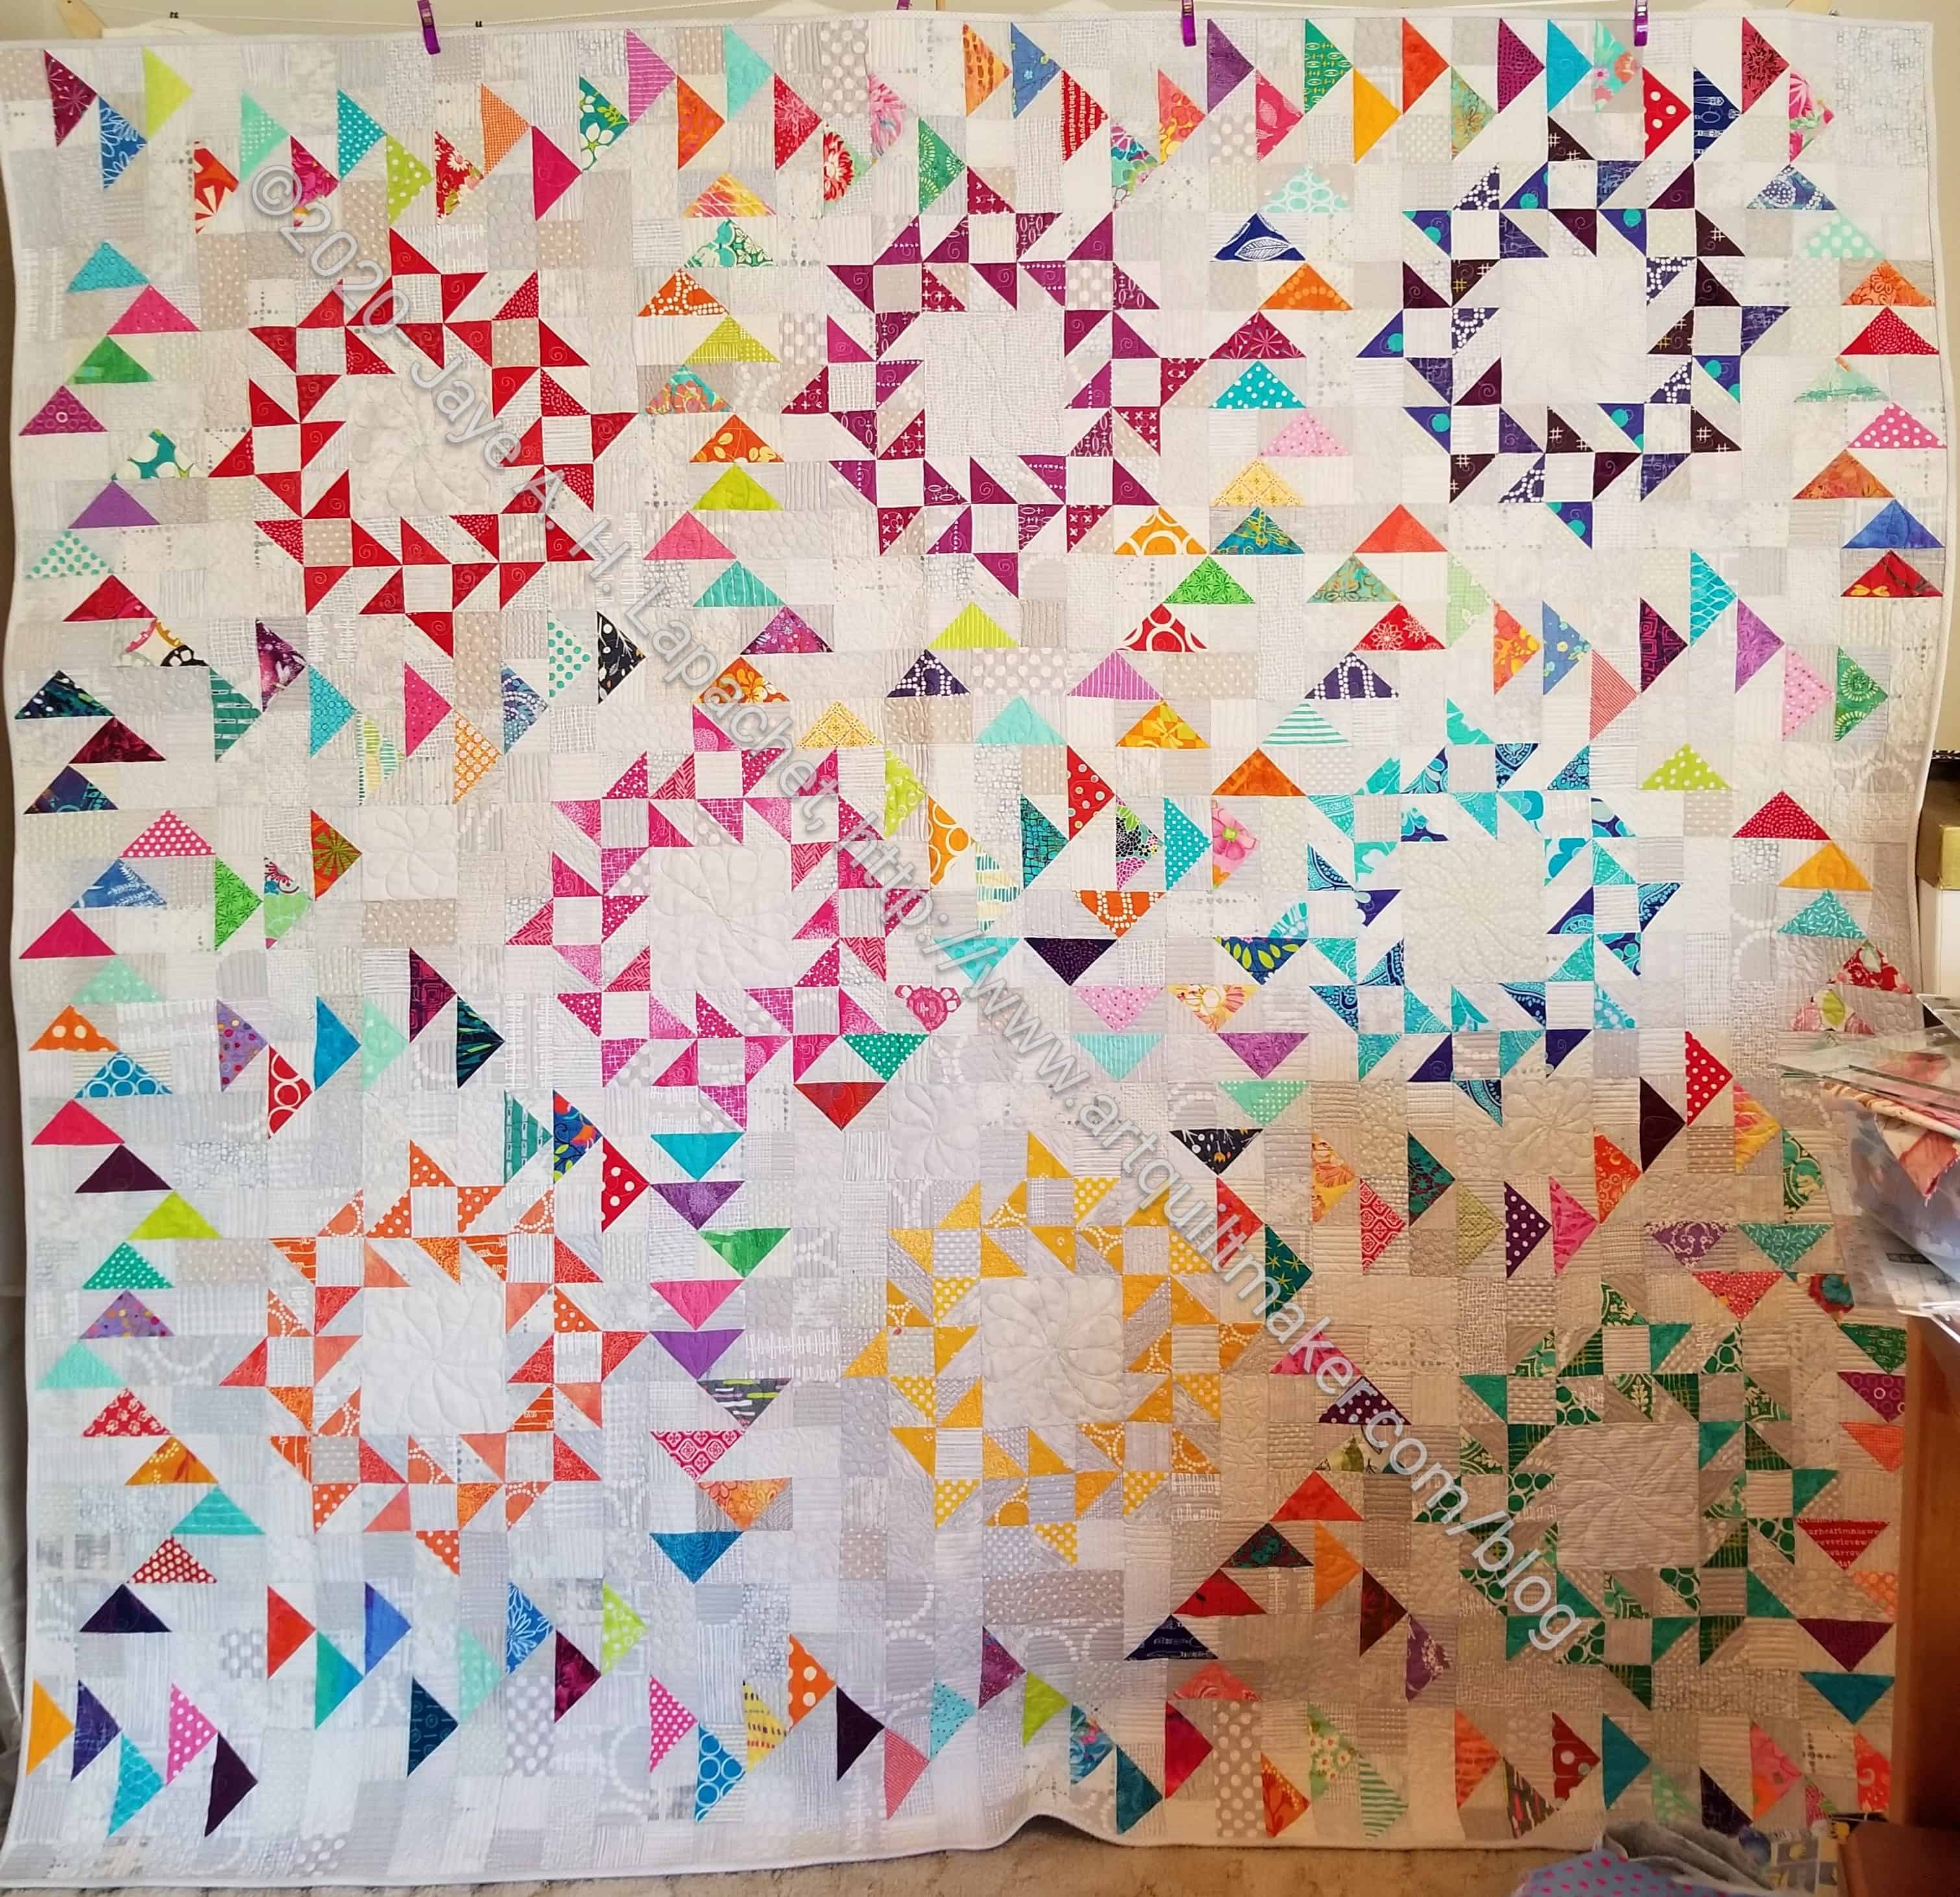
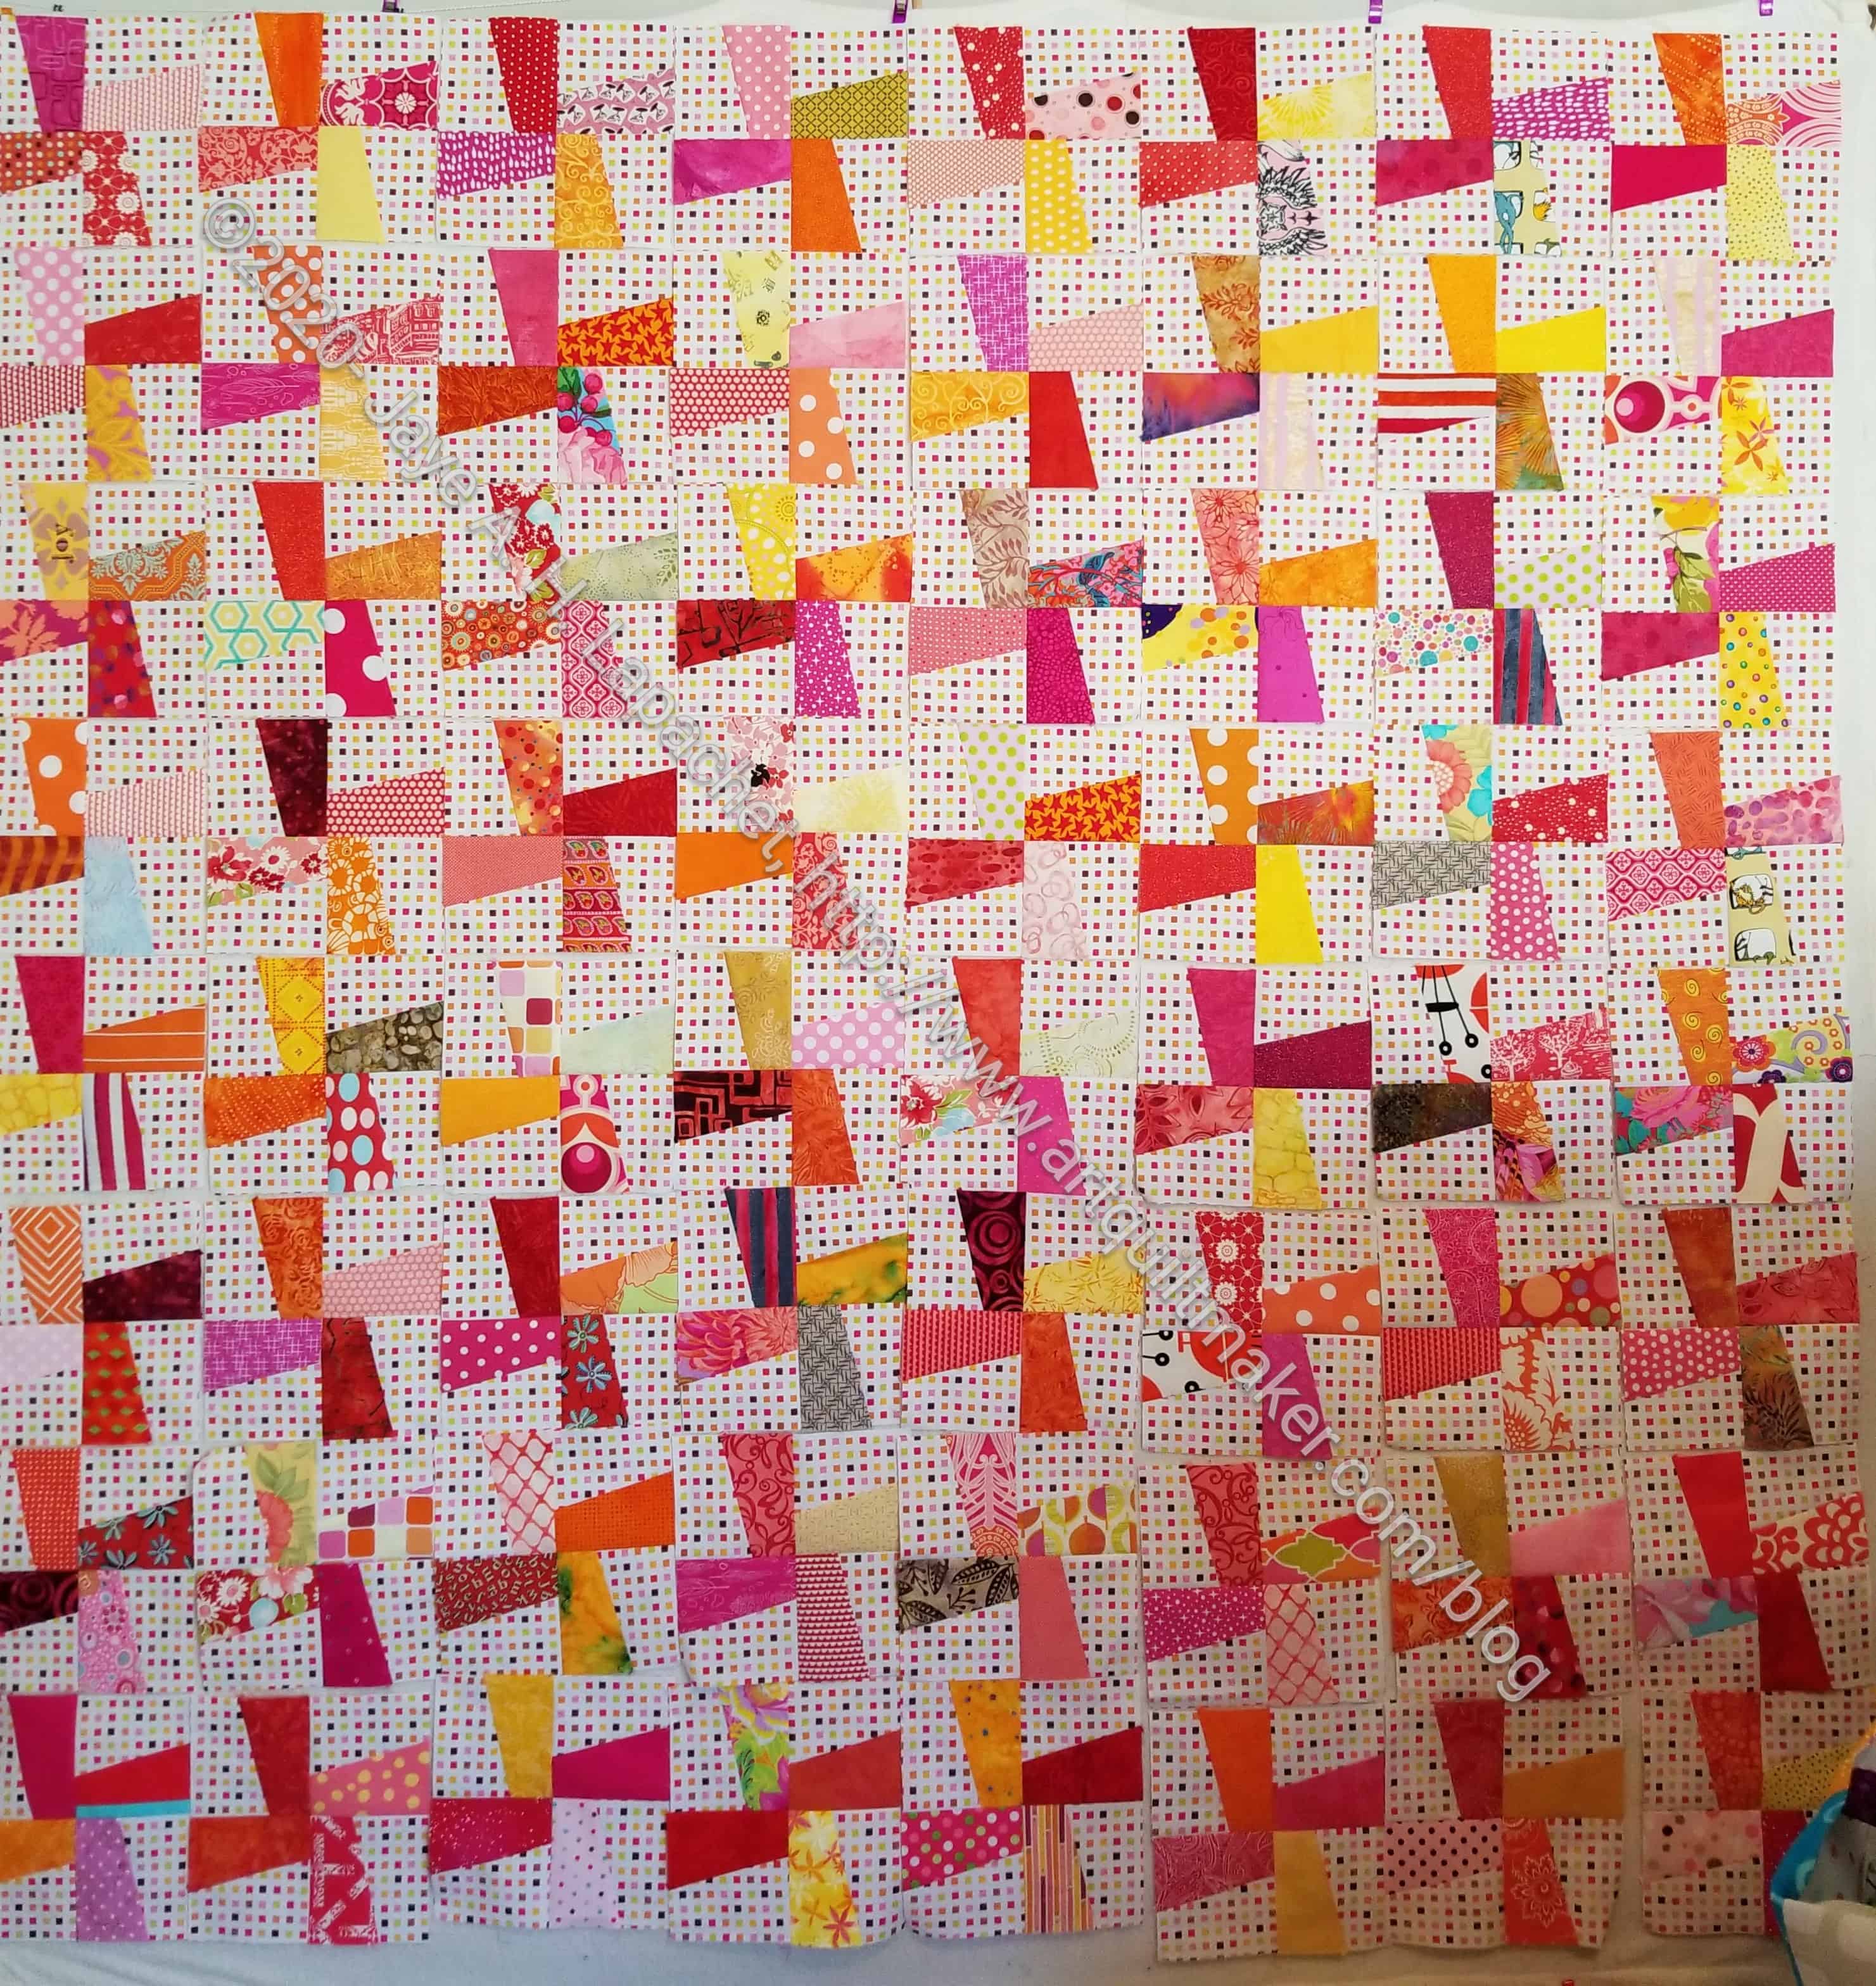
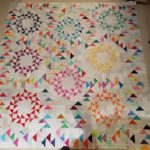
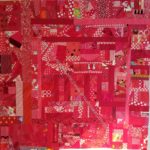
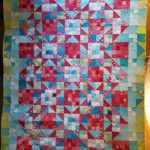
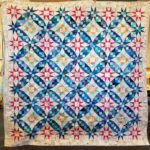
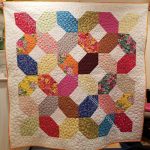
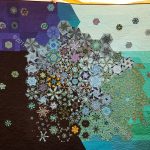
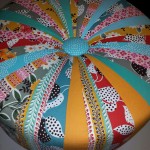
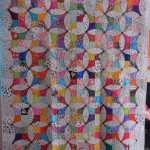
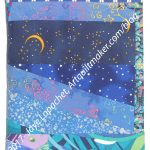
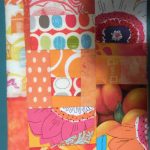
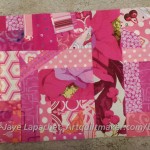
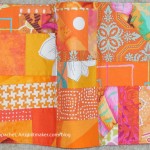
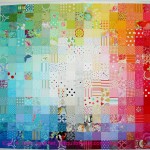
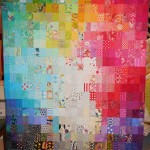
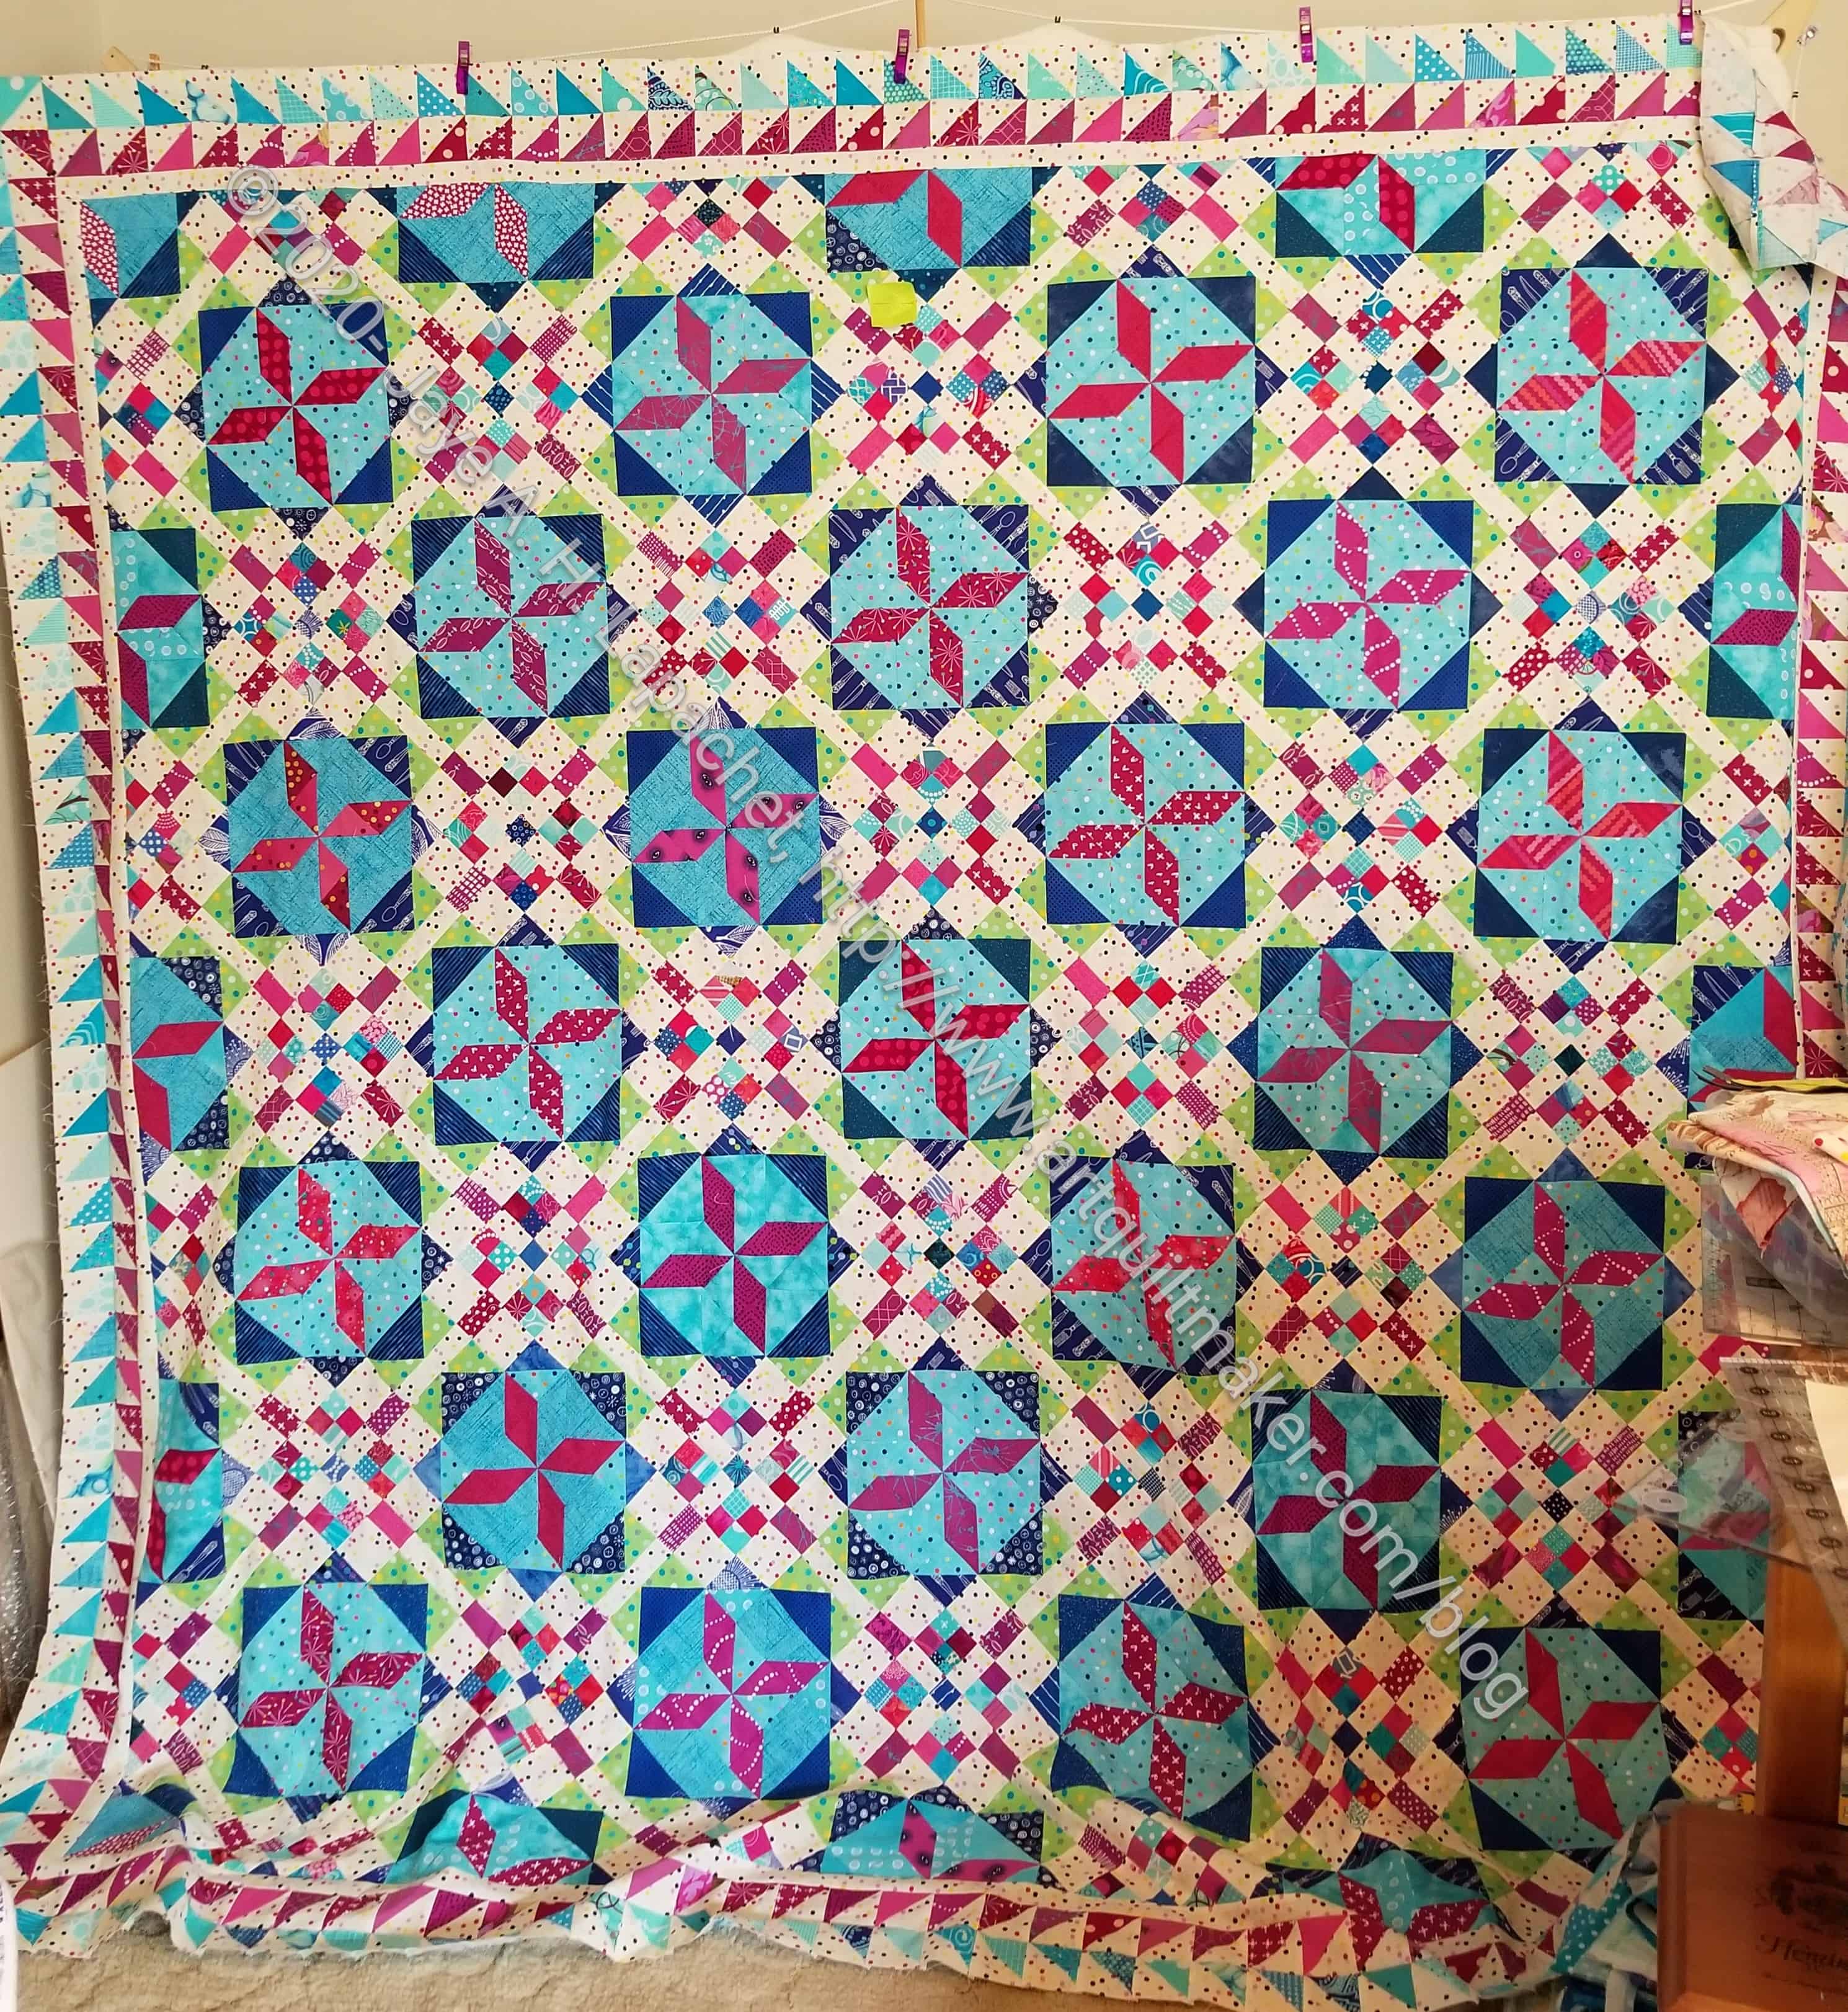
I have the papers and the book to make a La Passacaglia quilt. I don’t want to start it until some of my other handwork projects are finished. I keep looking at examples of nice La Pass quilts and Wendy’s is fabulous. I love the colors/fabrics. I am having some trouble selecting fabrics, though I haven’t tried very hard either. Wendy shows the fabrics she started with, which is a help.

Not all of us sew garments, but we can still use pattern weights. They can help us sew outside, or with the windows open on a windy day. They can be a quick and easy gift project, because they are cute and would look great in a pouch. This free pattern calls for rice, but you can also use Beanie Baby pellets -also called Poly Pellets weighted stuffing beads**.

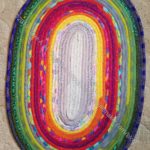
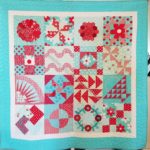
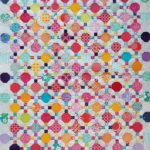
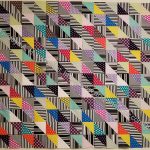
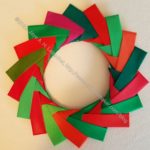
Twirling at the Disco would be a good leaders and enders project as you could make 4 patches while working on another project. It looks like a traditional triple Irish Chain quilt, so you might check out some books on those patterns to confirm construction.
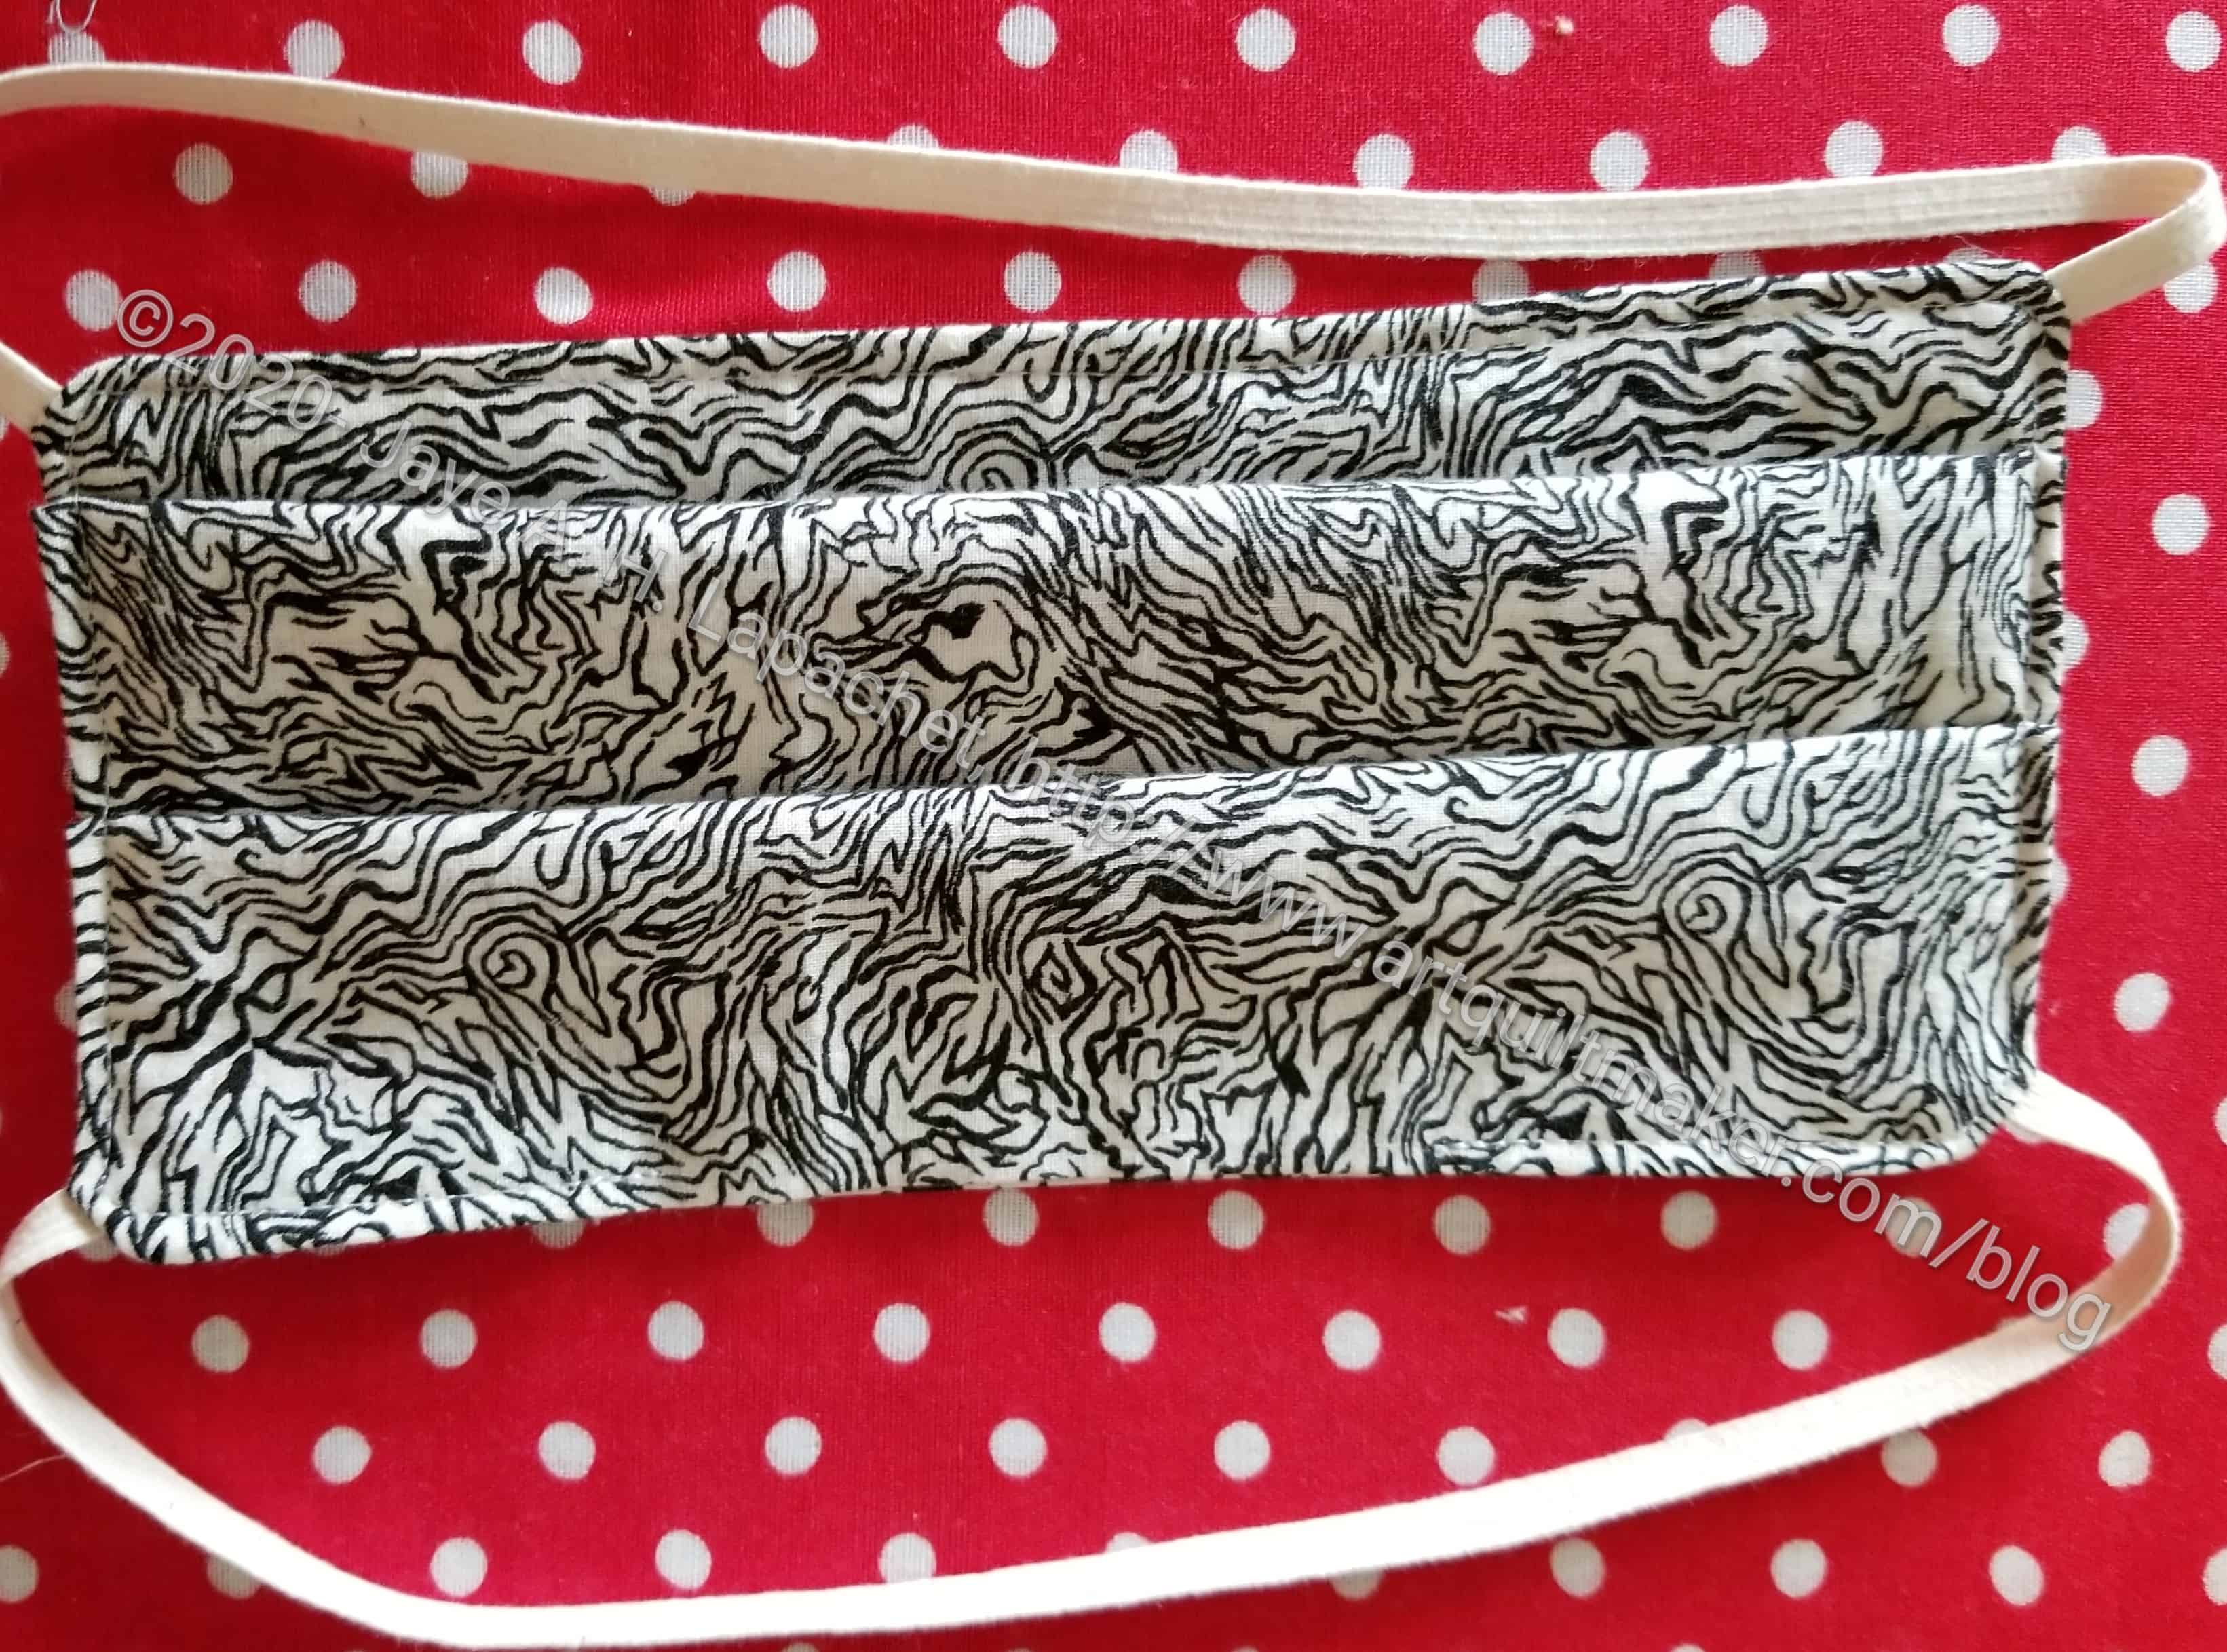
More Face Masks

  • Watch the Modern Quilt Studio’s Face Mask tutorial on YouTube and download the free patterns.
  • DIY face mask tutorial with Kaye (video)
  • Adding a nylon layer – DH told me about this and I thought it was adding a nylon stocking layer to a sewn mask. I started thinking about the difficulties of sewing that type of fabric. When I saw the picture, I realized they were suggesting cutting up stockings and putting them over your face under the mask. Did you ever notice how people modelling masks never have glasses, hats or headphones?
  • Friend Julie has some comments about the Instructables face mask pattern, which she likes
  • Friend Julie also talks about mask making in general and what her research has told her about the best types of masks to make.
  • Wazoodle has a lot of resources for making masks, fabrics suitable for PPE type masks and patterns. I also saw anti-microbial fabrics. N.B.: I haven’t tried any of these fabrics or patterns.
  • My friend, Deirdr likes Lorrie Nunemaker’s pattern. She has adapted the pattern to work in an assembly line. It is a free download, though you can also pay her something. She has videos on YouTube which show how she assembles her mask. Deirdre made changes to her pattern was so the front curve is 1/2 inch taller, which means the mask doesn’t touch your mouth). Deirdre also lengthened the depth of the sides by an additional 1/2 inch, for the front and lining. For the filter layer, she matched the new curve but did not change the length.
  • Deirdre also likes the Martelli Enterprises pattern. Deirdre said that the Martelli Enterprises set of masks fit adults best. They are selling a set of 3 templates withn non-slip plastic for $12 which includes shipping. She found, using their templates, that her 45mm and 28 mm rotary cutters have a hard time if I am cutting more than 2 layers. The nut in the rotary cutter hits this template. She ordered a 60mm Martelli rotary cutter, which works great for straight cuts. She has a hard time cutting curves with it. She changed the way she sews these by adding an antimicrobial one-way fabric. She also uses that as a 3rd layer which can hold a filter.
  • A Dress A Day blog (thanks Julie!) tells how to add a nose wire and piping! I might even have some of that wire from a long-ago picture framing class
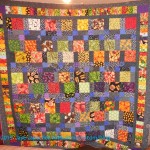
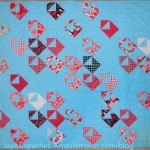
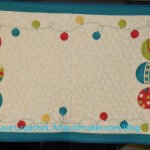
Pretty Quilts

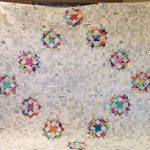
I love this and may have to make one some day. Perhaps I can use the templates I bought from BettyCrockerAss to cut them?

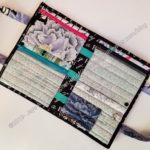
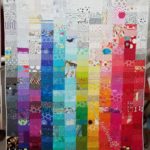
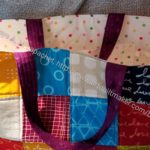
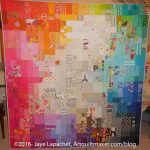
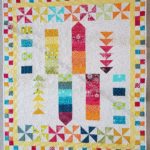
Valerie has a baby quilt in her Etsy Shop that is awesome! I love the design and think the design could be used in other ways to great effect. If you have a panel you have been wanting to use, this might be your design.

Fabric, Products, Supplies & Tools

Now that we are all on video calls, we have to pay attention to our lighting. I have been thinking, as I spend more time in my workroom, that the lighting is awful. It could be the life sucking beige the walls are still painted. Regardless, I have been looking at more lighting. I saw the Carex Day-Light, which was recommended to me as a way to enhance the lighting for my video calls. It is also good for SAD Syndrome. I don’t usually suffer from it, but it might help when I am just plain cranky. 🙂

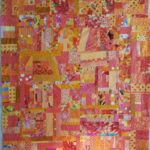
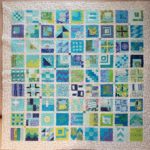
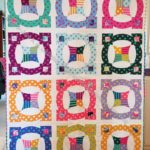
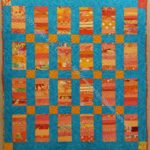
Color Girl Quilts (Sharon) reviews the Oliso mini iron. She comes across as simply delighted to open and try this new iron. I signed up for her mailing list just because she was so delightful. I am eyeing the Black Jack pattern she has. It is the style of a quilt I have wanted to make since the dark ages (before the Internet). I saw another quilt that was similar.

The Modern Quilt Studio has a new line of rulers called “Good Measure.” They don’t really say why these are better, though I may have missed a blog post about them, but the rulers are cool looking.

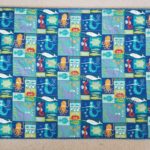
I saw some interesting Disney-esque fabrics at Wonder Ground fabrics. they have a variety of designs in different substrates.

Wazoodle sells food-safe PUL (multiple colors) fabrics. I heard about this site in the Sew Sweetness Facebook Group. I haven’t ordered from them or tried the fabric, so I can’t comment on their service or the quality of the fabric. I was thinking that I might like to try some waterproof fabric and this store might be an option.

Media, Articles and Information

Science Alert had an article about why crafting is so good for us. This was not an article just saying that it was, but it said why. One of the quotes I really liked was “According to the famous psychologist Mihaly Csikszentmihalyi** this allows us to enter a “flow” state, a perfect immersive state of balance between skill and challenge.” Flow state is a great description. Some of us call it ‘getting into the zone’.  I find that repetitive nature of piecing calms my mind. Ironing fabric (not work shirts!) also has that effect on me. The article discusses why various crafts (there was a bit of a focus on knitting) make people with a variety of disorders feel better. It is amazing that we don’t see more people knitting during meetings. I used to do that during long ELT meetings to help me focus.

The NY Times had another article about the benefits of creativity. Remember: if you don’t have a subscription, check your local public library’s online resources. This article talks about drawing and the guy who wrote the article describes how drawing helps him manage stress. If you want prompts, the prompts from the Creative Prompt Project are still available.

Frances shared a video on Rose Kretsinger.

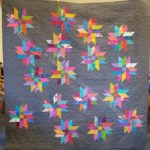
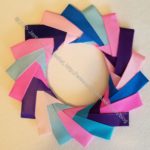
I was excited to see a hashtag for #windmillbladesquilt. I could be all over that hashtag! However, I annoyed to see that that hashtag is being applied to Pineapple quilts! The patterns, all of them, were PINEAPPLES! It is so irritating when people don’t know their quilt patterns. Adding a different hashtag doesn’t make them a completely different quilt!

Spring Quilt Market has been cancelled, but Barbara Brackman has a virtual booth.

I am really excited for and also super jealous of my pal Jeff Rutherford. He has another local newspaper article written about him! Good job, Jeff!


**I use affiliate links and may be paid for your purchase of an item when you click on an item link in my post. There is no additional cost to you for clicking or purchasing items I recommend. I appreciate your clicks and purchases as it helps support this blog.

Warm Windmill n.2 Ready for Quilting

Warm Windmill n.2 ready for quilting

I had to get the Warm Windmill n.2 off the design wall by the end of the weekend. I sewed a little each day at lunchtime last week and also a little after work. I finished sewing the whole piece together on Saturday, including sewing around the outside edge.

I pulled fabrics for the back on Saturday evening, but didn’t do any sewing. After sleeping on it, I remembered to look at my back fabrics and found the leftovers of a#politicalwifery dress that formed the backbone of the back.

Warm Windmill n.2 back ready for quilting

This is quilt #2 that is ready for Colleen.

I am going to make some bags and more face masks and some smaller projects while I work on a new design wall.

Face Masks Again

Mask #3 - front
Mask #3 – front

Push came to shove this past weekend. I couldn’t put off making masks any longer. I had a dentist appointment in the City. The City requires that N95 masks be covered, if you wear that kind of mask. That is the mask I have been wearing on the few occasions I go out. They have to be covered since your breath goes out the filter (meaning I could breath on someone). Thus, I had to have something else. DH’s mask is more like one you would wear so you don’t breath in dust and it is getting a little worn, so I had to make two.

Mask #3 - back
Mask #3 – back

Before I did any other sewing I got down to business. I had printed out a new pattern from Madeeveryday.com. It was laying on my desk and looked easy enough, so I went for it. Except for the bottom elastic length, these came out pretty well. They are not excellent, but better than my first effort.

I made DH’s mask first. He has been great at trying masks on and providing kind feedback.

DH's mask
DH’s mask

After making his, I decided to use a 1/4 inch seam allowance instead of half as suggested on the pattern. I also rounded the corners of mine using a 2.5 inch rotary cutting circle. I think I need a new blade for my small rotary cutter, because it did not roll as smoothly as my regular rotary cutter. Still, I added the rounded corners so I could just zoom around the whole thing without having to deal with corners. Also, I thought it would reduce bulk. I might cut little darts in the seam allowance of the curves on the next one.

DH's mask
DH’s mask

At least we are set for this week. I promised my ‘mature’ neighbor a mask, so I’ll make one for her this week.

I might have to create a blog hashtag for face masks, but for now, I am filing these posts under accessories. I have a feeling we may be making face masks to match our outfits in the not too distant future. I also think gloves will come back into fashion.

Flying Around Finished

Flying Around Finished

I know you thought you would never see the finished product. It took me awhile to get a photo of it, but Sunday was the day.

I cleared off my design wall and hung up Flying Around. I had to work quickly as finished quilts are heavy. I wasn’t sure if the design wall could handle it.

I might need to make this design, or a similar one again. I think the Friendship Star wreaths need to be farther apart, so they can be more staggered. That means a larger quilt. I know my friends will sigh at that.

The quilting is magnificent. Colleen did a fabulous job. I want to enter this in a big show, but looking at it today, I am not sure it is ready for prime time. Also, are all the shows cancelled?

Arty Running with Scissors Finished

Arty Running with Scissors Tote

As I mentioned, I made another Running with Scissors tote. As you can see, it is for my mom and made with the paint tube fabric I bought last year. It will go with the rest of the set (Poolside Tote, Persimmon Pouch, Mega Pinnie and Scissor Cozy).

This version is an improvement on the previous version, but still not where I want it to be in terms of quality of sewing.

Arty Running with Scissors Tote-inside

The best part is that I think the binding looks great. I am also pretty pleased with the inside. I made an effort to make the stitching really even and consistent. I think I succeeded, but we’ll see what mom thinks.

I have, actually, had this done since March. It was killing me not to talk about it every step of the way. However, my mom reads the blog and I wanted to surprise her. As soon as she saw the fabric, she would know it was for her, so I had to keep quiet.

I can’t wait to see what she puts in it and whether or not she uses the ironing pad.


Warm Windmill n.2 Sewn

Warm Windmill n.2 - blocks sewn
Warm Windmill n.2 – blocks sewn

Well, at least the blocks are sewn together.

 I am working hard at making this a top not because I want a product, but because I need to free up the design wall. I am still being careful about the colors.

I spent several lunch hours and time after work sewing to get this done. From what you see in the photo, I need to finish sewing all the blocks together.

I found a GREAT binding fabric by chance and am excited about that.

15 Years of Artquiltmaker Blog

Today is my 15 year Blogiversary. 15 YEARS!!!I’d love to have a party, but since we are sheltering in place, it will have to be virtual.

5 years ago I wrote my 10 year anniversary post and can’t believe another 5 years have elapsed. I guess I blinked.

Have you been with me the whole time?

I started Artquiltmaker Blog because I had hit a big milestone and I wanted to start something new and send my life in a new direction and practice writing. My first post was not stellar. I remember being distinctly uncomfortable and not knowing what to write. I got better though and even later in May 2005, I was posting real content. Short, not every day, but real content. Now I just blather on at ease and start to get twitchy if I don’t write regularly.

At the end of 2008 I moved the blog over to WordPress.

In 2008 and 2009, I started trying to post every day. It took some time to work up to that schedule. I still try to post every day and mostly succeed, though sometimes I forget, get busy or have nothing to talk about.

This forum has really helped me to move forward in my work. Writing this blog has forced me to make lists of projects and stick to working on those projects. I have enjoyed seeing comments from people, getting to see the work of different quiltmakers via Instagram and Twitter and even meeting a few in person.

I really enjoyed looking through the photos to pick the ones I wanted to add to the gallery when I wrote my 10 year post. I decided to look through the last 5 years worth of photos and pick some of that work for you to review.

To see all of my work, check out the Year in Review tag.

Thanks for reading and commenting for 15 YEARS!!!

Journals on the Shelf

Journals with Covers in the wildI was ironing fabric the other day and looked up to see my journal covers staring back at me. I had been thinking about making a journal cover from some leftover fabric from the Frolic! back and the journals on the shelf caught my eye. They sit on a shelf at about eye level. Since I have cleared off some of the books on my shelves, I can see things I didn’t see before.

Looking at these journal covers has made me think about beauty and fabric. I am much more careful now about choosing fabrics to purchase. Some of the fabrics above reflect some, if not poor, ill advised combinations of poor fabric choices. Something appealed to me about the fabrics, but the combinations and how they appear on the shelf do not all appeal.

I don’t plan to remake the journal covers, but I do plan on paying more attention to how the new ones come out. I have several that need covers and journal covers are a good use of scraps.

This is part of the process. I probably made the covers I no longer like a long time ago. I have evolved in my color choices and the way I put colors together since then. I also realized that I can see these journal cover, so I need them to be pretty. I need to take more care in choosing fabrics.

I use a medium gridded Leuchtturm journal now, so I don’t need journal covers. I still like the Miquelrius journals. I plan to use up the blank  journals I have and to make journal covers for them. I find that the Leuchtturms fit in my purse and seem more compact. I can also put a spine sticker on them saying which month is contained within.

Process vs. Product…Again

A bunch of things came together this past week or so to make me think about process vs. product.

For at least a month, I really wanted to finish the Frolic! top and back and get it ready for quilting. I felt like it was taking me too long to piece. However, when I looked at the blocks, they did have a lot of pieces (63? 68? I counted, but can’t remember). Bonnie Hunter, the designer of the quilt, gives the steps, but she doesn’t estimate the time each step takes. I am an experienced piecer, so I expect things to take a shorter period of time. I forget to take the looking, ripping, re-pressing and other parts of the process into account.

Of course, Frolic! might be a particular case. I spent a good portion of last year piecing Flying Around. When I started Frolic! I wanted and needed a quick and fun project. Frolic!’s outcome is fantastic, but it wasn’t quick and there were some frustrating bits. It was a process. I forget that. I really should have done the Windmills before starting Frolic!, but I didn’t know how involved it would be. I have only done one other Bonnie Hunter Mystery quilt, so the complexity of Bonnie’s designs wasn’t in my mind.

I looked through my process posts to find the one I was thinking of and came across one to read over and contemplate again. Sometime ago I pondered on process, but thought more about creating a habit and continuing to improve rather than exactly process vs. product. There is the implication of process vs. product in that post. The other day, I read a NYT times article** about activities in which people were engaging during Shelter-in-place and found the following quote:

“In the 19th century, intellectuals like Johann Wolfgang von Goethe and others started to expand on the positive psychological benefits associated with a concept now known as mastery: practicing an activity at which you have no previous level of expertise, and experiencing gradual improvement over time.”

I know I want to improve over time, so perhaps I need to ponder what Frolic! gave me in terms of skills beyond the finished product. One thing that comes to mind is the way Bonnie Hunter mimicked 8 pointed stars with HSTs. How do I feel about that?

I like the NYT article. It gives examples of non-digital projects people are pursuing, but it talks a lot about the time it takes to improve. I have always been annoyed at ‘quick quilting projects’. Quiltmaking is not a fast process. There are a lot of steps and they take time. I understand the desire for instant gratification, especially since that seems to be what I am talking about in wanting Frolic! done faster. I rely on my knowledge and experience in quiltmaking to finish projects quickly rather than continuously choosing easy patterns. Another conundrum to contemplate.

N.B. There is nothing wrong with easy patterns!

I also came across a Creative Spark post about process, which reminds me of my hopes and dreams within process. This post is part of the Little Spark project we did a few years ago. You can go through the posts again. I am sure you’ll get value.

The post I was actually looking for talked more about product vs. process. Product is very seductive. I like finishing. I try very hard to be more mindful of the process, to enjoy the process and be engaged with the process, to have my quiltmaking be about the process. It can be difficult, because I like to finish things. I also want to use 100 yards of fabric, I want to clear out my fabric closet so I can fit more of my tools and supplies in there and not have them all over the workroom. I want to be more organized. How does the finishing of a quilt contribute to my goals? Does it contribute?

It is possible that how I am feeling has nothing to do with product vs. process. Perhaps Frolic! wasn’t the right project for the time? Perhaps I needed a much easier project to alternate with Flying Around. I needed some mind sorbet. Perhaps my brain needed a rest? It is possible that I will always struggle with that concept when I get tired of piecing something. I do notice that my efforts to teach myself to keep working through problems with projects stuck. I didn’t put Frolic! away. I kept working on it. Did I work on other things? Yes. I worked on the Running with Scissors Tote and I did some work on the UCAB as well as donation blocks and quilt tops, but my primary project was Frolic!.

So, am I stuck on products? Have I not evolved to enjoy the process? Perhaps this is a stepping stone in the path of mastery and I have to work through it. I really think that the biggest issue was that I should have picked an easier project before I started Frolic!


** If you don’t have a personal or work subscription to the NYT, check your local library. They may be able to provide you with access.

Warm Windmill n.2

Warm Windmill n.2 test

I am starting the Windmill. for my mom.

The photo shows a test to see what I think of that square dot as a background. I was afraid it would overwhelm the blade fabrics. I think it looks ok.

Warm Windmill n.2 -layout

I have done some piecing and am pleased with the look. The image below shows the quilt laid out on my design wall before I started to piece. I can’t believe how many batiks there are! That is all Friend Julie. She has an amazing collection of batiks!

First Face Mask

First Face Mask
First Face Mask

I finally made a face mask.

I am ashamed to say that I have only been encouraging/enabling others to make masks. One thing I did was post a list of face mask patterns. This is the first one I have made. I don’t know why I haven’t been able to get it done. I have planned to, but this is the first one.

I used the Fat Quarter Shop pattern and didn’t like it. The mask came out terribly. It is too small lengthwise and too long width-wise. I think it will fit someone; it just doesn’t fit us.

Mary sent me elastic and I am determined not to waste it. I am going to try another one; I just haven’t done it yet.

Starting Another Windmill

Windmill blades + background

As you know from a previous post, I had about a million leftover Windmill blades. I put them back in the box after finishing both Windmill quilts, not sure what I would do with them. Apparently. Mom was broadly hinting that she wanted Warm Windmill. Unfortunately, she was too subtle and I had already promised it to someone else. Finally, she just asked me straight out to make her one. I agreed, but couldn’t start it until I finished Frolic! As I said before, I have known she wanted one for awhile and it was in my plan to make it for her. I am pleased to make something for her as she is such a good Mom.

Testing the Windmill Background

After finishing Frolic!, I needed an easy project. There are other quilts I need to make but these Windmills are  quick and easy and relatively mindless, but not boring. Since Mom wants a Windmill quilt, this is the one to go under the needle next. It will be my palate cleanser before I start on something else. I am already thinking about what is next. I need to reel those thoughts in and focus on making this quilt fabulous.

Finishing Frolic! Top

Finished Frolic! Top

Yes! I finished the Frolic! top. The borders were not painful. I was sure the top and bottom borders would cause me problems. I had to ease a bit more on the top and bottom than I did on the sides. Other than that they went on smoothly. I am really pleased.

I thought about adding another plain border, but decided I couldn’t face it.

Frolic! Back
Frolic! Back

I also made the back and the binding so the whole piece is ready to be quilted. For the moment, I am not planning on doing a drive-by at the moment, but we will see.

This quilt used about 11 yards of fabric, which put my total up. I am thrilled about that and thrilled that the piece is really for quilting. Really thrilled!

Frolic! Top finished- corner detail

I can’t decide whether I like working on quilts for so long. I did other projects after I started this, but no quilts except donation tops. It is the second project I have worked on recently that took me ~5 months to piece. I am trying to decide if I like those types of projects. I definitely don’t mind the piecing. I think the problem is not having things to show at meetings, feeling like I am making progress and the process being slow. I have to find a balance between impressive, complex projects and speed.

26 Projects 2020 #4

So far this year I am well on my way to using 100 yards of fabric. I have used 44.75 including Frolic! so far this year. Of that, 26% was used for charity projects.

Finished 2020 Quilt Projects

Finished 2020 Non-Quilt Projects

This category covers bags, toys, aprons and knitting as well as other non-quilt projects.

Doing Good

In Process
The ‘In Process’ is used to denote projects on which I am actively working or are on the design wall waiting for me to stitch. I try not to put away projects, because that will ensure I never work on them.

  • English Paper Piecing Project– half hexies – I have been making slow, but steady progress. I am adding another dots on white row to the piece to make it larger. I am getting a little sick of it and thinking that I will just accept the size, square it up and finish it.

Small Projects to Make or in Process

Most of my progress involves thinking or just cutting.

  • One Hour Basket for organizing my decks of cards – Creative Strength, mindfulness, etc.
  • Retreat Organizer – another project from the Crafty Gemini Organizer Club, also on my list, but not yet started
  • Running with Scissors tote gift
  • Ultimate Project Organizer – another project from the Crafty Gemini Organizer Club, also on my list, but not yet started
  • Officer gifts for January 2021 – have the pattern and the supplies. Need to start so these are ready and I am not scrambling at the last minute

Ready for Quilting

  • Frolic! – I haven’t shown the finished piece yet, but it is ready for quilting.

In the Quilting Process

In the Finishing Process

nothing now

Still WIPs
I still have WIPs. Who doesn’t, after all? A project in the ‘UFO’ category means I am stalled. A nicer way of saying UFO is a WIP. The list is a lot shorter and the projects are newer, for the most part.

  1. FOTY 2018 – this has to be on the list now as I have cut a ton of squares and need to arrange and sew it together. This is next on my quilt list. I cut a bunch of black 2.5? squares so now I can get started.
  2. FOTY 2019 – this is now on the list since 2019 is over and I have the squares,theoretically, ready to sew.
  3. Handbag Sampler – this is still the forgotten project. It should be on the UFO list. Too bad I don’t have one. The blocks were teaching samples when I taught a sampler class the time before I started writing the quilt class sampler tutorials. I found one block recently, but otherwise I actually don’t know exactly where the blocks are hiding. I have an idea and still have to crawl up in the far reaches of my fabric closet soon and see if I can find them. I haven’t even found a picture of all the blocks. Sad.
  4. Lobster – I finished the stitching. I plan to back it and overlock or satin stitch the edges. Even though I don’t need anymore cushions, I may turn this into a cushion.
  5. Pies and Points from 2016 Victoria Findlay Wolfe class. The last time I worked on it was when Julie and I had a playdate in April 2018. I brought this piece with me so I could cut more elements (Julie has a Sizzix). I lost my excitement about this piece shortly thereafter and still have to get it back. Thus, I had to move this to the WIPs area.
  6. Pointillist Palette #4: Fourth is a series of 6 quilts; needs tiny square patches sewn together. No progress.
  7. Self Portrait: started in 2006 at a class at Quilting Adventures in Richmond, Virginia. I am still stalled on this again. As one of my oldest (I am pretty sure) UFO, I put it on my blog and out into the Twitterverse and Diane suggested that I not consider this as a self portrait. I think that strategy is a great idea. I am now trying to think of a new persona for her.
  8. Serendipity Lady – I am still planning to take this piece to be framed.
  9. Black and Red quilt – This project is creeping into my mind, so it might be up for work soon. The project originally came about because of two other projects. I made a whole bunch of bias tape as part of my failed attempt at doing the Mighty Lucky Club a few years ago. Another part of the inspiration came from my class with Tina of Little Blue Cottage fame. This was going to be for a nephew, but I think it will be for one of my SILs and BILs. I have rectangles cut and some bias tape ready. My next step is to sew the bias tape to the rectangles like pickup sticks. I don’t have any photos of this, so you’ll have to use your imagination.
  10. Who Am I? – This piece is off my design. I have lost momentum, but I think that just has to do with the amount of satin stitching I am facing.