Month two’s work is getting done. Not as fast as I would like, especially since I already received Month 3. I have to keep reminding myself it is not a race. As I have said before I just don’t want to fall behind. And I am making progress. I posted about my M2 work the other day and you can see that I have made progress since then.
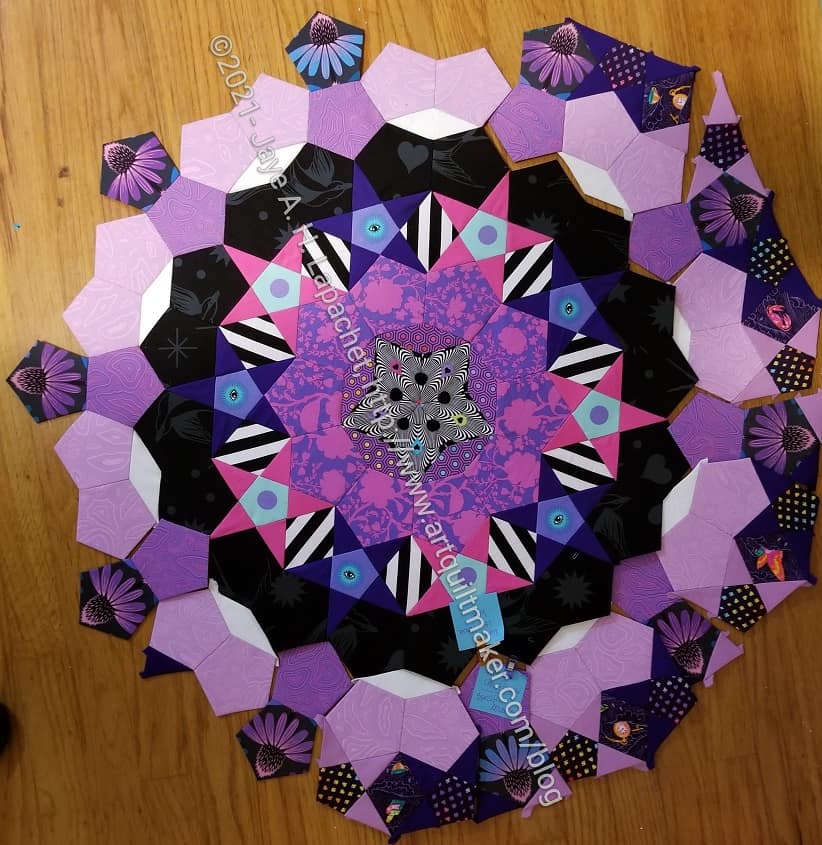
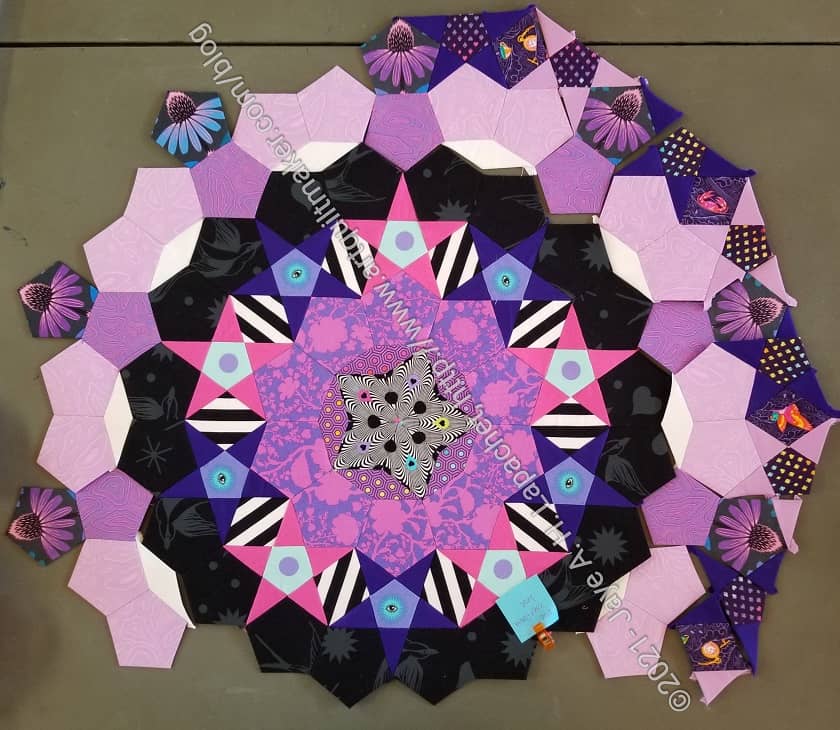
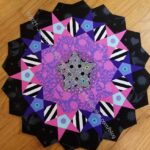
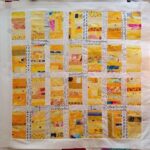
Everything outside the black circle is Month 2. In this picture you can see the various chunks laid out next to the Rosette #1 with only some (mostly on the left) sewn down.
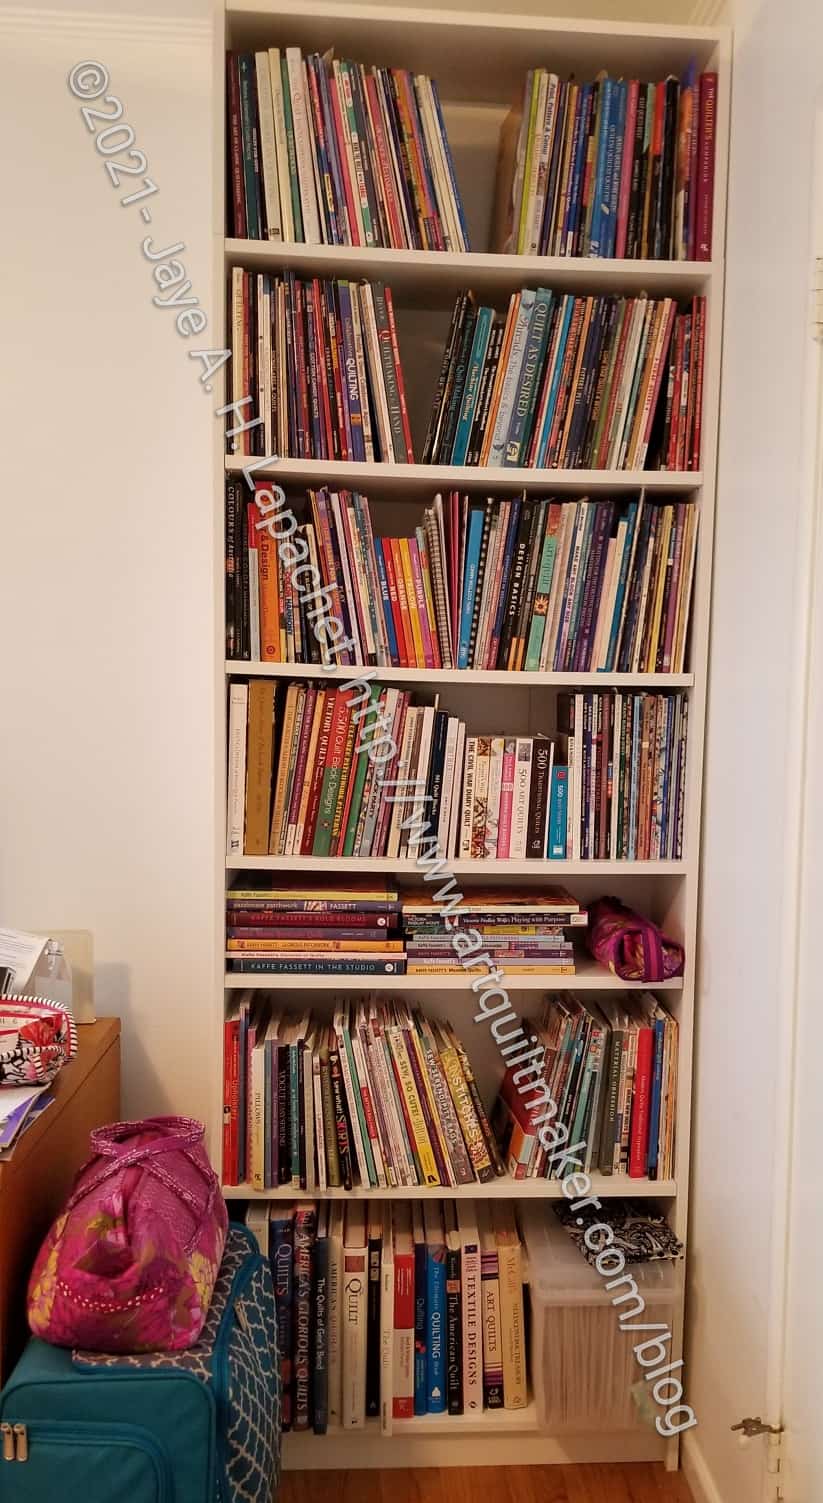
I spent time filling my shelves and emptying boxes. The boxes went out with the recycling (except for some DH hid from me) and my shelves are now filled with my quilt books.
I am really happy that my books are more accessible. Before, some of them were on the floor in big stacks, which was not conducive to browsing.
Last week after I had done some of the work, I spent time leafing through some of the books that were more accessible to me. I also leafed through some while on work calls, though I have to be careful, because I tend to tune out work and focus on quiltmaking, which is not what they pay me for. 🙂
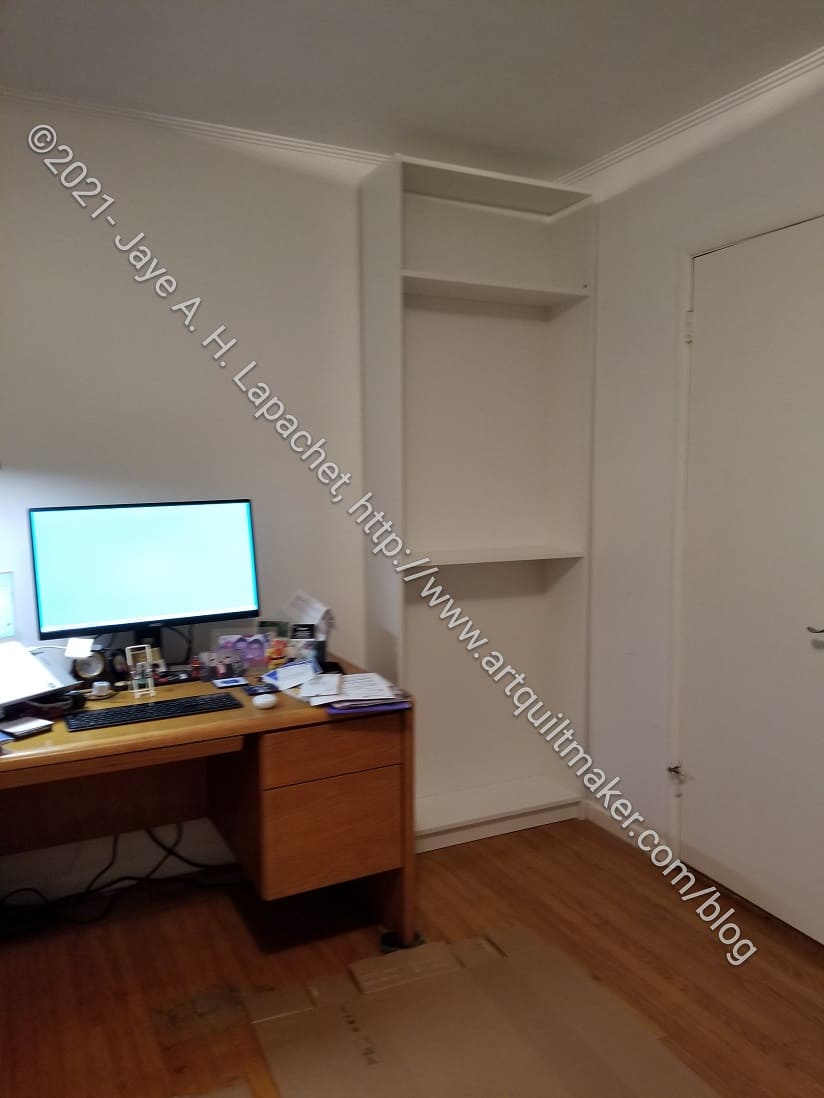
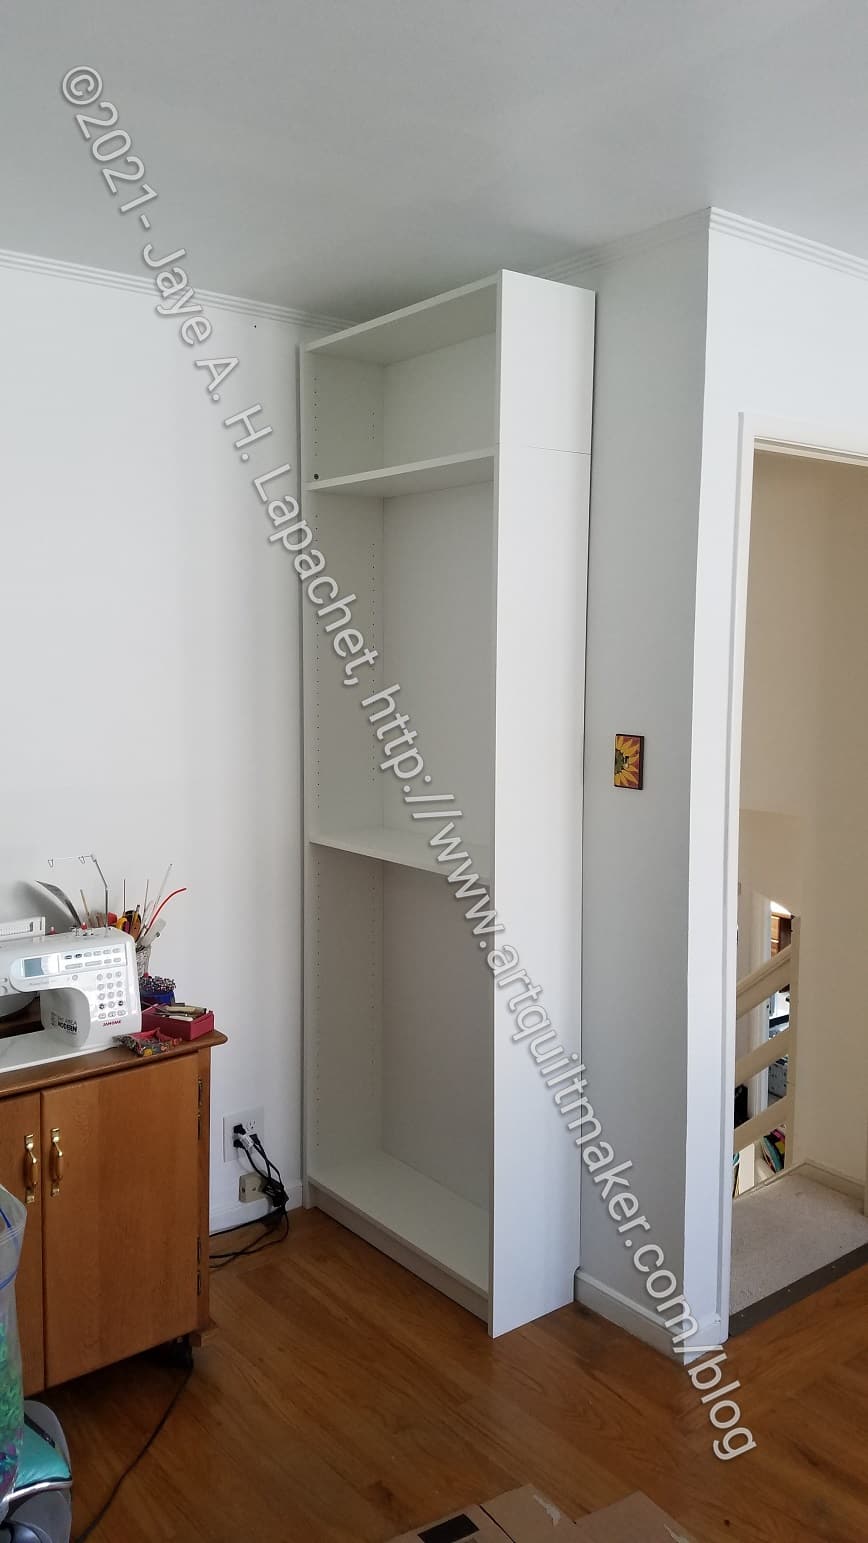
Shelf replacing old desk
Before this whole workroom redo I had collected books, run out of space which meant all the books on one topic were scattered. As I was putting books in boxes, I made an effort to arrange them so that like books were together. All quilt history in a group of boxes, all art quilt books in other boxes. This made it easier to shelve them all together when I unboxed everything.
The very top shelves are less useful *to me* because I can’t reach them without a stool. I wanted them (the top shelves are add-ons to the Billy bookcases not part of the shelves) for two reasons. First, stuff will get crammed up there anyway, so I might as well have a shelf. Second, dust. I prefer cabinets and bookcases to go to the ceiling because that open space just becomes a dust collector. With these shelves, I put books and stuff up there that I don’t access often. For the books housed there, they may be candidates for weeding in the future. We’ll see.
My shelves are not 100% crammed full, which is great. I am glad to have some growth space. I do feel like there are a few books missing, so there may be another box somewhere.
Next project is to put up the design walls. I want to work on some quilts again soon, not that I am short of bag and other projects, so I can mark some fabric off my ‘fabric used’ list. DH is busy with clearing out his parents’ house (still) so I have to fit this in or get the handyman in.
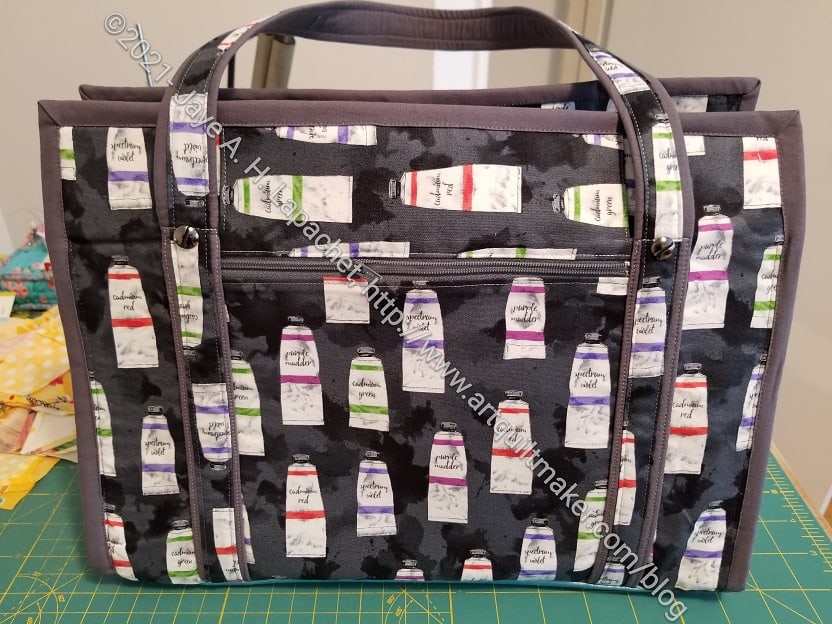
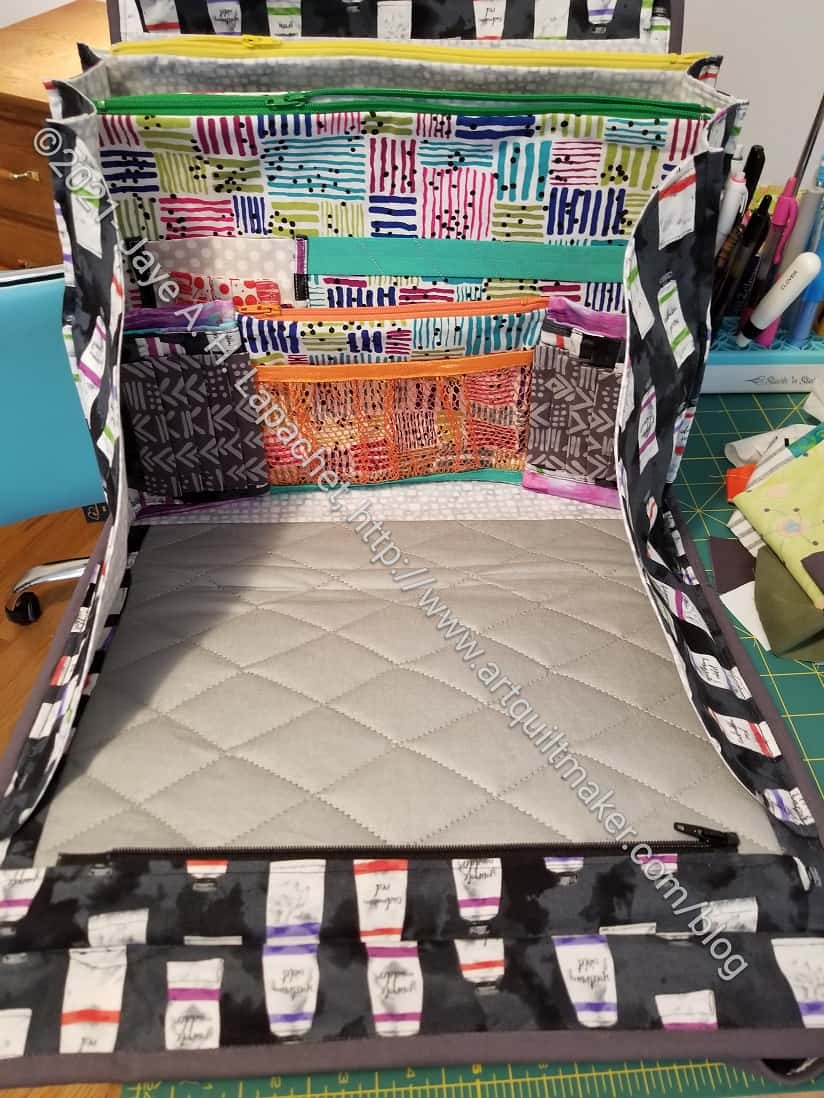
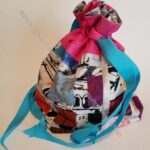
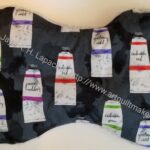
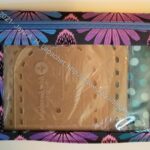
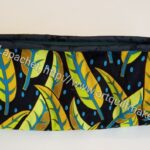
I can’t tell you how excited I am to be saying that I finished the UCAB for my mom and gave it to her for her birthday! This bag goes with the set of items I am making from the Paint Tube fabric.
I am so excited because I spent a lot of time on this bag and got everyone excited about it, then the pandemic hit and all the excitement died.
I finished the bag on September 12, 2021 after spending September 11 ripping out a lot of what I had sewn the prior week. I spent the Sunday morning of the 12th thinking about construction and how I could avoid putting the bag together the way Natalie does. I know she has had success putting together a million of these bags, but the construction did not work for me. I can’t believe how flat she gets her binding.
Ultimate Carry All Bag – binding applied
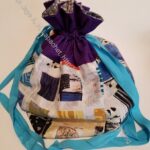
What I ended up doing is putting the binding on before I constructed the whole bag. I know the binding is supposed to cover the edges of the sides. This made no sense since the sides were finished.
After thinking about how I could construct the bag without killing myself, I decided that I would put the binding on the exterior, then sew the side section to the exterior. The sides were already finished and the process worked very well. I lined up the bottom of the sides right next to the binding and clipped the living daylights out of it, then sewed that section to the exterior. It looked a lot better than my previous effort, which was a big mess. My effort is not as neat as Natalie’s, but I am happy with what I did. I am not embarrassed to give this bag as a gift.
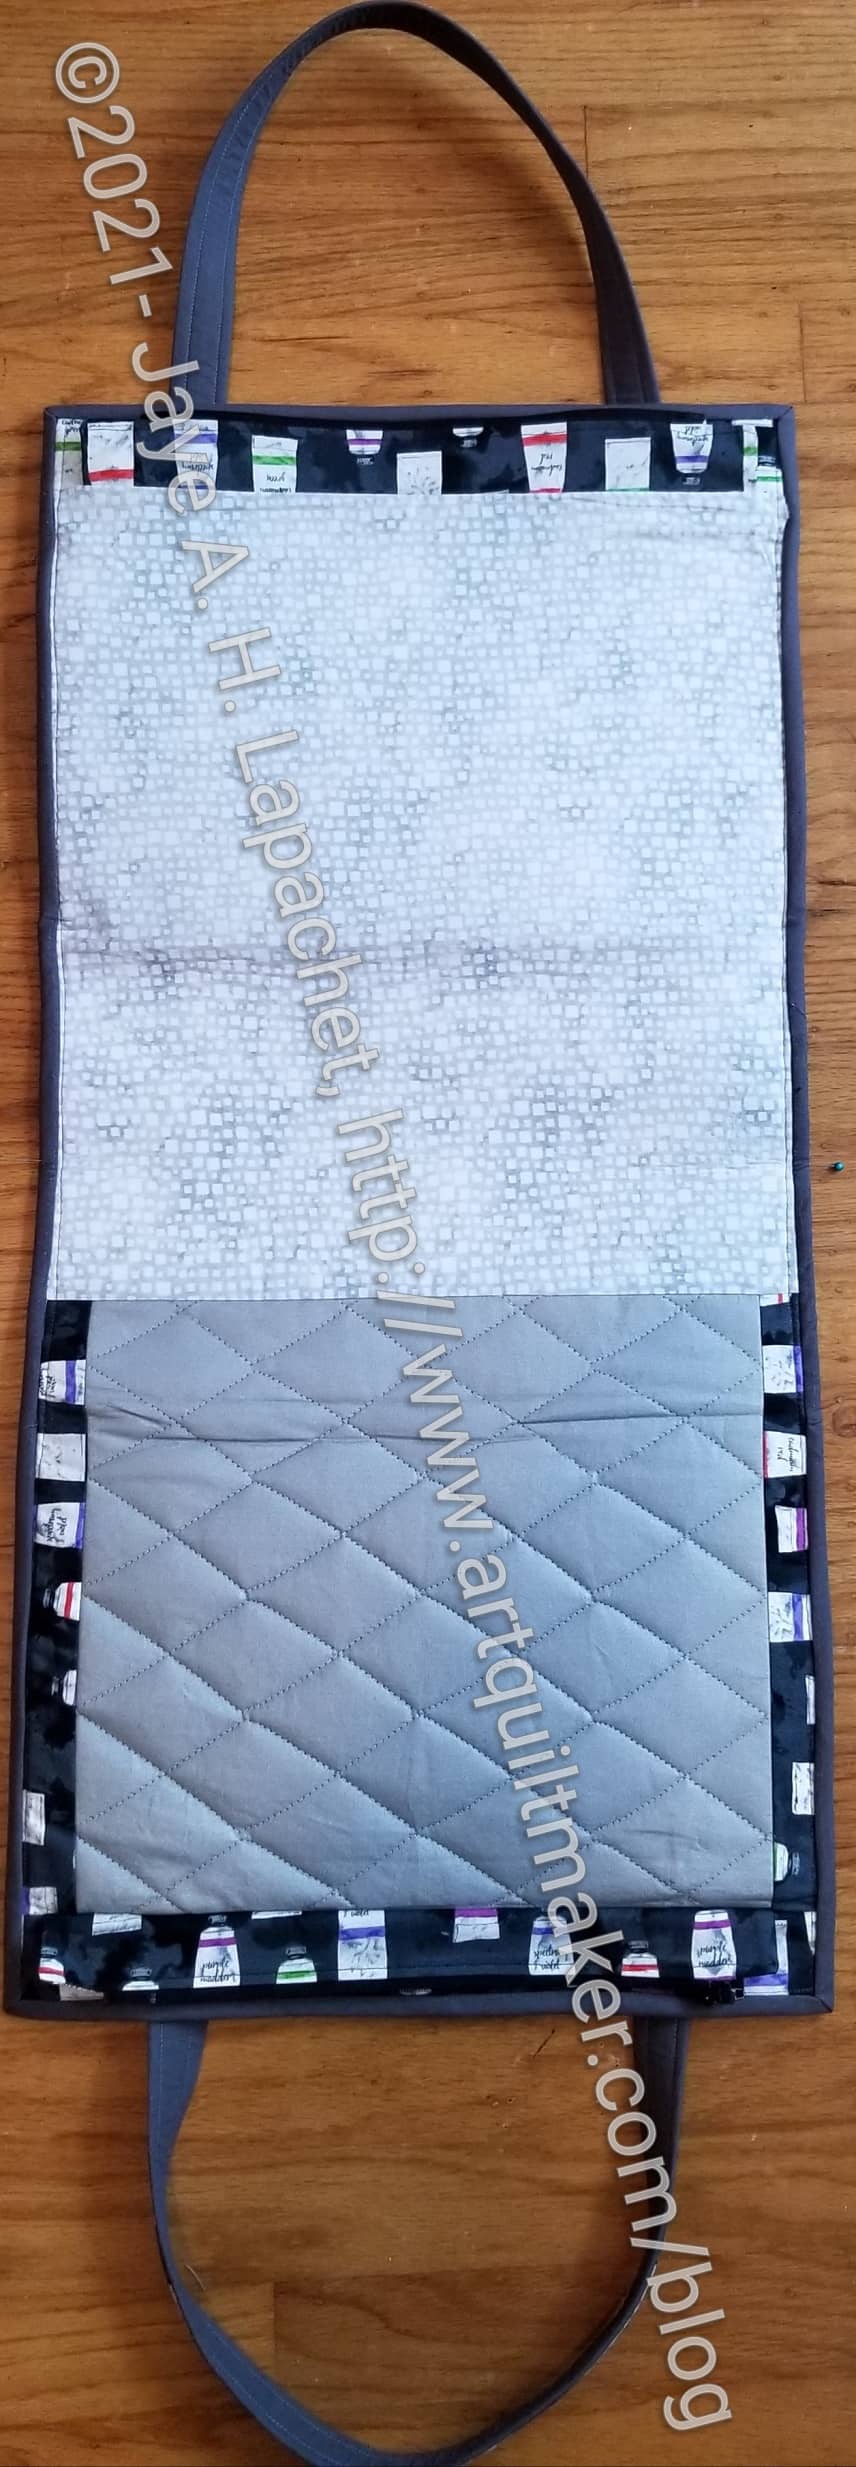
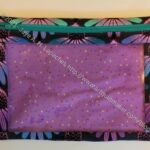
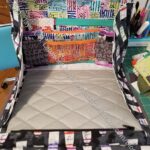
Ultimate Carry All Bag – interior
The other thing I thought about is not finishing the bottom of the side panels. This would mean that only two layers of fabric along with the thickness of the exterior would need to be under the binding. I might try it that way on the other version of the bag.
There is a lot of discussion in the Pink Door La Pass FB group when each new month arrives. One of the discussions has to do with how to put the sections together before adding them a main piece.
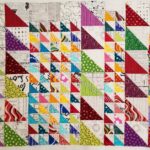
The goal, overall, is to have as many straight lines as possible . One of the members is great at figuring out what pieces to put together to make sections of straight lines.She figured out the Hearts and Cones method I talked about.
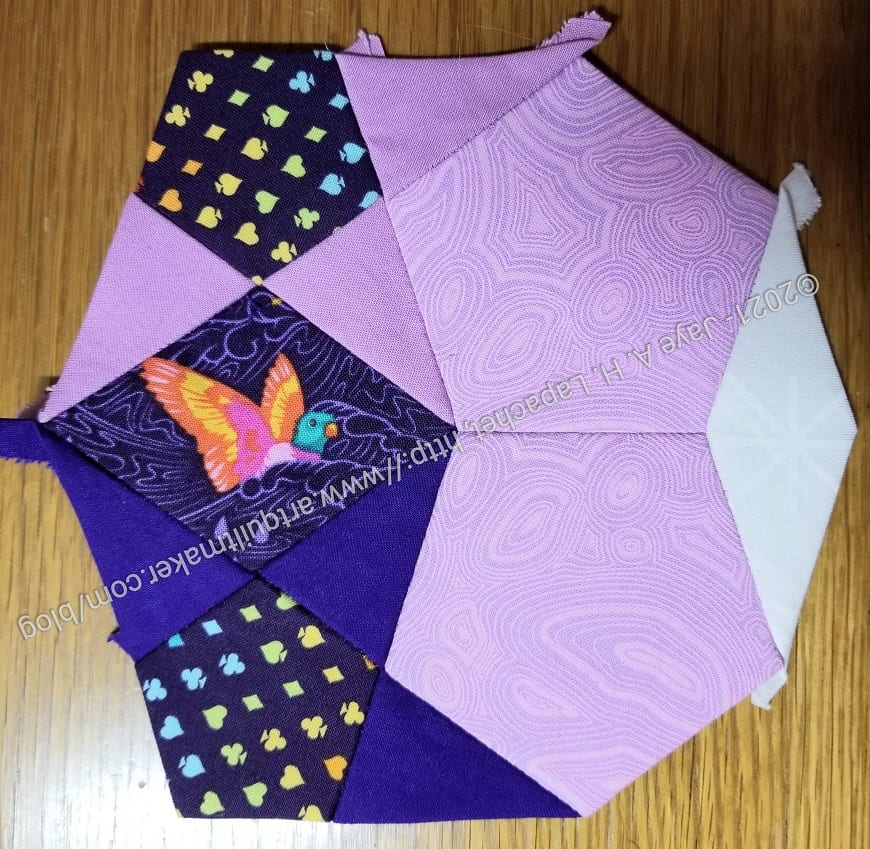
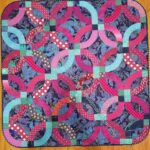
La Pass M2 chunk
For month 2 I didn’t pay attention to her work. I just figured out what worked for me. I felt like these chunks worked for me. Adding any piece to a larger rosette, like Rosette #1, is a hassle, but with this chunk, I get a lot of bang for effort.
I decided as the chunks floated around my workroom that I would sew them partially to Rosette #1 so that they wouldn’t get lost, then go back and sew the rest later. Stay tuned for more on whether that worked or not.
DH came home from the football game Saturday night and put together the second shelf. My room has that new paint or furniture smell again and is a complete wreck.
I really like the clean, white look of the bookcase next to my desk. It is beautiful. It is also a lot better than a pile of cardboard boxes.
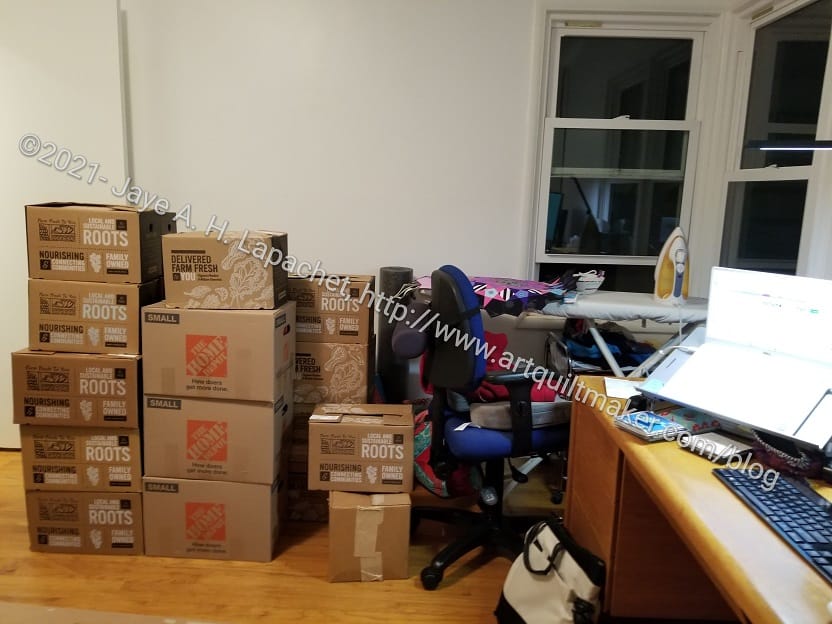
Big mess in the workroom
Cardboard boxes don’t just magically unpack themselves, though I wish they did. The rest of the room is a wreck. I have a lot of work to do reshelving books and arranging stuff on the shelves.
DH has to get some anchors, so I am not allowed to stand in front of the bookshelves during an earthquake for the moment.
See that computer set up in the picture (above right)? That is where I spend my days. That particular computer is my personal computer. I swap it out for my work laptop at about 8am every morning. One reason I need to clean this area up is that I have to get that blue chair out from the boxes, so I can “go to work” on Monday. Currently, it is stuck behind some of the boxes because we quickly moved the boxes out of the corner of the room so DH could install the second bookshelf.
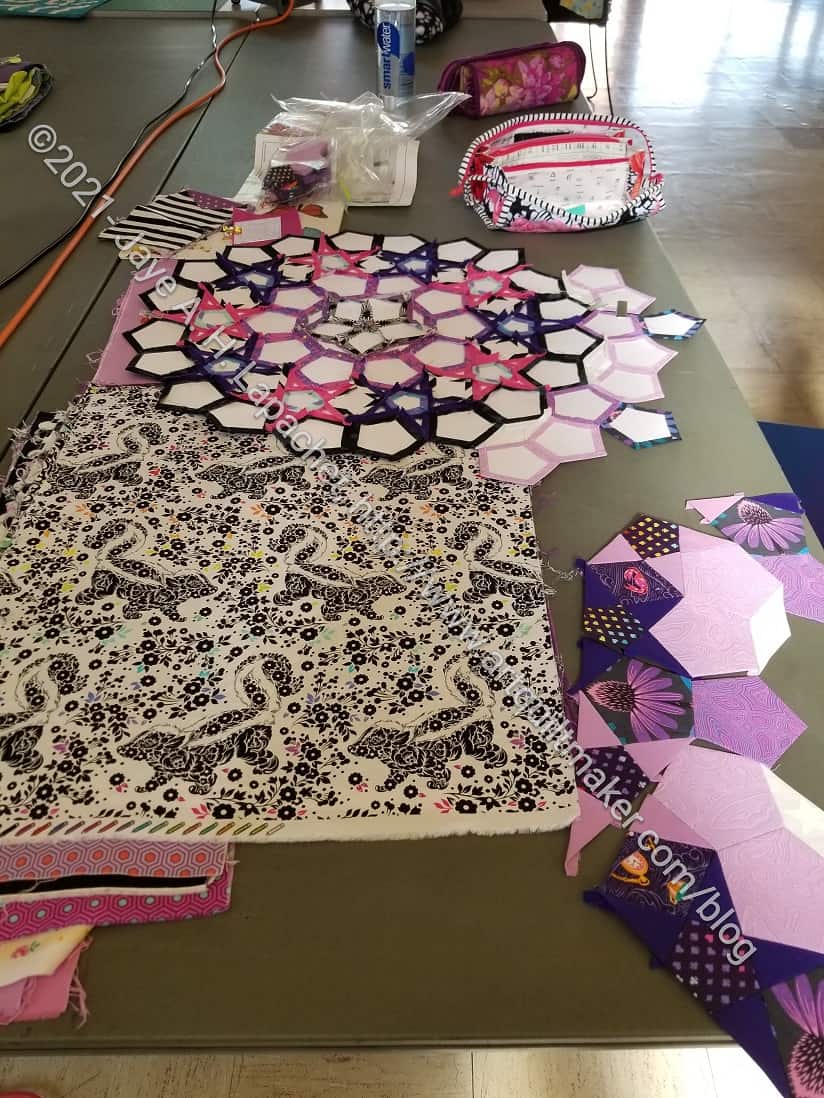
I spent some time at Sew Day working on La Pass, M2. Actually, I spent the whole Sew Day working on La Pass. I got some more done, but, as usual, not as much as I expected.
I might be using Sew Day for the foreseeable future for La Pass since I have so little other time to work on it. I was working on it during meetings where I didn’t have to present, but those meetings are less forthcoming that before.
Many of the pieces you see around the right edge are not sewn to Rosette #1, though some of the smaller chunks on the left edge are attached. I am working on putting chunks together before I sew them to the rosette.
The chunks are strange shapes. I didn’t follow the guidelines shown in the Pink Door La Pass BOM group. I know I can sew them to Rosette #1 and I just didn’t feel like doing it their way.
Some progress, which is good. Not enough, but better than nothing.
Some progress is being made on my workroom. I retrieved the purchased bookshelves about two weeks ago. It seems like an eternity.
I asked DH if I should get the handyman to put these shelves together. (I am sure they are relatively straightforward to assemble, but my shoulder can’t handle such work.) He said that he would put them together. Time went on, we went to San Bernardino ? for an event (it was a good event, but an icky town) and still he insisted he would put them together.
When DH told me he had to go work at his mom’s house over the weekend, I asked him when he was going to put my shelves together. While I was gone at Sew Day, he put the first one together. Then he came home from the football game later the same day and banged around putting the second one together. He is a really great husband.
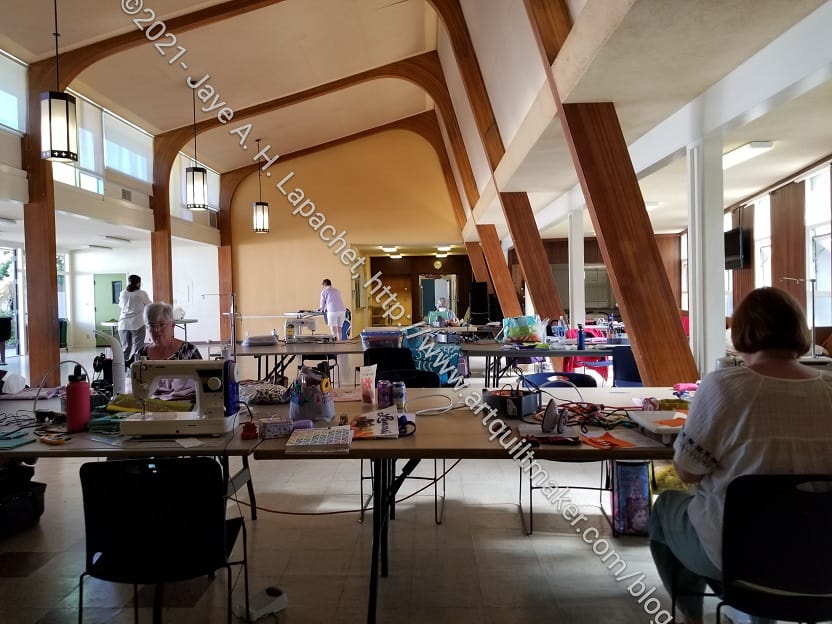
We had another in person Sew Day the other day. We all wore masks and did quite a bit of physical distancing. We each had our own 6 foot table, which was nice not only for safety, but also because we could spread out.
In addition we had, as usual, cutting tables, ironing boards and a free table. The usual, overflowing snack table was strangely empty. I did not have a chance to make coffee cake, so I wasn’t surprised that other were in the same boat.
As usual, it was great to see people. Mary and I tested the 5 ironing boards the guild has and decided two of them were substandard – one was too wobbly and one tilted in an odd direction. We have been wanting to do that for awhile, so it was good to get it done.
The Sew Day was actually a Super Sew Day in that people came on Friday and Saturday. I put together two door prize bags, which were won by Amy and Joelle. I wish I could have attended on Friday, but work and taking off the Friday before prevented me from attending.
Someone from the church donated her mother’s fabrics. The mother had died and there were 12 garbage bags full of fabric. Some guild members sorted the fabric. People chose pieces they wanted. Most of the fabric was Joann quality. I didn’t take any, but some went to make pet beds. I think some will go to the community quilt project as well. The rest of the fabric will go to FabMo for others to pick through.
Sew Day Workspace
My workspace was good. Having a 6 foot table to myself allowed me to leave Rosette #1 flat on the table while I worked with the smaller chunks.
It also allow people to see the big part of the piece and not disturb my progress. As I said before, people are very interested in the progress of my piece. They were less interested this time in English Paper Piecing in general. The La Pass rosettes are very impressive and my Rosette #1 is no exception.
Month 3 arrived and I was able to press the fabric as well.
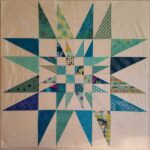
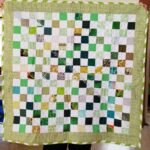
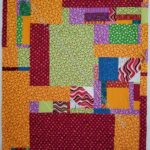
Melinda’s AGF piece
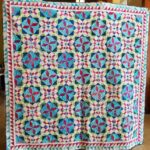
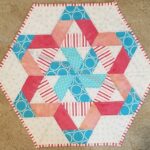
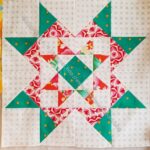
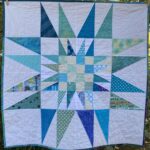
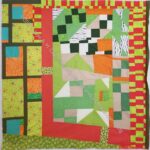
Rhonda’s Round Robin
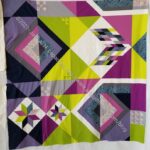
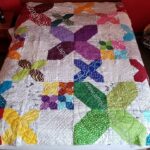
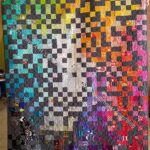
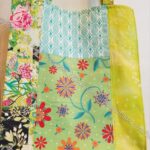
People were working on really nice projects. Rhonda sat across from me and shared a design wall with Melinda. Rhonda’s piece (right) was fantastic! She is working on a round robin with Cheryl, Kelly, Ruth and some others. It is one of the best round robins I have ever seen. She told me that Ruth did a lot of the design work. I love everything about it.
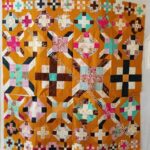
Melinda’s piece was also really great. The colors aren’t exactly my colors, but I did like the combination. It is really different. I also like the variety of plus (cross) blocks. I received some of these fabrics in one of the Modern Handmade modern boxes I got last year before they stopped the subscriptions.
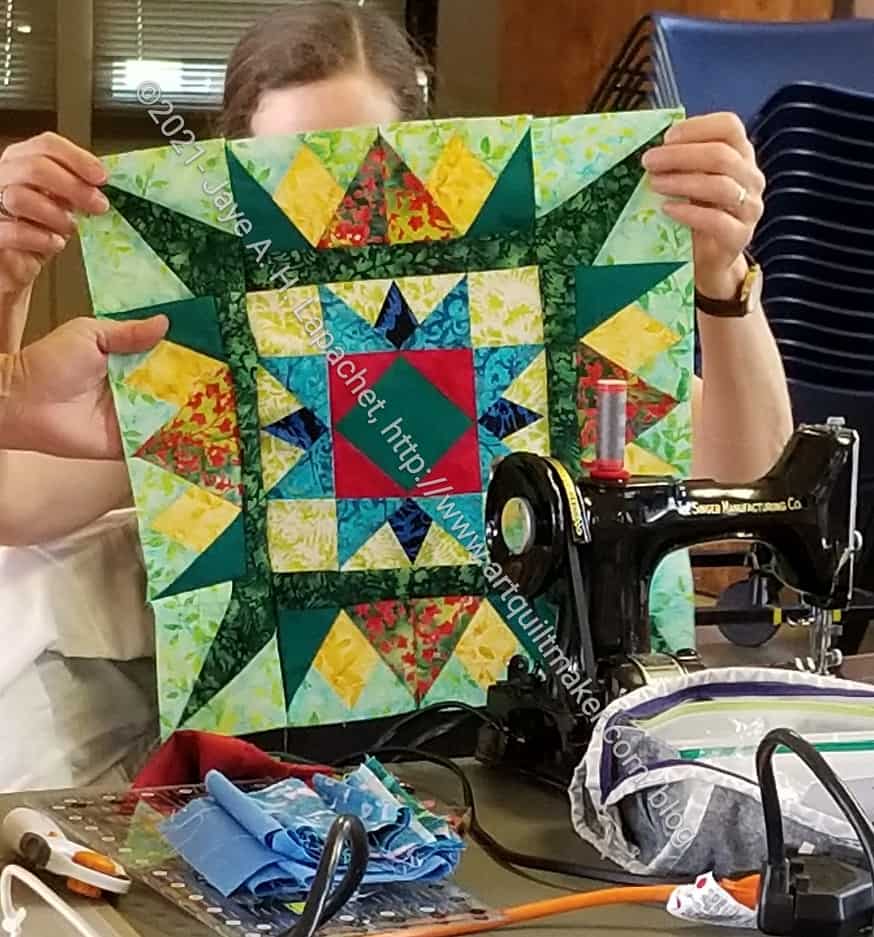
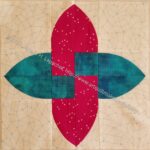
Alice’s block
Other people were working on interesting projects as well. Bonnie was working on a quilt top that looks woven. Nancy was quilting a community quilt. Alice finished a great block that I think was paper pieced.
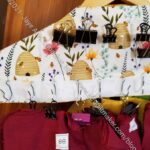
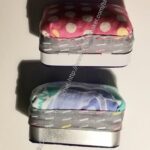
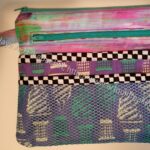
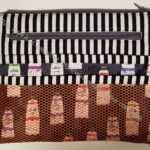
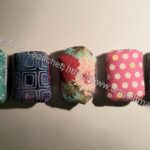
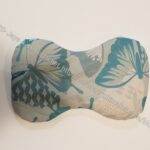
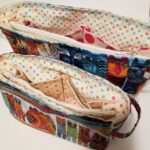
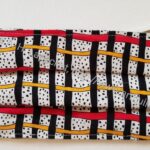
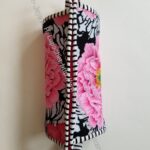
Amy found a project that has generated interest throughout the guild. She found a pattern for a zipper organizer. She made one for Mary C as a gift and Mary started to use it to organize pieces for a quilt she is working on. It looks like it works really well! I think I might need to make some as gifts.
Zipper Organizer
Zipper Organizer – detail
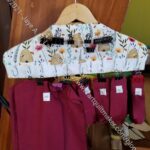
Mary clipped the various pieces for her Aftershock quilt in groups and then hung them on the zipper organizer, which is now a project organizer. I can see using it for bag parts and other projects.
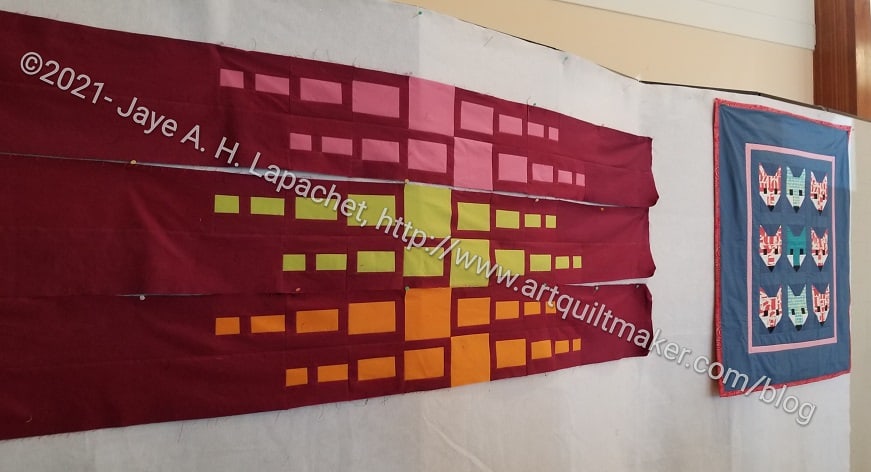
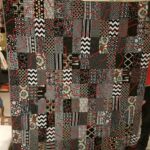
Mary’s Aftershock quilt
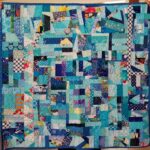
The other thing I noticed was the quilt on which Mary was working. As mentioned it is called Aftershock and is from Wren Collective. Mary picked her colors and then didn’t have enough of the background. Also, the quilt store was out of it. The quilt store, Bay Quilts, was very helpful in that they pulled Mary’s foreground colors and suggested several different background colors. Mary picked the maroon-ish you see above. She admitted that it wasn’t one she would normally pick, but that it worked really well. I have to agree. It isn’t a color I would pick, but it looks great with her foreground colors.
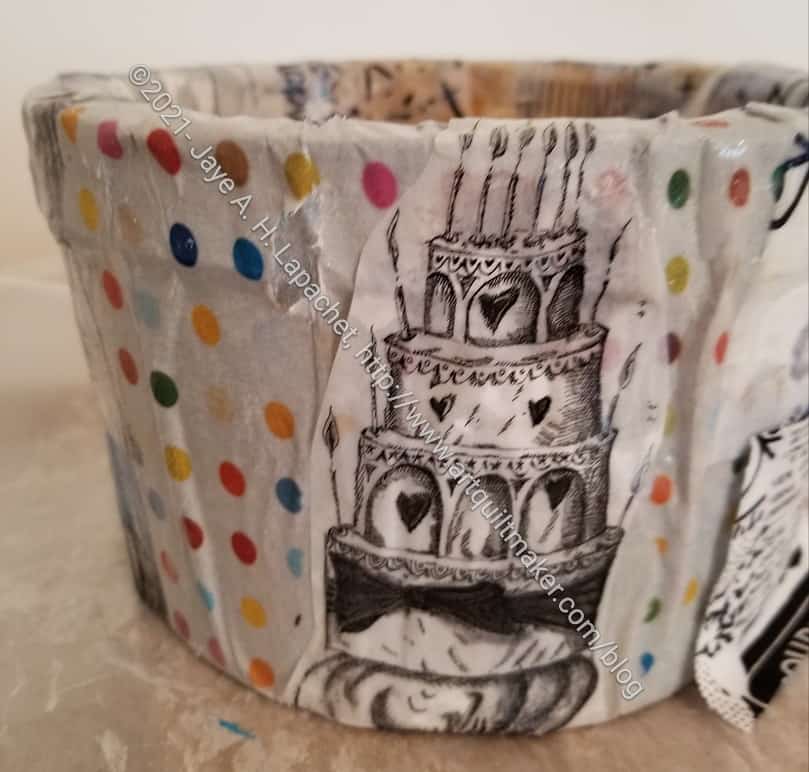
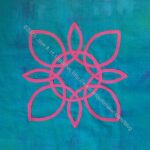
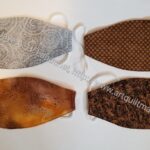
I worked on covering up the previous blue with some magazine pictures.
It didn’t like the way it looked. If I had had more cakes and dots, it probably would have been fine, but I didn’t. I thought it looked bad, so I went back to fabric. The good part was that the magazine paper covered up the blue pretty well. After this 3rd layer dried, it made a good base for more fabric.
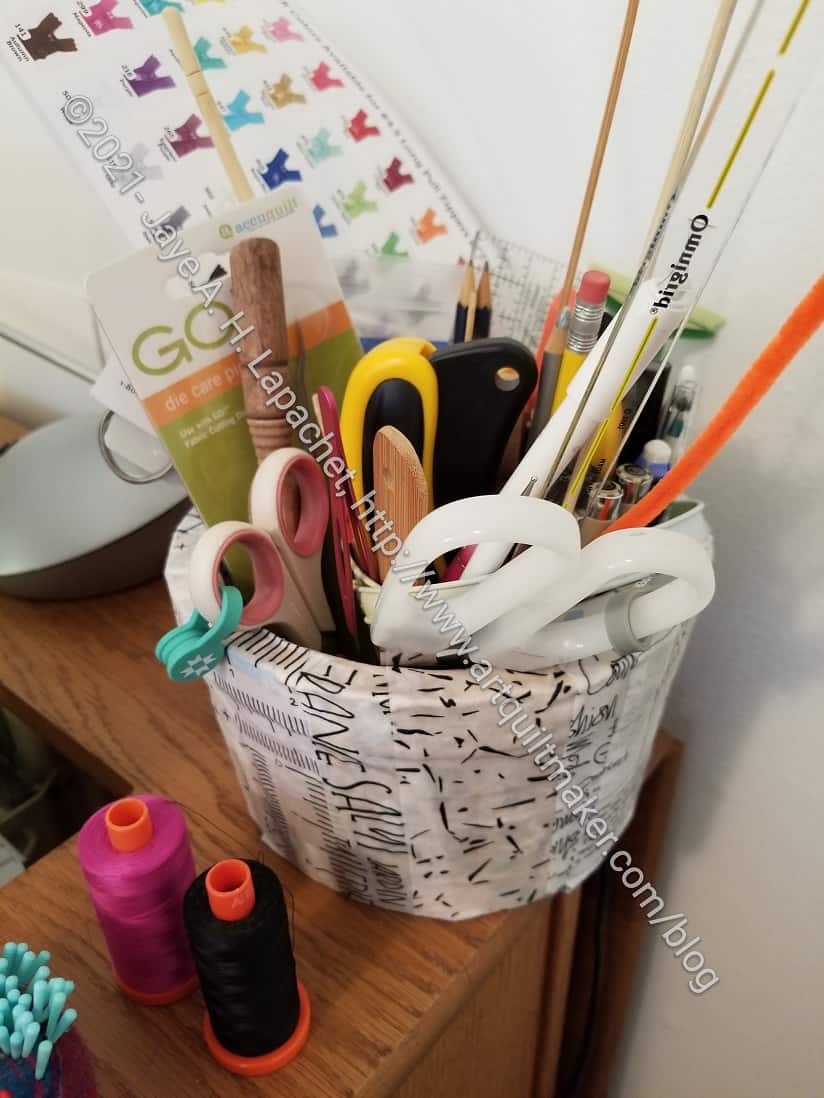
Finished: Tools Bucket
I finished decoupaging my Tools Bucket in a way that I can live with a few days later.
As you can see, it is in use next to my sewing machine. I don’t notice any difference from before I decorated it. I think it looks better, though.
More progress! Creeping along, but workroom progress.
After posted the most recent 26 Projects post, one kind reader asked me what my favorite was. S/he kind of took me off guard. I like keep tracking of my finishes, but I don’t think about them much after I finish them. On reflection, that is kind of a weird response.
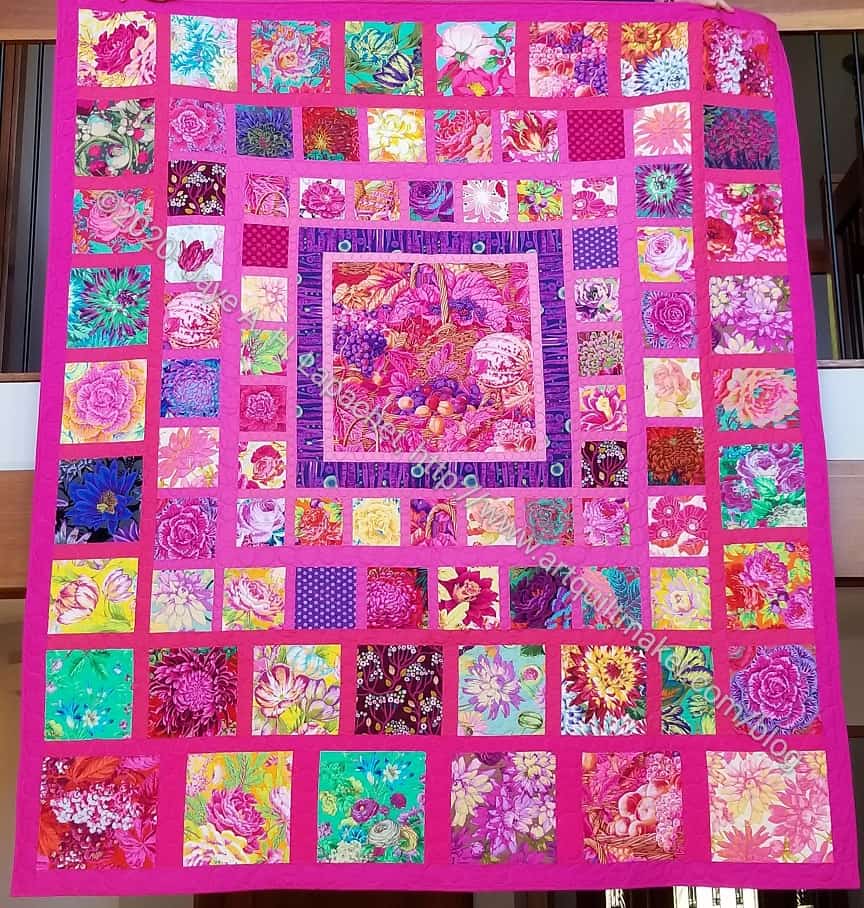
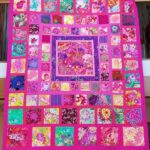
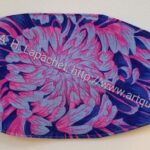
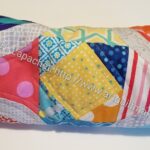
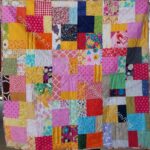
Pink Kaffe Quilt finished
While I like all of my projects (or most of them) I didn’t have much trouble picking a favorite quilt.
I really like this Pink Kaffe quilt. I like the solids that I used (mostly AGF). I also like the flowers that I fussy cut. I didn’t follow the pattern exactly. I cut flowers that I like, including some that were non- Philip Jacobs, though very few.
I find that to be really strange because 1) it was a pattern rather than an original design; 2) none of the rooms in my house are pink; 3) I don’t really have a place to display it where the colors would fit in. This quilt really shows how I make quilts to please myself.
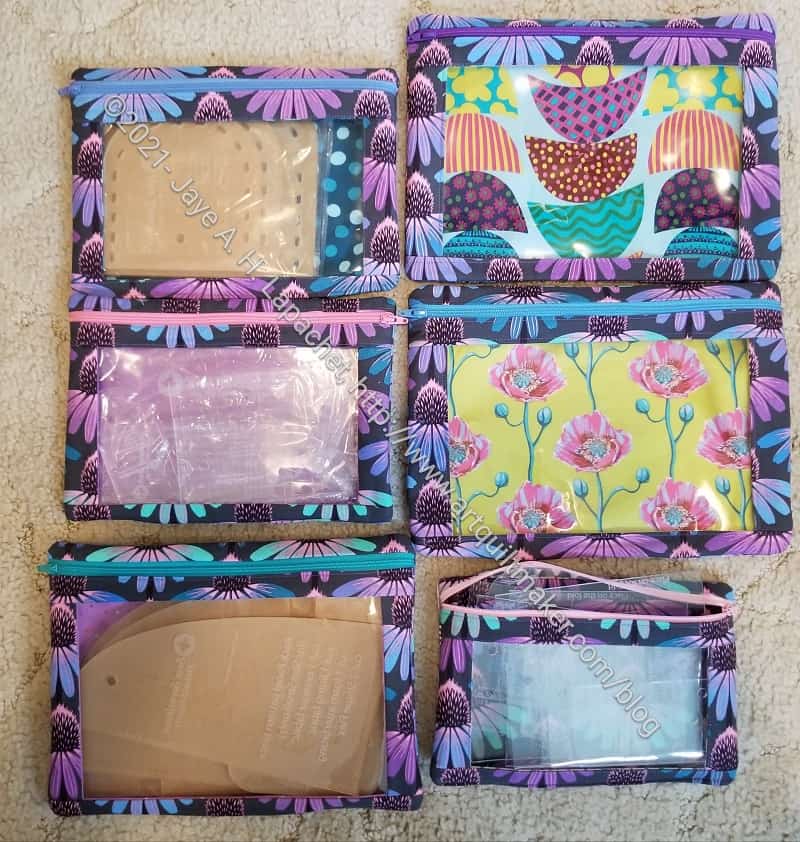
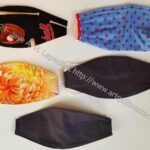
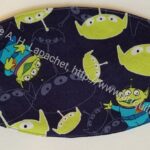
All the I Spy Pouches
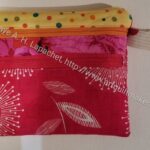
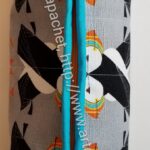
I find myself really liking bags lately. My workroom is still without its design walls, which makes it hard *for me* to work on quilts. As a result, I have been working on bags that are cut. You have seen my work on the Ultimate Carry All Bag recently. That is just one of a few that I am working on. I have to say, though that I really like the I Spy pouches I have made as well as the Retreat Pouches.
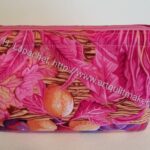
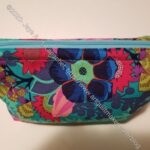
Retreat Pouch closed
Retreat Pouch #2
I haven’t made the large version yet, but I have the frames, so I can do it any time.
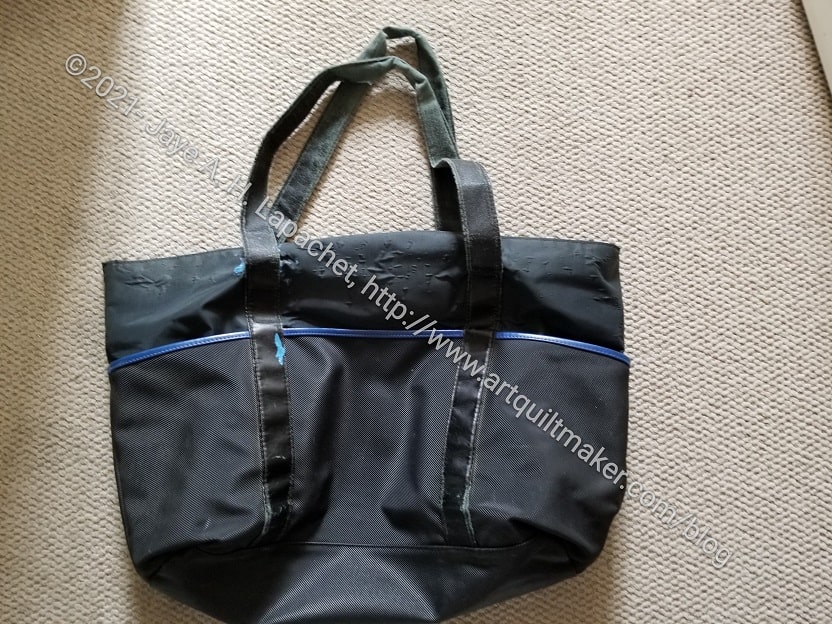
As I was clearing out my workroom to paint, I decided it was time to consolidate bags. My travel bag has served me well, but wasn’t the ideal travel bag and was also wearing out.
I got it in college as a premium with some makeup I bought. That was about 1,000 years ago so it was time.
The bag is a good shape and has a lot of pockets, so it might be worthwhile to make a replacement or another version for a different use.
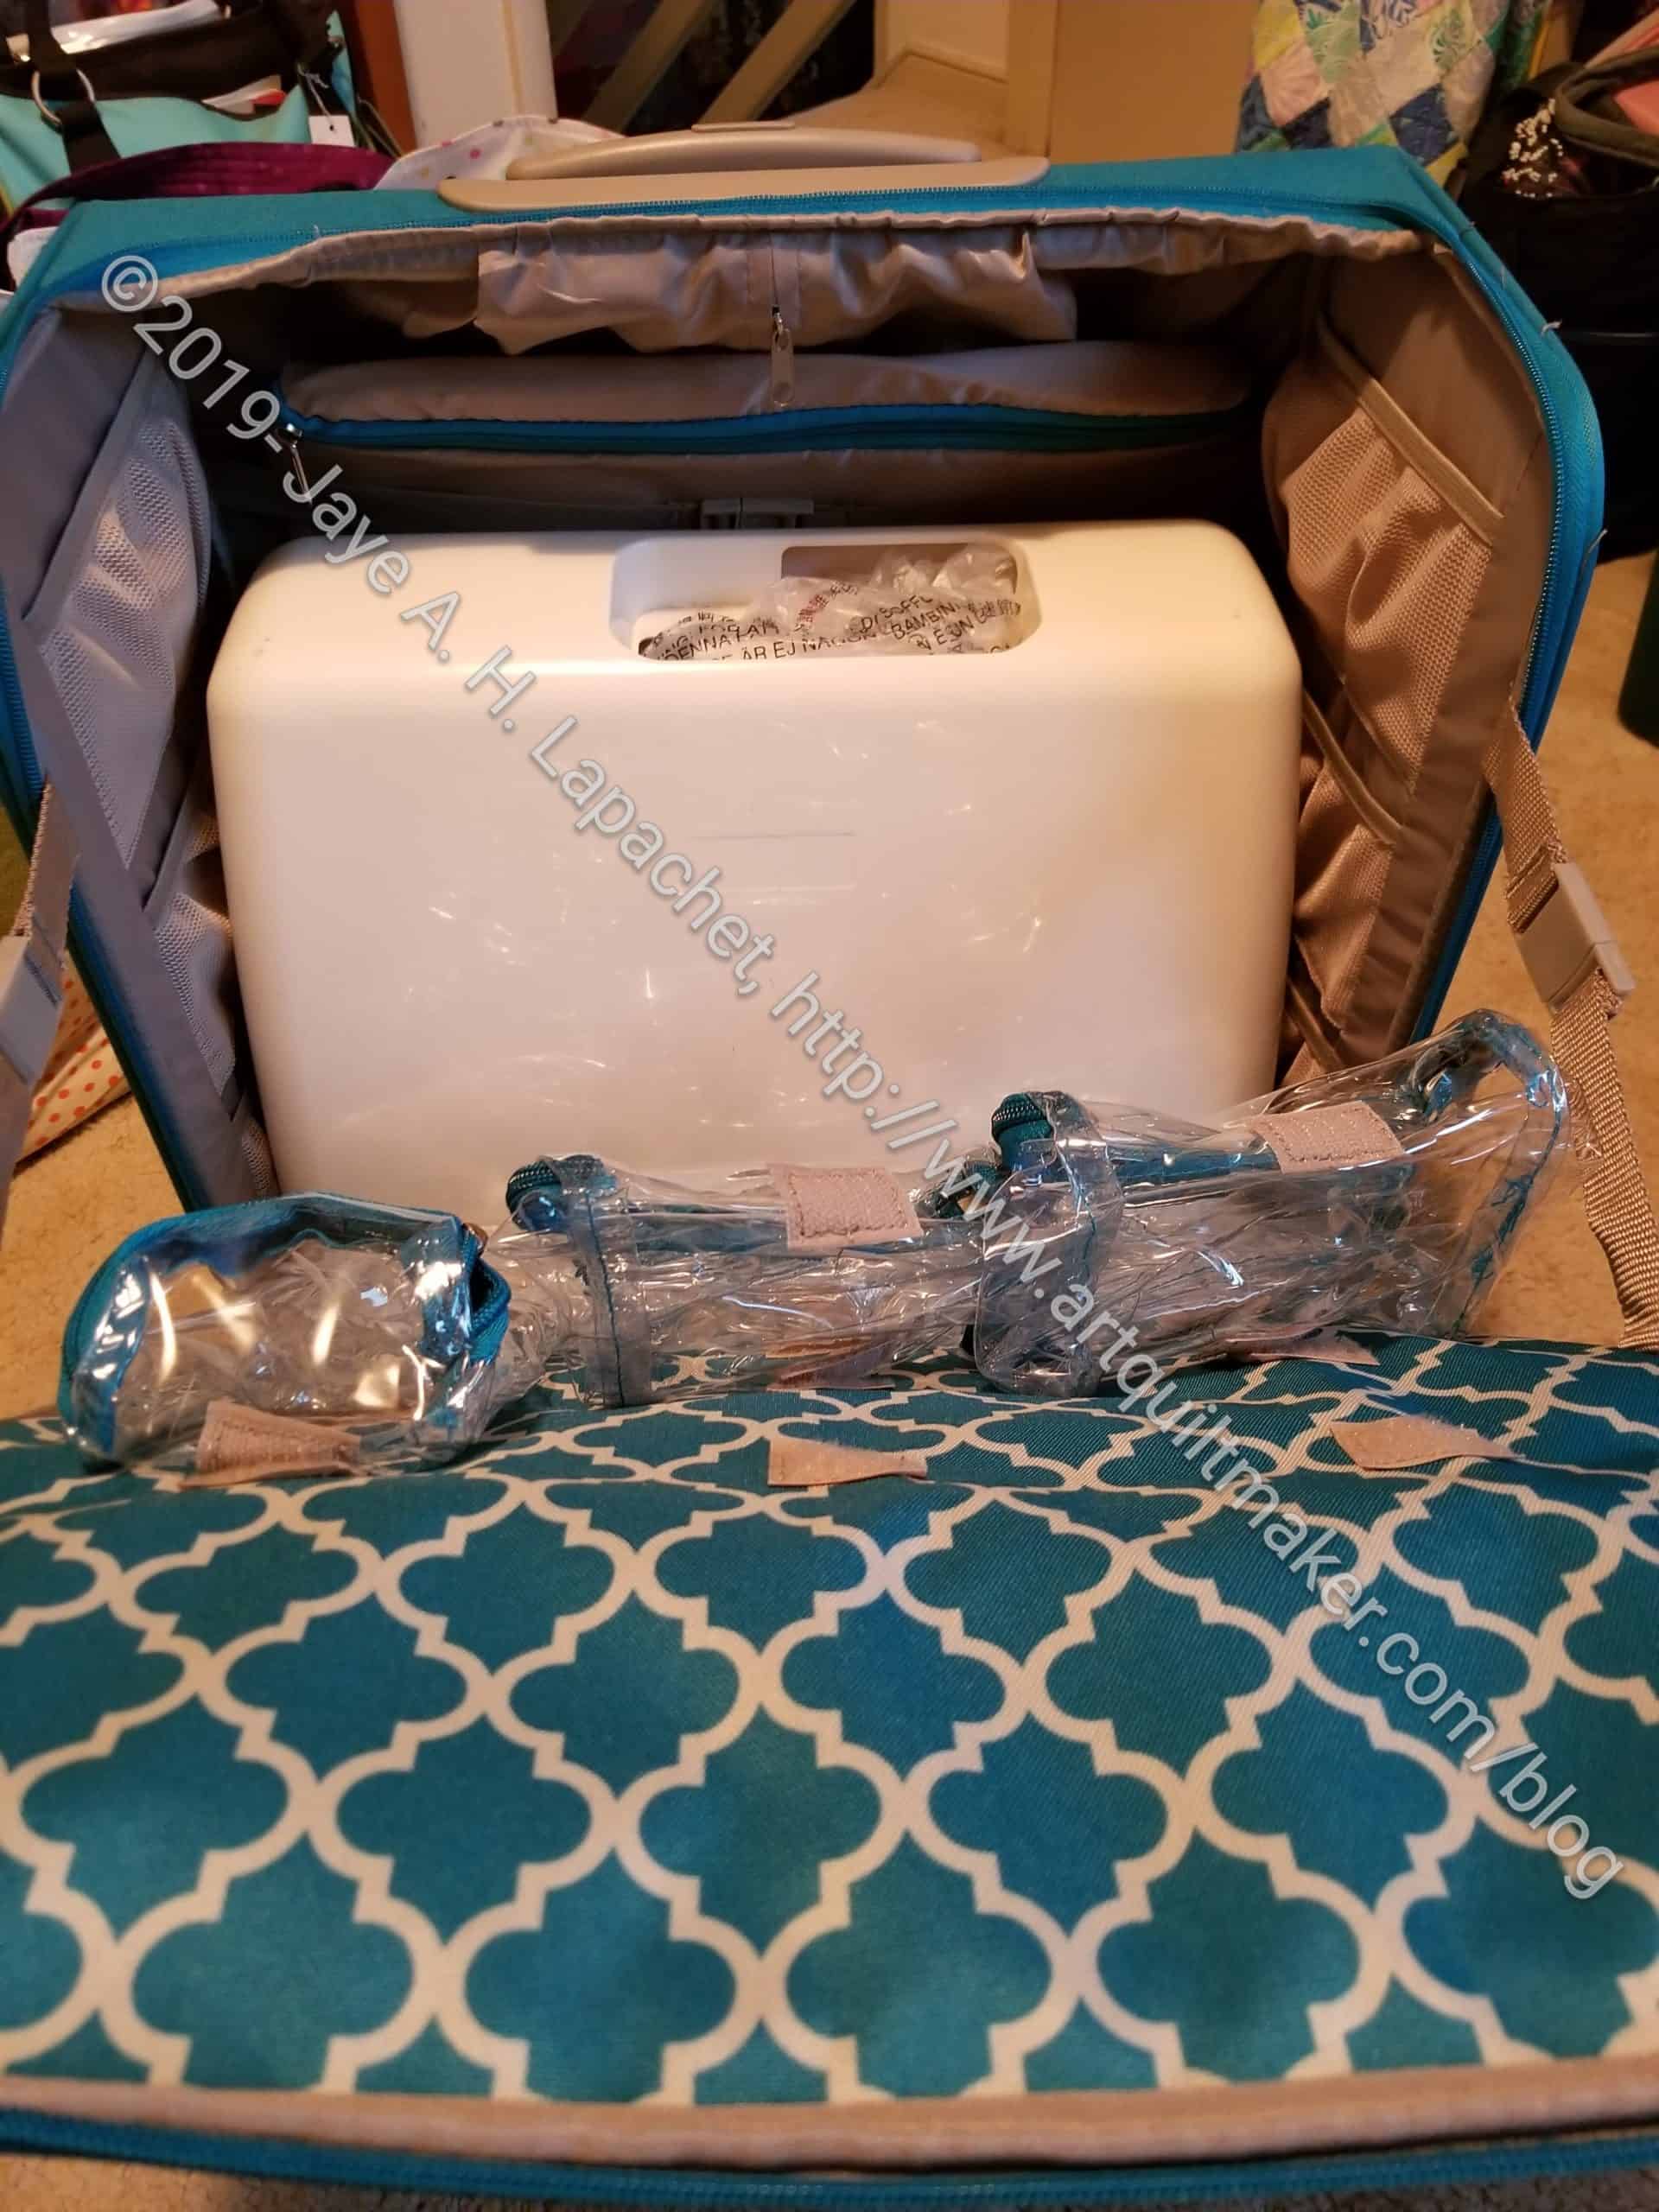
Sewing machine cart- main compartment
I emptied the old travel bag and decided to fill my sewing machine cart with the various items.
🙁 Not great. It was convenient to have everything in one bag, but the various zippers and ‘doors’ were hard to open and close with all the stuff inside.
For the moment this is the way it will be. Since I have been working on La Pass at Sew Day, I don’t anticipate having to worry about traveling with my sewing supplies for the foreseeable future.
I had a day off the other day and really wanted to finish my UCAB.
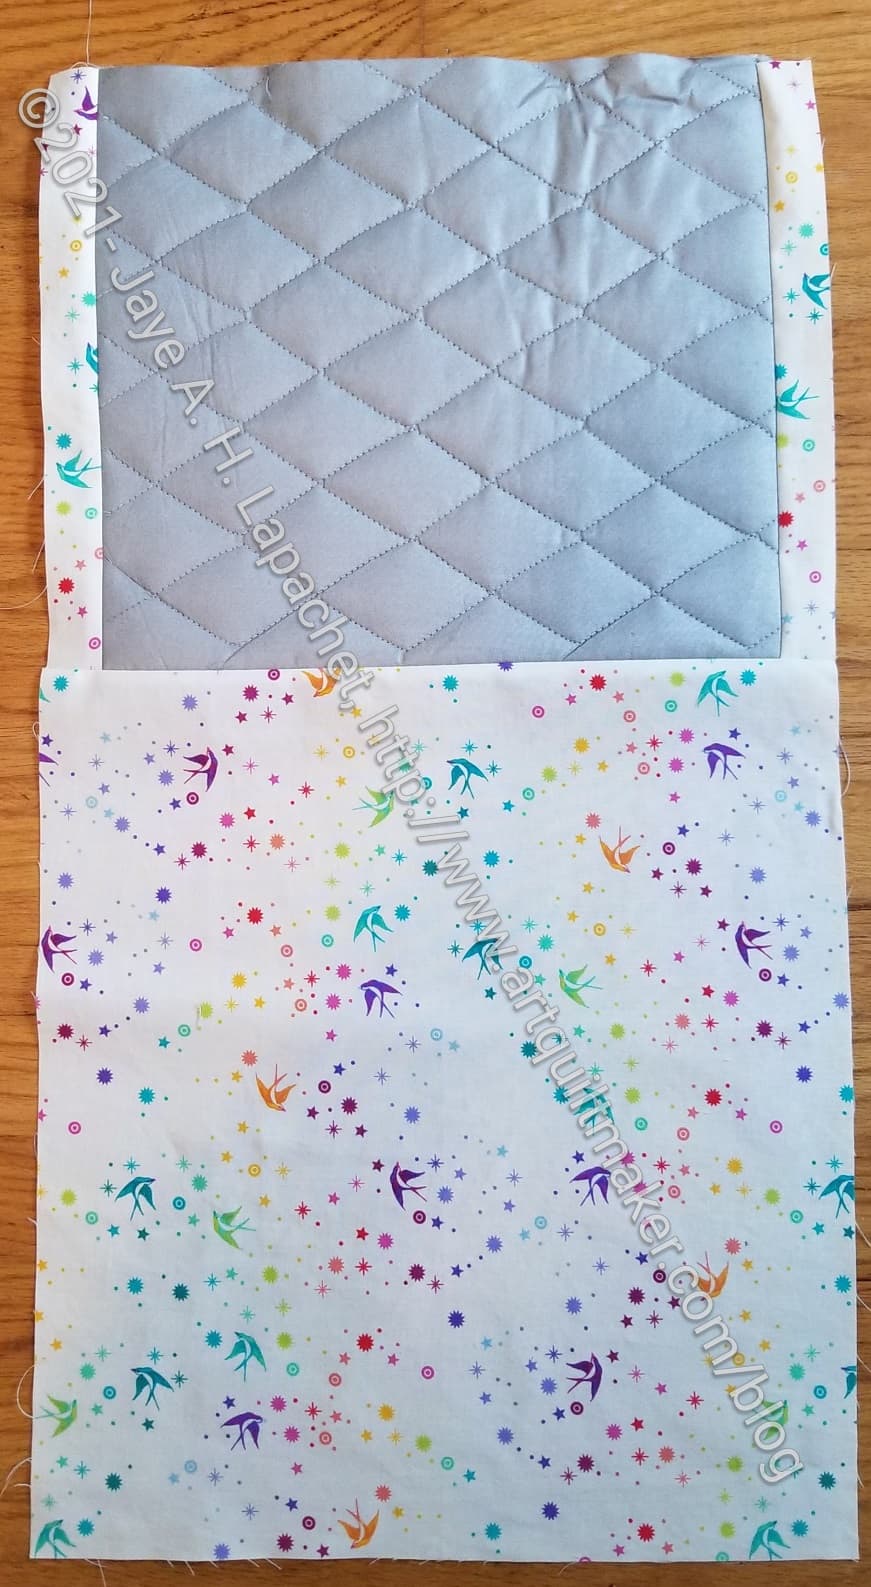
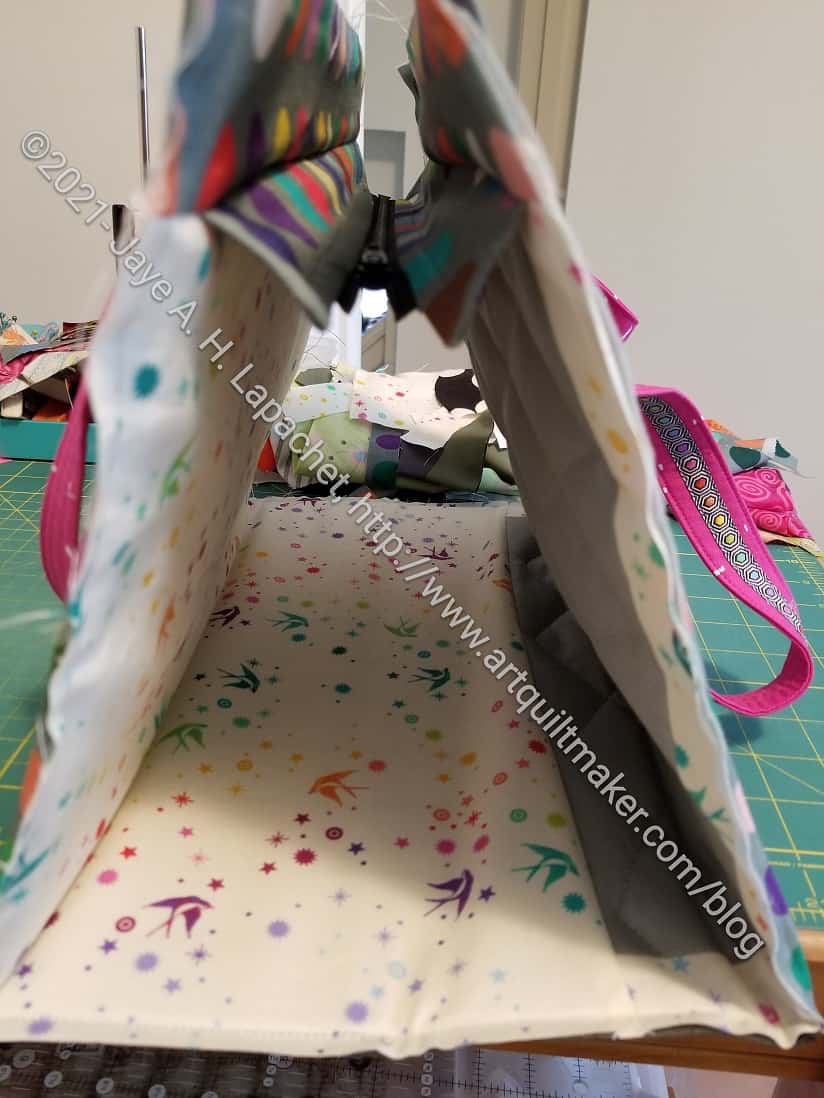
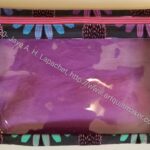
UCAB Lining
In order to finish the exterior I had to sew the lining. I decided to put in an ironing pad even though I don’t think I will use it much. I have my new Mini Maker Case, so I may actually use it. I will try it out regardless.
I had to cut all of the pieces for the lining before assembling the interior. Construction of the lining went pretty smoothly.
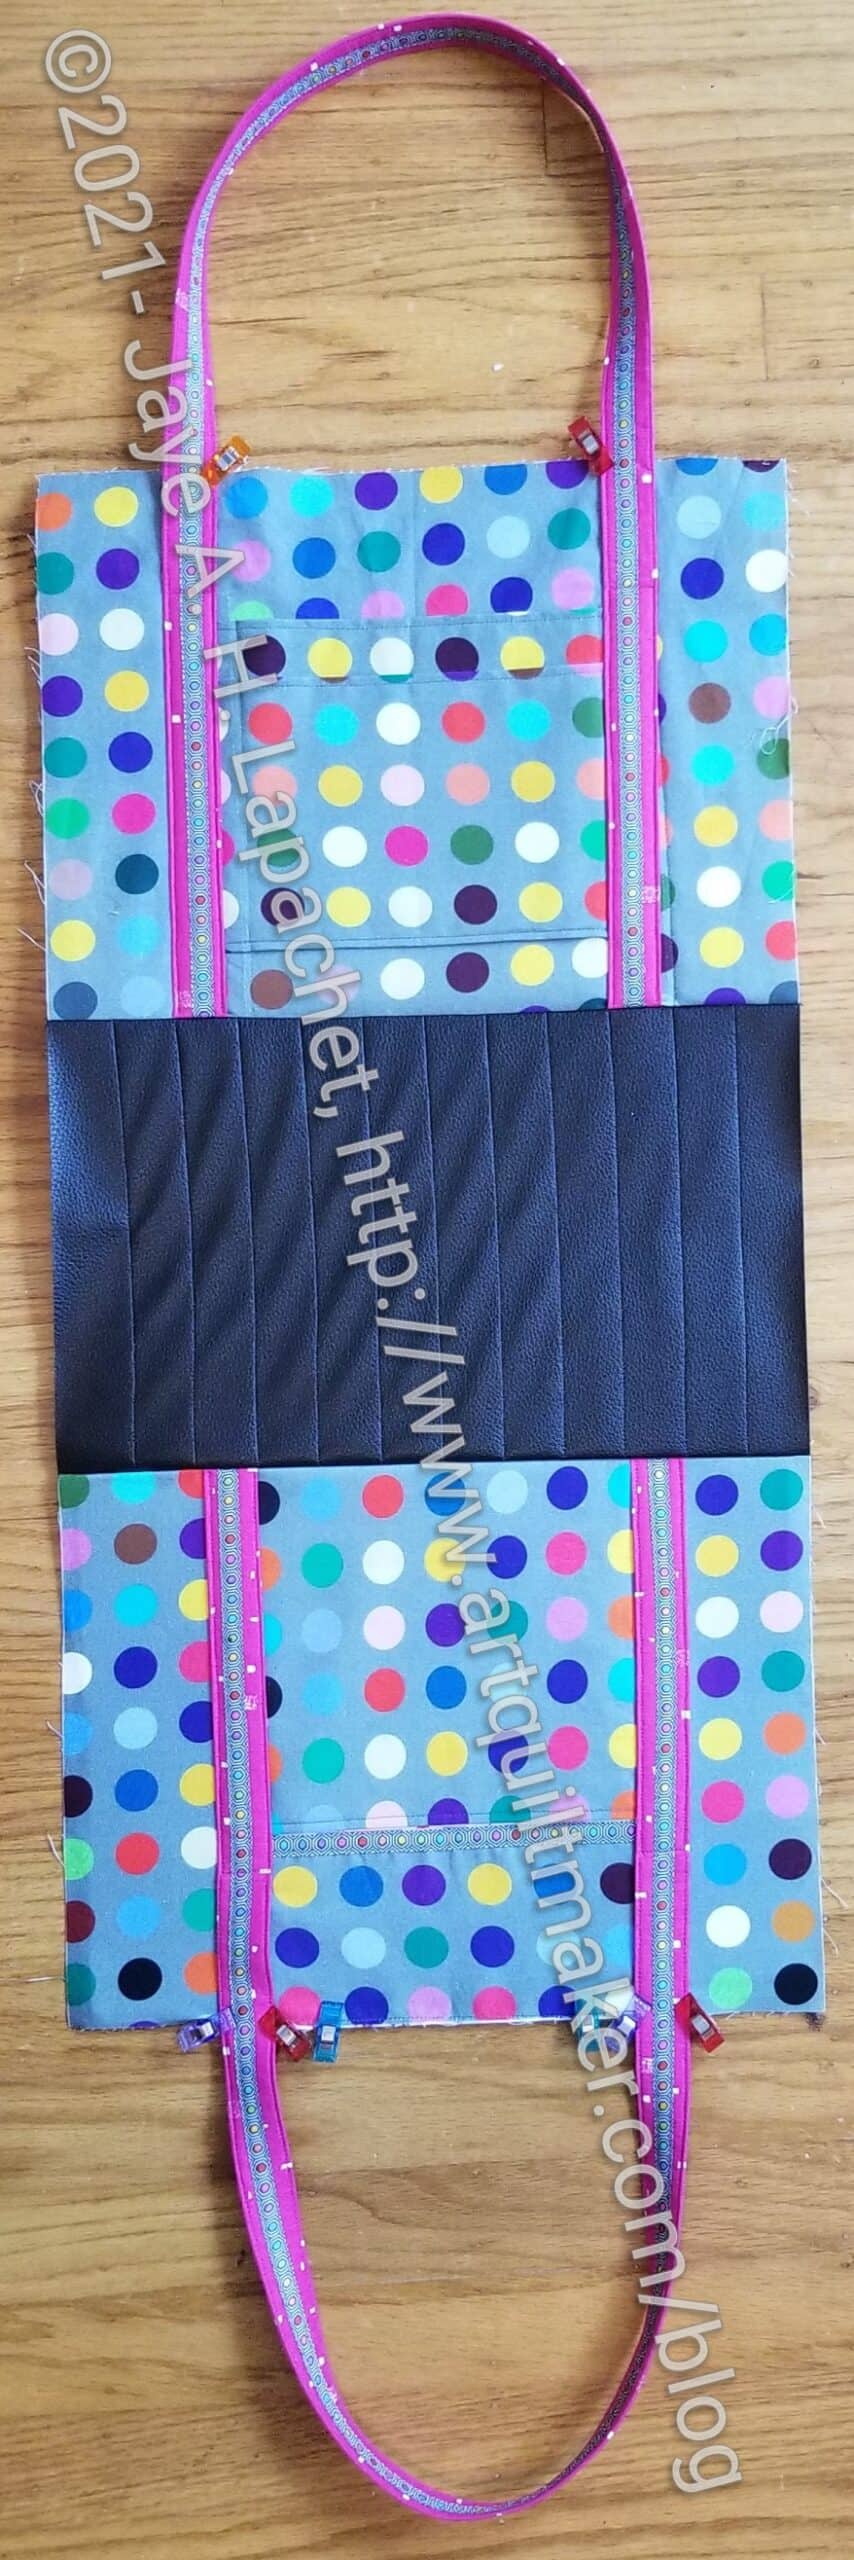
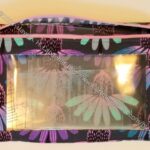
UCAB Exterior
Another task was to finish the exterior. I sewed the three parts together (back, front and bottom), which was pretty easy. I did have some trouble with the pleather bottom sticking to my machine’s bed. I held up both edges and kept as much of it off the machine bed as I could. Then I sort of shoved it through, but will need to rethink that strategy in the future. It doesn’t make for nice stitching.
Laid out like the photo left doesn’t do anything for the overall look of the bag, but you know how it is. It always looks worse before it looks better.
UCAB Exterior – standing up
I wanted the bottom to be flat, so I sewed two layers of Peltex to the pleather – kind of like quilting it. I was careful to keep the Peltex away from the edges so that the edges wouldn’t be too thick. I don’t know if that strategy will work, but it seems to be flatter than I could have hoped.
To encourage the bottom get into (and stay into) the right shape I thought of sewing a seam along the edges where the front and back fold up. The ironing pad extends into the bottom of the bag, so sewing a seam would create a bump. If I want to do that, I’ll probably need to omit the ironing pad.
I also cut out the sides (from a template) and put those together. They are an odd shape, so I used scissors. I also pressed the folds into the places where the pockets will be inserted.
I got a fair amount done, but didn’t finish. Progress! Not finished, but progress.
Recently my guild had Heather Black as a speaker. She was a really good speaker. I went to her website after and bought a couple of her books. The price was better than on Amazon! I also noticed that she has the Classic Curves ruler for sale. This is the Color Girl quilts ruler I bought some time ago. The thing I liked about Heather’s site was that she said which of her patterns could be used with the Classic Curves ruler. GREAT idea and GREAT marketing. Heather is also updating her blog again after some life upheavals.
The last time I bought Decovil Light (Pellon #525) I had to buy it from Emmaline Bags. That isn’t a bad thing as Emmaline Bags is awesome. The problem is they are in Canada so customs, shipping, etc. I found some, based on a recommendation from a fellow Sew Sweetness fan, at HarrisSquared on Etsy.
Projects, Classes, Patterns & Tutorials
I am thinking about doing Tula Pink’s Butterfly quilt. I have the pattern, but have never made it. Friend Julie pointed out the Colorways shown on the Gnome Angel site. I found a site called Petting Fabric, which has kits that are much more my style. Now I have to decide if I want to take on another kit type project like this.
Angela sent me a link to Kitchen Table Quilting’s ‘Valued Scrap Quilt’. The pattern reminded her of my Fabric of the Year quilts.
If you are interested in the A Place for Everything 2.0 bag, you can see a full demo on one of Tula Pink’s IGTV videos. It shows the size, which is smaller than I thought, and all of the features. Tula also talks about the differences between the newer vs the older versions.
Sara Lawson just came out with 4 new patterns. If you want to see the first two, check out her Sunday Sewcial where she shows and talks about two new tote bags.
Really interesting patterns on the In Sewing Times page. The iron carrier is interesting. It looks like the same idea as the Mini Maker Case I made awhile ago. I also like the Swing Basket.
Judy Martin has reduced one of her patterns and recolored it as a wreath. Great idea for reuse.
Carrie P shared a new pillowcase video tutorial with me. She made an adorable mini-pillowcase for her friend’s travel pillow.
Media
Accuquilt has videos on how to use different dies. I think they come out with them as companions to a new die. A recent new die is the Schoolhouse block. To accompany the new die, they asked Barbara Brackman for a history fo the block. She has some great examples of Schoolhouse quilts, including one that is a village, in a recent blog post.
Sara Goer pointed me to Material Girlfriends, a blog and shop. They have a cheerful tone in their posts.
Check out John Lovett’s color page. It is fantastic!
Exhibits & Shows
Luke Haynes and Joe Cunningham will be doing a collaborative show. the opening will be on September 26 at 1803 Market St, San Francisco, CA 94103-1107 from 3-6pm. Find out more information on their FB page.
Other Artists
You can now purchase your own Gee’s Bend quilt from the comfort of your living room. Etsy has partnered with the Gee’s Bend quiltmakers and XX to make their works available with no fee for the quiltmakers from Etsy. A blog post talks about the whole program and provides links to the individual quiltmakers’ shops. I found all of the information in a New York Times article about Souls Grown Deep, a foundation working to preserve art made by diverse artists. The details of documenting Joe Minter’s installation artwork is amazing. The photos in the article are interesting as well.
In Process or To Make
The ‘In Process’ is used to denote projects on which I am actively working or are on the design wall waiting for me to stitch. I am continuing to try not to put away projects. I find putting a project away ensures I never work on them, because I just lose steam.
Quilts
The circle quilt is on the design wall
Small Projects to Make or in Process
Most of my progress involves thinking or just cutting.
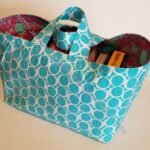
One Hour Basket for my stuff that tends to accumulate on the dining room table. I may switch to one of the Minikins projects or a Catch All Caddy for this purpose.
One Hour Basket for DH’s stuff that tends to accumulate on the dining room table. I may switch the pattern to one of the Minikins projects for this purpose.
Percheron Pouch cut out and ready to sew
Retreat Organizer – another project from the Crafty Gemini Organizer Club, also on my list, but not yet started. Recently, I saw one of these made up and I am not so nervous about it
Superbloom tote using Hindsight fabric – not started
Tessuti Japanese Apron – cut out and ready to sew. I am figuring out how to make it reversible.
Ultimate Project Organizer – another project from the Crafty Gemini Organizer Club, also on my list, but not yet started
Ultimate Carry All Bag gift – Bag-a-Long for BAM – I have the inside pockets as well as the front panel made and am looking forward to the next step
Ultimate Carry All Bag for me – I have the inside pockets as well as the front panel made. I am working my way through the exterior and hope to finish soon.
I decided that some of my projects are in a different class because they are hand piecing or embroidery or beading. They take longer. Thus I created a new category and have moved some projects here.
Still WIPs
I still have WIPs. Who doesn’t, after all? A project in the ‘UFO’ category means I am stalled. A nicer way of saying UFO is a WIP. The list is a lot shorter and the projects are newer, for the most part.
Handbag Sampler – this is still the forgotten project. It should be on the UFO list. The blocks were teaching samples when I taught a sampler class some time before I started writing the quilt class sampler tutorials. I found one block recently, but otherwise I actually don’t know exactly where the blocks are hiding. I crawled up in the far reaches of my fabric closet to see if I could find them and they weren’t where I thought. I am sort of mystified as to where they could be. I haven’t even found a picture of all the blocks. Sad.
Lobster – I think I might make this into a tablerunner for the buffet. I think that will be a good and fun use of the piece even if the colors aren’t quite right for the dining room.
Pies and Points from 2016 Victoria Findlay Wolfe class. The last time I worked on it was when Julie and I had a playdate in April 2018. I brought this piece with me so I could cut more elements (Julie has a Sizzix). I lost my excitement about this piece shortly thereafter, but I am ready to work on it as soon as I get my design walls back up.
Pointillist Palette #4: Fourth is a series of 6 quilts; needs tiny square patches sewn together. No progress.
Serendipity Lady – I am still planning to take this piece to be framed.
Who Am I? – This piece is still languishing. Perhaps having a larger design wall will help me regain momentum. The amount of satin stitching I was facing was a problem until I thought of BIAS TAPE. I am going to make the words with bias tape, perhaps different widths, then I won’t have to sew the satin stitching. Red Scribbles and Friend Julie helped me come up with this solution. Now I just have to do it!