Finished: Knitting Needles Bag

Knitting Needles Bag - closed
Knitting Needles Bag – closed

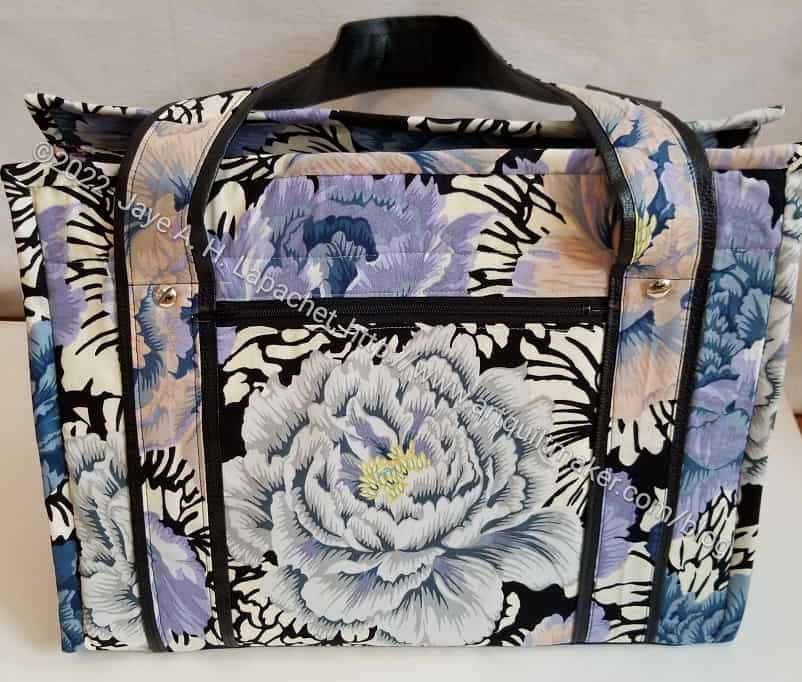
I am really pleased with the way this bag went together and moderately pleased with how it came out. I want to make another one, now that I have the basics down in my head, because there are some things that didn’t come out right….for me.

Knitting Needles bag - starting to open
Knitting Needles bag – starting to open

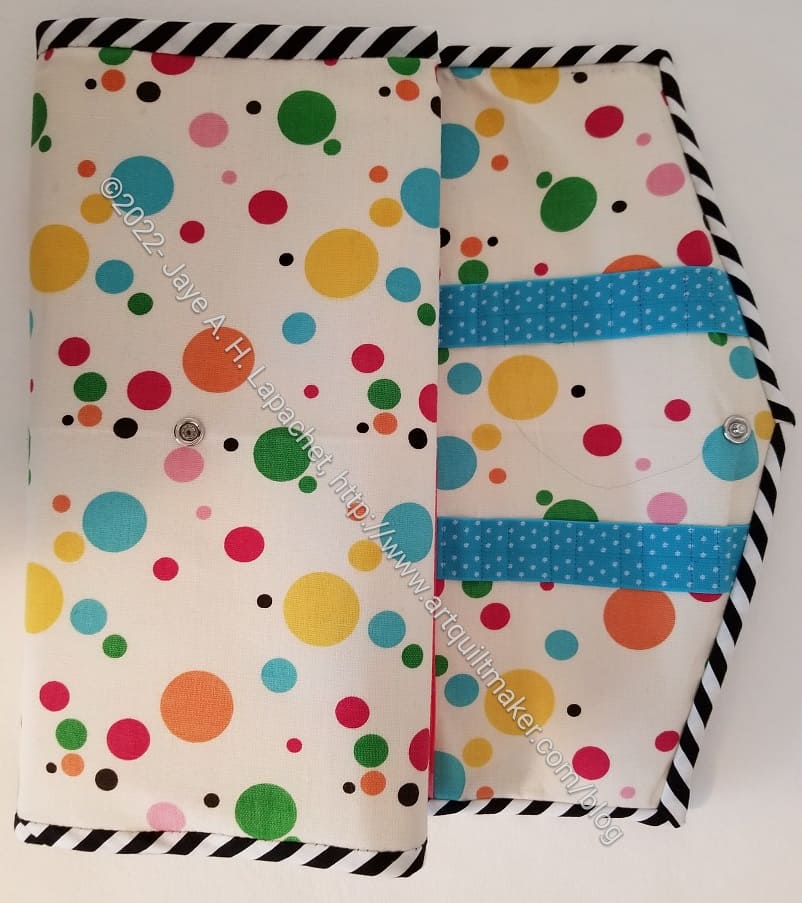
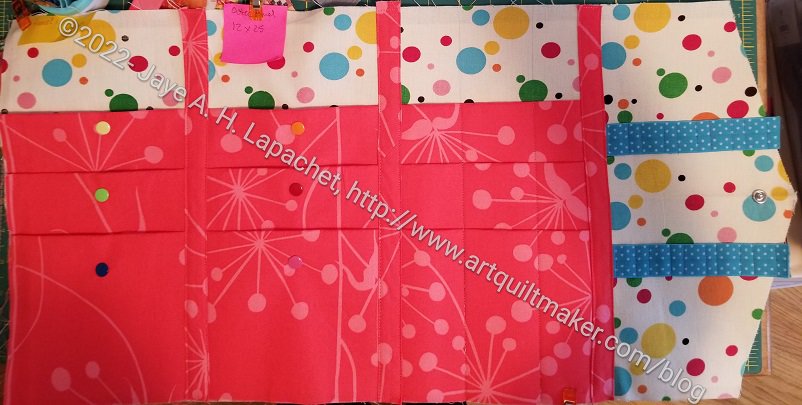
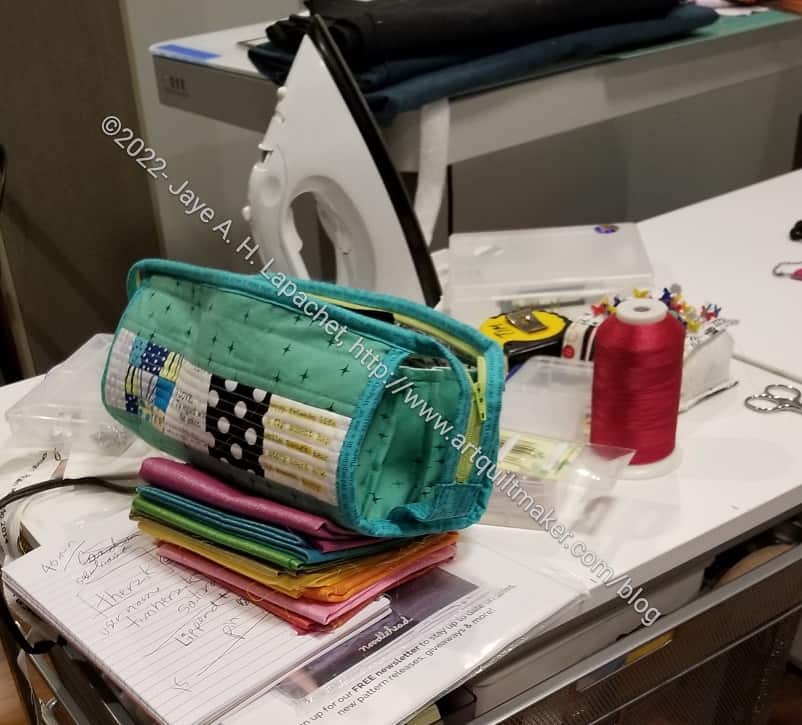
I was glad to have a project on which to use canvas. I bought the cream dot canvas A LONG time ago and have just never used it. This pattern specifically called for canvas and I am determined to use fabric I have as much as possible, so I pulled it out. It looks very cheerful in the picture and IRL, too.

I thought the pattern was very good, too. I know I didn’t believe what the designer wrote, but she wrote it correctly.

Knitting Needles Bag snaps

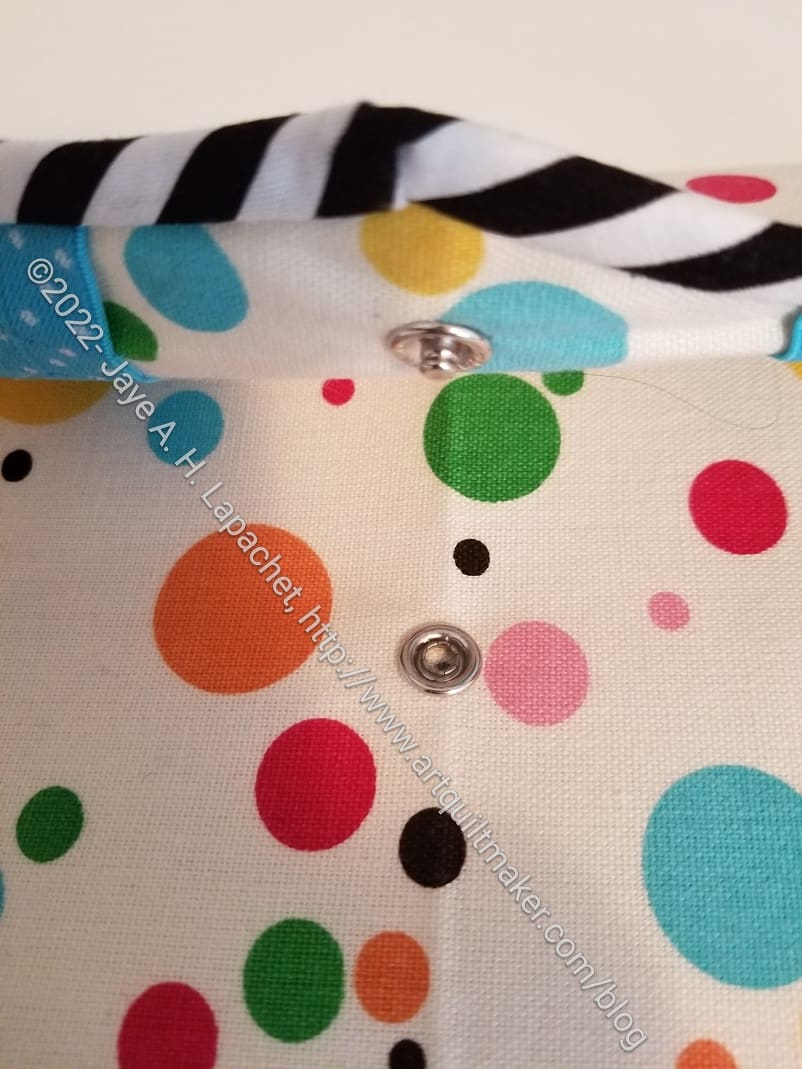
I know I mentioned adding snaps in the last post, but I have to say that I was pleased to do so and have some ideas for using them. Also, again kudos to the designer: the snaps all lined up properly, which was great.

I used the SnapSetter I got from Sew Sweetness. I tried to use the pliers I bought, but couldn’t figure them out. I found the SnapSetter to be really easy and straightforward to use. Sara of Sew Sweetness has a video on how to use the tool.

Knitting Needles Bag - label and binding
Knitting Needles Bag – label and binding

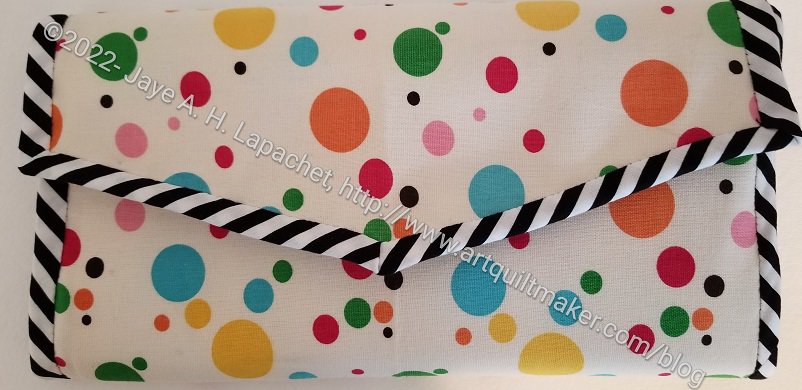
My striped binding wasn’t the ideal choice. If I had it to do over again, I’d choose a solid. Normally, I am a huge striped binding fan, but in this case it clashes a bit with the dots and I think a solid would work better with that non-45 degree point in the front. The stripes make that weird angle look bad. Otherwise, the binding looks fine.

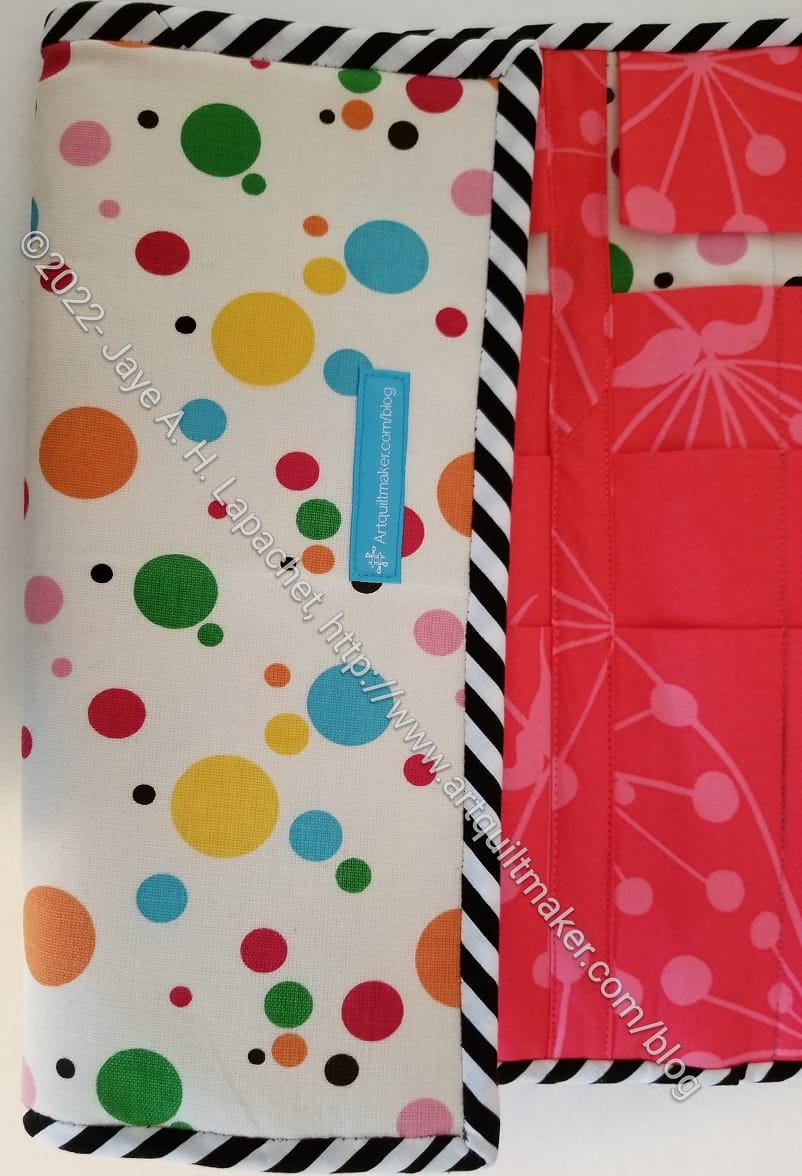
The other good thing about the pattern is that the designer tells you exactly where to put a label. I am excited about that since I just bought some Wunderlabels. You can see that I added one in the location indicated. It is covered when the bag is closed.

Knitting Needles Bag - fully open
Knitting Needles Bag – fully open

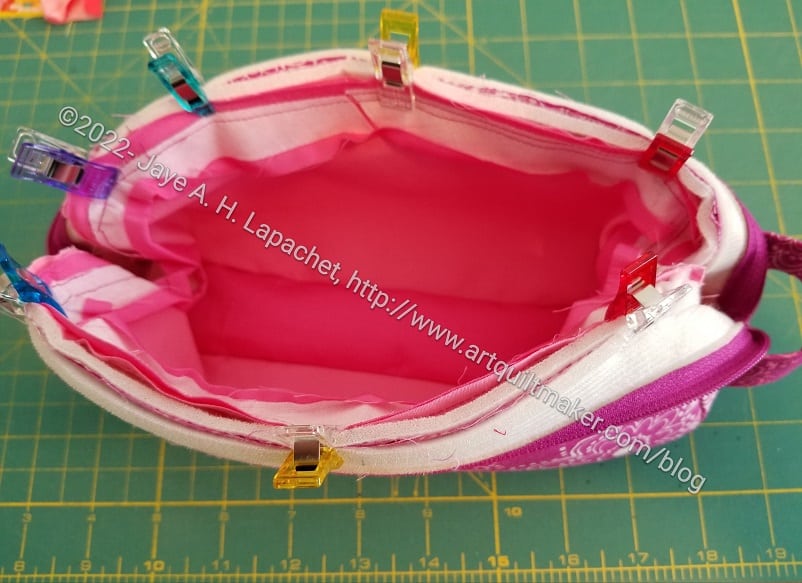
The bag has three compartments. It is designed for circular and double pointed needles. There are some optional directions for modifying the compartments for other types of needles. I have a lot of circular needles so I will use it for those.

Knitting Needles Bag - starting to fill
Knitting Needles Bag – starting to fill

I haven’t completely filled it yet, but I have started to put some needles in it.

The circular needles are placed so the snap is in the middle of the needle. This is great, because it is another check to make sure the needles don’t slide out.

I really like the shape and the way the bag snaps together. I highly recommend the pattern by Tinberry/Zaudal Creates.

La Pass Spikes in Month 16

La Pass: Cutting spikes

I am really pleased that Lindsay is doing this project with me. She inspires me and I learn a lot from her knowledge.

She showed me her spike motifs a few months ago. As soon as I saw what she had done, I wanted to try it. This month is the month!

Basically, the design requires combining the fabrics in different ways to create a different look. I combined a pentagon and one of the long skinny triangles to make the largest piece. I used the dark blue Contempo fabric to really highlight the design.

La Pass: Month 16 start

I haven’t cut out all the pieces, but I had cut enough to start trying out my fabric choices and to see how the spikes would look. I also had to change a few of the fabrics. It’s ok, because I will use some of the new fabrics I chose for the last large rosette.

Moto Pouch in Process

Moto Pouch #1 in process

I have a couple of nieces who have recently joined the family. I decided to make them each a pouch. I like to make some gifts “from Santa” for newbies in the family. It gives me an excuse to make more pouches and adds to their often anemic gift pile a little.

Eventually I decided on the Moto Pouch from Sew Sweetness. The Moto pouch is part of the Sew Sweetness Minikins Season 1. I cut the fabric for both pouches out at the same time, but I didn’t sew them at the same time, for some reason. Only one is in process at the moment. I’ll have more experience when I start the next one.

This pattern has a drop in lining, which people on the Sew Sweetness FB group don’t like as much.I am struggling a little as well.

The construction is similar to the Sidewinder pouches I made in 2020. The design itself is remarkably similar, though not exactly the same.

BAM Swap Gift

Wrapped Swap Gift from Sue G.

I was so pleased to receive a really nice swap gift from Sue G!

Not only did she sew some scrap bins/thread holders, but she gave me some of my favorite Art Gallery fabric as well. All of it came wrapped in this bag filled with festive tissue paper.

On the form we had to fill out, Isaid my colors were turquoise and red. Sue knows that I like my red to be more towards the pink than the orange and she did a great job choosing fabric.

All the gifts
All the gifts

The large thread catcher, or soft bin, isn’t huge, but everything else fit inside. In the bin is another bin and four half yards of fabric. I didn’t realize there was another bin inside when I opened it, so was very surprised when I opened it.

Two swap gift bins
Two swap gift bins

The small bin will go very well on my ironing board. Normally, I just pile up threads as I iron fabric until the wad gets to big or falls on the floor. I think the small bin will look much nicer.

Bin on ironing board

I haven’t quite decided how I will use the larger bin. The mini-charms falling out of the 1 hour basket in the fabric closet might fit – or some of them might.

Thanks, Sue!!

La Pass Month 16 Arrives

La Passacaglia month 16 fabric and supplies

My month 16 BOM packet arrived the other day. I was pleased, because I had just enough time to wash the fabric before Sew Day. My plan, which has been foiled the past couple of months, was to cut and baste at Sew Day.

I was surprised at the large size of the packet that arrived. I was pleased to find that this month has a lot of fabric to use in the 3 (THREE!!!!) rosettes we have to make. They are smaller rosettes, so I am not worried. Still! THREE!!!!

La Passacaglia month 16- more fabric

As I got ready to wash the fabric, I kept finding more pieces of different designs each time I unfolded another piece.

I plan to rearrange the way the pieces are presented so I don’t know how much of the above fabric I will use.

Sewing Advent Calendar

Wrapped gift from Julie

Friend Julie’s birthday is December 1. Like mine, we bookend Christmas, though our birthdays are both far enough away to, mostly, not get combined gifts. Regardless, I try and make sure her gift arrives so she can open it on December 1 and she can enjoy it before all the other Christmas gifts arrive. I’d like it to arrive the day before, but it’s challenging, because of Thanksgiving.

Sewing Advent Calendar

This year, I was surprised to receive a gift from her that I needed to open on her birthday! It was super fun to keep it on my desk and think about what it could be while I worked. I couldn’t guess, so was surprised and pleased when I opened an Advent calendar with sewing labels inside. These are labels I can use in my bags and on my quilts.

Along with the Wunderlabels, I need to get better about remembering to add them.

Advent Calendar label, day 2

Unlike the Wunderlabels, these are not personalized. The labels behind the doors I have opened so far have different sewing related sayings on them. Each door seems to have two of the same labels behind it.

It is really fun to open these every day and I am pleased about having something fun to do on the lead up to Christmas.

Knitting Needles Bag in Process

Knitting Needles Case in process

I finally got over the hump of the elastic on my Knitting Needle Case and started to make progress. It has been over a month since I started working on this bag and I thought it would go more quickly.

The problem was that I couldn’t believe I was reading the pattern correctly. The first instruction after cutting is to apply elastic to the right side of the fabric. I couldn’t believe that was right, so I procrastinated, then I DMed the creator and then I found her videos. There are two videos. I skipped through a lot of the first one, though when I found the section I needed it was really helpful.

Lining Up Elastic
Lining Up Elastic

Neither of the videos have talking. The sound is all musical (I turned the sound off), but there are some titles. It doesn’t matter, the visuals are helpful. The part about the elastic also gives a helpful tip for lining up the elastic as holders for needles.

After getting over the elastic hump and learning to add snaps, I was able to make good progress in a few hours. The last step I have is to sew on the binding.

New Pantone Project Blocks

Pantone Project Blocks - November 2022
Pantone Project Blocks – November 2022

I received a nice package of blocks from Friend Julie the other day. It is so interesting to see these blocks. Julie mentioned that it looked like a real project now when she posted about the blocks I sent to her last week.

I can’t really see what they will end up looking like, but I can see that they will end up as something. I can see the possibilities now.

I have received more postcards and need to match them to fabric. I might be over the hump of fabric selection being a big barrier. We’ll see how it goes with the next group.

Random Donation Blocks –> Top

Lee Ann's donation quilt
Lee Ann’s donation quilt

I was super pleased to see a quilt show up made from blocks I had donated. I made a number of these blocks this year, so they didn’t hang around very long, which is nice.

LeeAnn finished this quilt and showed it at last month’s meeting. The corner fabrics she chose make the quilt look like a night sky quilt.

I love seeing what other people are inspired to make from my blocks.

Gift Post #1-2022 -Julie’s UCAB

Julie's UCAB
Julie’s UCAB

Yes, I made Julie a UCAB. This wasn’t planned for her, but she admired mine at Super Sew Day so much that I showed her the outside of the Brocade Peony UCAB and we made a deal. I would finish it for her and she would forget our conversation and be surprised.

I didn’t wait until the last minute to get the project done. About a week after Super Sew Day, I started on the pockets and just powered through. This is my third UCAB and I don’t find it any easier than the first two. Well, maybe a little easier.

Anyway, I sent it off the day before Thanksgiving and I am sure she got it. I can’t wait to hear if it is useful or her.

Various & Sundry 2022 #12

Admin

I updated the Minikins page. I also updated the Ends Donation quilts page.

Projects, Classes, Patterns & Tutorials

I found an interesting bag while scrolling through Instagram. It is called DIY Magic Twist Zip bag. It has a template for the shape included, though I don’t know what the template is made from. It comes from a shop called Dremmie.com, which appears to be just a shop to sell patterns and templates. There is no information about the shop except hidden in the About us on certain screens and that doesn’t even say that much, such as where they are located and the location from where they ship.

Crafty Gemini has a video on choosing bag interfacing.

Natalie from SewHungryHippie has a free tutorial for a see-through pouch called the Comet Case. In the tutorial, she shows you how to make it with vinyl.

The first clue for Bonnie Hunter’s FREE 2022 Mystery Quilt came out this morning. If you want to join in, take a look at the introduction and first clue. All the information is on the Chilhowie tab on her website. I have made two of her mysteries, En Provence and Frolic!. Lots of piecing, but it is broken down into manageable stages. I don’t always do the quilts, but I always save the clues.

Bonnie’s mystery quilts are great scrap busters and also a great way to hone your precision piecing. She gives lots of tips and tutorials on making your pieces fit.

I tried to teach myself to use the pliers I bought to add snaps to a project. I even found a tutorial that was helpful in getting me to understand what I was doing. It didn’t help. I rummaged in my tools pouch some more and found the Snapsetter tool. It was in an unlabelled box, so I had forgotten about it. Apparently, I didn’t end up using it for whatever project needed snaps.  I do remember that Sew Sweetness has them, so I checked the tutorials link on her site. There, I found a video on how to use it. I did a few practice snaps then went for it. I am pleased with the way the snaps came out. Stay tuned for photos.

Tools, Books, Fabric, Notions & Supplies

Need colored elastic? Check out ElasticBytheYard. They have polka dot foldover elastic!

Media

I watched a GREAT Tula Pink video where she showed A LOT of bags made with her new Everglow fabric line. She showed a Bionic Gear bag that finally made me want to make one of those.