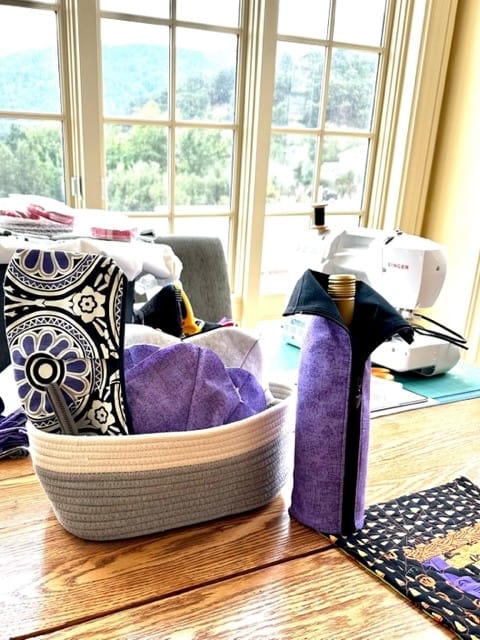
As mentioned, I am making another Kit Supply Tote. For some reason, I am thinking a lot about this bag. Sometimes, making the pattern a second time gives me new insights.
Over the weekend, I worked on the zippers in addition to the pockets.
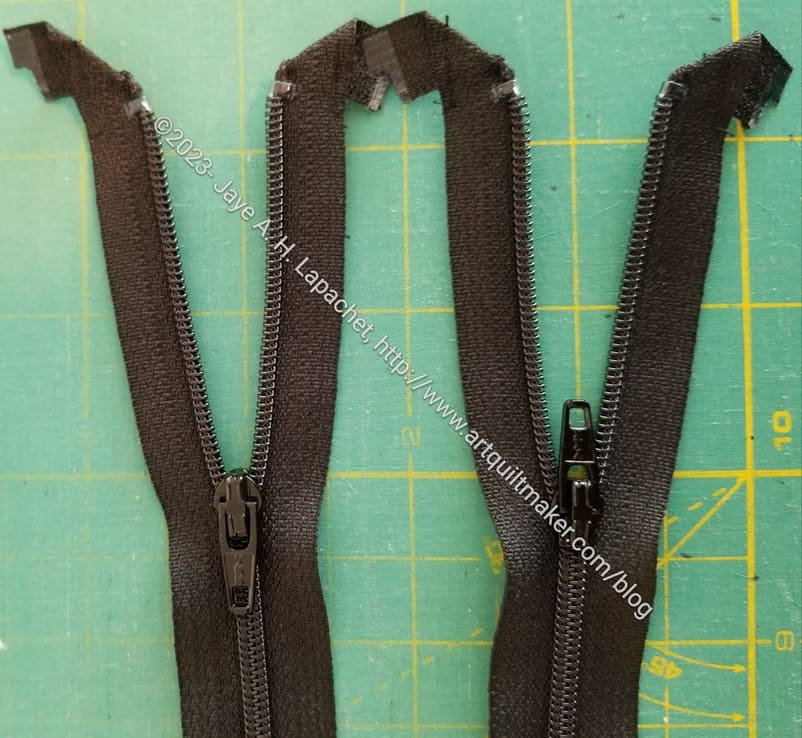
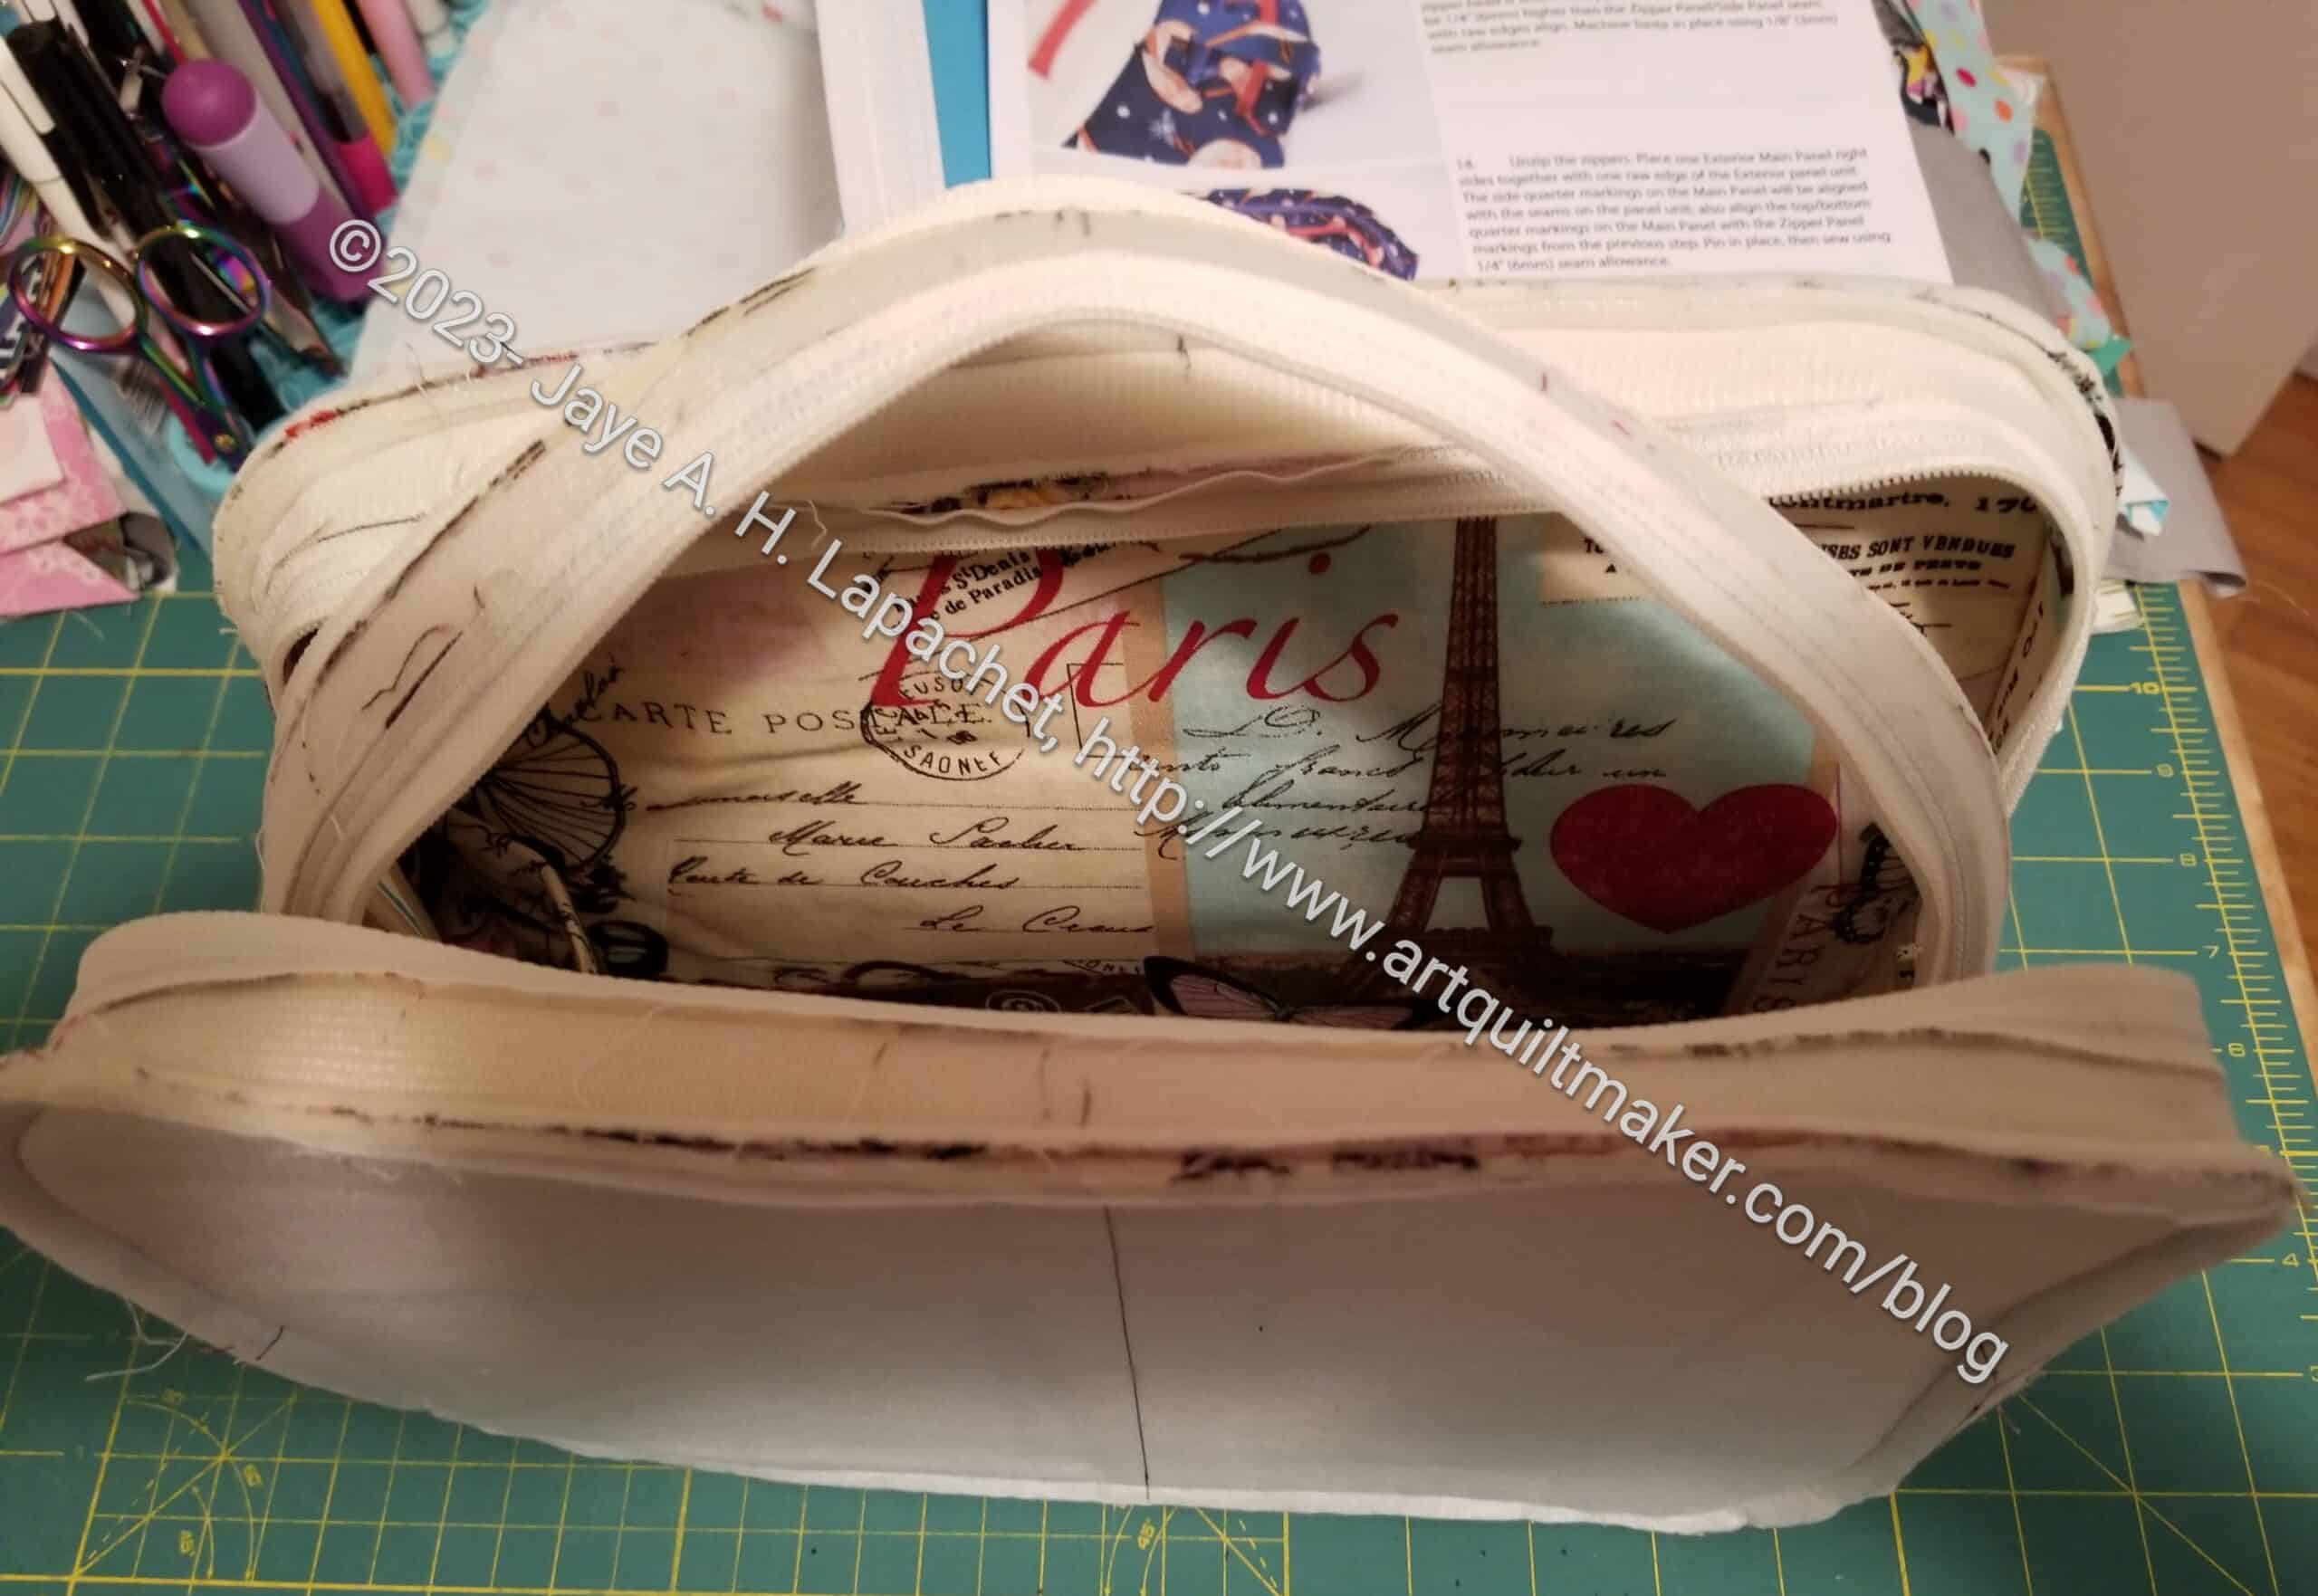
The bag requires one separating zipper. I am getting more experience with them after the UCAB and my own Kit Supply Tote.
Zipper tape at 90 degrees
Some designers have makers fold back the zipper tape at a 90 degree angle. I have always found this problematic. Over the weekend, looking at the pattern, I realized that I didn’t have to totally secure the piece so it would never come out. I only had to secure it enough to keep it in place until I sewed the zipper in. I sewed a few stitches just where the open edge of the 90 degree folded piece. I had no problems with the zipper tape sticking under the presser foot and developing a thread blob.
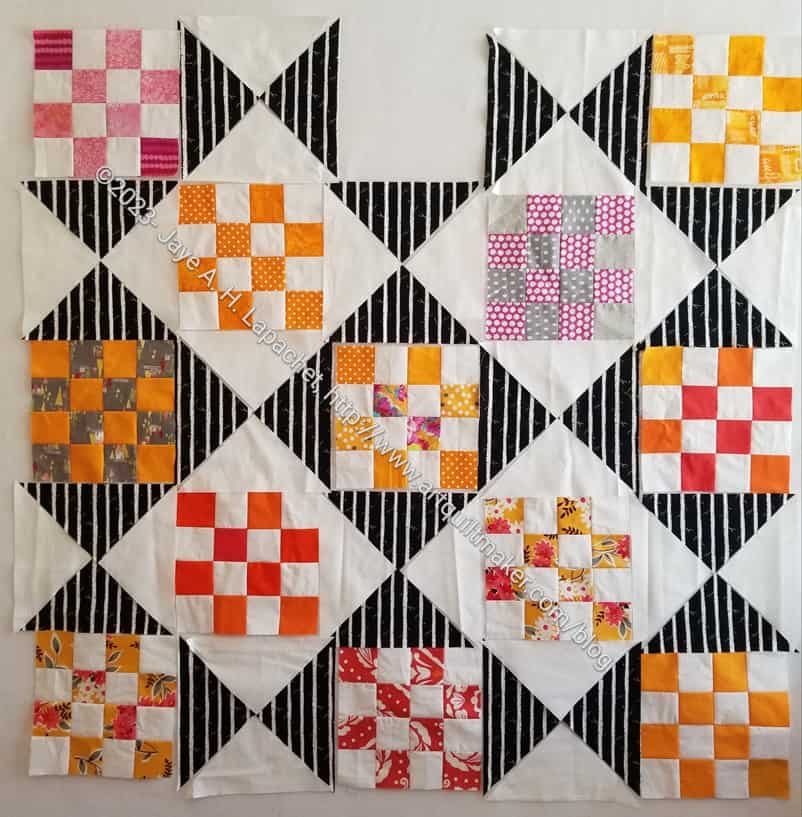
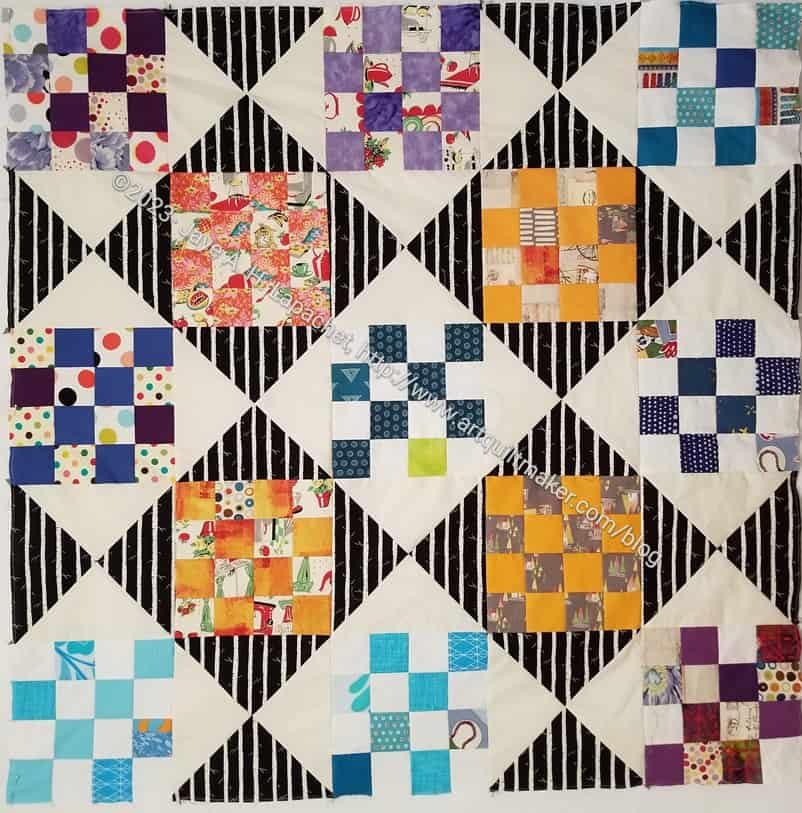
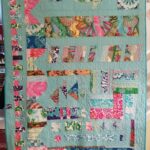
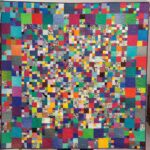
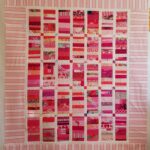
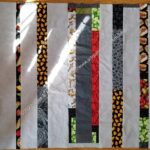
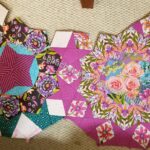
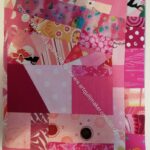
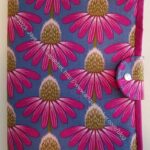
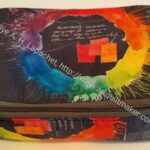
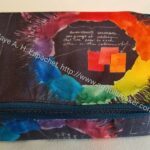
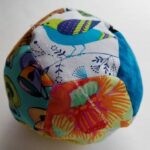
Here is the second of my new series, apparently. More orange, though i didn’t have quite enough and had to use some pink blocks. We’ll see if they stay.
I hope to have this done for the meeting on Saturday.
I am working on another Kit Supply Tote. As an aside, having a model to look at as I make the pattern again makes the second one much easier.
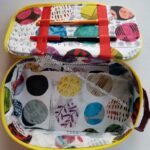
In this case, I worked on the pockets on Saturday night. I modified the pockets in the pattern, because I thought I could add more pockets. I prepared the modified pockets some time ago, but just started to sew them over the weekend.
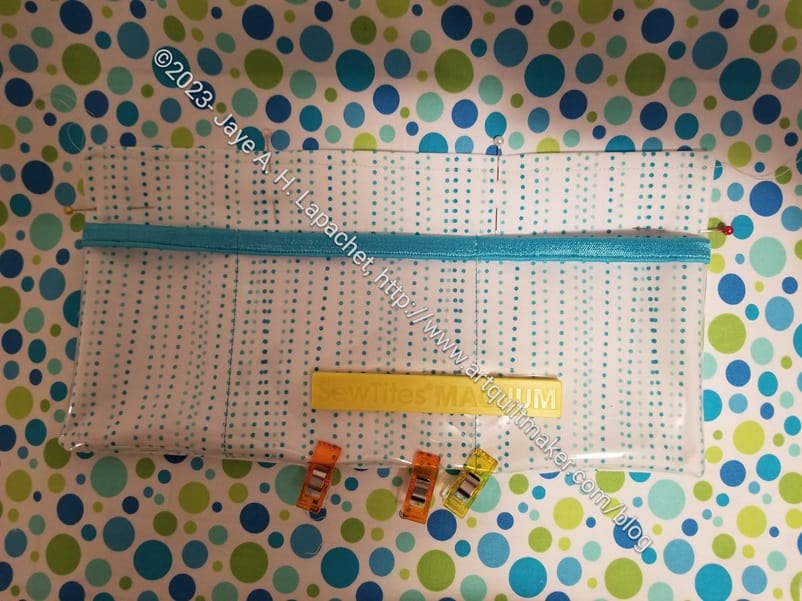
Kit Supply Tote pocket modification
My pockets have the pockets from the pattern on the bottom (white fabric with blue lines of dots) and another vinyl pocket (top of vinyl has blue double fold elastic) layered on top. I thought this was a great idea until I started to sew it. I had to fold the vinyl under to make a seam, which makes the whole piece really thick. It worked, but it wasn’t ideal. I had to rip out one section at the bottom, because I didn’t quite catch the vinyl. After that I was very careful about catching the vinyl.
I could always add an internal zipper pocket, but I think these slip pockets are more useful. I think this idea has potential; I just have to work on it a little more.
N. B. In the photo, I am using Sew Tites**, pins** and WonderClips** to hold the pocket in place. The pins cannot be used on vinyl. I know I have mentioned this before, but it is always useful to hear it again. Vinyl doesn’t self heal, so WonderClips and Sew Tites are a must when you work with vinyl. That Sew Tite Magnum** was great! I use the pins linked above because they work better for me with bags. The super thin pins that some quiltmakers love bend when used with the layers required for bagmaking.
**N. B. : Obviously, you should shop at local quilt shops and small businesses. However, if you are too busy or can’t find what you need there, I use Amazon affiliate links and may be paid for your purchase of an item when you click on an item’s link in my post. There is no additional cost to you for clicking or purchasing items I recommend. I appreciate your clicks and purchases as it helps support this blog.
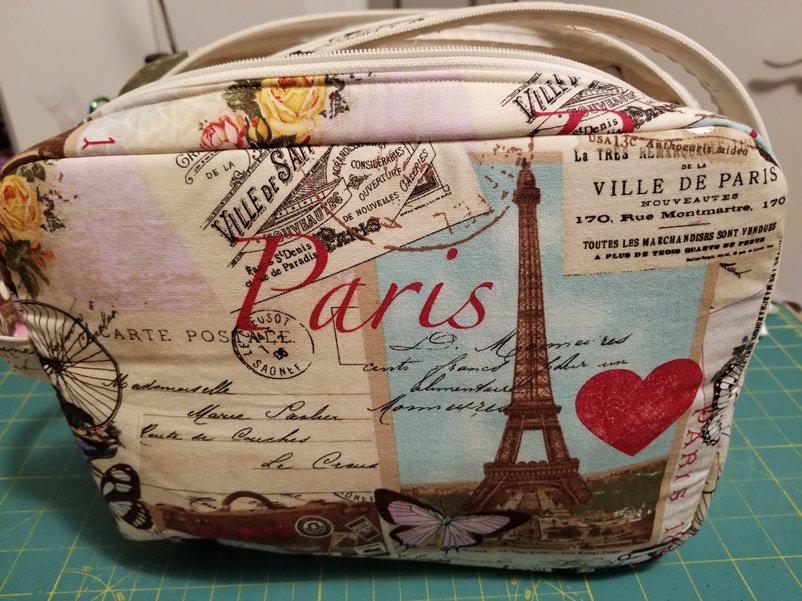
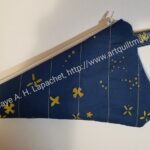
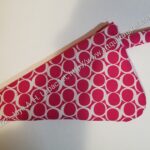
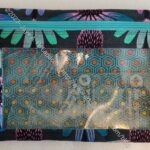
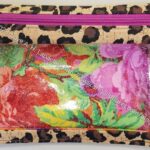
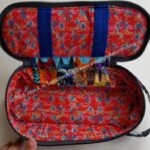
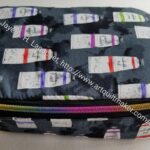
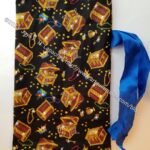
The pouch itself is quite large and with the extra Decor Bond, it is not very squishable. It would fit well into a Chubby Charmer to organize all the things someone needs to take somewhere.
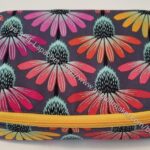
Disco Double Zip Pouch – top
If I were to make this pouch again, I might add some interior zipper pockets. I am not sure how useful they would be, but there is enough space and I think you can never have too many pockets. It would also be good to add some pen holders. As the pattern is written, you just toss things into the pouch. It would fit my Leuchtturm notebook, but then what? I just don’t know how I would use this pouch.
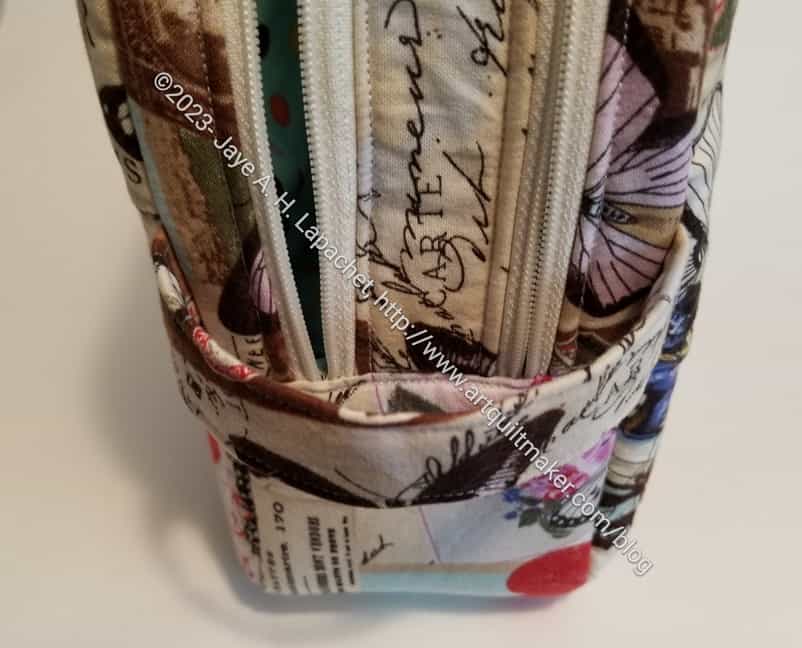
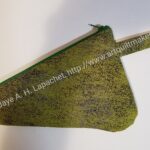
Disco Double Zip Pouch – handle
The handle is very useful, I think. One of the reasons I added a handle to the Hackney was that it made the bag more usable. I am glad the pattern included a handle for this pouch. The weird thing is that the zippers are behind the handle. I might add some zipper pulls.
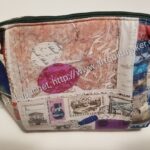
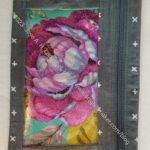
This pouch is great if you want to fussy cut some special fabric, or use an embroidery design. The large size has a great space for a specific motif. Frankly, I am not sure how I would use this pouch, but I am glad I made it.
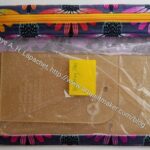
I spent some time at the November Sew Day cutting out this bag. I am kind of shocked at how little there is to cut out.
These are just the fabric pieces. I have interfaced some of them with SF101, but not all. I need to cut out the foam and do some quilting (sad face), but I am kind of excited to get this far…..finally after YEARS. This club was in 2018. Apparently cutting this out made me so excited that I want to push aside some of my other projects and get this done! I need to control myself, or do a little and then get back to making gifts.
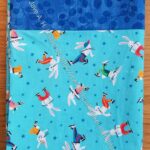
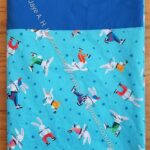
The black and white fabric is intended to be the exterior. I bought it at Sew Creative in Ashland the first time I visited with Mary M. It is a cotton-linen blend and kind of thick. It isn’t quite canvas, but it is tending that way. I always intended to make bags from it. I just haven’t gotten around to it until now. I also have the same fabric in grey.
The interior fabric was used a thousand years ago on one of the first bags that I made. I think it is a reproduction of a 1940s print. It shreds like crazy, so I think it must be a Moda, but I love the design.
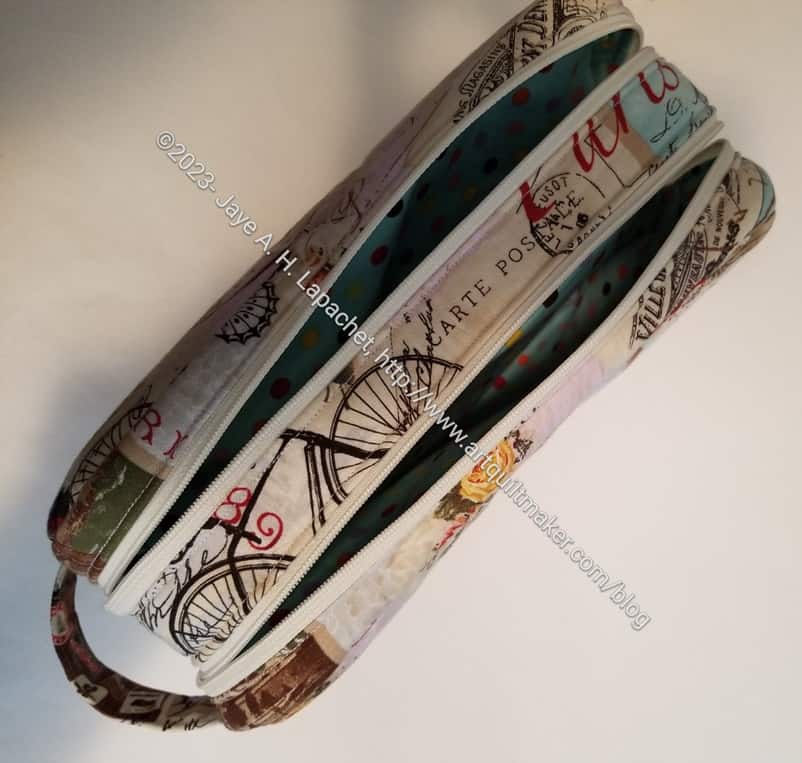
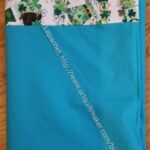
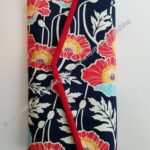
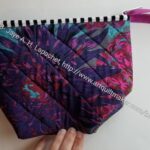
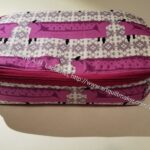
I made good progress on the disco Double Zip Pouch. This is an image of the pouch with the exterior completed.
Disco Double zip from top
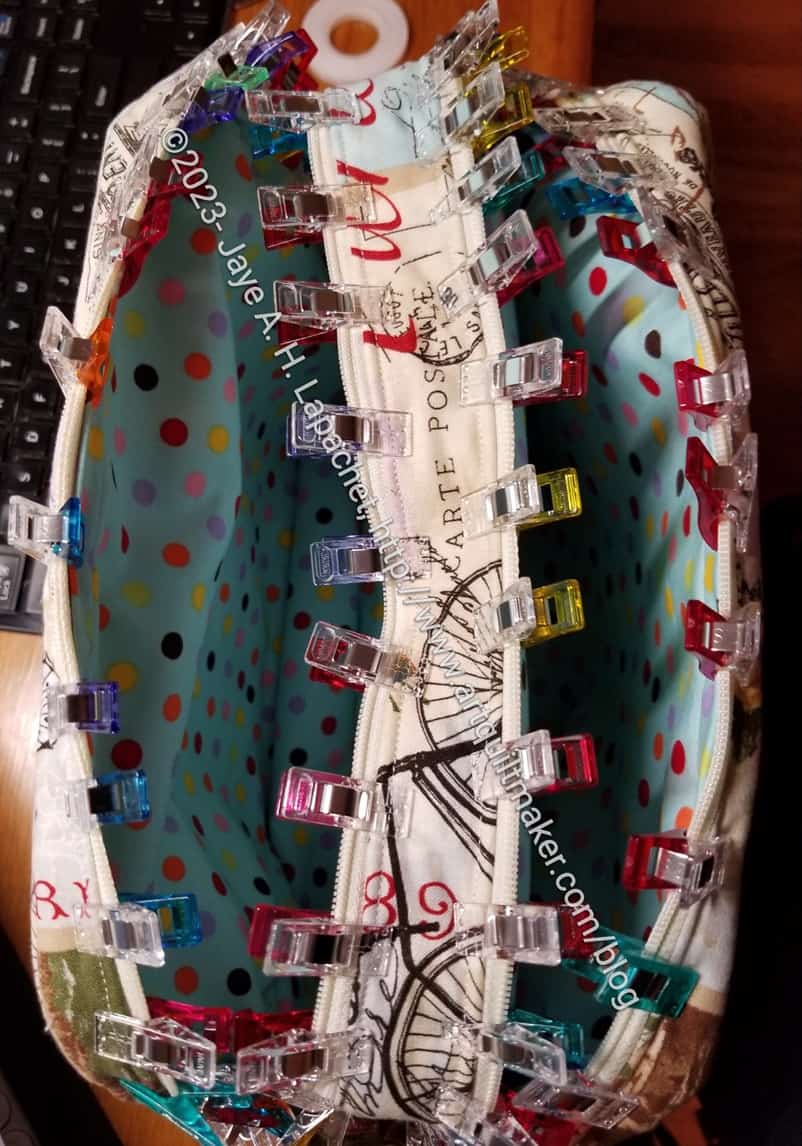
The next step was to install the lining. I had to put the lining together. The instructions said to use washaway tape** to attach the lining to the inside of the exterior. I added the clips** to keep all the parts of the lining in place.
Now I have to sew it.
In general, I thought this was a pretty easy pouch to make. The drop-in lining is not a favorite, but I am determined to succeed.
**N. B. : Obviously, you should shop at local quilt shops and small businesses. However, if you are too busy or can’t find what you need there, I use Amazon affiliate links and may be paid for your purchase of an item when you click on an item’s link in my post. There is no additional cost to you for clicking or purchasing items I recommend. I appreciate your clicks and purchases as it helps support this blog.
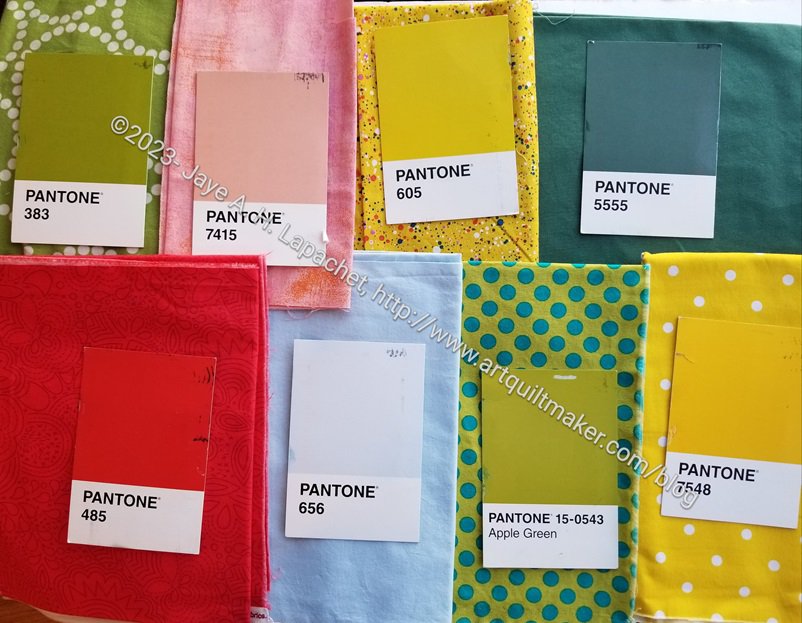
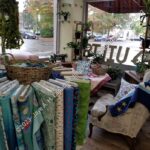
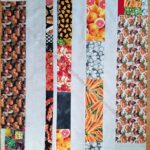
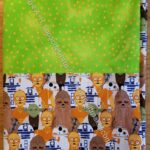
Before I started working on the Disco Double Zip Pouch last Sunday, I decided I needed to select some fabrics for The Pantone Project. I felt like I had about 20 cards, but I could only find 8.
I think I brought down at least 20 fabric boxes, which is always the thing that keeps me from picking out fabrics as the postcards arrive. It always ends up being fun, however and I seem to have a hard time remembering that. I always find fabrics that I remember buying, but had forgotten about.
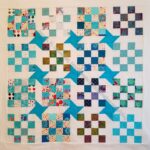
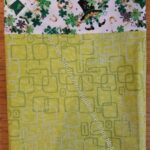
Pantone Project fabric selections – Oct 2023
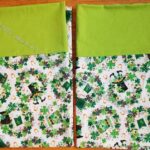
I was only able to choose the fabrics. I didn’t have a chance to make the blocks yet. I might be able to make them before the next Sew Day.
I am only a little sure about the Apple Green. The background is perfect, but I don’t know what the blue dots do to the overall effect.
The Disco Double Zip Pouch is from Minikins Season 2. Yes, hooray, I am working on it. Last time we talked, I had everything cut out. Then I went on vacation for a week and didn’t work on it. When I returned, I started sewing this project.
I think I decided to make the large size, because what I have is rather large. I have no idea what I chose. It is, at least larger than I expected. This pattern seems very similar to the Bello Pouch, though with double zips
Disco Double Zip inside out
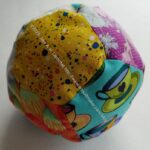
It is kind of amazing. It went together very quickly. I thought it would be complicated, but the parts of the zipper that create the double zippers went together really easily. The center piece looks strange, kind of like a handle.
Disco Double Zip in process
There were some similarities to the Hackney. Specifically, making the gusset was similar to the Hackney. I am learning that making a dozen (??) Hackneys really upped my skills. I am not sure why that one pattern helped me so much.
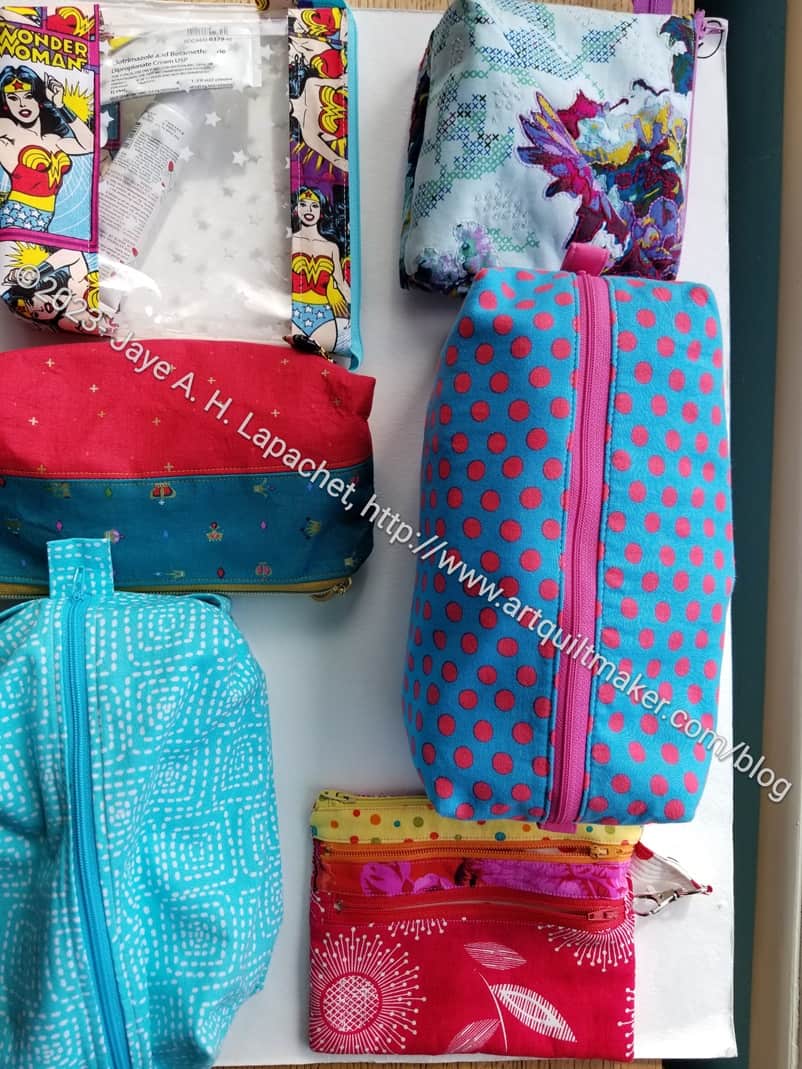
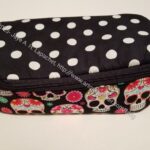
As I was packing for my second trip in October, it occurred to me that I should show you the pouches I use when I travel. all the pouches that I made ARE useful. However, of the bags I use for travel, I only made one of them. ;0
Pouches for travel
I use various pouches instead of one big bag as I can designate them for various purposes. This also means I don’t have to have a large bag in a, possibly, small bathroom.
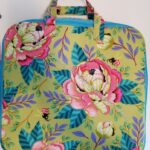
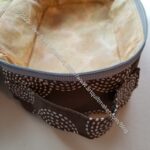
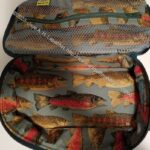
The Wonder Woman pouch (top left) is one I use for tubes and bottles that don’t fit in my toilet kit. It was a birthday gift this year and made by Angela.
The pouch on the upper right is used for vitamins and various OTC medications. It was made by Gerre and has hand embroidery as well as a clever use of zippers. I keep for getting to ask her about the pattern.
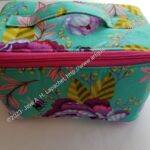
The red and teal pouch is from Amanda and was another birthday gift. It is perfect for various cords and my headphones. Yes, I made an charger case a long time ago. I did a great job on that case, but it was too big. When I went to Switzerland and Austria in April, I needed the space in my suitcase.
The turquoise stitch boxy bag is from TFQ and is probably the first pouch I ever used.
The pink and turquoise dotted bad has the most useful stuff in it: moleskin, scissors, post-its, tape, a power strip and all sorts of random things that I needed when I was attending conferences.
The Triple Zip pouch is what I use for jewelry. It isn’t great for jewelry, but it is okay. Until I find something different, it will have to do.
The whole point of this post is to show you how you can use different pouches and bags in daily life – or travel life.
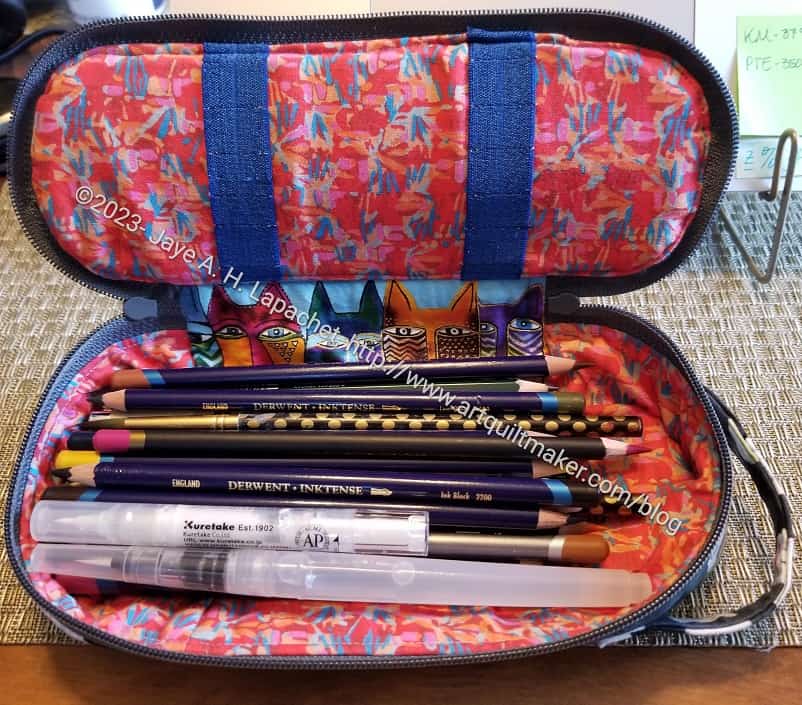
I took this picture soon after I gave the Hackneys to my mom. She is really great when I give her gifts. She puts them to use right away, which is very gratifying. On our trip to Portland, she had at least 3 of the Paint Tube bags with her.
This is the small Hackney. I am not sure what she was using for her pens and pencils before I gave her this Hackney. She liked being able to see them all. I am continually amazed to see how much these Hackneys hold.
The trip home from Portland started off slow. It took us forever to get out of the city, which I expected. it was Friday afternoon, after all, and people wanted to get away. I was a little surprised, though, since we left around 1pm. I thought that was a little early for people to be leaving the office.
What I did not expect was slow traffic all the way down I5. It wasn’t stopped, but we only went about 40-50 mph (~70 kph). Finally, I was falling asleep at the wheel and needed a break. We stopped in Albany, because it was close and looked large-ish. Mom was able to find a quilt shop there, which was a bonus. We thought we could, also, certainly find a coffee shop, but no such luck. Note to Starbuck’s: please put your *amn outlets next to the freeway not in some secluded Safeway.
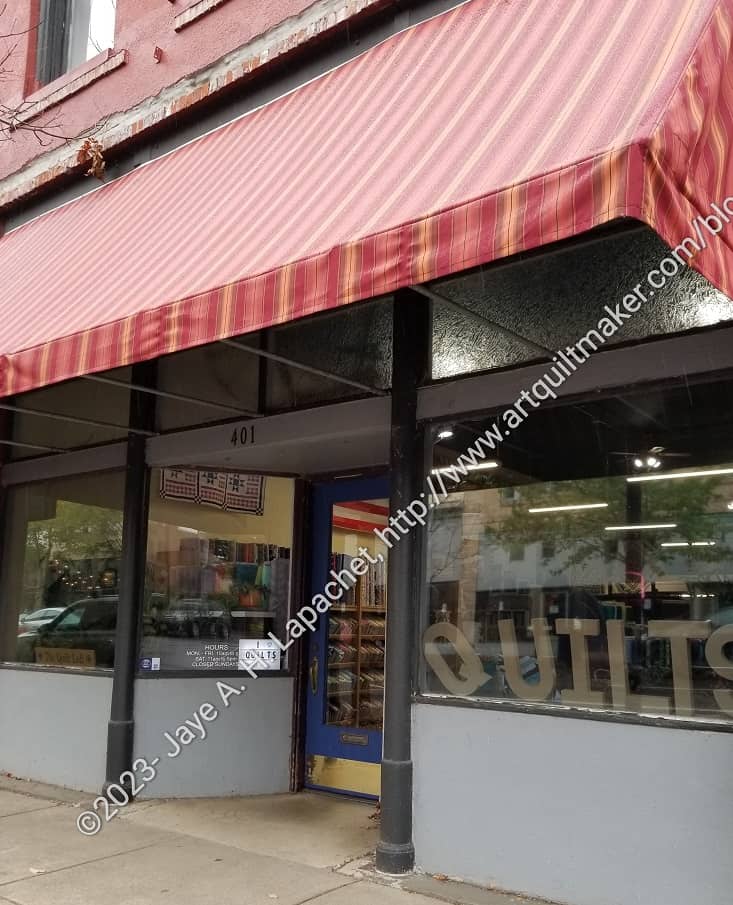
Anyway, it was worth a stop. I had never been to Albany, Oregon and the shop was worth stopping to visit. It is a mile or two off the highway, but the Google directions were good and the downtown street, where the shop is located, had a lot of charm.
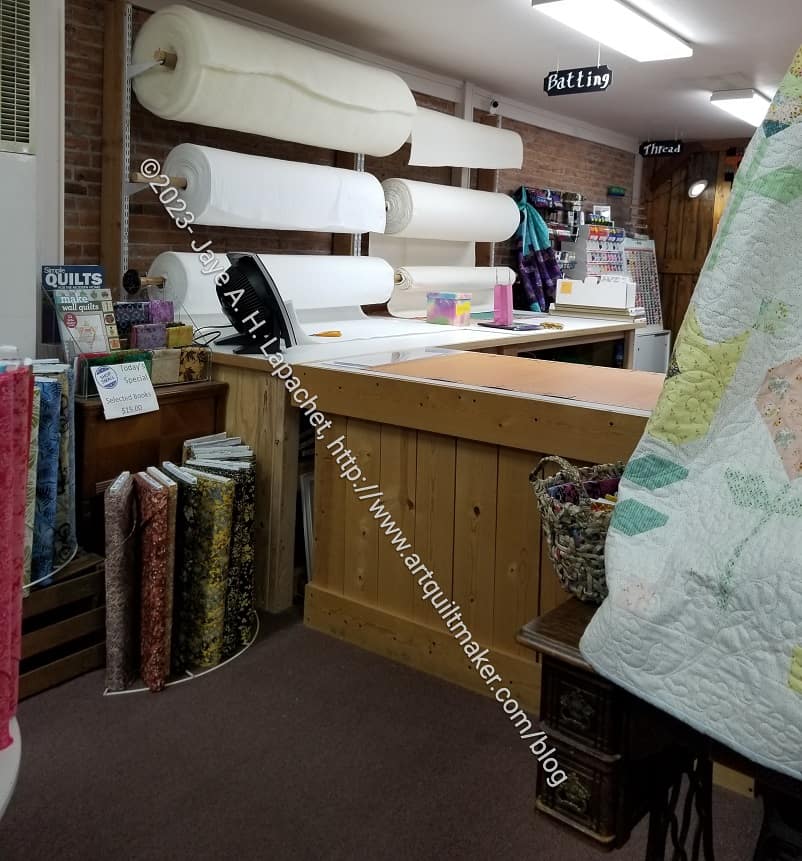
The Quilt Loft is a large shop, though the interior also came across as long and thin. It covers two storefronts and held a lot of fabrics.
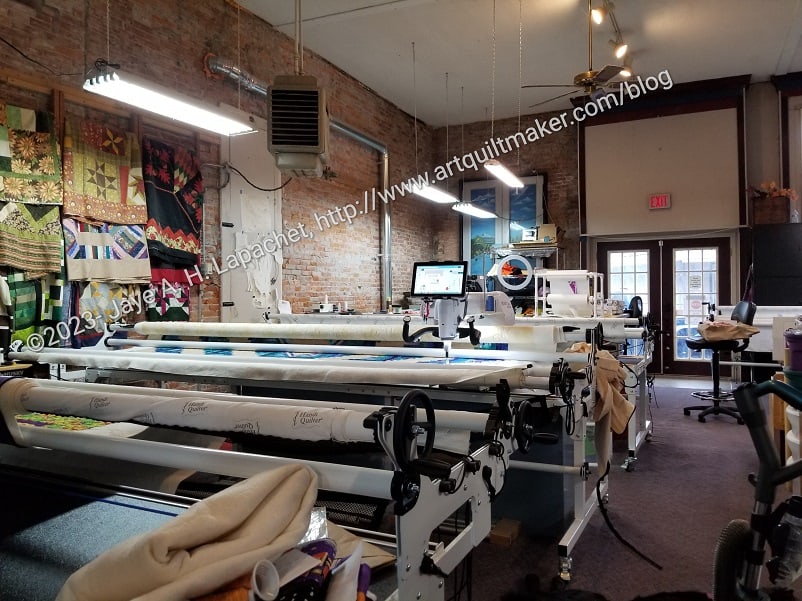
The Quilt Loft, longarms in action
I was VERY impressed to see four longarms, controlled by computers working away when we were there. I was told later that one of the staff was an excellent custom longarm quilter and was working back there as well. I was happy to see a shop helping people get their quilts finished. I am sure it is good for their cash flow as well.
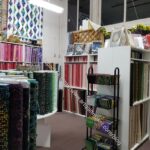
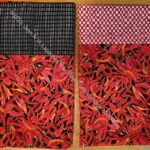
The Quilt Loft, batting and notions
The longarm area was in the back of the second storefront (to the left of the main door you see in the photo above). In front of the longarm workroom was the notions, books and batting area. I had never seen rolls of batting in a quilt shop like they had in the Quilt Loft!
I didn’t check to see what kind of batting they had. You can see that the do offer a few choices.
The Quilt Loft, batting and notions
The Quilt Loft, batting and notions
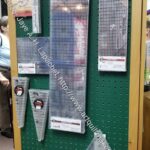
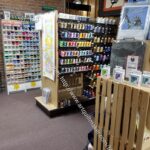
Next to the batting area were notions and some books. The shop had a few books, but not a large book area that I saw. The books were mostly scattered around the shop. One I saw looked interesting, Scrappiness is Happiness** by Lori Holt. I thought there were at least 5 quilts I would make out of that book. However, I wasn’t in the mood to buy books, so I put it on my Christmas list. I don’t see this book on their website, but I am sure you can call them and they will ship it to you.
I didn’t think they had a ton of notions either. I was surprised to see Quilter’s Rule rulers. I am not sure I have ever seen these for sale in a shop. If I have it was either a long time ago or I just don’t remember.
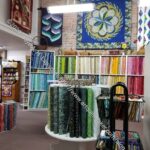
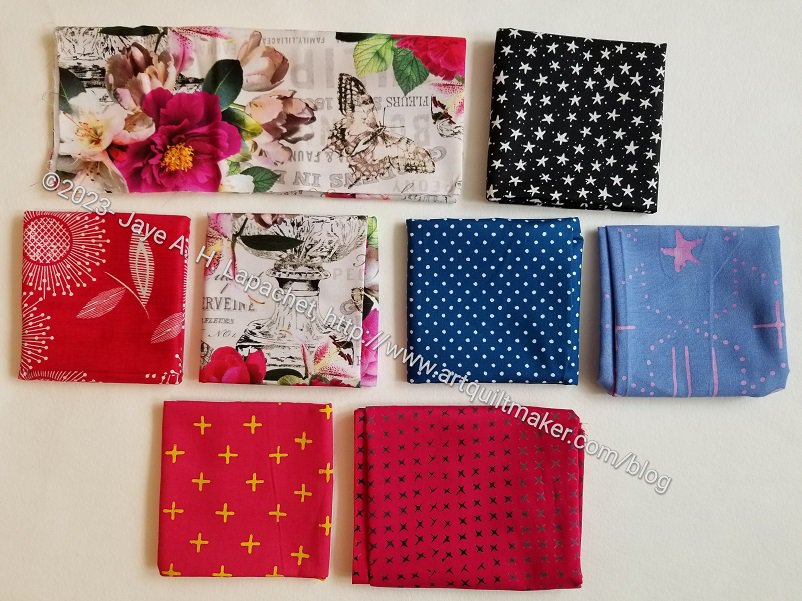
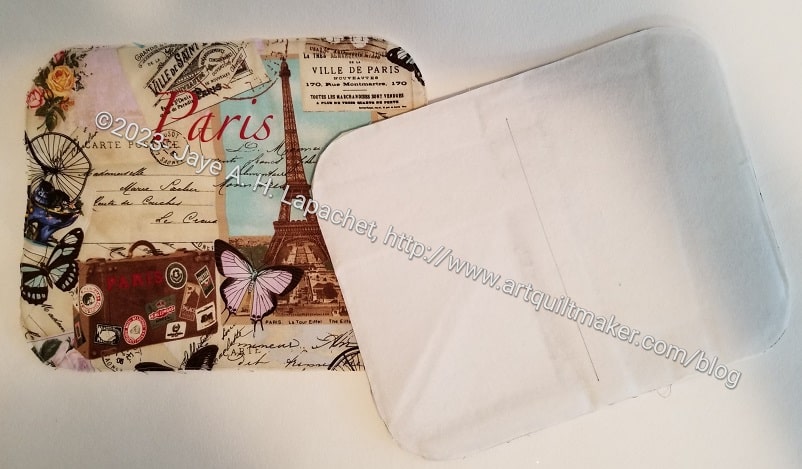
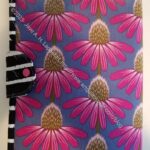
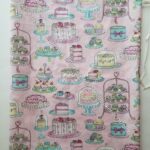
The Quilt Loft fabric
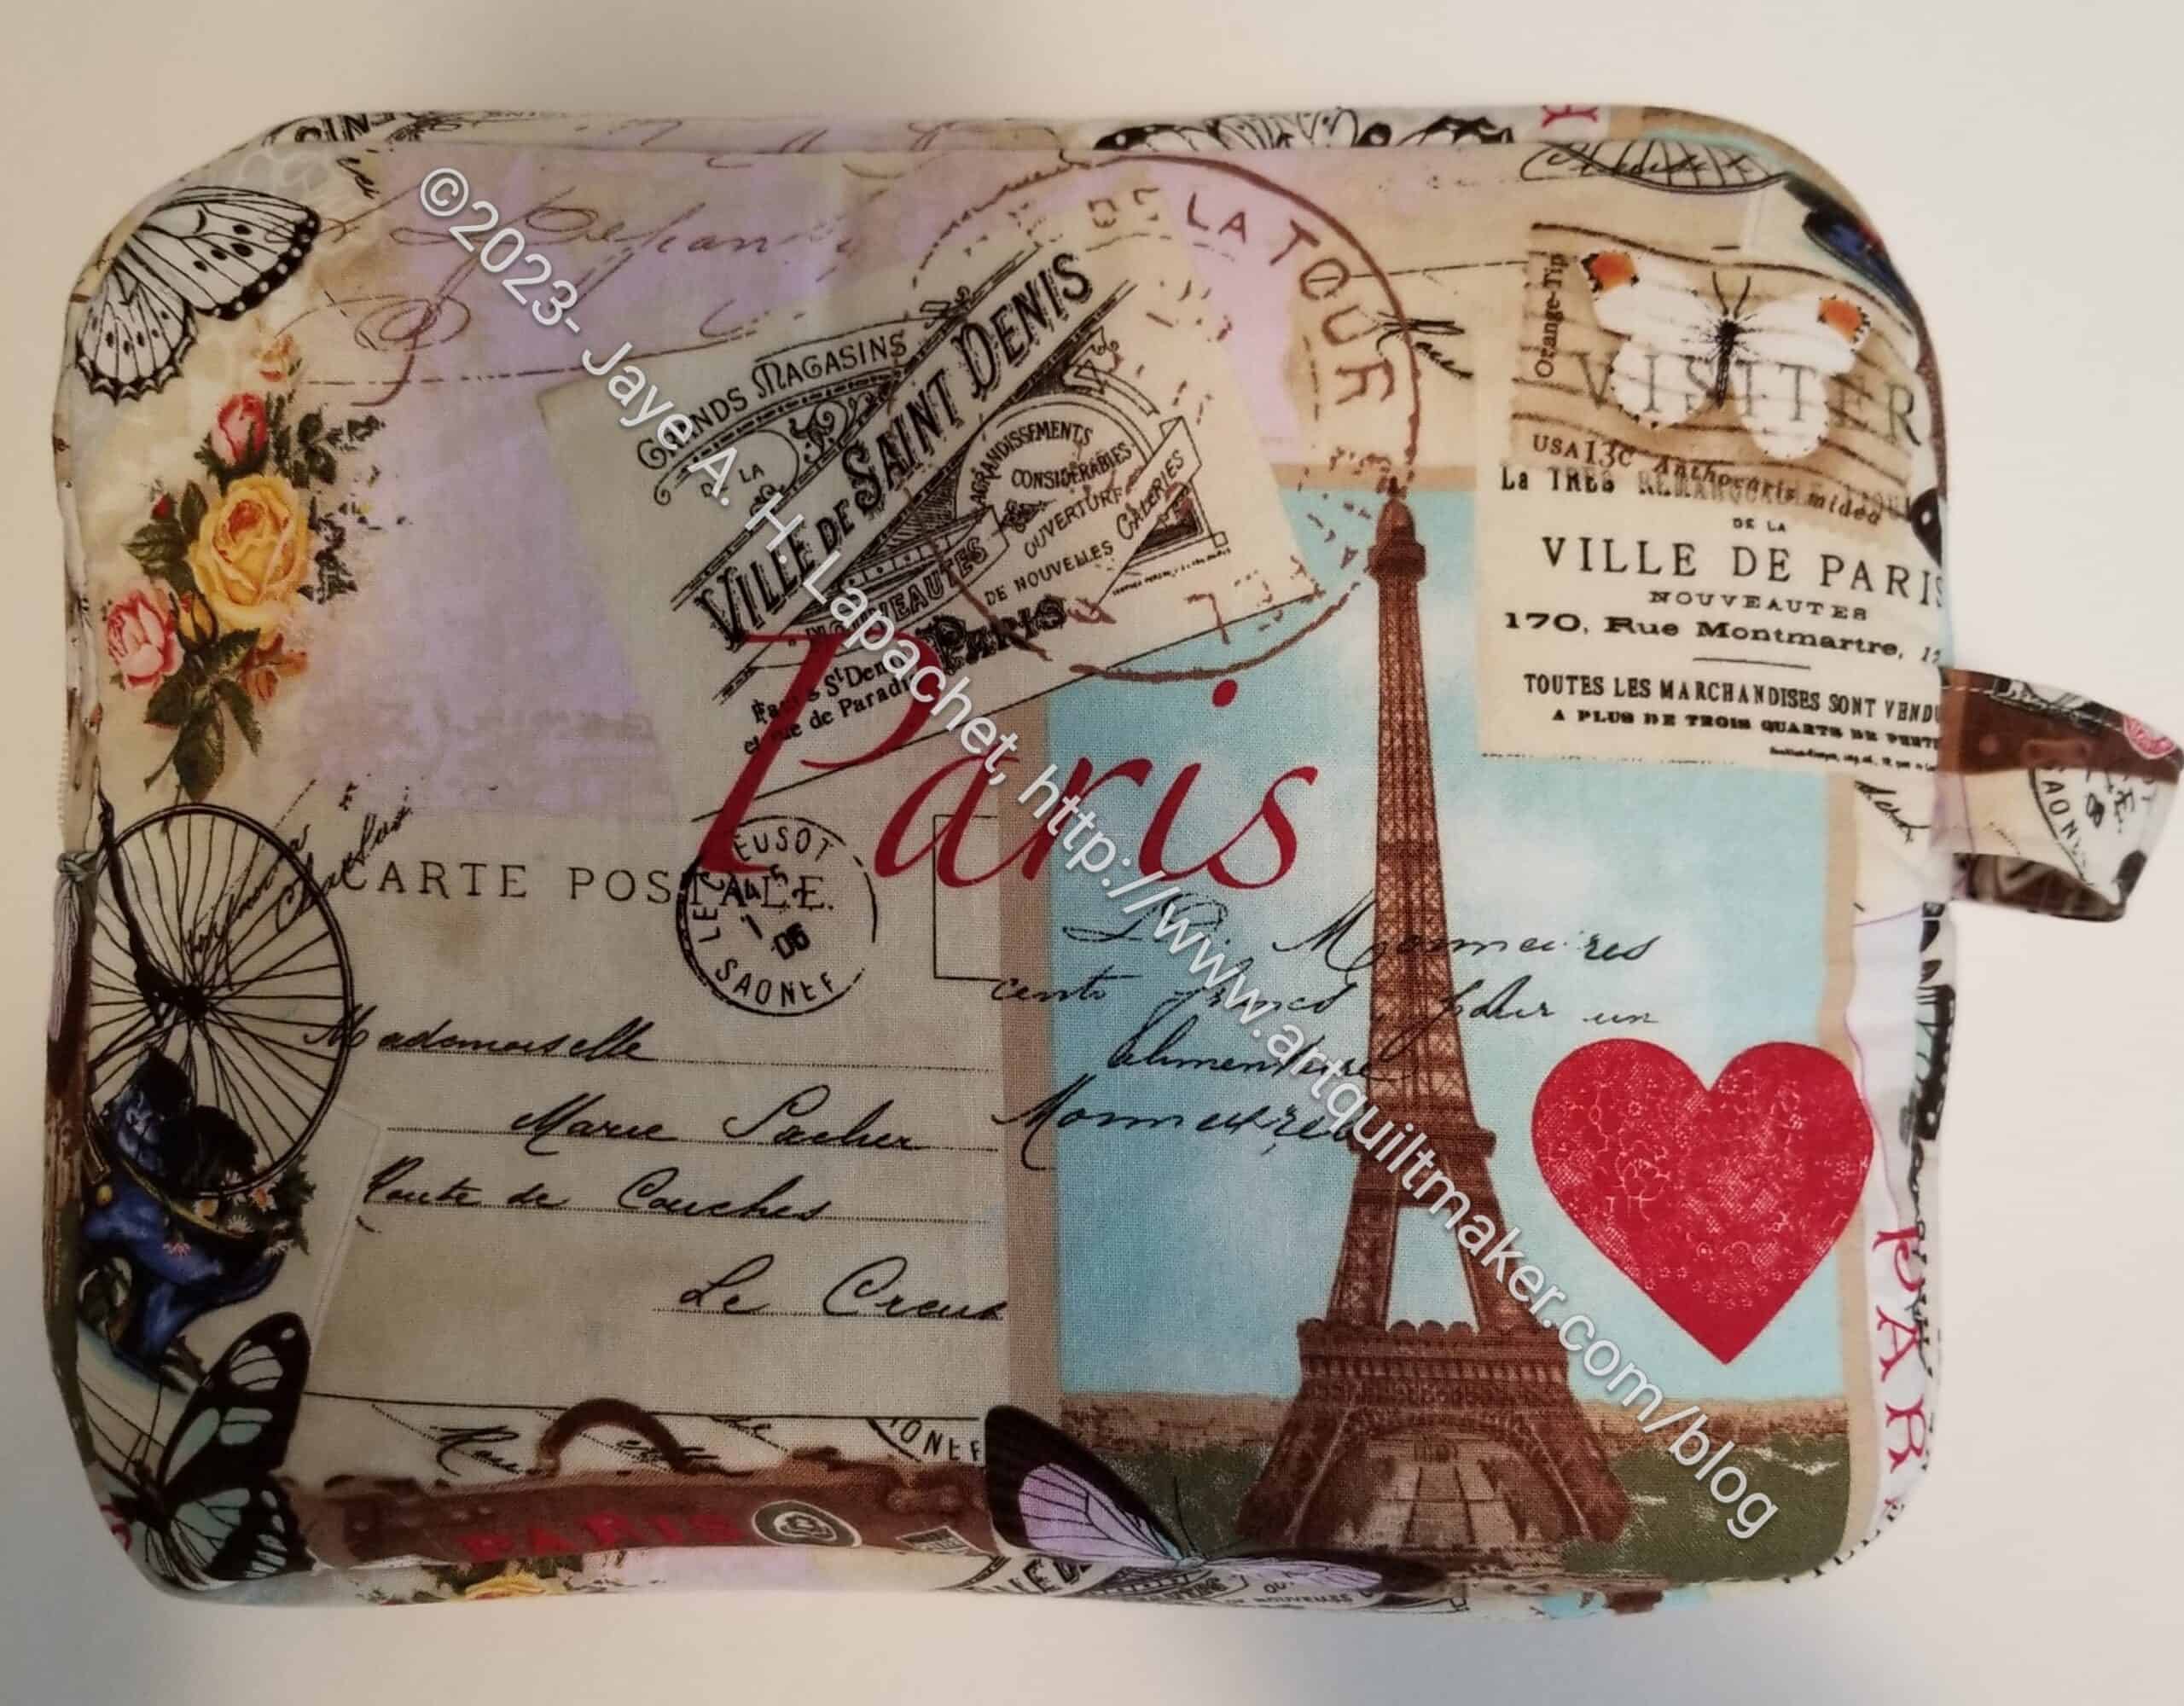
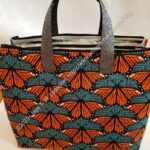
As mentioned, the shop had a lot of fabric. Much of it was new to me, though I did recognize the manufacturers. I didn’t see any Tula or Kaffe. I always find it nice to see new and different fabric.
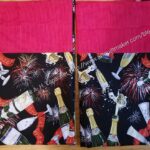
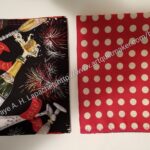
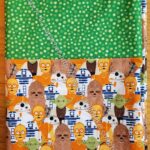
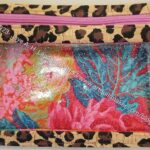
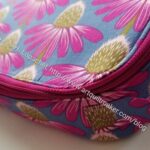
On the left of the photo (right) was a new line of butterfly type fabric. The main, or focus fabric had words on it. I thought the French theme would make a good future bag for my sister, but there was no more yardage. I was only able to find a couple of fat quarters. I can make some small pouches or, perhaps, a small Kit Supply Tote with the amount I bought.
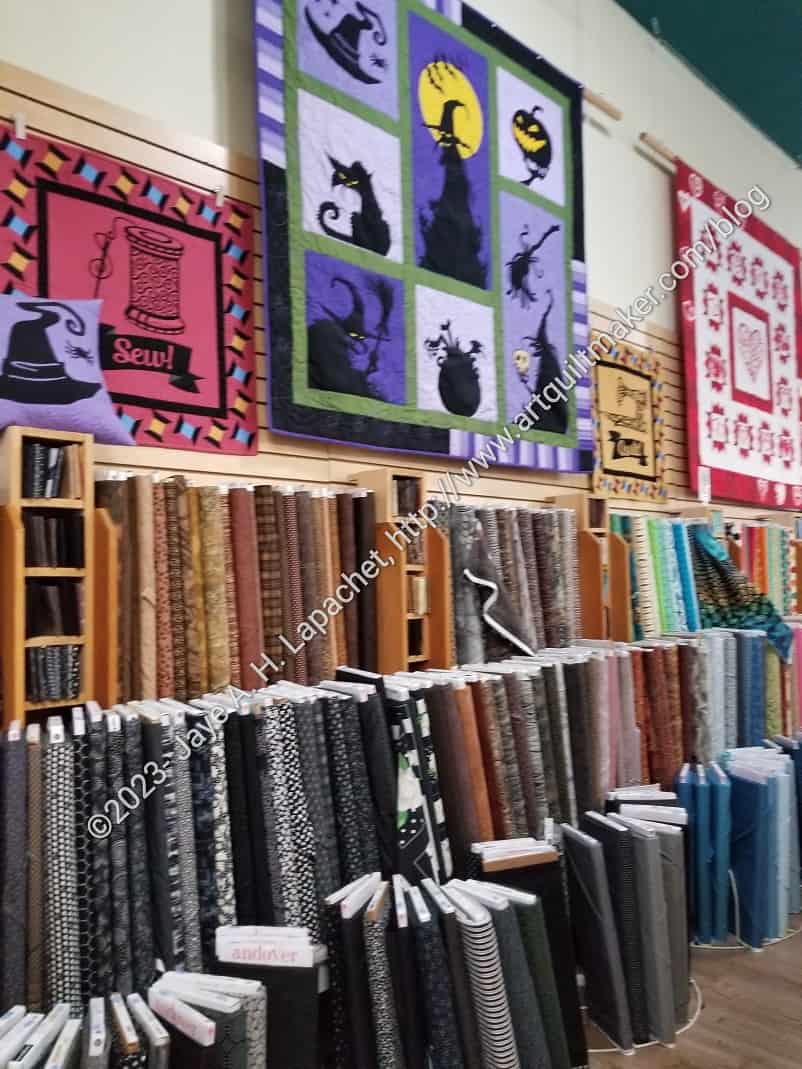
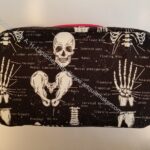
The Quilt Loft for Hallowe’en
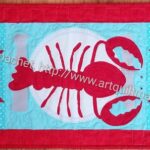
I wasn’t able to visit a lot of shops on this trip, but the ones I did visit were decorated for Hallowe’en. They had projects on the walls and appropriate fabrics front and center. The Quilt Loft was no exception.
I haven’t seen that applique’ pattern with the purple back and black silhouettes before. I thought it was interesting. It looked like all needle turn applique’, which will never happen in my house. 😉
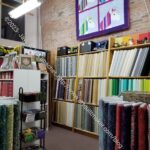
The Quilt Loft modern area
The Quilt Loft modern area
The Quilt Loft modern area
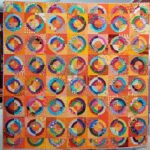
Some of the more modern fabrics were near the notions and batting. I found quite a few Allison Glass fabrics in that area. The staff who helped me said they were flying off the shelves. I also saw some of the Judy Niemeyer samples that are so popular at the San Mateo County Fair. I was pleased to see a wide variety of solids and not all of them (if any?) were Kona. They carry a wide selection of American Made Brands solids, which made me happy.
The shop also had different substrates. I didn’t see a class schedule, but they must have garment classes as well.
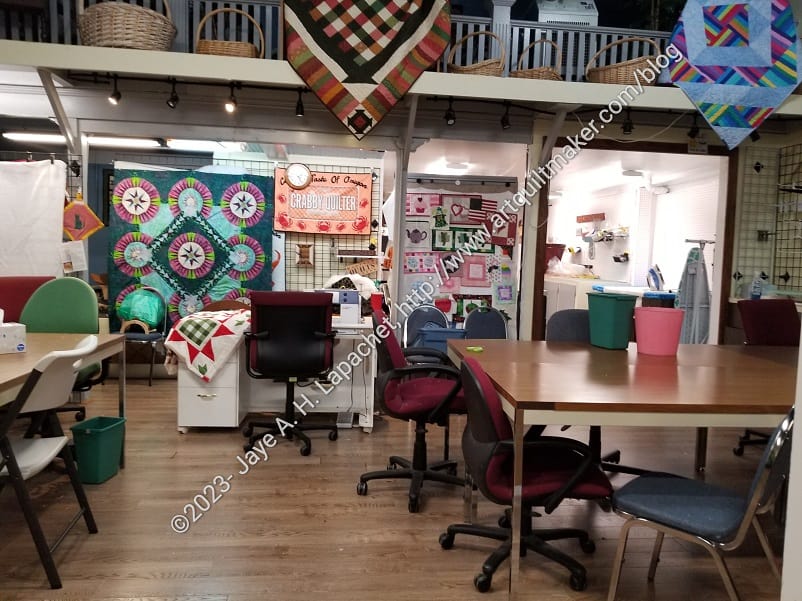
The Quilt Loft classroom
The classroom was in the first/main building behind all the initial fabric you see when you first walk in. It was large. It has a mishmash of chairs, but there were some comfy looking office chairs. The room also had three large tables, so I think people could spread out.
There were some interesting projects hanging there. As I said, I didn’t see the class schedule, so I don’t know which were samples and which were decoration. Regardless, this shop had a lot of quilts hanging up which provided a lot of inspiration.
The Quilt Loft front seating area
The Quilt Loft front seating area
As is common in many quilt shops, there was a nice looking seating area in the front. I liked the design of the chairs. Partners could be comfy while their other half shopped. If it hadn’t been raining the light would have been good, so someone could sit there and do handwork as well. I don’t know if the shop allows it.
The Quilt Loft purchases
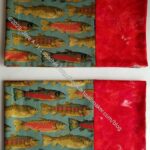
I bought a few fat quarters and one half yard of a new Alison Glass fabric. They had the full line of her new fabrics and I couldn’t resist just a bit of it.
I also bought that red and white flower print on the left. It is an older fabric. I had some and used it up. I decided to grab one last FQ.
Not that this is a different shop than the Quilting Loft in Seattle, which I reviewed in 2013. I haven’t been to Seattle in awhile, but the website for the Quilting Loft is no longer, so I imagine the shop is closed as well.
The Quilt Loft
405 First Ave NW, Albany, OR 97321, United States
tel: +1 541 928 7242
Website: https://www.evilmadquilter.com/
Email: Info@QuiltLoft.com or Info@EvilMadQuilter.com
**N. B. : Obviously, you should shop at local quilt shops and small businesses. However, if you are too busy or can’t find what you need there, I use Amazon affiliate links and may be paid for your purchase of an item when you click on an item’s link in my post. There is no additional cost to you for clicking or purchasing items I recommend. I appreciate your clicks and purchases as it helps support this blog.
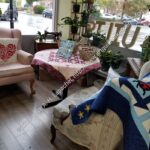
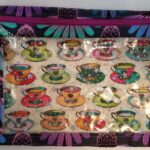
Carrie is having fun making door prize collections.
BAM Picnic themed Door Prize
This one has a picnic theme, which I think is very clever. She is using some contributions from other team members, such as an interesting pouch that Tim made. The basket is from Amazon**, but there free patterns* for rope baskets, too. They are a good project for using up fabric scraps.
*N.B. I haven’t tried this pattern so your mileage may vary.
**N. B. : Obviously, you should shop at local quilt shops and small businesses. However, if you are too busy or can’t find what you need there, I use Amazon affiliate links and may be paid for your purchase of an item when you click on an item’s link in my post. There is no additional cost to you for clicking or purchasing items I recommend. I appreciate your clicks and purchases as it helps support this blog.
I spent some time over last weekend cutting out a Disco Double Zip Pouch. This is another pattern from Sara Lawson’s Minikins. In this case, it is from Season 2. Yes, you have to buy the whole set. The individual patterns are not sold separately.
I haven’t made this pattern before and I am not sure what inspired me. I made the recipient a Hackney pouch already, so that pattern was out. This one came to my attention and here I am! It is always good to try out a new pattern, though I do tend to get comfortable making several of the same pattern over and over.
So far, I am still at the prep stage. All the pieces are cut and most of the lining has ShapeFlex applied. I am sewing the exterior pieces to the foam at the moment, then I can start preparing the zippers.
Augmenting the Frankenfoam
One problem I had was with the Frankenfoam (see the glossary). Once I cut the pieces required, I felt the larger, exterior pieces weren’t stiff enough. I added some DecorBond** to the exterior pieces to make it a bit stiffer. Stay tuned to see how that works out.
Another thing about the Minikins is that I have only made one project from Season 2. Season 2 includes the DayTrip Cell Phone Wallet and was the whol reason I bought that group of patterns. I do REALLY want to make that project; I just haven’t yet. I have to admit that I am kind of scared to do so. People talk about the horrors of turning the project. That doesn’t mean I shouldn’t make it. I spent some time screenshotting various versions off IG to get inspired and might be ready to work on it. Perhaps I can cut it out and go from there.
The other idea I had from Season 2 is to enlarge the Sewing Stand. Sara has a tutorial for this. I keep looking at the image and thinking that it looks larger than the one I made. Then I realized I could enlarge the pattern. It wouldn’t impact cutting it out as most of the pattern pieces are squares and rectangles. I didn’t buy templates for it and I don’t even think they are available.
Obviously, Season 2 isn’t dead in the water. I just need to get inspired and I have a little bit.
**N. B. : Obviously, you should shop at local quilt shops and small businesses. However, if you are too busy or can’t find what you need there, I use Amazon affiliate links and may be paid for your purchase of an item when you click on an item’s link in my post. There is no additional cost to you for clicking or purchasing items I recommend. I appreciate your clicks and purchases as it helps support this blog.
I don’t quilt much and I enjoy the collaborative effort of making a top and allowing someone else to quilt it. Thus, the quilts below are mostly tops, but I will include a finished quilt once someone else finishes it for the group.
The ‘In Process’ is used to denote projects on which I am actively working or are on the design wall waiting for me to stitch. I am continuing to try not to put away projects. I find putting a project away ensures I never work on them, because I just lose steam.
I decided that some of my quilts are in a different class because they are hand piecing or embroidery or beading. They take longer. Thus I created a new category and have moved some projects here.
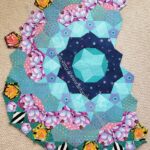
La Passacaglia – The rosettes are all assembled. I am ripping out the papers and deciding what to do with the border.
Ultimate Project Organizer – another project from the Crafty Gemini Organizer Club, also on my list, but not yet started. I did pull the fabric, supplies and reviewed some finished photos that others posted, so I am one step closer.
Retreat Organizer – another project from the Crafty Gemini Organizer Club, also on my list, but not yet started. Recently, I saw one of these made up and I am not so nervous about it. I did pull the fabric, supplies and reviewed some finished photos that others posted, so I am one step closer.
Rose Petrillo bag – I found the pieces for this bag cut out, but not sewn.
Superbloom tote using Hindsight fabric – not started. I did pull the fabric, supplies and found a photo I plan to use as inspiration that others posted, so I am one step closer.
Still UFOs
I still have UFOs. Who doesn’t, after all? A project in the ‘UFO’ category means I am stalled, it hasn’t been worked on in awhile or it is waiting its turn to be worked on. The list is a lot shorter and the projects are newer, for the most part.
I am annoyed that some of these are still WIPs. I just need to work on them!
Handbag Sampler – this is still the forgotten project. I found one block in the not-too-distant past, but otherwise I don’t actually know exactly where the blocks are hiding. I crawled up in the far reaches of my fabric closet to see if I could find them and they weren’t where I thought. I am sort of mystified as to where they could be. I haven’t even found a picture of all the blocks. WTH?